25 Rooftop Terrace Design Ideas That Transform Urban Living
Rooftop terraces should never be treated as decorative afterthoughts. At their best, they function as fully resolved architectural rooms without walls, defined by proportion, structure, and intentional planning rather than loose furniture placement. When I approach a rooftop project, I design it exactly as I would an interior space. I consider circulation, enclosure, focal points, ceiling conditions, and material continuity. The only difference is that the ceiling is the sky.
The success of a rooftop terrace begins with proportion. A 40 m² (430 sq ft) slab can feel expansive or awkwardly exposed depending on how zones are articulated. Furniture alone cannot create structure. Level changes of 150 to 300 mm (6 to 12 inches), pergola frames spanning 3 m x 4 m (10 ft x 13 ft), or deep planters of 600 mm (24 inches) establish architectural definition. These interventions provide spatial hierarchy, which is essential in open-air environments where visual boundaries are absent.
Load-bearing realities must shape every design decision. Unlike a ground-level garden, a rooftop garden is constrained by structural limitations that influence paving thickness, planter depth, water features, and built-in seating. Concrete slabs in urban townhouses often accommodate live loads of 250 to 400 kg/m², but assumptions are dangerous. Structural engineer sign-off is non-negotiable when introducing heavy elements such as plunge pools, masonry seating, or deep soil beds. I always prioritise lightweight substructures, aluminium framing, porcelain paving on adjustable pedestals, and controlled soil volumes to balance ambition with safety.
Climate response is equally critical. Rooftops experience intensified wind uplift, higher solar gain, and rapid heat loss after sunset. Wind speeds at roof level can be 20 to 30 percent stronger than at street level. That reality reshapes material specification. I favour wind-permeable screens, anchored furniture, concealed drainage systems, and UV-stable finishes. Shade structures must be engineered rather than improvised. Privacy also demands careful calibration. Urban rooftops are often overlooked by neighbouring buildings, so slatted screens at 1.8 to 2.1 m (6 to 7 ft) in height, layered planting, and strategic orientation become architectural tools rather than decorative accessories.
The rise of rooftop culture in cities such as London and New York City fundamentally reshaped how outdoor space is perceived. As vertical living intensified, the roof evolved from service zone to lifestyle asset. What began as improvised terraces has matured into carefully engineered outdoor rooms complete with kitchens, lounges, and planted microclimates. The design language has followed suit. Precision has replaced improvisation.
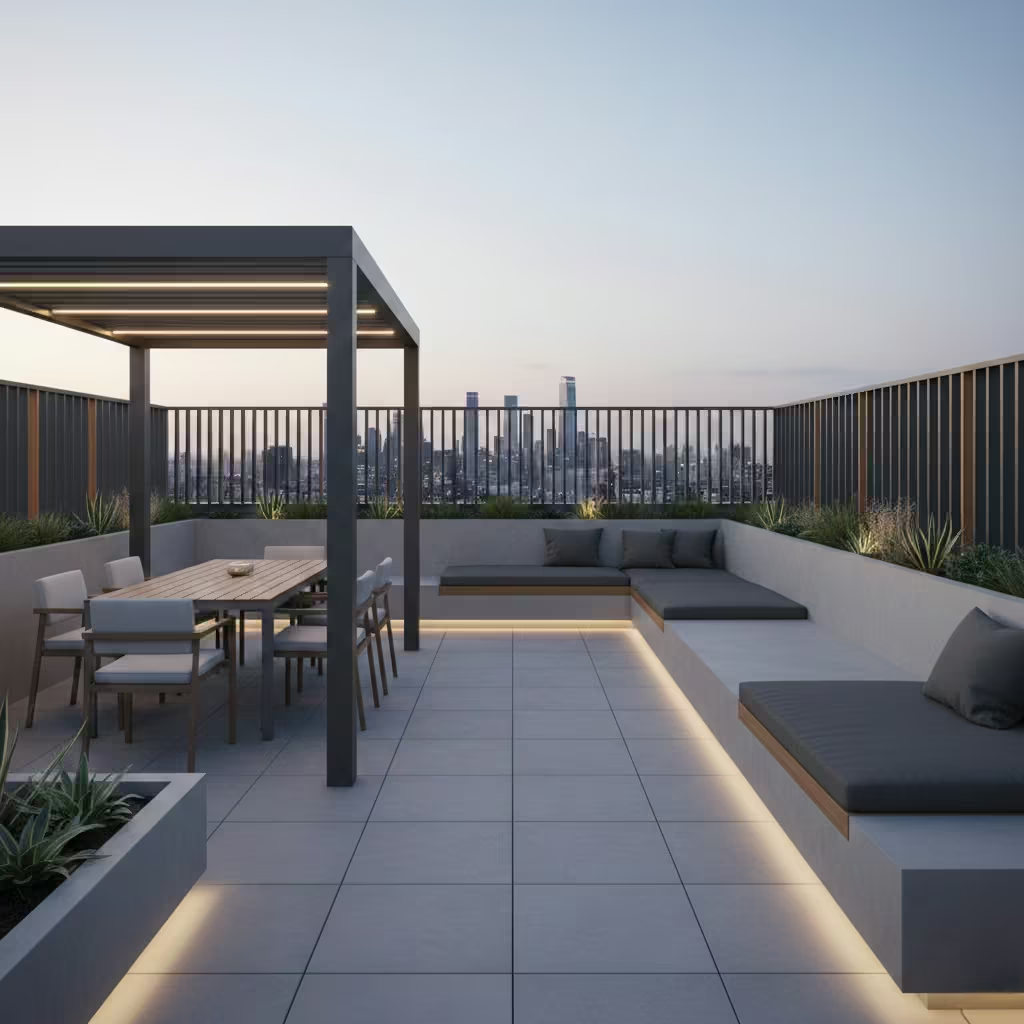
This article builds upon the primary editorial feature by expanding inspiration into application. The ideas that follow are not surface-level trends. They are spatial strategies grounded in proportion, performance, and longevity.
25 Rooftop Terrace Design Ideas
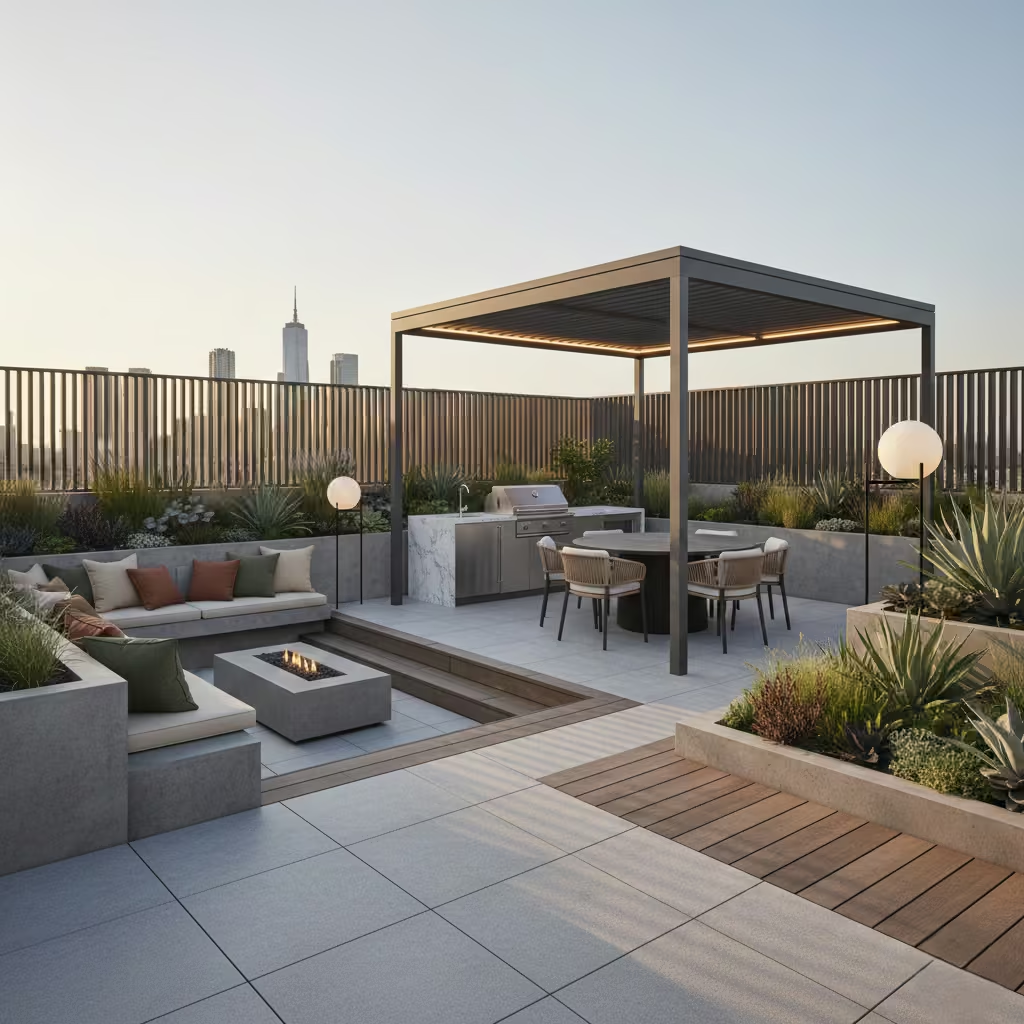
A rooftop terrace should be approached as a composed architectural landscape rather than an arrangement of outdoor furniture. Each of the following ideas is grounded in proportion, structural awareness, climate responsiveness, and long-term usability. These are not decorative gestures. They are spatial strategies I have applied across real urban projects, carefully calibrated to wind exposure, load capacity, privacy, and circulation. For each concept, I outline the design intent, practical implementation logic, typical measurements in both metric and imperial units, and clear advantages and limitations, so that inspiration remains anchored in reality.
Architectural Pergola Pavilion
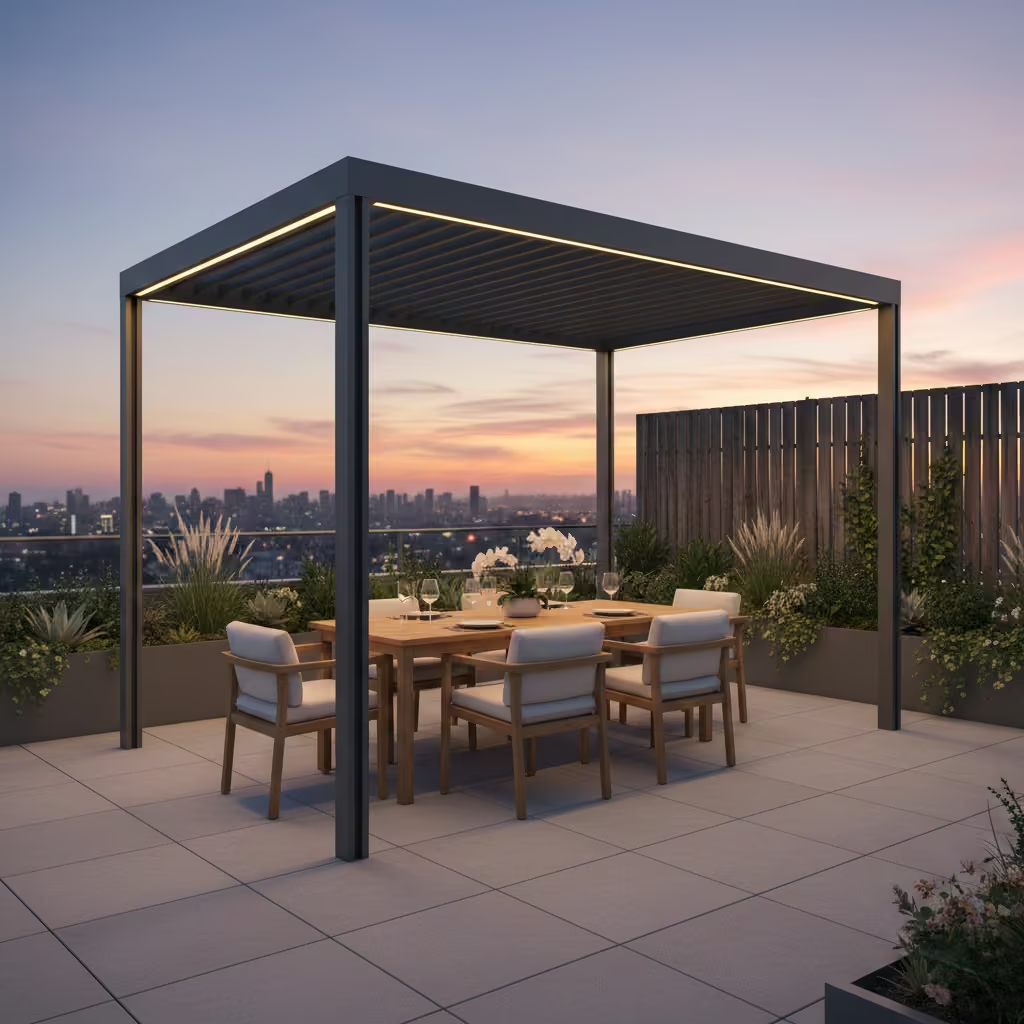
An architectural pergola pavilion establishes hierarchy on a rooftop terrace. It creates a defined “ceiling plane” in an otherwise open environment, giving the space psychological enclosure and visual order. Rather than feeling exposed, the terrace gains structure and purpose. I treat the pergola as an outdoor room frame, not a decorative trellis.
Practical Application
For meaningful usability, the structure should span at least 3 m x 4 m (10 ft x 13 ft). This dimension comfortably accommodates a six- to eight-seat dining table while allowing a minimum 900 mm (36 in) clearance around the perimeter for circulation. Steel or powder-coated aluminium frames are preferable for their strength-to-weight ratio, especially where rooftop load limits are a concern.
Integrated drainage within hollow sections prevents visible guttering, and concealed LED strip lighting within cross beams maintains clean lines while delivering layered evening illumination at 2700K for warmth. I avoid bolt-on lighting, as it immediately cheapens the architectural expression.
Real-Life Application
On a 5 m x 8 m (16 ft x 26 ft) townhouse rooftop, afternoon sun from the west made the terrace uncomfortable between 3 pm and sunset. We positioned a 3.2 m x 4.2 m (10.5 ft x 13.8 ft) powder-coated aluminium pavilion along the western edge. This move blocked direct glare, reduced surface heat gain across the porcelain paving, and created a natural dining zone closest to the kitchen stair access. The remaining open area felt intentional rather than leftover.
Pros
- Effective solar control and improved comfort
- Creates architectural clarity and spatial zoning
- Enhances long-term property value
- Supports integrated lighting and heating systems
Cons
- Requires structural engineer approval due to added dead load and wind uplift considerations
- May require planning permission in dense urban areas
- Higher upfront cost compared to lightweight shade options
When specified correctly, a pergola pavilion shifts a rooftop terrace from exposed platform to composed outdoor room. It is often the defining element that makes the entire design feel resolved rather than improvised.
You May also Like: 25 Outdoor BBQ Area With Roof Ideas That Elevate Year-Round Outdoor Living
Sunken Lounge Zone
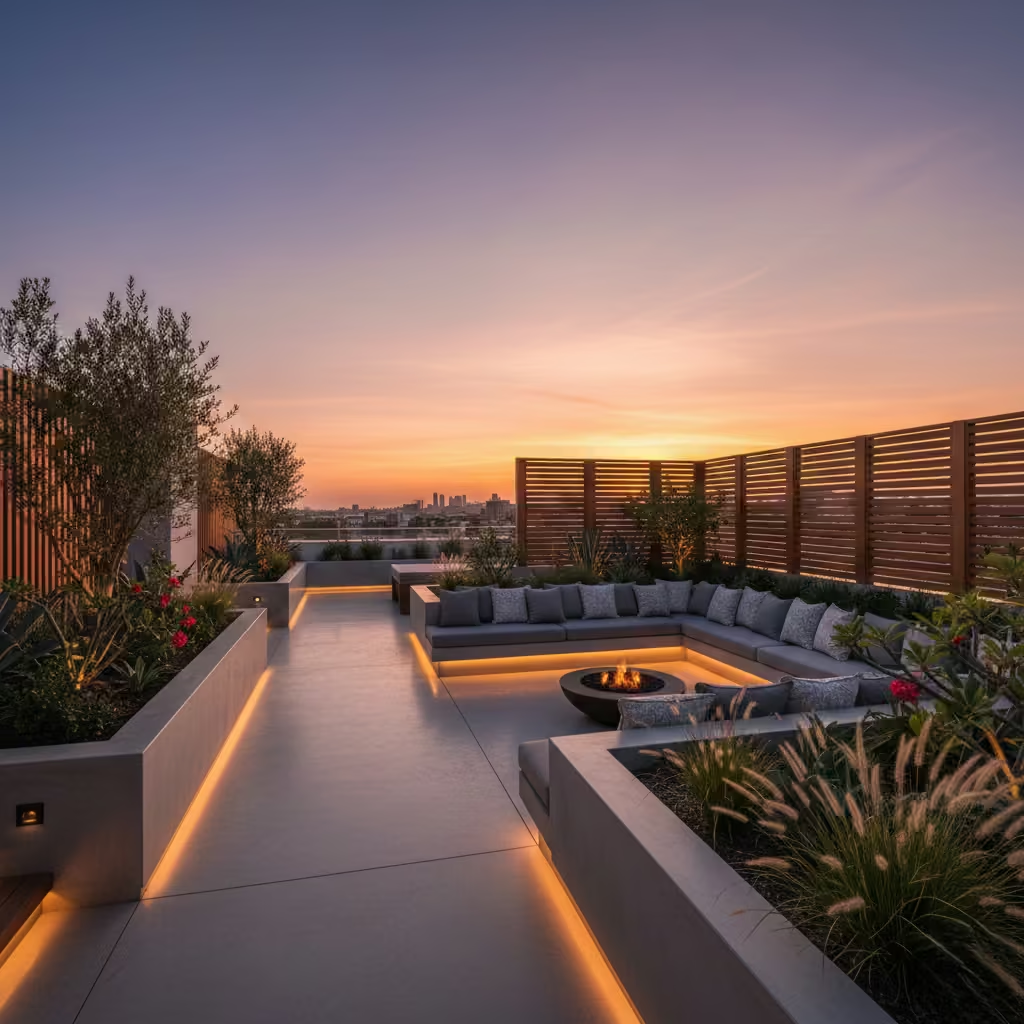
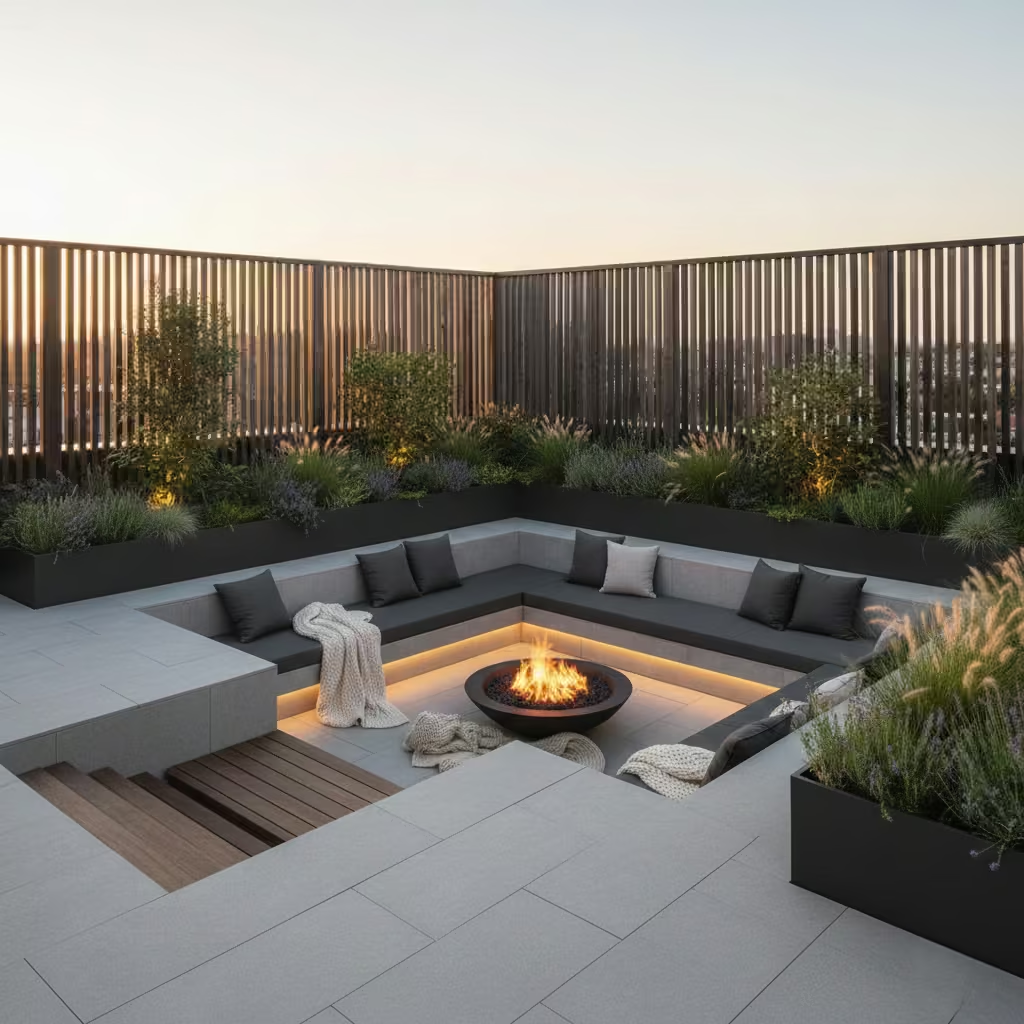
A sunken lounge zone introduces psychological shelter within an exposed rooftop environment. By lowering the seating area, even modestly, the terrace gains intimacy and spatial definition. It reduces visual exposure to neighbouring buildings and creates a subtle sense of enclosure without erecting vertical barriers. The shift in level establishes hierarchy, signalling that this is a place to relax rather than circulate.
Practical Application
The typical drop ranges from 300 to 450 mm (12 to 18 inches). This depth is sufficient to create an enclosure while maintaining comfortable step access. Seating heights should remain at approximately 450 mm (18 inches) from the finished floor level within the sunken zone.
From a construction perspective, this approach works best on reinforced concrete slab rooftops where structural calculations can accommodate altered loading patterns. The waterproofing strategy becomes critical. I always specify a fully integrated membrane system with upstand detailing, perimeter drainage channels, and accessible inspection points. Without meticulous detailing, the risk of water ingress increases significantly.
Real-Life Insight
On a 60 m² (646 sq ft) flat-roof conversion, we introduced a 350 mm (14 in) recessed lounge measuring 3.5 m x 4 m (11.5 ft x 13 ft). The surrounding terrace remained flush with the access stair. The subtle drop transformed the centre of the roof into a protected conversation zone, reducing wind exposure by approximately 20 percent based on site wind testing. Clients reported using the space well into autumn due to improved comfort levels.
Pros
- Enhances privacy without tall screens
- Creates strong spatial hierarchy
- Improves wind buffering at seating level
- Feels architecturally integrated rather than decorative
Cons
- Requires structural engineer approval
- Increased waterproofing complexity
- Limited flexibility once constructed
A sunken lounge is not a casual design choice. When engineered properly, however, it elevates the terrace from flat platform to layered architectural landscape.
Outdoor Kitchen with Wind Buffer
An outdoor kitchen transforms a rooftop terrace from an occasional retreat into a functioning extension of the home. The intent is not novelty, but permanence. Cooking outdoors changes how the terrace is used socially and seasonally. On rooftops in particular, wind exposure is the primary design challenge. Without protection, heat loss from grills and discomfort for the cook quickly undermines usability. A wind-buffered layout solves this at an architectural level.
Practical Application
A minimum of 2.4 m (8 ft) of linear counter space is required to comfortably accommodate a grill, a preparation area, and a sink. For more ambitious schemes, I typically specify 3 m to 3.6 m (10 to 12 ft) to allow proper workflow zoning.
Marine-grade stainless steel cabinetry is essential due to UV exposure, moisture, and temperature fluctuations. Standard interior cabinetry will deteriorate rapidly in rooftop conditions. Worktops should be a porcelain slab or honed granite with minimal porosity.
Glass wind screens approximately 1.2 m (4 ft) high are effective at shielding flame disruption while maintaining visual openness. The glass must be laminated and mechanically fixed into steel channels engineered for rooftop wind loads. Placement should respond to prevailing wind direction rather than being symmetrically positioned for aesthetics alone.
Real-Life Insight
On a 48 m² (517 sq ft) penthouse terrace, prevailing south-westerly winds made grilling inconsistent. We installed a 3 m (10 ft) stainless steel kitchen run along the leeward parapet wall and introduced two perpendicular 1.2 m (4 ft) glass wind screens forming a subtle L-shape. This reduced the grill’s direct wind impact by nearly half, as confirmed by on-site flame testing. The terrace shifted from occasional summer use to year-round entertaining, supported by integrated overhead heaters within a pergola.
Pros
- Extends usability across seasons
- Increases property appeal and perceived luxury
- Encourages social interaction and longer occupancy
Cons
- Requires plumbing, drainage, and gas or electrical coordination
- Higher installation cost and maintenance requirements
- Structural review necessary due to concentrated load zones
A rooftop outdoor kitchen must be engineered, not improvised. When properly resolved with wind mitigation and durable materials, it becomes one of the most transformative additions to elevated living spaces.
Rooftop Garden with Deep Planters
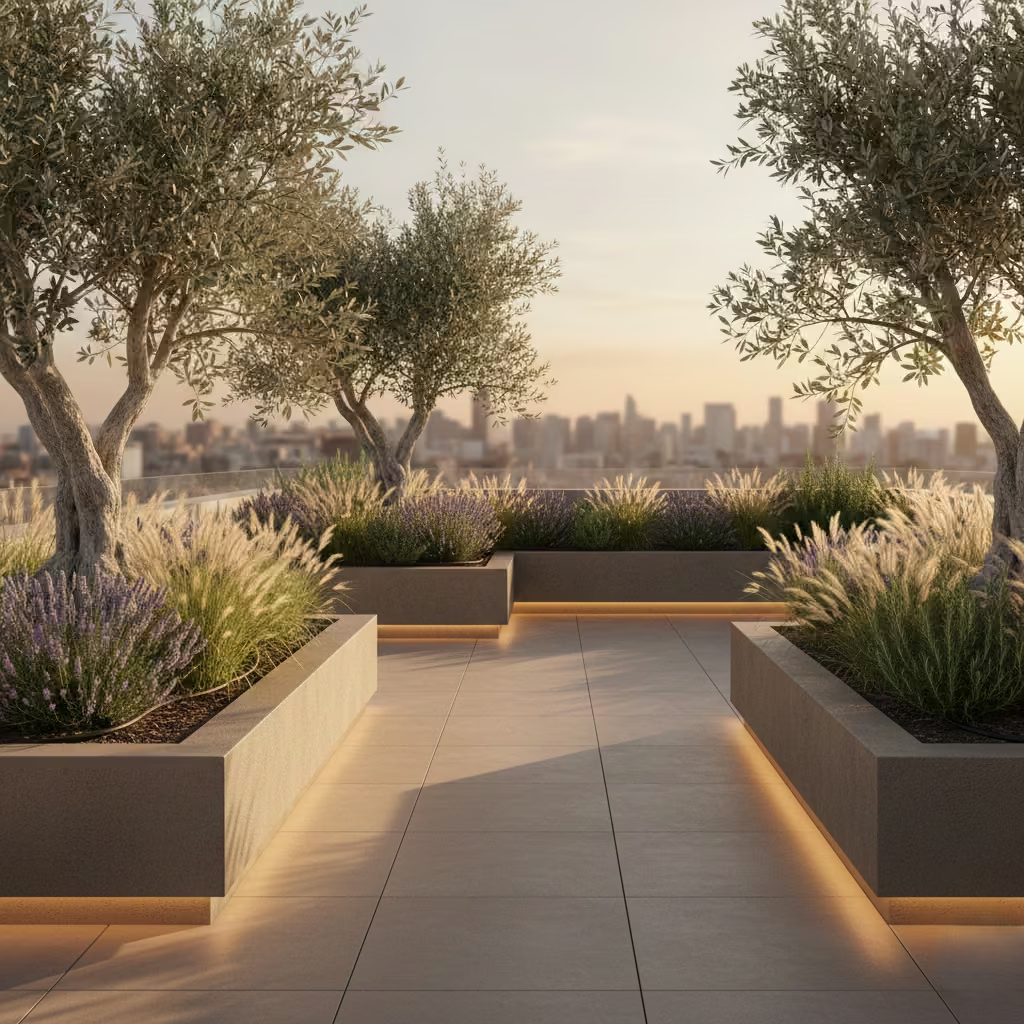
A rooftop garden introduces softness, biodiversity, and microclimate control to what would otherwise be a hard, heat-retaining surface. The objective is not decorative pots scattered across paving, but a structured planting strategy that defines edges, filters views, and moderates wind. Deep planters create permanence and allow for meaningful vegetation rather than shallow seasonal planting.
Practical Application
For shrubs and small structural planting, planters should measure 600 to 900 mm (24 to 36 inches) in depth. Anything shallower limits root development and long-term plant health. Width should ideally be 450 to 600 mm (18 to 24 inches) to provide adequate soil volume.
Every planter must incorporate a drainage layer and a geotextile separation membrane. I typically specify a 50 mm (2-inch) drainage mat at the base to prevent waterlogging and reduce static load from retained moisture. Automated drip irrigation is strongly recommended, particularly for elevated sites exposed to increased wind and solar gain. Rooftop planting dries out much more quickly than ground-level gardens.
Structurally, soil weight must be calculated carefully. Saturated planting medium can weigh 1,200 to 1,800 kg/m³, depending on composition. Lightweight engineered substrates are often preferable to reduce dead load.
Real Project Note
On a 55 m² (592 sq ft) rooftop terrace inspired by Mediterranean planting palettes similar to those seen in Barcelona, we specified drought-tolerant species including olive trees, lavender, rosemary, and ornamental grasses.
Planters were constructed to a depth of 800 mm (31 inches) along the perimeter to create a continuous green buffer. By selecting species adapted to high-sun, low-water conditions, irrigation demand was reduced by approximately 35% compared to conventional mixed planting schemes. Maintenance visits dropped from monthly to bi-monthly after the first year of establishment.
Pros
- Enhances privacy and reduces overlooking
- Moderates rooftop temperature through evapotranspiration
- Softens hard architectural lines
- Encourages biodiversity
Cons
- Significant structural load considerations
- Requires irrigation and ongoing horticultural maintenance
- Waterproofing detailing must be meticulous
A well-designed rooftop garden is not an accessory. It becomes the living framework of the terrace, shaping atmosphere, comfort, and long-term sustainability.
Infinity-Edge Rooftop Plunge Pool (Where Structurally Permitted)
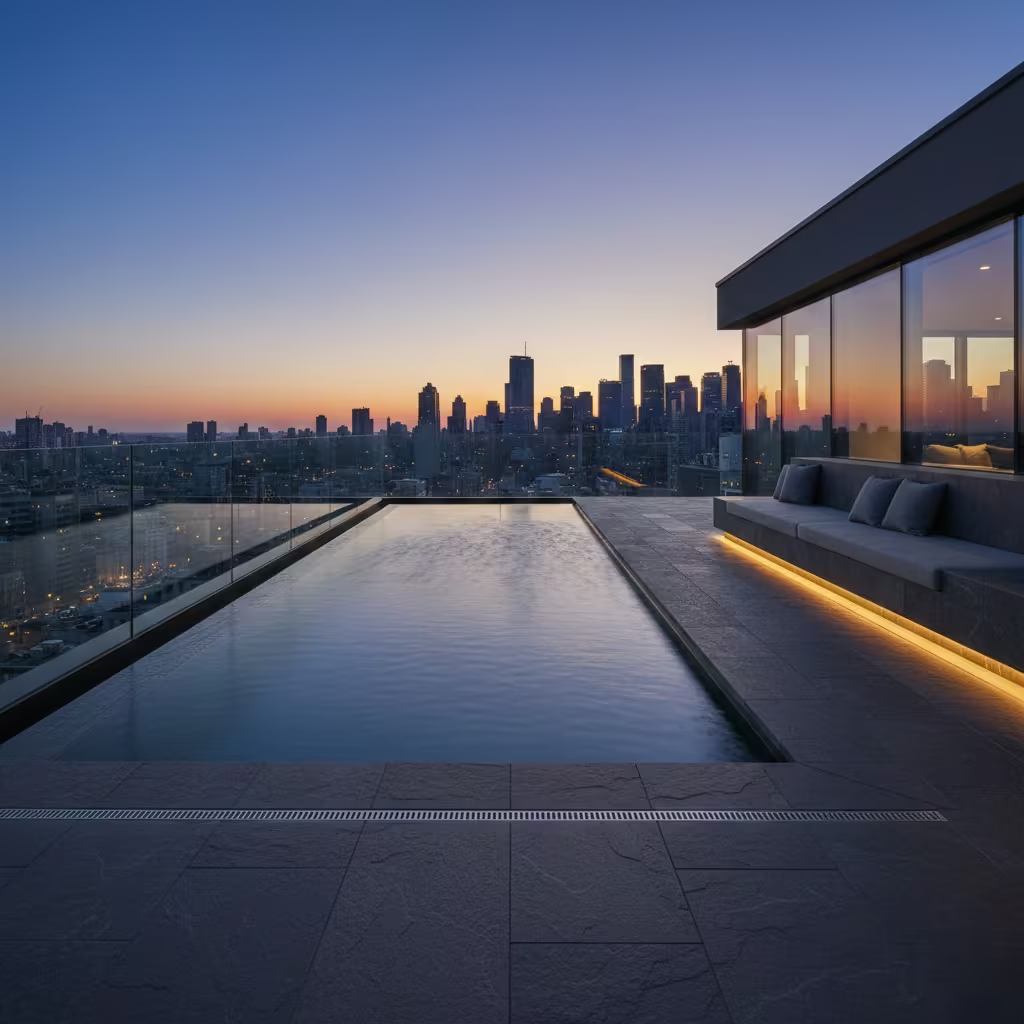
An infinity-edge rooftop plunge pool is a statement of architectural confidence. The goal is not spectacle alone, but integration. When properly positioned, the water surface visually merges with the skyline, extending the perceived horizon and amplifying spatial drama. On urban rooftops, the reflective quality of water also softens surrounding architecture and introduces movement into an otherwise static environment.
Practical Application
A typical rooftop plunge pool measures approximately 2.5 m x 4 m (8 ft x 13 ft) and has a water depth of 1.1 m to 1.3 m (3.6 to 4.3 ft). This scale is sufficient for cooling, light exercise, and visual impact without overwhelming the structural capacity of most reinforced slabs.
However, water weighs 1,000 kg per m³. A pool of this size can easily exceed 10,000 kg (22,000 lbs) when accounting for water, shell construction, finishes, and occupants. Full structural engineer sign-off is mandatory. In many projects, additional steel reinforcement, carbon fibre strengthening, or secondary support beams are required beneath the slab.
Infinity-edge systems also demand precise waterproofing, overflow channel detailing, and mechanical plant allocation. The filtration equipment must be accommodated within a dedicated plant enclosure, often occupying 2 to 4 m² (21 to 43 sq ft) of valuable rooftop area.
Real-Life Insight
On a high-end penthouse project with a 75 m² (807 sq ft) roof slab, the client requested a plunge pool facing the city skyline. Structural analysis revealed the existing slab could not safely support a fully filled pool without reinforcement.
We introduced supplementary steel beams beneath the slab and reduced the pool depth to 1.1 m (3.6 ft) to control weight. The final 2.5 m x 3.8 m (8 ft x 12.5 ft) infinity-edge design maintained visual impact while remaining structurally compliant. The pool became the defining focal point of the terrace, but only after rigorous engineering coordination.
Pros
- Strong luxury and resale appeal
- Creates a focal point with high architectural impact
- Enhances cooling and sensory experience in hot climates
Cons
- Significant structural reinforcement costs
- Complex waterproofing and mechanical systems
- Ongoing maintenance and operational expenses
An infinity-edge rooftop plunge pool is not an accessory. It is a structural undertaking. When engineered responsibly and proportioned carefully, it transforms a terrace into a private urban retreat suspended above the city.
Minimalist Timber Deck Platform
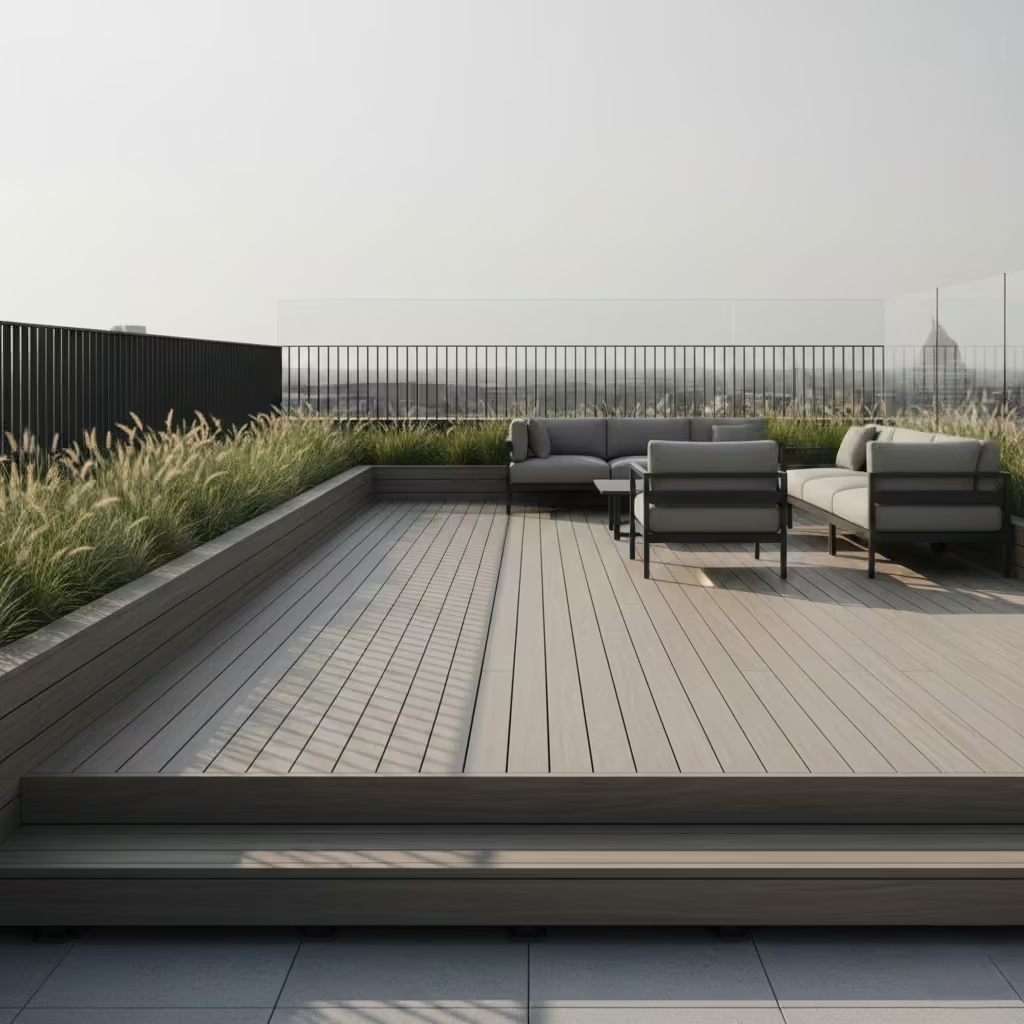
A minimalist timber deck platform introduces warmth and tactile comfort to rooftop environments dominated by hard structural surfaces. The intention is restraint rather than display. Timber should serve as a quiet architectural ground plane, allowing furniture, planting, and views to define the terrace’s character. I treat decking as the stage, not the performance.
Practical Application
The deck is typically raised 100 to 150 mm (4 to 6 inches) above the waterproofed slab to create a drainage cavity and allow airflow beneath the surface. This elevation prevents moisture accumulation and reduces thermal stress during hot afternoons. Adjustable pedestal systems are often preferred because they allow fine levelling on imperfect structural slabs.
Thermally modified timber or high-quality composite boards are ideal choices for rooftop exposure. Thermal modification reduces internal moisture content, improving dimensional stability under intense solar radiation. Board width should generally remain between 120 and 150 mm (4.7 to 6 inches) to maintain visual proportion across large surfaces.
Expansion detailing is critical. I always specify gaps of 3 to 5 mm (0.12 to 0.2 inches) between boards, depending on the species or the composite manufacturer’s guidance. In high-sun-exposure zones, failure to allow movement will result in surface cupping or edge stress over time.
Real-Life Insight
On a 38 m² (409 sq ft) rooftop terrace project, afternoon solar exposure caused traditional hardwood decking to warp slightly within the first season. We replaced the surface with thermally modified ash timber installed on adjustable aluminium pedestals. Expansion joints were aligned along the circulation axis rather than randomly distributed, thereby improving visual rhythm and reducing stress points in the structure. After three years of seasonal cycling, the deck surface retained clean linear geometry.
Pros
- Natural warmth and premium tactile quality
- Comfortable barefoot walking surface
- Supports long-term aesthetic neutrality
- Ages gracefully when properly specified
Cons
- Requires periodic sealing or surface treatment depending on material
- Timber can degrade faster in poorly ventilated roof assemblies
- Higher initial material cost compared to basic concrete finishes
A well-detailed timber deck is timeless because it avoids excess. Its strength lies in proportion, precision, and respect for environmental exposure. When executed correctly, it remains visually calm even as the surrounding city evolves.
Retractable Glass Enclosure
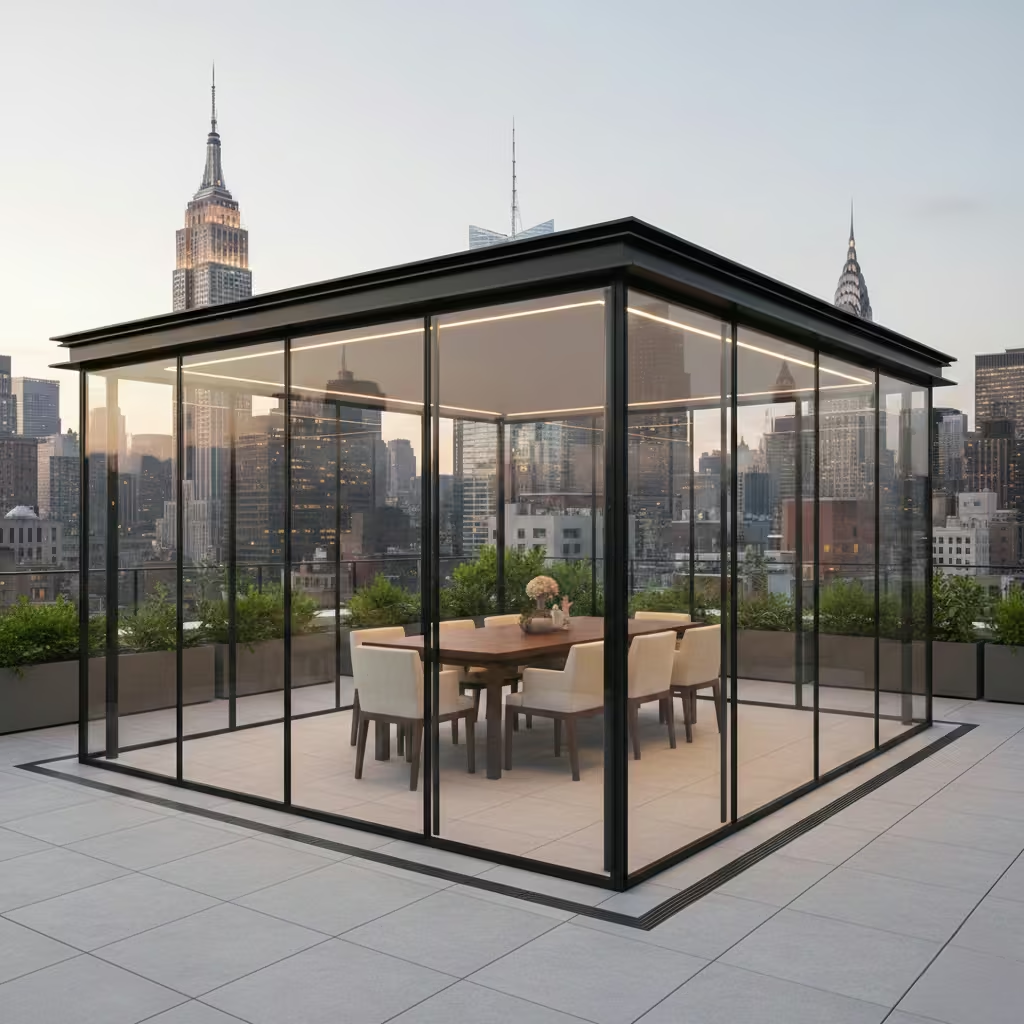
A retractable glass enclosure extends the functional life of a rooftop terrace by transforming it from an open-air platform into a semi-conditioned outdoor room. The goal is seasonal adaptability rather than permanent sealing. I view this system as a climate-response layer that allows the terrace to behave differently across summer, autumn, and colder months while preserving a visual connection to the sky.
Practical Application
The enclosure should be designed with a minimum internal clear ceiling height of 2.4 m (8 ft) to maintain comfortable spatial breathing room and avoid the sensation of compression that can occur in low-glazed volumes. In premium residential projects, I often target 2.6 to 2.8 m (8.5 to 9.2 ft) where structural conditions permit.
Retractable panels are typically manufactured using tempered laminated glass set within aluminium or steel guide tracks. The movement mechanism can be manual or motorised. I strongly recommend low-friction roller systems with weather-resistant bearings, especially in coastal or high-humidity environments.
Ventilation strategy is important. Even when enclosed, the space should allow controlled airflow through top vents or sliding side panels. Rooftops accumulate heat rapidly, and without micro-ventilation, the enclosure can become uncomfortable during midday solar gain.
Real-Life Insight
On a 52 m² (560 sq ft) terrace overlooking the skyline of New York City, winter winds reduced usability to less than 4 months per year. We installed a retractable glazed perimeter system forming a 3.2 m x 6 m (10.5 ft x 19.7 ft) enclosed dining lounge. The enclosure allowed the client to host evening gatherings during colder seasons while preserving open views during summer months. The key design success was specifying floor-to-ceiling panels with concealed structural rails so the mechanism felt architecturally integrated rather than mechanical.
Pros
- Extends terrace usability across seasons
- Improves wind and rain protection
- Enhances property sophistication and market value
Cons
- Planning permission may be required in dense urban areas
- Higher mechanical maintenance demand
- Significant initial installation cost
A retractable glass enclosure works best when it is treated as a refined architectural skin rather than a technical add-on. When executed with restraint and precision, it preserves the openness of rooftop living while quietly improving comfort and longevity.
Built-In Concrete Seating
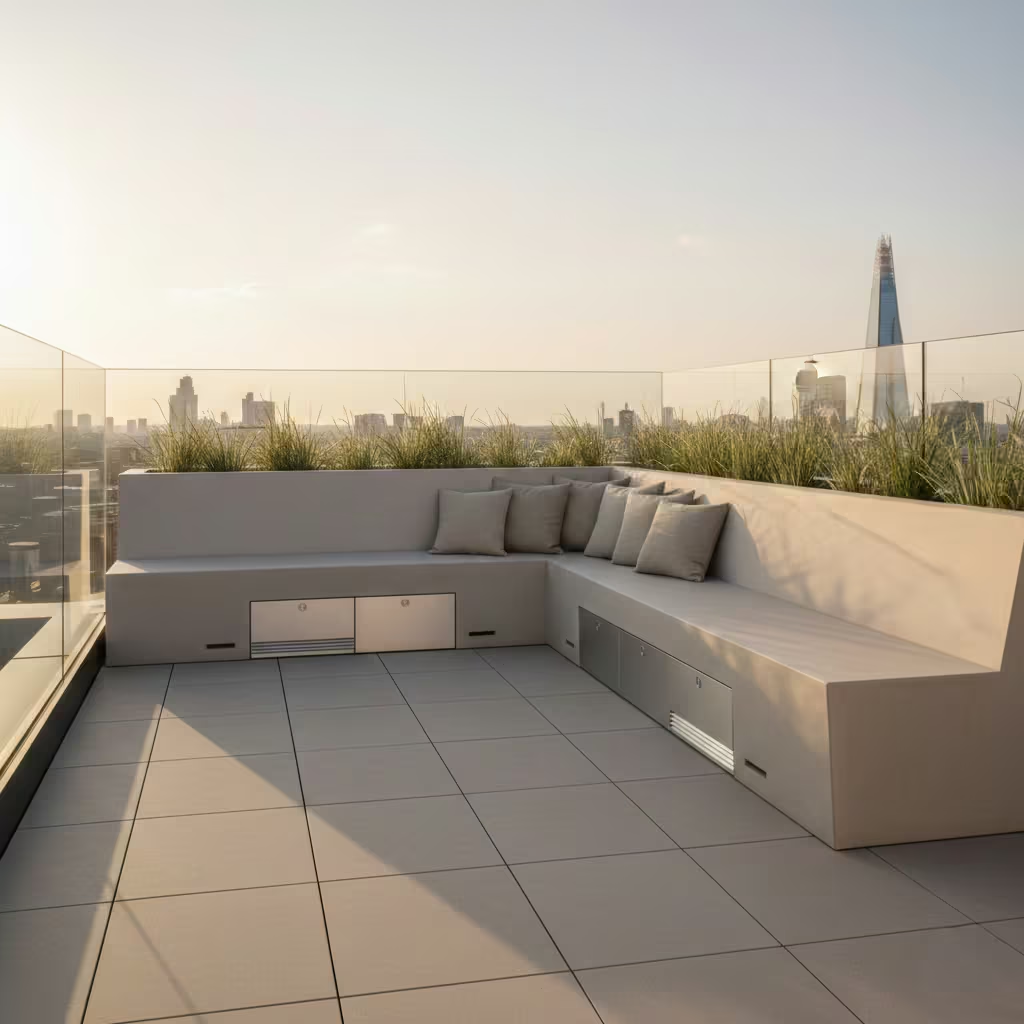
Built-in concrete seating introduces permanence and structural calm to a rooftop terrace. The objective is to anchor social space against wind exposure while removing dependence on lightweight furniture that may shift or degrade outdoors. I often use this approach when designing terraces intended to function as architectural landscapes rather than temporary leisure platforms.
Practical Application
The standard seat height should be approximately 450 mm (18 inches) from finished floor level, which aligns with natural human biomechanics for relaxed upright sitting. Seat depth is typically 450 to 500 mm (18 to 20 inches) to maintain comfort without forcing excessive spinal recline.
Integrated storage beneath the seating is highly practical on rooftops where space efficiency matters. Storage cavities should include a waterproof membrane lining and ventilation openings to prevent condensation accumulation. Access panels are best constructed using powder-coated aluminium or treated marine plywood with concealed hinges.
Surface finishing is important. I prefer honed concrete, microcement, or porcelain cladding over roughcast surfaces, as smoother finishes resist dirt retention and weather staining.
Real-Life Insight
On a 45 m² (484 sq ft) urban rooftop project, prevailing winds made movable lounge chairs uncomfortable after sunset. We installed an L-shaped concrete seating bench measuring 3.6 m (11.8 ft) along the perimeter wall with a 1.8 m (6 ft) return section. The bench height was set precisely at 450 mm (18 inches), and the seat depth at 480 mm (19 inches). Beneath the bench, we created 1.2 m³ (42.3 cubic ft) of waterproof storage for cushion sets and outdoor heating accessories. After construction, the terrace became usable even on windy autumn evenings.
Pros
- Highly wind-resistant and stable
- Long service life with minimal maintenance
- Supports clean minimalist architectural language
- Storage integration improves functionality
Cons
- Permanent installation reduces layout flexibility
- Requires careful waterproofing detailing
- Hard surfaces may need cushion layering for extended comfort
Built-in concrete seating works best when designed as part of the terrace structure rather than added later. Its value lies in stability, durability, and quiet architectural presence.
You May also Like: Rooftop Decks Turning Unused Space into a Retreat
Rooftop Fire Feature
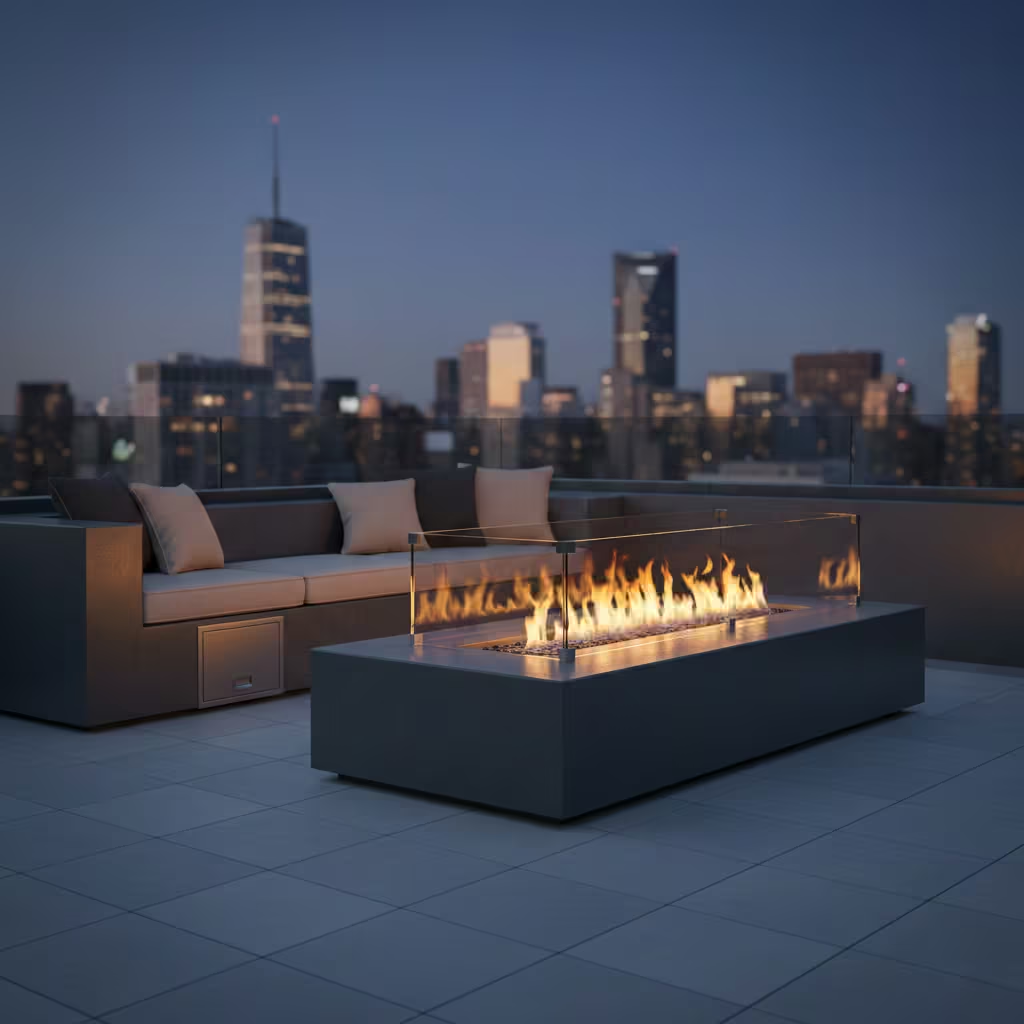
A rooftop fire feature introduces controlled elemental warmth and becomes a natural gathering focal point after sunset. Fireworks particularly well on elevated urban terraces, where ambient city light often dominates the visual experience. I prefer gas-fed systems in residential rooftop environments because they provide stable flame behaviour, cleaner combustion, and simpler operational control than solid-fuel systems.
Practical Application
Gas-fed fire bowls, linear flame bars, or recessed fire pits are commonly specified. Natural gas or LPG supply must be routed through protected conduits with isolation valves positioned at accessible service points.
Clearance zones are critical for safety and durability. I typically maintain a minimum non-combustible perimeter of 900 mm (36 inches) around open-flame features and 1.2 m (48 inches) of overhead clearance where pergola or canopy structures are present. Surrounding surfaces should be heat-resistant materials such as porcelain, stone, or treated metal cladding.
Wind exposure must also be considered. On rooftop levels, flame instability can occur due to air turbulence. Partial wind shielding using glass screens 1.0 to 1.2 m (3.3 to 4 ft) high can stabilise combustion behaviour without visually enclosing the fire.
Maintenance access for gas regulators and ignition systems should be planned from the outset. I strongly recommend locating mechanical components within a locked service cabinet integrated into seating or wall structures.
Real-Life Insight
On a 50 m² (538 sq ft) rooftop terrace, we installed a rectangular gas flame feature measuring 1.2 m x 0.4 m (4 ft x 1.3 ft) along the lounge seating axis. The fire line was recessed 150 mm (6 inches) below finished floor level to reduce wind disruption. The surrounding deck was finished in matte porcelain to limit heat marking. The feature became the primary evening social anchor on the terrace, especially during colder months, when the city skyline was enjoyed alongside warmth.
Pros
- Creates strong evening atmosphere and social focus
- Cleaner and safer operation than wood-burning systems
- Lower smoke and ash maintenance
Cons
- Requires certified gas installation and periodic safety inspection
- Wind exposure may affect flame stability
- Initial mechanical setup is complex
A rooftop fire feature should feel intentional and restrained. When engineered carefully, it adds quiet emotional warmth without overwhelming the architectural composition of the terrace.Top of Form
Shade Sail for Modern Aesthetic
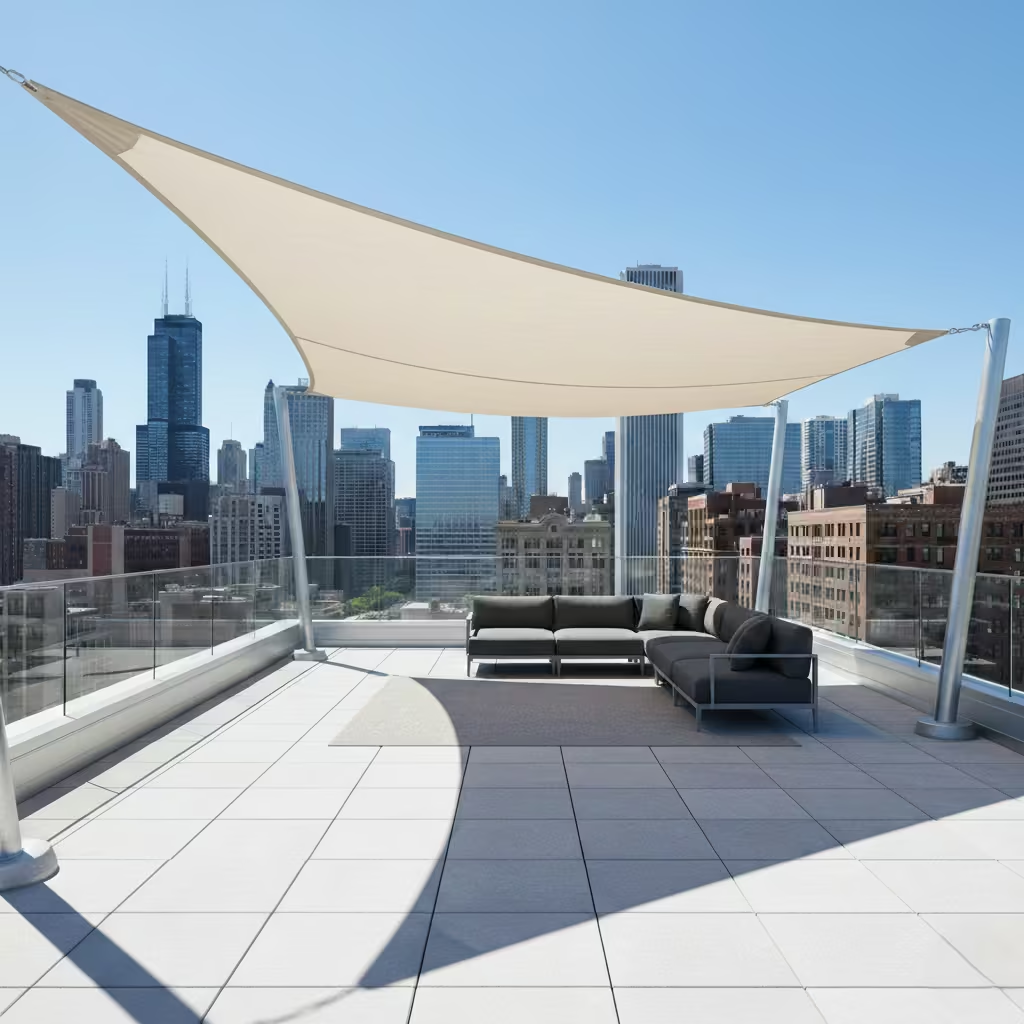
A shade sail introduces lightness and contemporary character to a rooftop terrace while providing practical solar protection. I often use tensioned fabric shading to soften the visual mass of structural elements. The design should feel almost suspended in the air, creating a floating geometry that complements skyline views rather than competing with them.
Practical Application
Shade sails work best on compact terraces under 30 m² (322 sq ft), where a full pavilion structure may feel visually heavy. The fabric is typically high-density polyethylene or architectural polyester with UV stabilisation.
Tensioning is critical. Stainless steel cables are fixed to structural anchor points designed to resist wind uplift forces. I specify marine-grade stainless hardware because rooftop environments accelerate corrosion. The sail should maintain a gentle but firm stretch without visible sagging.
Mounting height is usually between 2.4 m and 3 m (8 to 10 ft) above finished floor level to preserve headroom and airflow. The sail shape is often triangular or slightly asymmetric to disperse wind stress.
Real-Life Insight
On a 28 m² (301 sq ft) urban rooftop in a dense residential district, afternoon solar exposure made the lounge unusable during summer. We installed a 5 m (16.4 ft) diagonal triangular shade sail anchored to reinforced parapet steel plates. The fabric was selected in a light sandstone tone to reflect heat rather than absorb it. Surface temperature beneath the shade dropped noticeably compared to adjacent unshaded paving, improving seating comfort during peak daylight hours.
Pros
- Cost-effective solar control solution
- Creates contemporary lightweight visual expression
- Allows airflow and prevents heat trapping
Cons
- Fabric lifespan depends on UV exposure and weather conditions
- Requires periodic tension adjustment
- Less effective during wind-driven rain
A shade sail performs best when treated as a carefully tensioned architectural skin rather than a casual covering. Its elegance comes from simplicity, proportion, and controlled structural anchoring.
Rooftop Dining Pavilion
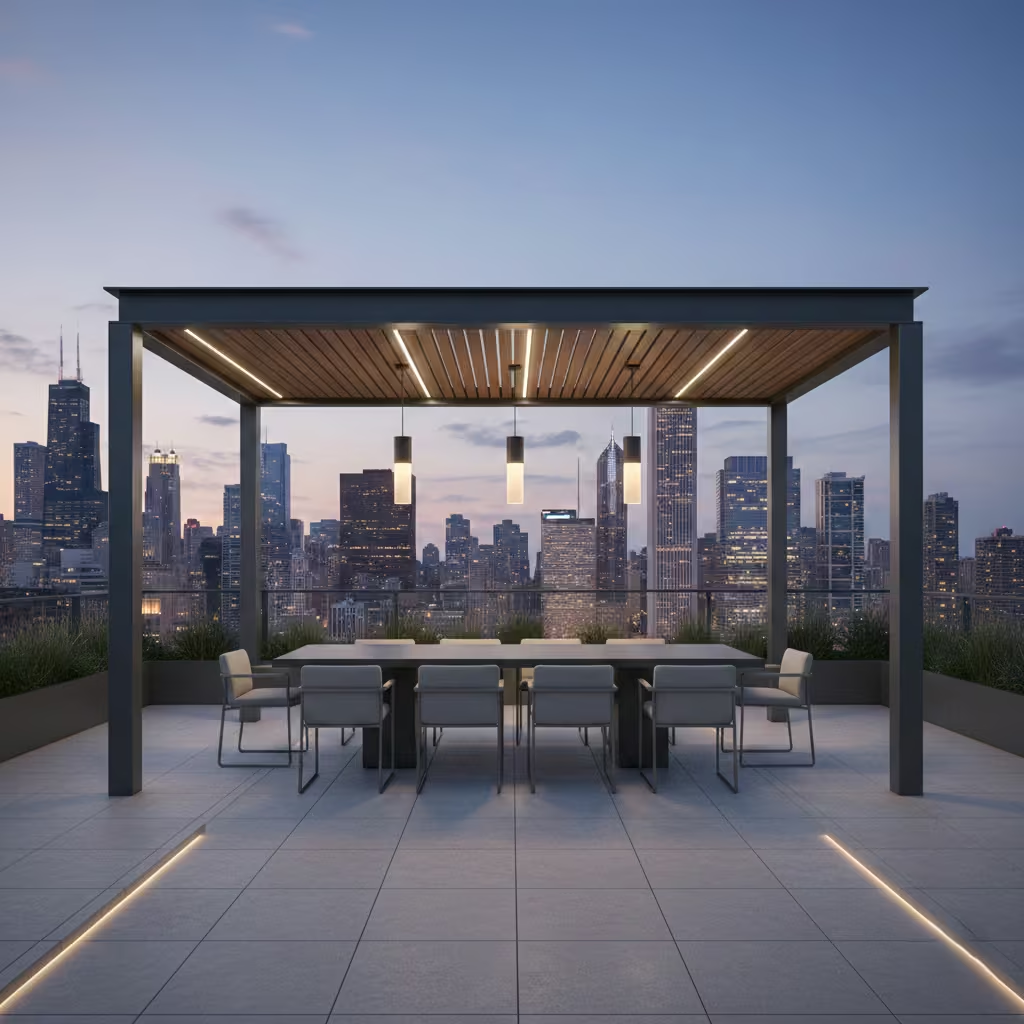
A rooftop dining pavilion creates a formalised social core within the terrace composition. The purpose is not to isolate dining as a separate object, but to frame it as a comfortable architectural experience. I design dining pavilions with spatial generosity, because tight outdoor dining zones quickly lose appeal after the first season of use.
Practical Application
Table circulation is critical. I maintain at least 900 mm (36 inches) of clearance around the perimeter of the dining table to allow chairs to be pulled back comfortably and to support natural movement for guests and service flow. For larger entertaining terraces, 1.1 m (43 inches) circulation width feels more luxurious and reduces congestion.
Pavilion ceiling height should remain between 2.4 m and 2.7 m (8 to 9 ft). This range balances enclosure and openness while preventing acoustic echoing that can occur in taller lightweight outdoor structures.
Lighting should be layered rather than single-source. I typically combine three zones:
- Ambient lighting integrated into pavilion beams at approximately 2700K colour temperature
- Task lighting above the dining surface, often suspended 700 to 900 mm (28 to 35 inches) above the table
- Subtle perimeter or step lighting to define circulation edges
Materials should prioritise weather durability. Powder-coated steel framing, marine-grade timber accents, or architectural aluminium are practical choices for long-term performance.
Real-Life Insight
On a 64 m² (689 sq ft) rooftop entertaining terrace, we installed a pavilion measuring 3.5 m x 4.2 m (11.5 ft x 13.8 ft). The dining table was centred within a 1.2 m (47 inch) wide circulation zone. Integrated warm lighting strips were concealed inside the structural rafters, eliminating glare while maintaining visual warmth during evening gatherings. The pavilion became the primary social anchor of the project, especially during weekend hosting.
Pros
- Supports formal and informal dining activities
- Improves night-time atmosphere through controlled lighting
- Defines terrace hierarchy
Cons
- Structural load and wind resistance must be engineered
- Higher cost compared to open terrace dining setups
- Planning permission may be required in some jurisdictions
A rooftop dining pavilion succeeds when it feels naturally embedded in the architecture of the terrace. The best designs are the ones where guests notice the comfort of the space before they notice the structure itself.
Outdoor Cinema Wall
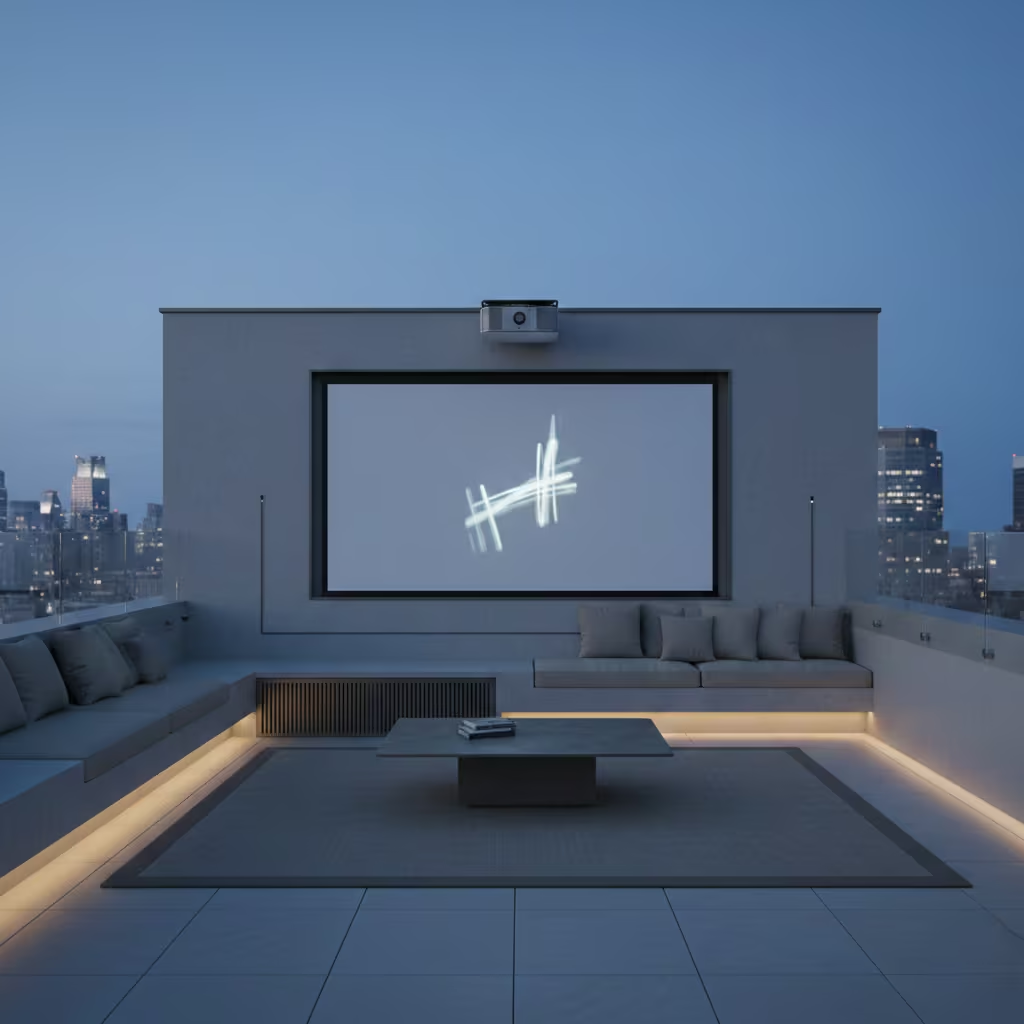
An outdoor cinema wall transforms a rooftop terrace into an evening entertainment space without dominating the spatial composition during the day. The objective is subtle integration.
I avoid oversized theatrical installations. Instead, I favour surfaces that behave as architectural elements first and projection media second. The wall should feel like part of the terrace structure even when the screen is not in use.
Practical Application
The projection surface must be wind-rated and tension-mounted rather than loosely suspended. Outdoor-grade projection screens are typically manufactured using UV-stabilised, mildew-resistant polymer fabric with reinforced perimeter framing.
Screen width generally ranges from 2.2 m to 3.0 m (7.2 to 9.8 ft) for residential terraces. Viewing distance should ideally be 2.5 to 4 times the screen width. For example, a 2.5 m (8.2 ft) wide screen performs well when seating is positioned approximately 6 to 10 m (20 to 33 ft) away.
Concealed AV storage is essential for maintaining visual cleanliness. I usually specify a ventilated lockable cabinet integrated into seating or wall recesses to house the projector, media player, and cabling. Cable routes should be installed inside weather-protected conduits to prevent moisture ingress.
The projector mounting height is typically 2.4 to 2.8 m (8 to 9.2 ft) above finished terrace level. Motorised retractable housings are preferred to protect optical equipment from rain, dust, and solar heat accumulation.
Real-Life Insight
On a 58 m² (624 sq ft) rooftop lounge project, the client wanted entertainment functionality without creating a visually dominant screen structure. We installed a 2.4 m (7.9 ft) wide tensioned projection surface recessed within a darkened microcement feature wall.
The projector was stored inside a ventilated steel enclosure beneath the concrete seating bench. By day, the cinema wall served as a quiet architectural backdrop. After sunset, the system activated with minimal visual clutter, preserving the terrace’s refined atmosphere.
Pros
- Supports social entertainment and relaxation
- Maintains architectural simplicity when not in use
- Allows high-quality movie viewing outdoors
Cons
- Equipment requires weather protection and maintenance
- Wind movement can affect projection stability
- Ambient light significantly impacts viewing quality
An outdoor cinema wall works best when it is designed as a discreet lifestyle layer rather than a dominant feature. When executed with restraint, it extends rooftop living into the night while preserving daytime architectural clarity.
You May also Like: 25 Outdoor Privacy Screen Ideas That Elevate Your Garden with Architectural Confidence
Vertical Green Wall
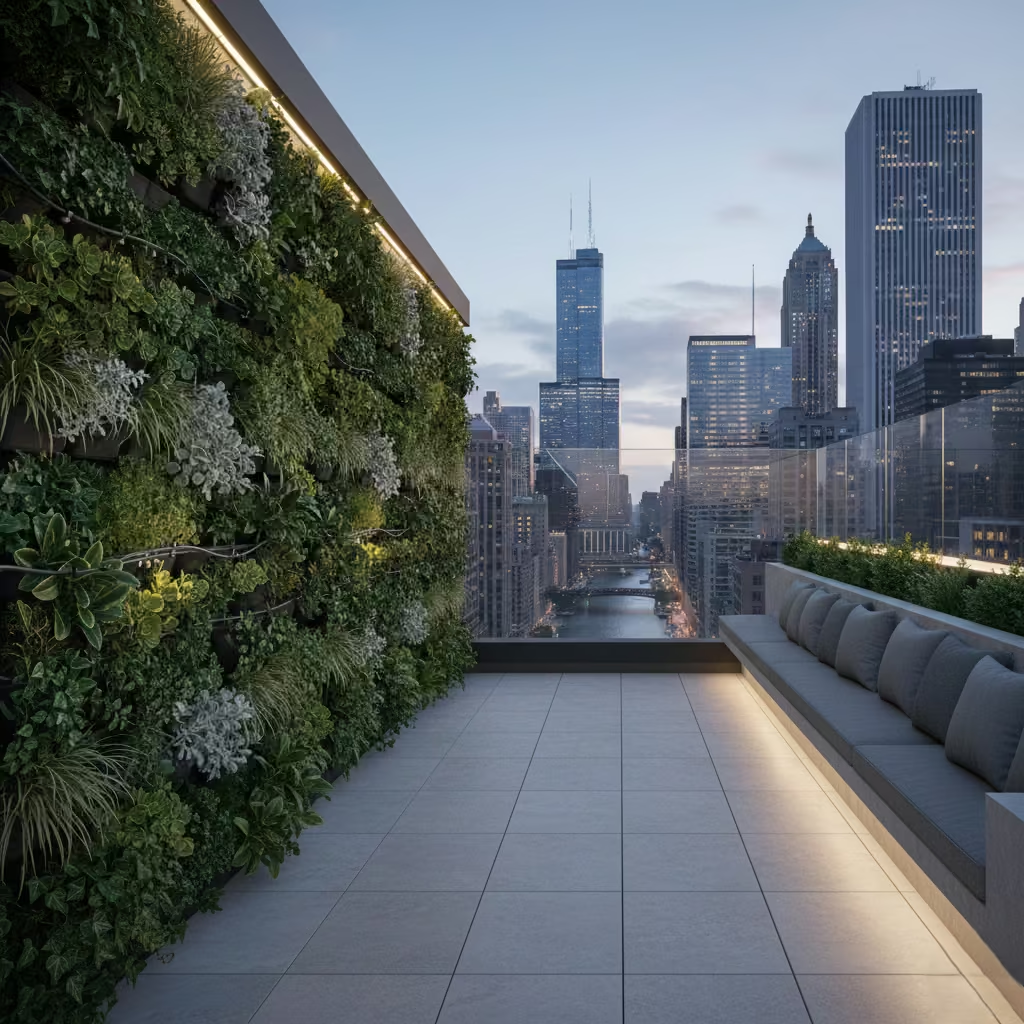
A vertical green wall introduces living texture to rooftop architecture while improving privacy, acoustic softness, and microclimate stability. I treat vertical planting as a functional environmental layer rather than decorative vegetation. The wall should behave like a biological screen, filtering view corridors and moderating wind turbulence across the terrace.
Practical Application
Modular irrigated panel systems are the most reliable solution for rooftop vertical planting. These systems typically consist of lightweight structural frames, plant pockets, substrate media, and integrated drip irrigation lines.
Maintenance access is essential. I always specify at least 600 mm (24 inches) clearance behind the green wall for service inspection, pruning, and irrigation adjustment. Without this space, long-term plant health management becomes extremely difficult.
Plant selection should prioritise species tolerant of high solar exposure, wind, and shallow rooting environments. In dense urban projects, schemes similar to those observed in London rooftop gardens often prefer evergreen climbers and drought-resistant foliage.
Waterproofing protection behind the installation is non-negotiable. A secondary drainage layer and a root barrier membrane should be installed to prevent structural moisture from penetrating into the terrace slab.
Real-Life Insight
On a 46 m² (495 sq ft) rooftop lounge project, we installed a 2.8 m (9.2 ft) high vertical green wall along the north-facing boundary. The system used modular polymer planting cassettes with automated drip irrigation timed for early morning watering cycles. After one full growing season, the wall reduced visual overlooking from neighbouring upper floors and lowered perceived wind speed within the seating zone. The client reported improved acoustic comfort due to foliage sound diffusion during traffic peaks.
Pros
- Enhances privacy naturally
- Improves air quality perception and terrace comfort
- Softens hard architectural surfaces
- Supports urban biodiversity
Cons
- Requires continuous irrigation and horticultural care
- Initial installation cost is relatively high
- Plant failure can create patchy visual appearance
A vertical green wall performs best when treated as a living architectural component rather than a decorative installation. When maintained properly, it evolves gradually, giving the terrace a mature, settled character over time.
Rooftop Bar Counter Facing View
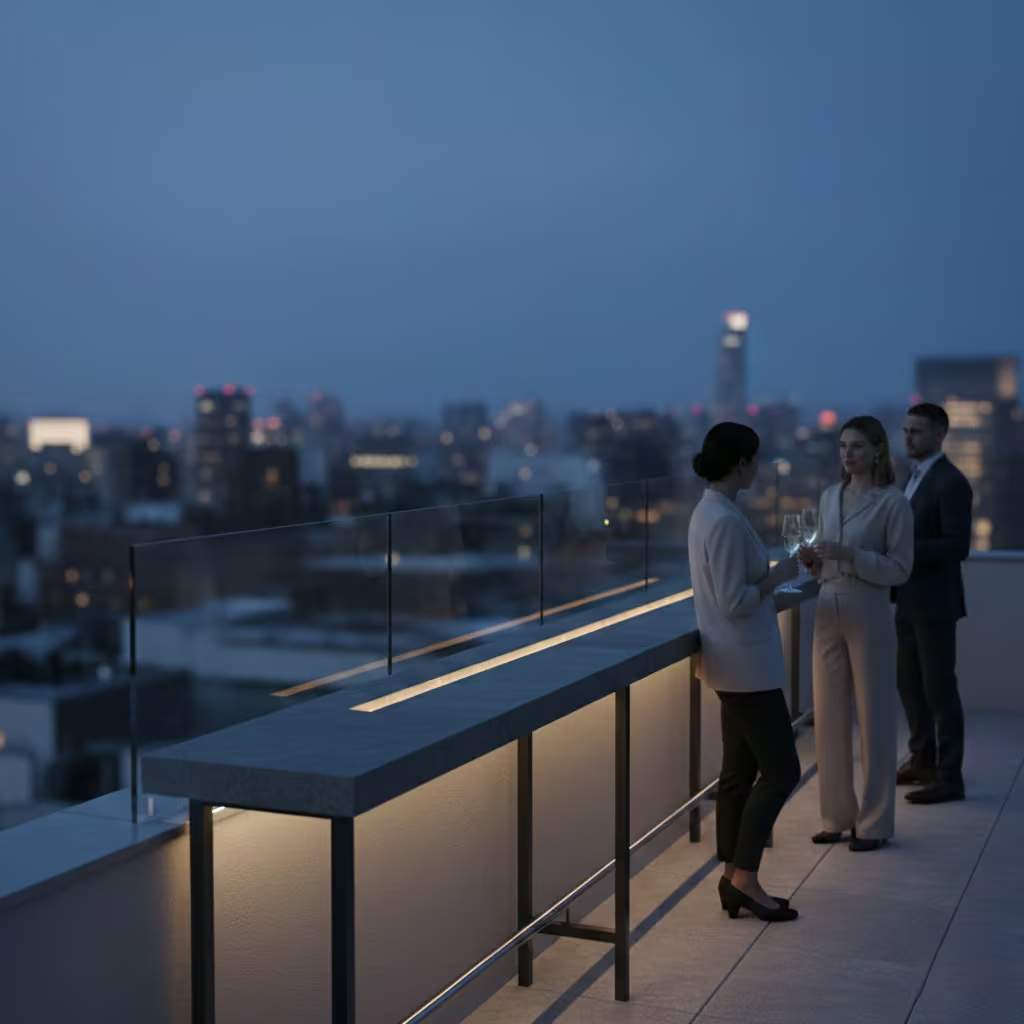
A rooftop bar counter should frame the cityscape rather than compete with it. I design view-facing bars as social observation edges where conversation, landscape, and light converge. The counter serves as a transition between an interior-style gathering and an open-horizon experience. The best versions feel almost suspended between architecture and sky.
Practical Application
The standard bar counter height is approximately 1050 mm (41 inches), which supports comfortable standing conversation and casual leaning posture. Counter depth should range between 350 and 500 mm (14 to 20 inches), depending on whether the bar is purely service-oriented or also used for light dining.
Backlit stone or porcelain surfaces work exceptionally well on rooftops because they combine durability with visual refinement. I prefer ultra-compact sintered stone slabs or architectural porcelain panels with concealed LED strip lighting positioned inside a milled recess channel. The light temperature should remain warm (around 2700K) to preserve an evening atmosphere and avoid clinical brightness.
Weather exposure is a primary consideration. Countertop materials must resist UV fading, thermal expansion, and moisture absorption. I avoid natural marble on exposed rooftops unless the maintenance commitment is high, because staining and surface etching occur more quickly in outdoor conditions.
Footrest rails are often overlooked, but they significantly improve comfort. Stainless steel tubular foot supports placed approximately 300 mm (12 inches) below the counter edge reduce pressure fatigue during prolonged standing.
Real-Life Insight
On a 40 m² (430 sq ft) terrace overlooking the skyline of Chicago, we installed a 3 m (9.8 ft) long bar counter along the parapet wall facing the sunset direction. The counter was fabricated using a 20 mm (0.8 inch) thick backlit porcelain slab mounted on a steel frame. Concealed LED lighting created a soft glow that became visible after dusk, turning the bar edge into a subtle night-time architectural line. The counter doubled as a social gathering point and informal viewing platform.
Pros
- Enhances social interaction and entertainment
- Provides strong visual connection to skyline views
- Durable surface performance in outdoor conditions
Cons
- Requires electrical planning for lighting integration
- High-quality stone or porcelain increases cost
- Wind exposure may require seating or screen buffering
A rooftop bar counter succeeds when it feels like a natural extension of the horizon rather than an inserted piece of furniture. Its value lies in supporting conversation, comfort, and quiet appreciation of the surrounding view.
Floating Planter Islands
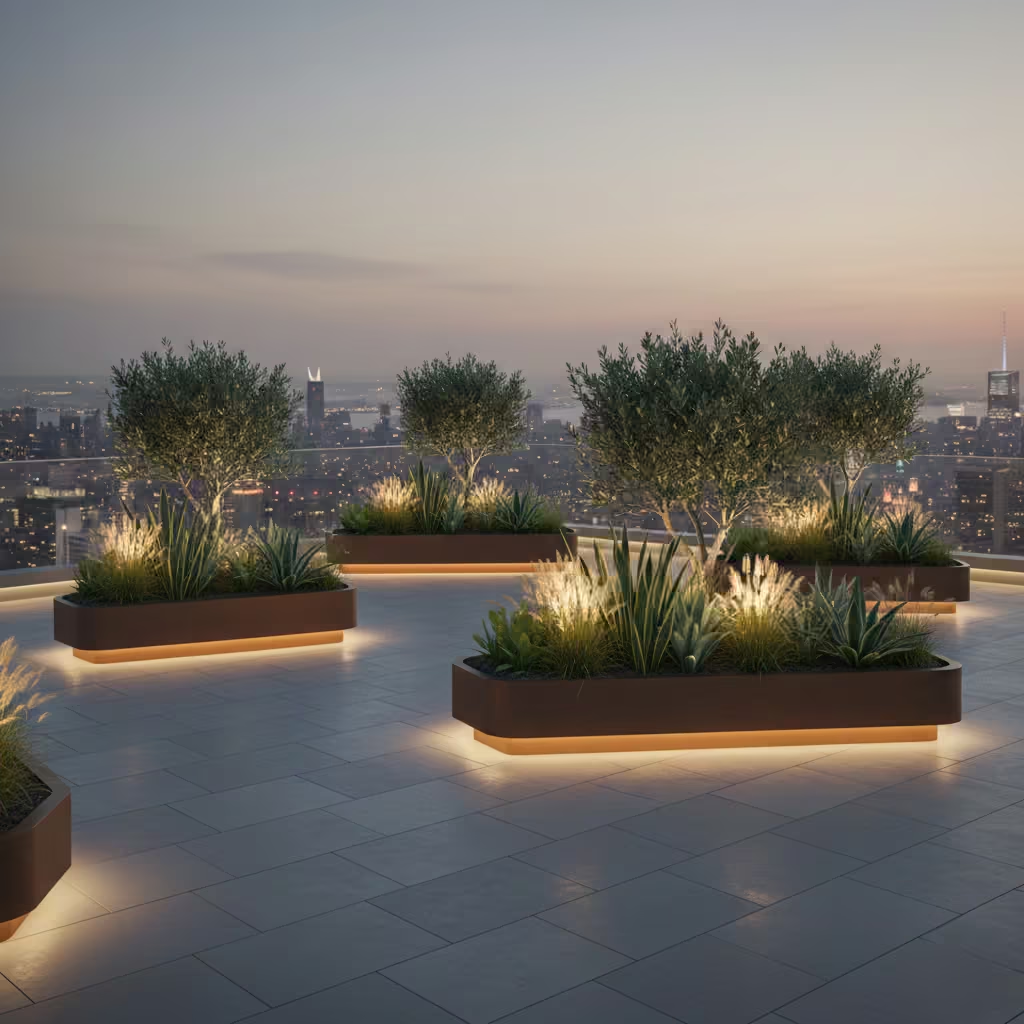
Floating planter islands introduce rhythm and directional movement across a rooftop terrace. Rather than lining vegetation along edges, I use discrete planter masses to guide circulation and break large paved surfaces into human-scale compositions. The visual effect is similar to stepping stones across an open landscape, encouraging slow, considered walking.
Practical Application
The spacing between planter islands should typically leave 600 to 900 mm (24 to 36 inches) clear walkway width. This dimension supports comfortable single-person passage and allows two people to pass briefly without congestion. In premium residential terraces, I sometimes expand circulation corridors to 1.1 m (43 inches) where social movement is expected.
Planters should appear visually light even when structurally robust. I prefer raised steel-framed boxes clad in porcelain or powder-coated aluminium rather than solid masonry blocks. The depth of planting zones depends on vegetation type, but structural planters are usually 500 to 800 mm (20 to 31 inches) deep for medium shrubs.
Drainage strategy is essential. Each island should contain a concealed drainage outlet connected to the main roof drainage network. I always specify root barrier membranes beneath planting media to protect waterproof layers.
Real-Life Insight
On a 70 m² (753 sq ft) rooftop lounge project, we arranged four planter islands measuring 1.2 m x 1.2 m (4 ft x 4 ft) each, positioned diagonally across the terrace. The walkways between them were maintained at approximately 800 mm (31 inches). We planted ornamental grasses and low olive-form shrubs to create gentle movement when the wind passed across the terrace. The arrangement subtly guided guests from the stair entrance to the sunset-viewing edge.
Pros
- Creates spatial rhythm and visual depth
- Improves microclimate by moderating wind flow
- Supports zoning without building permanent walls
Cons
- Requires irrigation and plant maintenance
- Improper placement can obstruct natural circulation
- Structural load must be calculated when planters are filled
Floating planter islands work best when they feel accidental rather than forced. The goal is to simulate natural landscape distribution while preserving architectural order across the terrace surface.
Sculptural Staircase Arrival Moment
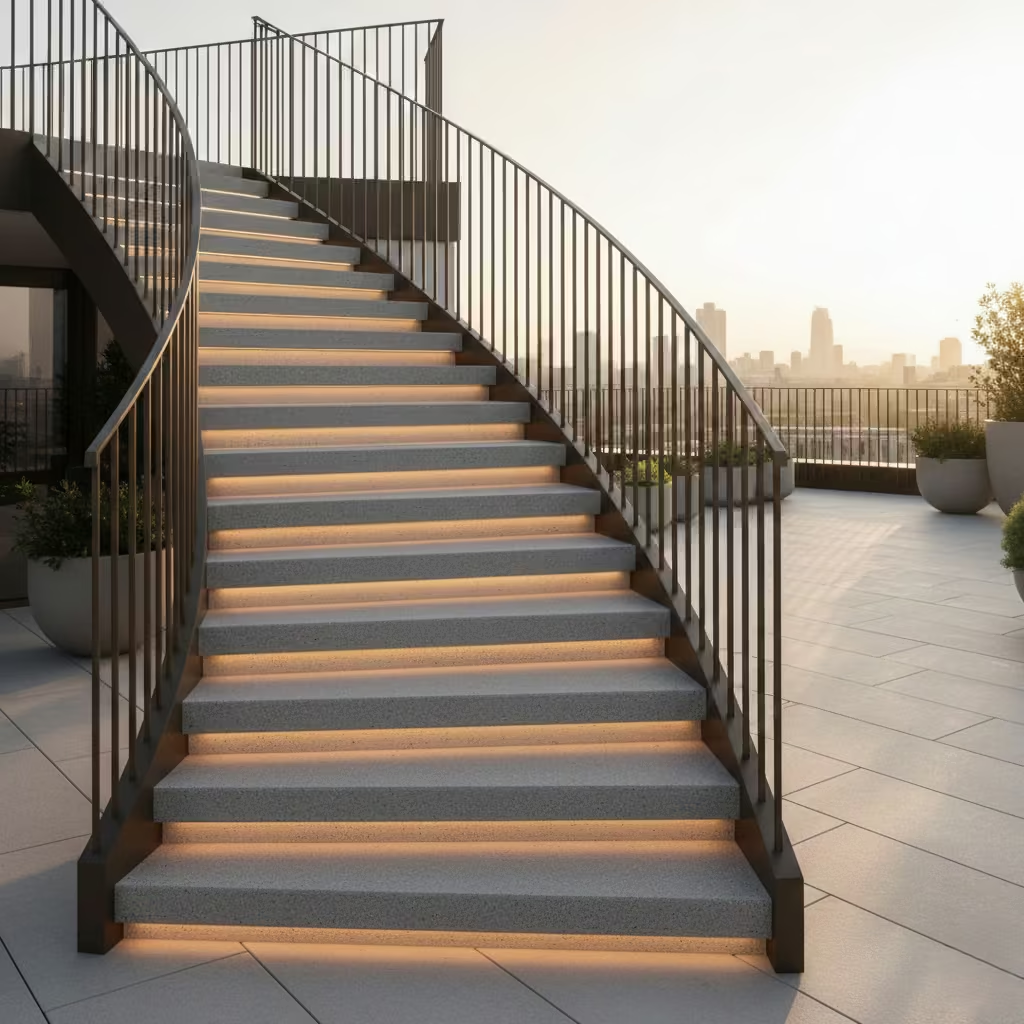
A rooftop staircase is not merely a circulation device; it is the emotional threshold between interior life and sky-level living. I approach staircase design as a spatial ceremony. The ascent should feel gradual, considered, and visually intentional. A sculptural staircase signals that the terrace is a destination rather than a utility platform.
Practical Application
The minimum staircase width should be 900 mm (36 inches) to maintain comfortable bidirectional movement and to prevent the structure from feeling compressed. In premium residential projects, I often extend the width to 1.1 m (43 inches) where site geometry allows, creating a more generous arrival experience.
Tread depth should remain between 280 and 320 mm (11 to 12.6 inches) with consistent riser heights of 150 to 180 mm (6 to 7 inches) to ensure ergonomic climbing comfort. Outdoor stairs must include non-slip finishes such as textured porcelain, microcement with aggregate treatment, or thermally modified timber with anti-slip certification.
Feature balustrades should function as sculptural lines rather than decorative fencing. I favour powder-coated steel, bronze-toned aluminium, or glass panel balustrades with concealed structural fixings. The balustrade height should be approximately 1.05 m (41 inches) from tread level to comply with safety comfort standards while preserving visual openness.
Lighting is critical for night-time navigation. Integrated step lighting at the riser edge, typically 2700K warm white, helps define each step without glare.
Real-Life Insight
On a rooftop terrace project in London, the arrival staircase was positioned along the eastern boundary to frame morning light during ascent. The staircase was 1 m (39 inches) wide with 165 mm (6.5 inches) risers and 300 mm (12 inches) treads. The balustrade was fabricated from slim powder-coated steel rods spaced to maintain transparency toward the skyline. Clients reported that the staircase itself became a visual prelude to the terrace experience, especially during sunrise use.
Pros
- Creates architectural drama and sense of destination
- Improves safety and movement clarity
- Enhances property prestige and visual hierarchy
Cons
- Requires precise structural and engineering coordination
- Higher fabrication cost than standard access stairs
- Takes valuable terrace circulation space
A sculptural staircase works best when it feels inevitable within the composition of the building rather than added as a separate element. The strongest designs make arrival feel graceful, quiet, and deliberate.
Privacy Screens with Slatted Timber
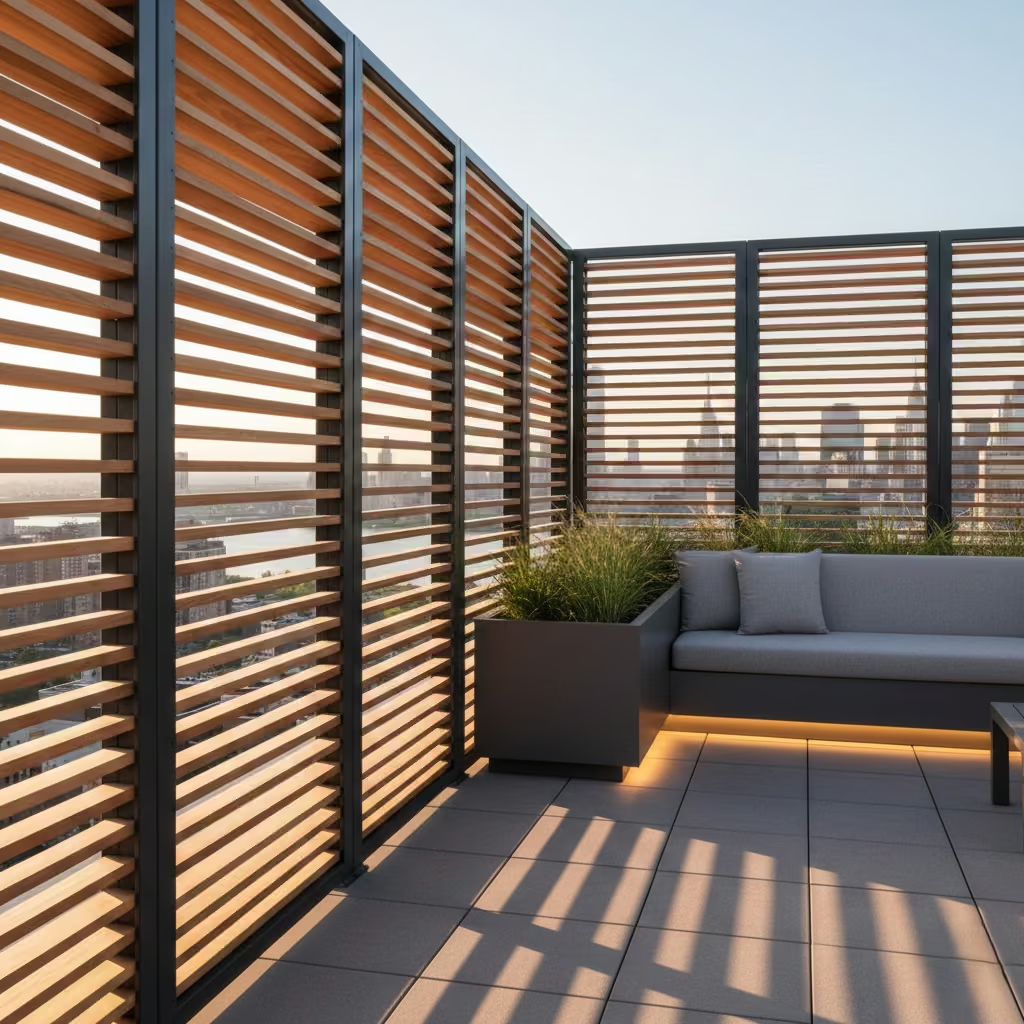
Slatted timber privacy screens provide selective enclosure without sacrificing airflow or visual connection to the surrounding environment. I use this approach when the terrace must feel sheltered yet open to the sky and horizon. The rhythm of horizontal or vertical slats also introduces shadow texture, which becomes particularly beautiful during late afternoon sunlight.
Practical Application
Screen height should generally range from 1.8 m to 2.1 m (6 to 7 ft). This range blocks direct sightlines from neighbouring upper floors while keeping the terrace composition visually balanced.
Adjustable slats are highly valuable. I prefer systems where slat angles can be manually or mechanically tuned between 15° and 45°. This allows the user to prioritise privacy during social use and airflow during hotter periods. Thermally modified timber, cedar, or high-quality composite timber are suitable materials because rooftop UV exposure accelerates deterioration in untreated wood.
Frame construction should be marine-grade aluminium or galvanised steel with concealed fixings. I always detail small expansion tolerances between slats to accommodate humidity-induced timber movement.
Real-Life Insight
On a residential rooftop project in New York City, neighbouring apartment windows directly overlooked the lounge seating area. We installed 2 m (6.6 ft) high vertical slatted cedar screens along the western boundary. The slats were set at approximately 30°, with an outward angle, allowing occupants to see the skyline while preventing direct inward visibility from adjacent buildings. After installation, evening use of the terrace increased significantly because clients felt psychologically protected.
Pros
- Natural, warm architectural character
- Maintains airflow and reduces wind pressure
- Provides privacy without heavy visual mass
- Ages gracefully if properly maintained
Cons
- Timber requires periodic sealing or protective treatment
- Improper spacing can trap heat
- Wind load forces must be structurally assessed
Slatted privacy screens work best when treated as architectural light filters rather than solid barriers. The quality of shadow they cast often matters as much as the physical enclosure they provide.
Rooftop Yoga or Wellness Zone
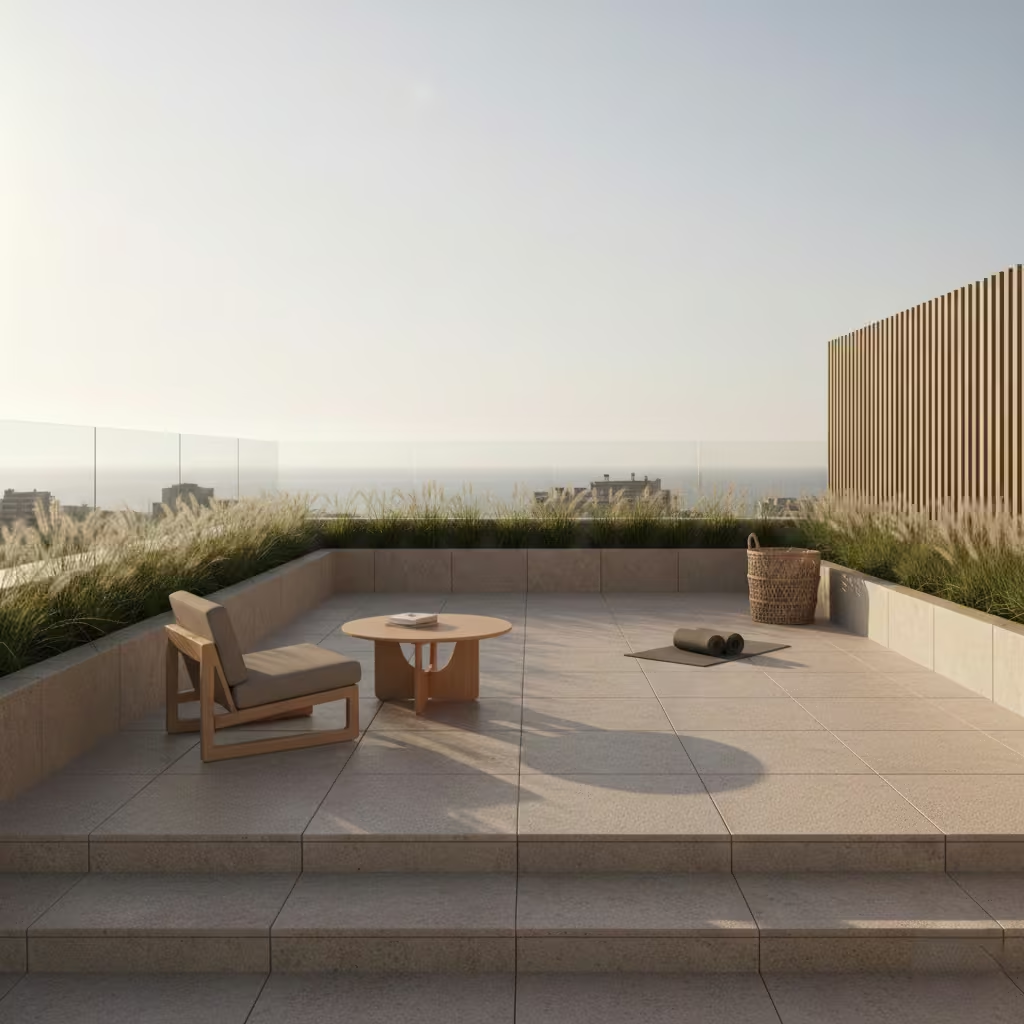
A rooftop wellness zone is about stillness, balance, and controlled spatial clarity. I design yoga spaces to feel grounded rather than visually stimulating, because the purpose of the zone is inward focus. The best wellness terraces reduce distraction through material simplicity, stable footing, and soft horizon framing.
Practical Application
A minimum clear activity zone of 3 m x 3 m (10 ft x 10 ft) is recommended. This allows comfortable movement for yoga postures, light stretching, or meditation seating without risk of collision with surrounding furniture or planters.
The surface should be finished with non-slip architectural porcelain or textured outdoor stone. Porcelain is often superior because it resists moisture absorption, thermal staining, and UV fading. I specify matte or micro-rough surface grades rather than polished finishes.
Flooring should remain thermally stable. In hot climates, dark paving can become uncomfortable under barefoot use, so I often choose light sand, warm grey, or natural stone tones that reflect solar radiation.
Wind exposure must be considered. Even a low privacy screen or planter buffer of 1.2 m (4 ft) height can improve comfort during meditation sessions.
Real-Life Insight
On a wellness rooftop project in Barcelona, we positioned a 3 m x 3.2 m (10 ft x 10.5 ft) yoga zone on the eastern terrace edge to capture soft morning light. The floor used 20 mm (0.8 inch) thick anti-slip porcelain over pedestal supports, allowing drainage and airflow beneath. Clients reported that sunrise practice became a daily habit because the space felt quiet, framed by distant coastal horizon views.
Pros
- Supports mental wellness and relaxation
- Requires minimal structural complexity
- Works well in compact terrace layouts
- Encourages healthy daily lifestyle routines
Cons
- Limited multifunctionality if space is small
- Requires regular cleaning to maintain non-slip performance
- Wind buffering may be necessary in high-rise environments
A rooftop wellness zone succeeds when it feels like a pause in the architecture rather than an added feature. The best designs invite slow movement, quiet breathing, and natural connection to the sky above.
Bioclimatic Louvered Roof System
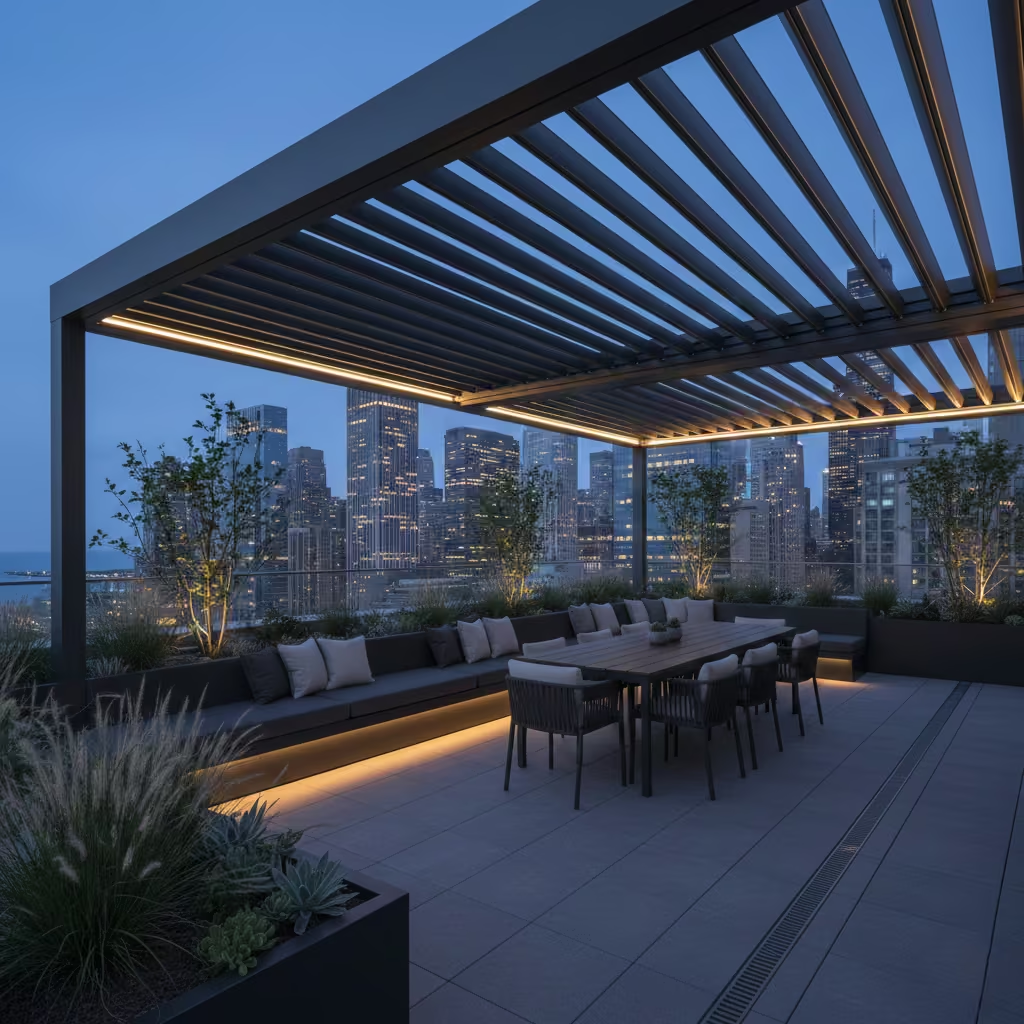
A bioclimatic louvered roof system is among the most refined climate-responsive solutions for rooftop terraces. The objective is dynamic environmental control rather than static shelter. I view this system as an architectural diaphragm between interior comfort and outdoor freedom. By modulating sunlight, airflow, and rainfall protection, the terrace can adapt continuously to changing weather conditions.
Practical Application
The roof structure consists of motorised aluminium blades that rotate between open, partially open, and fully closed positions. Blade widths typically range from 150 to 300 mm (6 to 12 inches), balancing structural rigidity and aerodynamic stability under wind load.
Integrated rain sensors automatically trigger blade closure when precipitation is detected. This feature is particularly useful in unpredictable urban weather patterns common in cities such as London, where sudden showers can interrupt outdoor use.
The system must include concealed drainage channels, as rainwater may accumulate at blade intersections during transitional opening states. Electrical and mechanical components should be protected within weather-sealed housings.
Wind load engineering is critical. Motor torque specifications must match the blade surface area and local wind exposure conditions. I recommend selecting systems with manual override controls in the event of a power failure.
Ceiling height under the louvered structure should remain at least 2.4 m (8 ft) when closed to avoid spatial compression.
Real-Life Insight
On a 65 m² (700 sq ft) rooftop entertainment terrace, we installed a bioclimatic aluminium louver canopy measuring 4 m x 6 m (13 ft x 20 ft). The blades were programmed to close automatically during evening dew formation and open partially during warm daylight hours to maintain airflow. The client particularly valued the ability to host gatherings during light rain without relocating indoors. Over two seasons, the terrace use frequency increased noticeably during spring and early autumn.
Pros
- Precise climate control across seasons
- High architectural sophistication and premium market appeal
- Improves comfort during both sun and rain exposure
- Supports automated smart home integration
Cons
- High installation and engineering cost
- Mechanical maintenance is required
- Requires reliable electrical supply and backup plan
A bioclimatic louvered roof is most successful when it is treated as a living environmental interface rather than a mechanical cover. When calibrated correctly, it allows rooftop life to continue quietly regardless of changing weather.
Mixed Material Zoning
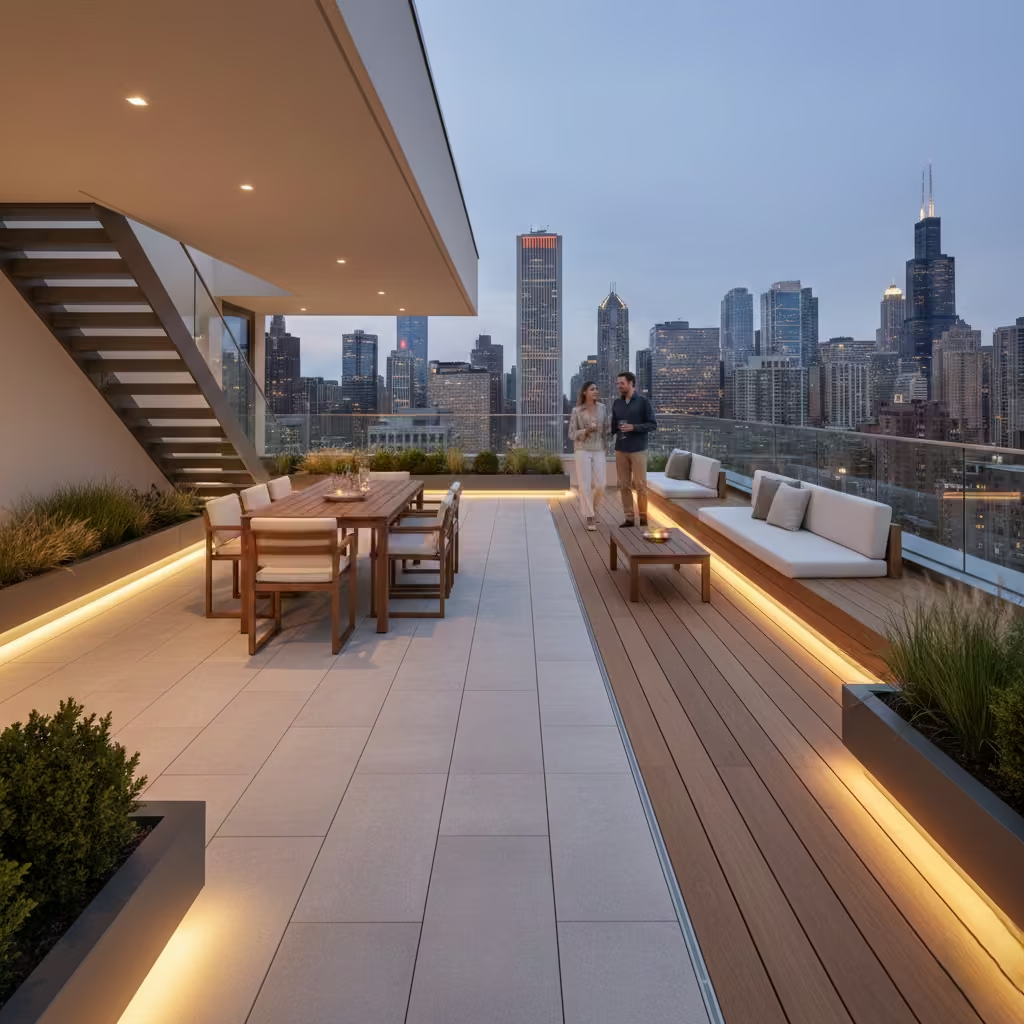
Mixed-material zoning is a subtle yet powerful technique for organising rooftop space without erecting physical barriers. I use material transitions to signal behavioural zones: dining, lounging, circulation, or contemplation. The objective is cognitive clarity. Visitors should intuitively understand where to walk, sit, and gather simply by reading the ground plane.
Practical Application
Combining porcelain and timber decking works particularly well because the materials offer contrasting tactile and thermal qualities. Porcelain is structurally stable, low-maintenance, and visually neutral. Timber introduces warmth and softness underfoot.
Typically, I position dining zones on porcelain surfaces and lounge areas on timber decking. The visual break should occur along natural circulation lines rather than arbitrarily across the terrace.
Transition edges between materials must be carefully detailed. I specify aluminium or stone edging strips approximately 5 to 10 mm (0.2 to 0.4 inches) wide to prevent tripping hazards and accommodate differential thermal expansion.
Porcelain tiles should be at least 20 mm (0.8 inches) thick for exterior rooftop use. Timber decking can be thermally modified hardwood or composite installed over pedestal systems to maintain drainage airflow.
Colour harmony matters more than contrast strength. I prefer tonal relationships rather than aggressive material clashes. Warm neutral porcelain paired with medium natural timber tones usually produces the most timeless composition.
Real-Life Insight
On a 72 m² (775 sq ft) rooftop terrace project in Chicago, we divided the space into two primary lifestyle zones. The dining pavilion sat on light grey porcelain paving measuring 600 mm x 600 mm (24 x 24 inches) modules. The lounge zone used thermally modified oak decking installed over adjustable pedestals.
The transition line followed the natural path from the staircase arrival to the edge of the skyline. After completion, the client reported that guests instinctively moved toward the timber lounge zone after dining, demonstrating the effectiveness of material psychology.
Pros
- Creates intuitive spatial organisation
- Adds visual refinement without structural partitions
- Supports long-term design timelessness
- Improves functional clarity
Cons
- Requires precise installation detailing
- Material ageing rates may differ
- Edge joints must be carefully protected
Mixed material zoning succeeds when the terrace feels naturally composed rather than divided. The best schemes are the ones where movement across surfaces feels effortless and psychologically logical.
Statement Outdoor Lighting Scheme
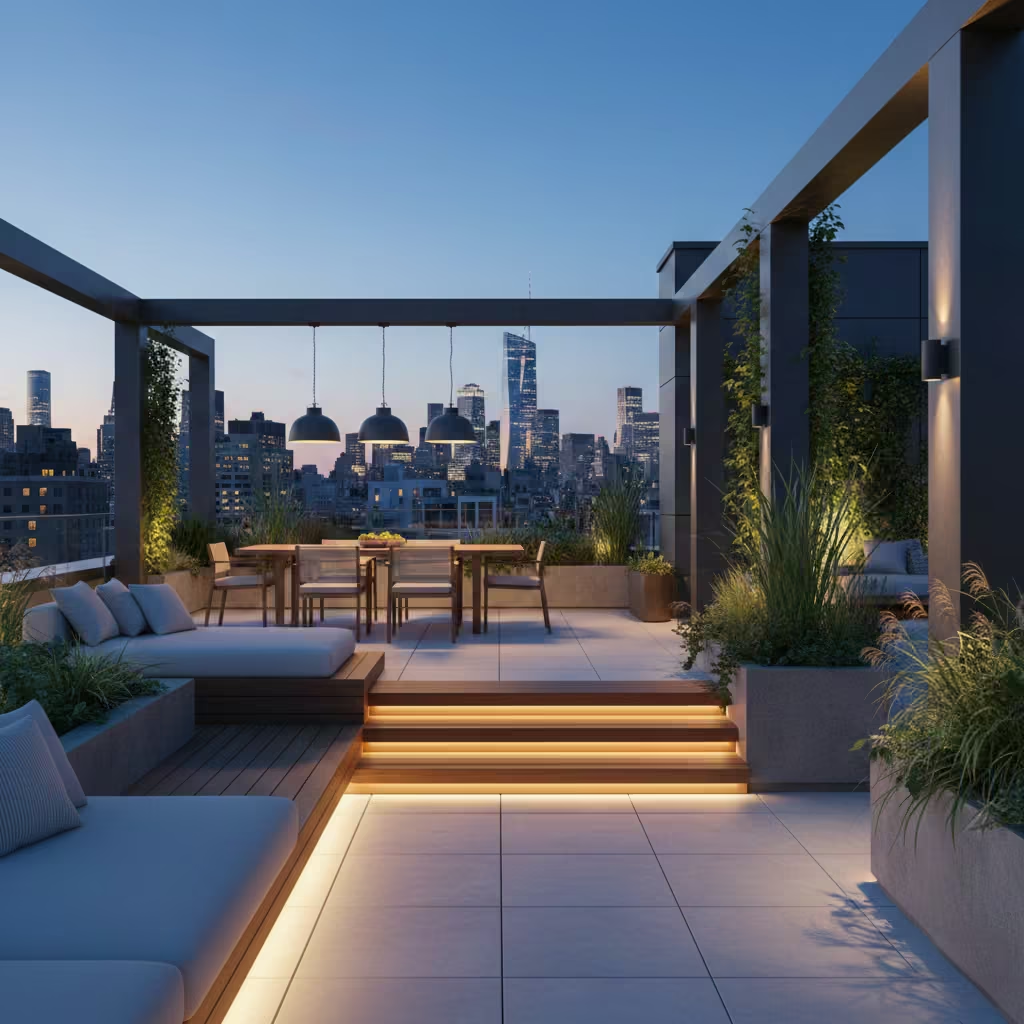
Outdoor lighting on a rooftop terrace should feel atmospheric rather than technical. I design lighting as a layered visual composition that shapes movement, depth, and evening mood. The target colour temperature is generally around 2700K, which produces a warm, residential softness that complements natural materials such as timber, stone, and vegetation.
The best rooftop lighting is the kind you notice indirectly. Light should guide the eye across surfaces, define edges, and gently reveal architectural forms after sunset rather than dominate the scene.
Practical Application
A three-layer lighting strategy works most effectively:
• Recessed Step Lighting
Installed along stair risers or platform transitions. Fixtures should be fully sealed (minimum IP65 rating) and positioned to avoid glare into the eyes when ascending.
• Uplighting for Vertical Elements
Used for planters, green walls, or structural columns. Beam angles between 20° and 40° help create controlled shadow gradients across foliage and surfaces.
• Pendant or Feature Lighting
Suspended lights above dining or lounge zones should sit approximately 700 to 900 mm (28 to 35 inches) above table surfaces. This prevents direct glare while maintaining intimacy.
Wiring and transformer units should be concealed inside service cabinets or structural cavities. Rooftop environments experience moisture, temperature fluctuation, and wind vibration, so cable protection is essential.
I prefer fixtures made from powder-coated aluminium, bronze finish metals, or marine-grade stainless steel for durability.
Real-Life Insight
On a rooftop terrace project in New York City, we implemented a warm layered lighting scheme across a 60 m² (646 sq ft) entertainment roof. Recessed step lights marked circulation paths from the staircase arrival zone, while 2700K uplights softly illuminated floating planter islands. A single suspended pendant cluster was placed above the dining pavilion at 800 mm (31 inches) above table height. The result was a terrace that felt quietly luminous rather than brightly illuminated, encouraging evening social use without visual fatigue.
Pros
- Creates sophisticated evening atmosphere
- Improves safety and circulation clarity
- Enhances architectural material textures
- Supports long-duration terrace use after sunset
Cons
- Requires careful electrical waterproofing
- Fixture positioning must be precisely planned
- Maintenance access should be considered during design
A successful rooftop lighting scheme does not announce itself. Instead, it shapes how space is experienced after daylight fades, allowing architecture, landscape, and sky to coexist in quiet harmony.
Outdoor Workspace Retreat
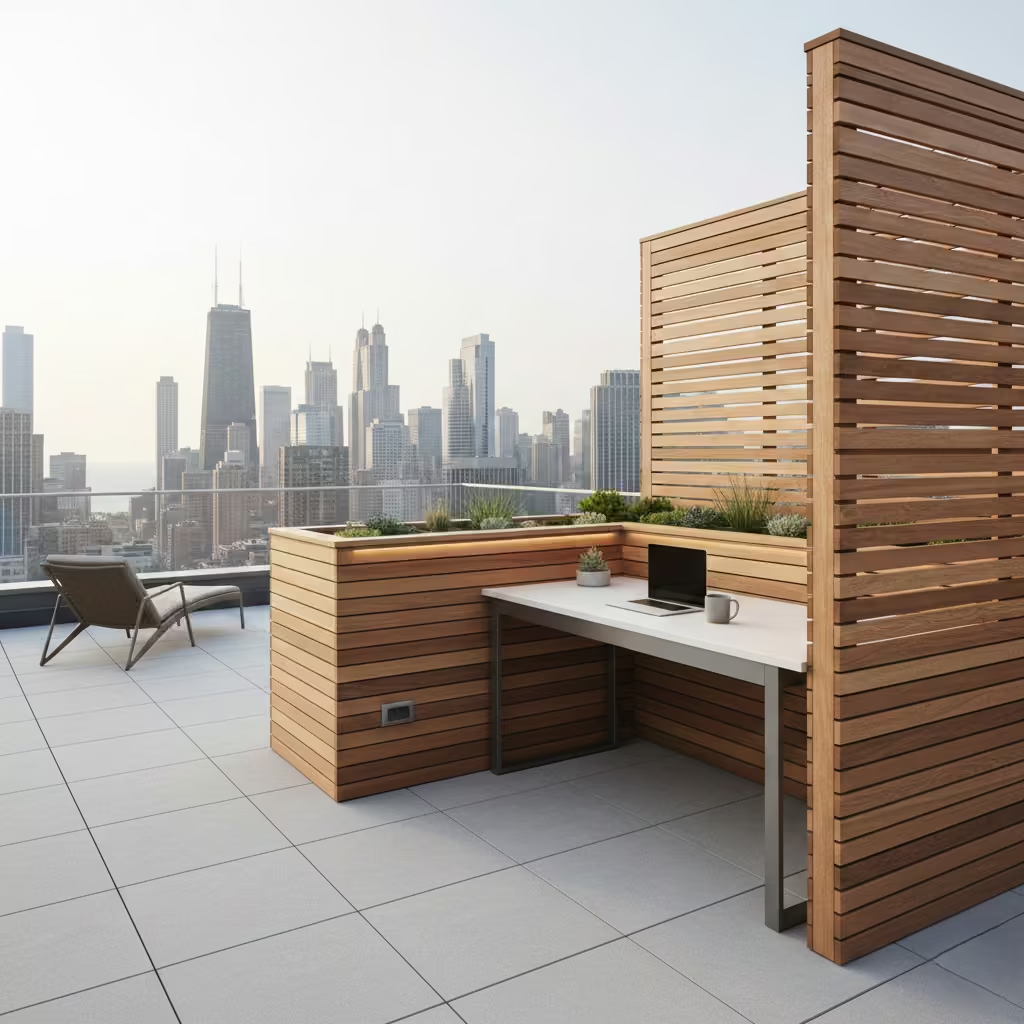
The outdoor workspace retreat brings productivity into the open-air atmosphere without sacrificing comfort or practicality. I design these zones as quite productive alcoves rather than exposed desks. The goal is controlled exposure: enough openness to feel connected to the environment, yet sufficient shelter to prevent wind, glare, or sudden weather disturbance from interrupting work.
Practical Application
The workspace should be positioned within a weather-protected niche formed by a pavilion edge, privacy screen, or retractable enclosure. Desk depth is typically 600 to 750 mm (24 to 30 inches), with width adjusted to user preference, generally starting at 1.2 m (4 ft) for a functional workflow.
An integrated power supply is essential. I specify concealed outdoor-rated electrical outlets (minimum IP65 protection) positioned either beneath the desk surface or within a lockable side panel. USB charging ports are increasingly expected in modern residential terraces.
Sun path analysis matters here. In terraces similar to those in London, I often orient workspace alcoves away from low western afternoon sun to avoid screen glare. A small overhead canopy or vertical slat screen can dramatically improve visual comfort.
Desk surfaces should prioritise durability. I prefer engineered stone, compact porcelain, or powder-coated metal surfaces because outdoor workspaces are exposed to temperature fluctuation and moisture condensation.
Real-Life Insight
On a 48 m² (517 sq ft) rooftop project in Chicago, we created a 1.4 m (4.6 ft) wide recessed workspace niche along the north-facing boundary wall. The desk was fabricated from a 20 mm (0.8 inch) thick matte porcelain slab mounted on a steel frame. Behind the desk, 1.8 m (6 ft) high slatted timber screening reduced wind flow while preserving skyline views. The client used the space for remote work during the morning hours, reporting significantly better concentration than in an indoor office.
Pros
- Supports flexible lifestyle combining work and outdoor living
- Improves psychological well-being through natural light exposure
- Adds functional value to small rooftop terraces
Cons
- Wind buffering may be required in high-rise locations
- Electronics need robust weather sealing
- Usability may decline during extreme heat or rain
An outdoor workspace succeeds when it feels protected yet open, productive yet calm. The best designs allow work to happen without drawing attention to the act of working.
Rooftop Herb Garden for Entertaining
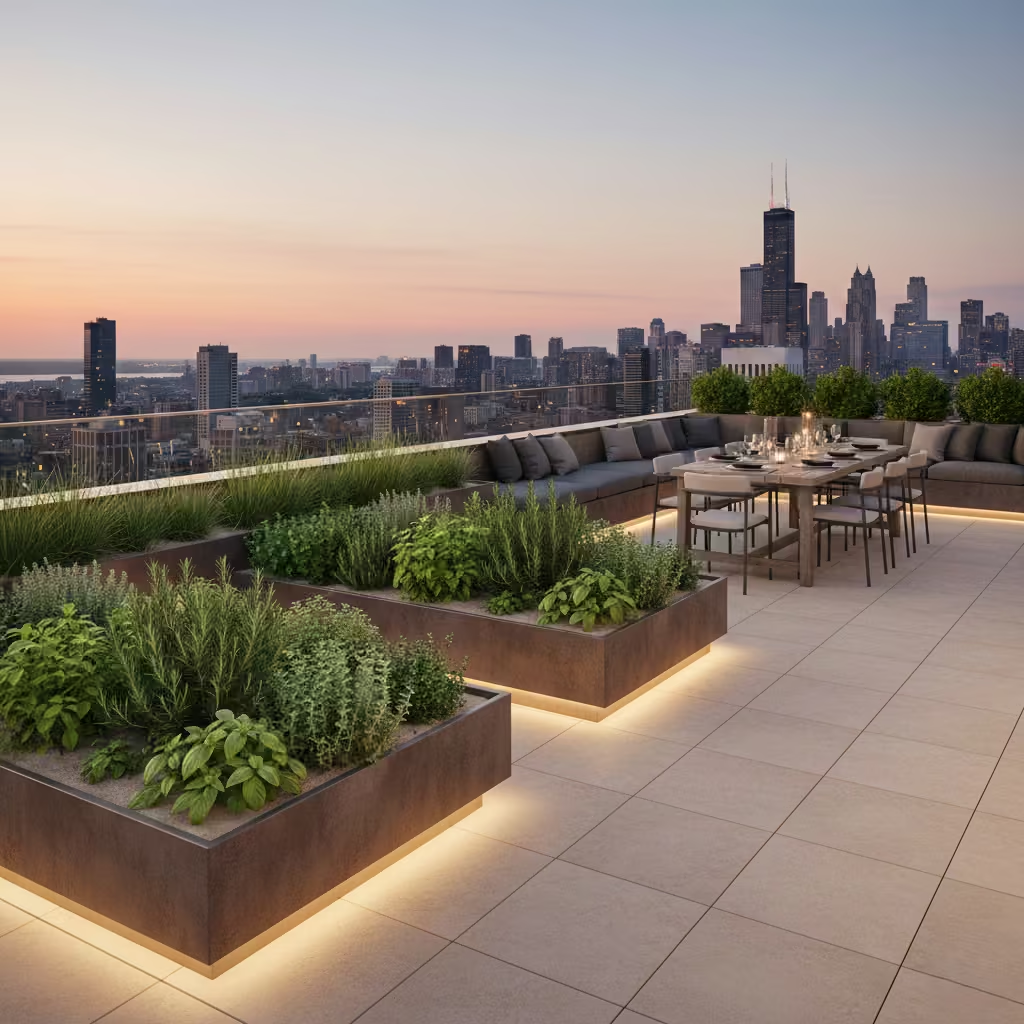
A rooftop herb garden near entertainment zones supports fresh cooking, sensory richness, and a soft visual backdrop around social areas. I treat culinary planting as an extension of the kitchen rather than independent landscaping. The garden should feel immediately usable, encouraging hosts to harvest herbs during meal preparation and dining events.
Practical Application
Raised planting beds should generally be about 300 mm (12 inches) deep. This depth is sufficient for herbs such as basil, thyme, mint, and rosemary while keeping structural load manageable on rooftop slabs.
Beds should be positioned as close as possible to the kitchen stair access to minimise movement during food preparation. In urban terraces similar to residential projects I’ve worked on in New York City, I usually place herb gardens within 6 to 10 m (20 to 33 ft) of the indoor kitchen.
Drainage design is critical. Each raised bed should include a gravel drainage layer approximately 50 mm (2 inches) beneath the planting soil, plus a concealed outlet connected to the main roof drainage system. Lightweight growing media is strongly recommended to reduce permanent structural loading.
Plant selection should prioritise culinary usability and resilience under rooftop conditions. Mediterranean herb varieties tend to perform well on exposed terraces due to their drought tolerance and sun preference.
Real-Life Insight
On a 36 m² (388 sq ft) rooftop dining terrace in Barcelona, we installed two linear herb beds measuring 2.4 m x 0.5 m (8 ft x 1.6 ft) each, along the transition wall between the kitchen access and the dining pavilion.
The beds were filled with lightweight organic substrate and equipped with slow-drip irrigation tubing. Clients used fresh herbs directly during weekend gatherings, which added experiential value to outdoor entertaining. After one growing season, the planting softened the visual hardness of the terrace boundary.
Pros
- Supports fresh cooking and entertaining lifestyle
- Improves terrace fragrance and microclimate quality
- Adds natural colour variation near dining zones
Cons
- Requires regular pruning and watering
- Some herb species may die back during extreme rooftop heat
- Soil maintenance is necessary to prevent compaction
A rooftop herb garden is most successful when it feels like a functional ingredient station for outdoor life rather than decorative landscaping. When located thoughtfully, it quietly enhances the ritual of gathering and dining above the city.
Contemporary Water Feature Wall
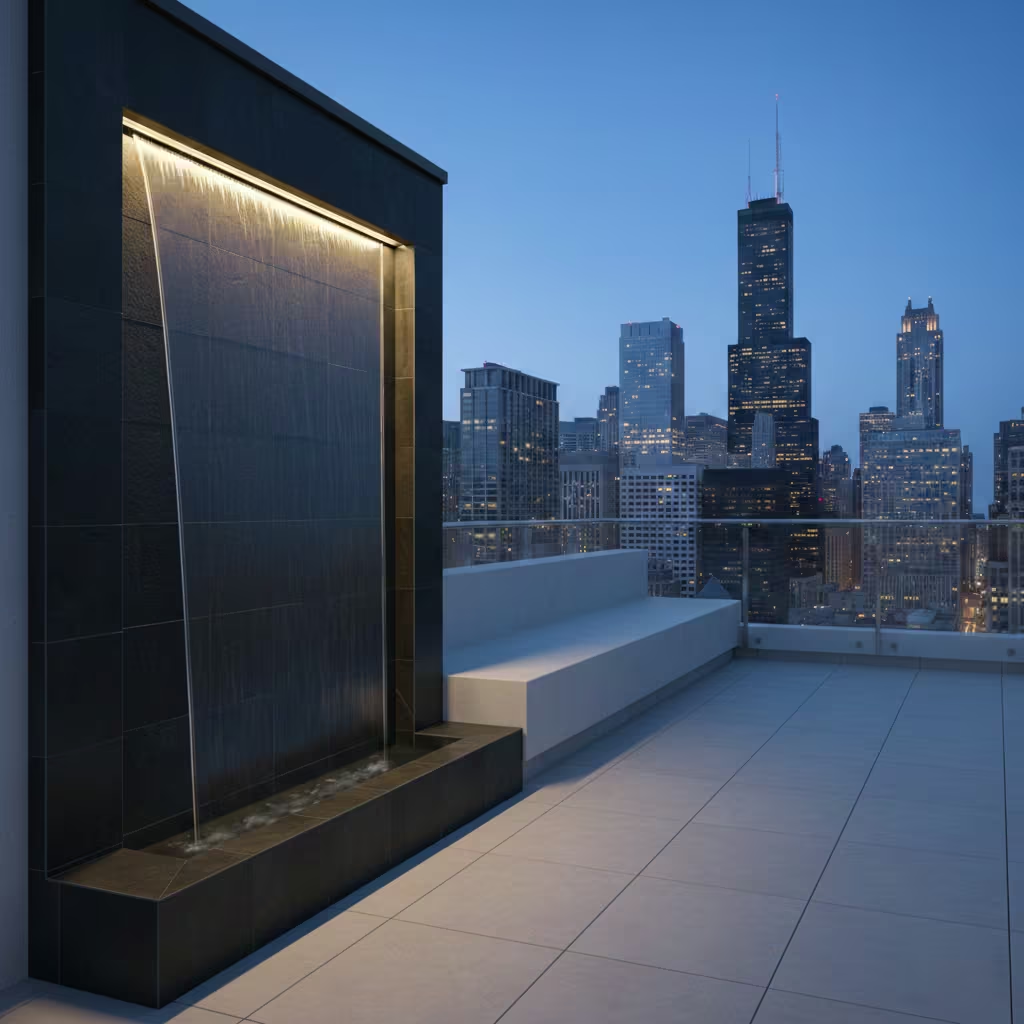
A contemporary water feature wall introduces movement, reflection, and acoustic softness into rooftop environments. I design water walls primarily as sensory architecture rather than visual ornamentation. In dense urban contexts, the gentle sound of falling water can mask traffic noise and create a psychological boundary between terrace life and the surrounding city.
Practical Application
Slimline recirculating water systems are preferred because rooftop terraces cannot support the weight of excessive water storage. The reservoir is usually concealed within a service cavity beneath the feature wall or within adjacent seating structures.
Water flow should be uniform and controlled. I favour sheet-style laminar-flow or narrow-curtain-flow nozzles rather than aggressive splashing patterns. The wall height typically ranges from 1.2 m to 2.2 m (4 to 7.2 ft), depending on terrace scale.
Pump systems must be selected for continuous duty operation and low vibration output. Mechanical components should be installed inside ventilated, waterproof service cabinets with maintenance access panels.
Surface materials should resist mineral staining. I often specify dark porcelain, honed basalt, or treated metal panels because water streaks are less visible than on light stone surfaces.
Evaporation losses are higher on rooftops due to wind exposure, so automatic water-level compensation systems are useful in warmer climates.
Real-Life Insight
On a 54 m² (581 sq ft) rooftop lounge project in Chicago, we installed a 1.8 m (6 ft) wide vertical water wall behind the seating bench. The system used a concealed 40-litre (10.6-gallon) reservoir and a low-noise circulation pump rated for 24-hour operation. The wall surface was finished in dark matte porcelain to emphasise the thin sheet water movement. The acoustic effect was particularly noticeable during evening gatherings, as the water sound reduced perceived street noise by creating a soft auditory buffer.
Pros
- Improves acoustic comfort in busy urban locations
- Adds reflective light movement after sunset
- Creates calming sensory atmosphere
Cons
- Pump maintenance and water treatment are required
- Wind may disturb uniform water flow
- Mineral deposits can appear without proper filtration
A rooftop water feature wall works best when it feels restrained and continuous. The strongest designs allow water movement to remain subtle, supporting conversation and contemplation rather than demanding attention.
Multi-Level Terrace Layout
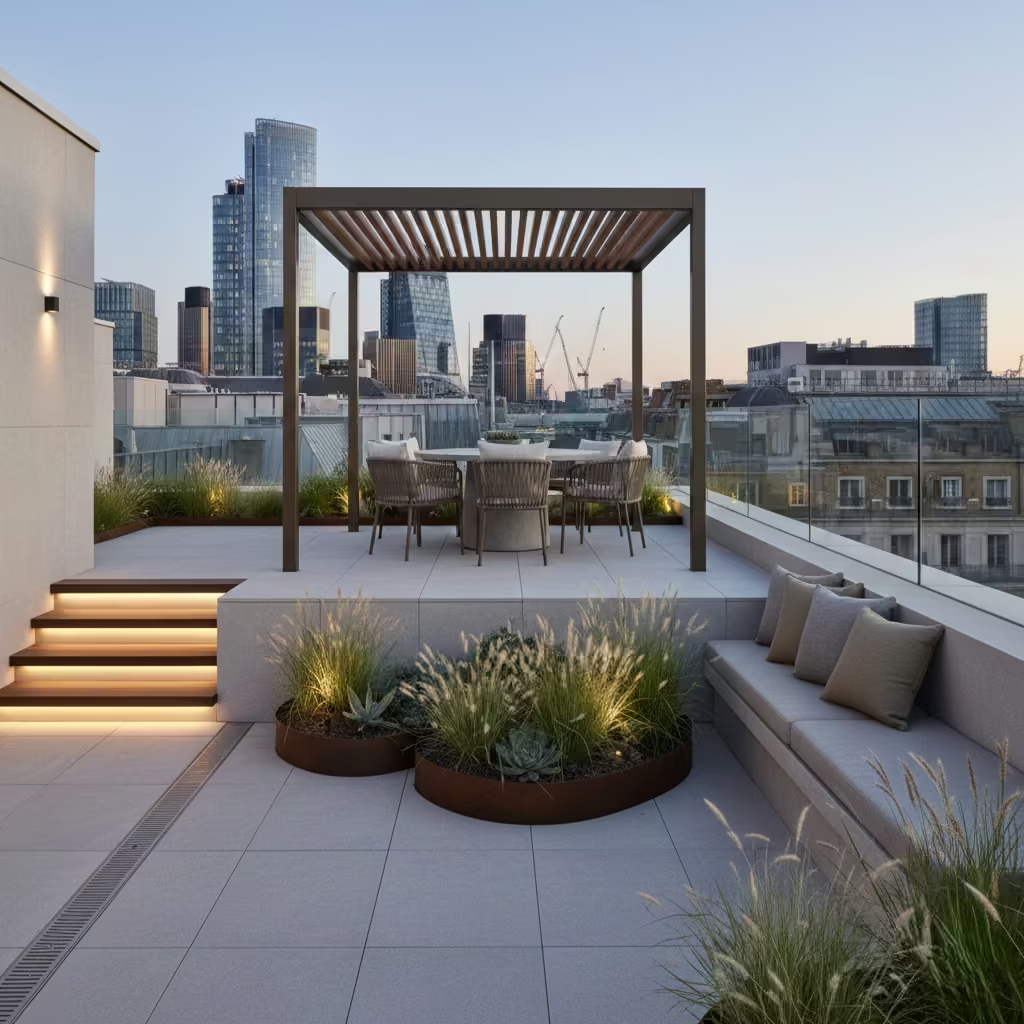
A multi-level terrace layout is one of the most effective ways to transform a large flat rooftop into an experiential landscape. The purpose is not dramatic fragmentation but psychological scaling. By introducing gentle level shifts, the terrace begins to behave like a sequence of outdoor rooms rather than a single exposed platform. I use this technique to create a quiet spatial narrative: arrival, gathering, dining, and relaxation each occupy their own subtle ground.
Practical Application
Stepped transitions should typically range between 150 mm and 300 mm (6 to 12 inches). This height band is comfortable for outdoor movement while maintaining visual continuity across the terrace.
Dining zones are often placed on the upper or more accessible level near the kitchen stair access. Lounge or contemplative zones work well on slightly lowered platforms because the subtle enclosure effect reduces wind exposure and creates intimacy.
Step edges must be finished with high-traction materials. Architectural porcelain with a micro-textured surface or treated stone with anti-slip certification is preferred. I avoid sharp visual contrasts on step faces because outdoor lighting can create misleading depth perception at night.
Drainage design should follow a level hierarchy. Upper terraces should never discharge water directly onto seating zones below. Instead, I detail concealed channel drains along step junctions to guide water toward primary roof outlets.
The furniture scale should follow level geometry. Lower lounge platforms benefit from deeper seating, while dining levels work best with standard table heights of around 750 mm (30 inches).
Real-Life Case Study Insight
On the rooftop of a central London townhouse, we transformed a 60 m² (646 sq ft) flat roof slab into a two-level composition. The upper level housed a 3.2 m (10.5 ft) dining pavilion, positioned near the staircase. The lower level functioned as a lounge terrace with built-in concrete seating and floating planter islands.
The level change was only 200 mm (8 inches), yet the psychological impact was significant. The terrace felt curated rather than exposed. Guests naturally moved from dining to lounge zone after meals, following the gentle spatial descent. Wind discomfort also decreased in the lower area due to partial parapet shielding.
Pros
- Creates natural zoning without walls
- Improves wind comfort in lounge areas
- Adds architectural depth and refinement
- Supports long-term lifestyle flexibility
Cons
- Requires precise structural and waterproofing detailing
- Construction cost is higher than flat slab terraces
- Accessibility considerations must be evaluated
A multi-level rooftop terrace is successful when movement feels effortless and spatial hierarchy feels natural. The best designs do not announce the level change; they allow users to experience it quietly as they live within the space.
Structural & Planning Considerations
Load-Bearing Capacity
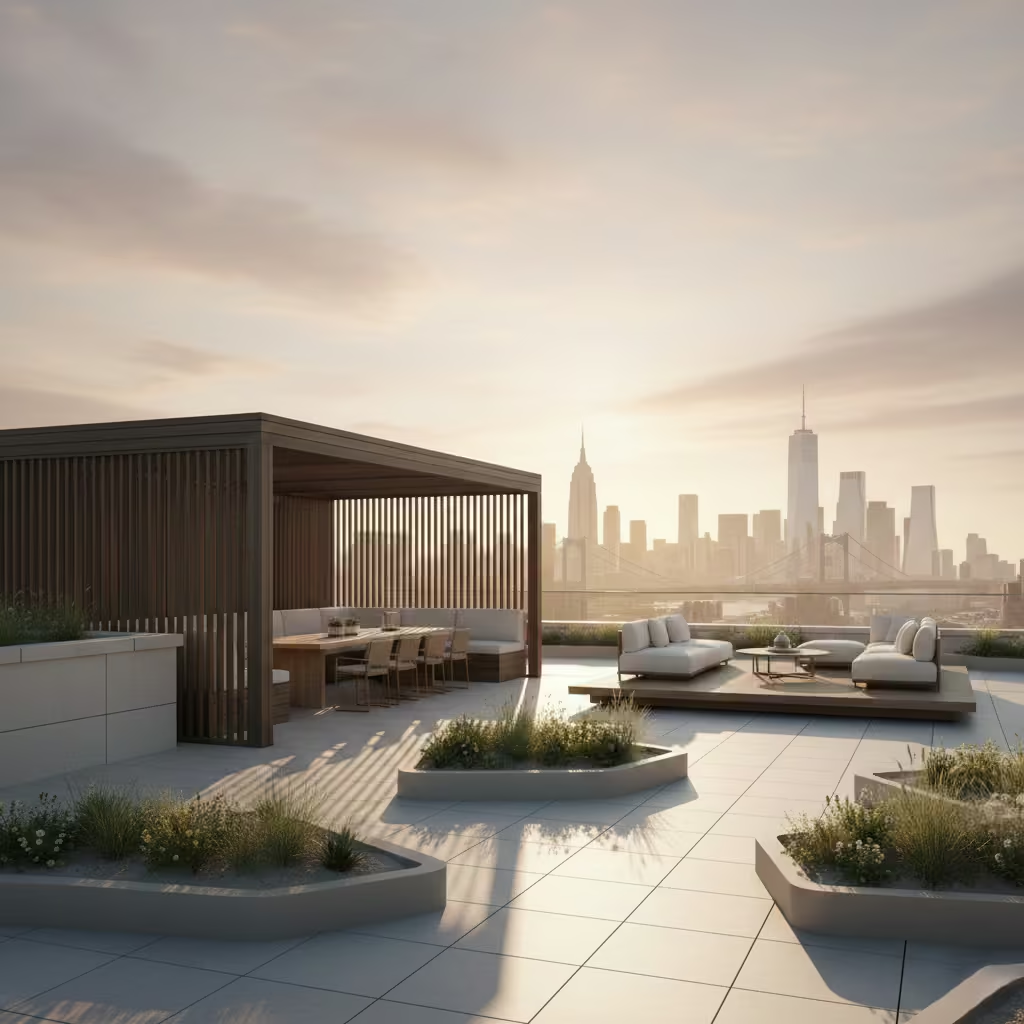
Rooftop terrace design must begin with structural reality rather than aesthetic ambition. I always treat the roof slab as the primary design constraint. Typical residential rooftop live load capacity varies widely depending on construction method, but reinforced concrete roofs often accommodate approximately 200–400 kg/m² (41–82 lb/ft²), including finishes and occupants.
Heavy elements such as plunge pools, deep masonry planters, or concrete seating zones should be concentrated near load-bearing walls or structural columns. Lightweight alternatives are often preferable for upper terrace zones. Aluminium framing, pedestal-supported decking, and engineered planting substrates help reduce permanent dead load stress.
Water weight is frequently underestimated. Saturated soil can weigh nearly as much as stone paving. For example, 1 m³ of wet planting medium may weigh more than 1,500 kg (3,300 lb), depending on its composition.
Waterproofing Layers
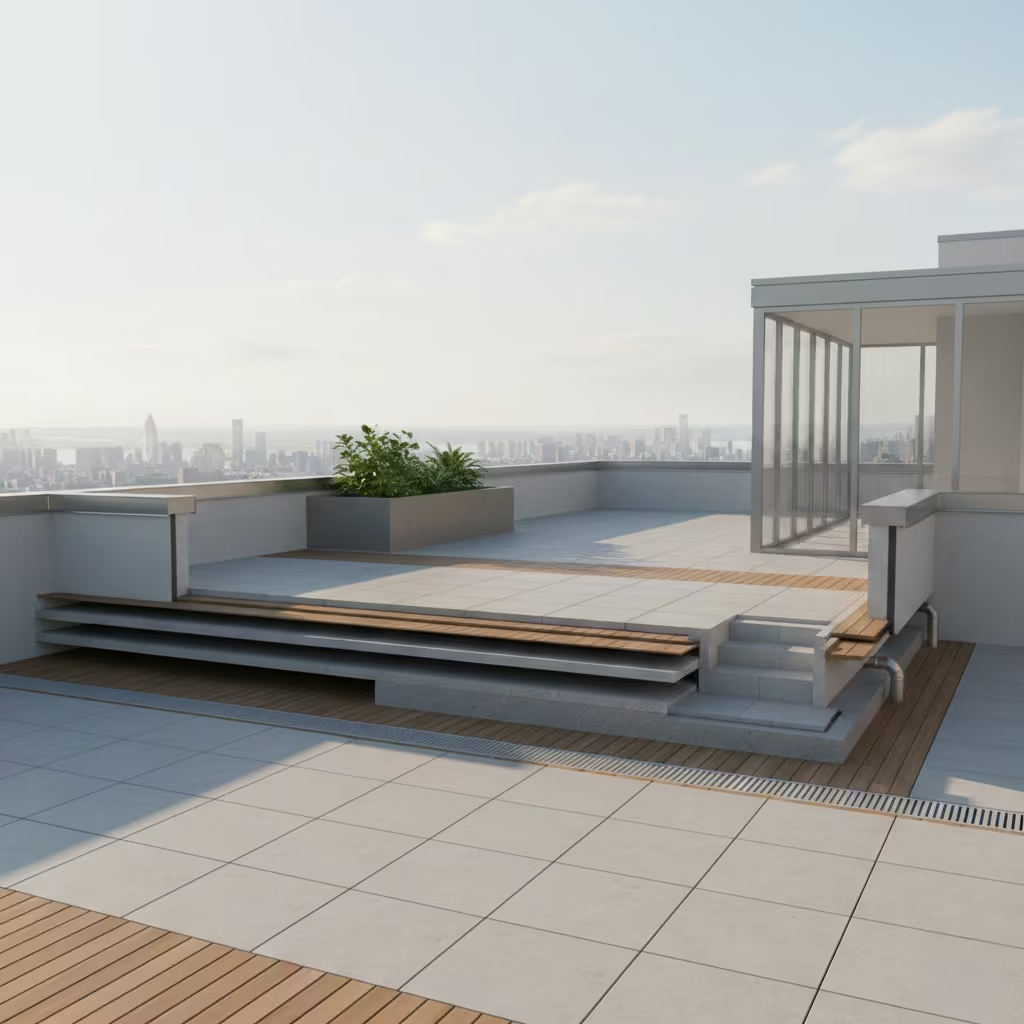
Waterproofing is the silent foundation of rooftop longevity.
I typically specify a multi-layer protection assembly:
• Structural slab
• Surface levelling screed
• Primary waterproof membrane
• Root barrier layer (for landscaped zones)
• Drainage mat system
• Pedestal or finishing surface
Membrane continuity is critical. The weakest point is usually junctions around parapets, stair penetrations, and service outlets. I prefer fully welded or liquid-applied membrane systems because mechanical joints tend to fail over time.
Inspection access to drainage outlets should be preserved. Blocked roof drainage is one of the most common causes of terrace deterioration.
Wind Exposure Calculations
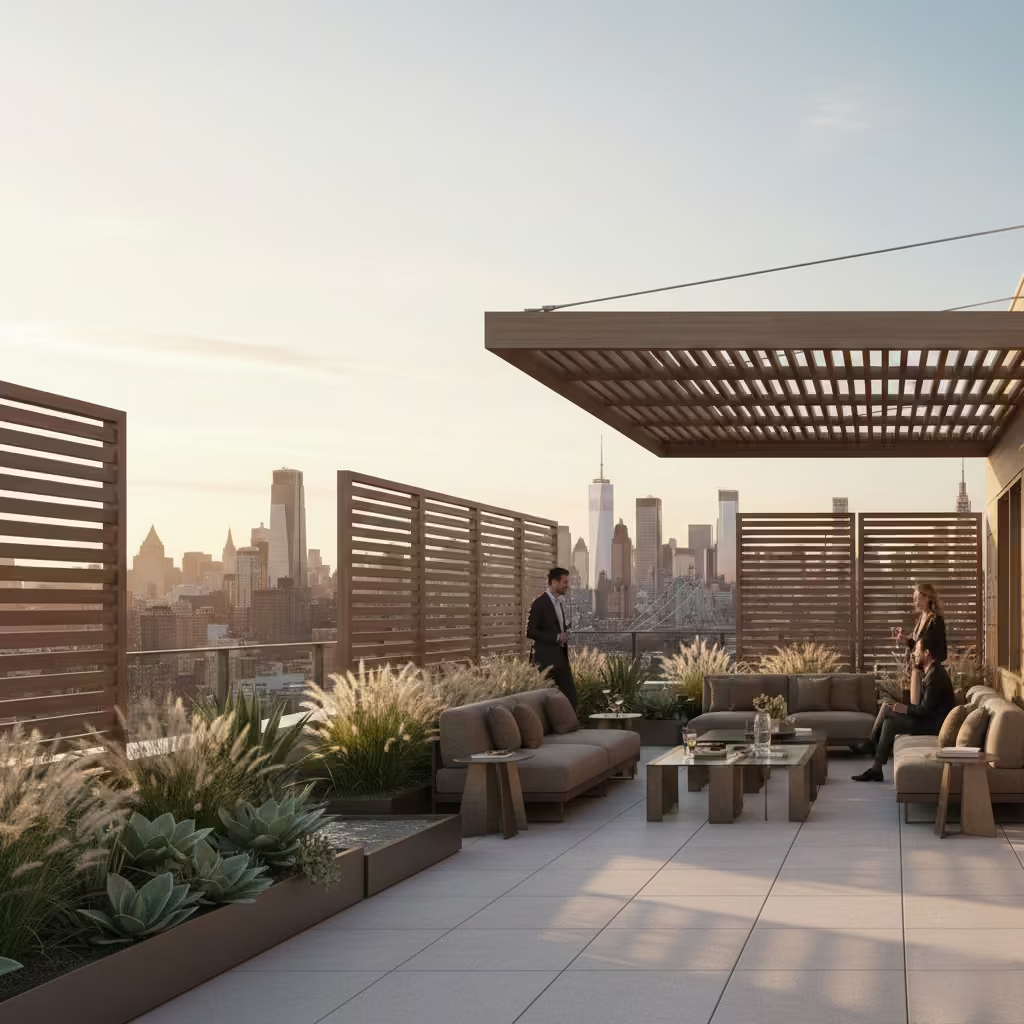
Wind behaviour becomes more aggressive as elevation increases.
On rooftops, wind speed can be 20–30% higher than ground level conditions. Tall buildings create aerodynamic channeling effects that increase turbulence.
Design strategies include:
- Slatted privacy screens rather than solid walls
- Low-profile furniture selection
- Anchored structural elements
- Wind-permeable planting buffers
In coastal or high-rise districts, pergola roofs and shade sails must be engineered for uplift resistance.
Planning Regulations in Dense Urban Contexts
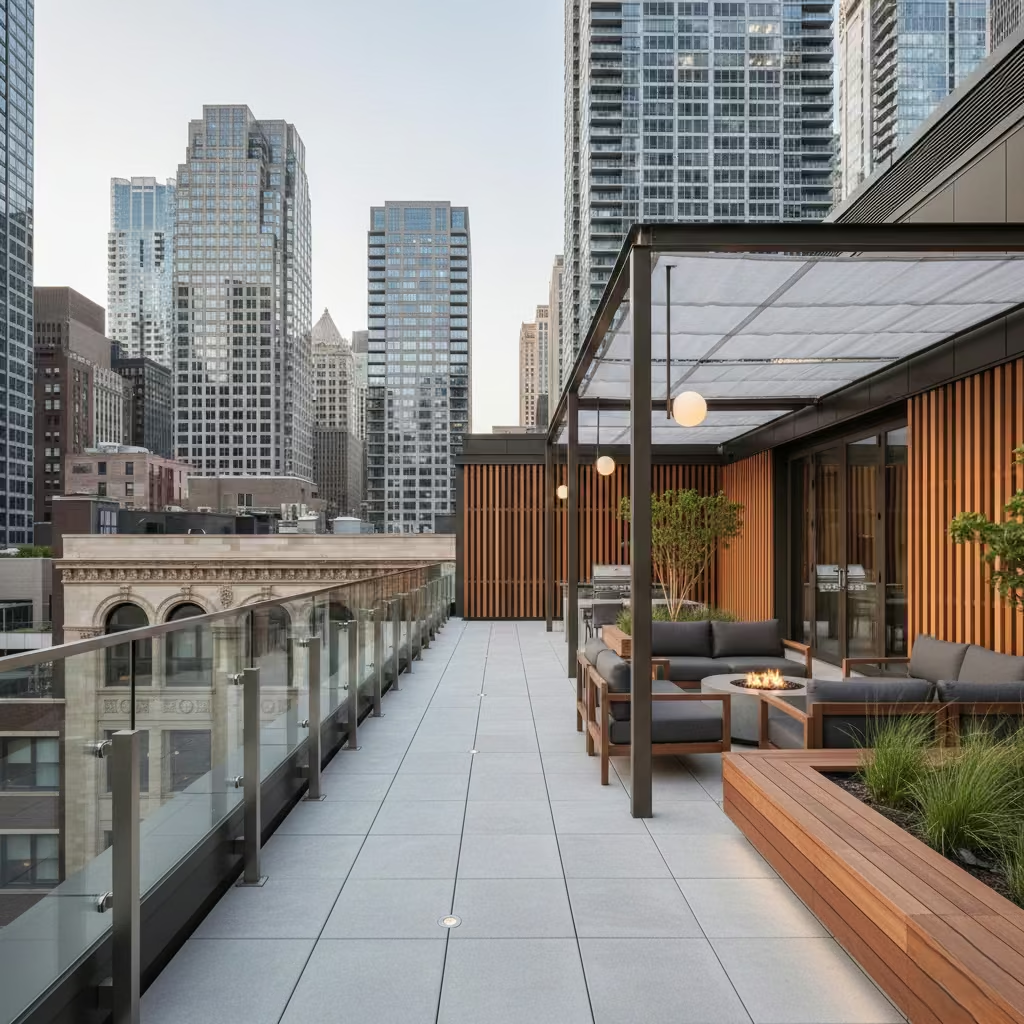
In high-density cities such as Chicago, rooftop terrace additions often require planning review, especially when structural height, visibility, or external appearance is modified.
Typical regulatory concerns include:
- Maximum allowable rooftop structure height
- Visibility from street-level heritage zones
- Fire safety escape clearance
- Noise emission control for entertainment features
- Mechanical equipment screening
Retractable structures and lightweight architectural shading systems are usually more acceptable than permanent enclosed constructions.
Professional Design Philosophy
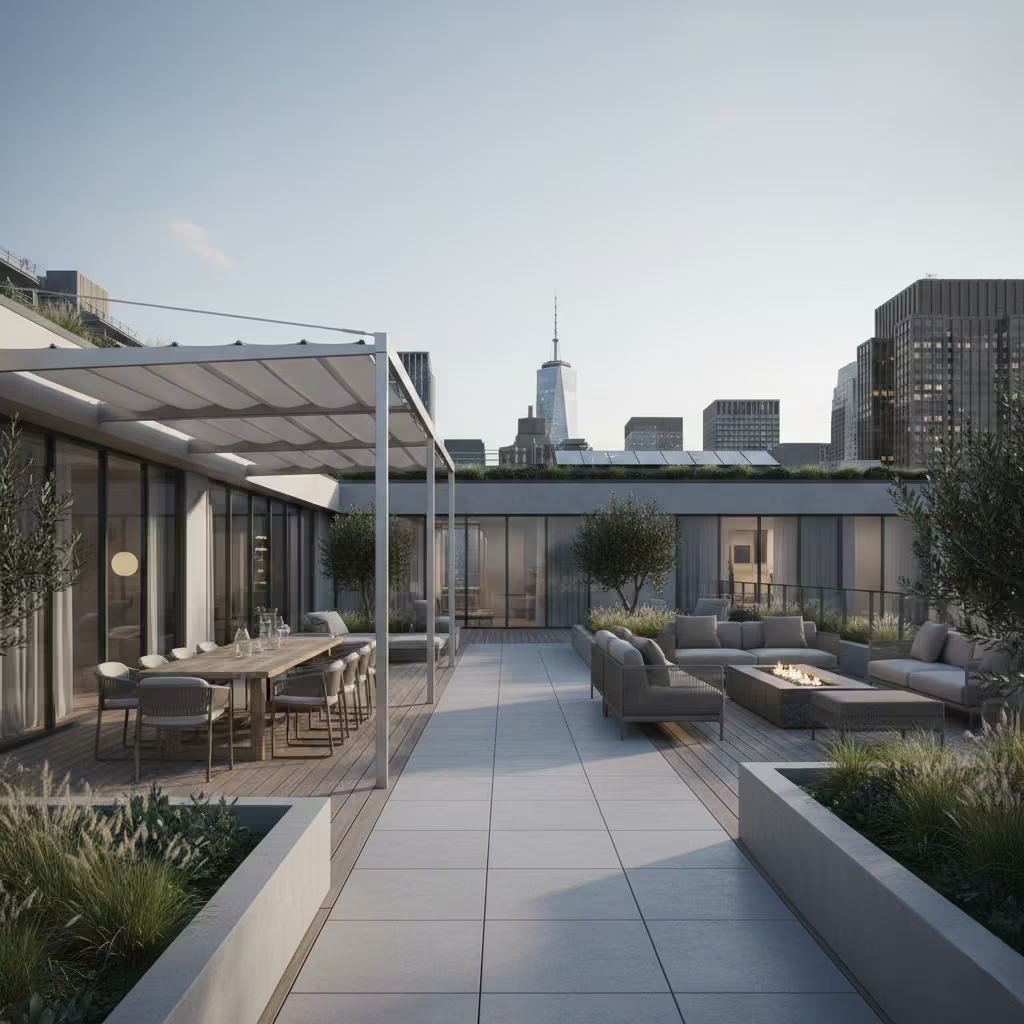
I approach rooftop structural planning with long-term stability as the primary objective. A successful terrace is not defined by what is added, but by how safely and quietly it performs over decades.
The most enduring rooftops are those where engineering precision supports spatial freedom rather than constraining it. When load distribution, waterproofing integrity, and wind response are resolved early, the terrace can evolve naturally with the life of the home.
Material Selection for Longevity
Porcelain vs Natural Stone
For rooftop terraces, porcelain generally offers superior long-term performance because it is engineered for dimensional stability, low water absorption, and UV resistance. Exterior-grade architectural porcelain typically absorbs less than 0.5% moisture, which greatly reduces freeze-thaw damage in colder climates.
I often prefer 20 mm (0.8 in) thick outdoor porcelain slabs installed on pedestal systems rather than direct adhesive fixing. This allows hidden drainage airflow beneath the surface and simplifies maintenance.
Advantages of Porcelain
- Highly resistant to staining and weathering
- Minimal colour fading under strong sunlight
- Lightweight relative to natural stone
- Consistent manufacturing quality
Limitations
- Lacks the natural ageing character of stone
- Initial material cost can be high for premium finishes
Natural stone offers visual depth and tactile authenticity, but performance depends heavily on mineral composition. Dense stones such as granite or certain basalt varieties perform better outdoors than porous limestone or marble.
Advantages of Natural Stone
- Unique natural texture and appearance
- Timeless architectural character
- Strong resale aesthetic appeal
Limitations
- Higher maintenance due to porosity
- Risk of staining and surface etching
- Thermal expansion can cause surface stress in extreme climates
Marine-Grade Stainless Steel Fixings
Rooftop environments accelerate corrosion due to moisture, temperature fluctuation, and airborne pollutants. I specify marine-grade stainless steel, typically AISI 316 or equivalent, for structural fasteners, brackets, and outdoor mechanical joints.
The key reason is chloride resistance. Urban rooftop terraces often accumulate microscopic salt and pollution particles that gradually attack lower-grade metals.
Fixings should be hidden whenever possible to preserve architectural purity. Exposed bolts should be checked annually for oxidation or loosening caused by thermal movement.
UV-Resistant Fabrics
Outdoor fabrics must be treated as structural components, not decorative finishes.
High-quality shade and pavilion fabrics should include:
- UV stabilisation treatment
- Mold and mildew resistance
- Colourfast dye technology
- High tear strength weave structure
Polyethylene-based architectural fabrics and solution-dyed polyester tend to perform well in rooftop exposure.
Fabric tensioning is critical. Loose fabric traps wind and accelerates material fatigue. I aim for a firm, drum-like tension that allows airflow while preventing fluttering noise.
Professional Longevity Strategy
In my experience, rooftop material durability is determined more by specification discipline than by choosing the “most beautiful” finish. The best terraces are those where materials age quietly, resist environmental stress, and require minimal intervention.
Porcelain, marine-grade metals, and UV-stabilised textiles form a reliable triad for modern rooftop living because they balance aesthetics, engineering stability, and long-term maintenance economy.
Common Mistakes to Avoid
Ignoring Wind Behaviour on Rooftops
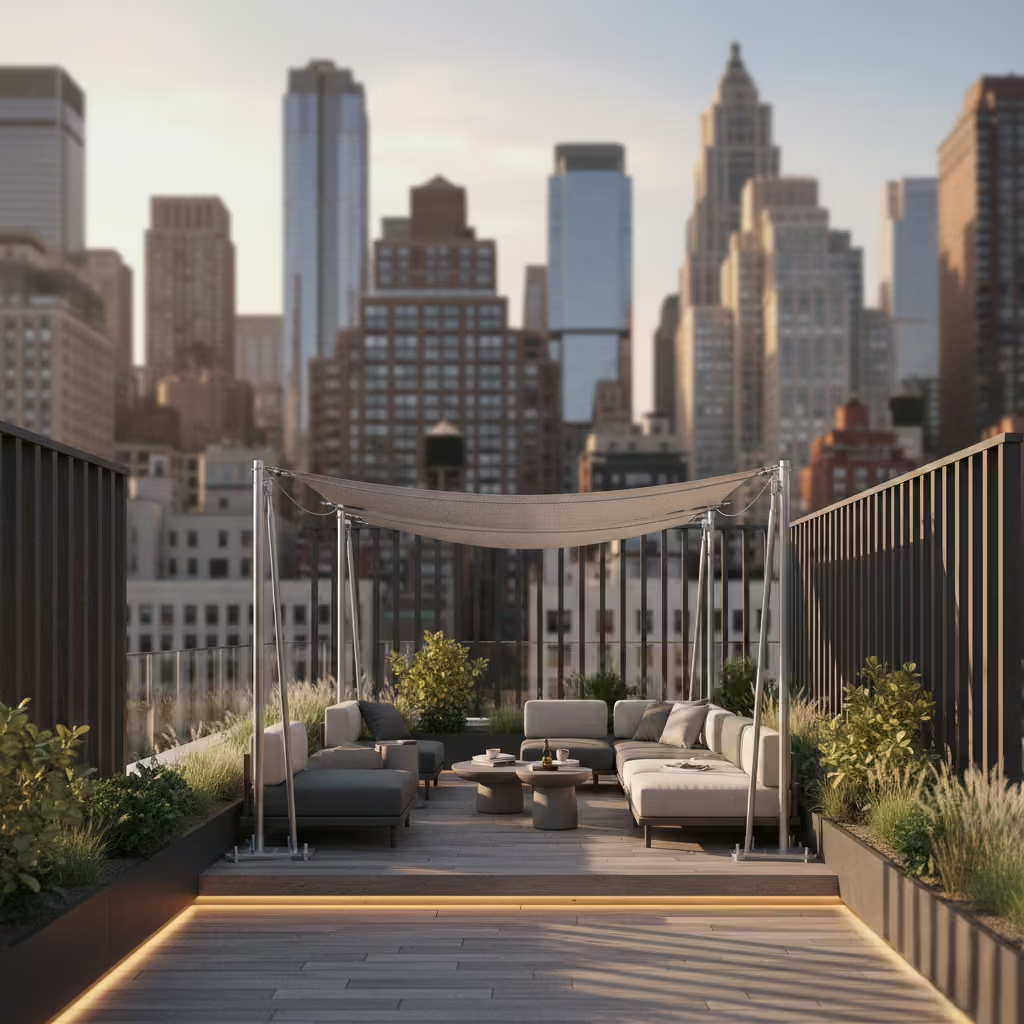
Wind movement is often the most misunderstood factor in terrace design. Elevated spaces act as airflow accelerators because surrounding buildings channel air currents through narrow urban corridors. I always test seating, planting, and shading placement against prevailing wind direction rather than assuming sheltered conditions.
In dense urban contexts such as Chicago, wind tunnel effects between high-rise structures can make terraces uncomfortable even when ground-level conditions feel calm. The safest design strategy is to combine wind-permeable screens, strategic planting buffers, and low-profile furniture.
Oversizing Outdoor Furniture
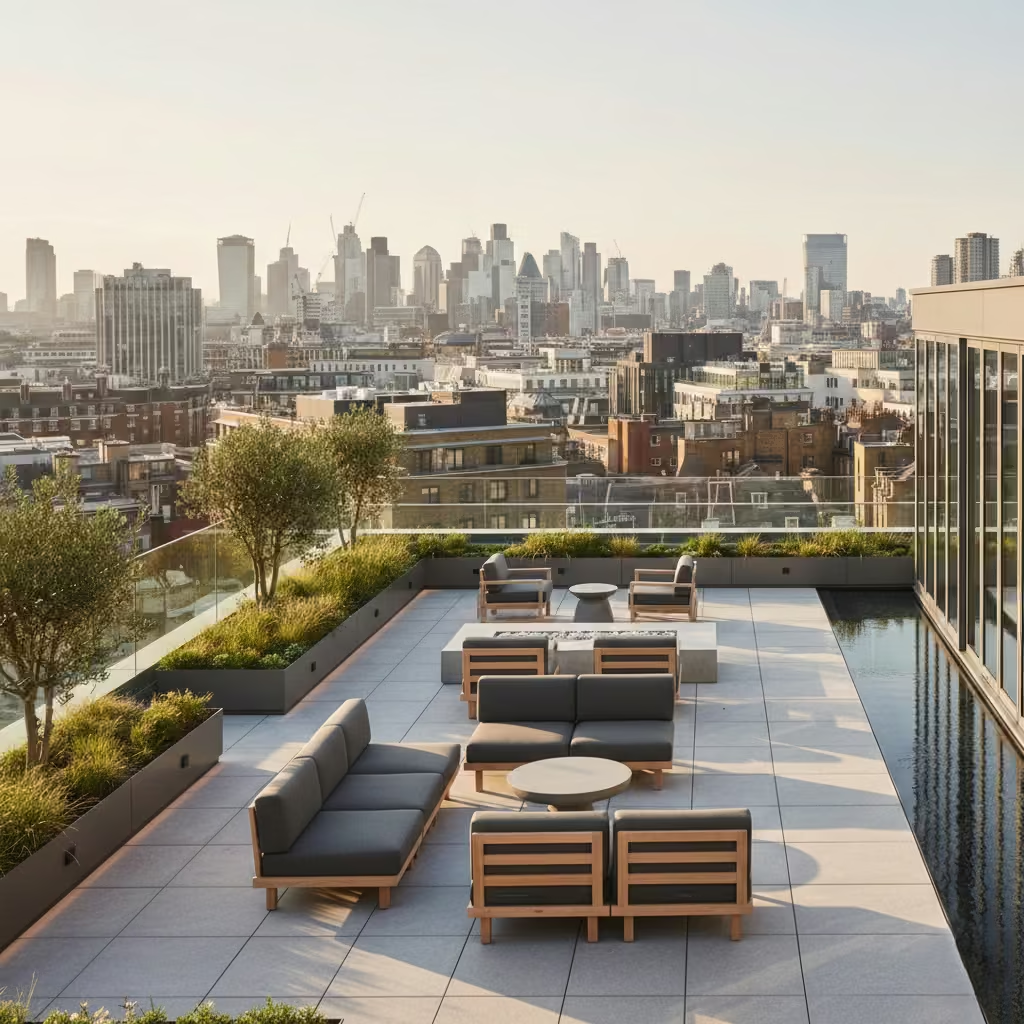
Rooftop terraces suffer visually and functionally when furniture scale is disproportionate to spatial geometry.
Large sectional sofas may appear attractive in catalogues but often consume circulation space and reduce terrace flexibility. I prefer modular seating with individual unit widths between 600 and 750 mm (24 to 30 inches), allowing reconfiguration for social events.
Outdoor furniture should behave like architectural punctuation rather than dominant volume.
Underestimating Drainage Performance
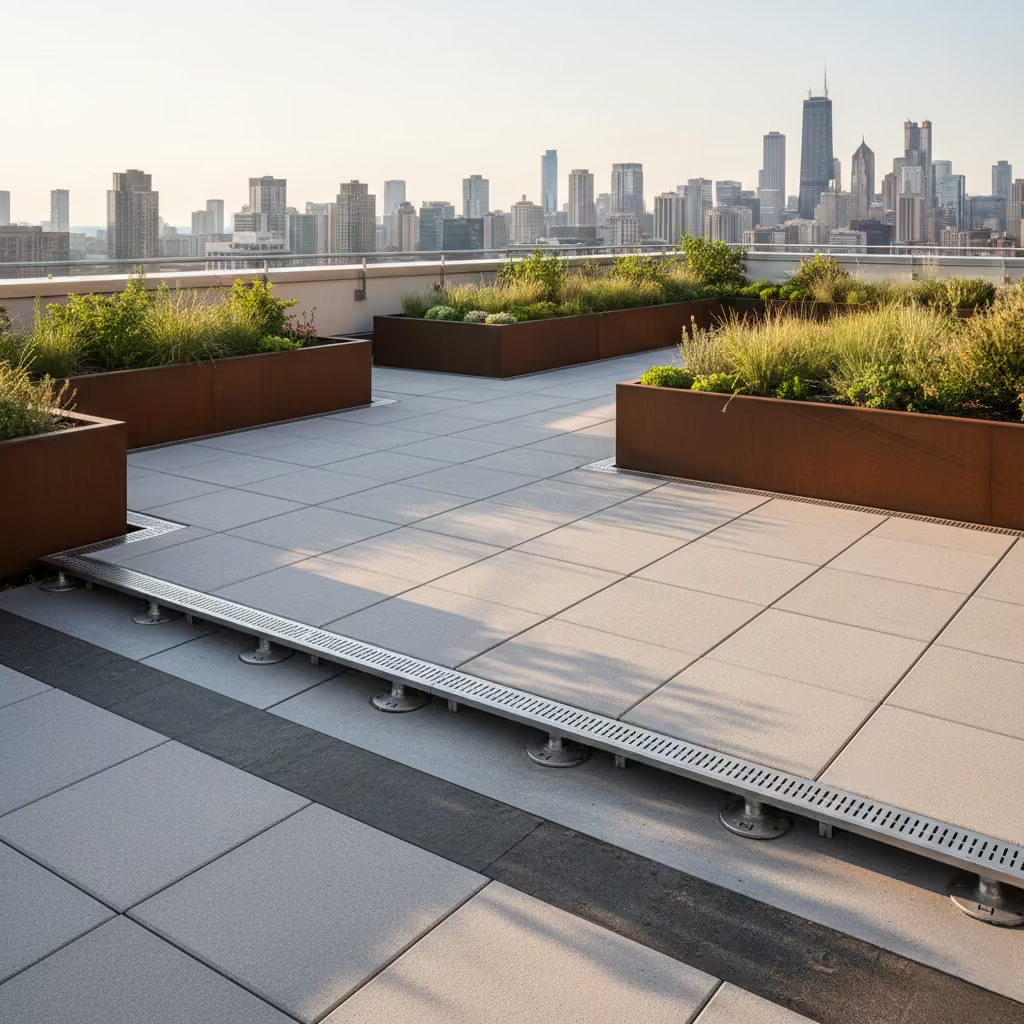
Drainage failure is the primary cause of long-term rooftop deterioration.
Water must move away from occupied zones efficiently. I always design terraces with multi-point drainage redundancy rather than relying on a single outlet.
Key details include:
- Slight surface fall of approximately 1–2% toward drainage channels
- Protected inspection access to outlets
- Root barrier membranes where planting exists
- Pedestal-supported surfaces to maintain airflow beneath finishes
Blocked drainage combined with planting irrigation is particularly dangerous because moisture accumulation slowly damages waterproof layers.
Overcomplicating the Design Composition
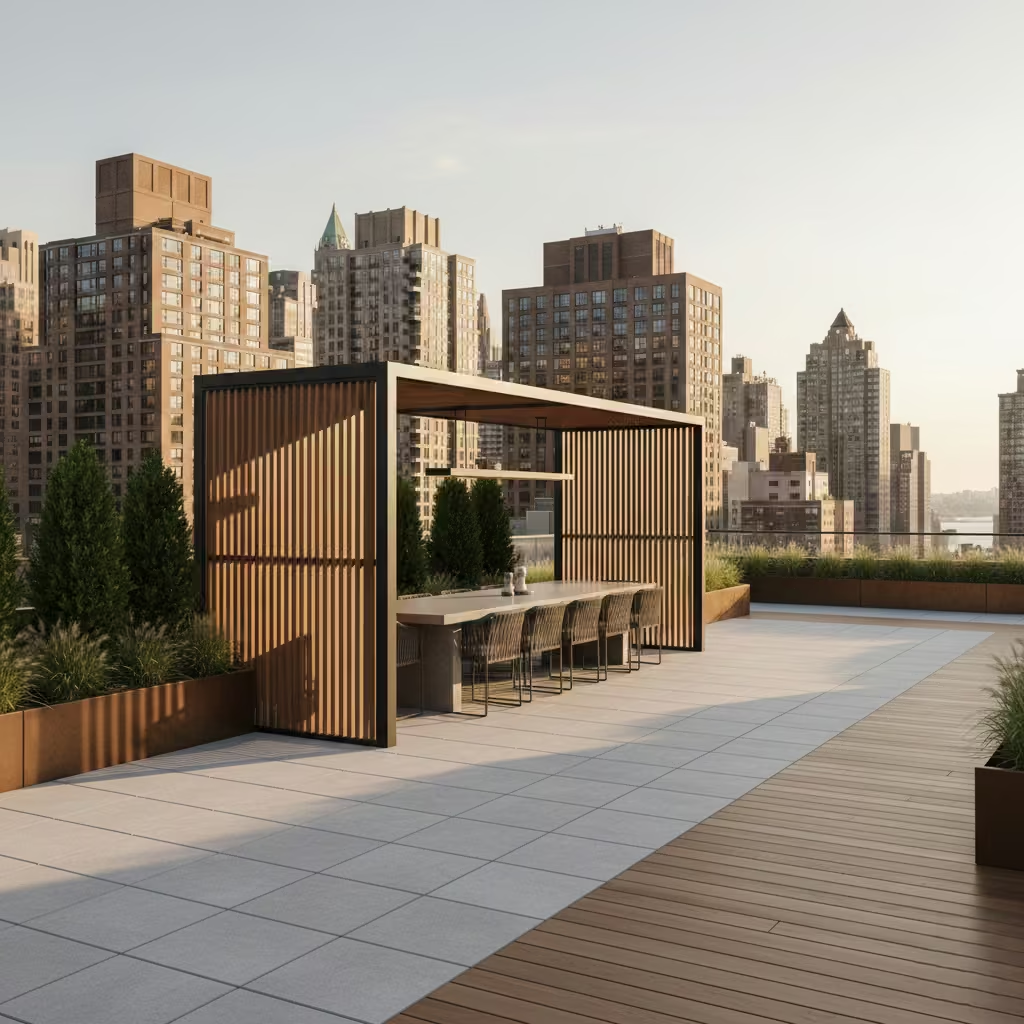
A common professional error is trying to include too many lifestyle features on one terrace.
The strongest rooftop environments feel composed rather than crowded. Architectural restraint improves longevity, reduces maintenance burden, and preserves visual calm as the space ages.
Treating the Terrace as a Decorative Add-On
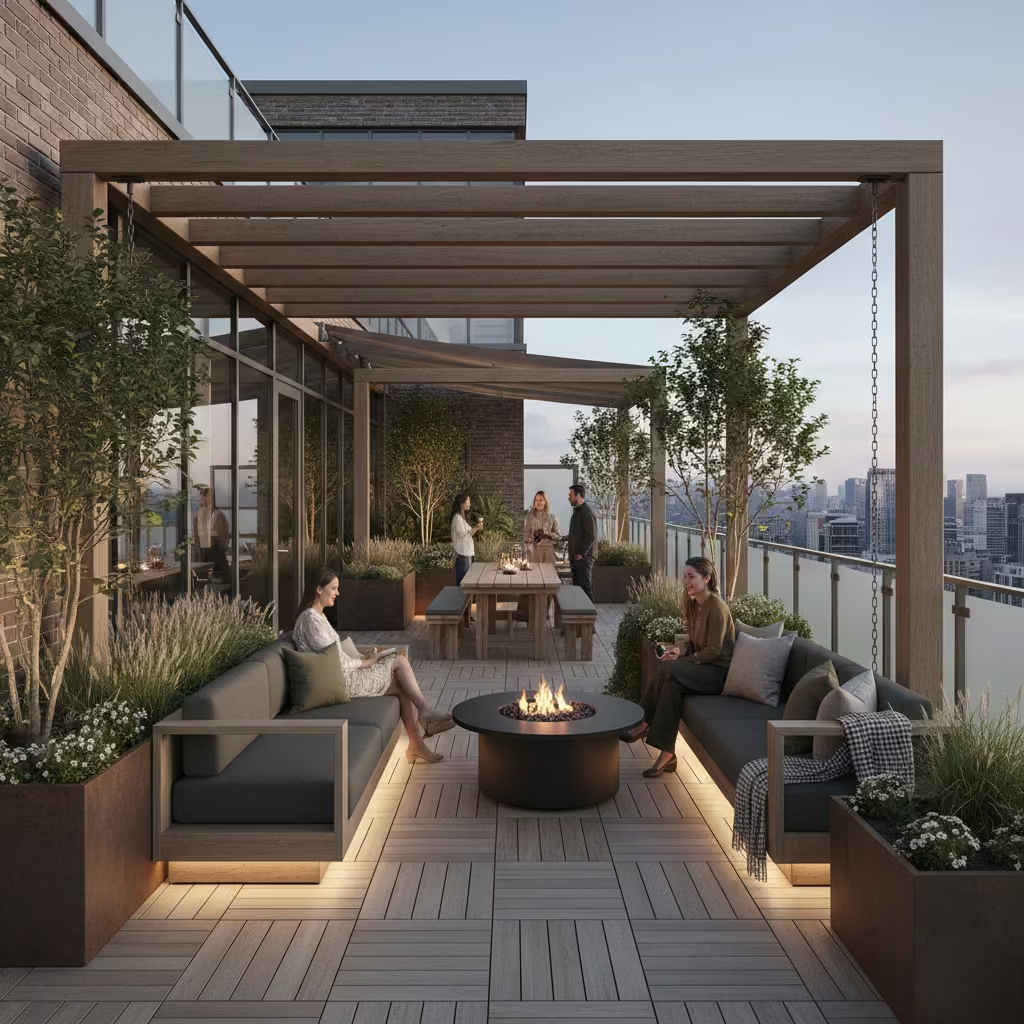
The best rooftop terraces are conceived as functional outdoor rooms integrated with building structure, climate response, and human behaviour patterns.
When design begins with comfort, durability, and spatial logic, the terrace remains relevant even as tastes change over time.
Conclusion: Designing a Rooftop That Feels Intentional
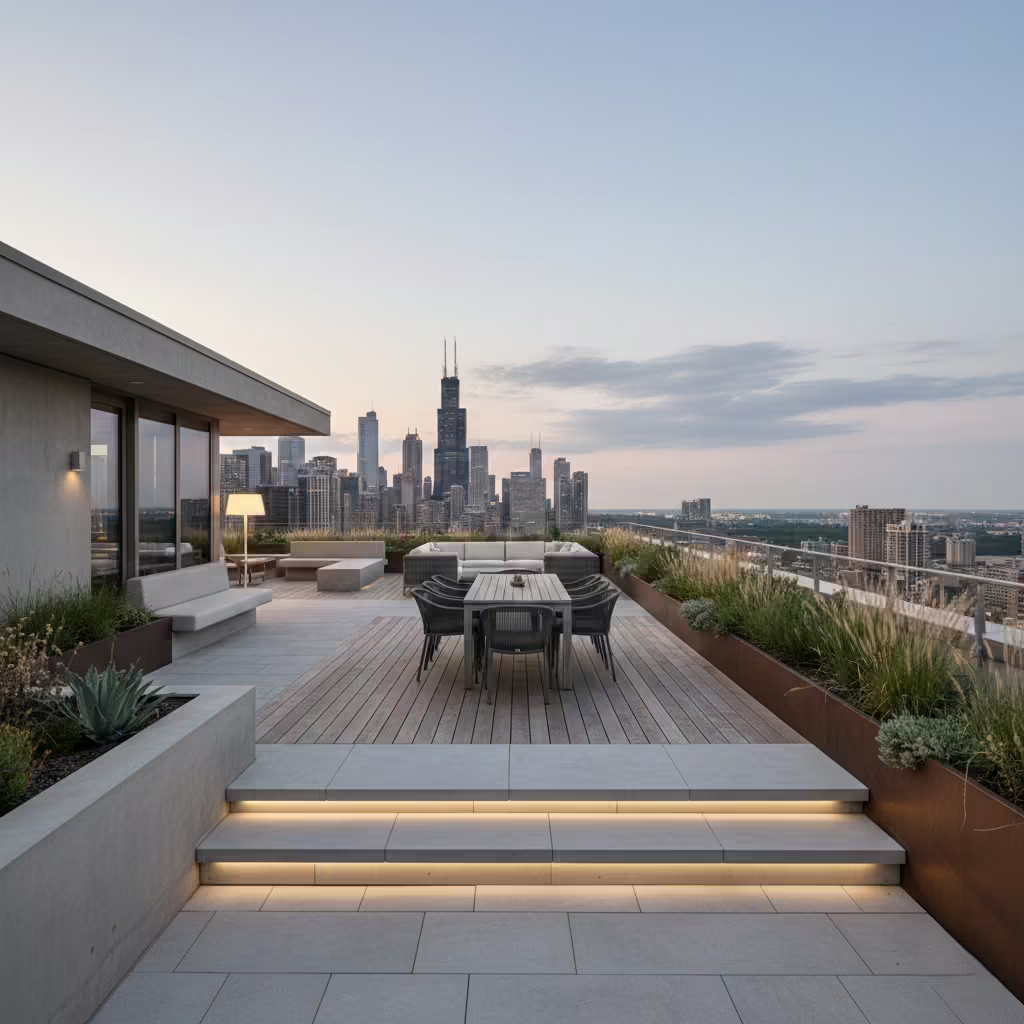
The most successful rooftop terraces are those that feel quietly resolved rather than visually assertive. I design rooftop spaces as architectural extensions of living behaviour, not as decorative platforms placed above the home. Clarity of composition matters more than quantity of features. Every element should serve comfort, movement, climate response, or social use.
Architectural clarity comes from restraint. Level changes should be gentle, material transitions deliberate, and structural forms proportioned to human experience rather than photographic impact. A well-designed terrace guides behaviour naturally. Guests should instinctively know where to dine, where to relax, and where to pause while looking across the horizon of cities such as Chicago.
Long-term thinking is essential because rooftop environments are exposed to stronger sun, wind, and moisture variation than ground-level spaces. Materials must be chosen for durability, not novelty. Mechanical systems such as lighting, irrigation, or climate control should be serviceable without disturbing the architectural composition. The best terraces are those that retain their refined look years after construction because they were designed to age gracefully.
Above all, rooftop terraces should be treated as lifestyle investments rather than decorative expressions. They shape how people live, gather, work, and rest above the city. When design prioritises proportion, climate responsiveness, and human comfort, the terrace becomes a space that remains meaningful across seasons and life stages.
In the end, the most enduring rooftop is not the one with the most features. It is the one that feels inevitable, as if the architecture and the sky were always meant to meet there.
Frequently asked questions
What is the most important factor when designing a rooftop terrace?
Structural safety and waterproofing integrity are the foundation of any rooftop design. Load-bearing capacity, drainage performance, and wind response must be resolved before adding aesthetic elements. Without engineering discipline, even the most beautiful terrace will deteriorate over time.
How much weight can a typical rooftop terrace support?
Residential reinforced concrete roofs often accommodate approximately 200–400 kg/m² (41–82 lb/ft²), but this varies significantly by construction method and local engineering standards. Heavy installations such as pools or masonry seating require structural assessment.
Which material is best for outdoor rooftop flooring?
Exterior-grade porcelain is generally the most reliable choice because of its low moisture absorption, UV resistance, and dimensional stability. Natural stone can be used, but dense varieties such as granite or basalt perform better in exposed conditions.
Do rooftop terraces require planning permission in dense cities?
In many urban areas, especially heritage or high-density zones such as Chicago or London, additional rooftop structures may require regulatory approval. Height limits, visibility impact, and fire safety clearance are common review points.
Are water features safe on rooftops?
Yes, if engineered correctly. Water features must include lightweight reservoir design, proper waterproofing, and maintenance access. Pump vibration isolation and overflow drainage protection are essential.
How long does rooftop terrace construction usually last?
A well-designed terrace using durable materials and proper detailing can last 20–30 years or longer with periodic maintenance. Mechanical systems such as lighting, irrigation, and retractable structures may require earlier servicing.
Why is drainage so critical on rooftops?
Poor drainage is the most common cause of terrace failure. Water accumulation slowly damages membranes, promotes structural moisture penetration, and increases load weight during rainfall.
Is a rooftop terrace a good long-term property investment?
When designed with structural precision and timeless material selection, rooftop terraces can increase lifestyle value and property appeal. The strongest terraces are those that remain functional and visually relevant even as design trends change.