25 Outdoor Lighting Ideas That Transform Gardens After Dark
Outdoor lighting is often treated as a finishing touch, specified late and selected in isolation from the wider design. In practice, it is one of the most influential structural layers in an exterior scheme. Long after planting settles and surfaces weather, lighting continues to define how the space is perceived, navigated, and used. I approach lighting in the same way I approach layout or material selection. It shapes behaviour, directs movement, and determines whether an outdoor space functions beyond daylight hours.
The quality of an outdoor environment after dark is dictated almost entirely by its lighting strategy. Thoughtful illumination extends usability well into the evening, allowing dining areas, circulation routes, and seating zones to remain comfortable and intuitive. Poor lighting, by contrast, shortens occupancy, introduces safety risks, and creates visual uncertainty.
I have seen beautifully constructed terraces and gardens effectively abandoned at dusk because light was either insufficient, poorly placed, or overly harsh. Comfort outdoors is not only about furniture and shelter. It is about being able to see clearly without glare, move confidently without hesitation, and remain visually connected to the house and surrounding landscape.
Most outdoor spaces fail after dark because lighting is treated as decoration rather than infrastructure. Fixtures are chosen for appearance rather than beam control, scale, or placement. Light is applied evenly or excessively, flattening the landscape and erasing depth. Circulation routes are overlooked, transitions between spaces are unclear, and focal points disappear into shadow.
WWIn many projects I have reviewed, lighting was added after hard landscaping was complete, leaving little opportunity for integration, concealment, or correct spacing. The result is often compromised performance and a scheme that feels temporary rather than intentional.
When lighting is considered an investment rather than an embellishment, the outcome is markedly different. A well-planned lighting scheme supports the garden year after year, adapting as planting matures and usage patterns evolve. It protects material choices by reducing trip hazards and wear, enhances perceived space without additional construction, and allows outdoor areas to function as true extensions of the home.
Longevity in outdoor design does not come from statement fixtures or novelty effects. It comes from restraint, precision, and an understanding that light, used properly, is the quiet architect that holds the entire scheme together.
Planning Outdoor Lighting Before Choosing Fixtures
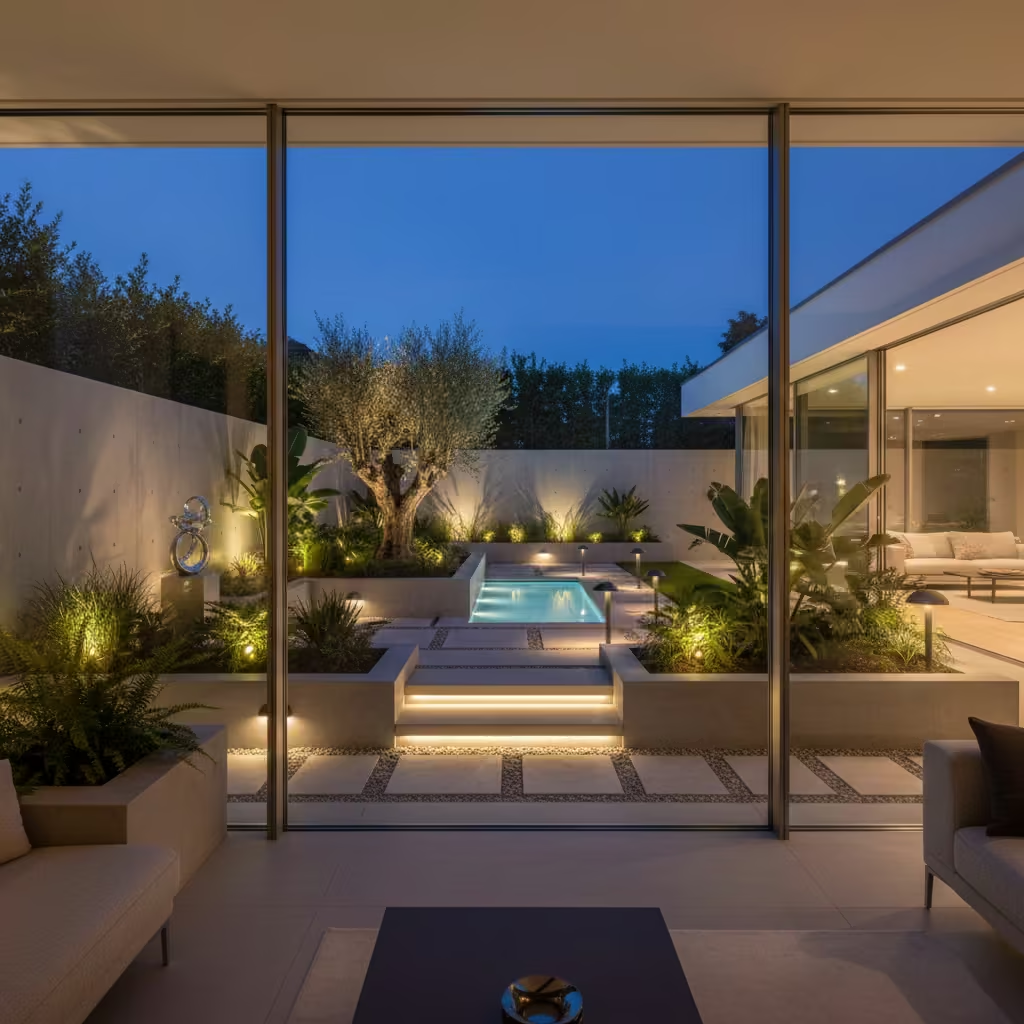
The most successful outdoor lighting schemes are planned long before a single fitting is selected. This stage is where design intelligence shows. Rather than thinking in terms of products, I always start by thinking in terms of experience. How the garden should feel after dark, how people move through it, and how it is viewed from inside the house all shape the lighting strategy far more than the fixture itself.
To keep this process clear and approachable, I break planning into a few simple but critical layers.
Start with a layered lighting strategy
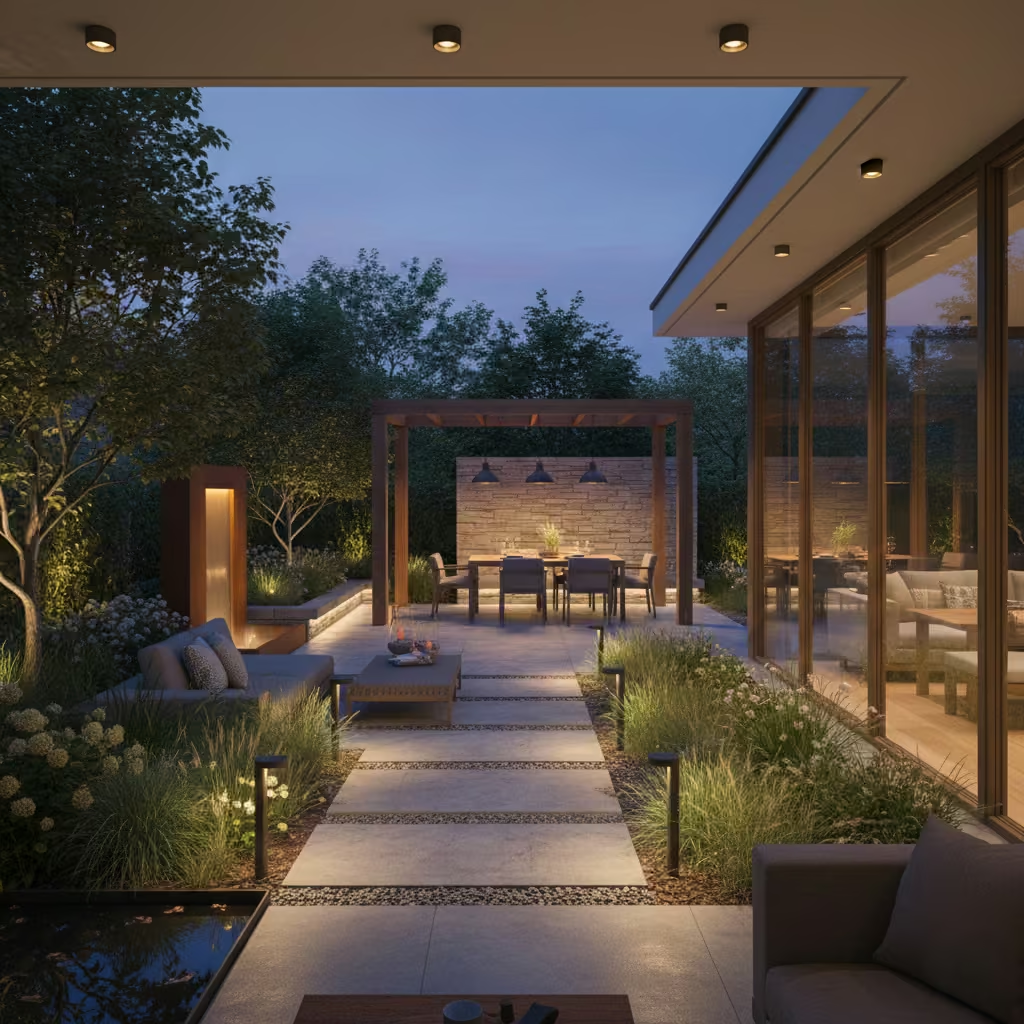
Outdoor lighting works best when it is layered, not uniform. Each layer has a distinct role.
- Ambient lighting provides overall visibility and establishes mood. This might come from subtle wall washing, reflected light from planting, or softly lit boundaries.
- Task lighting supports specific activities such as cooking, dining, steps, and pathways. It should be precise and controlled, never overpowering.
- Accent lighting highlights focal points such as trees, sculptures, textured walls, or water features, adding depth and visual interest.
When these layers are balanced, the garden feels composed and calm. When one layer dominates, especially task lighting, the space quickly becomes harsh and uncomfortable.
Consider how the garden is seen from indoors
Outdoor lighting is not only experienced in the garden. It is also part of the interior view, particularly in the evening. I always assess key sightlines from living rooms, kitchens, and bedrooms. Lighting that looks acceptable outside can feel glaring or chaotic when viewed through glass.
Soft transitions, controlled beam angles, and deliberate focal points help create a framed view rather than a flood of light. A well-lit garden should feel like a continuation of the interior, not a separate scene competing for attention.
Control light spill and glare from the outset
Poor glare control is one of the most common reasons outdoor lighting feels uncomfortable. Exposed light sources, incorrect mounting heights, and wide beam spreads can create sharp contrast and visual fatigue.
Equally important is light spill beyond the boundary of the property. Thoughtful positioning and beam control protect neighbouring homes, reduce unnecessary brightness, and create a more refined result. In my experience, restraint almost always produces a stronger visual outcome than excess.
Zone the garden for different evening uses
Outdoor spaces rarely serve a single function. Dining, circulation, lounging, and quiet viewing areas all benefit from different lighting treatments. Zoning allows each area to be lit appropriately without over-lighting the entire garden.
A dining terrace may need focused, warmer light, while a pathway requires low-level guidance. Seating areas often benefit from indirect or reflected light that encourages people to linger. Thinking in zones also makes it easier to control lighting later, adapting the space for different occasions and seasons.
Real-life insight from practice
From experience, lighting plans drawn after hard landscaping almost always lead to compromise. Cabling becomes visible, fixture placement is dictated by what is physically possible rather than what works visually, and spacing is often inconsistent. The result is uneven illumination that feels added on rather than integrated.
When lighting is planned alongside levels, walls, planting, and joinery, it becomes part of the architecture of the garden. The fittings disappear, and the effect remains. That is the difference between a space that simply looks lit and one that truly works after dark.
25 Outdoor Lighting Ideas That Work in Real Gardens
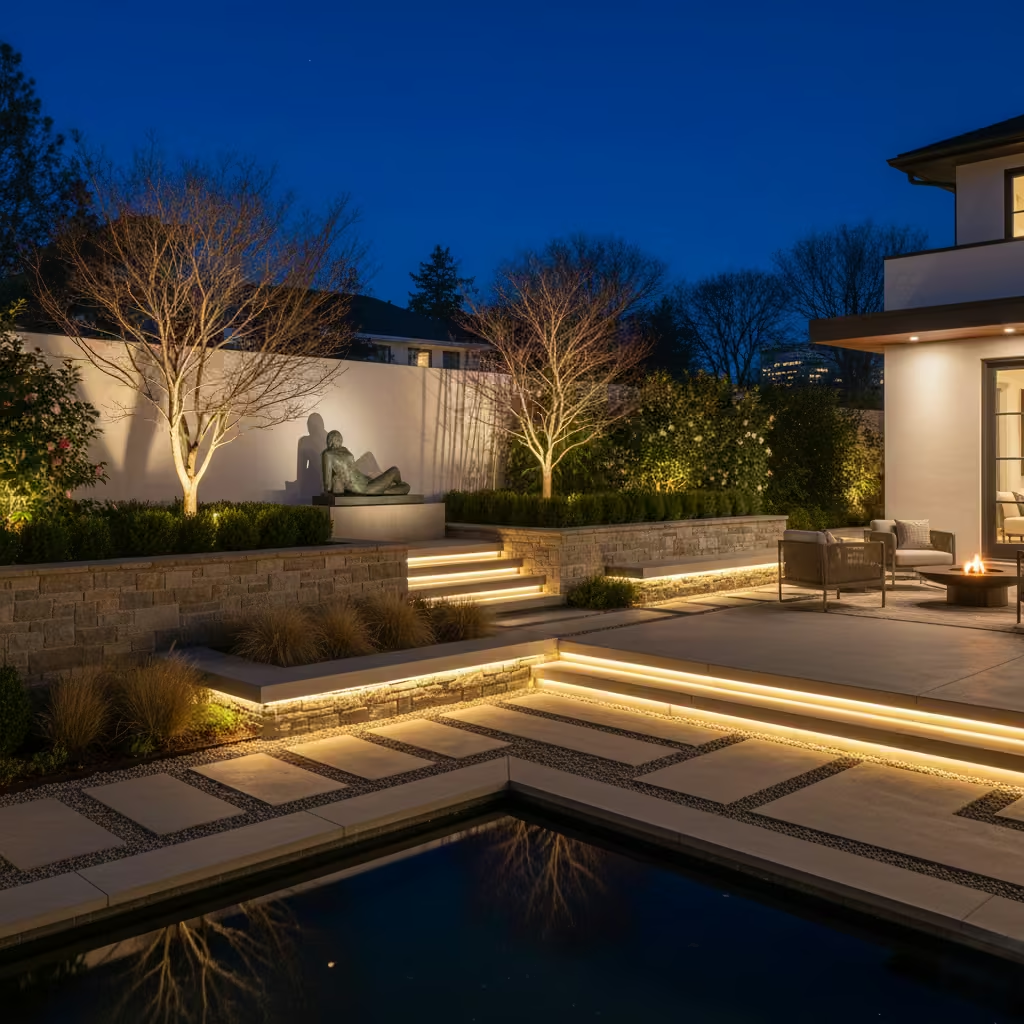
Before exploring individual lighting ideas, it is worth setting one expectation clearly. Effective outdoor lighting is rarely about adding more fixtures. It is about placing fewer lights with greater intent. In real gardens, success comes from understanding scale, distance, and restraint, and from choosing lighting positions that work with planting,
levels, and architecture rather than fighting them. The ideas that follow are drawn from practical, built projects where performance, longevity, and night-time comfort mattered more than visual novelty.
Recessed Path Lighting That Guides Without Dominating
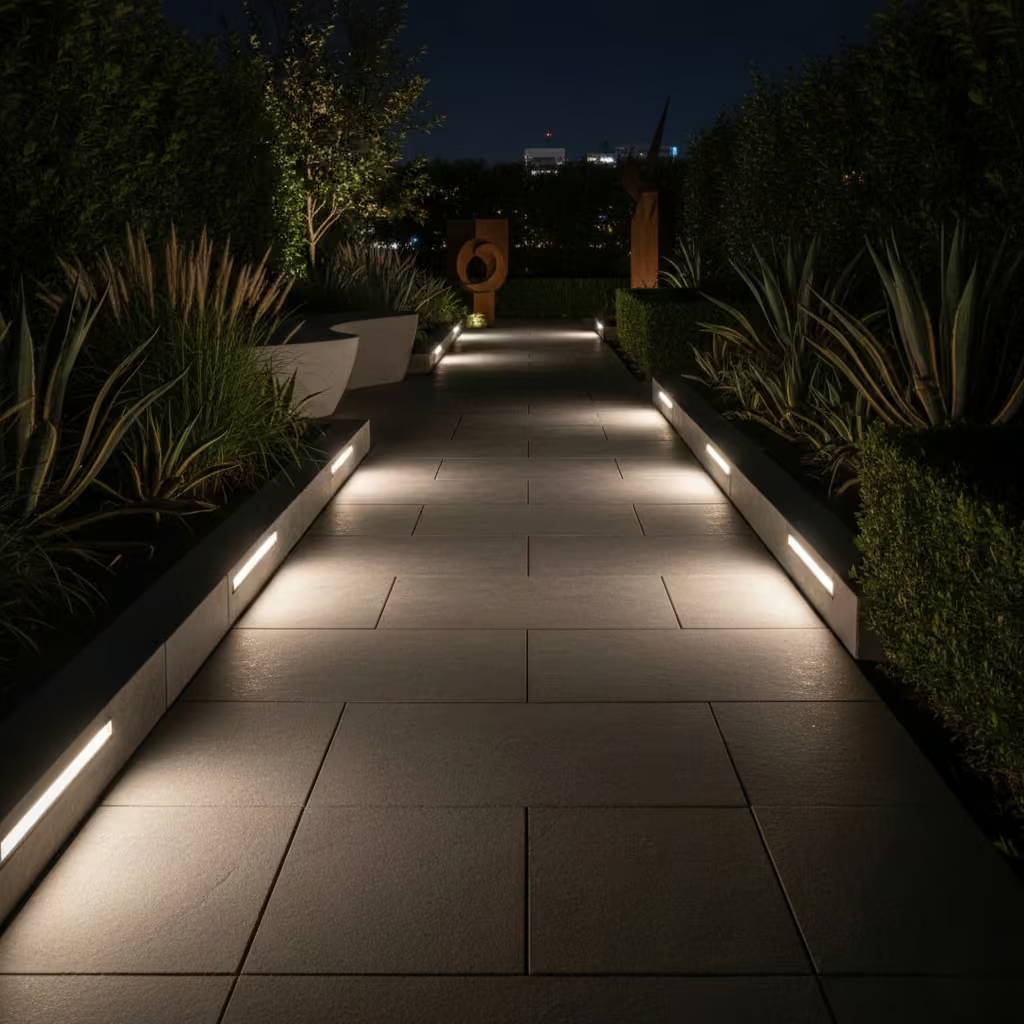
Recessed path lighting is about guidance rather than spectacle. The goal is to lead movement through the garden subtly, allowing the eye to follow a natural rhythm without being drawn to the fittings themselves. When done well, the light feels as though it belongs to the ground plane, quietly supporting circulation while preserving darkness elsewhere. I favour this approach in gardens where calm, continuity, and architectural clarity matter more than decorative effect.
Typical placement and scale
These fittings work best when integrated into hard landscaping such as paving edges, retaining walls, or low kerbs rather than placed in the middle of paths. Positioning them to one side of a route, rather than symmetrically on both sides, often creates a more relaxed and visually generous result. Scale is critical. Oversized fixtures quickly dominate the path and flatten the landscape, while smaller, discreet units disappear during the day and perform precisely at night.
Professional measurements and spacing
In real projects, I typically space recessed path lights at 1.8–2.4 m (6–8 ft) intervals, depending on beam spread and surrounding ambient light. Mounting height is usually kept low, around 150–300 mm (6–12 in) above finished ground level when integrated into walls or steps. This height provides sufficient illumination for safe movement without casting harsh light into the eye line.
Performance considerations
Beam angle should be narrow and directional, aimed across the path rather than directly forward. This reduces glare and creates gentle pools of light that overlap just enough to maintain continuity. Warm colour temperatures, generally in the 2700–3000K range, help the path feel inviting rather than clinical, particularly when viewed from the house.
Professional insight
In my experience, recessed path lighting succeeds when it is almost unnoticeable. The moment you become aware of the fixture rather than the route it defines, the balance has shifted too far. When planned early and detailed properly, this type of lighting becomes one of the most reliable ways to make a garden feel composed, safe, and quietly confident after dark.
Low-Level Bollard Lighting for Long Garden Routes
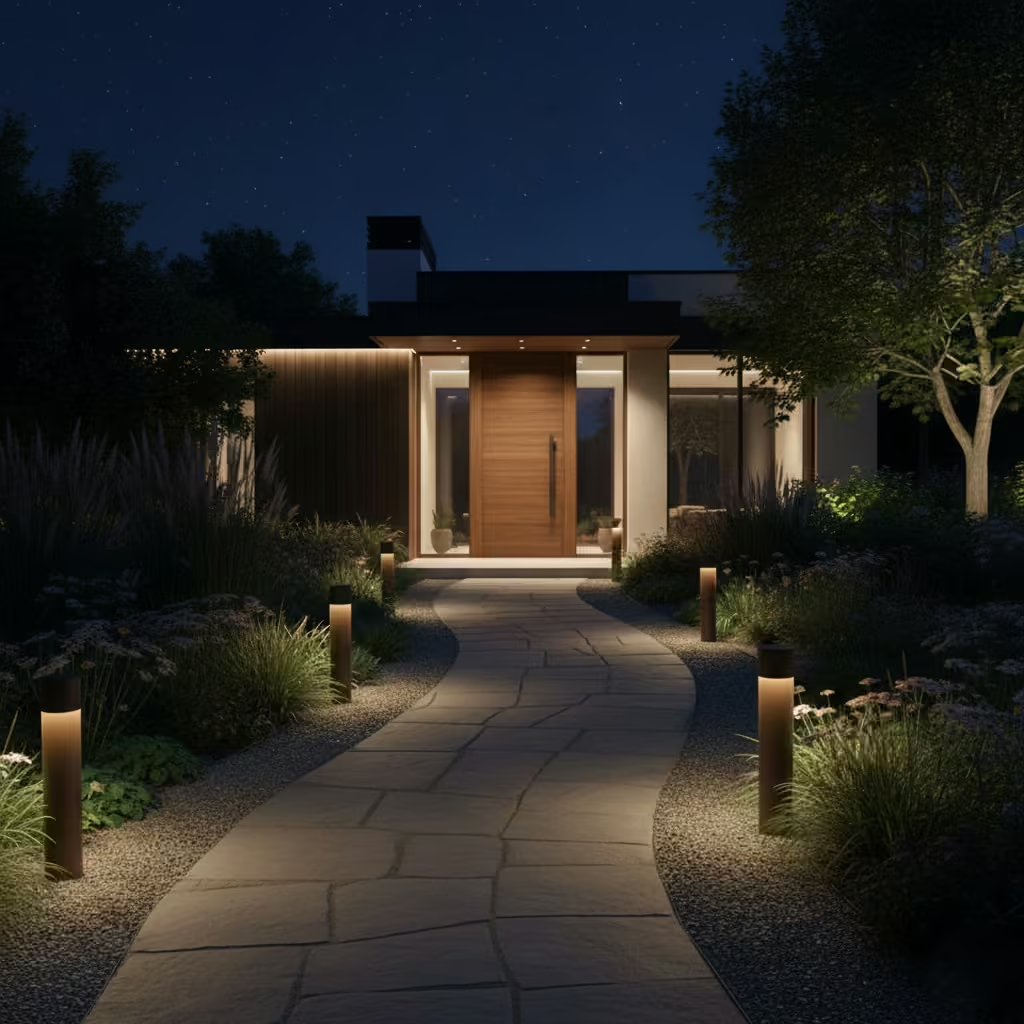
Low-level bollard lighting is most effective when a garden route needs clarity over distance rather than drama at close range. I use bollards to establish rhythm and orientation along longer paths, driveways, or garden axes where the eye benefits from repetition. The aim is not to spotlight the route, but to create a steady visual cadence that draws people forward and reassures them as they move through the space after dark.
Typical placement and scale
Bollards should sit just outside the main walking line, never in the centre of the path. Positioning them slightly offset keeps circulation clear and avoids a runway effect. Scale is crucial. Short, compact bollards read as part of the landscape, while taller versions can quickly feel intrusive. In residential gardens, restraint always produces a more refined outcome.
Professional measurements and spacing
In practice, I specify bollards at 600–900 mm (24–36 in) high for most private gardens. Spacing typically falls between 2.4–3.6 m (8–12 ft), depending on lumen output and beam spread. Wider spacing often works better than expected, particularly when combined with softer ambient light elsewhere in the garden.
Light control and comfort
The best bollard fittings shield the light source completely, directing illumination downward and outward across the path surface. This prevents glare and ensures the light remains functional rather than distracting. Warm colour temperatures, generally 2700K, help long routes feel calm and continuous rather than stark or over-lit.
Professional insight
I have seen long garden routes transformed simply by reducing bollard height and increasing spacing. The instinct to add more fittings is rarely the answer. A lighter touch, combined with thoughtful placement, almost always results in a route that feels calmer, safer, and far more intentional after dark.
Step Lighting Integrated Into Risers and Retaining Walls
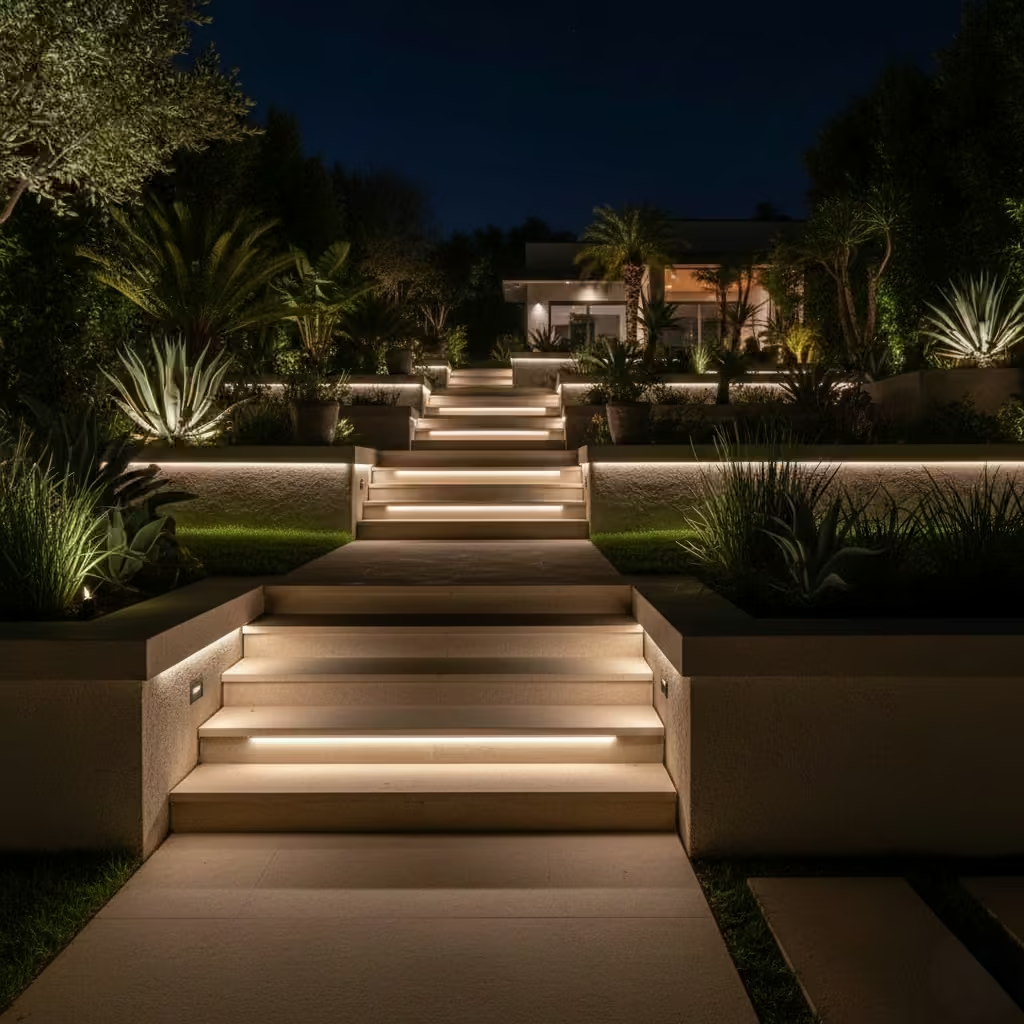
Integrated step lighting is about safety delivered with discretion. The purpose is to make level changes legible without visually breaking the architecture of the garden. When light is built into risers or retaining walls, it reinforces the structure of the space, allowing steps to read clearly while keeping the surrounding areas calm and uncluttered. This approach works particularly well in gardens with terraces, split levels, or sloped sites.
Typical placement and scale
The most effective placement is within the vertical face of the step or wall, never on the tread itself. This keeps fixtures protected and maintains a clean walking surface. In retaining walls, lights should align consistently with step positions or key transitions rather than being evenly distributed without reference to function. Compact fittings with shallow profiles are essential so the lighting feels embedded rather than applied.
Professional measurements and spacing
In real projects, I typically position step lights 150–200 mm (6–8 in) above the tread level. This height provides enough forward light to define the edge without creating glare. On wider staircases, lights can be placed on alternating sides, usually every 900–1,200 mm (3–4 ft), depending on step width and surrounding ambient light.
Performance and visual comfort
Beam direction should wash gently across the step surface, not project outward. This avoids harsh contrast and ensures each tread is visible as part of a continuous sequence. Warm colour temperatures in the 2700–3000K range help steps feel welcoming and natural, especially when stone or concrete is used.
Professional insight
In my experience, integrated step lighting is one of the most appreciated features in everyday use. Clients often comment on how confident and natural movement feels at night, even though the lights themselves barely register visually. When detailing is handled early, this type of lighting becomes part of the garden’s architecture rather than an added layer.
Wall-Washed Lighting for Boundary and Garden Walls
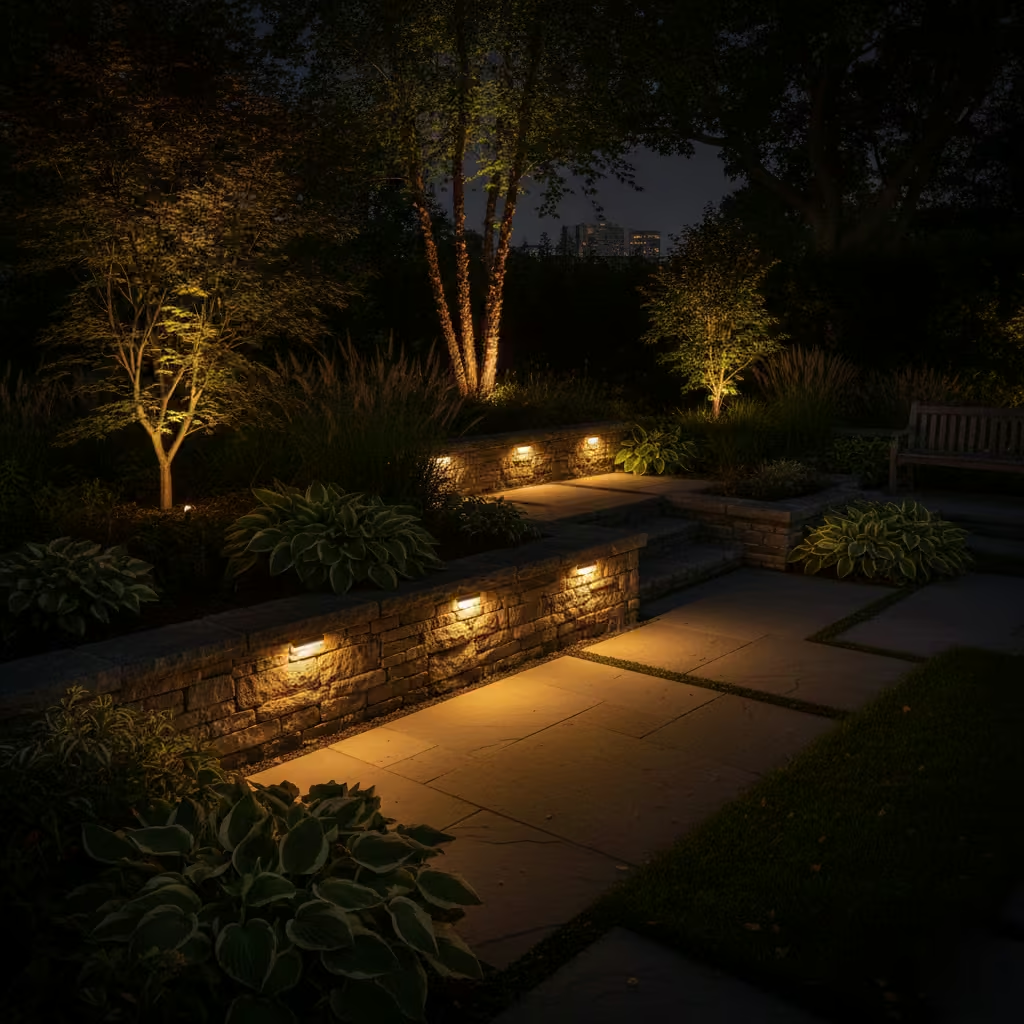
Wall-washed lighting transforms plain boundaries and garden walls into visual assets, creating a sense of depth and texture rather than leaving surfaces flat and lifeless after dark. The goal is to subtly highlight the scale, materiality, and composition of walls, providing context and definition for the garden while enhancing atmosphere. In my projects, walls become more than barriers they frame the space, guide the eye, and contribute to the overall spatial experience.
Typical placement and scale
Fixtures should be positioned close to the wall base or recessed discreetly within raised beds, planting edges, or coping stones. Light should graze upward, emphasizing texture and form without drawing attention to the source. In taller walls, multiple fixtures at regular vertical intervals may be required to achieve even coverage. Compact linear or cylinder fittings usually work best, allowing continuous illumination without visual clutter.
Professional measurements and spacing
For walls 1.8–2.4 m (6–8 ft) high, I typically space wall-wash fixtures 2–3 m (6.5–10 ft) apart. Beam spreads are generally 20–40 degrees, creating a gentle, continuous wash rather than harsh spots. Low-voltage fittings, usually around 12–24V, are preferred for safety and discreet cabling.
Performance and visual comfort
Wall-washing works best with indirect or shielded beams. The light should accentuate texture—such as masonry joints, timber grain, or rendered surfaces—without creating glare or overly bright patches. Warm colour temperatures (2700–3000K) preserve a welcoming, cohesive evening atmosphere.
Professional insight
In several gardens I’ve designed, walls lit with a subtle wash completely redefine perception of scale. Boundaries recede gracefully, planting is softly framed, and the garden feels far larger than it actually is. When planned alongside paving and planting, wall-washing becomes a quiet but powerful architectural tool, shaping how the space is experienced without ever feeling “lit.”
Uplighting Mature Trees for Vertical Depth
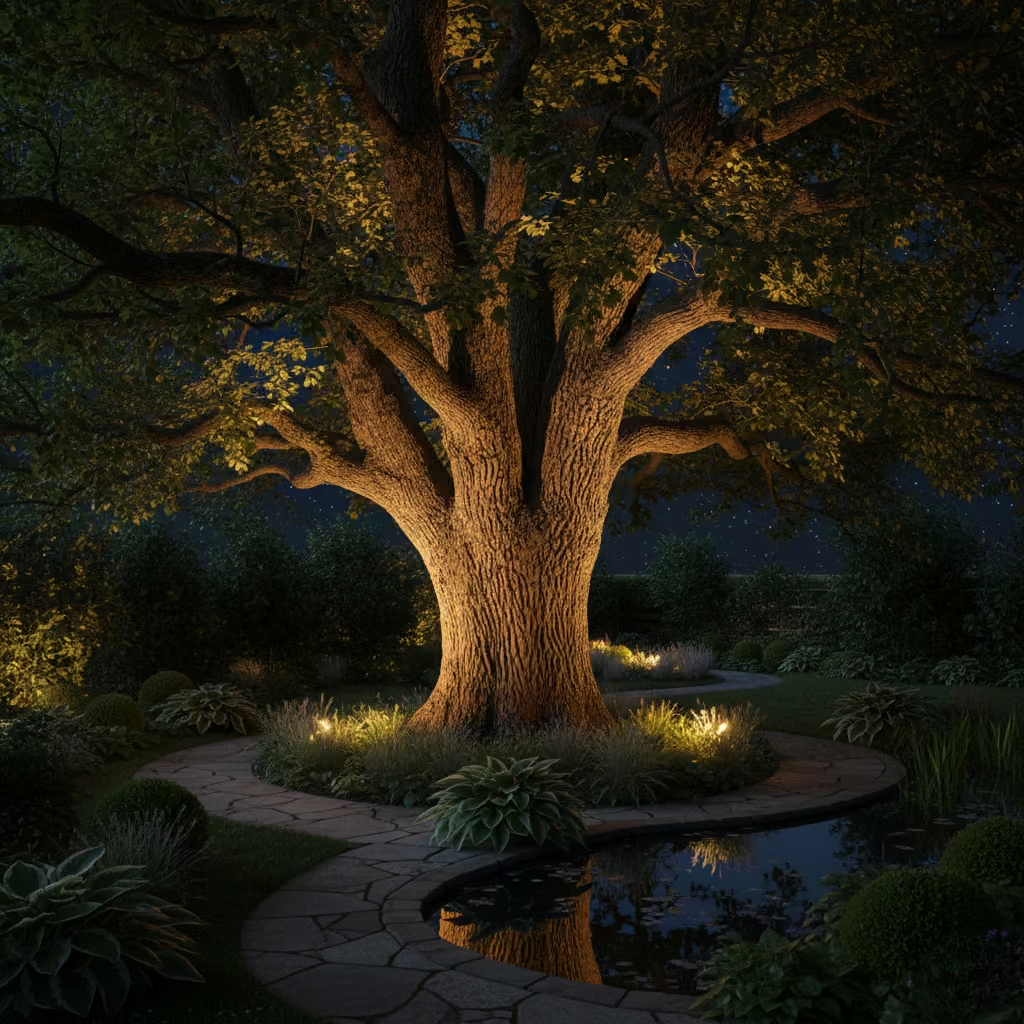
Uplighting mature trees is one of the most effective ways to add vertical depth and sculptural interest to a garden at night. The goal is to transform existing planting into focal points, emphasising trunk structure, branch architecture, and canopy texture. Rather than spotlighting the tree in isolation, I use uplighting to create layers of light and shadow, which add rhythm, scale, and a sense of enclosure to the surrounding space.
Typical placement and scale
Fixtures are positioned at the base of the trunk, slightly offset to highlight interesting branch lines or trunk texture. In larger trees, multiple uplights can be used around the perimeter to create even illumination while maintaining natural shadowing. Compact, ground-recessed units or well-protected spike-mounted fittings work best, as they blend seamlessly into the landscape during the day.
Professional measurements and spacing
For trees up to 5–6 m (16–20 ft) tall, a single uplight is often sufficient, placed 600–900 mm (24–36 in) from the trunk. Taller specimens may require two or three lights spaced evenly around the base. Beam angles of 20–30 degrees help focus on the trunk and lower canopy while preserving softer shadows. Warm colour temperatures (2700–3000K) are ideal to avoid stark contrasts that feel unnatural.
Performance and visual comfort
The fixture should be shielded or recessed to prevent glare when viewed from seating areas or adjacent paths. A subtle uplight reveals texture and form without appearing like a spotlight, maintaining the tree as part of the landscape rather than an isolated feature. I often combine uplighting with softer background illumination to balance vertical drama with horizontal continuity.
Professional insight
In my experience, the key to successful tree uplighting is subtlety. The most compelling installations feel effortless: the tree appears to glow naturally, drawing the eye upward without dominating the scene. When integrated with layered garden lighting, uplighted trees provide a structural spine that guides circulation and gives the garden an unmistakable sense of depth and presence after dark.
Uplighting Mature Trees for Vertical Depth
Downlighting from tree canopies is designed to mimic the natural quality of moonlight, casting soft, dappled illumination across paths, seating areas, and planting. This technique adds a poetic dimension to the garden, creating gentle shadows, highlighting textures, and enhancing spatial depth. Unlike uplighting, which emphasizes vertical structure, downlighting subtly shapes the horizontal plane, producing a serene, enveloping atmosphere that encourages lingering.
Typical placement and scale
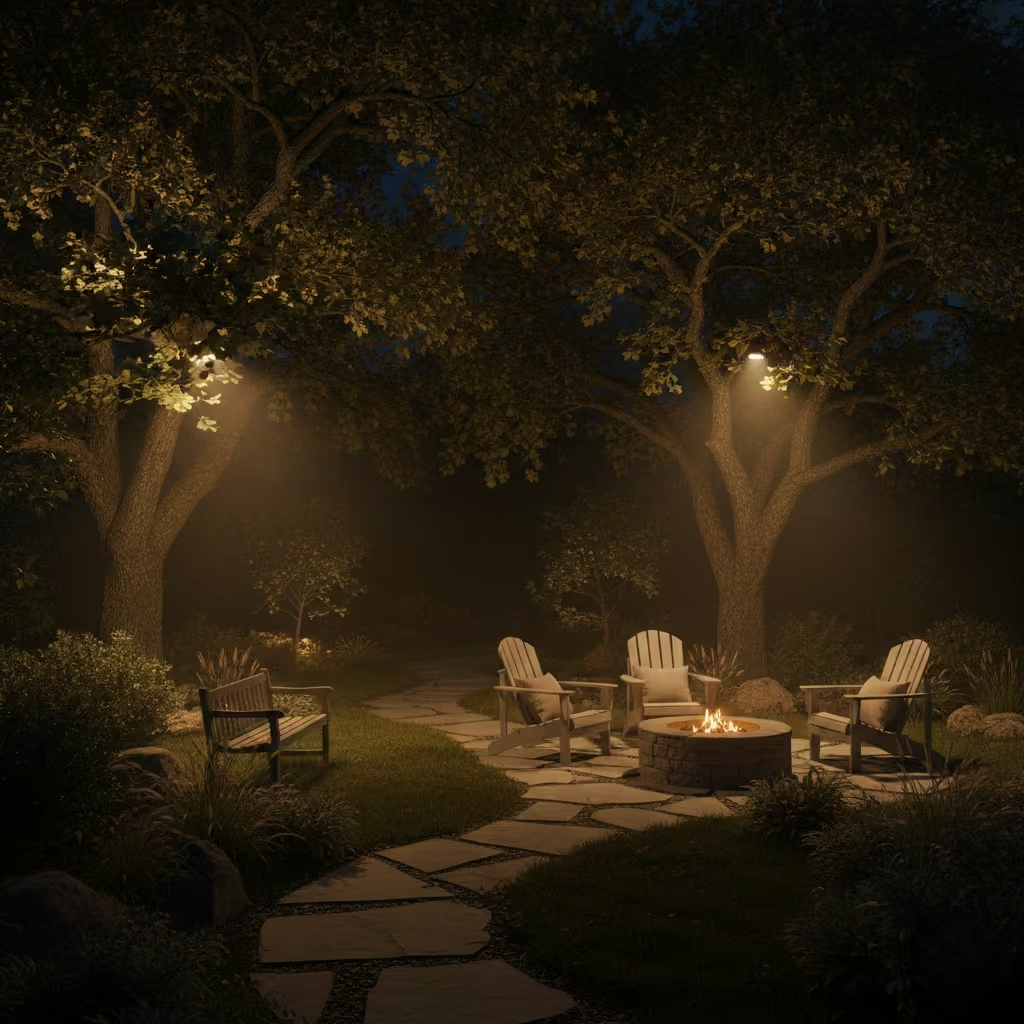
Fixtures are mounted high in the canopy, ideally concealed within branches, so that the light filters through leaves rather than striking surfaces directly. Placement should consider both beam angle and leaf density; too high or too wide a spread risks uneven illumination, while too low can feel artificial. Compact, weatherproof LED units are preferred to minimize visual intrusion during the day.
Professional measurements and spacing
I usually mount downlights at 2.4–3.6 m (8–12 ft) above ground level in small to medium gardens. Beam spreads of 20–30 degrees create overlapping pools of light that simulate natural moonlight. For larger gardens, multiple fixtures spaced 3–5 m (10–16 ft) apart may be required to ensure even coverage without bright spots. Warm white LEDs (2700–3000K) maintain a calm, natural glow.
Performance and visual comfort
Downlighting should be indirect and diffused. Shielded fittings prevent glare when viewed from seating areas or through windows. The effect is subtle: surfaces are illuminated without harsh shadows, and surrounding planting retains depth and texture. This approach works particularly well when combined with uplighting on feature trees, creating a layered nightscape.
Professional insight
In my experience, the magic of moonlighting comes from restraint. Even a single well-positioned fixture can transform a garden, turning everyday trees into living light sculptures. Combined with carefully considered layers of ambient and accent lighting, this approach produces a garden that feels calm, spacious, and welcoming after dark, without ever appearing artificially “lit.”
You May also Like: 25 Front Yard Landscaping Ideas That Elevate Curb Appeal with Architectural Intention
Pergola-Integrated Lighting for Dining Zones
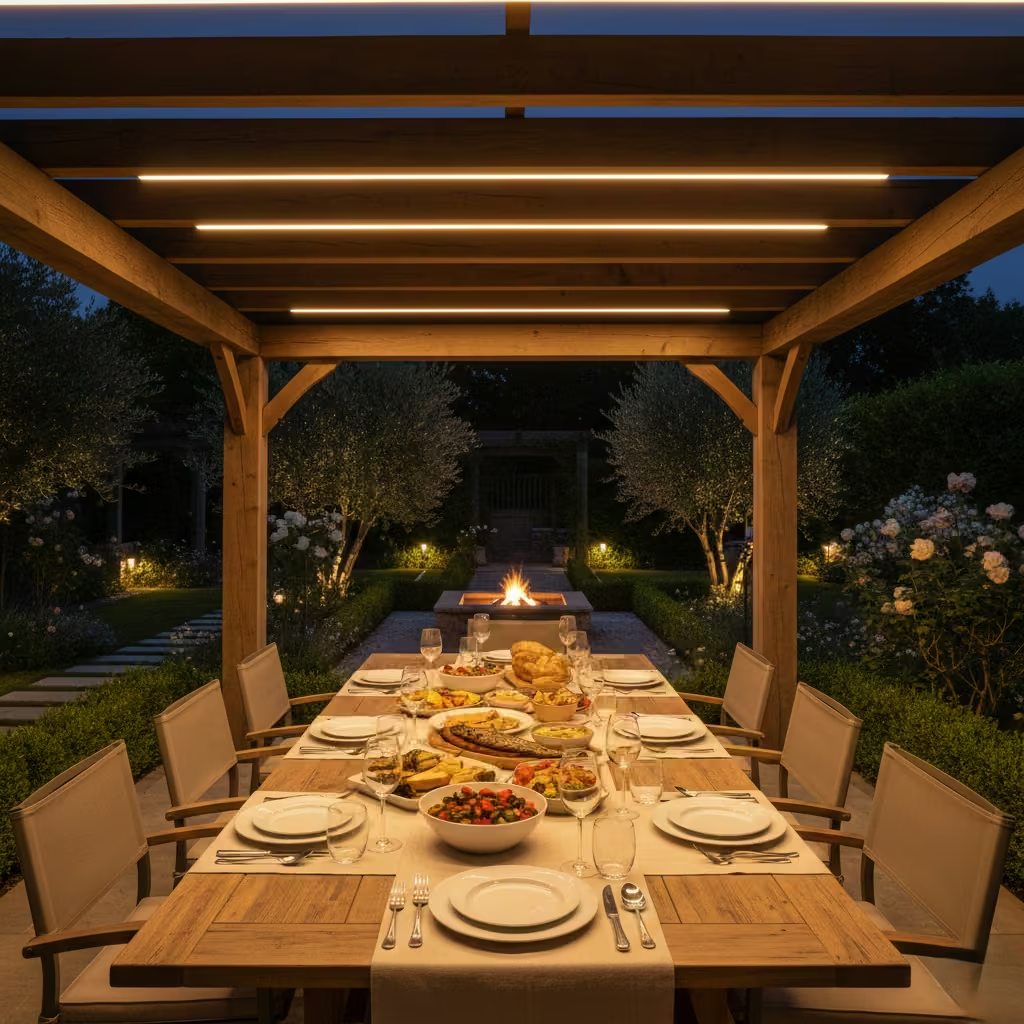
Lighting integrated into a pergola is about creating a sense of intimacy, structure, and focus for outdoor dining areas. Rather than relying on standalone fixtures or overhead poles, the pergola itself becomes a framework for illumination. This approach defines the space, encourages lingering, and subtly balances brightness so meals feel comfortable and inviting without glare. In my experience, properly integrated pergola lighting can transform a simple terrace into a distinct, purposeful room after dark.
Typical placement and scale
Fixtures are recessed or concealed within beams, rafters, or slatted tops. Linear LEDs, downlights, or subtle spotlights can highlight the table below without spilling light beyond the intended area. Scale is critical: lighting should feel proportional to the pergola structure, enhancing its geometry without overwhelming it. I often avoid large pendant-style lights unless the pergola is generously scaled and high enough to prevent obstruction.
Professional measurements and spacing
For a dining table 2–3 m (6–10 ft) long, I typically use linear or spot fixtures spaced 0.6–1 m (2–3 ft) along the pergola beams. Mounting height is usually 2.1–2.4 m (7–8 ft) above the table surface to balance illumination and visual comfort. The key is even coverage with minimal shadowing, ensuring that the entire dining surface is adequately lit for tasks such as serving food or reading menus.
Performance and visual comfort
I favour warm colour temperatures (2700K) to create a welcoming, natural glow. Fixtures should be recessed or shielded to avoid direct eye contact, and the light should wash gently over the table rather than creating hotspots. Diffused or angled beams help maintain a calm, intimate ambience while supporting functional requirements.
Professional insight
In my projects, pergola-integrated lighting consistently elevates the dining experience. The space feels deliberately designed and visually connected to the rest of the garden. When planned early, the installation is seamless, functional, and almost invisible during the day yet after dark, it becomes the anchor of a warm, inviting outdoor room that people naturally want to use.
Soft Edge Lighting for Decking Perimeters
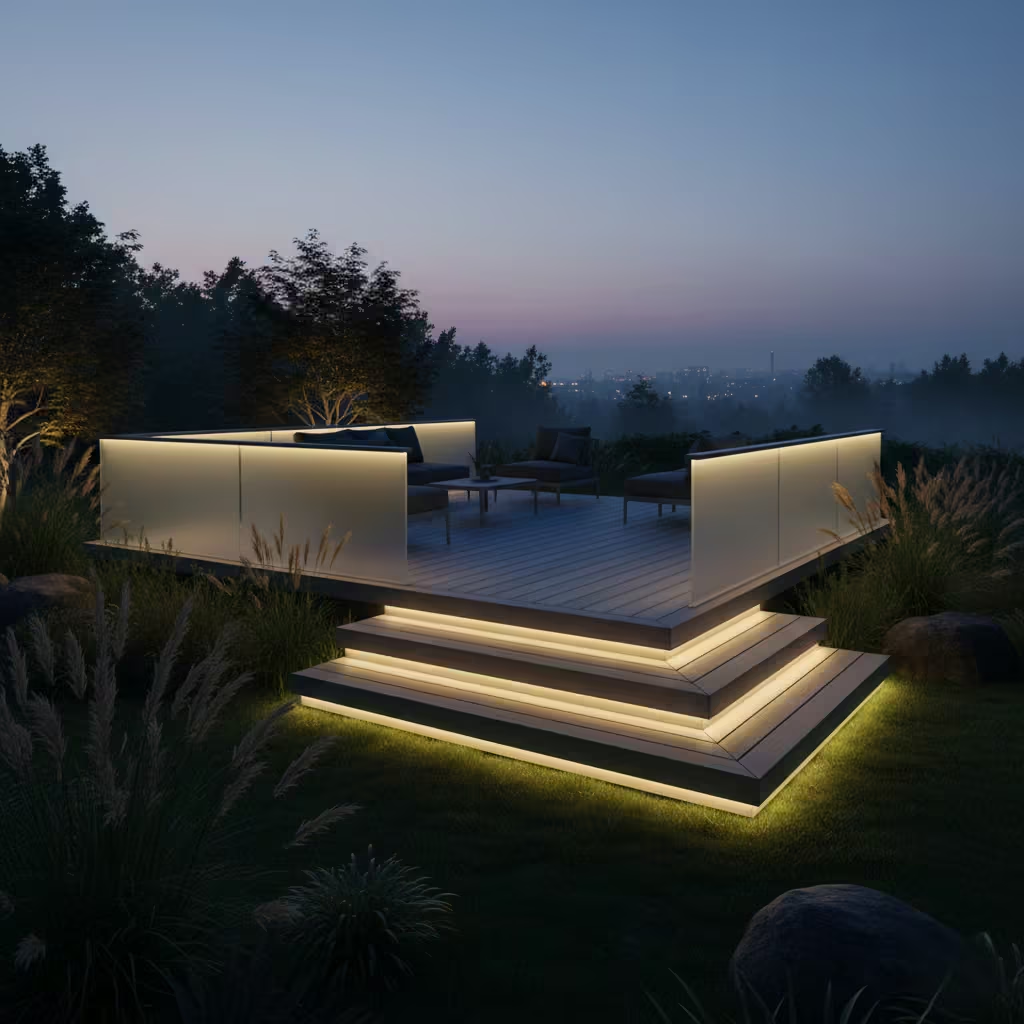
Soft edge lighting is about defining the boundary of a deck without drawing attention to the fixtures themselves. Rather than bright spotlights or harsh linear strips, this approach uses subtle illumination to gently outline the deck’s perimeter, enhancing safety, visual clarity, and atmosphere. In my experience, soft edge lighting transforms a simple platform into an inviting extension of the home, encouraging evening use while maintaining a sense of calm and spaciousness.
Typical placement and scale
Fixtures are integrated into the deck structure, either recessed into fascia boards, built into stair risers, or tucked beneath handrails. The goal is to allow light to skim across the decking surface or steps, creating a continuous, understated glow. Scale matters: small, low-profile fittings provide guidance without competing with other lighting layers or drawing attention away from the garden beyond.
Professional measurements and spacing
I typically position soft edge lights 100–150 mm (4–6 in) from the deck edge or handrail underside, depending on height. Spacing is usually 1–1.5 m (3–5 ft) for a continuous effect, though this can be adjusted to suit deck shape or furniture layout. Using warm LEDs (2700–3000K) helps maintain a welcoming, cohesive feel that aligns with other lighting layers in the garden.
Performance and visual comfort
Light should be low and directional, washing gently across the deck surface without creating glare or hotspots. Shielded fittings are essential to prevent direct eye contact when standing or seated. When combined with soft ambient or accent lighting, edge illumination provides both safety and atmosphere without dominating the overall composition.
Professional insight
In projects I’ve designed, soft edge lighting makes the difference between a deck that feels “used” and one that feels like a stage. By providing understated guidance and a gentle glow, it encourages movement, enhances safety, and adds a quiet layer of sophistication. The deck becomes an outdoor room that is welcoming long after the sun has set, without ever feeling artificially lit.
In-Ground Spotlights for Architectural Features
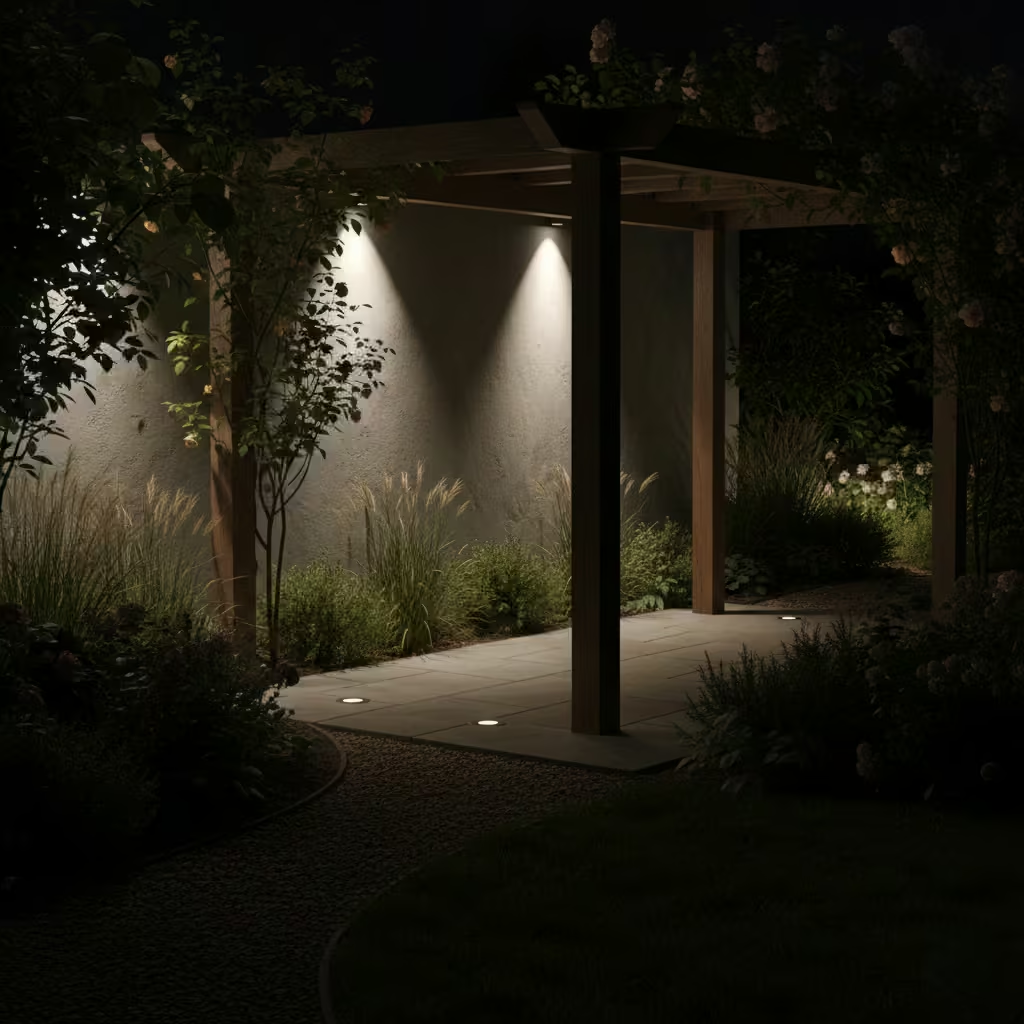
In-ground spotlights are designed to highlight architectural elements—walls, columns, pergolas, or bespoke garden structures without drawing attention to the fixtures themselves. The aim is to create a sculptural effect that reinforces the garden’s structure and hierarchy. Unlike uplighting from plants or boundary walls, in-ground spots establish a subtle sense of drama and form, emphasizing geometry, texture, and verticality while keeping the surrounding landscape in soft shadow.
Typical placement and scale
Fixtures are recessed flush with paving or lawn edges, positioned to aim precisely at the feature. The light source should be discreet and low-profile, disappearing entirely during the day. Scale is critical: overly powerful or large fixtures can dominate the view and distort the intended effect. I usually select fittings that provide a concentrated beam while blending seamlessly with the ground plane.
Professional measurements and spacing
For most features, a single in-ground spotlight 300–600 mm (12–24 in) from the base provides sufficient coverage. Beam angles of 10–30 degrees allow precise highlighting of columns, facades, or sculptures without spilling into pathways. For larger architectural elements, multiple fixtures may be arranged symmetrically, spaced 1.2–2 m (4–6 ft) apart, to create balanced illumination. Warm white LEDs (2700–3000K) maintain natural tonality, while cooler temperatures risk appearing stark or industrial.
Performance and visual comfort
The fixture must be fully shielded to prevent glare, especially when viewed from seating areas or through windows. Light should graze the surface, emphasizing form and texture rather than washing everything evenly. I often combine in-ground spotlights with softer ambient or wall-wash layers to preserve depth and avoid flattening the space.
Professional insight
I have found that in-ground spotlights are most effective when they are almost invisible—viewers notice the effect, not the source. When integrated early in the project and coordinated with material textures and garden composition, these lights transform architectural features into night-time focal points, giving the garden structure, hierarchy, and presence after dark.
Concealed Lighting Under Built-In Seating
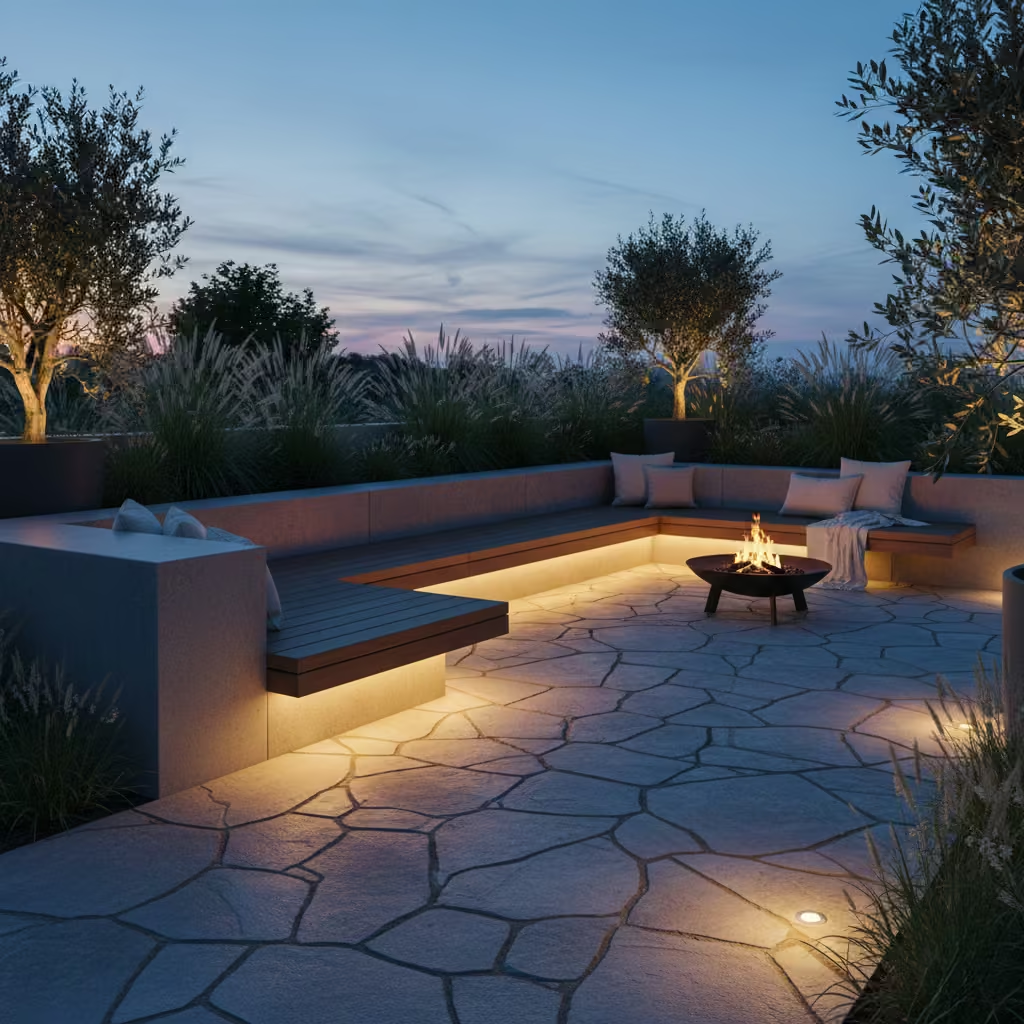
Lighting integrated beneath built-in seating is about subtlety, comfort, and spatial definition. Rather than overt illumination, this approach provides a gentle glow that visually “floats” the seating above the ground while improving circulation and safety. In my experience, concealed under-seat lighting transforms terraces, patios, and garden rooms into spaces that feel intentionally designed and inviting, extending their usability well into the evening.
Typical placement and scale
Fixtures are recessed under bench seats, ledges, or planter edges, shielded from direct view. Placement should illuminate the floor plane or the base of the seating without creating hotspots or glare. Scale is modest—linear LEDs or small recessed units work best, blending with the structure and emphasizing form rather than brightness.
Professional measurements and spacing
I typically position under-seat lighting 100–150 mm (4–6 in) from the floor, with continuous or evenly spaced linear fittings for consistent coverage. Spacing depends on bench length: for runs of 2–3 m (6–10 ft), one or two linear strips often suffice. Warm white LEDs (2700–3000K) produce a soft, inviting glow that complements other lighting layers.
Performance and visual comfort
The key is diffusion. Light should be indirect and shielded so that eyes are never exposed to the source when approaching the seating. I often combine under-seat lighting with subtle step or path lighting to create layered safety cues while preserving a calm, intimate atmosphere.
You May also Like: What an English Country Entrance Is Actually Trying to Do
Outdoor Kitchen Task Lighting That Feels Invisible
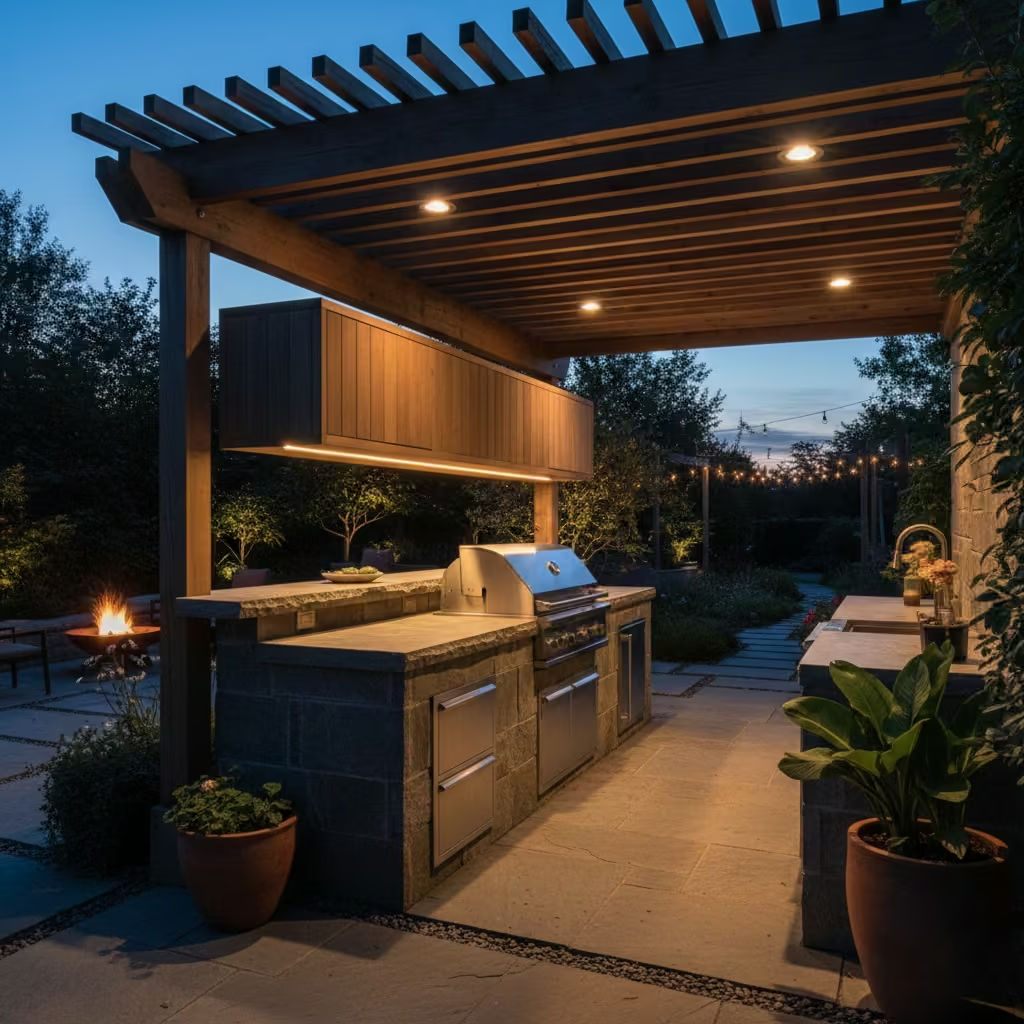
Task lighting in an outdoor kitchen should support function without calling attention to itself. The goal is clarity and precision illuminating work surfaces, grills, and prep areas while preserving the overall atmosphere. I approach it as a hidden layer: the lighting should feel natural and integrated, letting the kitchen perform at night without becoming visually dominant or distracting from the surrounding garden.
Typical placement and scale
Fixtures are typically recessed under overhead cabinets, pergola beams, or integrated within shelving and canopy structures. The aim is to cast light directly onto countertops, cooking zones, and prep areas while keeping the fittings out of sight. Small linear LEDs or directional recessed downlights work best; oversized units can dominate visually and flatten the space.
Professional measurements and spacing
For work surfaces 900–1,050 mm (35–41 in) high, I usually install lighting 150–200 mm (6–8 in) above the counter plane. Spacing depends on fixture output and beam spread: a 1–1.5 m (3–5 ft) interval is typical for continuous illumination. Beam angles of 30–45 degrees focus light where it is needed without spilling into seating zones. Warm white (2700–3000K) maintains a comfortable, cohesive evening environment.
Performance and visual comfort
Shielding and directionality are critical. Task light should avoid glare into adjacent seating or entertaining areas. Diffusers or narrow beams help maintain a calm atmosphere while still providing functional visibility for food preparation. Combined with ambient or accent layers, this approach ensures the kitchen is fully usable without standing out.
Professional insight
In my experience, invisible task lighting is a hallmark of high-quality outdoor kitchen design. When executed correctly, it allows the space to function efficiently while keeping the focus on the food, the garden, and the people using it. The effect is subtle but essential: the kitchen performs flawlessly at night while remaining visually calm and inviting.
Outdoor Kitchen Task Lighting That Feels Invisible
Feature pendant lighting is about creating a central point of focus in a covered terrace while providing functional illumination for dining or lounging areas. Unlike general overhead lighting, a well-chosen pendant defines the space, anchors furniture arrangements, and adds character without overwhelming the garden beyond. I use this approach when the terrace has sufficient ceiling height and structure to support a visually engaging fixture that also enhances usability.
Typical placement and scale
Pendants should hang directly above key activity zones, such as dining tables or seating clusters, with sufficient clearance above head height to avoid obstruction. Scale is crucial: fixtures must be proportional to both the terrace dimensions and the furniture beneath. Oversized pendants in small spaces can feel oppressive, while fixtures that are too small fail to create presence.
Professional measurements and spacing
I typically position pendants 2.1–2.4 m (7–8 ft) above the table surface for comfortable clearance. For terraces over 3–4 m (10–13 ft) wide, multiple pendants spaced evenly may be used to maintain balance and even illumination. A warm colour temperature (2700–3000K) helps the terrace feel inviting while complementing surrounding ambient and accent lighting layers.
Performance and visual comfort
The key is to provide sufficient illumination for tasks eating, reading, or socialising without creating harsh glare. Shielded bulbs, diffusers, or layered designs that combine downlight and soft glow often produce the most balanced effect. A pendant should feel part of the architectural structure rather than an afterthought.
Professional insight
In my experience, a well-chosen pendant elevates a covered terrace from a simple roofed area to a defined outdoor room. It gives the space identity, guides furniture placement, and ensures that evening use is both comfortable and visually composed. When integrated with layered lighting and considered from the outset, feature pendants provide both atmosphere and function, anchoring the terrace elegantly within the wider garden.
Lantern-Style Lighting for Transitional Garden Zones
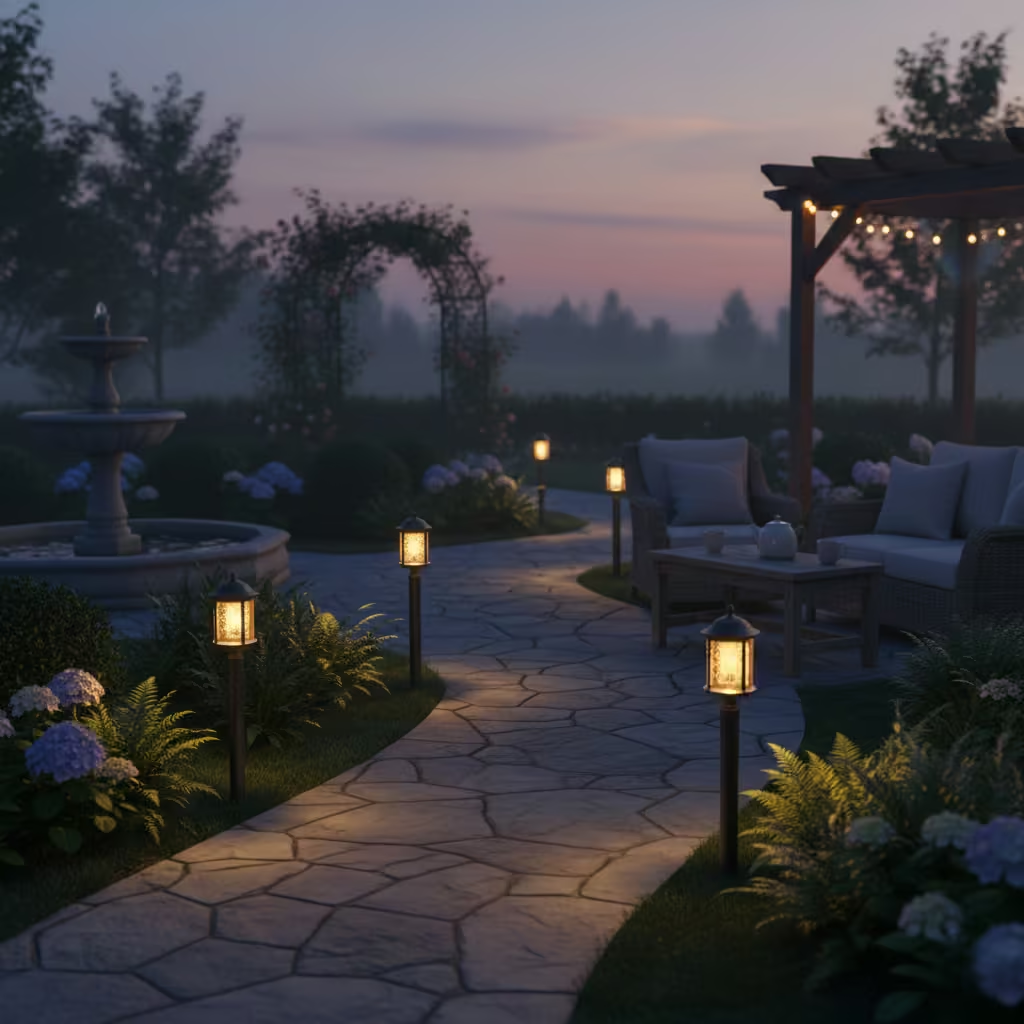
Lantern-style lighting is perfect for transitional zones pathways between garden areas, entrances, or small seating nooks where a subtle, approachable glow is needed. The aim is to provide orientation and atmosphere simultaneously, creating points of interest that guide movement while enhancing the garden’s narrative. I often use lanterns to bridge formal and informal spaces, adding charm without overpowering the overall lighting composition.
Typical placement and scale
Lanterns can be mounted on posts, walls, or even low plinths, depending on context. They should be scaled to the surrounding environment: smaller units suit intimate pathways or narrow borders, while larger lanterns work well at the junction of multiple garden zones. The fixture should complement the landscape style, whether traditional, contemporary, or transitional, without competing with surrounding planting or architectural features.
Professional measurements and spacing
For post-mounted lanterns along paths, I usually place them 1.0–1.2 m (3–4 ft) above ground, with intervals of 2–3 m (6.5–10 ft) depending on the level of illumination required and the lumen output. Wall-mounted lanterns are typically positioned at 1.8–2.0 m (6–6.5 ft) above paths or steps. Warm white light (2700–3000K) creates a welcoming, gentle glow, ideal for transitional areas that are used casually but need safety cues.
Performance and visual comfort
The lantern should be shielded or fitted with frosted glass to diffuse light evenly, avoiding glare while casting soft pools on the ground or nearby surfaces. The goal is subtle visibility that feels natural, blending with ambient or accent layers rather than standing out as a primary light source. Lanterns work best when integrated into a layered lighting scheme, complementing uplighting, path lights, or pergola lighting.
Professional insight
In my experience, lantern-style lighting is most effective when it blends function with charm. Even a single well-placed lantern can elevate a transitional area, making movement between spaces feel intentional and inviting. When combined with other lighting layers, these fixtures help the garden read cohesively, adding subtle guidance, texture, and atmosphere that supports evening use without overpowering the design.
Lighting Water Features Without Harsh Reflection
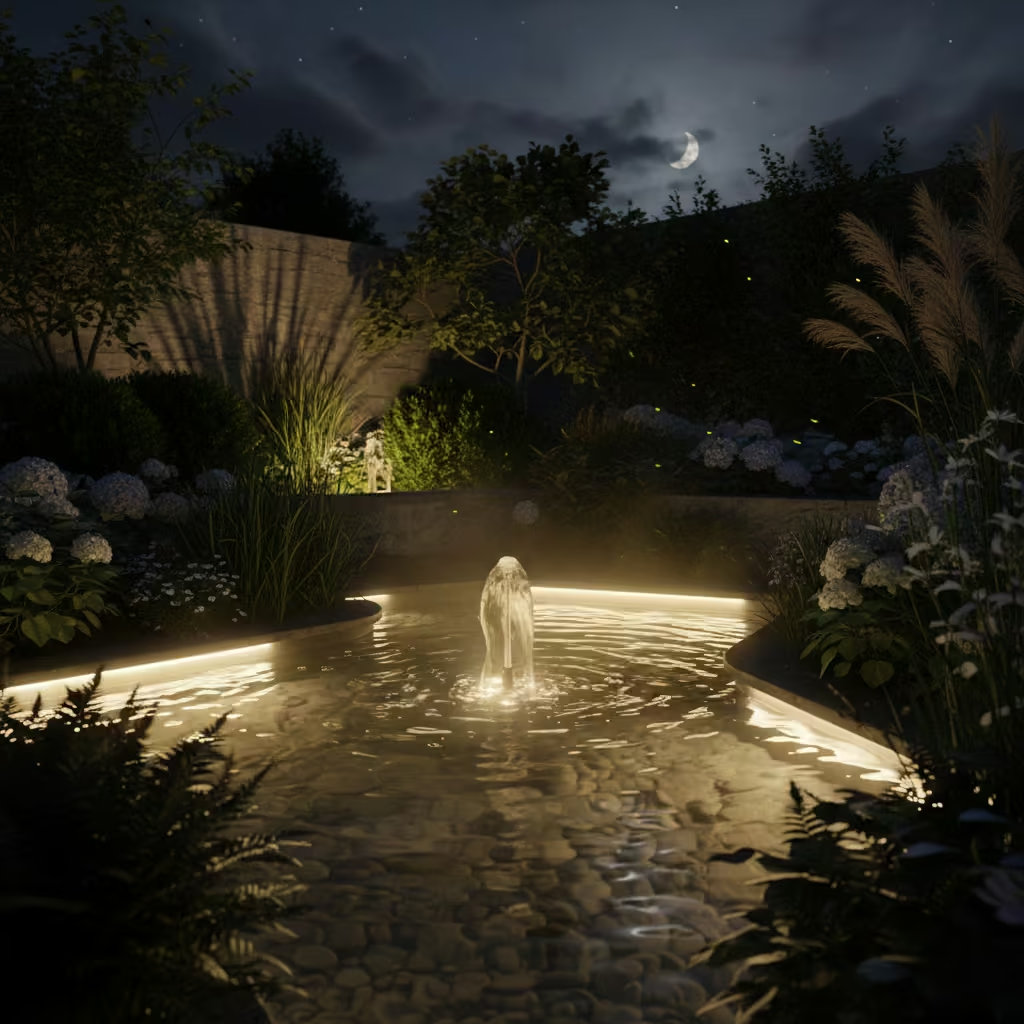
Water features are among the most dynamic elements in a garden, and lighting them properly can transform them into night-time focal points. The goal is to accentuate movement, texture, and form ripples, falls, or still surfaces without creating harsh reflections or glare that distract from the effect. I approach water feature lighting as part of the overall landscape composition, integrating illumination in a way that feels natural and serene rather than theatrical.
Typical placement and scale
Fixtures are usually placed at low angles along the feature’s perimeter, recessed into edging, submerged with waterproof fittings, or hidden in planting to wash the surface gently. Scale should be proportional to the water feature: small fountains need subtle single points of light, while ponds or cascades may require multiple low-intensity fittings to highlight depth and movement without overwhelming the surrounding space.
Professional measurements and spacing
For most garden-scale water features, I position fixtures 150–300 mm (6–12 in) above or below the water line, depending on the desired effect. Spotlights with beam angles of 15–30 degrees are ideal to highlight flow or texture without spilling across the surface excessively. In linear features, spacing of 1.5–3 m (5–10 ft) between lights usually creates balanced illumination. Warm LEDs (2700–3000K) maintain a natural, inviting glow, avoiding stark white reflections.
Performance and visual comfort
Avoid placing lights directly in the line of sight from seating areas to prevent harsh glare. Fixtures should be shielded, angled carefully, or frosted to soften the light on the moving surface. Reflections can enhance depth and drama if controlled, but uncontrolled reflections can feel chaotic and flatten the visual effect. Layering with subtle uplighting on nearby planting or walls can provide context and depth.
Professional insight
In my experience, the most successful water feature lighting is quiet yet deliberate. By carefully controlling angles, intensity, and layering with surrounding garden lighting, the water becomes an elegant, living sculpture at night. It enhances the atmosphere without dominating it, reinforcing the garden’s structure, texture, and rhythm while maintaining a natural, calming presence.
Pool and Spa Perimeter Lighting for Safety and Calm
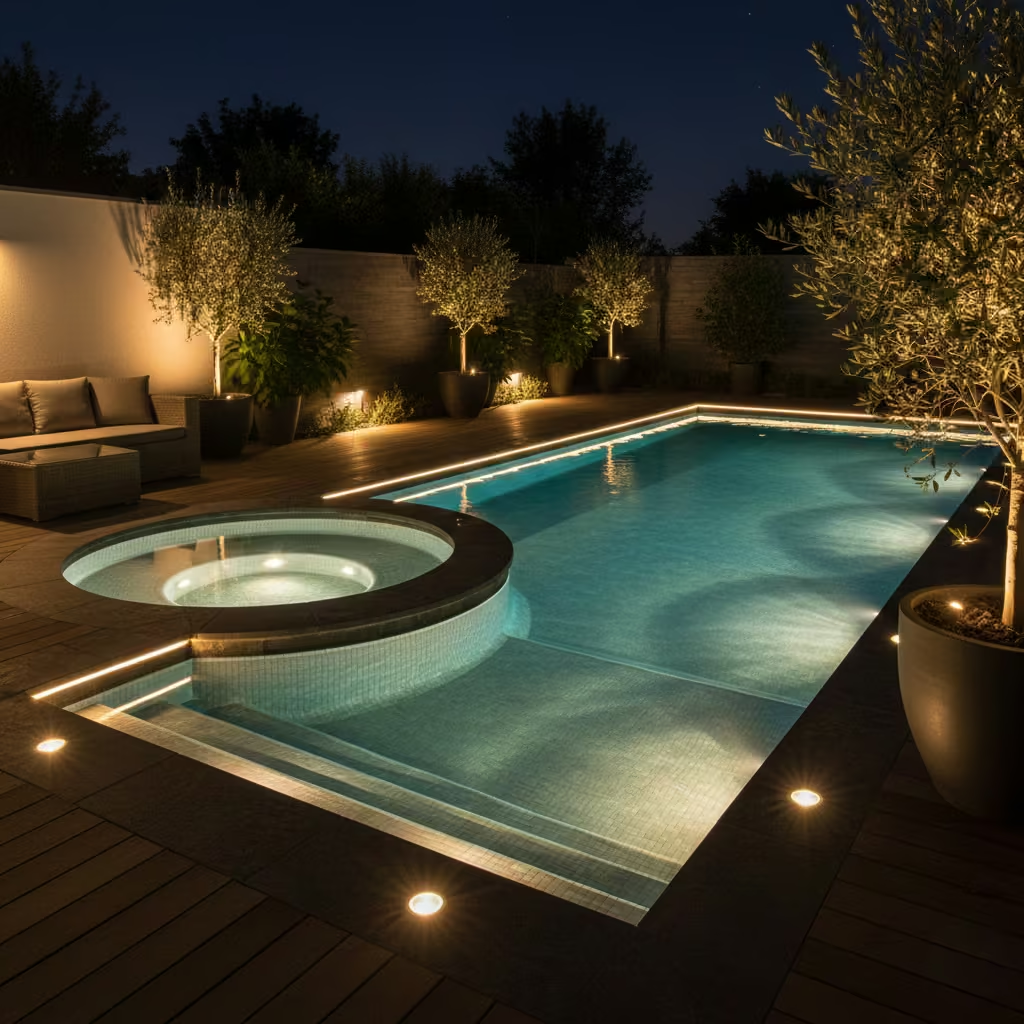
Perimeter lighting around pools and spas balances two critical goals: safety and atmosphere. The objective is to define edges clearly, prevent accidents, and subtly highlight water surfaces without creating harsh glare or overly bright zones. In my experience, thoughtfully designed pool perimeter lighting transforms a functional area into a serene evening retreat, extending usability while maintaining a calm, inviting ambience.
Typical placement and scale
Fixtures are typically recessed into coping, installed in low walls, or integrated into surrounding decking or paving. They should outline the water’s edge without overwhelming the surface itself. Scale is important: small, linear LEDs or low-profile spotlights maintain proportion with pool or spa dimensions and preserve a relaxed, understated aesthetic.
Professional measurements and spacing
I generally position lights 150–250 mm (6–10 in) above the water level, or flush with coping edges. For long pool runs, spacing of 1.5–3 m (5–10 ft) provides continuous guidance without harsh bright spots. Beam angles of 20–40 degrees offer gentle illumination that defines boundaries while keeping reflections soft. Warm white LEDs (2700–3000K) help maintain a welcoming, non-clinical feel.
Performance and visual comfort
Lighting should be low and directional, avoiding glare into seating areas or across the pool surface. I often combine perimeter illumination with underwater LEDs or subtle landscape lighting to create layered effects, enhancing depth and drama without compromising calmness. Proper shielding and careful placement prevent visual distraction and maintain a sense of tranqu ility.
Professional insight
From my experience, the most successful pool and spa perimeter lighting feels invisible yet provides reassurance. Guests navigate the space safely, the water glows gently, and the surrounding garden remains soft and inviting. Done right, it creates a calm, confident environment where both function and atmosphere are fully considered, enhancing the night-time experience without ever feeling artificial.
Driveway Lighting That Enhances Arrival Experience
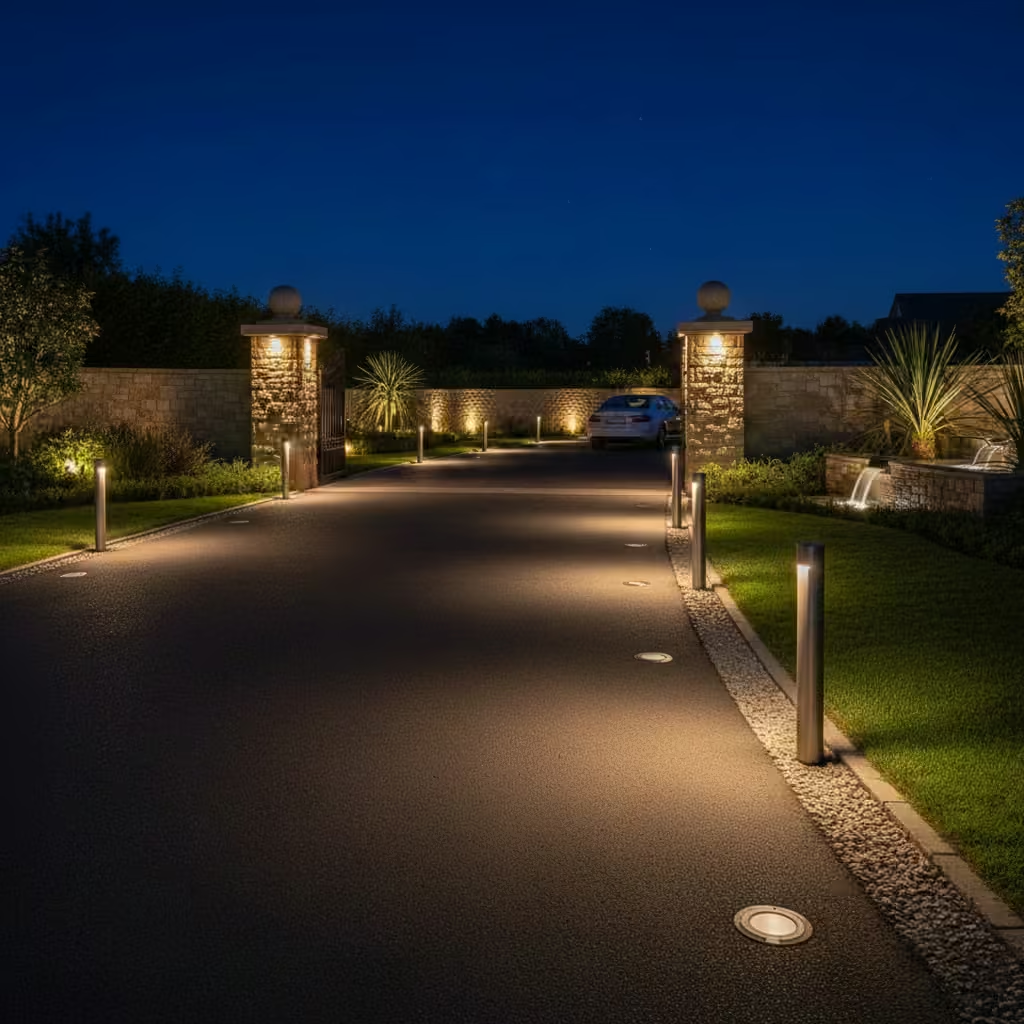
Driveway lighting is about more than just safety it’s the first impression of a home after dark. Properly considered lighting guides vehicles and pedestrians, highlights key architectural elements, and creates a sense of arrival without feeling overlit or commercial. In my projects, driveway lighting sets the tone for the entire property, combining function, style, and subtle drama to make every approach feel deliberate and welcoming.
Typical placement and scale
I typically use low-level bollards, recessed curb lights, or subtle wall washes along the driveway edge. Placement should follow the route naturally, emphasizing curves, junctions, or entrances without interrupting sightlines. Fixtures must be scaled proportionally: oversized fittings on residential drives often look out of place, while small, understated units blend seamlessly with the landscape.
Professional measurements and spacing
Bollards or low-level lights are generally installed 600–900 mm (24–36 in) above the driveway surface, spaced 3–4 m (10–13 ft) apart depending on lumen output and desired rhythm. Recessed or in-ground units should be positioned 200–300 mm (8–12 in) from the edge for visibility without obstruction. Warm LEDs (2700–3000K) are preferable to maintain a soft, inviting glow and harmonize with surrounding landscape lighting.
Performance and visual comfort
The key is guidance without glare. Fixtures should be shielded or angled to avoid blinding drivers and pedestrians while maintaining a clear, intuitive path. Combining low-level and subtle accent lighting on walls, gates, or planting enhances spatial understanding and creates depth, contributing to a sense of arrival that is both confident and understated.
Professional insight
In my experience, driveway lighting succeeds when it feels effortless: it guides, reassures, and highlights key architectural moments without drawing attention to itself. When layered with subtle accent lighting and carefully planned spacing, it transforms a routine approach into a thoughtful, elegant first experience, reinforcing the property’s overall design narrative from the very moment you arrive.
Layered Entrance Lighting for Front Gardens
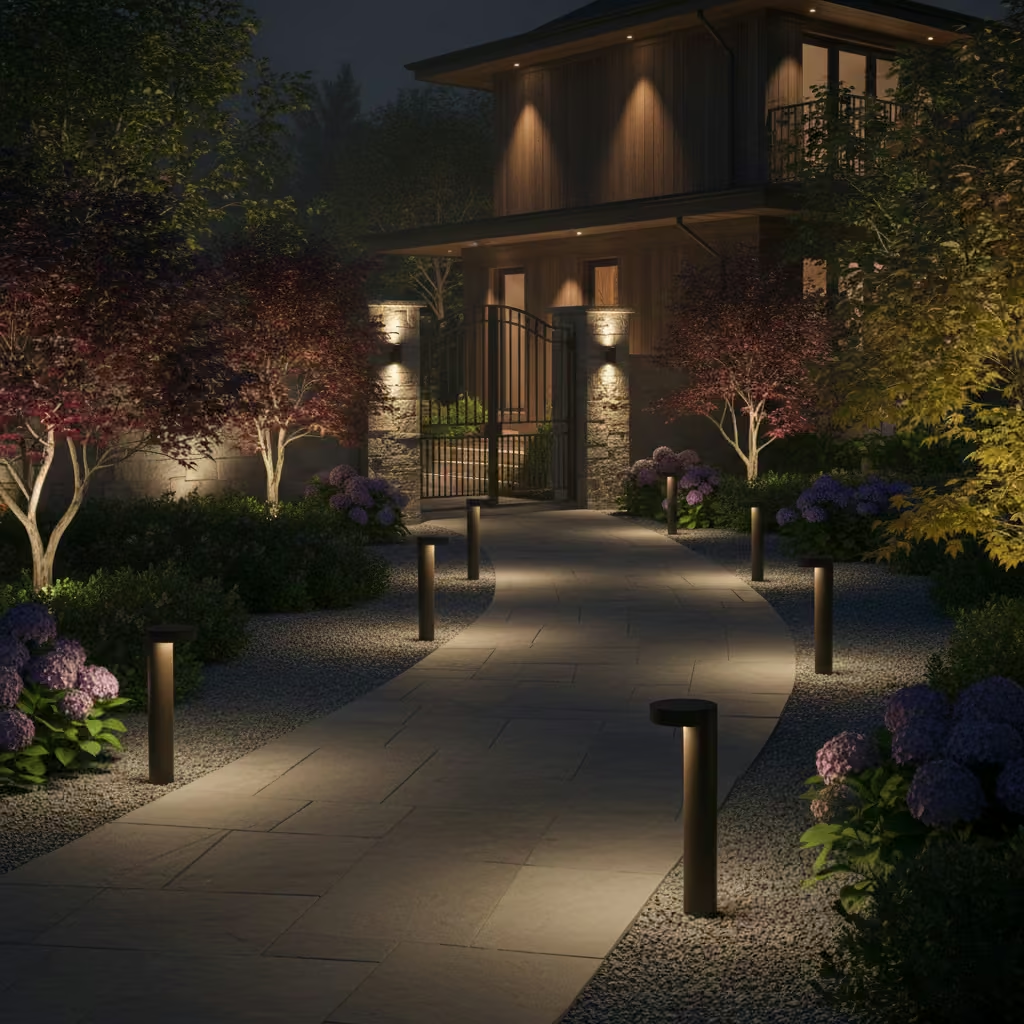
Layered entrance lighting creates a welcoming, secure, and visually appealing approach to the home. The goal is to combine functional illumination with architectural and landscape storytelling, guiding visitors safely while enhancing key features such as gates, pathways, planting, and facades. In my experience, a front garden designed with layered lighting immediately signals a sense of care, proportion, and intentionality without ever feeling overlit or artificial.
Typical placement and scale
I typically combine three layers:
- Path lighting along walkways for safety and subtle guidance
- Feature lighting on architectural elements, gates, or focal planting
- Ambient or wall-wash lighting to unify space and provide depth
Fixtures should be scaled to the front garden’s proportions. Smaller bollards or recessed path lights suit narrow approaches, while larger wall-mounted or feature fittings work for more expansive drives or terraces. The arrangement should maintain balance without cluttering sightlines or overpowering planting.
Professional measurements and spacing
Path lights are usually installed 600–900 mm (24–36 in) above ground, spaced 2–3 m (6.5–10 ft) apart depending on lumen output. Feature lights, such as wall washes or accent uplights, are positioned 150–300 mm (6–12 in) above the surface or integrated into planting beds for controlled illumination. Warm LEDs (2700–3000K) maintain a natural, inviting tone that harmonizes with both building materials and landscape.
Performance and visual comfort
The key is layering: no single fixture should dominate, and light should be distributed to support safe movement while revealing texture and form. Shielded or diffused fittings prevent glare, and directional beams allow each layer to contribute purposefully. By combining ambient, task, and accent light, entrances feel composed, welcoming, and legible even after dark.
Fence-Line Lighting to Extend Visual Boundaries
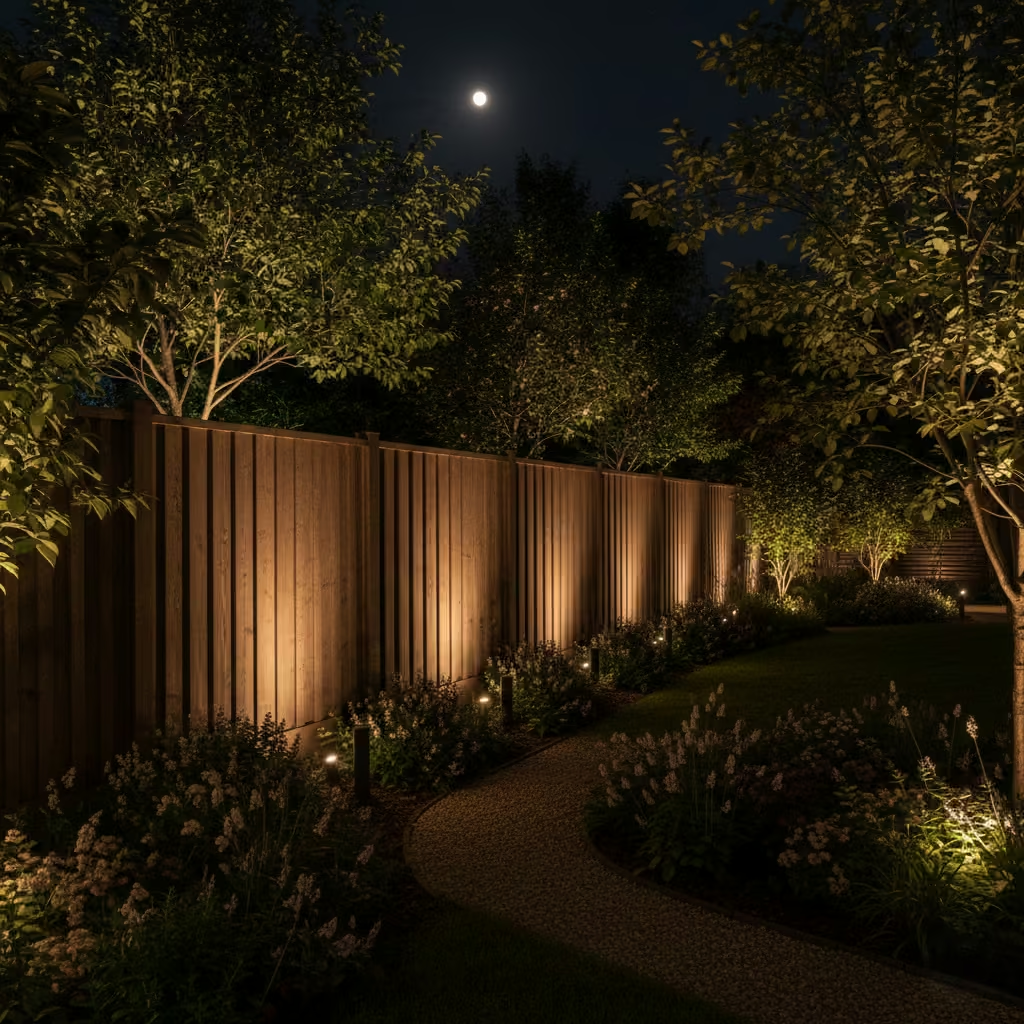
Fence-line lighting transforms boundaries from static edges into subtle extensions of the garden’s composition. The goal is to create a sense of depth and continuity, drawing the eye along perimeter lines without overwhelming the space. In my experience, well-executed fence lighting enhances the perception of scale, frames planting, and gives the garden a cohesive night-time identity while remaining understated.
Typical placement and scale
Fixtures are generally mounted low on fence posts, recessed into horizontal rails, or positioned at the base of the fence to wash the surface upward. Scale is important: small, discreet fittings are preferred so the fence recedes into the background while the light emphasizes form and texture. Linear or narrow-beam spotlights work best, maintaining subtlety while creating a continuous visual guide.
Professional measurements and spacing
I typically position fence-mounted lights 150–300 mm (6–12 in) above ground, with spacing of 2–3 m (6.5–10 ft) for even illumination. Narrow beam angles (15–30 degrees) help define the boundary without spilling into adjacent garden zones or neighboring properties. Using warm LEDs (2700–3000K) preserves a natural, soft glow that complements planting and other garden lighting layers.
Performance and visual comfort
Fence-line lighting should be indirect and shielded to avoid glare from nearby seating or windows. The effect should emphasize linearity and continuity rather than creating hotspots. Layering with soft ambient lighting or uplighting on nearby trees and shrubs enhances depth and prevents the fence from feeling isolated or overly rigid.
Staircase Lighting for Sloped Gardens
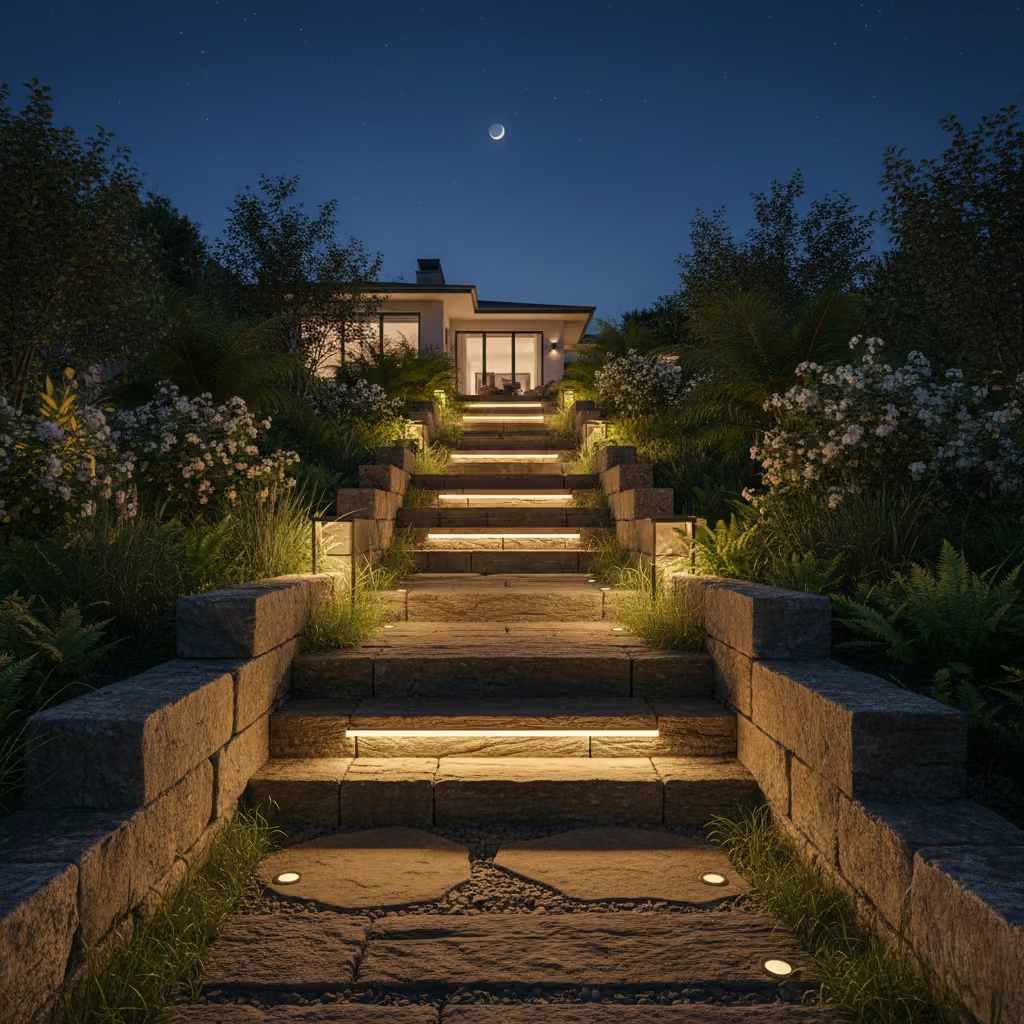
In sloped gardens, staircase lighting is as much about spatial confidence as it is about safety. The aim is to make level changes legible after dark without turning the steps into a visual feature in their own right. When handled well, lighting clarifies movement, reinforces the rhythm of the landscape, and allows the garden to be used naturally at night rather than cautiously. In my experience, poorly lit steps are one of the main reasons outdoor spaces stop being used after dusk.
Typical placement and scale
The most effective approach is to integrate lighting directly into the stair structure. Recessed step lights set into risers, low-level wall lights within adjacent retaining walls, or concealed strip lighting beneath stair nosings all work well. Fixtures should be compact and visually quiet so the stone, concrete, or timber remains the focus during the day. Avoid surface-mounted fittings on treads, which feel intrusive and are prone to damage.
Professional measurements and spacing
For comfortable and safe illumination, I typically specify step lights installed 150–200 mm (6–8 in) above the tread line, either centered on each riser or staggered every second step for longer stair runs. On wide staircases, lights can be spaced at 900–1200 mm (35–47 in) intervals to maintain even coverage without over-lighting. Warm white LEDs at 2700–3000K provide sufficient clarity while preserving a calm, residential feel.
Light control and user comfort
The light should wash gently across the tread surface, not shine directly into the eye. Shielded fittings or asymmetric beams are essential, particularly where steps align with seating areas or interior sightlines. In terraced gardens, combining step lighting with soft ambient lighting at landings helps visually anchor each level and reduces contrast fatigue.
Professional insight
In real projects, staircase lighting succeeds when it feels almost unnoticed. When clients tell me they stop thinking about the steps and simply move through the garden naturally, I know the lighting is doing its job. In sloped gardens especially, this kind of restraint transforms difficult terrain into a space that feels calm, navigable, and genuinely usable after dark.
Fire Feature Accent Lighting for Night-Time Focus
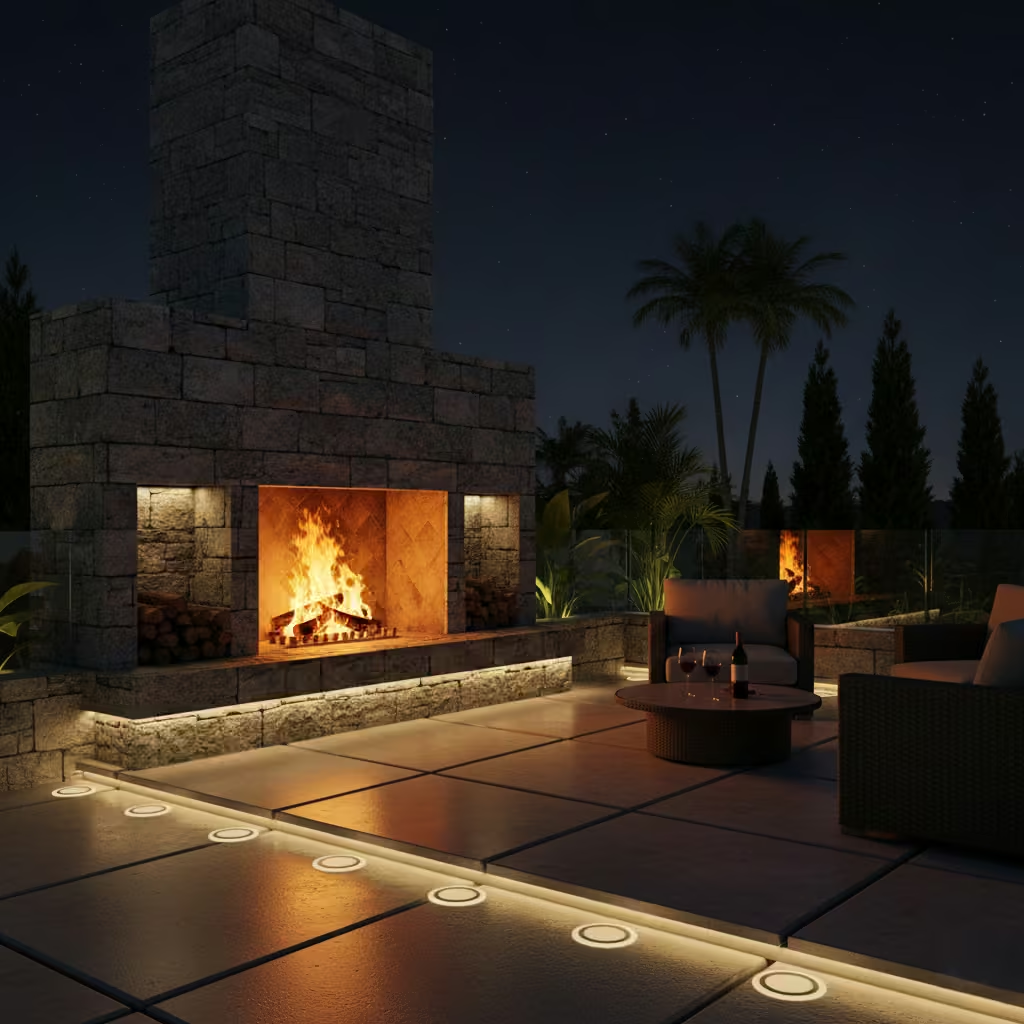
Fire features naturally draw attention after dark, but without considered lighting they often disappear into shadow once the flames die down. Accent lighting around a fire pit or outdoor fireplace is not about competing with the fire itself, but about anchoring it within the wider garden composition. The goal is to maintain a sense of focus, depth, and spatial clarity before the fire is lit and long after it has been extinguished.
Typical placement and scale
The most successful fire feature lighting is indirect and discreet. I typically use low-level recessed lights set into surrounding paving, integrated lighting within seating plinths, or subtle uplighting aimed at the vertical mass of a fireplace structure. Fixtures should remain visually quiet and set back from the fire source to avoid heat damage and visual clutter. The fire remains the star; the lighting simply frames it.
Professional measurements and spacing
For recessed or perimeter lighting, I generally specify fittings positioned 300–600 mm (12–24 in) away from the fire feature edge. Light levels should be modest, often 50–150 lumens per fitting, just enough to define form without overpowering the natural flame. Warm colour temperatures around 2200–2700K complement firelight and prevent tonal clash.
Light control and visual comfort
Shielded fittings and low-glare optics are essential, particularly when seating is arranged around the fire. Any direct glare quickly breaks the intimacy of the setting. In wind-exposed gardens, lighting should be positioned to avoid casting moving shadows that can feel distracting or uncomfortable when combined with flame movement.
Professional insight
In my experience, the most atmospheric fire features are supported by lighting you barely notice. When the surrounding forms remain softly visible and the flame feels naturally grounded within the space, the garden stays inviting even on nights when the fire is used sparingly or not at all.
Seasonal Planting Highlighted with Adjustable Spotlights
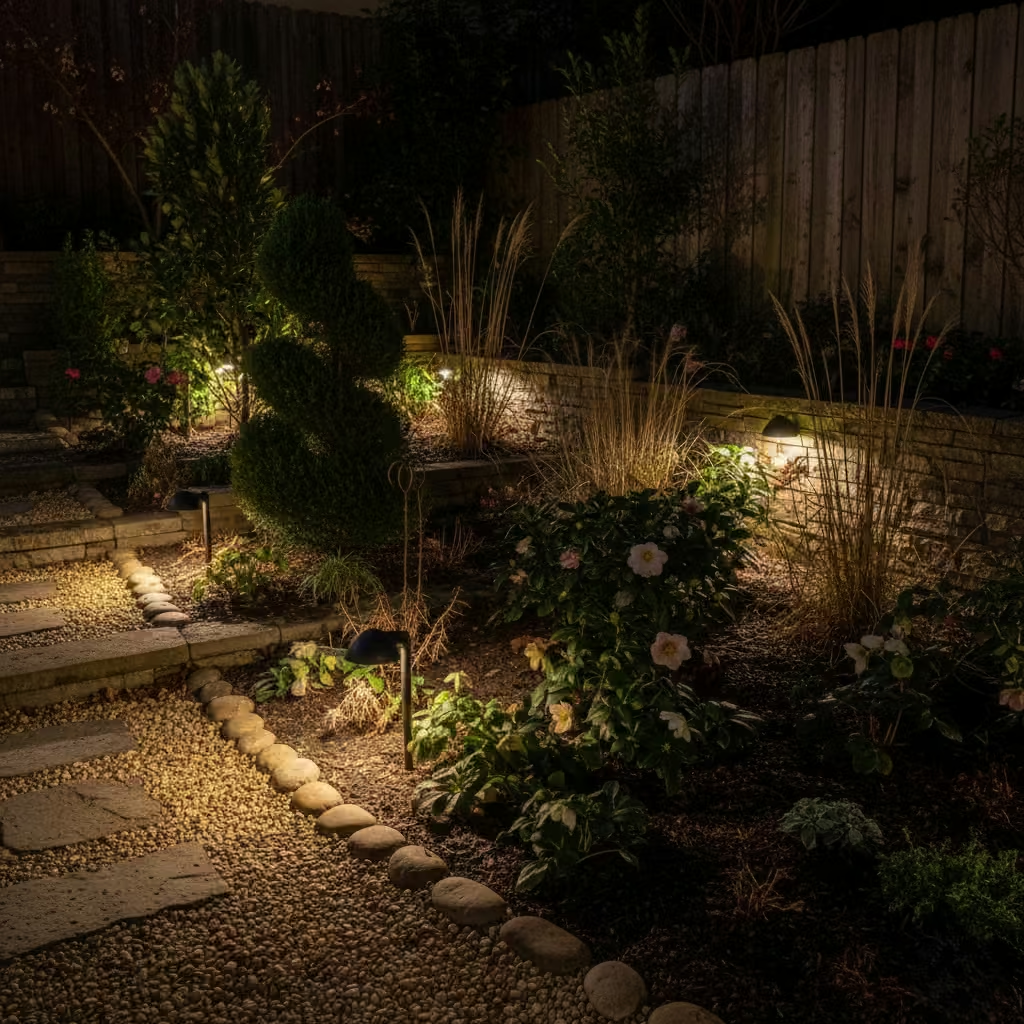
Seasonal planting brings movement and change to a garden, and adjustable spotlights allow the lighting scheme to evolve alongside it. The intent here is flexibility rather than permanence. Instead of locking the garden into a fixed composition, these fittings let you respond to growth, pruning, and seasonal interest, ensuring key plants continue to read clearly after dark without constant reinstallation.
Typical placement and scale
Adjustable spotlights are best concealed within planting beds, gravel margins, or low ground cover so they remain visually discreet by day. I avoid placing them directly at the base of delicate plants. Instead, I position them slightly offset to create depth and shadow, which adds texture rather than flattening foliage. Compact, low-profile fittings integrate more successfully in residential gardens.
Professional measurements and aiming guidance
In most gardens, spotlights positioned 300–500 mm (12–20 in) from the plant base provide enough throw for shrubs and ornamental grasses. For small trees or feature planting, this can extend to 600–900 mm (24–36 in). Adjustable heads should be aimed at a 30–45° angle to avoid harsh uplighting and excessive glare. I generally specify warm white LEDs at 2700K, with modest outputs of 150–300 lumens to maintain balance.
Light control and adaptability
The real value of adjustable fittings lies in their ability to be re-aimed as planting matures. Shielded housings and glare hoods are essential, particularly where sightlines align with seating or interior windows. When used thoughtfully, these lights create layered depth without locking the garden into a static night-time scene.
Lighting Garden Sculptures and Statement Planters
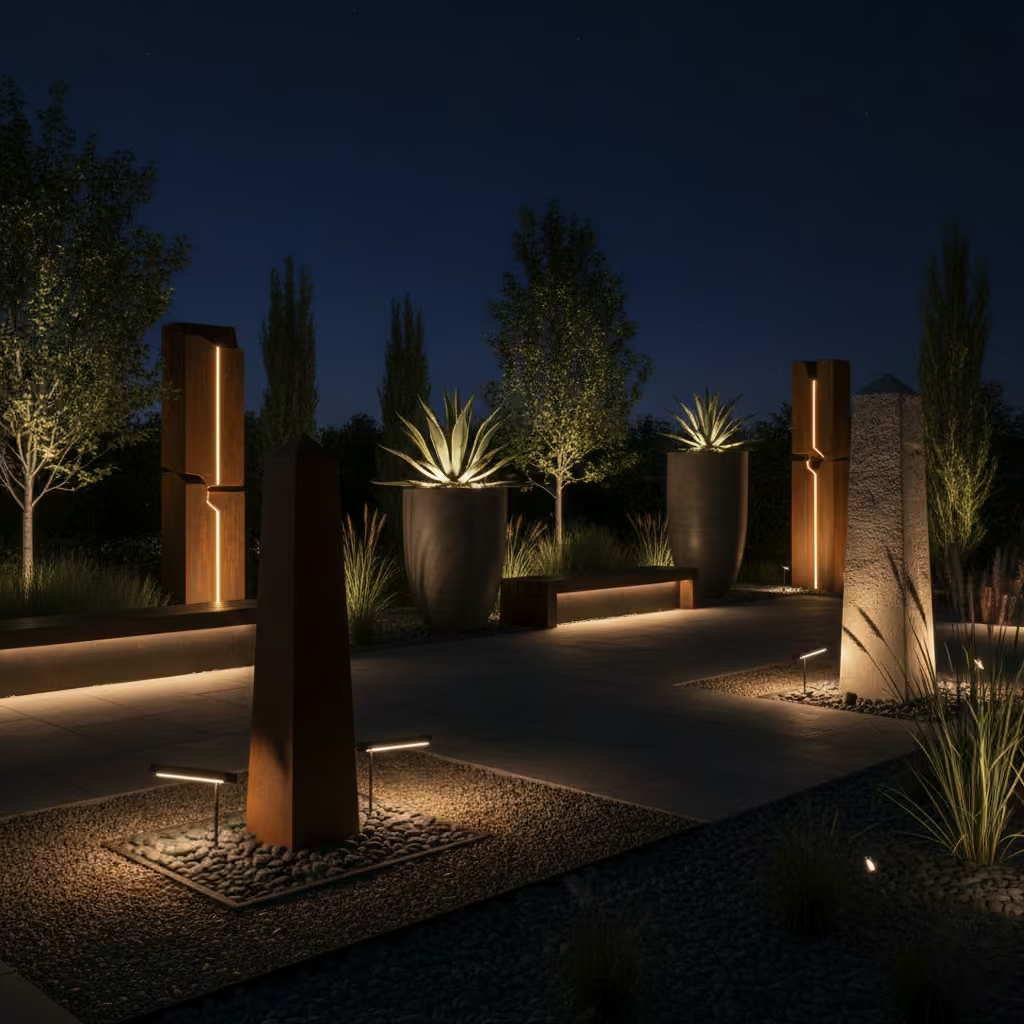
Garden sculptures and statement planters act as visual anchors, particularly in minimalist or architecturally led landscapes. Lighting them is not about turning them into theatrical displays, but about giving them presence after dark so the garden retains its structure and hierarchy. The goal is to reinforce form, texture, and materiality, allowing these elements to read as intentional focal points rather than disappearing into shadow.
Typical placement and scale
I generally position light sources outside the immediate footprint of the object, never directly beneath it. Side-lighting or shallow uplighting produces softer shadows and reveals surface detail more effectively than frontal illumination. For tall planters or vertical sculptures, a pair of lower-output fittings placed asymmetrically often gives a more sculptural result than a single central spotlight.
Professional measurements and positioning
For most freestanding features, placing spotlights 400–700 mm (16–28 in) away from the base allows the light to spread naturally across the form. Taller pieces may require lights set back up to 1 m (39 in). Beam angles of 20–40° work well, depending on object width. I typically specify 150–300 lumens at 2700K to avoid harsh contrast and maintain a residential scale.
Light control and material sensitivity
Shielded fittings are essential to prevent glare, especially where sculptures sit near circulation routes or seating. Highly reflective materials, such as polished stone or metal, require lower output and careful aiming to avoid hotspots. Textured finishes, by contrast, benefit from grazing light that enhances depth and shadow.
Professional insight
In my experience, the most successful sculpture lighting is almost understated. When a piece quietly holds its place in the landscape at night, without demanding attention, it feels integrated rather than imposed. That restraint is what separates considered garden lighting from decoration.
Outdoor Bar and Serving Zone Lighting
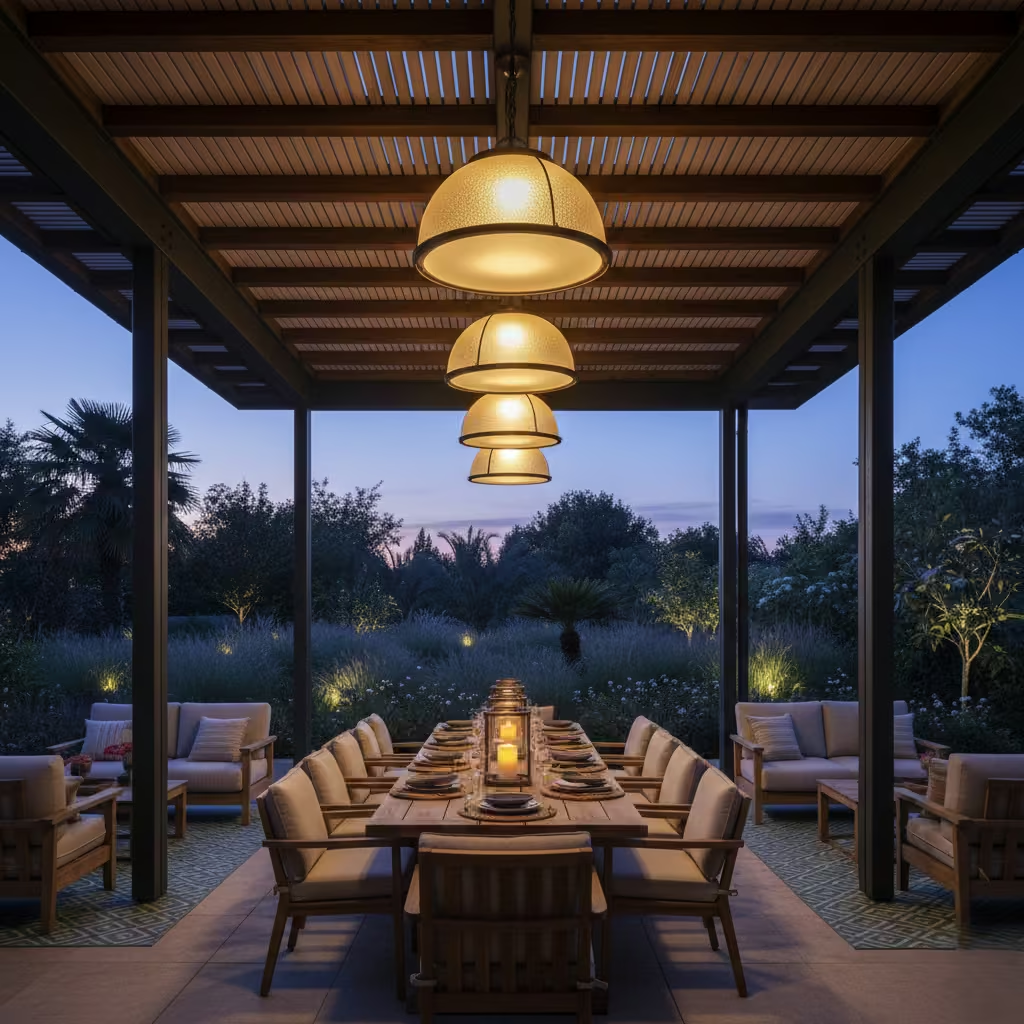
Outdoor bars and serving zones sit at the intersection of function and atmosphere. The lighting needs to support practical tasks such as pouring, prepping, and serving, while still feeling relaxed enough to suit evening social use. The intent is to make the space usable without making it feel like a commercial back-of-house environment. When done well, the lighting disappears into the architecture and the experience feels effortless.
Typical placement and scale
The most effective schemes combine concealed task lighting with soft ambient layers. I often integrate low-glare LED strips beneath bar counters, shelving, or overhead structures, supported by discreet downlights positioned above work surfaces. Fixtures should align precisely with the bar layout to avoid shadows on preparation areas and keep the visual language clean.
Professional measurements and light levels
For bar counters and prep surfaces, I typically specify lighting positioned 450–600 mm (18–24 in) above the work surface when overhead, or concealed directly beneath counter overhangs. Task lighting should deliver around 300–500 lux on the working plane, while ambient lighting remains lower to maintain mood. Warm white LEDs at 2700–3000K strike the right balance between clarity and comfort.
Light control and visual comfort
Glare control is critical, especially where guests are seated opposite the bar. Diffused light sources and recessed channels help avoid visible hotspots. Dimmable circuits allow the space to transition easily from functional early evening use to a softer, more relaxed atmosphere later on.
Professional insight
I have found that the best outdoor bars feel inviting even when no one is actively using them. Subtle lighting under counters or shelving keeps the zone legible after dark and signals hospitality, without ever announcing itself as a lighting feature.
Subtle Lighting for Garden Rooms and Studios
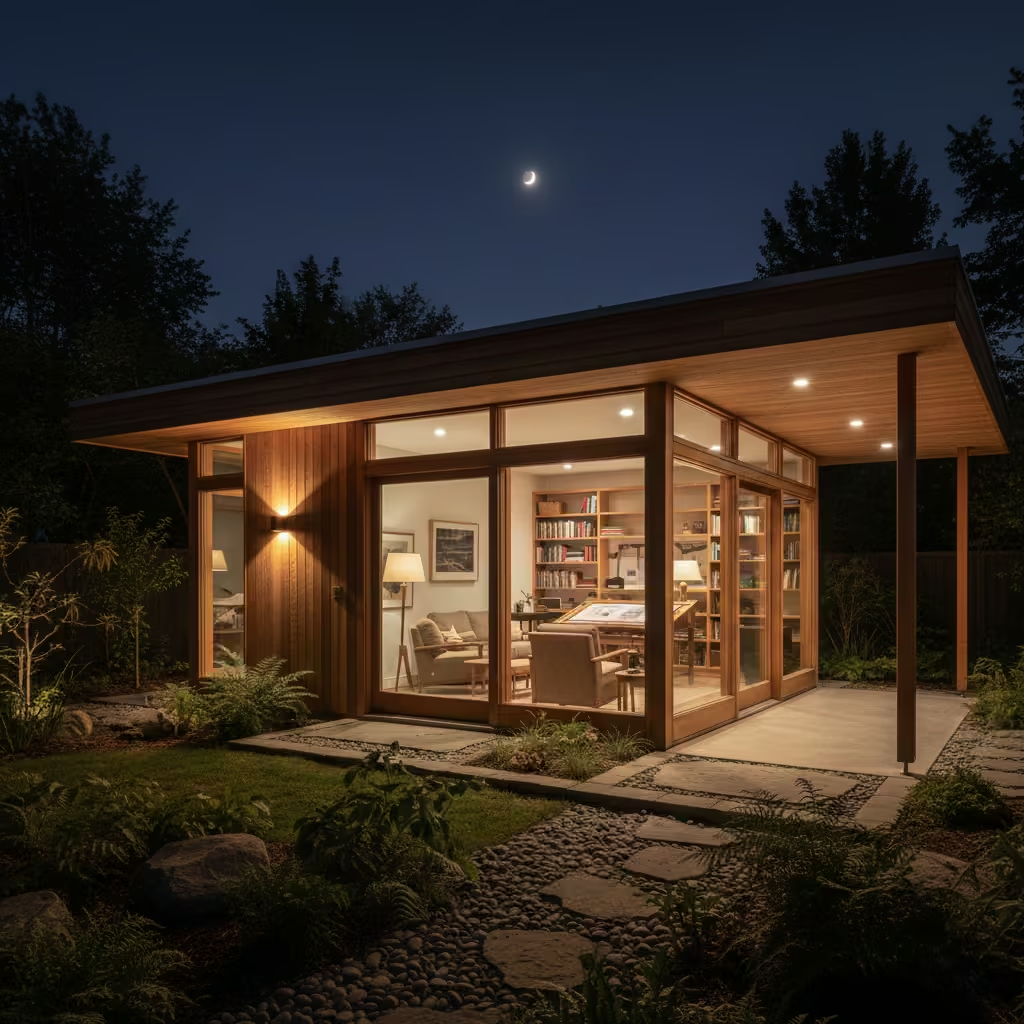
Garden rooms and studios are increasingly used as extensions of the home, not occasional outbuildings. The lighting should reflect this shift. The intent is to support regular, comfortable use while ensuring the structure sits calmly within the garden at night. Rather than announcing the building, subtle lighting allows it to glow gently, reinforcing its presence without dominating the surrounding landscape.
Typical placement and scale
The most effective approach is to layer soft exterior lighting with controlled interior spill. Low-level wall lights near entrances, concealed strip lighting beneath eaves, or discreet downlights within covered thresholds work well. I avoid overt façade lighting unless the architecture genuinely warrants it. Compact fittings and integrated details always produce a more residential, considered result.
Professional measurements and light levels
For exterior wall or threshold lighting, I typically specify fixtures mounted 300–600 mm (12–24 in) above finished ground level. Light outputs remain modest, often 100–200 lumens per fitting, to prevent the building from feeling over-lit. Warm colour temperatures at 2700K maintain continuity with interior spaces and soften the transition between house, garden, and studio.
Light control and night-time comfort
Glare control is essential, particularly where studios face planting or seating areas. Shielded fittings and downward-focused beams prevent light spill into the garden and protect night-time ambience. Internally, dimmable lighting helps manage window glow so the building reads as occupied and welcoming rather than stark.
Professional insight
In projects where garden rooms are used year-round, restraint is always the key. When the building reads as a softly lit volume rather than a focal point, it feels like a natural extension of the landscape and remains inviting without ever demanding attention.
Whole-Garden Lighting Scenes Controlled as One System
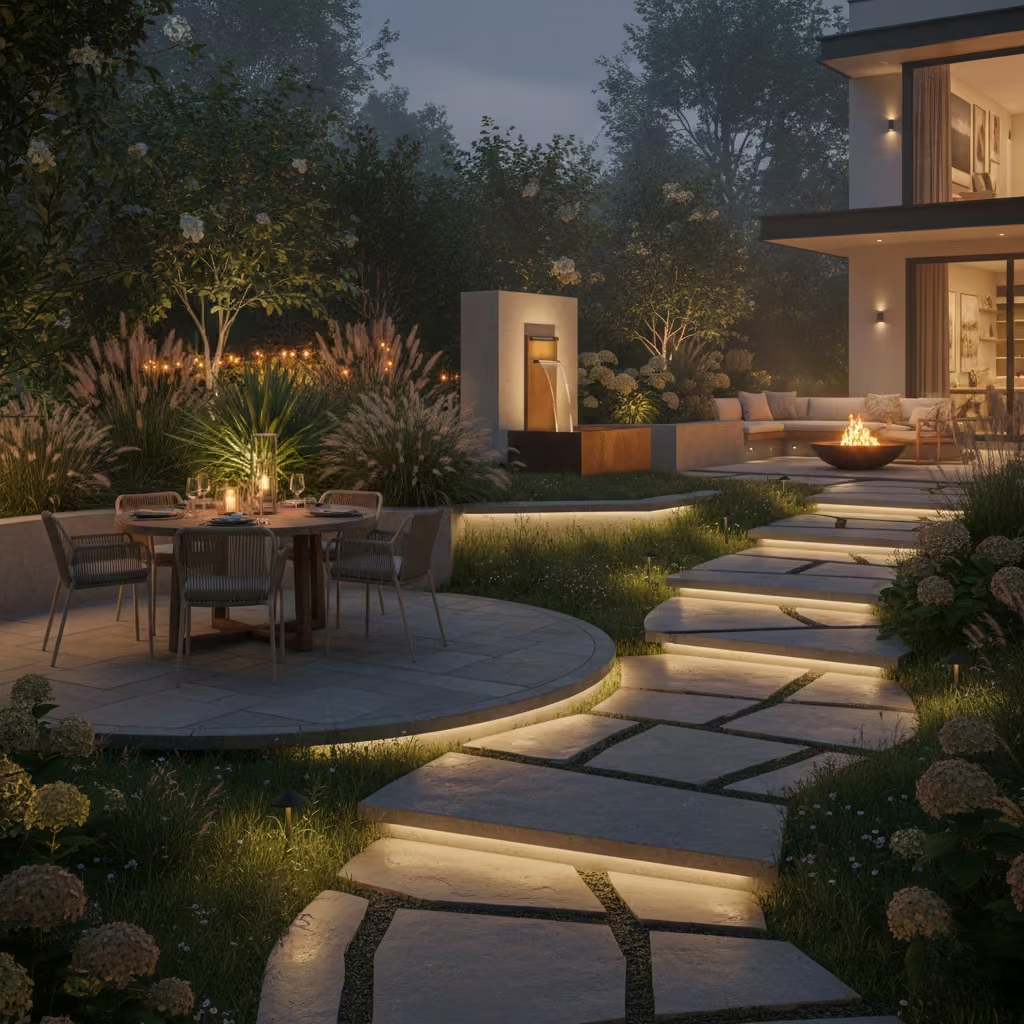
A whole-garden lighting system is about coherence, not complexity. The intent is to allow multiple zones, features, and functions to work together under a single, intuitive control strategy. Rather than treating each light as an isolated element, scenes create a layered composition that adapts to how the garden is actually used. This approach turns lighting into infrastructure, supporting daily routines, entertaining, and seasonal change with minimal effort.
Typical system layout and integration
In practice, I divide the garden into clear lighting zones such as circulation, dining, feature planting, boundaries, and architectural elements. Each zone is wired and addressed separately but controlled centrally. Controls can be wall-mounted within the house, integrated into smart home systems, or accessed via mobile devices. The physical fittings remain discreet; the intelligence sits in the system.
Professional planning and specification
For residential gardens, I typically design 3–5 core scenes: arrival, evening use, entertaining, security, and late night. Each scene balances light levels across zones to avoid harsh contrast. Dimming capability across all circuits is essential. Colour temperature consistency, usually 2700K throughout, prevents visual fragmentation and keeps the garden feeling calm and unified.
Light control and longevity
Scene-based systems significantly extend the lifespan of a lighting scheme. As planting matures or spaces change function, scenes can be rebalanced without rewiring or adding fittings. Timers and astronomical clocks help automate use, reducing energy waste and ensuring the garden always feels intentional after dark.
Professional insight
In my experience, the most successful gardens are not those with the most lights, but those with the smartest control. When a single button transforms the entire garden into a balanced, comfortable night-time environment, lighting stops being a feature and becomes part of how the garden quietly works.
How Lighting Changes How Outdoor Spaces Are Used
Outdoor lighting does far more than make a garden visible after dark. When it is properly planned, it reshapes how the space is occupied, how long it is used, and how comfortable people feel moving through it. In my experience, lighting is often the single factor that turns a garden from a daytime asset into a genuinely lived-in part of the home.
Extending usability from sunset to late evening
A layered lighting scheme allows outdoor spaces to remain functional well beyond sunset without feeling artificially lit. Ambient light establishes overall visibility, while task and accent lighting support specific activities such as dining, walking, or relaxing. This balance means the garden naturally transitions into evening use rather than shutting down as daylight fades. The result is longer, more relaxed occupancy that mirrors how interior spaces are used.
Psychological comfort created by balanced illumination
Even, considered lighting reduces uncertainty and visual strain. Harsh contrasts, deep shadows, or isolated bright spots make people hesitant, even if they cannot articulate why. Balanced illumination creates a sense of calm and control, encouraging people to sit, move, and linger without conscious effort. This psychological comfort is often overlooked, yet it is fundamental to how welcoming a garden feels after dark.
Why evenly lit gardens feel larger and more composed
When light is distributed thoughtfully across boundaries, planting, and circulation routes, the eye reads the garden as a complete volume rather than a series of disconnected pockets. This visual continuity makes outdoor spaces feel larger and more ordered. Instead of darkness closing in around the edges, the garden retains depth and proportion, reinforcing the original design intent long after sunset.
How lighting affects furniture placement and circulation
Lighting influences where people naturally choose to sit, gather, and move. Seating areas that fall outside balanced light zones are used less, regardless of comfort or layout. Clear, softly lit circulation routes encourage intuitive movement between zones, while poorly lit transitions often become dead space. In practice, lighting frequently determines whether furniture layouts succeed or fail in the evening.
Real-life insight
Across several residential projects, I have seen clients increase their garden use by 30–40 percent once lighting was properly layered and zoned. The spaces themselves did not change. What changed was confidence, comfort, and the feeling that the garden remained usable and welcoming long after dark.
Common Outdoor Lighting Mistakes I See Repeated
Even well-designed gardens can fall short after dark when lighting is treated as an afterthought or purely decorative layer. In my work, I see the same mistakes repeated across projects of all sizes. Correcting them rarely requires more fittings, just clearer intent and better restraint.
Over-lighting paths and flattening the landscape
One of the most common errors is flooding paths with light in the name of safety. Excessive brightness removes shadow and texture, making the garden feel flat and over-exposed. A softer, guided approach is far more effective. When the eye can still read depth and contrast, paths feel safer and the surrounding landscape retains its character.
Using cold colour temperatures outdoors
Cool white lighting may appear crisp initially, but it rarely suits residential outdoor spaces. Cold temperatures strip warmth from materials and planting, creating a stark, uninviting atmosphere. In most gardens, warm white light supports relaxation and continuity with interior spaces, making the transition outdoors feel natural rather than abrupt.
Poor beam angles causing glare
Glare is one of the quickest ways to undermine an otherwise thoughtful scheme. Incorrect beam angles or exposed light sources draw attention to the fitting rather than the space. This is particularly disruptive along circulation routes and near seating. Controlled optics and careful aiming are essential to keep light where it is needed and out of the eye line.
Ignoring maintenance access and fixture lifespan
Lighting schemes often fail over time because maintenance has not been considered. Inaccessible fittings, poor drainage, or low-quality components lead to early failure and uneven light levels. Designing for access, durability, and replacement ensures the garden continues to perform years after installation.
Lighting everything instead of composing focal points
Trying to illuminate every element dilutes impact and creates visual noise. Effective outdoor lighting is selective. By composing a hierarchy of focal points, circulation, and background layers, the garden reads clearly and feels intentional. Darkness, when used deliberately, is as important as light.Top of Form
Professional Measurements and Spacing Guidelines
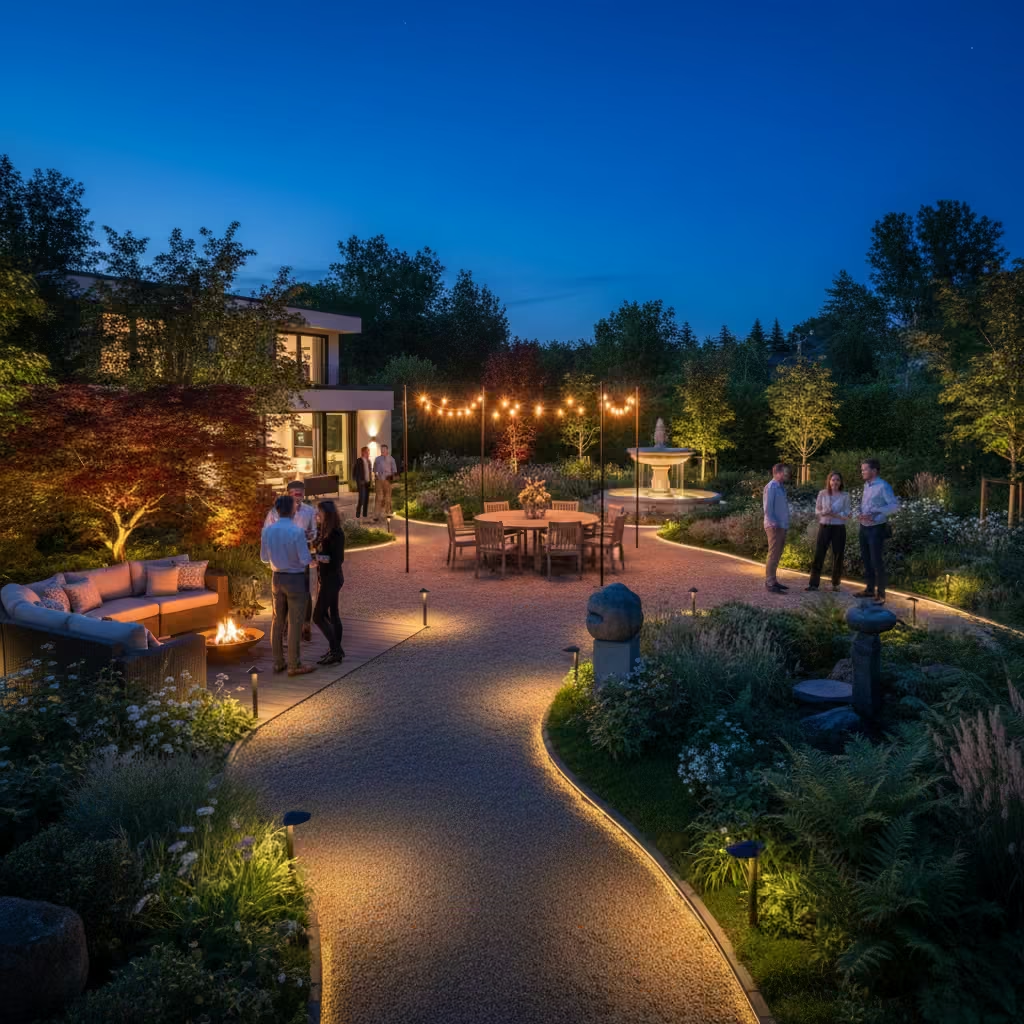
These measurements reflect typical professional ranges I use during the design phase to establish proportion, comfort, and visual balance. They are not prescriptive rules, but reference points that help avoid over-lighting, glare, and uneven illumination across a garden. Final specifications should always be coordinated with site conditions, materials, and fixture performance.
Path light spacing
For most residential paths, fittings are spaced at 1.8–2.4 m (6–8 ft) intervals. This distance allows light to overlap gently, guiding movement without creating a continuous line of brightness. Wider spacing often feels calmer and more residential, especially when combined with low-level ambient lighting elsewhere in the garden.
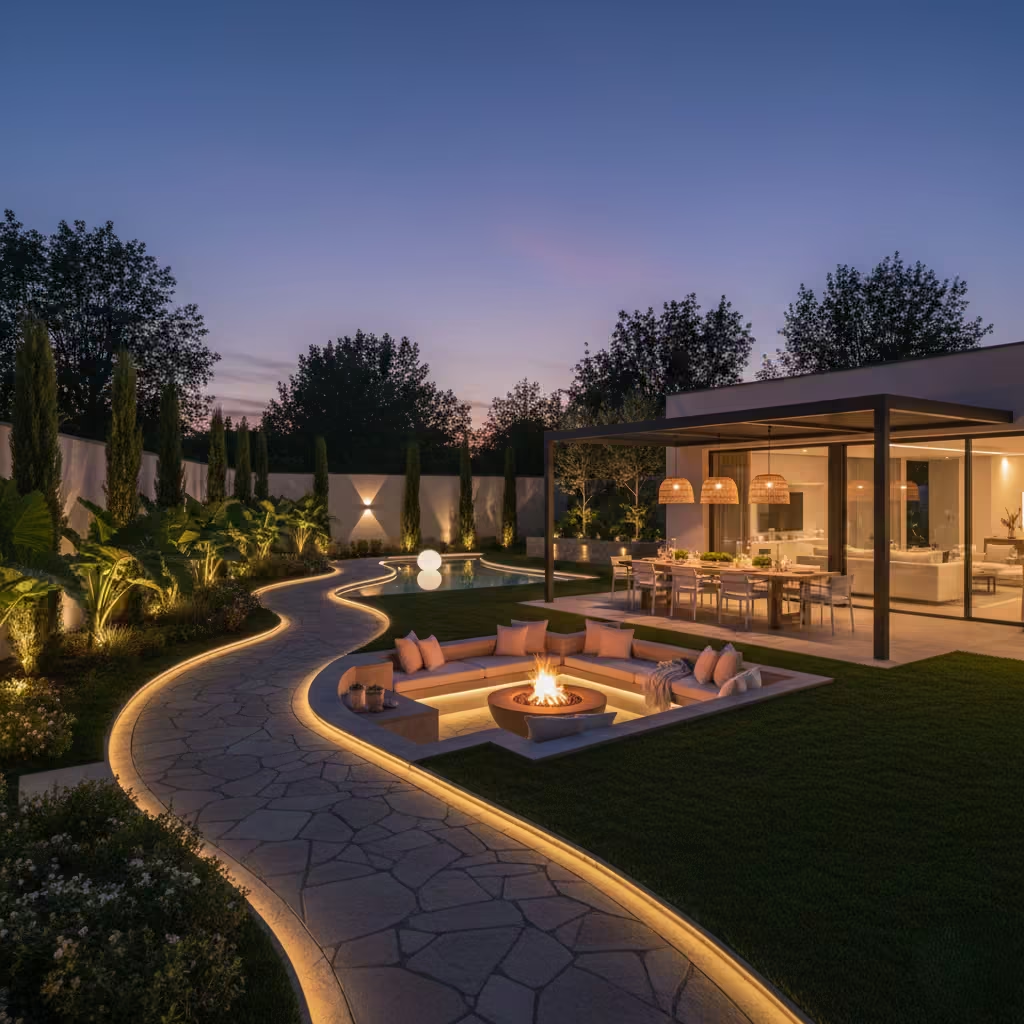
Step light height placement
Step lights are typically installed 150–200 mm (6–8 in) above the tread line, either within risers or adjacent retaining walls. This height allows light to wash across the step surface without shining directly into the eye. On longer stair runs, lights can be staggered rather than repeated on every riser to maintain visual rhythm and avoid over-illumination.
Tree uplighting distance
For mature trees, uplights are usually positioned 600–1,200 mm (24–48 in) from the trunk. The exact distance depends on trunk diameter and canopy spread. Placing the light too close creates harsh hotspots, while setting it further back allows the beam to open up and reveal branching structure and vertical depth more naturally.
Seating zone ambient light levels
In seating areas, the aim is visual comfort rather than brightness. Ambient lighting should be sufficient to read faces and edges without flattening the space. Conceptually, this means light levels that feel closer to a living room in the evening than a task-driven workspace. Soft perimeter lighting, combined with discreet accents, creates enclosure and calm while still allowing movement and conversation to feel natural.
When to Involve a Lighting Designer or Specialist
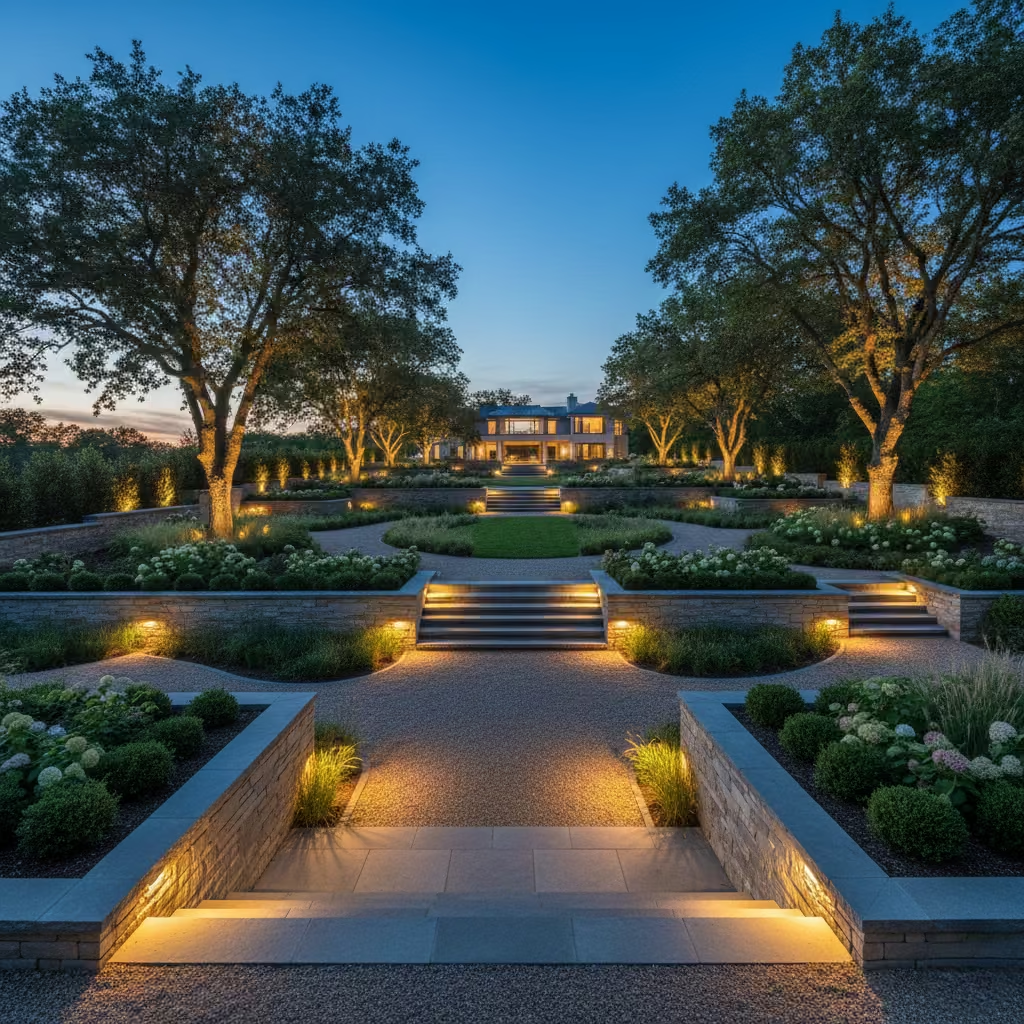
Lighting transforms outdoor spaces, but its full potential and longevity often requires professional expertise. While basic schemes can sometimes be handled by general contractors, certain conditions make specialist involvement essential. In my experience, early consultation saves cost, prevents compromises, and ensures a garden functions beautifully after dark.
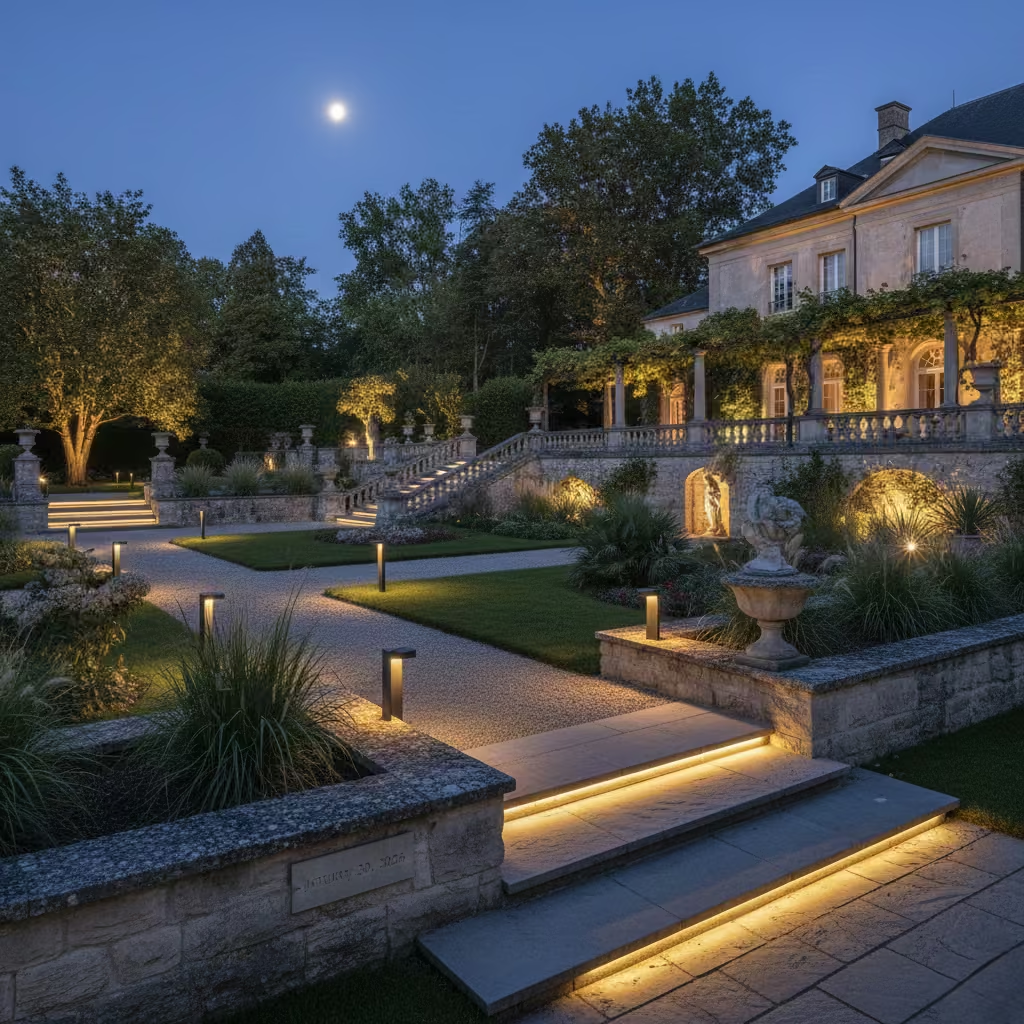
Project scale thresholds
Larger gardens or estates with multiple zones, long runs of paths, or extensive planting benefit from a lighting designer. Coordinating spacing, beam angles, and fixture hierarchy across a significant area is rarely straightforward. Without professional input, lighting can feel uneven, overlit, or disconnected from the garden’s spatial composition.
Complex gardens, slopes, or multi-level terraces
Sites with topographical challenges demand precise planning. Staircases, terraces, retaining walls, and steep slopes require careful fixture placement to ensure safety, balance, and visual coherence. In these situations, a specialist can model illumination, anticipate glare issues, and integrate lighting with circulation, making the space both usable and comfortable after dark.
Integrated control systems
Smart or scene-controlled lighting adds flexibility but also complexity. Designing zones, programming scenes, and coordinating dimming and timers benefits from specialist knowledge. A designer ensures that the system is intuitive, energy-efficient, and able to adapt to seasonal changes, planting growth, or evolving garden use.
Heritage or architecturally sensitive homes
Properties with listed status, strict planning conditions, or architecturally significant elements require a careful approach. Lighting must enhance without compromising materials, façade integrity, or historic character. Specialists understand these constraints and can provide solutions that respect context while achieving modern usability and aesthetic goals.
Professional insight
In my experience, involving a lighting designer early often alongside the landscape or architectural designer ensures the garden works holistically. It reduces the risk of compromise, creates visual cohesion, and maximizes the return on investment by producing outdoor spaces that are safe, atmospheric, and usable long after the sun sets.
Conclusion: Outdoor Lighting That Ages Well
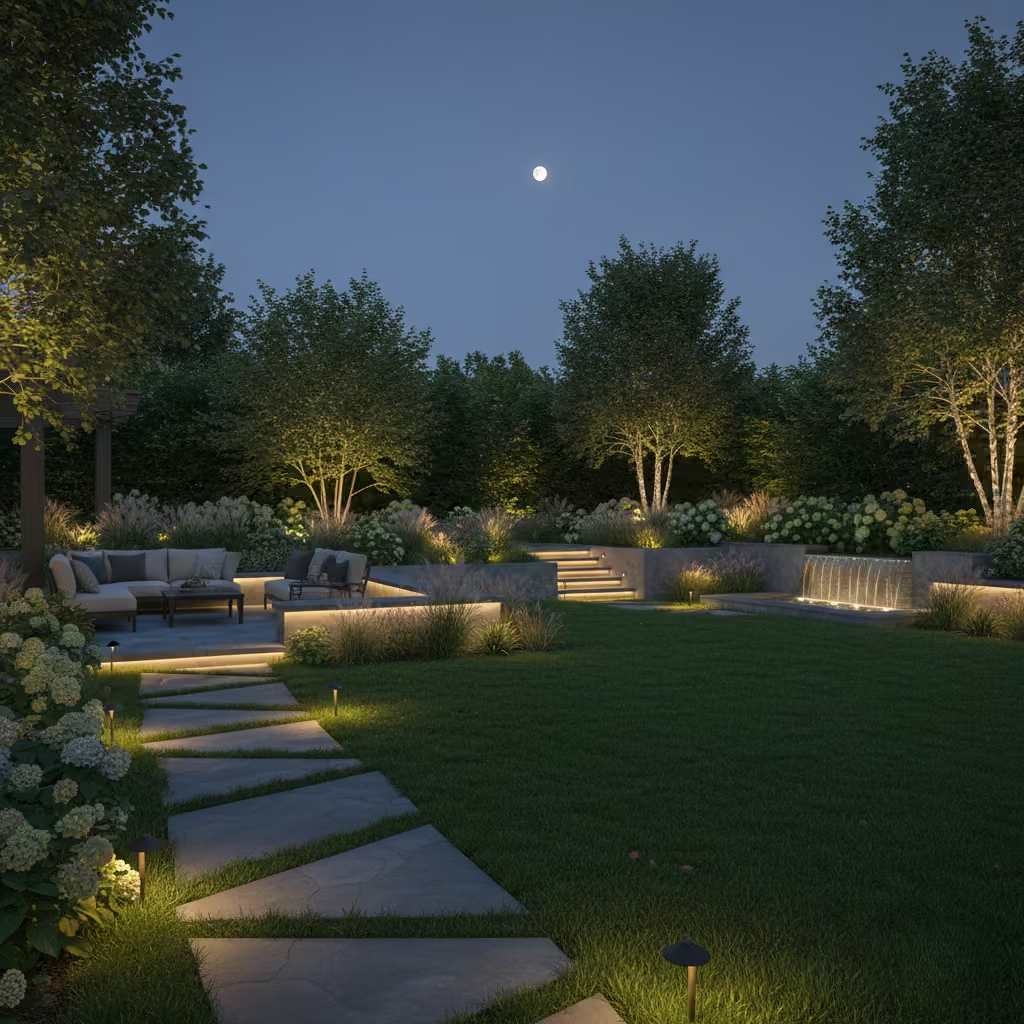
The best outdoor lighting is rarely the first thing you notice it works quietly, shaping the garden without calling attention to itself. Confidence in a scheme comes from restraint, balance, and precision, ensuring each fixture serves a clear purpose while contributing to the overall composition.
A well-lit garden doesn’t shout or overwhelm; it guides movement, supports activities, and invites lingering, creating spaces that feel safe, comfortable, and visually coherent at night. Thoughtful lighting extends the life of your outdoor design, allowing patios, terraces, planting, and water features to remain fully functional and aesthetically compelling long after sunset.
In my experience, gardens illuminated with care don’t just look good—they feel usable, welcoming, and enduring, turning evening hours into an extension of everyday living.
Frequently asked questions about Outdoor Lighting
Why is outdoor lighting important beyond aesthetics?
Outdoor lighting is not just decorative; it shapes how gardens are used, enhances safety, and reinforces spatial hierarchy. Properly layered lighting allows gardens to be functional and inviting long after dark.
How do I decide which type of lighting to use for different areas?
Different zones require different strategies: path lighting for guidance, uplighting for trees or sculptures, task lighting for kitchens or bars, and ambient lighting for seating. A layered approach balances safety, function, and atmosphere.
What is the ideal colour temperature for garden lighting?
Warm white LEDs between 2700K–3000K are preferred for residential gardens. They complement planting, materials, and interior spaces, creating a welcoming, calm environment. Cold light tends to feel harsh and uninviting.
How far apart should outdoor lights be spaced?
Path lights typically 1.8–2.4 m (6–8 ft) apart, step lights 150–200 mm (6–8 in) above treads, and tree uplights 600–1,200 mm (24–48 in) from trunks. Exact spacing depends on fixture output, beam angles, and site conditions.
Can I light my entire garden evenly?
Lighting everything evenly often flattens the space and reduces visual interest. It’s better to create focal points, circulation guidance, and layered ambient light, allowing darkness to define depth and contrast.
When should I hire a lighting designer or specialist?
Specialist input is recommended for large gardens, multi-level terraces, complex slopes, integrated control systems, or heritage and architecturally sensitive homes. They ensure safety, cohesion, and long-term performance.
How does outdoor lighting affect furniture placement and circulation?
Lighting defines safe pathways, draws attention to seating zones, and subtly influences where people naturally gather. Well-planned illumination encourages use of the garden and supports intuitive movement.
What common mistakes should I avoid?
Over-lighting, using cold light, poor beam angles, ignoring maintenance, and attempting to illuminate everything are frequent errors. Thoughtful layering, restraint, and focal composition prevent these issues.
How can I make my outdoor lighting adaptable to seasonal changes?
Using adjustable spotlights for planting, dimmable systems, and scene-controlled lighting allows the garden to evolve with growth, seasonal interest, and functional needs without rewiring or replacing fixtures.
How do I ensure my lighting design “ages well”?
Prioritize restraint, balance, and precision, integrate lighting early with hard landscaping, plan for maintenance, and adopt layered systems. The goal is to guide, support, and enhance the garden subtly, rather than dominate it.