25 Barndominium Bathroom Design Ideas for Rustic-Chic Homes
I’m often asked why barndominiums have become such a compelling backdrop for modern living, and the bathroom is a big reason. A barndominium pairs rugged, agricultural bones, exposed timber, metal cladding and open volumes with contemporary comforts, and the bathroom is where that contrast can feel most deliberate. Well chosen materials, careful detailing and thoughtful layout turn a purely functional room into a tactile, restorative space that reads both rustic and refined.
This article collects 25 barndominium bathroom design ideas that balance utility with character. Each idea targets a specific need, such as storage, lighting, waterproofing, accessibility or statement styling, and shows how to make it work in real projects.
I focus on solutions that respect the structural realities of barn conversions, like exposed beams and uneven floors, while bringing in luxury touches such as heated floors, freestanding tubs and high-performance ventilation.
For every idea I include practical guidance you can act on immediately: suggested dimensions in both metric and imperial units, material choices, installation tips, ballpark cost considerations and clear pros and cons.
Whether you are planning a full remodel, a modest refresh or a DIY upgrade, these ideas will help you make confident decisions that keep your barndominium bathroom both beautiful and fit for everyday life.
25 Barndominium Bathroom Design Ideas
Before we dive into the 25 design ideas, it’s worth noting that a barndominium bathroom is more than just a place to get ready it’s a chance to blend rustic charm with modern comfort. From reclaimed wood vanities to industrial-inspired fixtures, each design choice can enhance both the functionality and the personality of your space.
These ideas will help you create a bathroom that feels spacious, stylish, and true to the barndominium aesthetic.
Exposed Beam Ceiling with Recessed Lighting
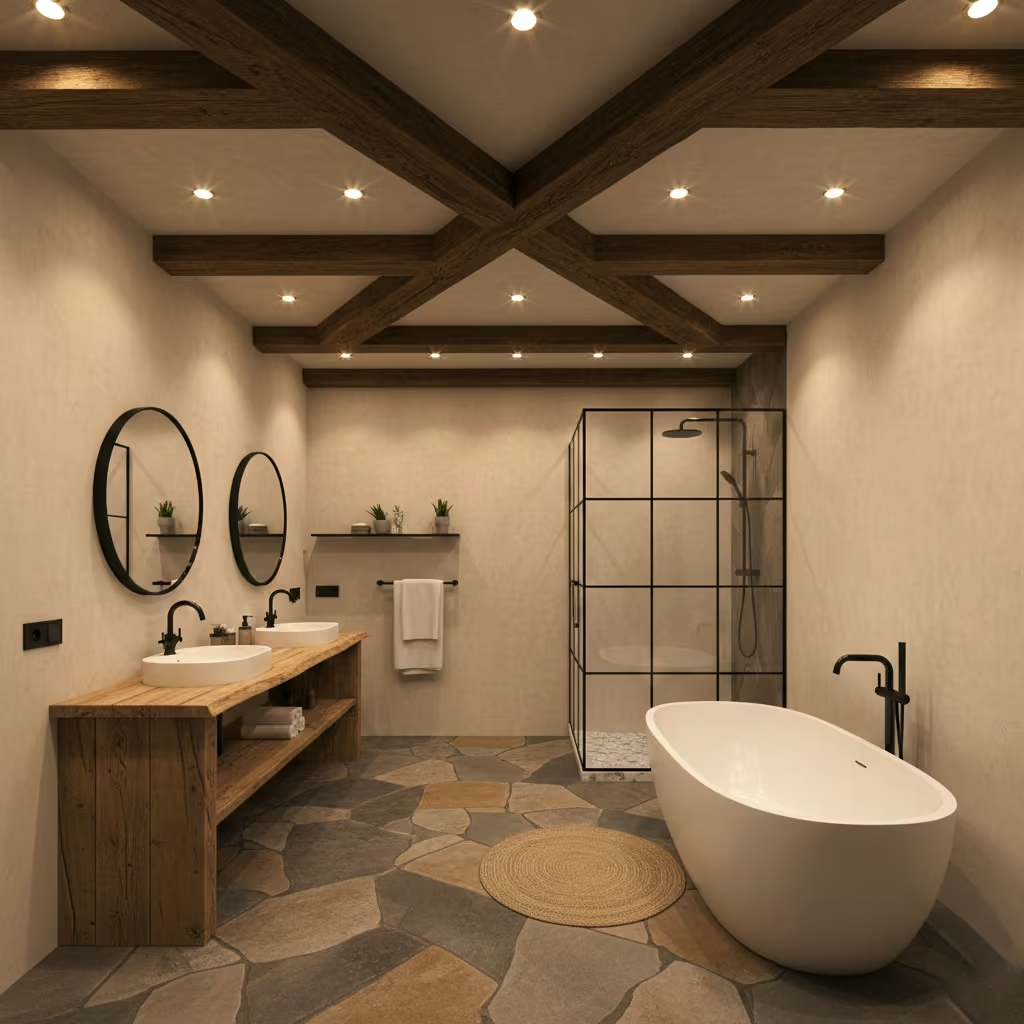
Exposed beams are a hallmark of barndominium style, giving your bathroom an immediate sense of rustic character and architectural interest. Pairing them with recessed lighting lets you retain that raw, natural aesthetic while introducing functional, modern illumination.
Practical details:
- Ceiling height: Ideally 2.4–3.0 m (8–10 ft) to maintain an open feel and accommodate beams.
- Lighting spacing: Recessed lights should be spaced 600–900 mm (24–36 in) apart along the ceiling between beams. Use adjustable trims to direct light over vanity, shower, and tub areas.
- Installation tip: Ensure electrical wiring is concealed without interfering with structural beams. For timber beams, consider surface-mounted conduit painted to match the wood if wiring through beams isn’t possible.
Pros
- Preserves the rustic charm while adding modern functionality.
- Can visually expand the room with layered lighting.
- Flexible for task, ambient, and accent lighting.
Cons
- Installation can be tricky if beams are structural and cannot be drilled.
- Higher ceilings may increase heating costs if not insulated properly.
- Requires careful planning to avoid shadows or uneven light distribution.
This approach keeps your bathroom authentic to barndominium style while ensuring practical, usable light.
Sliding Barn Door Entry
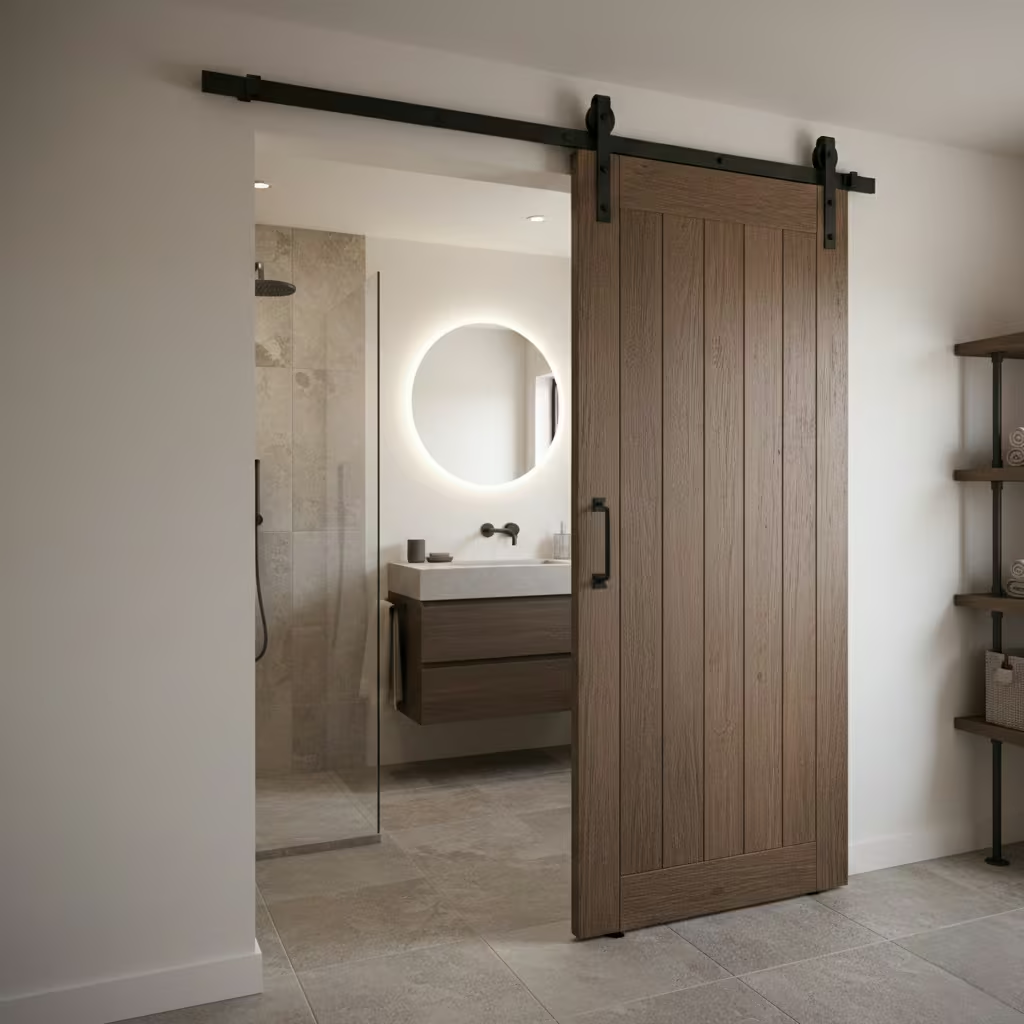
A sliding barn door is a perfect way to add rustic character while saving valuable floor space in a barndominium bathroom. Unlike traditional swing doors, sliding doors free up room for cabinetry, vanities, or storage and create a striking visual feature that reinforces the barn-inspired aesthetic.
Practical details:
- Standard door sizes: 762–914 mm wide × 1981–2134 mm tall (30–36 in × 78–84 in) are common for bathrooms. Adjust width based on wall opening and clearance.
- Track type: Ceiling-mounted or wall-mounted steel track systems are most reliable. Soft-close options prevent slamming and protect timber finishes.
- Installation tips: Ensure the wall supporting the track can bear the door’s weight (typical solid wood doors weigh 30–50 kg / 66–110 lbs). Allow 50–75 mm (2–3 in) clearance from floor for smooth sliding. Consider a guide at the floor to prevent the door swinging.
Pros
- Saves floor space in tight bathrooms.
- Adds strong rustic, architectural character.
- Can be customized with reclaimed wood or metal accents.
Cons
- Wall must be unobstructed where door slides; may not work in very small or awkward layouts.
- Hardware costs can be higher than standard doors.
- Privacy and soundproofing can be slightly less than a hinged door if not properly sealed.
Sliding barn doors are both practical and visually compelling, making them a go-to choice for barndominium bathrooms.
Freestanding Soaking Tub with Rustic Pedestal
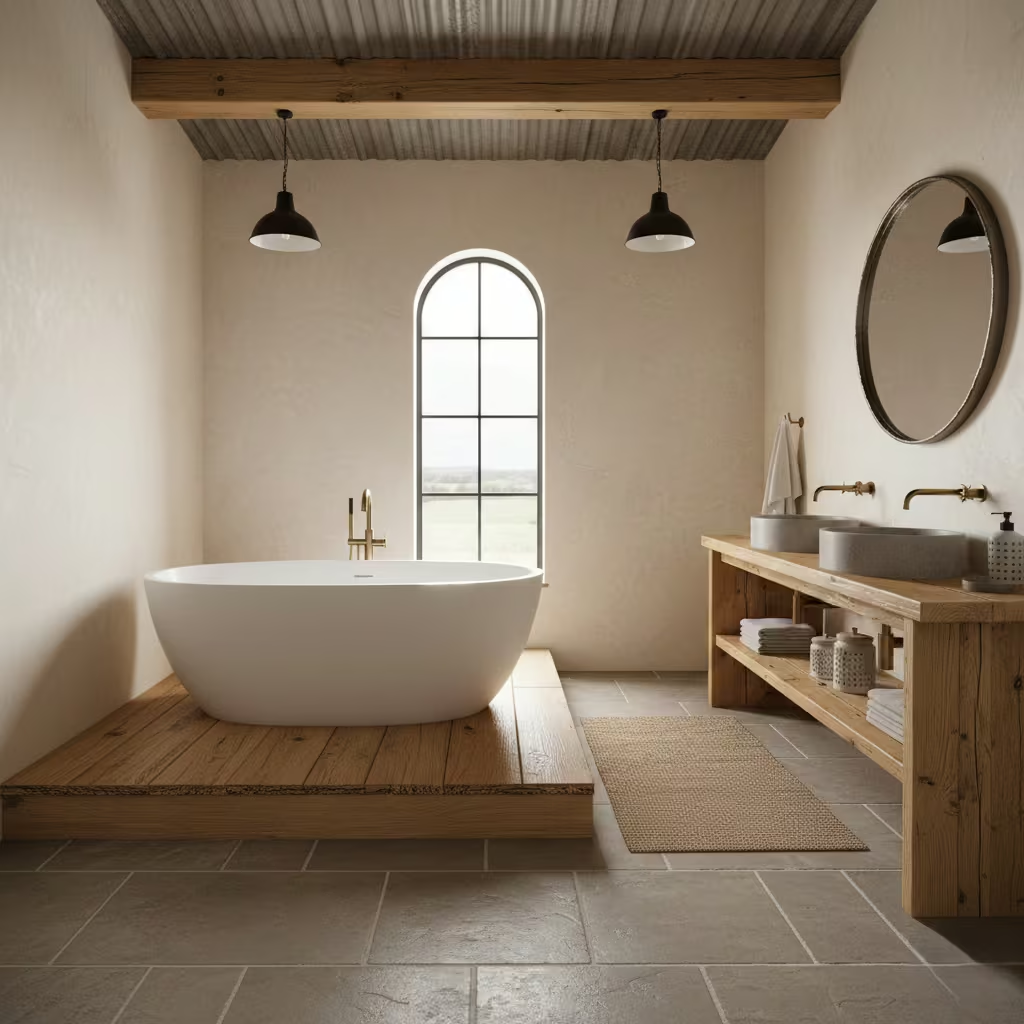
A freestanding soaking tub instantly elevates a barndominium bathroom, offering a luxurious focal point while reinforcing the rustic-modern aesthetic. Pairing it with a rustic pedestal or wooden base can integrate the tub seamlessly with exposed beams, reclaimed wood vanities, and other barn-inspired elements.
Practical details:
- Dimensions: Standard tubs range from 1500–1800 mm long × 700–850 mm wide (59–71 × 28–33 in). Ensure at least 600 mm (24 in) clearance around all sides for comfortable access and cleaning.
- Material options: Acrylic (lightweight and warm to touch), cast iron (durable, retains heat), stone resin (premium, tactile finish). Choose material based on weight support and bathroom floor strength.
- Installation tips: For heavy materials like cast iron or stone, verify floor load capacity. Allow plumbing access below or through the pedestal.
Pros
- Creates a dramatic, luxurious centerpiece.
- Comfortable for soaking and relaxation.
- Easily paired with rustic or industrial fixtures.
Cons
- Heavy tubs may require floor reinforcement.
- Takes up significant floor space; not ideal for small bathrooms.
- Higher cost for premium materials.
Industrial Pipe Shelving
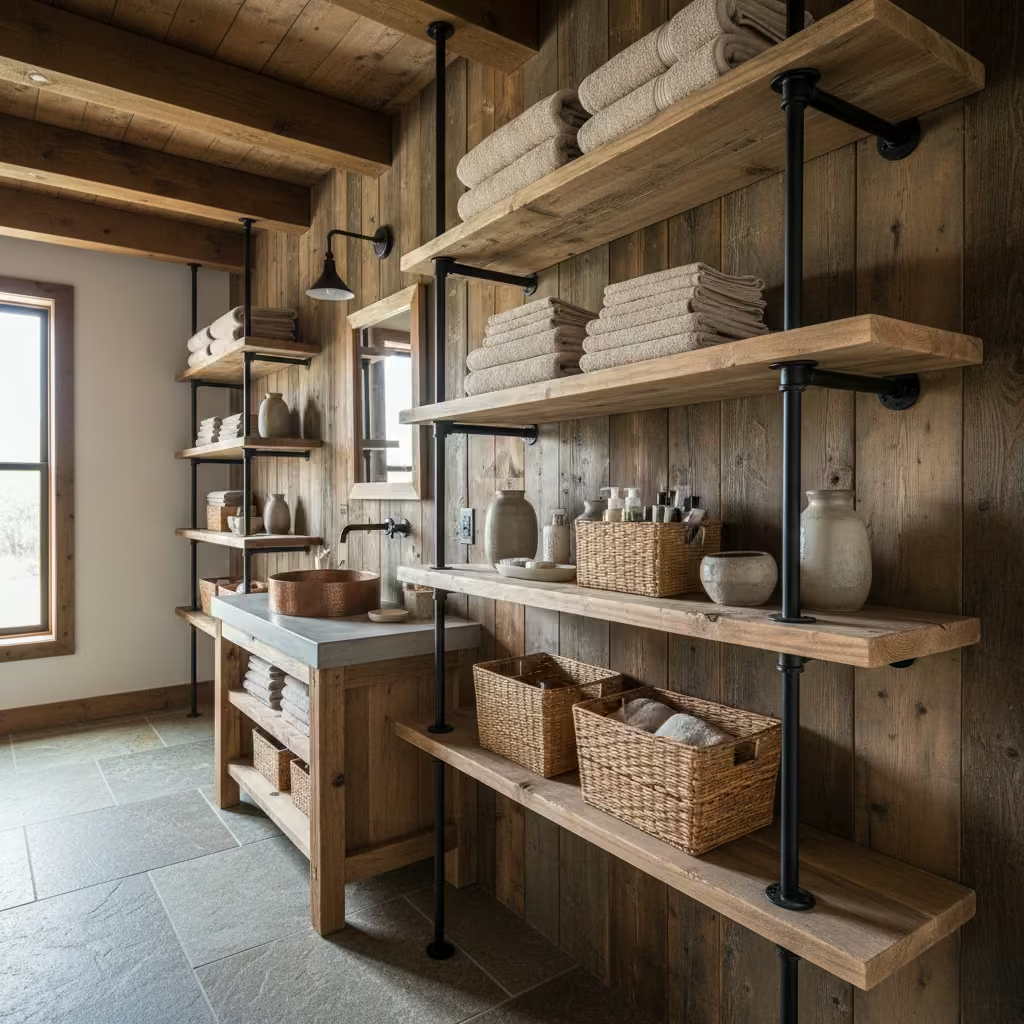
Industrial pipe shelving adds rugged, functional storage to a barndominium bathroom while complementing exposed beams, metal accents, and barn-inspired fixtures. It’s ideal for towels, toiletries, or decorative items, reinforcing a practical yet stylish aesthetic.
Practical details:
- Shelf depth: 200–300 mm (8–12 in) is ideal for towels and toiletries.
- Weight limit: Steel pipe frames typically support 20–30 kg per shelf (44–66 lbs); ensure proper wall anchors for heavier items.
- Styling tips: Mix wood planks with black or brushed metal pipes for a balanced rustic-industrial look. Consider staggered heights or floating-style arrangements for visual interest.
Pros
- Provides open, accessible storage while maintaining style.
- Modular and customizable to different wall spaces.
- Durable and low maintenance.
Cons
- Items on open shelves can collect dust and moisture.
- Requires secure anchoring for heavier loads.
- Industrial aesthetic may not suit ultra-modern or soft rustic themes.
These two ideas together freestanding tub and industrial shelving combine luxury, functionality, and authentic barndominium character.
You May also Like: 25 Bathroom Mirror Ideas That Balance Design, Light, and Everyday Use
Reclaimed Wood Vanity with Stone Countertop
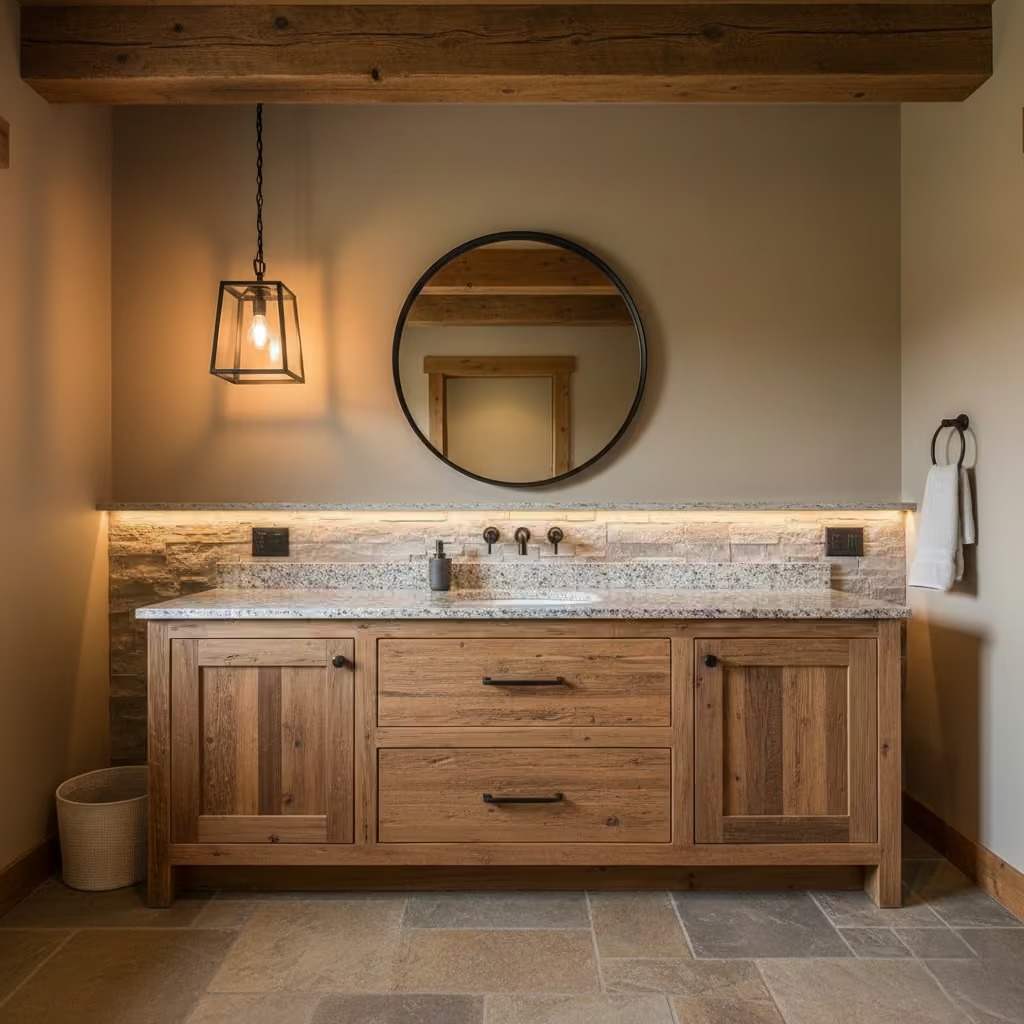
A reclaimed wood vanity paired with a stone countertop brings warmth, texture, and authenticity to a barndominium bathroom. Using salvaged timber adds character through natural knots, grain patterns, and weathered finishes, while a stone countertop ensures durability and water resistance.
Practical details:
- Size considerations: Standard vanities are 900–1800 mm wide × 500–600 mm deep (35–71 × 20–24 in) for single or double sinks. Ensure 200–300 mm (8–12 in) clearance from walls for plumbing access.
- Materials: Wood: reclaimed oak, pine, or cedar; Countertop: granite, quartz, or marble. Seal wood and stone to prevent moisture damage.
- Maintenance: Clean spills immediately, reseal stone every 1–2 years, and apply wood protective oil periodically.
Pros
- Adds rustic charm with a sturdy, functional surface.
- Eco-friendly and unique.
- Can be custom-sized to fit awkward spaces.
Cons
- Wood is susceptible to water damage if not properly sealed.
- Stone tops can be heavy and require floor support.
- Custom pieces can be costly.
Matte Black Fixtures and Hardware
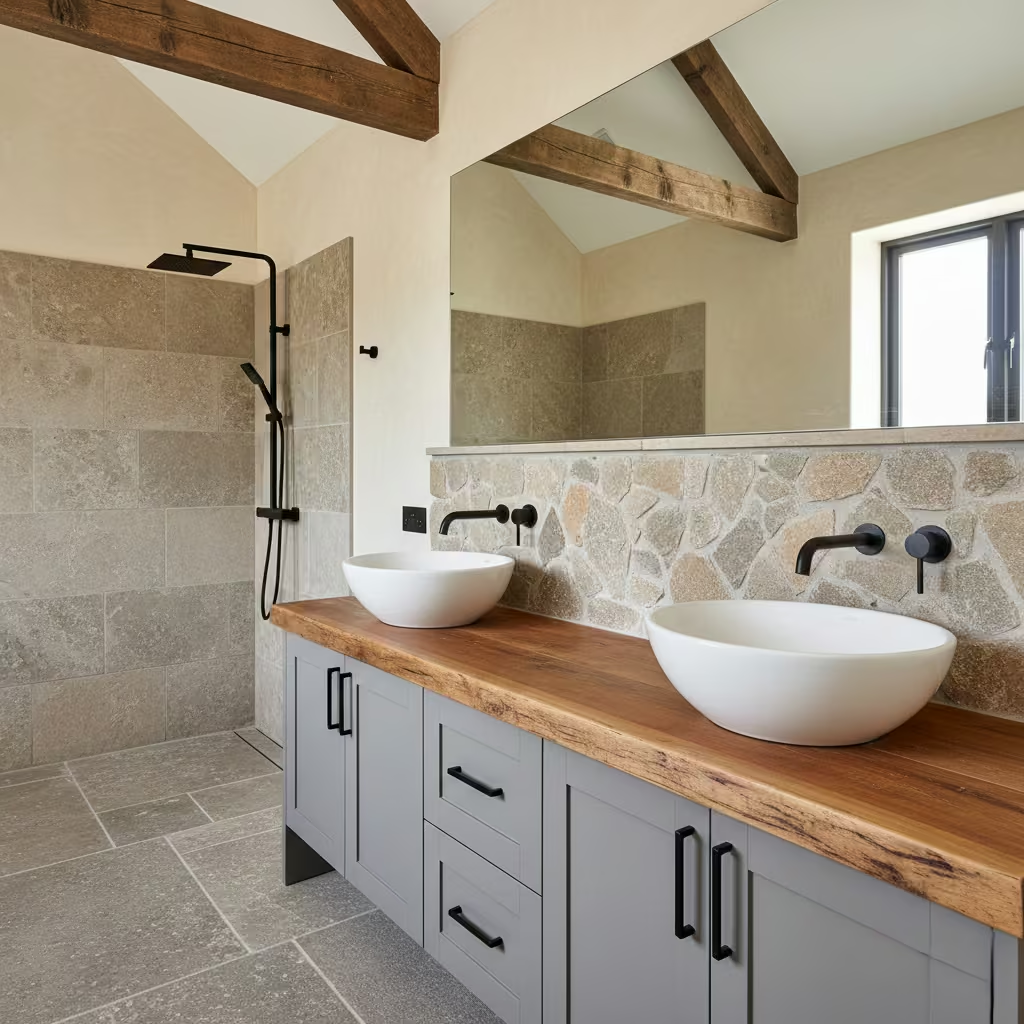
Matte black taps, showerheads, and handles create a striking contrast against wood, stone, or neutral tile finishes, bridging rustic and modern styles in a barndominium bathroom.
Practical details:
- Tap height: Allow 200–250 mm (8–10 in) from countertop to spout for comfort.
- Spacing: For double vanities, maintain 400–450 mm (16–18 in) between faucets; ensure 50 mm (2 in) clearance behind for handles.
- Cleaning tips: Wipe with soft microfiber cloths; avoid harsh chemicals to preserve matte finish.
Pros
- Adds visual drama and contemporary edge.
- Works with a variety of rustic or industrial design elements.
- Durable and resistant to fingerprints compared to polished finishes.
Cons
- Can show water spots if not wiped regularly.
- Limited color options may constrain mixing with other metals.
- Matte black can appear stark if the rest of the space is too dark.
Rustic Tile Accent Wall
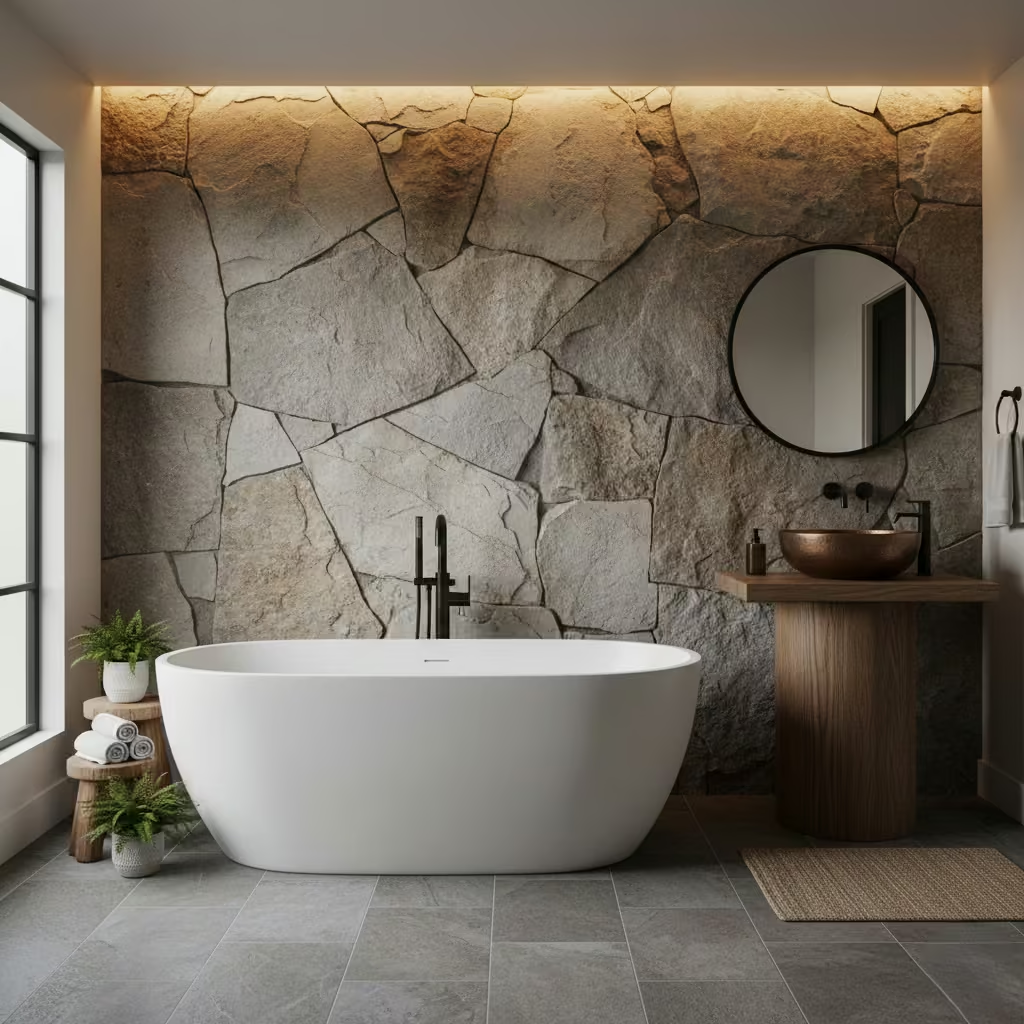
A rustic tile accent wall adds texture, warmth, and a visual focal point, perfect behind a vanity, bathtub, or in the shower. Materials like stone, terracotta, or textured ceramic evoke a handcrafted feel while enhancing durability.
Practical details:
- Tile size: 100×200 mm (4×8 in) subway-style, 150×150 mm (6×6 in) squares, or irregular natural stone slabs for visual interest.
- Layout tips: Stagger patterns or mix tile sizes for a more organic look. Grout color should complement stone or wood tones.
- Moisture resistance: Use water-resistant adhesives and seal grout to prevent mold and staining. Ideal for wet zones behind vanities and showers.
Pros
- Creates a strong visual anchor in the bathroom.
- Adds texture without overwhelming the space.
- Durable and easy to clean if properly sealed.
Cons
- Installation can be labor-intensive, especially with irregular stone.
- Heavy tiles may require reinforced wall support.
- Incorrect sealing can lead to water damage over time.
These elements vanity, fixtures, and accent wall combine functionality and rustic charm while introducing modern contrast and texture to the barndominium bathroom.
Walk-In Shower with Frameless Glass
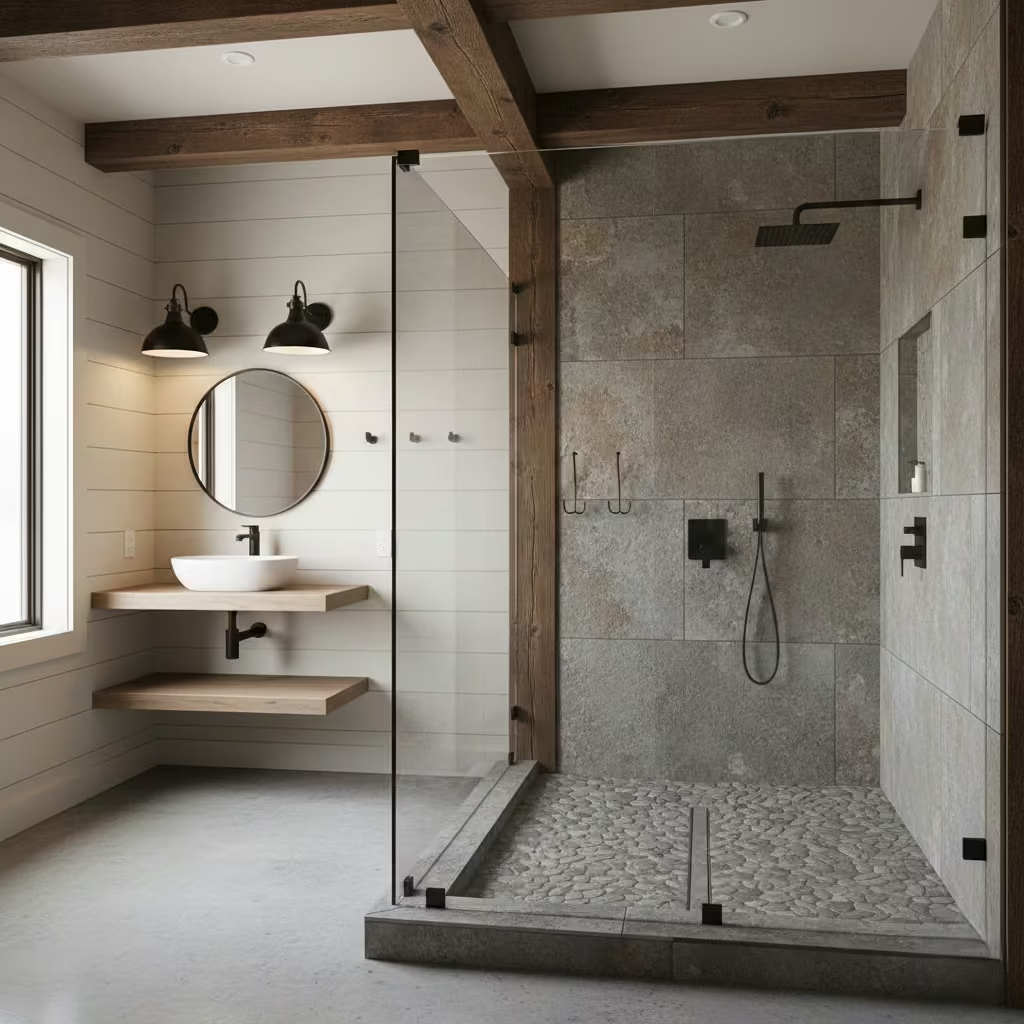
A frameless glass walk-in shower keeps sightlines open and reinforces the industrial-rustic clarity of a barndominium while feeling contemporary and clean. I often use frameless glazing to showcase tile work or exposed masonry without visual interruption.
Practical details
- Minimum dimensions: 900 × 900 mm (35 × 35 in) absolute minimum for a functional shower. Preferable minimum for comfortable use: 1200 × 900 mm (47 × 35 in). For a luxurious experience consider 1500 × 900–1200 mm (59 × 35–47 in).
- Slope for drainage: 1:50 to 1:60 fall (20–25 mm fall per metre; about 0.8–1.0 in fall per 3.3 ft) toward the drain. For curbless designs use a continuous fall or pre-formed gradient trays.
- Glass specification & hardware: Toughened safety glass 8–10 mm thick (5/16–3/8 in) for typical frameless panels. Use stabilising rails or discreet clamps where panels exceed 1200 mm (47 in) in height or width. Soft-close or magnetic seals are not usually used on frameless open designs but good quality gaskets improve splash control.
- Threshold & drainage options: Linear drains simplify curbless transitions; point drains are fine when falls can be achieved in multiple directions. For curbless entry allow a slight ramp or depressed channel at the threshold to stop water spreading.
- Safety tips: Specify slip-resistant floor finishes with a minimum recommended slip rating for wet areas (choose tiles with appropriate wet-slip certification). Use safety glass to building regs and fit anti-lift clips if the panel is freestanding. Include a grab bar if accessibility or elderly use is a factor. Ensure glass edges are polished and all fixings are corrosion resistant.
Pros
- Opens the room visually and showcases finishes.
- Easier to clean than framed alternatives and fewer profiles to trap grime.
Cons
- Frameless panels can allow more splash unless planned carefully.
- Heavier glass and custom fixes raise cost and require precise installation.
You May also Like: 25 Eye-Catching Bathroom Floor Tile Ideas for a Luxurious Look
Barnwood Mirror Frame
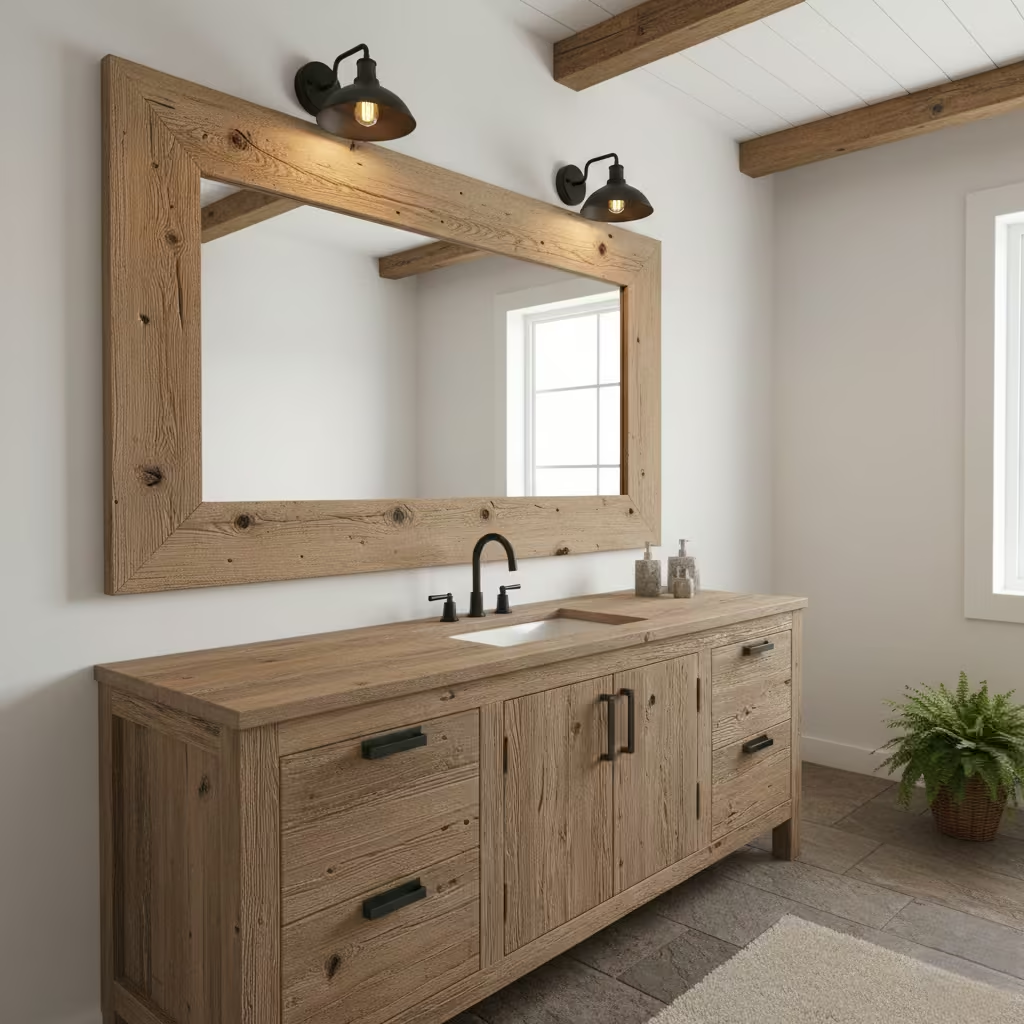
A barnwood-framed mirror is a quick, high-impact way to introduce authentic rustic texture and coordinate with reclaimed timber vanities or exposed beams. I frequently specify frames that read as reclaimed without sacrificing long-term performance.
Practical details
- Mirror dimensions: Match the mirror width to the vanity: for a single vanity 600–900 mm wide (24–36 in) a 500–800 mm (20–32 in) mirror works well; for double vanities use a continuous mirror 1400–2200 mm wide (55–87 in) or twin mirrors each 500–800 mm (20–32 in) wide. Standard mirror height 600–900 mm (24–36 in) depending on ceiling height and lighting.
- Mounting height: Bottom edge typically 100–150 mm (4–6 in) above the worktop or backsplash. Centre the mirror at average eye level if it is freestanding about 1500–1600 mm (59–63 in) from finished floor to centre.
- Mounting options: French cleat offers strong, concealed support for heavy framed mirrors and allows easy removal. D-rings with heavy-duty wall anchors are suitable for medium-weight frames if anchored to studs. Z-clips give a flush, secure fix for larger or commercial installs. Always locate fixings into studs for frames heavier than 10–12 kg (22–26 lbs) or use appropriate heavy-duty anchors rated to the load.
- Durability & finishing tips: Seal reclaimed timber with a water-resistant finish (e.g., spar varnish or oil) before framing; leave a small gap between wood and mirror glass to avoid trapped moisture. If using genuine reclaimed wood, pack and back the frame to prevent warping. Consider a thin isolation layer (e.g., silicone beads) where timber meets the wall to prevent moisture transfer.
Pros
- High visual impact and ties the design to the barndominium’s reclaimed aesthetic.
- Can be custom-sized to awkward spaces.
Cons
- Unsealed wood will degrade in humid environments.
- Heavy frames require secure fixing and can complicate lighting placement.
Double Vanity Setup
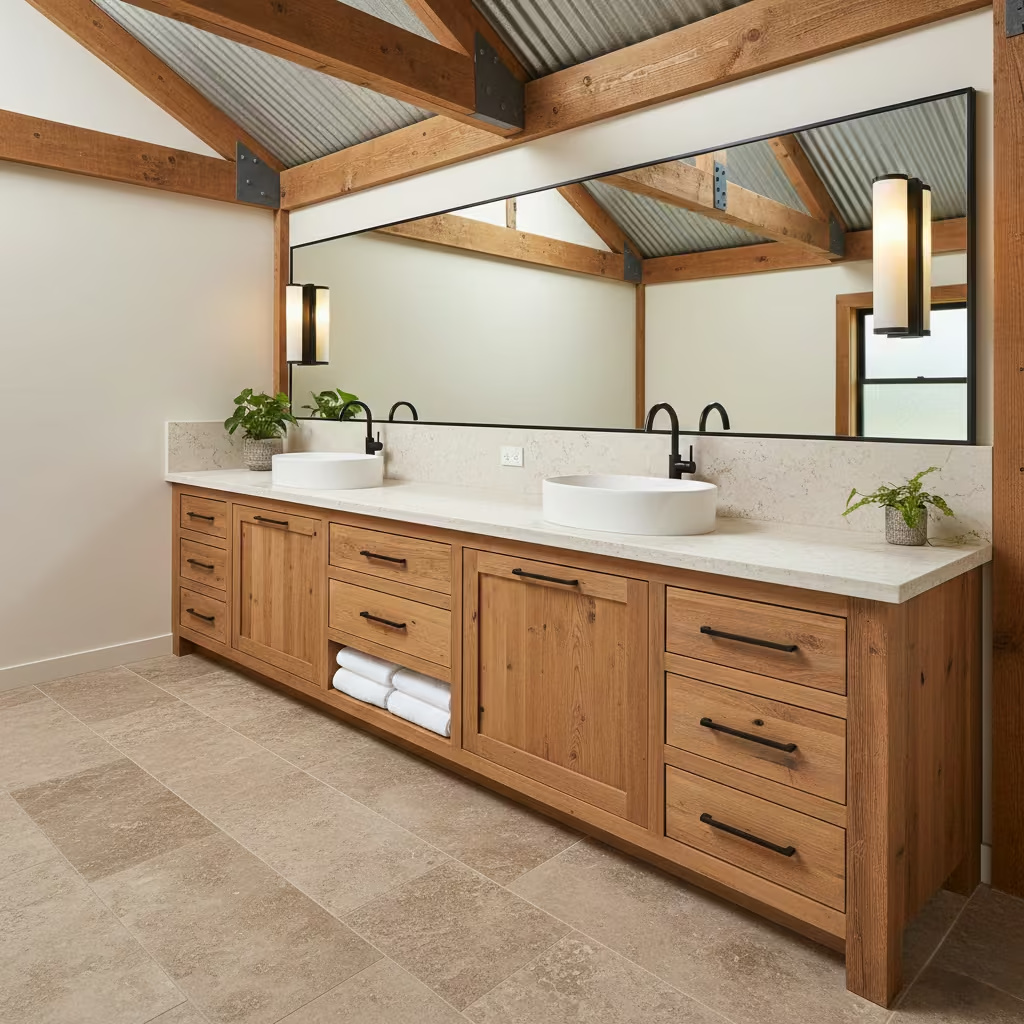
A double vanity improves morning routines for couples and adds perceived value to a bathroom. I recommend sizing and plumbing with both ergonomics and service access in mind.
Practical details
- Overall width: Minimum practical double vanity width 1500 mm (59 in); comfortable typical range 1600–1800 mm (63–71 in). Premium layouts often use 1800–2400 mm (71–95 in) for generous countertop and storage.
- Spacing between sinks: Aim for centre-to-centre spacing of 750–900 mm (30–36 in) between basin centres. This provides personal elbow room and space for tapware. If using under-mount basins, allow at least 600 mm (24 in) of countertop width per user as an absolute minimum.
- Countertop depth: Standard depths 500–600 mm (20–24 in). Use 600 mm where you want comfortable elbow room and to accommodate larger basins or integrated backsplash.
- Height: Standard worktop height 900–920 mm (35–36 in) for comfort; 850–900 mm (33–35 in) can work for lower users or children. Wall-hung or floating vanities can be set to custom heights but ensure plumbing trap clearances.
- Plumbing considerations: Provide separate trap assemblies for each basin where possible; traps normally require 150–200 mm (6–8 in) clearance beneath basin outlet to allow servicing. Leave a 200–300 mm (8–12 in) service gap behind the vanity for flexible connections, isolating valves and the sanitary pipe runs. If using a shared waste, fit an accessible removable tee or access panel. Plan hot/cold supply lines with isolation valves for each tap. Confirm local code on venting and trap placement; in some jurisdictions shared traps or improper venting are not permitted.
- Electrical & lighting: Install GFCI/RCD-protected outlets near the vanity per local electrical code, typically 600–900 mm (24–36 in) horizontally from basin centreline and 1100–1200 mm (43–47 in) above finished floor depending on outlet type. Provide mirror lighting that avoids shadows on the face vertical sconces or backlit mirrors are effective.
Pros
- Improves usability and resale appeal.
- Offers more storage and counter space without large footprint increase.
Cons
- Requires wider bathroom footprint; tight rooms may feel cramped if pushed into small spaces.
- Plumbing complexity and cost increase with two basins and additional fixtures.
Heated Flooring Installation![]()
Heated floors are a luxurious addition to any barndominium bathroom, combining comfort with energy-efficient warmth. They work well with stone, tile, or concrete floors, which can otherwise feel cold underfoot, and add a modern touch to rustic interiors.
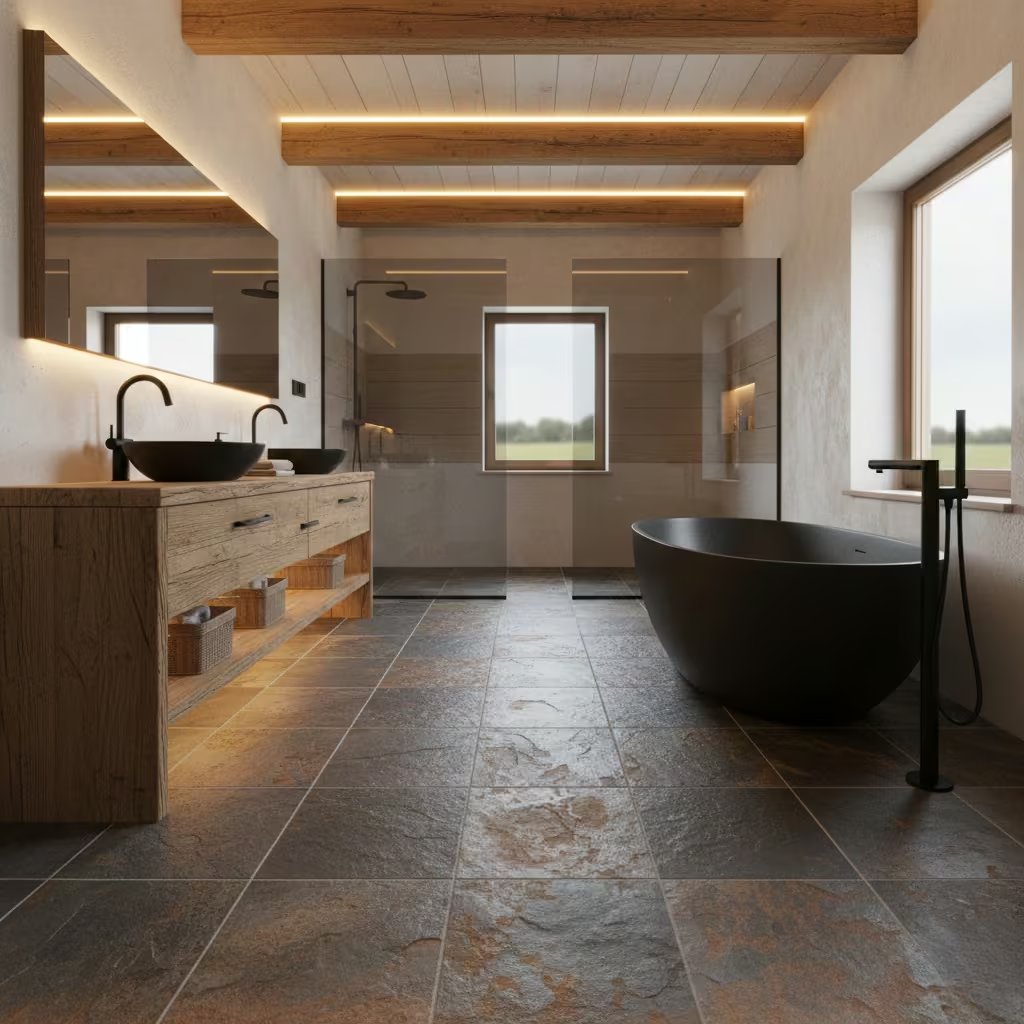
Practical details:
- Installation tips: Electric mats or hydronic piping can be embedded under tile or stone. Ensure subfloor is level and insulated with a thermal barrier to prevent heat loss. For retrofits over existing floors, low-profile electric mats are preferred. Include a thermostat for temperature control.
- Energy requirements: Electric systems typically use 120–150 W/m² (11–14 W/ft²), hydronic systems vary with boiler output; expect 200–400 kWh/year for a 5 m² (54 sq ft) bathroom depending on insulation and climate.
Pros
- Warm, comfortable surface year-round.
- Works with any layout and complements luxury finishes.
- Increases perceived property value.
Cons
- Adds to installation cost.
- Retrofitting can require removing existing flooring.
- Hydronic systems are more complex and require maintenance of pumps and boiler.
You May also Like: 25 Best Neutral bathroom Ideas Modern Trends for 2026
Floating Vanity for Modern Rustic Look
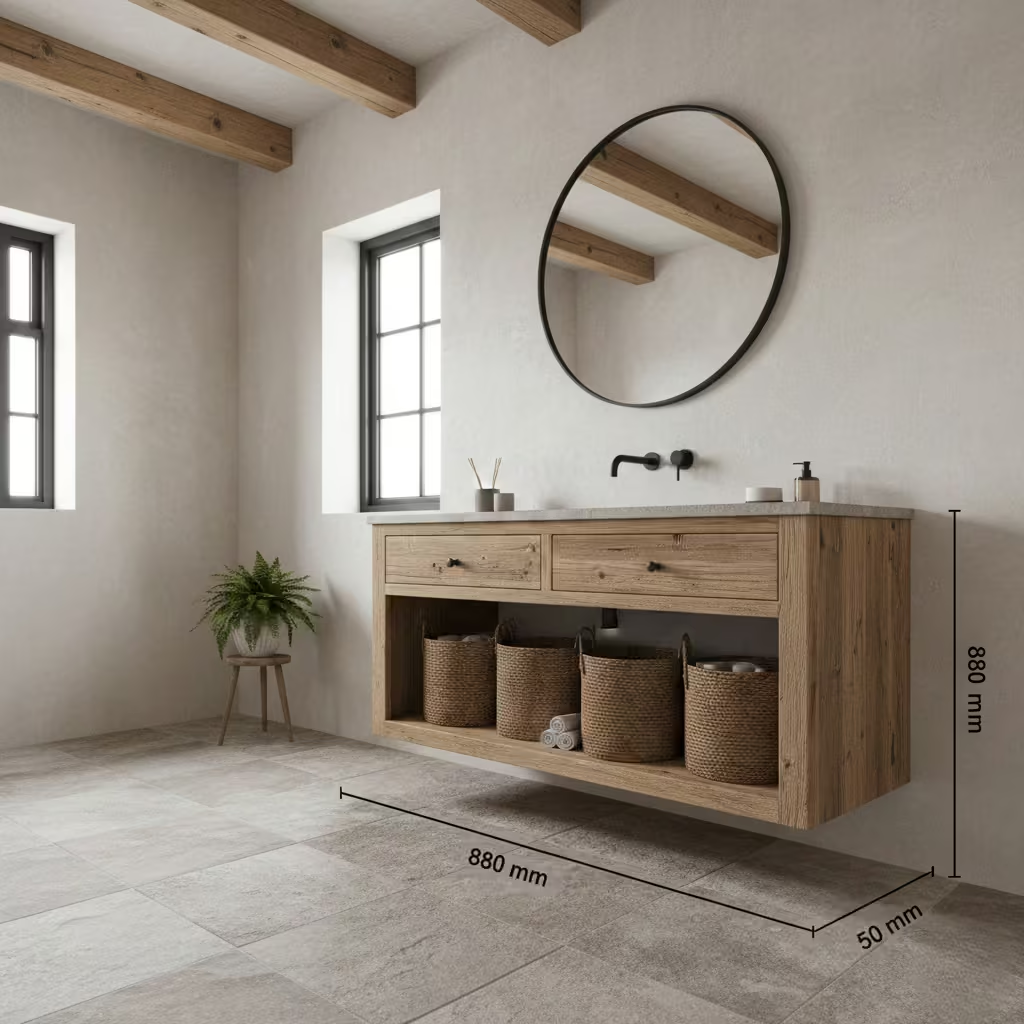
Floating vanities create a clean, modern aesthetic while keeping the rustic charm of a barndominium. They open up floor space visually, making bathrooms feel larger and easier to clean.
Practical details:
- Wall reinforcement: Must be fixed to studs or reinforced wall panels; use heavy-duty brackets to support typical weights of 50–70 kg (110–155 lbs) for vanity plus countertop.
- Standard heights: 850–900 mm (33–35 in) for comfort, adjustable depending on user height. Depth: 500–600 mm (20–24 in).
- Storage tips: Combine drawers and open shelving; consider integrating baskets for a rustic touch. Leave at least 100 mm (4 in) clearance from floor for cleaning access.
Pros
- Modern, spacious feel with rustic detailing.
- Easier to clean beneath the vanity.
- Can showcase flooring as part of the design.
Cons
- Requires proper wall reinforcement; cannot be installed on weak walls.
- Storage may be reduced compared to floor-mounted cabinets.
- Heavy countertops or stone slabs increase support requirements.
You May also Like: 25 Bathroom Organizer Ideas to Maximise Storage in Any Bathroom
Statement Pendant Lighting
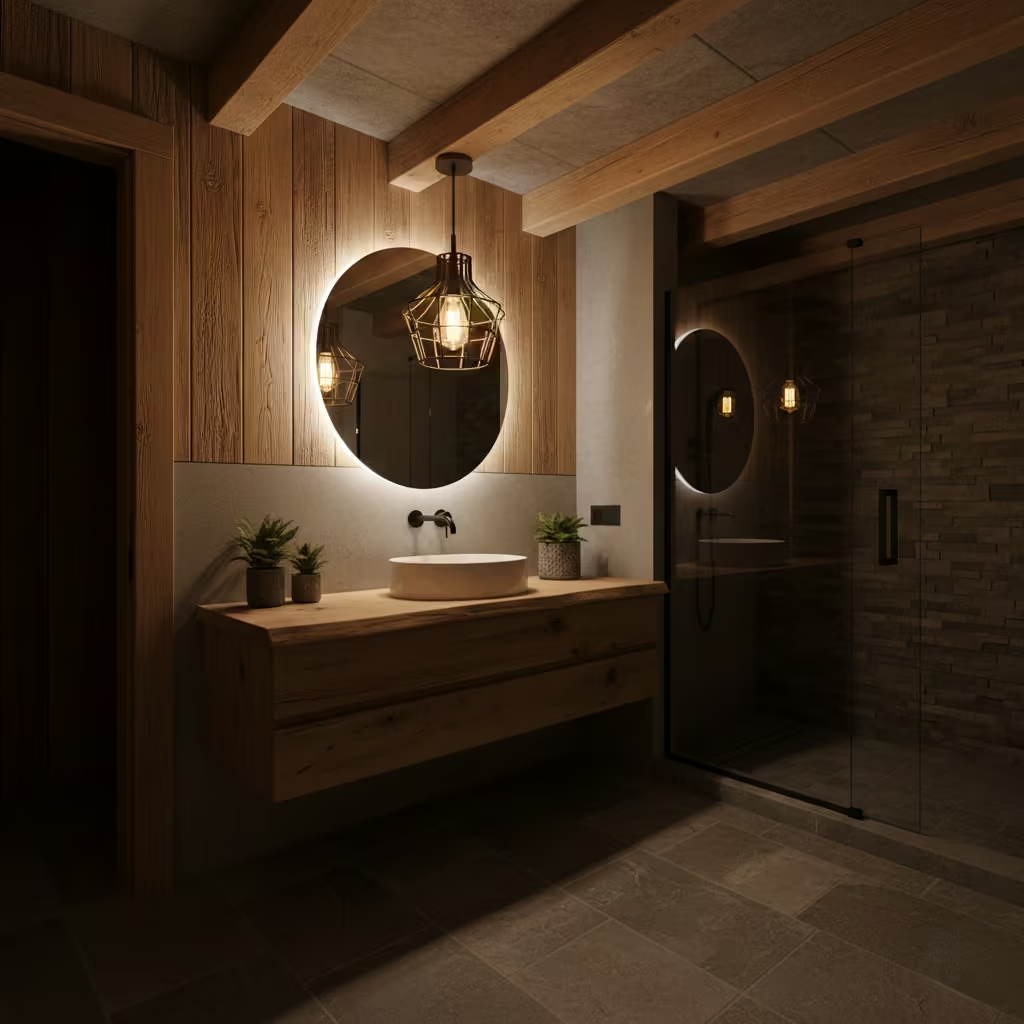
Statement pendants bring personality and visual interest to barndominium bathrooms, acting as both functional light and décor feature. They can reinforce rustic charm or add a modern contrast depending on finish and style.
Practical details:
- Ceiling height recommendations: Ideal 2.7–3.0 m (9–10 ft) for single pendants; lower ceilings may require compact designs or flush mounts.
- Distance from mirrors: Position 600–750 mm (24–30 in) above the vanity top to avoid glare and shadows on the face. Maintain at least 150 mm (6 in) clearance from wall to allow for light spread.
- Style options: Exposed filament bulbs, metal cage shades, glass globes, or reclaimed wood accents complement rustic themes. Grouped pendants or oversized single fixtures create focal points.
Pros
- Adds dramatic visual impact and personality.
- Can highlight specific areas like vanity or tub.
- Flexible style to match rustic, industrial, or modern themes.
Cons
- Needs careful positioning to avoid glare or shadows.
- Overly large fixtures can overwhelm small bathrooms.
- Installation may require electrical rewiring for pendant drops.
Vintage Tin Ceiling Tiles
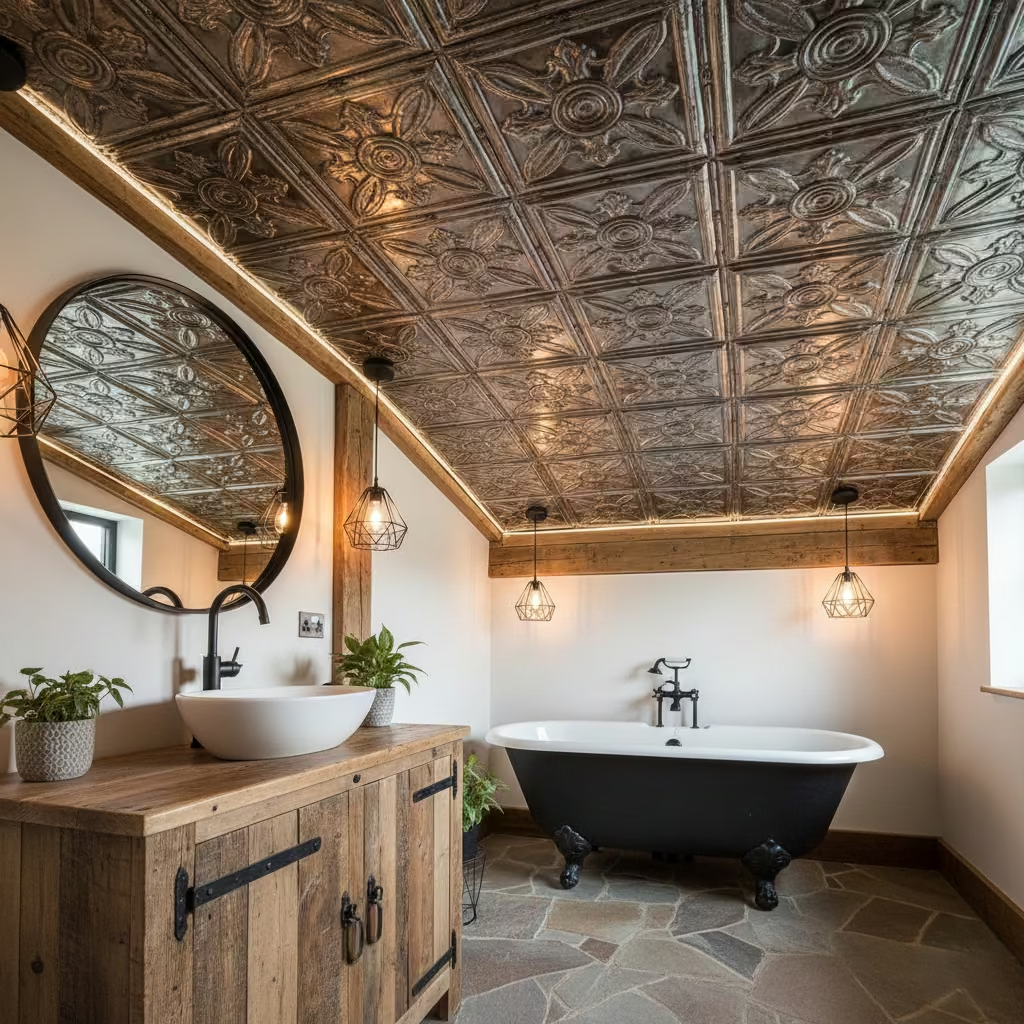
Vintage tin ceiling tiles introduce historic character and texture, giving a barndominium bathroom a unique, timeless charm. Their embossed patterns create visual interest while echoing industrial and rustic motifs often seen in barn conversions.
Practical details:
- Ceiling area coverage: Standard tin tiles are 305 × 305 mm (12 × 12 in) or 610 × 610 mm (24 × 24 in). Calculate quantity based on total ceiling area, allowing 5–10% extra for cuts and pattern matching.
- Installation challenges: Tiles require a flat substrate or furring strips for mounting. Cutting embossed metal can be tricky; specialist snips or shears may be needed. They must be primed and sealed to resist moisture in bathrooms. Consider lightweight PVC versions for simpler installation and corrosion resistance.
Pros
- Adds rustic-industrial elegance and textural interest.
- Durable and long-lasting if properly sealed.
- Can be painted or finished to match décor.
Cons
- Installation is labor-intensive, especially for heavy or authentic tin.
- Prone to dents if handled roughly.
- Needs sealing or coating to prevent rust in wet environments.
Textured Stone or Brick Wall
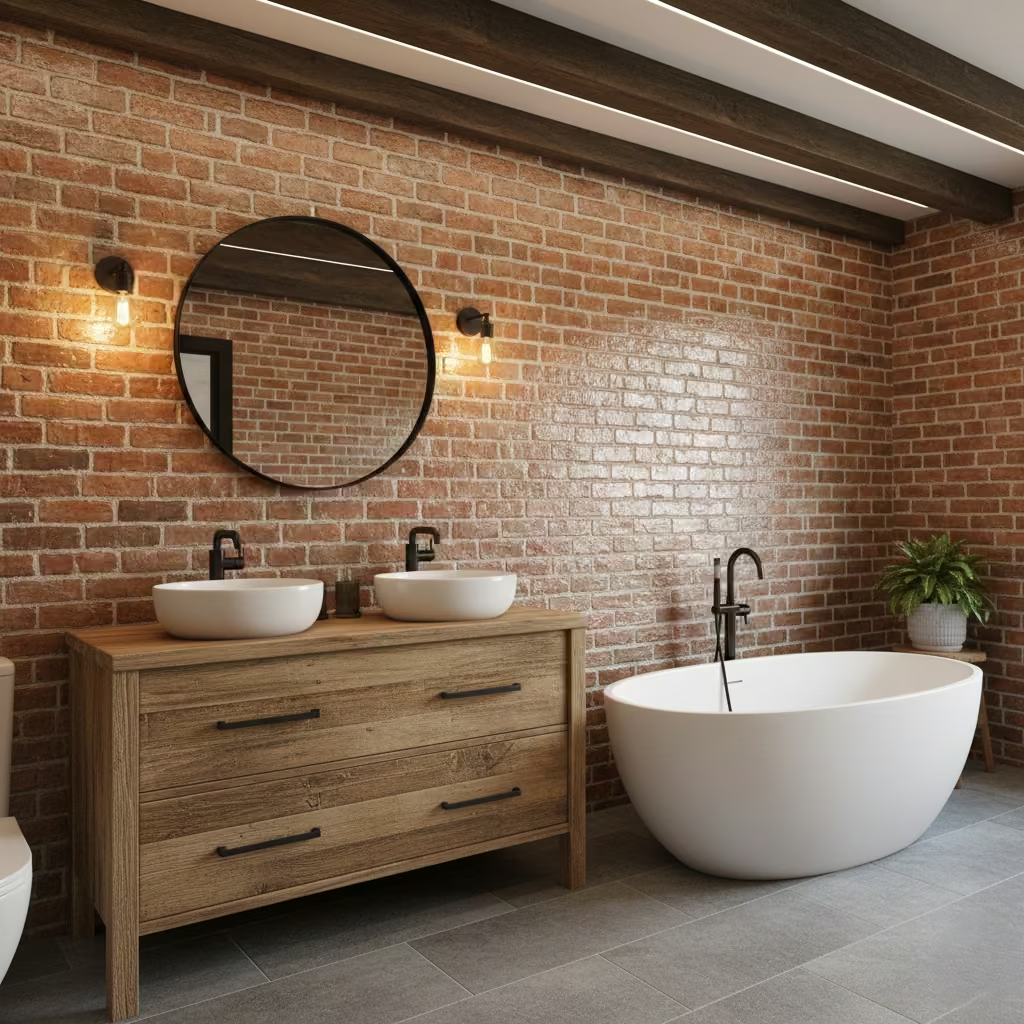
A textured stone or brick wall acts as a dramatic focal point while reinforcing the barn-inspired rustic aesthetic. It works well behind vanities, tubs, or in wet zones when properly treated.
Practical details:
- Moisture sealing: Use waterproof membranes behind masonry or stone veneers; seal grout and exposed surfaces with penetrating sealer.
- Thickness: Veneer panels are typically 20–50 mm (0.8–2 in); full stone walls may be 100–150 mm (4–6 in).
- Cost considerations: Veneer tiles: GBP 50–120 / m² | USD 60–150 / m²; full masonry walls higher due to labor and structural requirements.
Pros
- Creates a striking, rustic focal point.
- Durable and low maintenance once sealed.
- Complements vanities, tubs, and barnwood finishes.
Cons
- Heavy materials may require structural assessment.
- Sealing and maintenance are essential to prevent moisture damage.
- Installation is labor-intensive and can be expensive.
You May also Like: 15 Bathroom Remodel Ideas That Will Inspire Your Dream Renovation
Open Shelving with Woven Baskets
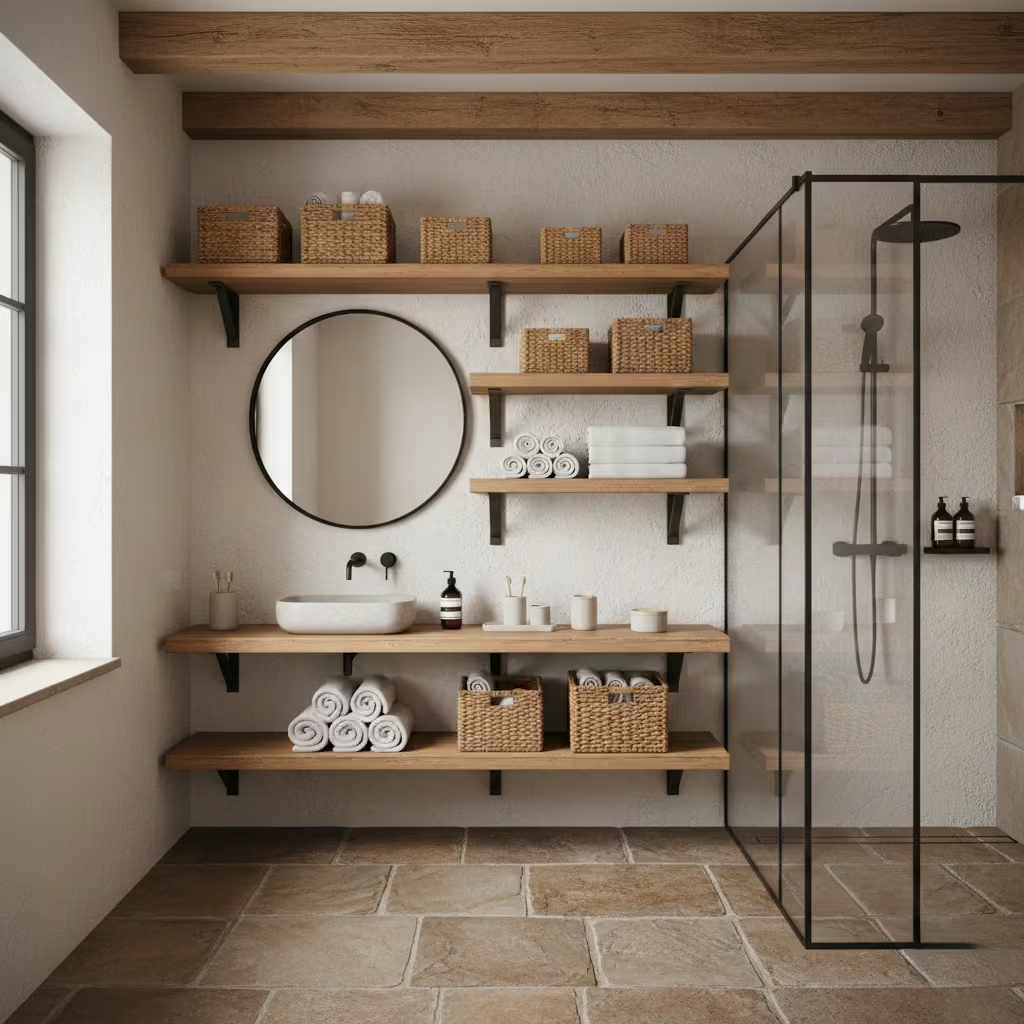
Open shelving provides practical storage while maintaining a rustic, airy feel. Pairing shelves with woven baskets combines style and functionality, keeping towels, toiletries, and décor organized.
Practical details:
- Shelf depth: 200–300 mm (8–12 in) for towels or small baskets.
- Weight limit: Ensure 15–25 kg (33–55 lbs) per shelf with proper wall anchors or stud mounting.
- Styling tips: Mix textures wooden shelves, metal brackets, and natural fiber baskets. Leave some negative space to prevent clutter and maintain an open feel.
Pros
- Easy access to frequently used items.
- Complements rustic and industrial designs.
- Flexible layout and style customization.
Cons
- Items on open shelves collect dust and may need frequent cleaning.
- Overloading shelves risks wall damage.
- May not provide the privacy or concealment that closed cabinetry offers.Top of Form
Custom Shower Niche for Storage
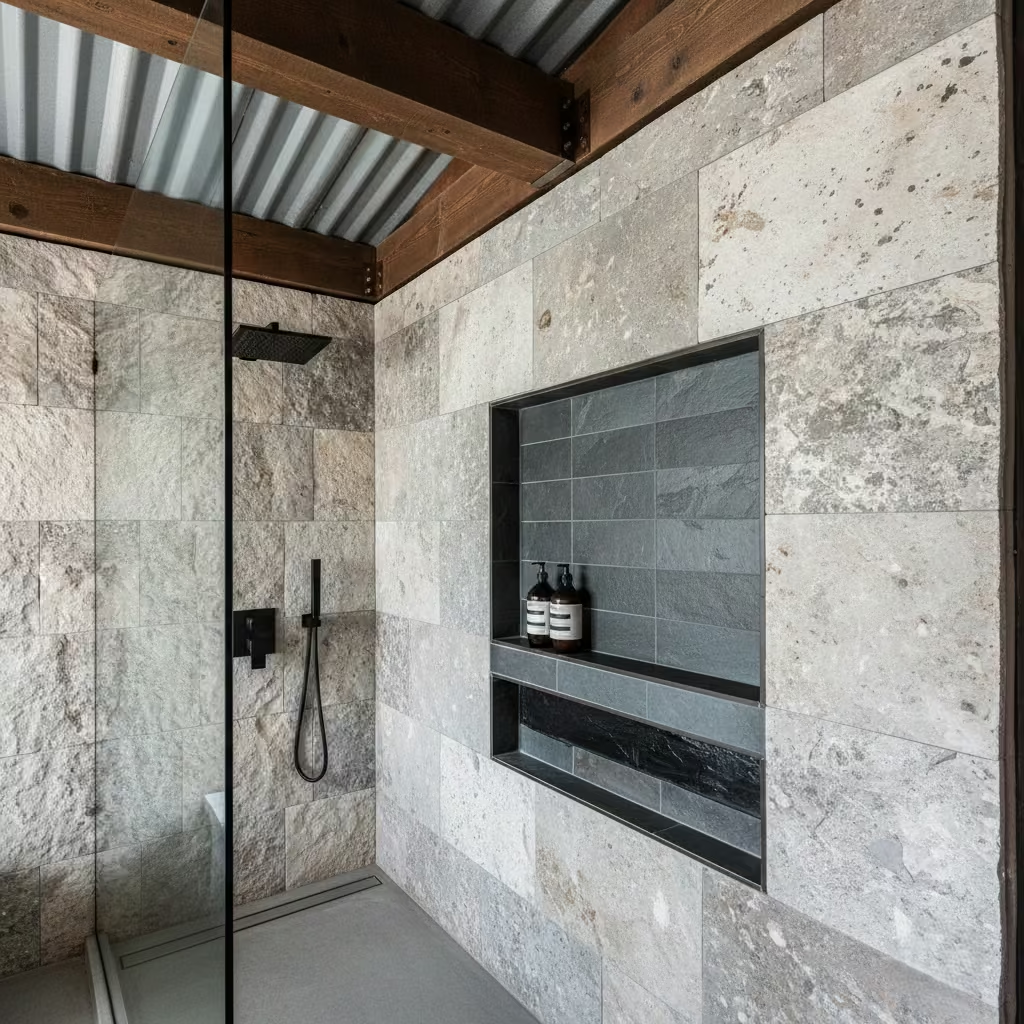
A custom shower niche is a practical way to store toiletries without cluttering your shower floor or ledges, while also adding a sleek, integrated look that complements a barndominium’s rustic-industrial style.
Practical details:
- Recommended size: 300–400 mm wide × 200–300 mm high × 90–120 mm deep (12–16 × 8–12 × 3.5–5 in) per niche is ideal for standard shampoo and soap bottles. Multiple stacked niches can accommodate more items.
- Tile finishing tips: Line the niche with the same waterproof membrane and tiles as the surrounding shower wall. Consider contrasting tiles for a visual highlight, but ensure grout joints are sealed to prevent water infiltration. Include a slight tilt toward the shower for drainage (2–3 mm / 0.08–0.12 in).
Pros
- Keeps shower area organized and clutter-free.
- Customizable to fit space and design style.
- Can serve as a decorative feature with accent tiles.
Cons
- Incorrect waterproofing risks leaks and water damage.
- Requires precise planning before tiling or waterproofing.
- Too small niches may be impractical for larger bottles.
You May also Like: 30 Stunning Desert Bathroom Design Ideas for a Warm, Natural Look
Neutral Earth Tone Palette
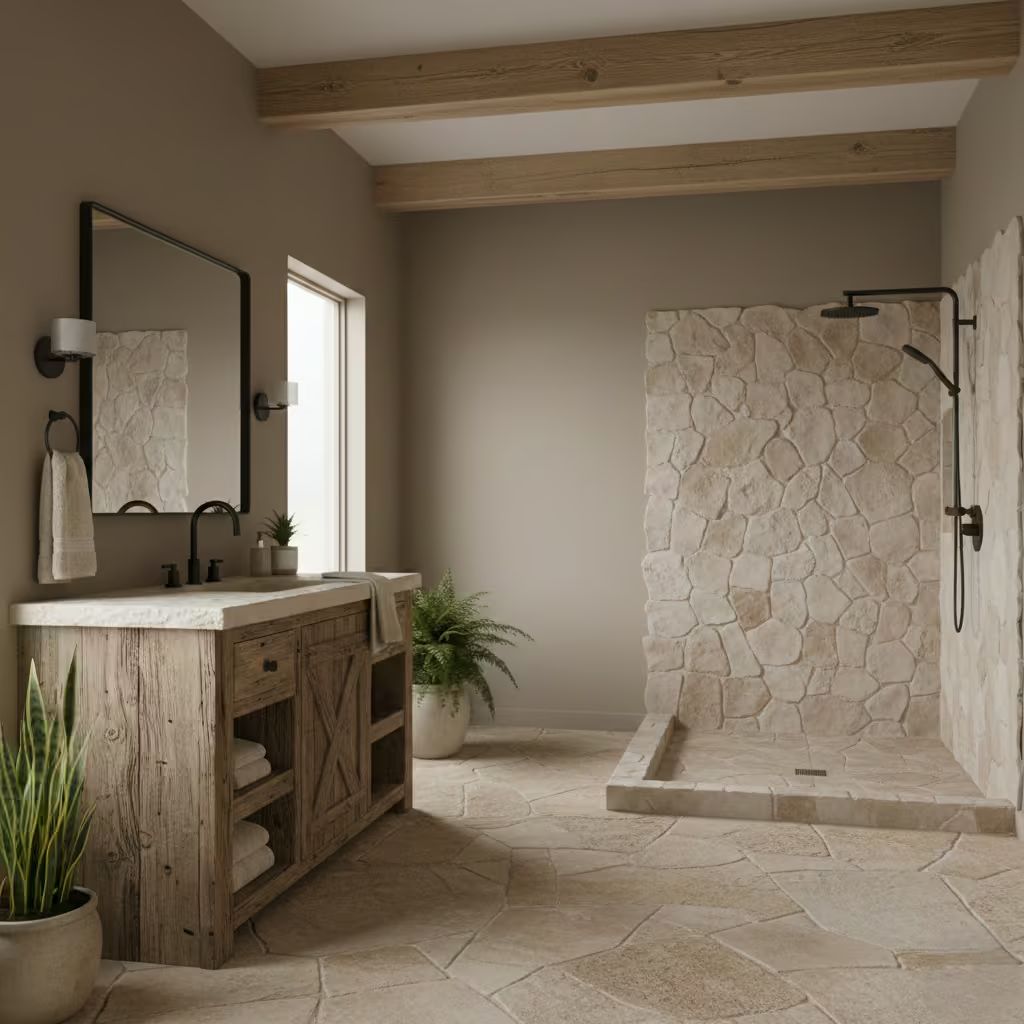
A neutral, earth-toned palette enhances the warm, natural aesthetic of a barndominium bathroom while creating a versatile backdrop for rustic and modern elements.
Practical details:
- Paint vs tile options: Matte or satin paint works well for walls not directly exposed to water; consider textured plaster or lime wash for added rustic feel. Tiles in beige, taupe, clay, or soft gray are ideal for wet zones, splashbacks, or floors.
- Pairing tips: Combine wood, stone, and metal finishes with subtle contrast to avoid monotony. For example, soft taupe walls with reclaimed wood vanities and matte black fixtures create depth and warmth. Include darker grout to highlight textures or lighter grout for a seamless look.
Pros
- Timeless, flexible base that complements rustic and modern décor.
- Creates a calming, spa-like atmosphere.
- Easy to update with accent colors via accessories or textiles.
Cons
- Overuse of neutrals without contrast can feel flat or cold.
- Some lighter shades may show stains or watermarks more easily.
- Requires careful selection of finish for wet areas to prevent moisture issues.
Skylight Above Shower or Tub
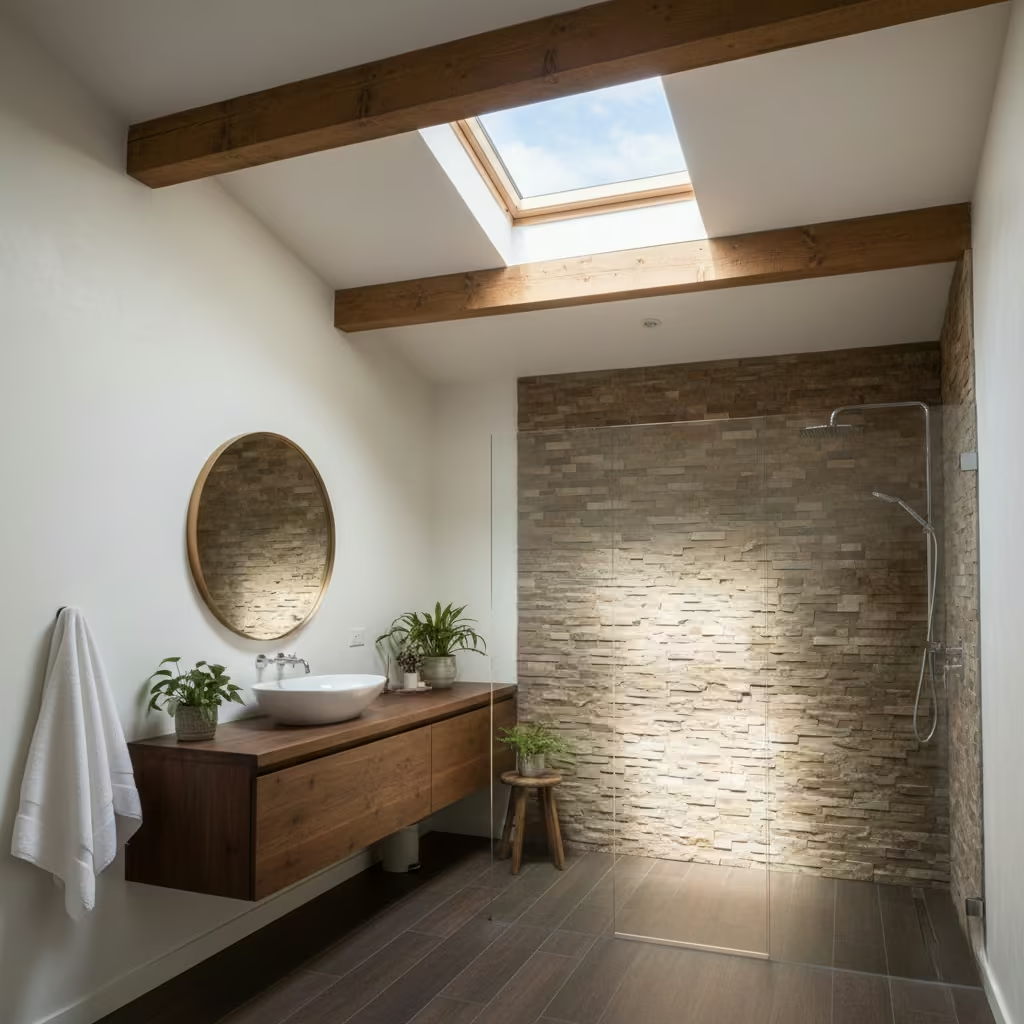
A skylight brings natural light into the bathroom, enhancing the open, airy feel typical of barndominiums while showcasing design features like tubs or stone walls.
Practical details:
- Minimum dimensions: 600 × 600 mm (24 × 24 in) for standard natural light; larger 900 × 1200 mm (35 × 47 in) recommended for more illumination in spacious bathrooms.
- Privacy tips: Use frosted glass, opaque glazing, or interior blinds to maintain privacy, especially for second-floor bathrooms.
- Water-resistance considerations: Ensure skylights have proper flashing and waterproof seals. Position away from direct water spray where possible; use tempered or laminated glass suitable for wet environments. Consider low-E coatings for UV protection.
Pros
- Floods the space with natural light, enhancing mood and visibility.
- Reduces reliance on artificial lighting during the day.
- Highlights textures and materials, amplifying rustic appeal.
Cons
- Installation is costly and may require roof modification.
- Needs careful waterproofing to prevent leaks.
- Privacy and heat gain must be managed appropriately.
Antique Fixtures (e.g., Clawfoot Tubs, Brass Taps)
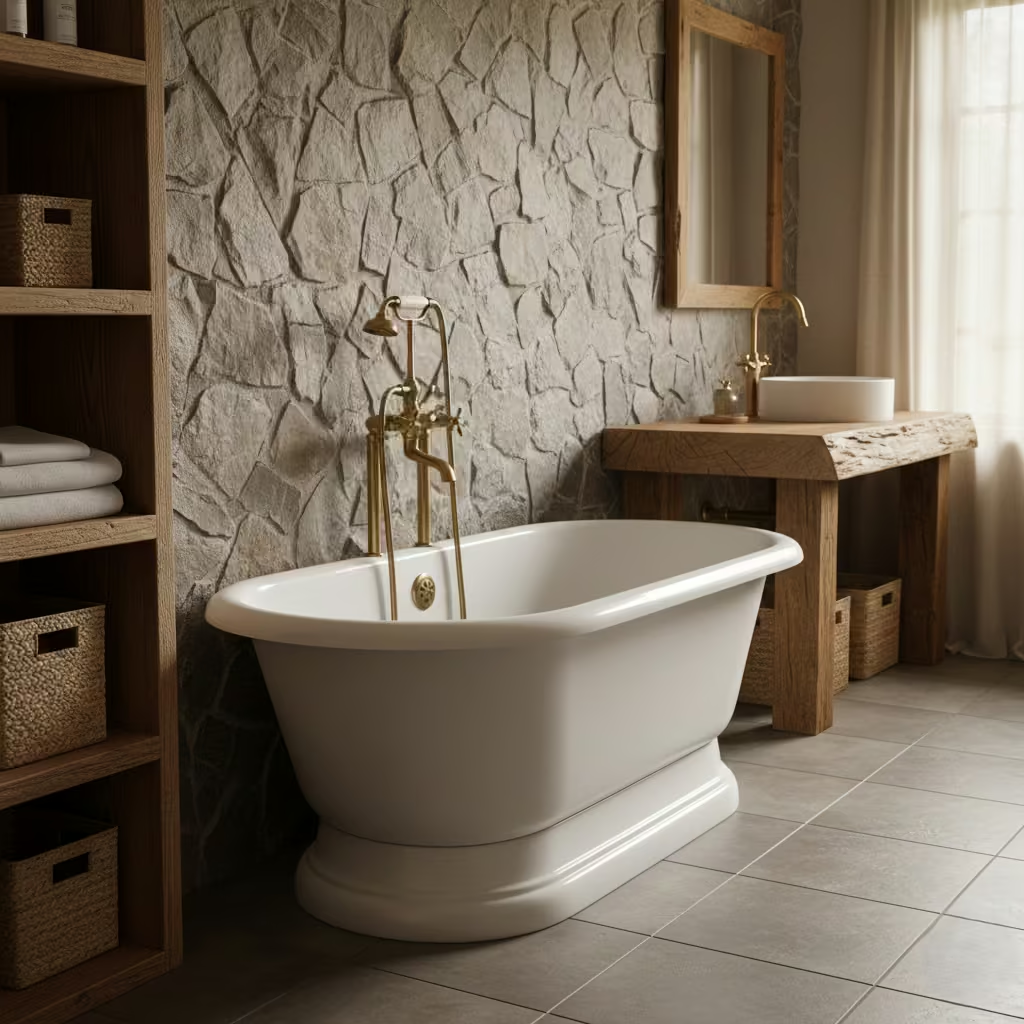
Incorporating antique fixtures like clawfoot tubs or brass taps adds historic charm and character to a barndominium bathroom. These pieces often become focal points, reinforcing the rustic aesthetic while delivering a sense of timeless luxury.
Practical details:
- Sourcing tips: Look for reputable salvage yards, specialty antique shops, or online marketplaces. Verify that items are structurally sound and free of leaks or corrosion. Refurbished or reproduction pieces are a safer alternative if originals are fragile.
- Compatibility with modern plumbing: Ensure fixtures match current pipe diameters (typically 15–22 mm / 0.6–0.87 in for hot/cold water). You may need adapters or conversion fittings. Check that taps comply with local water pressure standards and consider mixer valves for convenience.
Pros
- Creates a unique, character-filled bathroom.
- Can be a standout design feature and conversation piece.
- Reclaimed or vintage items are eco-friendly.
Cons
- May require plumbing adaptations or specialist installation.
- Potential maintenance issues if aged materials corrode.
- Authentic antiques can be costly and hard to source.
Combination of Matte and Glossy Finishes
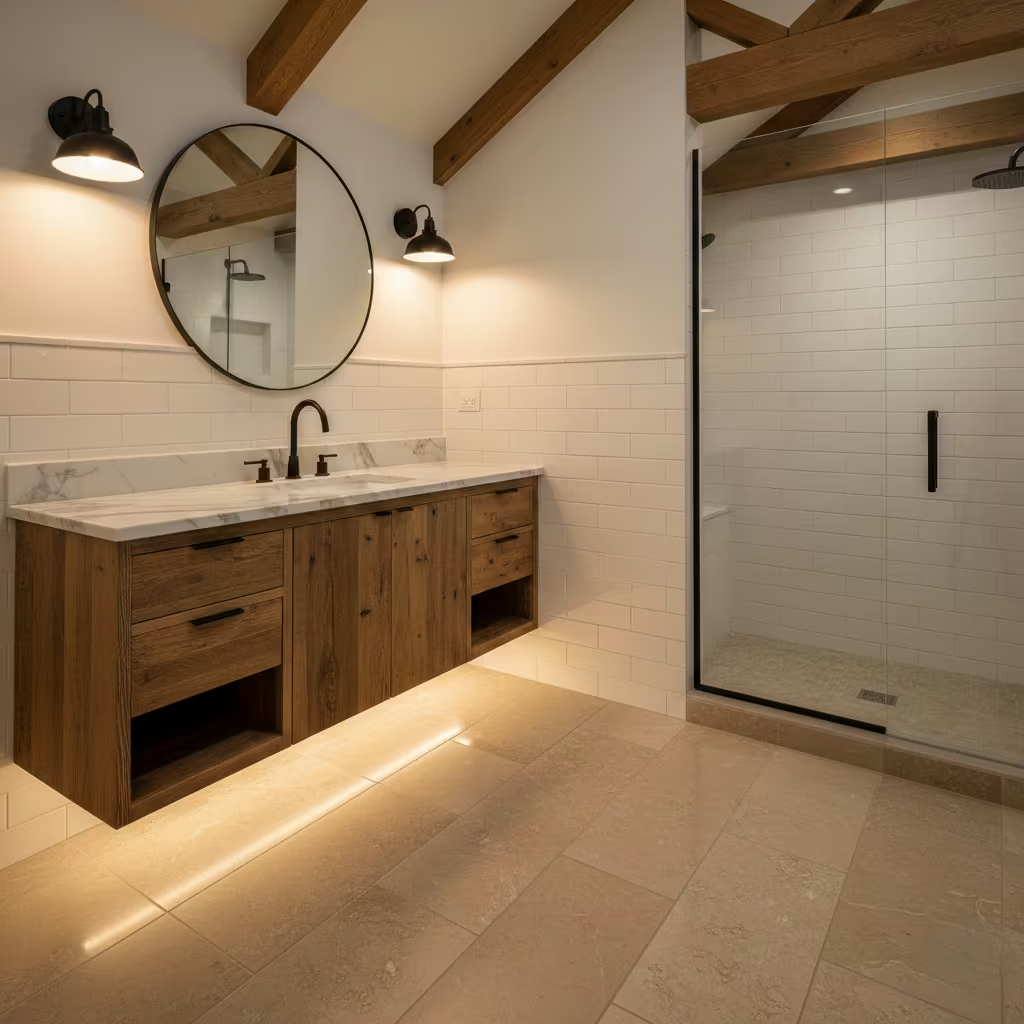
Using a mix of matte and glossy finishes introduces contrast and visual interest while complementing the rustic-modern theme of a barndominium bathroom. This approach can be applied to tiles, fixtures, cabinetry, or accessories.
Practical details:
- Examples: Matte subway tiles on walls paired with glossy floor tiles; matte cabinetry with glossy countertops; matte black taps against polished stone.
- Cleaning and durability: Matte surfaces resist fingerprints but can show soap residue; glossy surfaces reflect light but may show smudges more easily. Use soft cloths and non-abrasive cleaners suitable for each finish.
Pros
- Adds depth and texture without overwhelming the space.
- Highlights key features and architectural elements.
- Works across rustic, industrial, and modern styles.
Cons
- Requires careful planning to avoid visual clash.
- Glossy surfaces may need frequent cleaning.
- Overuse of high-gloss may feel too contemporary for a rustic setting.
Rustic Ladder Towel Rack
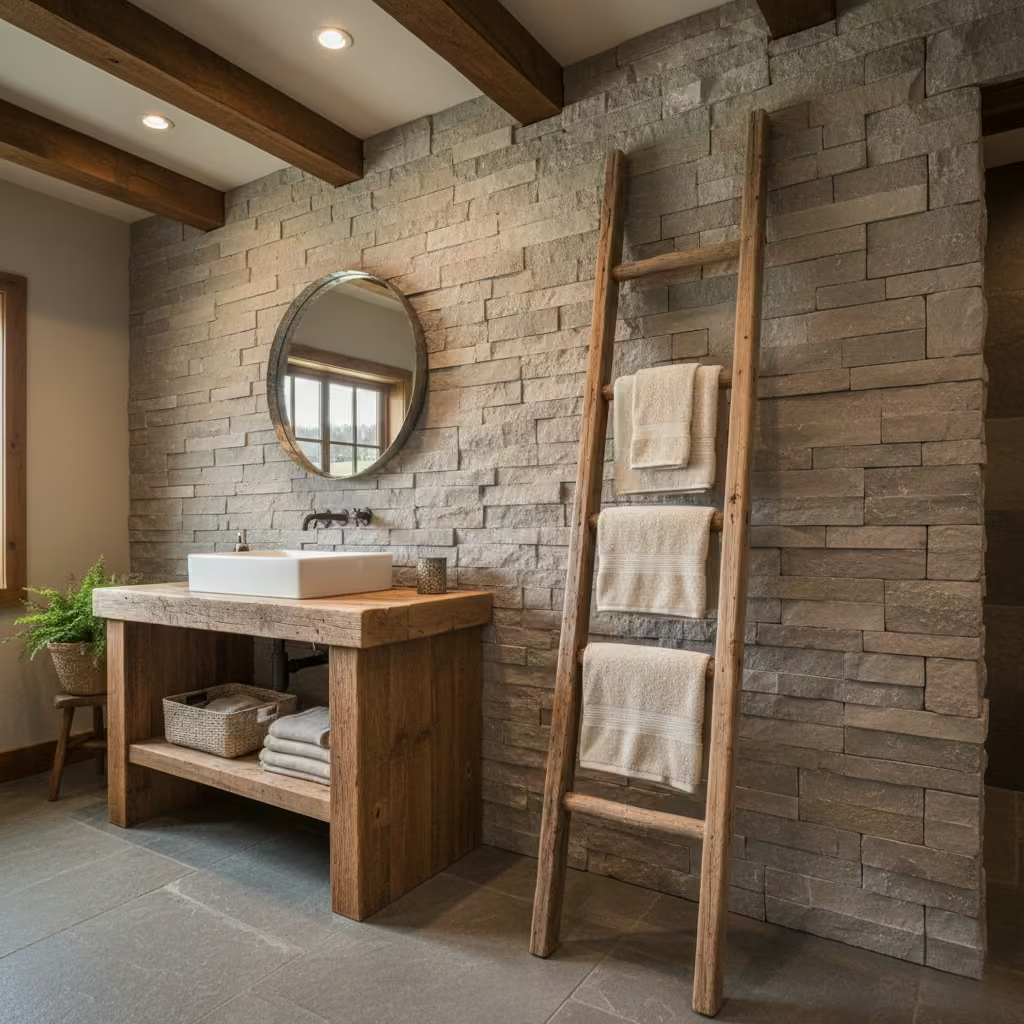
A rustic ladder towel rack combines practical storage with decorative flair, echoing barn-inspired design while keeping towels within easy reach. It’s especially effective in bathrooms with limited wall space.
Practical details:
- Ideal height: Top rung 1.5–1.6 m (59–63 in) from finished floor; bottom rung at 600–700 mm (24–28 in).
- Spacing between rungs: 250–300 mm (10–12 in) to allow towels to hang without overlapping excessively.
- Safety tips: Ensure ladder leans securely against wall or is fixed with brackets to prevent tipping. Use non-slip feet if freestanding on tile floors. Avoid overloading with heavy items.
Pros
- Provides functional storage and easy towel access.
- Adds rustic, decorative charm.
- Lightweight and easy to move or adjust.
Cons
- Limited storage compared to cabinets or shelves.
- Overloading may cause tipping or wall damage.
- Exposed wood may require occasional sealing to prevent moisture damage.Top of Form
Concrete or Stone Sink Bowl
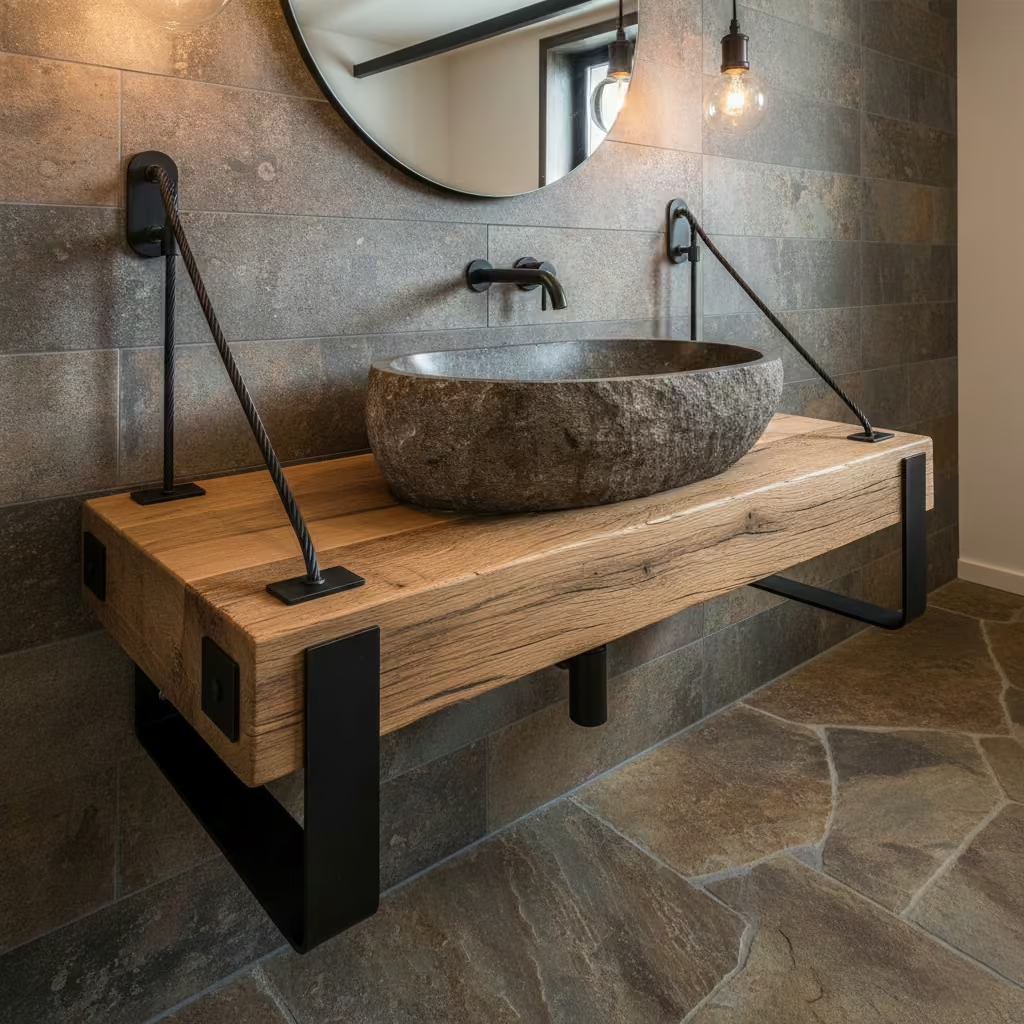
Concrete or stone sink bowls bring a tactile, sculptural element to a barndominium bathroom while reinforcing its rustic-industrial character. These sinks pair well with wood vanities, metal fixtures, and textured tiles.
Practical details:
- Size: Common diameters range from 380–500 mm (15–20 in) with depths of 120–200 mm (5–8 in). Rectangular or oval bowls may be 400–600 mm (16–24 in) wide.
- Weight: 15–50 kg (33–110 lbs) depending on material and size; verify countertop and cabinet support.
- Installation notes: Require flat, sturdy surface; use adhesive suitable for stone or concrete. Ensure proper plumbing alignment and overflow access if applicable. Sealing is essential to prevent staining and water absorption.
- Maintenance tips: Clean with mild soap and water; avoid acidic cleaners. Re-seal periodically to protect the surface from moisture and stains.
Pros
- Strong visual impact and unique texture.
- Durable and long-lasting if properly sealed.
- Complements rustic, industrial, or modern finishes.
Cons
- Heavy; requires reinforced support.
- Sealing and maintenance required to prevent damage.
- Can be costly compared to ceramic or resin options.
Integrated Laundry Space
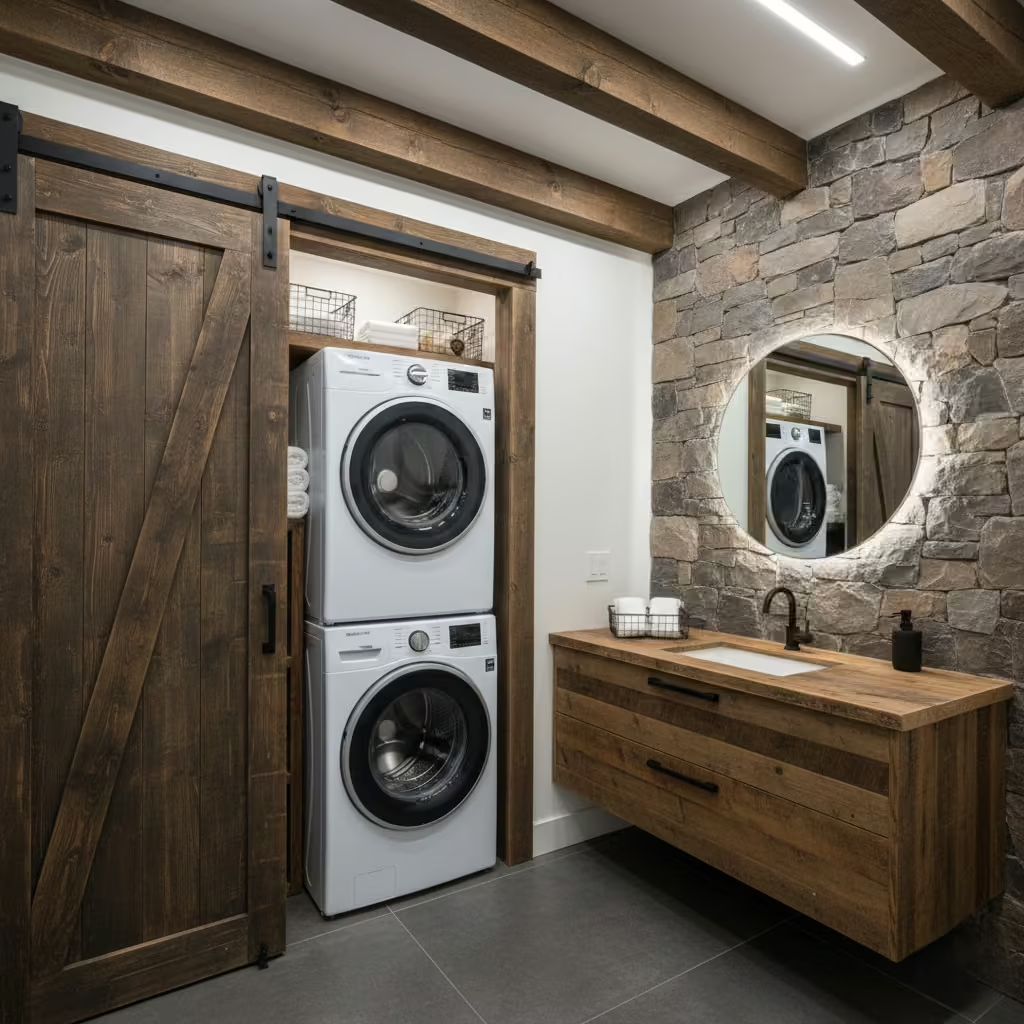
In larger barndominium bathrooms, an integrated laundry zone maximizes utility without compromising style. Concealed or semi-open setups keep appliances accessible yet unobtrusive.
Practical details:
- Dimensions: Minimum 900–1200 mm wide × 600 mm deep × 850–900 mm high (35–47 × 24 × 33–35 in) for a front-loading washer and dryer stack or side-by-side.
- Appliance clearance: Leave 50–75 mm (2–3 in) around machines for ventilation and servicing. Ensure access to plumbing and electrical outlets.
- Storage ideas: Add upper cabinets, pull-out hampers, or open shelves above appliances. Use sliding doors or barn-style doors to conceal the area when not in use.
Pros
- Consolidates bathroom and laundry functionality in one space.
- Saves footprint compared to separate laundry rooms.
- Can be styled to match rustic-modern bathroom aesthetics.
Cons
- Requires careful planning of plumbing, venting, and electrical.
- Noise from appliances may affect bathroom comfort.
- Limited flexibility for very small bathrooms.
Minimalist Accessories with Rustic Texture
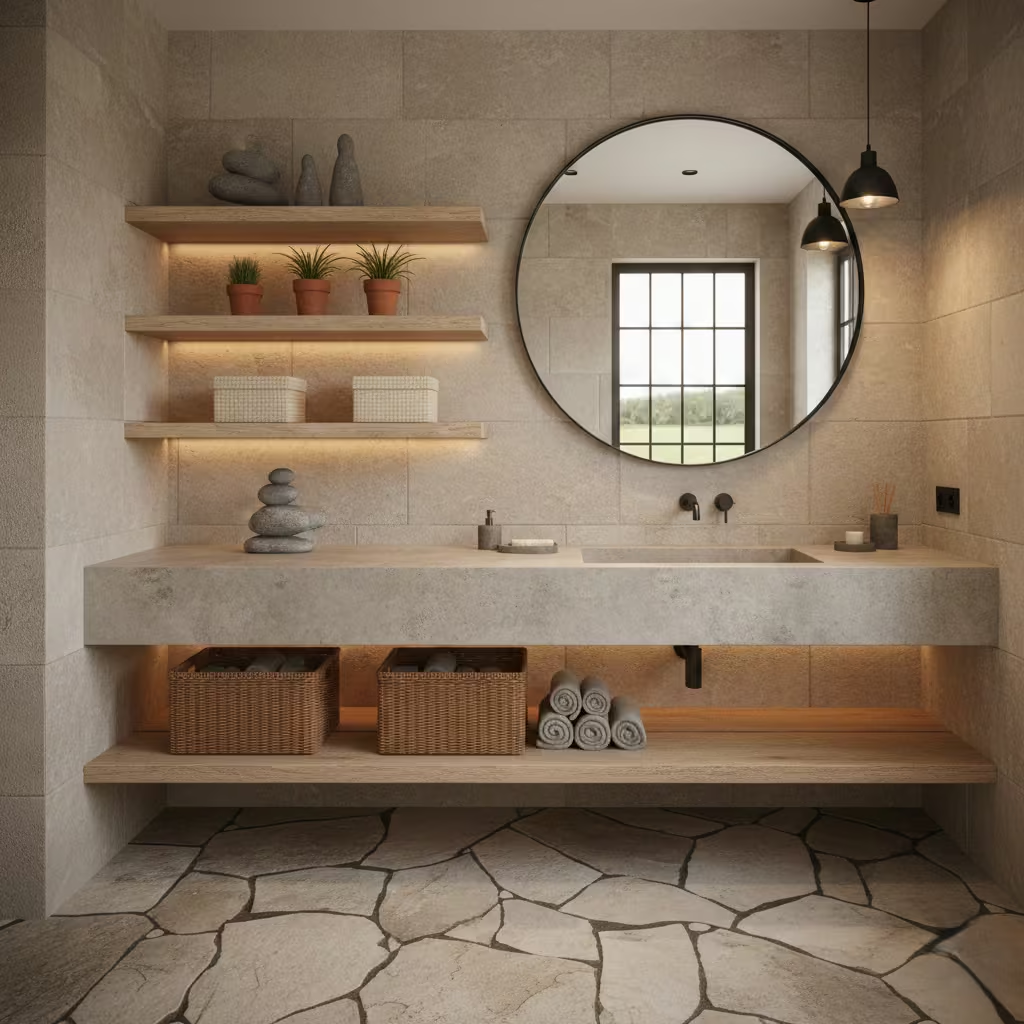
Finishing touches like sculptural vases, woven baskets, or stone figurines add personality and tactile warmth to a barndominium bathroom without overcrowding surfaces. Minimalist accessories balance rustic textures with clean lines.
Practical details:
- Examples: Stone soap dishes, wooden trays, ceramic planters, small driftwood sculptures.
- Materials: Wood, stone, clay, woven fibers. Avoid overly glossy or synthetic finishes that clash with rustic elements.
- Styling dos/don’ts: Do select a few standout pieces rather than cluttering surfaces. Do mix textures subtly for contrast. Don’t overcrowd vanities or shelves; keep functional items accessible. Rotate items seasonally to refresh the look.
Pros
- Adds personality and warmth without overwhelming the space.
- Reinforces rustic-modern aesthetic.
- Flexible and easy to update.
Cons
- Over-accessorizing can make the space feel cluttered.
- Some materials (wood, woven fibers) require occasional cleaning or sealing.
- Small pieces can get lost in large bathrooms if not scaled properly.
Tips for Designing a Barndominium Bathroom
Designing a barndominium bathroom is all about balancing rustic charm with modern convenience. Exposed beams, reclaimed wood, and textured walls bring warmth and character, but without careful planning, functionality can suffer. Start by prioritizing ventilation and moisture management: install an effective extractor fan, consider operable windows or skylights, and choose water-resistant finishes for floors, walls, and cabinetry to prevent mold and warping.
A clear layout ensures both comfort and practicality. Use a checklist to guide your planning: measure floor space and ceiling height accurately, confirm clearance around tubs, showers, and vanities (minimum 600 mm / 24 in for movement), and plan tap heights and spacing for sinks (750–900 mm / 30–36 in between double basins). For lighting, layer ambient, task, and accent illumination, keeping recessed lights or pendants at safe distances from mirrors and wet areas.
Finally, integrate storage without clutter think open shelves with baskets, niches, or floating vanities. By combining these practical considerations with textured materials, warm tones, and statement fixtures, you can create a barndominium bathroom that feels both inviting and luxurious while standing up to everyday use.
Final Thoughts about Designing barndominium bathroom
A barndominium bathroom is an opportunity to blend rugged character with everyday comfort. Mix and match the ideas above to suit your footprint, budget, and personal style pair exposed beams with modern fixtures, or balance reclaimed wood with clean, minimalist hardware. With careful attention to ventilation, waterproofing, and measured clearances, these design choices can deliver a room that is both highly functional and distinctly striking.
Save the ideas that resonate, create a mood board, and consult a qualified designer or tradesperson for structural or plumbing work. If you prefer a hands-on approach, start with smaller projects vanity swaps, shelving, or lighting so you can test materials and finishes before committing. If you’d like, I can produce measured plans, material lists, or a project sequence to get you started.
Frequently asked Questions about barndominium bathroom Designing
What makes a barndominium bathroom different from a regular bathroom?
Barndominium bathrooms blend rustic, industrial, or barn-inspired elements like exposed beams, reclaimed wood, and metal fixtures with modern conveniences such as frameless showers, heated floors, and efficient storage solutions. The design focuses on both aesthetic character and functional durability.
How do I choose the right flooring for a barndominium bathroom?
Opt for water-resistant, durable materials like stone, porcelain tiles, or sealed concrete. Heated flooring is a popular option to add comfort. Consider slip resistance, color coordination with rustic elements, and ease of maintenance.
Can I install a freestanding tub on a standard subfloor?
It depends on the tub material. Acrylic tubs are lightweight, but cast iron or stone tubs can weigh over 200 kg (440 lbs) when filled. You may need to reinforce the floor joists to safely support the weight.
How do I maintain reclaimed wood in a bathroom environment?
Seal wood with a water-resistant finish such as oil, varnish, or polyurethane. Avoid prolonged direct water contact, wipe spills immediately, and reapply sealant every 1–2 years to prevent warping or mold.
Are antique or vintage fixtures compatible with modern plumbing?
Yes, but you may need adapters, modern valves, or modified piping to match contemporary water pressure and pipe sizes. Always check compatibility with local building codes.
What’s the best way to add storage without compromising rustic aesthetics?
Use open shelving with woven baskets, niches in showers, floating vanities, or sliding barn doors to conceal laundry and supplies. Keep designs simple and materials consistent with the rustic theme.
How do I ensure proper lighting in a rustic bathroom?
Layer lighting by combining ambient (recessed or ceiling), task (vanity sconces), and accent (pendants or under-cabinet lights). Use matte finishes or warm-toned bulbs to maintain a cozy, rustic feel.
Can I integrate a laundry area into my barndominium bathroom?
Yes, in larger bathrooms. Allocate at least 900–1200 mm width and 600 mm depth per appliance, with adequate ventilation and clearance for servicing. Conceal appliances with sliding doors or cabinetry to maintain aesthetic consistency.
How do I prevent mold and moisture damage?
Ensure proper ventilation, install moisture-resistant materials, seal grout and wood, and slope shower floors toward drains. Skylights or operable windows can improve airflow and natural light, reducing dampness.
How can I make a small barndominium bathroom feel spacious?
Use frameless glass showers, floating vanities, light neutral palettes, and strategically placed mirrors. Keep clutter minimal and incorporate open shelving or niches to maintain visual openness.