Walk-In Wardrobes Designs: A Complete Design-Led Guide for Long-Term Use
Most Walk-In Wardrobes fail not because of poor materials or lack of storage, but because they are designed as oversized cupboards rather than functional rooms. I see this repeatedly in renovation projects where the space looks impressive on paper, yet feels awkward, inefficient, or surprisingly frustrating to use day-to-day.
A well-designed walk-in wardrobe is not about how much you can fit inside it. It is about how the space supports daily behaviour. Dressing, storing, editing, and maintaining clothing all require movement, light, and visual clarity. When these fundamentals are ignored, even generous wardrobes become cluttered, uncomfortable, and short-lived.
Why Walk-In Wardrobes Are Rooms, Not Storage Units
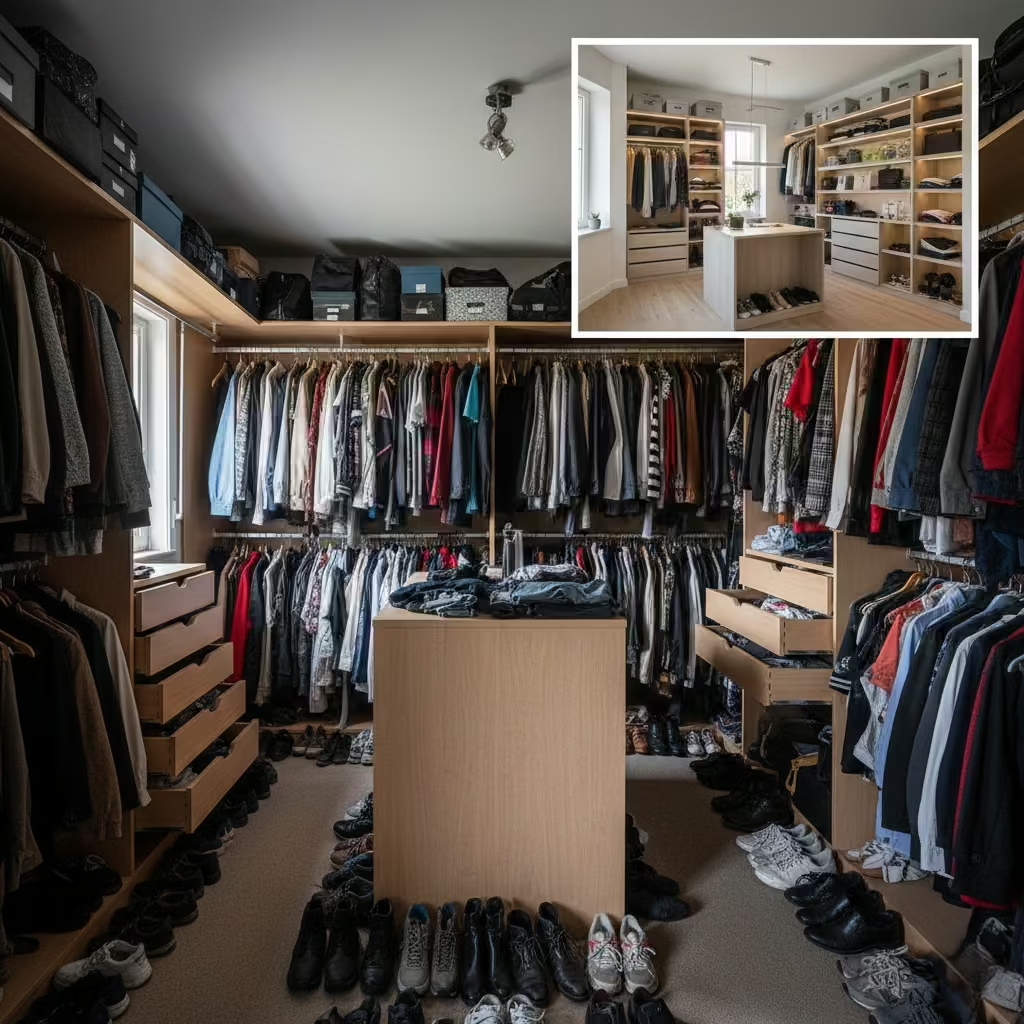
The most common mistake I encounter is treating a walk-in wardrobe as a collection of fitted units rather than a room with its own logic. Furniture thinking focuses on maximising internal volume. Behavioural design focuses on how the body moves, reaches, turns, and pauses within the space.
In practical terms, this means designing around:
- How often items are accessed
- Whether clothes are folded, hung, or layered
- How many steps and movements are required to complete a dressing routine
When wardrobes are designed purely as storage, circulation is compromised. Doors clash, drawers block walkways, and daily use becomes inefficient. A room-based approach ensures that storage serves movement, not the other way around.
Circulation, lighting, and zoning fundamentals
Circulation is the backbone of any successful walk-in wardrobe. As a baseline, I never allow clear walkways below 900 mm (36 in). Anything tighter immediately restricts comfort and usability, especially once drawers or pull-out elements are in use.
Zoning should follow frequency of use:
- Primary zone: Daily clothing at eye and waist height
- Secondary zone: Occasional items slightly above or below
- Archive zone: Seasonal or infrequently worn pieces stored higher
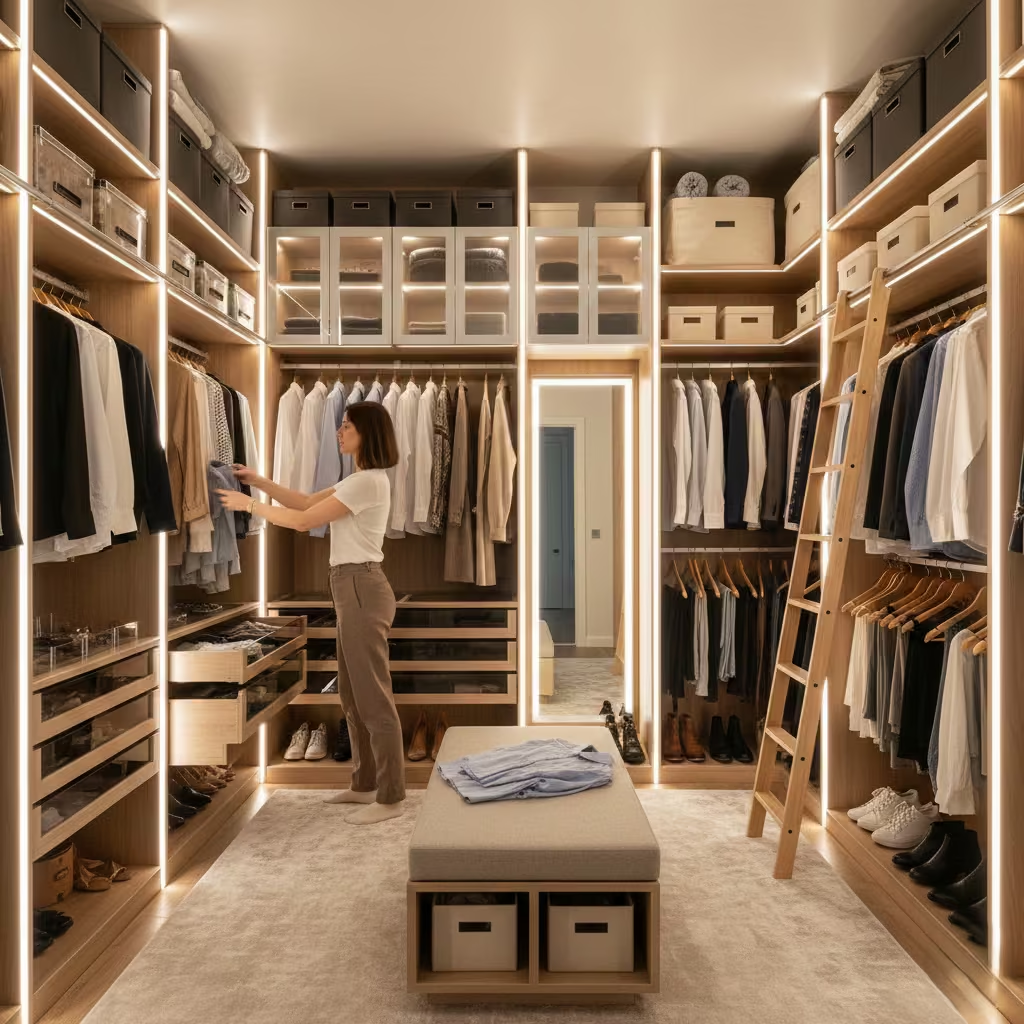
Lighting must support these zones. Overhead lighting alone is inadequate. Vertical lighting integrated into cabinetry or positioned at face height prevents shadowing and improves colour accuracy, which directly affects how clothing is perceived.
When a Walk-In Wardrobe Makes Sense (And When It Does Not)
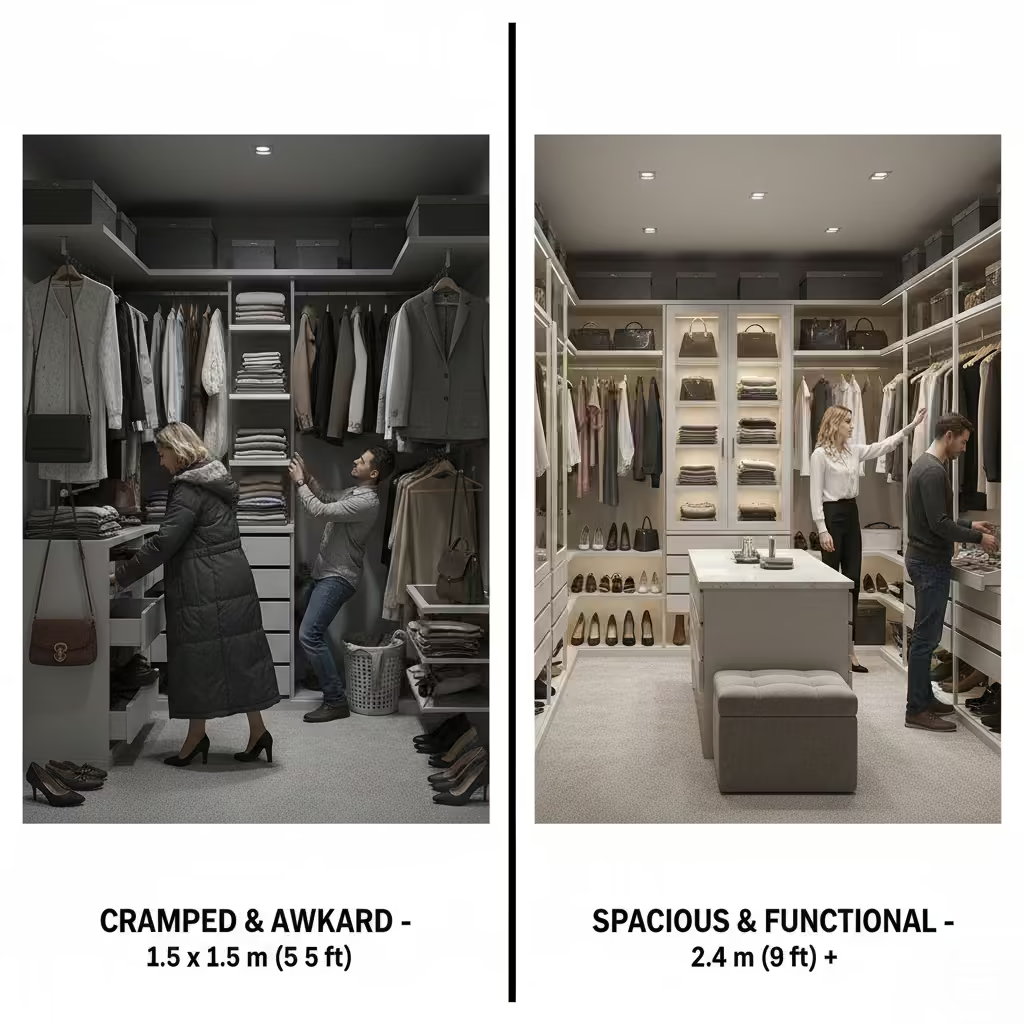
Not every home benefits from a walk-in wardrobe, even if the idea feels aspirational. In my experience, a walk-in wardrobe only begins to function properly when the available space reaches at least 1.5 x 1.5 m (5 x 5 ft). Below this, circulation and storage compete with each other, and the result often underperforms compared to a well-designed fitted wardrobe.
Comfortable, long-term layouts typically start at:
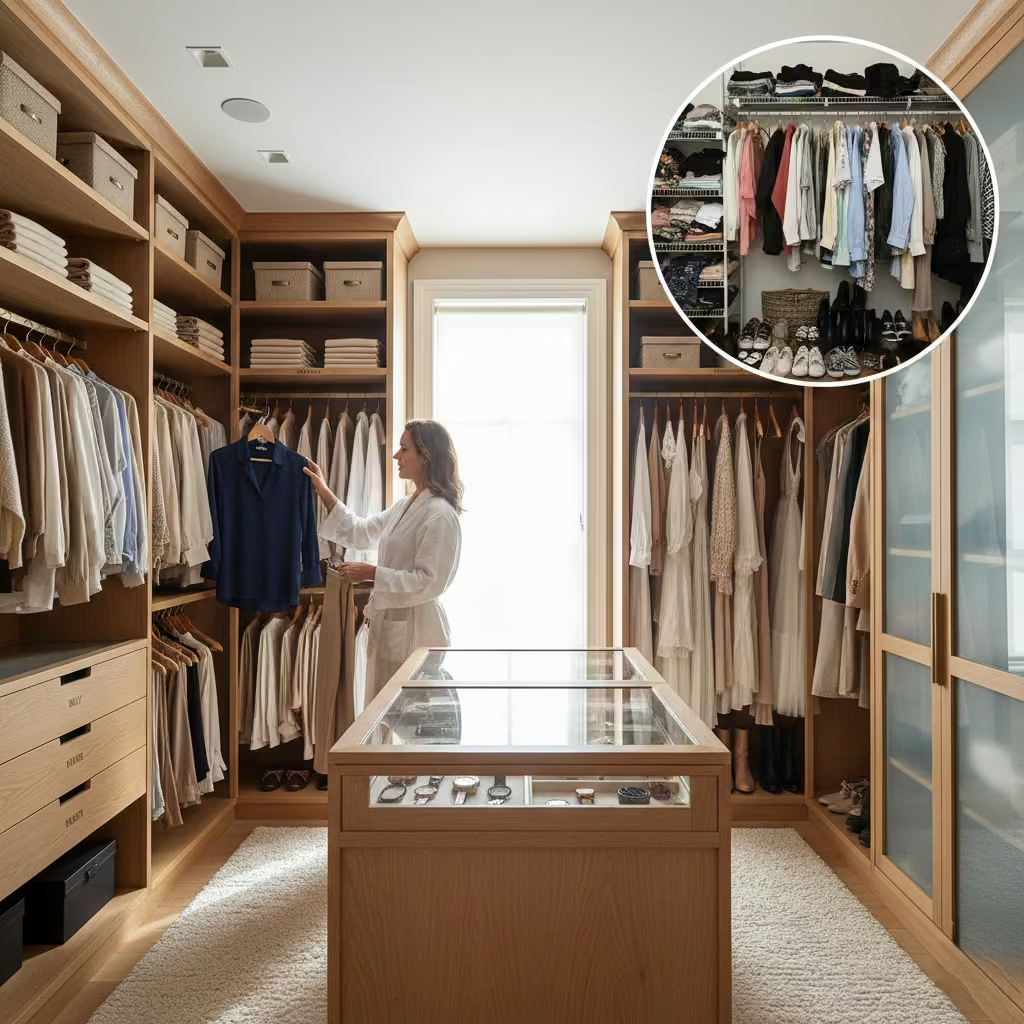
- 2.0 m width (6.5 ft) for single-sided or L-shaped layouts
- 2.4 m (8 ft) or more for U-shaped or island-based designs
If the space cannot meet these thresholds, the design will rely on compromises that often outweigh the perceived benefit of a walk-in.
Lifestyle suitability assessment
Beyond space, lifestyle is critical. Walk-in wardrobes work best for homeowners who:
- Prefer visual order and structured storage
- Edit wardrobes seasonally
- Dress with intention rather than speed
For households with high clothing turnover, shared storage chaos, or limited time for maintenance, fitted wardrobes with enclosed systems often perform better. A walk-in wardrobe exposes habits. If the habits are not aligned with the design, frustration follows.
Walk-In Wardrobe vs Fitted Wardrobe: Functional Differences
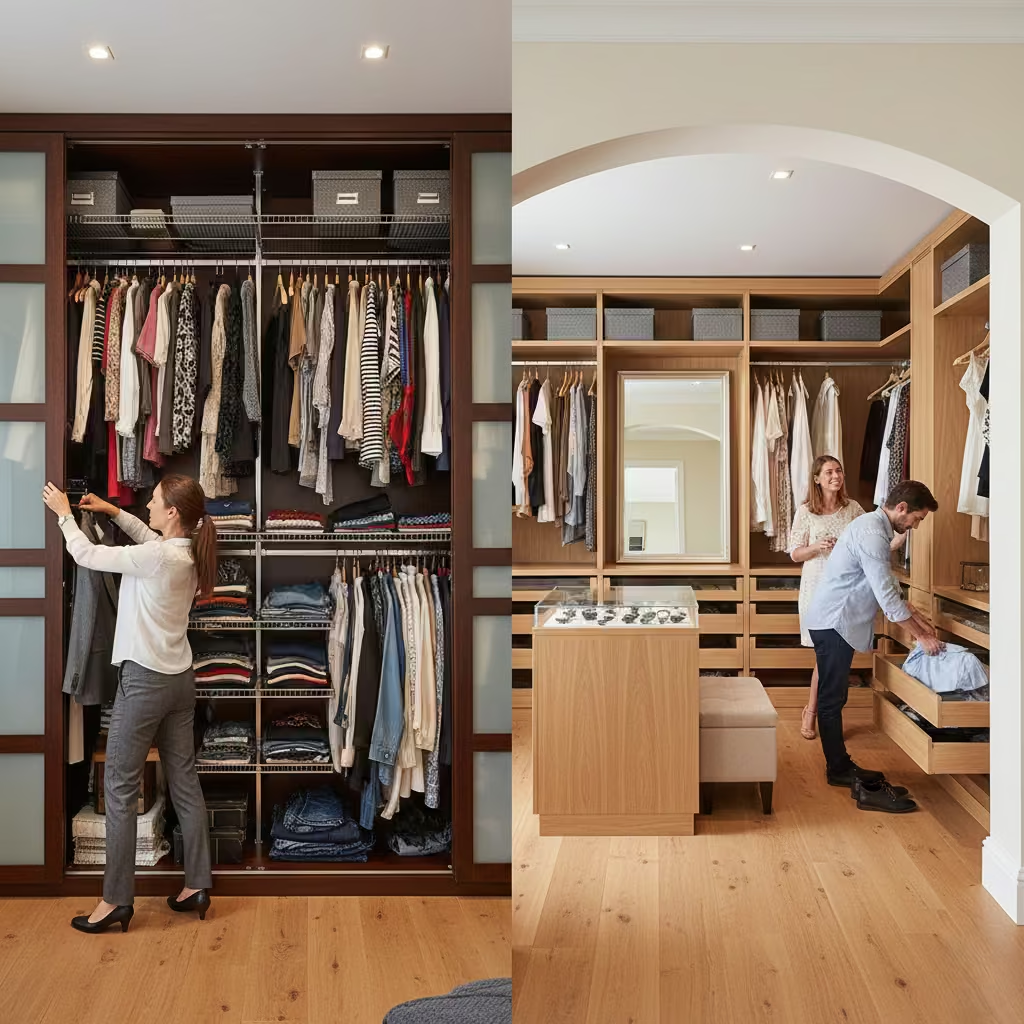
Fitted wardrobes almost always win on pure storage density. They can use full wall height and tighter internal spacing without requiring circulation space. Walk-in wardrobes trade some of that density for usability, visibility, and comfort.
In practical terms, a fitted wardrobe may store 10–20 percent more volume in the same footprint, but a walk-in wardrobe makes it easier to access, maintain, and assess what you own.
Flexibility over time
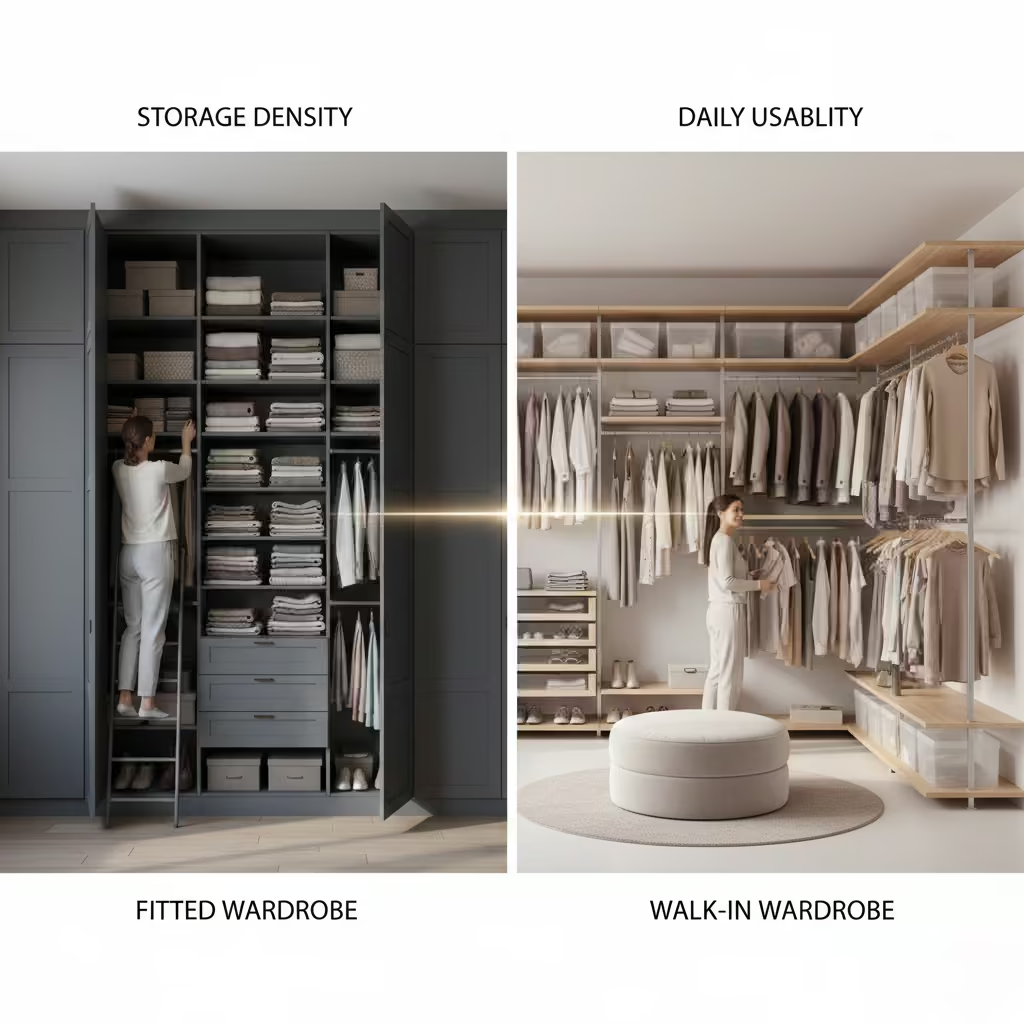
Walk-in wardrobes are inherently more adaptable. Internal layouts can be rebalanced as lifestyles change, particularly when using modular systems or adjustable rails and shelving. Fitted wardrobes tend to lock users into fixed configurations that are harder to evolve without significant cost.
This flexibility becomes valuable over long ownership periods, especially in family homes or primary residences.
Planning a Walk-In Wardrobe Before Any Design Decisions
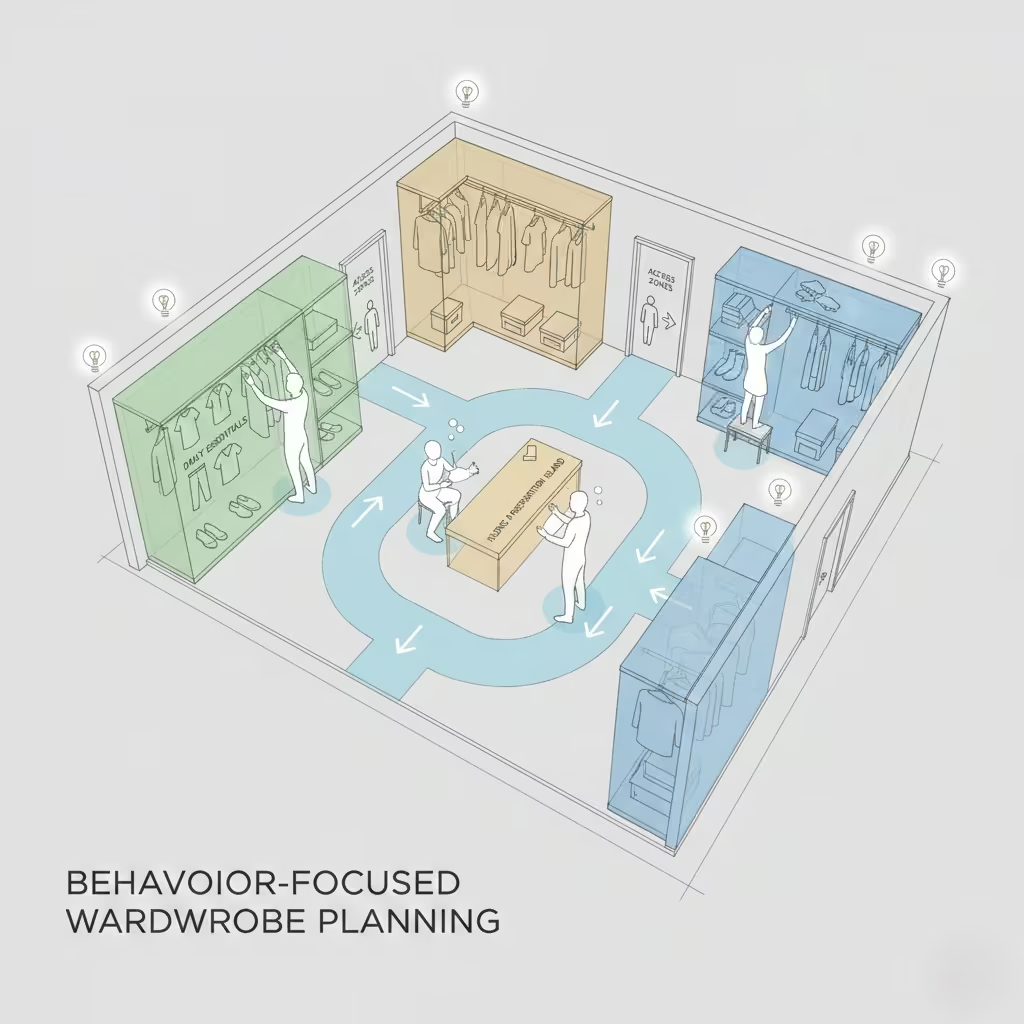
Before layout, materials, or lighting are even considered, a walk-in wardrobe must be planned around behaviour, not aspiration. This is the stage where most long-term problems are either avoided or quietly designed in. Taking time to understand how the space will be used day-to-day allows every subsequent decision to feel deliberate, proportioned, and future-proof, rather than reactive or decorative.
Understanding How You Actually Use Clothing
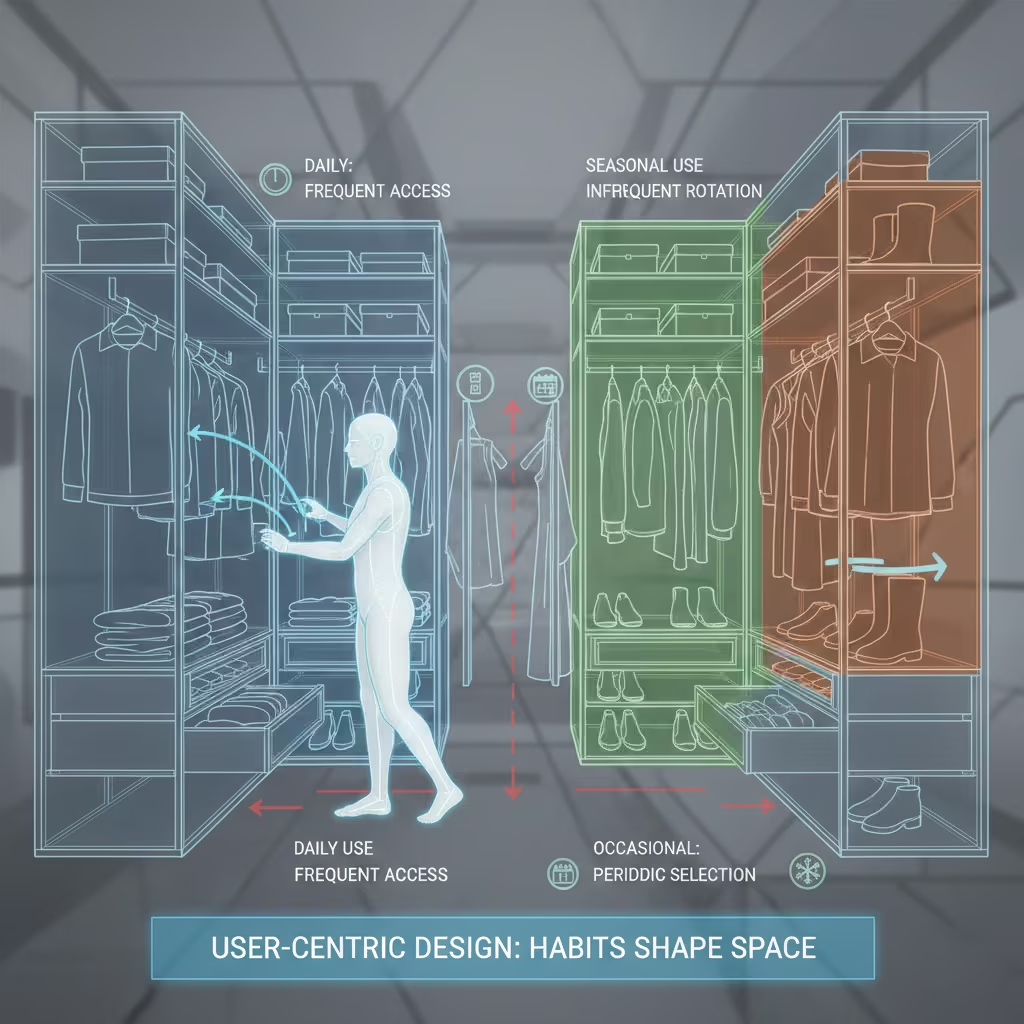
A walk-in wardrobe only performs well when it reflects real habits rather than idealised ones. Before any layout is fixed, I always assess how clothing is worn, rotated, and maintained in practice. This single exercise often reshapes the entire design, preventing storage imbalance and long-term clutter.
Daily vs occasional items
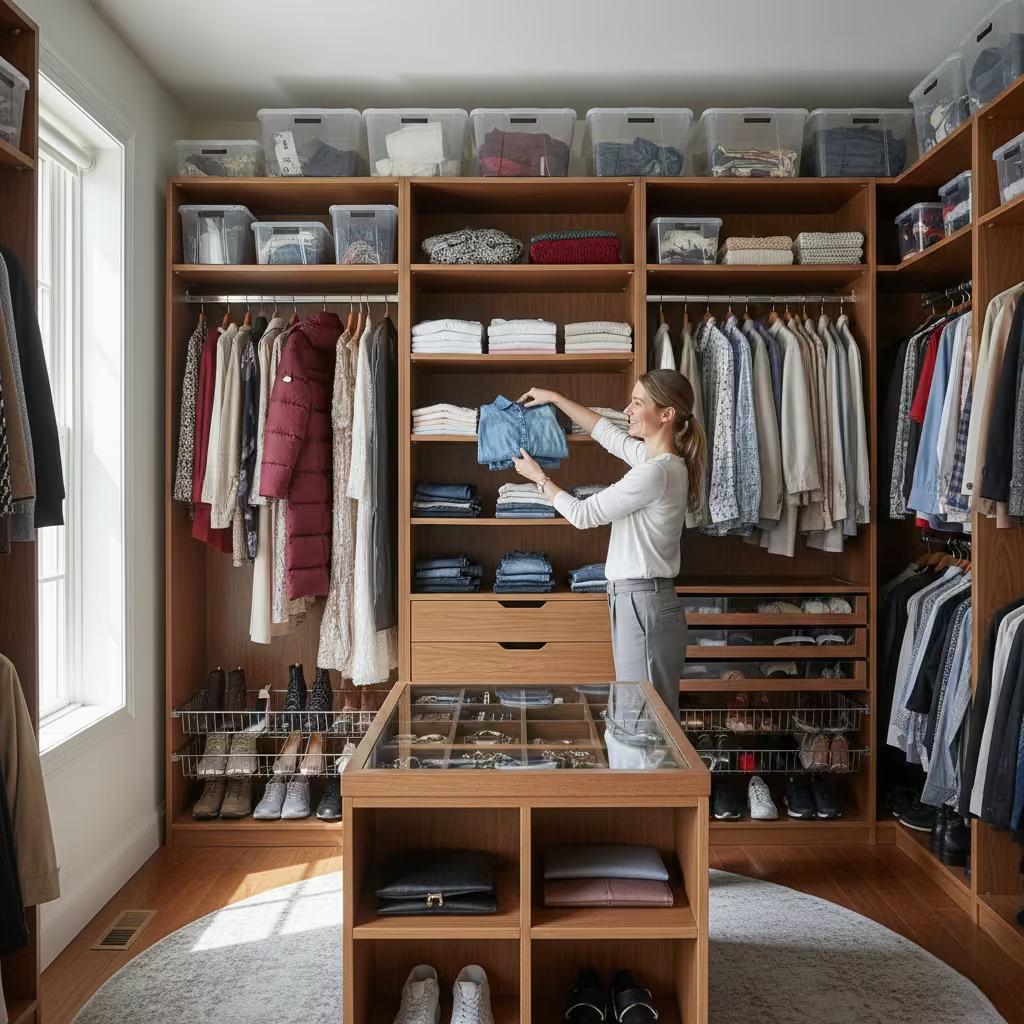
Daily clothing should dominate the most accessible zones of the wardrobe. Garments worn several times a week belong between shoulder and waist height, within a comfortable reach zone of 750–1,600 mm (30–63 in) from the floor. Occasional items, such as formalwear or seasonal pieces, can be stored higher or deeper, where access is less immediate. When this hierarchy is ignored, wardrobes feel inconvenient even when storage capacity is generous.
Folding vs hanging habits
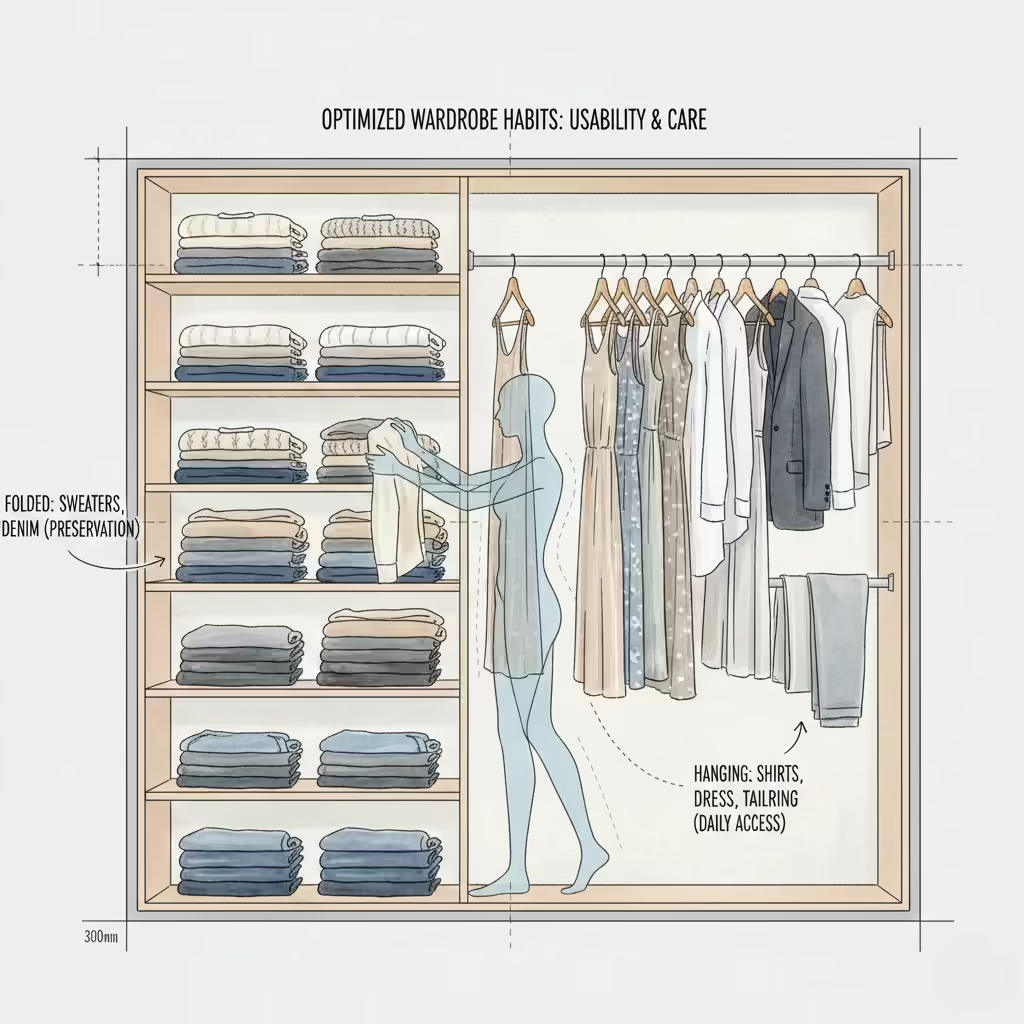
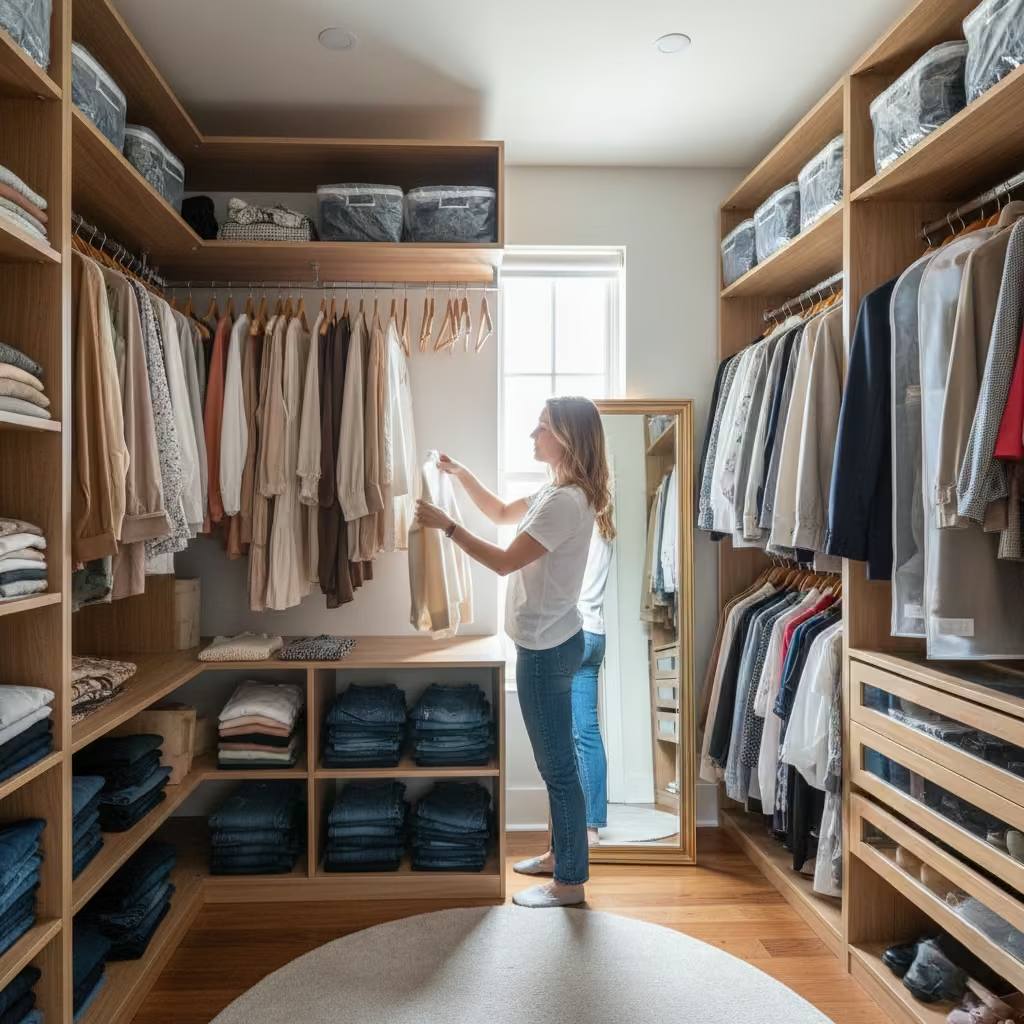
Not all clothing benefits from hanging. In my projects, I find that homeowners often over-allocate hanging space while underestimating folded storage. Knitwear, denim, and casual tops perform better when folded, reducing stretch and improving visual clarity. Shelves should be sized accordingly, typically 300–350 mm (12–14 in) deep, with vertical spacing that allows stacks to remain stable without compressing fabrics. Hanging zones should then be reserved for garments that genuinely require them, such as shirts, dresses, and tailored pieces.
Shoe and accessory behaviour
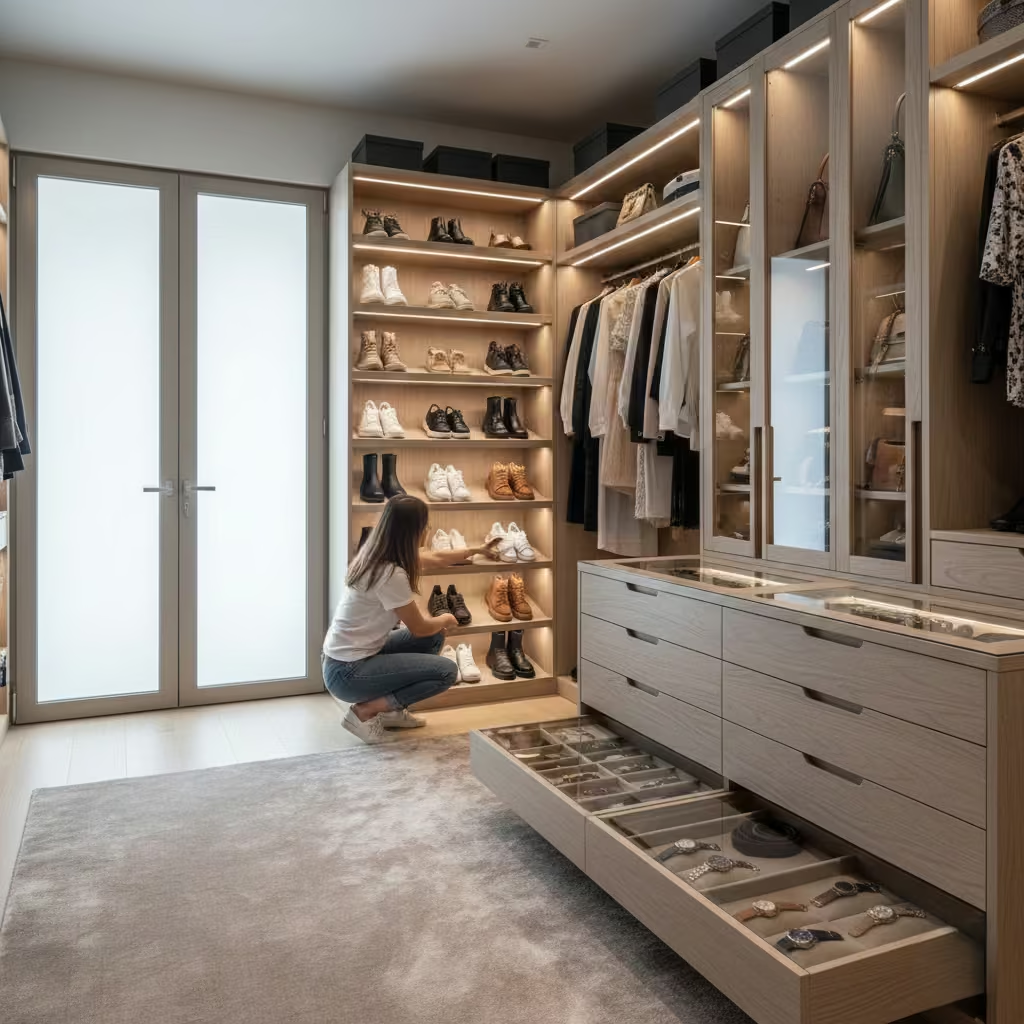
Shoes and accessories are where disorder usually begins. Daily footwear needs shallow, immediately visible storage near the wardrobe entrance, while occasional shoes can be placed higher or deeper within the layout. Accessories such as belts, bags, and jewellery should not be treated as secondary; they require dedicated micro-storage to prevent sprawl. Drawers with internal dividers or narrow vertical compartments often outperform open shelving, both visually and functionally.
Zoning Principles That Prevent Long-Term Clutter
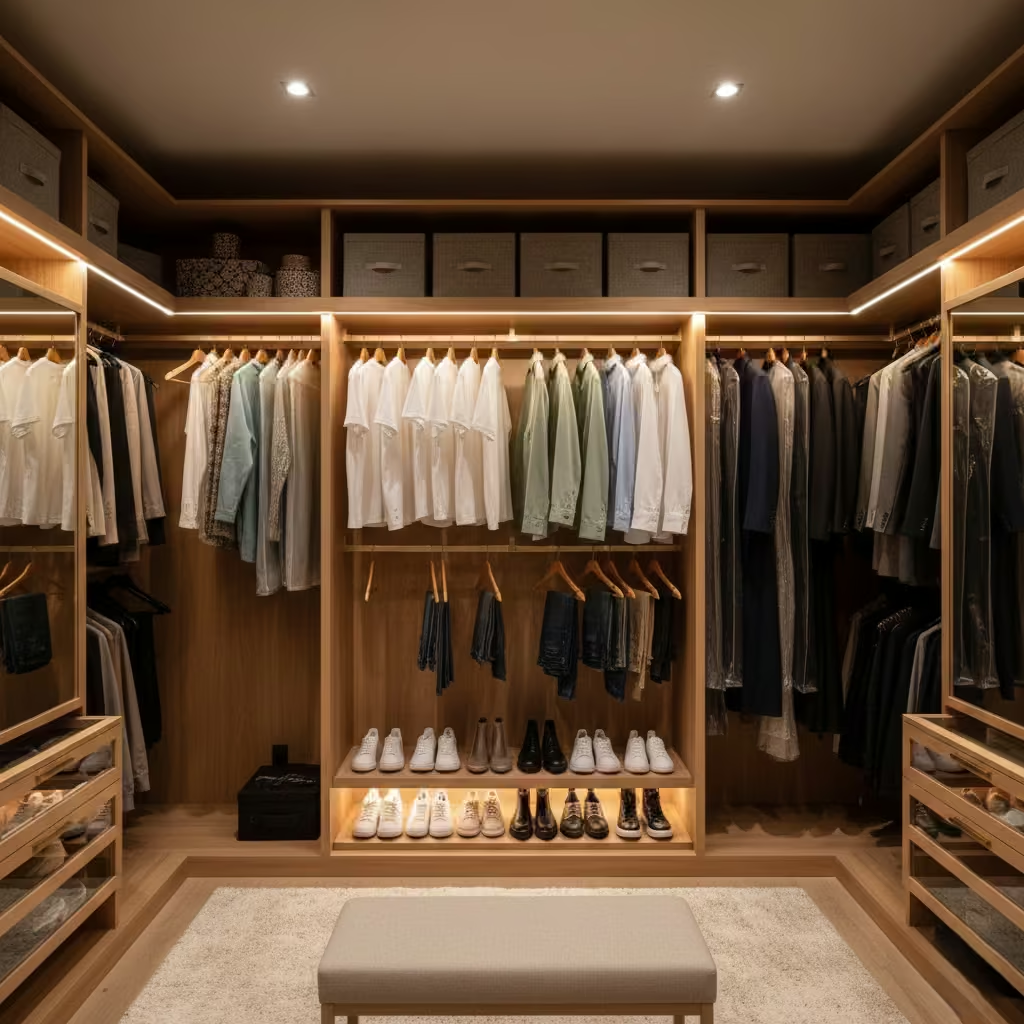
A walk-in wardrobe functions best when the space is divided according to frequency of use, rather than purely by type of clothing. I always plan zones that correspond to daily routines, which prevents visual and functional clutter over time. Without clear zoning, even a spacious wardrobe can feel disorganised and overwhelming.
Primary, secondary, and archive zones
- Primary zone: This is the area used daily and should occupy the most accessible spaces—between waist and eye level (750–1,600 mm / 30–63 in from the floor). Items here include frequently worn tops, trousers, and shoes.
- Secondary zone: Slightly higher or lower shelves and rails house less frequently used items such as seasonal jackets or special-occasion pieces. Reach is still comfortable but doesn’t interfere with daily movement.
- Archive zone: The highest or deepest areas store long-term or rarely used items like winter coats, formalwear, or keepsakes. Access is occasional, so it can require a step stool or pull-down rail system.
Eye-level priority planning
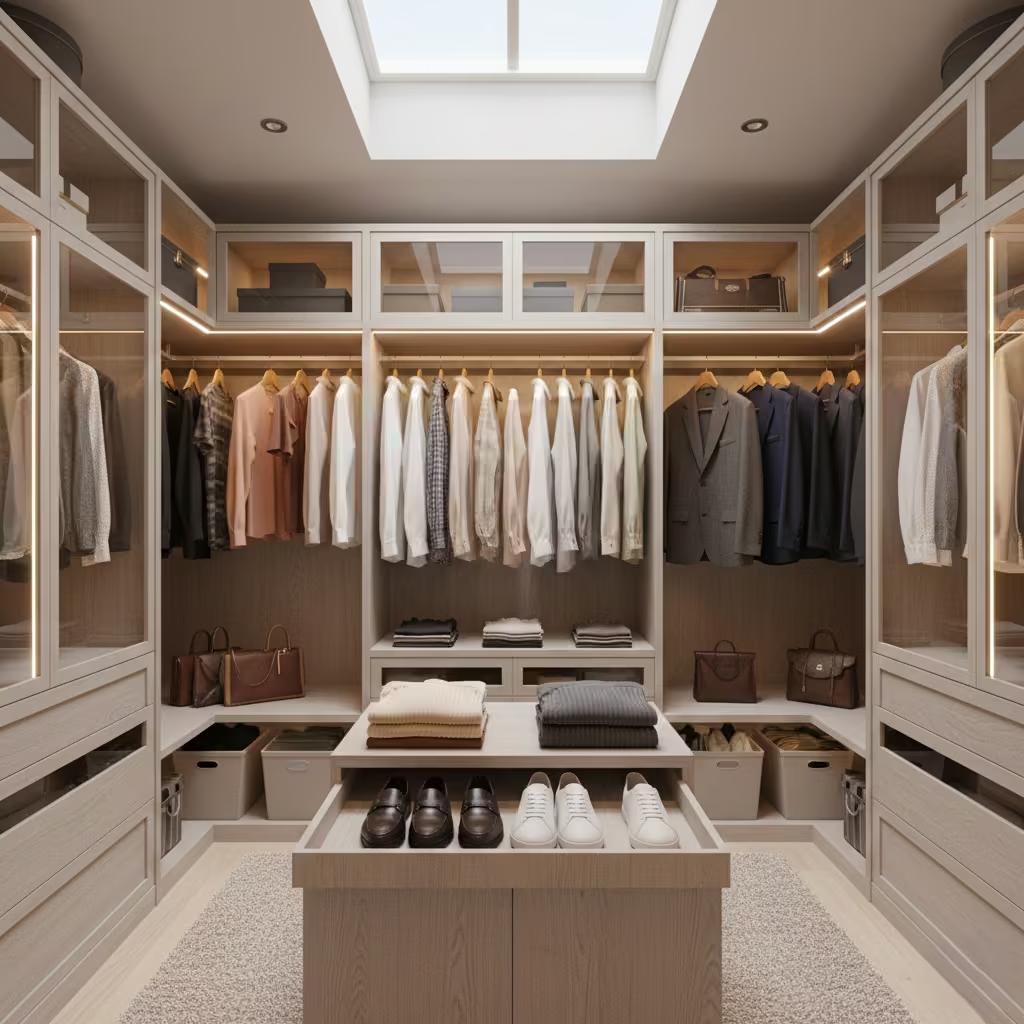
Our eyes naturally scan the middle plane first, so I always position the most-used and visually important items at eye level. This not only makes selection easier but also encourages users to maintain order: visible items are more likely to be returned correctly. Placing secondary and archive items outside this primary visual plane prevents clutter from dominating the immediate field of view.
Circulation Rules That Dictate Layout Success
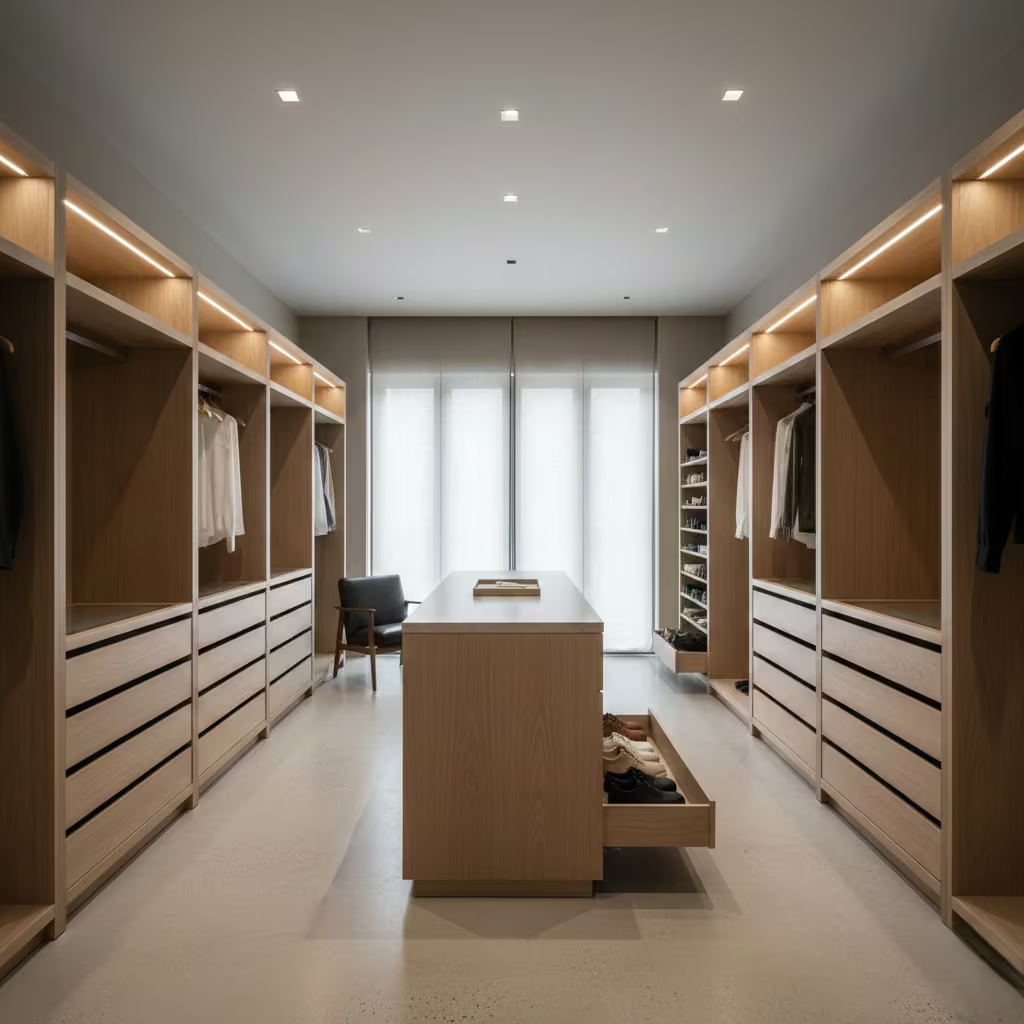
Even the most luxurious walk-in wardrobe can feel cramped or frustrating if circulation isn’t planned carefully. Circulation is about how the body moves through the space, how doors and drawers operate, and how easy it is to access items without obstruction. Designing around movement ensures the wardrobe is intuitive, efficient, and comfortable every day.
Minimum clearances
A functional walkway is non-negotiable. I always allow at least 900 mm (36 in) of clear space for single-sided layouts and 1,000–1,100 mm (39–43 in) for U-shaped or double-sided designs. Narrower aisles immediately reduce comfort, make reaching items difficult, and increase the risk of doors or drawers colliding.
Door, drawer, and body movement allowances
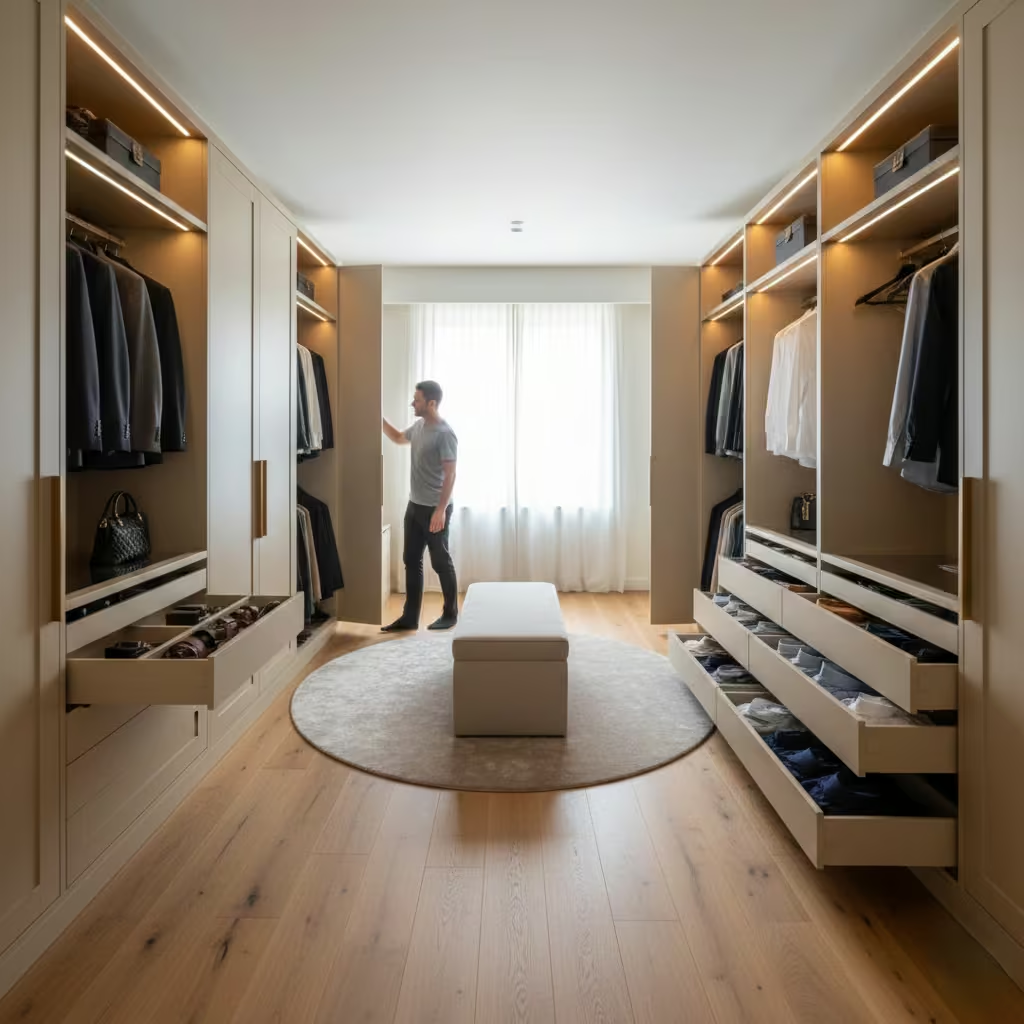
Each functional element requires space to operate fully. For example:
- Hinged doors need minimum swing clearance equal to their width plus 50 mm (2 in) buffer.
- Drawers and pull-out racks require 500–600 mm (20–24 in) clearance in front to allow full extension and comfortable access.
- When planning islands or central units, allow a minimum 900 mm (36 in) clearance on all sides for movement.
Key measurements
| Element | Recommended Clearance |
| Walkway (single-sided) | 900 mm / 36 in |
| Walkway (double-sided/U-shaped) | 1,000–1,100 mm / 39–43 in |
| Drawer/pull-out clearance | 500–600 mm / 20–24 in |
| Hanging reach height | 1,600 mm / 63 in (eye-level access) |
| Shelf reach height (archive zone) | up to 2,100–2,400 mm / 7–8 ft |
By respecting these circulation rules, you ensure the wardrobe is comfortable to use, prevents obstruction, and maximises accessibility, even when fully loaded. Proper planning at this stage saves headaches and retrofit costs later.
Key Measurements and Standards for Functional Walk-In Wardrobes
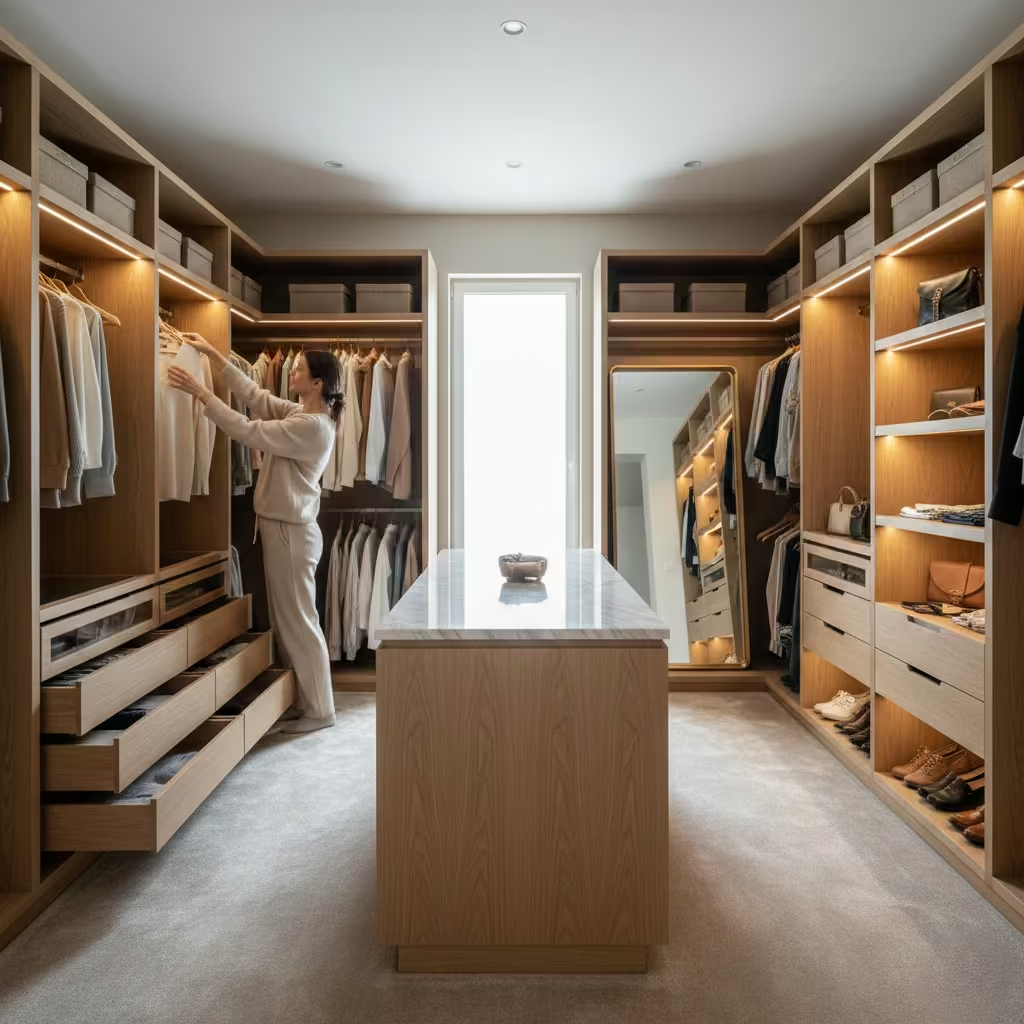
Planning a walk-in wardrobe is meaningless without precise measurements that balance storage capacity, circulation, and reach. Even minor deviations can make a space feel awkward or unusable. Below are the standards I follow on all projects to ensure long-term functionality.
Walkway minimums:
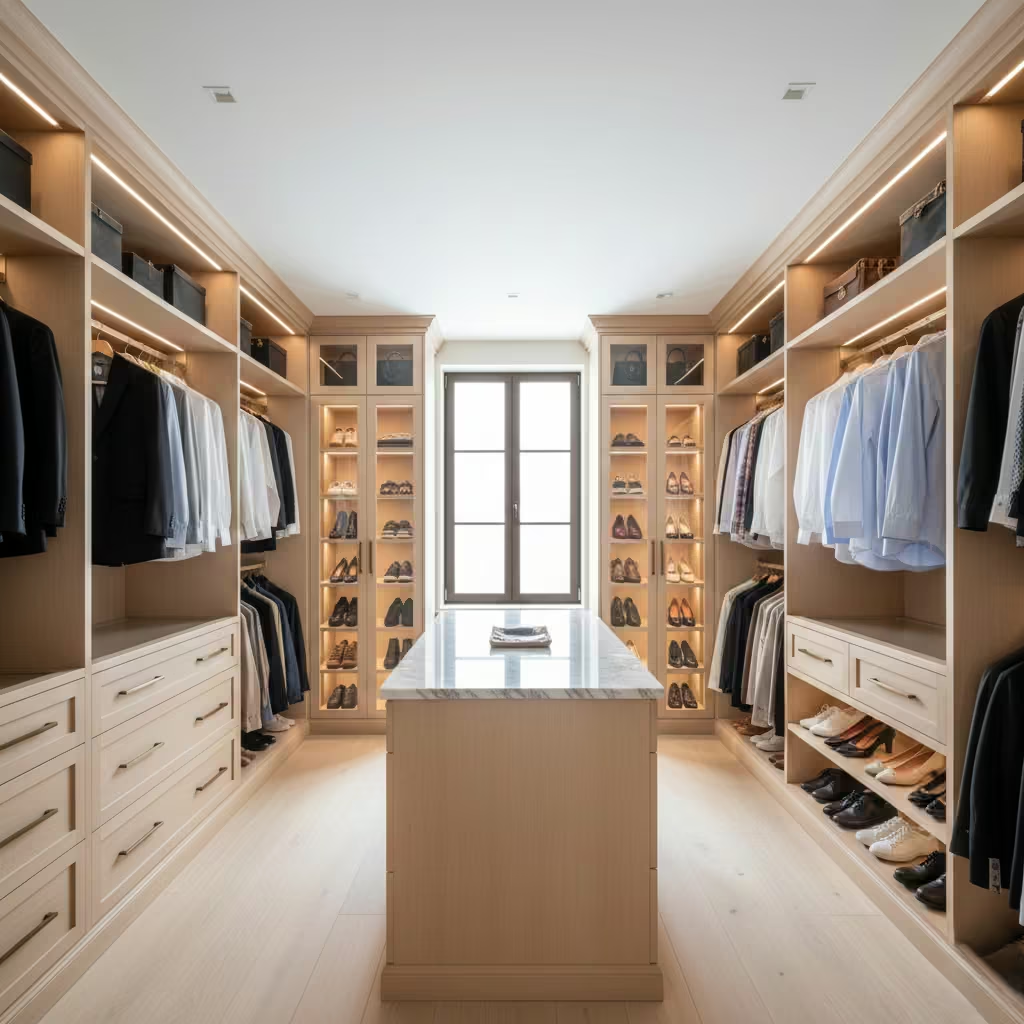
- Single-sided layout: 900 mm (36 in)
- Double-sided or U-shaped layout: 1,000–1,100 mm (39–43 in)
These clearances allow free movement even when drawers are fully open or multiple people share the space.
Reach and accessibility standards:
- Primary hanging zones: 750–1,600 mm (30–63 in) from the floor
- Secondary shelves: 1,600–2,100 mm (63–83 in)
- Archive storage: up to 2,400 mm (8 ft)
- Drawer and pull-out clearance: 500–600 mm (20–24 in) in front
Additional considerations:
- Rail spacing: 50–75 mm (2–3 in) between double rails to avoid crushing garments
- Shelf depth: 300–350 mm (12–14 in) for folded items, 550–600 mm (21–24 in) for hanging space
- Island clearance (if included): 900 mm (36 in) all sides
Adhering to these measurements ensures the wardrobe feels intuitive and ergonomic, avoids awkward reaches or collisions, and supports a stress-free dressing
Linear Walk-In Wardrobe Designs
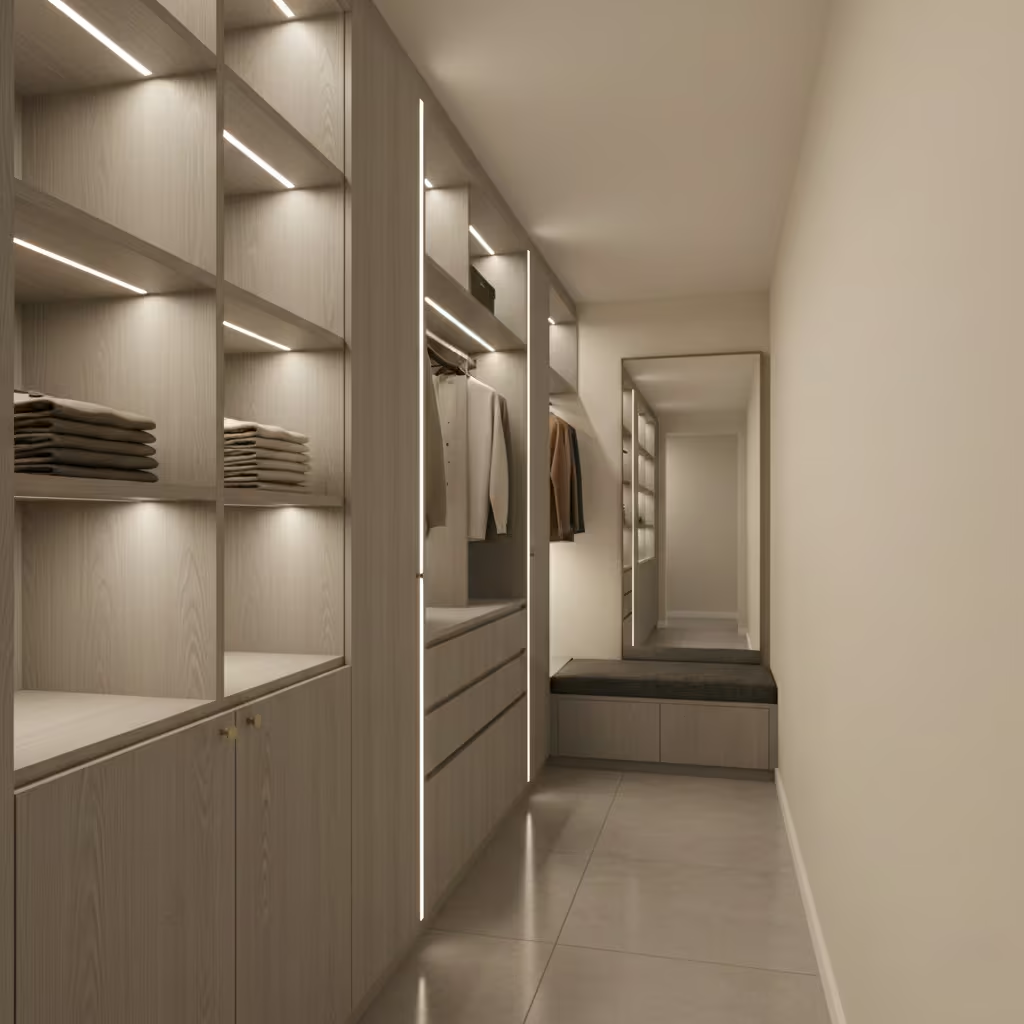
A linear layout is the simplest form of walk-in wardrobe, yet when executed correctly, it delivers maximum efficiency, clarity, and usability for narrow spaces. I often specify this layout for conversions or tight areas where circulation must be optimised without sacrificing storage.
Why This Layout Works
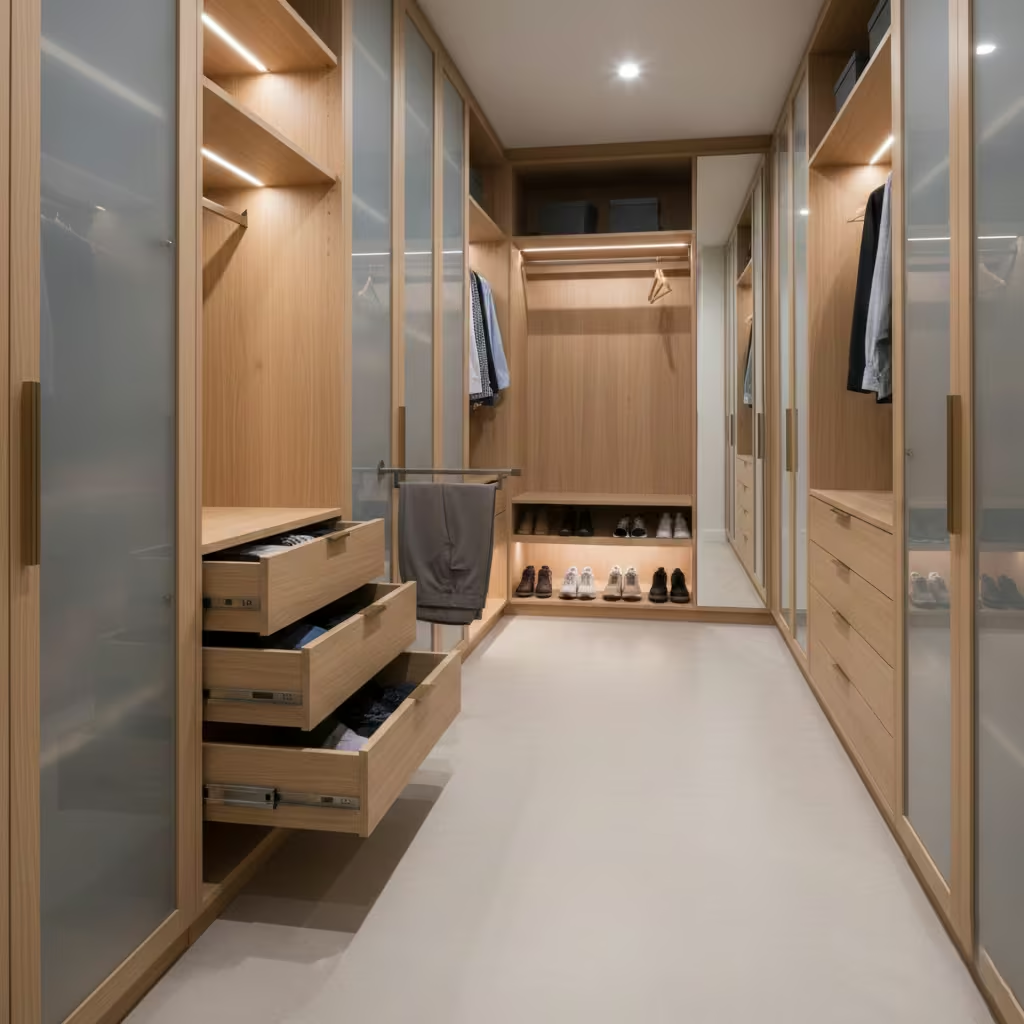
Linear layouts make the most of a single wall while keeping circulation unobstructed. By placing all storage along one plane, you maintain a clear walkway of at least 900 mm (36 in), which is sufficient even when drawers or pull-out rails are fully extended. This efficiency reduces wasted space and ensures that every garment and accessory remains accessible without complex manoeuvring.
Visual control and simplicity
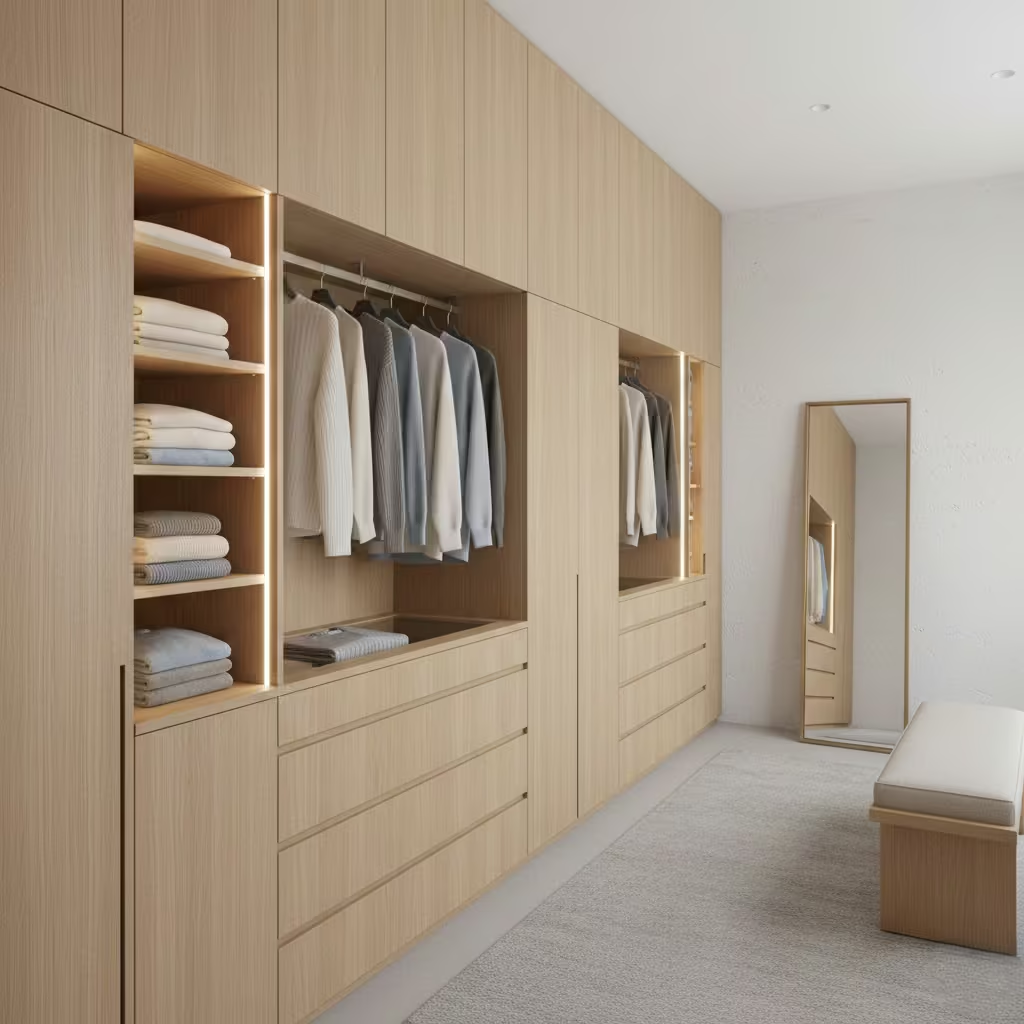
The linear approach naturally limits visual clutter. With everything in one line, the wardrobe reads as calm, ordered, and architectural, which helps users maintain organisation. I often find this design works well with continuous vertical grain finishes or matte panels to emphasise the linearity and reinforce the sense of calm.
When to Use It
- Converted bedrooms: When a spare room is repurposed as a dressing area, wall space is usually one-sided, making a linear layout ideal.
- Loft and attic spaces: Narrow, constrained areas benefit from this layout because it respects rooflines and avoids awkward circulation issues.
You May also Like: 25 Stunning Mountain Bedroom Design Ideas That Feel Like a Luxury Escape
Key Measurements and Clearances
| Element | Recommended Measurement |
| Walkway | 900 mm / 36 in minimum |
| Hanging depth | 550–600 mm / 21–24 in |
| Shelf depth | 300–350 mm / 12–14 in |
| Drawer clearance | 500–600 mm / 20–24 in |
These dimensions allow the wardrobe to function seamlessly for daily use, even in tight or irregular spaces.
Visual Outcome
The linear layout produces a clean, restrained, and architectural appearance. Its simplicity lets materials and finishes take centre stage, while the uniformity of rails, shelves, and drawers creates a sense of orderly sophistication.
In practice, I’ve seen linear layouts in small London apartments and attic conversions feel more spacious than their square footage would suggest, simply because circulation and visual lines are unobstructed.
L-Shaped Walk-In Wardrobe Designs
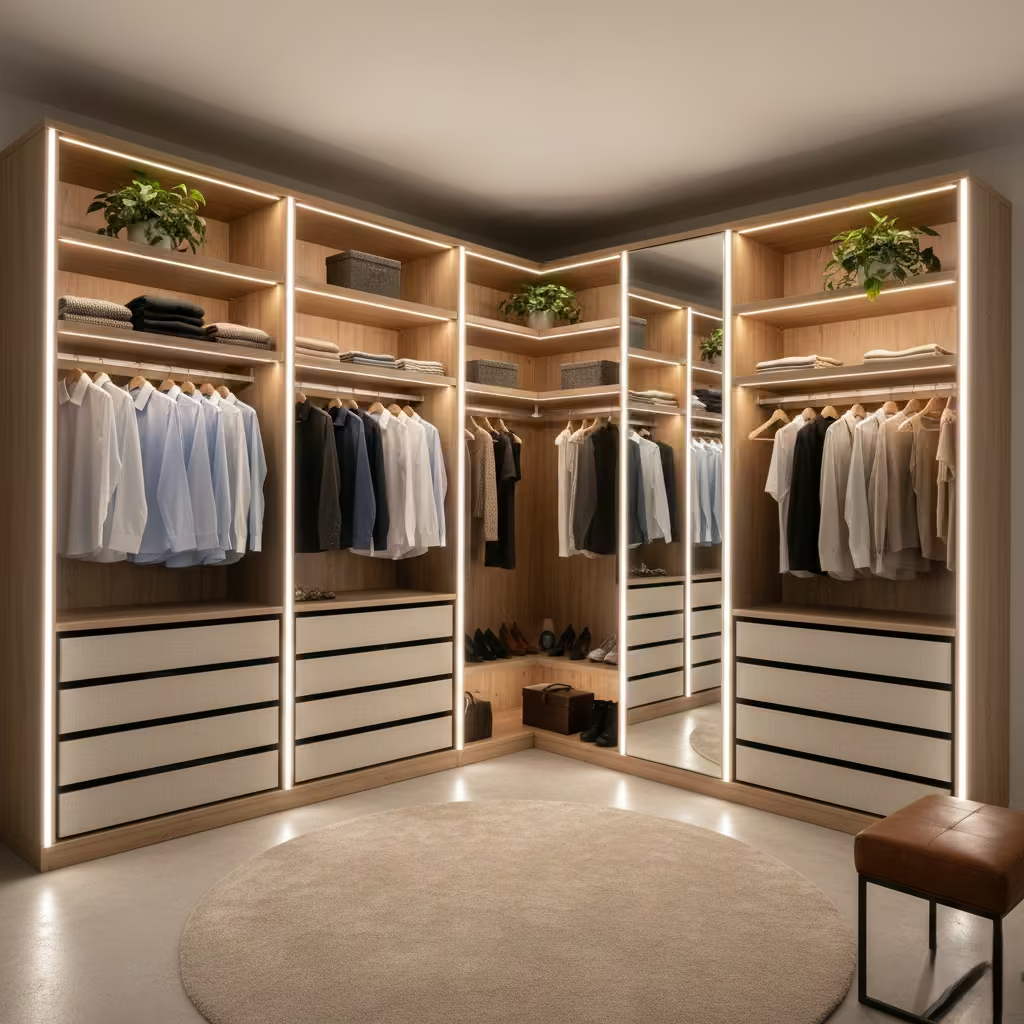
The L-shaped layout is one of my favourite solutions for medium-sized spaces where you want more storage than a linear layout without enclosing the room completely. It balances accessibility, circulation, and storage density, making it versatile for a variety of homes.
Why This Layout Works
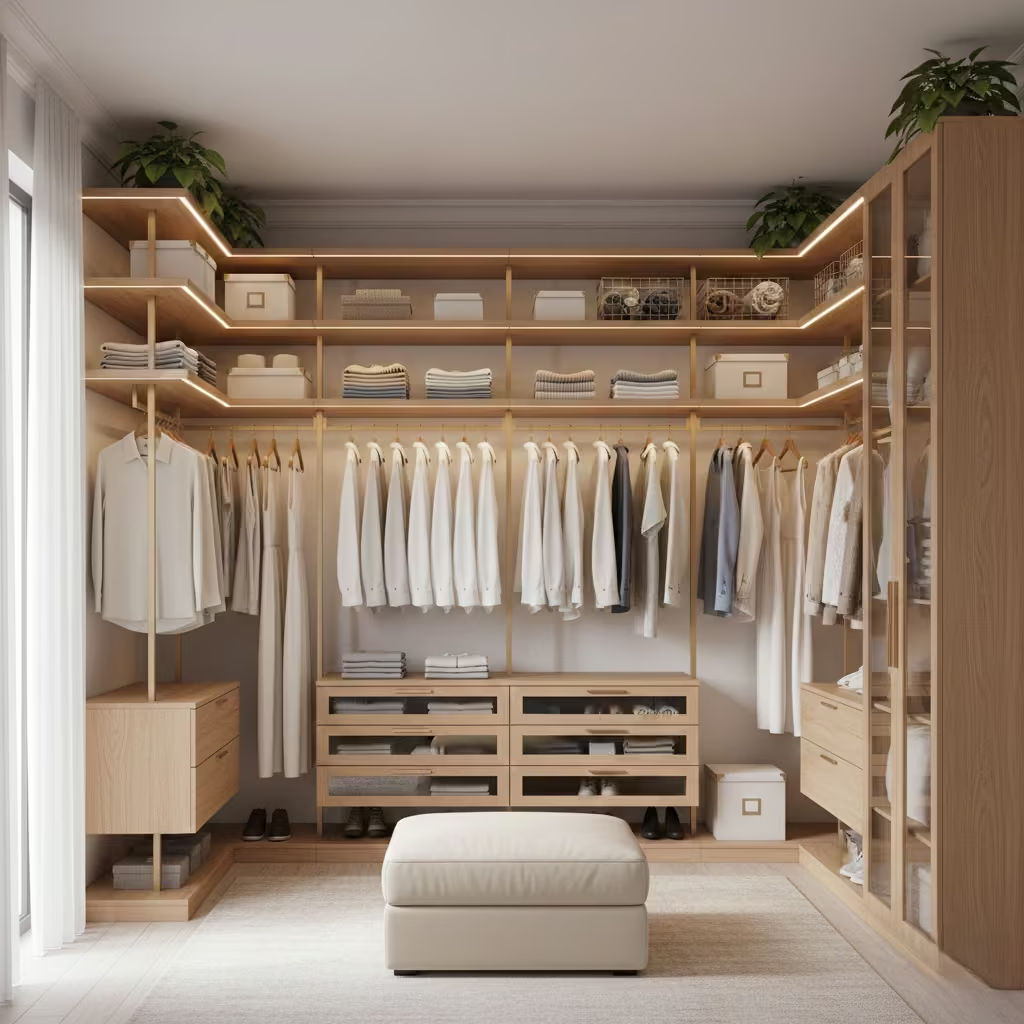
By utilising two adjacent walls, the L-shaped layout increases storage capacity while maintaining a comfortable open corner for circulation. This design ensures that all garments and accessories remain within easy reach, and it avoids the tunnel-like feel that can occur in U-shaped layouts in smaller rooms.
Good compromise between openness and capacity
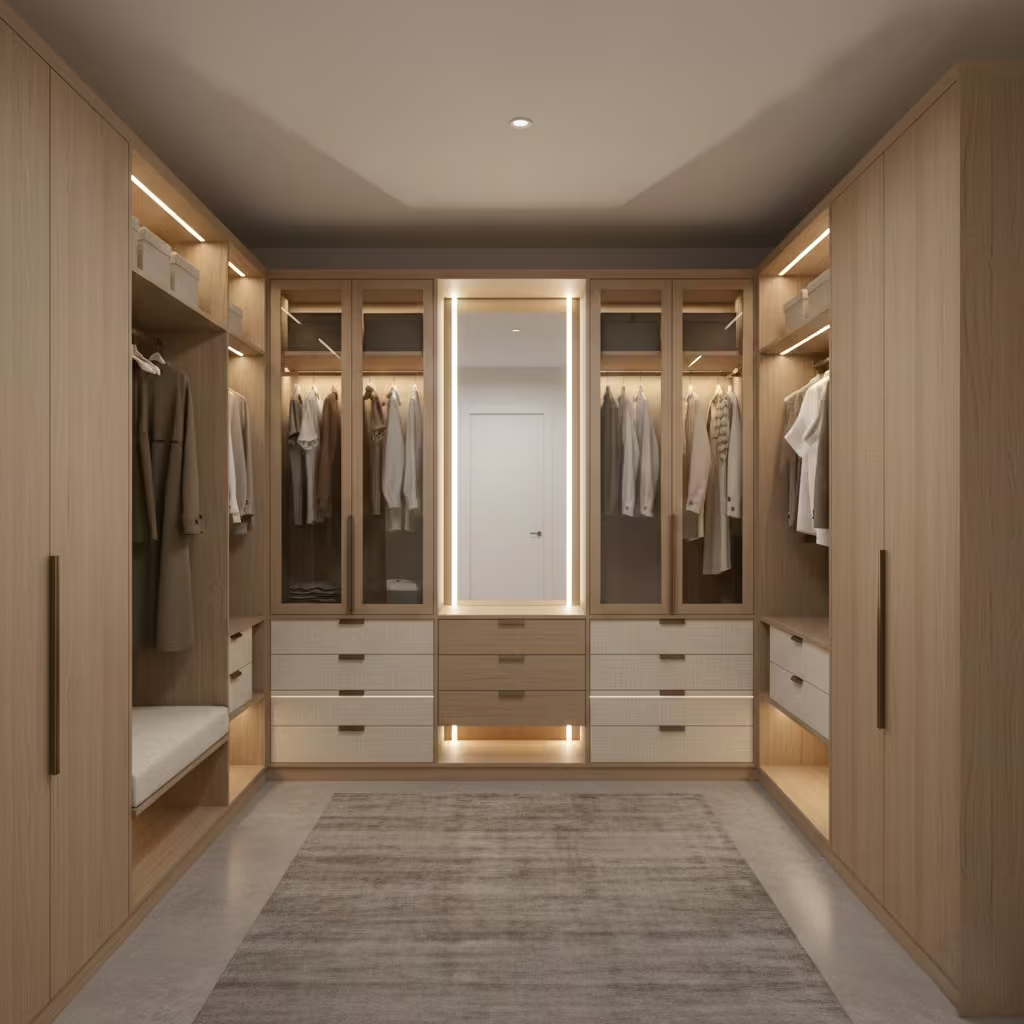
The L-shape allows designers to create a primary zone along the longer wall for daily items and a secondary zone on the shorter wall for less frequently used clothing or accessories. This hierarchy keeps the wardrobe functional without feeling crowded, and it accommodates both hanging and folded storage efficiently.
Ideal Room Dimensions
- Minimum room width: 2.0 m (6.5 ft) along the primary wall
- Minimum secondary wall depth: 550–600 mm (21–24 in) for hanging or shelving
- Walkway clearance: 900–1,000 mm (36–39 in)
- Recommended ceiling height: 2.4 m (8 ft) or more to allow for vertical storage
These dimensions provide enough space for drawers, pull-out racks, and shelving, while keeping circulation smooth. L-shaped layouts are particularly effective in converted bedrooms, attic spaces, or corners adjacent to dressing areas.
Visual Outcome
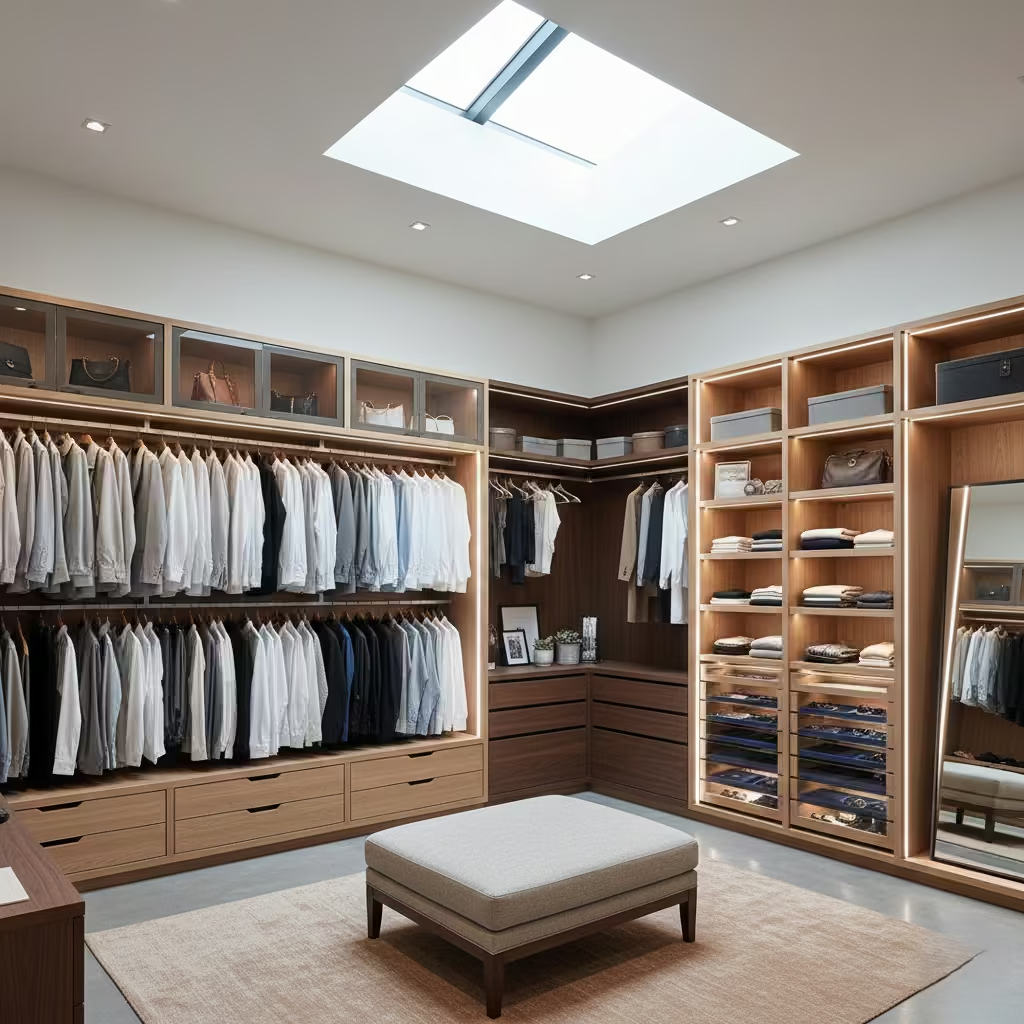
L-shaped wardrobes read as architecturally structured yet open. The corner creates a natural visual pause, preventing the storage from feeling like a continuous block of cabinetry. I often use contrasting finishes or integrated lighting along the shorter wall to highlight accessories or folded items, which enhances the sense of order and sophistication.
The result is a wardrobe that feels spacious, approachable, and functional, while delivering noticeably more storage than a linear layout without overwhelming the room.
U-Shaped Walk-In Wardrobe Designs
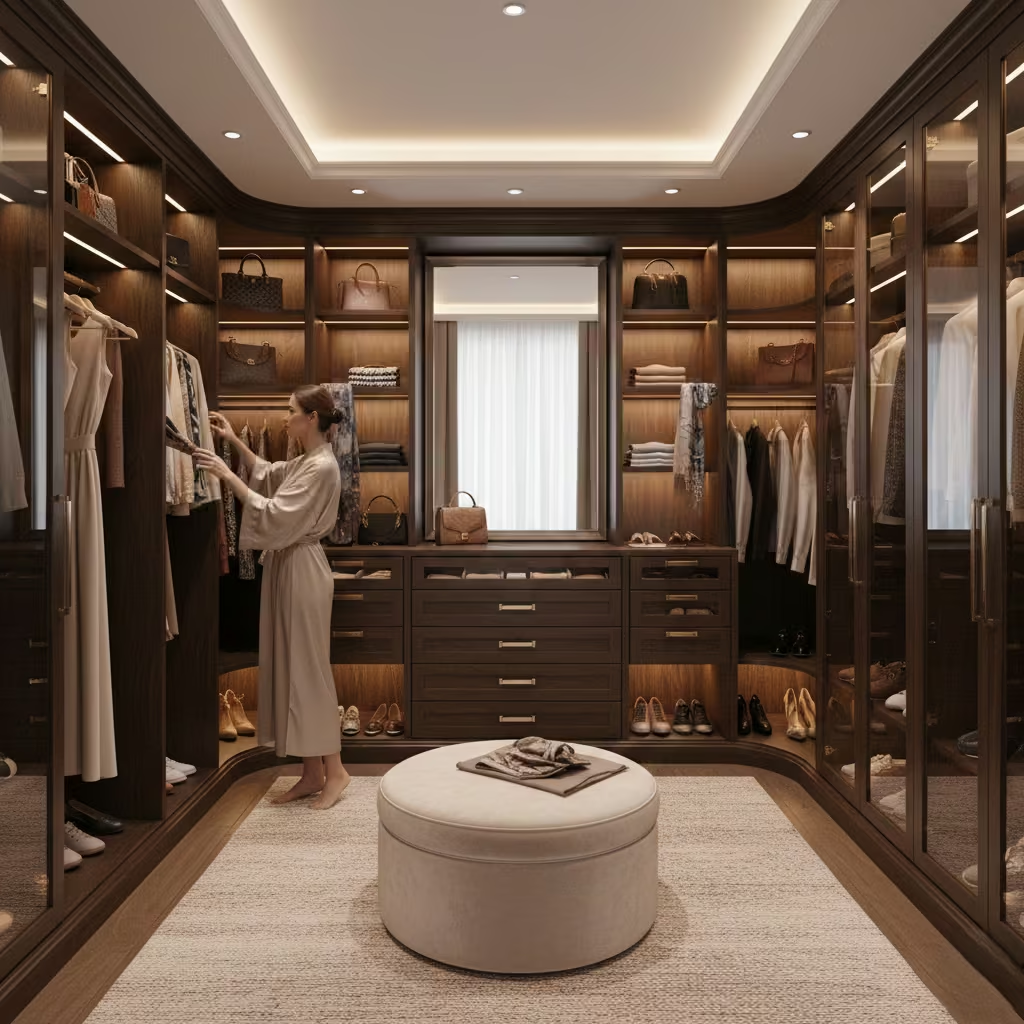
The U-shaped layout is the ultimate solution for dedicated dressing rooms or large walk-in wardrobes, where maximising storage without compromising accessibility is a priority. When designed correctly, it creates a sense of luxury and efficiency, but it demands careful planning to avoid overcrowding.
Why This Layout Works
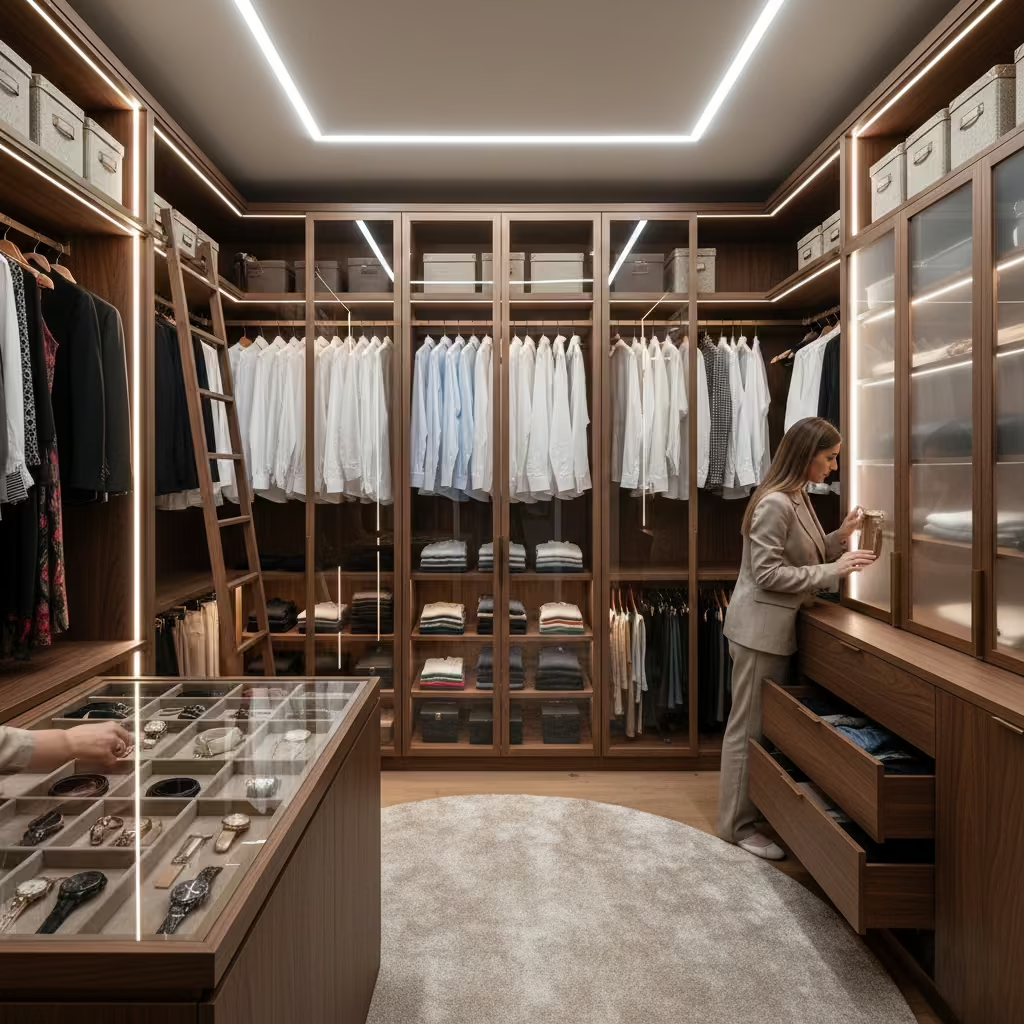
By utilising three walls, the U-shaped layout provides the highest storage capacity of any walk-in wardrobe design. It allows for distinct zones for hanging, folded, and accessory storage, making it ideal for homeowners with extensive wardrobes. I often specify this layout for long-term clients who require both functional organisation and visible order.
Efficient pivot movement
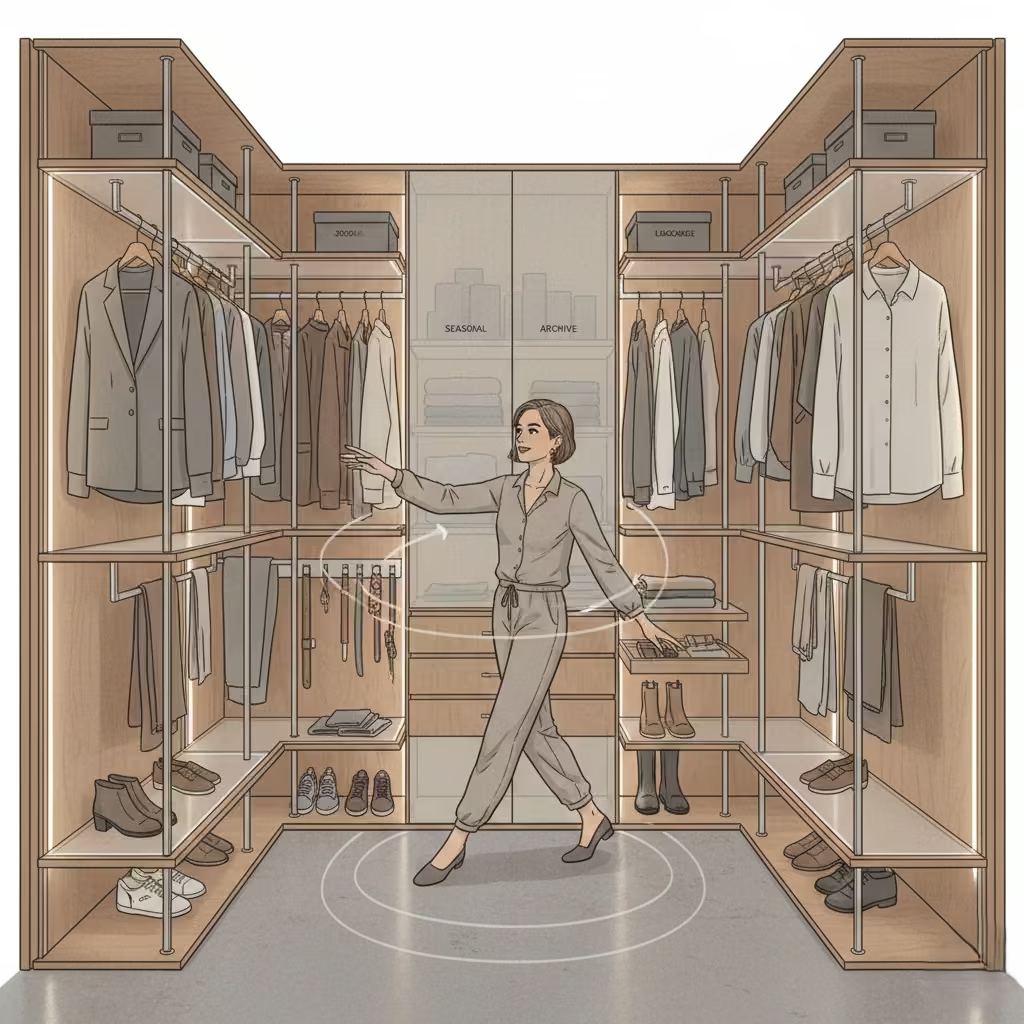
The U-shape naturally positions frequently used items along the two primary walls, with secondary or archive storage on the third. This configuration allows the user to pivot on the central axis, accessing most clothing and accessories with minimal steps, which is a subtle but significant improvement in daily functionality.
When It Becomes a Mistake
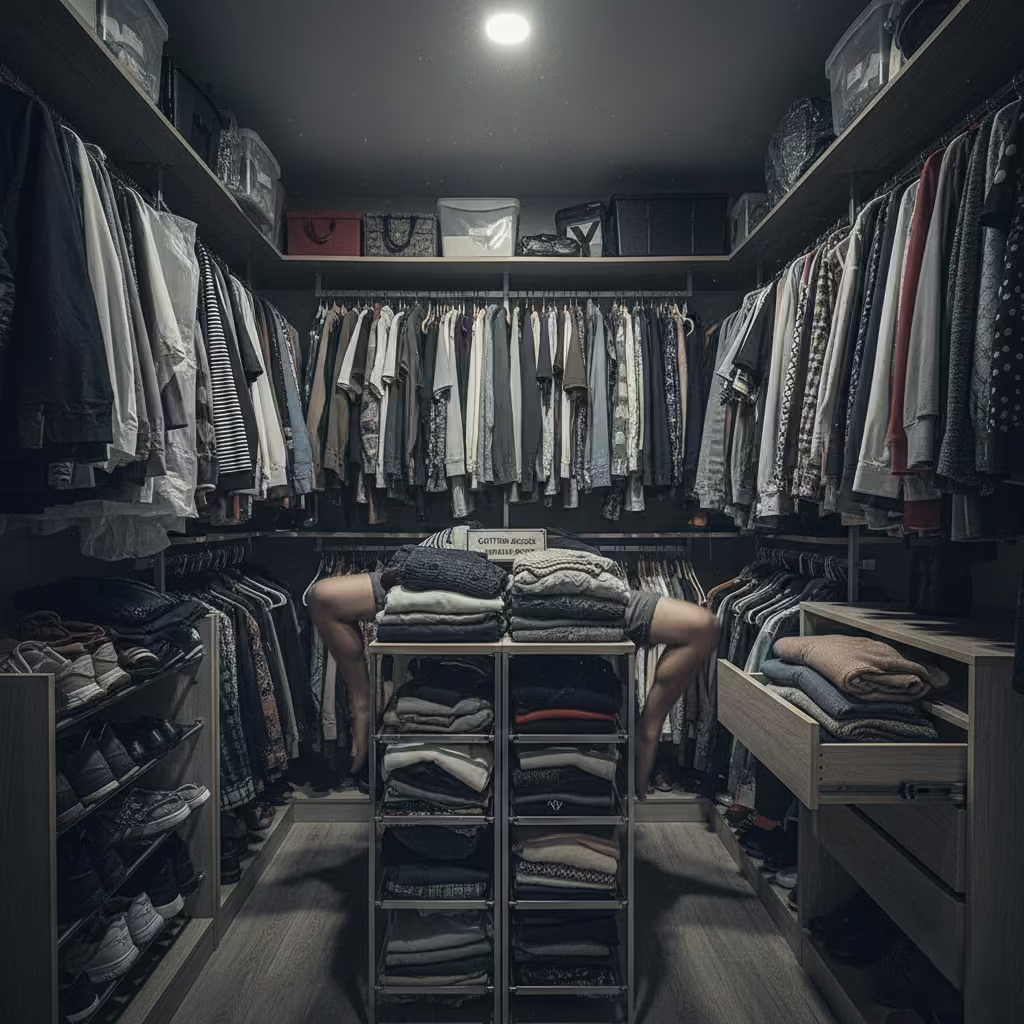
The U-shaped layout only works when the space is generous enough to accommodate a central circulation zone. In rooms smaller than 2.4 x 2.4 m (8 x 8 ft), this design can feel cramped, and users may struggle to move freely, especially when drawers or island units are included. Overloading such a layout not only reduces usability but also diminishes the visual clarity and calmness the design is intended to provide.
Key Measurements and Clearances
| Element | Recommended Measurement |
| Walkway (central clearance) | 900–1,100 mm / 36–43 in |
| Hanging depth | 550–600 mm / 21–24 in |
| Shelf depth | 300–350 mm / 12–14 in |
| Drawer clearance | 500–600 mm / 20–24 in |
| Ceiling height | 2.4–2.7 m / 8–9 ft |
Maintaining these clearances ensures the U-shaped layout remains ergonomic, accessible, and visually balanced, even when fully stocked.
Visual Outcome
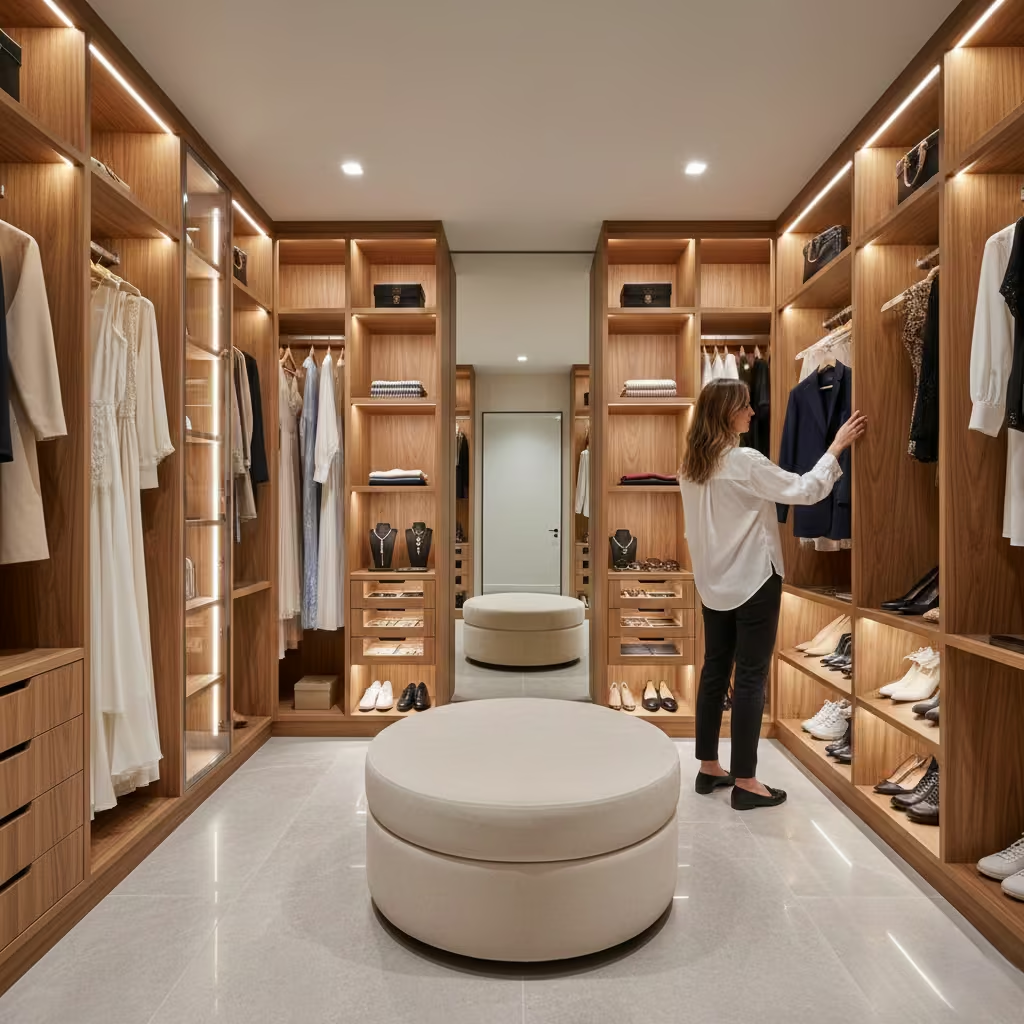
A well-executed U-shaped wardrobe feels enveloping yet organised, resembling a boutique dressing room. Continuous cabinetry along three walls can create a commanding architectural statement, particularly when paired with vertical grain finishes, integrated lighting, and subtle detailing.
The design conveys luxury and order, while also performing exceptionally well in daily routines, provided the room size and circulation requirements are respected.
Walk-Through Walk-In Wardrobe Designs
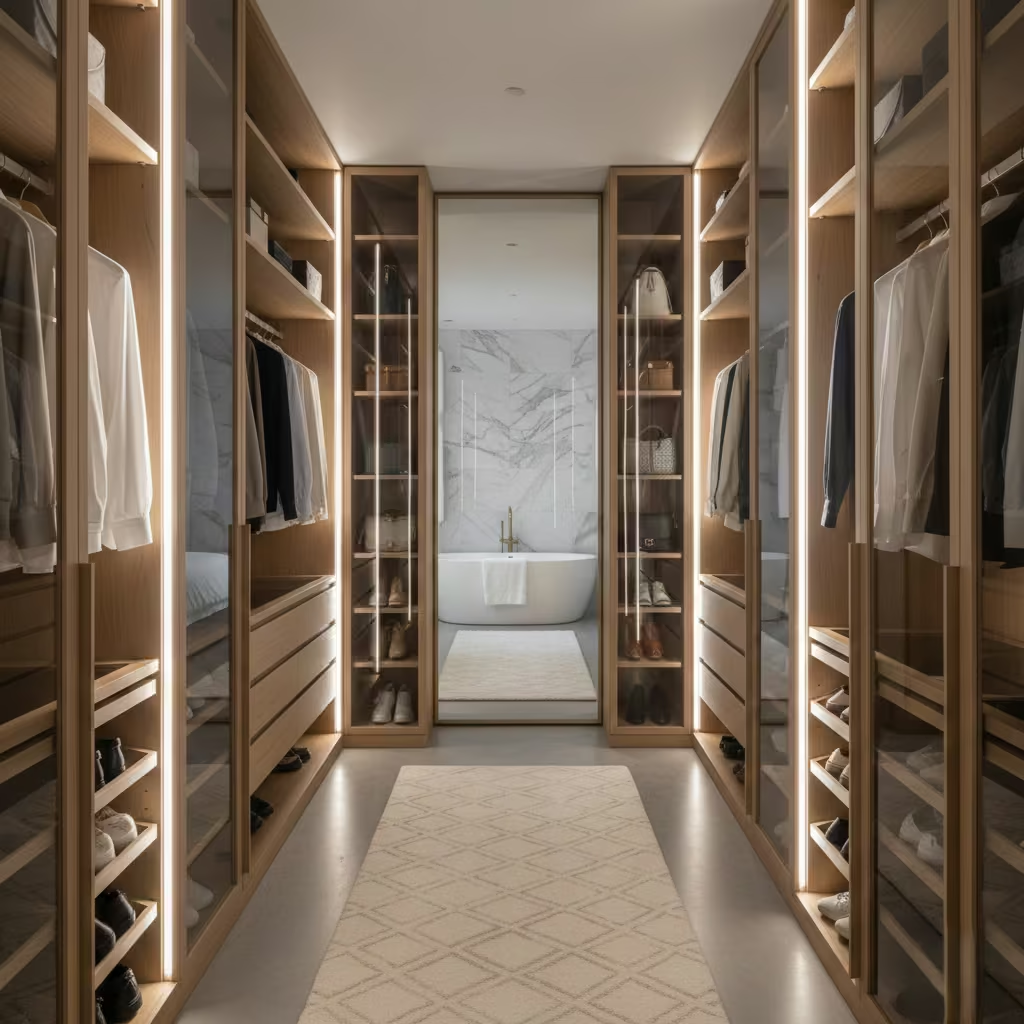
Walk-through wardrobes are a favourite in modern master suites, where fluid movement between the bedroom and bathroom enhances daily routines. This design turns circulation into a feature rather than a compromise, making the wardrobe feel like an integrated, functional corridor rather than a separate room.
Why This Layout Works
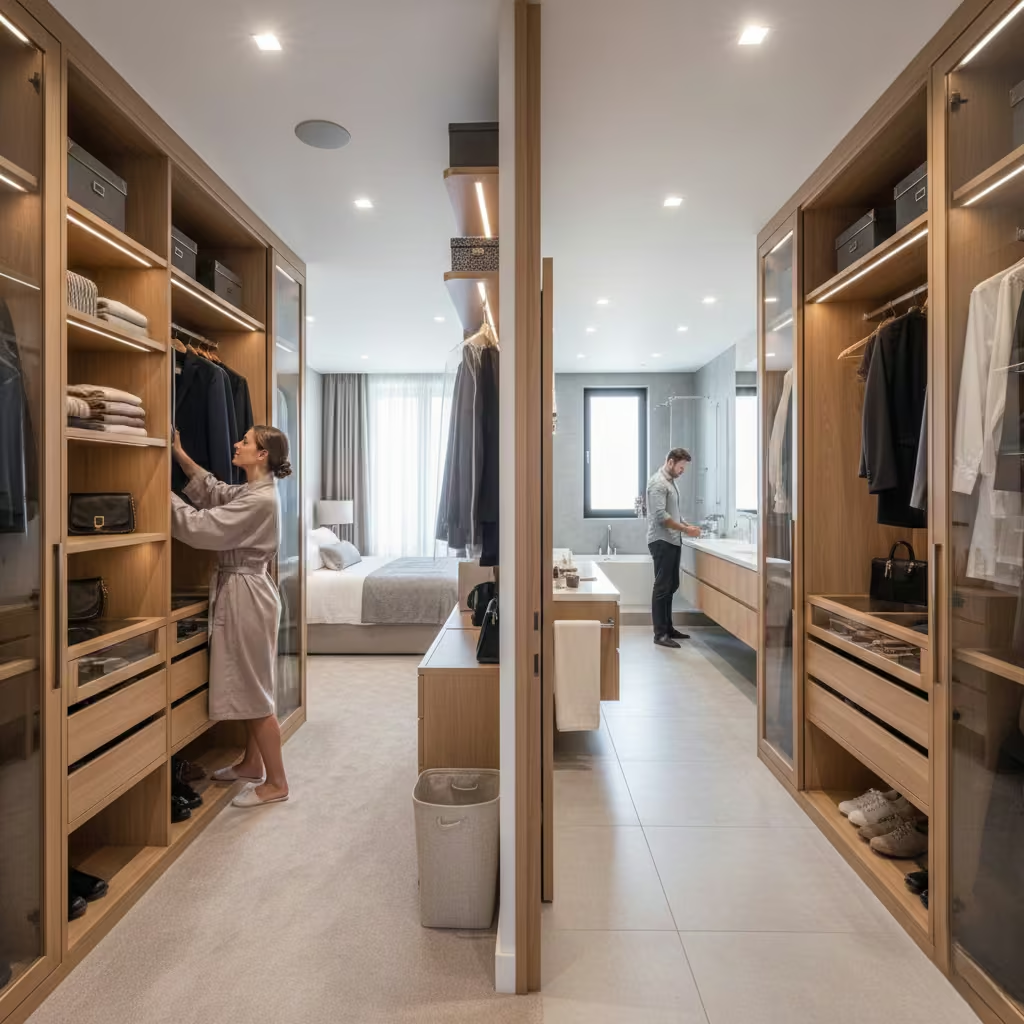
The walk-through layout creates a direct, intuitive path between sleeping, dressing, and bathing zones. This eliminates unnecessary back-and-forth trips and ensures the wardrobe functions as part of a larger, cohesive suite. In my experience, this type of design works especially well in homes where morning routines involve multiple people, reducing congestion while keeping everything accessible.
Natural zoning without doors
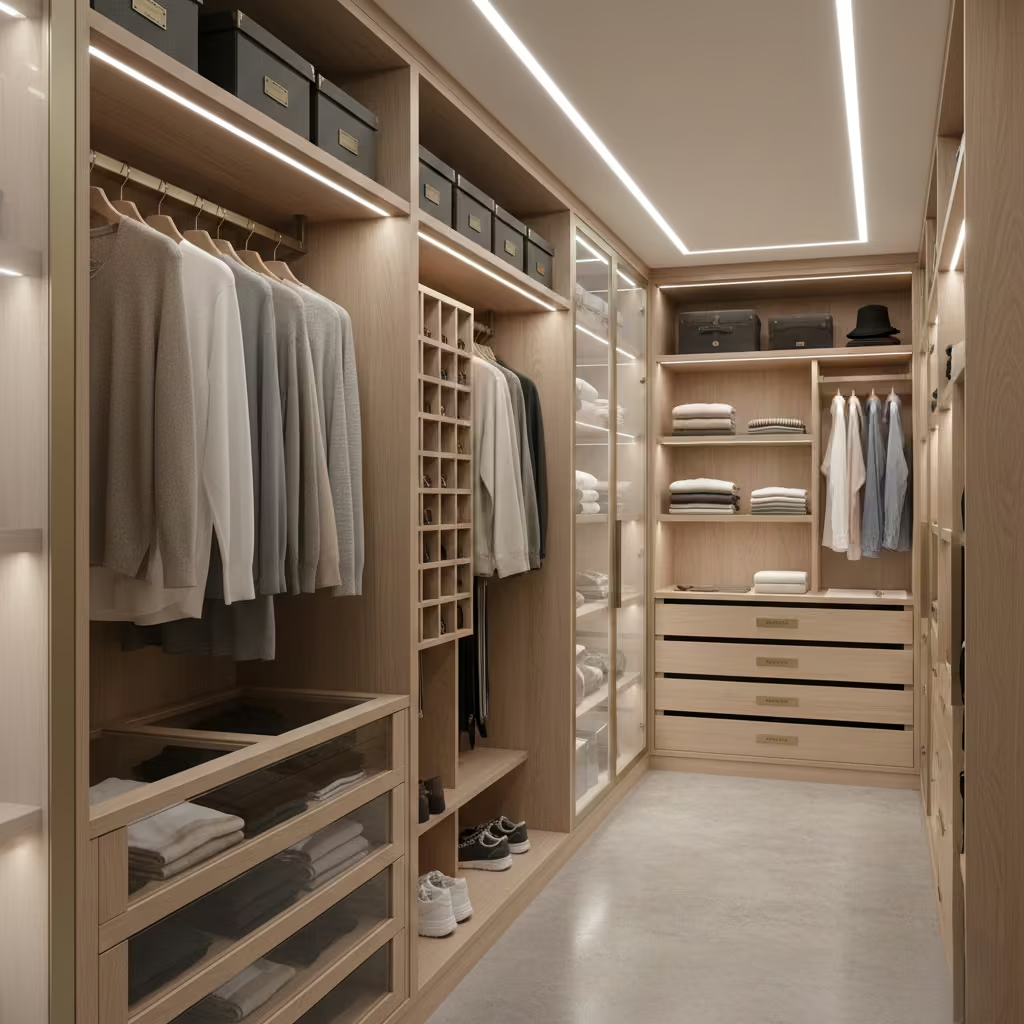
Without the need for doors to separate zones, walk-through wardrobes allow gradual exposure of storage areas, helping users prioritise items by frequency of use. Hanging, folded, and accessory zones can be positioned along the path logically: daily-use clothing closest to the bedroom, seasonal or secondary items nearer the bathroom or end of the corridor. This approach encourages behavioural order and effortless organisation.
You May also Like: 25 Black Bedroom Ideas That Feel Bold, Cozy, and Timeless
Privacy and Noise Considerations
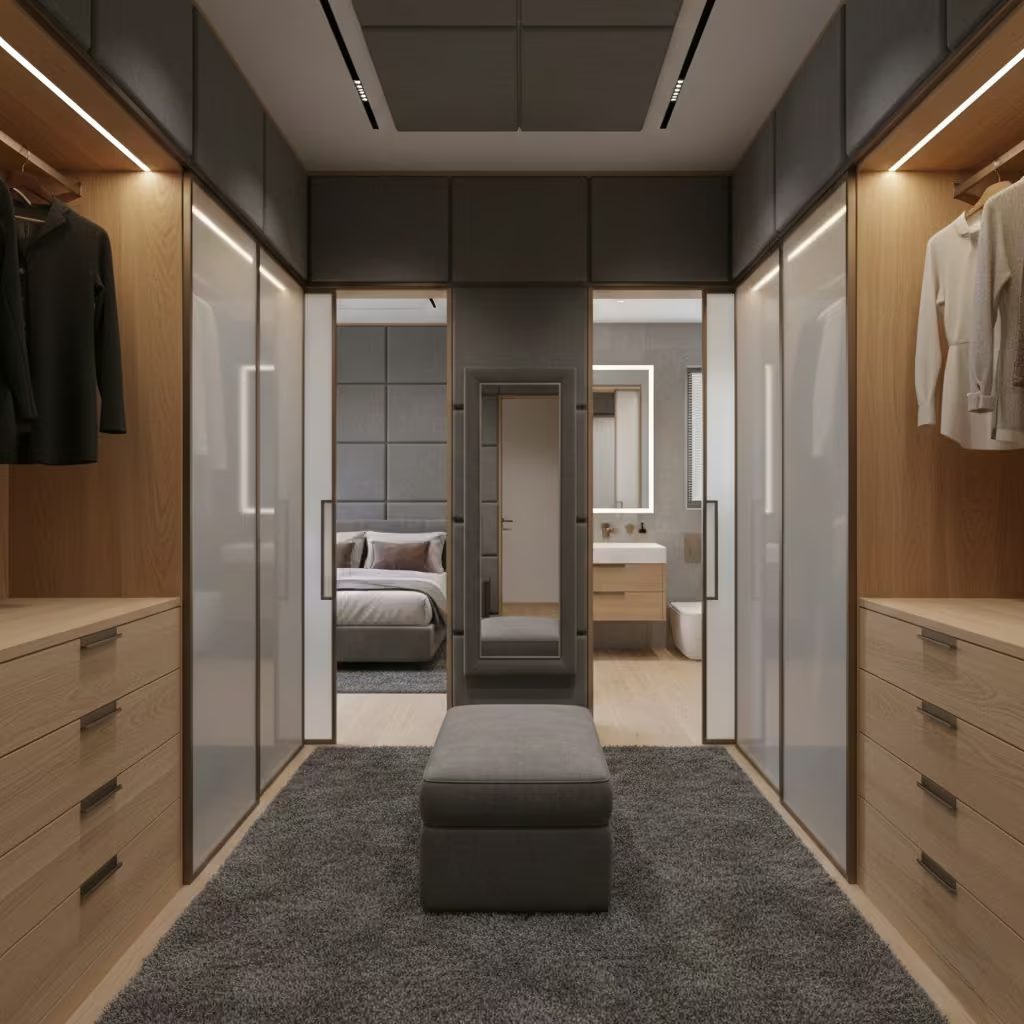
While visually seamless, walk-through designs must consider privacy and acoustic separation:
- Visual screening: Partial-height partitions or sliding panels can prevent direct views into the wardrobe from the bedroom or bathroom.
- Noise management: Soft-close drawers and concealed hardware reduce operational noise, which is critical in shared suites or when someone is sleeping nearby.
- Material selection: Sound-absorbing finishes, rugs, and wall treatments help maintain calm in the passage.
Visual Outcome
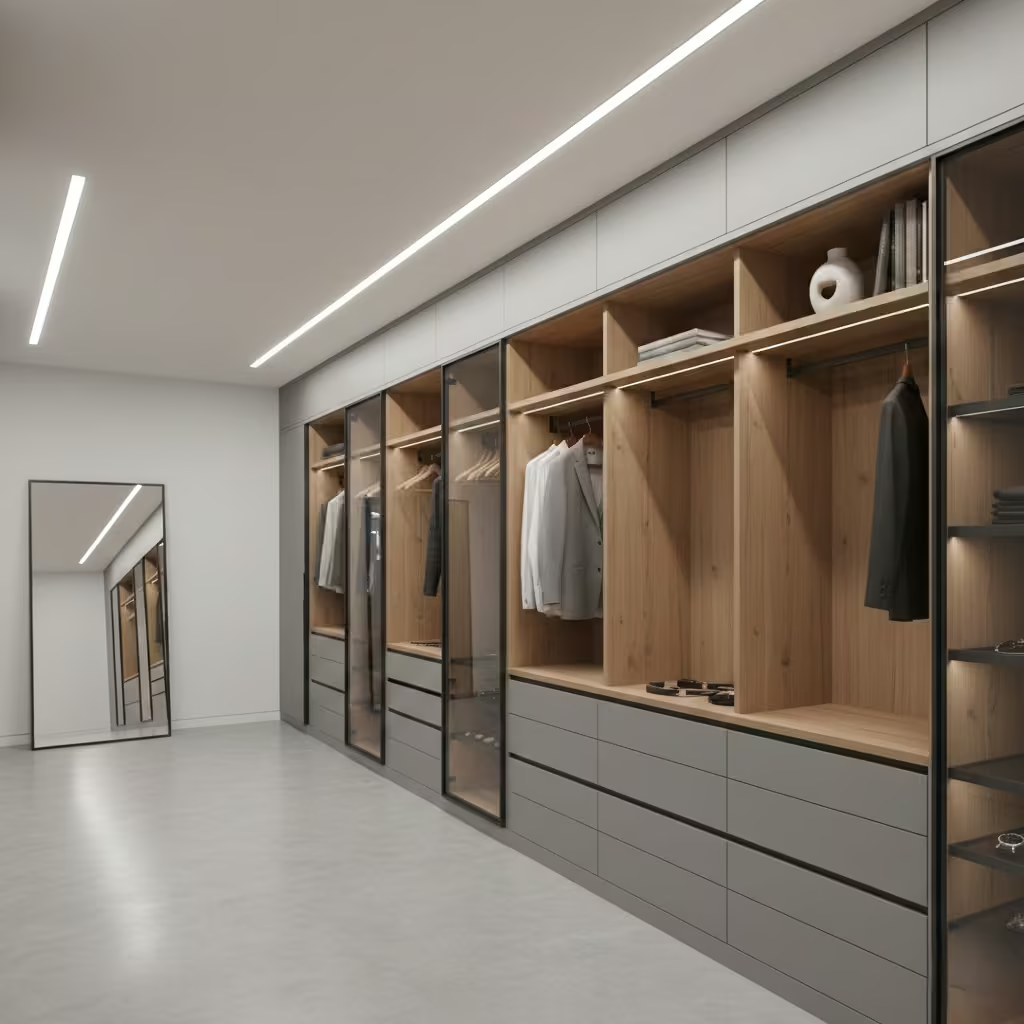
A walk-through wardrobe reads as continuous, architectural, and integrated. Its corridor-like form allows for layered lighting, vertical detailing, and balanced proportions, making the space feel spacious even in narrow dimensions. In practice, I’ve seen walk-through layouts transform master suites, giving a sense of luxury and seamless functionality without increasing the visual footprint of the wardrobe.
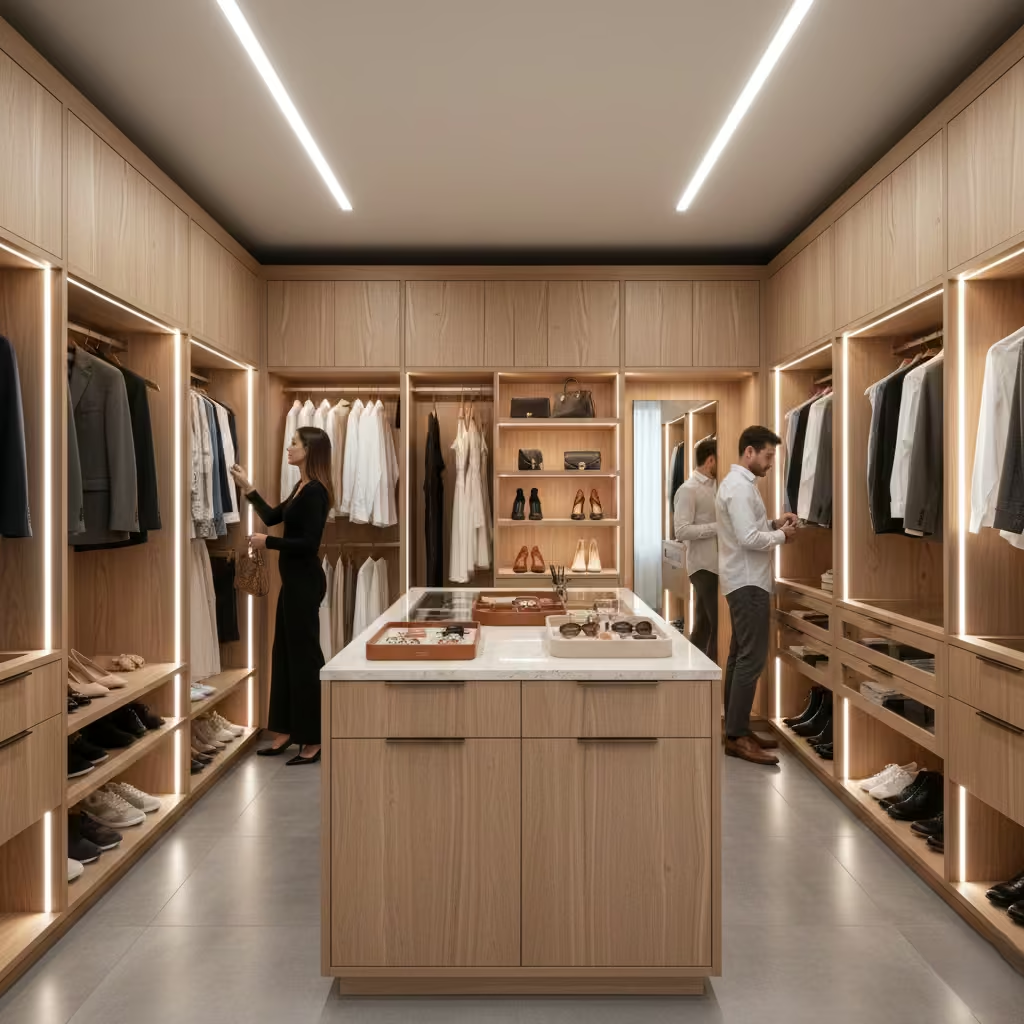
Walk-In Wardrobe Designs with Central Islands
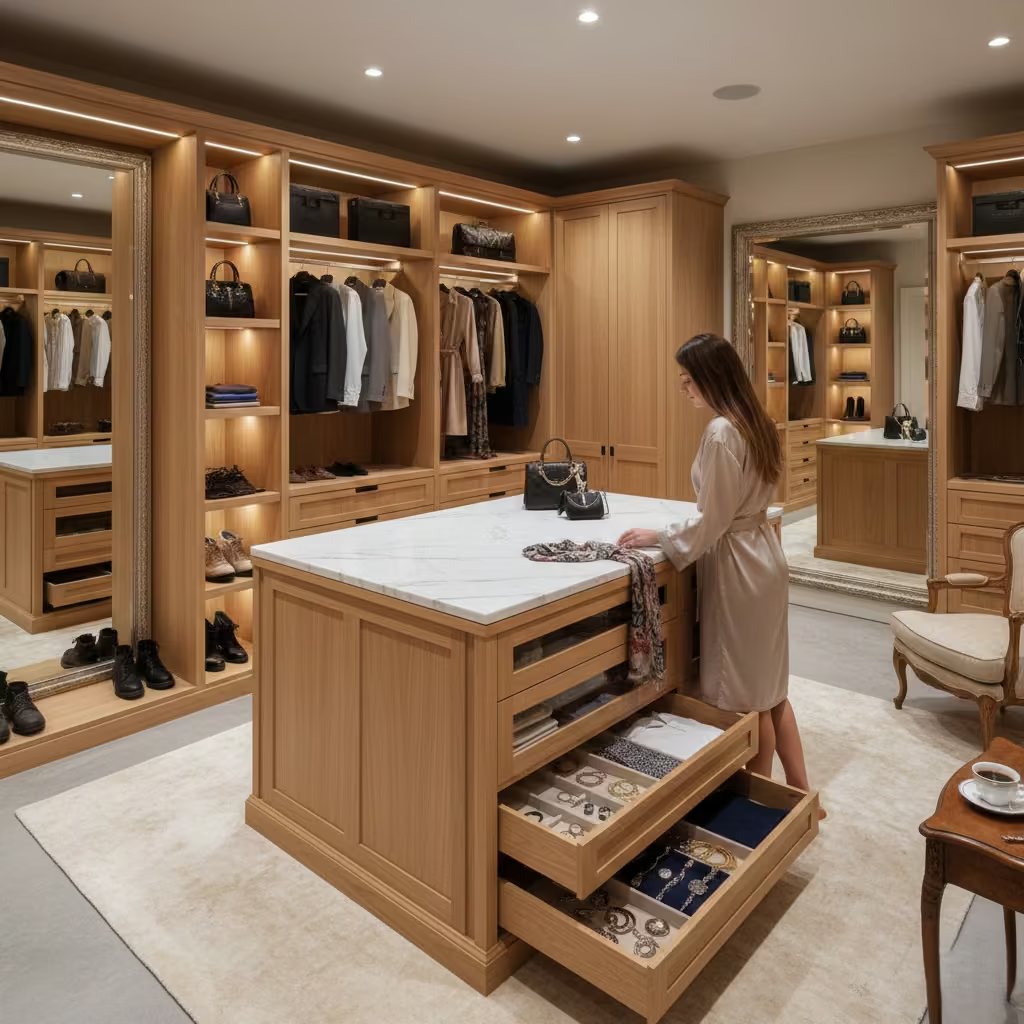
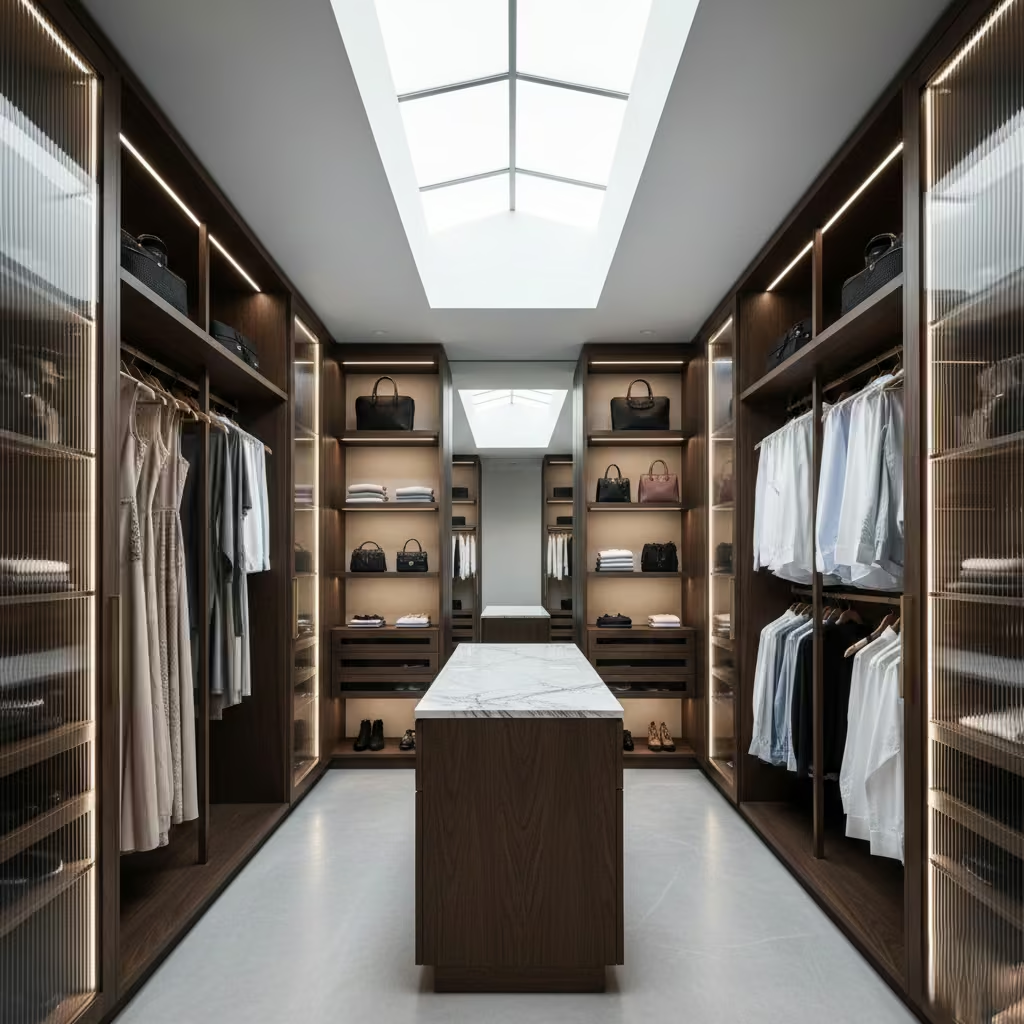
Central islands are a hallmark of premium walk-in wardrobes, offering both functional and visual benefits. When incorporated thoughtfully, islands transform the wardrobe from a storage space into a behaviourally organised dressing room.
Why Islands Improve Organisation
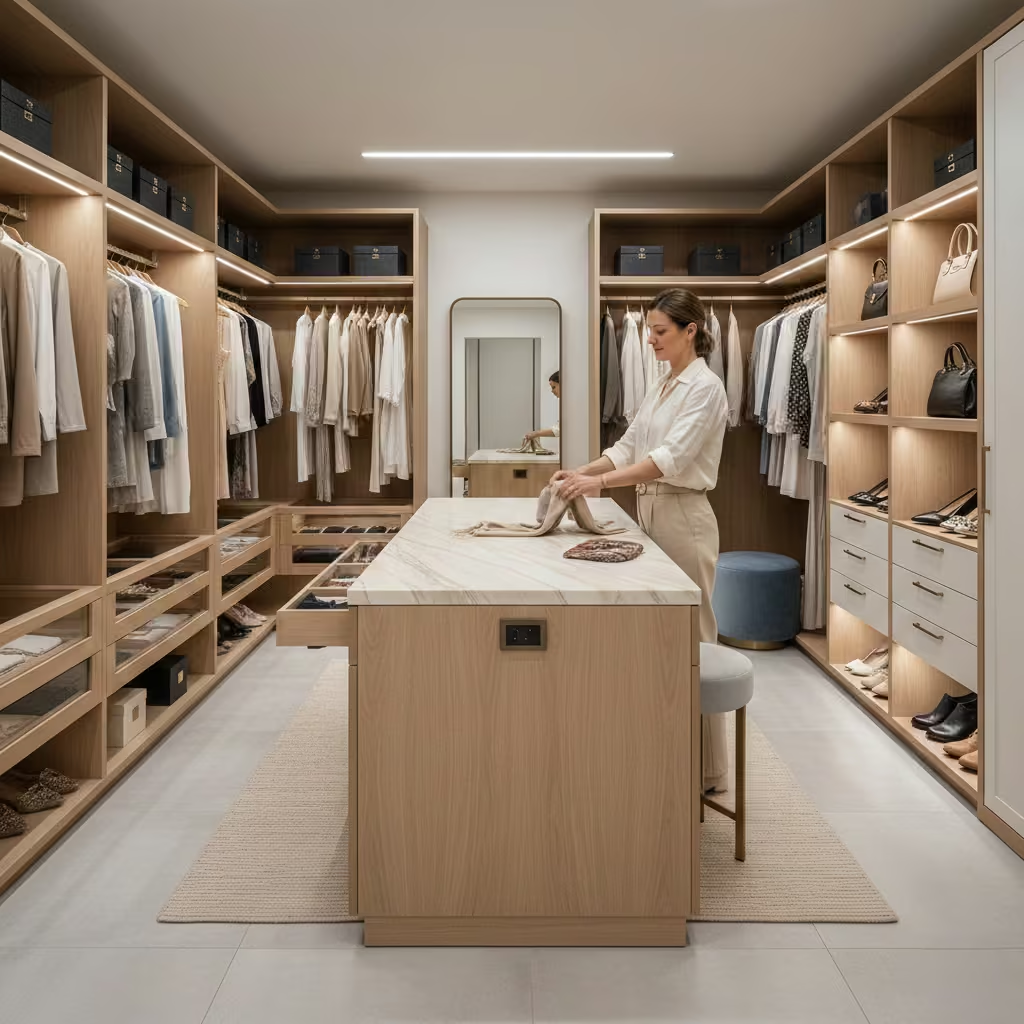
Islands act as a central reference point, encouraging users to organise around a fixed zone. I often position the island in a way that divides the space into clear pathways while providing a surface for folding, sorting, or staging outfits. This behavioural cue prevents clutter from spreading into circulation zones.
Folded and accessory management
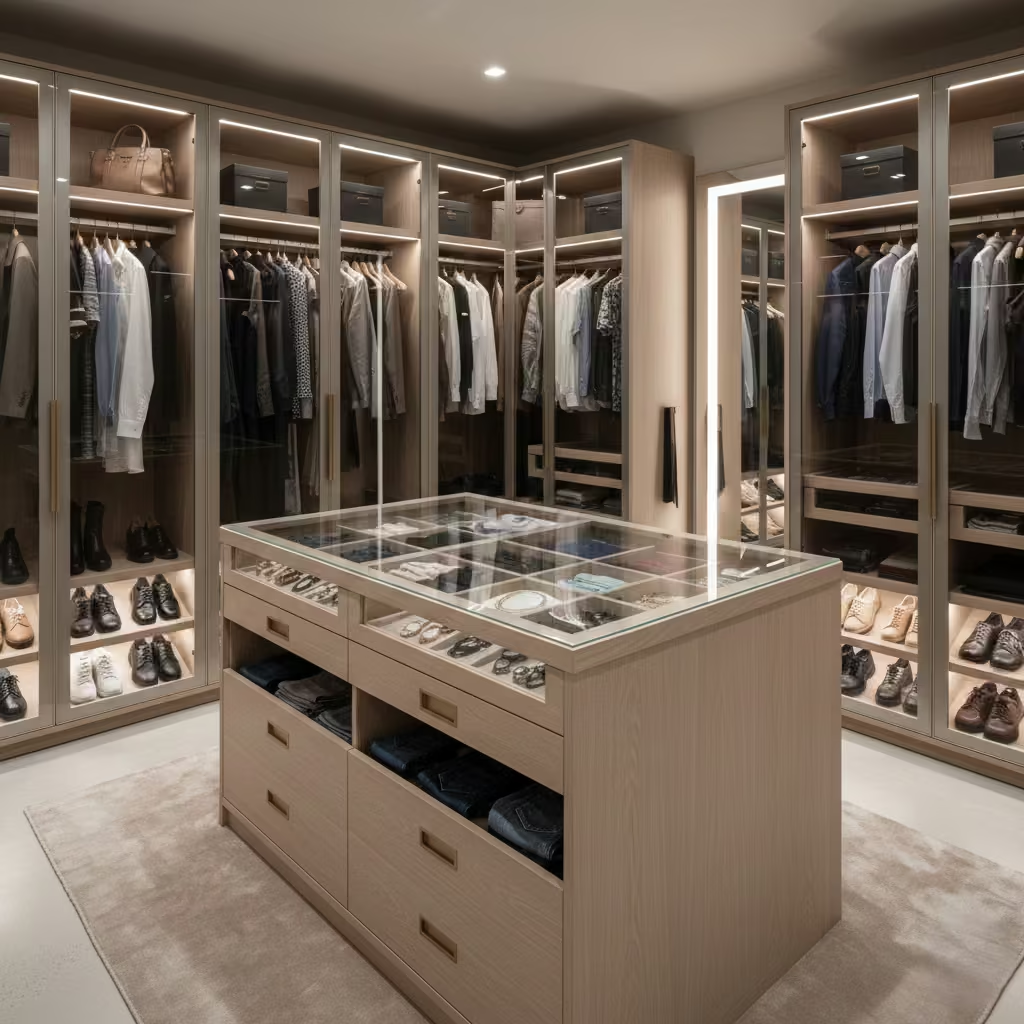
Islands offer dedicated storage for folded clothing, accessories, and jewellery, often with multiple layers of drawers, compartments, and trays. By centralising these items, they remain immediately visible and accessible, reducing the temptation to leave items on shelves or counters. In one of my recent projects, adding a 1.2 m (47 in) long island with shallow drawers cut wardrobe clutter in half and made daily dressing far more intuitive.
Minimum Room Size Requirements
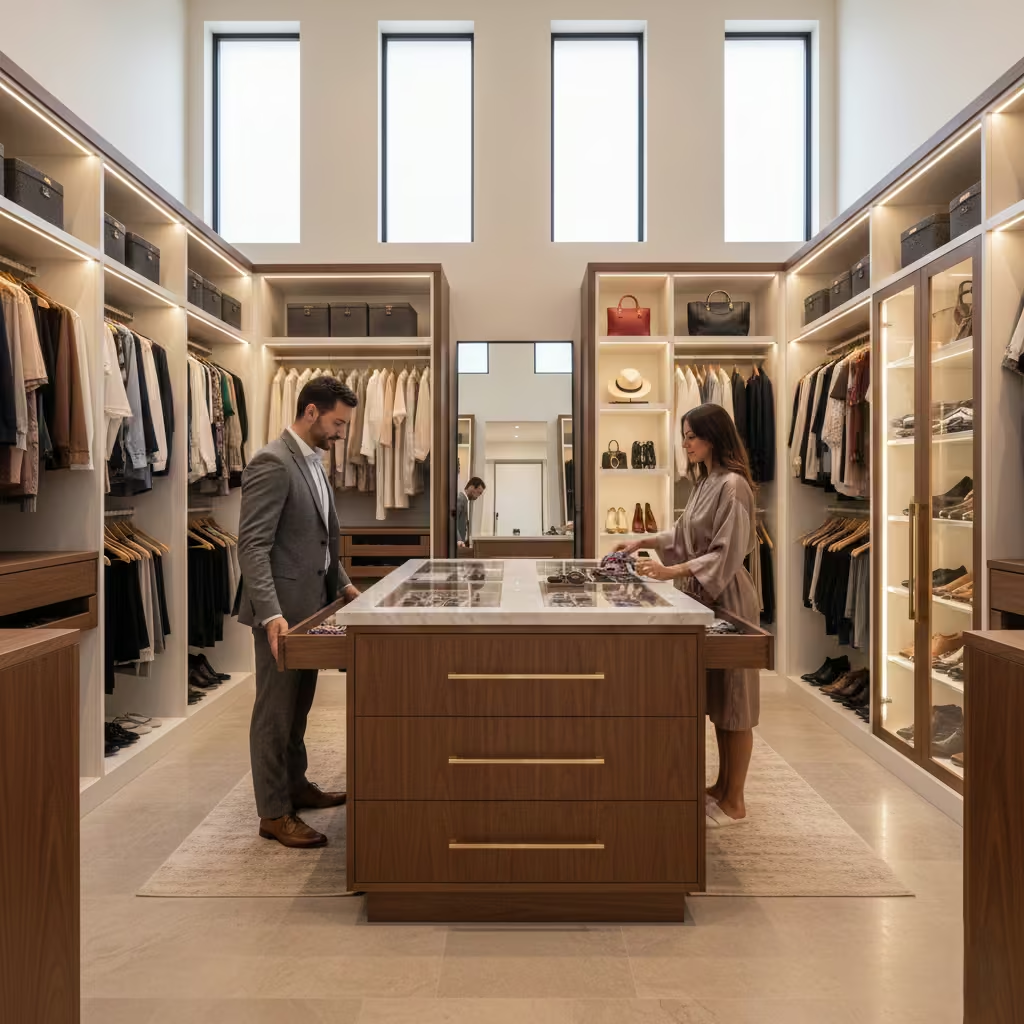
Central islands require generous clearance to function effectively:
- Minimum room width and length: 3.0 x 2.5 m (10 x 8 ft) for basic islands
- Island dimensions: 1,200 x 750 mm (47 x 30 in) is typical
- Circulation clearance: Minimum 900 mm (36 in) on all sides
- Ceiling height: 2.4–2.7 m (8–9 ft) to maintain proportion and allow upper storage
Smaller rooms often cannot accommodate an island without creating bottlenecks or blocked access, which undermines the functionality that islands are intended to provide.
Visual Outcome
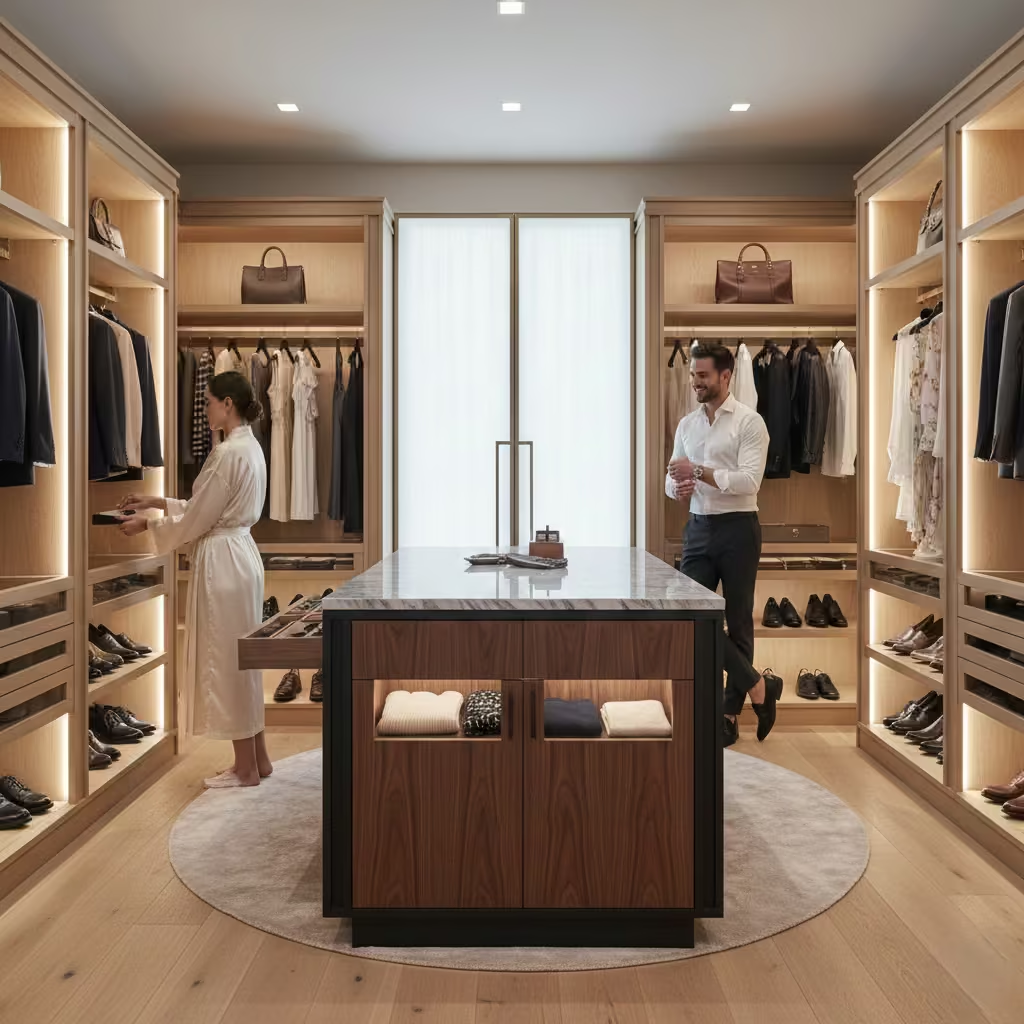
An island elevates the wardrobe to a boutique-style dressing room, creating a focal point that anchors the space visually and functionally. Surfaces can feature high-quality finishes such as matte lacquer, timber veneer, or integrated lighting to enhance luxury while maintaining restraint. In practice, I’ve found that islands improve perception of space, guiding circulation and framing the surrounding cabinetry for a balanced, architectural appearance.
You May also Like: 25 Cozy White Interior Ideas That Prove White Can Feel Warm
Walk-In Wardrobe Designs by Room Size
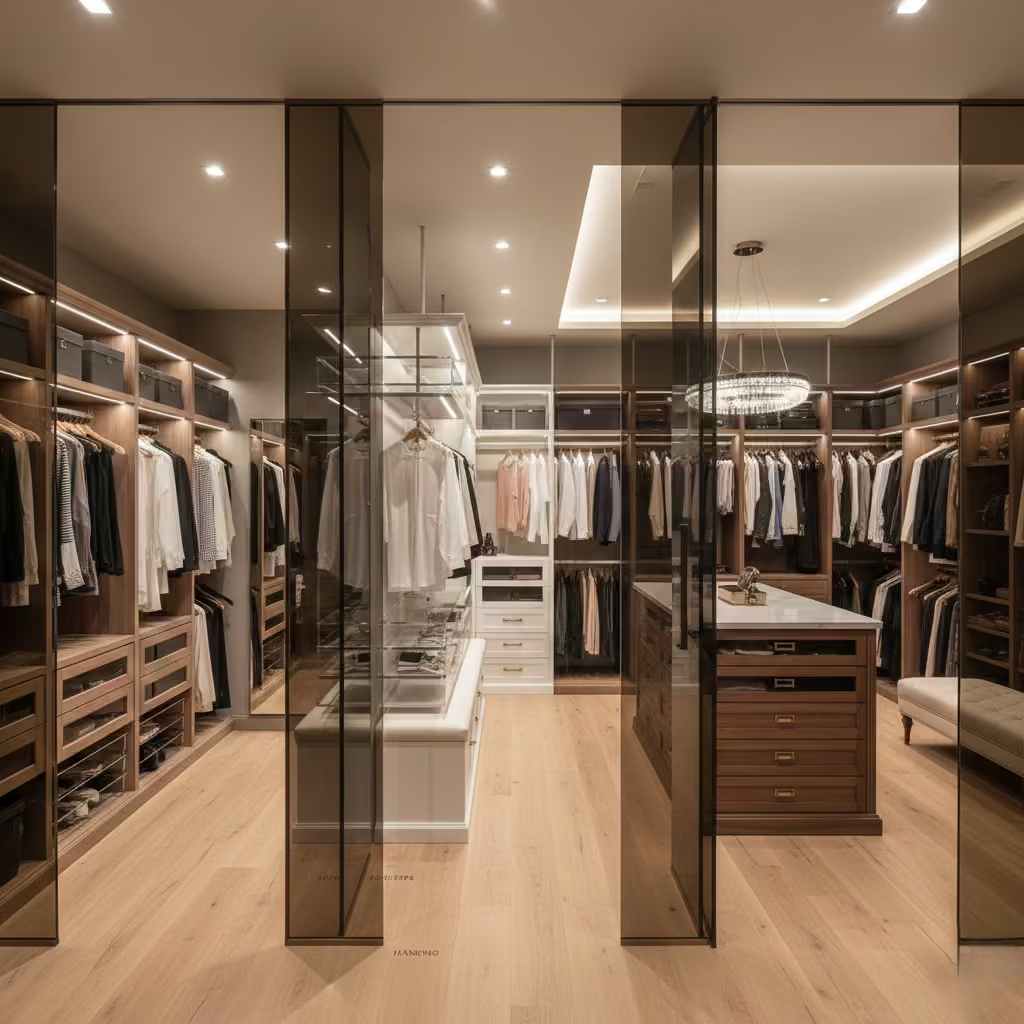
Room size is one of the most important determinants of walk-in wardrobe design. Even a luxurious concept can fail if the layout does not suit the available dimensions. In my experience, tailoring the design to the scale of the room ensures efficiency, comfort, and long-term usability, while making the most of both circulation and storage.
Below, I break down walk-in wardrobe design strategies based on small, medium, and large rooms, highlighting why each approach works, practical measurements, and visual outcomes.
Small Walk-In Wardrobe Designs
Small walk-in wardrobes present a unique challenge: there isn’t room to over-engineer, so every design decision must prioritise function, circulation, and perception of space. In my experience, a well-planned small wardrobe can feel as efficient and luxurious as a larger one, provided verticality and behavioural organisation are fully leveraged.
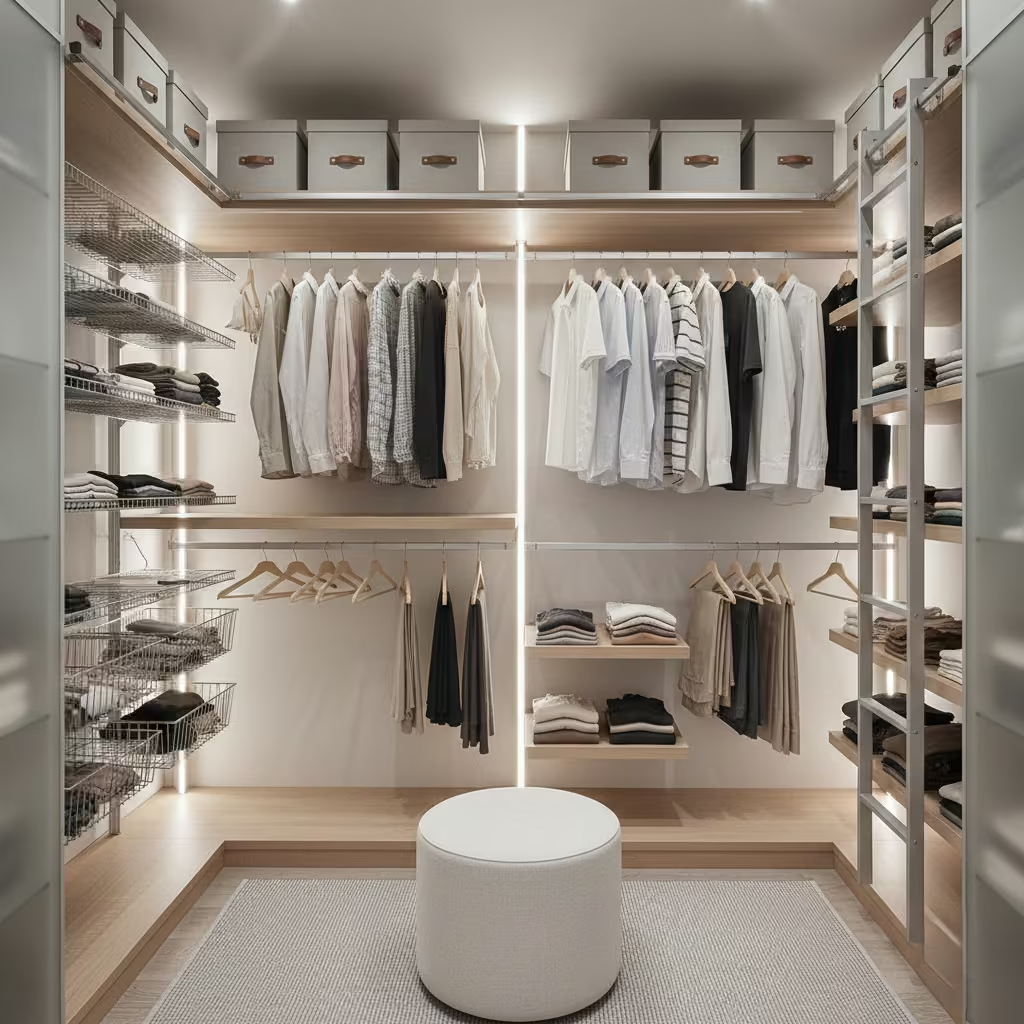
Why Vertical Design Matters More Than Width
In compact spaces, horizontal storage is limited, so using vertical space efficiently becomes essential. Shelves, hanging zones, and pull-down rails should extend up to the ceiling up to 2.4 m (8 ft) to maximise storage without crowding the floor. Items accessed less frequently, such as seasonal clothing, can occupy higher shelves, while daily-use items remain within easy reach (750–1,600 mm / 30–63 in).
Vertical design also prevents the wardrobe from feeling cramped. By drawing the eye upward, it creates a perception of height and openness, offsetting the small footprint. In one project, adding vertical pull-down rails and slim shelving transformed a 1.5 x 1.5 m walk-in into a fully functional dressing area with room to move.
Smart Storage Ratios
Small wardrobes require careful allocation of storage types:
- Hanging space: 40–50% of total storage for shirts, jackets, and dresses
- Shelving: 30–35% for folded clothing like knitwear and jeans
- Drawers and compartments: 15–20% for accessories, jewellery, and smaller items
Using these ratios ensures that the space functions efficiently without overloading any single type of storage, which is a common cause of clutter in small wardrobes.
Visual Strategies to Prevent Compression
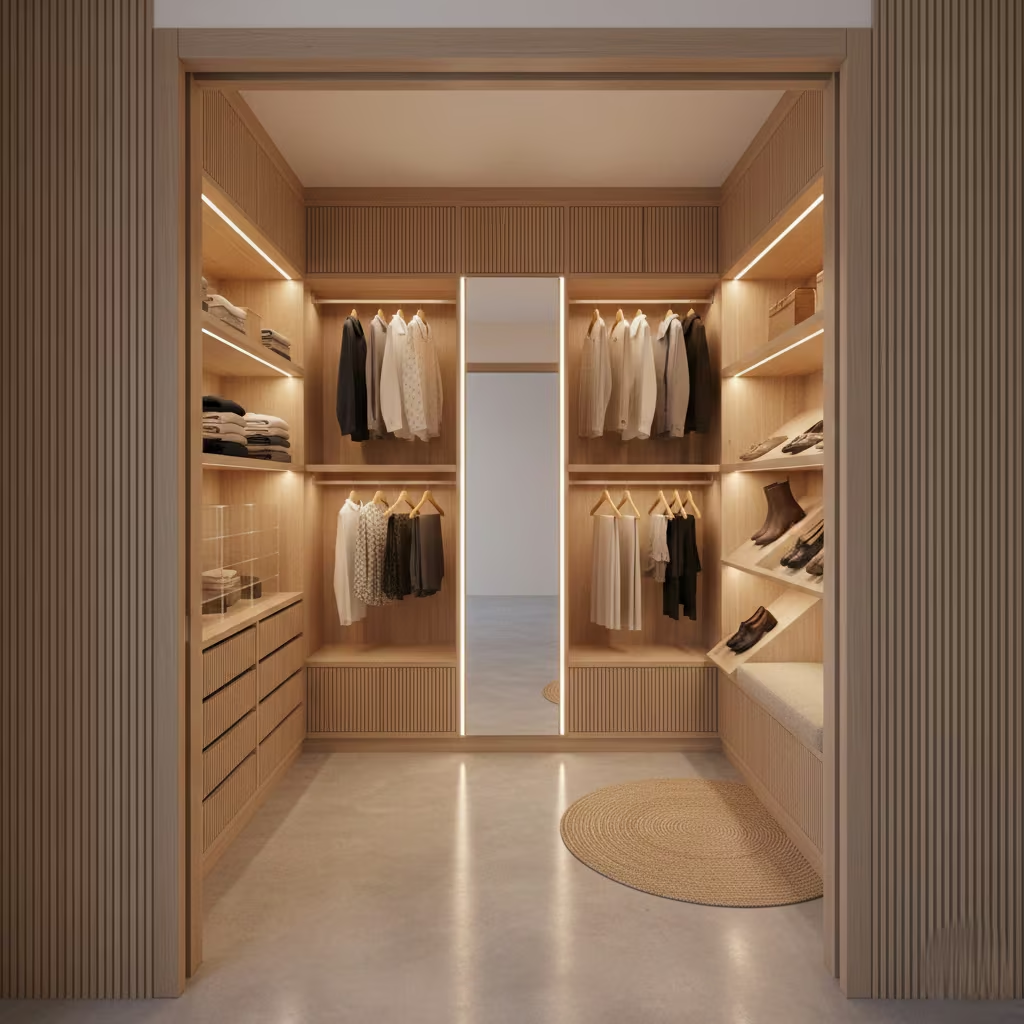
Even with perfect storage ratios, a small walk-in wardrobe can feel tight if visual strategies are ignored. I recommend:
- Light, reflective finishes to enhance brightness and perception of space
- Continuous vertical lines to guide the eye upward
- Open shelving at eye level to maintain visual breathing room
- Integrated LED strip lighting along rails and shelves to illuminate depth
These strategies maintain a sense of calm, order, and accessibility, ensuring that even a 1.5 x 1.5 m wardrobe feels intentional, uncluttered, and functional.
Medium Walk-In Wardrobe Designs
Medium-sized walk-in wardrobes offer a rare balance between storage capacity and circulation comfort, making them ideal for homeowners who want functionality without overwhelming the space. In my experience, these layouts are the most versatile, allowing for thoughtful zoning and adaptability over time.
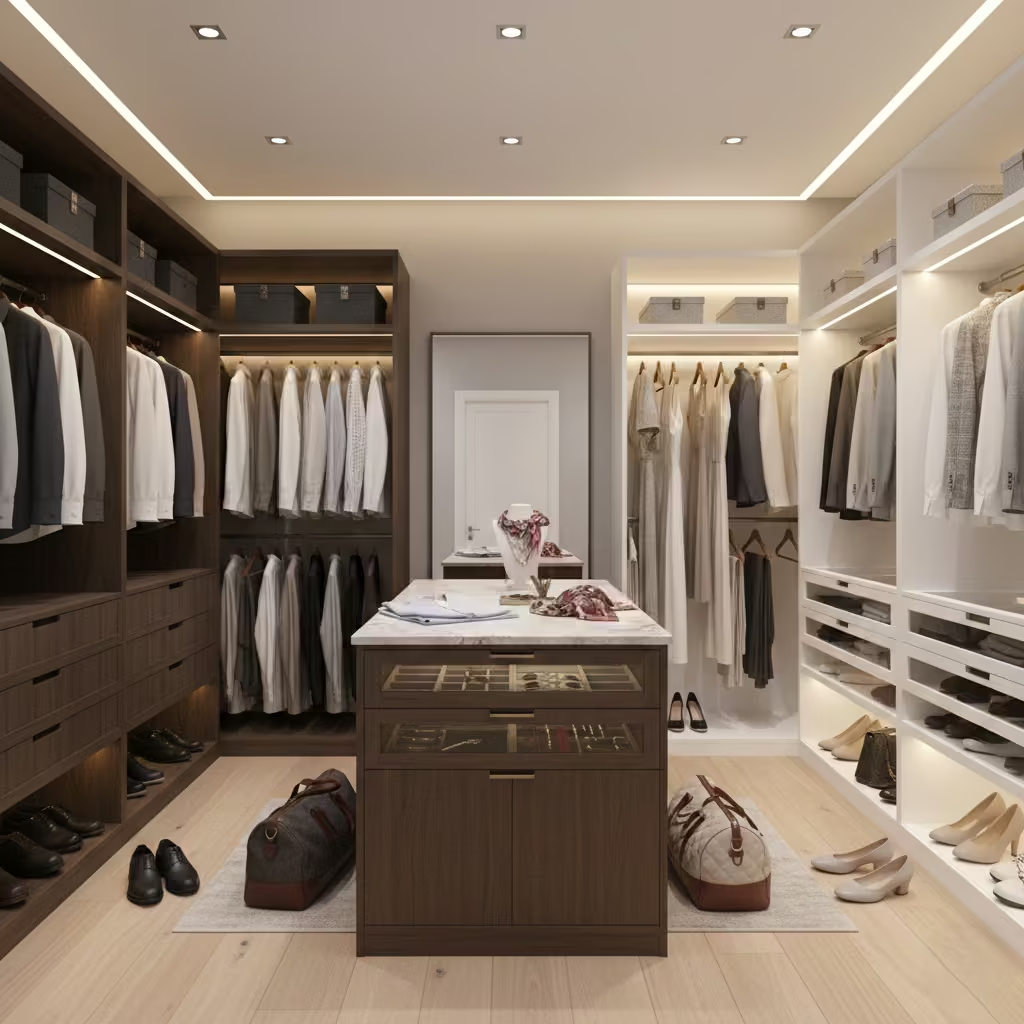
Balanced Layout Opportunities
Medium rooms can accommodate L-shaped or walk-through configurations, providing distinct zones for hanging, folded, and accessory storage without compromising movement. For example, I often position daily-use items along the longer wall for quick access, while secondary or seasonal items occupy the shorter wall or deeper shelving. This balance prevents clutter from creeping into circulation areas and makes the wardrobe feel structured, intuitive, and easy to maintain.
Other layout strategies that work well in medium spaces include:
- Split his-and-hers zones to reduce visual and functional conflict
- Combination of open shelving and enclosed drawers for flexibility in storing folded or delicate items
- Corner shelving or angled drawers to maximise every square foot without blocking access
Flexibility for Future Change
One of the advantages of a medium-sized wardrobe is the ability to adapt to evolving storage needs. Adjustable shelving, modular drawer systems, and movable rails allow the space to reconfigure for new clothing habits, lifestyle changes, or additional family members.
From a practical standpoint, planning for adaptability ensures the wardrobe remains functional and aesthetically coherent for years. For instance, in one of my projects, designing adjustable shelving allowed the client to add a second rail and additional shoe storage without a complete overhaul, extending the wardrobe’s usefulness and protecting the investment.
Key Measurements
| Element | Recommended Measurement |
| Walkway clearance | 1,000 mm / 39 in minimum |
| Hanging depth | 550–600 mm / 21–24 in |
| Drawer clearance | 500–600 mm / 20–24 in |
| Secondary shelf depth | 300–350 mm / 12–14 in |
Visual Outcome
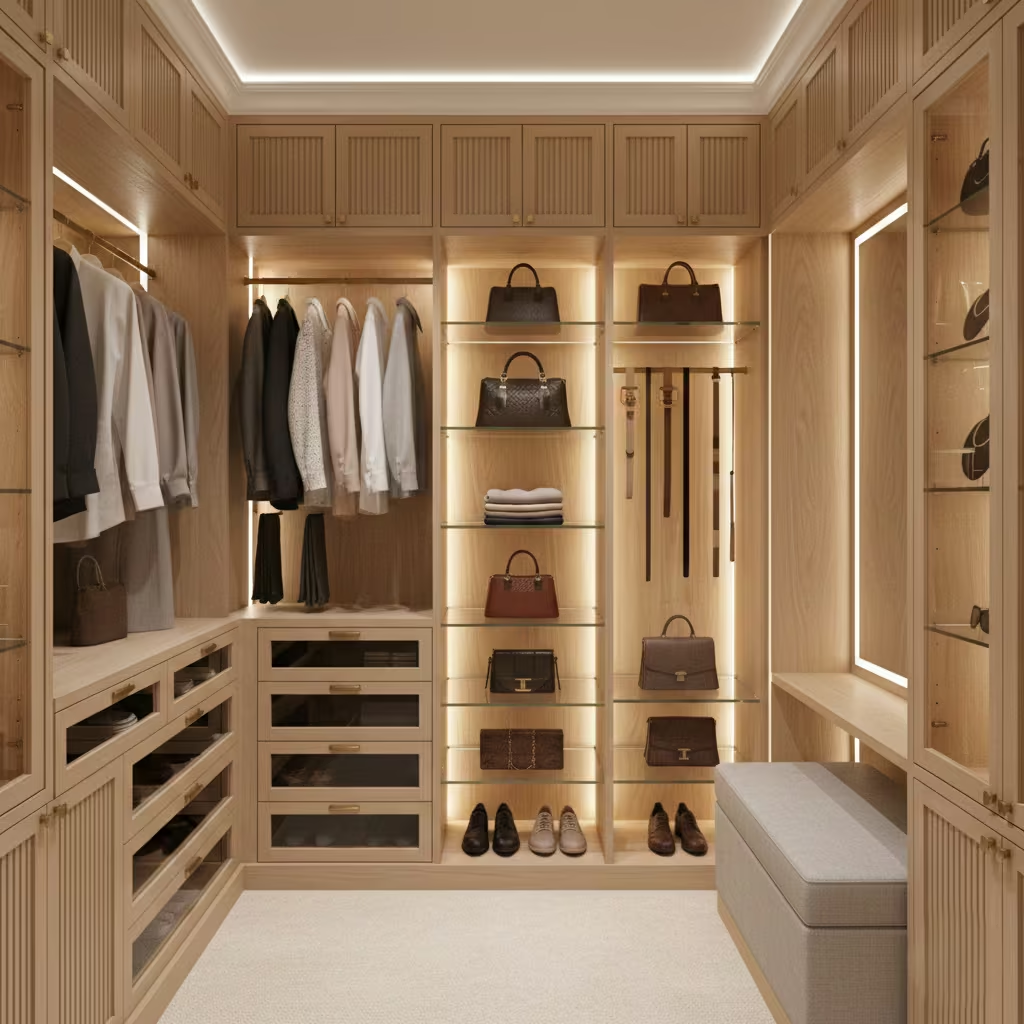
A medium walk-in wardrobe can feel open yet purposeful. Zoning creates a sense of order, while consistent materials and finishes unify the space. Subtle lighting along shelving and rails enhances functionality without overwhelming the room, making the wardrobe feel both inviting and efficient.
Large Walk-In Wardrobe Designs
Large walk-in wardrobes offer unparalleled flexibility, storage capacity, and luxury, but without careful planning, they can easily become overwhelming or inefficient. I’ve seen spacious wardrobes filled with excessive cabinetry, creating a cluttered feel despite their size. The key is to balance storage with usability and circulation.
Avoiding Overdesign
In large rooms, it’s tempting to maximise every wall with hanging, shelving, and drawers. However, overdesign can reduce comfort and accessibility, turning a spacious wardrobe into a visual and functional labyrinth. I always prioritise:
- Clear central circulation of at least 1,000–1,100 mm (39–43 in)
- Strategic placement of islands, if included, so they anchor the room without obstructing movement
- Reserving wall space for primary-use items and keeping secondary or seasonal storage in less prominent areas
By avoiding unnecessary cabinetry, the wardrobe maintains architectural clarity, encourages order, and improves daily usability.
When Less Storage Improves Use
Sometimes, reducing storage actually enhances the wardrobe’s functionality. For example:
- Limiting hanging rails prevents overcrowding and keeps garments easily visible and accessible
- Minimising deep shelves reduces overstuffed piles of folded clothes, which often collapse or get lost at the back
- Prioritising zones for daily items over rarely used archive pieces encourages consistent maintenance and organisation
In one of my projects, a 12 x 12 ft (3.7 x 3.7 m) wardrobe with slightly reduced cabinetry and a carefully planned central island performed far better than a fully packed U-shaped design. Users could move freely, see all items at a glance, and maintain order effortlessly.
Key Measurements
| Element | Recommended Measurement |
| Central circulation | 1,000–1,100 mm / 39–43 in |
| Island size | 1,200 x 750 mm / 47 x 30 in |
| Hanging depth | 550–600 mm / 21–24 in |
| Drawer clearance | 500–600 mm / 20–24 in |
| Ceiling height | 2.4–2.7 m / 8–9 ft |
Visual Outcome
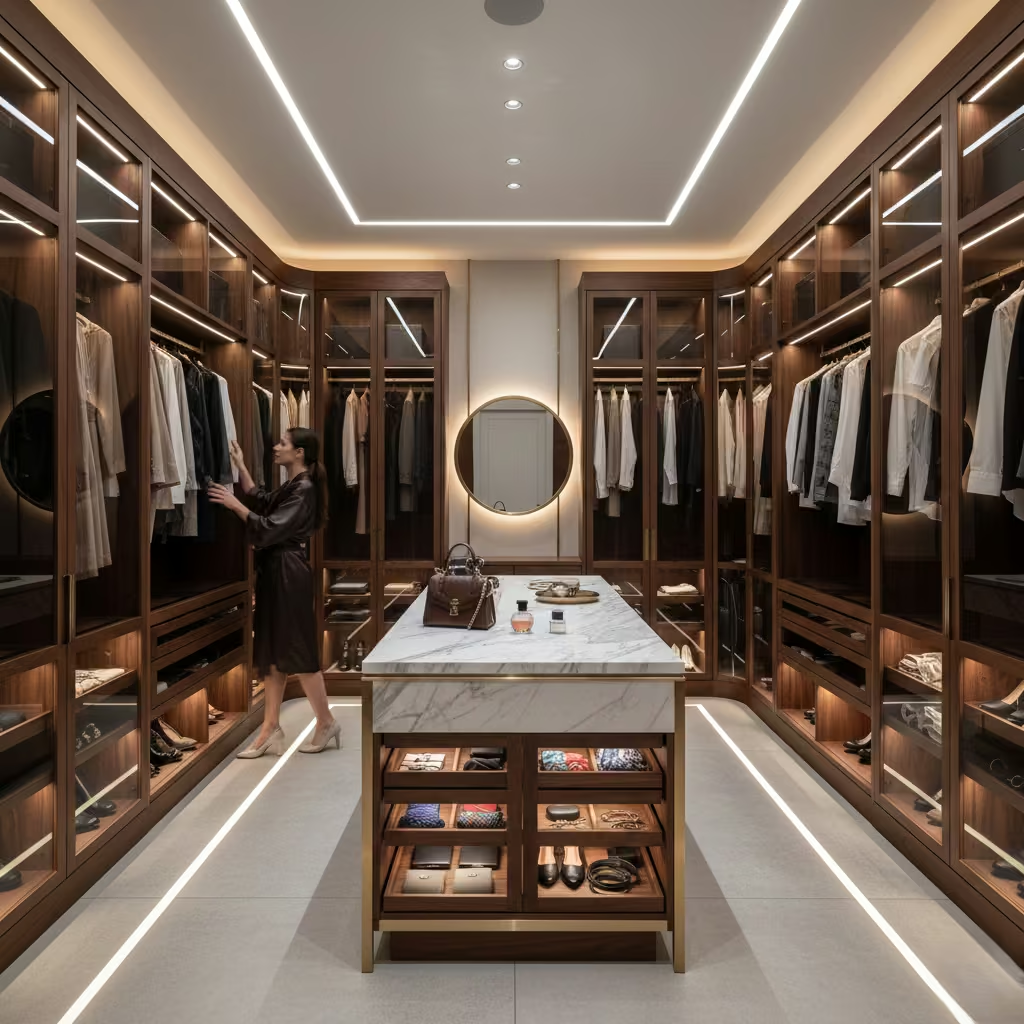
When executed correctly, large wardrobes feel luxurious, organised, and intentional. Islands and U-shaped configurations create a boutique dressing room effect, while zoning and restraint in cabinetry prevent visual overload. Materials, lighting, and subtle detailing can transform the space from purely functional to architecturally striking, while still supporting efficient daily routines.
Storage Systems That Make Walk-In Wardrobes Work
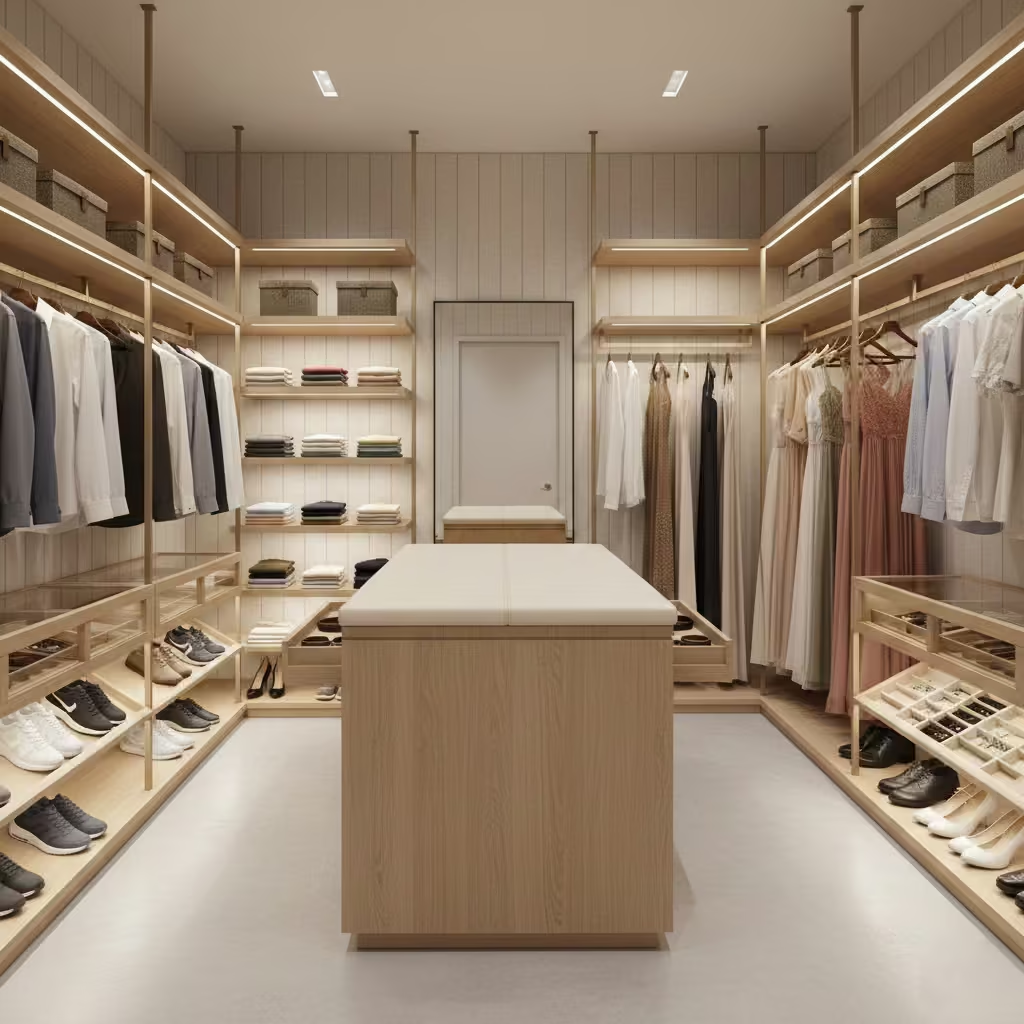
A walk-in wardrobe is only as effective as its storage systems. Before selecting finishes or layouts, it’s critical to understand how each type of storage functions, interacts with circulation, and supports daily habits.
From hanging rails to drawers, shelves, and accessory compartments, every element should be planned to maximise accessibility, maintain order, and adapt to changing wardrobe needs over time.
Properly designed storage systems transform a walk-in wardrobe from a static cupboard into a behaviourally intelligent, effortless space.
Hanging Systems Explained
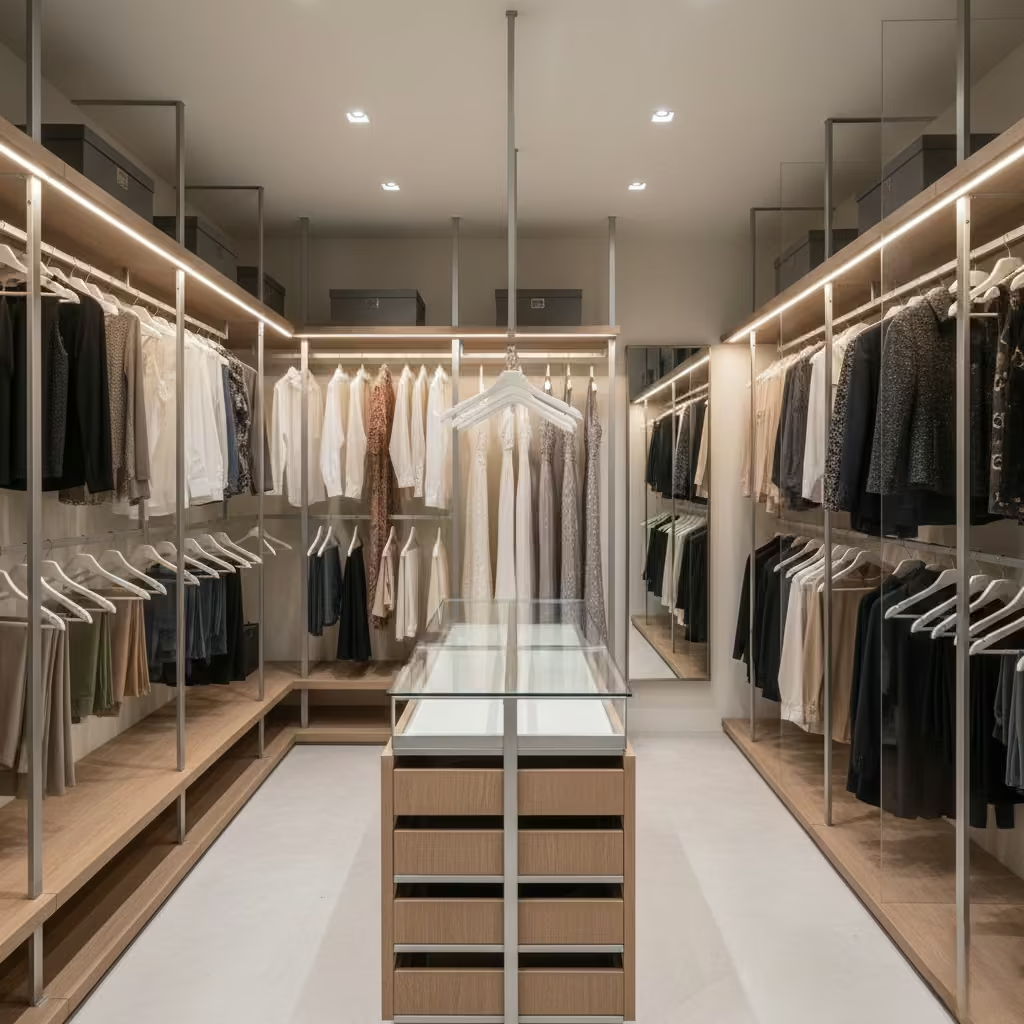
Hanging systems are the backbone of any walk-in wardrobe. They define how garments are stored, accessed, and maintained, and they play a major role in preventing overcrowding or creasing. When designed correctly, hanging systems make the wardrobe intuitive and efficient, turning daily dressing into a seamless routine.
Single vs Double Rail Logic
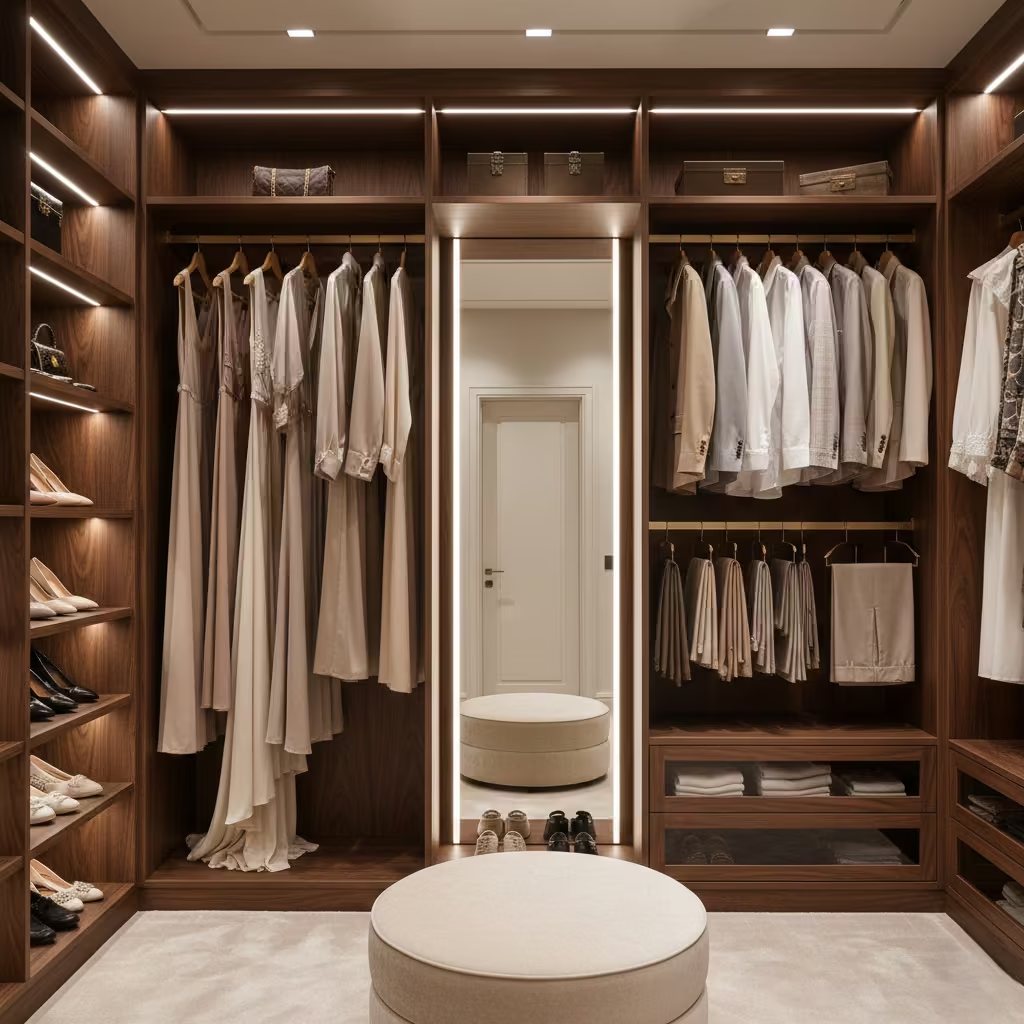
Single rails are ideal for long garments such as dresses, coats, and floor-length robes. They prevent crumpling and give items the space they need to hang naturally.
Double rails work best for shorter garments like shirts, blouses, jackets, and trousers. By stacking two rails vertically, you double storage capacity without increasing footprint, but care must be taken to ensure adequate clearance between rails to avoid crushing clothes. In practice, I often combine single and double rails along the same wall to optimise storage by garment type and frequency of use.
Long-Hang Zones
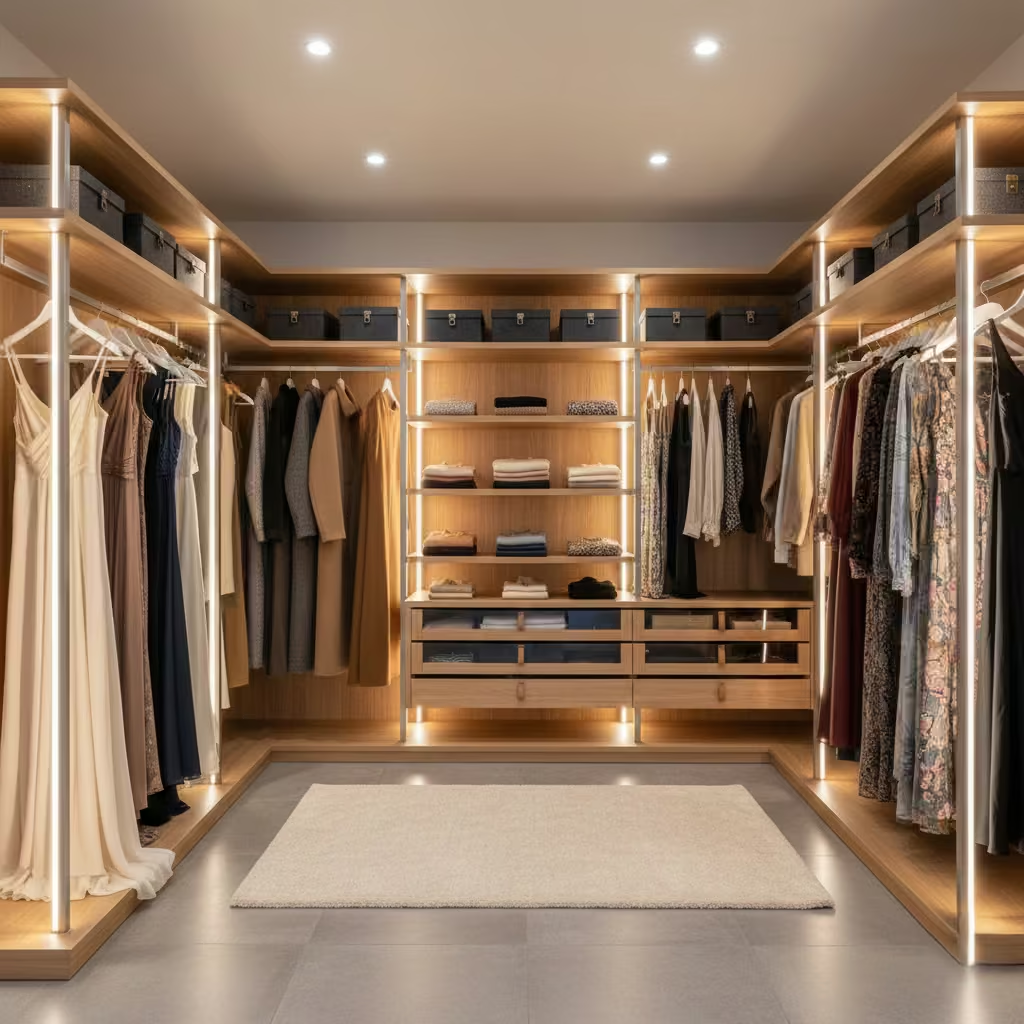
Long-hang zones are essential for items that need full vertical space, such as evening gowns, long coats, or maxi dresses. I usually dedicate at least 600–700 mm (24–28 in) of width per long-hang section, depending on garment volume. These zones should be positioned in easily accessible areas, often at the end of a linear or U-shaped layout, so that long items do not interfere with daily circulation.
Measurements Rail Heights for Different Garments
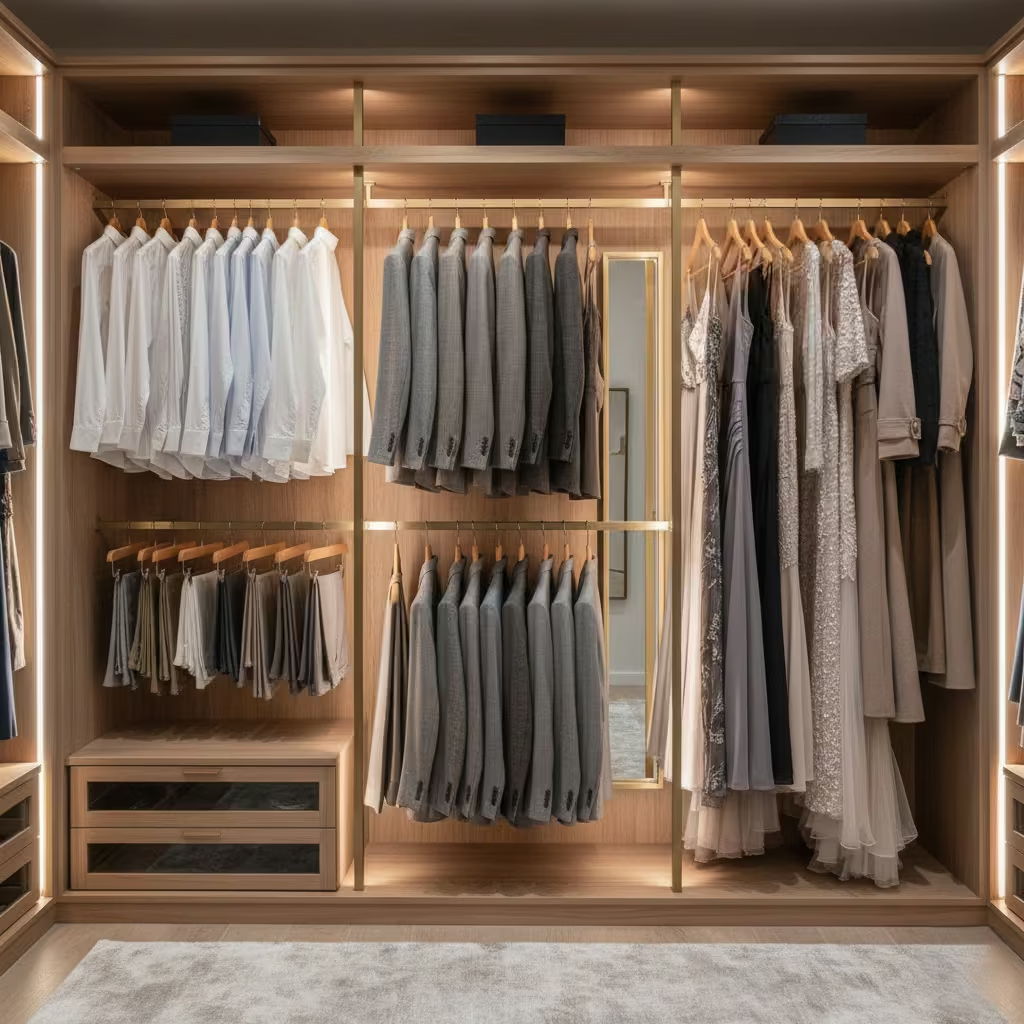
| Garment Type | Recommended Rail Height from Floor |
| Shirts, tops | 1,000–1,200 mm / 39–47 in |
| Trousers, skirts (double rail) | Upper rail: 1,500 mm / 59 in, Lower rail: 900 mm / 36 in |
| Jackets, blazers | 1,400–1,500 mm / 55–59 in |
| Long coats, dresses | 1,700–1,800 mm / 67–71 in |
| Floor-length gowns | 1,900–2,000 mm / 75–79 in |
Shelving and Folded Storage
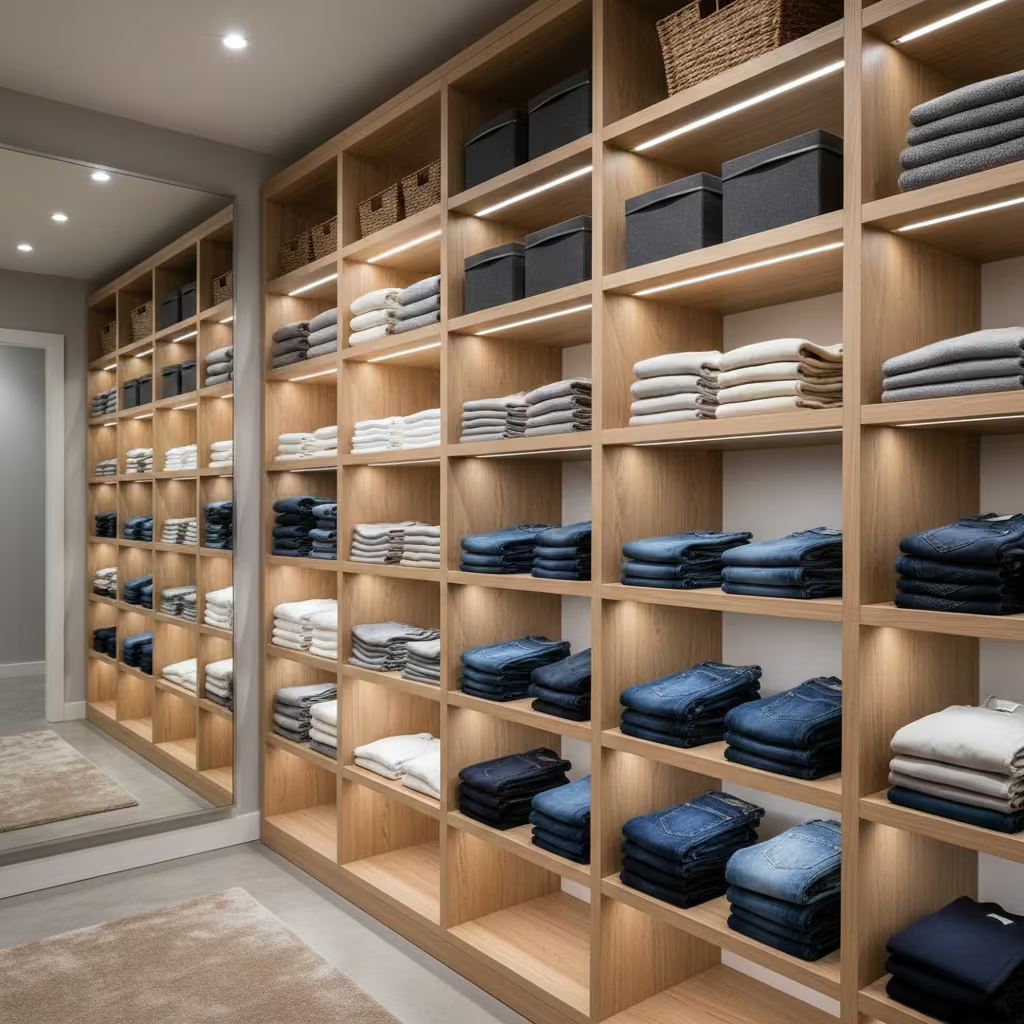
Shelves are the silent workhorses of any walk-in wardrobe. They provide easy visibility, organisation, and quick access to folded garments, but they are often overdesigned, leading to wasted space or unstable stacks. Understanding depth, height, and positioning is critical for maintaining both functionality and visual order.
Why Shelf Depth Is Often Overdesigned
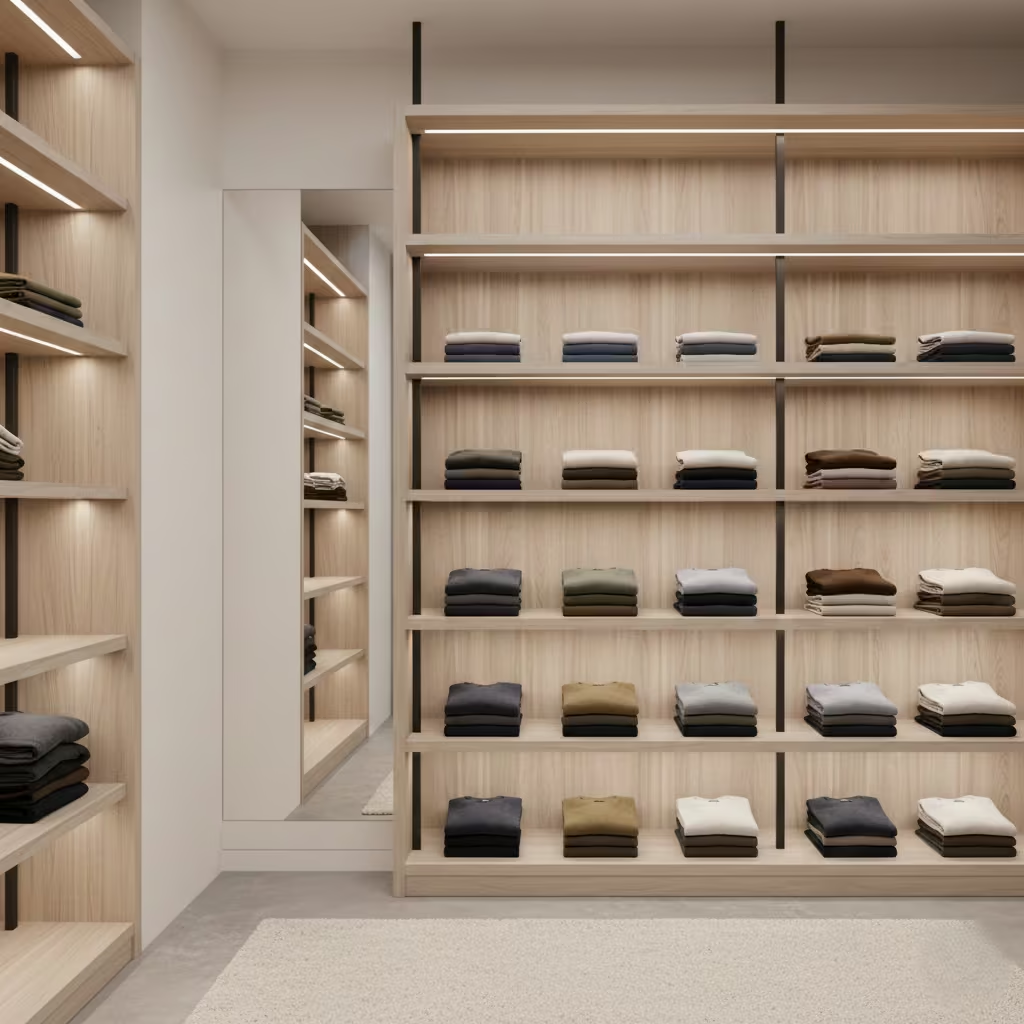
In many projects, I see shelves installed too deep, under the assumption that more space equals more storage. In reality, deep shelves make folded piles difficult to reach and see, often causing items to get lost at the back. They also encourage overstacking, which leads to collapsed piles and messy surfaces.
Optimally designed shelves balance storage capacity with accessibility. Shallow, well-organised shelves keep garments visible, reduce folding stress, and encourage consistent use. This approach also maintains a clean, architectural aesthetic, even when the wardrobe is fully stocked.
Ideal Dimensions for Fold Stability
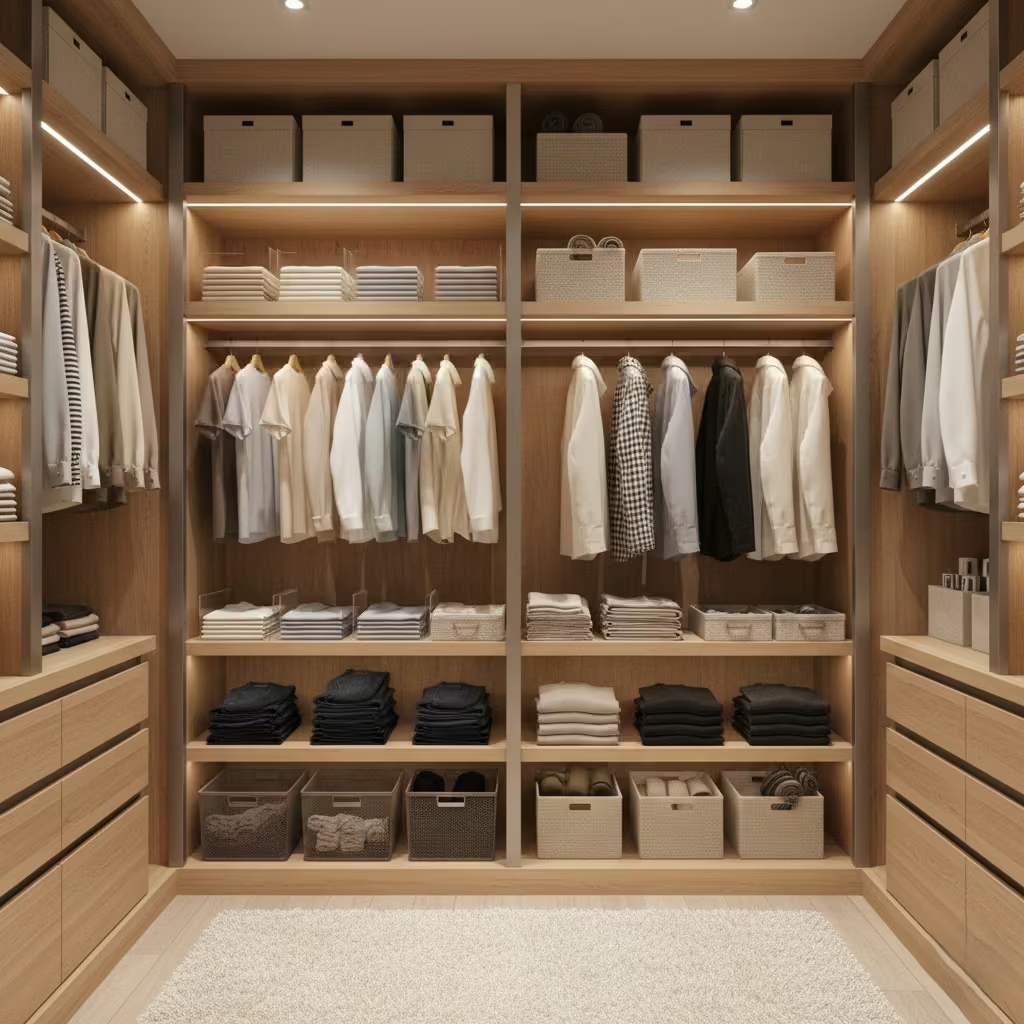
| Item Type | Shelf Depth | Vertical Spacing |
| T-shirts, casual tops | 300 mm / 12 in | 250–300 mm / 10–12 in |
| Knitwear, sweaters | 350 mm / 14 in | 300–350 mm / 12–14 in |
| Jeans, trousers | 350 mm / 14 in | 250–300 mm / 10–12 in |
| Heavy or bulky items | 400 mm / 16 in | 350 mm / 14 in |
Additional tips from real projects:
- Use dividers or shallow trays for stacks to prevent slippage.
- Position frequently used items at eye to waist level for immediate access.
- Avoid stacking more than 4–5 items deep, which preserves visual clarity and reduces retrieval effort.Top of Form
Drawer Systems and Internal Organisation
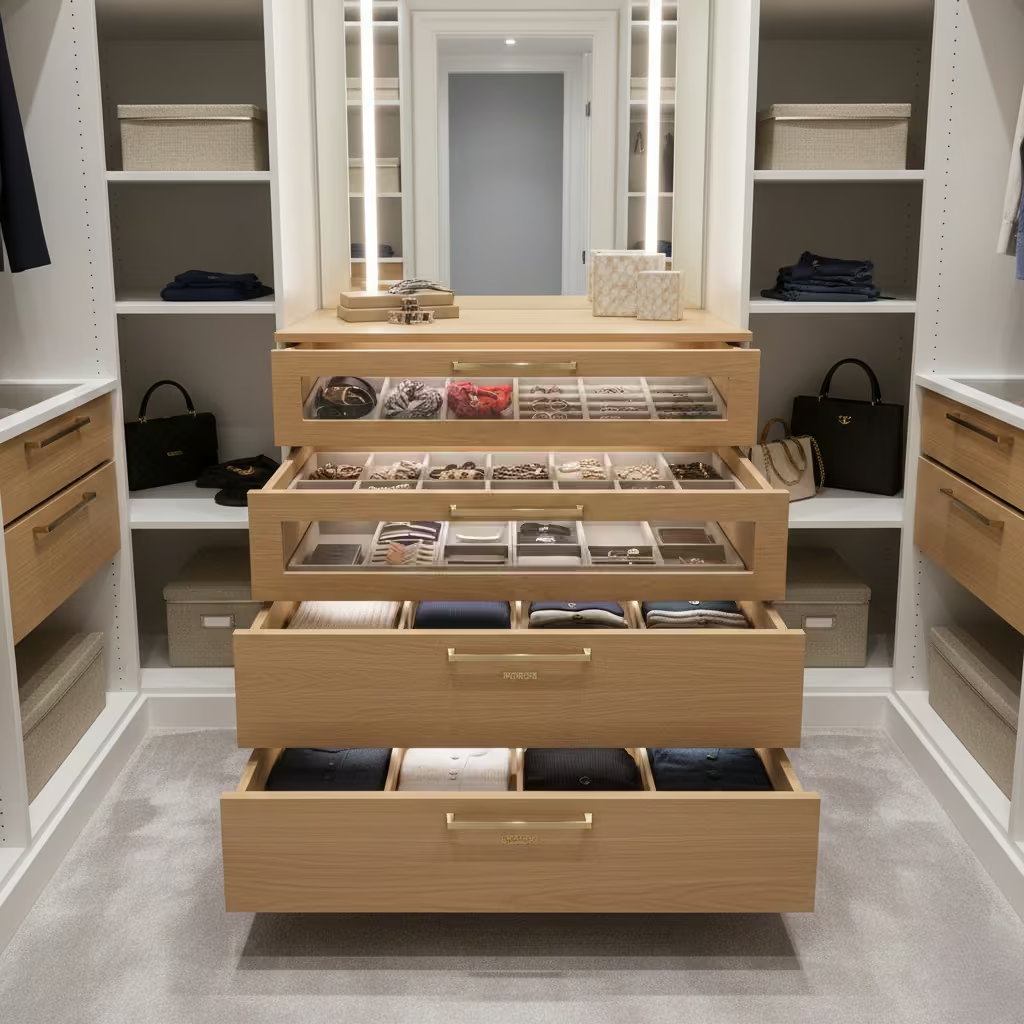
Drawers are a critical component of a functional walk-in wardrobe, providing neat storage for smaller items, folded clothing, and accessories that would otherwise clutter shelves. When designed thoughtfully, drawers improve accessibility, protect garments, and create a sense of order within the wardrobe.
Soft-Close Importance
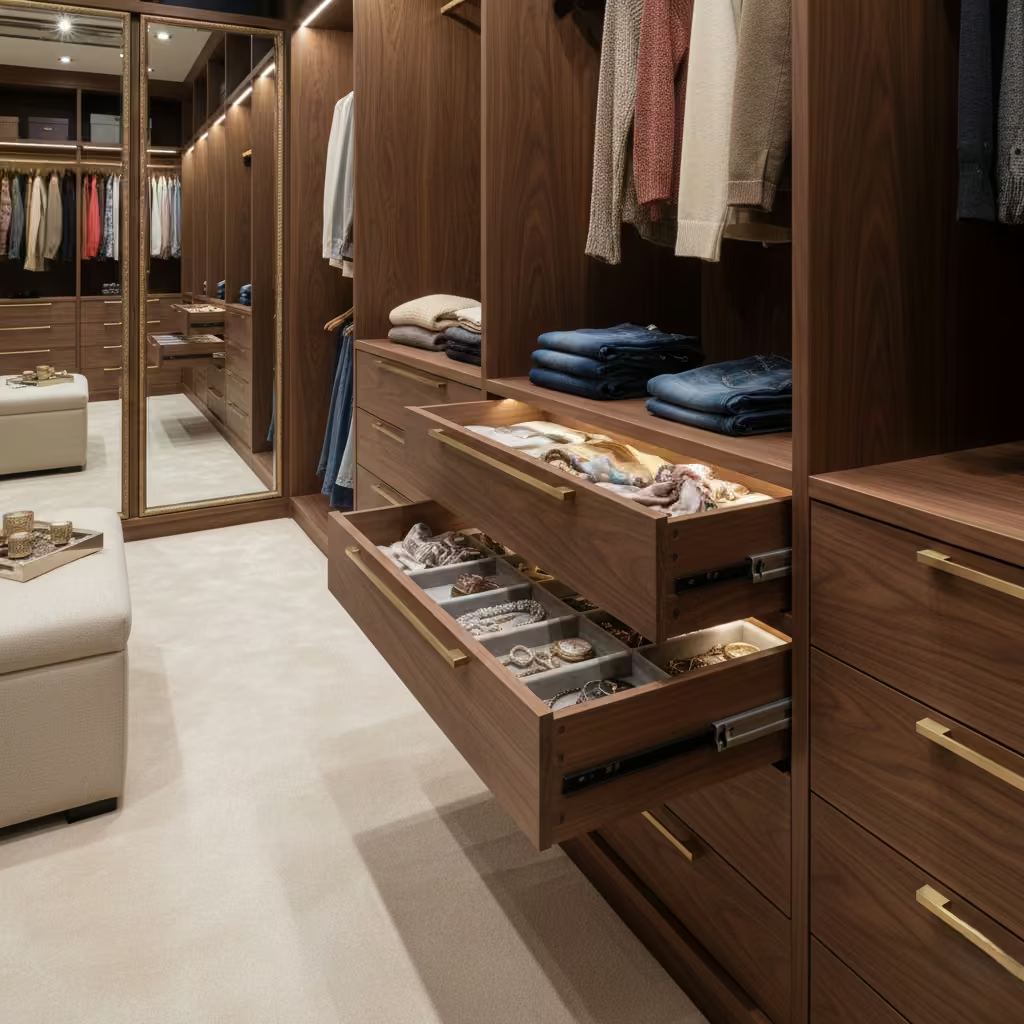
Soft-close mechanisms are more than a luxury; they are essential for longevity and ease of use. In my projects, I specify soft-close drawers for every high-use zone because:
- They reduce noise, which is crucial in shared or master suites.
- They protect contents from sudden impact, keeping delicate items safe.
- They enhance perceived quality, making the wardrobe feel premium and well-engineered.
Without soft-close functionality, drawers are prone to slamming, misalignment, and accelerated wear over time.
Internal Dividers vs Open Drawers
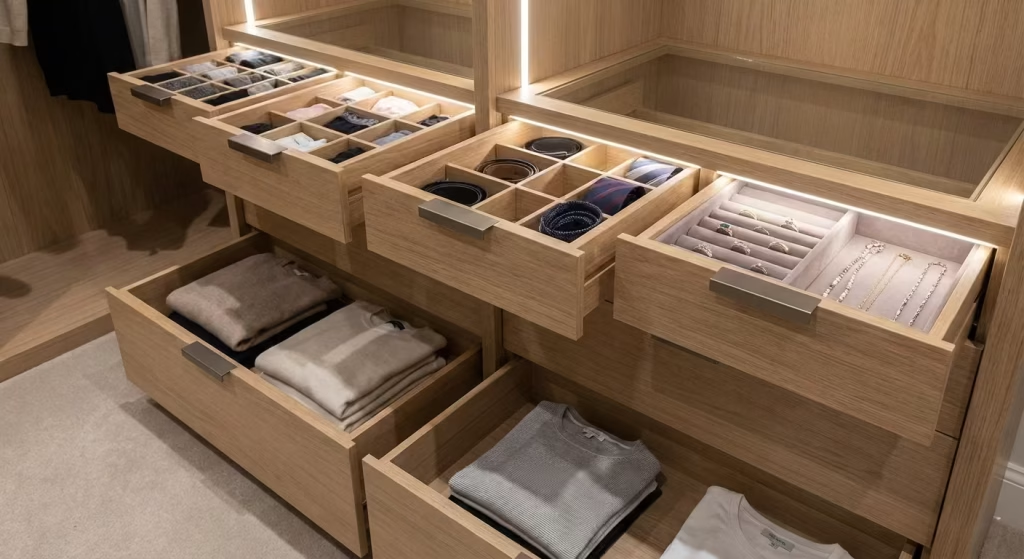
Internal dividers are ideal for organisation within drawers. They separate items like:
- Underwear, socks, and hosiery
- Accessories such as belts, ties, or jewellery
- Folded small tops or t-shirts
Dividers prevent items from mixing or becoming jumbled, allowing users to see everything at a glance. In contrast, open drawers without compartments may work for bulky items like sweaters, but often result in disordered stacks.
In practice, I often combine both approaches: open drawers for larger folded items and dividers for smaller garments or accessories. This creates a hierarchy within storage, ensuring efficiency, order, and quick retrieval.
Practical Measurements
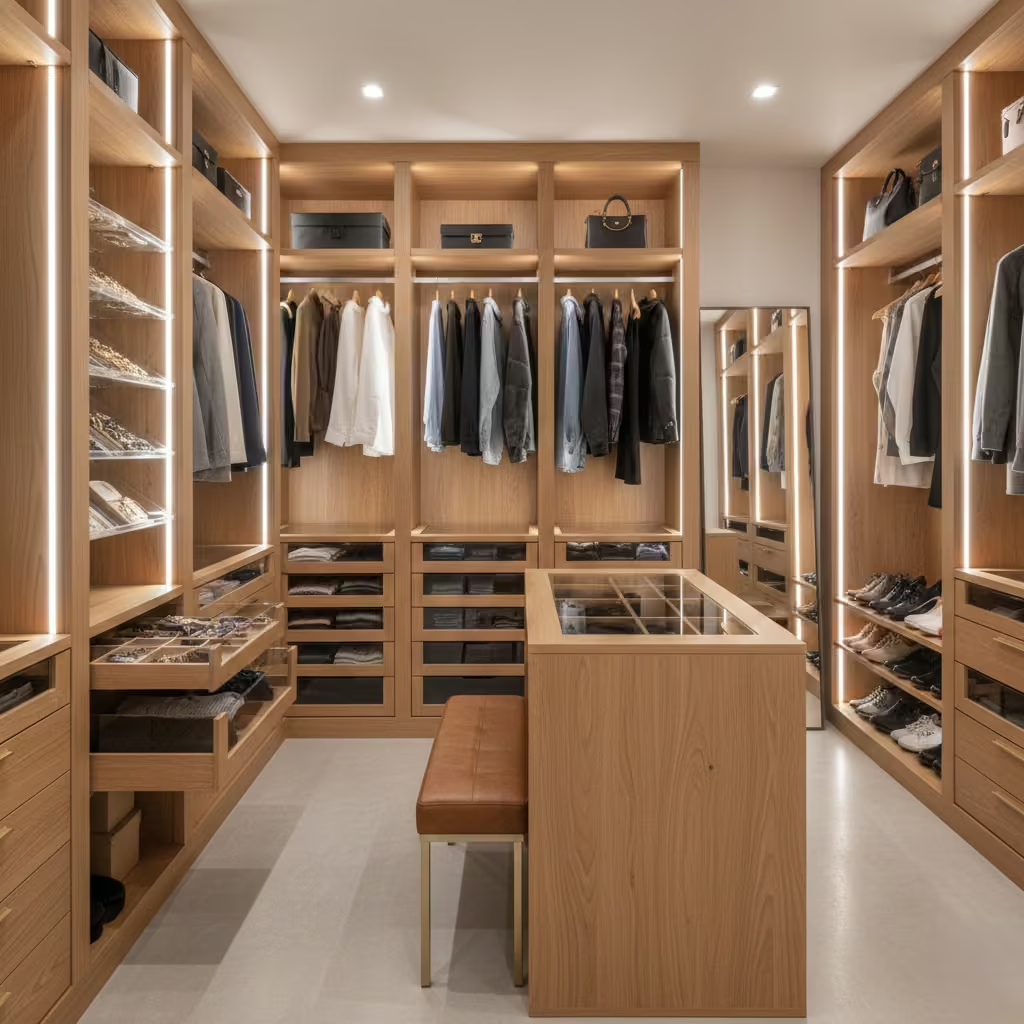
| Drawer Type | Depth | Height | Use Case |
| Small accessory drawer | 400 mm / 16 in | 80–120 mm / 3–5 in | Jewellery, belts, ties |
| Medium folded drawer | 400 mm / 16 in | 150–180 mm / 6–7 in | T-shirts, tops |
| Large folded drawer | 500 mm / 20 in | 180–220 mm / 7–9 in | Knitwear, sweaters |
| Deep drawer | 500 mm / 20 in | 220–250 mm / 9–10 in | Jeans, bulky items |
Shoe Storage That Prevents Visual Clutter
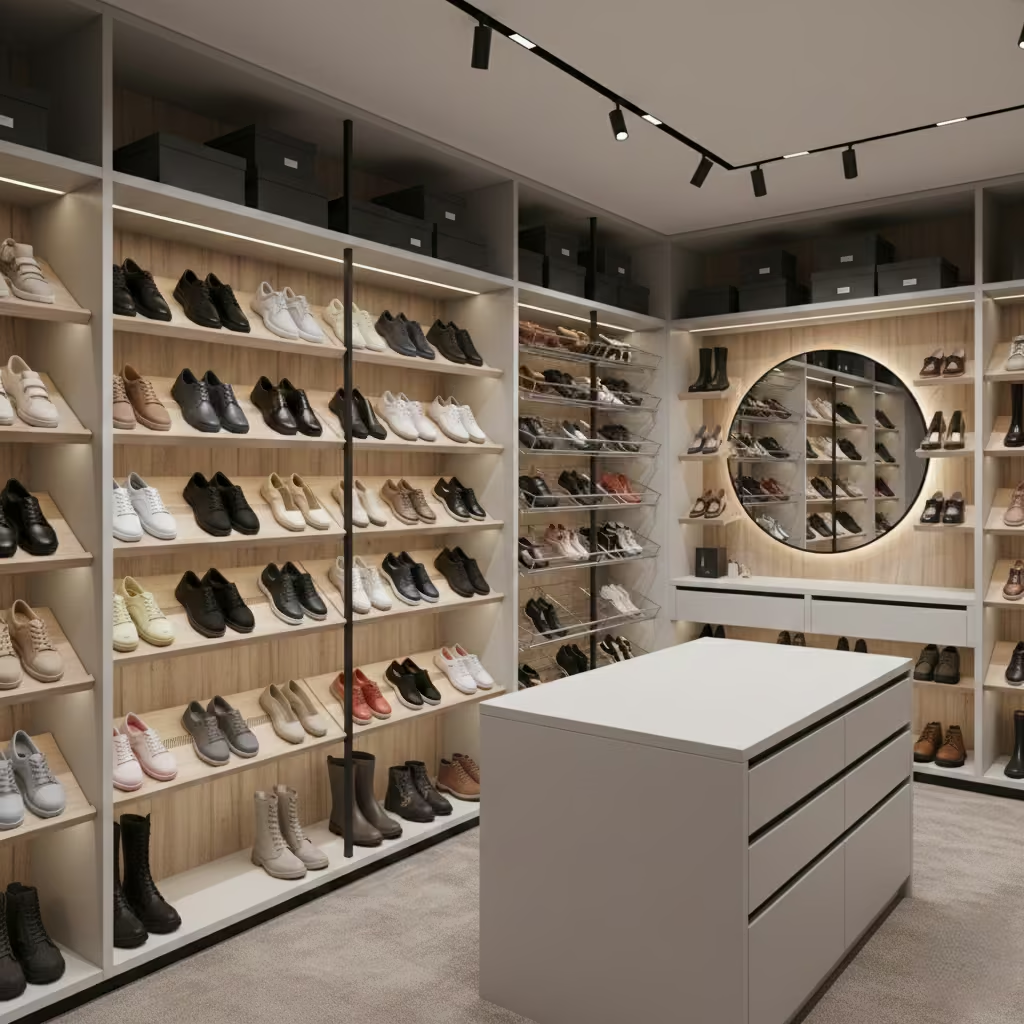
Shoe storage is where wardrobes either stay tidy or quietly fall apart. I treat shoes as a design problem first and an aesthetic issue second: correct geometry, visibility, and airflow prevent clutter and extend the life of footwear. Below I set out practical systems, exact dimensions, ventilation and maintenance advice I use on projects to keep shoes organised, healthy, and out of sight when needed.
Angled vs flat shelving when to use each
Angled (display) shelving
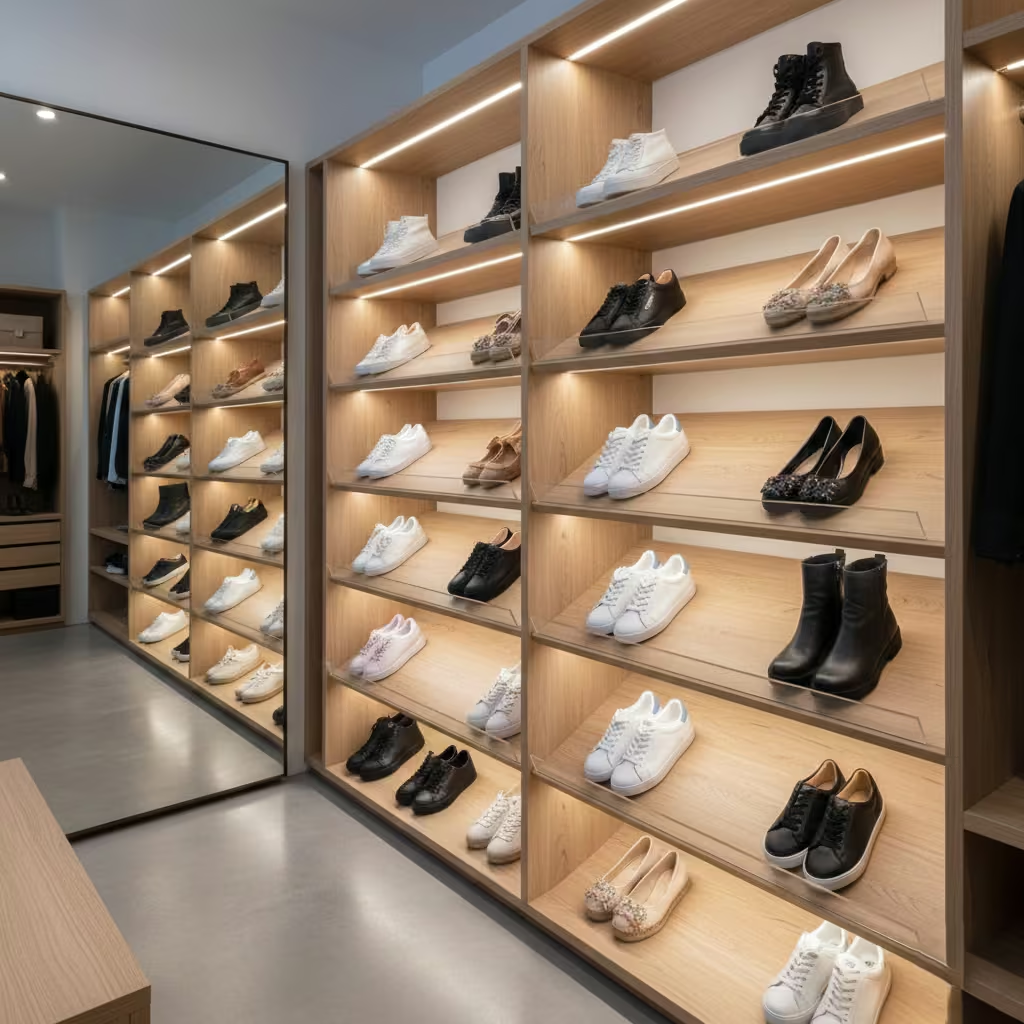
- Why I specify it: Shows pairs at a glance, reduces time spent hunting for a pair, and encourages users to maintain order because shoes read like an exhibit.
- Best for: Everyday shoes, trainers, low- to mid-heel footwear, and feature or favourite pairs.
- Typical geometry: shelf depth 200–250 mm (8–10 in); riser (front lip) 80–100 mm (3–4 in); tilt 10–15 degrees.
- Pros: High visibility, encourages rotation, neat presentation.
- Cons: Uses slightly more vertical slots per shoe, not ideal for bulky boots or very deep storage needs.
Flat shelving
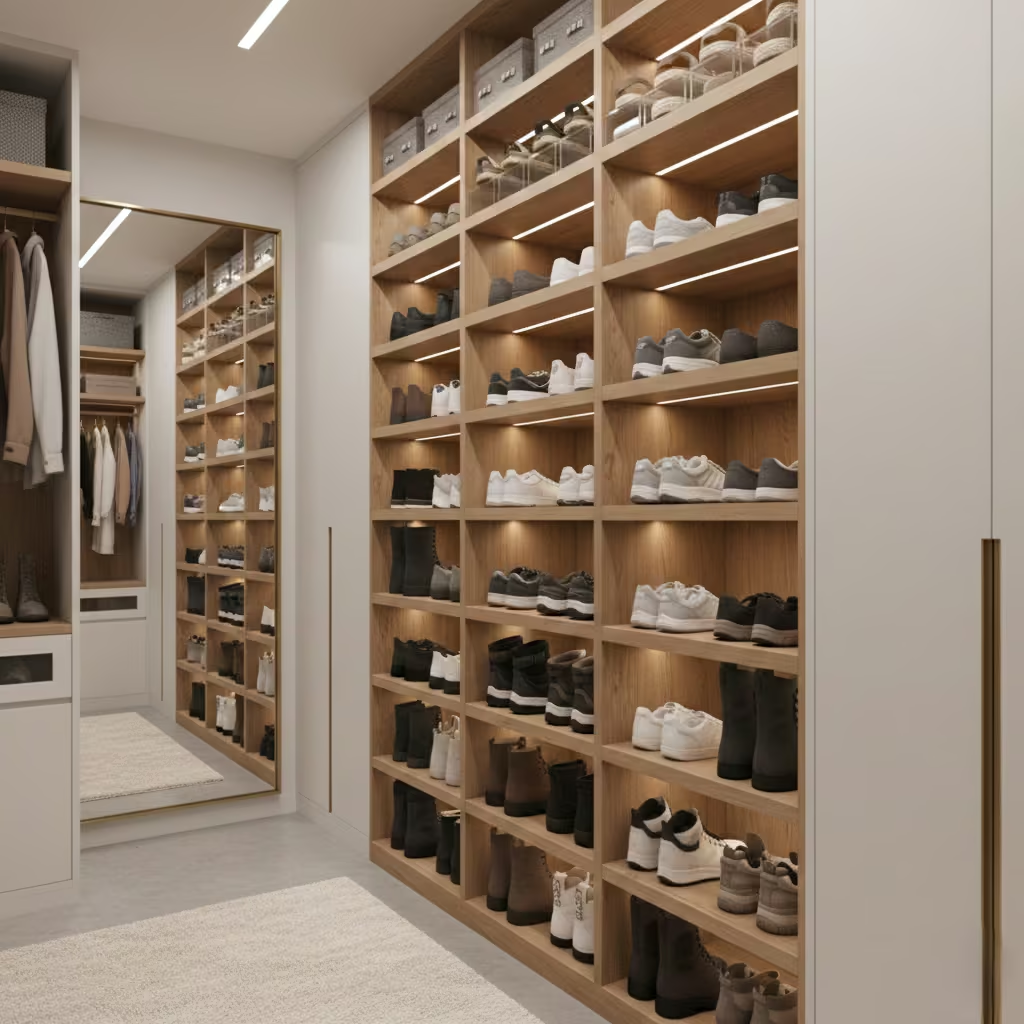
- Why I specify it: Maximises capacity and suits bulkier footwear such as boots and stacked storage for off-season shoes.
- Best for: Boots (if stored lying or supported), extra pairs, overflow, storage behind display rows.
- Typical geometry: shelf depth 300–350 mm (12–14 in) for trainers/boots; vertical spacing 150–250 mm (6–10 in) depending on shoe height.
- Pros: Efficient use of depth, adaptable for multiple shoe types.
- Cons: Lower visibility; deeper shelves encourage overstacking unless subdivided.
Practical hybrid approach (what I use): display the most-used 6–12 pairs on angled shelves at eye-to-waist level, reserve flat or deeper shelves for seasonal/overflow storage. This keeps the visual plane ordered and reduces impulse piles.
Dedicated boot storage
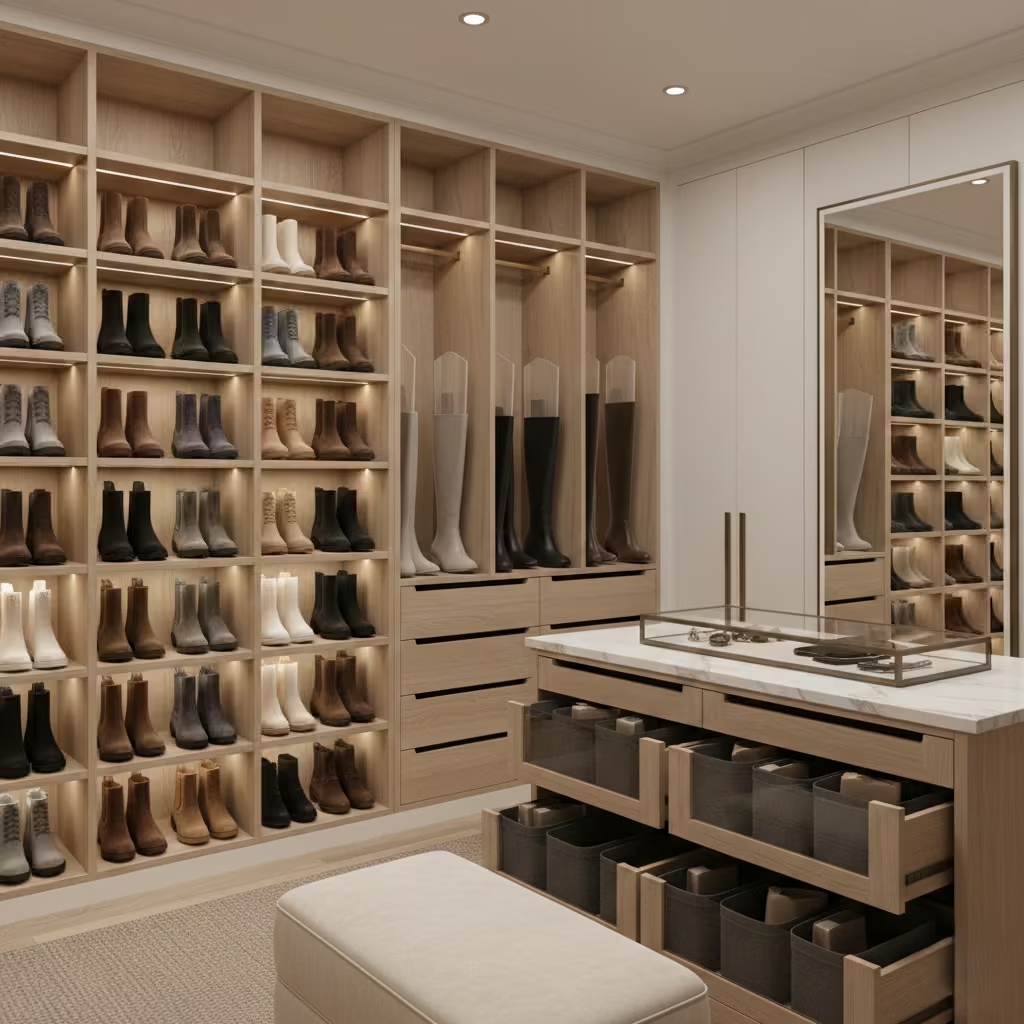
- Ankle/short boots: vertical slot height 200–300 mm (8–12 in).
- Knee-high boots: tall cubby or pull-out boot drawer 700–1,000 mm (27–39 in) depending on boot length and any pull-up required.
- Alternative: boot boxes or removable boot shapers to store in deep drawers if vertical height is constrained.
Pull-out and tilt systems
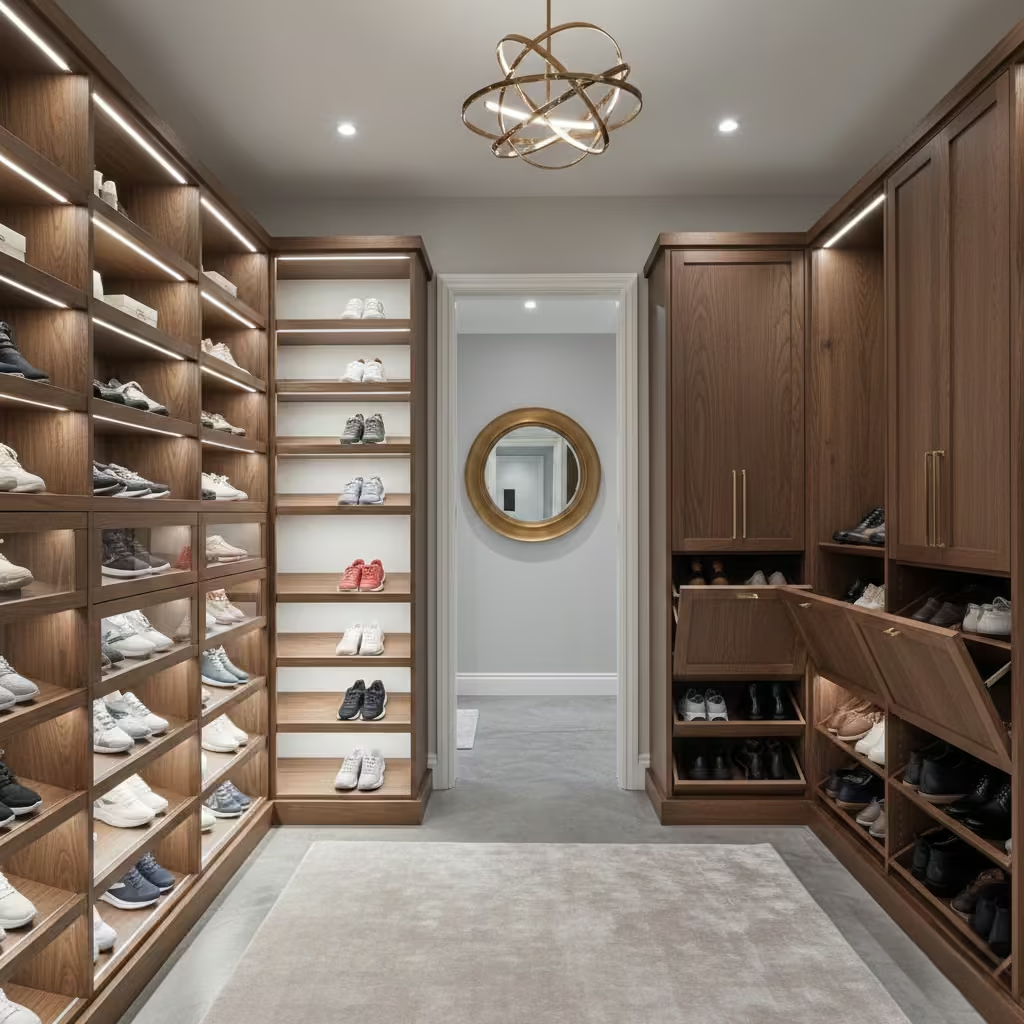
- Pull-out trays / shallow drawers are excellent for trainers and delicate shoes — typical tray depth 350–400 mm (14–16 in).
- Tilt-out racks are compact and good for hallway or circulation-adjacent storage but usually hold fewer pairs and are best as secondary storage.
- I specify full-extension runners and soft-close where drawers or trays are used.
Ventilation and moisture control
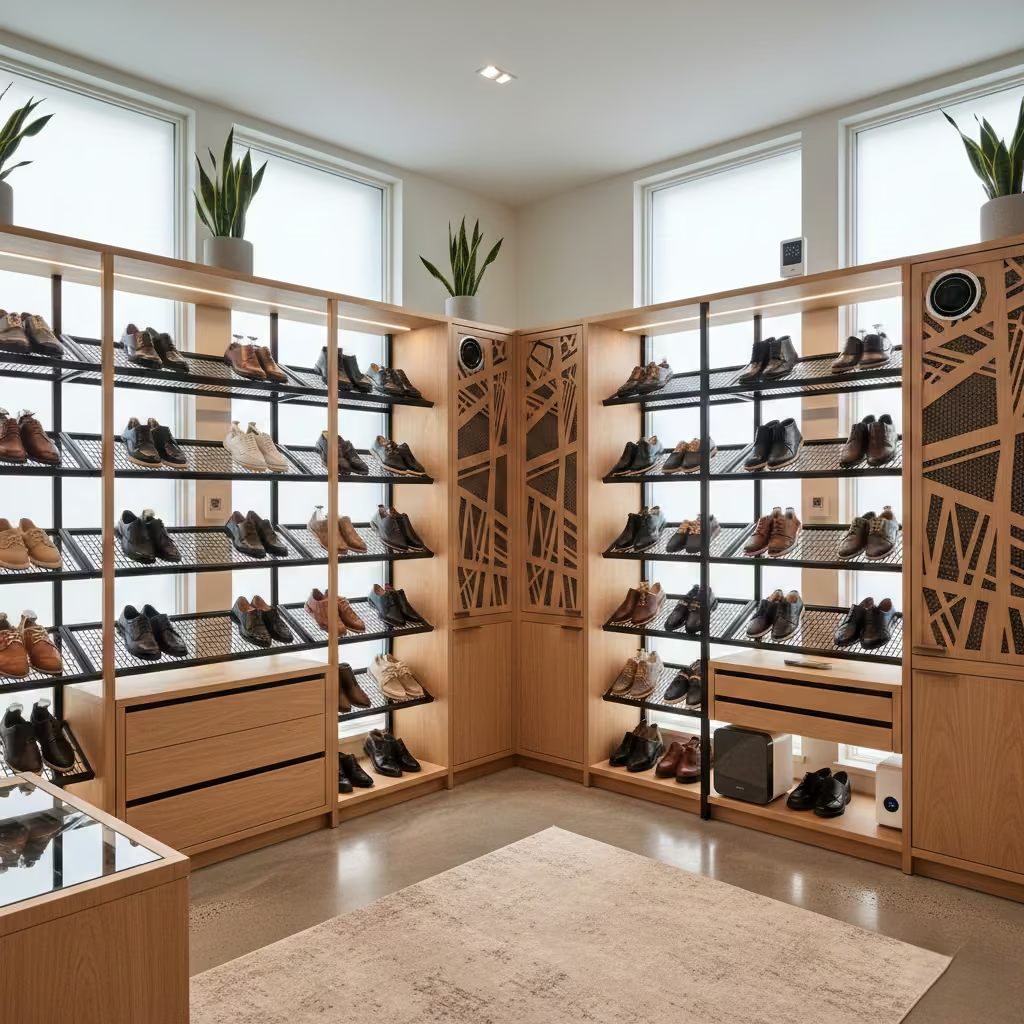
Shoes trap moisture and odour; ventilation stops mould and keeps materials healthy.
- Passive airflow: leave a 10–20 mm (0.4–0.8 in) gap at the back of shelving or use slatted/mesh shelving to allow cross-flow.
- Perforated panels or metal wire shelving work well in humid climates.
- Mechanical measures (when needed): small in-cabinet ventilator or a condensate-controlled dehumidifier if the wardrobe sits above a garage, in a basement, or next to a bathroom.
- Target interior humidity: aim to keep relative humidity in the wardrobe between 40–60%; higher RH encourages mildew.
- Avoid direct heat sources and strong sunlight that can dry and crack leather.
Materials and finishes for shoe zones
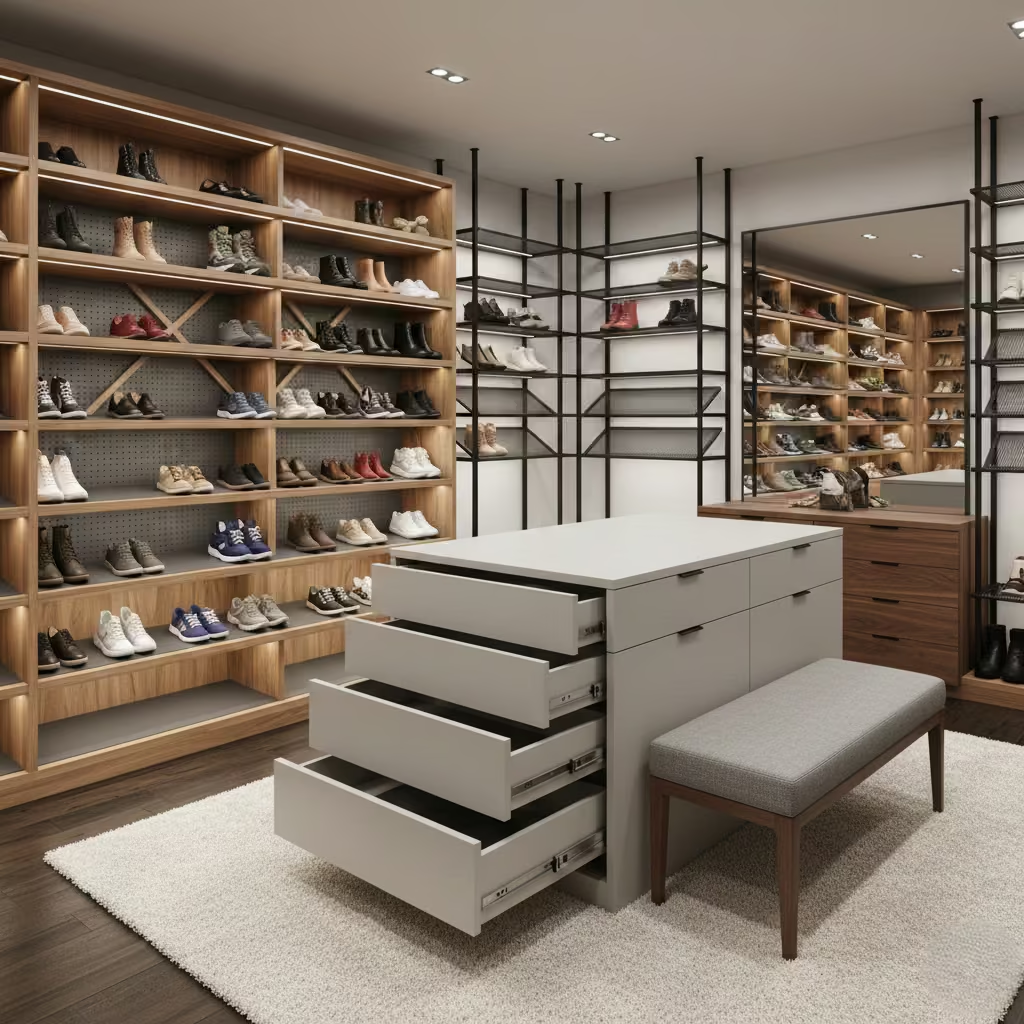
- Slatted timber, perforated MDF, or powder-coated metal for ventilated shelving.
- Laminate or veneered drawers for concealed seasonal storage.
- Non-absorbent liners on lower shelves for easy cleaning.
- Use solid, durable fixings for pull-out systems shoes are heavy when stored in numbers.
Organisation and anti-clutter details
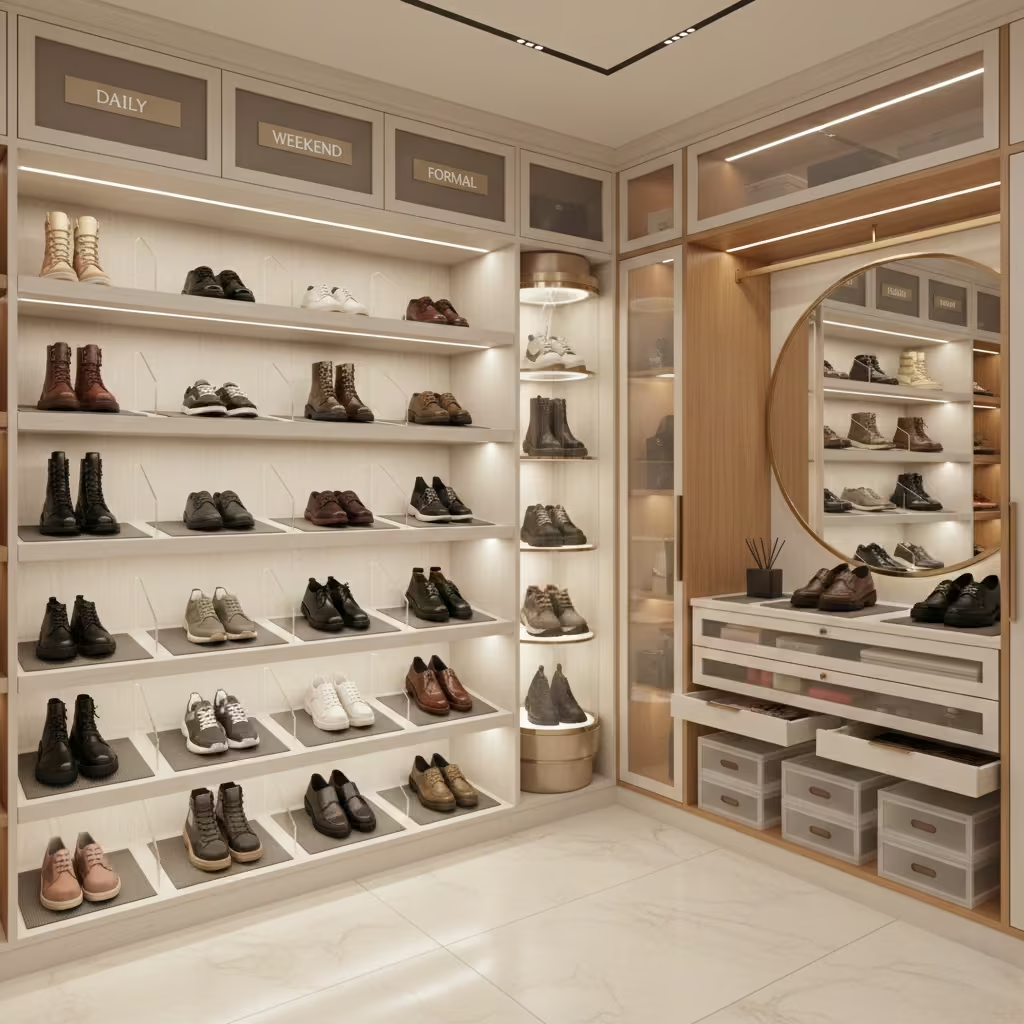
- Limit stacks to 3–4 pairs deep on flat shelves, or use dividers so stacks don’t collapse.
- Label or zone the shelves (e.g., “daily”, “weekend”, “formal”) for multi-user wardrobes.
- Rotating/display row: keep 6–12 pairs on the angled row; everything else is archive.
- Removable trays or washable liners make cleaning easy and contain salts/mud.
- Odour control: charcoal sachets, cedar blocks, or washable liners; avoid sprays that leave residues on leather.
Measurements summary (quick reference)
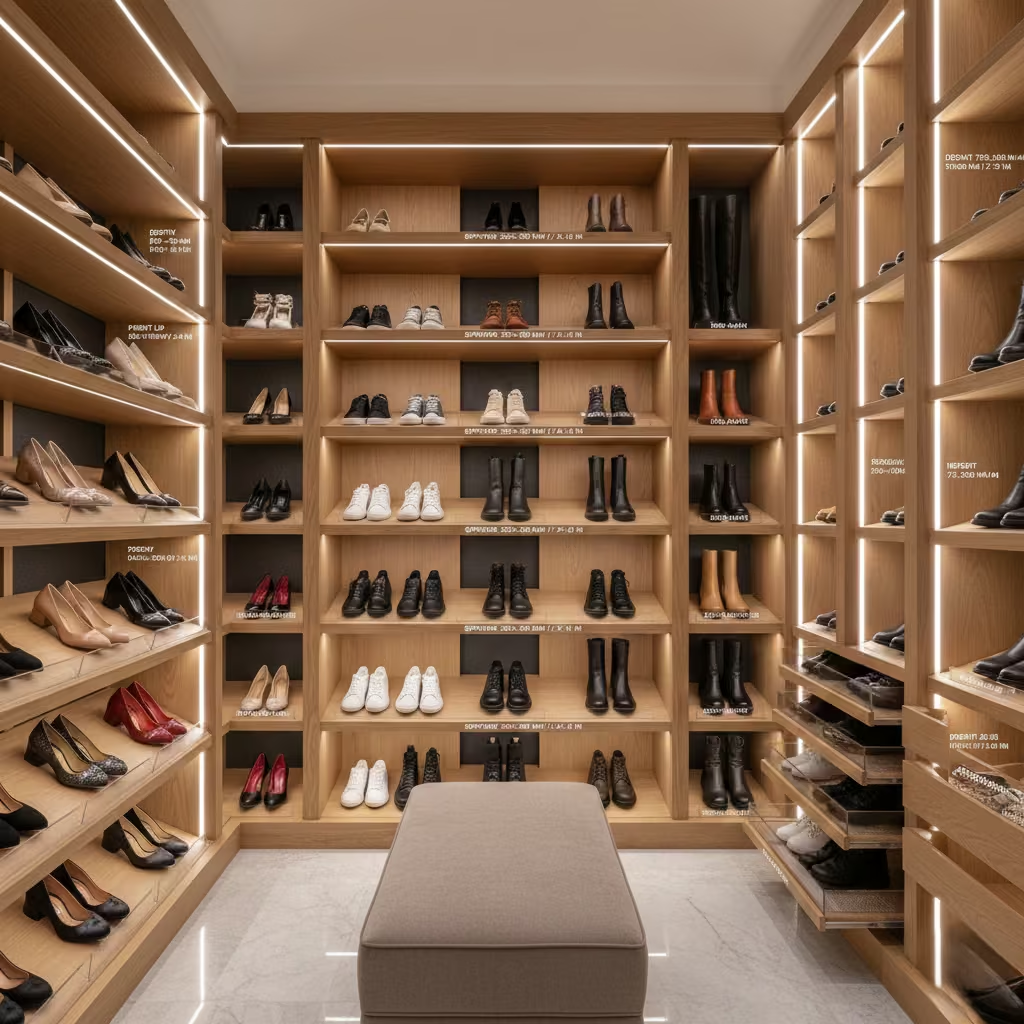
| Item | Recommended dimension |
| Angled shelf depth | 200–250 mm (8–10 in) |
| Angled shelf front lip | 80–100 mm (3–4 in) |
| Flat shelf depth | 300–350 mm (12–14 in) |
| Flat shelf vertical spacing (trainers) | 150–180 mm (6–7 in) |
| Flat shelf vertical spacing (boots/ankle) | 200–300 mm (8–12 in) |
| Tall boot cubby | 700–1,000 mm (27–39 in) |
| Pull-out tray depth | 350–400 mm (14–16 in) |
| Back ventilation gap | 10–20 mm (0.4–0.8 in) |
Real-project note and maintenance rhythm
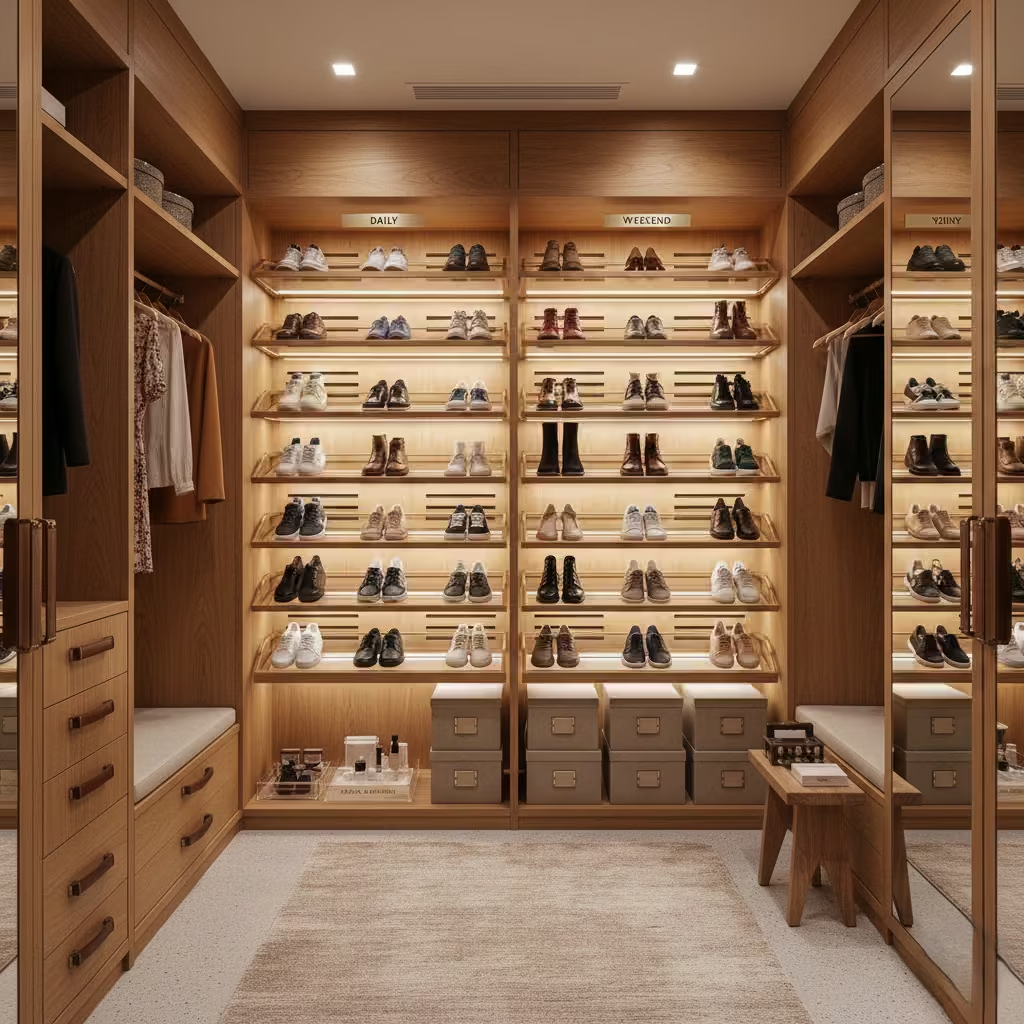
On a recent project I replaced deep, unseen shelving with a hybrid of angled display at eye level and shallower pull-out trays below. The client immediately stopped leaving shoes in the hallway because the day-to-day pairs were visible and simple to return. I recommend a seasonal audit every three months: remove all shoes, air them, check for damp or damage, and reallocate any pairs that have fallen into “overflow” to labelled archive boxes.
Accessory and Jewellery Storage
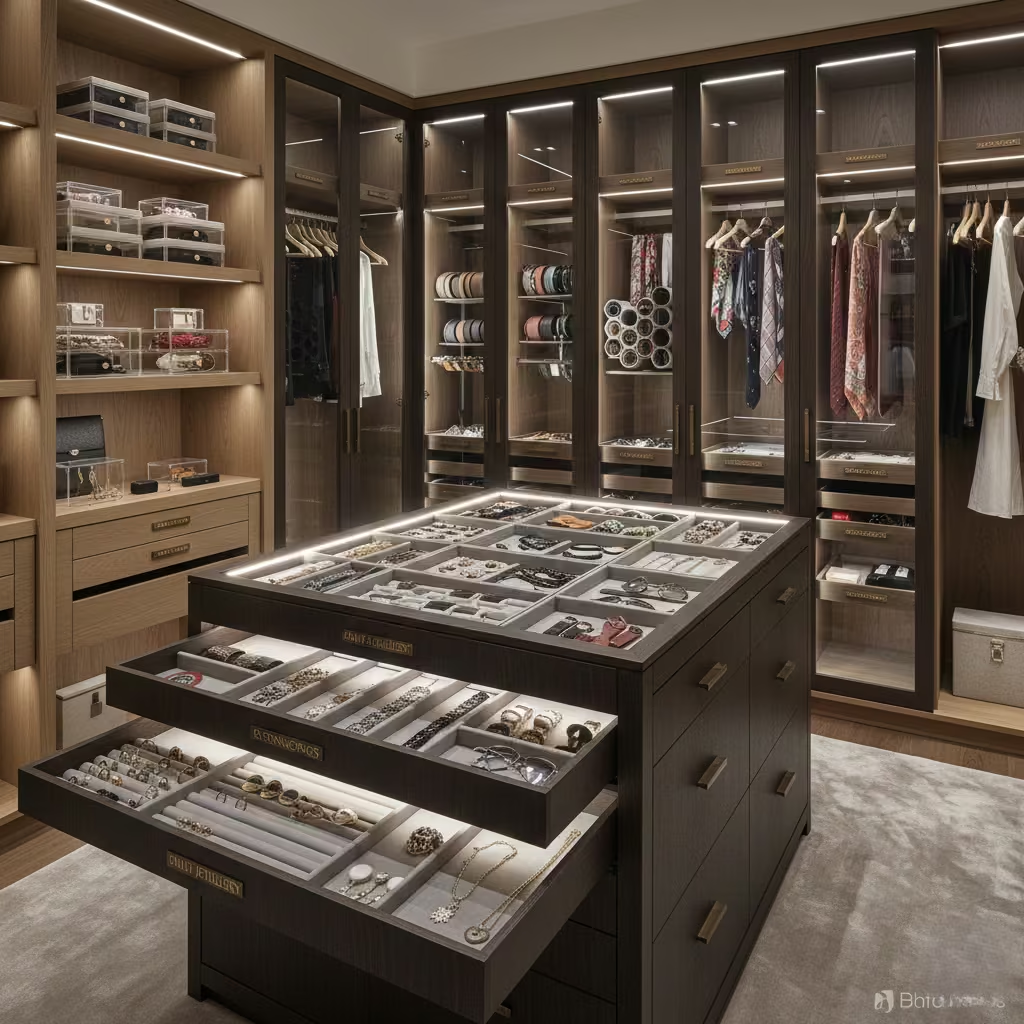
Accessories and jewellery are small, high-value items that can quickly create visual chaos if left unmanaged. Effective micro-storage transforms these items from clutter into accessible, organised elements of a wardrobe, improving both routine efficiency and the sense of calm in the space.
Why Micro-Storage Improves Daily Routines
Behavioural efficiency
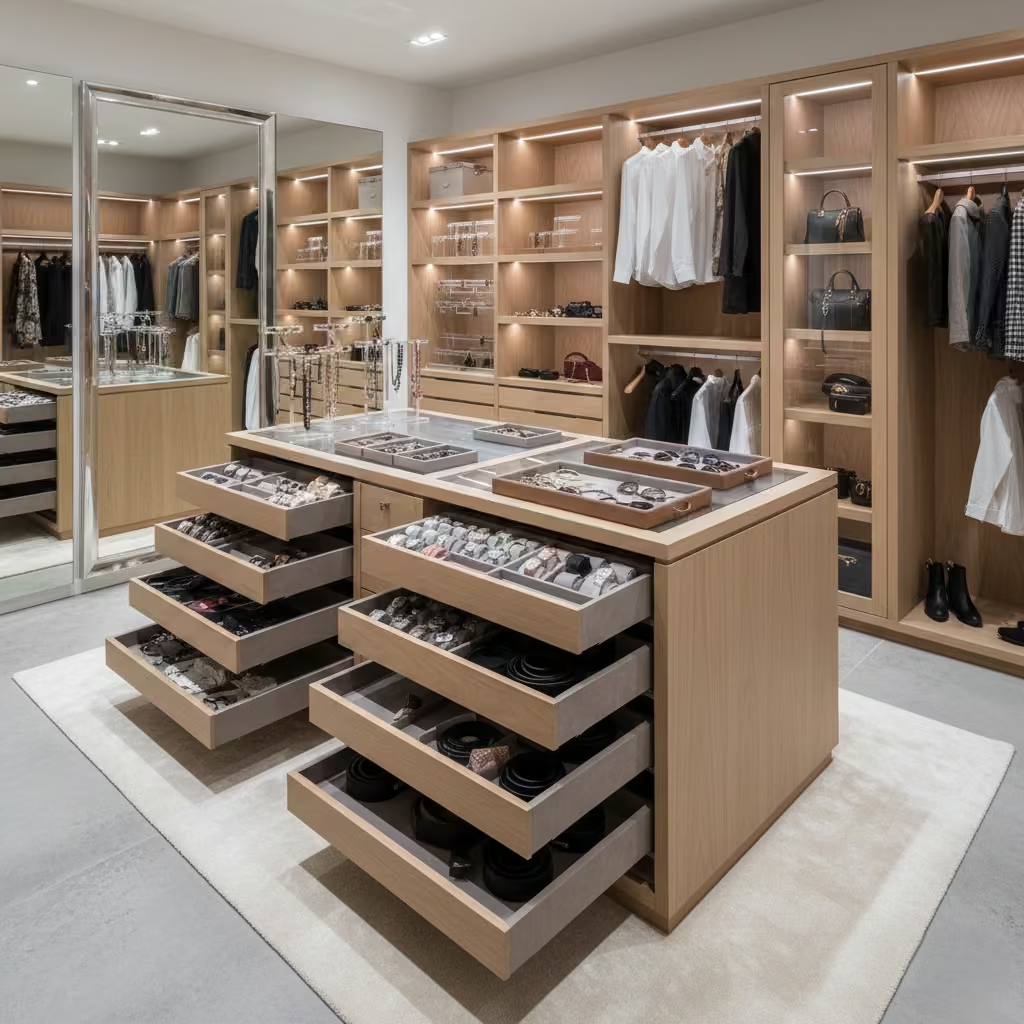
When belts, ties, watches, and jewellery each have a dedicated place, selecting and returning items becomes almost automatic. I often install divided drawers, trays, and vertical slots so users don’t have to search, reducing morning decision fatigue and the risk of misplacing pieces.
Preservation of items
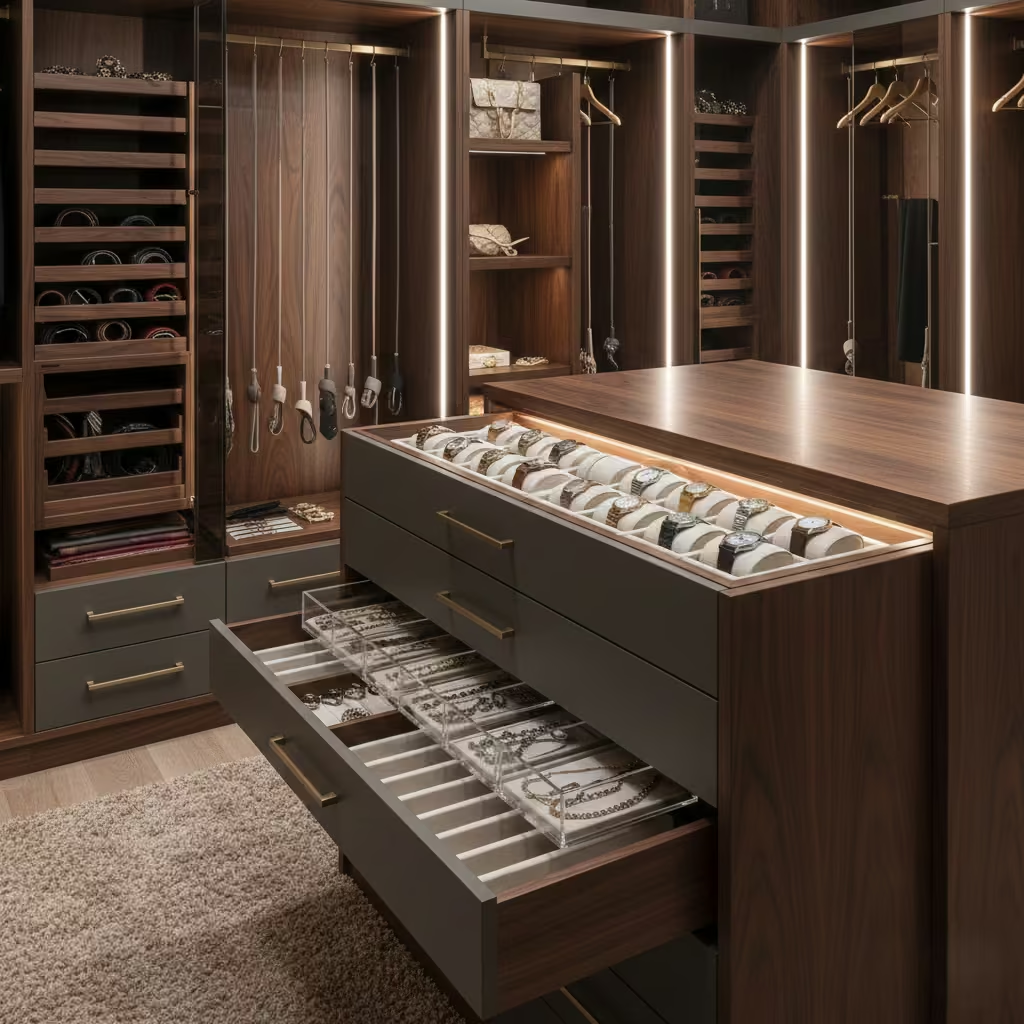
Micro-storage also protects delicate items from tangling, scratches, and dust, which is especially important for fine jewellery, watches, and leather straps. Soft-touch liners, compartments, and clear trays allow pieces to remain in pristine condition while still being fully visible.
Visual clarity
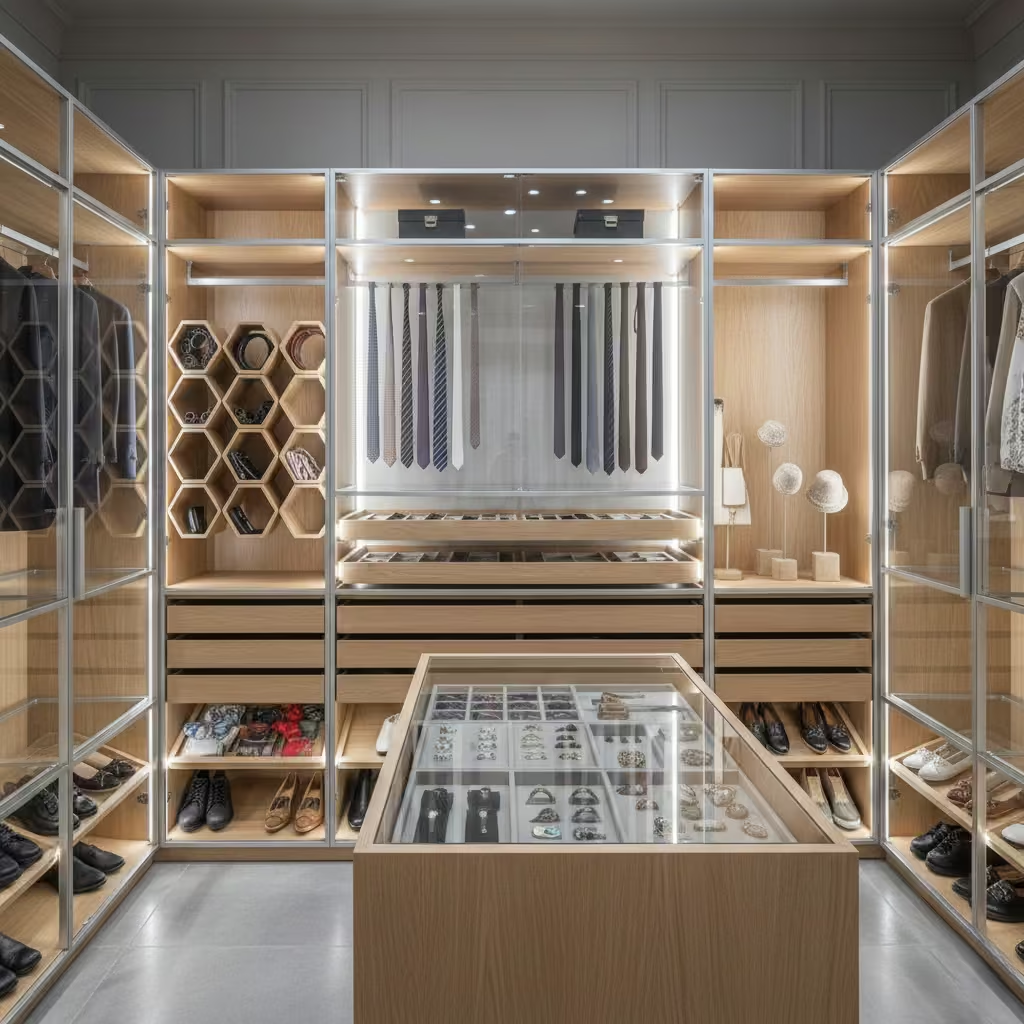
Dedicated accessory zones prevent small items from spilling onto shelves or drawers. I typically position frequently used accessories at waist-to-eye level, keeping them in the primary zone, while less-used or seasonal items go in secondary drawers or vertical pull-out racks. This zoning creates an organised, stress-free environment, even when the wardrobe is fully loaded.
Practical Micro-Storage Solutions
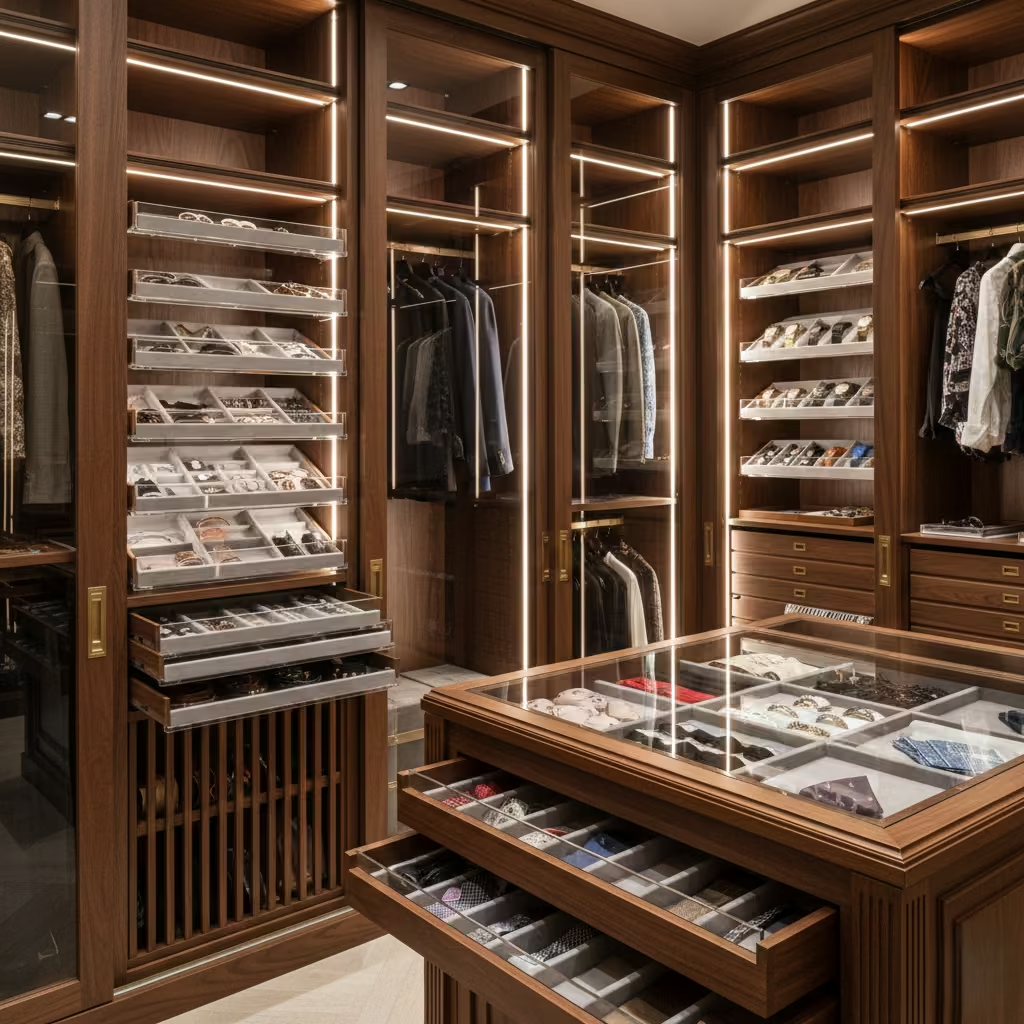
- Divided drawers: perfect for rings, watches, belts, ties, scarves. Typical drawer dimensions: 400 mm depth x 80–120 mm height / 16 in x 3–5 in per compartment.
- Pull-out trays: shallow trays for jewellery or sunglasses. Depth 350–400 mm / 14–16 in, subdivided with removable inserts.
- Vertical slots: for belts and ties. Width 50–60 mm / 2–2.5 in per strap, mounted inside a drawer or tall cabinet.
- Clear acrylic inserts: help visualise contents at a glance, reducing time spent searching.
- Soft-touch lining: velvet, leather, or rubberised finishes protect delicate surfaces.
Real-World Application
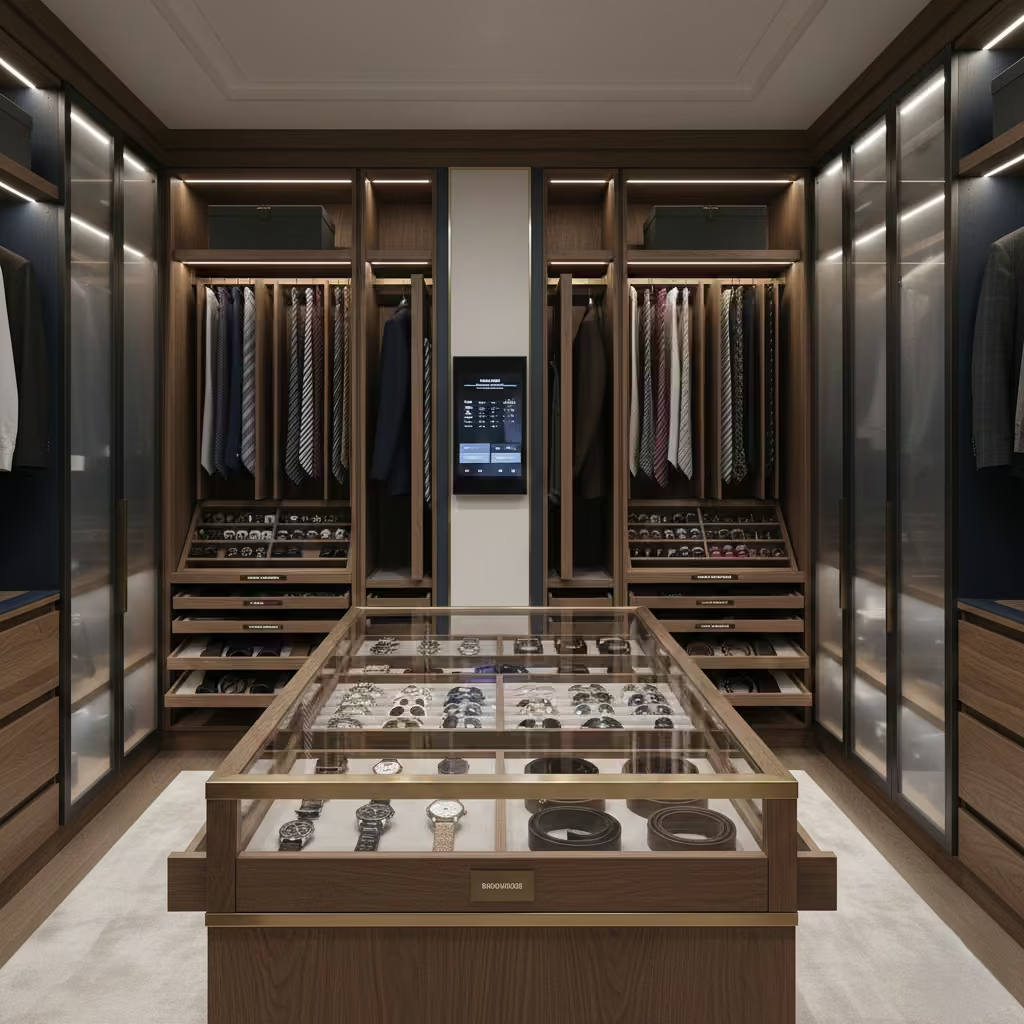
In a recent project, I created a series of shallow, divided drawers along the central island for rings, watches, and sunglasses. By pairing this with labelled vertical tie racks and pull-out belt trays, the client reduced clutter on shelves by over 70%. Daily routines became faster, and the wardrobe maintained a calm, boutique-quality appearance.
Materials and Finishes That Age Well in Walk-In Wardrobes
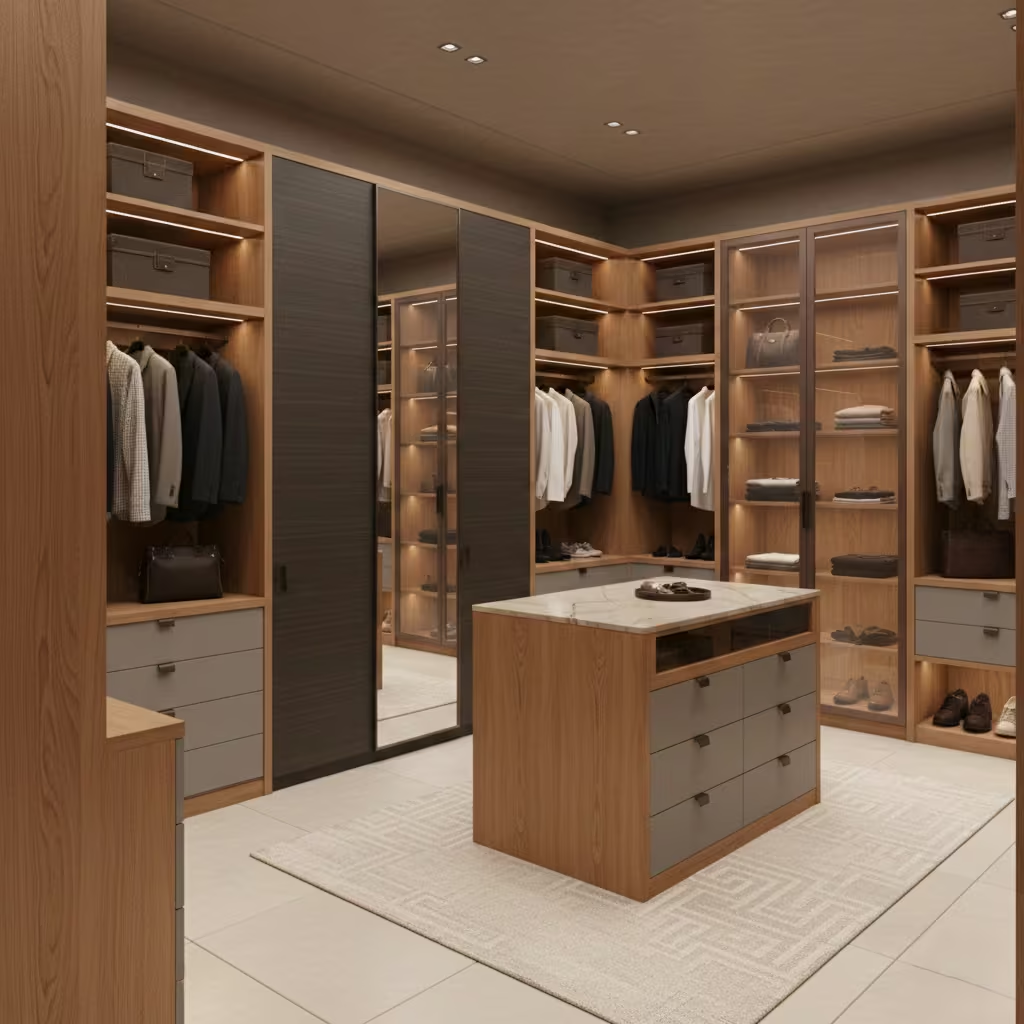
Materials and finishes are more than aesthetics in a walk-in wardrobe—they influence usability, maintenance, and how the space feels over time. Choosing finishes that are durable, timeless, and low-maintenance ensures the wardrobe remains functional and visually calm for years, avoiding the “dated” look that trends can impose.
Why Matte and Low-Sheen Finishes Perform Better
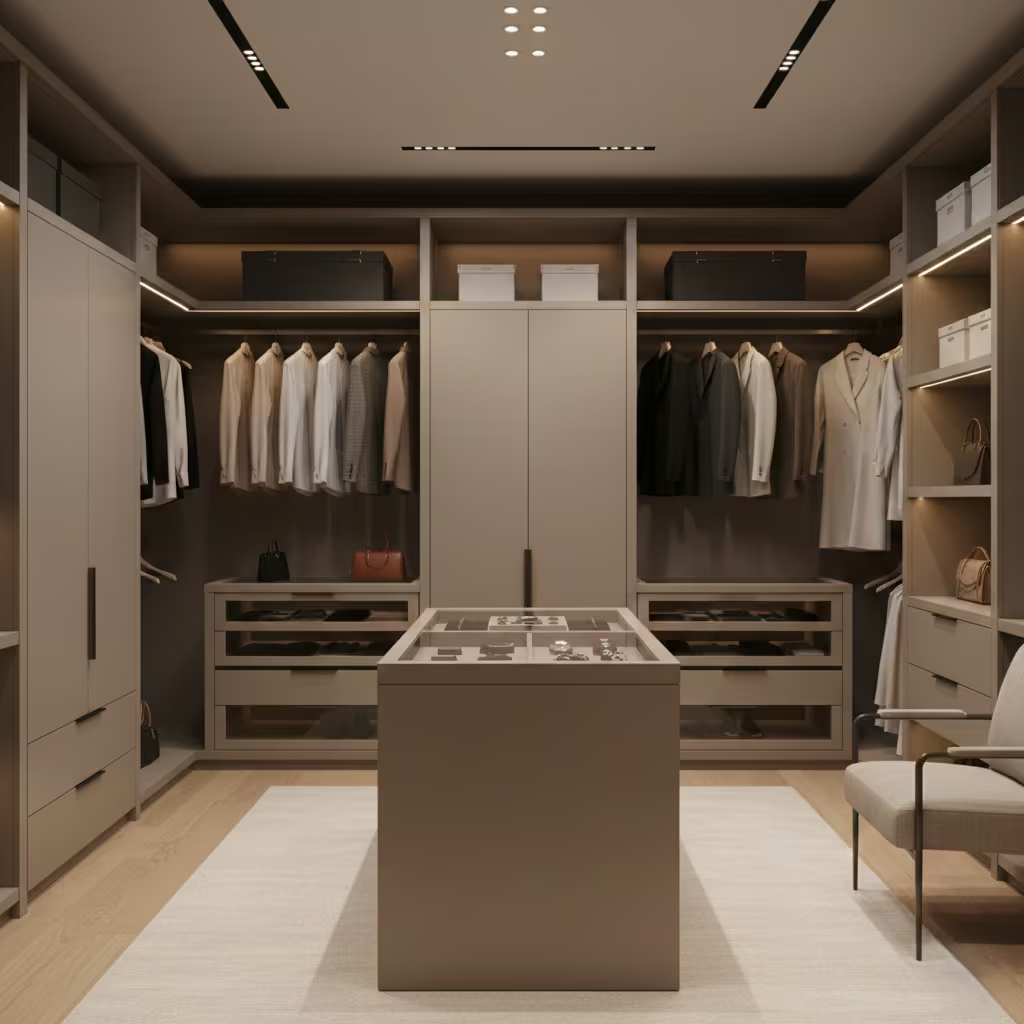
Matte and low-sheen surfaces are my default for wardrobe cabinetry because they:
- Hide fingerprints and dust, reducing daily cleaning.
- Create a subtle, architectural appearance, which keeps the space feeling calm and sophisticated.
- Age gracefully, avoiding the glossy plastic feel that often dates quickly.
High-gloss finishes can work in small doses, but I rarely specify them for full cabinetry—especially in larger wardrobes—because scratches and micro-marking become noticeable over time. Matte surfaces also complement integrated lighting better, producing soft, even reflections rather than harsh glare.
Veneers vs Laminates vs Solid Timber
Veneers
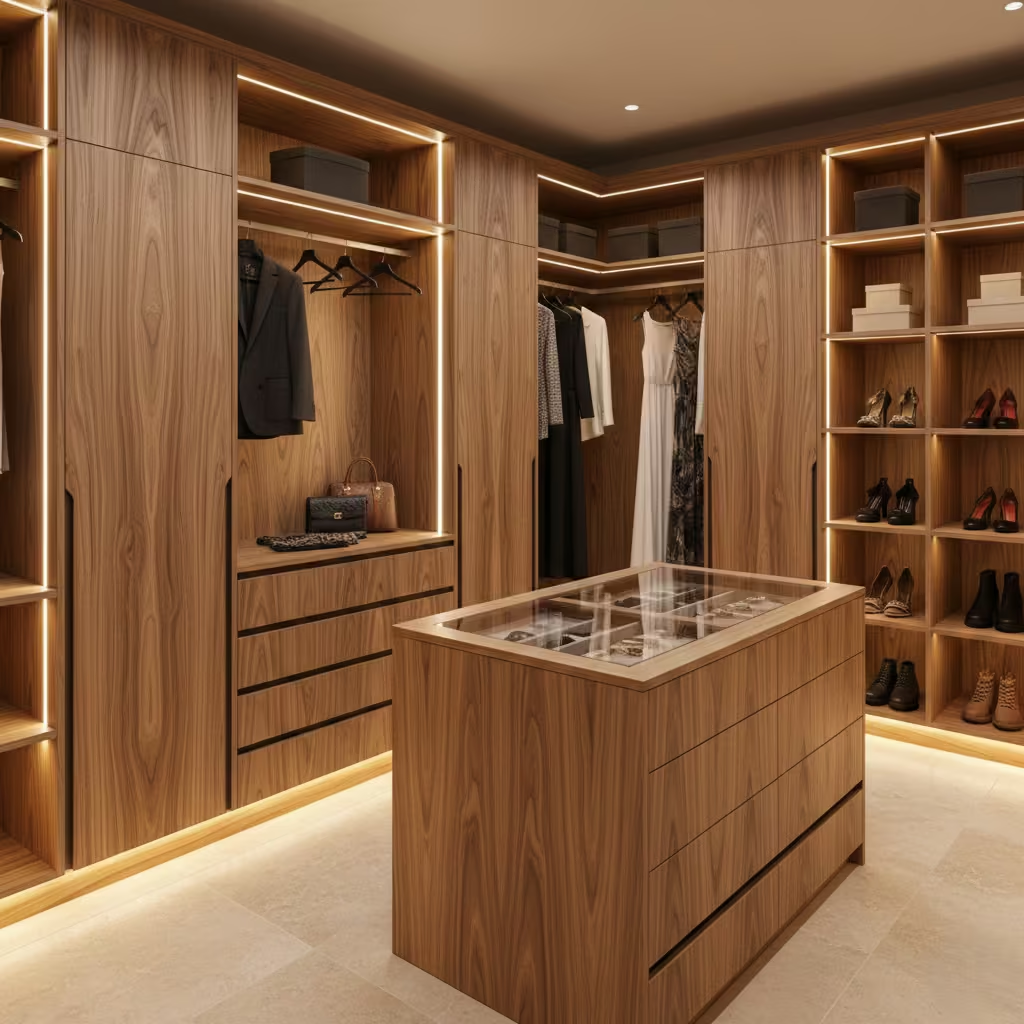
- Thin layers of natural timber applied over MDF or plywood.
- Pros: authentic wood appearance at lower cost, stable dimensionally, easy to repair small scratches.
- Cons: Limited thickness for sanding, can chip if edges aren’t protected.
- Best for: premium wardrobes with visible panels, vertical grain emphasis, or selective feature walls.
Laminates
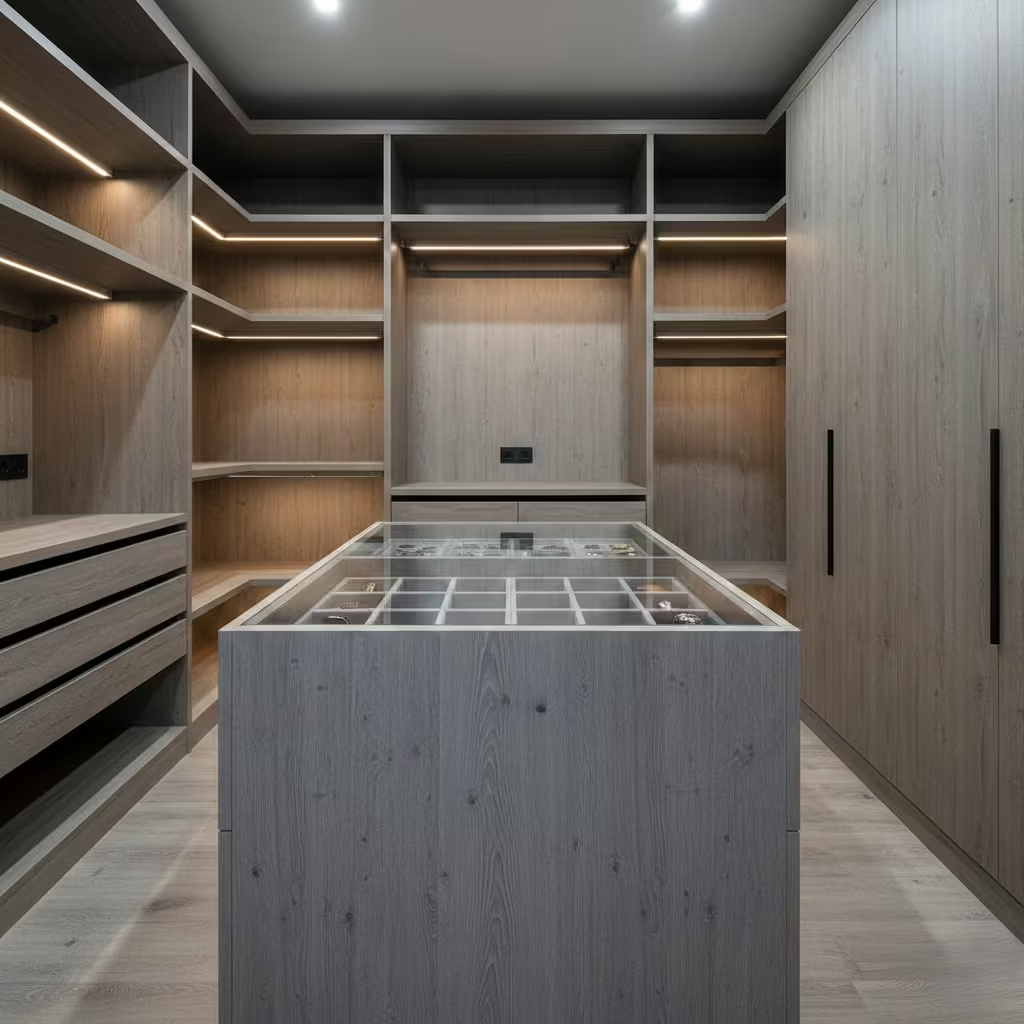
- Synthetic sheets adhered to substrate (MDF or particleboard).
- Pros: Very durable, wide colour/pattern range, easy to clean, moisture-resistant.
- Cons: Can feel less luxurious; edges need precision finishing.
- Best for: high-traffic zones, inside drawers, or wardrobes in humid areas.
Solid timber
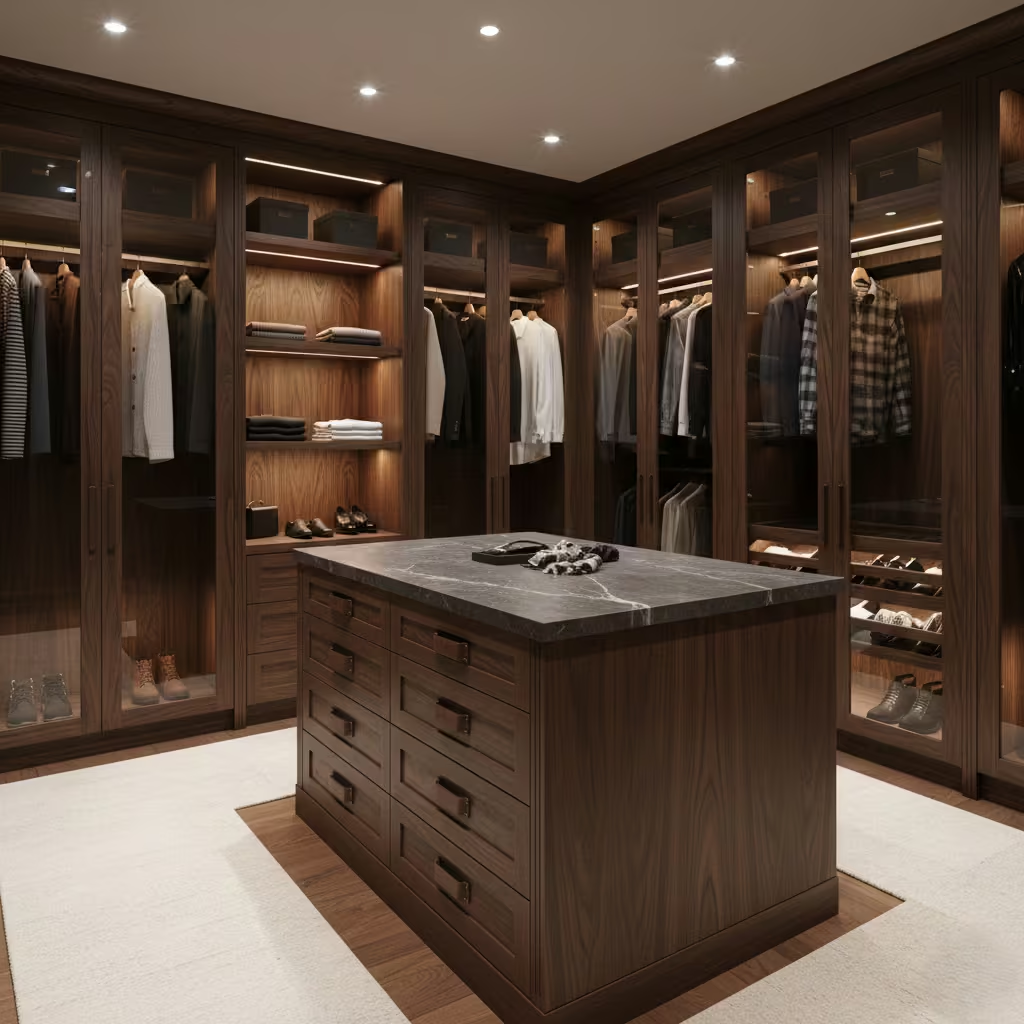
- Full-depth wood panels.
- Pros: High-end tactile quality, can be refinished, timeless appeal.
- Cons: Expensive, susceptible to shrinkage or warping in humidity extremes.
- Best for: bespoke, boutique wardrobes where longevity and luxury are priorities.
In practice, I often combine veneers for visible walls, laminates for interior shelving, and solid timber for islands or detailing, achieving both durability and a premium aesthetic.
Glass, Mirror, and Reflective Surfaces
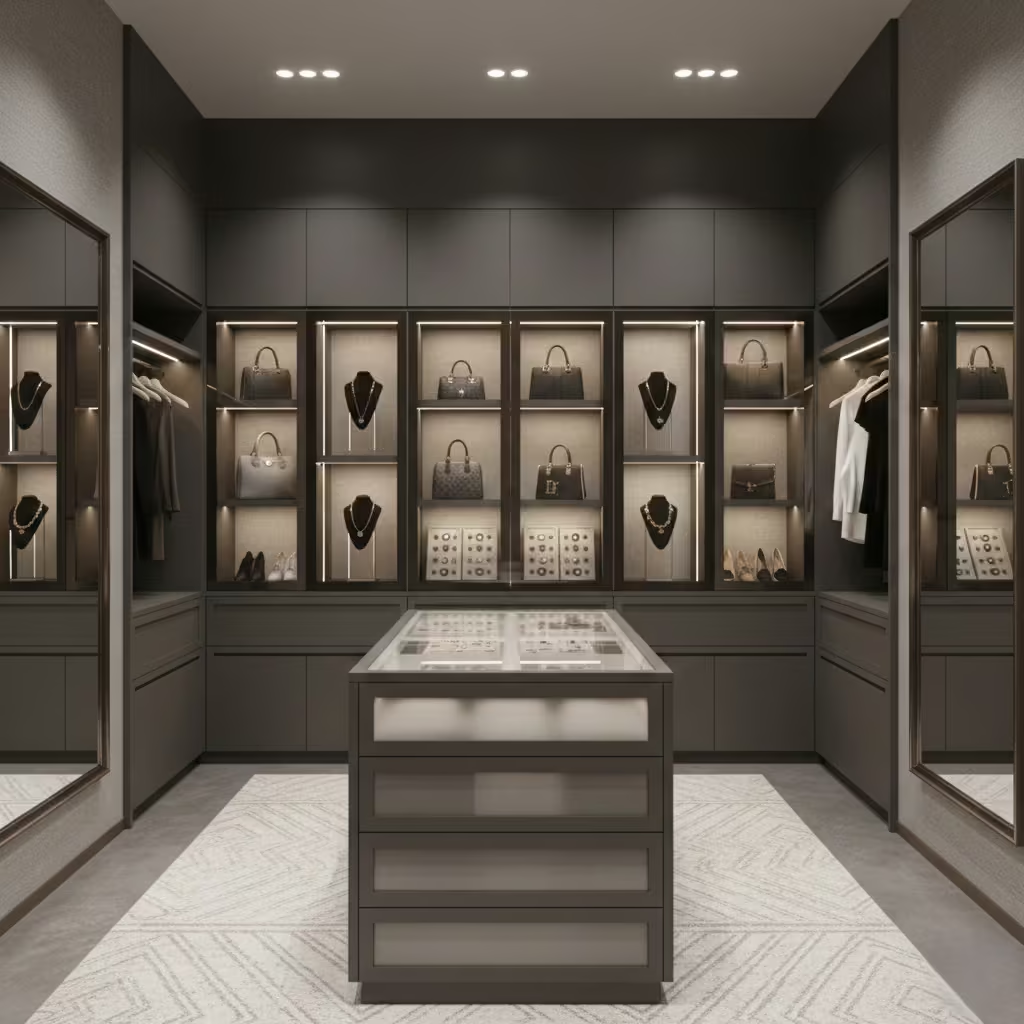
Mirrors are essential for function and perception:
- Full-length mirrors for dressing; 2 m (78 in) minimum height recommended.
- Frosted or tinted mirrors for feature panels, reducing visual clutter while maintaining reflection.
Glass fronts
- Ideal for jewellery, handbags, or display shelving.
- Tempered glass recommended for safety; allow 10–20 mm (0.4–0.8 in) ventilation behind glass if enclosed to prevent condensation.
Practical tip: Use reflective surfaces to increase perceived space in narrow or medium rooms. Avoid overuse in large rooms, as excessive reflection can feel cold or visually busy.
Hardware and Handle Decisions
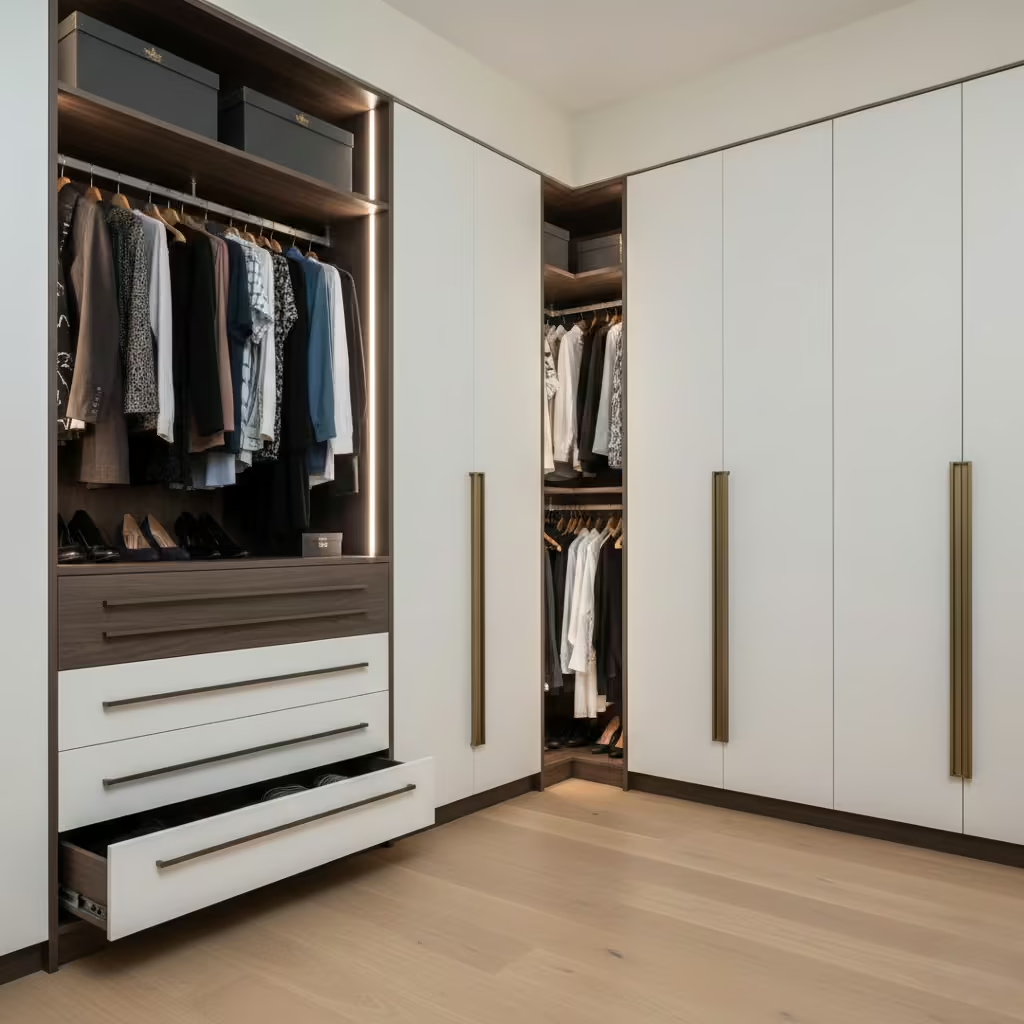
Hardware defines interaction and tactile experience:
- Handles: recessed, integrated, or slim bar pulls maintain a clean, minimal line. Avoid overly ornate handles that date quickly.
- Soft-close hinges and drawer runners: reduce wear and enhance premium feel.
- Material selection: brushed nickel, matte black, or brass patina are timeless and perform well against fingerprints.
- Placement: Keep handles consistent in height (typically 900–1,000 mm / 36–39 in for drawers; 1,000–1,100 mm / 39–43 in for doors) to support ergonomic access.
Lighting Design for Walk-In Wardrobes
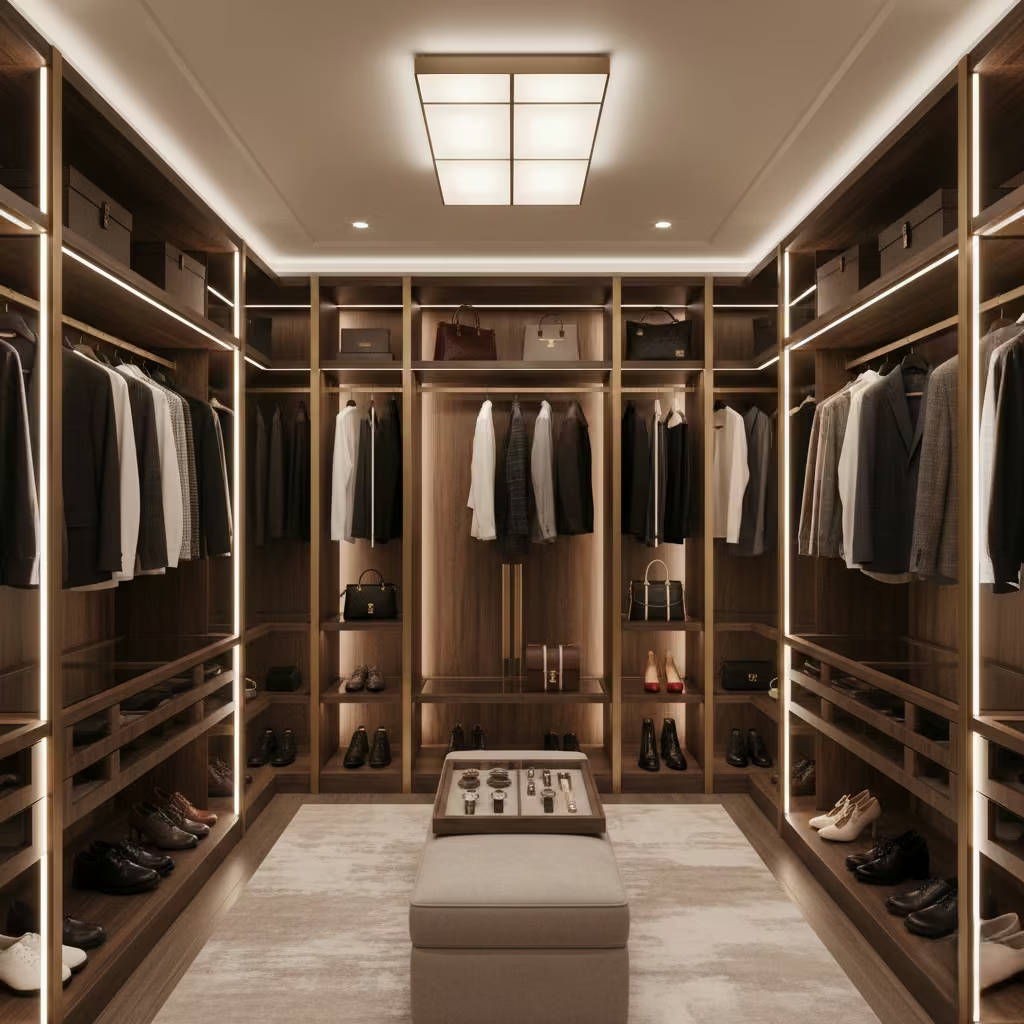
Lighting is often underestimated in walk-in wardrobe design, yet it is critical to both function and perception. Without carefully planned illumination, even the most organised wardrobe can feel cramped, cluttered, or confusing. Thoughtful lighting ensures visibility, highlights key zones, and enhances the sense of luxury in the space.
Why Lighting Is the Most Critical Design Element
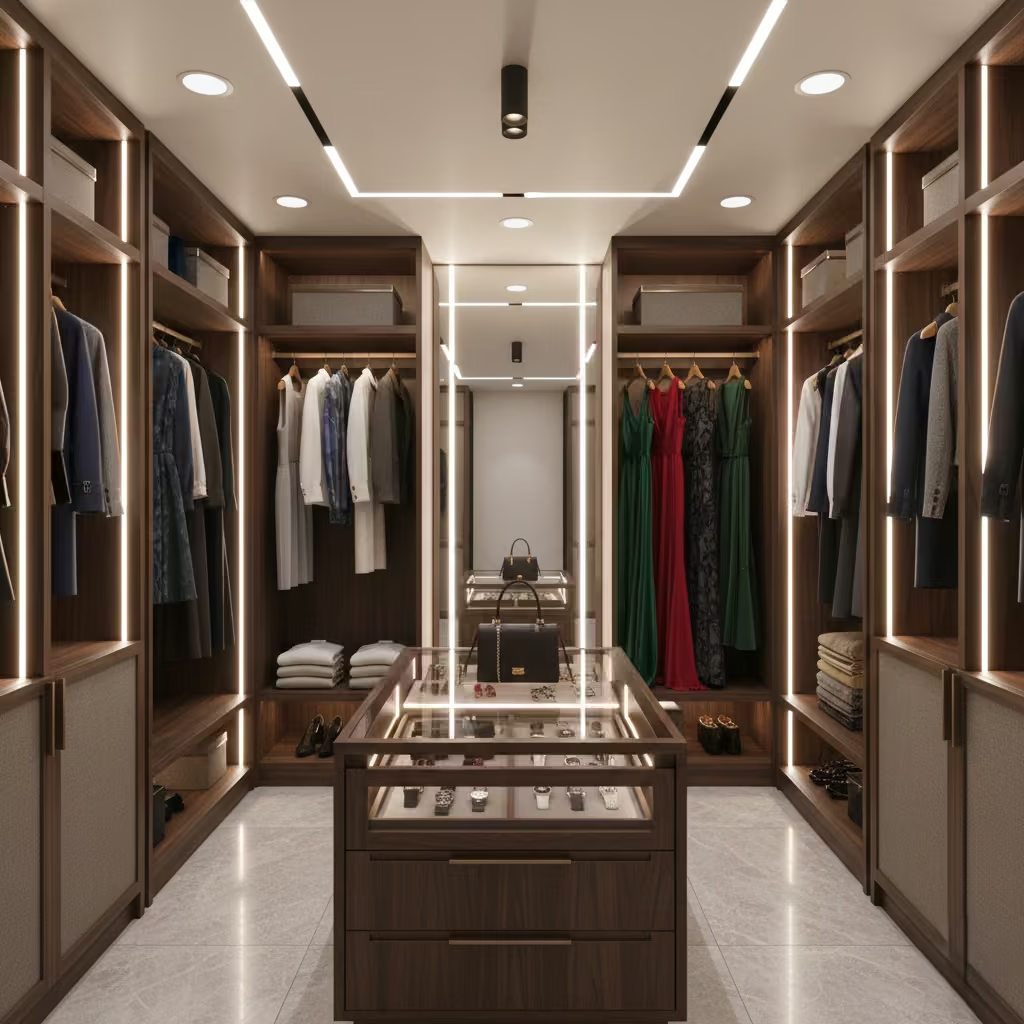
Lighting influences how colours, textures, and finishes appear, which directly affects outfit selection. Poorly lit wardrobes cause shadows, hide clothing details, and make retrieval inefficient. I always approach wardrobe design with lighting integrated into layout planning, not added as an afterthought, because circulation, visibility, and aesthetics are all compromised without it.
Ambient, Task, and Accent Lighting Layers
Ambient lighting
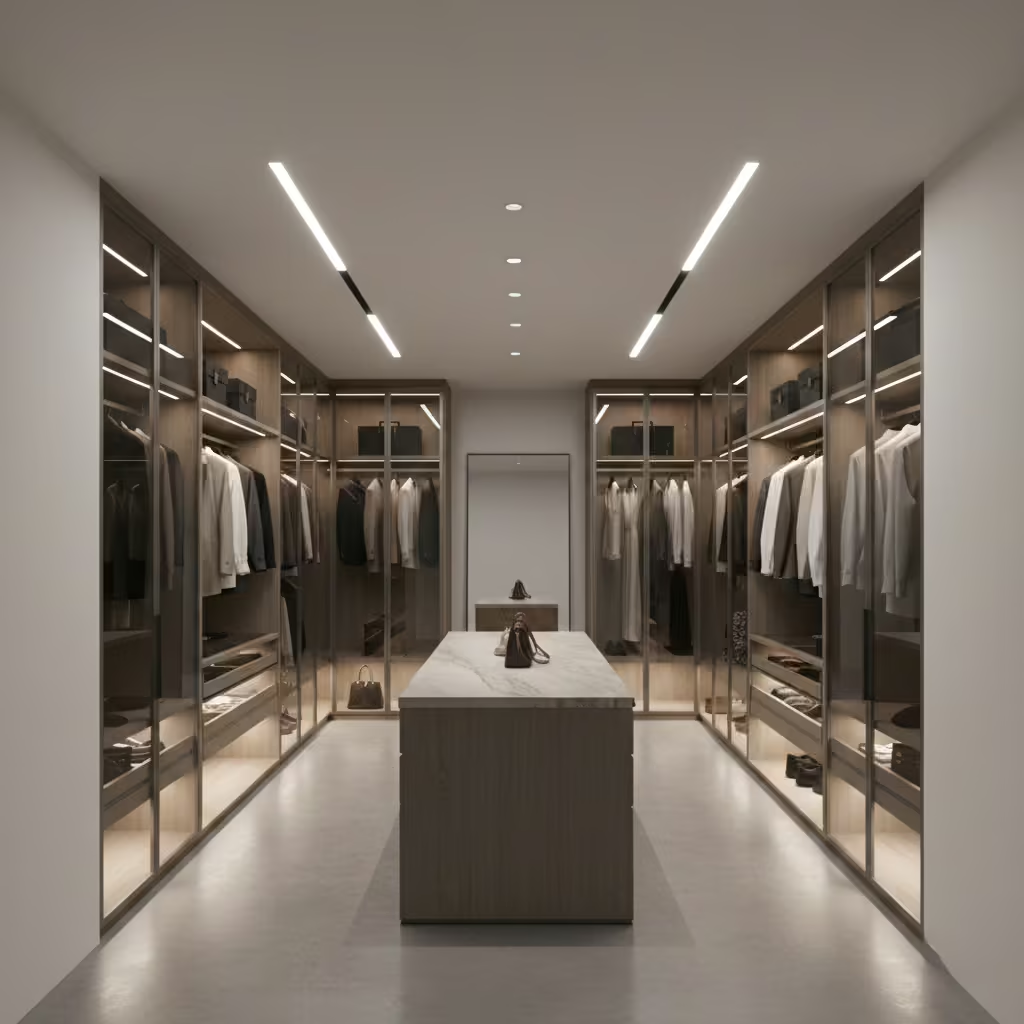
- Provides general illumination for the wardrobe.
- Typically, a ceiling-mounted LED panel, recessed downlight, or flush linear fixture.
- Ensures the space feels evenly lit without glare.
Task lighting
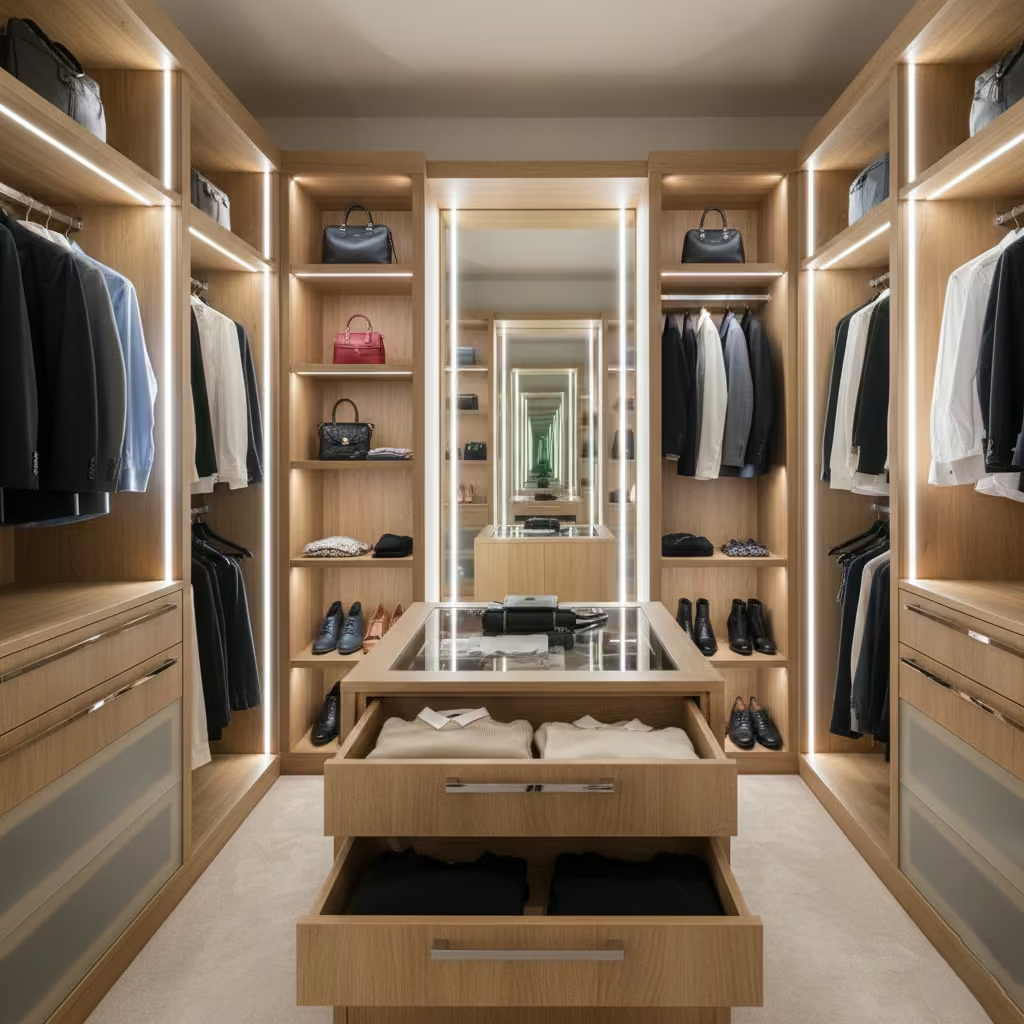
- Focused lighting for specific activities: selecting clothes, accessing drawers, or folding garments.
- Often achieved with LED strips inside shelves, drawers, or hanging rails.
- Placement should avoid casting shadows on clothes or creating hotspots.
Accent lighting
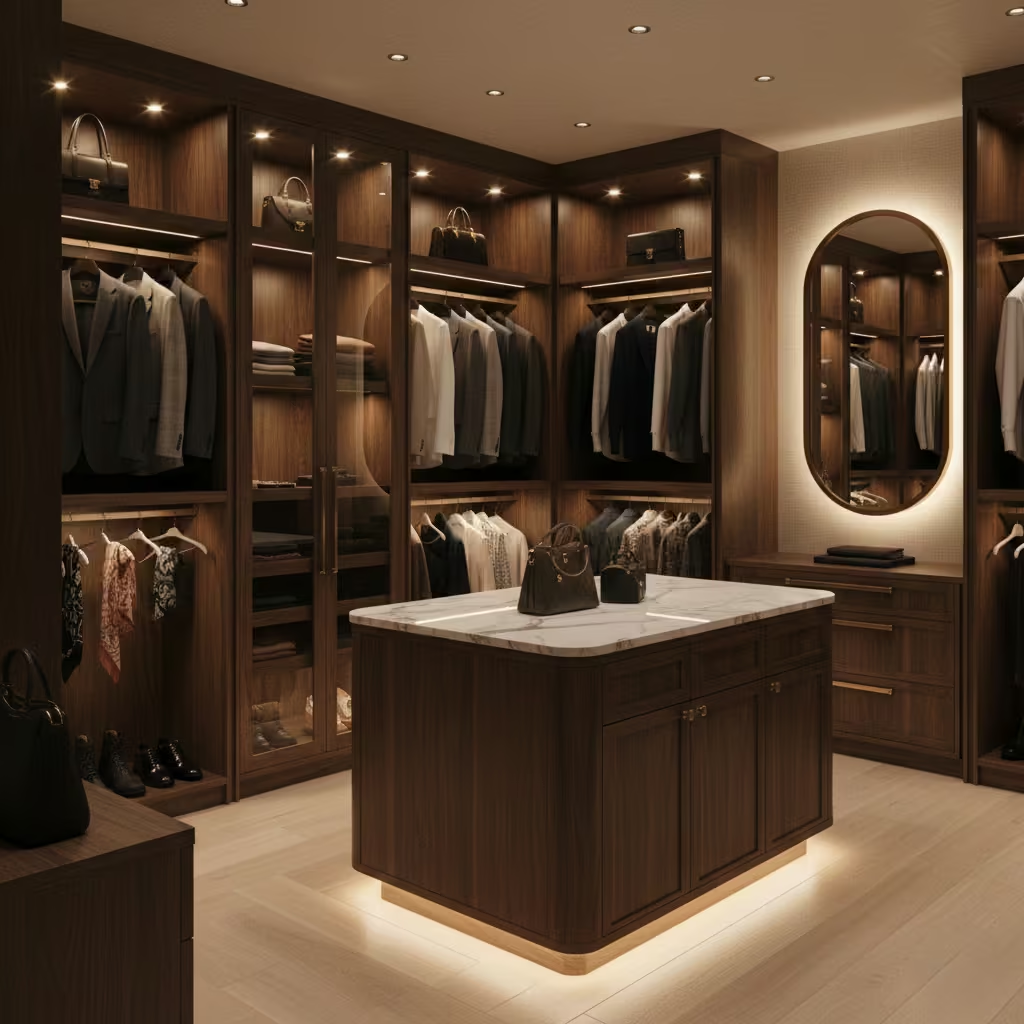
- Highlights architectural features, display shelving, or decorative items.
- Used sparingly to maintain a refined, boutique feel.
- Small recessed spotlights, linear LEDs above glass-fronted cabinets, or under-island illumination are effective.
Layering these three types ensures the wardrobe is functional, visually organised, and visually appealing, reinforcing both accessibility and luxury.
Integrated LED Strip Placement
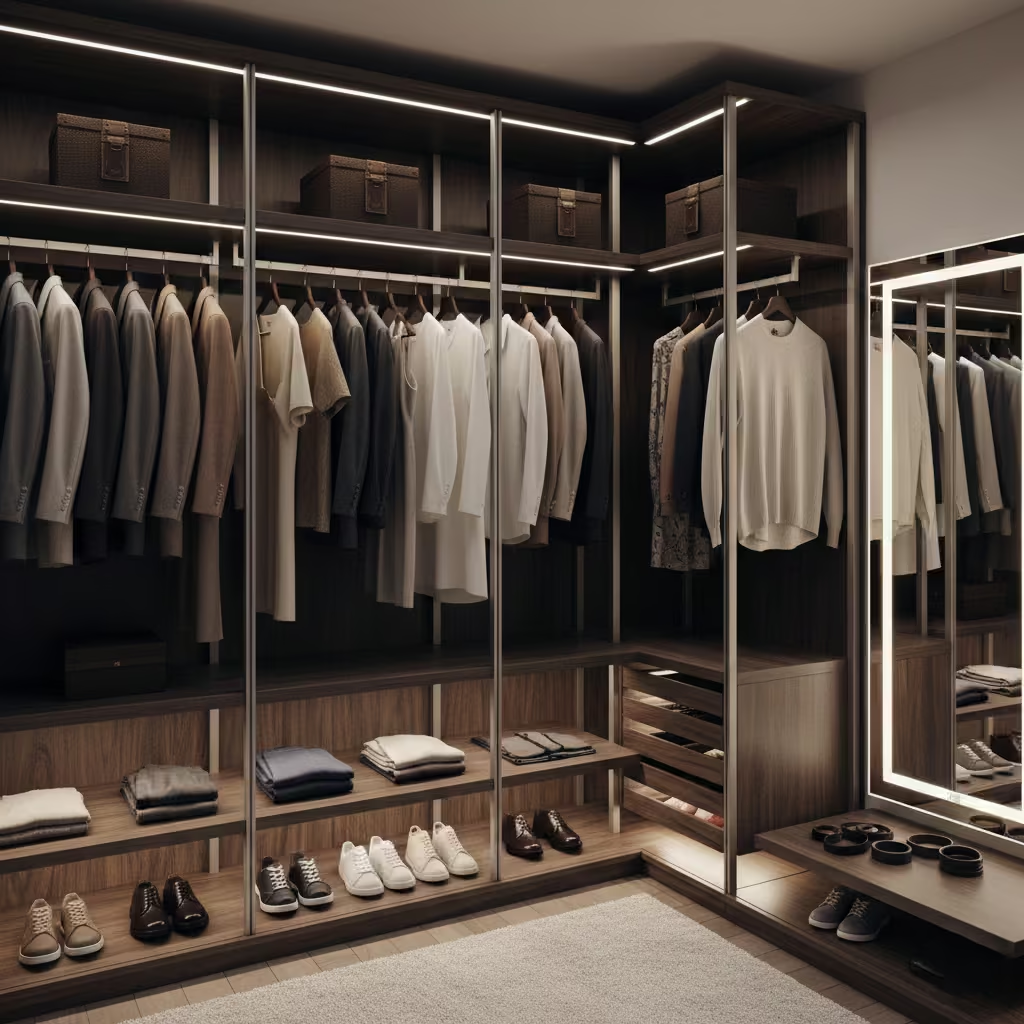
- Hanging rails: LED strips mounted above or behind rails illuminate garments evenly. Minimum spacing: 10–15 mm from edge to prevent harsh shadows.
- Shelving: LED strips installed at the front underside of shelves highlight folded items. Depth: 5–10 mm recessed for a soft glow.
- Drawers and pull-outs: LED strips or motion-activated lighting inside drawers increase visibility without requiring external switches.
Practical tip: use diffusers to prevent direct LED glare; continuous strips create an even, high-quality light field.
Light Temperature and Colour Accuracy
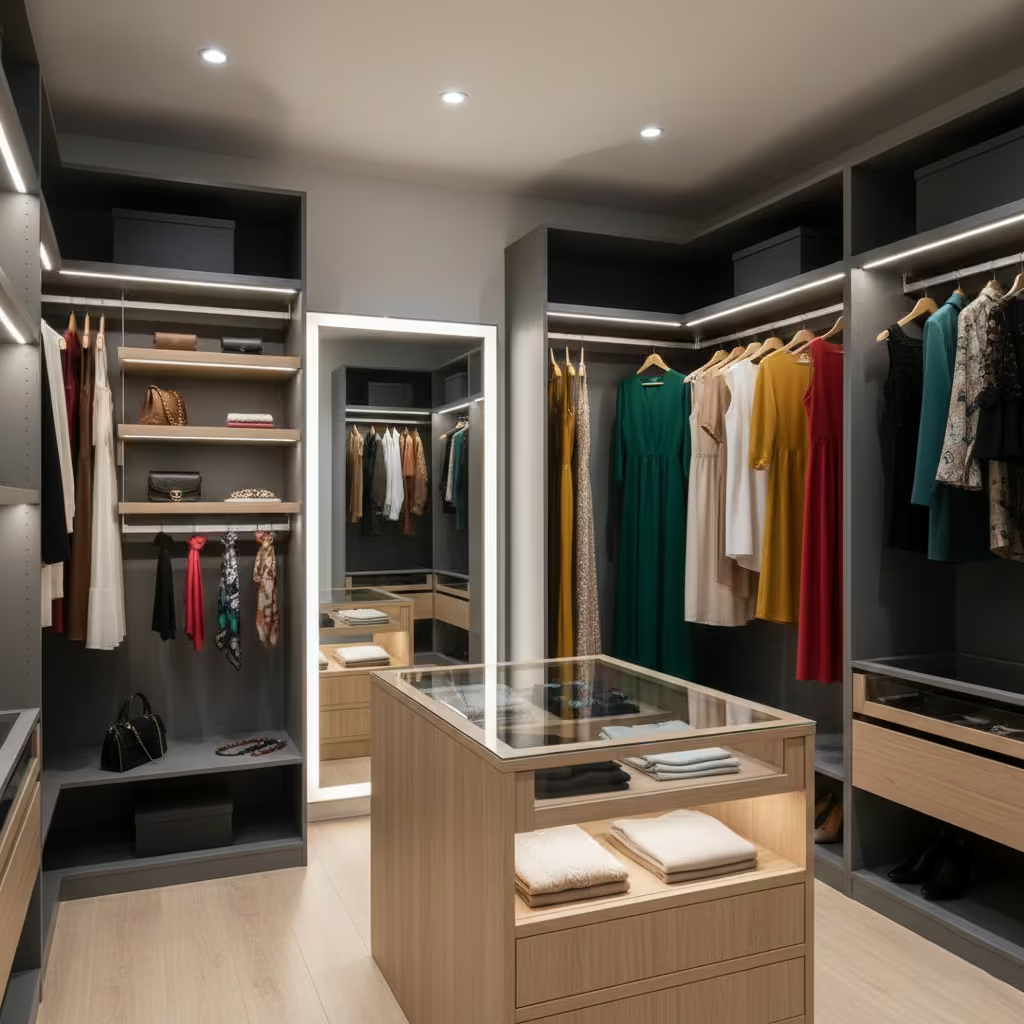
Lighting must represent colours accurately, which is essential for wardrobe use.
Kelvin ranges (colour temperature):
- 3,000–3,500 K: Warm white, cozy but may slightly distort colour perception.
- 3,500–4,000 K: Neutral white, ideal for general wardrobe use.
- 4,000–5,000 K: Crisp white, excellent for colour differentiation in clothes.
CRI (Colour Rendering Index) recommendations:
- CRI ≥ 90 is ideal to ensure colours are represented accurately.
- Lower CRI lighting can make fabrics look dull, misleading outfit choices, or hide subtle differences in tones.
In practice, I specify neutral-white, high-CRI LED strips for task zones, supplemented by slightly warmer ambient lighting to maintain a welcoming feel. Properly calibrated lighting enhances both usability and perception of material quality, ensuring every garment, accessory, and finish is shown at its best.
Ventilation, Climate, and Fabric Care
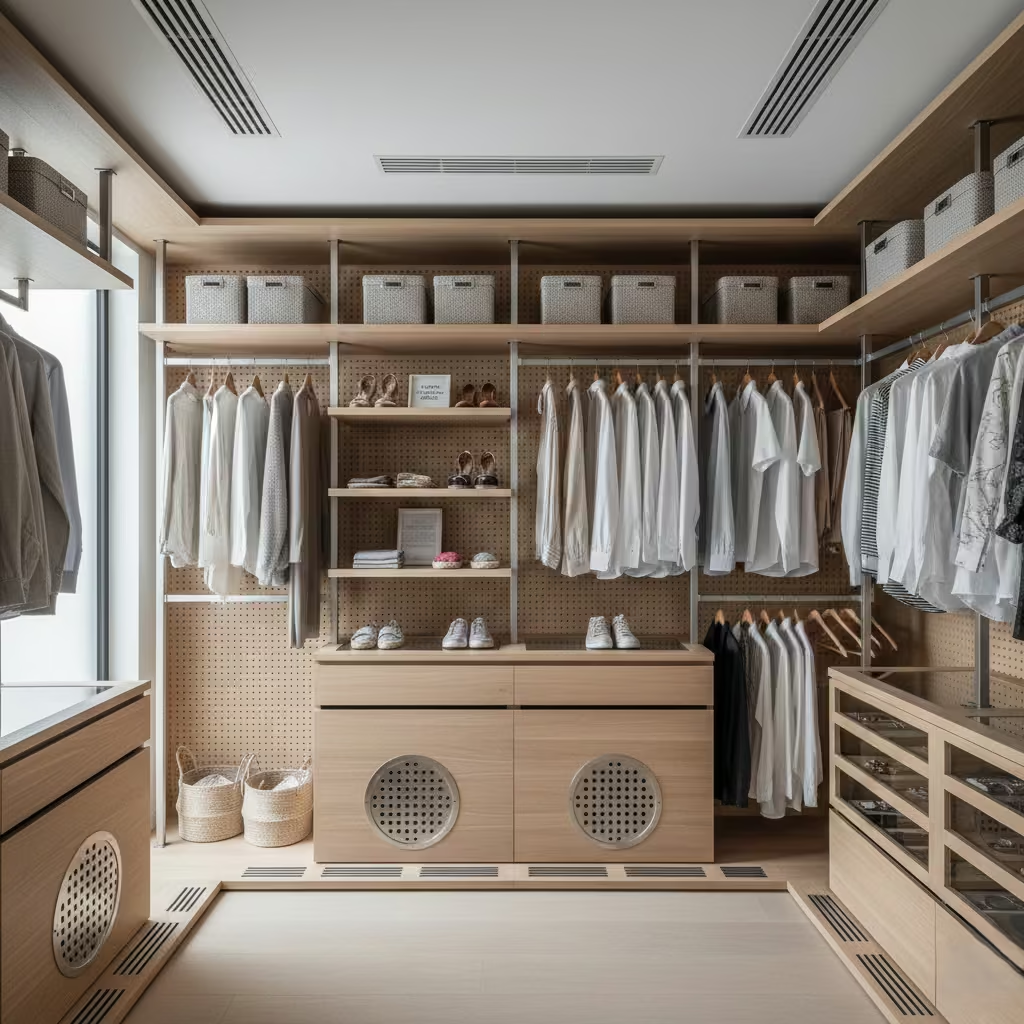
A walk-in wardrobe isn’t just about storage—it’s a microclimate for your clothing and accessories. Proper airflow and climate management protect fabrics, leather, and shoes, while preventing damp, odours, and long-term damage. In my projects, I always integrate ventilation planning early, because poor airflow can compromise even the most luxurious wardrobe design.
Why Walk-In Wardrobes Need Airflow
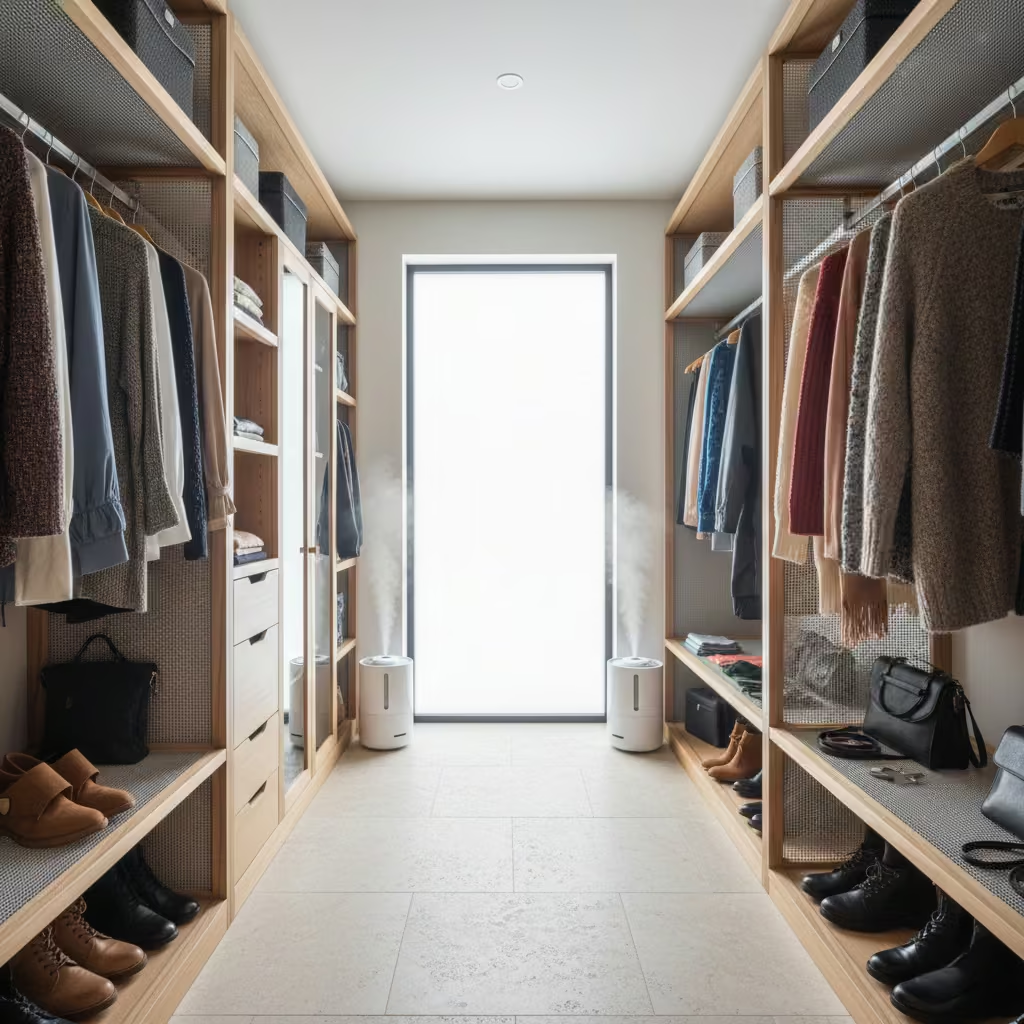
Even in dry climates, wardrobes trap heat, moisture, and odours, which can:
- Cause mildew on natural fibres like wool, silk, and cashmere.
- Lead to leather drying, cracking, or developing odours.
- Reduce lifespan of synthetic fabrics through trapped humidity.
A well-ventilated wardrobe maintains a healthy microclimate, preserving colour, texture, and structure while making the space feel fresher and lighter.
Preventing Damp, Odours, and Fabric Damage
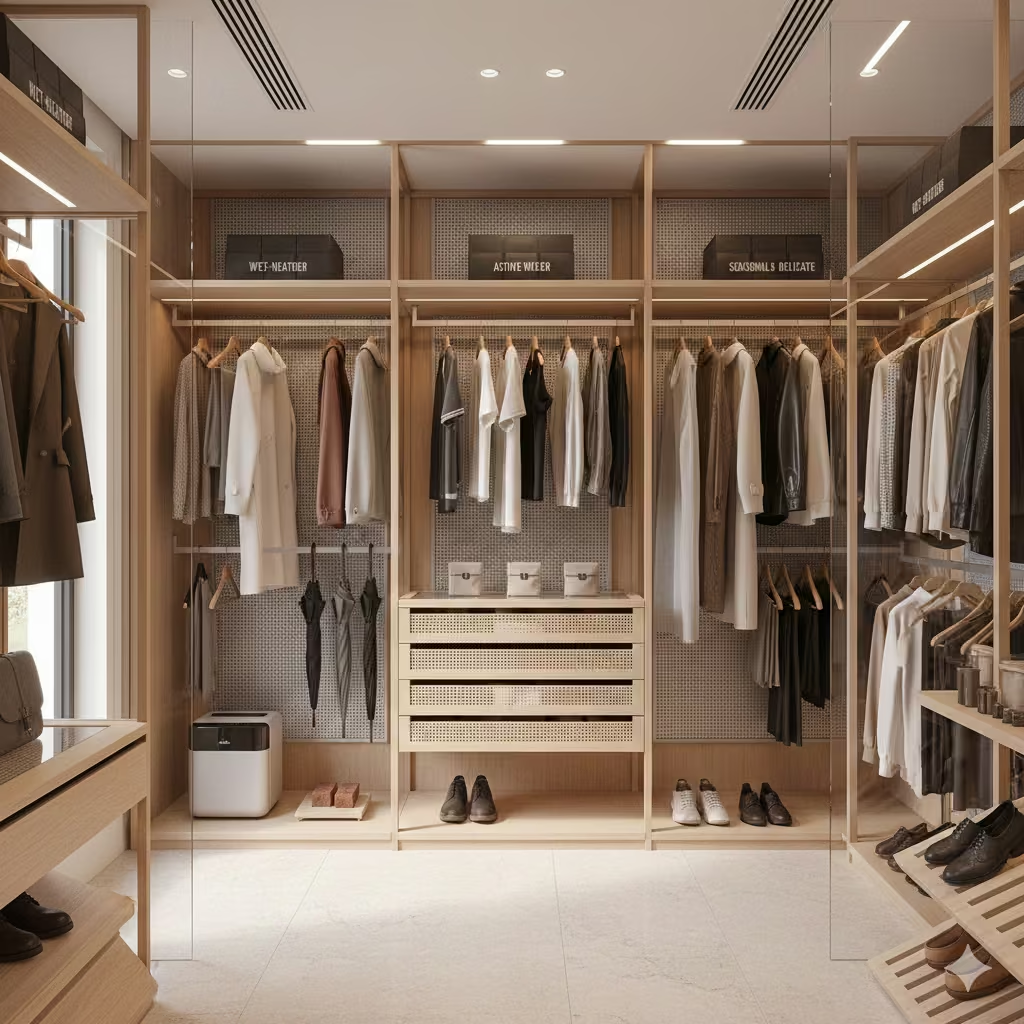
Key strategies I use in practice include:
- Material choice: Ventilated shelving, slatted timber, or perforated panels allow air circulation behind garments.
- Zoning: Keep wet-weather coats or gym clothes in separate, ventilated compartments to prevent odour spreading.
- Moisture control: Small desiccant packs, cedar blocks, or in-cabinet dehumidifiers can prevent damp accumulation, especially in humid climates or wardrobes near bathrooms.
- Daily routine: Encourage clothing rotation and airing, particularly for seasonal garments in storage zones.
These measures reduce mildew, odours, and fabric stress, keeping wardrobes functional and garments in pristine condition over years.
Passive vs Mechanical Ventilation
Passive ventilation
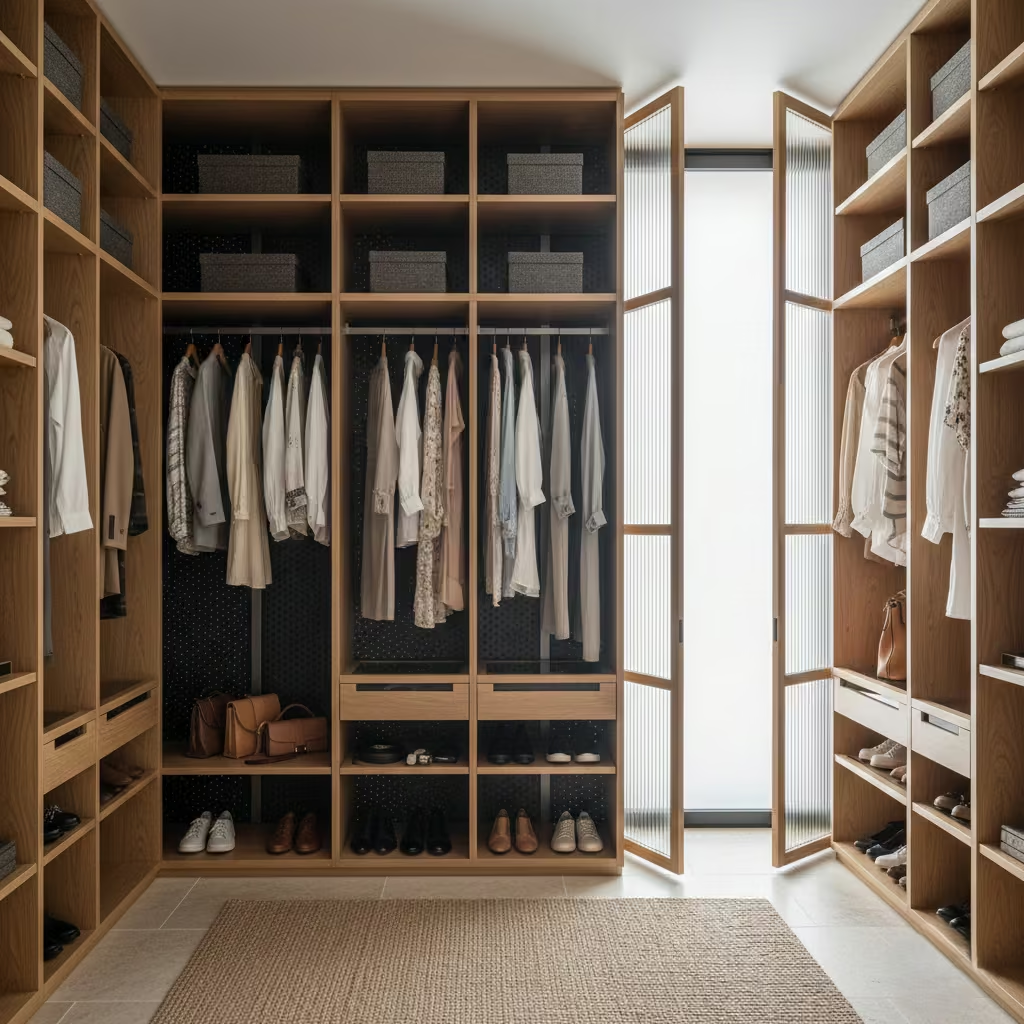
- Achieved via natural airflow: vents in cabinet backs, slatted shelves, or slightly open doors.
- Pros: Silent, low-maintenance, cost-effective.
- Cons: Limited in enclosed or humid spaces; less controllable.
Mechanical ventilation
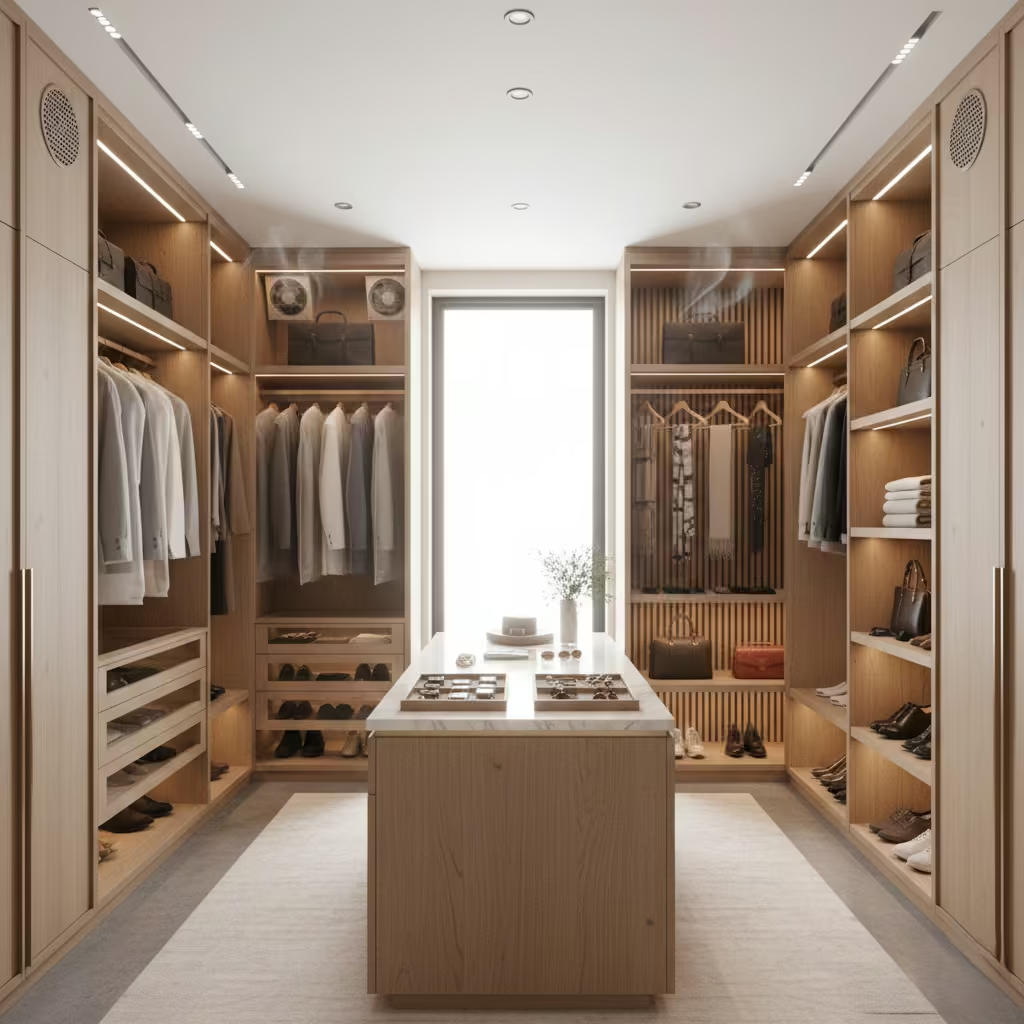
- Small, integrated fans or ducted systems to regulate humidity and airflow.
- Pros: Effective in high-humidity areas, basements, or wardrobes connected to bathrooms; prevents condensation and odour.
- Cons: Slightly higher cost, requires installation and occasional maintenance; noise must be considered.
Best practice: I combine passive airflow as a baseline, supplemented by mechanical ventilation in problem areas or for premium wardrobes, ensuring clothing longevity and a fresh wardrobe environment.
Doors, Screens, and Privacy Options
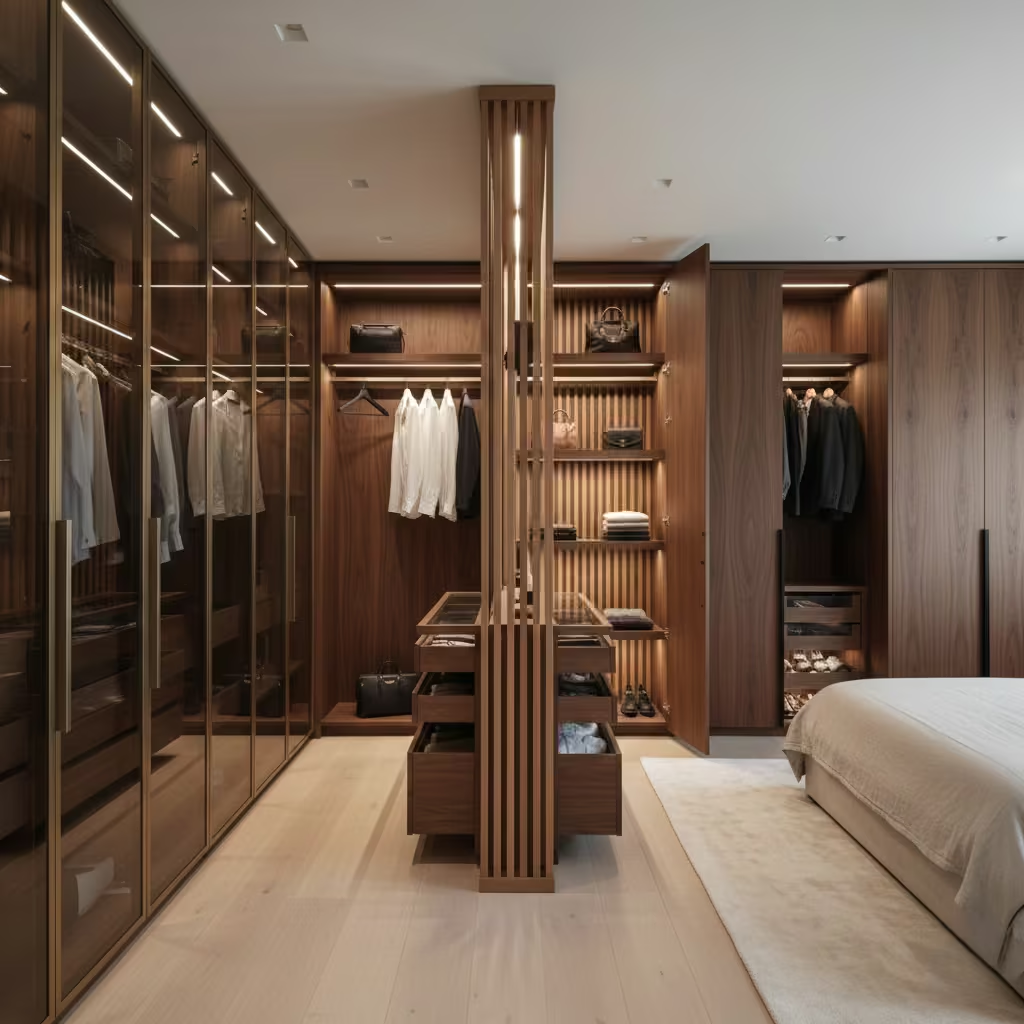
The decision around doors and screens in a walk-in wardrobe is more than aesthetic—it shapes circulation, accessibility, and privacy. The right approach balances openness with containment, ensuring that clothes and accessories remain protected from dust, light, and noise while allowing the space to feel integrated with the bedroom. In my experience, wardrobe doors are often treated as an afterthought, but they significantly influence how the wardrobe functions and how luxurious it feels.
Open vs Closed Walk-In Wardrobes
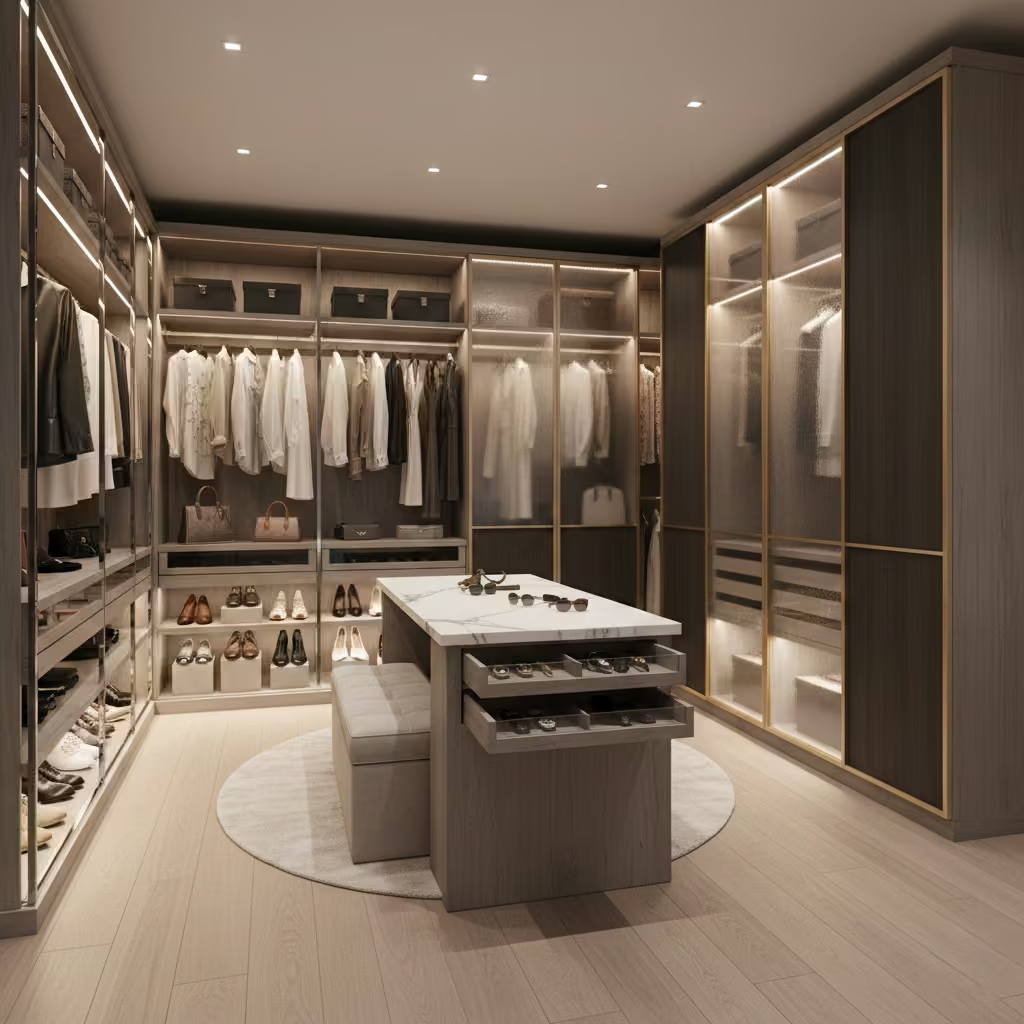
Open wardrobes are ideal for those who value immediate visibility and easy access. They create a sense of flow between dressing and sleeping zones, and when combined with disciplined storage systems, they feel spacious and organised. However, open wardrobes require behavioural consistency: if items aren’t returned to their designated zones, visual clutter can accumulate quickly.
Closed wardrobes, on the other hand, provide privacy, protection, and a cleaner bedroom appearance. Doors and panels keep dust, sunlight, and incidental wear off clothing, while giving the wardrobe a more architecturally integrated look. I often recommend a hybrid solution: open sections for frequently used items and closed sections for seasonal or less-used garments, which balances accessibility with tidiness.
You May also Like: 25 Simple Bedroom Makeover Ideas: Stunning, Low-Effort Transformations
Glass, Pocket, and Sliding Doors
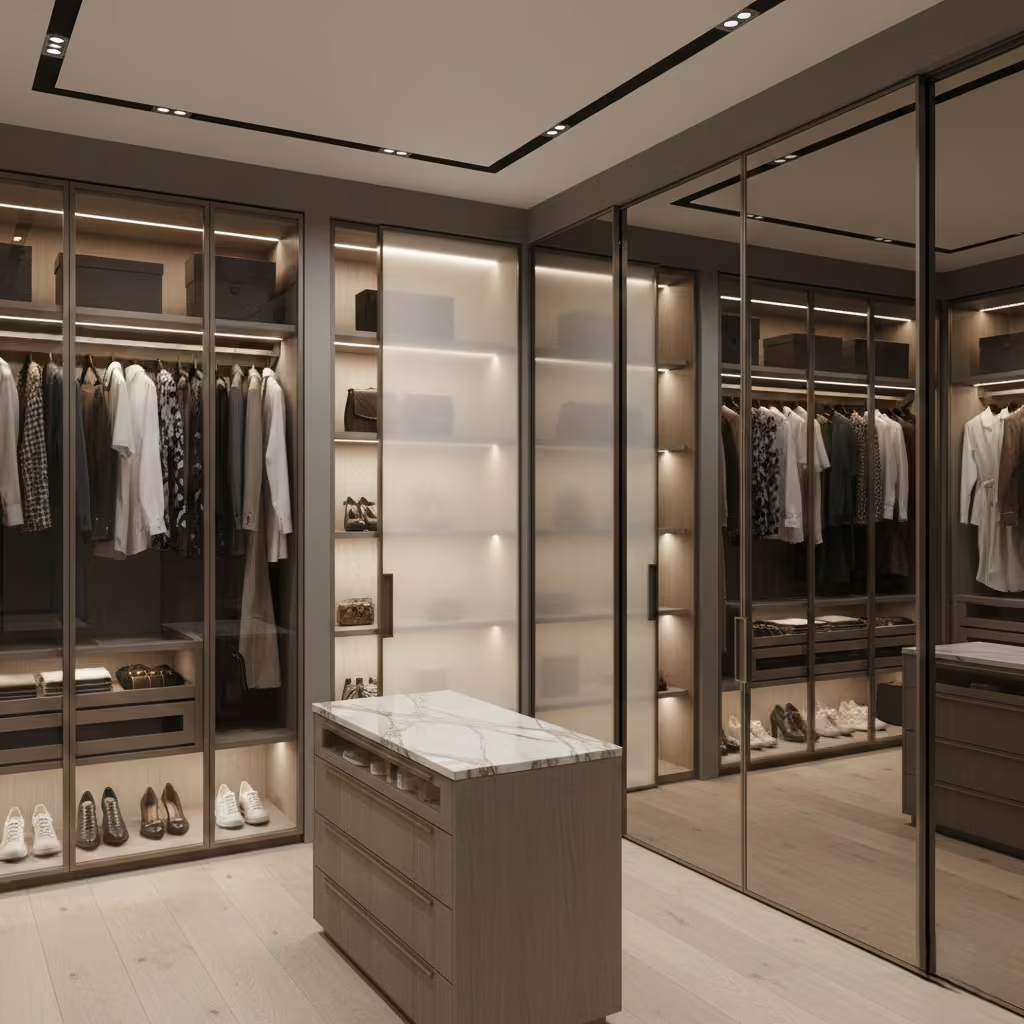
Glass doors allow for visibility while offering protection. Frosted or tinted glass adds privacy without sacrificing light, while clear glass works well for feature sections where clothing is part of the visual design.
Pocket and sliding doors are essential in wardrobes where circulation or space is limited. Pocket doors disappear into walls, maximising usable area, while sliding doors can be paired with mirrored panels to enhance perception of space in narrower bedrooms. Both solutions require precision installation to ensure smooth operation and long-term durability.
In my projects, I frequently combine these door types with internal lighting to ensure items remain clearly visible even when doors are closed, and the movement is smooth and silent.
Acoustic and Visual Separation
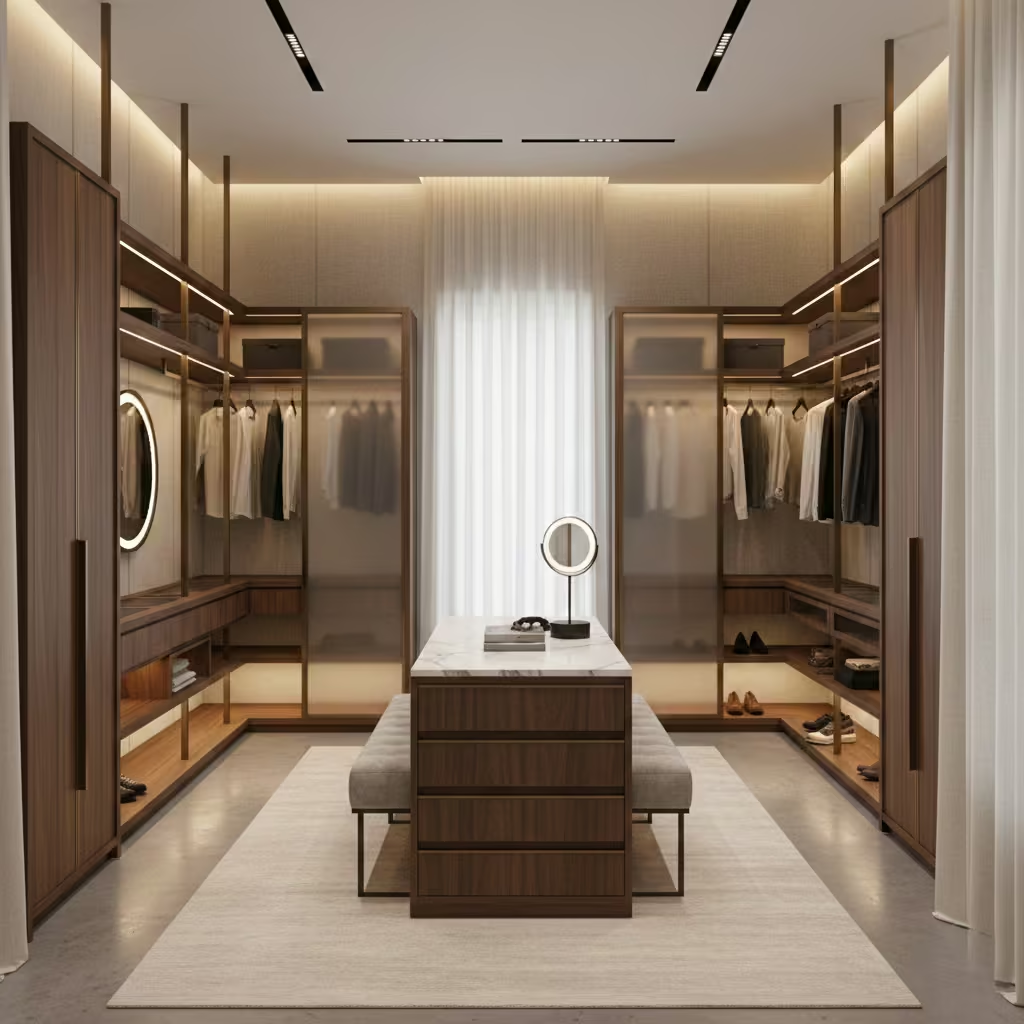
Privacy isn’t just about visual separation. Noise from drawers, hangers, or doors can disturb sleeping partners or nearby living spaces. Acoustic separation can be achieved through:
- Soft-close hinges and drawer runners, which reduce operational noise.
- Partial-height screens or sliding panels, which provide visual boundaries while allowing airflow.
- Sound-absorbing panels or curtains in open-plan suites to mitigate echoes or incidental noise.
Balancing acoustic and visual separation ensures the wardrobe feels luxurious, calm, and functional, maintaining a boutique atmosphere even in shared or open-plan master suites.
Cost Planning and Budget Expectations
Walk-in wardrobes can range from modest upgrades to fully bespoke, boutique-style installations. Understanding what drives cost, where to invest, and where savings can be made is essential to avoid overspending while ensuring longevity and functionality. In my experience, a clearly defined budget at the start prevents compromise on the elements that matter most, such as storage systems, materials, and lighting, while allowing flexibility in less critical areas.
What Drives Cost in Walk-In Wardrobe Design
The biggest contributors to cost are often materials, bespoke joinery, integrated lighting, and mechanical components. For example, solid timber cabinetry and high-end veneer finishes significantly increase material costs, while soft-close mechanisms, drawers, and pull-out accessories add both complexity and expense. Larger wardrobes naturally require more materials and labour, and features such as central islands, glass doors, or fully integrated accessory storage further elevate the price.
Labour costs are also critical. Precision joinery, perfectly aligned sliding or pocket doors, and careful integration of lighting and ventilation all require skilled craftsmanship, which should never be underestimated. I’ve seen projects where underestimating installation time led to additional costs mid-build because fine detailing was rushed or poorly executed.
Budget, Mid-Range, and Premium Builds
Budget builds typically use laminate or MDF cabinetry with standard hinges and hardware. They focus on efficient layouts and essential storage, with minimal detailing or integrated lighting. These wardrobes are functional, but durability and long-term aesthetics can be limited.
Mid-range builds combine veneers, high-quality laminates, and moderate bespoke detailing. Soft-close drawers, integrated lighting in primary zones, and a thoughtful layout provide a balance between functionality, luxury, and cost-efficiency. Many of my clients find this range delivers the best value for day-to-day use without appearing budget-conscious.
Premium builds involve fully bespoke cabinetry, solid timber, high-end finishes, integrated lighting throughout, and central islands. These wardrobes prioritise long-term durability, tactile quality, and a boutique dressing-room experience. While the upfront investment is higher, the payoff is a wardrobe that performs seamlessly for decades.
Where to Spend and Where to Save
Invest in elements that directly impact usability, longevity, and daily routines. This includes:
- Soft-close drawers, quality hinges, and pull-out systems, which enhance user experience.
- Durable, well-finished cabinetry that will age gracefully.
- Lighting and accessory organisation, which improves daily efficiency and protects garments.
Savings can be made in areas that are less visible or replaceable over time, such as:
- Secondary shelves or deep storage for seasonal items.
- Laminate or veneered backs of cabinets rather than solid timber throughout.
- Open storage in low-visibility zones rather than expensive glass-fronted displays.
In practice, a carefully considered mix of investment and compromise ensures that budget, mid-range, or premium wardrobes all perform well while providing the appearance, functionality, and longevity expected from a high-quality walk-in wardrobe.
Common Walk-In Wardrobe Design Mistakes
Even the most luxurious walk-in wardrobes can fail if the design overlooks practical use. In my experience, the most frequent errors are behavioural, spatial, and environmental, rather than purely aesthetic. Avoiding these mistakes ensures the wardrobe remains functional, organised, and timeless over years of daily use.
Prioritising Aesthetics Over Behaviour
A common pitfall is designing a wardrobe that looks stunning in renderings but doesn’t accommodate real-world habits. For example, allocating shallow shelving for bulkier sweaters or placing long garments where they interfere with drawer openings creates frustration. I always start with a behavioural analysis: how items are accessed, stored, and rotated daily. This approach ensures the wardrobe feels effortless and intuitive, not just visually impressive.
Overbuilding Storage
More storage isn’t always better. Overloading walls with cabinetry can reduce circulation, block sightlines, and make the wardrobe feel cramped, even in a large room. I often see clients tempted to fill every wall with hanging, shelving, and drawers, only to find access difficult and maintenance overwhelming. Optimised layouts with thoughtful zoning primary, secondary, and archive often outperform overbuilt storage in both efficiency and daily usability.
Ignoring Lighting and Ventilation
Neglecting lighting and airflow compromises the wardrobe’s core function. Poorly lit areas hide clothing, distort colours, and make garment selection cumbersome. Likewise, insufficient ventilation can lead to damp, odours, and fabric deterioration over time. In my projects, integrating LED task lighting along rails and shelves, combined with passive or mechanical ventilation, ensures both comfort and longevity—an investment often overlooked in early design stages.
Designing for Today Only
Wardrobes designed solely for current wardrobes or lifestyle often become obsolete as needs change. Failing to consider future clothing habits, seasonal rotation, or family growth results in a space that quickly feels inadequate. I always recommend adjustable shelving, modular drawers, and flexible hanging systems so the wardrobe can evolve with the homeowner, remaining functional and stylish for years.
How to Choose the Right Walk-In Wardrobe Design for Your Home
Selecting the right walk-in wardrobe is more than picking a layout or finish—it’s about ensuring the space fits your lifestyle, complements your architecture, and adapts over time. A successful wardrobe feels intuitive, supports daily routines, and enhances the overall bedroom environment rather than simply acting as storage.
Matching Design to Lifestyle
Your wardrobe should reflect how you live and dress. For example, someone with extensive formalwear may benefit from long-hang zones and dedicated accessory storage, while a casual dresser may prioritise flexible shelving and double rails. I often start projects by assessing:
- Frequency of use (daily vs occasional garments)
- Variety of clothing types (jackets, dresses, knitwear, sportswear)
- Storage habits (folding vs hanging, shoe rotation, accessories)
This analysis ensures the wardrobe supports efficient, low-friction routines rather than imposing artificial organisation systems that are hard to maintain.
Matching Design to Architecture
The wardrobe should feel integrated, not imposed. Architectural factors such as ceiling height, room proportions, window placement, and natural light influence layout choices:
- Linear and L-shaped designs work well in narrow or converted bedrooms.
- U-shaped or island layouts suit larger, square rooms with ample circulation.
- Walk-through layouts are ideal when connecting to bathrooms or dressing suites.
Matching the wardrobe to the architecture ensures flow, spatial clarity, and visual harmony, while avoiding awkward corners, blocked pathways, or unusable storage.
Long-Term Adaptability Checklist
A good walk-in wardrobe should evolve with your needs. I recommend considering the following:
- Adjustable shelving and hanging rails to accommodate seasonal changes or new garments.
- Modular drawers and pull-out systems for flexible accessory and shoe storage.
- Zoning flexibility to allow items to move between primary, secondary, and archive areas.
- Lighting and ventilation capacity that can support future layout modifications or additional features.
- Durable materials that withstand repeated reconfiguration without losing aesthetic or structural integrity.
Final Guidance: What I Look for When Designing Walk-In Wardrobes That Last
Designing a walk-in wardrobe that performs beautifully for decades requires more than following trends it’s about balancing function, aesthetics, and future adaptability. In my experience, the most successful wardrobes embody three core principles: performance, restraint, and adaptability.
Performance
A wardrobe must support daily routines effortlessly. This means circulation is intuitive, storage is accessible, and each system hanging, shelving, drawers, shoe and accessory zones is designed for behavioural efficiency. I prioritise correct measurements, optimal rail heights, clearances, and zoning so that every garment and accessory has a logical place. Lighting and ventilation are fully integrated, ensuring clothes are visible, well-preserved, and easy to maintain. Performance is the foundation: a wardrobe that doesn’t function smoothly, no matter how beautiful, quickly becomes frustrating.
Restraint
Luxury in a wardrobe is often defined by subtlety and control, not opulence. I focus on restraint in material choices, finishes, and storage density to maintain calm, uncluttered spaces. Matte or low-sheen finishes, selective use of mirrors or glass, and minimal, ergonomic hardware create a timeless aesthetic. Even in large wardrobes, less can be more: overbuilt cabinetry, excessive decoration, or unnecessary compartments compromise circulation, accessibility, and visual harmony. Restraint ensures the wardrobe feels architecturally considered, not overloaded, while supporting clarity and order.
Adaptability
Wardrobes must evolve with changing lifestyles. I always design with modularity, adjustable shelving, and flexible hanging systems so the space can accommodate new garments, seasonal rotation, or even household growth. Accessories, shoes, and special storage zones are organised for easy modification, and lighting or ventilation systems are future-ready. Adaptability ensures the wardrobe remains relevant, functional, and valuable for years, avoiding costly redesigns or premature obsolescence.
By focusing on performance, restraint, and adaptability, I create walk-in wardrobes that are both highly functional and visually serene, capable of standing the test of time. These principles guide every decision from layout and circulation to materials, lighting, and accessory storage resulting in wardrobes that are not only beautiful but practical, durable, and timeless.
Final Thoughts
A walk-in wardrobe is far more than a storage solution it is a carefully orchestrated extension of your daily life, blending form, function, and long-term adaptability. The most successful designs consider how you live, move, and interact with your clothing, integrating circulation, lighting, ventilation, and material choices into a cohesive whole.
When done well, a wardrobe enhances your routines, preserves your garments, and elevates the aesthetic of your bedroom. By prioritising performance, exercising restraint, and planning for adaptability, you ensure that the space remains both practical and visually serene for years to come.
Ultimately, the right walk-in wardrobe is timeless, intuitive, and tailored to you a space that makes every day dressing feel effortless and luxurious. Proper planning, attention to detail, and thoughtful design choices transform a wardrobe from a simple storage area into a signature feature of your home.
Frequently Asked Questions About Walk-In Wardrobes
How much space do I need for a functional walk-in wardrobe?
A minimum width of 1.5–1.8 m (5–6 ft) is generally required for a narrow, linear layout, while a U-shaped or island layout needs at least 3.5–4 m (11–13 ft) width to maintain circulation and access. Depth should allow minimum 900 mm (36 in) walkway clearance to comfortably move and open drawers or doors.
Should I choose open or closed wardrobes?
Open wardrobes work well for immediate visibility and quick access but require discipline to prevent clutter. Closed wardrobes protect clothing from dust, light, and wear, and are ideal if you want a cleaner, more architectural look. A hybrid approach open display for daily garments and closed storage for seasonal items is often the most practical.
What is the ideal lighting for a walk-in wardrobe?
Layered lighting works best: ambient lighting for general visibility, task lighting along rails and drawers for easy selection, and accent lighting to highlight accessories or feature shelves. I recommend neutral-white LED (3,500–4,000 K) with CRI ≥ 90 to ensure accurate colour rendering.
How should I store shoes efficiently?
A combination of angled display shelves for daily shoes and flat or pull-out shelving for seasonal or bulky shoes works best. Depths range from 200–250 mm (8–10 in) for angled display to 300–350 mm (12–14 in) for flat shelves, with ventilation gaps of 10–20 mm (0.4–0.8 in) to prevent odours and damp.
How do I organise accessories and jewellery?
Small items benefit from micro-storage systems like divided drawers, pull-out trays, vertical racks, and soft-touch liners. These ensure items are visible, protected, and easy to retrieve, reducing clutter and speeding up daily routines.
What materials and finishes age best in a wardrobe?
I recommend matte or low-sheen finishes, veneers for visible panels, laminates for high-traffic interior areas, and solid timber for premium detailing. Glass and mirrors enhance perception of space but should be used thoughtfully to avoid glare or over-reflection. Hardware should be durable and subtle, with soft-close hinges for longevity.
How can I prevent damp, odours, and fabric damage?
Ensure adequate ventilation, either passive (slatted shelves, back gaps, open panels) or mechanical (small in-cabinet fans or ducted airflow). Regular garment rotation, moisture control (desiccants, cedar blocks), and zoned storage for wet or gym items protect clothing and maintain a fresh wardrobe environment.
How do I future-proof my wardrobe?
Include adjustable shelving, modular drawers, and flexible hanging systems, and plan lighting and ventilation that can accommodate future changes. This ensures the wardrobe adapts to new clothing habits, seasonal rotation, or household growth, avoiding costly redesigns.