25 Back Patio Ideas That Transform Outdoor Space into True Living Areas
A back patio should never feel like a leftover surface poured behind the house. When properly conceived, it operates as exterior architecture, a spatial extension of the interior plan. I approach patios in the same way I would a living room or kitchen. There must be proportion, hierarchy, circulation logic, and material coherence. Without these fundamentals, even the most expensive finishes feel temporary.
The first principle is proportion. The size of the patio must relate directly to the scale of the house and the width of the rear elevation. A 2.5 m deep slab against a 7 m wide façade often feels compressed and underpowered. In contrast, a depth of 3.5 m to 4.5 m (11 ft to 15 ft) allows furniture to breathe while maintaining comfortable circulation of at least 900 mm (36 inches) around key zones. The patio should feel intentional, not appended.
Climate response follows immediately. Sun path, prevailing wind, and seasonal temperature shifts determine how a patio is truly used. In warmer climates, shade control becomes architectural rather than decorative. In cooler regions, thermal mass, wind buffering, and heating integration become critical. I regularly analyse orientation before specifying materials. South- or west-facing patios benefit from pergolas, deep roof overhangs, or vertical screening. North-facing spaces may require lighter-toned paving to maximise reflected light.
Material longevity is equally decisive. Exterior surfaces endure ultraviolet exposure, freeze-thaw cycles, moisture ingress, and daily abrasion. Large-format porcelain with a minimum R11 slip rating offers durability with low porosity. Natural stone, while beautiful, must be selected with density and weathering in mind. I specify sub-base depths of 150 to 200 mm (6 to 8 inches) compacted hardcore beneath paved patios to prevent settlement over time. Longevity is not a luxury consideration; it is fundamental.
Zoning transforms a patio from a surface into a living environment. I typically define three core zones: dining, lounging, and circulation. A dining area ideally requires at least 3 m x 3.5 m (10 ft x 12 ft) to accommodate a six-seat table comfortably. Lounge seating may require 3 m x 3 m (10 ft x 10 ft) minimum. Clear circulation routes between these areas should not fall below 900 mm (36 inches). When these dimensions are respected, movement feels natural rather than constrained.
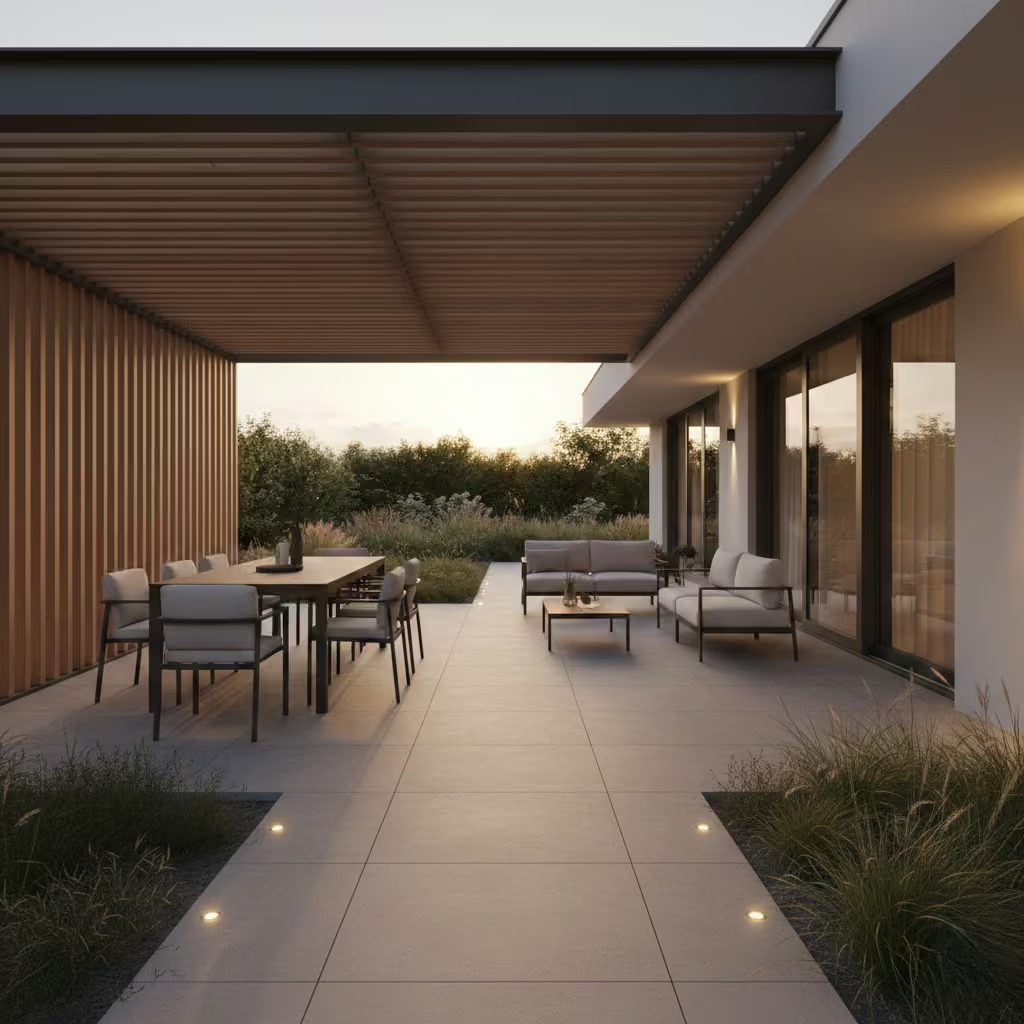
Light control also defines daily usability. Layered lighting allows the patio to transition from daytime extension to evening retreat. Integrated wall lights at 2700K provide warmth, while subtle ground lighting guides movement without glare. Shade structures, planting, and vertical elements regulate both light intensity and privacy.
On a recent project, I redesigned a 4 m x 6 m (13 ft x 20 ft) rear patio attached to a contemporary home. The original layout placed furniture directly against the façade, leaving a narrow and awkward walkway. Afternoon western sun made the seating area unusable for several hours each day.
We reoriented the dining zone perpendicular to the house, introduced a 3.2 m (10.5 ft) wide pergola with adjustable louvres, and shifted the lounge area slightly inward to create a defined circulation path of 1 m (40 inches). The addition of vertical timber screening reduced glare and wind exposure. The result was not simply aesthetic improvement. It fundamentally changed how the family used the space, extending occupancy into late afternoon and early evening.
A well-designed patio does not rely on decorative accessories to feel complete. It succeeds because its proportions are resolved, its materials are durable, its orientation is understood, and its zones support daily life. When these architectural principles are respected, the patio becomes a natural continuation of the home rather than an afterthought.
Structural & Architectural Patio Ideas
The most enduring patios are defined not by furniture or surface finish, but by structure. Architectural elements such as roof forms, level changes, built-in walls, and defined edges establish permanence, proportion, and environmental control. Before selecting materials or styling details, I prioritise overhead cover, vertical screening, and structural rhythm, because these components determine shade, shelter, privacy, and how the space will perform across seasons. When the architecture is resolved first, everything layered onto it feels intentional rather than improvised.
Covered Patio Pavilion
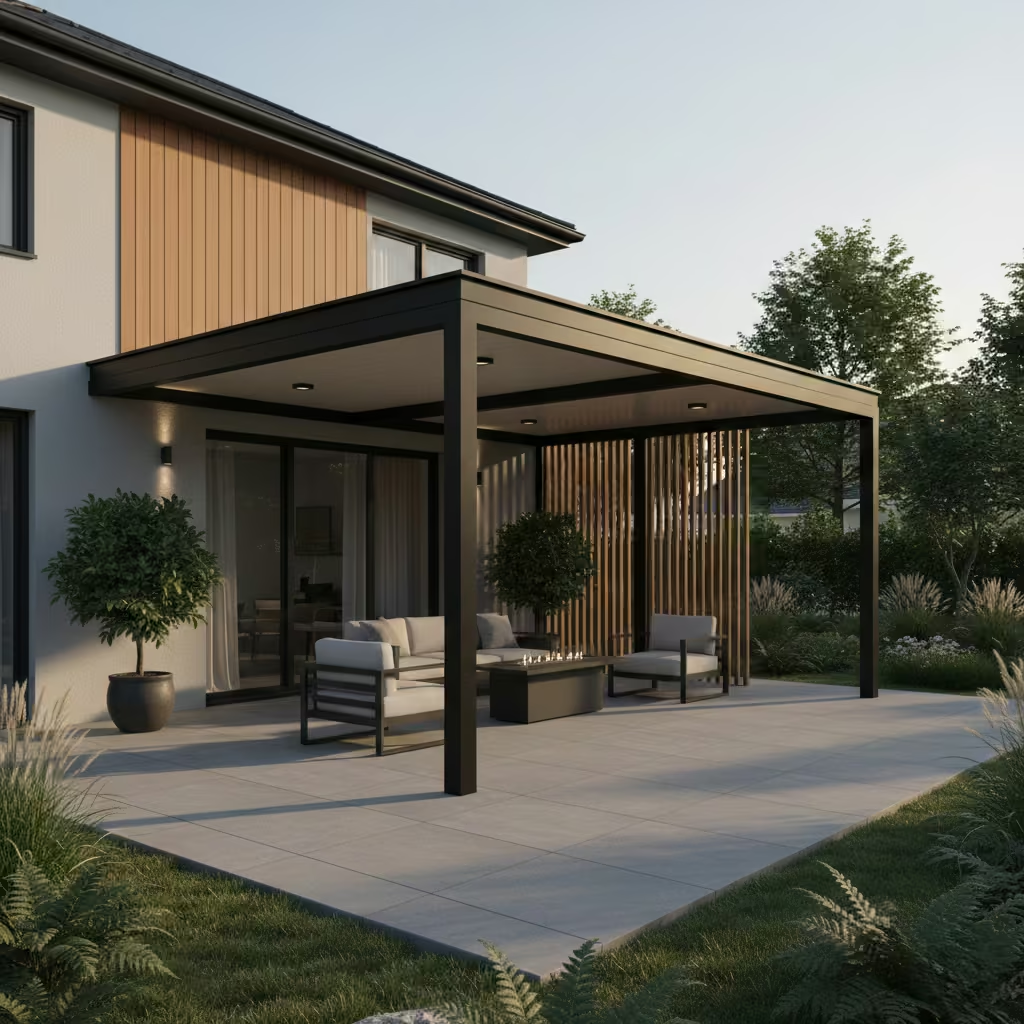
A covered patio pavilion transforms an exposed slab into a defined outdoor room. Structurally, I typically specify either powder-coated steel framing for a refined, contemporary profile or engineered timber for warmth and architectural softness. The decision is rarely aesthetic alone. It is driven by span requirements, exposure levels, and long-term maintenance expectations.
Ceiling height is critical. I rarely go below 2.4 m (8 ft), as anything lower feels compressed, especially when ceiling fans or lighting are introduced. For larger patios exceeding 4 m (13 ft) in depth, I prefer 2.6 m to 2.7 m (8.5 ft to 9 ft). This proportion allows heat to rise, improves air circulation, and visually aligns the pavilion with standard internal ceiling heights, reinforcing continuity between inside and out.
On a recent west-facing project, the patio measured 5 m x 4 m (16 ft x 13 ft) and was previously uncovered. Afternoon sun made the space unusable between 3 pm and 6 pm during summer months. We installed a steel-framed pavilion spanning 4.2 m (14 ft) with a solid insulated roof panel system. The ceiling was set at 2.65 m (8 ft 8 in), with concealed guttering and integrated downlights at 2700K.
To address wind exposure, we added a vertical slatted screen along the southwestern edge, reducing crosswinds without blocking airflow entirely. The transformation was immediate. Surface temperatures dropped significantly, glare was reduced, and the family began using the patio daily rather than occasionally.
From a performance standpoint, a pavilion offers more than shade. It protects furniture from UV degradation, reduces heat gain through adjacent glazing, and allows year-round usability when combined with heating.
Pros
- Provides permanent shade and weather protection
- Extends seasonal usability
- Enhances property value through architectural presence
- Protects flooring and furnishings from direct exposure
- Creates opportunity for integrated lighting, heating, and ceiling fans
Cons
- Higher upfront structural cost compared to pergolas
- May require planning approval depending on region
- Poorly proportioned designs can feel heavy or visually dominant
- Ongoing maintenance for timber structures
When designed with correct proportions and orientation awareness, a covered pavilion ceases to be an accessory. It becomes the architectural anchor of the entire patio composition.
Retractable Roof System
A retractable roof system introduces flexibility where a fixed pavilion delivers permanence. In projects where climate variability is significant, particularly in regions with strong summer sun but moderate winters, motorised louvre systems allow precise environmental control without committing to full enclosure. Architecturally, they sit between a pergola and a solid roof, offering adaptability while maintaining a refined structural presence.
Most high-performance systems use powder-coated aluminium frames with rotating louvres that pivot up to 120 degrees. When closed, they form a watertight surface with integrated gutter channels directing water into concealed downpipes. When open, they allow ventilation and controlled sunlight penetration. For patios between 3.5 m and 5 m (11 ft to 16 ft) in projection, these systems provide effective coverage without excessive structural bulk. Clear span limits typically range from 4 m to 6 m (13 ft to 20 ft), depending on manufacturer engineering specifications.
On a 4.5 m x 6 m (15 ft x 20 ft) patio project, the homeowners wanted open sky visibility in the evenings but full shade during peak afternoon heat. A motorised louvre system allowed them to angle blades at approximately 45 degrees to deflect direct western sun while maintaining airflow. During rainfall, the roof closed automatically via a rain sensor, protecting outdoor upholstery and integrated lighting. The flexibility significantly increased daily usability, especially during transitional seasons when weather shifts rapidly.
Climate adaptability is the defining advantage. Unlike static covers, louvre systems respond dynamically to solar path, wind conditions, and rainfall. They also reduce overheating beneath the structure because hot air can escape through partially opened blades.
Maintenance, however, must be considered carefully. Moving components require periodic inspection. Motors, sensors, and drainage channels need servicing to prevent blockages or malfunction. In coastal environments, salt exposure accelerates wear, making marine-grade finishes advisable. I recommend annual servicing and regular cleaning of louvre channels to prevent debris accumulation.
Pros
- Adjustable shade and ventilation
- Rain protection with integrated drainage
- Enhances year-round usability
- Visually lighter than solid roof systems
- Technologically sophisticated aesthetic
Cons
- Higher cost due to motorisation and engineering
- Requires electrical integration
- Ongoing maintenance of mechanical components
- May produce operational noise depending on system quality
A retractable louvre roof works best when climate variability is high and clients value adaptability. When specified correctly and maintained properly, it delivers control without compromising architectural clarity.
Integrated Outdoor Fireplace Wall
An integrated outdoor fireplace wall introduces vertical presence, thermal comfort, and architectural anchoring in one gesture. Unlike freestanding fire pits, a masonry fireplace becomes part of the spatial composition, defining edges and reinforcing enclosure. I often use it to terminate sightlines or create a focal axis from the interior living space outward.
Masonry mass is central to performance. Brick, concrete block with render, or natural stone assemblies retain and radiate heat long after the flame subsides. On cooler evenings, this retained warmth significantly improves perceived comfort within a 2 m to 3 m (6.5 ft to 10 ft) radius. I typically specify a wall thickness of 200 mm to 300 mm (8 to 12 inches) depending on structural requirements, with a reinforced concrete footing beneath extending below frost depth where applicable. The weight and density are not aesthetic indulgences; they are functional assets.
Clearance planning is non-negotiable. I maintain a minimum of 900 mm (36 inches) clearance in front of the hearth opening for circulation and safety. Side clearances depend on local code, but combustible furniture should remain at least 1.2 m (4 ft) away. Chimney height must extend sufficiently to ensure proper draft, generally at least 600 mm (24 inches) above adjacent rooflines or structures to prevent smoke backflow.
On a recent 5 m x 7 m (16 ft x 23 ft) patio project, prevailing winds came consistently from the northwest. The original concept positioned the fireplace centrally against the rear boundary wall. During testing, smoke drifted directly into the seating area due to crosswinds. We relocated the fireplace to the northeastern corner and introduced a 2.4 m (8 ft) high masonry side return wall, which acted as a wind buffer. The adjustment stabilised airflow and improved draft efficiency. The fireplace now anchors the lounge zone while shielding it from direct wind exposure.
Material selection must also account for weathering. I favour high-density brick or stone with low absorption rates to reduce freeze-thaw deterioration. Stainless steel flue liners are advisable in damp climates to prevent corrosion.
Pros
- Provides radiant heat and seasonal extension
- Creates architectural focal point
- Adds vertical definition and enclosure
- Enhances property value and perceived luxury
Cons
- High structural and installation cost
- Requires compliance with local fire and building regulations
- Permanent placement limits future layout flexibility
- Wind miscalculation can cause smoke drift issues
When positioned with climatic awareness and proportion discipline, an integrated fireplace wall does more than provide warmth. It shapes atmosphere, anchors composition, and elevates the patio from surface treatment to architectural statement.
Pergola With Adjustable Screens
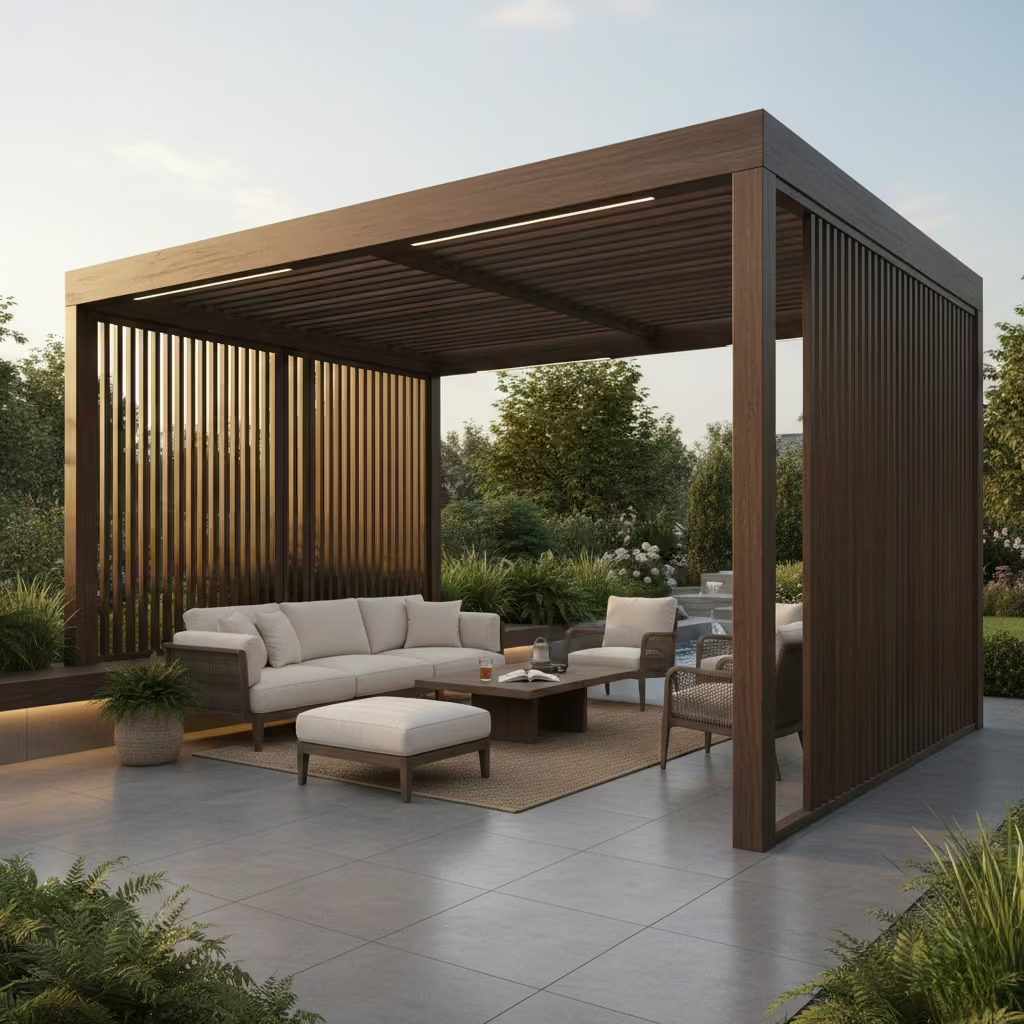
A pergola with adjustable screens introduces filtered enclosure without fully solidifying the structure. It is particularly effective where full roof coverage is unnecessary, but solar control and privacy are essential. I treat pergolas as transitional architectural frameworks rather than decorative trellises. When proportioned correctly, they provide rhythm, depth, and climatic moderation.
Shade control is achieved through either fixed overhead slats combined with vertical adjustable screens, or through integrated sliding or pivoting panels. Vertical screens positioned on the western or southwestern edge significantly reduce low-angle afternoon glare. In projects facing neighbouring properties, adjustable screening allows privacy without blocking airflow. I maintain a structural height between 2.4 m and 2.6 m (8 ft to 8 ft 6 in) to preserve openness while ensuring shade coverage is effective.
On a 3.8 m x 5 m (12.5 ft x 16 ft) patio project overlooking adjacent gardens, privacy was a primary concern. We installed a 3 m (10 ft) wide pergola with aluminium framing and vertically sliding slatted screens along one boundary. By angling the slats at approximately 30 to 45 degrees, we filtered direct sun while obscuring sightlines from upper-level neighbouring windows. The result was a space that felt protected but not enclosed.
Material selection significantly affects performance and longevity.
Aluminium Pergolas
- Structurally stable and resistant to warping
- Powder-coated finishes offer corrosion resistance
- Minimal maintenance beyond periodic cleaning
- Slimmer profiles allow longer spans
However, aluminium can feel visually cold if not softened with planting or timber accents. It also carries a higher upfront fabrication cost.
Hardwood Pergolas
- Warm, tactile appearance
- Naturally integrates with garden environments
- Can weather attractively if allowed to silver
Yet hardwood requires regular sealing or oiling to prevent cracking and moisture ingress. Structural movement due to humidity changes must also be accounted for in joint detailing.
Pros
- Provides flexible shade and privacy
- Architecturally lighter than a full pavilion
- Enhances visual layering and depth
- Encourages airflow
Cons
- Limited rain protection compared to solid roofs
- Timber versions demand ongoing maintenance
- Poorly aligned slats can create uneven light patterns
A pergola with adjustable screens works best where climate requires modulation rather than full enclosure. When designed with orientation awareness and material clarity, it introduces comfort without compromising spatial openness.
Raised Patio Platform
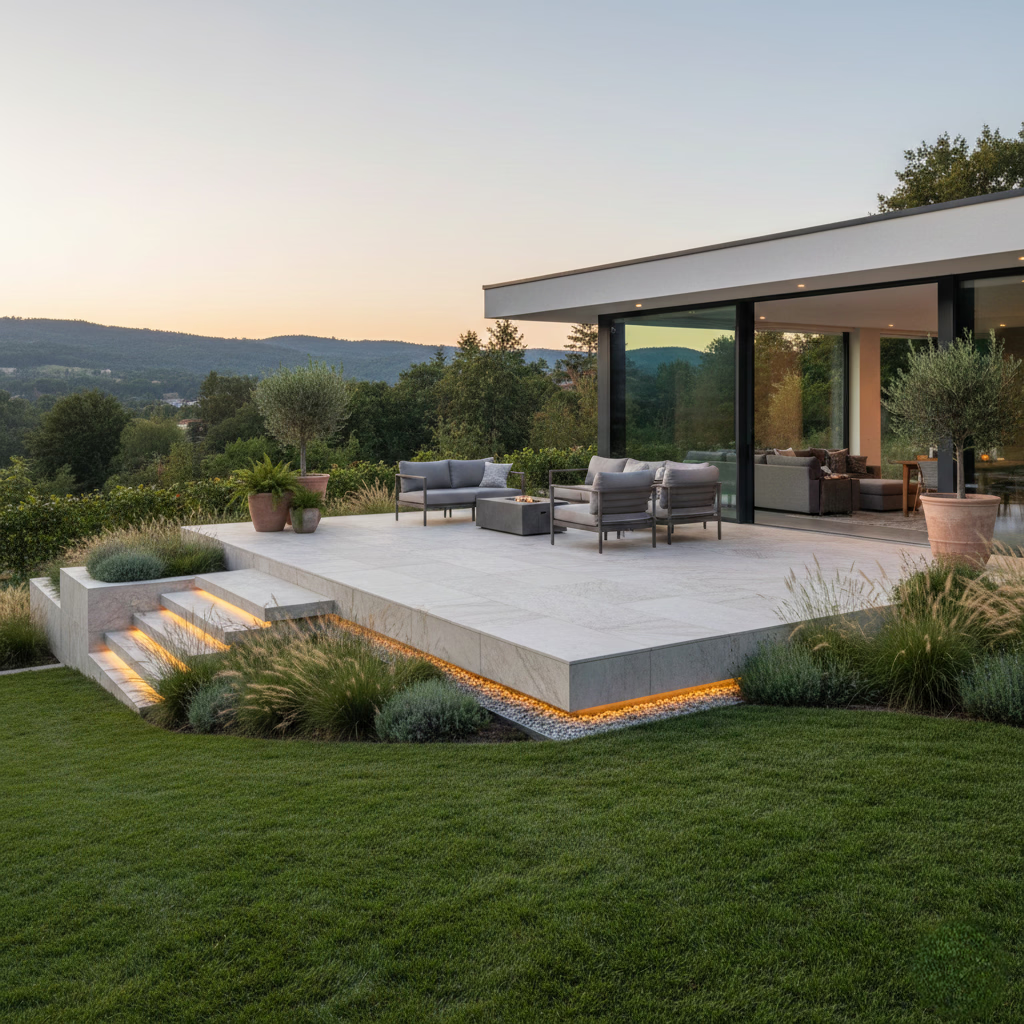
A raised patio platform is often the most practical solution for gardens with natural slope or uneven terrain. Rather than fighting the landform, I prefer working with it, using elevation change to create a defined outdoor room that feels intentionally placed within the landscape. A gentle lift also improves visibility, keeps seating areas drier, and strengthens the architectural relationship between house and garden.
For sloped gardens, structural depth beneath the finished surface becomes critical. I typically design raised platforms with a build-up thickness between 300 mm and 600 mm (12 inches to 24 inches), depending on soil stability, load expectations, and drainage strategy. Lightly sloped sites may only require compacted hardcore and reinforced slab construction, while steeper gradients may need retaining edge walls or engineered subframes.
In one residential project with a rear garden dropping roughly 420 mm (16.5 inches) across a 6 m (20 ft) run, we installed a raised porcelain patio platform supported by a reinforced concrete substructure. The elevation aligned the patio floor almost flush with the interior living room threshold, improving indoor-outdoor continuity. Beneath the platform, we created a ventilated drainage layer using graded aggregate and perforated channel drainage leading to a soakaway system. This prevented water pooling during heavy rainfall and protected the slab from hydrostatic pressure.
Drainage is the invisible intelligence of any raised patio. I specify a minimum fall of 1:60 across the finished surface, directing water away from the building envelope. Waterproof membranes or tanking layers are advisable where the patio sits directly above habitable spaces or storage voids. Edge detailing is equally important. Metal flashing or stone coping should overhang structural walls slightly to prevent water tracking.
Material weight must also be considered. Natural stone or thick porcelain slabs add dead load, which influences foundation specification. Structural engineers are often involved when patio platforms exceed 400 mm (16 inches) elevation or span large areas without intermediate support.
Pros
- Resolves uneven or sloped garden terrain
- Improves drainage performance
- Creates visually grounded outdoor architecture
- Can align patio level with interior flooring
Cons
- Higher construction complexity
- Requires professional structural and waterproofing design
- Cost increases with elevation height
- Future access to substructure may be limited
A raised patio platform is most successful when it appears naturally anchored to the house rather than visually imposed upon the garden. The best designs feel as though the land was gently shaped to receive the living space, not forced to accommodate it.
Layout & Zoning Ideas
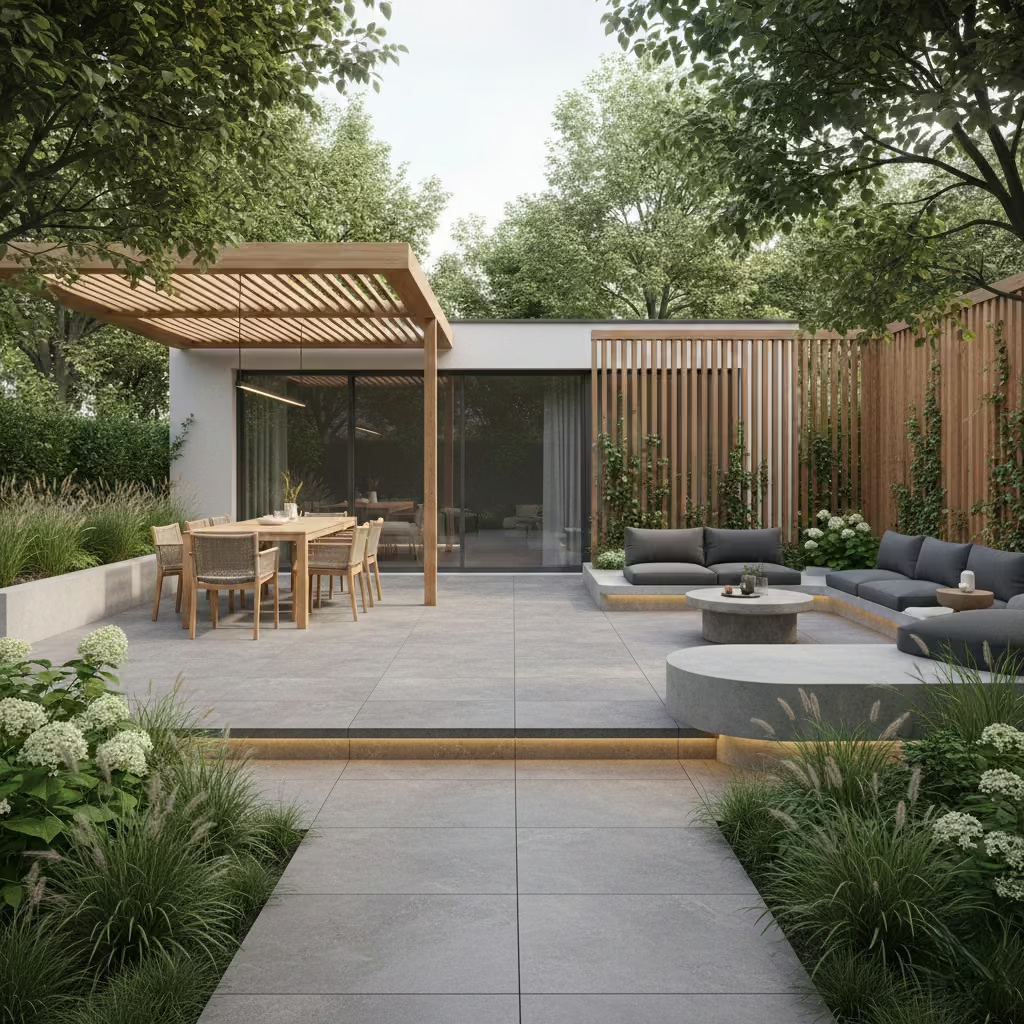
Patio design reaches its highest clarity when space is organised around use rather than appearance. I approach layout planning as a quiet exercise in behavioural architecture, observing how people move, sit, gather, and transition between indoor and outdoor life. Zoning introduces rhythm and purpose. Dining, lounging, and circulation areas should feel naturally separated while remaining visually connected. When spatial logic is resolved early, even modest patios feel generous and comfortable across years of daily use.
Defined Dining Zone
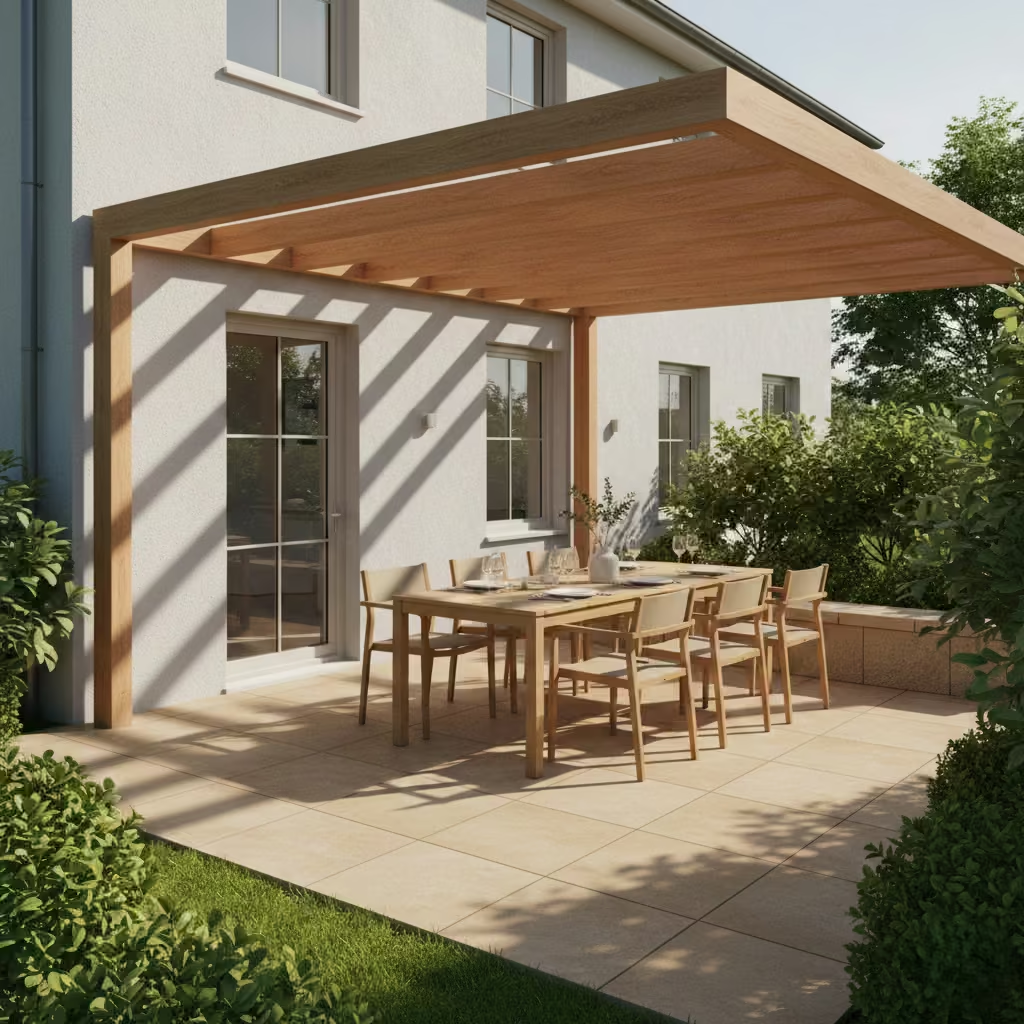
A dedicated dining zone gives a patio social gravity. Rather than placing a table wherever it fits, I design dining areas as anchored spatial rooms that support comfortable conversation, chair movement, and service circulation. The goal is not maximum seating capacity, but a proportion that allows people to sit, stand, and move without constant adjustment.
For practical comfort, I rarely go smaller than 3 m x 3.5 m (10 ft x 12 ft) for a six-seat outdoor dining setting. This footprint accommodates a standard rectangular table and allows chairs to be pulled back naturally. If the table is circular, slightly tighter spatial efficiency is possible, but I still prefer maintaining breathing space around the perimeter.
Circulation clearance is equally important. I maintain at least 900 mm (36 inches) of walking space around the table edges where possible. This allows two people to pass without awkward side-stepping and prevents furniture from feeling crowded against walls, planting beds, or structural screens. In high-usage family patios, I sometimes increase clearance to 1 m (40 inches) along primary movement paths.
On a 5 m x 6 m (16 ft x 20 ft) patio project, we positioned the dining zone adjacent to the kitchen exit threshold to shorten service distance. The table sat slightly offset from the pavilion centreline, allowing a 1.1 m (43 inch) circulation spine leading toward the lounge area. This subtle shift improved natural flow and prevented the dining set from visually dominating the space.
Material durability is essential for dining zones because they experience the highest mechanical wear. I favour large-format porcelain or sealed natural stone surfaces that resist staining from food, wine, and moisture.
Pros
- Encourages organised social gathering
- Improves furniture usability and movement comfort
- Reduces visual clutter
- Supports long-term functional planning
Cons
- Requires careful dimensional planning in small patios
- Fixed dining zones may limit future layout changes
- High-quality outdoor dining furniture can be costly
A well-defined dining zone should feel like an intentional outdoor room rather than a table placed against a wall. When proportion, circulation, and material resilience are balanced, the space supports everyday life with quiet confidence.
Sunken Lounge Area
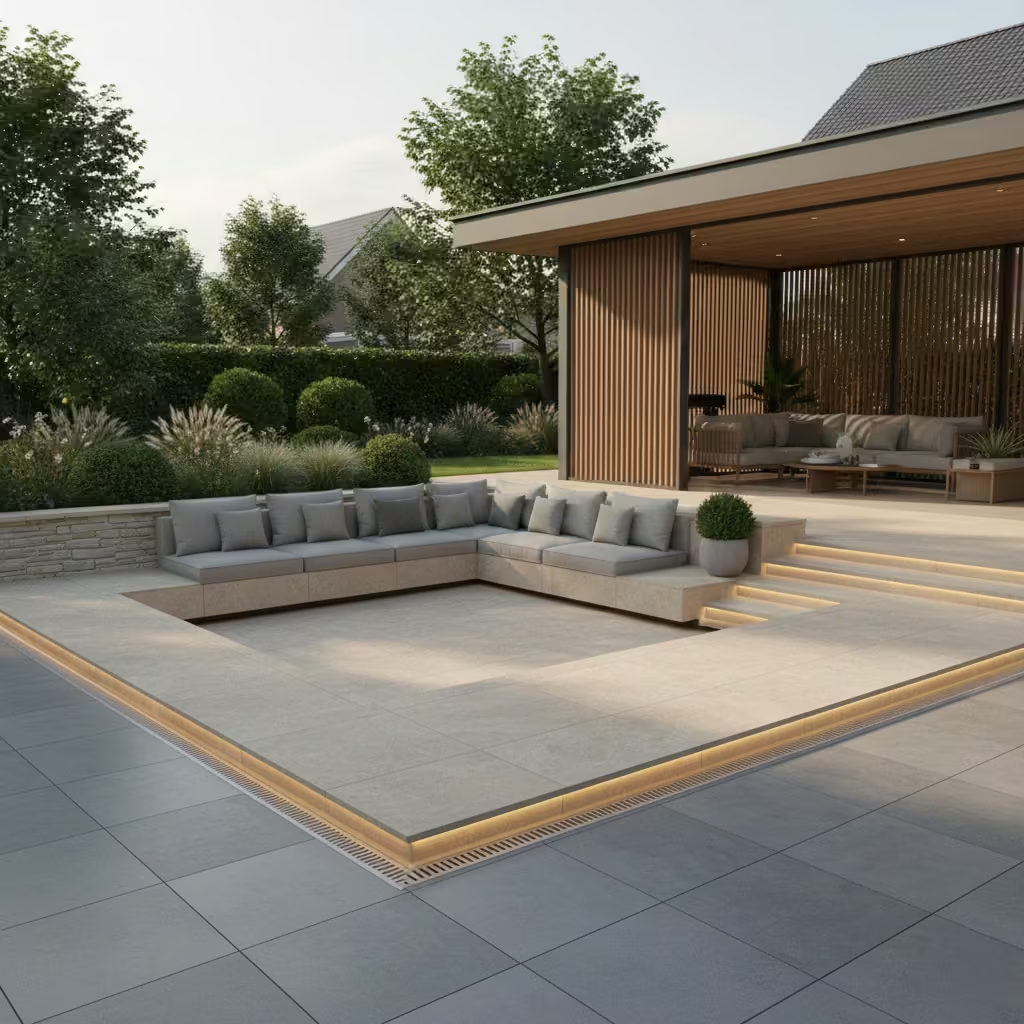
A sunken lounge area creates one of the most psychologically intimate experiences in patio design. The subtle step-down signals a change of function without relying on walls or heavy screening. I use this technique when the goal is to make outdoor seating feel grounded, sheltered, and slightly withdrawn from movement zones. The depth of enclosure is gentle rather than absolute, which is why it works so well in contemporary residential gardens.
The typical step-down range is 300 mm to 450 mm (12 inches to 18 inches). Anything shallower loses spatial definition, while deeper drops begin to feel architectural rather than residential. The seating platform itself should maintain a clear floor width of at least 2.4 m (8 ft) for a small lounge arrangement, increasing to 3 m (10 ft) for sectional furniture.
One of the functional advantages is wind buffering. By lowering the seating plane below the main patio level, air movement across occupants is reduced. On a coastal suburban project, we lowered the lounge zone by 350 mm (14 inches) on the leeward side of a pavilion structure. The result was noticeable. Evening breezes that previously disrupted conversation passed gently above head height, creating a calmer microclimate.
Waterproofing and drainage detailing are critical because sunken spaces behave like shallow basins if construction is careless. I always specify perimeter channel drainage around the step-down edge, connected to the main site drainage system or soakaway. The structural slab beneath the lounge must include damp-proof membrane layers and proper tanking if the platform sits close to soil or retaining walls.
Surface gradient remains necessary even in sunken zones. I maintain a minimum fall of 1:80 toward hidden drainage channels to prevent standing water after rainfall. Drain outlets should be accessible for maintenance because leaf debris and outdoor dust gradually accumulate.
Furniture selection also matters. Sunken lounges benefit from low-profile seating with weather-resistant cushions stored indoors during heavy rain. I avoid placing wooden furniture directly on the slab unless treated feet or isolation pads are installed.
Pros
- Creates intimate, sheltered seating atmosphere
- Improves wind protection naturally
- Enhances spatial layering and luxury perception
- Encourages relaxed conversational seating
Cons
- Higher construction complexity
- Requires careful waterproofing design
- Drainage blockage can cause long-term damage
- Accessibility may be reduced for elderly users
A sunken lounge area succeeds when it feels quietly embraced by the patio architecture. The best examples never appear dramatic; they simply feel comfortable, protected, and naturally settled into the landscape.
Outdoor Kitchen Wall
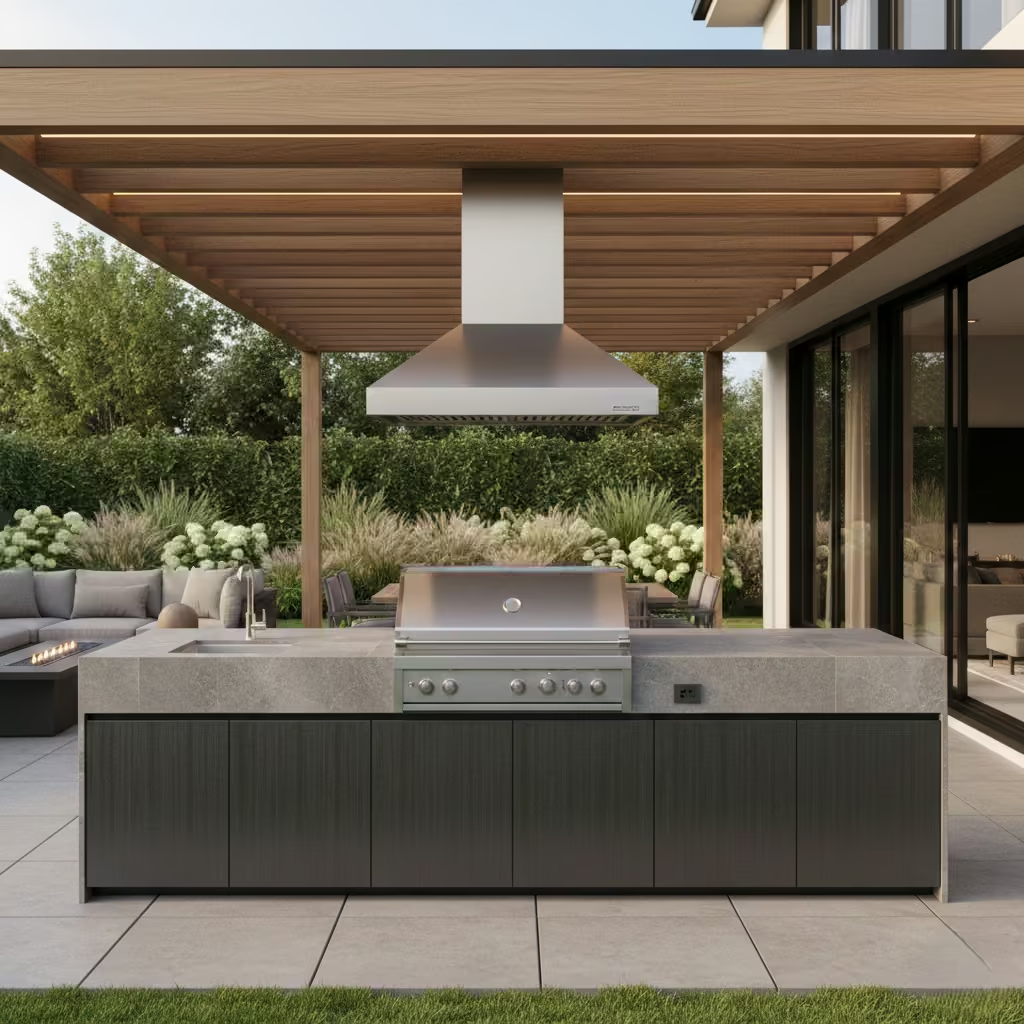
An outdoor kitchen wall turns a patio into a true living and entertaining platform. I approach this element as service architecture rather than decoration. The layout must support cooking workflow, moisture exposure, and cleaning practicality. Outdoor kitchens perform best when treated as durable working surfaces instead of indoor-style culinary replicas.
Linear vs L-Shaped Layouts
A linear kitchen arrangement works well in narrow patios or against boundary walls. It simplifies plumbing and electrical routing while keeping movement paths open. I typically recommend a minimum continuous counter run of 2.4 m (8 ft) for functional operation. This length allows placement of a cooking zone, preparation surface, and small storage compartment without crowding.
An L-shaped layout is more suitable for larger patios where social cooking is expected. The design separates heat-intensive appliances from preparation space and creates a natural corner enclosure. I often use the shorter leg of the “L” for sinks or refrigeration units and reserve the longer run for cooking and plating.
On a 5 m x 4 m (16 ft x 13 ft) entertainment patio project, we installed a 2.8 m (9 ft) linear kitchen wall beneath a pavilion roof. The grill sat centrally, with 600 mm (24 inch) preparation counter space on each side. This allowed the client to cook while still participating in conversation with guests seated nearby.
Moisture protection is essential. Outdoor cabinetry should be constructed using marine-grade or exterior-rated materials. Countertops perform best in sealed natural stone or high-quality porcelain surfaces with low porosity. I always ensure that power outlets are weather-shielded and positioned slightly away from direct splash zones.
Ventilation must also be considered. Heat-generating appliances should have at least 900 mm (36 inches) clearance above if enclosed by overhead structure.
Pros
- Supports social cooking and entertainment
- Increases property lifestyle value
- Reduces indoor kitchen traffic during gatherings
- Creates architectural focus along patio edge
Cons
- High installation cost for plumbing, gas, and electrical work
- Requires weather-resistant material specification
- Appliances may need seasonal protection covers
- Maintenance demands are higher than indoor kitchens
An outdoor kitchen wall works best when it feels permanently grounded in the architecture of the patio rather than added as equipment. When workflow, moisture resistance, and spatial comfort are balanced, it becomes a natural extension of everyday living.
You May also Like: 25 Outdoor Patio Ideas That Elevate Everyday Living
Multi-Level Patio Design
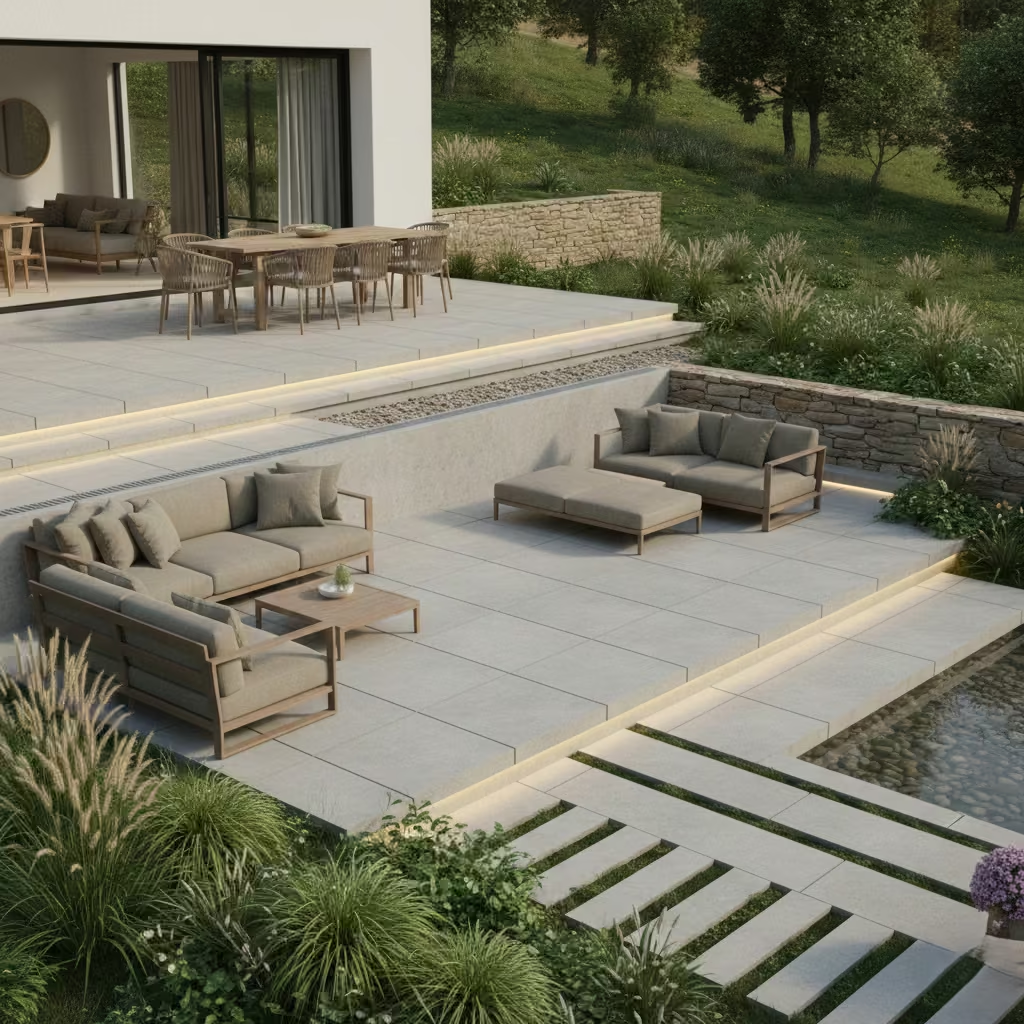
Multi-level patio design introduces spatial hierarchy through subtle topographical change rather than decorative separation. I use level variation when a single flat surface would feel visually monotonous or when different activities require gentle psychological and functional zoning. The human eye reads level shifts as room boundaries, even when walls are absent.
Natural zoning through elevation change is particularly effective for separating dining, lounge, and circulation areas. A typical residential patio might use a 150 mm to 300 mm (6 to 12 inches) step difference between zones. This is enough to signal spatial transition without creating accessibility barriers. I prefer keeping primary social areas closer to interior floor level for smoother indoor-outdoor continuity.
On a hillside garden project with a 5% natural slope, we created a three-tier patio composition. The upper level, aligned with the house threshold, served as dining space. The middle level, dropped by 220 mm (9 inches), became the lounge platform. The lowest level, another 180 mm (7 inches) down, supported planting and water feature integration. The visual result was calm and balanced, avoiding the feeling of stacked terraces.
Structural retaining considerations are critical in multi-level patios. Retaining walls must be engineered to resist lateral soil pressure, especially where soil moisture fluctuates. I typically specify reinforced concrete or blockwork retaining structures with proper drainage backfill. Weep holes and geotextile layers help prevent hydrostatic pressure buildup behind walls.
Surface drainage must follow level transitions. Each terrace should have independent fall gradients, usually around 1:80 to 1:60, directing water toward channel drains rather than over step edges. Poorly detailed multi-level patios often fail due to hidden water accumulation rather than structural weakness.
Material consistency across levels maintains architectural coherence. I often repeat one primary paving material across tiers, altering only format size or laying pattern to reinforce unity.
Pros
- Creates sophisticated spatial layering
- Naturally separates functional zones
- Improves visual interest and landscape integration
- Enhances garden architecture quality
Cons
- Higher construction and engineering cost
- Requires careful waterproofing and drainage design
- Accessibility challenges for mobility-limited users
- Retaining structure must be professionally designed
Multi-level patios work best when elevation changes feel measured and deliberate. The best designs do not announce themselves loudly; they guide movement and attention with quiet architectural confidence.
Indoor-Outdoor Threshold Continuity
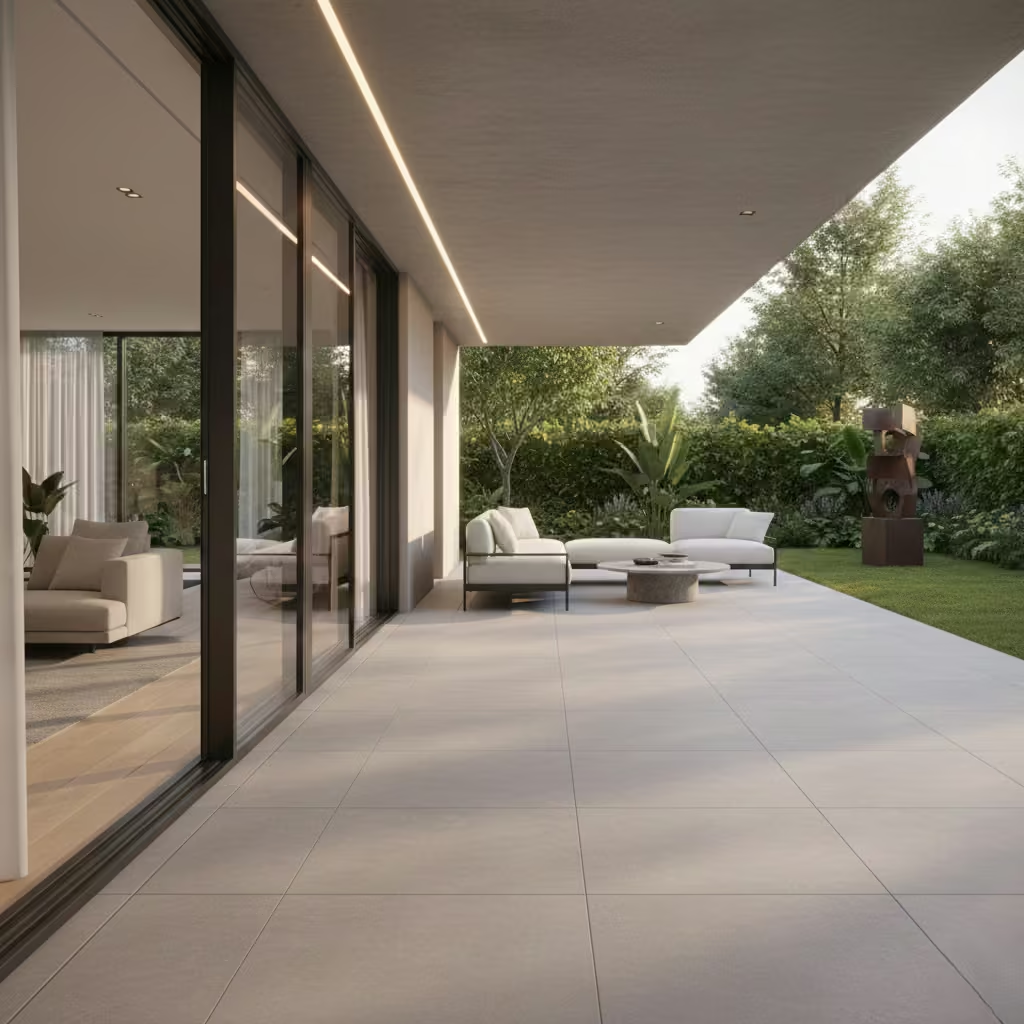
Threshold continuity is one of the most refined expressions of contemporary patio design. I treat the transition between interior and exterior floors as a single architectural gesture rather than a break in construction. When executed well, the boundary between house and garden feels visually dissolved, encouraging movement and reinforcing spatial unity.
Flush floor transitions are the defining feature of this approach. Interior flooring and patio surfaces are aligned to minimise step changes, typically allowing a tolerance of 5 mm to 15 mm (0.2 to 0.6 inches) for structural movement and drainage performance. Achieving this requires precise coordination between builder, waterproofing specialist, and flooring installer before construction begins. I prefer slightly recessed exterior drainage channels positioned immediately outside the threshold to prevent water tracking back into the interior space.
Slip resistance becomes especially important because continuity encourages frequent movement across the boundary. Outdoor paving should generally meet R11 or R12 slip resistance ratings in residential applications. In wetter climates, textured porcelain or honed natural stone finishes provide a good balance between safety and aesthetic clarity. I avoid highly polished exterior surfaces because they tend to lose traction when wet, even if visually striking.
On a contemporary garden project, we aligned a 6 m (20 ft) sliding glass living room wall with a porcelain patio surface laid on a reinforced slab. The interior tile thickness and exterior paving bed were coordinated so that the finished heights matched within 10 mm (0.4 inches). A concealed linear drain sat 250 mm (10 inches) outside the glazing line, collecting rainwater before it could reach the threshold. The result was a seamless visual flow from sofa seating to outdoor dining.
Expansion joint detailing is essential because outdoor surfaces experience thermal movement. I typically specify expansion joints every 3 m to 4 m (10 ft to 13 ft) in porcelain or stone patio fields, with flexible polyurethane sealants rather than rigid grout. The joint pattern should be planned as a design element rather than hidden randomly.
Climate exposure also influences material selection. In regions with large seasonal temperature swings, allowing slight movement tolerance prevents cracking and tile debonding over time.
Pros
- Creates premium architectural continuity between house and garden
- Improves accessibility and movement flow
- Enhances perceived interior space size
- Supports modern minimalist design language
Cons
- Requires high construction precision
- Waterproofing failure risk if detailing is poor
- Higher installation cost due to coordination requirements
- Thermal movement must be carefully managed
Indoor-outdoor threshold continuity is less about eliminating the boundary and more about softening it. The most successful schemes do not hide the transition; they make movement between spaces feel effortless and natural.
Material-Led Patio Ideas
Material choice defines how a patio ages, feels underfoot, and interacts with light, weather, and daily use. I approach patio materials not as surface decoration but as long-term environmental performance systems. Stone, porcelain, timber, and polished concrete each carry distinct thermal behaviour, maintenance demands, and visual character. The best patios are those where material honesty is allowed to speak quietly over time, allowing weathering, sunlight, and touch to deepen rather than diminish their presence. When material selection aligns with climate and lifestyle, the patio evolves gracefully rather than showing premature wear.
Large Format Porcelain Slabs
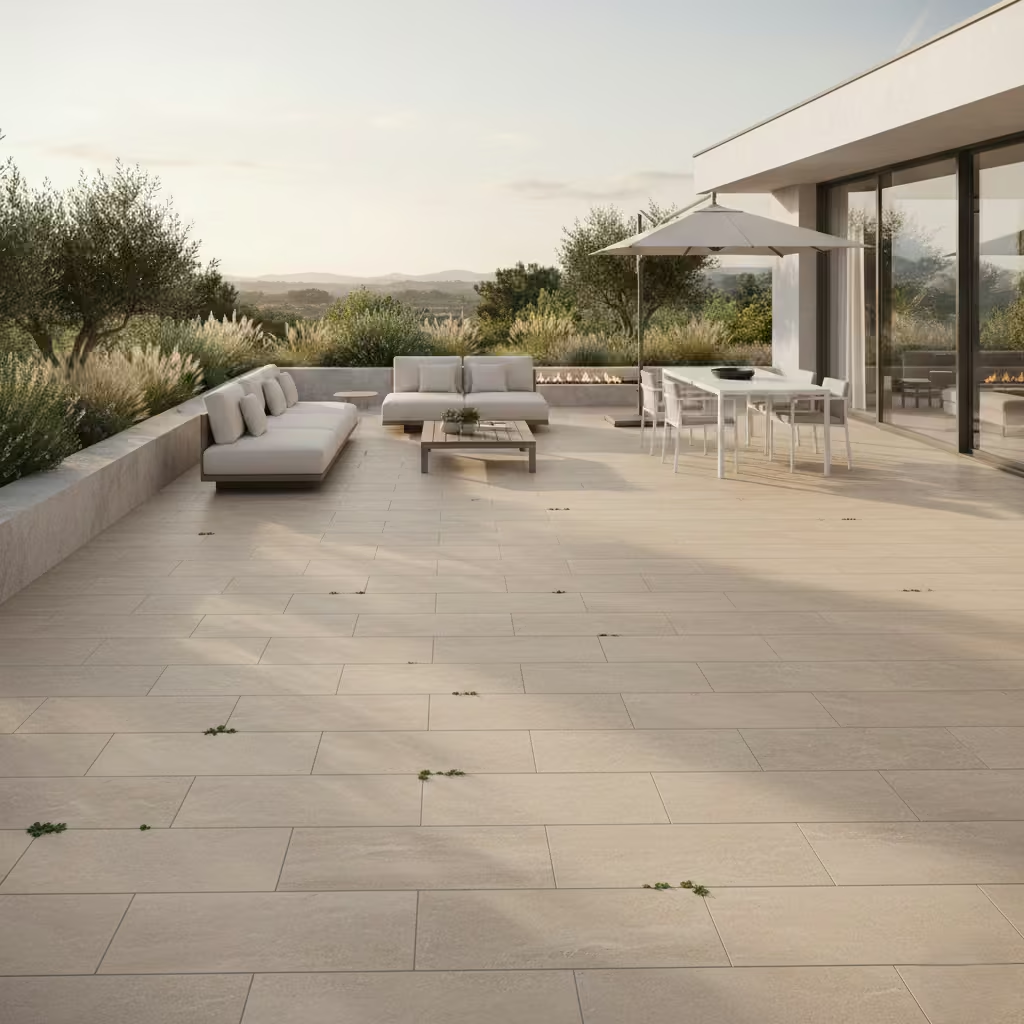
Large-format porcelain slabs are among the most technically reliable patio surfacing choices in contemporary residential design. I often specify them when the objective is visual calmness, structural durability, and low maintenance across long time horizons. Their strength lies in material consistency rather than decorative complexity.
Common residential formats include 900 × 900 mm (35 × 35 inches) and 600 × 1200 mm (24 × 47 inches) slabs. The larger module size reduces grout line density, which creates a cleaner visual field and minimises dirt accumulation. From a spatial perception standpoint, fewer joints also make compact patios feel slightly more expansive. Installation requires a perfectly prepared sub-base because large slabs reveal settlement or uneven bedding more visibly than smaller units.
Slip resistance is critical for outdoor safety. I typically recommend porcelain surfaces rated R11 or higher for family patios exposed to rain or garden moisture. Textured or micro-rough finishes provide traction without sacrificing architectural refinement. Highly glossy exterior porcelain is avoided because it tends to become slippery when wet and can produce glare under strong sunlight.
Heat absorption is another important performance factor. Light-toned porcelain reflects more solar radiation, reducing surface temperature during summer afternoons. Darker shades absorb more heat and may feel uncomfortable under bare feet in direct sunlight. On a west-facing 4 m x 5 m (13 ft x 16 ft) patio project, we selected a warm beige porcelain with medium reflectance. Surface temperatures were noticeably lower than neighbouring dark stone patios during peak afternoon exposure.
Substructure preparation is essential for large-format porcelain. I usually specify a compacted hardcore base of 150 mm to 200 mm (6 to 8 inches), followed by a reinforced sand-cement or pedestal support system depending on site conditions. Flexible adhesive bedding is necessary to accommodate micro-movement.
Pros
- Highly durable and weather resistant
- Low porosity reduces staining risk
- Minimal maintenance requirement
- Clean, contemporary architectural appearance
- Good long-term colour stability
Cons
- Higher material and installation cost
- Requires precise sub-base leveling
- Poor installation can cause slab cracking or hollow sound
- Replacement of a single damaged slab can be difficult
Large-format porcelain works best when the goal is a restrained, confident patio surface that supports architecture rather than competing with it. The material should feel permanent, balanced, and quietly reliable under daily outdoor life.
Natural Stone Flagstone
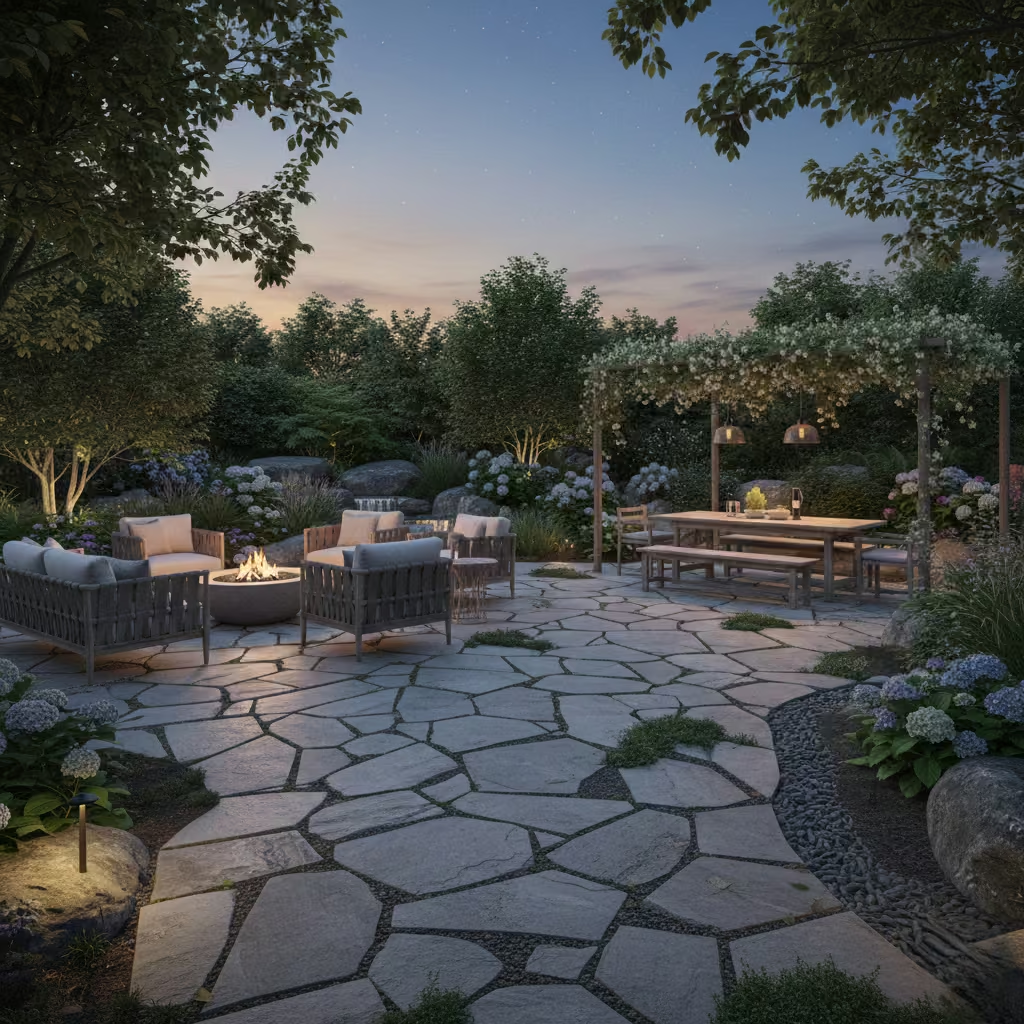
Natural stone flagstone introduces a tactile, landscape-integrated quality that manufactured surfaces often struggle to replicate. I use flagstone when the patio is intended to age visibly with the garden rather than remain visually static. The character of natural stone lies in subtle variation, mineral depth, and weathering behaviour over time.
Limestone vs Sandstone Performance
Limestone offers a quieter, more architectural appearance with relatively consistent colour tones ranging from soft grey to warm cream. It is dense and generally comfortable underfoot because of its smoother crystalline structure. In residential patios, limestone performs well in moderate climates with controlled moisture exposure. However, it can be susceptible to acid rain or acidic cleaning agents, which may slowly erode surface definition.
Sandstone tends to feel more organic and landscape-like, displaying layered grain textures and warmer earth tones. Its slightly higher porosity compared to limestone means it can absorb moisture more readily. In freeze-thaw climates, poorly sealed sandstone may experience surface flaking over time. I prefer high-density sandstone variants for exterior patios rather than softer sedimentary grades.
On a 6 m x 4 m (20 ft x 13 ft) garden patio project, we selected light grey limestone flagstones with irregular edge cuts. The stone thickness was 30 mm to 40 mm (1.2 to 1.6 inches), laid on a reinforced mortar bed. The goal was to allow natural tonal variation while maintaining structural stability under frequent foot traffic.
Sealing and Long-Term Aging
Sealing is essential but should not eliminate natural ageing. I usually specify penetrating sealers rather than surface coatings because they protect pores without creating artificial gloss. Initial sealing is applied after installation and grout curing, followed by maintenance resealing every 2 to 3 years depending on exposure.
Natural stone develops character as it weathers. Gentle colour softening, minor surface smoothing, and micro-patina formation are signs of healthy ageing. I avoid aggressive pressure washing because it can strip mineral surface layers and accelerate uneven wear.
Drainage design is particularly important for flagstone patios. I maintain a surface fall of 1:60 toward channel drains to prevent standing water between stone joints. Joint width is typically 6 mm to 12 mm (0.25 to 0.5 inches), filled with permeable grout or fine aggregate to support infiltration.
Pros
- Authentic natural landscape appearance
- Unique variation between stones
- Good thermal comfort in shaded zones
- Ages gracefully with garden environment
Cons
- Higher maintenance compared to porcelain
- Requires sealing and periodic inspection
- Quality varies significantly by quarry source
- Installation must be highly skilled to avoid settlement
Natural flagstone patios are most successful when they are allowed to behave like landscape geology rather than engineered flooring. The best examples feel as though the stone was revealed, not installed.
Timber Deck and Stone Hybrid
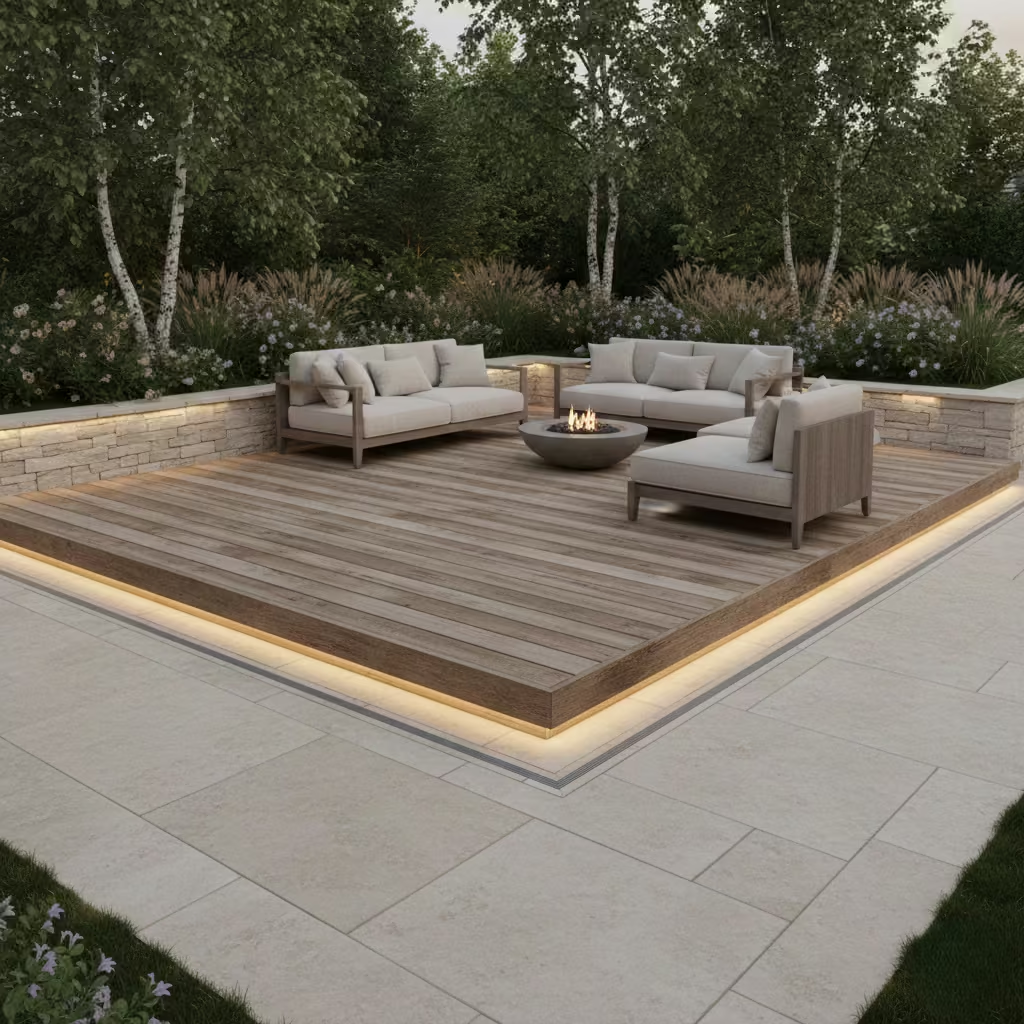
Combining timber decking with stone paving creates one of the most balanced patio compositions I work with. The strategy is not about mixing materials for visual contrast alone, but about merging tactile warmth with structural permanence. Timber softens the rigidity of hardscape surfaces, while stone provides grounding stability and defines architectural edges.
The most successful hybrids follow a clear hierarchy. I usually place timber in zones intended for sitting, barefoot movement, or lounge relaxation, while stone forms circulation paths, boundaries, or service edges. This prevents timber wear from concentrated foot traffic and allows the patio to age evenly.
In one residential garden project, we used 140 mm (5.5 inch) wide composite-style timber deck boards arranged in a linear running pattern for a 4 m x 3 m (13 ft x 10 ft) lounge platform. The perimeter was finished with a 600 mm (24 inch) band of light grey limestone flagstone. This stone frame visually anchored the deck, protected timber edges from moisture runoff, and created a subtle architectural border that prevented furniture from visually “escaping” the platform.
The junction between timber and stone requires careful detailing. I maintain a small expansion buffer of 5 mm to 10 mm (0.2 to 0.4 inches) because timber naturally moves with humidity and temperature changes. Hidden metal edging profiles are often used to hold stone paving securely while allowing deck boards to breathe.
Durability depends heavily on timber species or composite quality. Hardwood decking can develop an elegant silver patina over time if left untreated, which many homeowners appreciate. Composite boards reduce maintenance but sometimes lack the natural thermal feel of real timber underfoot.
Drainage must flow away from timber sections because prolonged moisture contact accelerates material degradation. I typically specify slightly higher elevation for deck platforms, roughly 20 mm to 40 mm (0.8 to 1.6 inches) above adjacent stone paving.
Pros
- Creates tactile and visual warmth
- Defines functional zones naturally
- Reduces the visual hardness of large patios
- Supports long-term landscape integration
Cons
- Requires precise edge detailing
- Timber needs periodic maintenance or quality composite alternatives
- Poor drainage design can shorten deck lifespan
- Material colour aging may differ between stone and timber
A timber and stone hybrid patio succeeds when the materials are allowed to perform their natural roles. The stone grounds the architecture, while the timber brings human comfort and warmth to the outdoor living experience.
Patterned Brick Patio
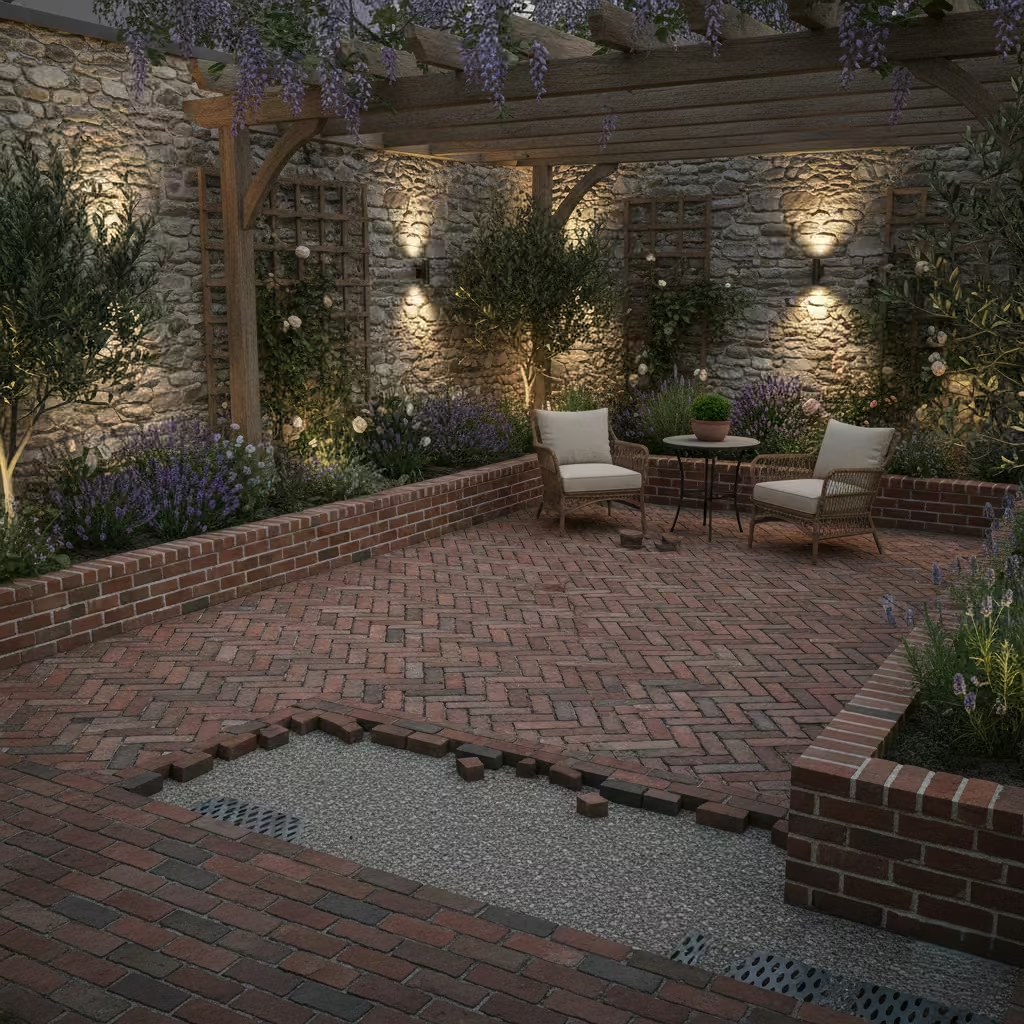
Patterned brick patios carry a timeless architectural character that works particularly well in traditional or transitional garden settings. Among laying patterns, herringbone is my preferred choice when structural performance and visual durability are priorities. The interlocking geometry distributes load forces laterally, making the surface more resistant to movement under repeated foot traffic and furniture placement.
The herringbone pattern, typically laid at 45° or 90°, improves mechanical stability compared to straight-running bonds because individual bricks lock against adjacent units. This is especially useful in entertainment patios where movement and loading are concentrated around seating and dining areas. I often specify clay engineering bricks or high-density paving bricks because they resist moisture penetration and colour fading better than soft masonry bricks.
Sub-base preparation is critical for brick patios because the material is comparatively thin and reveals ground settlement quickly if the foundation is weak. I usually design a compacted sub-base depth of 200 mm to 300 mm (8 inches to 12 inches) depending on soil stability and expected load. The structure typically consists of:
- Compacted hardcore or crushed stone layer for load distribution
- Sharp sand or cement-stabilised bedding layer for leveling
- Flexible jointing sand to allow micro-movement
On a 5 m x 4 m (16 ft x 13 ft) courtyard patio project, we installed engineering brick pavers on a 250 mm (10 inch) compacted aggregate base. After three seasons of exposure, settlement movement remained minimal because drainage and compaction were carefully controlled.
Brick patios require controlled drainage gradients. I maintain a surface fall of approximately 1:60 toward channel drains or garden beds. Poor water runoff management is the most common cause of joint erosion and moss accumulation in brick paving.
Pros
- Classic, long-lasting architectural appearance
- Herringbone pattern improves structural strength
- Compatible with traditional and contemporary homes
- Individual bricks are replaceable if damaged
Cons
- Labour-intensive installation
- Requires careful base compaction
- Higher joint maintenance compared to large slab systems
- Colour variation can occur between production batches
Polished Concrete Surface
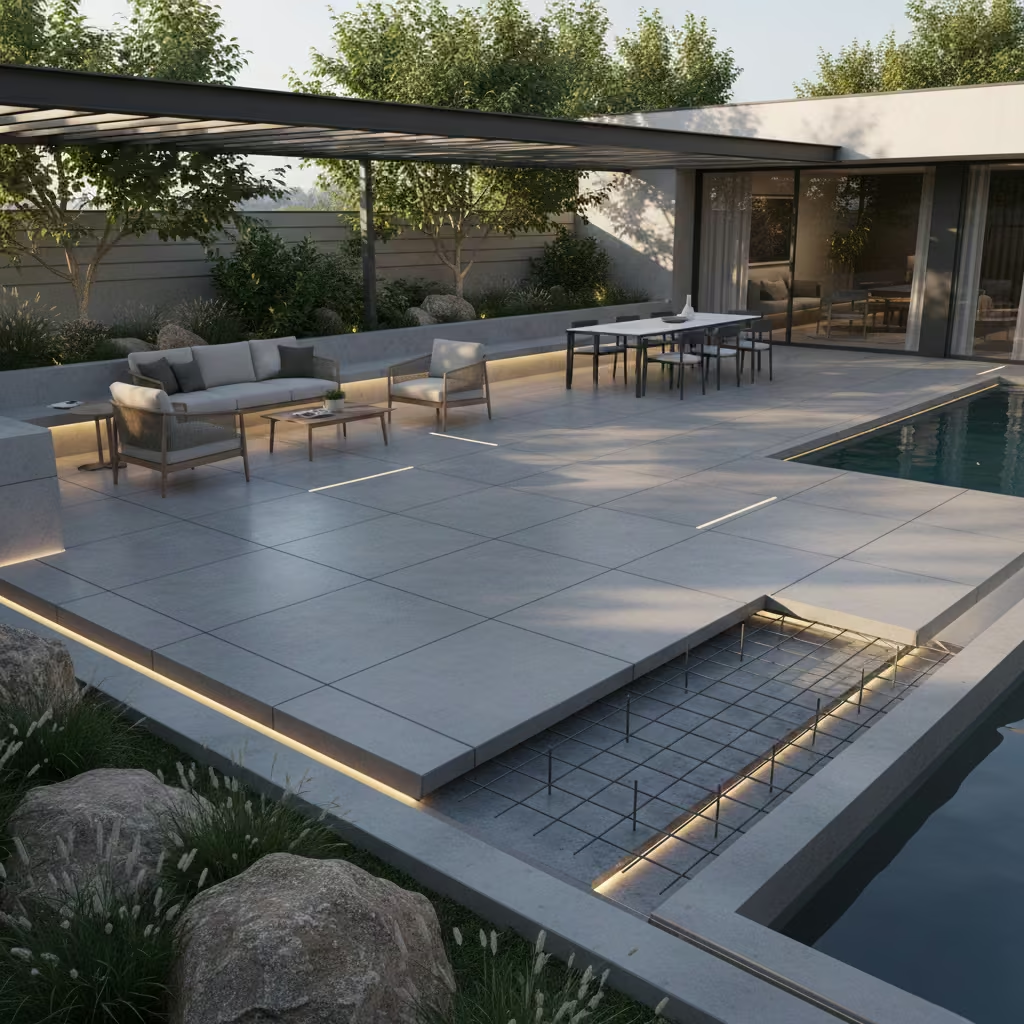
Polished concrete patios appeal to contemporary architectural restraint. I use this material when the design intention is continuity, solidity, and quiet surface reflection rather than texture-driven expression. Properly executed polished concrete feels monolithic, almost geological, and can age gracefully if structural movement is controlled.
Expansion joint planning is essential because concrete behaves dynamically under temperature variation. I typically specify control joints every 3 m to 4 m (10 ft to 13 ft) in residential patio slabs, depending on reinforcement design and local climate range. These joints should align with architectural lines such as glazing edges, wall returns, or furniture zoning boundaries so they appear intentional rather than fragmented.
Joint width is usually maintained between 6 mm and 12 mm (0.25 to 0.5 inches), filled with flexible polyurethane sealant rather than rigid mortar. This allows the slab to expand and contract without transferring stress into adjacent sections. Poor joint detailing is the primary reason polished concrete surfaces develop visible cracking patterns over time.
Thermal mass is one of polished concrete’s strongest performance characteristics. The material absorbs solar heat during daytime exposure and releases it slowly after sunset, creating stable microclimate comfort in lounge zones. On a south-facing 6 m x 5 m (20 ft x 16 ft) patio project, surface temperatures remained noticeably more stable than adjacent dark stone paving during evening use.
Cracking risk is reduced through proper reinforcement and curing discipline. I prefer fibre-reinforced concrete or steel mesh reinforcement combined with controlled curing for at least 7 to 14 days before polishing begins. Rapid drying is avoided because moisture loss too quickly can induce surface micro-fractures.
Surface finish grade also matters. A medium-level polish (not mirror gloss) is ideal for outdoor use because it balances aesthetic refinement with slip resistance. Highly reflective finishes can produce glare and become slippery when wet.
Pros
- Extremely durable structural surface
- Low maintenance when sealed properly
- Excellent thermal stability
- Modern architectural appearance
- Long service life
Cons
- Installation requires skilled workmanship
- Visible cracking may occur if joints or curing are poor
- Surface can feel hard underfoot without furniture zoning
- Repairing polished sections is difficult once finished
Polished concrete works best when treated as structural landscape architecture rather than decorative flooring. When reinforcement, curing, and joint strategy are resolved early, the material offers remarkable longevity and architectural calm.
Comfort & Atmosphere Enhancements
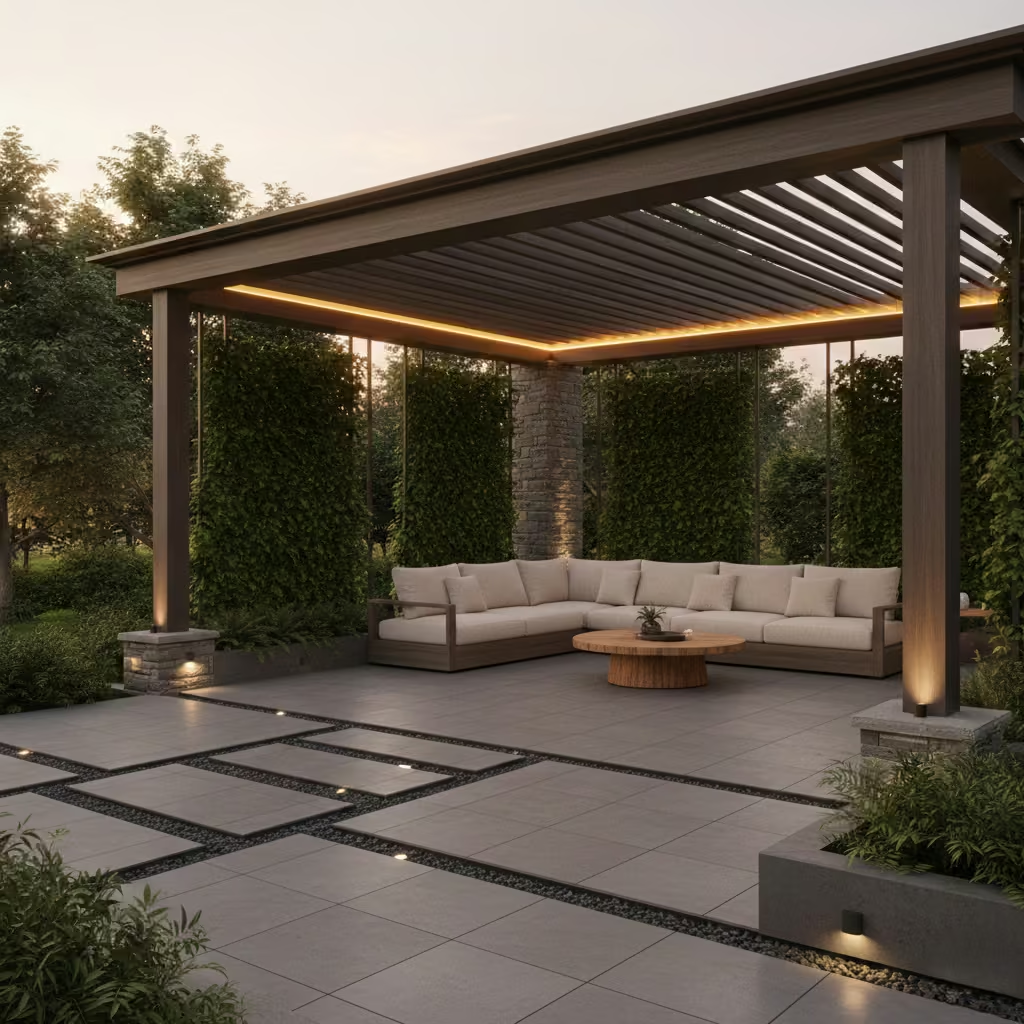
Comfort in patio design is rarely achieved through objects alone. It emerges from the orchestration of light, airflow, temperature moderation, and spatial enclosure. I treat atmosphere as a quiet performance layer that operates continuously in the background. The most successful patios do not announce comfort; they simply allow people to remain outside longer without noticing why they feel relaxed. Layered lighting, thermal control, seating ergonomics, and visual softness work together to create this effect. When atmosphere is carefully tuned, the patio transitions naturally from daytime living space to evening retreat.
Integrated Outdoor Lighting Plan
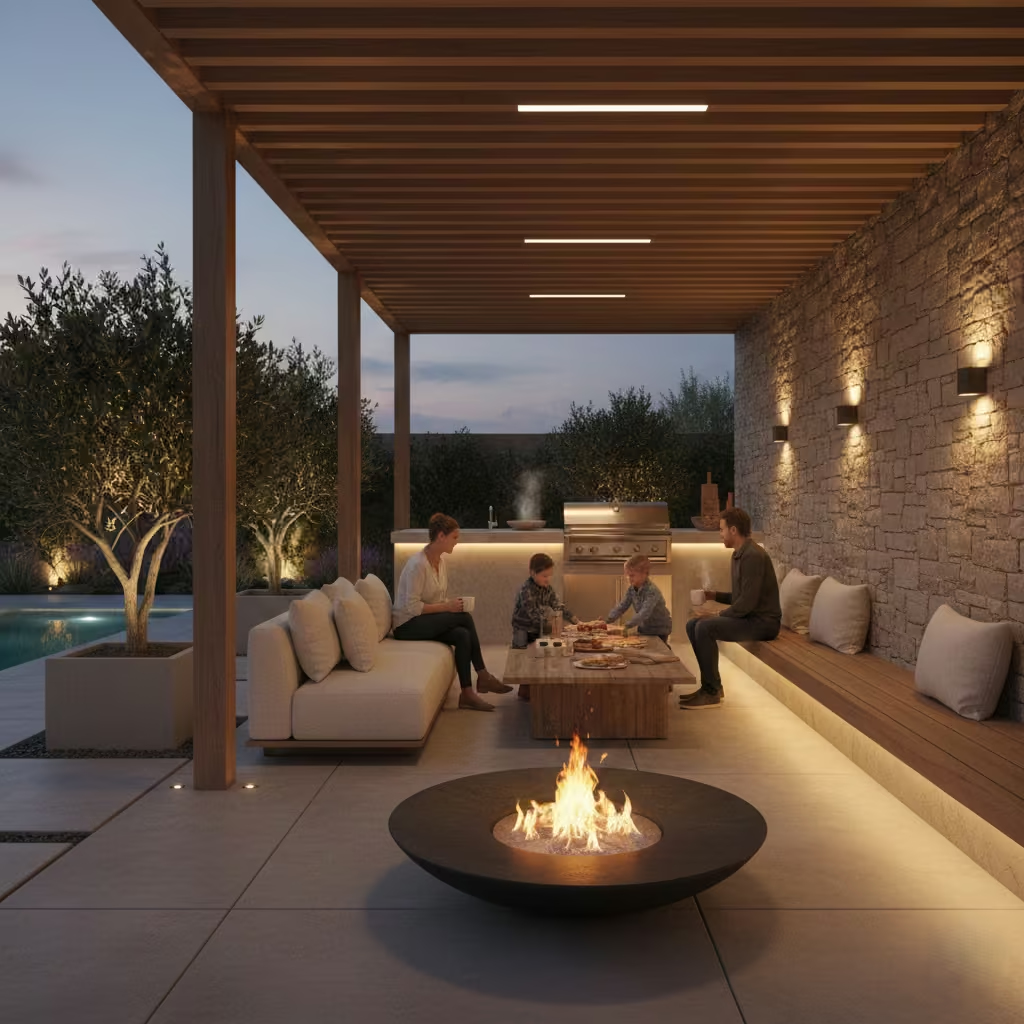
Lighting is one of the most powerful yet often understated tools in patio design. I approach outdoor lighting as a layered composition rather than a collection of fixtures. The goal is to guide movement, soften architectural edges, and extend usable time into the evening without creating visual noise. A successful lighting scheme feels natural to the human eye, supporting activity while preserving night-time calm.
Layered lighting is built on three fundamental levels.
Task Lighting focuses on functional activity zones. I usually position weather-rated downlights beneath pavilion ceilings, kitchen preparation walls, and threshold walking routes. These lights must be positioned to avoid glare when seated. Beam spread is typically narrow to medium, concentrating illumination where hands and movement require clarity.
Ambient Lighting establishes the overall mood of the patio. Warm wall washers, concealed cove strips, and low-level step lighting create a gentle luminosity that allows people to navigate and socialise comfortably. For residential patios, I strongly prefer 2700K colour temperature lighting because it mimics the softness of sunset light and preserves natural skin tone perception.
Accent Lighting adds architectural focus. I use it sparingly on planting textures, fireplace walls, or water feature surfaces. The intention is not decoration but visual anchoring. Too many accent points weaken spatial hierarchy.
On a 5 m x 6 m (16 ft x 20 ft) contemporary family patio project, we installed 2700K LED strip lighting concealed beneath pavilion roof beams and along a 300 mm (12 inch) raised step edge. The warm temperature created a subtle golden glow that reflected softly off porcelain paving. During evening gatherings, guests rarely noticed the fixtures themselves; they simply felt comfortable staying outside longer. The client later reported that the patio became their primary social space after sunset.
Fixture placement height matters. Wall lights were mounted approximately 1.8 m to 2.1 m (6 ft to 7 ft) above floor level to avoid eye-level glare while seated. Dimmable drivers were specified so brightness could be adjusted depending on activity.
Outdoor lighting must also account for durability. I prioritise IP65 or higher weather protection ratings and corrosion-resistant housing materials, especially in humid or coastal environments.
Pros
- Extends patio usability into evening hours
- Improves safety and movement clarity
- Enhances architectural mood and depth perception
- Supports social and entertainment activities
Cons
- Requires electrical planning during construction stage
- Poor fixture placement can cause glare
- Maintenance and bulb replacement access must be considered
- High-quality outdoor lighting systems increase upfront cost
Integrated lighting should never dominate the patio. The best schemes work quietly, shaping atmosphere with restraint and confidence, allowing architecture, landscape, and human presence to remain the true focus.
Built-In Seating with Storage
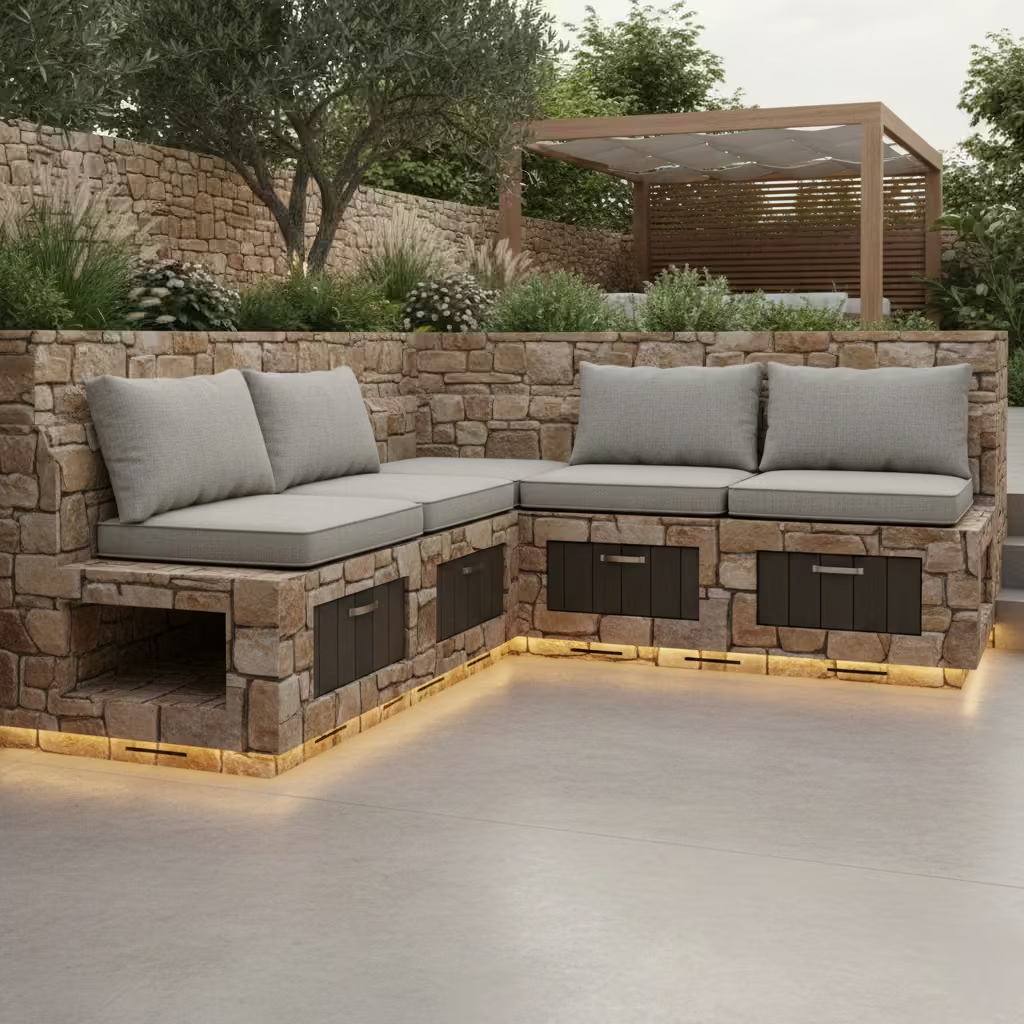
Built-in seating is one of the most practical ways to stabilise patio composition while increasing functional efficiency. I favour fixed seating when the goal is architectural order, because it removes the visual fragmentation caused by scattered furniture. When integrated correctly, seating becomes part of the structure rather than an afterthought placed on top of it.
Seat height is critical for long-term comfort. I typically design outdoor benches at 450 mm (18 inches) from finished floor level, which aligns closely with standard dining chair ergonomics. Depth of seating surface should fall between 450 mm and 600 mm (18 to 24 inches) depending on whether the user prefers upright social seating or relaxed lounge posture. Backrest inclination is usually set around 95° to 105° relative to the seat surface to balance support and openness.
Storage integration beneath seating is valuable for outdoor living. I often design hollow masonry or moisture-resistant timber compartments accessed through lift-up lids or hinged panels. Internal storage voids must include ventilation openings because trapped humidity is the main cause of cushion and fabric degradation.
On a 4 m x 3 m (13 ft x 10 ft) pavilion patio project, we built a perimeter stone bench running along two walls with a 1.2 m (4 ft) internal storage cavity beneath. Garden cushions, lightweight throws, and seasonal outdoor accessories were stored inside. Small drainage vents were installed at low points to prevent condensation accumulation during winter months.
Weather-resistant cushion strategy matters as much as structural seating design. I recommend quick-drying foam cores wrapped in marine-grade or outdoor-rated fabric with UV protection. Cushions should ideally be stored indoors during prolonged rainfall. Even high-quality outdoor textiles degrade faster when permanently exposed to moisture cycles.
Material selection for seating structure depends on patio style. Rendered masonry provides thermal stability and permanence. Hardwood offers warmth but requires sealing maintenance. Composite cladding can reduce upkeep but may lack tactile authenticity.
Pros
- Reduces need for movable furniture
- Creates clean architectural lines
- Provides hidden storage space
- Improves patio spatial organisation
Cons
- Fixed design limits future layout flexibility
- Cushion maintenance is necessary
- Poor ventilation can lead to moisture issues
- Construction cost is higher than standalone benches
Built-in seating works best when it feels naturally carved into the patio architecture rather than attached as an accessory. The most successful designs invite people to sit without drawing attention to how the seat was constructed.
Outdoor Heating Strategy
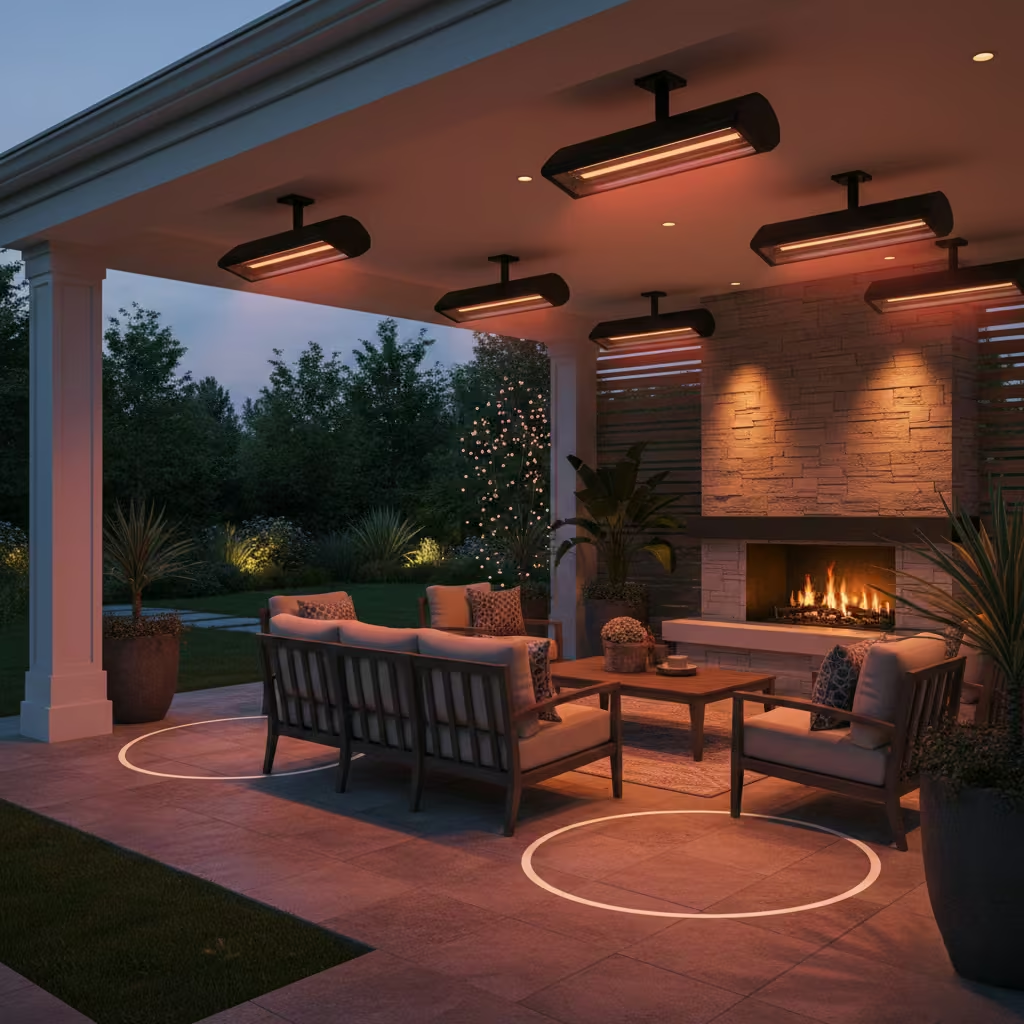
Outdoor heating extends patio usability into cooler evenings and shoulder seasons. I approach heating design as microclimate engineering rather than equipment placement. The objective is to stabilise perceived temperature within seating zones while maintaining visual and architectural balance.
Infrared Heaters vs Fire Features
Infrared heaters are my preferred solution for controlled thermal performance. They operate by transmitting radiant heat directly to people and surfaces rather than warming surrounding air. This makes them highly efficient in open patios where wind movement would otherwise disperse warmth. Wall-mounted or ceiling-integrated infrared units are typically cleaner architecturally because they avoid floor clutter.
I usually specify infrared heaters rated between 1.5 kW and 3 kW for residential patio use. Coverage depends on mounting height and environmental exposure. As a general guide, a 2 kW infrared heater positioned at 2.2 m to 2.5 m (7 ft to 8 ft) height can comfortably serve a seating zone of approximately 6 m² to 10 m² (65 ft² to 108 ft²) under sheltered conditions.
Fire features, such as fireplaces or gas fire tables, contribute more to atmosphere than precise thermal control. They create radiant warmth combined with psychological comfort through visible flame presence. However, wind exposure significantly affects performance. I use fire features mainly in enclosed or pavilion-style patios where airflow can be moderated.
On a 5 m x 6 m (16 ft x 20 ft) pavilion patio project, we installed two 2 kW infrared ceiling heaters positioned diagonally above the lounge seating. The heaters were angled slightly inward toward the seating cluster. During autumn evenings, occupants reported comfortable warmth even when ambient temperature dropped below 12°C (54°F).
Coverage Zones per Heater Rating
- 1.5 kW heater → approximately 4 m² to 6 m² (43 ft² to 65 ft²)
- 2 kW heater → approximately 6 m² to 10 m² (65 ft² to 108 ft²)
- 3 kW heater → approximately 10 m² to 15 m² (108 ft² to 161 ft²)
Multiple smaller heaters often perform better than one large unit because heat distribution becomes more uniform.
Fire features should be placed considering prevailing wind direction. On one west-facing garden project, a fireplace was shifted 1.5 m (5 ft) from the seating centreline to prevent smoke interference during evening breezes.
Pros
- Extends seasonal patio use
- Improves thermal comfort in open spaces
- Supports social gathering after sunset
- Infrared systems are energy efficient
Cons
- Electrical infrastructure required
- Fire features need wind management
- Heater placement affects effectiveness
- Initial installation cost can be high
Outdoor heating should always be integrated during patio design planning rather than added later. When heating, seating, and enclosure elements are considered together, the patio remains comfortable across changing seasons.
Privacy Screening With Planting
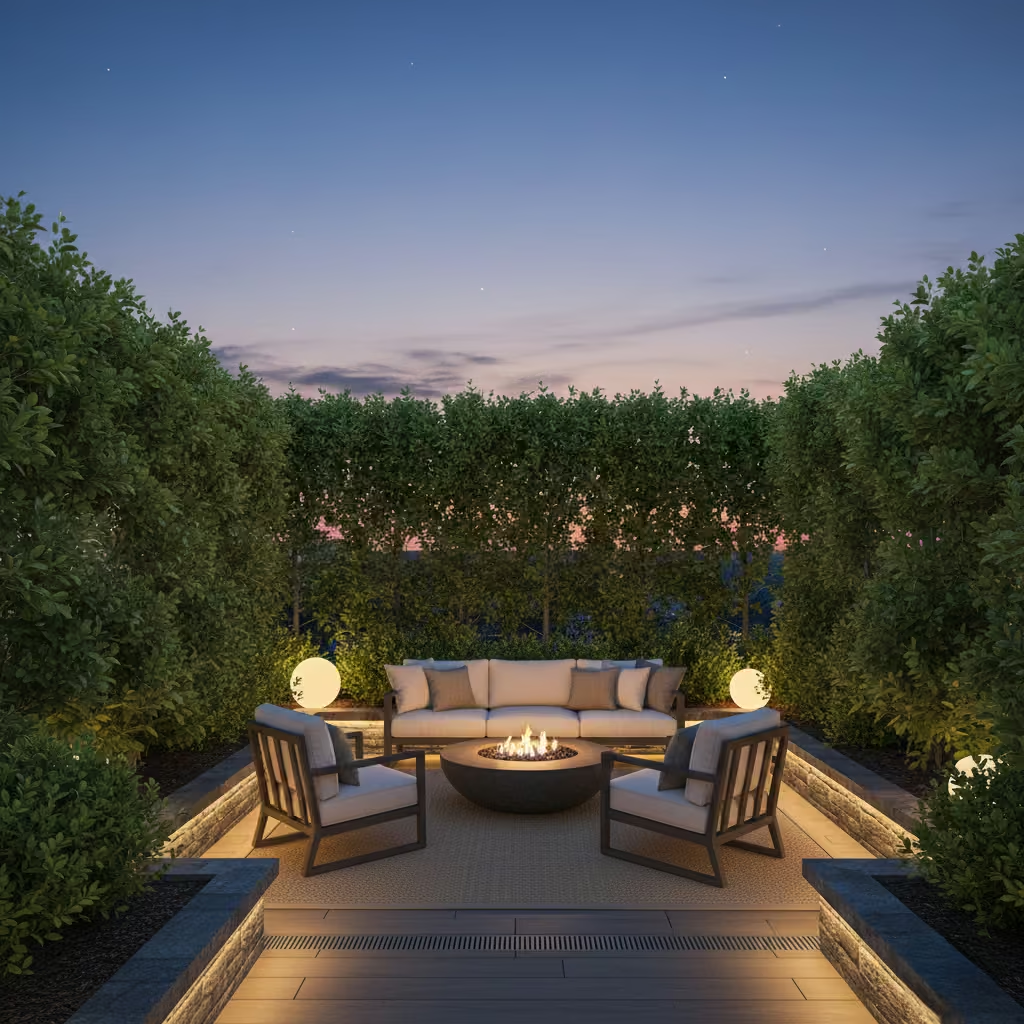
Living privacy screens are among the most elegant ways to soften patio edges without constructing hard barriers. I favour planting-based screening because it introduces movement, seasonal texture, and ecological balance while maintaining human-scale enclosure. The objective is not total visual blockage but rather a filtered boundary that protects intimacy while preserving light and airflow.
For evergreen hedge screening, I typically design planting depth between 600 mm and 900 mm (24 inches to 36 inches). This depth supports healthy root development and allows shrubs to grow dense enough to form a reliable visual barrier. Shallower beds tend to produce thin, stressed foliage, while excessively deep borders waste usable patio space.
Evergreen species are preferred because they maintain structural screening performance throughout the year. I select varieties based on local climate resilience, growth density, and pruning tolerance. Fast-growing but weak-structured plants are avoided because they often become maintenance burdens.
On a 5 m x 4 m (16 ft x 13 ft) patio project exposed to prevailing summer winds, we installed a 800 mm (31 inch) deep planting strip along the western boundary. Multi-stem evergreen shrubs were spaced roughly 400 mm to 500 mm (16 inches to 20 inches) apart. Within two growing seasons, foliage density was sufficient to reduce wind speed across the lounge zone noticeably. The vegetation functioned as a natural microclimate regulator rather than a decorative border.
Wind buffering is one of the most valuable functional benefits of planted screening. Dense foliage disrupts horizontal airflow, reducing discomfort caused by gusts across seating areas. However, airflow should not be completely blocked because stagnant air can increase humidity and encourage plant disease.
I always specify subsoil drainage beneath planting beds adjacent to patios. Waterlogged root zones damage both vegetation and structural patio edges over time. Irrigation systems should be positioned to avoid overspray onto paving surfaces.
Pros
- Creates natural, living privacy boundary
- Improves patio microclimate comfort
- Softens architectural hardscape edges
- Supports biodiversity and seasonal interest
Cons
- Requires ongoing horticultural maintenance
- Plant growth rates may vary
- Root expansion must be controlled near structures
- Full screening effect takes time to develop
Plant-based screening works best when treated as a long-term landscape layer rather than a quick visual fix. The most successful patios feel sheltered by nature rather than separated from it.
Water Feature Focal Point
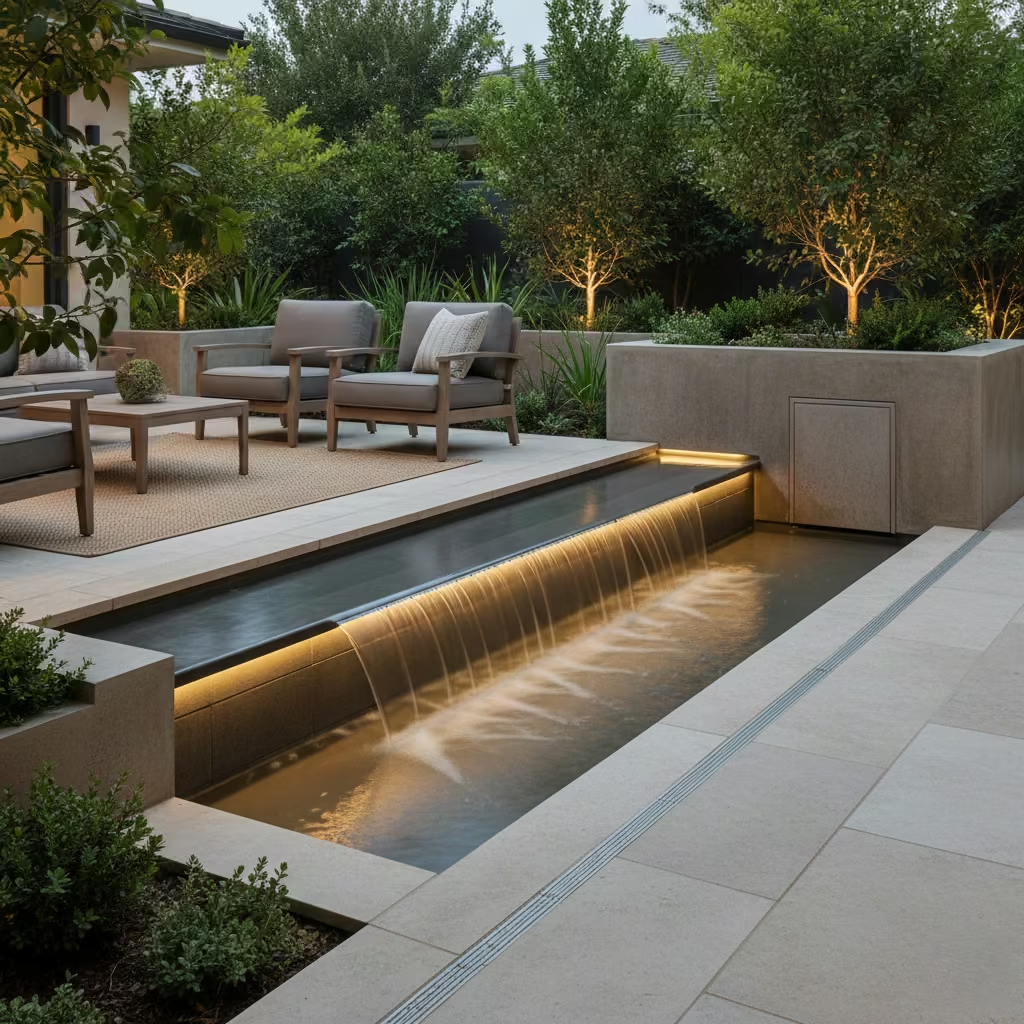
A water feature introduces movement and sound into the patio environment, transforming still space into a living sensory landscape. I use water features primarily for acoustic comfort and atmosphere control rather than ornamentation. The subtle presence of flowing water can soften external noise from traffic, neighbours, or urban activity, allowing conversation to feel more private and relaxed.
Acoustic masking is one of the most valuable benefits. The continuous, gentle sound of moving water reduces the perception of sudden environmental noises by creating a stable auditory background. I often design small recirculating cascade walls or shallow linear rills for residential patios. Flow height is kept modest, typically 300 mm to 800 mm (12 inches to 32 inches), because excessively tall drops can produce distracting noise rather than calming ambience. Pump flow rates are selected to maintain a soft, consistent movement rather than dramatic splashing.
On a 4 m x 3 m (13 ft x 10 ft) urban courtyard patio project, we installed a narrow stone water wall behind the lounge seating. The pump was tuned to create a thin sheet of falling water rather than turbulent flow. The client later noted that evening conversation felt more private despite nearby street activity, because the water sound acted as a natural acoustic filter.
Maintenance must be planned before construction begins. Water features require periodic pump inspection, filter cleaning, and algae control. I recommend installing easy-access service panels for mechanical components. Hard water deposits are common in many residential regions, so anti-scaling treatment or water softening may be necessary depending on local supply quality.
Evaporation is another practical consideration. Open water surfaces lose volume during hot weather, so automatic refill valves or regular manual topping-up should be expected. I also specify anti-slip edging materials around water features because wet surfaces increase fall risk near seating zones.
Energy efficiency matters as well. Modern low-wattage circulation pumps can operate continuously with minimal power consumption while preserving acoustic effect.
Pros
- Enhances atmospheric quality of patio space
- Provides natural acoustic masking
- Creates visual focal depth and movement
- Improves psychological comfort and relaxation
Cons
- Requires ongoing maintenance
- Pump or filtration failure affects appearance quickly
- Water quality must be monitored
- Installation cost is higher than static landscaping
A water feature should never dominate the patio. The most successful designs treat water as a quiet participant in the spatial composition, allowing light, sound, and reflection to work together to deepen the sense of outdoor calm.
Lifestyle-Focused Patio Concepts
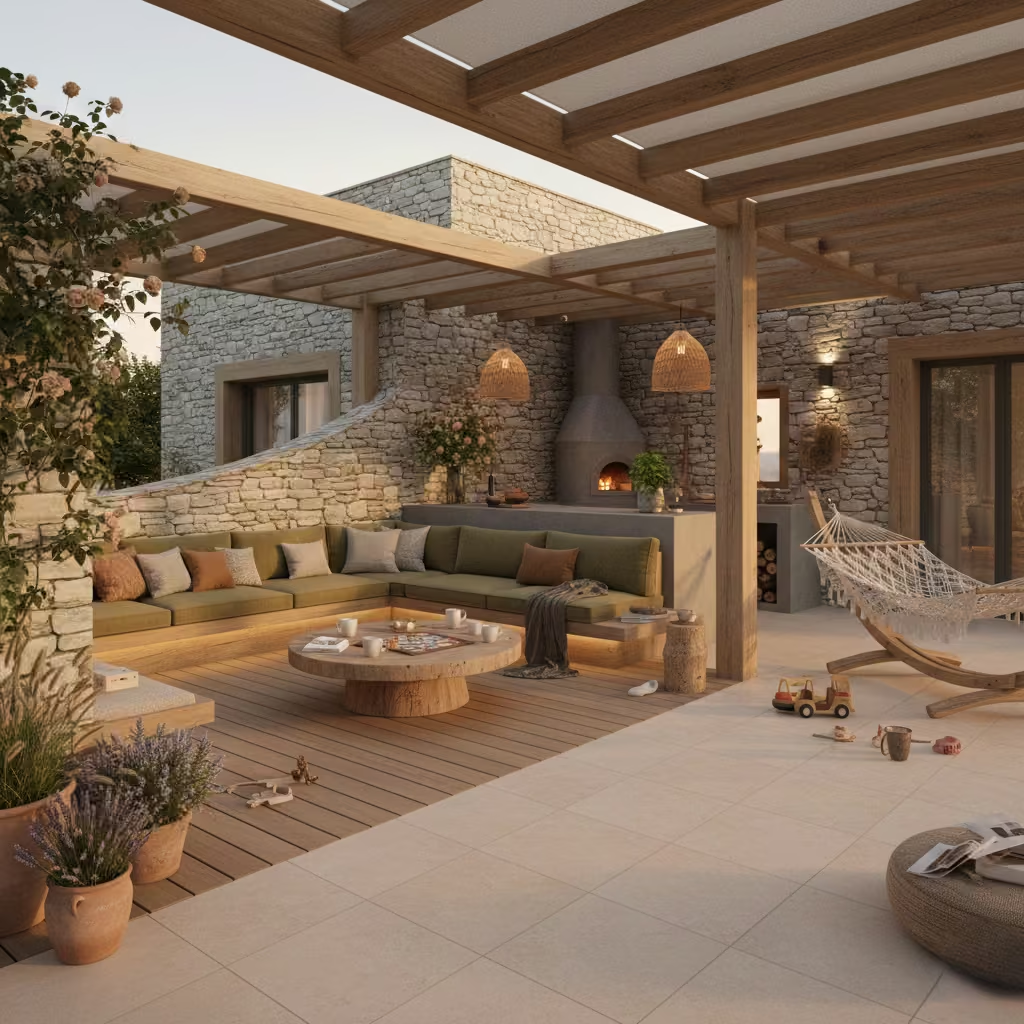
Lifestyle-focused patio design moves beyond construction detail into how space supports real daily living. I approach this stage by imagining the patio as a stage for ordinary moments rather than occasional entertainment. The best patios are not those that impress at first glance but those that quietly adapt to morning coffee, family conversation, solitary reading, and evening gatherings across many years.
Each lifestyle concept below reflects different patterns of use, yet all share the same design discipline: proportion, comfort, climate response, and material honesty. The objective is to build outdoor environments that feel natural to inhabit rather than curated to display. When lifestyle intent leads planning, patios mature gracefully with the household itself.
Minimalist Contemporary Patio
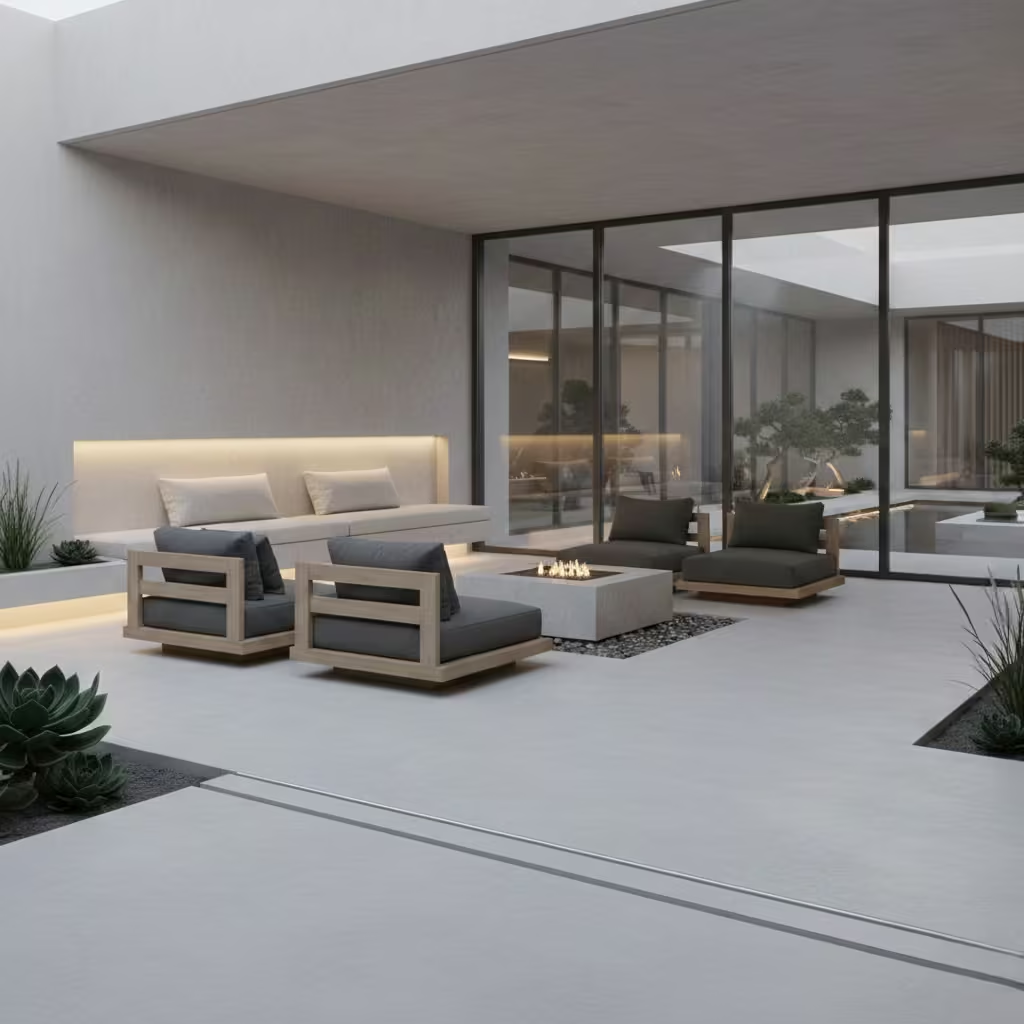
Minimalist contemporary patios are defined by restraint rather than absence. I treat this style as architectural editing, where every element must justify its presence. The intention is to create a calm outdoor room that feels measured, disciplined, and timeless rather than visually busy. Monochrome palettes are particularly effective because they allow light, shadow, and natural surroundings to become the primary visual actors.
A monochrome patio scheme typically uses subtle variations of one primary colour family. Light grey porcelain, soft concrete tones, or pale natural stone work well because they reflect daylight gently and reduce heat absorption. I often avoid sharp contrast patterns because they fracture spatial continuity. Instead, texture variation replaces colour variation. A matte or honed surface finish supports this philosophy by reducing glare and maintaining visual softness.
Clean lines are essential. Furniture is usually low-profile, with straight or gently curved geometries. Built-in seating, recessed lighting, and flush-mounted fixtures reinforce the architectural clarity of the space. On a 5 m x 4 m (16 ft x 13 ft) minimalist patio project, we concealed drainage channels along the perimeter boundary beneath a narrow stone edge strip. This allowed rainwater to be collected without interrupting the visual plane of the flooring.
Concealed drainage is one of the most important technical details in minimalist patios. Linear channel drains placed approximately 200 mm to 300 mm (8 to 12 inches) outside glazing lines prevent water tracking toward interior thresholds. Grating covers are selected to match paving colour or are positioned in shadow zones so they are not visually dominant.
Lighting is also restrained. I prefer concealed LED strip lighting beneath steps, seating edges, or pavilion beams rather than exposed fixtures. Colour temperature around 2700K maintains warmth without disturbing the neutral palette.
Pros
- Timeless architectural appearance
- Easy visual maintenance
- Enhances perception of spatial order
- Supports modern indoor-outdoor continuity
Cons
- Requires high construction precision
- Dirt and marks are more visible on monochrome surfaces
- Design mistakes are difficult to hide
- Can feel austere if lighting and planting are not balanced
The strength of a minimalist contemporary patio lies in confidence through reduction. When executed properly, the space feels calm, considered, and quietly luxurious, allowing daily life to unfold without visual distraction.
Mediterranean Sea Courtyard Style
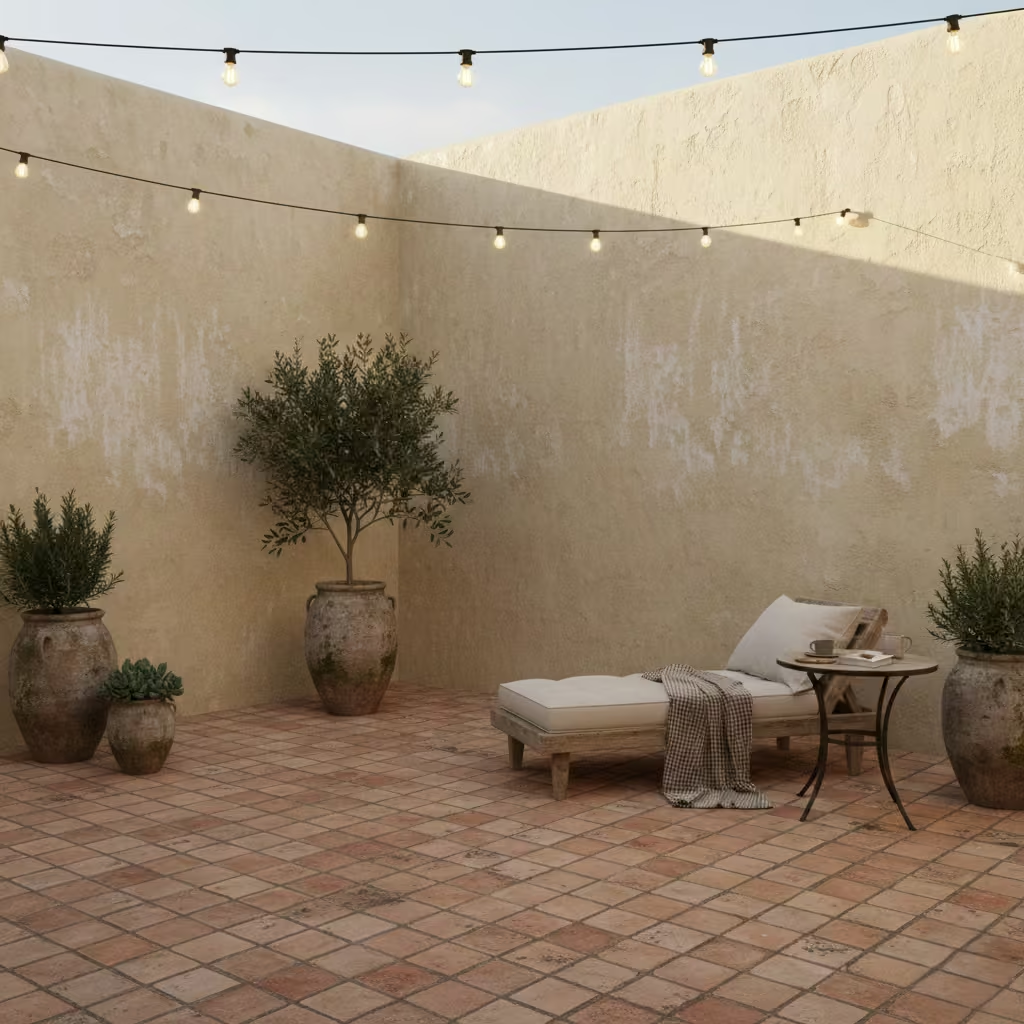
The Mediterranean courtyard style is built around climate responsiveness, material warmth, and tactile texture. I design this style when the goal is to create a sheltered outdoor room that feels connected to traditional southern European landscape architecture. The spatial character is intimate rather than expansive, emphasising enclosure, sunlight modulation, and surface warmth.
Textured plaster walls are a defining element. I prefer lime-based finishes because they breathe naturally and age gracefully. Lime render allows moisture to diffuse through the wall rather than trapping it internally, reducing long-term structural damp risk. Surface texture should be irregular but controlled. A lightly hand-trowelled finish creates soft shadow play across walls as sunlight moves during the day.
Terracotta elements provide colour and material continuity with traditional courtyard construction. Terracotta paving tiles are typically 20 mm to 30 mm (0.8 to 1.2 inches) thick and perform well in warm climates because they absorb heat slowly and release it gradually in the evening. I often integrate terracotta as seating caps, planter borders, or flooring accents rather than covering the entire surface.
On a residential courtyard project measuring 4 m x 5 m (13 ft x 16 ft), we applied lime-based render to three boundary walls at a thickness of approximately 12 mm to 15 mm (0.5 to 0.6 inches). The render was finished in a soft off-white tone to reflect daylight into the centre of the space. Terracotta paving was installed in a simple running bond pattern. The client wanted the courtyard to feel like a quiet summer retreat rather than a decorated outdoor room.
The natural performance of lime render is particularly valuable. It develops subtle patina over time, showing gentle colour variation caused by sunlight and weather interaction. Unlike synthetic coatings, lime plaster does not peel but slowly matures visually.
Planting in Mediterranean courtyard design is usually restrained. I favour olive-like evergreen species, lavender, or compact ornamental shrubs planted in 600 mm (24 inch) deep borders to maintain spatial clarity without overwhelming the architecture.
Pros
- Warm, timeless architectural character
- Excellent microclimate comfort in sunny regions
- Material ageing looks natural and intentional
- Supports quiet, retreat-like atmosphere
Cons
- Lime render requires skilled application
- Terracotta surfaces may need sealing in wet climates
- Colour variation occurs during weathering
- Maintenance is moderate but continuous
Mediterranean courtyard patios succeed when they feel naturally formed by climate and light rather than constructed to imitate style. The best examples appear settled, sun-worn, and peacefully permanent, as if the space has always belonged there.
Rustic Timber and Stone Retreat
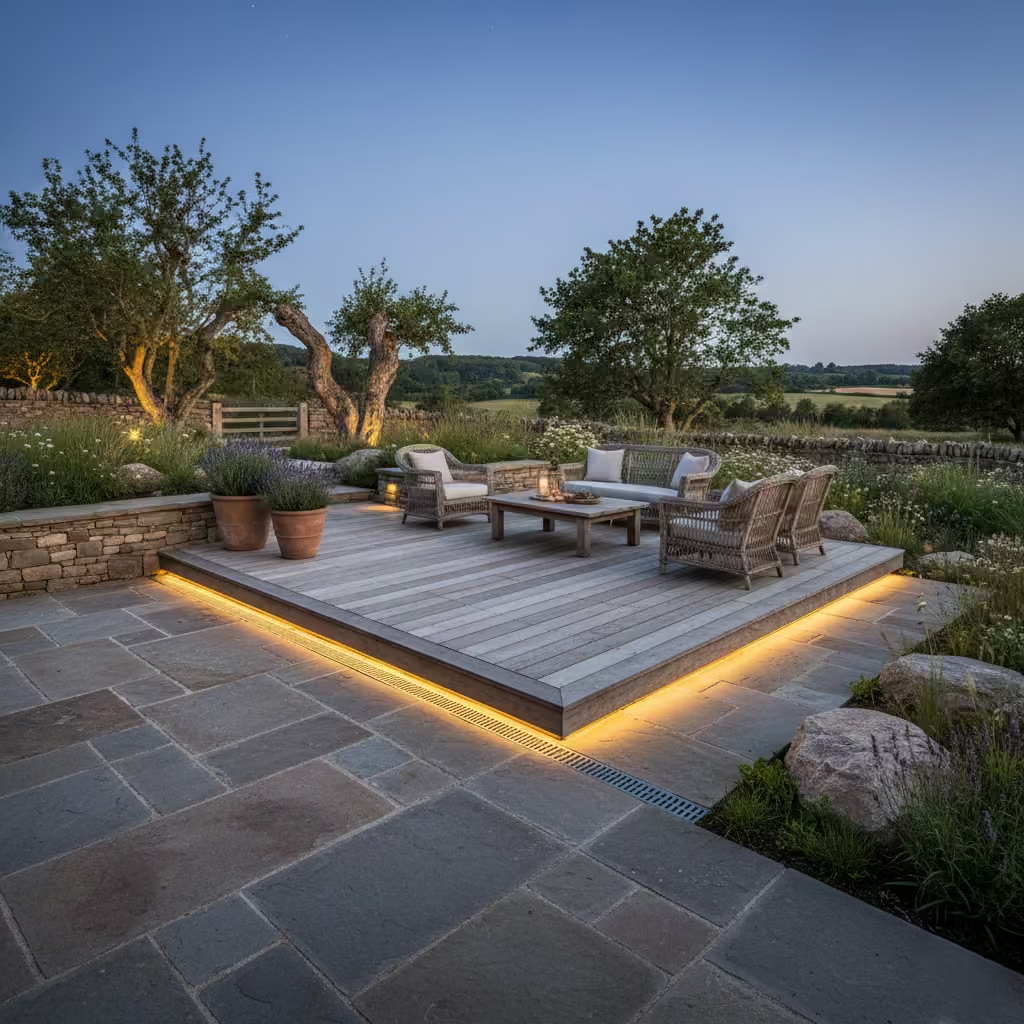
The rustic timber and stone retreat style draws its strength from material authenticity and natural ageing. I often associate this approach with landscape architecture found in rural heritage environments such as the Cotswolds, where buildings and gardens appear to grow gently into their surroundings. The design intention is comfort through material honesty rather than polished perfection.
Weathering behaviour is central to this concept. Timber and stone are allowed to mature visually, developing patina, tonal softening, and surface micro-texture over time. Hardwood timber, when exposed to outdoor conditions, may gradually shift toward a silver-grey hue if left untreated. This natural ageing is often desirable in rustic design because it reduces visual contrast between architecture and landscape.
However, controlled protection is still necessary. I specify exterior-grade timber with moisture-resistant treatment for structural members. Decking surfaces may be oiled or sealed during early service life to slow cracking and moisture ingress. Stone surfaces, particularly sedimentary stone, should be selected for density and low water absorption to reduce freeze-thaw stress in colder climates.
Structural timber grading is critical because rustic design must not compromise safety for aesthetic character. I typically specify construction-grade structural timber rated for exterior load-bearing use, such as C24 or equivalent structural performance class depending on region. Beams supporting roof elements or elevated platforms should be engineered rather than visually estimated.
On a 5 m x 4 m (16 ft x 13 ft) retreat patio project, we combined 50 mm (2 inch) thick natural stone flagging with 140 mm (5.5 inch) wide hardwood decking. The stone perimeter provided thermal grounding and moisture separation, while the timber platform formed the seating zone. The timber structure was mounted slightly above stone level, roughly 25 mm (1 inch), to prevent water pooling at junction edges.
Drainage management is essential because rustic materials are more tolerant of weathering than of water stagnation. Surface fall of approximately 1:60 toward garden soil or channel drainage is recommended.
Pros
- Natural, timeless landscape integration
- Warm tactile comfort underfoot
- Ages gracefully without looking artificial
- Works well in garden retreat environments
Cons
- Timber requires periodic maintenance or sealing
- Material colour variation occurs naturally
- Structural detailing must be precise
- Moisture exposure can shorten lifespan if drainage is poor
A rustic timber and stone patio is most successful when it is allowed to mature quietly. The design should feel as though it has always belonged to the landscape rather than appearing newly constructed.
Entertainment-Focused Patio
An entertainment-focused patio is designed around social behaviour rather than static composition. I approach this type of space as a small outdoor venue where conversation, music, movement, and comfort must coexist without competing visually or acoustically. The architecture should support gathering while maintaining enough spatial calm that interaction feels effortless rather than crowded.
Integrated sound systems are most effective when concealed within the structure of the patio rather than installed as visible equipment. I usually specify weather-rated landscape audio speakers mounted beneath pavilion ceilings, wall recesses, or planting edges. Outdoor sound reproduction should prioritise clarity at moderate volume rather than high-output intensity. Distributed low-power speaker placement often produces better listening quality than a single high-powered unit. Wiring must be protected inside moisture-sealed conduits because outdoor electrical degradation is a common long-term failure point.
On a 6 m x 5 m (20 ft x 16 ft) family entertainment patio project, we installed four small ceiling-mounted speakers positioned around the seating perimeter rather than directly above the dining table. This created a balanced acoustic field where music felt present but not directional. The client preferred jazz and soft instrumental playback during evening gatherings, and the system was calibrated accordingly.
Seating capacity planning is critical because entertainment patios fail when circulation is sacrificed for occupancy. I generally allocate approximately 0.8 m² to 1 m² (8.5 ft² to 11 ft²) per seated person for comfortable social gatherings. For example, a 5 m x 6 m (16 ft x 20 ft) patio can realistically support 8 to 12 people when including lounge and dining zones, assuming circulation pathways remain at least 900 mm (36 inches) wide.
Furniture selection should favour modular seating that can be reconfigured depending on event size. Fixed built-in seating works well along boundaries, while movable lounge chairs provide flexibility for different social settings.
Lighting integration is essential for entertainment patios. I prefer layered 2700K warm lighting combined with dimmable controls so evening ambience can transition from dining brightness to relaxed social mood.
Pros
- Supports social gatherings and family events
- Enhances outdoor lifestyle usability
- Integrated audio and lighting improve atmosphere
- Increases property entertainment value
Cons
- Higher electrical installation complexity
- Sound system maintenance is required
- Overcrowding reduces comfort quality
- Weather protection must be carefully engineered
An entertainment patio succeeds when technology quietly supports human interaction rather than dominating it. The most successful designs allow conversation, music, and movement to feel naturally balanced within the outdoor room.
Small Back Patio Maximised
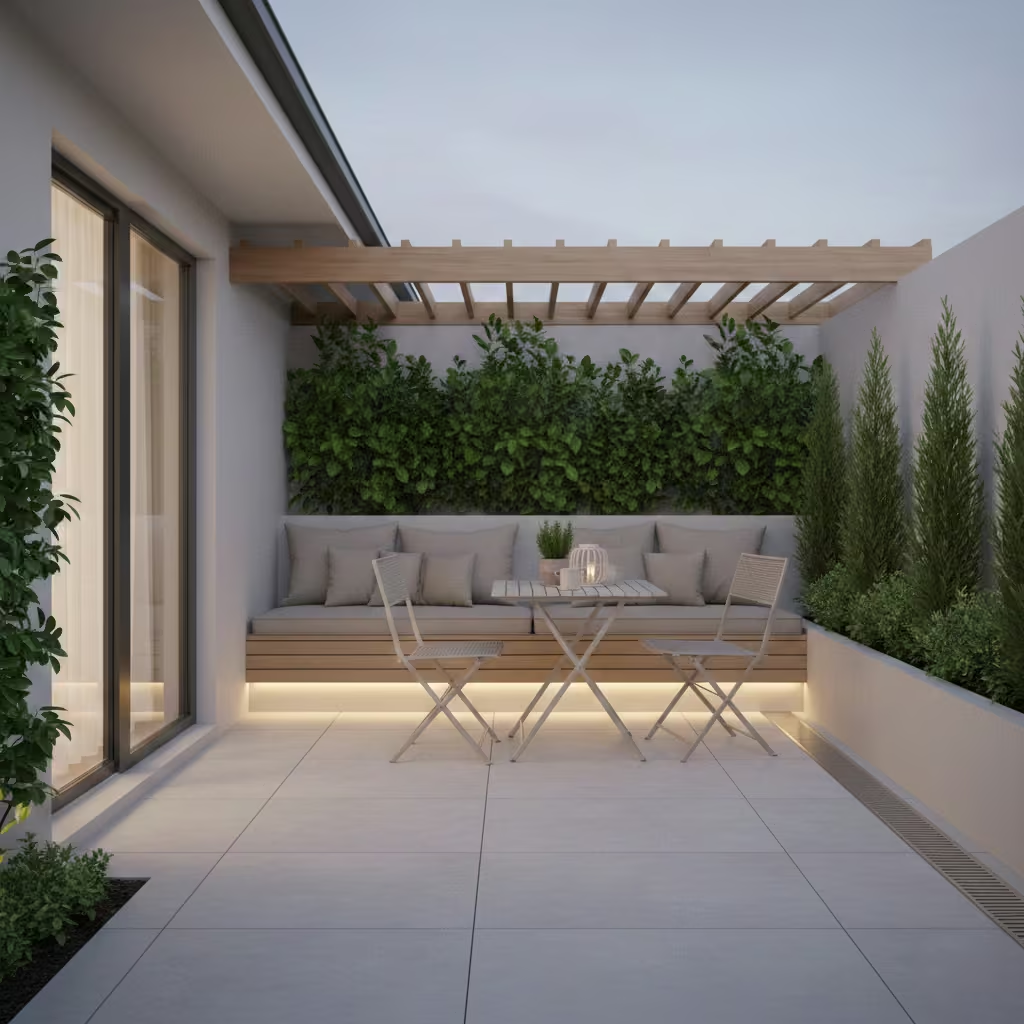
Small patios demand design discipline more than large ones. I treat a compact patio as a precision space where every centimetre must justify its function. The objective is not to make the area feel larger visually by cluttering it with tricks, but to extract the highest lifestyle value from limited footprint. When done correctly, even a 3 m x 4 m (10 ft x 13 ft) patio can feel generously usable.
The optimisation strategy for a 3 m x 4 m patio begins with zoning compression. Instead of dividing the space into many small decorative features, I prioritise one primary social function. Typically, I reserve approximately 1.8 m to 2.2 m (6 ft to 7 ft 3 in) depth for seating or lounge use along the rear boundary, leaving a circulation spine of at least 800 mm (32 inches) from the house threshold to the seating zone.
Vertical planting is one of the most effective spatial illusion tools. I prefer narrow evergreen planting strips around 300 mm to 600 mm (12 to 24 inches) deep along boundary walls. Climbing plants or columnar shrubs create height without consuming floor area. The vertical texture draws the eye upward, making the patio feel less compressed horizontally. Irrigation should be controlled because small planting beds dry faster than larger landscape zones.
Folding furniture is essential for compact patios. Lightweight aluminium or high-quality composite furniture that can be stored vertically or inside the house during non-use periods prevents visual crowding. I often recommend a two-seat folding lounge set rather than fixed seating when total patio width is under 3.5 m (11.5 ft).
Real-life compact project insight comes from a residential garden in London where the back patio measured only 3 m x 3.8 m (10 ft x 12.5 ft). We installed light grey large-format porcelain paving with concealed perimeter drainage. Along the eastern wall, a 400 mm (16 inch) deep vertical planting strip was introduced with evergreen ferns and climbing jasmine. A foldable bistro table and two stackable chairs were used instead of fixed seating. The pavilion roof was omitted to preserve sky openness, but subtle 2700K wall lighting was installed for evening use.
The psychological success of small patio design lies in restraint. Overloading a compact space with features destroys usability faster than modest design. Clear surfaces, vertical greenery, and movable furniture allow the patio to behave like an outdoor extension of the house rather than a crowded garden corner.
Pros
- Maximises lifestyle value in limited area
- Easier maintenance compared to large patios
- Encourages focused spatial design
- Supports urban residential living
Cons
- Limited capacity for large gatherings
- Poor feature selection can cause visual congestion
- Requires precise furniture and planting scale
- Design mistakes are immediately visible
A small back patio can be remarkably powerful when treated as an intimate outdoor room. The best compact patios do not try to appear large; they simply feel complete, comfortable, and quietly purposeful.
Expert Planning Considerations Before Implementation
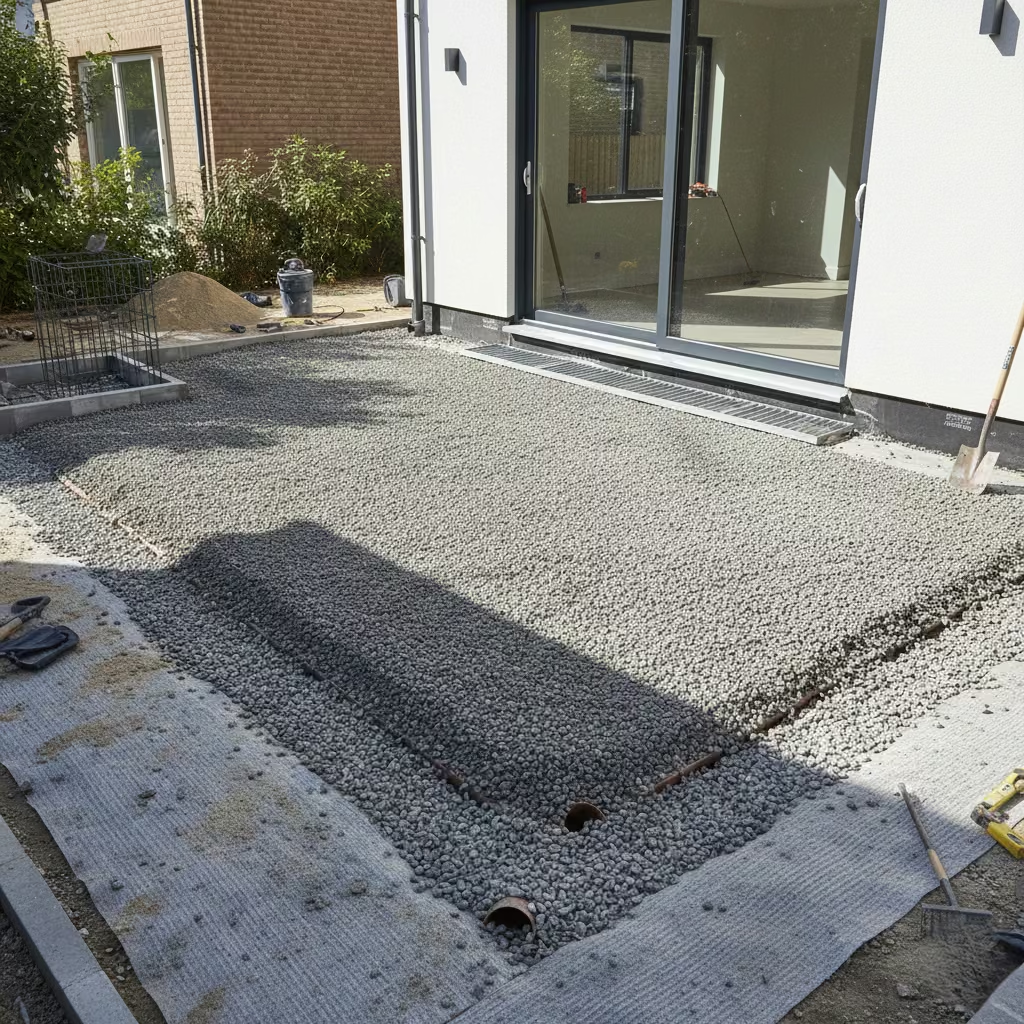
Successful patio construction depends on engineering preparation as much as design vision. I treat patio development as a small-scale architectural project rather than a landscaping upgrade. The quality of underground preparation, drainage logic, and contractor coordination determines long-term performance more than surface material selection.
Drainage Gradients
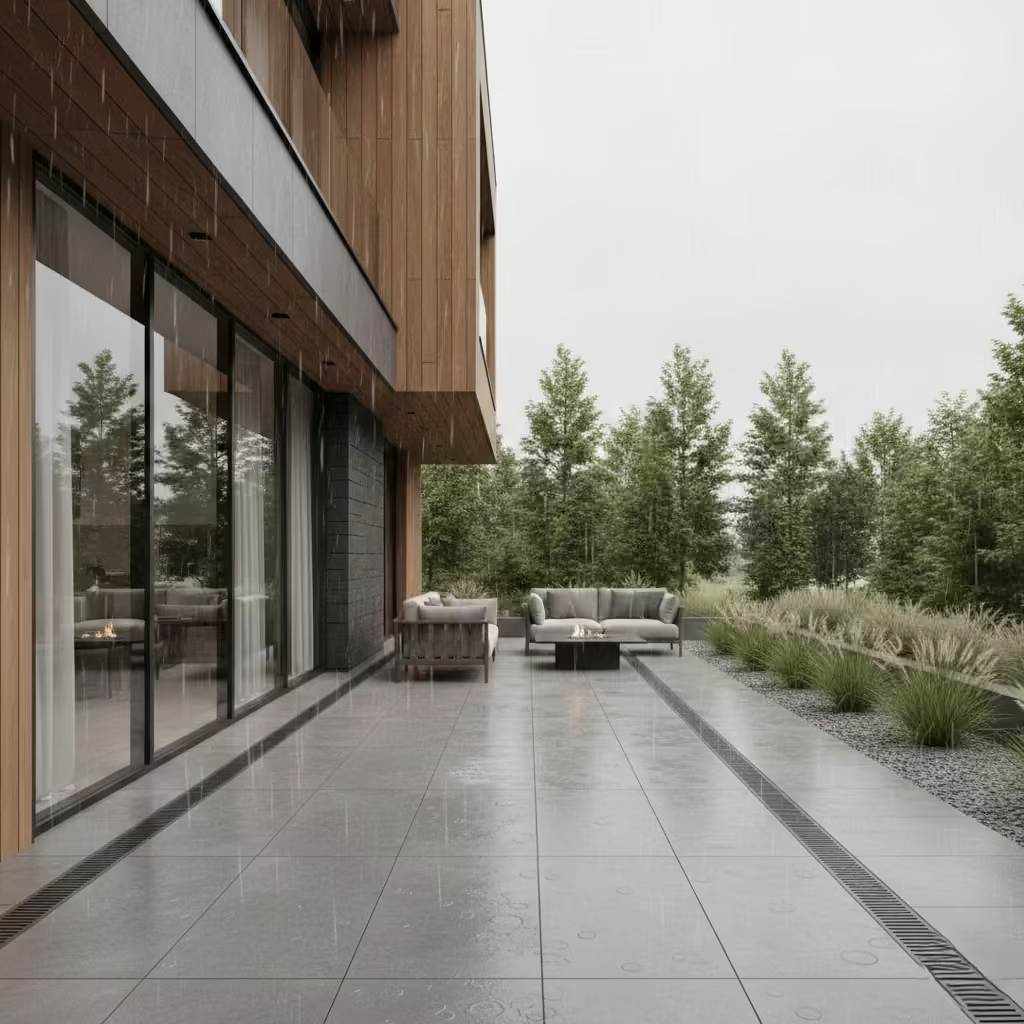
Surface water management is fundamental. I specify a minimum fall of 1:60 for residential patio surfaces, meaning a 1 unit vertical drop for every 60 units horizontal distance. In practical terms, a 3 m (10 ft) patio run should have approximately 50 mm (2 inches) of total slope. The gradient should direct water toward channel drains, planting borders, or garden soakaway systems rather than building walls or glazing lines. Poor drainage design is one of the most common causes of patio staining, moss growth, and structural moisture stress.
Structural Footings and Frost Depth
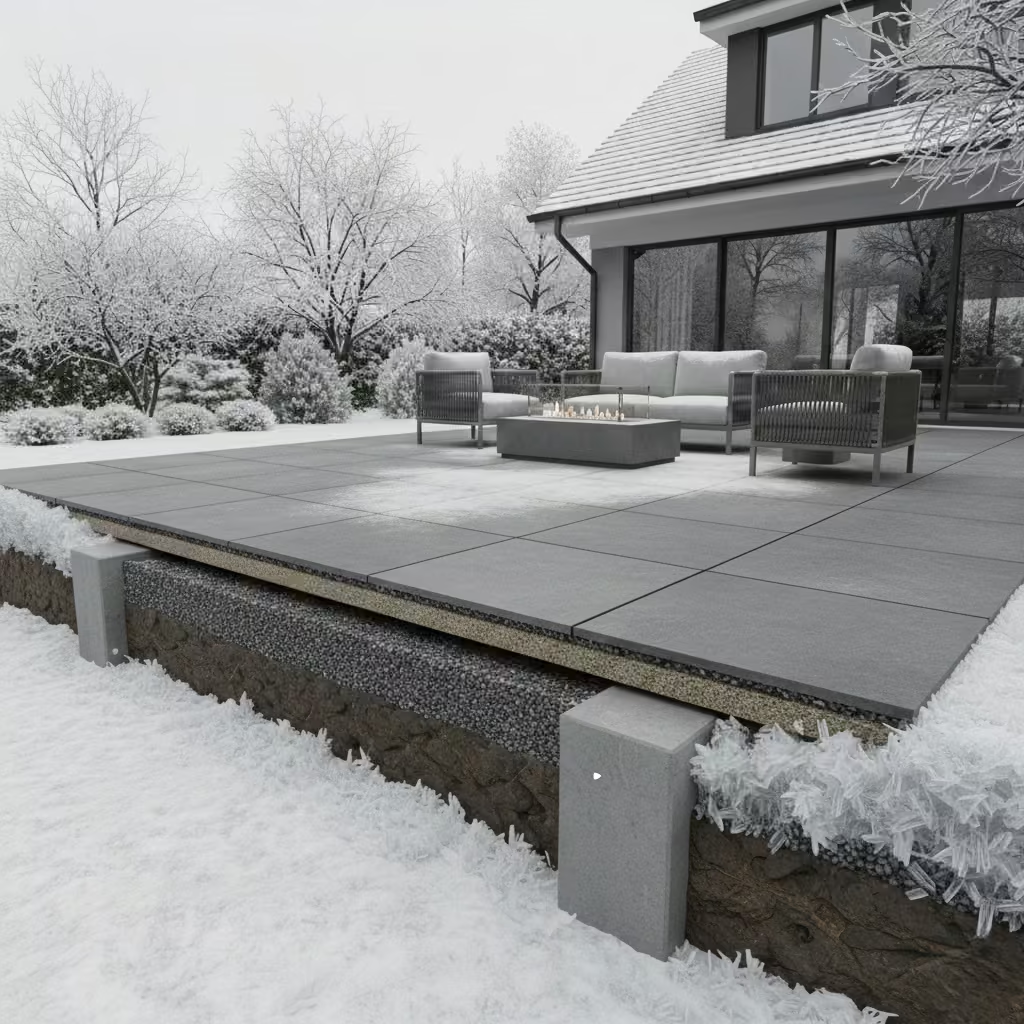
Foundation depth depends on soil type and climate exposure. In colder regions, footings must extend below frost line depth to prevent freeze-thaw movement. I generally recommend reinforced sub-base construction consisting of compacted hardcore layers between 150 mm and 250 mm (6 to 10 inches), followed by bedding sand or structural screed depending on paving material. Lightweight patios may tolerate shallower preparation, but entertainment or pavilion patios require stronger structural confidence.
Local Building Regulations
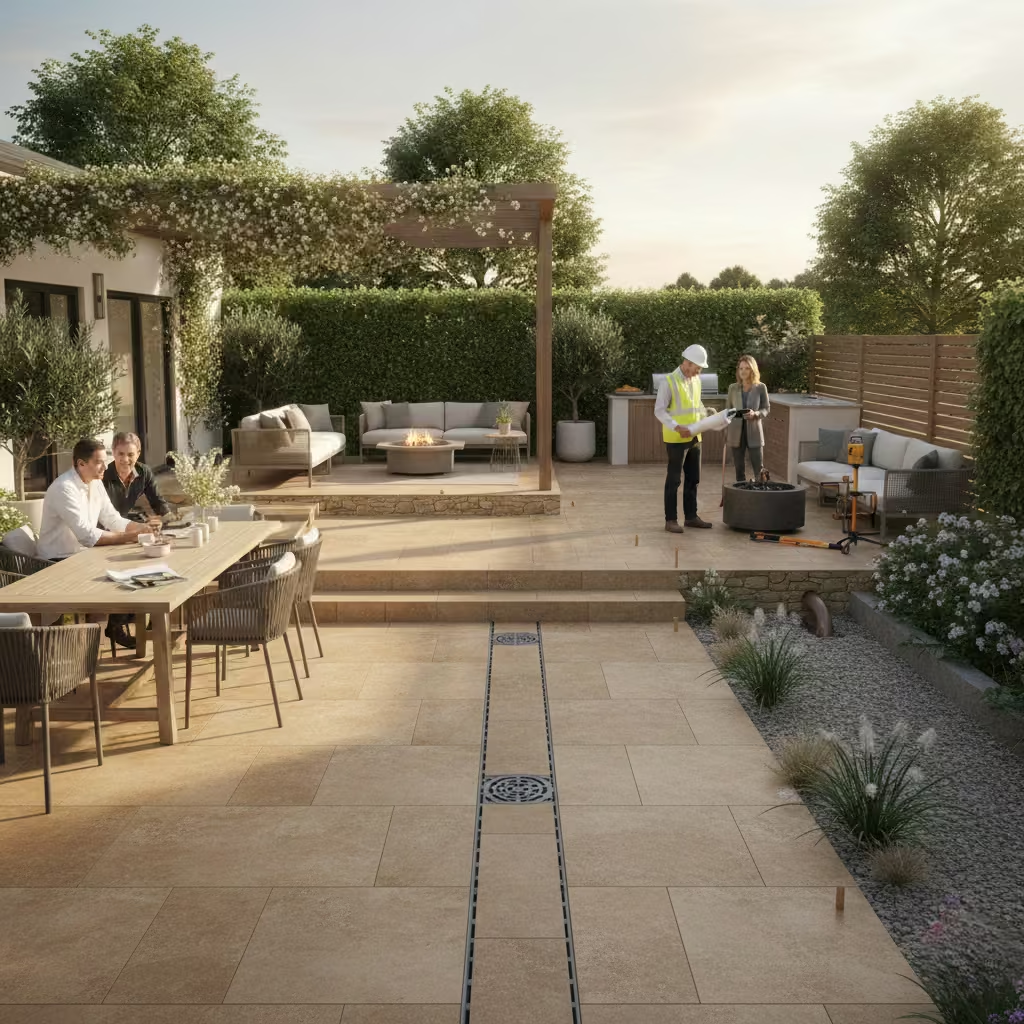
Patio construction may require approval if elevation changes, roof structures, or drainage discharge systems are introduced. Boundary proximity rules, fire safety clearances, and water runoff regulations vary by region. Early consultation with local planning authorities reduces redesign risk later in the project.
Contractor Coordination Timeline
Patio projects usually follow a staged delivery sequence. Site survey and design approval should precede excavation. Substructure work is then completed before surface materials arrive. I advise reserving 2 to 4 weeks for material installation depending on complexity. Mechanical elements such as lighting, heating, or automated roof systems should be scheduled during structural phase construction.
Budget Ranges per Square Metre / Square Foot
Costs vary significantly by material quality and structural complexity.
- Basic patio construction: moderate cost per square metre/foot
- Large-format porcelain, engineered drainage, or pavilion integration: higher premium range
- Luxury architectural patio systems with automation or custom masonry: highest tier
As a practical reference, complex residential patio schemes may range from mid-level to high-level investment depending on labour, material sourcing, and site preparation requirements.
Material Lead Times
Custom or imported materials can extend project timelines. Natural stone, specialised porcelain batches, and structural timber orders may require advance procurement. I usually recommend confirming material availability before finalising construction start dates. Allow buffer time for shipping, fabrication, and quality inspection.
Patio planning succeeds when underground engineering, regulatory compliance, and supply logistics are resolved before visible construction begins. Surface beauty should be the final layer of a carefully controlled technical process rather than the starting point.
Pros and Cons of Investing in a High-End Patio
Investing in a high-end patio is fundamentally a lifestyle and architectural decision rather than a purely cosmetic upgrade. I approach premium patio construction as a long-term spatial investment that extends the working envelope of the home into the landscape. When executed correctly, a well-designed patio behaves like an additional living room that happens to sit outdoors.
Pros
- Extends Functional Living Area
A high-quality patio effectively increases usable floor space without building internal extensions. In many homes, the patio becomes the primary summer dining and relaxation zone. I have seen families shift evening social life outdoors once thermal comfort and lighting are properly designed. - Increases Property Desirability
Premium outdoor architecture improves market perception. Buyers often value homes where indoor and outdoor spaces transition naturally. Features such as pavilion structures, integrated lighting, and durable surface materials contribute to long-term resale attractiveness. - Encourages Year-Round Use
With proper climate control elements such as heating systems, wind screening, and sheltered roofing, patios can remain usable beyond summer seasons. Infrared heating, planted wind buffers, and moisture-resistant materials help stabilise comfort levels.
Cons
- Structural Costs
High-end patios require engineered substructures, quality drainage systems, and precision installation. Large-format paving, masonry features, and roof integrations increase labour and material expense. - Ongoing Maintenance
Even premium materials require care. Timber surfaces may need sealing, stone may require periodic cleaning, and mechanical components such as lighting or roof automation must be serviced. - Planning Permissions in Some Regions
Structural additions including permanent roofing, elevation changes, or boundary construction may require local authority approval. Regulations vary by jurisdiction, and early compliance checks reduce redesign risk.
High-end patios succeed when investment is directed toward durability, comfort engineering, and spatial quality rather than decorative excess. The best schemes are those that feel natural to live in, quietly supporting daily life while retaining architectural dignity over time.
Conclusion: Designing a Patio That Feels Intentional, Not Added On
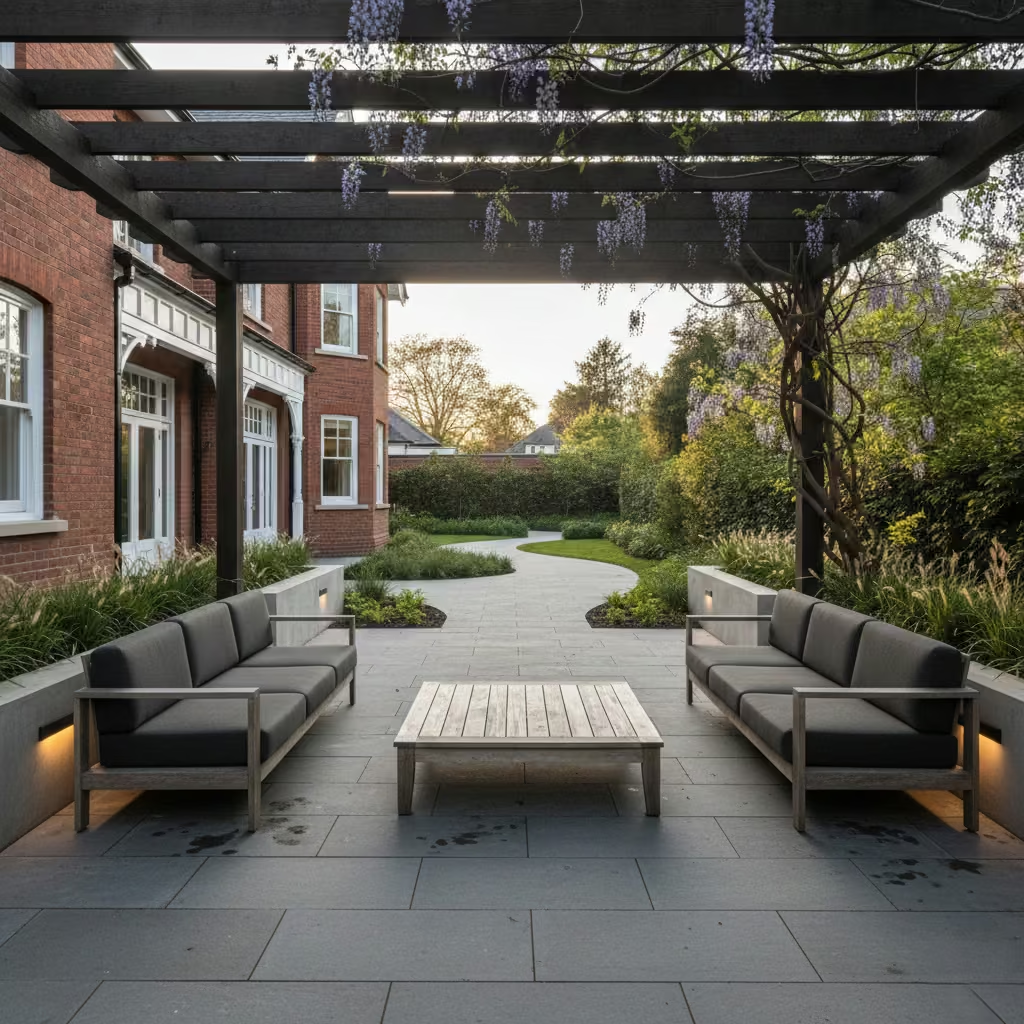
The most successful back patios are conceived as architectural outdoor rooms rather than decorative extensions of the garden. A patio should feel as though it belongs naturally to the house, shaped by sunlight, movement patterns, and long-term living behaviour. When design begins with purpose rather than ornament, the space remains relevant across seasons and lifestyle changes.
Enduring patio design is built on proportion, material integrity, and climate awareness. Surface beauty alone cannot sustain outdoor architecture. I prioritise materials that age quietly and perform reliably under exposure to sun, moisture, and temperature variation. Large-format stone, engineered porcelain, treated structural timber, and carefully detailed concrete work together to create surfaces that resist premature wear while maintaining visual calm.
Climate responsiveness is equally important. Shade control, wind moderation, and drainage logic are not technical afterthoughts but foundational planning principles. A patio that ignores environmental behaviour will eventually feel uncomfortable to use, regardless of how visually attractive it appears at installation.
Spatial flow defines how a patio is experienced over time. Circulation paths should feel natural, seating zones should support conversation without crowding, and transitions between house and garden should feel effortless. I believe outdoor spaces are most successful when people stop noticing design decisions and simply enjoy living inside them.
Above all, disciplined planning is the true luxury of high-quality patio architecture. Inspiration gives direction, but professional execution preserves value. When structure, material science, and lifestyle intention are resolved together, a patio becomes more than a construction project. It becomes a quiet, enduring part of daily life.
Frequently asked questions
What is the ideal size for a functional back patio?
There is no universal size, but practical residential patios usually perform well when they allow clear zoning. A minimum comfortable social patio often begins around 3 m x 4 m (10 ft x 13 ft). Larger homes or entertainment patios may extend beyond 5 m x 6 m (16 ft x 20 ft). Proportion to the house façade matters more than absolute area.
Which patio material is easiest to maintain long term?
Large-format porcelain slabs and sealed natural stone are generally the lowest maintenance choices. In climates similar to that of London, moisture resistance and frost tolerance become particularly important. Porcelain offers the best combination of durability, colour stability, and cleaning simplicity.
How important is drainage in patio construction?
Drainage is critical. I recommend a minimum surface fall of 1:60 directing water toward channel drains or garden soil zones. Poor drainage is the leading cause of staining, algae growth, and long-term structural deterioration.
Are covered patios worth the investment?
Yes, when designed as part of the architecture rather than added later. Pavilion or roofed structures improve usability during rain, reduce UV exposure on furniture, and extend seasonal living comfort.
How long does a high-quality patio typically last?
With proper engineering, materials, and maintenance, a premium patio can remain structurally sound and visually relevant for 20 to 40 years. Timber components may require more frequent treatment compared to stone or concrete surfaces.
Do I need planning permission for a patio?
It depends on location and structure type. Simple ground-level patios usually do not require permission, but raised platforms, permanent roof structures, or boundary constructions may be regulated. Local building authority consultation is advisable before construction.
What is the biggest design mistake in patio projects?
Ignoring climate behaviour and circulation flow. Patios that look attractive but fail to consider sun path, wind exposure, or drainage performance often become underused spaces over time.
Is high-end patio construction a good property investment?
A well-executed patio enhances lifestyle quality and can improve property appeal. However, value comes from design quality, durability, and usability rather than luxury materials alone.