26 Creative Halloween Garden Decor Ideas for Front Yards and Backyards
Twenty-six ways to turn a patch of lawn into the house everyone remembers, each with a method, a weatherproofing note and a nod to the wildlife sharing your hedges.
Every street has one. You know the house: cars crawl past it, children fall silent at the gate, and somebody’s gran mutters “well, I never” under her breath. That house is seldom the one with the fattest budget. It belongs to the person who treated the garden as a theatre set rather than a shelf for a few plastic bits and bobs.
Think back to the house you were dared to run past as a child. You can probably still picture it: the flicker in the window, the crooked gate, the shape in the hedge that may or may not have moved. You have long forgotten which sweets you collected that night, yet that tingle at the back of your neck is still there. That feeling is what this guide helps you build, for the small witches, 87ghosts and dinosaurs who will be coming up your path this year.
Here are 26 Halloween garden decor ideas for front yards and backyards alike, running from properly eerie DIY builds to gentle, budget-friendly accents for the littlest visitors. Every idea comes with a method, a weatherproofing note and, where it matters, a nod to the wildlife sharing your hedges, because a display that dazzles on Friday and slumps into a soggy heap by Sunday is money down the drain.
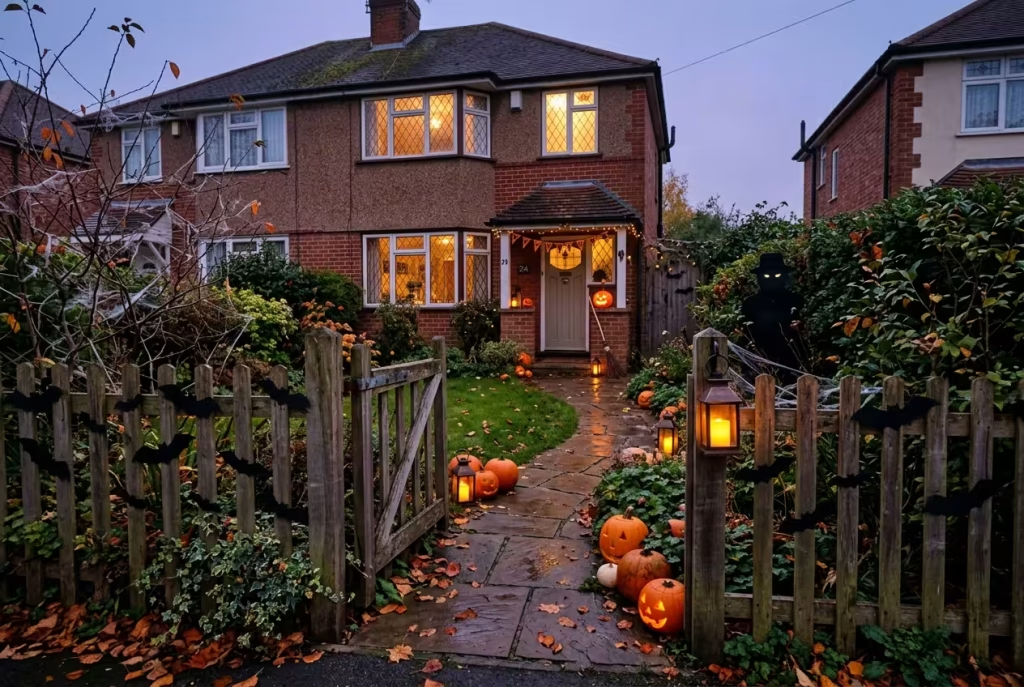
The appetite is certainly there. In the US, the National Retail Federation expects shoppers to spend around $4.3 billion on decorations this year, yet only 42% say they plan to decorate their home or yard, and the NRF describes buyers as shopping with affordability firmly in mind. Plenty of people want the magic. Far fewer want the bill. Read on and you can have the first without the second.
The Short Answer: What Makes a Halloween Garden Work
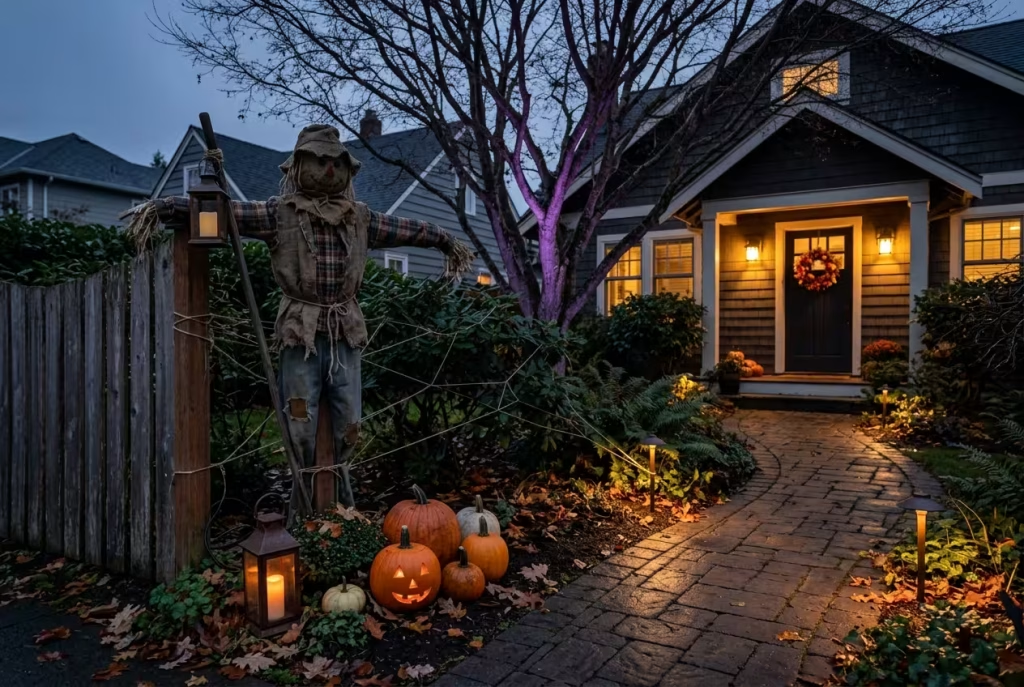
If you only have one evening, spend it on these five moves.
- Light first, props second. Low, coloured light along the path and up into a single tree does more than a skip full of plastic. Darkness is your free scenery; light is simply how you choose which parts of it to reveal.
- Pick one focal point. A graveyard, a scarecrow or a cauldron corner, with smaller pieces playing supporting roles. Five competing stars make a garden feel like a jumble sale; one star makes it feel like a story.
- Choose LED over flame, every time, and keep outdoor cables well off the walking route. Costumes are billowy, pavements are dark and children are looking at your scarecrow, not their feet.
- Skip plastic webbing outside. Brown garden twine looks every bit as sinister and will not snare a bat.
- Anchor everything. Stake it, weight it or tie it, then trust your knots rather than the forecast. October gales do not care how long you spent on the witch.
Plan Before You Plonk: The Five-Layer Rule
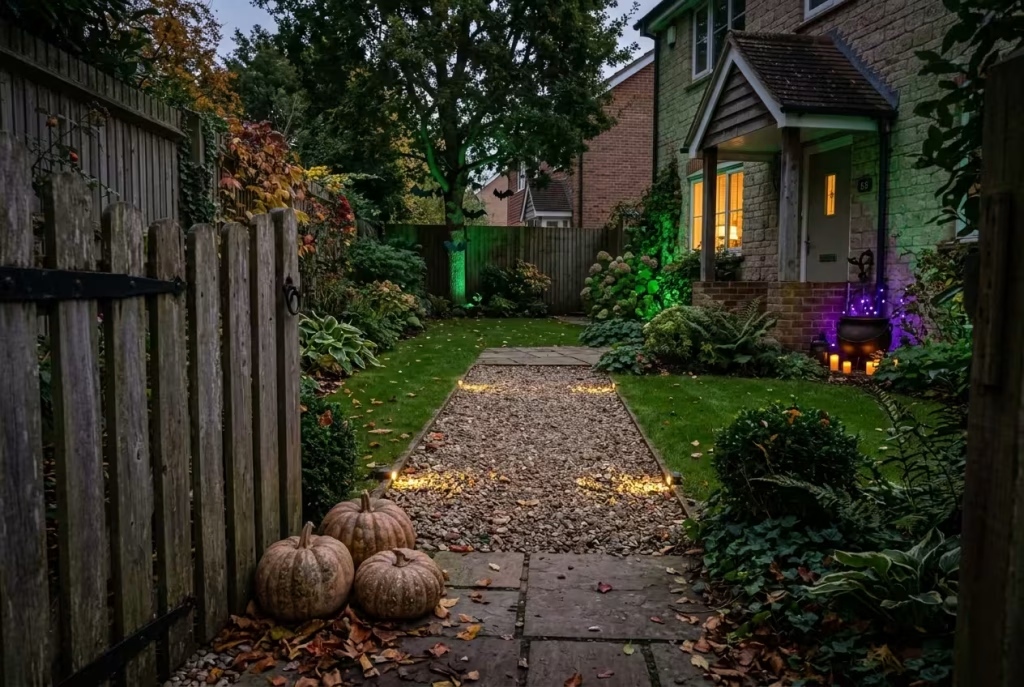
Professional installers who design Halloween displays for a living tend to think in layers, and the approach shrinks neatly to fit a terrace and a patch of lawn. Work through them in order.
Foundation lighting comes first: coloured uplights aimed at the house, a wall or a tree. This is the paint on the stage backdrop, and it costs less than any single prop.
One focal point comes next. Choose a single star of the show, not five competing ones. Your eye needs somewhere to land, and so do your visitors’.
Depth is what makes a small garden feel big. Place pieces near the gate, mid-lawn and by the door so the eye travels, and so the walk up the path feels like a journey rather than a short hop.
One mood keeps everything honest. A playful orange-and-purple yard and a gothic green-and-black one should never share a lawn. Settle on yours before buying a single thing, because a garden that commits to a theme reads as deliberate, even when half the props came out of the loft.
The walk to the door is the last layer and matters more than anything else on the night. It should be lit, flat and clear.
A worked example. Picture a modest front garden, about six metres by four. Two green uplights wash the house wall and the old apple tree (foundation). A cauldron corner beside the porch is the star (focal point). A gate with three pumpkins sits at the front, paper bats flutter in the tree mid-garden, and glowing steps lead to the door (depth). Everything is green and purple (mood), and the path stays a clear 90 cm wide (the walk). The whole thing costs less than a family meal out, and it looks planned because it was.
Greeting the Brave at the Gate and Along the Path (Ideas 1 to 5)
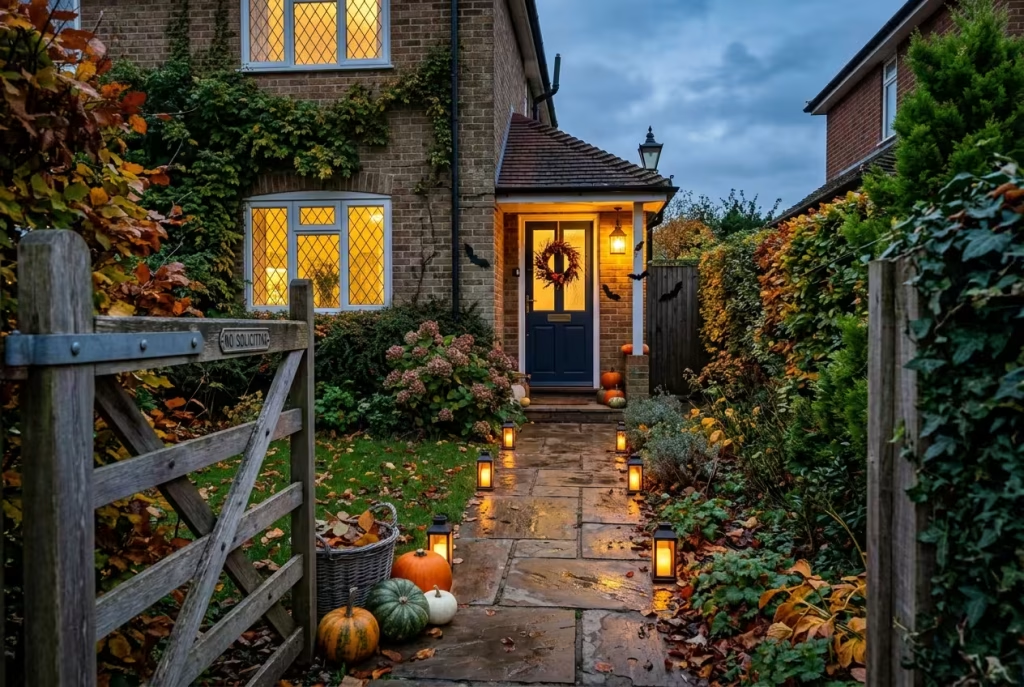
First impressions are made in the first ten steps from the pavement. Picture a small witch in a too-big hat, torch in one fist and a pillowcase in the other, weighing up whether your path looks brave-worthy. This zone has two jobs: to say “come on in” and “hold onto your hat” in the same breath, and to make absolutely certain nobody trips on the way. Lighting does the heavy lifting, so that is where we start.
1. Light the Route with Low, Layered Path Lights
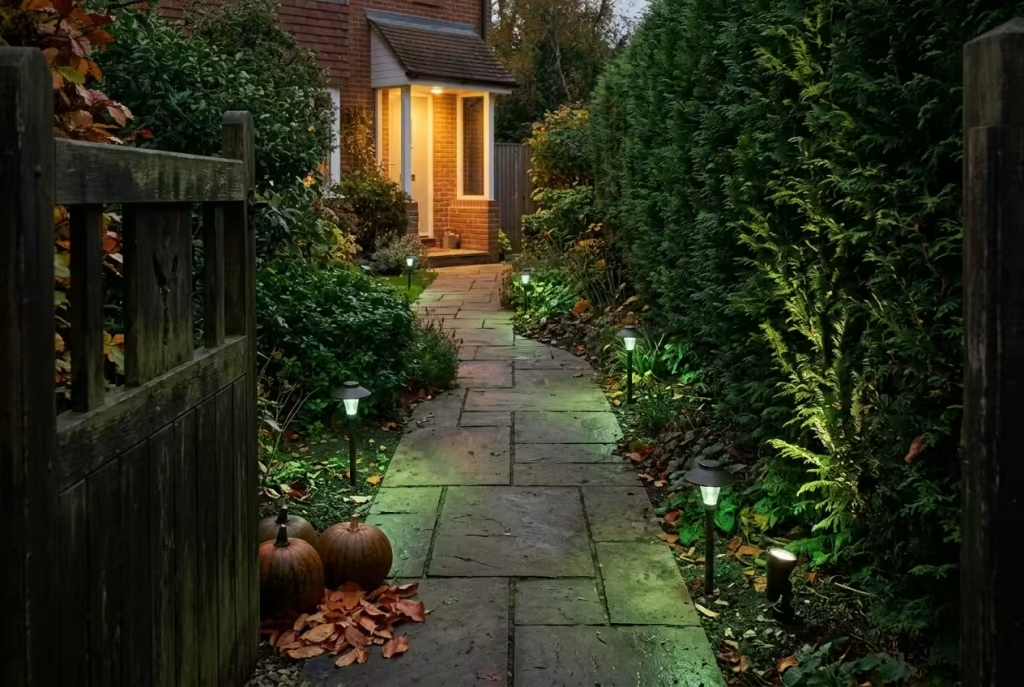
Try this before you buy anything. Wait until dusk, walk to your own gate and turn round. What do you see: a black hole, or a route? That is exactly what a seven-year-old sees, torch wobbling, one hand wrapped around a parent’s. Path lights do two jobs at once, guiding visitors safely and stitching the whole garden into a single scene.
Spacing and height. Push solar or low-voltage stakes in about a metre apart, on the soil edge rather than the paving, so no one’s toe finds them. A five-metre path wants five or six, plus an extra one wherever the ground changes level. Keep the glow low, ideally 20 to 30 cm off the ground. Light that pools on the floor flatters a path, whereas light at eye level just dazzles small faces.
Solar or low-voltage? Solar stakes are easy, but October days are short and grey, and many fade to a sulk long before the last trick-or-treaters arrive. If solar is what you have, charge them in the sunniest spot you own for a full day before staking them out, and consider a low-voltage set if you want reliability on the night itself.
Colour. Orange and purple read playful, green leans towards murky apothecary, and a single run of red feels like the road to somewhere you were told never to go. Pick one, not three.
The one-bulb trick. Add a single bulb at the foot of a shrub, aimed up. Light from below throws longer, more distorted shadows than any overhead lamp, and that one tilted beam makes the hedge seem to lean towards the gate.
A smart-bulb trick is worth a mention. Wirecutter’s home team likes colour-changing bulbs and suggests blood red for the creepiest welcome. If you try it, make sure the porch fitting is enclosed and suitable for outdoor use, and put it on a timer so it switches off when you do.
You May also Like: 27 Halloween Bedroom Decor Ideas to Create a Spooky, Cozy, and Stylish Space
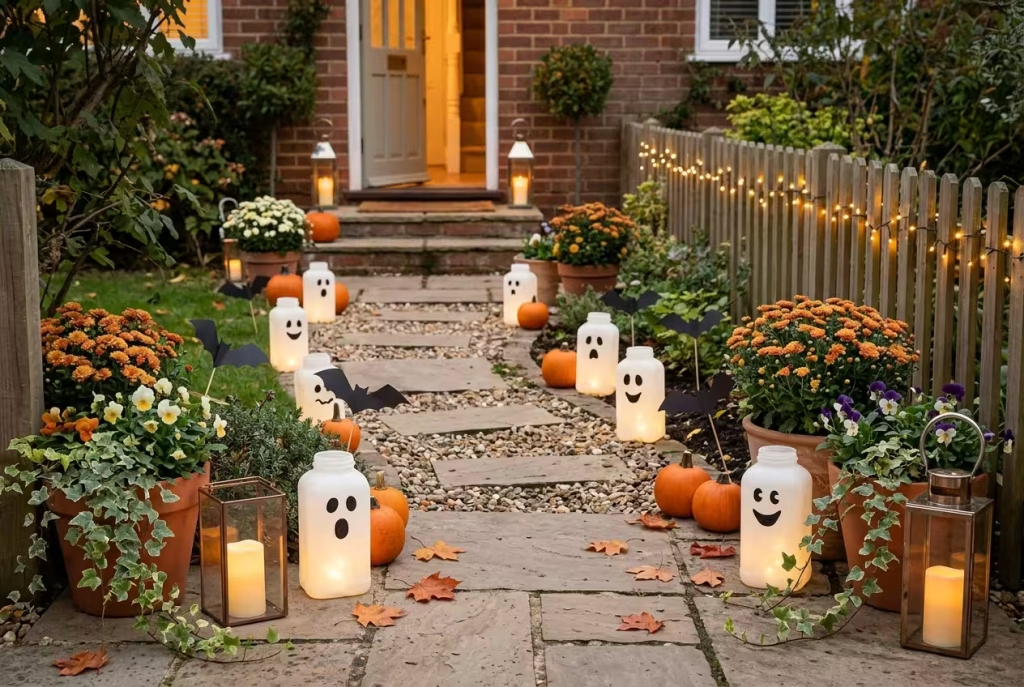
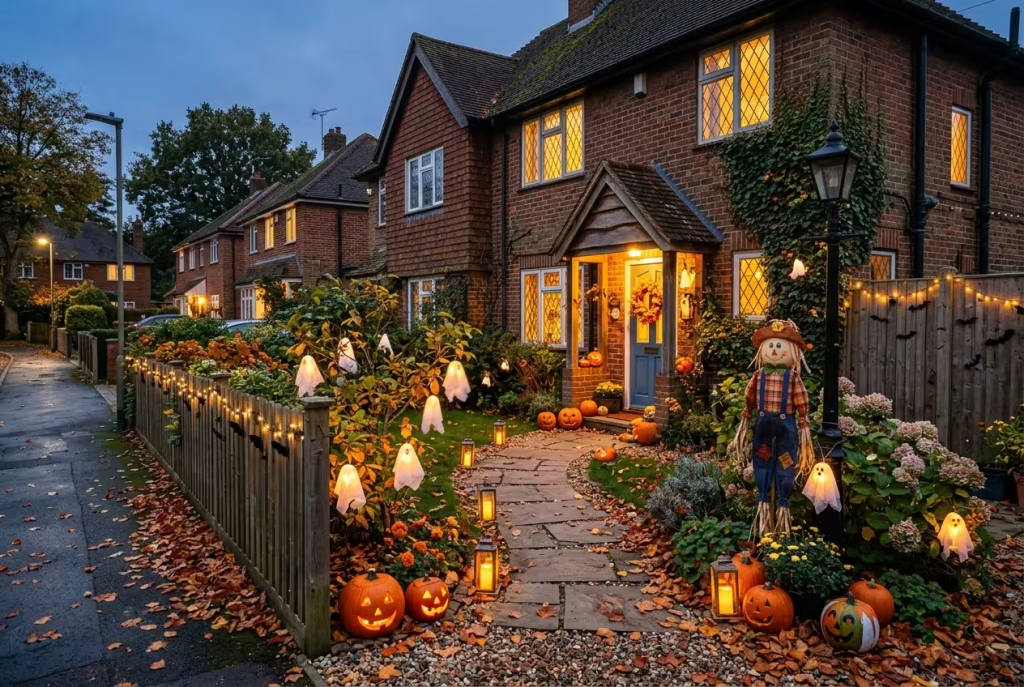
2. Milk Jug Ghosts That Glow Like Little Moons
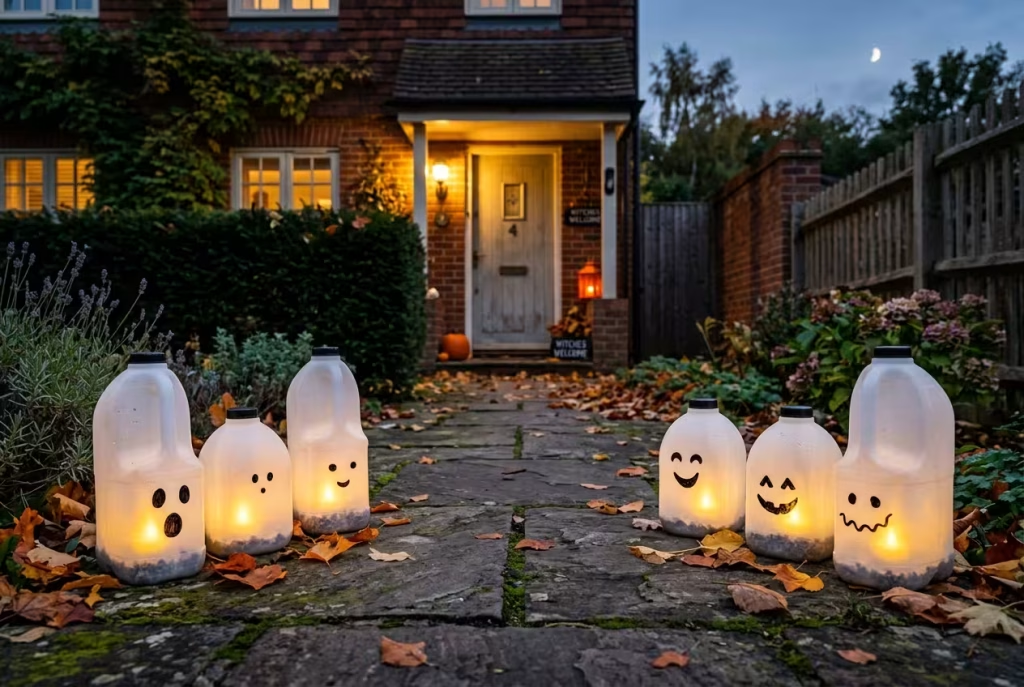
There is something faintly magical about a row of glowing milk bottles along a dark path, like a procession of tiny, friendly spirits who have come to see you home. Wildlife trusts and councils alike recommend them, and half a dozen take about ten minutes. They are also the best first project for children, because there is no wrong face to draw.
- Rinse each bottle thoroughly and peel off the label; warm soapy water shifts the glue. Choose translucent white plastic, since coloured or opaque jugs will not glow.
- Draw faces with a permanent marker or paint pen: round mouths for startled ghosts, wobbly zigzags for cheeky ones. Ordinary marker fades in strong sun, so a paint pen lasts better if you plan to reuse them.
- Pour a splash of water, or a handful of gravel or sand, into the base so a gust cannot topple it, as several local-authority guides suggest.
- Drop in a battery tea light or a short string of fairy lights, and turn the opening away from the prevailing rain.
Cluster them in threes and fives beside the step, or run a line along the path edge. Mix tall four-pint jugs with smaller ones so the group looks like a family rather than a regiment, and give the little ones the shortest, roundest faces. Each costs next to nothing, and the whole row goes back into the recycling after November, which beats the fate of most seasonal plastic.
3. An Uplit Tree Full of Paper Bats
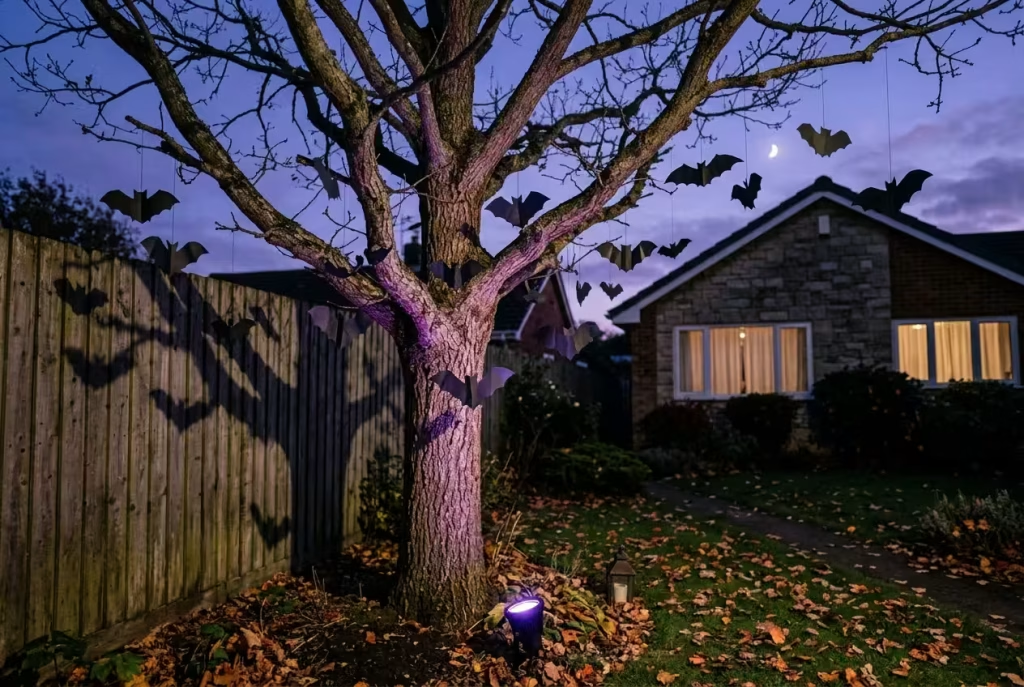
Why does one lit tree outshine a lawn crammed with props? Because shadow is the real decoration, and a tree gives you a whole cast of shadows for free.
The bats. Cut them from black card in three sizes, roughly 10, 20 and 30 centimetres across, then thread each onto fishing line and hang them at different heights so the colony seems to wheel through the branches. Fold the paper in half before cutting and you get matching wings every time. If rain is forecast, swap card for a black plastic folder or craft foam, which stays crisp where paper goes limp.
The light. Stand a small spotlight at the foot of the trunk, aimed upwards, in purple or green. Light from below stretches the shadow of every twig and bat across the wall behind, and on a breezy night the whole tree seems to breathe. If the tree stands a few metres from a wall or fence, you get a second, larger tree of shadows for the price of one bulb.
The movement. Hang the bats loosely, never in tight swags, so wind makes them flutter instead of tearing them. Use different lengths of line, from short to nearly a metre, so they never move in step.
Real bats, incidentally, are the quiet heroes of the garden at dusk, picking off midges while you sleep. Wildlife groups are happy to see paper bats in a garden, which is more than they can say for synthetic webbing.
4. A Gateway Worth Hesitating At
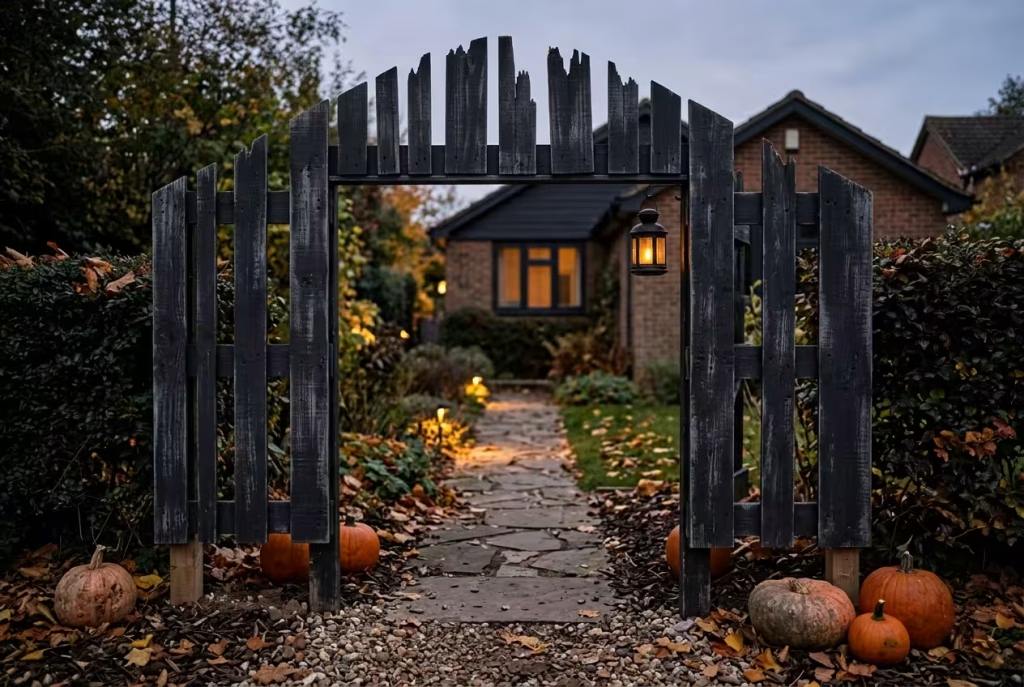
Nothing makes a child’s pulse quicken like a creaking gate with a dare attached. Reclaimed pallet timber builds one on a shoestring, and an afternoon is all it takes.
What you will need:
- Two uprights about 1.5 metres tall and a cross-rail
- Pallet slats, a drill and exterior screws
- Matt black or charcoal paint, plus a little grey dry-brushed on for age
- Timber stakes, or a fence to fix it to
The build. Screw the cross-rail between the uprights, near the top, then fix slats across it in a ragged fringe, like a broken-toothed grin. Tilt a few and leave a gap or two for that been-here-for-centuries look. Paint everything matt black, let it dry, then drag a nearly dry brush loaded with grey across the edges. That dry-brushing is the whole secret to making new wood look weathered.
The opening. Leave a clear gap of at least 90 centimetres, wide enough for a pram, a wheelchair or a gaggle of toddlers in tutus. A scary gate nobody can fit through is just an obstacle.
Anchoring. Sink the uprights in with stakes, or screw the frame to a fence. A gate that topples at seven o’clock is a hazard, not a highlight.
No tools? Stand two tall pots either side of the path, push in long branches that arch towards each other, and hang a lantern where they meet. The whole thing unscrews and stores flat, so next October it costs you nothing but an afternoon.
5. Pumpkin Steps with a Tea-Light Glow
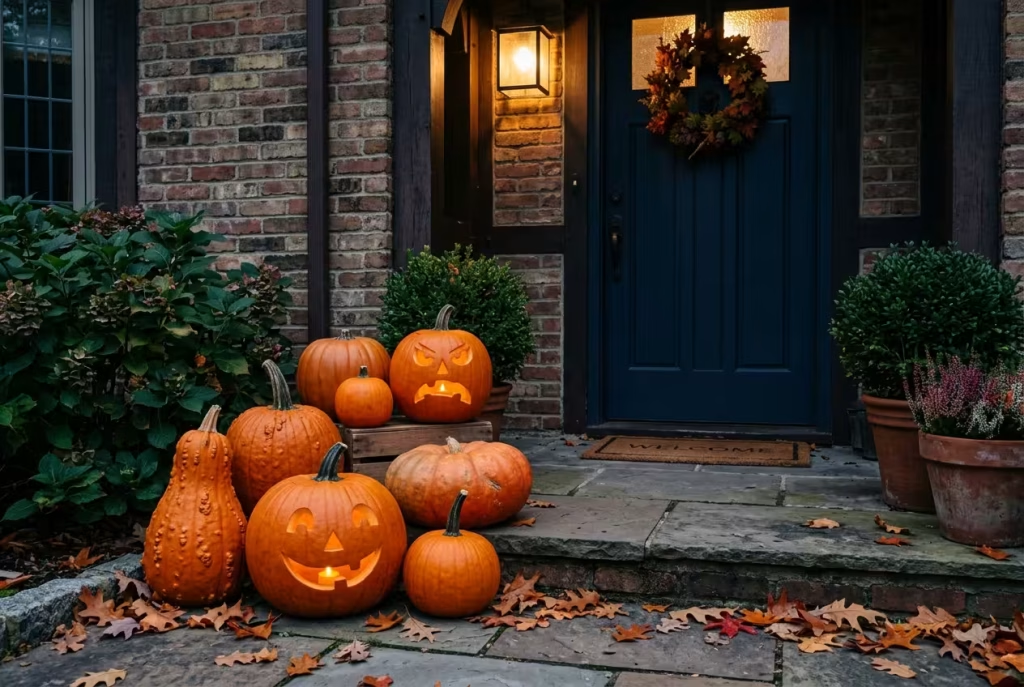
Pumpkins, plump and ready, are the one prop every visitor expects, so give them some choreography. A heap looks like a shop display; a considered group looks like a welcome.
Group them in odd numbers (three, five or seven) and vary the heights by hiding upturned crates or bricks behind the back row. Choose shapes with intent: one tall, narrow gourd, a couple of round carving pumpkins, and a flat, squat variety to settle the group. Carve one friendly face and one grumpy one, and let the faces look slightly towards the door, as if they are watching your guests arrive.
Keep the cluster tight to the sides of the steps and the treads themselves clear for feet. Inside carved ones, use battery tea lights, since US fire data shows nearly a third of decoration fires start with candles. Mix real and faux too: a few faux pumpkins at the back hold the picture together when the real ones begin to slump.
Carving that lasts. Cut the lid from the back rather than the top so rain cannot pool inside. Scrape the wall to roughly 2 to 3 cm, thin enough to carve, thick enough to hold its shape. Cut the biggest openings last, since big gaps weaken the wall.
Let the children carve at least one, however wonky. Years from now, it will be the one they point to.
Up in the Branches and Along the Boundaries (Ideas 6 to 10)
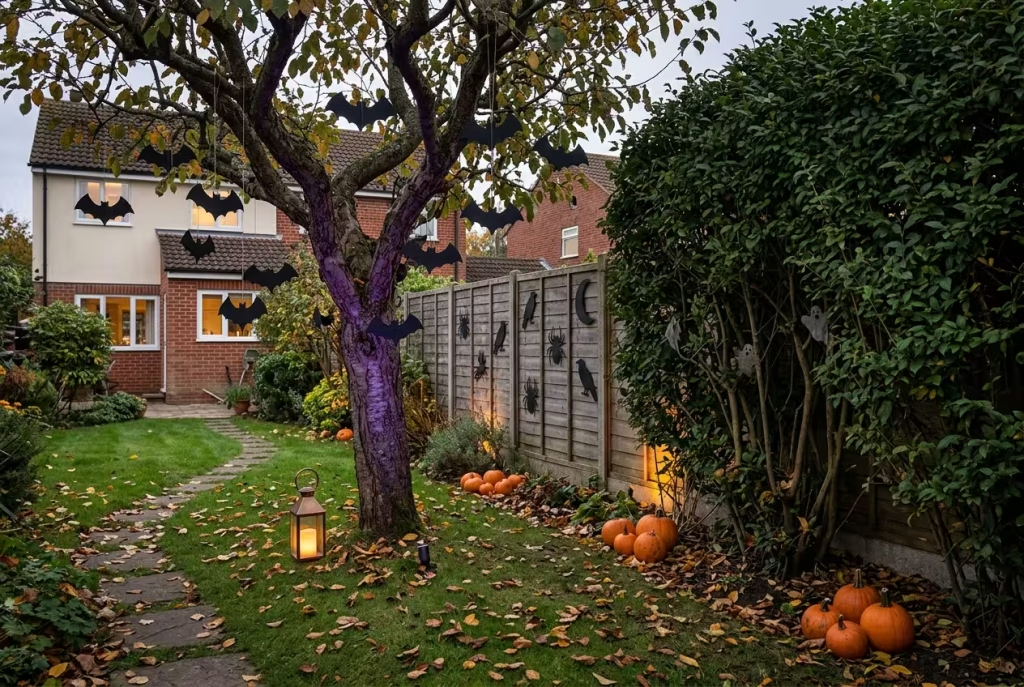
Walls, hedges and branches are scenery you already own. Dress them with care, and the display seems to grow out of the garden rather than sit on top of it. This zone leans on reusable, low-cost materials, so the wildlife and your wallet both come out ahead.
6. Floating Sheet Ghosts
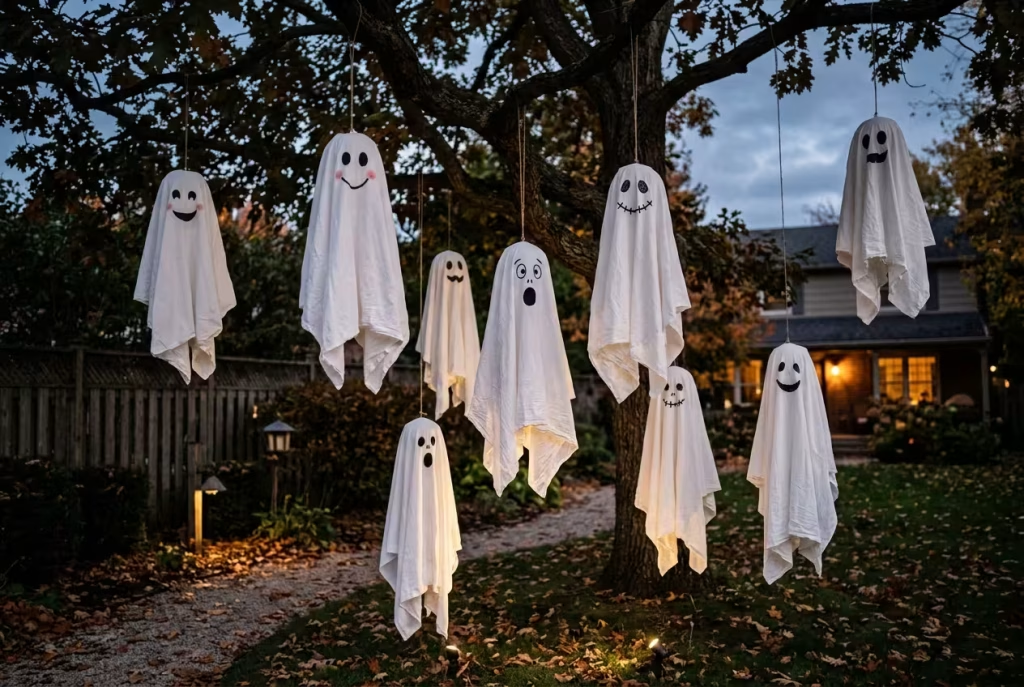
Cast your mind back to the pillowcase ghost costume you probably wore as a child, eyeholes slightly off-centre, bumping into the furniture. Same joy, grander scale.
Drape an old white sheet or a length of muslin over a scrunched carrier bag tied to a cord, then fasten a ribbon beneath the “head” to make a neck. Hang six to eight at different heights, anywhere from knee level to well above head height, from branches or a pergola, so they drift in the slightest breeze. A crowd of ghosts at mixed heights looks like a gathering; a line at one height looks like washing.
Draw faces with a fabric pen: wide, startled mouths for a fright, rosy cheeks and a tiny smile for the cuter end of the scale. Sew a coin or a small washer into each hem so it hangs straight, and aim a white or pale-green uplight underneath so the fabric glows from within.
Fabric dries far quicker than paper after a shower, and the whole crowd can go through the wash and into a box for next year. Sheet ghosts are light as a feather, so knot them firmly or one will wander off to visit the neighbours.
7. String Webs That Will Not Trap the Wildlife
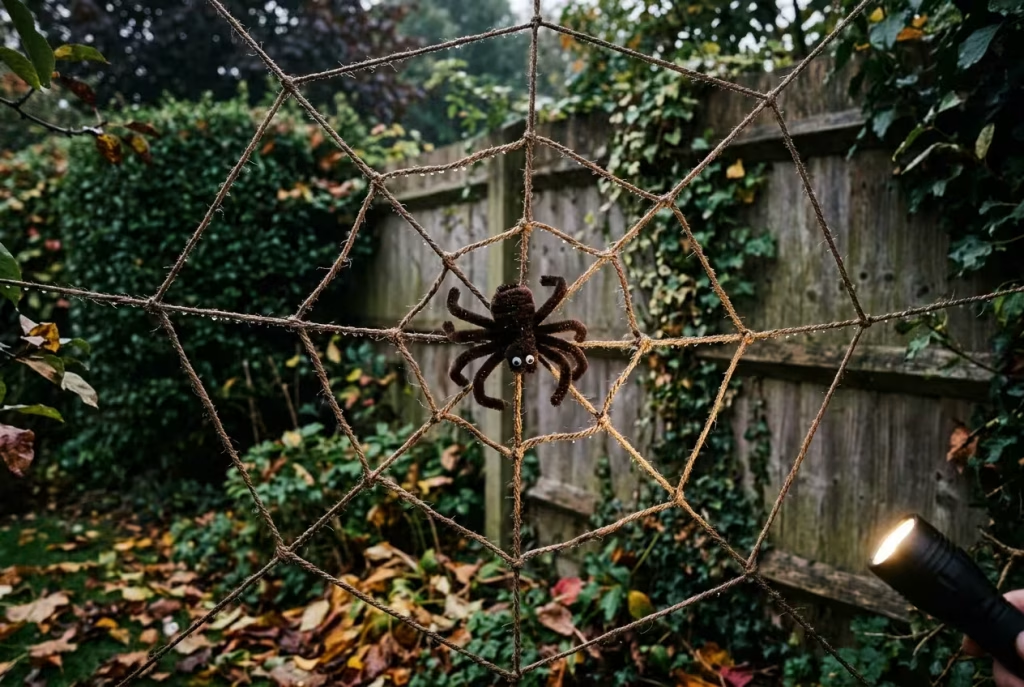
Plastic stretch webbing is the Halloween classic, yet the RSPB, the Yorkshire Wildlife Trust and Sussex Wildlife Trust all warn that it can entangle birds, bats, hedgehogs and insects. The fine, stretchy strands wind round legs and wings and are almost impossible for an animal to shake off. Wildlife rehabilitators in Nebraska have even seen young squirrels caught after their parents carried the synthetic strands into a nest.
Brown or black garden twine gives you the same chill without the guilt. Here is how to make a classic orb web:
- Fix six to eight spokes from a central point to the fence, hedge or a pair of posts, pulling each one taut.
- Spiral outwards with a single length of twine, knotting at each spoke so the rings stay put.
- Leave gaps wider than your hand, so a wing or a paw can pass through without snagging.
- Finish with a chunky spider knotted from black pipe cleaners, perched at the centre.
The finishing touch is water. A light misting from a plant sprayer on a cool evening leaves beads on the twine that catch the torchlight like dew on a real web. The result looks every bit as sinister in torchlight, and it comes down in one go on 1 November.
You May also Like: 26 Best Halloween Decor Ideas for Living Rooms: Stylish & Spooky
8. A Colony of Bats on the Shed Wall
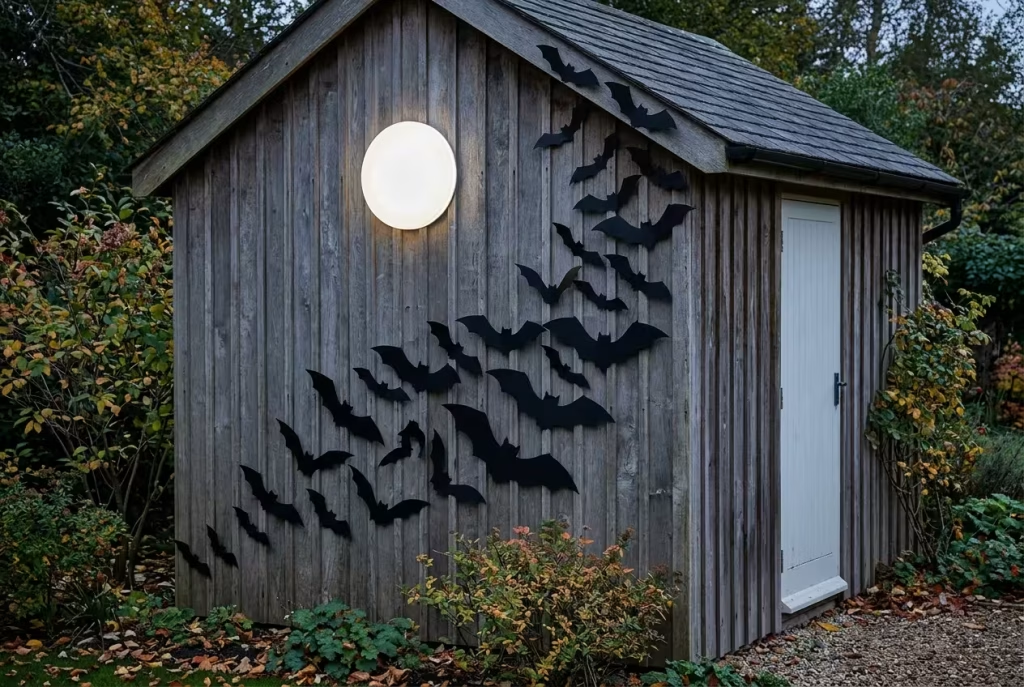
Begin with the moon. Pin a large disc of white card, or aim a round spotlight, at the shed wall, then let the bats fly across it. Picture a cloud of them lifting off the roof at dusk, and you have the whole concept.
Cut 20 to 30 from black foam sheet or corrugated plastic, which shrugs off drizzle where card collapses, in four sizes ranging from roughly 8 to 35 centimetres across the wings. Fix them with outdoor double-sided tape or small pins in a sweeping diagonal arc, packing them densely near the “source” by the roofline and letting them thin out as they fly.
Vary the angles: tilt some, flip a few, leave one or two tumbling. Movement is the secret, because a diagonal sweep tells a story whereas neat rows merely look like wallpaper. Put the biggest bats nearest the viewer’s eye line and the smallest furthest away, and the arc gains depth. A quick coat of matt black spray on the foam edges gives a crisp finish, and the whole colony peels off in a minute once the season ends.
9. Skull Lanterns Beneath the Porch Roof
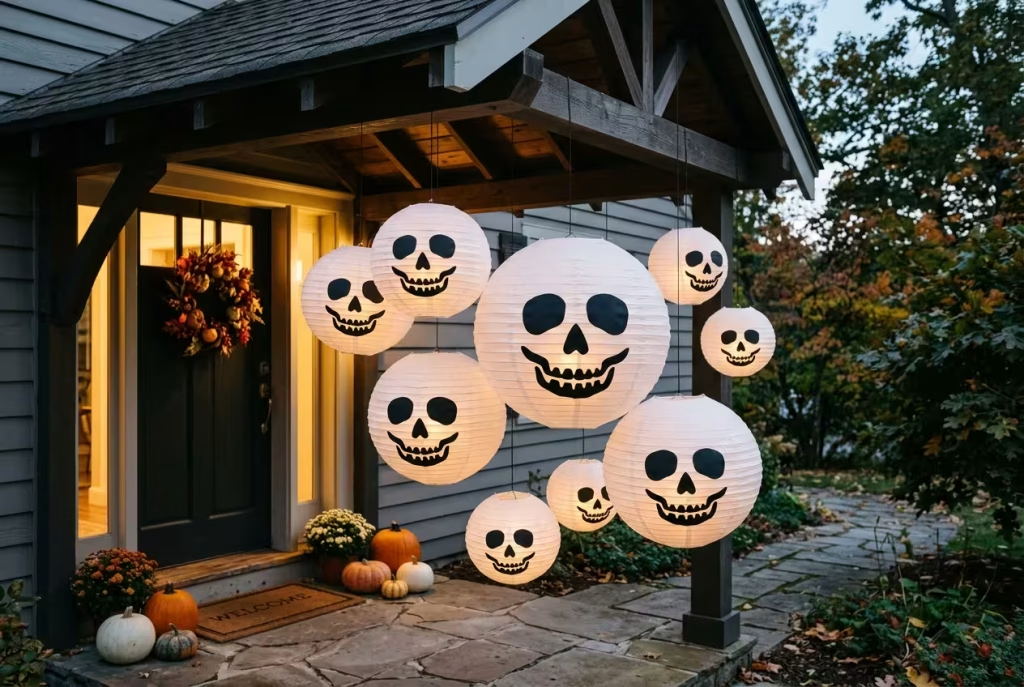
A string of skull lanterns has the feel of a macabre street party, all grinning faces in the dark. Cut skull faces (round eyes, a triangle nose, a toothy grin) from black paper, paste them onto white paper lanterns and thread an LED string through the lot, so each one glows like a ghostly moon.
Size matters here. Mix lanterns of about 20, 30 and 40 cm, and hang them at three or four different heights for a cascade, rather than one flat line. Neat symmetry looks like a shop; a loose, uneven cluster looks like something that has gathered of its own accord. Leave the eyes as open cut-outs, backed with a scrap of tissue paper, and the glow seems to burn from inside the skull.
Paper dislikes rain, so keep them beneath a porch, pergola or gazebo and bring them indoors on soggy nights. For something longer-lasting, swap paper for white fabric lantern shades, which survive damp far better. Stick to LED bulbs, because paper and heat are a bad marriage, and the US National Fire Protection Association points out that crepe paper and dried materials catch fire easily.
10. Witch Silhouettes on the Fence
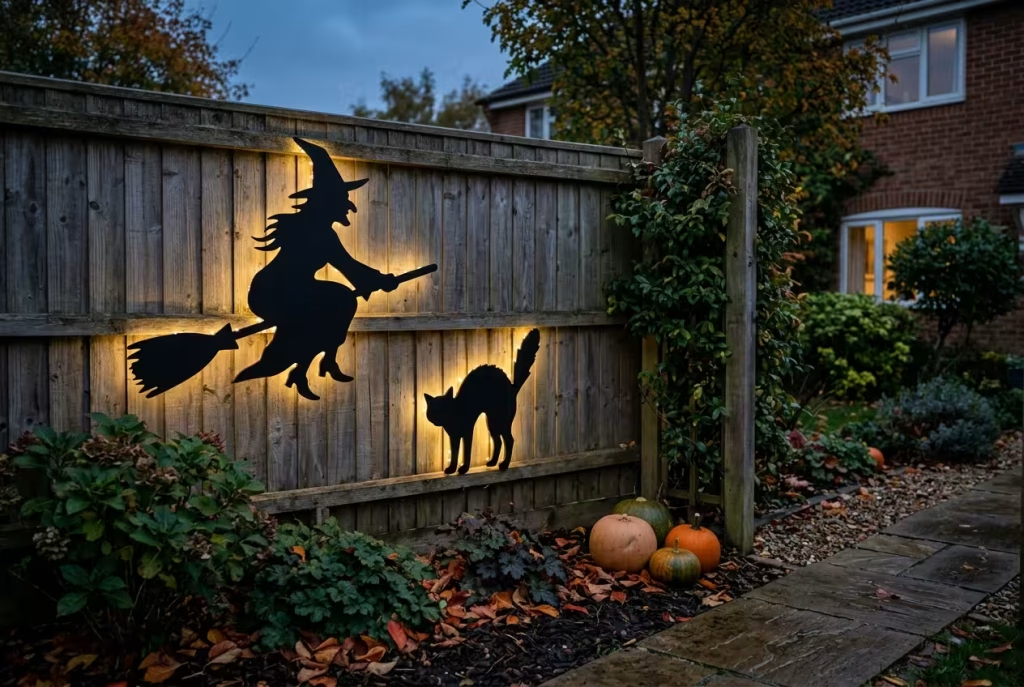
Silhouettes are the old-school trick that never lets you down, and they are an afternoon’s work.
Hour one: design. Keep the outlines bold and simple: a witch on a broomstick about a metre long, a cat arching its back, a crooked tree with a single owl. Detail disappears at night, so if a feature cannot be read as a black shape against the sky, leave it out. Sketch on paper, then scale up with a grid, or project the image onto the board and trace it.
Hour two: cut and seal. Transfer the outlines to 6mm exterior plywood or corrugated plastic and cut with a jigsaw. Give the plywood two coats of matt black and seal the cut edges against damp, because that is where water gets in first.
Hour three: fix and light. Screw them to the fence at staggered heights, set a few centimetres proud on small spacers, then place a string of warm fairy lights behind each shape so a halo of glow traces the edge. Face them towards the pavement, where the audience is.
It is the garden cousin of the classic window scene, and unlike card it will see off a week of drizzle. Wrap them in a sheet at the end of the month and they come out again next year, a little more battered and a lot more beloved.
Lawn Theatre Graveyards, Scarecrows and Mist (Ideas 11 to 15)
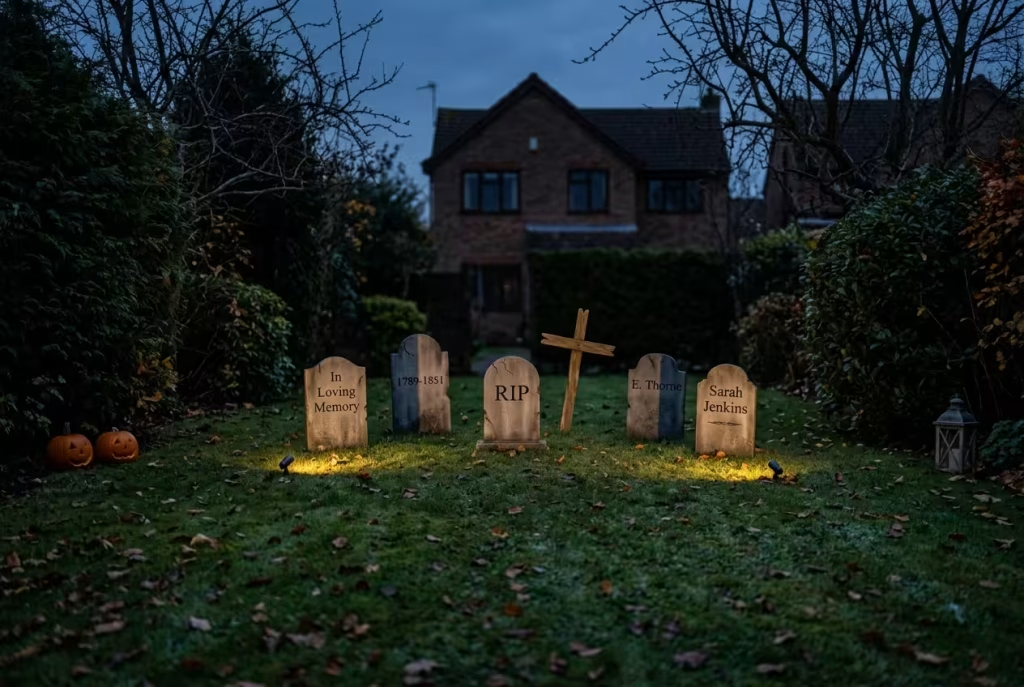
This is where the big moments live. Choose one scene from this zone as your focal point and let the rest of the garden support it. Whichever you pick, give it room: a star needs a little darkness around it to shine.
11. A Graveyard Built to Last the Week

The proof of the pudding is in the weather. Untreated cardboard tombstones turn to porridge after the first shower, whereas PVC foam board or rigid insulation board painted with grey masonry paint survives a soaking.
Shape. Aim for stones between 50 and 90 cm tall, in a mix of rounded tops, crosses and one tall obelisk. Chip a corner or two with a craft knife, lean a couple at odd angles and scatter a few bones around the bases.
Age. Start with a pale grey base coat, then dab on darker grey and a whisper of green with a sponge, so the stones look lichen-streaked and rain-worn. Letter the epitaphs with a black paint pen. Children adore reading them aloud, so save a few jokes for the grown-ups too: Here lies Dave. He said it was only a spider.
Arrange. A graveyard that stands in rows looks like a car park. Cluster the stones in two or three crooked groups, leave a winding gap between them and let the tallest stand slightly back.
Then make sure the lot stays put, because a light prop is a toppling prop. Give every stone the shove test: if it wobbles when you lean on it, it will not survive a gust.
| Anchor | Best for | Notes |
| Metal ground stakes | Soft lawn | Drive in at roughly 45 degrees; plastic stakes grip least |
| Rebar | Tall or heavy figures | Sink 10 to 12 inches into the ground and slide the legs over it, a trick swapped by r/halloween regulars |
| Sandbags | Patios and paving | Stack on the base and hide with leaves |
| Guy line to a tree | Towering props | Thin braided line, almost invisible after dark |
12. A Posable Skeleton Lounging on the Garden Bench

Some scares are funny first and creepy second, and a skeleton settled on a bench as if waiting for a bus is one of them. Wirecutter’s testers put a budget 60-inch posable skeleton through a hosing and several tumbles downstairs, and it came out without a broken bone. It cannot stand unaided, though, but a small loop on its head makes hanging easy.
So sit it on a bench, lash the waist to the slats with clear cable ties, and let the casting begin. Give it a character and the whole garden gets a personality:
- The reader: a battered book on its knees and a pair of spectacles on the skull.
- The gardener: a trowel in one hand, wellies on the bony feet, a straw hat tipped over one eye.
- The patient waiter: a potion bottle on the armrest and a crooked witch’s hat, sitting very, very still.
Pose the fingers and toes last, since that is where the charm lives. Keep it clear of the main path, since a skeleton sprawled across the route is a trip hazard dressed up as a joke.
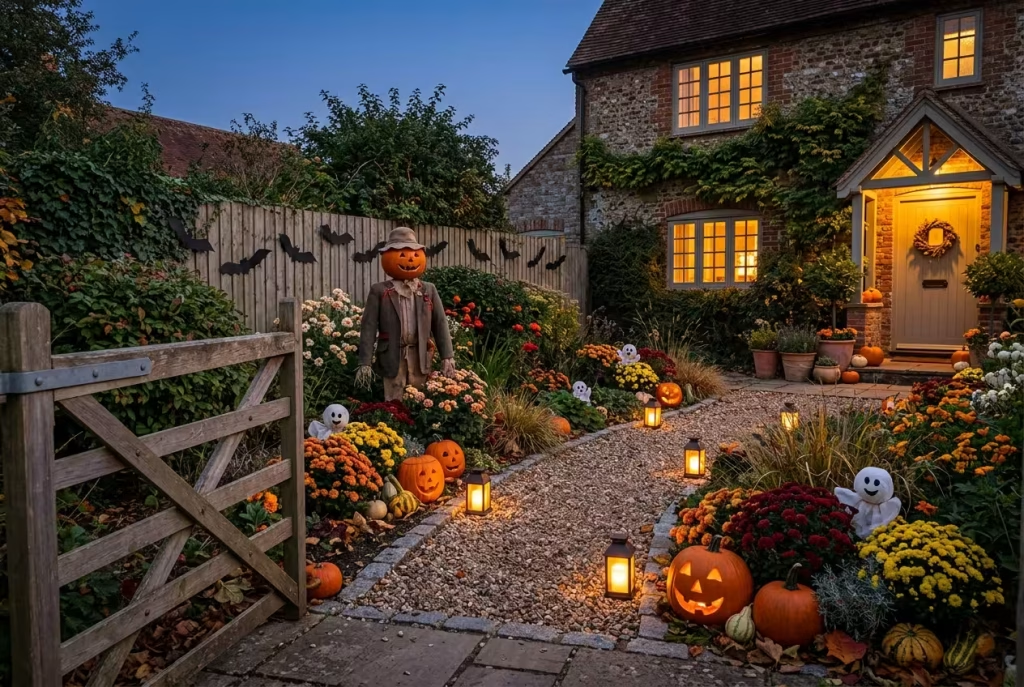
13. The Jack-o’-Lantern Scarecrow

The team at Spooky Little Halloween reckon a pumpkin-headed scarecrow is more sinister than a plain one, and the Sleepy Hollow connection backs them up. There is something unsettling about a figure that stands perfectly still all day and might, just might, be gone by morning. Here is how to build one in four moves.
The frame. Join two lengths of timber in a cross, one about 2 metres and one about 1.2 metres for the shoulders, and sink the upright about 30 centimetres into the ground. Screw the crossbar on firmly, since gravity and wind are both against you.
The body. Dress it in old clothes, stuffed with straw or dry autumn leaves. Cinch the waist with a belt or a length of rope so the stuffing does not slump to the ankles.
The head. Crown it with a faux pumpkin, which is lighter on the frame and ignored by squirrels. A real one looks wonderful for a night and then collapses at the neck by midweek.
The details. Add gloves, a battered hat and a few straws poking from the cuffs. Stand it where a spotlight can hit it from below and turn the face slightly towards the road.
Give it a name. By the second week you will find the children on your street greeting it by that name, and a few neighbours too. Come November, the straw goes straight onto the compost heap.
14. Ground Mist and a Green Wash
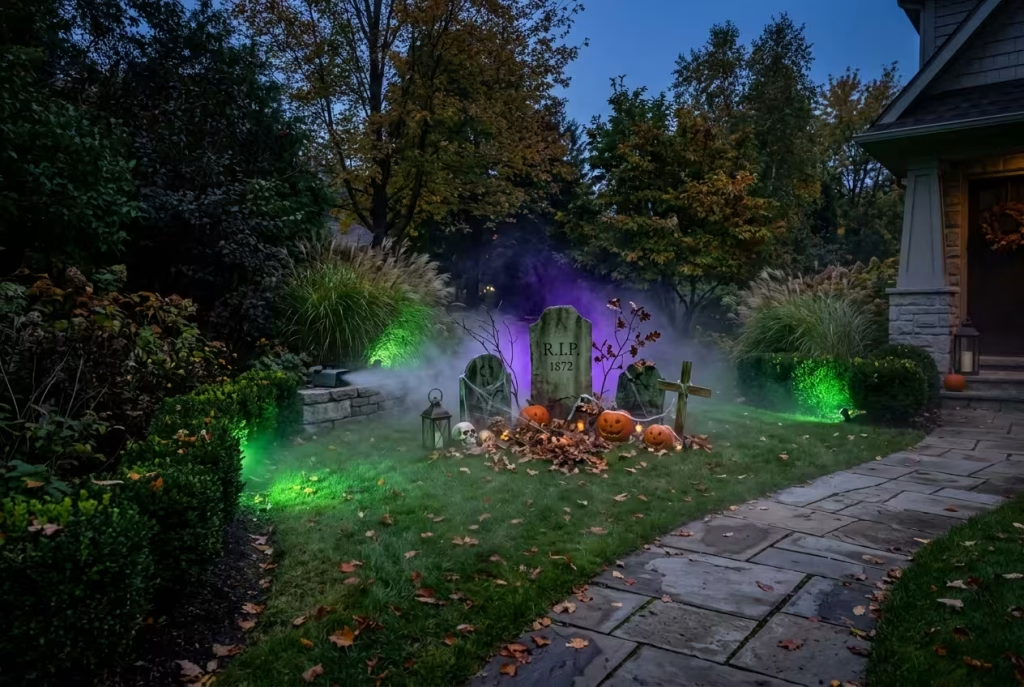
Imagine a lawn that looks as though it has been breathing out. Low-lying fog from a small fogger, paired with coloured spotlights, turns a flat patch of grass into a moody scene without a single extra prop. Professional installers say low mist is what ties a display’s layers together.
Three rules keep it looking good:
- Use more green than purple overall, and let one patch of the garden fall into shadow so the lit parts glow harder.
- Place the fogger low and near the focal point, such as the graveyard or cauldron, so the mist pools where the story is.
- Watch the wind. A breeze will carry fog away in minutes, so tuck the machine behind a hedge or wall, and keep it away from open doors and windows so it does not drift indoors and set off a smoke alarm.
Mind the visibility, though: an insurer warns that fog makes it harder for visitors to see where they are going, so keep it to the lawn edges and well away from the path.
15. Cauldron Corner
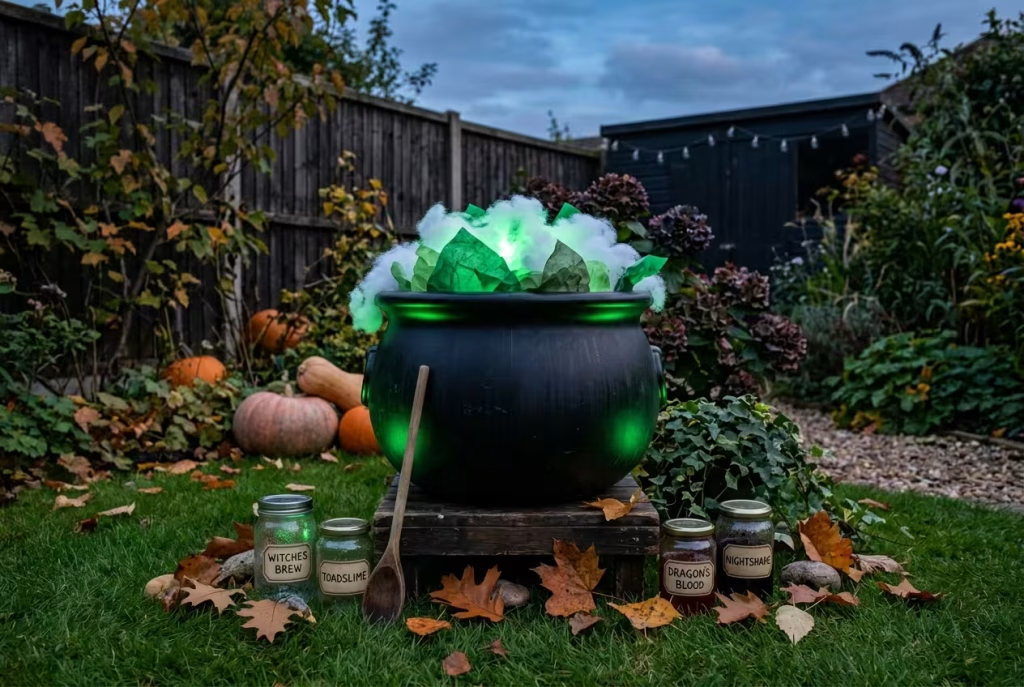
A black plastic cauldron, or a cast-iron planter pressed into service, makes a cracking focal point. Build it the way a stage designer would: from the bottom up.
- Fill the base with scrunched newspaper, so the cauldron looks full without needing a mountain of tissue.
- Layer scrunched green tissue and fibre-fill over the top, and tease it into peaks and bubbles.
- Drop in a flickering LED bulb and aim a green uplight at the rim so it seems to bubble.
- Cluster jam jars labelled with gloriously gruesome contents (eye of newt, bat wing, dragon sneeze) around the base, and prop an old wooden spoon against the side.
Stick to LEDs and leave dry ice well alone around children. The overall effect should say “witch’s kitchen”, not “something went wrong in the shed”.
Beds, Pots and Planters That Bite Back (Ideas 16 to 19)
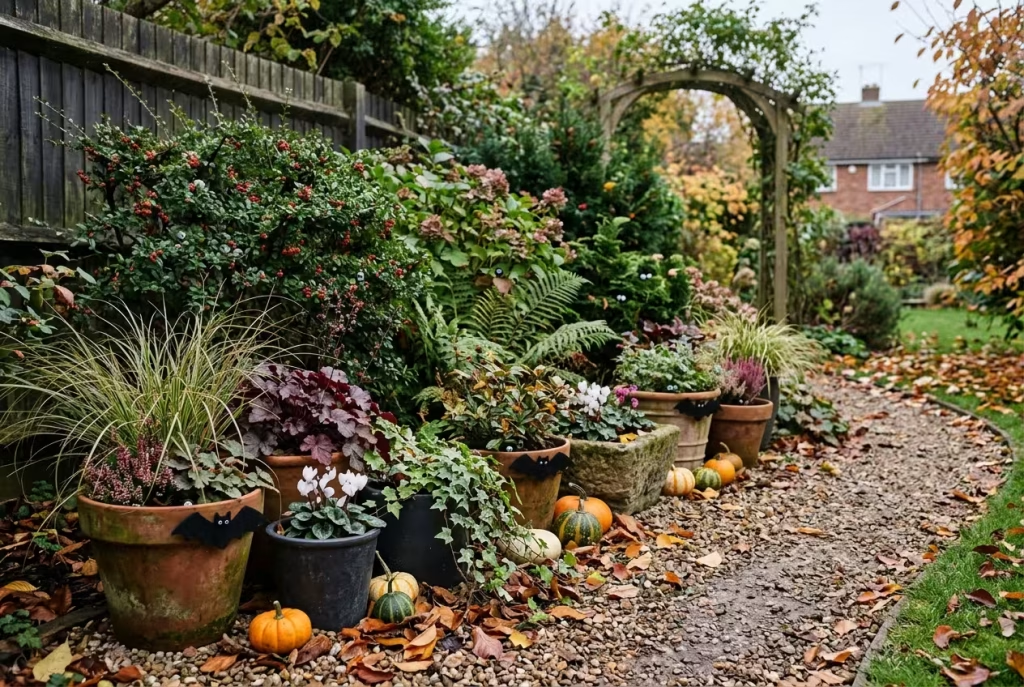
Borders and containers are where the garden itself joins the party. Living plants, felt and foraged finds keep this zone gentle on the planet and the purse, and they are the ideas most likely to survive well past the thirty-first.
16. Eyeballs Peering from the Foliage
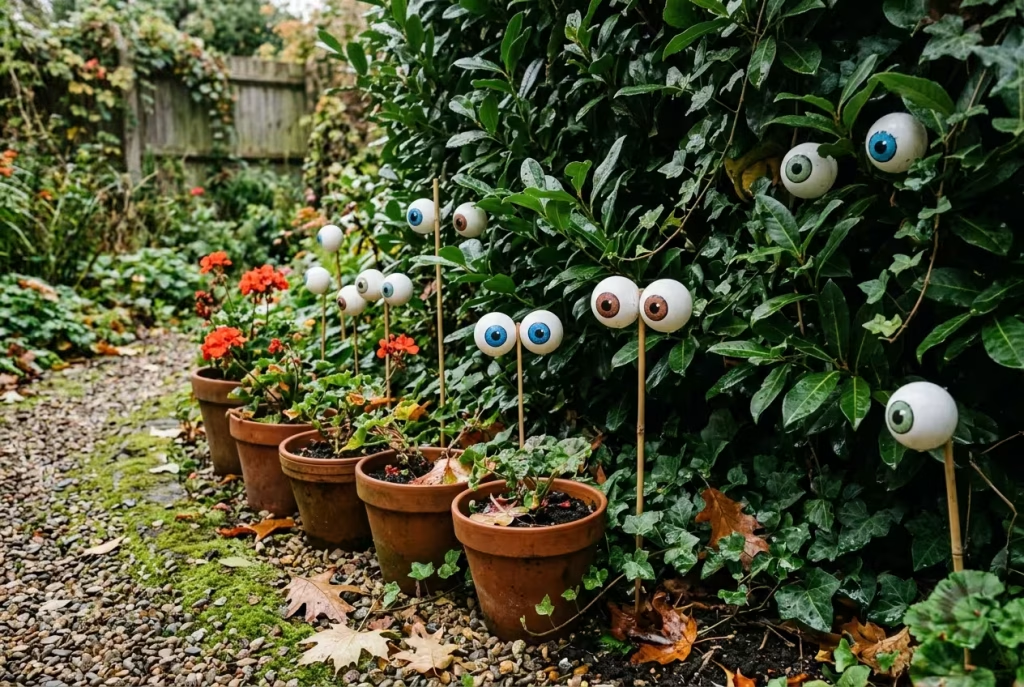
Here is the cheapest scare in this guide: something is watching from the bushes. Wirecutter praised hand-made wool planter eyeballs on 9-inch rustproof wire sticks, and they do turn an ordinary pot into a quirky character. The homemade route is cheaper still: paint pupils on ping pong balls and push them onto garden canes, the same ball trick Good Housekeeping uses for its eyeball wreath.
Poke them in at mixed heights, a few staring out from the base of a hedge, others rising above the geraniums. Pairs read as faces; singles read as something worse, so scatter some of each. Seal painted ones with clear varnish, because poster paint runs at the first shower. Silly, a touch macabre and adored by under-tens.
17. A Thriller, Filler and Spiller Container
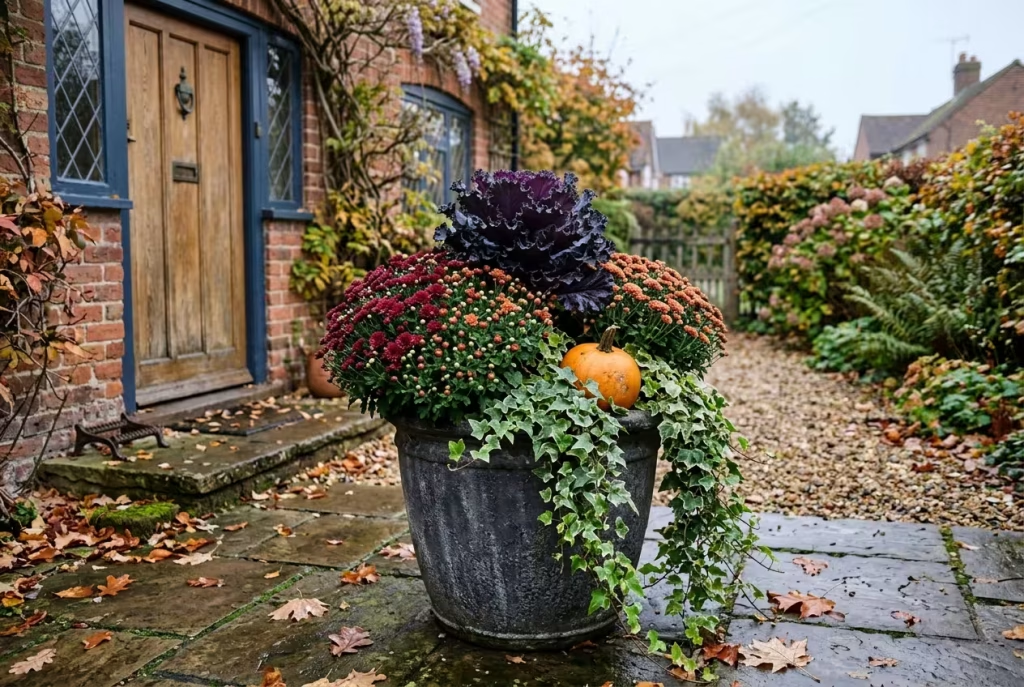
Designers lean on a simple recipe for pots: something tall, something bushy, something trailing. For October, it translates like this:
| Role | Plant | Why it works |
| Thriller (tall) | Ornamental kale or dark-leaved heuchera | Deep purple and near-black foliage looks wonderfully gloomy |
| Filler (middle) | Dwarf chrysanthemums | Cheerful colour, and they keep flowering well into the cold |
| Spiller (trailing) | Ivy | Spills over the rim like something creeping out |
| Finishing touch | One small pumpkin | Tucked in among the leaves for a bit of Halloween |
Buy the chrysanthemums in tight bud rather than full bloom, as they will keep flowering for longer. Pots under a porch roof miss the rain, so check the compost every couple of days. Kale and ivy shrug off early frosts, which keeps the display looking sharp well past Halloween.
18. A Harvest Bed That Carries On to Bonfire Night

One Wirecutter reader grumbled that the guide ignored harvest decor, which can run happily from Halloween to Thanksgiving. Take the hint, because this is the idea that keeps working after the sweets are gone.
Stack a couple of straw bales at the back of a border, then tumble gourds, squashes and a few cornstalks down in front, mixing colours from deep green to buttery cream. Let the biggest pieces sit furthest back and the little warty gourds spill forward, as though the harvest has just been dropped off the cart. A bundle of dried seedheads or a few twigs of rosehips adds height and a nod to the season.
Everything here is compostable, and wildlife experts suggest cutting the pumpkins up afterwards as a snack for birds and small mammals. Dry stalks and straw burn readily, so keep this display well away from candles, heaters and fire pits.
19. A Foraged Twig Wreath for the Gate

There is an old pleasure in wandering the lanes with a basket and coming home with something wild. Make it a family walk: let the children choose the seedheads and berries, and the wreath becomes a small souvenir of an autumn afternoon.
- Bend willow or bramble stems into a ring, wrapping the ends round each other, and bind with garden wire.
- Weave in seedheads, dried hydrangea heads, a few feathers and some berries, tucking each stem under the wire.
- Hang it on the gate or shed door with a swathe of black ribbon.
The finished piece contains no plastic and no glitter, a point that mattered to several Wirecutter readers worried about microplastics. When foraging, take only what you need, since the Sussex Wildlife Trust asks gatherers to leave enough for creatures needing food and shelter. Once the season ends, the whole wreath goes onto the compost.
The Backyard After Dark: Party Mode (Ideas 20 to 23)
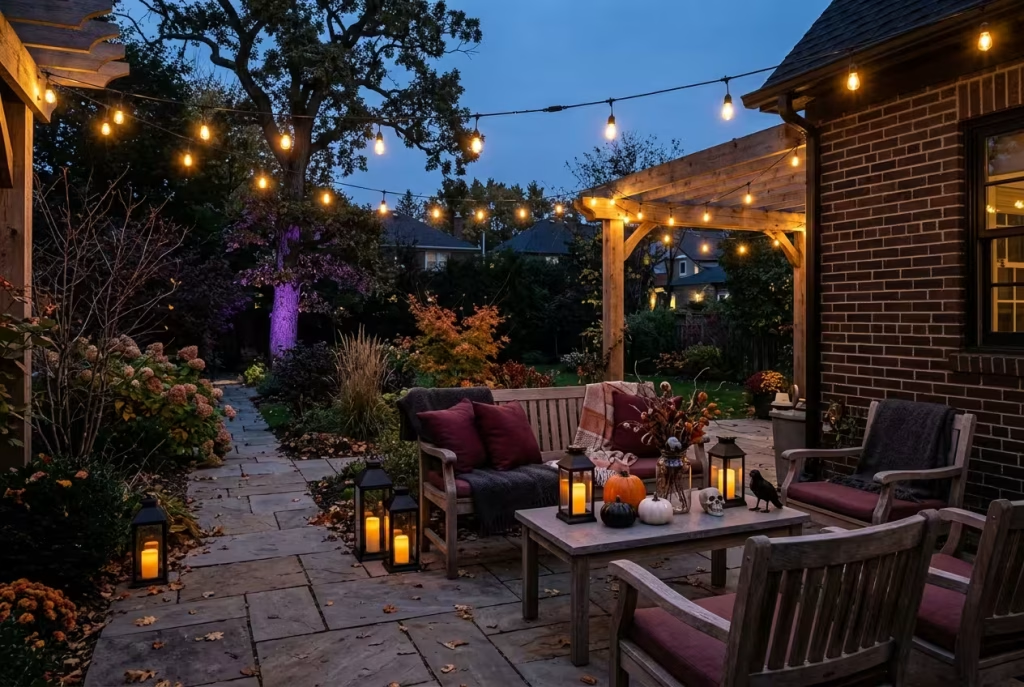
When the sun drops, the back garden becomes a different animal. These four ideas turn an ordinary patio into somewhere guests want to linger, long after the last trick-or-treater has gone home.
20. A Table That Glows Without a Flame
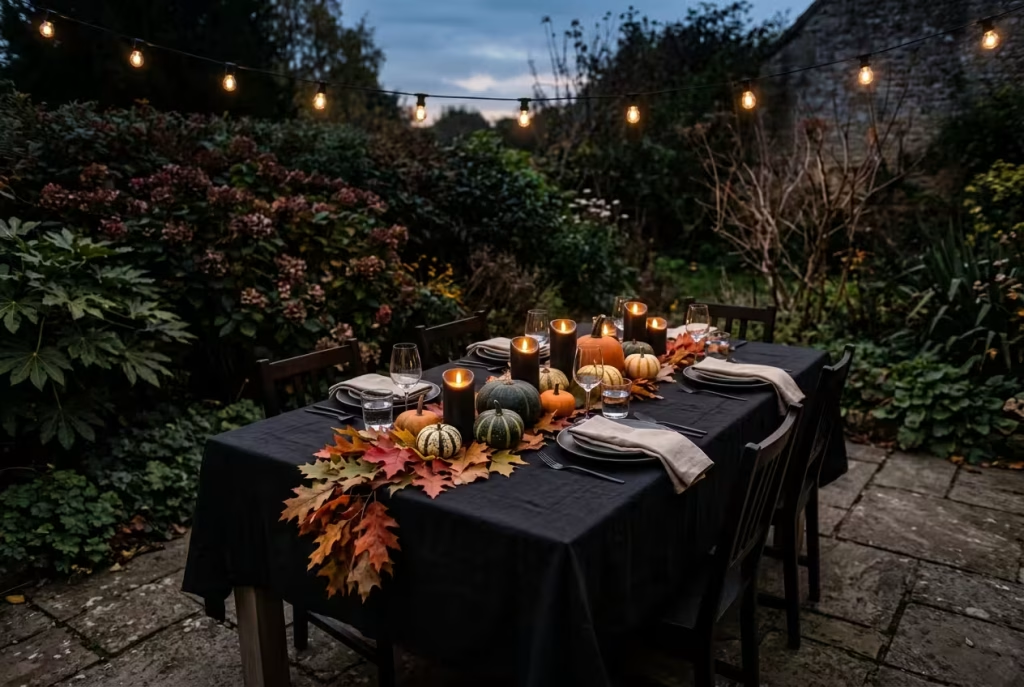
Build it from the bottom up. Cover the table in black linen, or even a black bedsheet, then lay a runner of leaves along the centre for a woodland touch that costs precisely nothing. On top, build a landscape of mixed heights with small pumpkins and flameless pillar candles, tallest in the middle and smallest at the edges.
Wirecutter rates a matt black outdoor LED pillar that glows all night on two C batteries without any risk, and similar designs are easy to find. A real flame sitting beside a paper napkin and a trailing costume sleeve is a recipe for tears before bedtime. With LEDs, you can pile on the atmosphere and none of the worry.
21. A Lantern-Lit Seating Nook
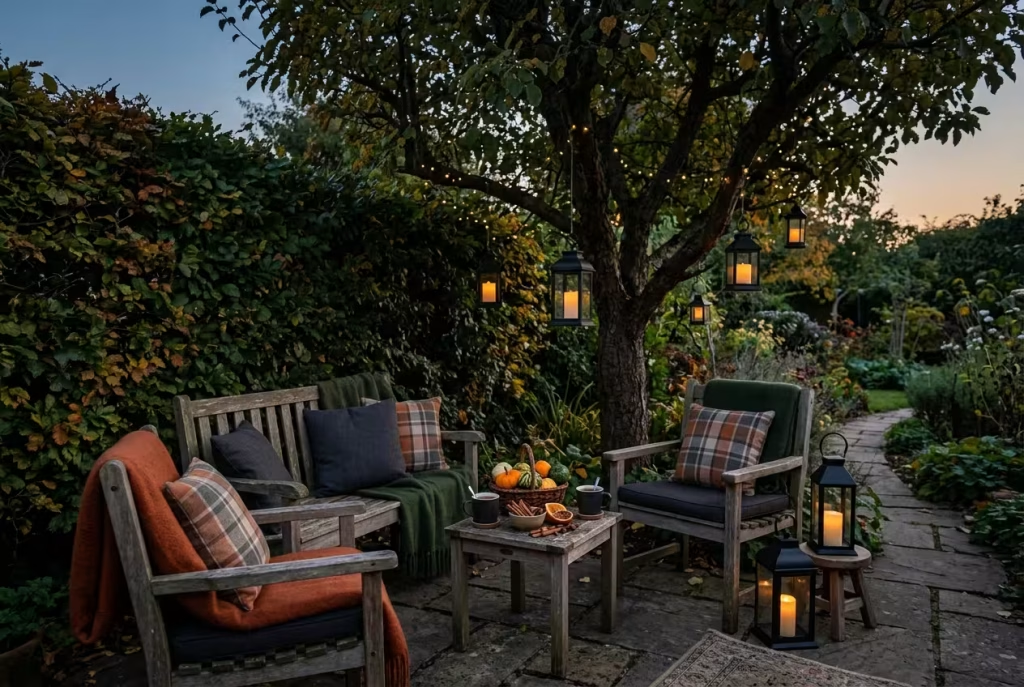
Every party needs a refuge. Think about what makes a corner feel safe and warm, then deliver all five senses:
- Sight: a cluster of lanterns at different heights from a pergola or tree, each holding an LED candle.
- Touch: blankets and cushions piled onto garden chairs.
- Taste: mugs of something hot and a basket of small pumpkins.
- Smell: a bowl of cinnamon sticks and orange peel nearby.
- Sound: a low, spooky playlist, kept quiet enough for conversation.
You have built a cosy corner where grown-ups can hide while the children trick and treat. If a fire pit or patio heater is part of the scene, keep every decoration at least a metre away from it. The safety table below explains why heat and decor are such risky neighbours.
22. A Potion Station for Thirsty Visitors
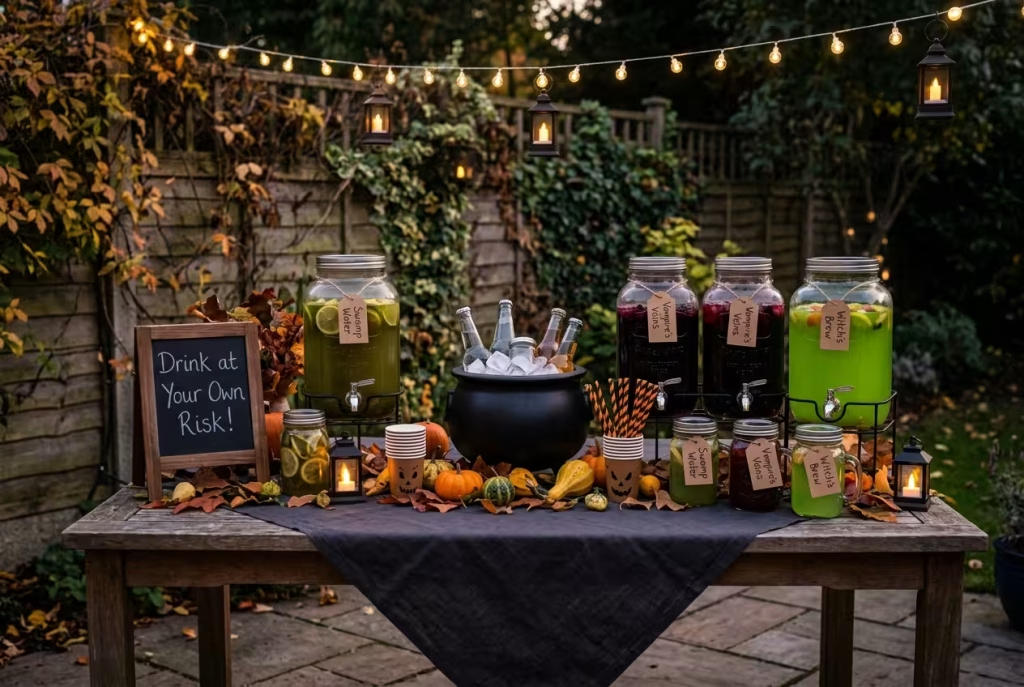
A drinks table earns its keep at any gathering, and this one doubles as a show. Fill jam jars with cordial and label them with handwritten tags: witch’s brew for lime, vampire’s veins for blackcurrant, swamp water for something suitably murky. Park a cauldron full of ice in the middle and set out paper cups.
One r/halloween commenter swears by a slow-cooker of spiced hot chocolate for a yard crowd, and on a chilly night it will draw a queue. Keep a ladle and a stack of cups beside it and add a sign: Drink at your own risk. Run any slow-cooker or lights from an outdoor-rated lead protected by a cover, and keep the cable tucked behind the table, out of the way of eager feet.
23. A Haunted Shed Wall Projection
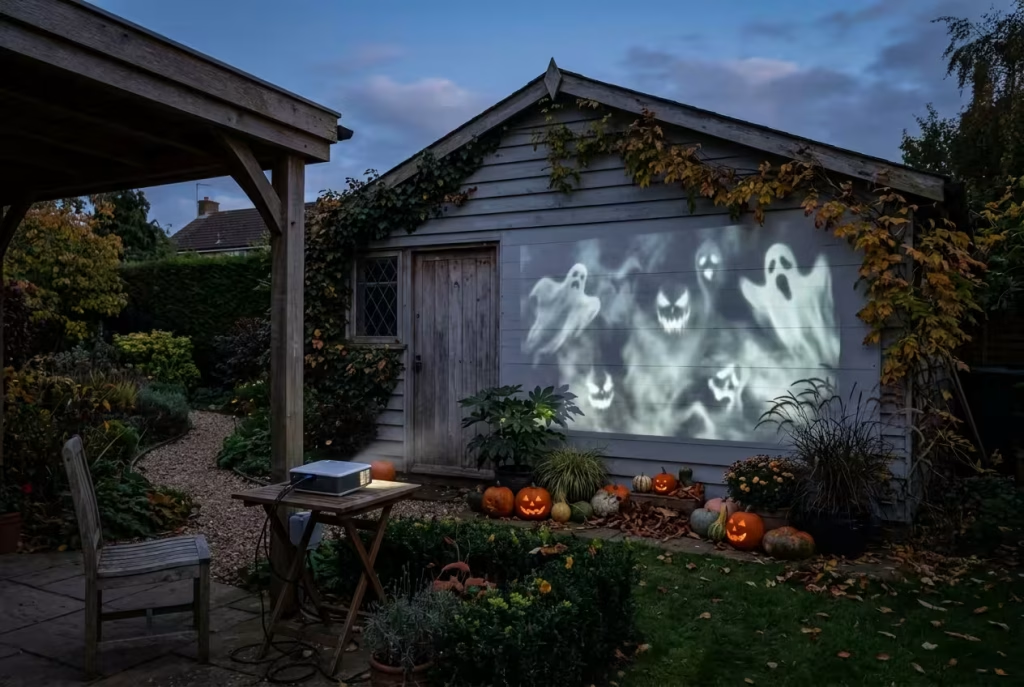
What if the ghosts moved on their own? An outdoor Halloween projector casts drifting ghosts and flickering faces across a shed wall or a white sheet strung between two posts. It costs a fraction of a full prop set, yet it fills a surprising amount of garden with movement.
Setting up. Place the projector on a table under cover, some way back from the surface: the further it sits, the bigger the picture, but the fainter it becomes. A pale, flat wall or a taut white sheet works best, and dusk is better than full dark because the image will still show against the sky. Keep the projector itself dry, and shield the plug end with a weatherproof box.
A second act. The same sheet can host an early evening film for younger guests, which lets the display pull double duty before the main event begins.
Small, Sweet and Budget-Friendly (Ideas 24 to 26)
Not every guest wants a fright. For every child who marches up the path roaring, there is another who holds a grown-up’s hand a little tighter at the gate. These last three keep the mood playful, the price low and the carbon footprint small, and they are the ones the nervous ones will remember kindly.
24. A Friendly Ghost Garden
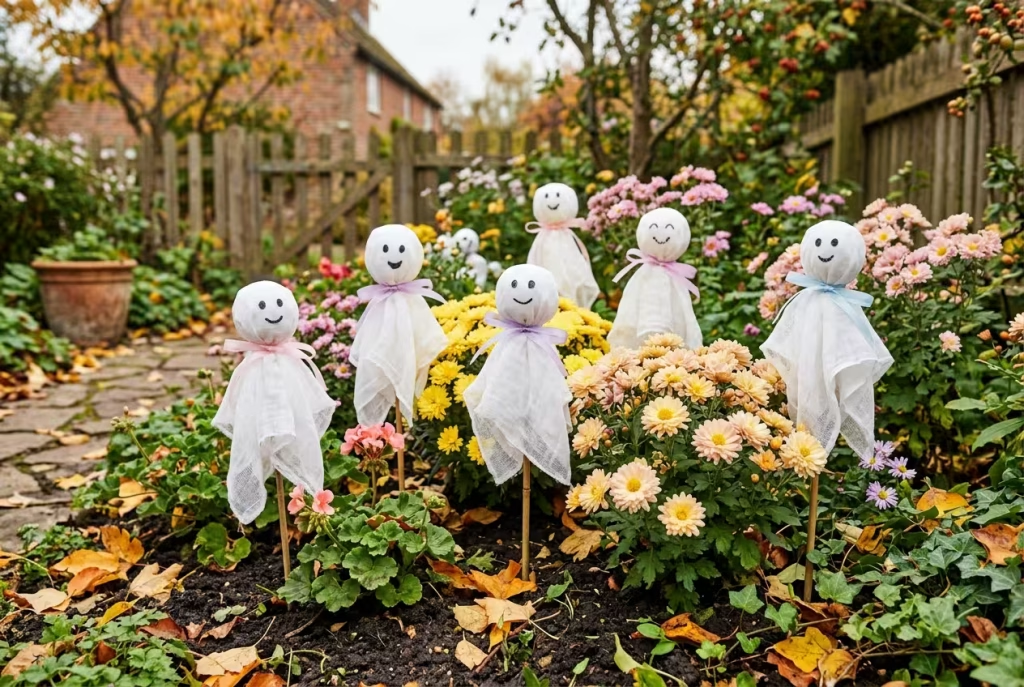
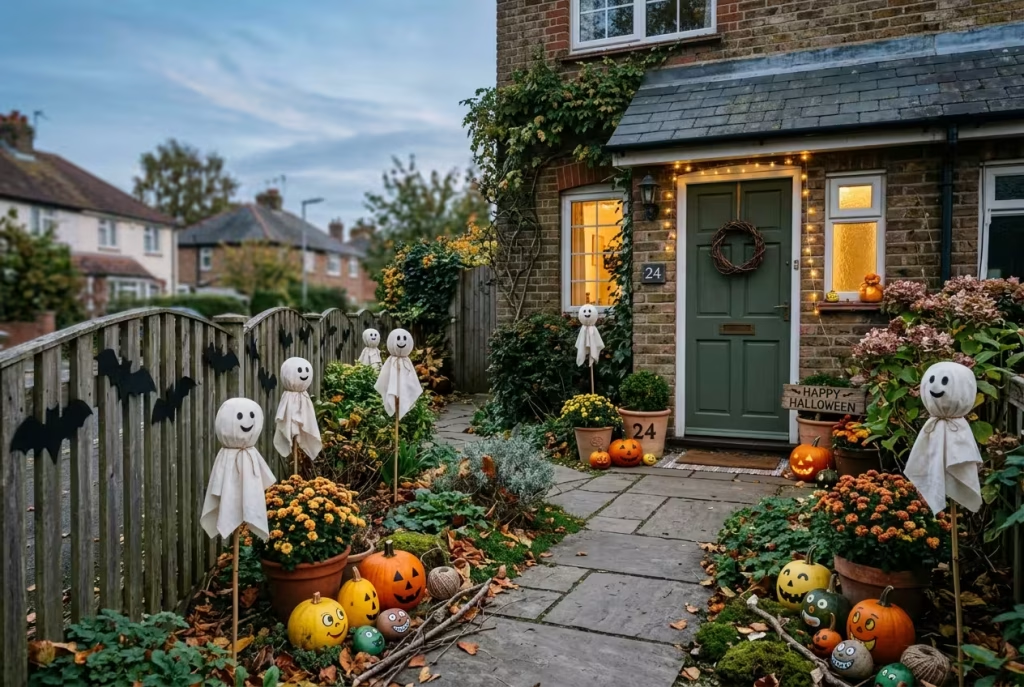
Cut small circles of muslin, drape them over scrunched paper, and fix them to garden canes pushed into the flower beds. Add smiley faces with a fabric pen and a ribbon bow or two. A cluster of these tiny ghosts, peeping out from between the chrysanthemums, is the perfect antidote for toddlers and nervous trick-or-treaters.
Stick to pastel ribbons and white fabric for a soft, sweet scheme, and leave a few hand-sized gaps between the ghosts so the whole bed reads as a gathering of friends rather than a crowd. Set a few at toddler eye level, around 40 to 60 cm, so the smallest visitors can meet them face to face and wave.
You May also Like:
25. No-Carve Painted Pumpkins

A carved pumpkin sags within days, yet an uncarved one kept out of hot sun and hard frost can last two or three months. Painting is also far gentler on small hands than a carving knife, and it means every child, however young, gets to make something that is truly theirs.
- Wipe each pumpkin first with a dilute bleach solution, as extension-service advice suggests, to see off the bacteria, then let it dry fully.
- Paint with acrylic in white, soft pastels or metallics. A pale base coat helps darker colours show up.
- Add faces, stripes or polka dots once the base is dry.
- Finish with a clear spray varnish, and skip the glitter.
You can paint them a week early, which makes them a cracking rainy-day project for the school holidays. Line the finished set along a wall or windowsill and the children will spend the evening pointing out which one is theirs.
You May also Like: 24 Easy Halloween Kitchen Decor Ideas: DIY Spooky Touches and Budget-Friendly Cute Accents
26. Smiling Stones with Attitude

A craft blogger who casts concrete garden stones reports they have lasted years outdoors, even under snow, and it is easy to see why they charm visitors. For most households, ordinary pebbles or flat garden stones do the job with a tiny fraction of the effort.
Paint toothy grins and wonky eyes with acrylics, seal them with outdoor varnish and tuck them along path edges and in borders. Choose flat, smooth stones for faces, and paint a white base first so the colours pop. Make them small and numerous: a dozen grinning stones along a path create a sense of being watched by something friendly.
If you do go the concrete route, wear gloves and a dust mask, because cement irritates skin and lungs. Pack the stones away afterwards, and they will be back next year, grinning as ever.
Keep Everyone Safe: Fire, Electrics and Little Feet
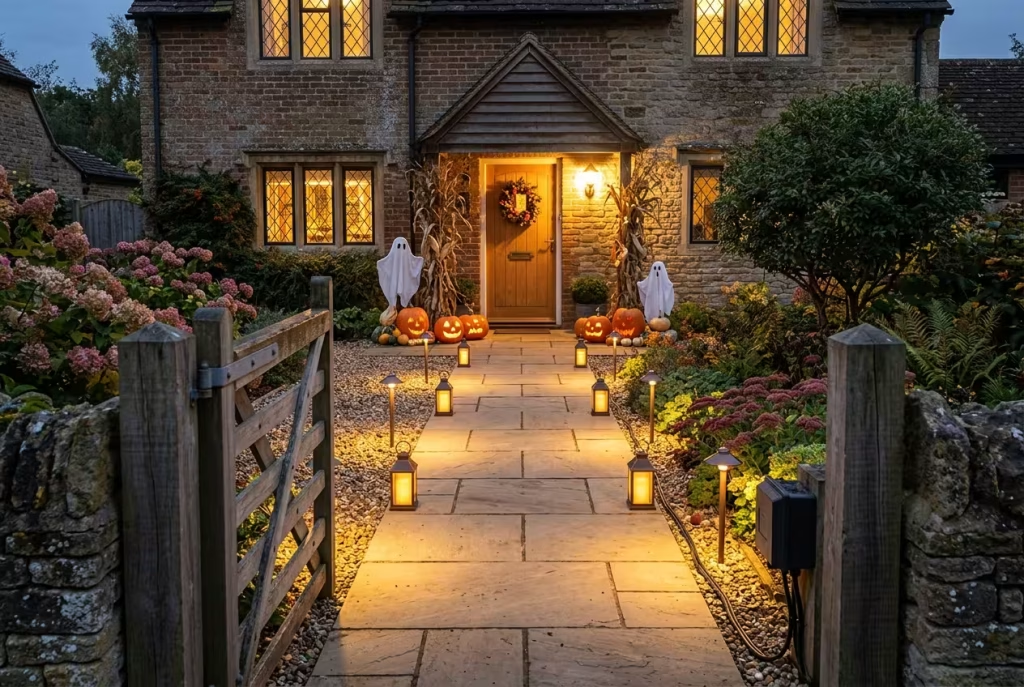
A gorgeous display means nothing if somebody ends the evening in A&E. Run through this table before you plug anything in.
| Hazard | What the evidence says | What to do |
| Real flames | In the US, an average of 832 home fires a year (2019 to 2023) began with decorations, with 3 deaths and $17 million in damage. Nearly half (47%) happened because items sat too close to a heat source, and about a third (33%) started with candles | Use LED lights only, and keep dried stalks, paper and fabric clear of heaters and fire pits |
| Outdoor electrics | IP44 means splash-resistant, while IP65 withstands water jets. Joining two light strings creates a gap where moisture creeps in | Use outdoor-rated cable, seal every join in a weatherproof box, plug into an RCD-protected socket (or add an RCD adaptor) and never chain extension leads |
| Trip hazards | Bulky masks and costumes limit children’s vision | Keep the route flat, lit and at least 90 cm wide, secure cables along the edge, and move hoses, bikes and plant pots |
| Fog and smoke | An insurer notes that fog makes it harder for visitors to see | Keep machines away from the route and switch off when queues form |
| Dogs and doorbells | Excited pets and a stream of strangers rarely mix | Keep dogs indoors or on a lead during trick-or-treat hours |
| Wet leaves | Autumn debris turns paving into an ice rink | Sweep the path and steps before dusk |
Buy lights and extension leads that carry a recognised safety mark (CE or UKCA) and check cables for cracks before use. Unmarked bargains are the false economy of the season.
One last habit is worth building: do a final walk at dusk, in costume height if you can manage it. Crouch to a child’s eye level and follow the path from the gate to the door. If anything makes you flinch, a cable, a dark step, a prop at ankle height, fix it before the first knock.
Be Kind to the Wildlife
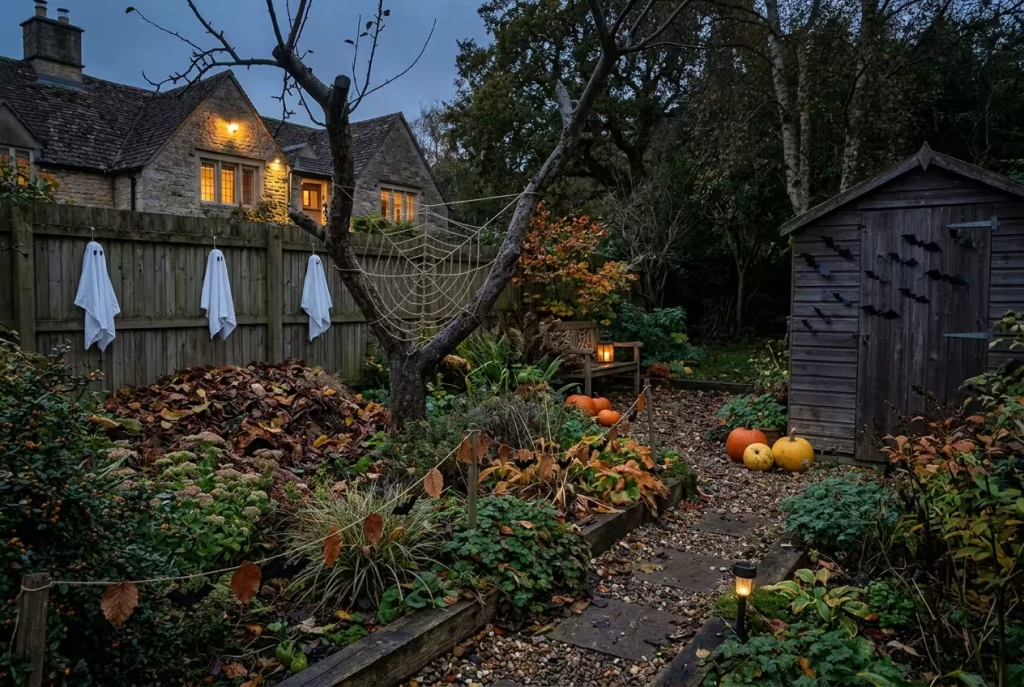
Halloween falls just as hedgehogs, birds and bats are preparing for winter, so a few small choices go a long way. A garden that frightens the neighbours is a triumph; one that frightens the wildlife is a missed opportunity. Beyond avoiding plastic webbing:
- Dim the late evening. Keep loud noise and bright lights to a minimum late in the evening, as the Sussex Wildlife Trust advises.
- Take it all down promptly on 1 November. Leftover plastic can harm animals, and birds may mistake it for nesting material.
- Try secondhand first. Charity shops and car boot sales are full of reusable props.
- Choose natural swaps. Twine webs, paper bats, towel ghosts and leaf bunting that can be composted all do the job.
- Store, do not bin. The easiest eco-friendly decoration is the one you already own.
Making Pumpkins Last
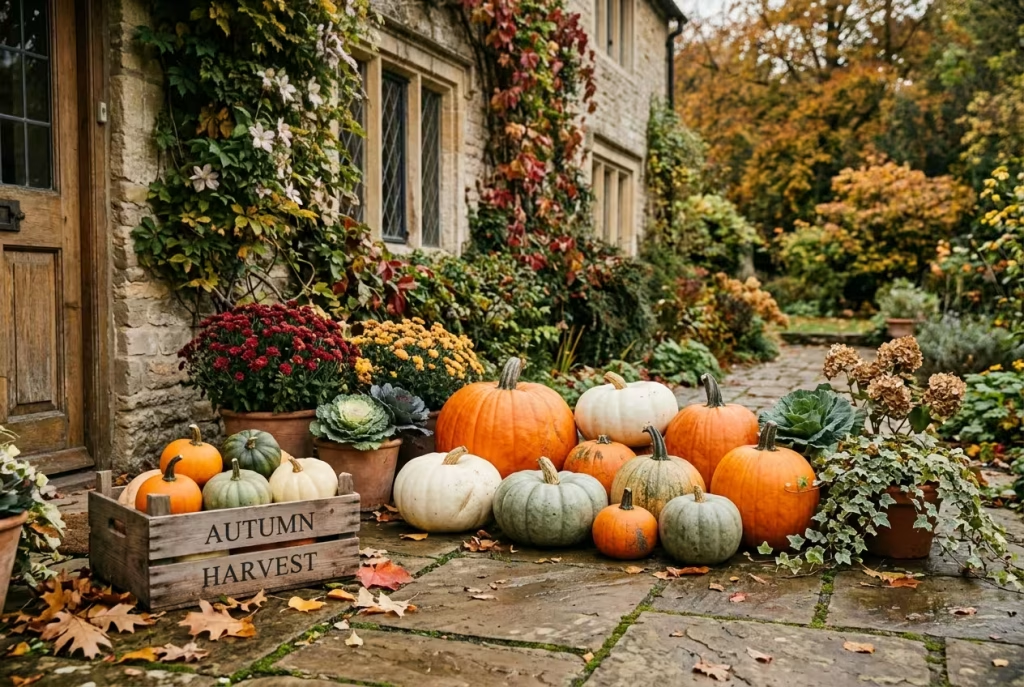
| Pumpkin state | How long it lasts | What helps |
| Uncarved, out of hot sun and hard frost | Two to three months | Wipe with 1 part bleach to 10 parts water before display, as extension-service advice recommends |
| Carved, on display | As little as a few days | Seal cut edges with petroleum jelly, and avoid real candles because the jelly is flammable |
| Carved, stored between displays | Up to ten days in the fridge | Keep out of direct sun by day |
| Squirrel pressure | They will nibble carved and uncarved alike | Smear on petroleum jelly mixed with hot sauce, or spray with hairspray, and bring pumpkins in overnight |
Nothing here is foolproof, and methods vary, so treat each as a way to improve the odds rather than a guarantee.
What It Will Cost Three Budget Tiers
| Tier | Ideas | Rough outlay | Best for |
| Pocket money, under £10 | 2, 6, 7, 8, 24, 25, 26 | Scrap, twine, old sheets, acrylic paint | Families and first-timers |
| Weekend project, £10 to £40 | 1, 3, 5, 9, 13, 16, 17, 18, 19, 20, 22, 23 | Lights, plants, a faux pumpkin, an LED pillar | Most gardens |
| Statement pieces, £40 and up | 4, 10, 11, 12, 14, 15, 21 | Timber, ply, foam board, a fogger, spotlights | Keen decorators who reuse for years |
These figures are rough guides and will shift with retailer and season. The NRF reports that about half of American shoppers start Halloween shopping in September or earlier, and spreading the spend across weeks is a trick any household can borrow. If you can only do one thing from each tier, light the path, build the scarecrow and hang the bats: three ideas, one evening each, and the garden is transformed.
Why a Garden Display Is Worth the Effort
Only 42% of American households in the NRF’s 2026 survey plan to decorate their home or yard, which means a lit gate and a grinning scarecrow make you part of a generous minority. A decorated garden is a small public gift. It tells the postman, the children and the grumpy chap next door that a bit of joy lives here.
Children remember the house with the glowing ghosts for years, long after they have forgotten which sweets they collected. Some of them will grow up and string their own lights along a path, and tell their own children about the house on the corner. Dusk deepens, the path glimmers, and for a few October evenings an ordinary street feels like the opening scene of a story.
Final Thoughts
The best Halloween garden decor ideas have little to do with money and a great deal to do with intent. Pick a mood, light the route, anchor your props and keep the wildlife in mind. Then add one idea that makes you grin, whether that is a pumpkin-headed scarecrow or a bed of tiny ghosts. Do that, and you will have built the house people remember.
Right, off you go: the gate is waiting.
Frequently Asked Questions
How do I keep wind from knocking over Halloween decorations?
Stake, weigh or tie everything. Drive metal stakes in at around 45 degrees, sink rebar 10 to 12 inches for tall figures, put sandbags on patios, and avoid cardboard, which collapses in the first shower.
Are fake spider webs bad for wildlife?
Yes. The RSPB, the Yorkshire Wildlife Trust and Sussex Wildlife Trust all warn that plastic webbing can trap birds, bats, hedgehogs and insects. Brown garden twine with generous gaps is a safer swap.
How long do pumpkins last outside?
Uncarved pumpkins last two to three months out of hot sun and hard frost. Carved ones may last only a few days, though refrigerating them between displays can stretch that to around ten.
How do I stop squirrels eating my pumpkins?
Nothing is foolproof, yet petroleum jelly mixed with hot sauce, a spray of hairspray and bringing pumpkins in overnight all help. A faux pumpkin at the front is ignored entirely.
Is it safe to use real candles in jack-o’-lanterns?
Fire experts at the NFPA advise battery-operated candles or glow sticks. Petroleum jelly on the pumpkin makes a real candle even riskier, so go LED.
Can Halloween lights and extension leads go outside in the rain?
Only if they are rated for outdoor use. Look for at least IP44 on connections, seal every join in a weatherproof box and plug into an RCD-protected socket.
How do I keep trick-or-treaters safe in a decorated garden?
Keep a flat, lit route at least 90 cm wide, run cables along the edge, move hoses and bikes, and keep fog and flames away from the path.
How do I decorate a small front garden without it looking cluttered?
Choose one focal point, group props in odd numbers, vary heights and stick to a single colour mood. Lighting does more work than extra props.
What can I do for a backyard Halloween party?
Try a flameless candlelit table, a potion station, a lantern-lit seating nook and a projected ghost show on the shed wall (ideas 20 to 23).
What are the cheapest ways to decorate a Halloween garden?
Milk jug ghosts, sheet ghosts, twine webs, paper bats, painted pumpkins and painted stones all come in under £10 and use materials you may already have.
How do I decorate without creating plastic waste?
Reuse milk jugs and old sheets, forage lightly, shop secondhand first, compost natural items and store decorations for next year.
When should I put decorations up and take them down?
There is no fixed rule, though the last two weeks of October suit most gardens. Take plastic and webbing down on 1 November, and leave harvest elements out until Bonfire Night if you like.