Mountain Beach House Ideas That Feel Impossible but Work Beautifully
A mountain beach house is a hybrid home designed for locations where coastline meets elevation, or where homeowners want the relaxed openness of coastal living without sacrificing the warmth, durability, and protection required in mountainous environments. I often describe it as a balance between exposure and shelter. You are designing for salt air, strong winds, shifting temperatures, and intense natural light, sometimes all within the same day. When done properly, this style feels calm, grounded, and effortless, yet performs exceptionally well in demanding conditions.
The reason this approach works is simple. Coastal design prioritises light, views, and fluid indoor outdoor living, while mountain architecture focuses on insulation, structure, and material resilience. A mountain beach house takes the best of both. In my own projects, this has meant pairing large glazed openings with high performance frames, combining pale coastal palettes with timber and stone, and using layouts that feel open without being exposed or inefficient. The challenge is never aesthetic alone. It is about managing solar gain, wind direction, moisture, and thermal comfort while maintaining a relaxed, unfussy interior.
This guide is structured around 25 practical design ideas drawn from real renovation and new build projects. Each idea focuses on a specific element, from cladding and rooflines to interior layouts and outdoor spaces. I include measurements, material considerations, and honest pros and cons so you can assess what will work for your site, climate, and budget.
This article is written for homeowners, self builders, and renovators who want design clarity rather than trends. Every recommendation comes from hands on experience working with coastal plots, hillside sites, and exposed locations. The goal is to help you design a mountain beach house that looks effortless but performs intelligently for years to come.
Weathered Timber Cladding With Coastal Undertones
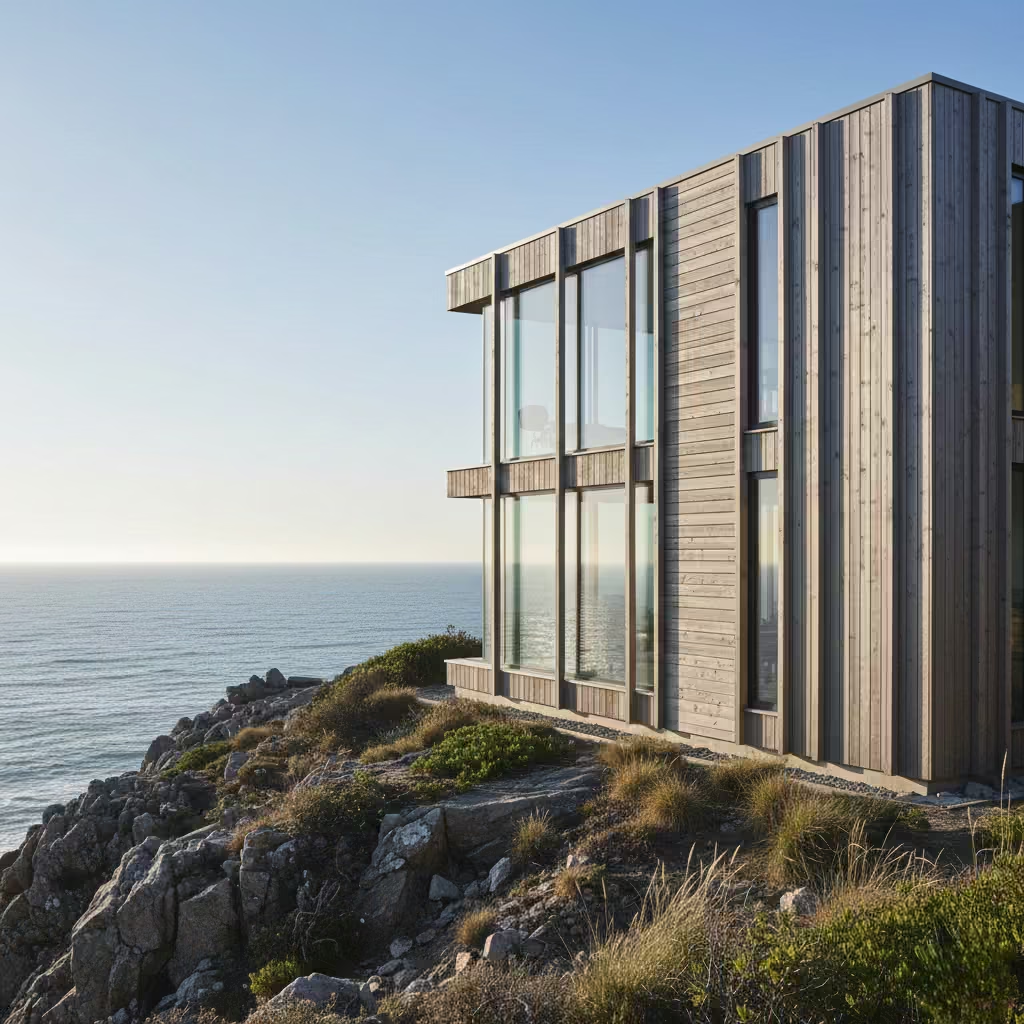
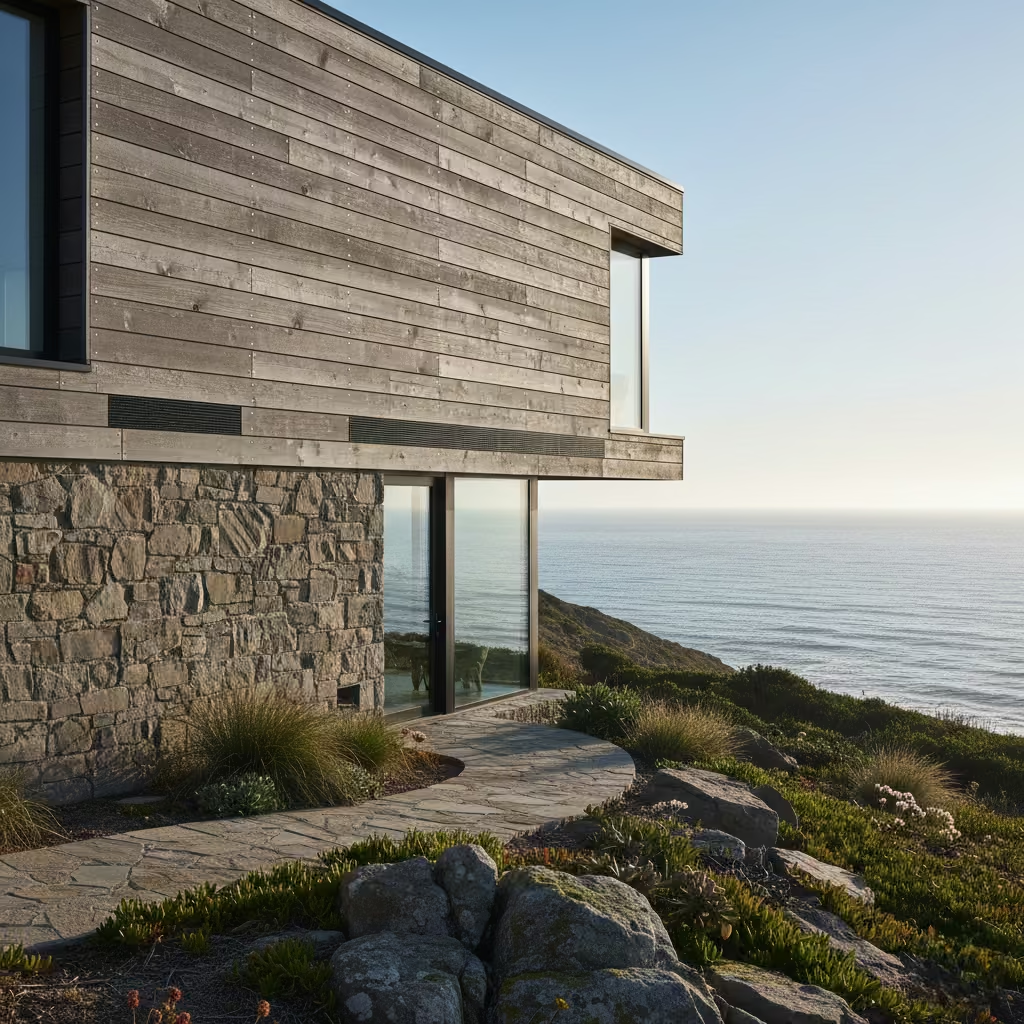
Weathered timber cladding is one of the most effective ways to visually connect a mountain beach house to its landscape. It bridges the raw, rugged quality of alpine architecture with the softness associated with coastal homes. I use this approach to create façades that feel settled and timeless rather than new or overly polished. The natural patina helps the building sit comfortably against rock, sand, and vegetation while diffusing the impact of strong light and shadow.
This approach performs best on exposed coastal sites near hills, cliffs, or elevated shoreline properties where salt air and wind are constant factors. It works particularly well on south- or west-facing elevations where sunlight will accelerate natural weathering. In colder mountain-adjacent climates, it is most effective when paired with a ventilated rainscreen system to manage moisture and temperature fluctuations.
I typically specify horizontal boards at 140–180 mm (5.5–7 in) face width for exterior cladding, with a thickness of 18–22 mm (0.7–0.9 in). Vertical battens, if used, are usually 40–50 mm (1.5–2 in) wide. A minimum 20–25 mm (0.8–1 in) cavity behind the cladding is essential for airflow and long-term durability. On multi-storey elevations, I break up large expanses with shadow gaps every 2.4–3 m (8–10 ft) to avoid visual monotony.
Western red cedar, larch, and thermally modified pine are my most reliable choices. For coastal undertones, I avoid heavy stains and instead use light oil treatments or allow the timber to silver naturally. In harsher marine environments, I often pre-weather boards or apply a grey wash to ensure even ageing. Stainless steel fixings are non-negotiable due to salt exposure.
On a recent hillside beach project, I specified untreated larch cladding on the upper storey and stone at ground level. Within 12 months, the timber had softened into a muted grey that reduced glare and blended beautifully with the surrounding rock. The key lesson was detailing. Proper drainage gaps and edge clearances made the difference between elegant ageing and premature failure.
Pros
- Ages gracefully and improves visually over time
- Reduces visual impact in exposed landscapes
- Works with both coastal and mountain architectural forms
- Minimal maintenance when detailed correctly
Cons
- Initial material cost is higher than composite alternatives
- Poor detailing can lead to uneven weathering
- Colour change is unpredictable without pre-treatment
- Not ideal for clients wanting a crisp, uniform finish
Elevated Decks Designed for Sea Views and Mountain Runoff
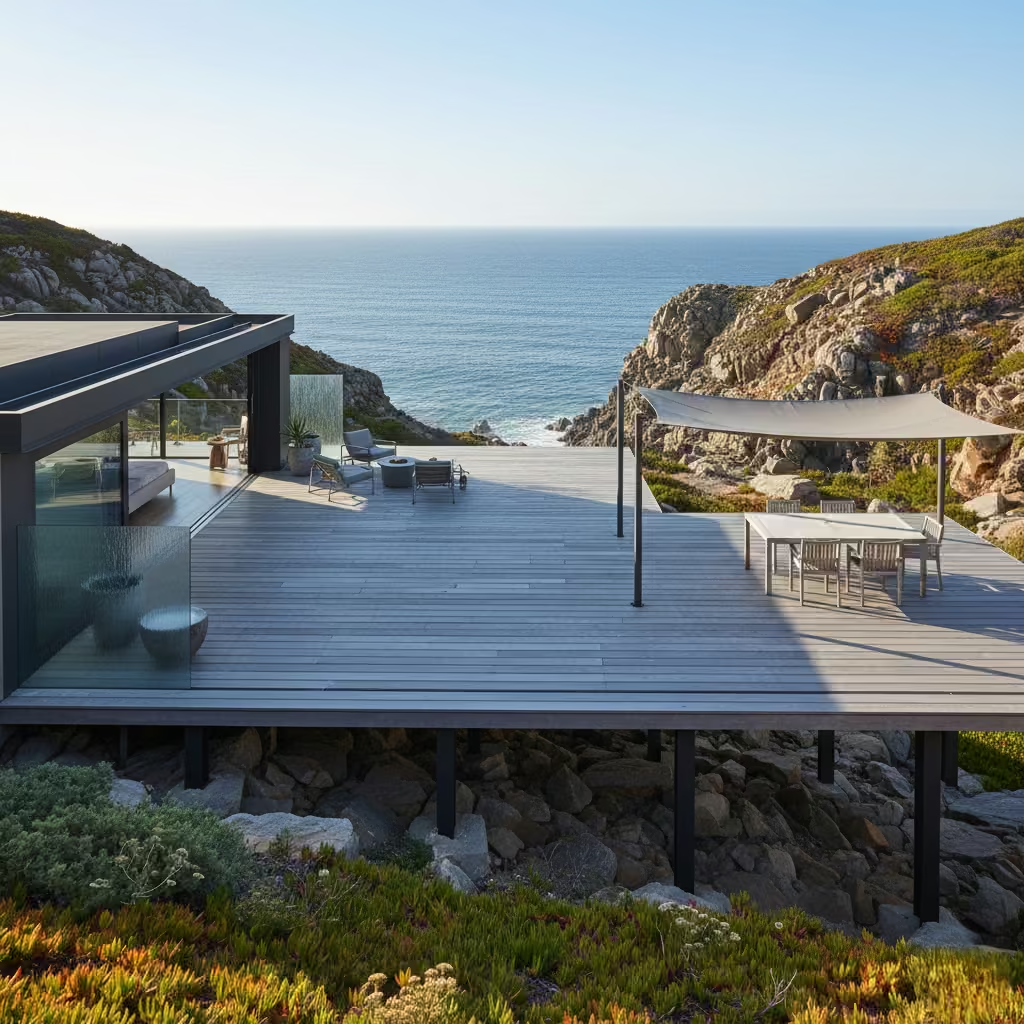
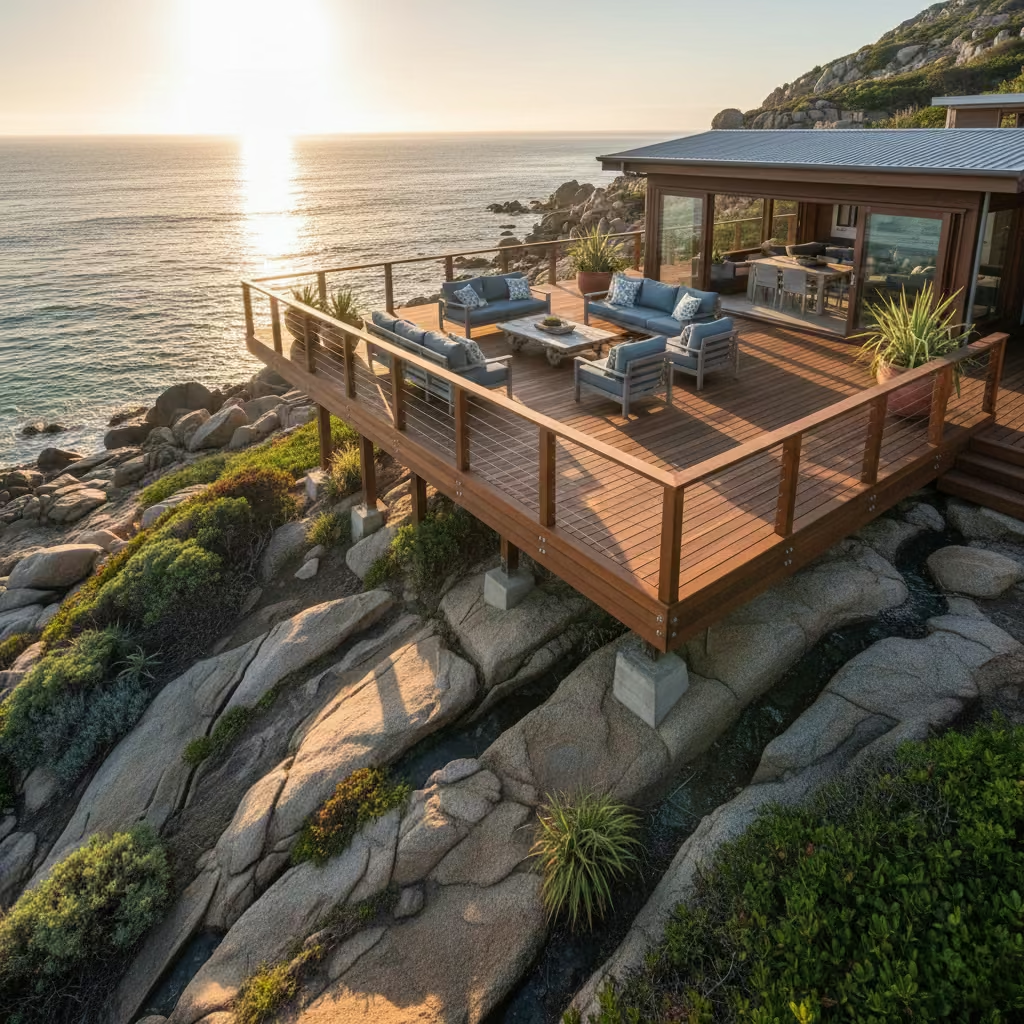
An elevated deck is often essential in a mountain beach house, not just for capturing sea views but for managing the realities of sloped terrain and heavy water flow. I design these decks as extensions of the architecture rather than add-ons. When handled correctly, they create a strong visual connection to the landscape while protecting the structure from surface water, sand, and erosion.
This approach is most effective on hillside or cliff-adjacent coastal sites where ground levels fall away quickly and stormwater runoff is significant. It suits properties with prevailing sea views, particularly when the main living spaces are positioned on the upper level. In areas with high rainfall or snowmelt from nearby mountains, elevation becomes a functional necessity rather than a luxury.
For comfortable outdoor living, I recommend a minimum deck depth of 3–3.6 m (10–12 ft). This allows for dining or lounge seating without crowding circulation zones. Finished deck height typically ranges from 600 mm to 1.5 m (24 in–5 ft) above grade, depending on slope. Structural posts are usually spaced at 1.8–2.4 m (6–8 ft), and I always allow a minimum fall of 1:80 for drainage. Guardrails should be 1–1.1 m (39–43 in) high to meet most building regulations while maintaining sightlines.
I favour hardwoods such as ipe or accoya for their durability, or high-quality composite boards where maintenance access is limited. In coastal mountain environments, all fixings and brackets must be marine-grade stainless steel. Open joint decking with 5–7 mm (0.2–0.28 in) gaps allows water, sand, and debris to pass through easily, reducing long-term maintenance.
On a coastal mountain renovation I worked on, we elevated the main deck by 1.2 m (4 ft) to sit level with the living room floor. This decision eliminated the need for steps, improved drainage during storms, and significantly enhanced the view line. The biggest lesson was planning substructure early. Coordinating drainage paths and footing placement before finalising finishes avoided costly retrofits later.
Pros
- Maximises views without altering the landscape
- Protects the structure from water and erosion
- Improves airflow beneath the deck
- Creates a clear indoor-outdoor connection
Cons
- Higher construction and engineering costs
- Requires precise drainage detailing
- Can feel exposed without proper wind screening
- Ongoing inspection needed in harsh climates
You May also Like: 25 Mountain Home Office Designs to Inspire Your Cozy Workspace
Large-Format Sliding Glass for Light Without Heat Loss
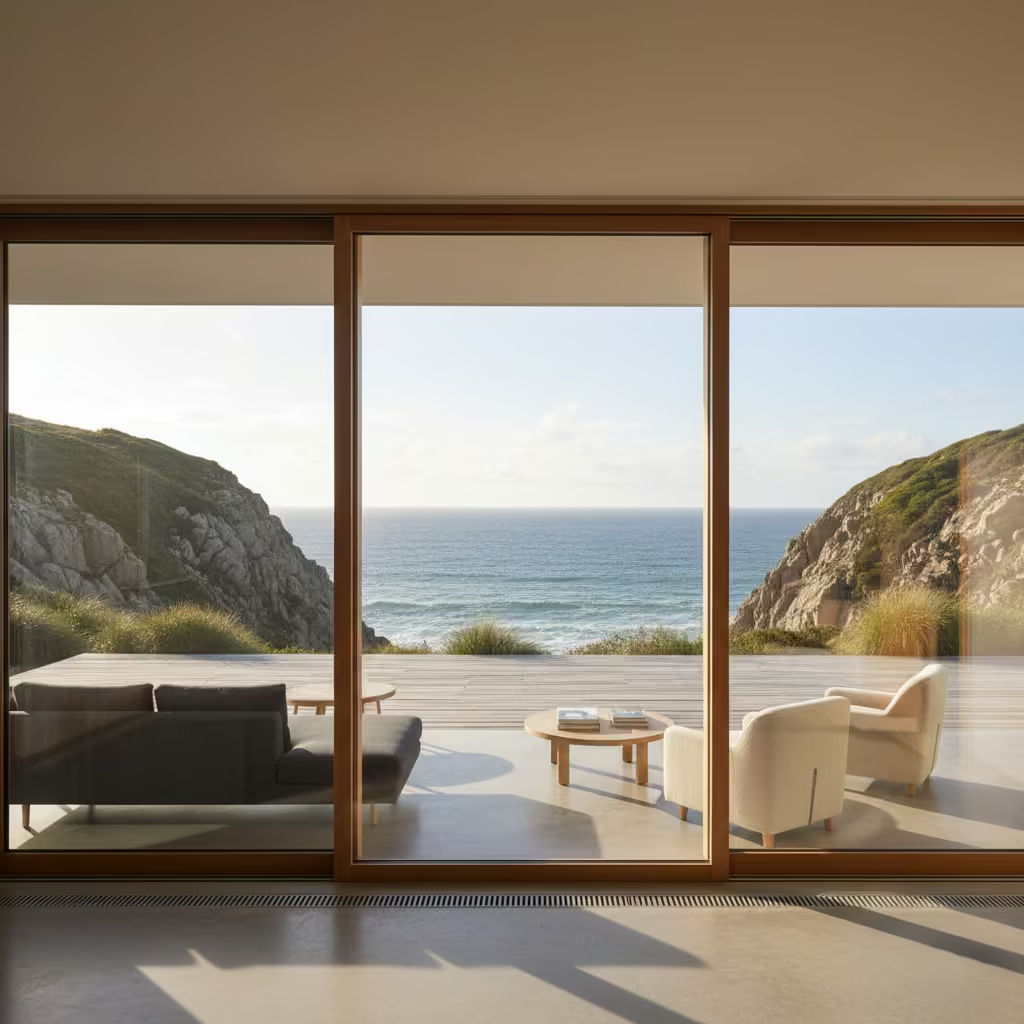
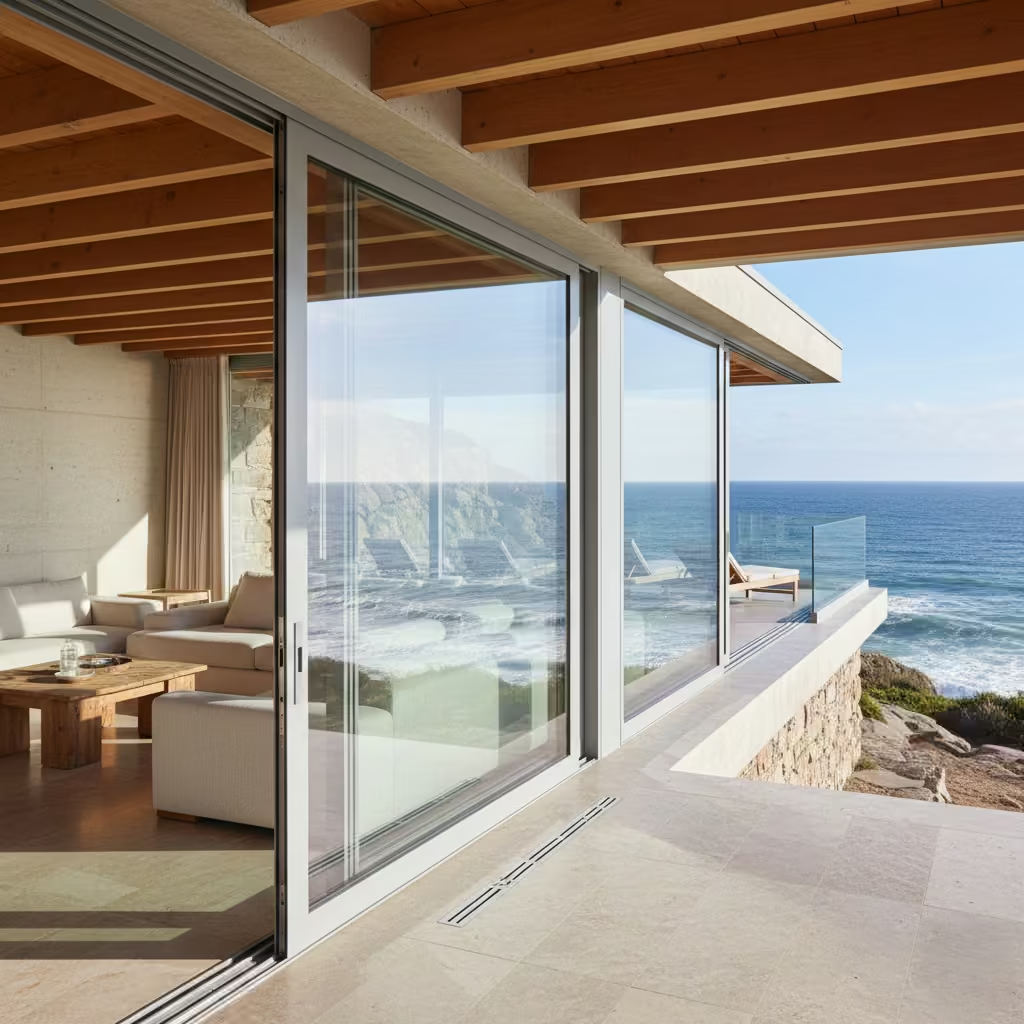
Large-format sliding glass is central to the mountain beach house aesthetic, but it is also one of the most technically demanding elements. The goal is not simply to maximise glazing, but to control how light, heat, and exposure are managed throughout the year. In my projects, I treat these openings as high-performance building components rather than architectural statements. When specified correctly, they deliver expansive views and daylight without compromising thermal comfort or energy efficiency.
This approach works best on elevations with controlled exposure, typically south-facing in the northern hemisphere, where daylight can be harnessed without excessive heat gain. On coastal mountain sites, I often avoid fully exposed windward façades and instead position large sliders on leeward sides or slightly recessed walls. This reduces pressure on seals and improves long-term performance in high-wind, salt-heavy environments.
I generally specify panels between 2.4–3 m (8–10 ft) wide and 2.2–2.7 m (7.2–9 ft) high for a balanced visual proportion. Anything larger requires careful structural coordination to avoid deflection. Triple-glazed units with low-E coatings typically achieve U-values of 0.8–1.2 W/m²K, which is critical in mountain-adjacent climates. Frames should sit flush with finished floor levels, with a recessed track depth of 50–70 mm (2–2.75 in) to maintain continuity between inside and out while still accommodating drainage channels.
Thermally broken aluminium frames are my default for exposed coastal locations due to their strength and corrosion resistance. In more sheltered sites, aluminium-clad timber frames offer additional warmth internally. I avoid standard black finishes in high sun exposure and instead opt for soft greys or bronze tones, which reduce heat absorption and visual glare. Laminated inner panes improve acoustic comfort during high winds.
On a recent mountain beach build, we installed a 7.2 m (23.6 ft) wide sliding system facing the sea. The client initially pushed for double glazing to reduce costs, but post-energy modelling showed significant heat loss in winter. Upgrading to triple glazing increased upfront cost by roughly 18 percent but reduced heating demand enough to justify the investment within five years. The key takeaway was that glazing choice should always be informed by performance modelling, not aesthetics alone.
Pros
- Floods interiors with natural light
- Strengthens indoor-outdoor living
- Improves property value when detailed correctly
- Can achieve excellent thermal performance
Cons
- High upfront cost for quality systems
- Poor specification leads to condensation and heat loss
- Requires precise installation tolerances
- Maintenance is essential in salt-air environments
Stone Fireplaces That Ground Open-Plan Living Areas
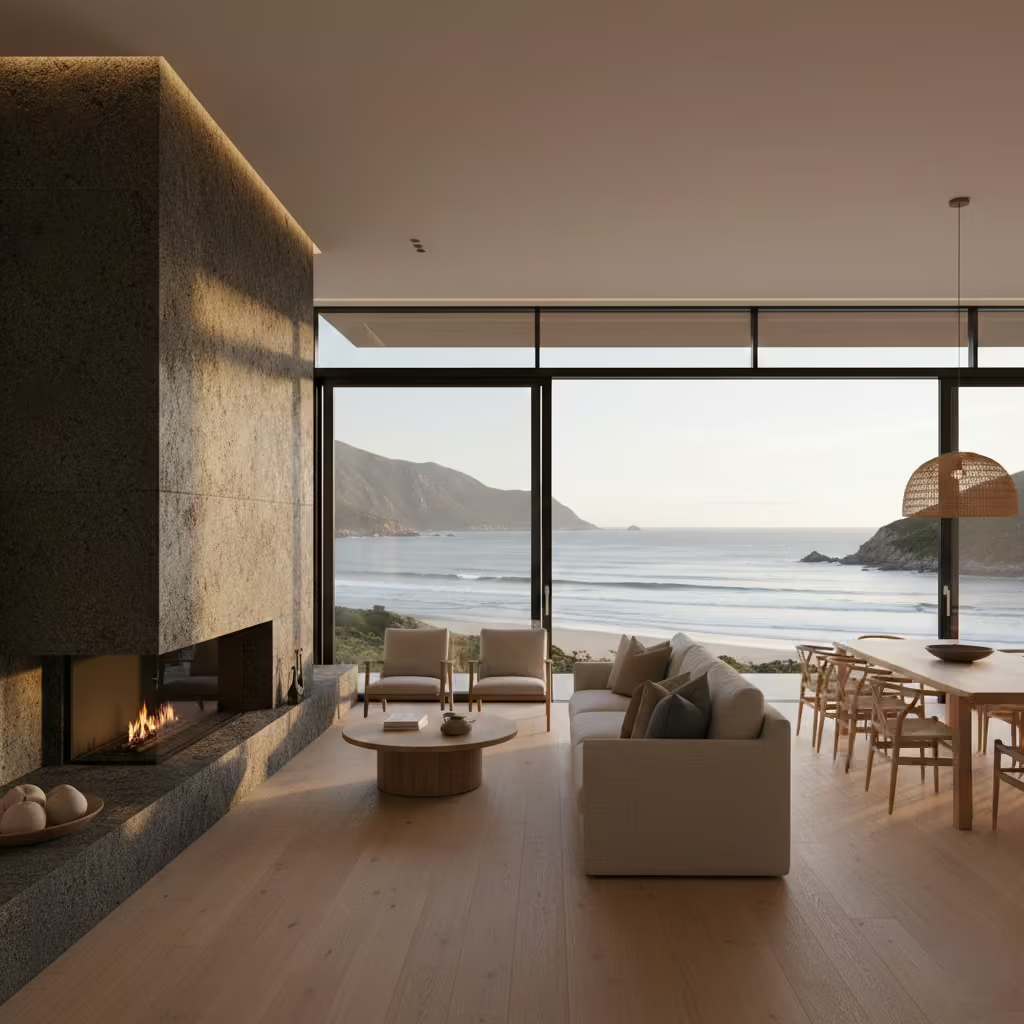
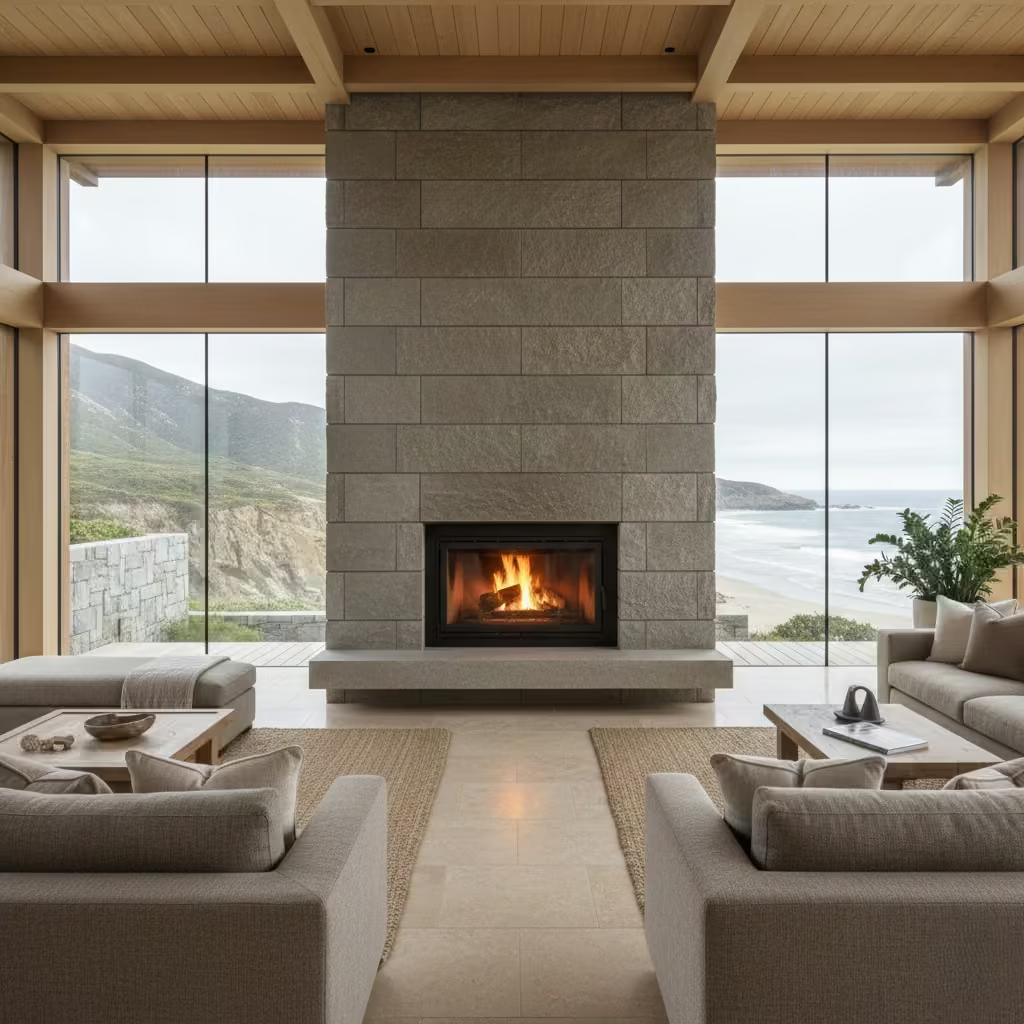
In a mountain beach house, a stone fireplace serves both a visual and environmental purpose. It anchors open-plan spaces that might otherwise feel too light or transient, particularly when large areas of glazing dominate the architecture. I use stone fireplaces to introduce weight, texture, and a sense of permanence, creating a focal point that balances coastal openness with mountain solidity. When detailed correctly, they provide not just warmth, but spatial clarity within expansive layouts.
Stone fireplaces perform best in open-plan living, dining, and kitchen areas where ceiling heights exceed 2.7 m (9 ft) and visual grounding is required. They are especially effective in homes with exposed sites, cooler evenings, or seasonal occupancy where thermal mass can stabilise indoor temperatures. I often position them on internal walls rather than external ones to improve heat retention and reduce thermal bridging.
For visual balance, I typically design fireplace surrounds between 1.6–2.2 m (5.2–7.2 ft) wide and 2.4–3 m (8–10 ft) high, depending on ceiling height. Hearth depths of 300–450 mm (12–18 in) allow for both safety and seating potential. Firebox openings generally range from 700–900 mm (27.5–35.5 in) wide for gas or sealed wood-burning units. Where thermal mass is a priority, stone thickness should be no less than 30–40 mm (1.2–1.6 in) for cladding, with a masonry or concrete backing.
I favour locally sourced limestone, granite, or split-face stone with a muted, matte finish. Coastal-adjacent mountain homes benefit from stones with low porosity to resist salt and moisture. Mortar colour is as important as the stone itself. I usually specify a tone that sits slightly darker than the stone to reduce visible staining over time. In contemporary settings, I avoid overly rustic stone and instead use honed or lightly textured finishes to maintain a refined feel.
On a recent open-plan renovation overlooking a coastal valley, the space felt visually unanchored despite extensive timber and soft furnishings. Introducing a full-height stone fireplace immediately resolved this. We extended the stone beyond the firebox to the ceiling, creating a vertical datum that visually organised the room. The unexpected benefit was acoustic. The stone surface significantly reduced echo in the space, an often-overlooked advantage in large, glazed interiors.
Pros
- Visually grounds large, open-plan spaces
- Adds thermal mass and improves heat stability
- Creates a strong architectural focal point
- Enhances acoustic performance
Cons
- Higher structural and installation costs
- Requires early coordination with engineering and flues
- Poor stone choice can feel heavy or dated
- Limited flexibility once installed
Soft Coastal Colour Palettes Anchored With Earthy Neutrals
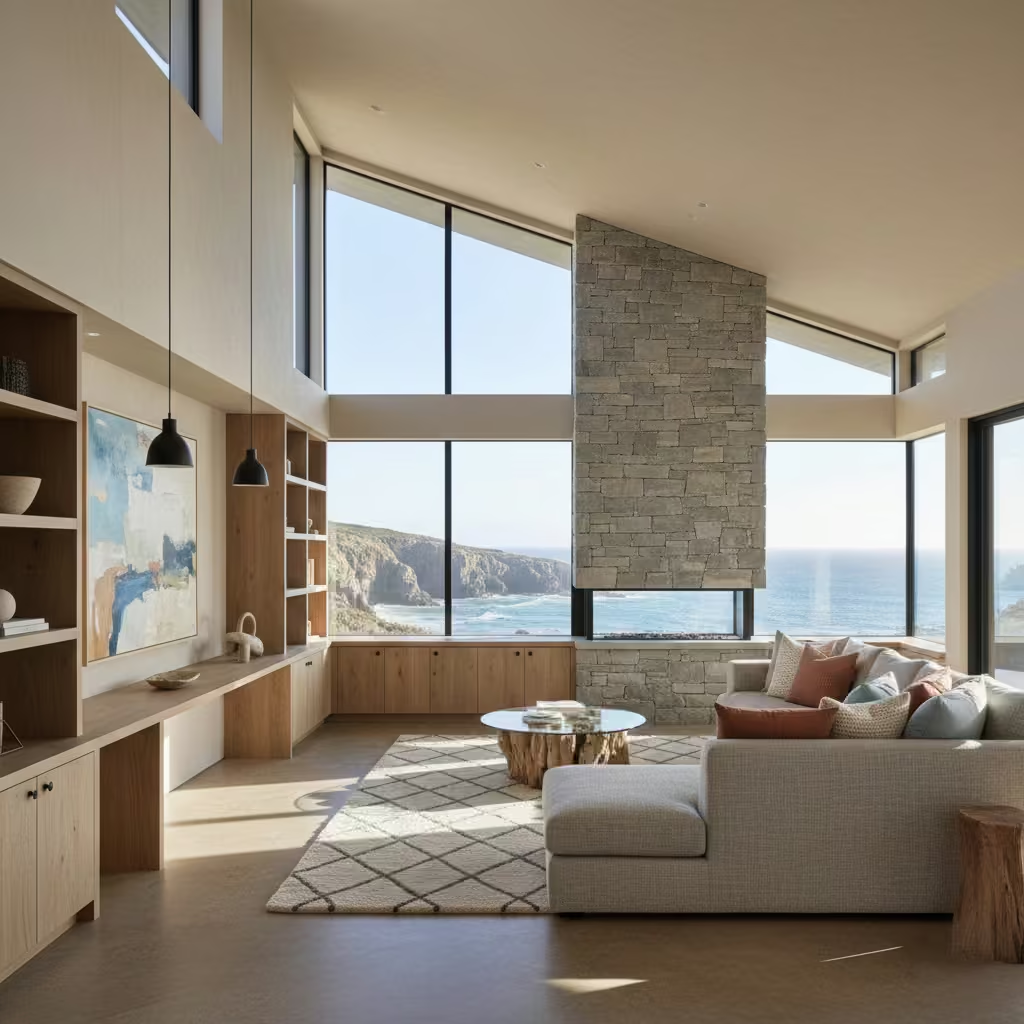
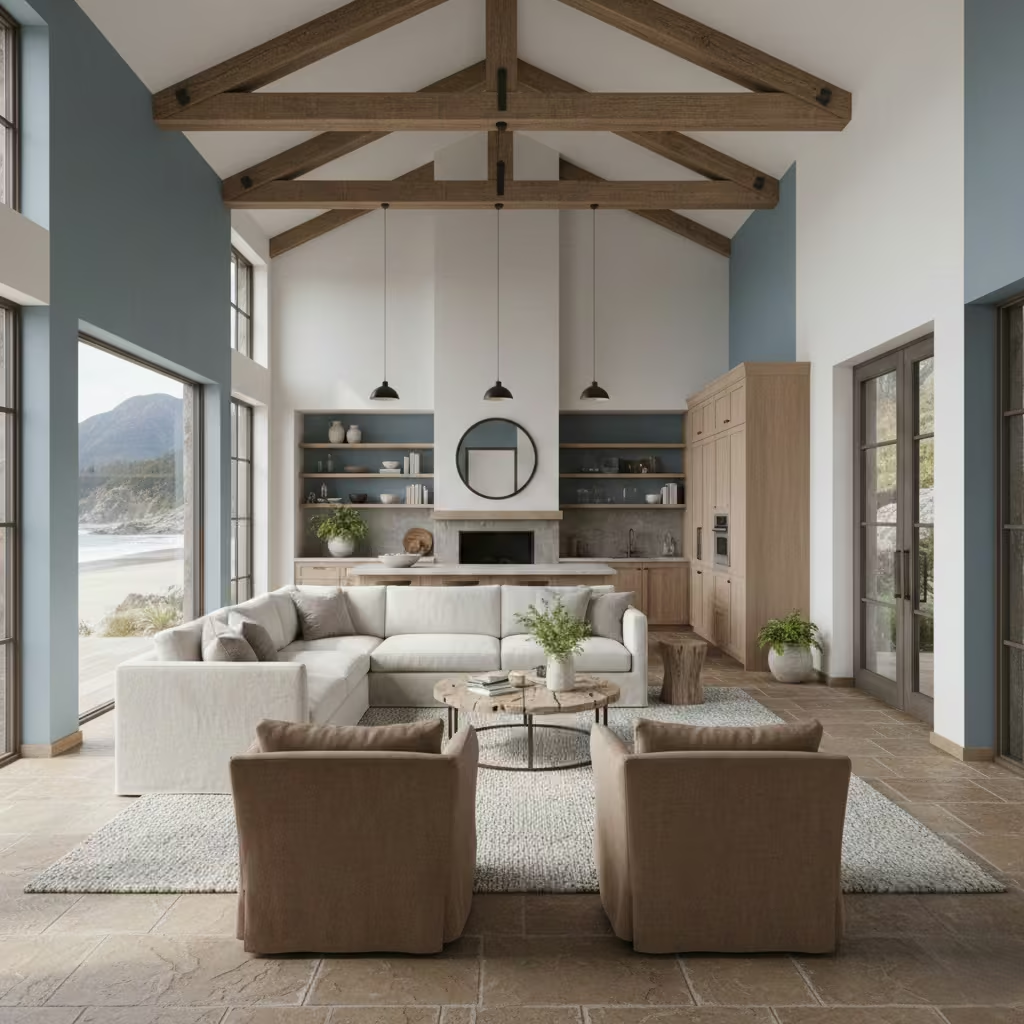
A soft coastal colour palette is essential in a mountain beach house, but without grounding tones it can quickly feel washed out or overly seasonal. In my work, I approach colour as a layering exercise rather than a single decision. Pale coastal hues bring lightness and calm, while earthy neutrals provide visual weight and long-term relevance. The result is an interior that feels relaxed yet considered, capable of responding to shifting light, weather, and seasons.
This palette works particularly well in open-plan living spaces with large windows, where natural light changes dramatically throughout the day. It is also highly effective in homes used year-round, as earthy neutrals prevent the space from feeling cold in winter or overly bright in summer. North- or west-facing rooms benefit most, as warmer undertones help counterbalance cooler light conditions common in mountainous coastal regions.
I typically apply lighter coastal tones to around 60–65 percent of visible surfaces, including walls and ceilings, to maximise reflectivity. Earthy neutrals should account for 25–30 percent through flooring, cabinetry, and larger furniture pieces. The remaining 5–10 percent is reserved for darker accents, such as joinery details or metal finishes. Ceiling colours are usually kept within 10 percent of the wall tone to maintain cohesion, especially in rooms with ceiling heights of 2.7 m (9 ft) or more.
My go-to coastal tones include chalky whites, soft sand, pale stone, and muted blue-grey, always with a warm undertone. For grounding, I rely on clay, taupe, mushroom, and warm greige. These colours perform well on natural materials such as timber, linen, wool, and stone. I avoid high-gloss finishes and instead specify matte or eggshell paints, which reduce glare and enhance texture under strong natural light.
On a mountain beach renovation with extensive glazing, the initial scheme leaned too heavily on pale coastal colours. The space felt bright but lacked depth. We rebalanced the palette by introducing a warm stone floor and deeper neutral cabinetry. This immediately grounded the interior and made the lighter walls feel intentional rather than unfinished. The key lesson was restraint. A limited, well-balanced palette ages far better than a highly varied one.
Pros
- Enhances natural light without feeling stark
- Adapts well to seasonal changes
- Timeless and easy to evolve with soft furnishings
- Complements natural materials
Cons
- Requires careful undertone coordination
- Can feel flat if not layered properly
- Overuse of pale tones may show wear more quickly
- Poor lighting can distort subtle colour differences
You May also Like: 25 70s Apartment Design Ideas That Bring Retro Vibes to Modern Homes
Pitched Rooflines That Echo Alpine Architecture
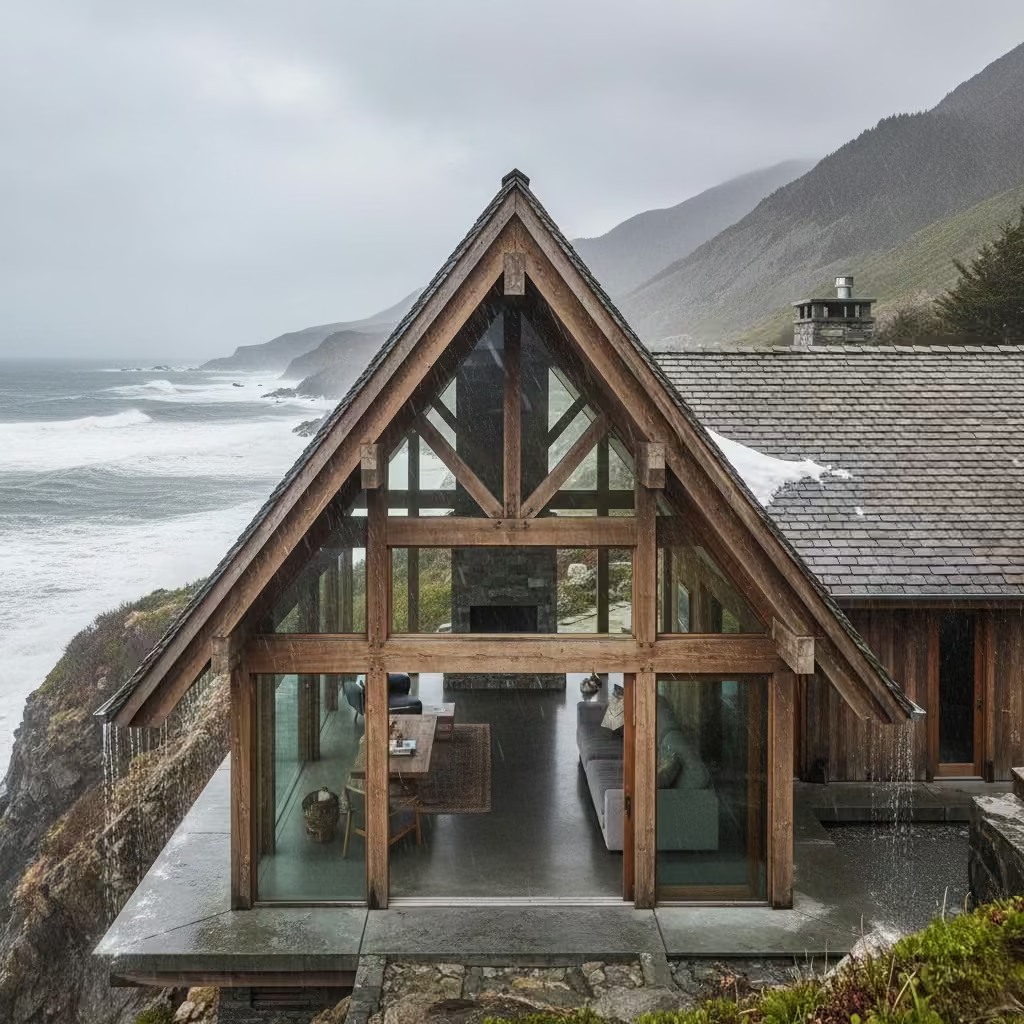
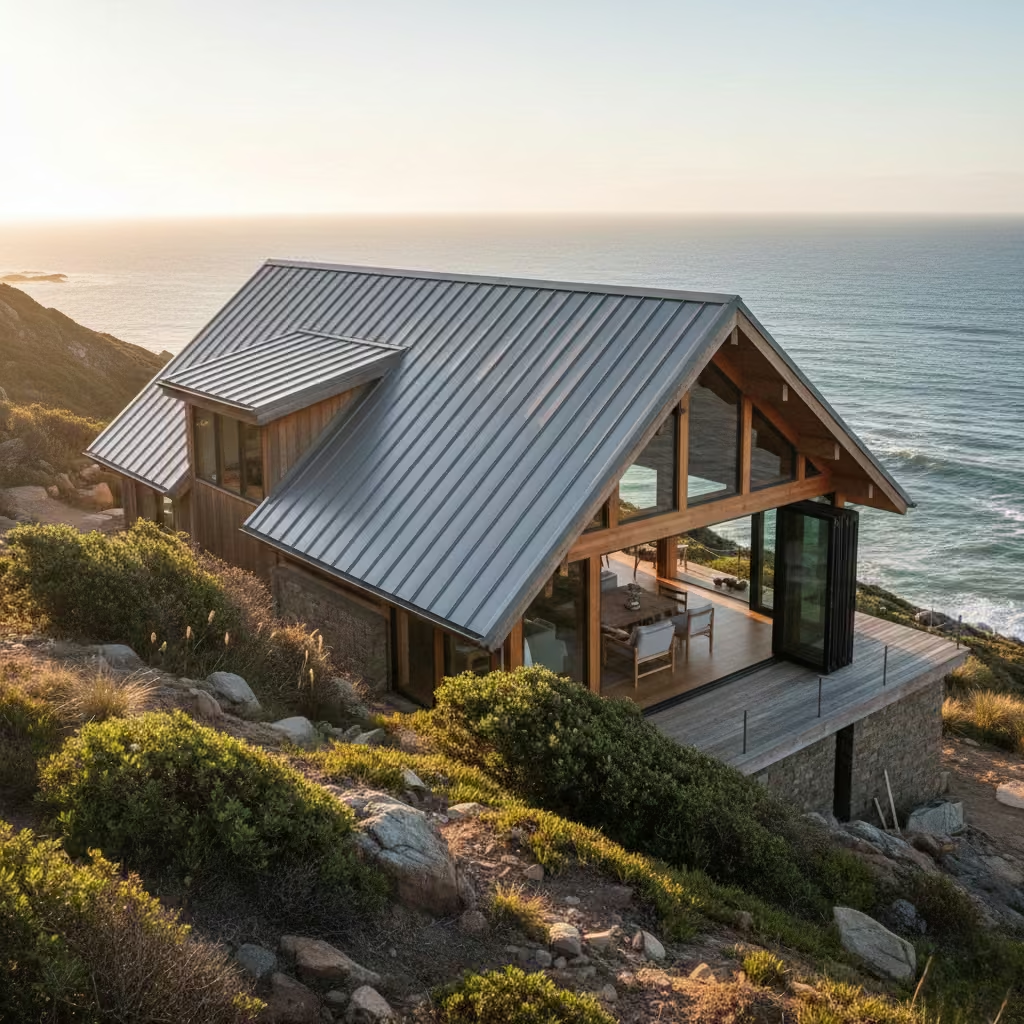
Pitched rooflines are a defining feature of alpine architecture, and in a mountain beach house they play a far more important role than visual reference alone. I use pitched roofs to manage weather, improve thermal performance, and give the building a grounded silhouette that sits comfortably within elevated or exposed landscapes. When softened with coastal detailing, the result feels purposeful rather than heavy, combining practicality with architectural restraint.
This approach works best in mountain-adjacent coastal regions where wind, rainfall, and occasional snow are genuine design considerations. Homes on ridgelines, sloped sites, or open coastal edges benefit most, as pitched roofs shed water efficiently and reduce wind uplift. Orientation matters. I often align the pitch to protect the most exposed elevation while opening the opposite side to views and daylight.
For performance and aesthetics, I typically specify roof pitches between 30–45 degrees. Anything shallower struggles with runoff in heavy rain, while steeper pitches can feel overly dominant in coastal settings. Eaves should project 600–900 mm (24–35 in) to protect façades from driving rain and summer sun. In vaulted interiors, ridge heights of 3.6–4.5 m (12–15 ft) allow for generous volume without overwhelming the space. Rafter spacing is usually set at 400–600 mm (16–24 in), depending on structural loads and insulation depth.
Standing seam metal, slate, and fibre cement shingles are my preferred materials. Standing seam metal performs exceptionally well in coastal mountain climates due to its durability and low maintenance, especially when finished in soft greys or muted bronze tones. I avoid highly reflective finishes, which can feel harsh in bright coastal light. Internally, exposed timber beams or lined ceilings help soften the structure and reinforce warmth.
On a recent hillside coastal build, we replaced a flat roof with a dual-pitched form to address persistent drainage issues. The change reduced water pooling immediately and allowed us to introduce high-level glazing beneath the ridge. This transformed the interior, improving daylight and ventilation while resolving long-standing performance problems. The project reinforced my belief that roof form should always be led by climate, not trends.
Pros
- Excellent water and snow shedding
- Strong reference to alpine architecture
- Improves insulation depth and airflow
- Creates opportunities for vaulted interiors
Cons
- Higher construction costs than flat roofs
- Requires careful detailing at junctions
- Can increase overall building height
- Less suitable for strict planning height limits
Outdoor Showers Designed for Cold and Warm Climates
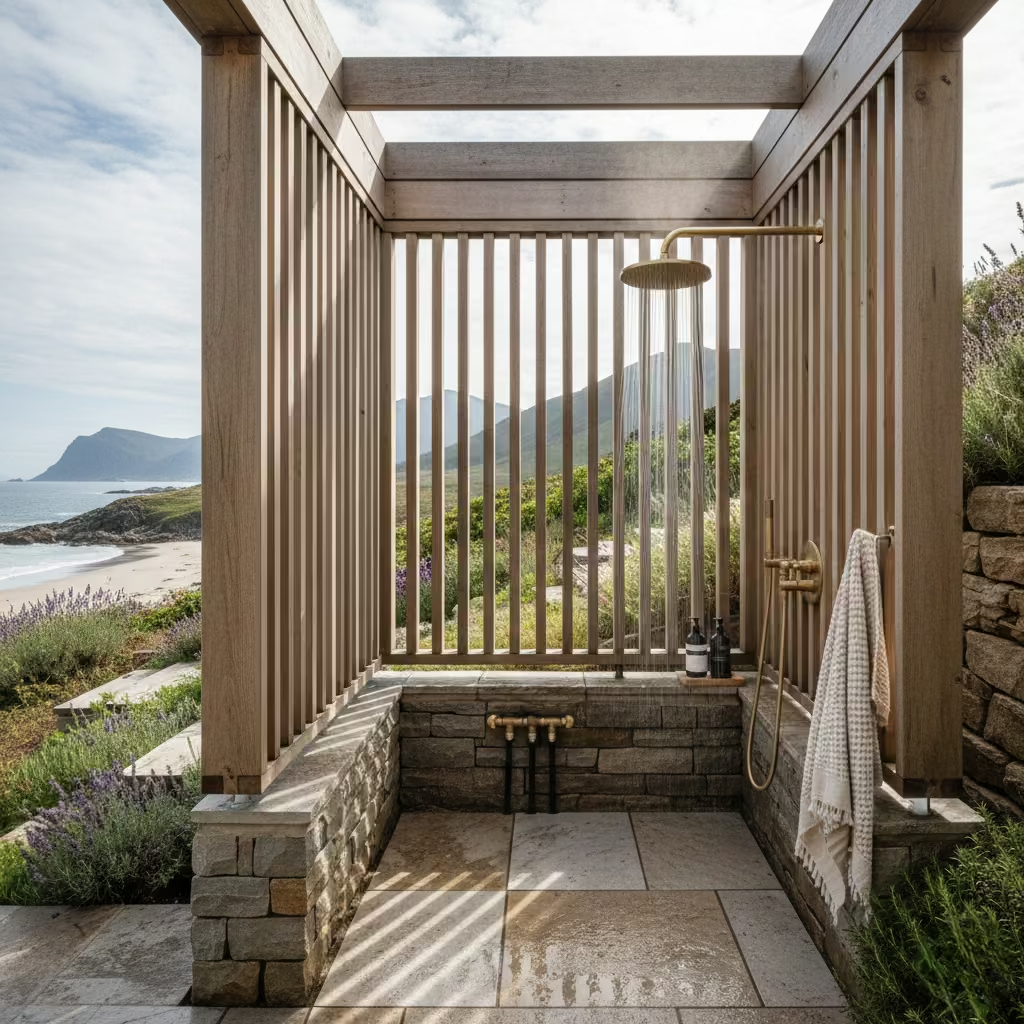
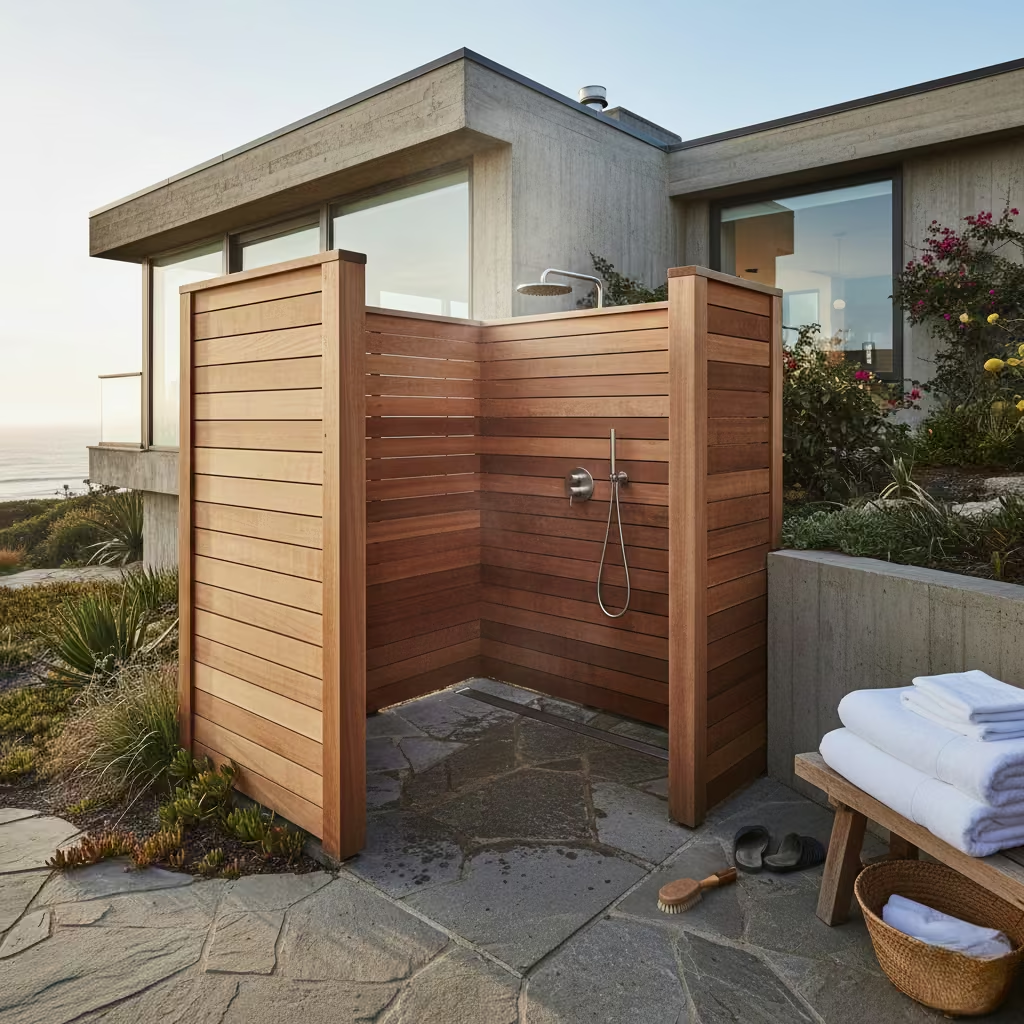
Outdoor showers are often associated with warm, casual beach living, but in a mountain beach house they need to work across a far wider range of conditions. I design outdoor showers as robust, year-round features rather than seasonal novelties. When planned properly, they provide a practical transition space for sand, salt, mud, and wet gear, while still delivering a relaxed, spa-like experience that feels appropriate to both coastal and alpine settings.
This idea works best on sheltered exterior walls close to main entrances, pool areas, or beach access points. In colder or elevated locations, positioning is critical. I always avoid fully exposed windward sides and instead locate showers in recessed alcoves, courtyards, or behind privacy screens. South-facing or partially enclosed positions offer better thermal comfort in variable climates.
A comfortable outdoor shower enclosure should measure at least 900 x 900 mm (35 x 35 in), though I prefer 1,000 x 1,200 mm (39 x 47 in) where space allows. Shower heads are typically set at 2–2.2 m (6.5–7.2 ft) high. Floor gradients should fall at a minimum of 1:60 to ensure proper drainage. In cold climates, all pipework must be insulated and fitted with frost-proof valves, with shut-off points located inside the thermal envelope of the house.
I specify materials that age well and handle moisture without becoming slippery or brittle. Slatted timber screens in cedar or thermally modified wood provide privacy while allowing airflow. For floors, textured stone, porcelain with an R11 slip rating, or concrete with exposed aggregate works well. All fixtures should be marine-grade stainless steel or solid brass. In colder zones, I often include a mixing valve that allows precise temperature control to prevent shock in low temperatures.
On a mountain beach renovation used year-round, the client was initially hesitant about an outdoor shower due to winter use. We designed a partially enclosed shower with three solid walls and a timber slatted screen, plus a ceiling-mounted rain head. By insulating the supply lines and adding a simple windbreak, the shower became usable even in colder months. The lesson was clear. Outdoor showers succeed when they are treated as micro-rooms, not exposed accessories.
Pros
- Reduces dirt, sand, and moisture indoors
- Enhances the coastal living experience
- Can be used year-round with proper detailing
- Adds value and functionality to outdoor spaces
Cons
- Requires careful plumbing and insulation
- Higher upfront cost than indoor-only solutions
- Needs regular maintenance in harsh climates
- Poor placement can limit usability
Wraparound Porches for Wind Protection and Sun Control
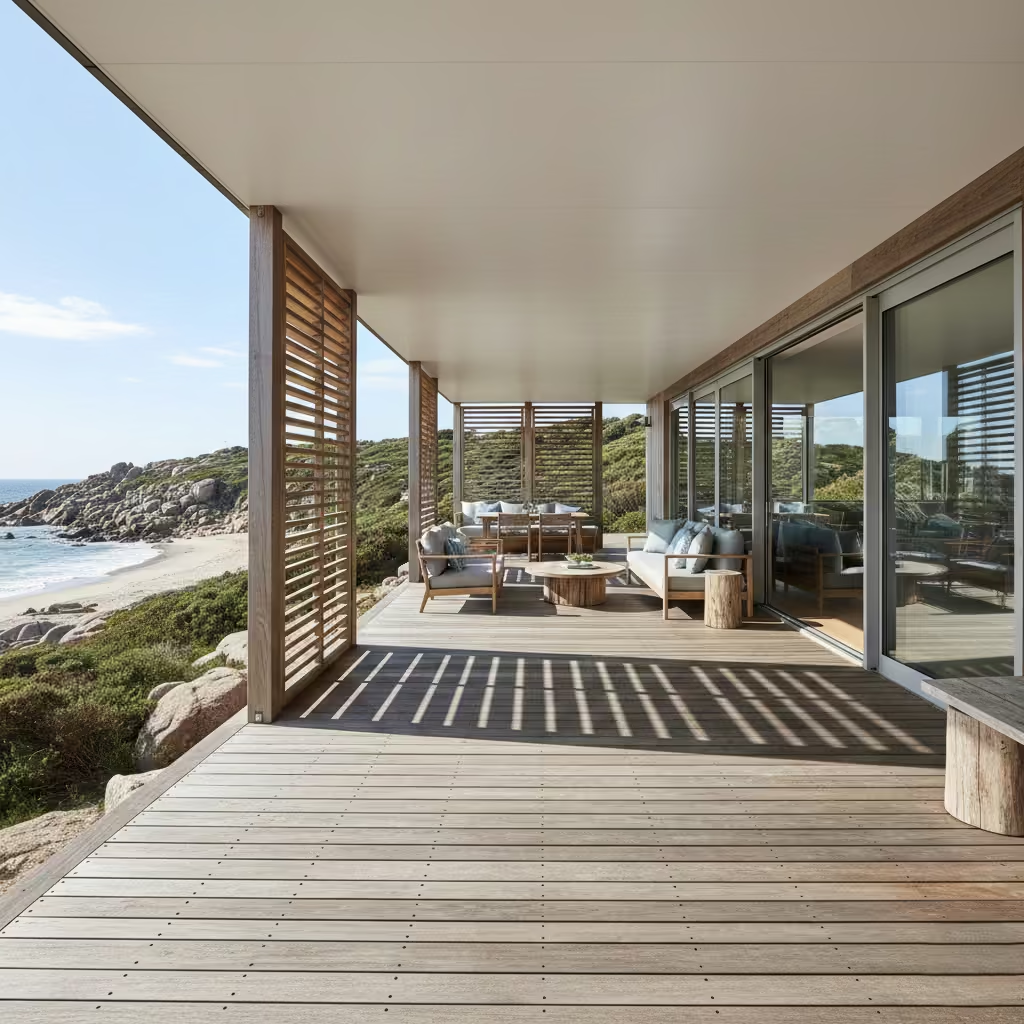
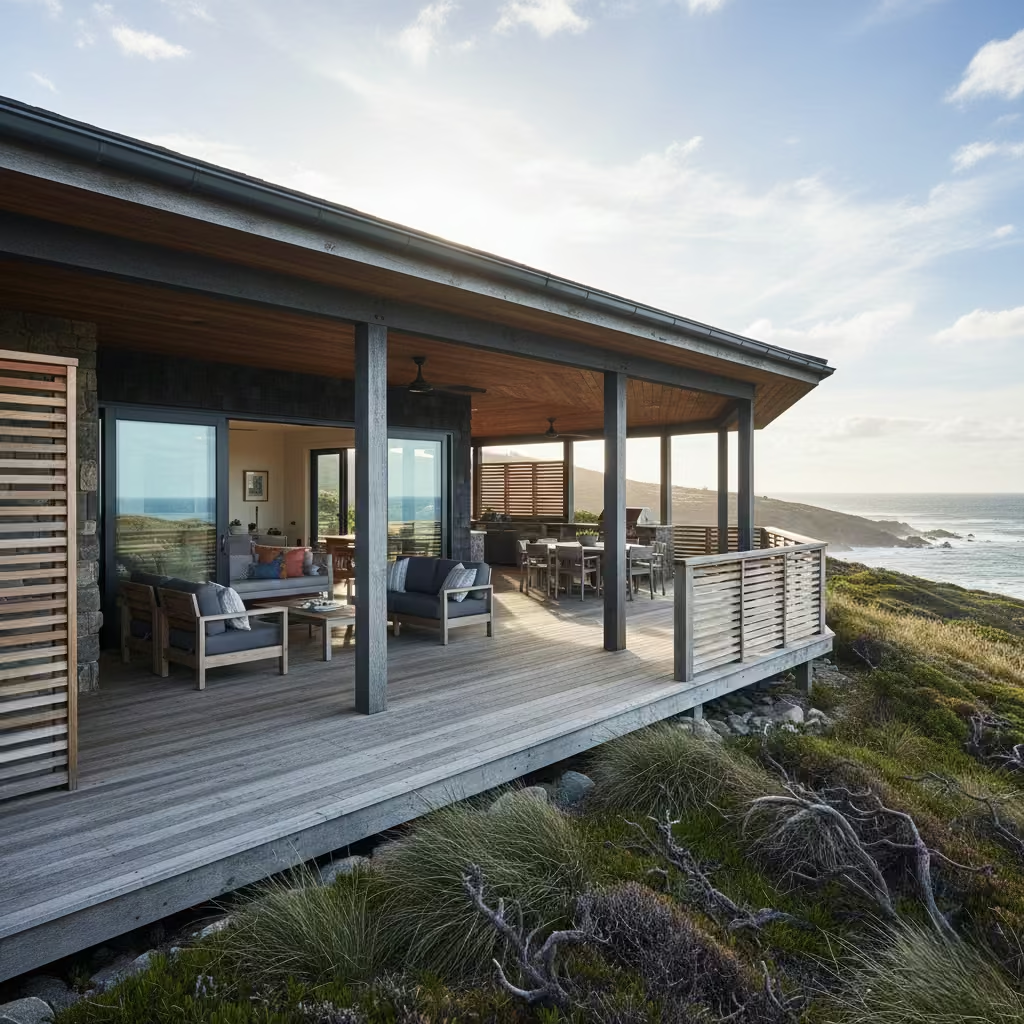
Wraparound porches are one of the most effective architectural tools for managing exposure in a mountain beach house. I use them as environmental buffers rather than purely decorative features. When designed properly, a wraparound porch moderates wind, filters sunlight, and creates a transitional zone between interior spaces and the surrounding landscape. It allows the house to respond to changing weather conditions while maintaining a relaxed, liveable connection to the outdoors.
This approach works particularly well on exposed coastal sites, hillside plots, or properties with multiple orientations to sun and wind. Wraparound porches are especially valuable in locations where prevailing winds shift seasonally. By extending around two or more elevations, the porch offers sheltered outdoor space at different times of day and year. They are most effective on ground or main living levels where indoor outdoor flow is a priority.
For comfortable circulation and seating, I specify a minimum porch depth of 2.1–2.4 m (7–8 ft). Narrower porches struggle to function beyond simple walkways. Roof overhangs should extend at least 900–1,200 mm (35–47 in) beyond the external wall to provide meaningful sun and rain protection. Structural posts are typically spaced at 2.4–3 m (8–10 ft) to balance openness with structural integrity. Floor levels should sit 150–300 mm (6–12 in) above finished ground to manage splashback and drainage.
Durability is critical. I favour pressure-treated or naturally durable timbers such as cedar or larch for decking and posts, paired with concealed stainless steel fixings. Porch ceilings finished in painted timber boards or exterior-grade plywood help reflect light back into the interior. For floors, I prefer textured timber or porcelain planks with a slip rating suitable for wet conditions. In high wind areas, I often integrate removable screens or timber battens for additional protection.
On a coastal mountain home with strong crosswinds, a wraparound porch transformed how the house was used. Before, outdoor areas were largely unusable for much of the year. By extending the porch around the most exposed elevations and adding partial wind screens, the client gained multiple sheltered zones. The key takeaway was orientation. Designing the porch in response to wind patterns made it far more effective than increasing its size alone.
Pros
- Provides passive wind and sun control
- Extends usable outdoor living space
- Protects façades from weathering
- Enhances indoor thermal comfort
Cons
- Increases build footprint and cost
- Requires careful detailing to avoid dark interiors
- Maintenance needed in exposed environments
- Planning restrictions may apply in some areas
Natural Stone Flooring with Underfloor Heating
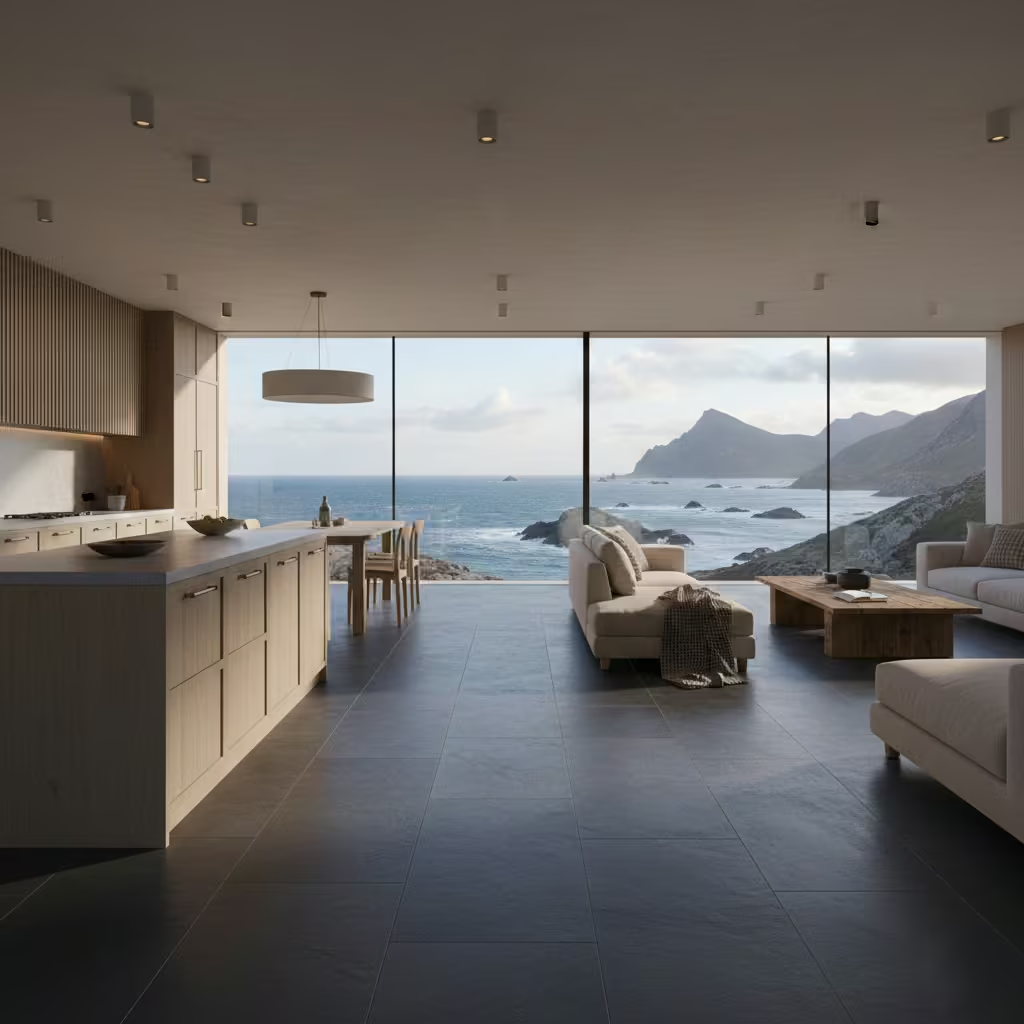
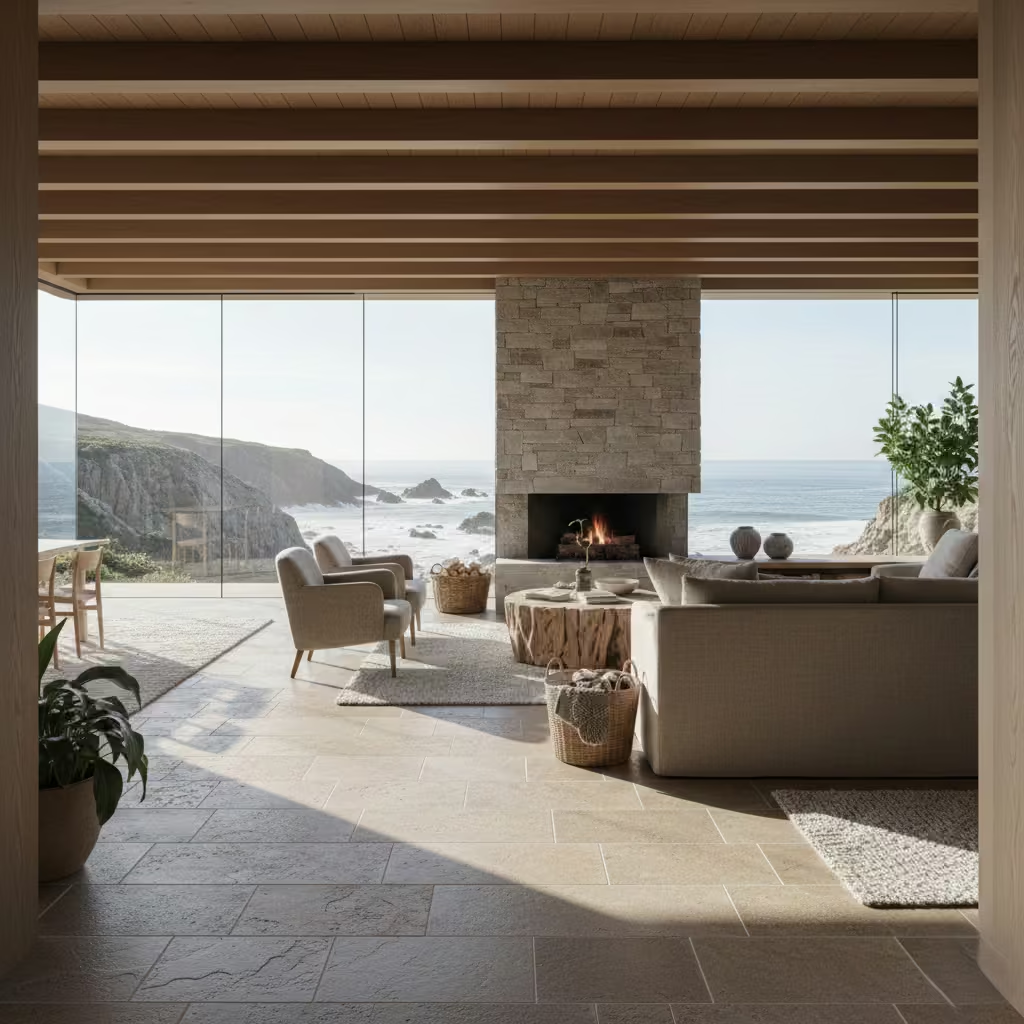
Natural stone flooring paired with underfloor heating is one of the most effective combinations for a mountain beach house. It delivers visual calm and durability while solving the common issue of cold surfaces in exposed or elevated locations. I use stone as a thermal and visual anchor, allowing the interior to feel grounded and comfortable without relying on bulky radiators or excessive soft finishes.
This approach works best in open-plan living areas, kitchens, hallways, and bathrooms where temperature consistency and durability are priorities. It is particularly effective on ground floors or concrete slab constructions, where thermal mass can be fully utilised. In mountain-adjacent coastal climates, stone floors help stabilise internal temperatures, absorbing heat during the day and releasing it slowly as temperatures drop.
Stone tiles typically perform best at thicknesses of 15–20 mm (0.6–0.8 in) for compatibility with underfloor heating systems. Heating pipe spacing is usually set at 100–150 mm (4–6 in), depending on heat output requirements. For optimal performance, the overall floor build-up, including insulation, screed, and stone, should be carefully calculated to avoid heat loss downward. In large spaces, I specify movement joints at intervals of 6–8 m (20–26 ft) to prevent cracking.
I favour limestone, travertine, and slate for their natural variation and thermal conductivity. Honed or lightly brushed finishes provide slip resistance without the harsh texture of heavily riven stone. In coastal environments, I avoid highly porous stones unless they are properly sealed. Grout colour should sit close to the stone tone to maintain visual continuity and reduce the appearance of wear.
On a mountain beach renovation with significant glazing, the client was concerned that stone floors would feel cold and echo-heavy. Installing water-based underfloor heating beneath a honed limestone floor resolved both issues. The stone retained warmth well, and the added mass improved acoustics by reducing sound reflection. The project reinforced that comfort is often about system integration rather than material avoidance.
Pros
- Excellent thermal performance with underfloor heating
- Highly durable and low maintenance
- Timeless appearance suited to both coastal and alpine styles
- Improves temperature stability in open-plan spaces
Cons
- Higher upfront installation cost
- Requires careful structural and heating design
- Some stones need regular sealing
- Hard underfoot without rugs or soft furnishings
Timber Ceilings That Add Warmth to Bright Interiors
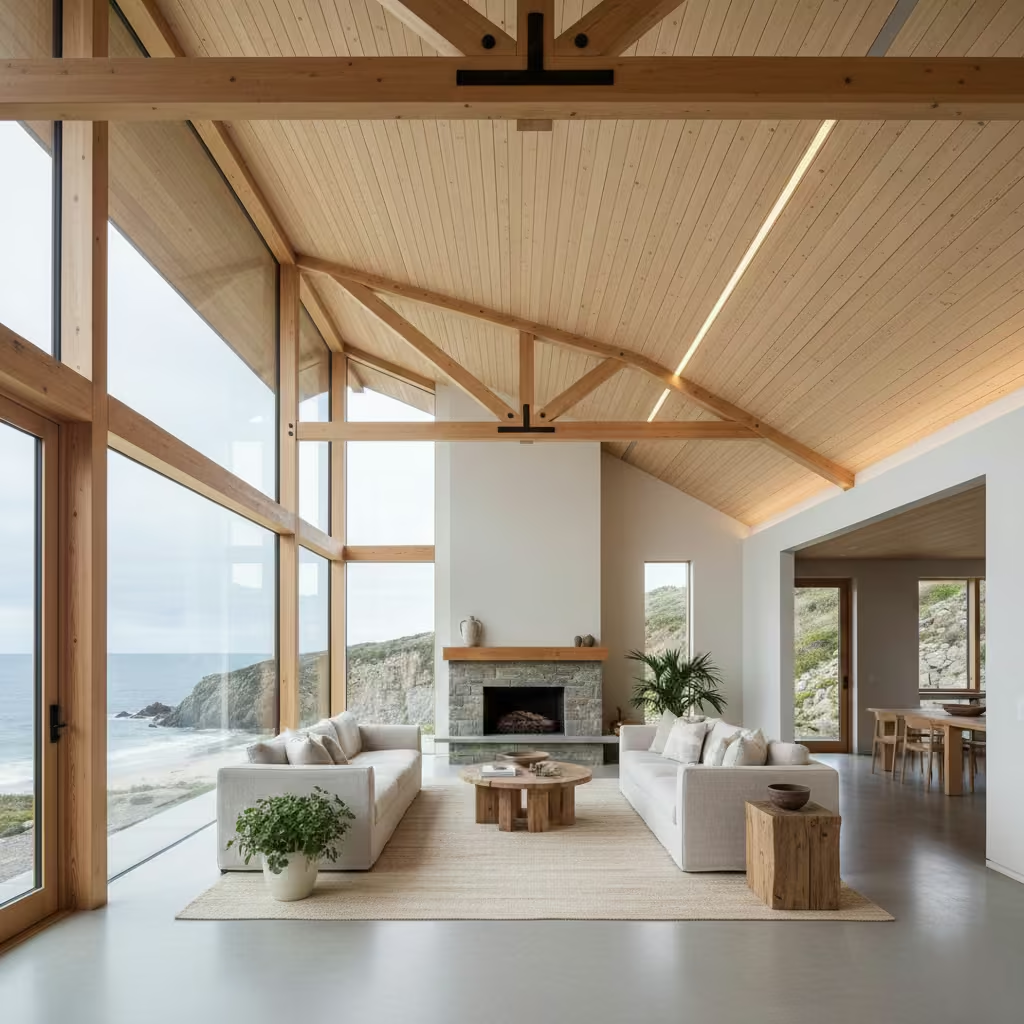
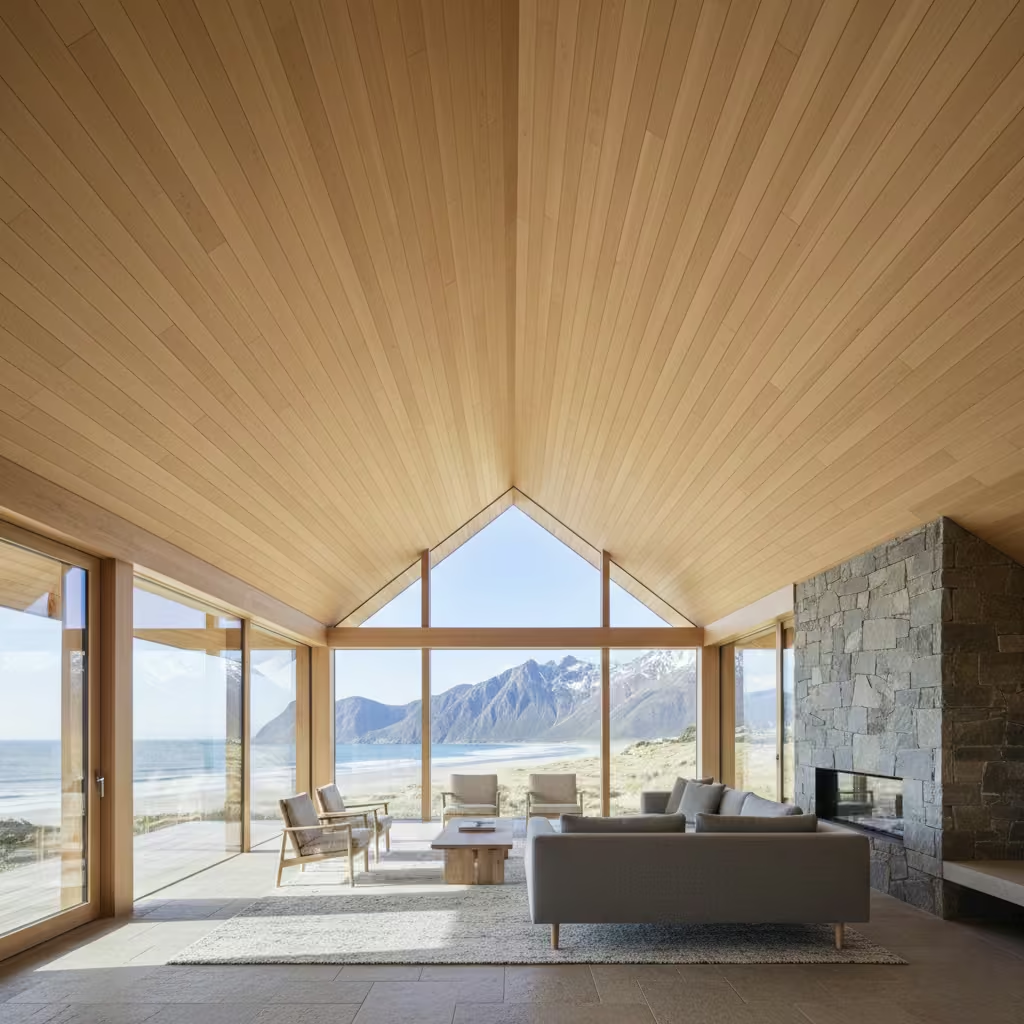
In mountain beach houses, generous glazing and pale finishes can sometimes push interiors toward feeling visually cool or acoustically hard. Timber ceilings are one of the most effective ways to counterbalance this. I use them to introduce warmth, texture, and scale overhead, helping bright interiors feel grounded and comfortable rather than stark. When detailed with restraint, timber ceilings enhance light rather than competing with it.
This approach works particularly well in open-plan living spaces, vaulted rooms, and areas with ceiling heights above 2.7 m (9 ft). It is especially effective where large-format glazing dominates one or more elevations. In coastal mountain climates, timber ceilings also perform well in semi-enclosed outdoor spaces such as covered porches, where continuity between inside and outside is important.
I typically specify ceiling boards between 90–140 mm (3.5–5.5 in) wide, with thicknesses of 12–18 mm (0.5–0.7 in). Narrower boards create a more refined, contemporary feel, while wider boards suit more rustic or alpine-influenced interiors. Batten spacing is usually set at 400–600 mm (16–24 in) depending on board thickness. In vaulted ceilings, I often align board direction with the roof pitch to reinforce architectural lines.
Light-toned timbers such as oak, ash, spruce, or cedar work best for maintaining brightness while adding warmth. In high-humidity coastal environments, I favour engineered or thermally modified timber for stability. Finishes are critical. I avoid heavy stains and instead use clear matte lacquers or lightly pigmented oils that allow the grain to remain visible while protecting against moisture and UV exposure.
On a mountain beach new build with extensive south-facing glazing, the interior initially felt echo-prone and visually flat despite high-end finishes. Introducing a pale oak ceiling transformed the space. The timber softened acoustics, reduced glare from reflected light, and made the room feel more intimate without lowering the ceiling height. The key lesson was that ceilings are as influential as floors when shaping comfort.
Pros
- Adds warmth without darkening the space
- Improves acoustic comfort in large rooms
- Enhances architectural character
- Works well with both coastal and alpine aesthetics
Cons
- Higher material and installation costs
- Requires careful detailing around lighting and services
- Timber movement must be accounted for
- Not ideal for very low ceilings
You May also Like: 25 Farmhouse Garden Ideas That Feel Timeless, Practical, and Full of Charm
Zoned Open-Plan Layouts for Seasonal Living
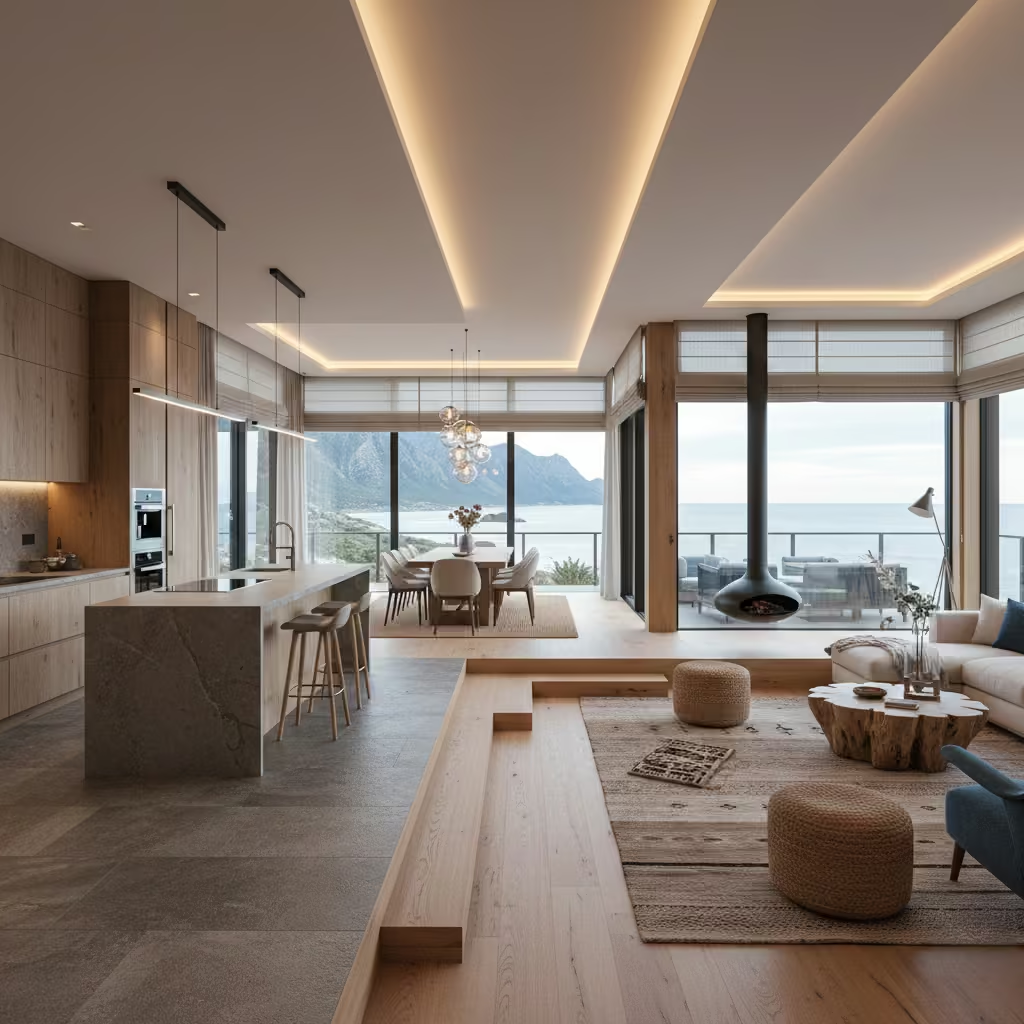
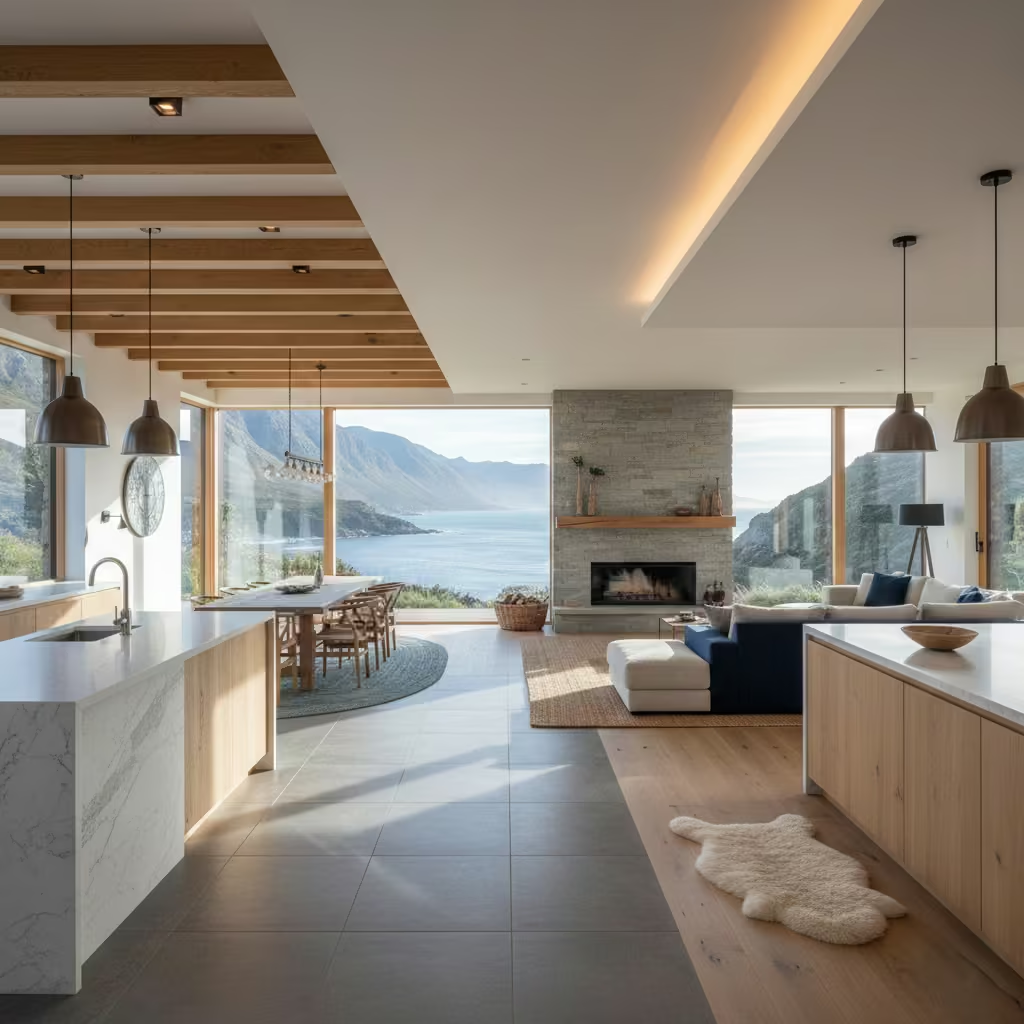
Open-plan living is a defining feature of mountain beach houses, but without clear zoning it can quickly become inefficient and uncomfortable, particularly across changing seasons. I design open-plan layouts as a series of interconnected zones rather than a single, undefined space. This approach preserves openness and light while allowing the home to adapt to summer ventilation, winter heat retention, and varied daily use.
Zoned open-plan layouts work best in homes intended for year-round occupation or frequent seasonal use. They are particularly effective in properties with large footprints, extensive glazing, or mixed orientations to sun and wind. Mountain beach houses benefit most when living, dining, and kitchen zones are positioned to respond differently to climate conditions, rather than treated as one continuous volume.
For functional zoning, I allow minimum clear widths of 3–3.6 m (10–12 ft) per primary zone. Circulation routes should be no narrower than 1–1.1 m (39–43 in) to avoid congestion. Changes in ceiling height of 300–600 mm (12–24 in), or subtle level changes of 150–300 mm (6–12 in), are often enough to define zones without closing them off. Large rugs, typically 2 x 3 m (6.5 x 10 ft) or larger, also help anchor seating areas visually.
Material shifts are one of the most effective zoning tools. I often use stone or tile in kitchen areas, transitioning to timber or layered rugs in living zones. Ceiling treatments, such as timber lining or exposed beams, can further differentiate areas without introducing walls. Lighting is critical. Layered lighting with independent controls allows each zone to function differently depending on the season and time of day.
On a mountain beach renovation used heavily in winter, an unzoned open-plan space proved difficult to heat efficiently. We reworked the layout by lowering the ceiling slightly over the seating area, adding a stone fireplace, and redefining circulation paths. These small adjustments created a sense of enclosure where needed, significantly improving thermal comfort while maintaining visual openness. The takeaway was that zoning does not require walls, only intention.
Pros
- Adapts to seasonal living patterns
- Improves heating and cooling efficiency
- Maintains openness without sacrificing comfort
- Allows flexible furniture arrangements
Cons
- Requires careful planning early in the design
- Poor zoning can feel disjointed
- Furniture placement becomes more critical
- Retrofitting zones can be disruptive
Coastal-Inspired Kitchens with Mountain-Grade Materials
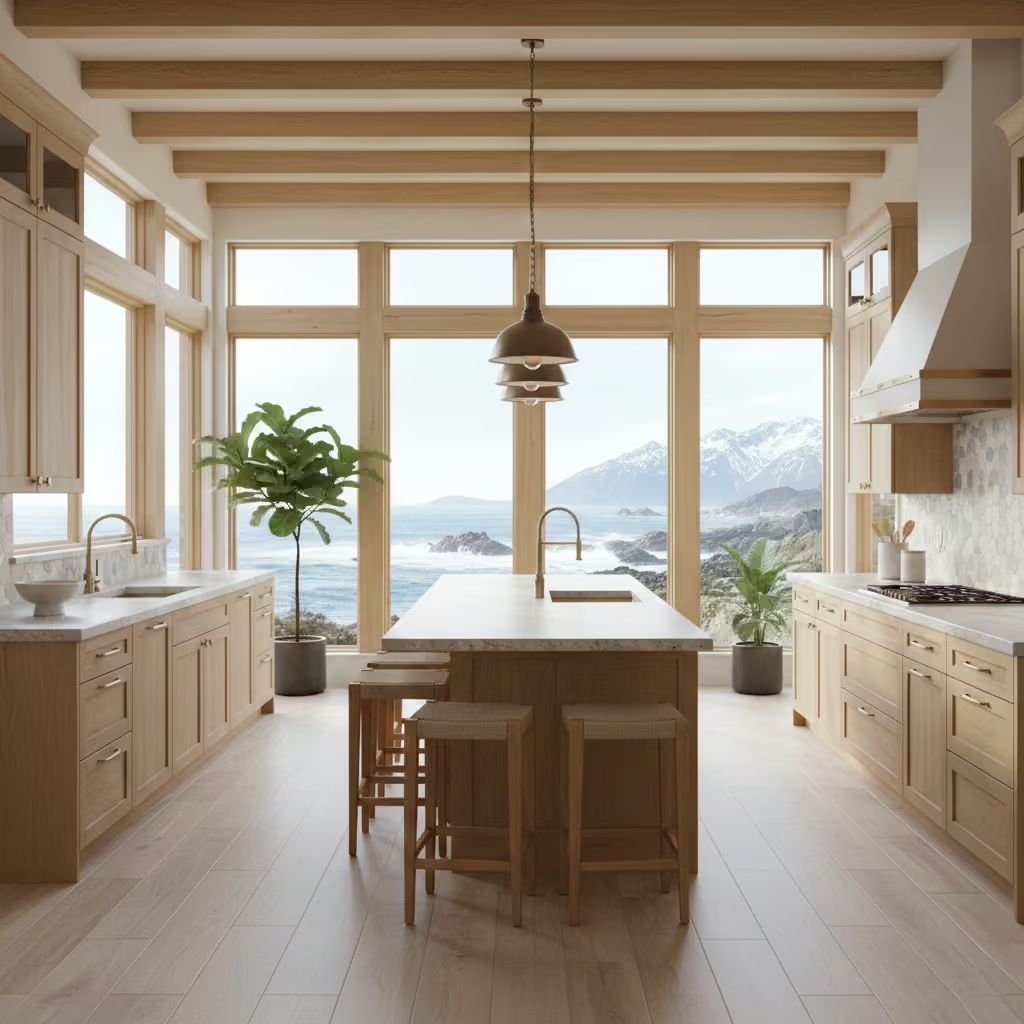
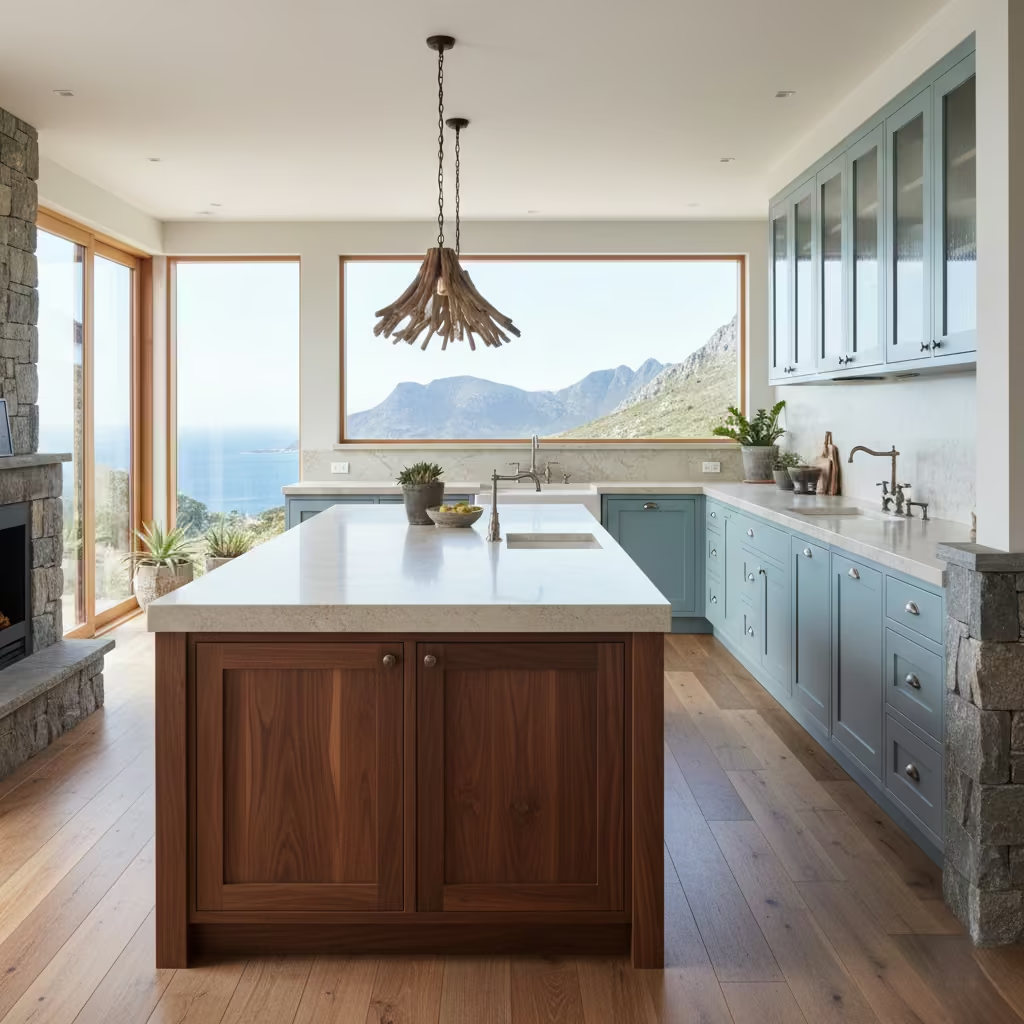
The kitchen in a mountain beach house must balance aesthetics with resilience. I design kitchens that feel light, airy, and coastal in tone, but are built with materials robust enough to withstand mountain climate challenges moisture, temperature swings, and heavy use. The goal is a space that delivers both style and durability, where finishes, joinery, and appliances can endure salty air, intense sunlight, and seasonal temperature changes without showing wear.
This approach is ideal in open-plan living areas with abundant natural light, particularly on elevations facing the sea or mountain vistas. It is especially effective for homes used seasonally, where kitchens may sit idle for weeks at a time. Coastal-inspired palettes keep the kitchen feeling fresh and bright, while mountain-grade materials ensure longevity and low maintenance in harsh climates.
I typically design island units at 900 mm (35 in) high with 1,200–1,500 mm (4–5 ft) clear circulation on all sides for functionality. Countertop depths are standard at 600 mm (24 in) for preparation areas, and 300 mm (12 in) overhangs are used where seating is required. Upper cabinets should sit no higher than 2.1 m (7 ft) from the finished floor for accessibility. When integrating large-format glazing nearby, I maintain a minimum 300 mm (12 in) backsplash depth of durable material to protect walls from splashes and sunlight exposure.
I favour solid timbers such as oak or walnut for cabinetry, finished with protective oils or lacquers suitable for coastal humidity. Stone or quartz countertops provide durable work surfaces, while engineered stone or tiles handle splash zones. Cabinet handles, sinks, and fixtures are marine-grade stainless steel or brushed brass to resist corrosion. I often pair light, coastal tones on wall cabinets with deeper earthy or stone shades on base units to provide visual weight and durability.
On a coastal mountain renovation, the client wanted a pale, beachy look but previously had cabinetry warped by salt air exposure. We used thermally modified timber with oil finish for cabinets, quartz countertops, and stainless steel hardware. The kitchen maintained its light, coastal appearance while performing flawlessly in winter storms and summer humidity. The lesson was clear: aesthetics must never override material performance in exposed locations.
Pros
- Combines bright, coastal aesthetic with durable, long-lasting materials
- Performs well in harsh coastal-mountain climates
- Supports open-plan layouts and outdoor integration
- Low maintenance with appropriate finishes
Cons
- Higher upfront material cost than standard kitchen cabinetry
- Requires careful specification to avoid warping or corrosion
- Limited flexibility in retrofitting if materials fail
- Coastal tones may need subtle balancing with darker elements for longevity
Built-In Window Seating for Views and Thermal Efficiency
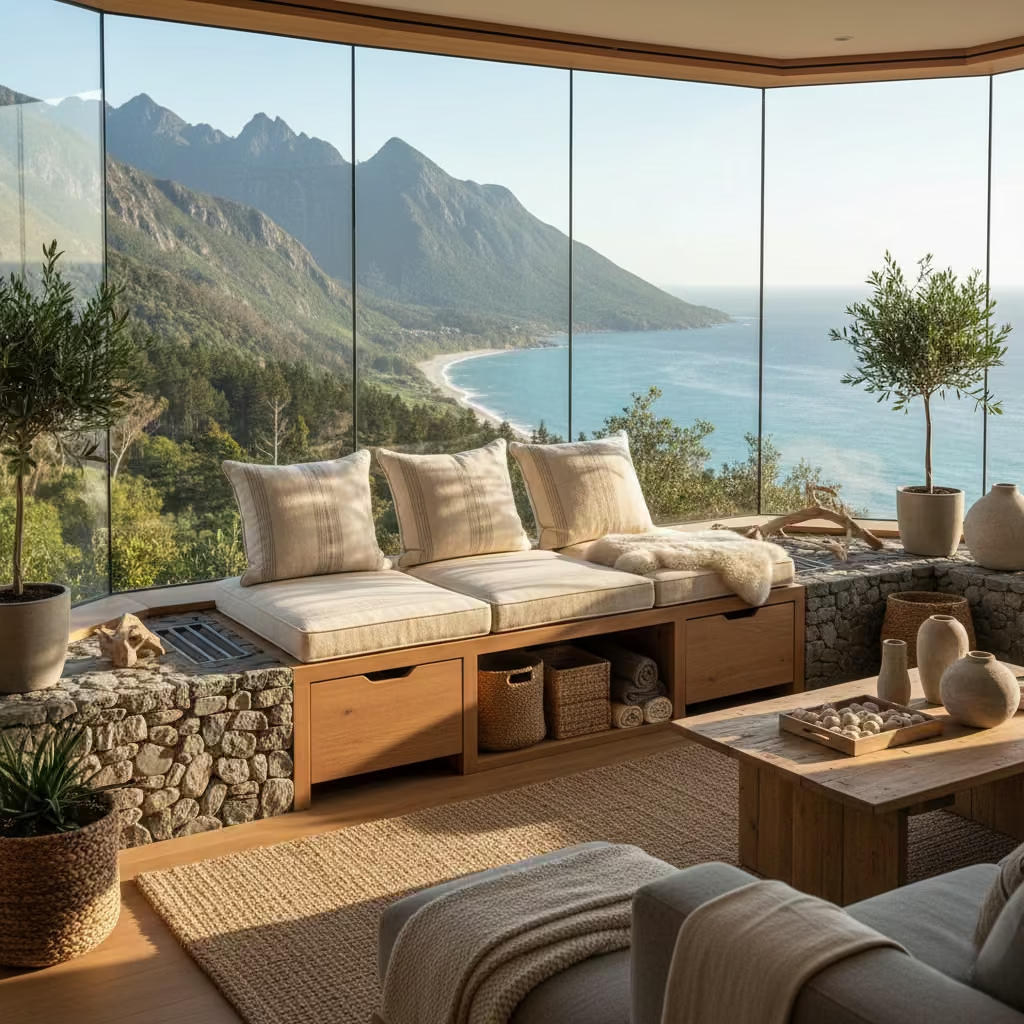
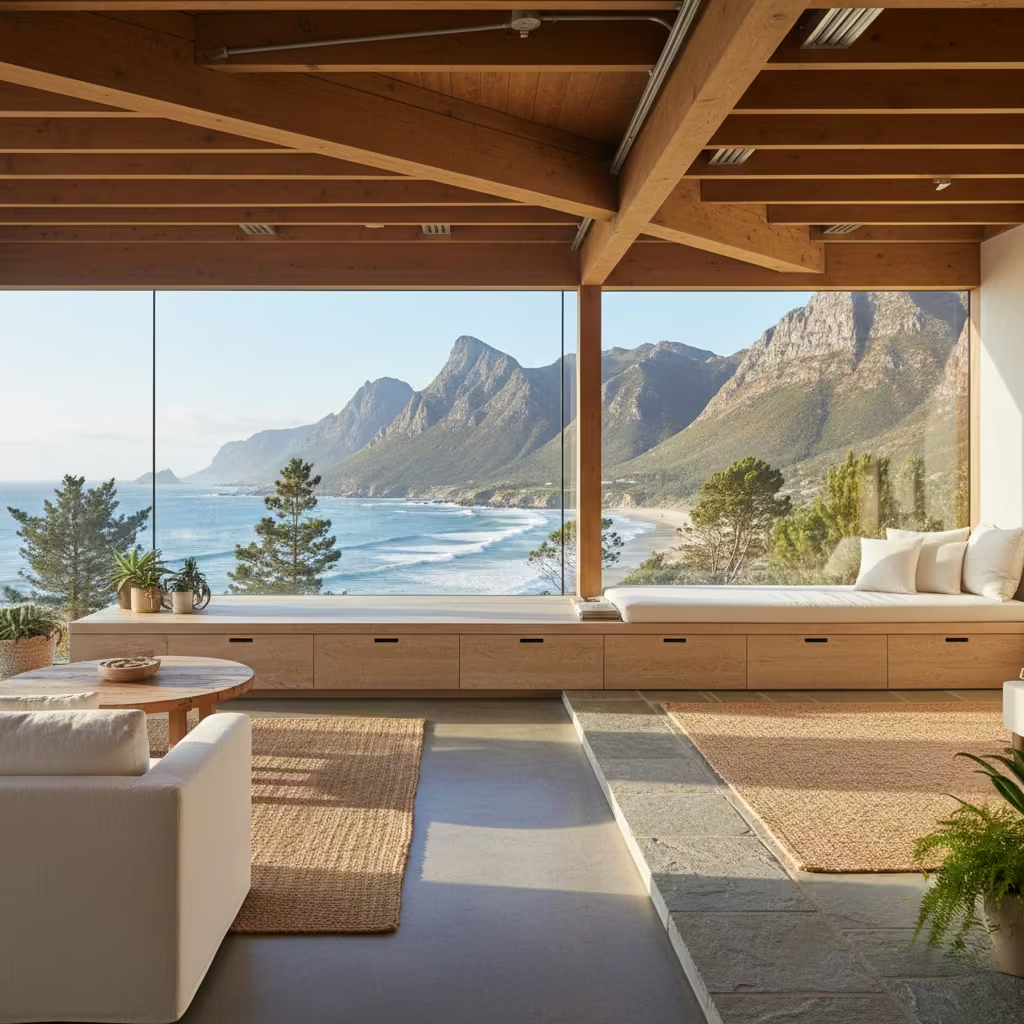
Built-in window seating is one of the most versatile design elements in a mountain beach house. It transforms large glazing areas from purely visual features into functional, comfortable spaces while improving thermal efficiency. In my experience, integrating seating into window bays or low walls not only frames expansive views but also adds insulation by reducing drafts and enhancing the thermal mass of the room. It’s a subtle way to merge practicality with architectural intent.
This approach works best in living rooms, reading nooks, or kitchen areas that feature large, panoramic windows. South- or west-facing windows benefit most from thermal mass integration, capturing sunlight in winter while reducing heat loss overnight. Window seating is particularly effective in spaces where large glazing is unavoidable but comfort, energy efficiency, and usability are also priorities.
For comfort, I recommend a seat height of 450–500 mm (17.5–19.5 in) with a depth of 400–500 mm (15.5–19.5 in) for lounging, or up to 600 mm (24 in) if cushions are included. The width can vary, but a minimum of 1.2 m (4 ft) allows two adults to sit comfortably. When incorporating under-seat storage or heating elements, allocate 300–350 mm (12–14 in) internal depth. Cushion thickness of 75–100 mm (3–4 in) ensures comfort without obstructing window sightlines.
I often construct seating in timber or plywood with a protective finish, pairing it with upholstered cushions in durable, fade-resistant fabrics such as Sunbrella or indoor/outdoor wool blends. Integrating stone or tiled surfaces beneath cushions in high-use areas can further enhance thermal mass. To improve energy efficiency, I seal the window frame carefully against the built-in structure and, when possible, include radiant heating panels under the seat.
On a coastal mountain property with floor-to-ceiling glazing, the client wanted a space to enjoy morning sunlight without losing heat overnight. We installed a built-in timber bench with integrated storage and under-seat heating. The seating area became the focal point of the room, providing comfort, warmth, and a clear view of the landscape. Importantly, the mass of the timber and stone base reduced the chill from large window panes during colder months. The lesson learned was that attention to depth, cushion specification, and insulation details ensures a feature is both beautiful and practical.
Pros
- Frames views while providing functional seating
- Adds thermal efficiency and reduces drafts
- Can include integrated storage or heating
- Enhances architectural character of the space
Cons
- Requires careful planning to avoid blocking heat or light
- Custom design can increase construction cost
- Cushion and fabric maintenance needed over time
- Poorly insulated builds can undermine thermal benefits
Neutral Upholstery Balanced with Textured Layers
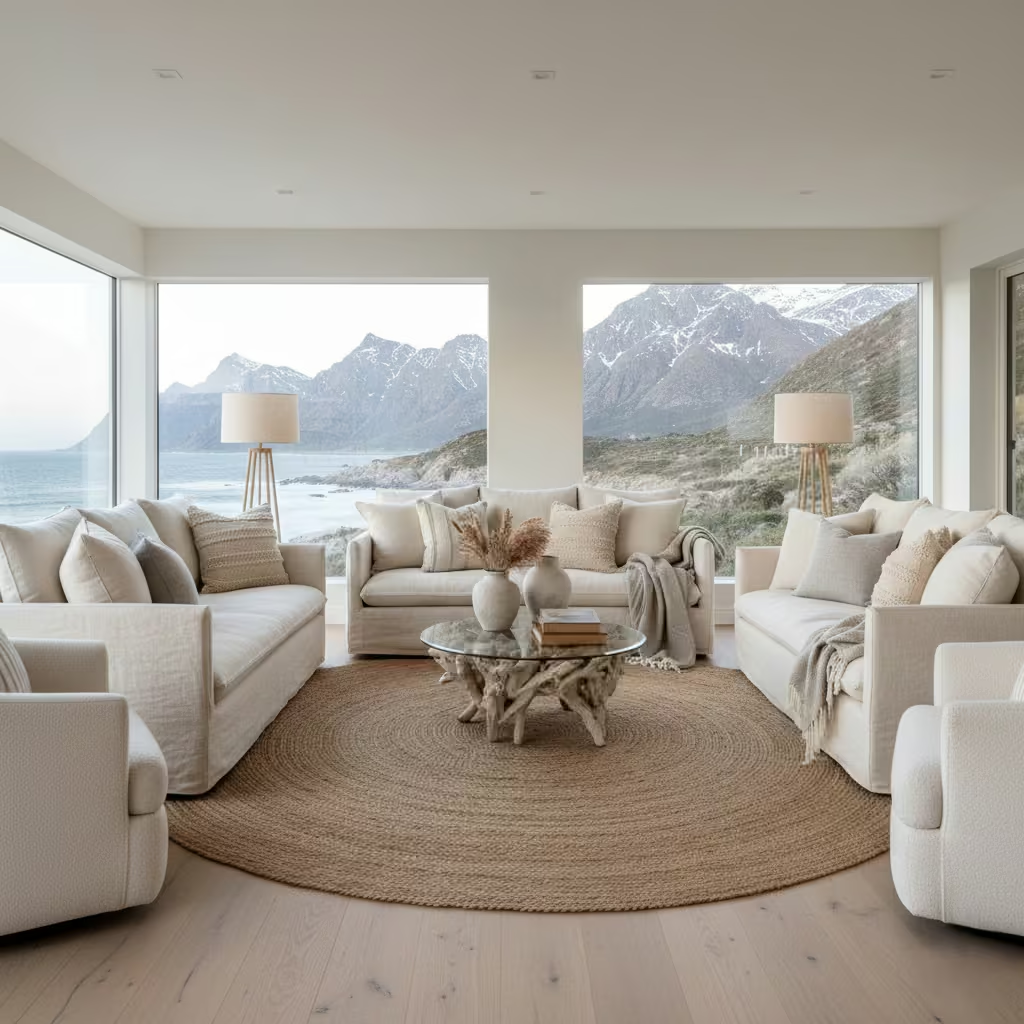
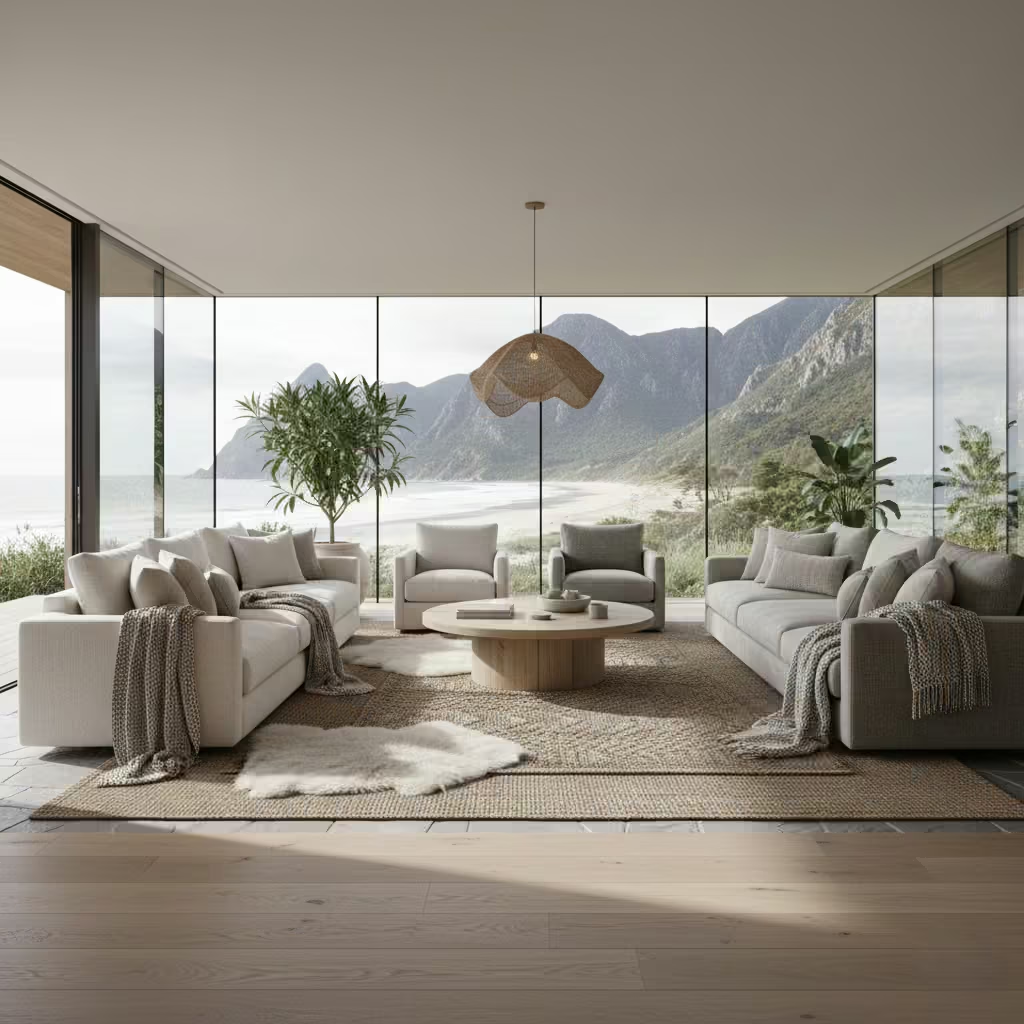
In a mountain beach house, neutral upholstery provides a calming foundation, but without texture, interiors can feel flat or overly clinical, especially in bright, light-filled spaces. I approach upholstery as a layering exercise, combining soft neutrals with tactile fabrics such as wool, linen, boucle, or leather to create depth, warmth, and a sense of intimacy. This technique balances the open, airy feel of coastal light with the grounded, tactile qualities associated with mountain living.
This strategy works best in living rooms, lounges, and bedroom seating areas where large furniture pieces dominate. It is particularly effective in spaces with extensive glazing, pale wall colours, or stone and timber floors that could otherwise feel stark. Layering textures also improves acoustic comfort in open-plan layouts and helps the space feel cozy during colder months without compromising brightness.
For seating, I typically specify sofas with a seat height of 430–460 mm (17–18 in) and a depth of 600–900 mm (24–35 in). Armchairs often mirror these dimensions to maintain visual proportion. Cushions are layered in varying sizes—commonly 450 x 450 mm (18 x 18 in) for primary cushions, with 300 x 500 mm (12 x 20 in) lumbar cushions to add contrast. Throws and rugs should extend beyond seating areas by at least 300 mm (12 in) to anchor textures cohesively.
Neutral upholstery fabrics include linen, cotton-linen blends, soft wool, and matte leather in shades of cream, taupe, greige, or pale stone. Textured layers are introduced through woven throws, boucle cushions, or patterned rugs in natural fibres. I avoid overly shiny finishes, which reflect harsh sunlight and disrupt the soft, layered feel. In high-use areas, I opt for fade- and stain-resistant fabrics that maintain quality over time.
On a mountain beach house I recently completed, the client wanted a light, coastal feel but also desired comfort for a family. Using neutral sofas paired with a mix of boucle cushions, woven throws, and a textured jute rug, the space instantly felt warmer and more inviting. The layering technique allowed the open-plan layout to remain airy while providing subtle visual interest and tactile comfort. The lesson was that neutral tones alone do not guarantee comfort; texture is essential for both function and design cohesion.
Pros
- Maintains bright, airy aesthetic while adding warmth
- Improves tactile and visual comfort in large spaces
- Flexible palette adapts to changing décor or seasons
- Enhances acoustic comfort in open-plan interiors
Cons
- Requires careful curation to avoid a cluttered look
- Layering can increase cleaning and maintenance requirements
- Fabric selection is critical to prevent fading or wear
- Over-texturing can compete with architectural elements if not balanced
Large-Scale Fire Pits for Transitional Outdoor Spaces
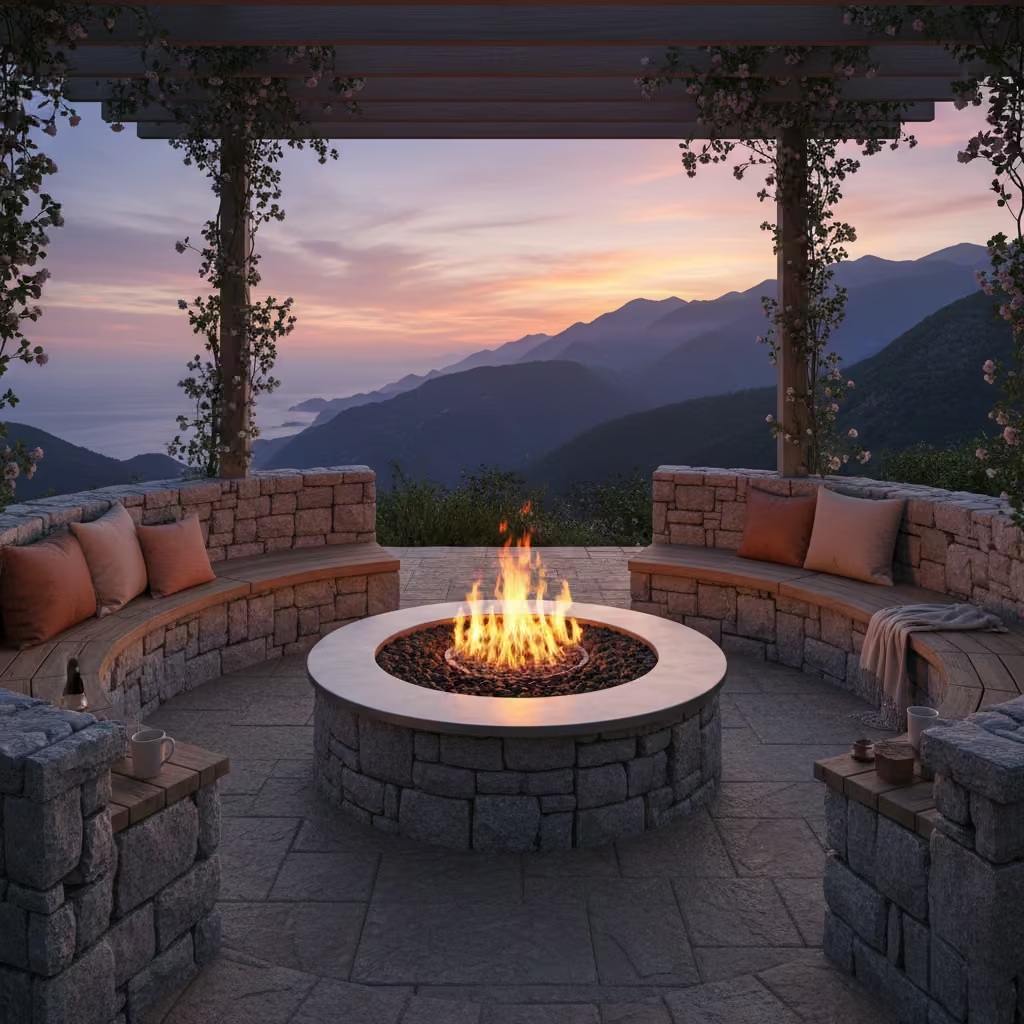
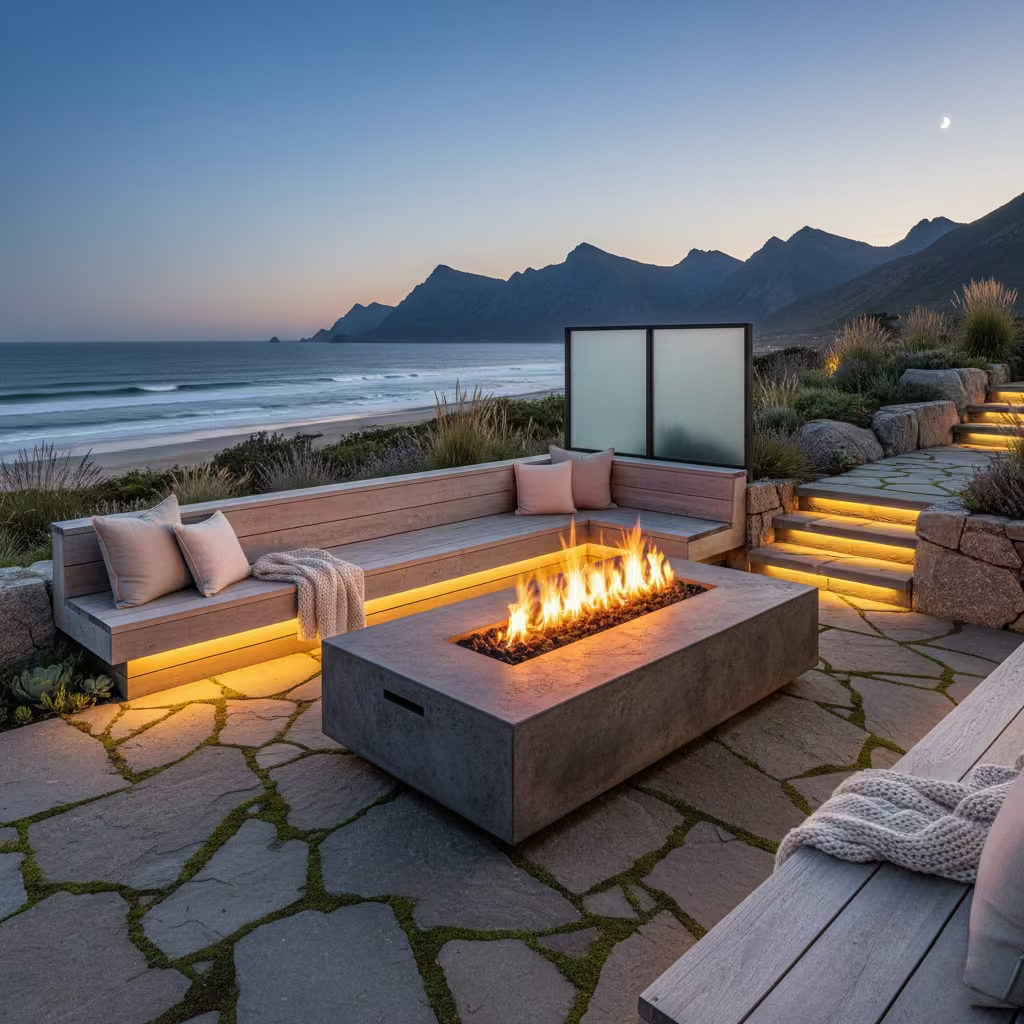
Large-scale fire pits are a powerful way to define transitional outdoor spaces in a mountain beach house. They act as both a social anchor and a thermal source, extending usability of terraces, decks, or courtyards across cool evenings and seasonal changes. I design fire pits not as standalone features but as integrated elements that respond to circulation, seating, and views, helping outdoor areas feel purposeful and inviting.
This approach works best in semi-enclosed outdoor areas such as wraparound porches, terraces, or patios that bridge the interior and landscape. Coastal mountain climates benefit most because fire pits provide warmth during evening breezes or colder months while encouraging gathering around a central focal point. Positioning is key: avoid areas directly exposed to prevailing wind, and ensure proximity to seating and sightlines without obstructing access.
For usability and safety, I typically design fire pits with a diameter of 1.2–1.5 m (4–5 ft) for circular pits, or 1.2 x 1.8 m (4 x 6 ft) for rectangular configurations. Seat walls or benches should maintain a 900–1,000 mm (35–39 in) distance from the fire edge to allow safe movement. Hearth height is ideally 400–450 mm (16–18 in) to provide warmth while keeping flames visible from a seated position. Ensure a minimum clearance of 1.5–2 m (5–6.5 ft) from combustible structures or overhangs.
Durable materials such as natural stone, cast concrete, or steel with high-temperature coatings are essential for coastal mountain conditions. I often incorporate firebrick linings or lava rock to improve heat retention and protect the structural material. Metal trims and grates should be marine-grade to resist corrosion from salty air. Surrounding surfaces should be non-combustible and slip-resistant, such as stone paving or porcelain tiles.
On a mountain beach deck project, we installed a large, circular fire pit at the junction of the living room and terrace. The client wanted a feature that could be used year-round. By combining a natural stone surround with a gas burner, the pit provided instant warmth, was low maintenance, and anchored the outdoor furniture layout. The fire pit not only extended outdoor usability but also visually connected the terrace to views of the coastline. Key insight: scale, material choice, and careful siting are critical for safety and comfort.
Pros
- Extends usability of outdoor spaces in cool or transitional weather
- Acts as a visual and social focal point
- Adds property value and lifestyle appeal
- Can be integrated with seating and landscape design
Cons
- Requires careful planning for safety and clearance
- Higher installation costs than portable solutions
- Regular maintenance needed in exposed coastal or mountainous environments
- Improper scale can overpower the space or obstruct views
Coastal Bathrooms With Spa-Level Insulation and Drainage
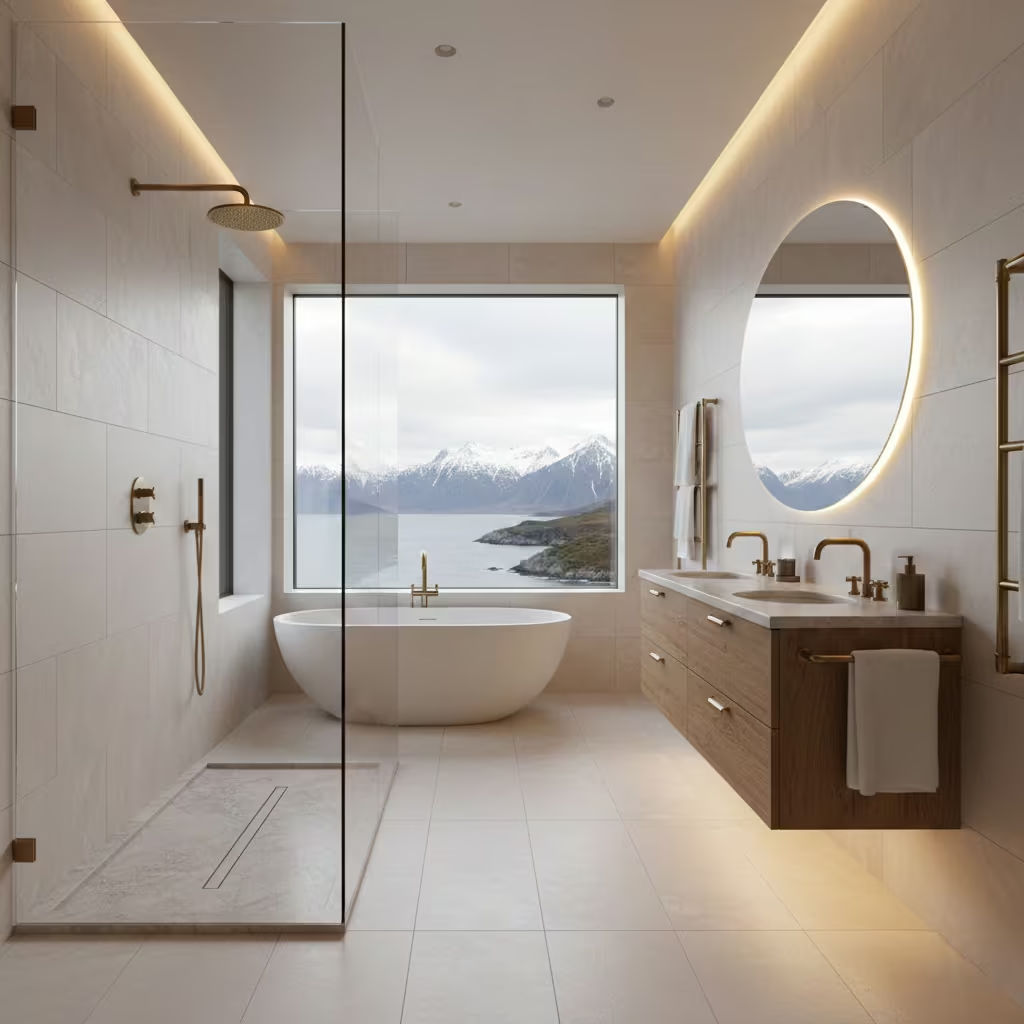
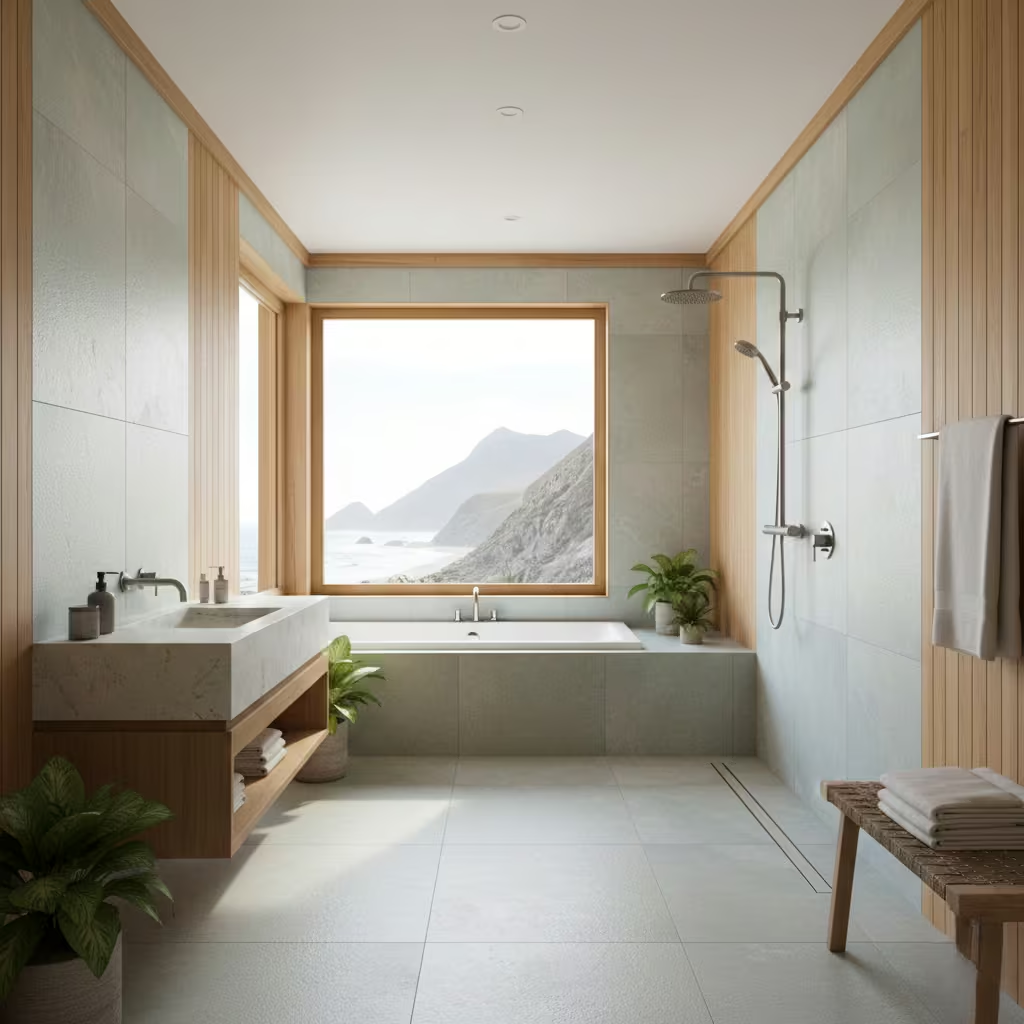
In a mountain beach house, bathrooms must combine a coastal aesthetic with robust performance. I design bathrooms to feel like spa retreats while addressing the unique challenges of coastal-mountain climates: high humidity, temperature fluctuations, salt-laden air, and seasonal occupancy. Spa-level insulation and advanced drainage systems ensure comfort, prevent moisture damage, and maintain a pristine, low-maintenance environment year-round.
This approach works best in en-suites, main bathrooms, and pool-adjacent wet rooms. Bathrooms located on upper levels or in exposed parts of the house particularly benefit from improved insulation, both in walls and floors. Proper drainage is essential for terraces or balconies with outdoor showers, as well as bathrooms facing prevailing winds or elevated sites prone to rainwater exposure.
For functionality, I recommend a minimum bathroom floor area of 5–6 m² (54–65 ft²) for full amenities, with circulation widths of 900–1,000 mm (35–39 in) between fixtures. Shower trays should be at least 900 x 1,200 mm (35 x 47 in), with a floor fall of 1:80 to drainage points. Wall cavities housing plumbing should include 50–75 mm (2–3 in) of insulation behind wet areas to prevent condensation and heat loss. In larger wet rooms, linear drains spanning the shower width improve water flow and reduce pooling.
I favour natural stone or high-performance porcelain tiles for floors and walls, paired with waterproof membranes and corrosion-resistant fixings. Timber accents should be thermally modified or sealed with water-resistant oils. For spa-level comfort, underfloor heating is essential, ideally in combination with insulated floor screeds. Fixtures, taps, and showerheads should be marine-grade stainless steel or brass with protective coatings to withstand salty air.
On a cliffside coastal mountain home, the client wanted a light, airy bathroom despite high winter winds and summer salt exposure. We installed a fully insulated wet room with underfloor heating, linear drains, and thermally stable timber accents. The room remained comfortable year-round, with minimal condensation and no maintenance issues after two years. The lesson learned was that performance detailing must match aesthetic ambition; a beautiful coastal bathroom without proper insulation or drainage will fail quickly in exposed conditions.
Pros
- Combines coastal aesthetics with year-round comfort
- Reduces risk of condensation, mould, and material degradation
- Supports underfloor heating and spa-level luxury
- Enhances resale and lifestyle value
Cons
- Higher upfront cost due to insulation and drainage systems
- Requires precise construction detailing
- Maintenance of natural stone or timber accents remains necessary
- Retrofitting insulation and drainage in existing bathrooms can be challenging
Wind-Resistant Landscaping With Native Planting
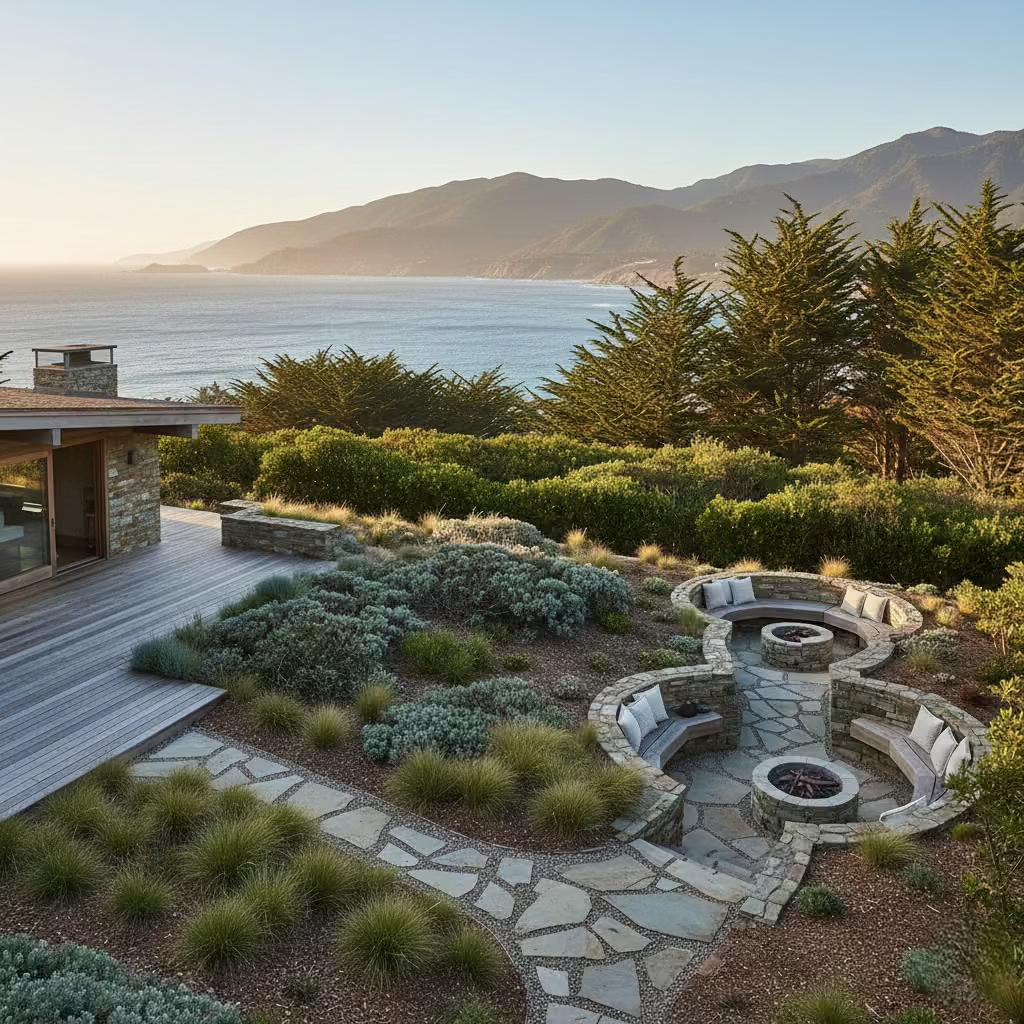
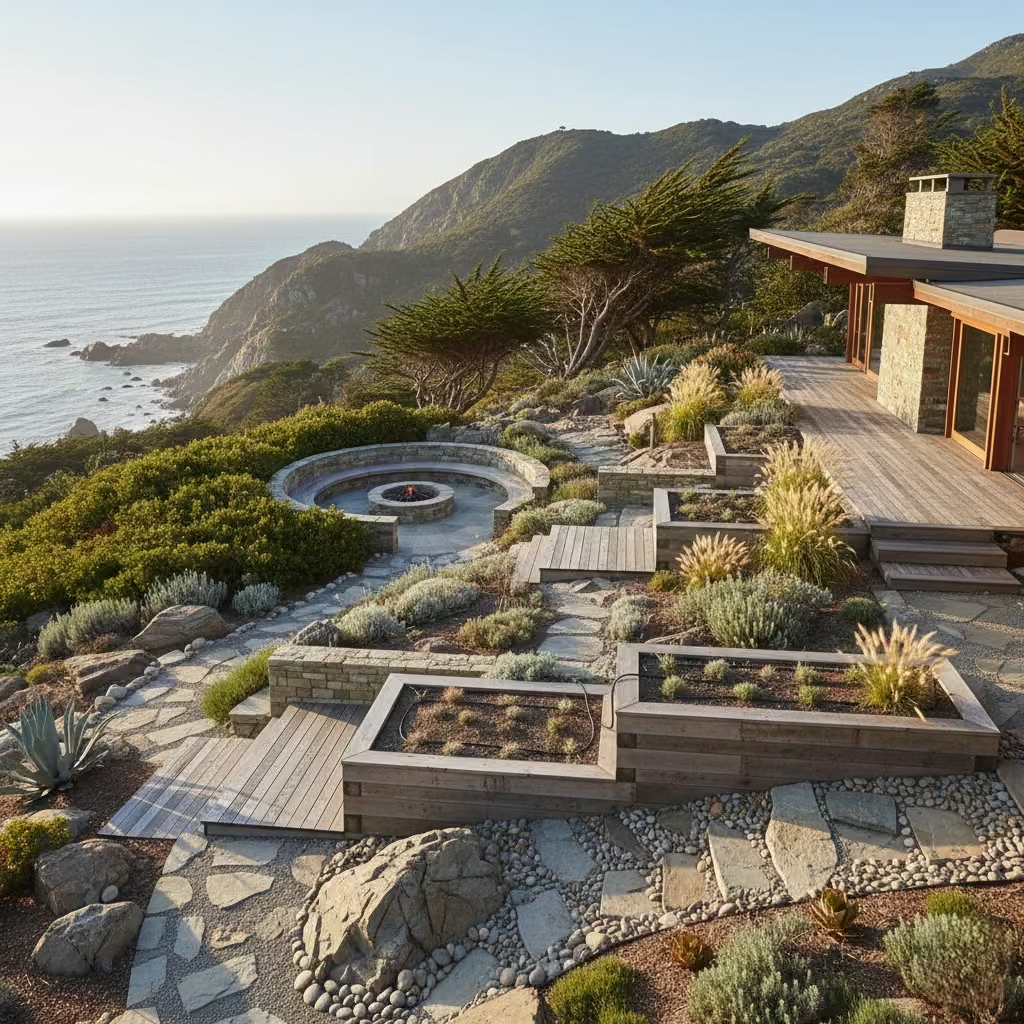
Landscaping around a mountain beach house must do more than look good—it must perform. I use wind-resistant landscaping and native planting to create outdoor spaces that withstand harsh coastal winds, reduce soil erosion, and require minimal maintenance. By selecting hardy, locally adapted species, and arranging them strategically, the landscape becomes both protective and visually integrated with the mountain and coastal environment.
This approach is essential for exposed coastal plots, ridgelines, and hillside gardens where wind and salt spray are frequent challenges. Native planting works well on slopes, terraces, and around decks or outdoor living areas, acting as natural windbreaks. It is particularly effective near outdoor social spaces such as decks, porches, or fire pit zones, providing shelter without interrupting views.
Windbreak planting should be spaced according to mature growth, typically 1.5–3 m (5–10 ft) between shrubs and 3–5 m (10–16 ft) for small trees. Layered planting works best: low shrubs (0.3–0.8 m / 1–2.5 ft) near decks, medium shrubs (0.8–1.5 m / 2.5–5 ft) as intermediate protection, and taller trees (3–5 m / 10–16 ft) in more distant areas to deflect prevailing winds. Mulch layers of 50–75 mm (2–3 in) help retain soil moisture and protect young plants.
I favour native species such as coastal grasses, hardy evergreens, salt-tolerant shrubs, and low-maintenance groundcovers. Stone or gravel mulches complement these plantings while improving drainage and preventing erosion. Where necessary, I incorporate permeable paving and raised beds to control run-off without disrupting natural contours. Irrigation should be drip-based, discreet, and calibrated for seasonal rainfall to reduce water consumption.
On a mountain beach property with exposed west-facing slopes, the client wanted an outdoor seating terrace but winds were strong year-round. We created a layered native planting scheme using low coastal grasses near the terrace, medium shrubs behind, and tall, wind-tolerant evergreens further out. Within two seasons, the terrace became usable year-round, and maintenance requirements were minimal. The key lesson was that early planning of plant size, spacing, and layering is critical for long-term success.
Pros
- Reduces wind impact on outdoor spaces
- Low-maintenance and sustainable
- Minimises soil erosion on slopes
- Integrates property with local environment visually and ecologically
Cons
- Establishment period can take 1–3 years before full protection
- Requires careful species selection for microclimates
- Windbreaks may block some views if not layered thoughtfully
- May need occasional pruning to maintain density and form
Mixed Metal Finishes for Coastal Durability
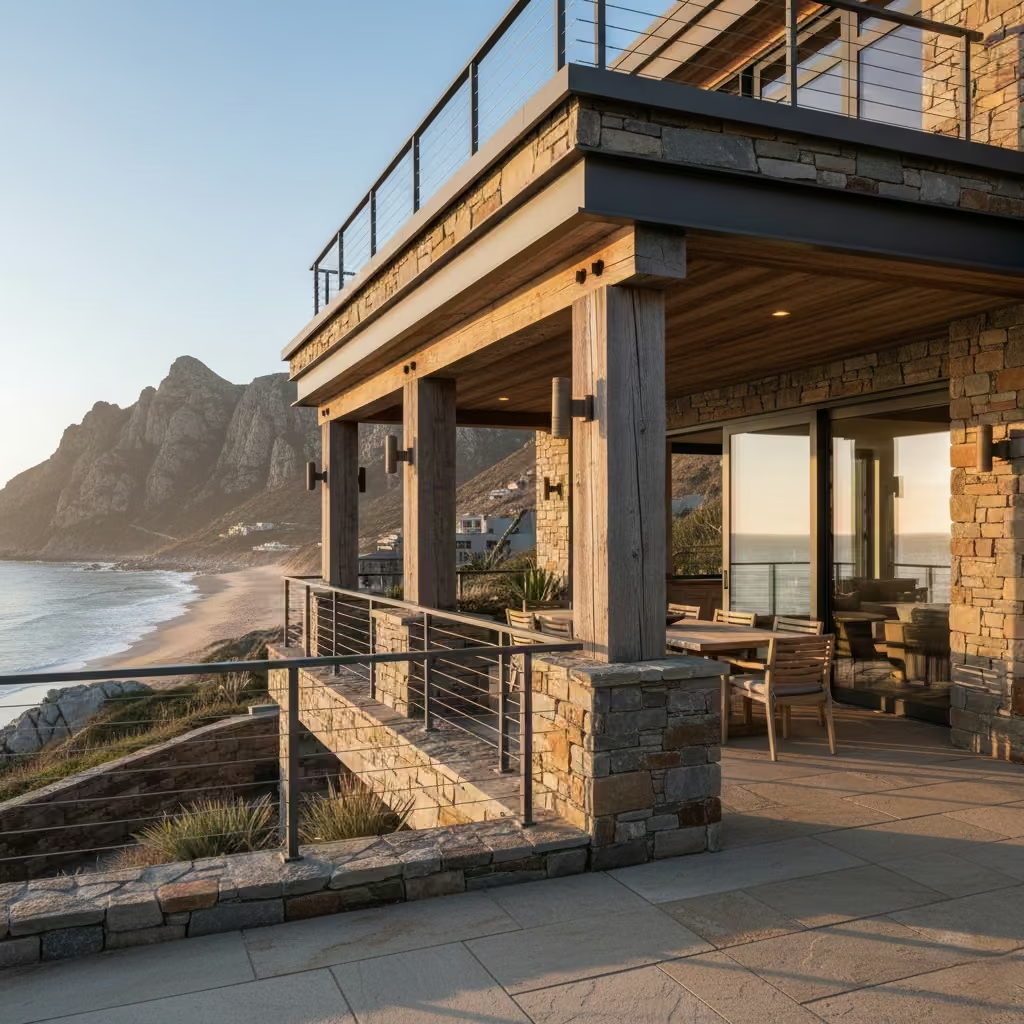
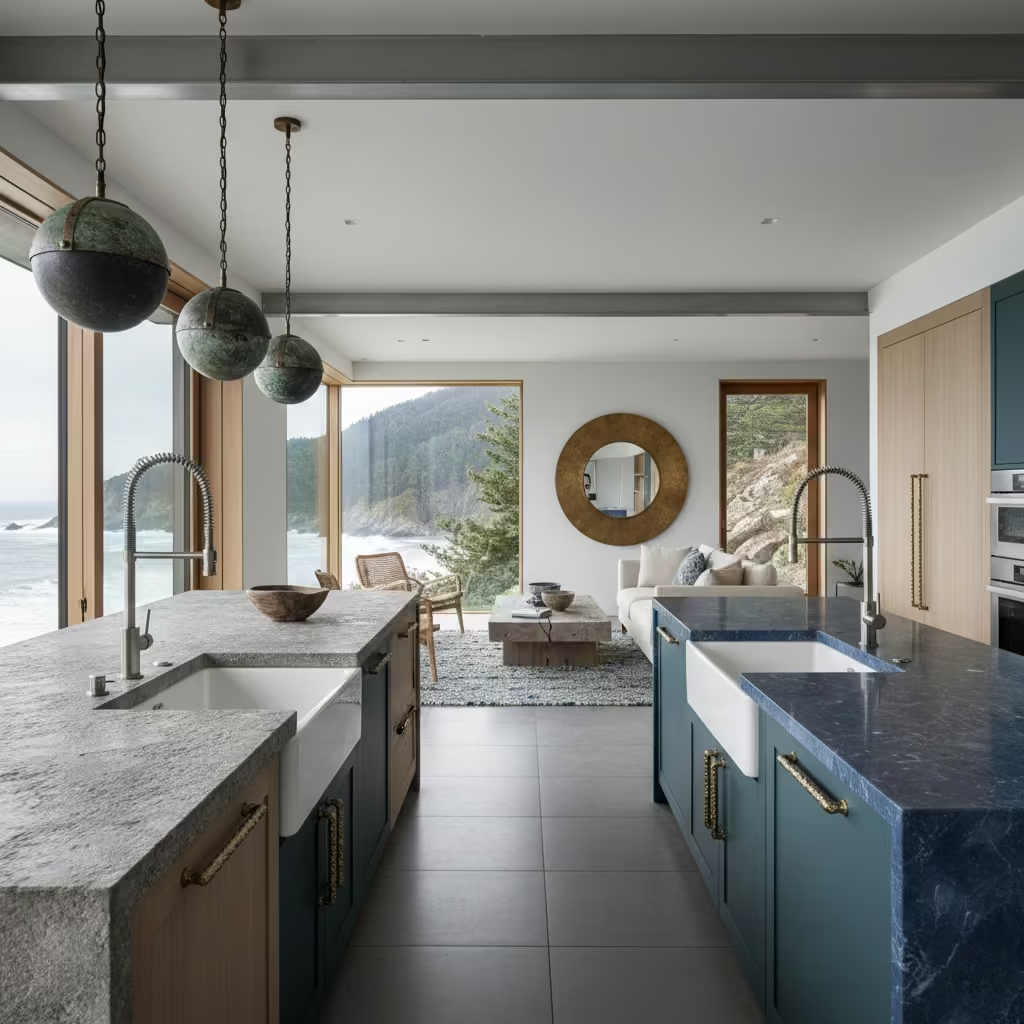
In mountain beach houses, metal finishes are exposed to both coastal salt air and variable mountain climates, making durability a critical concern. I use mixed metal finishes strategically to combine aesthetics, performance, and longevity. By pairing metals with different properties—such as stainless steel, brass, bronze, or powder-coated aluminium—I can create layered, high-end interiors and exteriors that withstand moisture, temperature swings, and UV exposure while adding visual interest.
This strategy works across kitchens, bathrooms, door and window hardware, lighting fixtures, balustrades, and outdoor fittings. Coastal mountain sites benefit from corrosion-resistant metals on external fixtures, while interiors can use warmer metals for visual layering. Mixed finishes are particularly effective where indoor-outdoor transitions are frequent, such as terraces, balconies, and pool areas.
For interior hardware, handles and fixtures should generally range 100–300 mm (4–12 in) for cabinets, and 300–500 mm (12–20 in) for door pulls, ensuring functional usability. In kitchens or bathrooms, combining a primary metal for taps (stainless steel or brass) with secondary metals for cabinet handles or lighting accents adds depth. For outdoor balustrades or gates, posts spaced at 1.8–2.4 m (6–8 ft) with 40–50 mm (1.5–2 in) tubing provides structural stability without excessive visual bulk.
I prioritize marine-grade stainless steel, powder-coated aluminium, solid brass, and bronze with patina-friendly finishes. Brushed or satin finishes are preferable over polished metals for both aesthetic longevity and resistance to fingerprinting and corrosion. In exposed coastal areas, I avoid ferrous metals unless fully treated or coated, and always use compatible fasteners to prevent galvanic corrosion when mixing metals.
On a mountain beach renovation, the client wanted a mix of warmth and industrial detail. We used stainless steel taps and marine-grade handles in the kitchen, combined with aged bronze pendant lights and timber trim. The result was a visually layered, durable scheme that resisted salt air corrosion and maintained finish integrity for over three years without refinishing. The lesson: deliberate contrast in metals adds sophistication but requires careful technical specification to prevent long-term corrosion issues.
Pros
- Combines aesthetic depth with functional durability
- Performs well in harsh coastal and mountain climates
- Allows flexible, layered design schemes
- Resistant to corrosion when properly specified
Cons
- Requires careful planning to avoid galvanic corrosion
- Higher upfront material costs than standard metals
- Limited flexibility for retrofitting without matching finishes
- Maintenance still required for high-touch areas
Mudrooms Designed for Sand, Snow, and Wet Gear
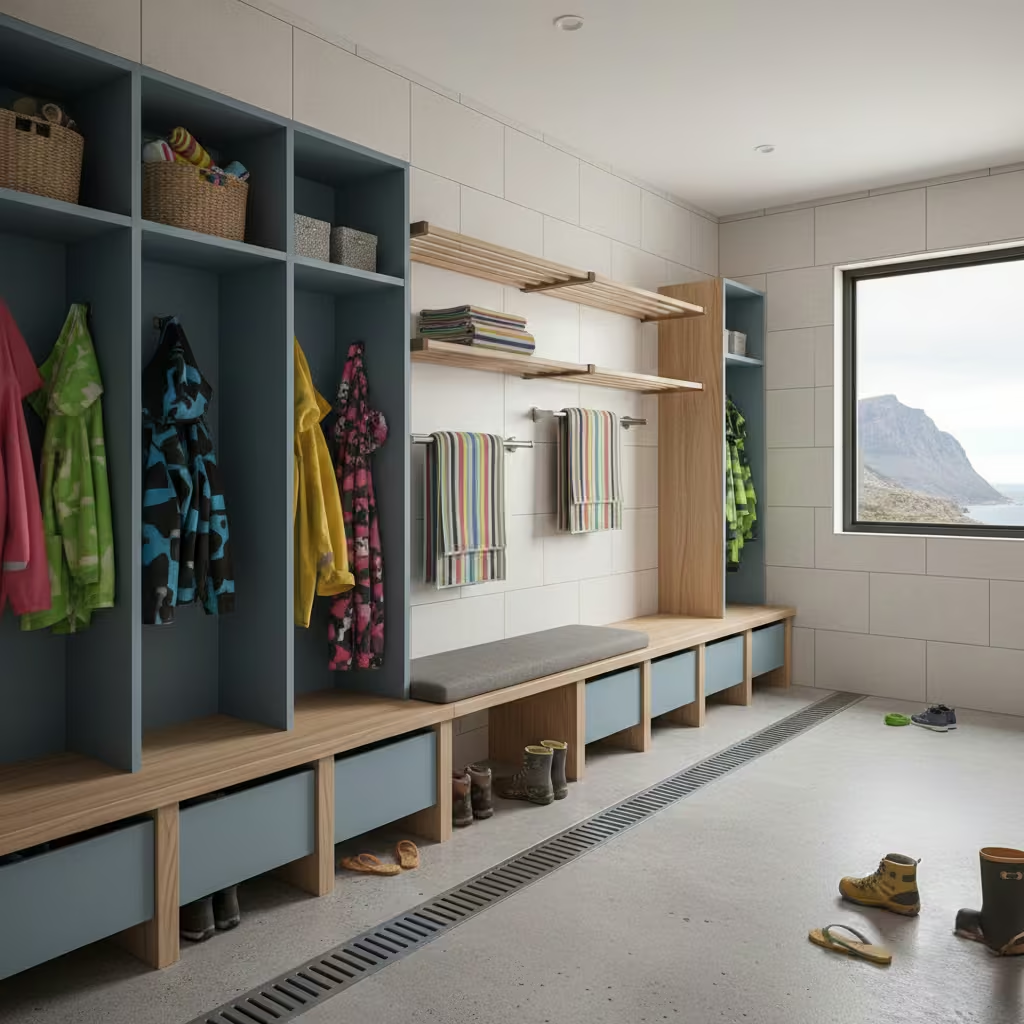
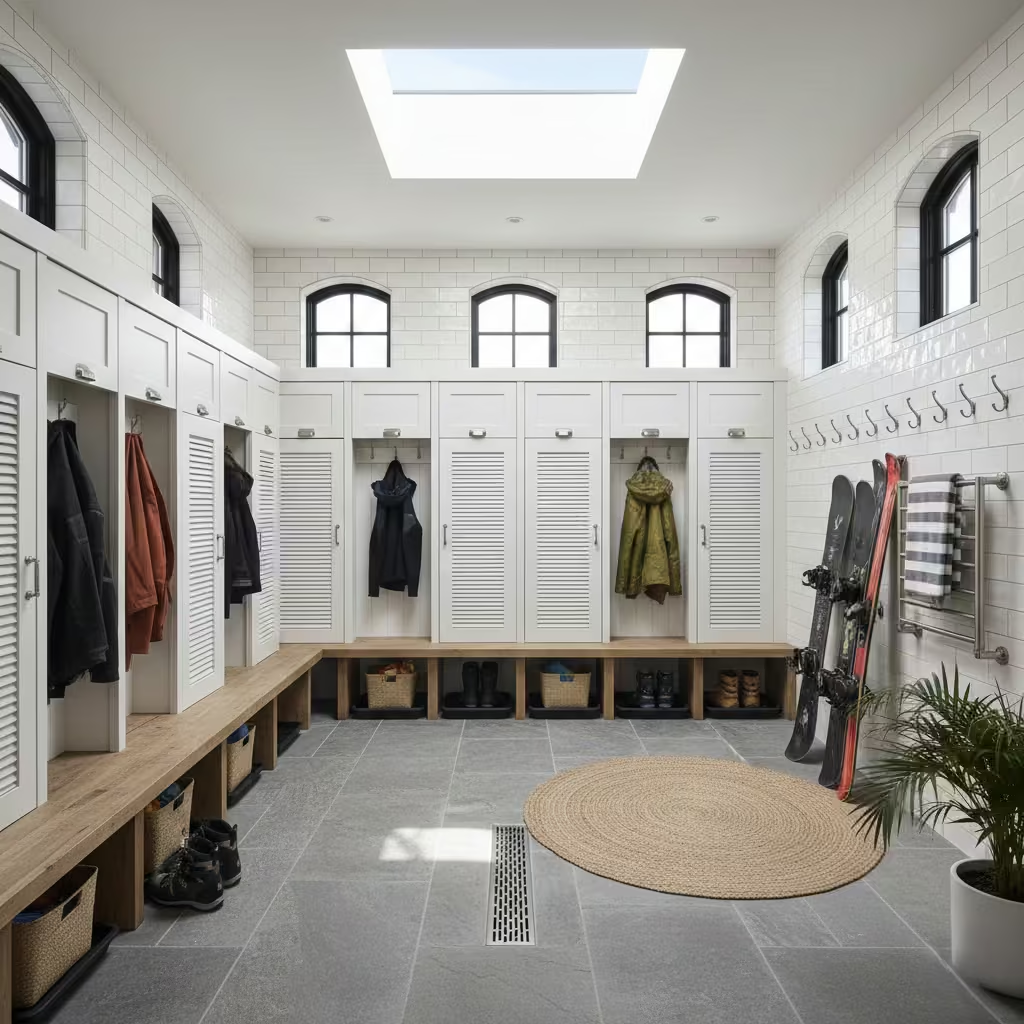
In a mountain beach house, mudrooms are essential functional spaces, acting as a buffer between the outdoors and the main living areas. I design mudrooms to handle sand, snow, wet towels, and muddy footwear without compromising style. They serve as organised t
ransition zones, protecting interiors from moisture and dirt while providing storage and drying solutions for active households in coastal and mountainous climates.
Mudrooms are most effective when located at primary entrances, garage entries, or points of beach and trail access. They work particularly well in homes with family use or high seasonal occupancy, where residents frequently move between outdoor recreation and indoor comfort. In coastal mountain regions, positioning near sheltered outdoor areas maximises usability and reduces exposure to prevailing winds or direct rainfall.
I recommend a minimum width of 1.5 m (5 ft) and depth of 2–2.4 m (6.5–8 ft) for a functional mudroom. Bench seating should sit 450 mm (17–18 in) high, with 400–500 mm (15–20 in) depth for sitting or shoe removal. Storage cubbies or lockers typically measure 300 mm (12 in) wide by 450 mm (18 in) high per person. Flooring slopes of 1–2% toward a drain or waterproof trough improve water management, and ceiling heights of 2.4–2.7 m (8–9 ft) maintain openness without feeling cramped.
Durable, water-resistant surfaces are key. I use porcelain, stone, or sealed timber flooring, with waterproof paint or tiles on walls in high-splash zones. Bench tops and storage surfaces are typically timber or engineered stone for durability and ease of cleaning. Hooks, rails, and shelving are marine-grade stainless steel or powder-coated metal. I often incorporate integrated boot trays, drying racks, and towel hooks to manage wet gear efficiently.
On a mountain beach property with direct beach access, the client initially lacked an organised mudroom, leading to sand and moisture entering the living area. We designed a space with tiled floors, under-bench drains, individual lockers, and heated towel rails. The result was a functional, low-maintenance transition zone that remained comfortable year-round. The key lesson was that effective mudrooms anticipate a range of outdoor conditions and gear, integrating storage, drainage, and durability seamlessly.
Pros
- Protects interiors from sand, snow, and moisture
- Provides organised storage and drying solutions
- Enhances year-round functionality of the home
- Can be integrated with heating or underfloor systems for comfort
Cons
- Requires dedicated footprint, increasing total square footage
- Higher upfront cost for durable materials and integrated systems
- Poorly planned layouts can become cluttered or inefficient
- Retrofitting existing homes may require plumbing and electrical adjustments
Minimal Window Treatments That Manage Glare and Privacy
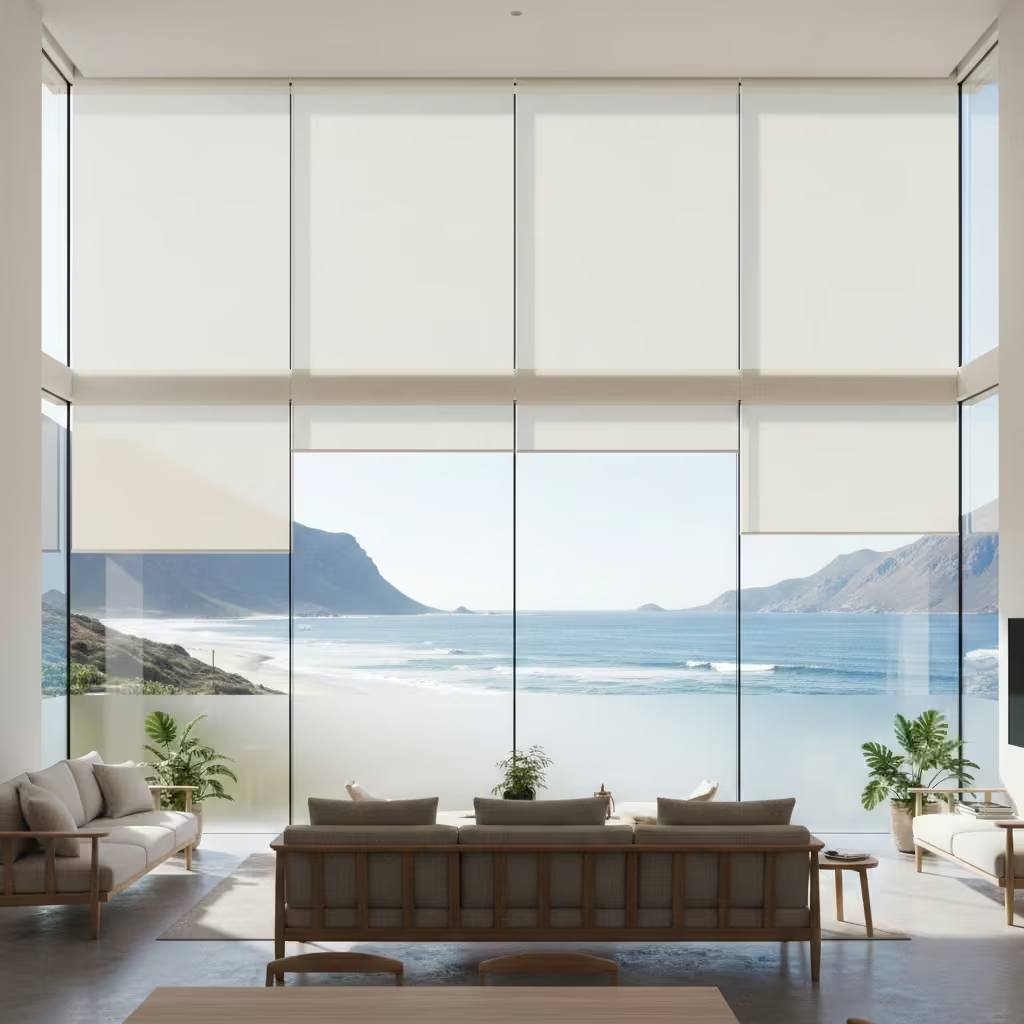
In a mountain beach house, large windows frame views and flood interiors with light, but they can also create glare, unwanted heat gain, and privacy issues. I specify minimal window treatments that balance function and aesthetics, enhancing comfort without compromising the connection to the landscape. This approach keeps interiors feeling open, airy, and visually uncluttered while providing effective control over sunlight and sightlines.
This strategy works best in living rooms, bedrooms, and dining areas with expansive glazing facing sun-exposed elevations or neighbouring properties. It’s particularly effective for spaces that rely on natural light for warmth and atmosphere but require occasional shading or privacy. West- and south-facing windows benefit most from treatments that control intense afternoon light without fully blocking views.
For roller blinds or motorised shades, I usually allow 50–100 mm (2–4 in) overlap beyond the window frame to maximise light control. Curtain tracks should extend 150–300 mm (6–12 in) beyond the reveal on either side to ensure full coverage when drawn. I recommend floor-to-ceiling installations in rooms with 2.7 m (9 ft) or higher ceilings to create a sense of height and proportion. Lightweight fabrics with 2–3% opacity allow filtered light while maintaining privacy during the day.
I favour natural, breathable fabrics like linen, cotton-linen blends, or semi-sheer voile for interiors. For external shading, aluminium or powder-coated metal screens can be used to protect interiors from glare and UV exposure. Roller systems, recessed tracks, or motorised controls keep hardware discreet and maintain a clean aesthetic. Neutral tones such as soft greys, sand, or muted white blend seamlessly with walls and furnishings while subtly complementing exterior views.
On a coastal mountain home, the client wanted unobstructed views but struggled with late-afternoon glare and privacy concerns. We installed floor-to-ceiling linen blinds with a light-filtering weave, paired with motorised operation for ease of use. The solution softened harsh light, maintained privacy, and preserved the open, airy feel of the interior. The lesson: minimal treatments can provide maximum comfort when carefully specified for fabric weight, opacity, and operation.
Pros
- Preserves natural light and views
- Enhances privacy without visual clutter
- Reduces glare and heat gain
- Easy to integrate with modern or coastal interiors
Cons
- Less effective in complete blackout situations
- Fabric treatments may fade over time in strong sunlight
- Motorised systems add cost and require maintenance
- Poorly specified opacity can compromise privacy or light control
Indoor-Outdoor Dining Spaces with Seasonal Flexibility
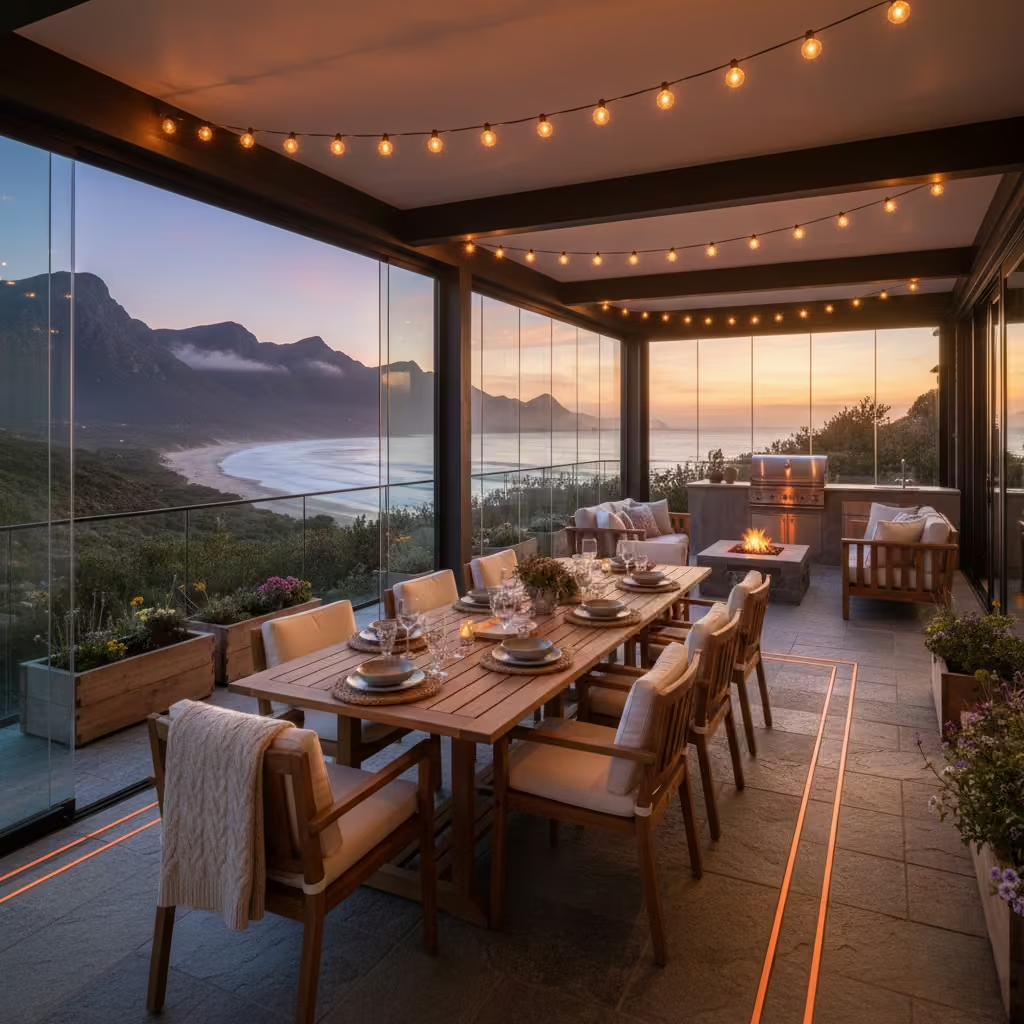
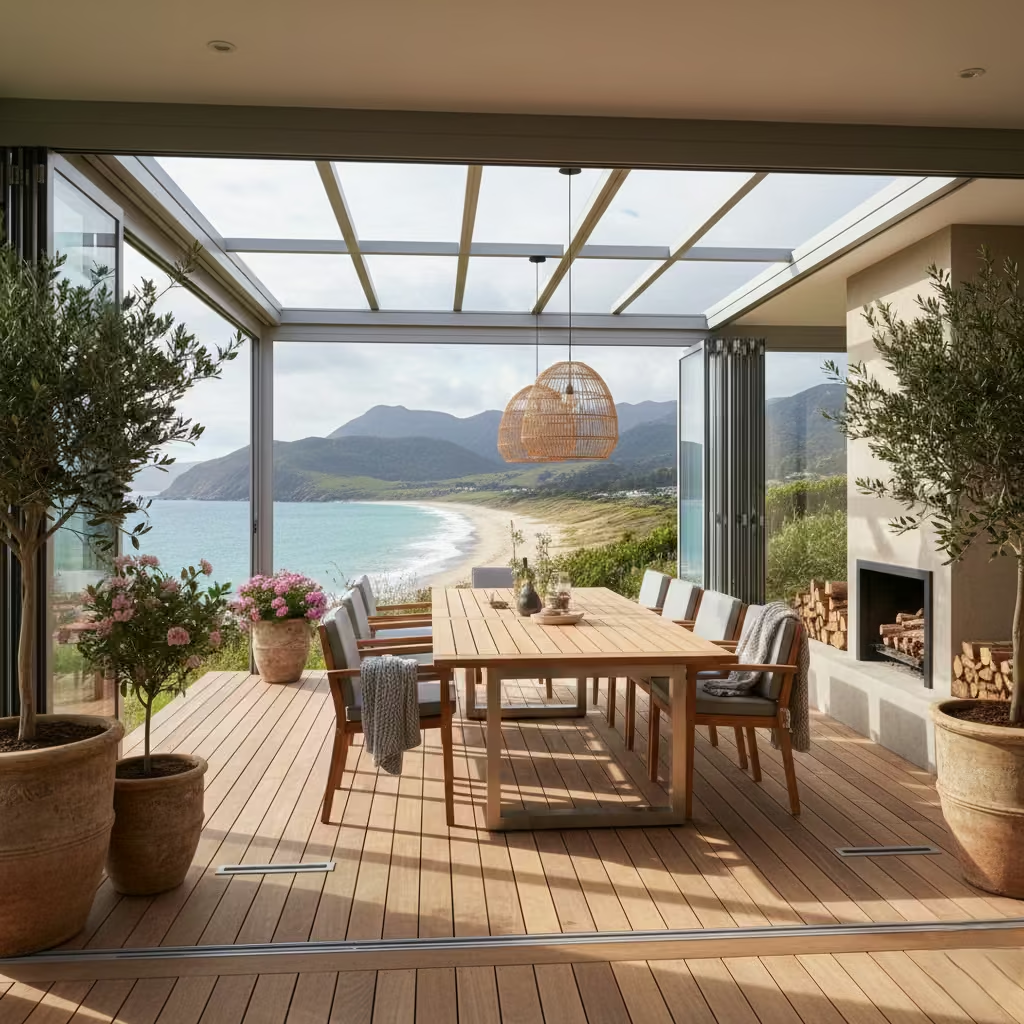
Indoor-outdoor dining areas are a hallmark of mountain beach houses, connecting interior living with the surrounding landscape. I design these spaces for seasonal flexibility, allowing them to function seamlessly in summer and winter. The goal is to create areas that feel integrated, comfortable, and practical, supporting meals, entertaining, and social gatherings while responding to variable climates.
This approach works best on terraces, covered patios, or spaces with large sliding or folding glass doors that open directly from the kitchen or living room. It is particularly effective in properties with south- or west-facing exposures, where sun and views are maximized, or in windy mountain coastal sites where partial enclosures provide shelter. Positioning near outdoor kitchens or fire pits further enhances usability.
I typically allow 900–1,000 mm (35–39 in) per seated person at tables to ensure comfort, with 1,200–1,500 mm (4–5 ft) of circulation space around the table. For foldable or extendable tables, I allow 600 mm (24 in) minimum overhang for seating flexibility. Covered areas should extend at least 1.2–1.5 m (4–5 ft) beyond the table perimeter to accommodate chairs and movement while protecting from sun or rain.
Durable, low-maintenance materials are essential. I use teak, iroko, or thermally modified timber for table tops and benches, paired with marine-grade stainless steel frames for corrosion resistance. Outdoor fabrics for cushions should be fade- and water-resistant, such as Sunbrella or solution-dyed acrylic. Flooring should be slip-resistant and weatherproof, like stone, porcelain, or treated timber decking. Retractable screens or glass panels can be integrated to manage wind, rain, and insects.
On a mountain coastal renovation, the client wanted a dining area that could be used year-round despite exposure to wind and rain. We designed a covered terrace with retractable glass panels, an extendable teak dining table, and underfloor heating for cooler months. The area quickly became the family hub, usable in all seasons without sacrificing openness or views. The key takeaway was that layering protection roof, screens, and thermal elements creates truly flexible spaces.
Pros
- Extends living and entertaining space outdoors
- Maximizes natural light and views
- Flexible for seasonal changes
- Enhances property lifestyle and resale value
Cons
- Requires careful weatherproofing and drainage
- Higher upfront cost for durable materials and retractable elements
- Furnishing must withstand sun, moisture, and temperature fluctuations
- Design must consider prevailing winds and site orientation
Layered Lighting for Long Evenings and Dark Winters
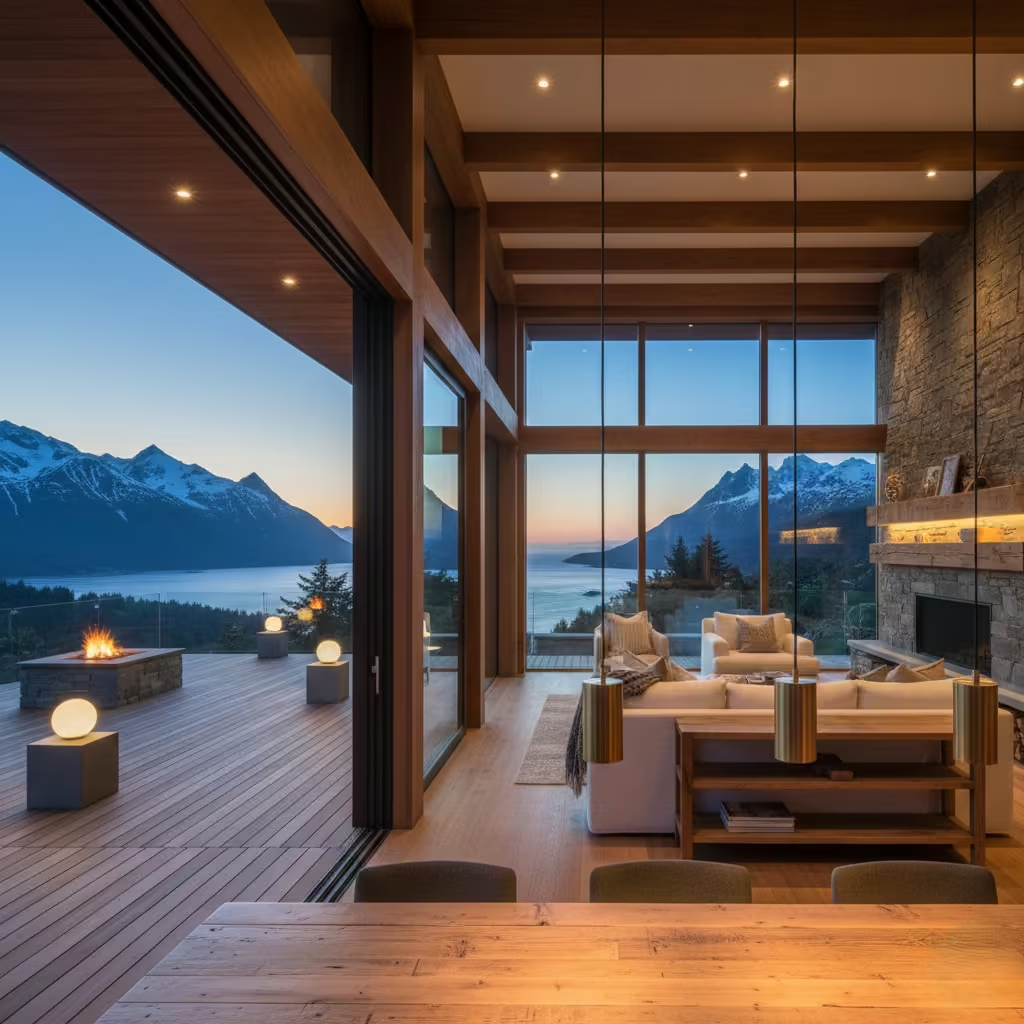
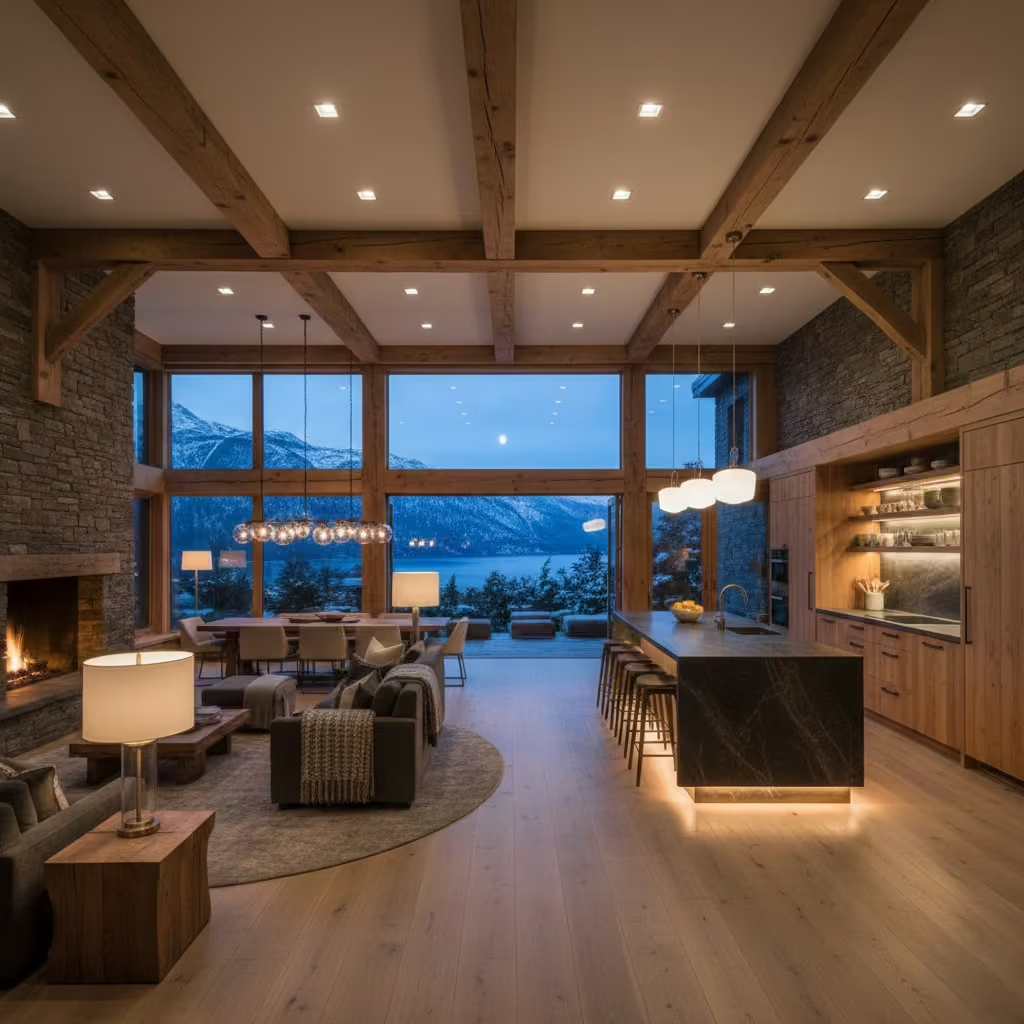
Mountain beach houses often face long, dark winters and extended evenings where natural light is limited. I emphasise layered lighting as a strategy to balance function, ambiance, and architectural expression. Layered lighting combines ambient, task, and accent sources to create depth, improve usability, and maintain a warm, inviting atmosphere regardless of season or time of day. It ensures that large, open-plan interiors feel cosy while highlighting material textures and landscape views.
Layered lighting is essential in living rooms, kitchens, dining areas, hallways, and bedrooms where daylight is inconsistent. Spaces with extensive glazing can benefit from supplemental lighting in winter when low sunlight angles fail to illuminate interiors evenly. Outdoor terraces and decks also benefit, extending usable hours for entertaining and creating a safe, visually appealing environment.
Practical measurements and proportions
- Ambient lighting: Recessed ceiling lights or flush-mounted fixtures spaced 1.5–2 m (5–6.5 ft) apart for even coverage. In large open-plan spaces, install dimmable circuits to adjust light intensity seasonally.
- Task lighting: Over kitchen islands, desks, or reading nooks, pendants or adjustable wall sconces should be installed 600–750 mm (24–30 in) above work surfaces. Under-cabinet lighting should sit 150–250 mm (6–10 in) from the wall for optimal illumination without glare.
- Accent lighting: Floor or table lamps, wall washers, and LED strips highlight architectural features, artwork, or textural materials. Spacing varies depending on feature size, but aim for 30–50% of overall room luminance to come from accent sources for depth.
I recommend fixtures made from corrosion-resistant metals such as brushed stainless steel, powder-coated aluminium, or marine-grade brass for coastal-mountain conditions. Warm white LEDs (2,700–3,000 K) create a comfortable glow without harshness. Diffusers, frosted glass, or fabric shades soften light, reducing glare on pale surfaces. Outdoor lighting should be IP65-rated or higher for protection against moisture and salt-laden air.
In a mountain beach house renovation, the client noted that interiors felt cold and dim in winter despite large windows. We implemented a layered lighting plan: dimmable recessed ambient lights, task lighting over the kitchen island, and accent uplights highlighting timber beams and stone walls. This approach created visual depth, improved comfort, and allowed the space to transition smoothly from daytime activity to evening relaxation. Key takeaway: layering lighting transforms both the functionality and emotional quality of a space.
Pros
- Provides functional illumination for varied activities
- Enhances warmth, comfort, and ambiance during long evenings
- Highlights architectural features and materials
- Flexible and adjustable for seasonal and situational needs
Cons
- Requires careful planning and coordination in design
- Higher upfront cost for multiple fixture types and controls
- Complex installation if retrofitted into existing homes
- Poor quality or incorrectly layered lighting can feel harsh or unbalanced
Sustainable Material Choices for Harsh Environments
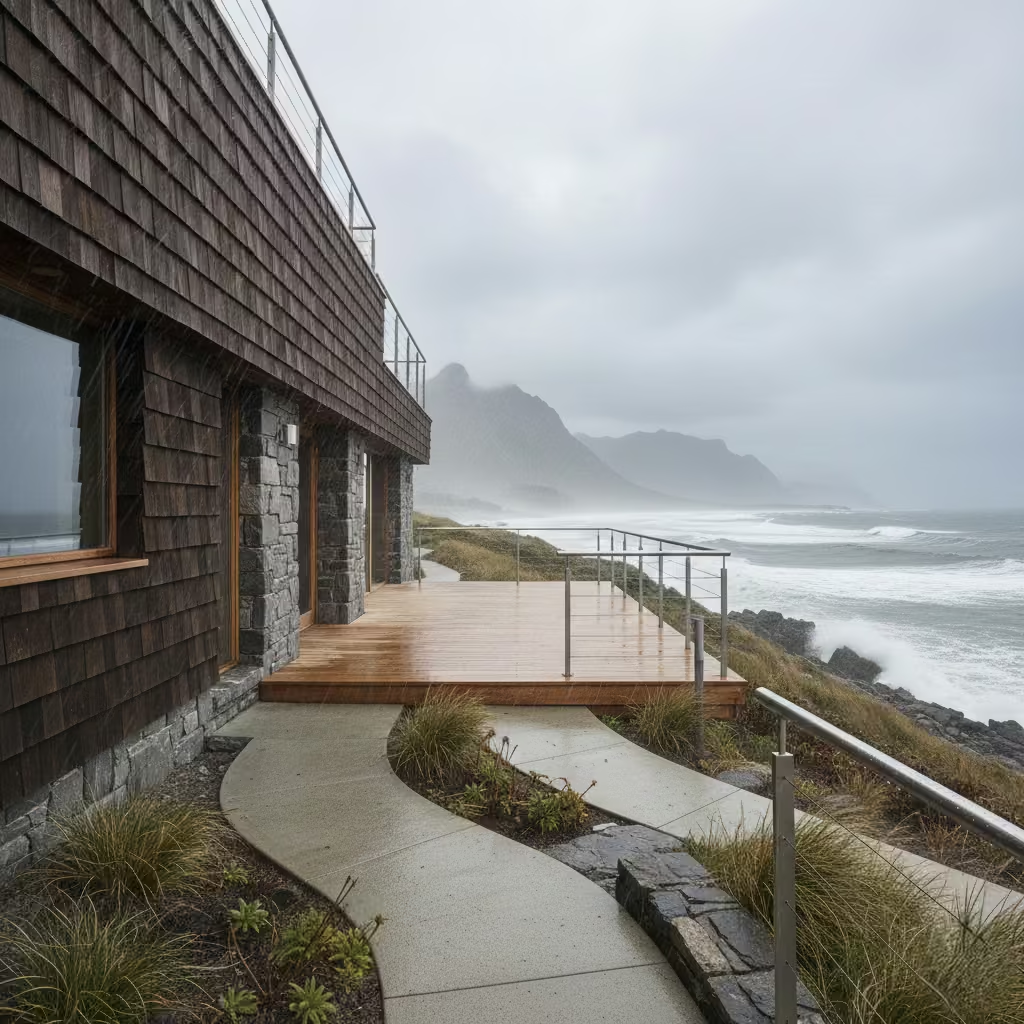
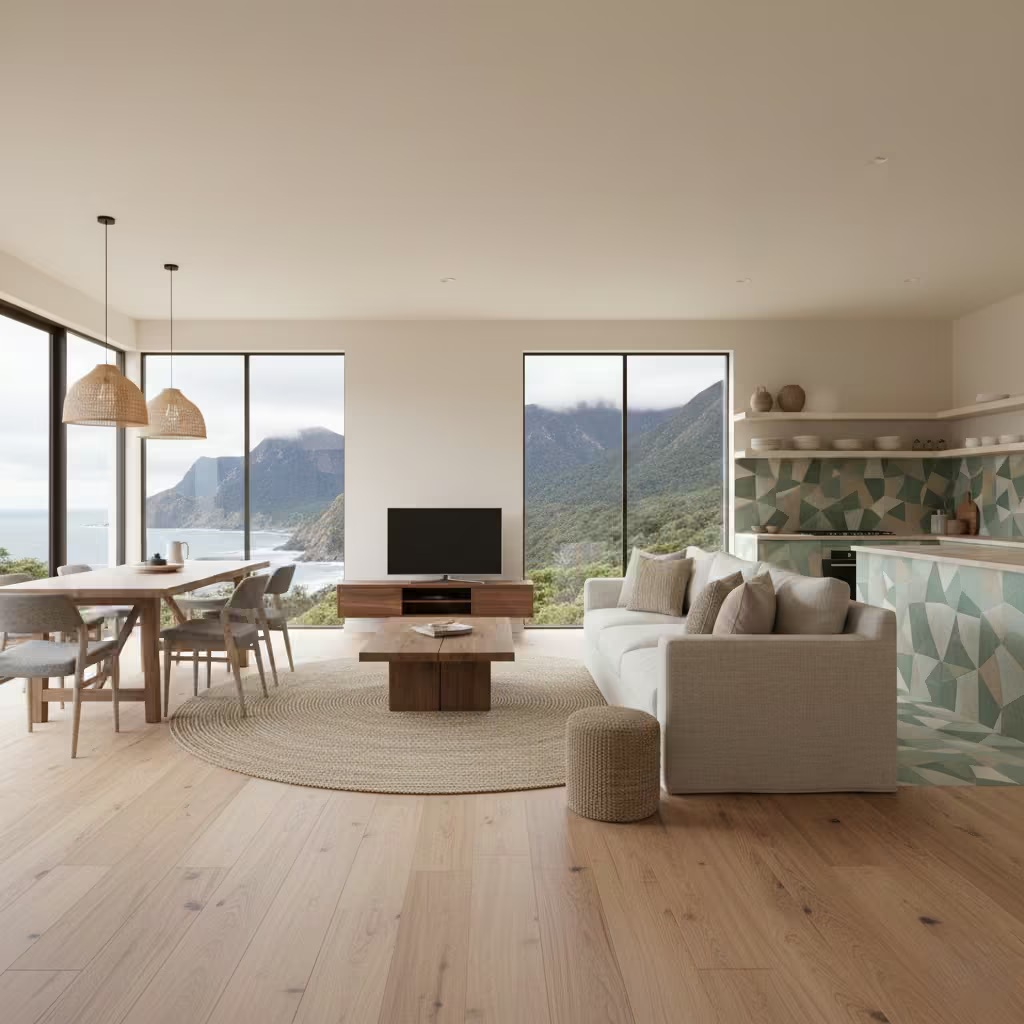
Mountain beach houses face the dual challenge of exposure to coastal moisture, salt, wind, and sun, as well as seasonal temperature extremes. Choosing sustainable materials that can endure these conditions is essential for longevity, comfort, and environmental responsibility. I approach material selection with three priorities: durability, low environmental impact, and timeless aesthetic appeal. Sustainable materials are not just ethical—they also reduce maintenance, energy consumption, and long-term replacement costs.
This strategy applies across the entire home—exterior cladding, roofing, decking, flooring, cabinetry, and furniture. Coastal mountain environments particularly benefit from materials that resist corrosion, UV degradation, moisture ingress, and freeze-thaw cycles. Using sustainably sourced, engineered, or naturally resilient materials ensures that both interior and exterior surfaces withstand harsh conditions without frequent repair or replacement.
Practical measurements and proportions
- Cladding and decking: Timber planks should be 25–40 mm (1–1.5 in) thick for strength and stability. Boards spaced 5–8 mm (0.2–0.3 in) apart allow for drainage and expansion.
- Flooring: Stone or porcelain tiles of 15–20 mm (0.6–0.8 in) thickness are ideal for durability. Engineered timber panels should be 14–20 mm (0.55–0.8 in) thick with stabilised cores for moisture resistance.
- Insulation and wall systems: Use recycled or natural insulation (sheep’s wool, cellulose, cork) with a minimum R-value of 3.5–4 per 100 mm (3.9 in) thickness in walls to maintain energy efficiency in harsh climates.
Materials and finishes
- Exterior timber: Thermally modified cedar, larch, or sustainably sourced hardwoods resist decay and require minimal chemical treatment.
- Stone and concrete: Locally quarried stone and low-carbon or geopolymer concrete reduce embodied energy while providing durability.
- Metals: Marine-grade stainless steel, powder-coated aluminium, and brass fixtures prevent corrosion in salt-laden air.
- Interior finishes: Low-VOC paints, recycled glass or ceramic tiles, and natural fibre textiles (linen, wool, jute) enhance indoor air quality and sustainability.
On a coastal mountain renovation, the client wanted a low-maintenance, sustainable home that felt luxurious. We specified thermally modified timber for cladding, recycled porcelain tiles for floors, and marine-grade steel for external fixtures. The result was a resilient, visually cohesive home with minimal environmental impact. After three years, maintenance was limited to occasional oiling of timber surfaces, proving that careful sustainable selection reduces long-term upkeep and enhances lifespan.
Pros
- Long-lasting and low-maintenance in harsh climates
- Reduces environmental footprint and energy consumption
- Supports healthy indoor air quality and eco-friendly living
- Creates timeless aesthetics that age gracefully
Cons
- Higher upfront cost than conventional materials
- Availability may be limited depending on region
- Requires specialist installation for some engineered or natural products
- Mis-specification can compromise durability in extreme conditions
Lofted Sleeping Areas for Views and Space Efficiency
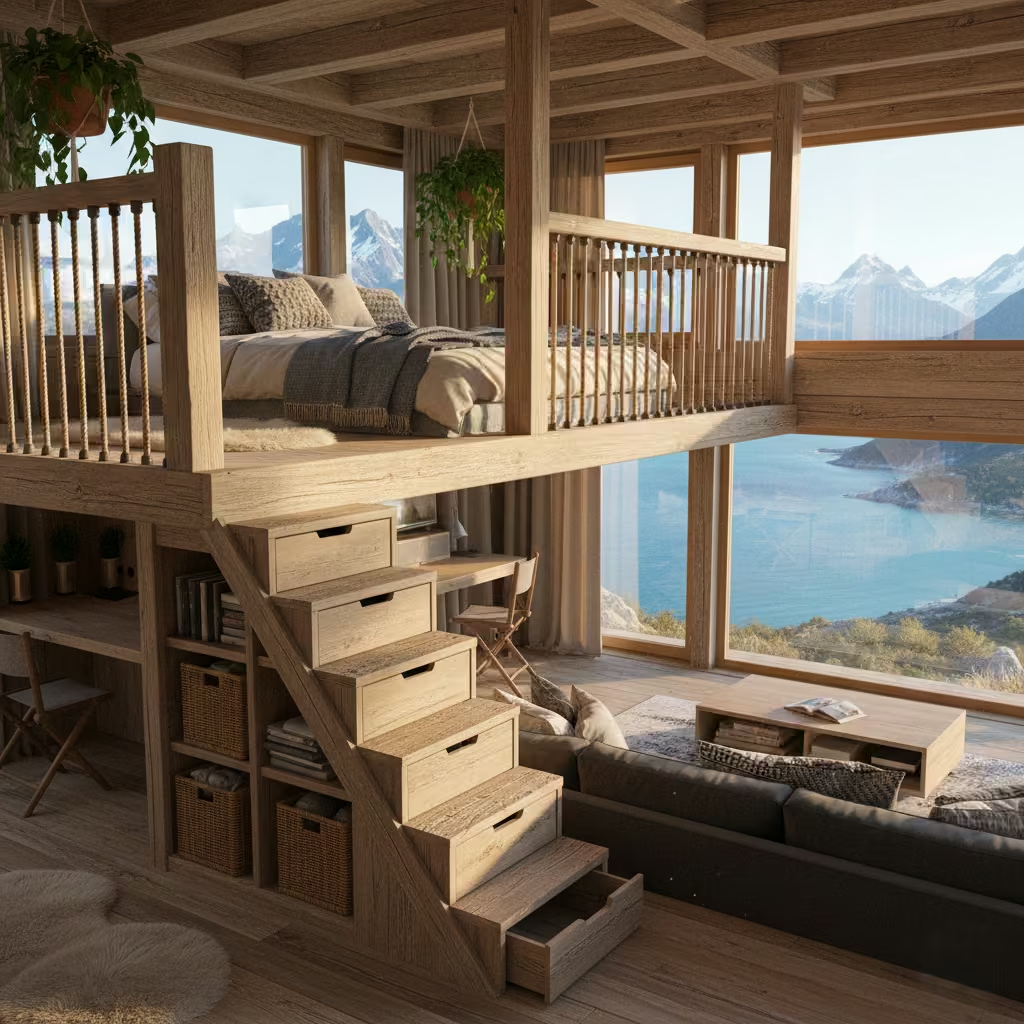
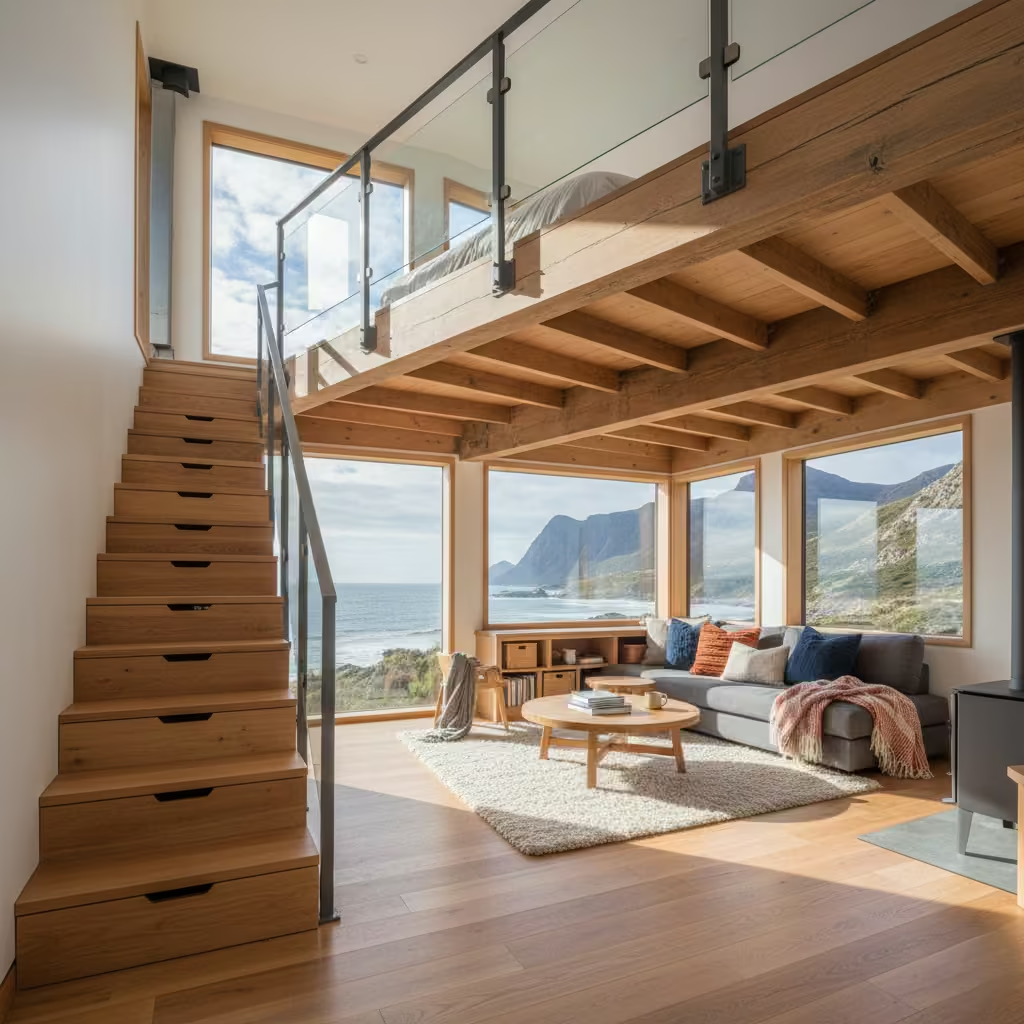
Lofted sleeping areas are an effective way to maximise space and capture panoramic views in a mountain beach house. By elevating sleeping zones, I create privacy without sacrificing floor space, while opening the main living areas below to light, circulation, and communal activities. Lofts also encourage clever integration of storage and multifunctional furniture, making them ideal for both permanent residences and seasonal retreats.
Lofts work best in homes with high or vaulted ceilings, open-plan living, or compact footprints where space efficiency is critical. They are particularly effective in coastal mountain homes with strong vistas, as elevating beds or bunks allows residents to enjoy views without relying on external decks. Lofts are ideal for guest bedrooms, children’s areas, or secondary sleeping zones where privacy and separation from the main living space are desired.
Practical measurements and proportions
- Ceiling height: Minimum 2.2 m (7 ft) at the loft platform for comfortable headroom; main floor below should maintain at least 2.4–2.7 m (8–9 ft).
- Platform depth: 2–2.4 m (6.5–8 ft) for single or double beds; width depends on bed size and circulation, typically 2.2–2.8 m (7–9 ft).
- Access: Stairs should be 700–800 mm (28–31 in) wide with 180–200 mm (7–8 in) risers; ladders are suitable for secondary sleeping areas but require safe handholds.
- Railings and safety: Guardrails 900–1,000 mm (35–39 in) high with baluster spacing <100 mm (4 in) to prevent accidents.
Timber is the preferred material for loft platforms and staircases due to warmth, strength, and ease of finishing. I often combine engineered timber for structural stability with solid timber facings for aesthetics. Handrails, guardrails, and balustrades in powder-coated steel, stainless steel, or glass maintain safety while keeping lines visually light. Flooring in lofts can match or complement the main floor to maintain continuity, with rugs or non-slip finishes enhancing comfort and warmth.
On a mountain beach property with limited footprint but exceptional ocean views, we installed a lofted sleeping platform over a living area. The design included built-in storage underneath and a minimal staircase that doubled as shelving. The loft captured panoramic views and freed up space below for communal living and dining. This project demonstrated that lofts can transform spatial constraints into functional, visually appealing solutions when carefully proportioned and integrated.
Pros
- Maximises floor space and spatial efficiency
- Offers elevated views and enhanced privacy
- Integrates storage and multifunctional design
- Maintains openness in compact or high-ceiling interiors
Cons
- Requires careful structural design and safety measures
- Access can be challenging for older residents or very young children
- Ceiling height restrictions limit usability in some spaces
- Can feel less private if open to main living areas below
Subtle Smart Home Integration for Climate and Security
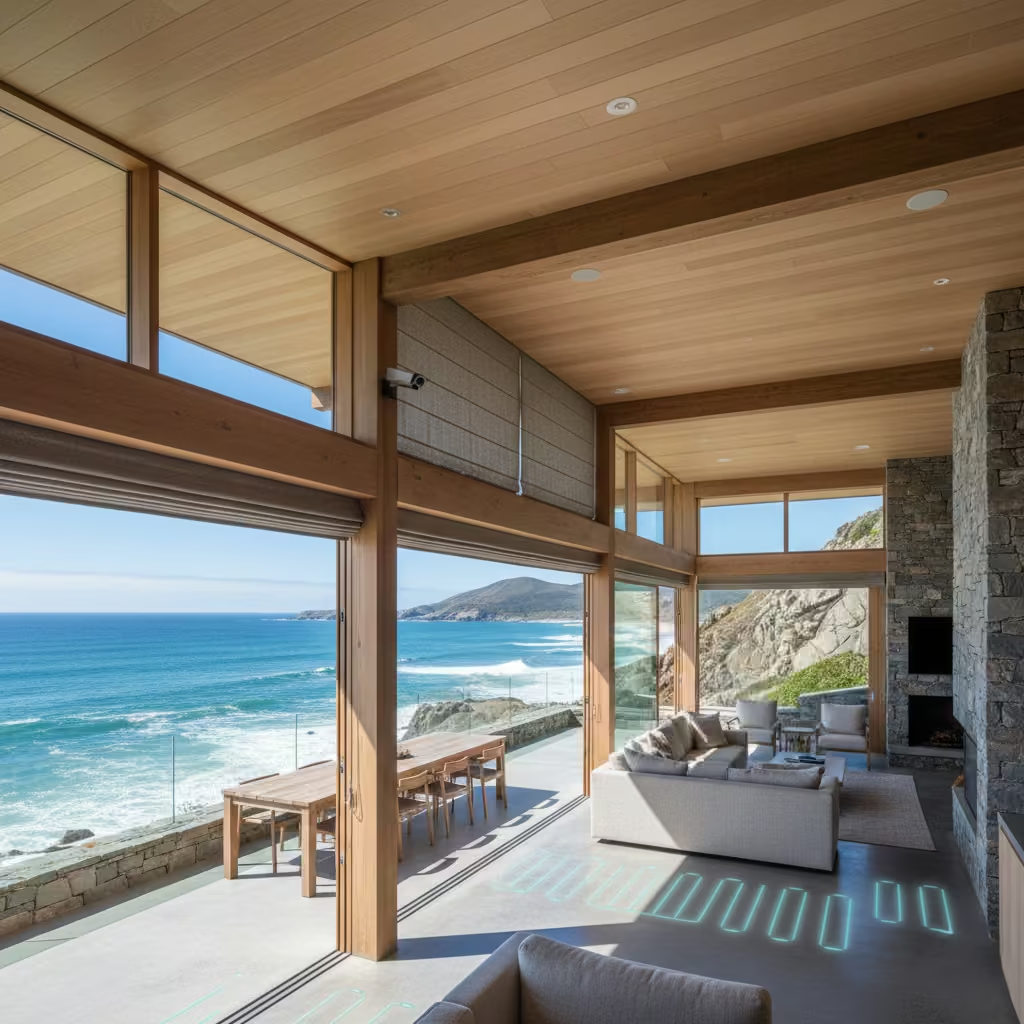
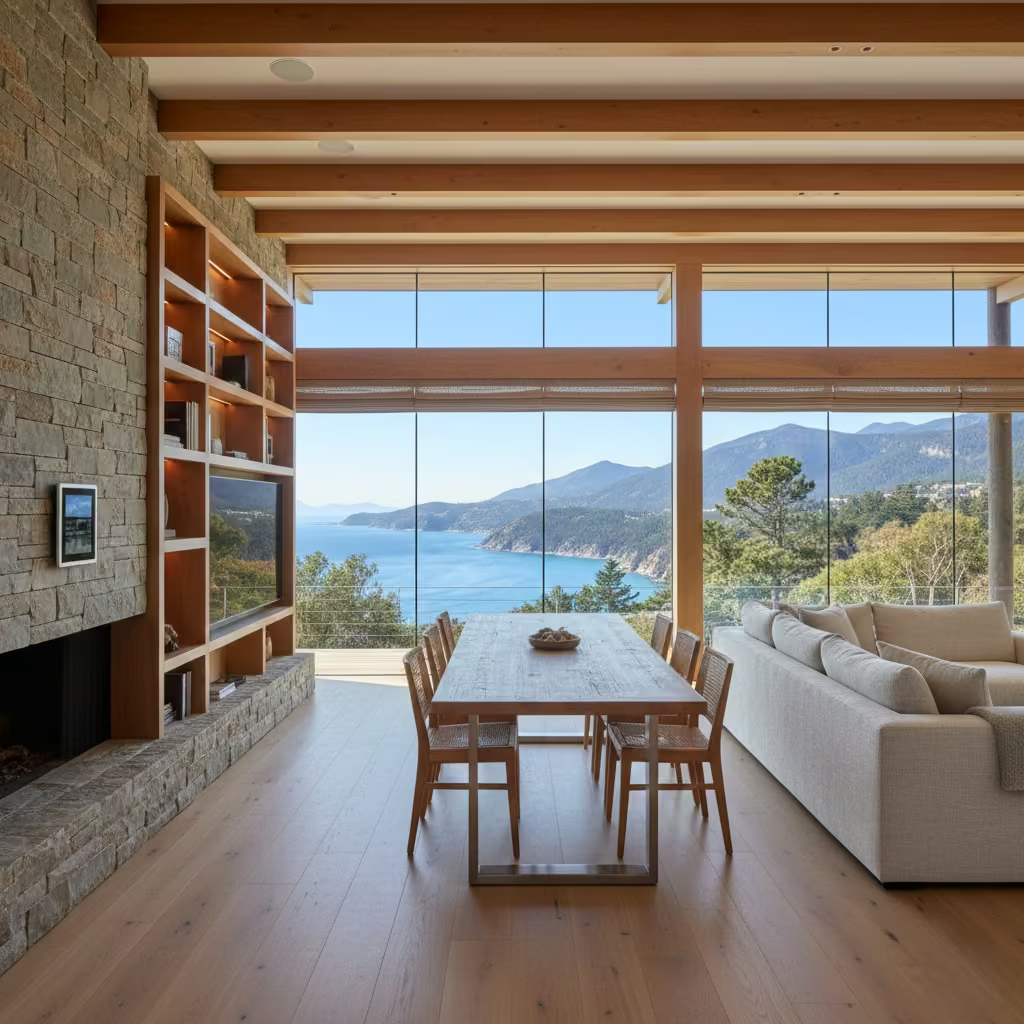
In mountain beach houses, smart home systems can enhance comfort, efficiency, and security without compromising the aesthetic of natural, light-filled spaces. I focus on subtle integration—programming climate control, lighting, and security to operate intuitively in the background, ensuring the home feels modern and convenient while maintaining its architectural and coastal-mountain character.
Smart integration is effective across all areas of the home—living spaces, bedrooms, kitchens, and outdoor terraces. Homes with large glazing, multi-level layouts, or seasonal occupancy benefit most, as automated systems can adjust temperature, ventilation, and lighting based on occupancy or external weather conditions. Outdoor security, lighting, and irrigation systems also enhance safety and efficiency without visual clutter.
Practical measurements and proportions
- Thermostats and sensors: Position at 1.2–1.5 m (4–5 ft) above the floor, away from direct sunlight, drafts, or heat sources for accurate readings.
- Lighting controls: Install smart switches at standard reach heights (900–1,100 mm / 35–43 in) while keeping sensors discreet in ceiling recesses or behind trim.
- Security cameras: Mount externally at 2.5–3 m (8–10 ft) to cover entrances without being intrusive. Motion sensors should cover angles of 90–120° and distances of 5–10 m (16–33 ft), depending on location.
Smart devices should be low-profile or concealed within existing architectural elements. I prefer neutral-coloured faceplates, integrated recesses for sensors, and wireless systems to minimise visible wiring. Exterior devices require weatherproof and corrosion-resistant housings suitable for coastal exposure, such as powder-coated aluminium or marine-grade plastic.
On a cliffside mountain beach property, the client wanted smart climate and security features that did not interfere with the minimalist, timber-and-stone interiors. We installed automated blinds, multi-zone heating with underfloor sensors, and discreet cameras integrated into architectural elements. The system improved energy efficiency, enhanced security, and allowed the home to “self-manage” during periods of absence. The lesson: when integrated subtly, smart technology can enhance comfort and safety without feeling intrusive or overly technical.
Pros
- Enhances comfort, energy efficiency, and security
- Minimal visual impact when designed into the architecture
- Supports seasonal and remote occupancy
- Can be expanded or upgraded over time
Cons
- Higher upfront cost and potential ongoing subscription fees
- Requires careful planning to maintain aesthetics and functionality
- Reliance on technology can create issues if systems fail or need maintenance
- Some learning curve for occupants to optimise use
You May also Like: From City to Sand: 25 Easy Ways to Get the Montauk Beach House Look Anywhere
Common Design Mistakes to Avoid
Designing a mountain beach house requires careful consideration of both coastal and alpine influences. One of the most common mistakes I see is overusing coastal elements in exposed mountain locations. While whitewashed timber, nautical accents, and light fabrics feel beachy, in high-wind or elevated mountain sites, excessive coastal detailing can clash with the rugged landscape and deteriorate quickly under harsh weather. A balanced approach, blending natural timber, stone, and muted coastal tones, ensures the design is durable and visually cohesive.
Another frequent error is ignoring thermal performance in favour of aesthetics. Large glazing, open-plan layouts, and lightweight finishes may look striking but can lead to heat loss in winter or overheating in summer. In my projects, integrating high-performance glazing, underfloor heating, insulation, and thermal-mass materials allows homes to maintain comfort without sacrificing style.
Poor drainage planning on sloped sites is also a major pitfall. Mountain and coastal sites often experience intense rainfall, and failing to direct water away from foundations and outdoor terraces can lead to erosion, structural damage, and damp interiors. Solutions such as graded landscaping, linear drains, and permeable paving prevent water pooling while enhancing usability and safety.
Using untreated or non-resistant materials in high-salt environments is another critical issue. Timber, metals, and fixtures not specified for coastal exposure corrode or warp rapidly, undermining both aesthetics and structural integrity. I always recommend marine-grade metals, thermally modified timber, and protective coatings to prolong material life in exposed locations.
Finally, designing without considering seasonal occupancy can compromise usability and comfort. Homes left unoccupied for weeks must be capable of maintaining climate control, preventing moisture damage, and ensuring security. Smart home systems, proper insulation, and thoughtful ventilation strategies are essential for homes with intermittent occupancy.
Avoiding these mistakes requires a design strategy that respects the site, climate, and lifestyle, blending durability, thermal performance, and timeless aesthetics to create a mountain beach house that endures and delights year-round.
Final Thoughts
Designing a mountain beach house is a delicate balance between beauty, functionality, and resilience. Thoughtful choices in materials, finishes, and layouts are essential not just for immediate appeal, but for how the home performs year after year in demanding coastal-mountain conditions. Durable, climate-appropriate materials, well-considered glazing, and flexible floorplans ensure that interiors remain comfortable, efficient, and visually harmonious across seasons.
Longevity should always take precedence over fleeting trends. While coastal-inspired colours, textures, and furniture can enhance a home’s character, they must be paired with robust, maintenance-friendly materials that withstand wind, moisture, and sun exposure. Prioritizing enduring quality in construction and finishes protects both the investment and the lifestyle experience.
Ultimately, a mountain beach house should be designed for real life not just for photographs or seasonal visits. Spaces that respond to climate realities, support daily routines, and offer flexible living arrangements provide both comfort and joy, whether in summer or winter. When homeowners combine thoughtful design, durable materials, and climate-conscious planning, they create a home that is not only visually striking but also functional, resilient, and timeless.
Frequently asked Questions while building a Beach House
How do I balance coastal aesthetics with mountain durability?
It’s essential to blend materials and colours suited to both environments. Use durable natural stone, thermally modified timber, and marine-grade metals for structure and surfaces, while introducing soft coastal tones and textures in upholstery, textiles, and finishes. This ensures the home feels light and airy without compromising resilience in wind, salt, or snow exposure.
What are the most critical considerations for thermal performance?
Large windows and open-plan layouts can look stunning but may result in heat loss or gain. High-performance glazing, insulated walls and roofs, underfloor heating, and thermal-mass materials like stone or concrete are key. Positioning windows for solar gain in winter and shading in summer helps maintain comfort year-round.
How can I protect my home from moisture and drainage issues?
Sloped sites require careful grading and drainage planning. Linear drains, permeable paving, retaining walls, and waterproof membranes prevent water pooling near foundations. Outdoor terraces, decks, and balconies should include proper slope away from the house and corrosion-resistant materials.
Which materials are best for salty coastal environments?
Marine-grade stainless steel, powder-coated aluminium, thermally modified timber, stone, and low-maintenance composites perform well. Avoid untreated metals or soft timbers that warp or corrode quickly. Proper detailing and finishes further extend lifespan.
How do I design for seasonal occupancy?
Homes left unoccupied must maintain safe temperature and humidity levels to prevent mould and structural damage. Smart climate systems, automated ventilation, and underfloor heating ensure the house remains comfortable and secure during extended absences.
What are the common design mistakes to avoid?
Overloading spaces with coastal décor, ignoring thermal efficiency, using untreated materials, and neglecting drainage or maintenance considerations are frequent pitfalls. Always plan with both aesthetic and environmental realities in mind.
Can outdoor spaces be used year-round?
Yes, with careful design. Covered terraces, retractable glass panels, outdoor heating, windbreak landscaping, and large-scale fire pits make outdoor living enjoyable even in colder months or windy conditions.
How do I maximise views without sacrificing privacy?
Use elevated platforms, built-in window seating, minimal window treatments, and strategic landscaping to frame views while shielding interiors from neighbours or roadways. Layering glazing, blinds, or screens provides flexible privacy without blocking light.
How do I ensure low-maintenance living?
Choose durable, weather-resistant materials, plan layered lighting and smart systems for climate control, and design storage or mudroom solutions to handle sand, snow, and wet gear. Simple finishes combined with functional zones reduce ongoing upkeep.
Should I invest in smart home technology?
Yes, if done subtly. Automation for lighting, climate, security, and irrigation enhances comfort, efficiency, and safety especially in homes with intermittent occupancy. Ensure devices are discreet, compatible with harsh environments, and integrated into the overall design aesthetic.