

39 Stunning Victorian Hallway Design Ideas for a Timeless, Elegant Home
Nobody chooses a house because of its hallway. Yet it’s the hallway, more than the kitchen island or the roll-top bath, that quietly decides how a home feels the moment you step through the door. Walk into a house with a dim, cluttered passage and your shoulders drop before you’ve even said hello.
Walk into one with a well-lit run of original tiles, a mirror throwing light back at you, and a staircase that means business, and something in you settles. That’s not decorating trivia. That’s the actual, measurable effect a hallway has on the people who live in it and the guests who pass through it.
Victorian houses, for all their period charm, were not built with generous hallways in mind. Land in the growing industrial towns and cities of the 19th century came at a premium, and architects squeezed corridors down to the bare minimum needed to get from the front door to the stairs. What they didn’t skimp on, though, was character.
High ceilings, decorative cornicing, patterned floor tiles, and stained glass panels were all considered non-negotiable, even in a hallway barely wide enough for two people to pass shoulder to shoulder. That tension between grand ambition and tight proportions is exactly why Victorian hallways still cause homeowners so much head-scratching today, and exactly why getting the design right pays such handsome dividends.
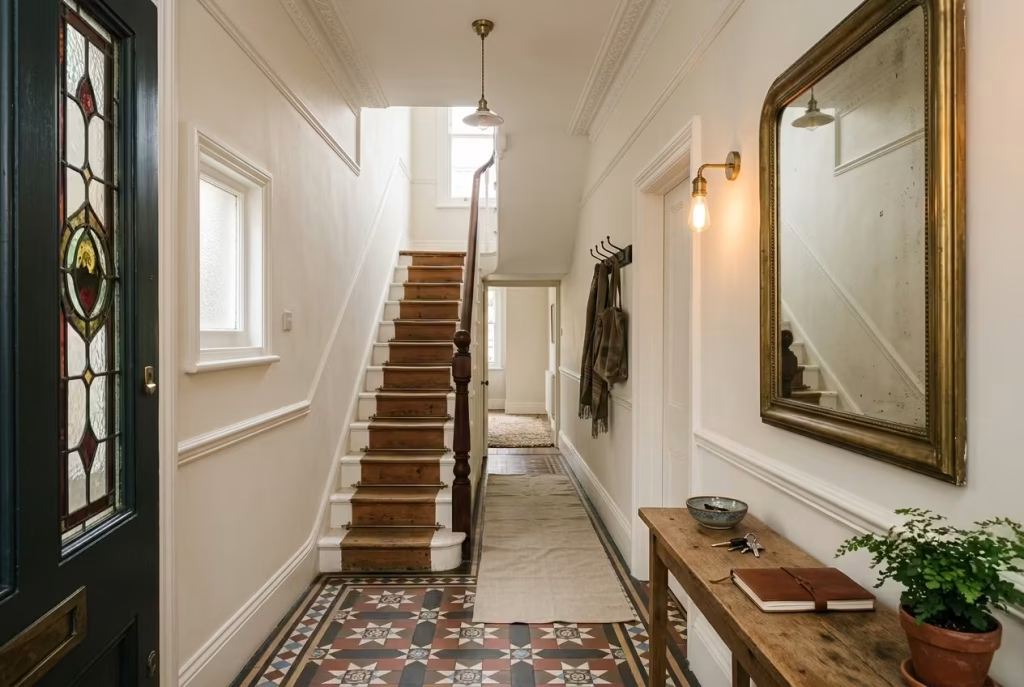
This guide sets out 39 ideas, each one grounded in real costs, real measurements, and lessons pulled from the sort of forums where actual homeowners swap actual horror stories about actual hallway makeovers. There’s no padding here, no idea repeated in a different coat of paint just to hit a round number. Whether your hallway is dark as a coal cellar, narrower than a train corridor, or simply crying out for a lick of personality, you’ll find something below that earns its place on your to-do list.
Why Your Hallway Deserves More Thought Than It Gets
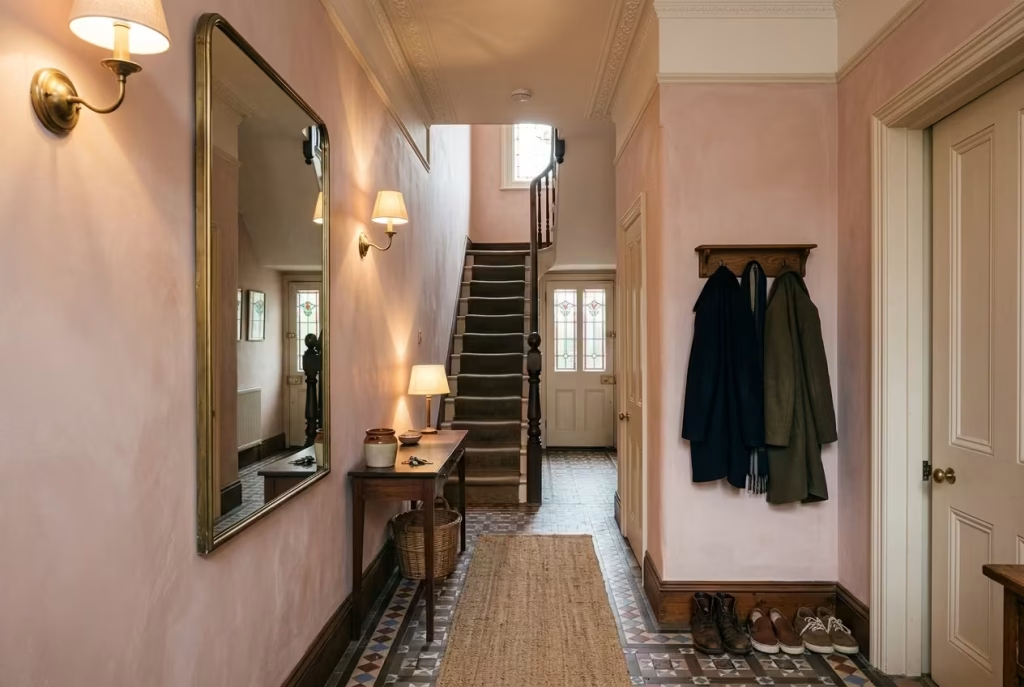
Psychologists who study the way people experience buildings often point to something called the “threshold effect”: the emotional shift that happens in the seconds after you cross from outside to inside. That shift happens nowhere more powerfully than in the hallway. It’s the room where the outside world, the weather, the traffic, the day you’ve just had, gets shed and the private world of home takes over. A hallway that’s dim, cramped, and cluttered with shoes doesn’t just look untidy. It actively works against that sense of arrival, leaving a faint but persistent friction every single time you come home.
The same goes in reverse for visitors. Estate agents will tell you, off the record, that buyers form a snap judgement about a property within the first thirty seconds, and an enormous share of that judgement is formed in the hallway, long before anyone’s clapped eyes on the kitchen. Get the hallway right and you’re not just making your own daily life more pleasant. You’re setting a tone that colours how every other room in the house is perceived. That’s a lot of weight to place on a strip of floor that’s often no wider than a metre, but it’s weight worth carrying.
Quick Answer: If you take nothing else from this guide, take this: painting a dark, narrow Victorian hallway brilliant white is not the fix people think it is. Without decent daylight bouncing around, stark white reads as cold and almost clinical rather than open and airy. A warmer approach, whether that’s a soft plaster pink, a historically accurate off-white, or even a bold, confident dark colour with a bit of texture behind it, will do far more to make the space feel considered. Pair that with an oversized mirror, layered lighting rather than one harsh overhead bulb, and pale flooring, and you’ll have solved eighty per cent of the problem before you’ve spent a penny on anything decorative.
Flooring That Sets the Tone
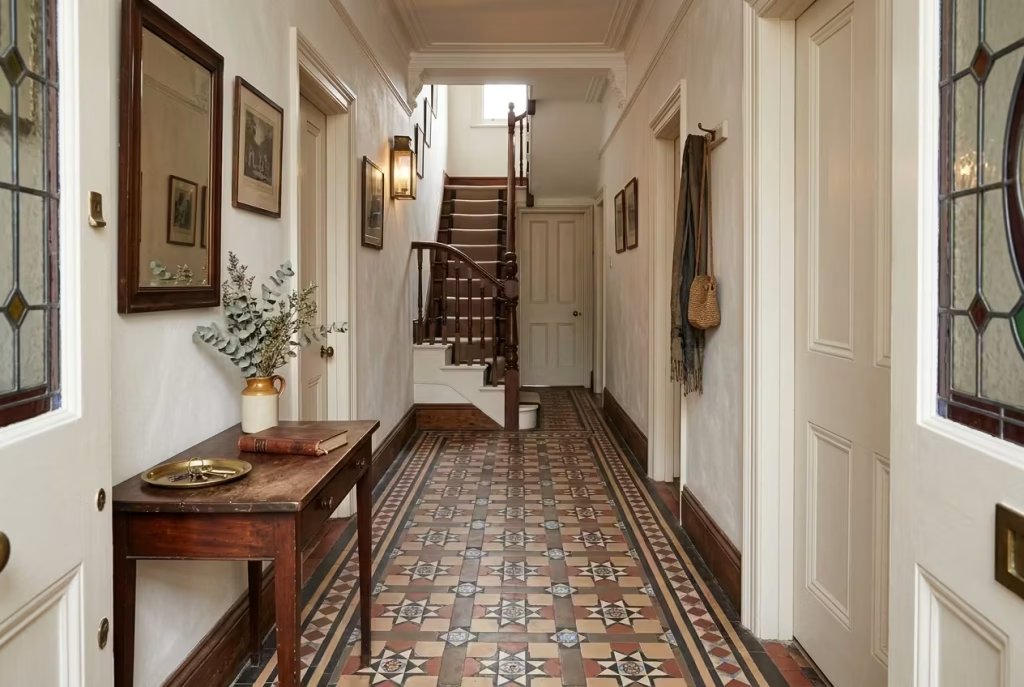
Ask any interior designer worth their salt where the eye lands first in a Victorian hallway, and they’ll point you straight down. Flooring in these houses was never an afterthought, it was the opening statement, and even now it’s often the single most transformative element you can get right. Everything else in the hallway, the colour on the walls, the light fittings, the mirror by the door, works in service of what’s underfoot. Get the floor wrong and no amount of clever paint will paper over the cracks, quite literally in some cases.
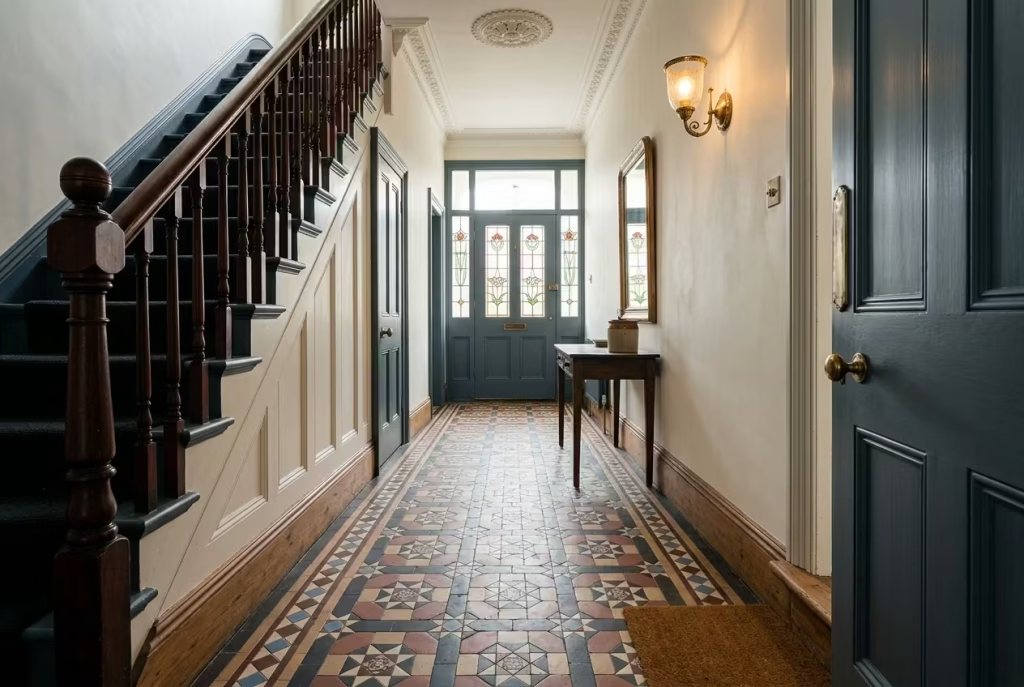
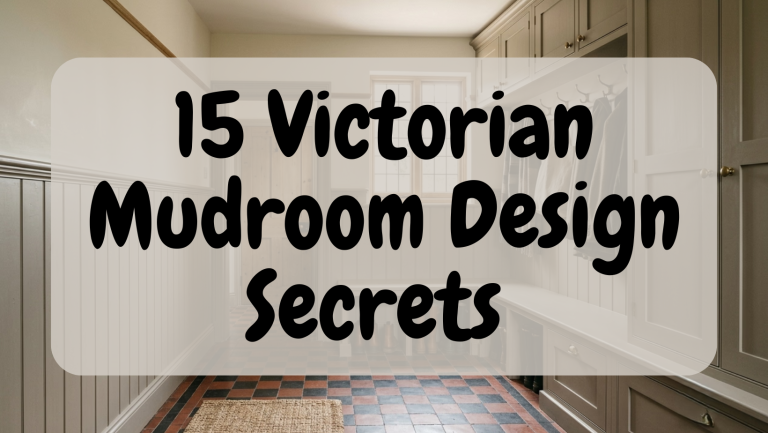
1. Restore original encaustic or Minton tiles. If you’ve pulled up carpet or lino and found patterned tiles hiding underneath, you’ve struck gold, and not in a figurative sense either, since original encaustic tiles regularly add real value to a period property. These tiles were made using pigmented clay running clean through the body of the tile rather than a thin glaze on top, which is precisely why so many have survived a century and a half of muddy boots, pram wheels, and the occasional dropped kettle without losing their pattern.
Restoration typically runs to somewhere between £1,200 and £2,400 for an 8m² hallway, covering a deep clean, regrouting, resealing, and a handful of tile replacements where the original clay has cracked or lifted. Where the floor has been buried under decades of bitumen or old adhesive, or where structural repairs are needed underneath, costs can climb past £5,000, so it pays to get an honest inspection before you commit to a budget you might blow through in week one.
There’s one rule that trips up even well-meaning homeowners time and again: never reach for vinegar or bleach on encaustic tiles. These are porous, natural materials, and acidic cleaners eat straight into the clay body while breaking down the grout, undoing in a single Saturday afternoon what took a professional several careful days to restore. Stick to a pH-neutral cleaner made specifically for unsealed period tiles, and you’ll keep that hard-won floor looking the part for decades yet.
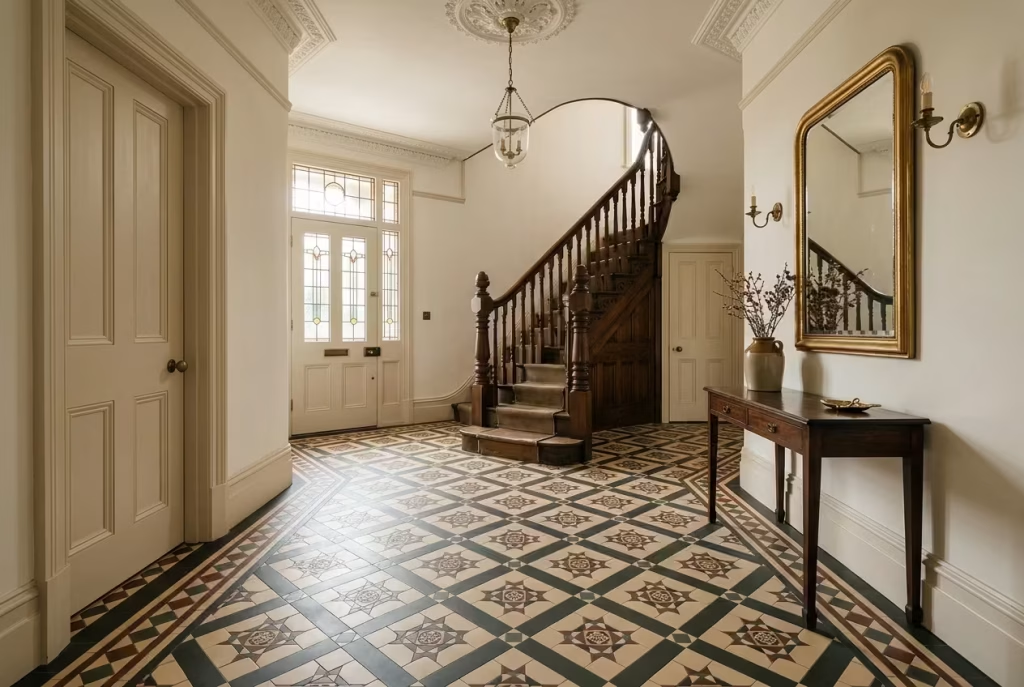
2. Choose reproduction geometric tiles if the originals are long gone. Not every hallway gets the lucky find, and there’s no shame in starting fresh. The good news is that reproduction tiles have come on leaps and bounds, and there’s a genuine spread of budgets to suit almost any project. Printed porcelain reproductions start from around £47 to £50 per square metre, which is a fraction of the cost of the real thing.
Step up to mid-range geometric mosaic patterns and you’re looking at £90 to £130 per square metre, while premium handmade heritage tiles, produced using traditional methods that mirror the original Victorian manufacturing process, push past £174 per square metre and beyond.
All three tiers will read as convincingly period from across the room, which is worth remembering if budget is tight. The difference tends to show up on closer inspection and underfoot, where the handmade versions carry a texture and heft that cheaper printed tiles simply can’t replicate.
If you’re torn between tiers, consider where the money will actually be seen and felt: a grand entrance hall that guests linger in deserves a different budget conversation than a narrow side-return passage nobody stops to admire.
You May also Like: 25 outdoor entryways to transform your outdoor arrival into a composed, lasting first impression
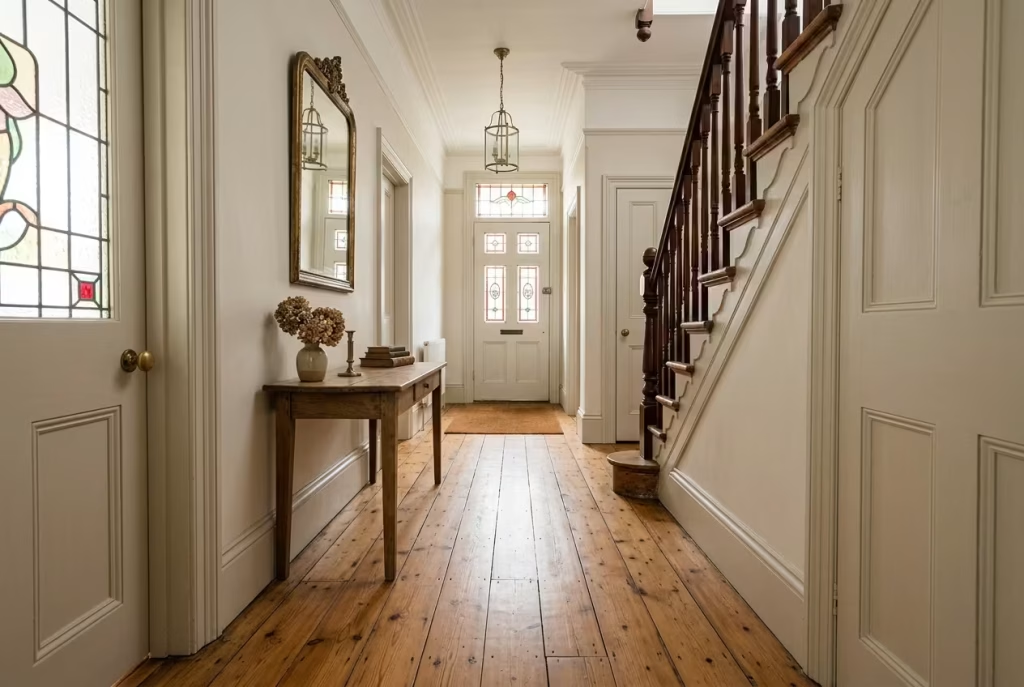
3. Sand and seal the original floorboards. Lift a corner of tired, decades-old carpet in a Victorian hallway and you might well find pitch pine or oak boards doing absolutely nothing but hiding their light under a bushel. Sanding, staining, and sealing them is one of the more affordable transformations on this entire list, often costing little more than hired equipment and a weekend of elbow grease if you’re handy, or a modest tradesperson’s fee if you’re not. What you get in return is a warm, honest base that plays well with almost any colour scheme you might layer on top, and a floor that only improves with age rather than dating the way certain trends do.
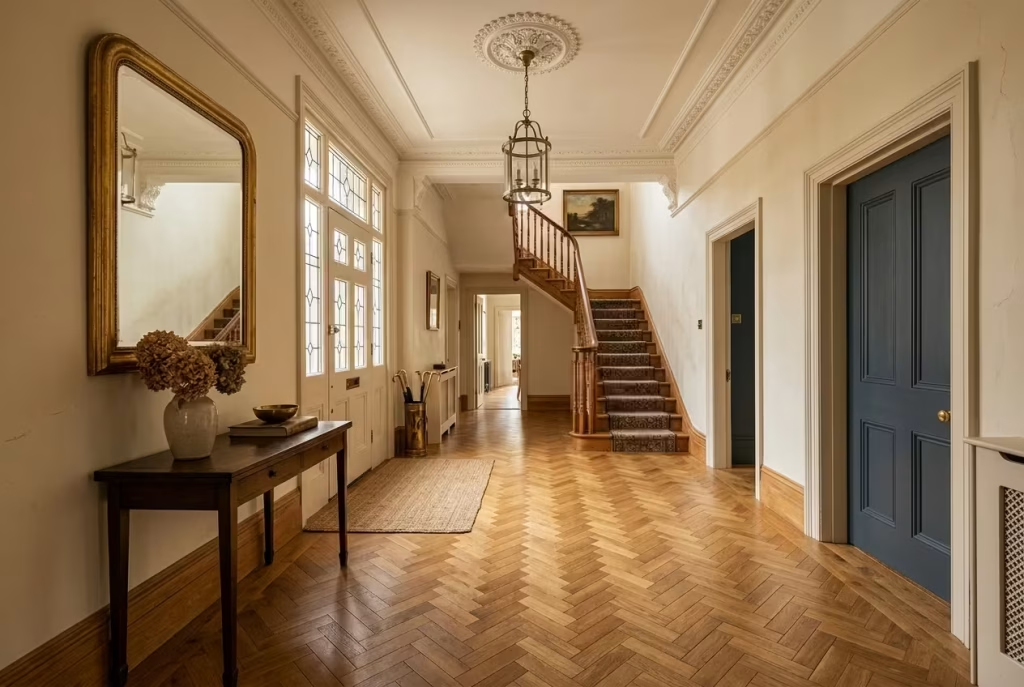
4. Lay parquet in a classic herringbone pattern. Parquet flooring genuinely hit its stride during the Victorian era, and a herringbone or basketweave pattern brings a level of grandeur that feels earned rather than showy, provided your hallway has the width to carry it. It’s a bigger outlay than boards or reproduction tiles, typically requiring a specialist fitter given how precise the cutting needs to be, but in a wider entrance hall it does more visual heavy lifting per square metre than almost anything else on this list. The pattern itself catches light differently depending on the angle you view it from, which adds a subtle sense of movement to a space that’s otherwise entirely static.
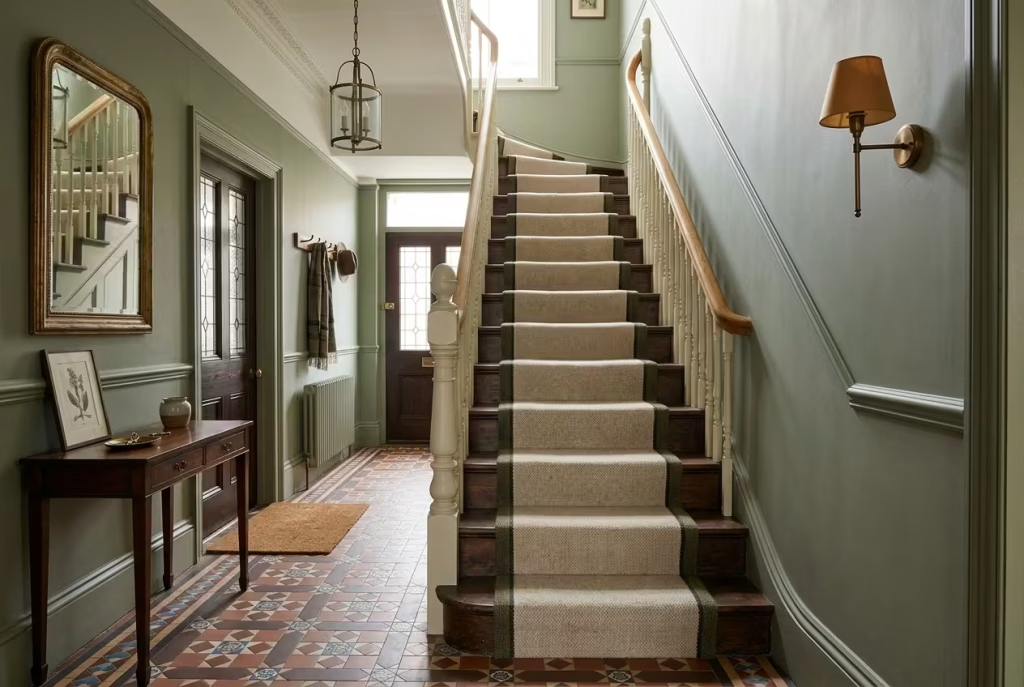
5. Fit a stair runner in a natural fibre. Sisal, wool, and jute runners aren’t purely decorative, they’re genuinely hardwearing, which matters enormously on a staircase that gets used dozens of times a day by feet, paws, and the occasional dragged suitcase. A bold border colour picks up the palette of the hallway below and carries it upward, stitching the whole run of the house together rather than treating the stairs as an entirely separate zone that just happens to be attached. Beyond the aesthetics, a runner also protects the treads underneath, which matters if you’re sitting on original wood that you’d rather not sand back to bare boards again in ten years’ time.
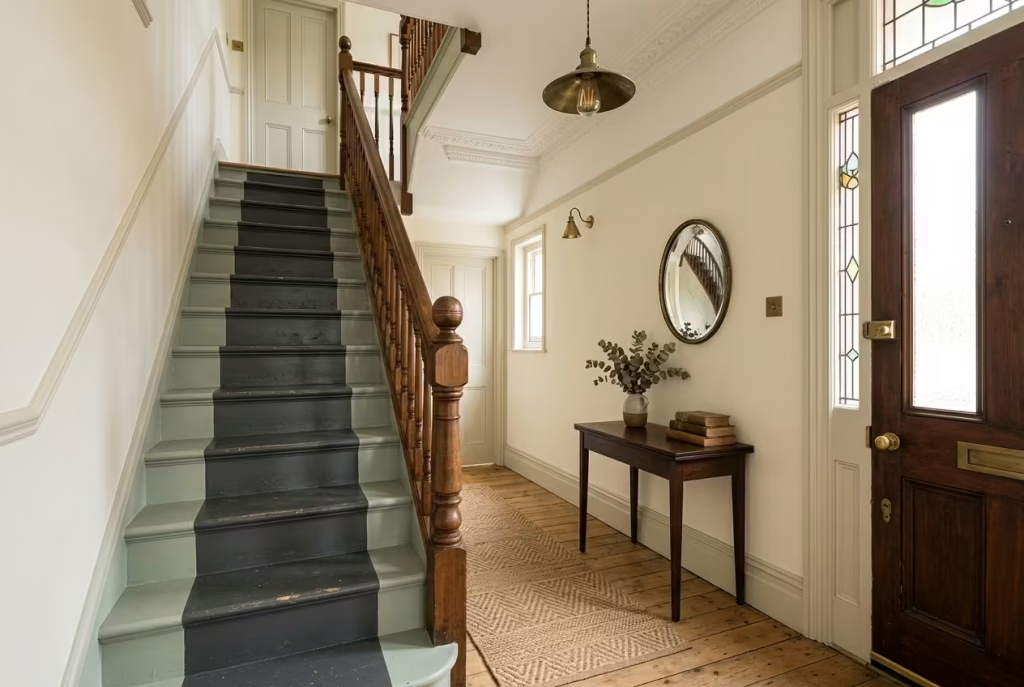
6. Paint the floorboards or stairs directly. If your budget for this year is closer to “one weekend and a tin of paint” than “a full retiling job,” painted floors and stairs are your best friend and cost next to nothing by comparison. Two-tone stair treatments, perhaps a soft sage on the risers and a contrasting charcoal on the treads, add real personality for the price of a floor-grade eggshell or satin paint. Because you’ve chosen every colour yourself rather than inheriting someone else’s decision from decades past, it never reads as an afterthought, and it’s one of the few hallway updates you can genuinely complete between a Friday evening and a Sunday roast.
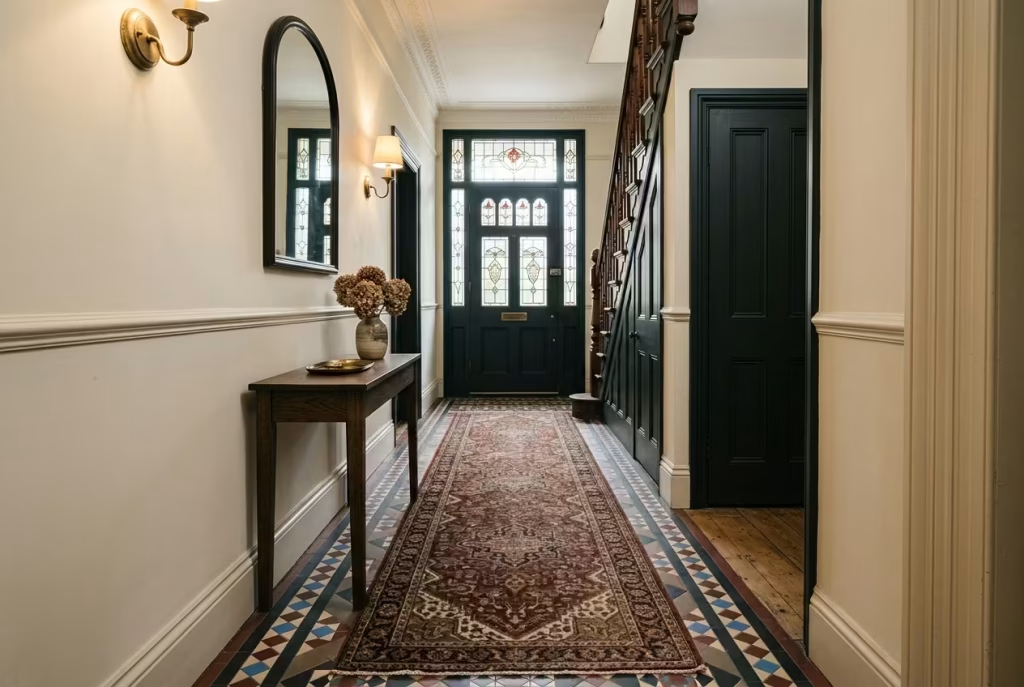
7. Add a hallway rug in deep, period-appropriate tones. Reds, deep blues, and richly patterned designs were common underfoot in Victorian homes, not purely for looks but because a rug does real, practical work in the highest-traffic room of the entire house. It softens footsteps, muffles the echo that tiled or wooden hallways are prone to, and buys precious extra years of life for whatever flooring sits beneath it. A well-chosen rug also gives you licence to experiment with pattern and colour without committing to a permanent, expensive change underneath.
Storage That Earns Its Keep
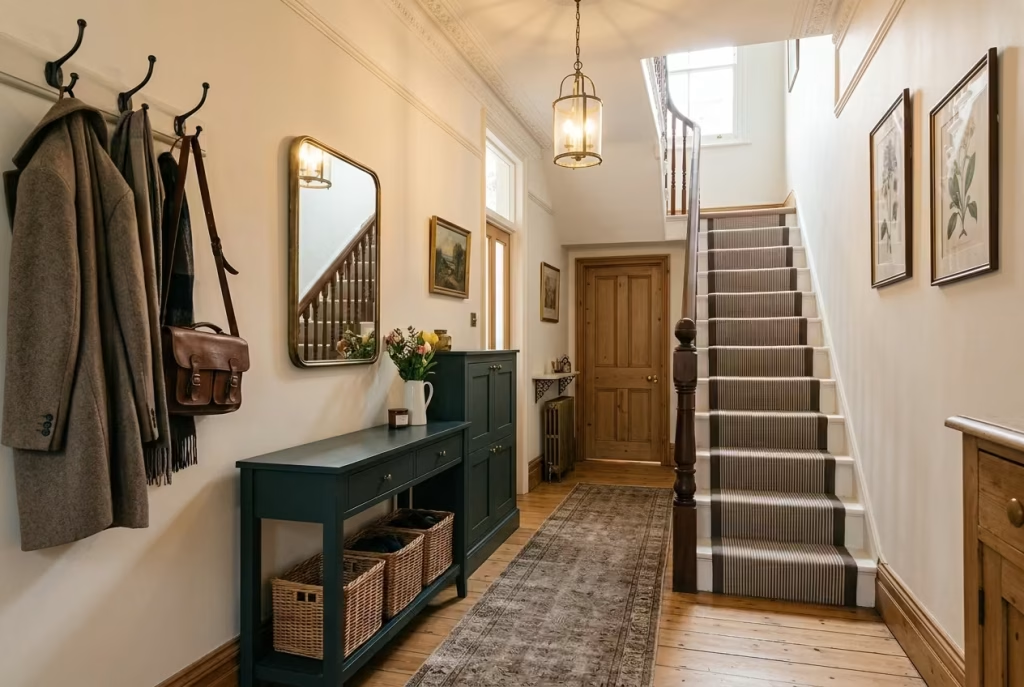
Victorian hallways are rarely generous with square footage, so every storage decision needs to pull its weight twice over: hiding the daily clutter of family life while adding to, rather than detracting from, the period character you’re trying to protect. This is where form and function have to shake hands rather than fight it out.
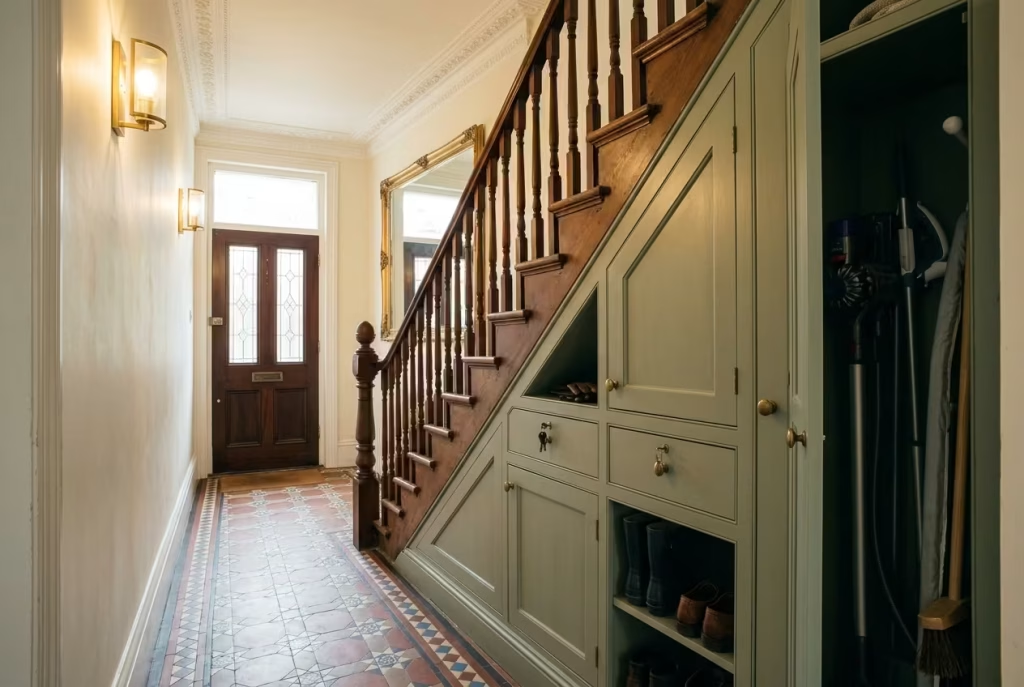
8. Build storage into the space under the stairs. This awkward triangle of dead space, sloping and often forgotten, is one of the most under-used corners in the entire house, and turning it into proper storage is a masterstroke that costs surprisingly little for the payoff involved. Fitted cupboards or open shelving here can swallow shoes, coats, the hoover, and even the ironing board without a single one of them ever being visible from the front door. It also means guests are never greeted by a jumble of wellies the moment they arrive, which does wonders for that all-important first impression.
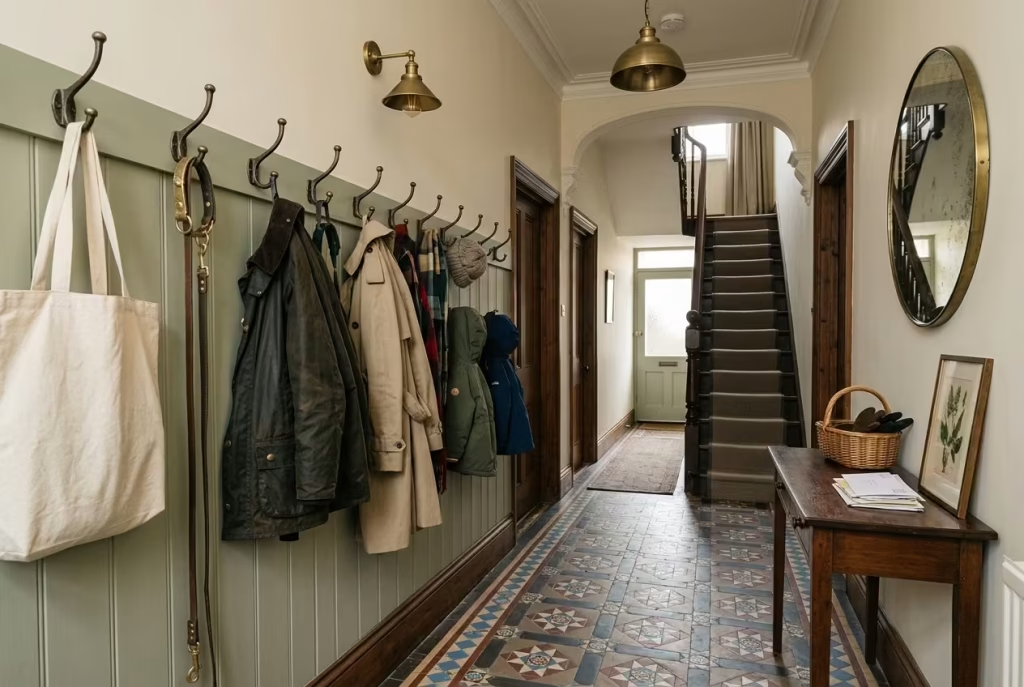
9. Fit a feature peg wall. A row of hooks, whether traditional cast iron or simply painted timber, mounted along a painted or half-panelled section of wall gives every family member a designated spot for coats, bags, and dog leads. It sounds almost too straightforward to count as a “design idea” in its own right, but the difference between a hallway with a proper peg wall and one without is, frankly, the difference between calm order and a nightly scramble to find someone’s missing scarf.
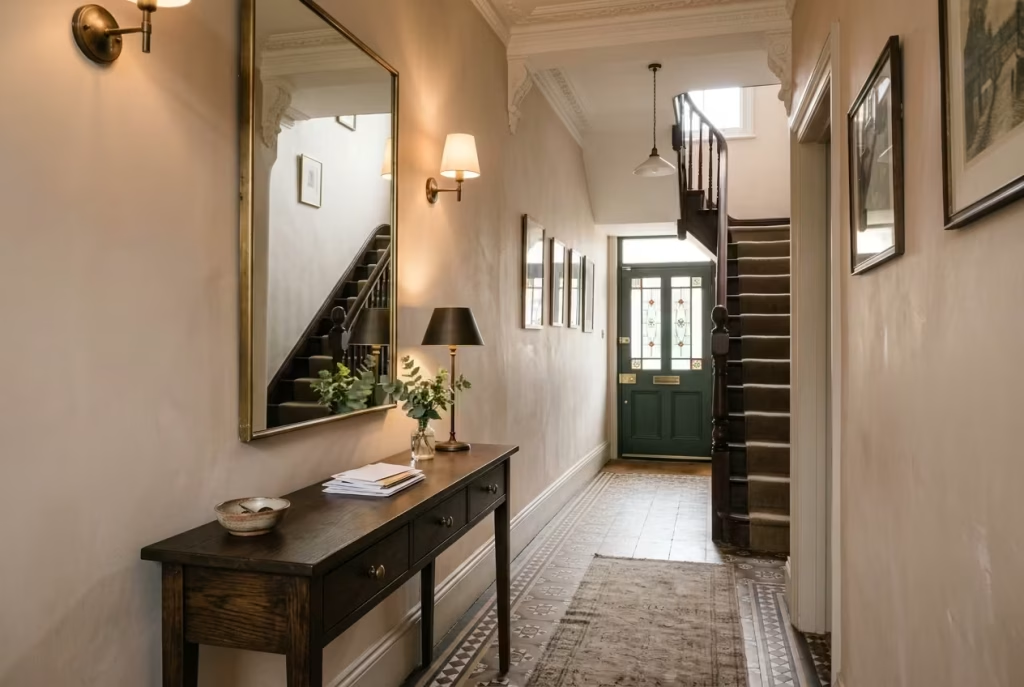
10. Bring in a console table with drawers. A narrow console does more heavy lifting than almost any other single piece of hallway furniture, and it’s often the unsung hero of the entire room. It’s the natural landing spot for post, keys, and the assorted contents of everyone’s pockets, and having drawers means that landing spot doesn’t have to look like a jumble sale by Wednesday afternoon. Choose one with a slim profile if your hallway is on the tight side, since even ten centimetres of extra depth can make the difference between a comfortable passage and a squeeze.
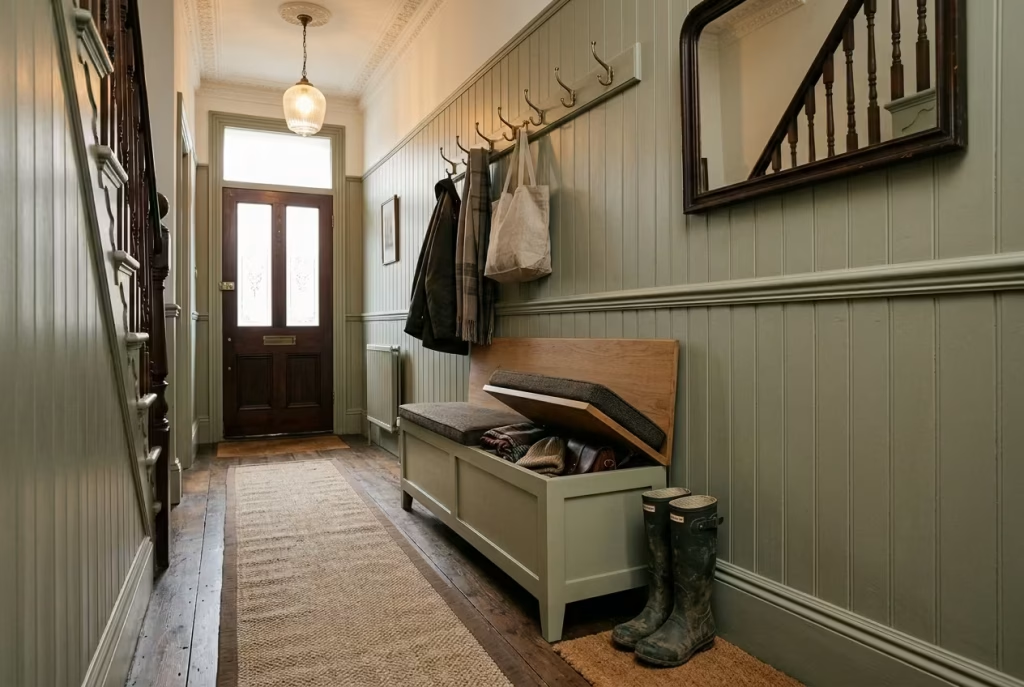
11. Install a slim storage bench. Somewhere to actually sit while pulling on wellies is a genuine everyday comfort that period properties rarely accounted for, since Victorian hallways were designed for passing through rather than pausing in. A bench with a lift-up seat or a drawer tucked underneath gives you that pause point without eating meaningfully into your usable width, and it’s the sort of small addition that guests always comment on, because most hallways simply don’t offer it.
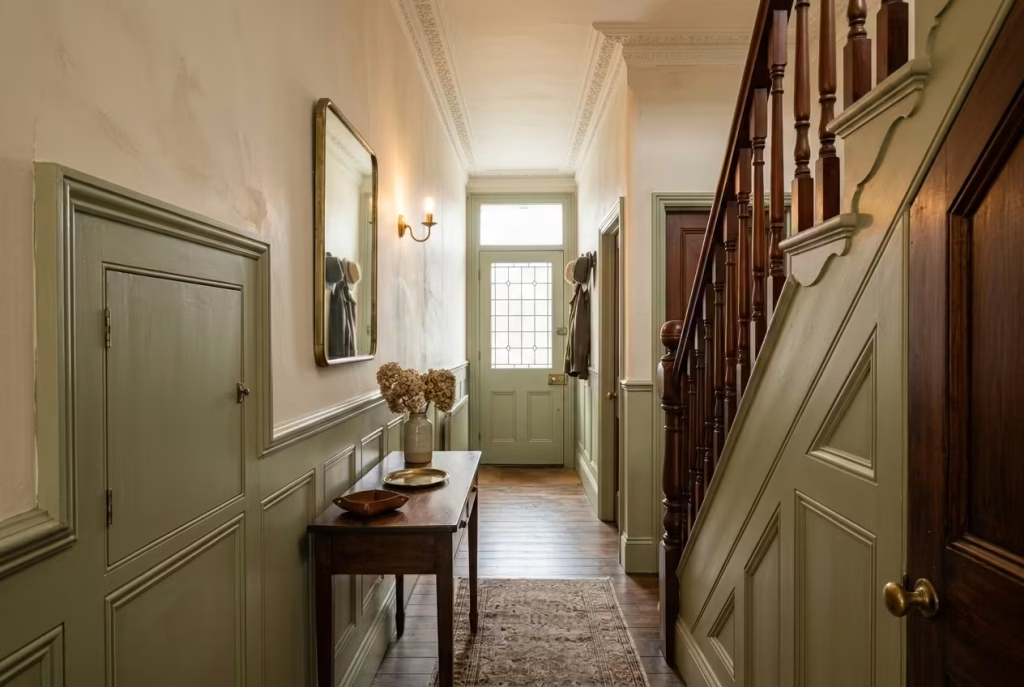
12. Use wall panelling to conceal pipework or damaged plaster. Half-height panelling isn’t purely decorative in older houses, though it certainly looks the part. It’s remarkably good at hiding the unglamorous reality of old pipework, patchy plaster, and uneven wall surfaces that a full replaster would cost a small fortune to put right. It’s a case of killing two birds with one stone: you get period authenticity and a practical fix rolled into a single job.
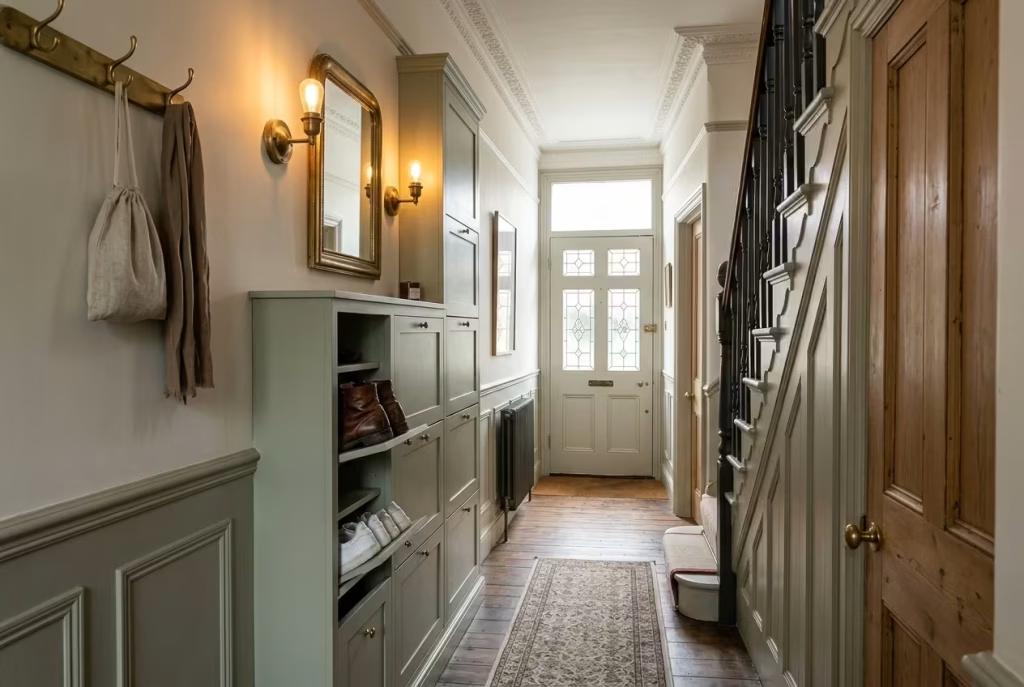
13. Add vertical shoe storage. Where floor space is at an absolute premium, going up rather than out is the only sensible option left on the table. A tall, narrow shoe cabinet takes up barely any width but holds considerably more than a low shoe rack ever could, and it keeps the actual floor of your hallway clear for walking rather than navigating an obstacle course of trainers.
Paint, Panelling & Wallpaper Where the Real Personality Lives
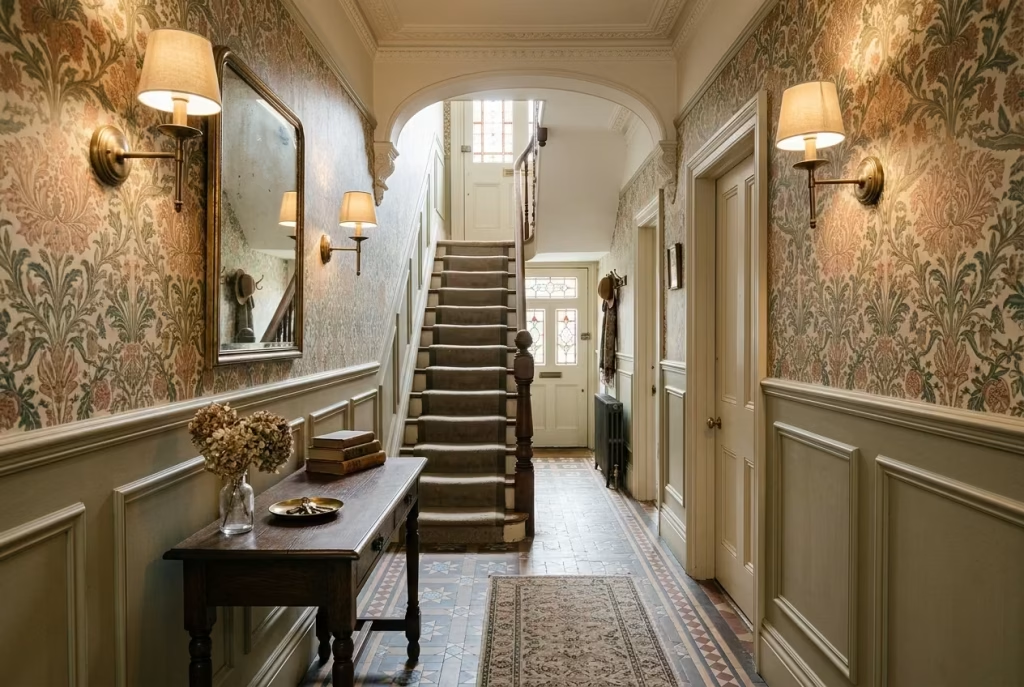
This is the section where most Victorian hallways either come alive or fall completely flat on their face, and it’s also where the single most persistent myth in period design needs putting to bed once and for all.
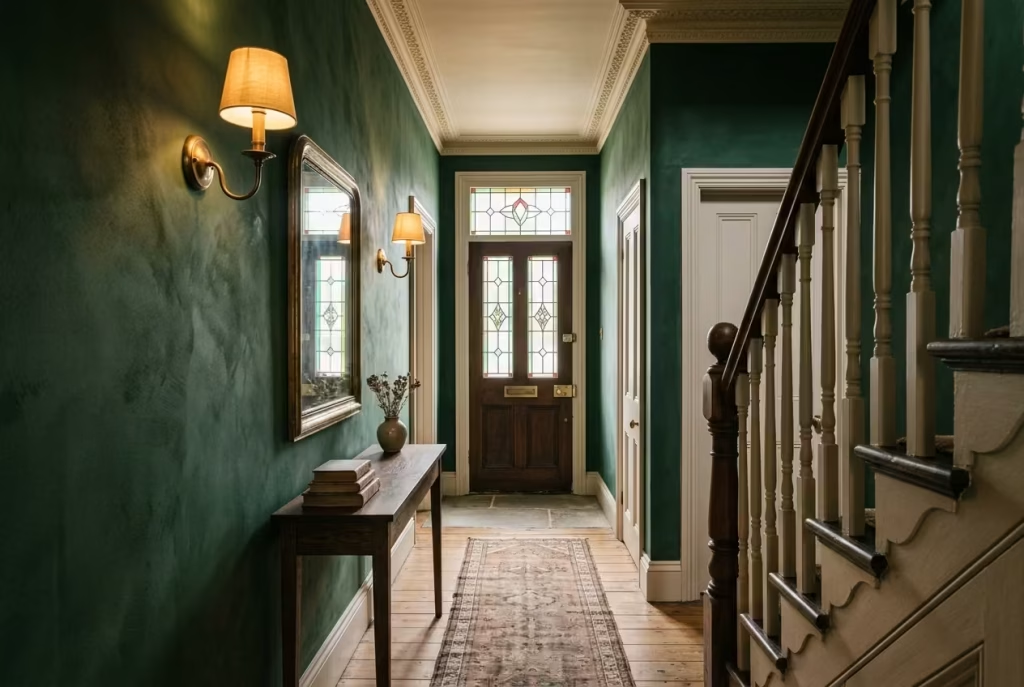
14. Go bold with a dark, dramatic colour. It sounds counterintuitive in a space that’s already short on natural light, and plenty of people will tell you it’s a recipe for gloom, but a confident dark shade, think deep green, navy, aubergine, or chocolate, can actually make a narrow hallway feel enveloping and intentional rather than dim and neglected. The trick lies in the finish rather than the colour itself: a flat, dead-matt dark paint will swallow light and look lifeless, whereas a paint with some depth or sheen, such as limewash or a plaster-effect finish, catches whatever light there is and gives the wall genuine texture and life.
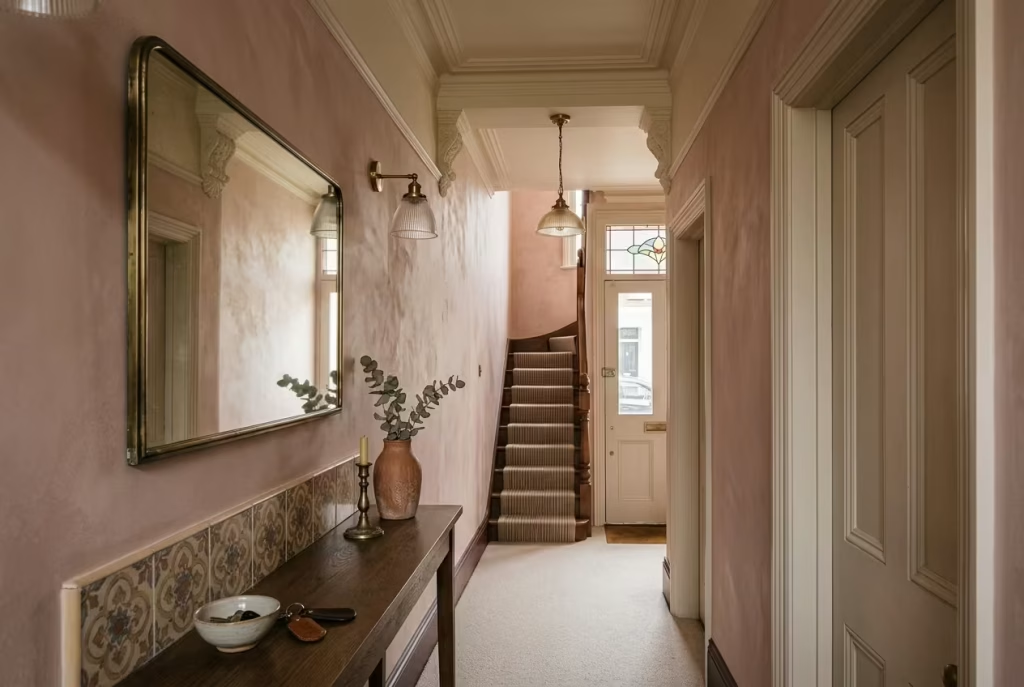
15. Try a warm plaster pink for a light-starved, north-facing hall. Where a hallway simply doesn’t receive enough natural light to carry a dark scheme with any confidence, a warm dusty pink does something rather clever: it reads as calm and neutral during daylight hours but glows with real warmth once artificial light takes over in the evenings, which happens to be exactly when most households are actually using their hallway. It’s a colour that works with the room rather than against its lighting limitations.
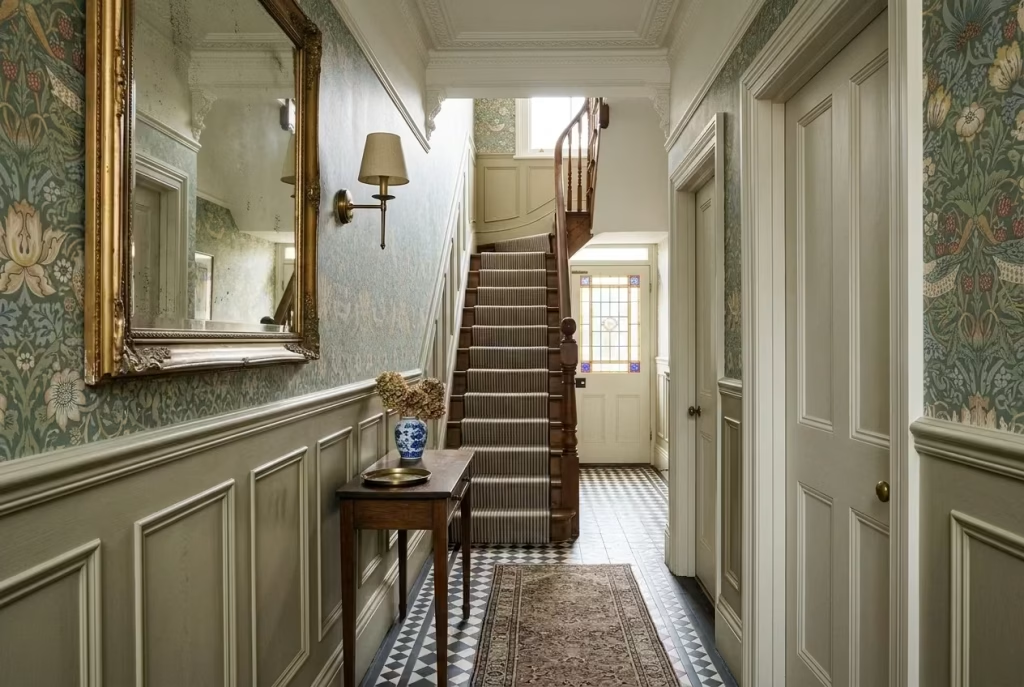
16. Half-panel the walls. Panelling to dado height, then painting or papering above it, is about as close to a genuine Victorian design signature as you’ll find anywhere in this guide. It adds real texture and a sense of craftsmanship that flat plaster simply can’t match, and it gives you a natural, built-in place to draw the eye without covering an entire wall in one single bold gesture from floor to ceiling.
You May also Like: 25 Entryway Renovation Ideas That Transform Your Home from the Moment You Walk In
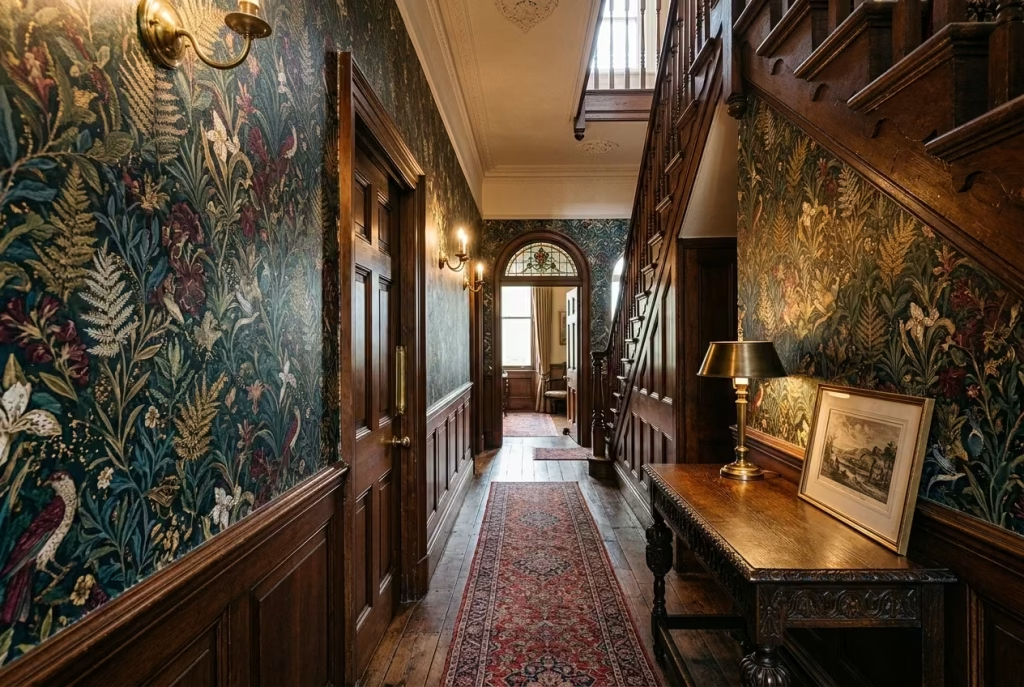
17. Hang a statement botanical or damask wallpaper. Victorian wallpaper production genuinely exploded once printing technology finally caught up with public demand, and the patterns from that era, dense, rich in colour, occasionally flecked with gold for a hint of opulence, still look extraordinary well over a century later. A hallway is the perfect place to be bold with pattern, precisely because you pass through it rather than sit and stare at it for hours on end. What might feel overwhelming in a sitting room reads as thrilling in a corridor you cross in a matter of seconds.
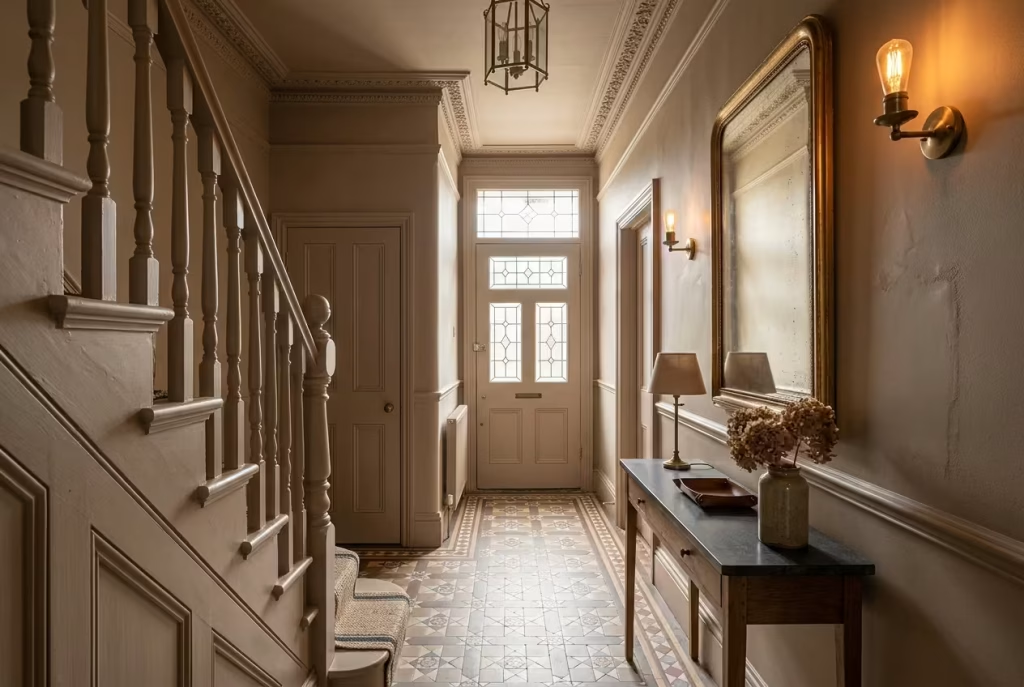
18. Colour-drench the walls, woodwork, and ceiling in one continuous shade. This technique blurs the visual boundaries of a room rather than chopping it up with hard contrast, which sounds on paper like it should make a small space feel even smaller, but achieves precisely the opposite effect in practice. With no visible stop where the wall meets the ceiling, the eye reads the whole space as one continuous, unbroken volume rather than a boxed-in corridor with a lid on it.
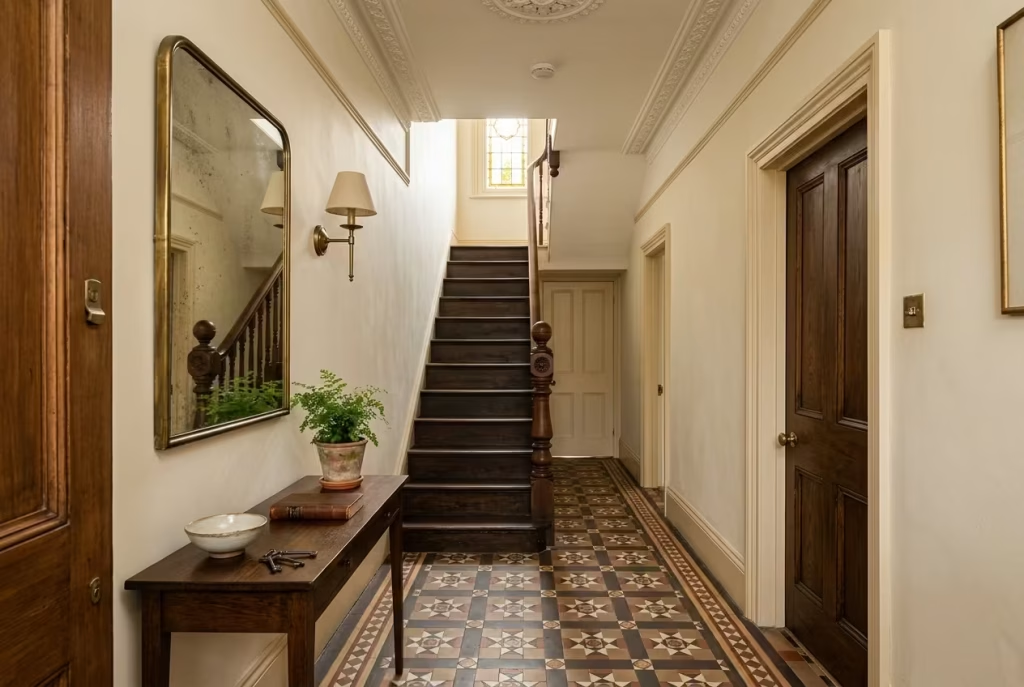
19. Choose a historically accurate off-white if purist authenticity is your goal. Here’s a fact that catches most homeowners off guard: the Victorians never used brilliant white, and pastels didn’t feature in their palette either. What they actually reached for were creams, buttermilks, and deep, toned-down versions of stronger colours. If period accuracy matters to you above all else, brilliant white paint is arguably the single most anachronistic choice available on the shelf, a modern imposter dressed up in period clothing.
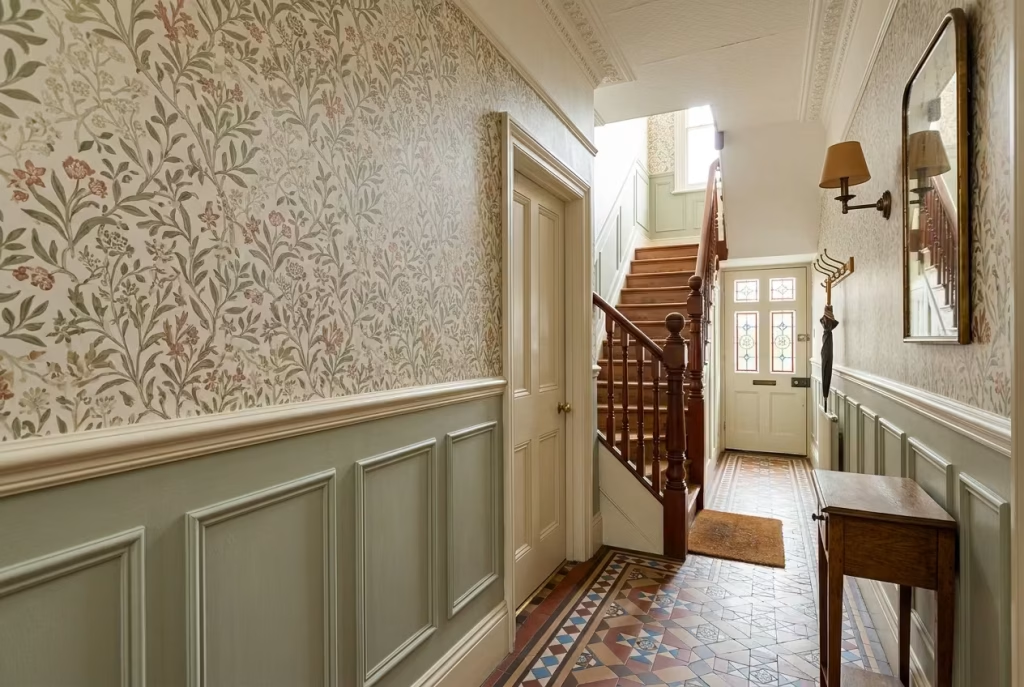
20. Add a dado rail at the correct height. This is a detail that’s shockingly easy to get wrong, and getting it wrong throws off the proportions of the entire hallway in a way that’s hard to unsee once you’ve noticed it. The rule of thumb, refined over generations of joiners, comes down to ceiling height:
| Ceiling Height | Recommended Dado Rail Height |
| Standard 2.4m ceiling | 900mm to 1,000mm from the floor |
| Taller Victorian/Edwardian ceiling (2.7m to 3m) | 1,000mm to 1,100mm from the floor |
| Very tall ceilings (above 3m) | 1,100mm to 1,200mm from the floor |
The original purpose, protecting plaster from dining chair backs, is where the alternative name “chair rail” comes from, and it remains a useful rule of thumb even now: set the rail roughly where a chair back would actually strike the wall, and you won’t go far wrong.
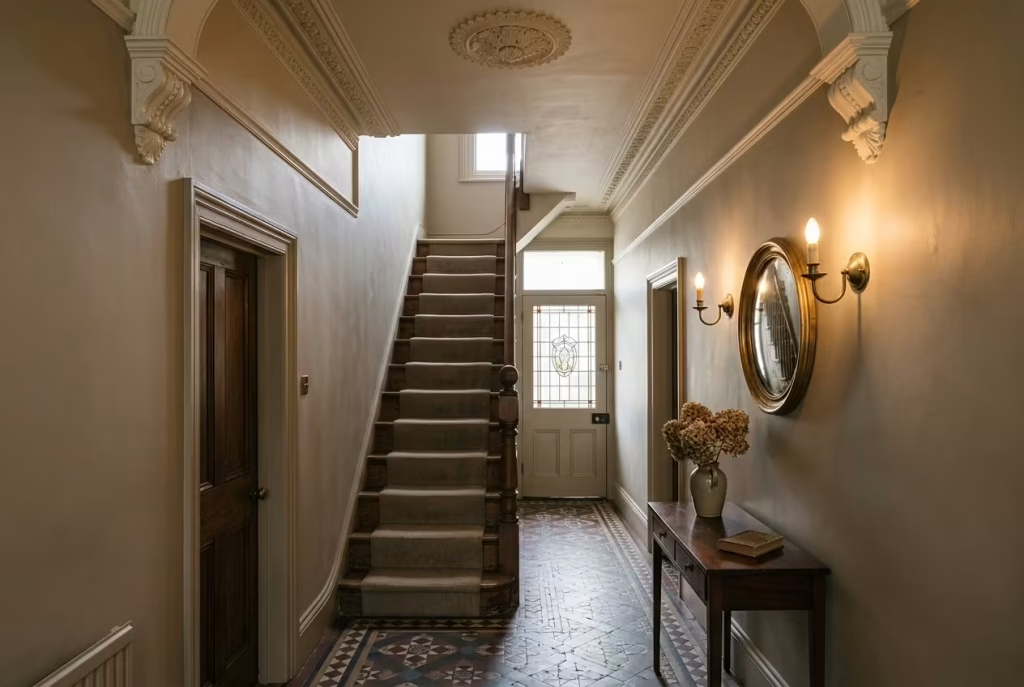
21. Highlight original mouldings in a contrasting shade. If you’re fortunate enough to have surviving cornicing, ceiling roses, or corbels, don’t let them fade quietly into a single flat colour scheme where they’ll go entirely unnoticed. Picking them out in a slightly different tone, even just a shade or two lighter or darker than the surrounding wall, throws the detail into relief and reminds every visitor that these features are original, hand-finished, and irreplaceable, not a modern reproduction bought off a shelf.
Lighting The Detail Everyone Underestimates
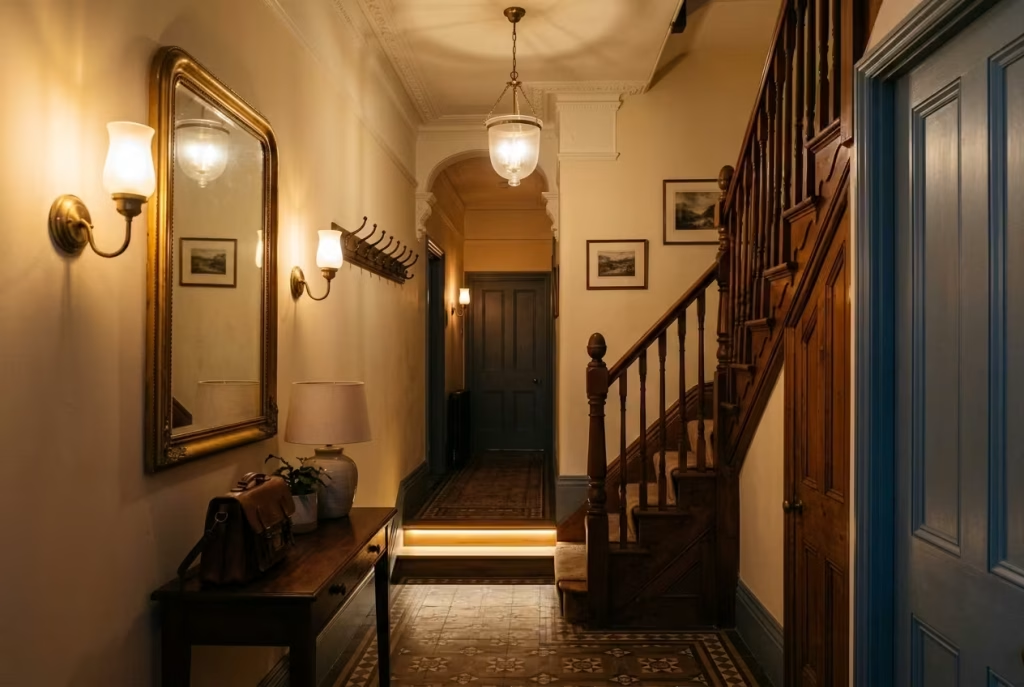
Victorian hallways were built in an age before electric light, which is precisely why so many of them still struggle for daylight today. Getting the lighting scheme right isn’t a nice-to-have here, it’s the difference between a hallway that feels genuinely welcoming after dark and one you rush through with your head down, keys already in hand.
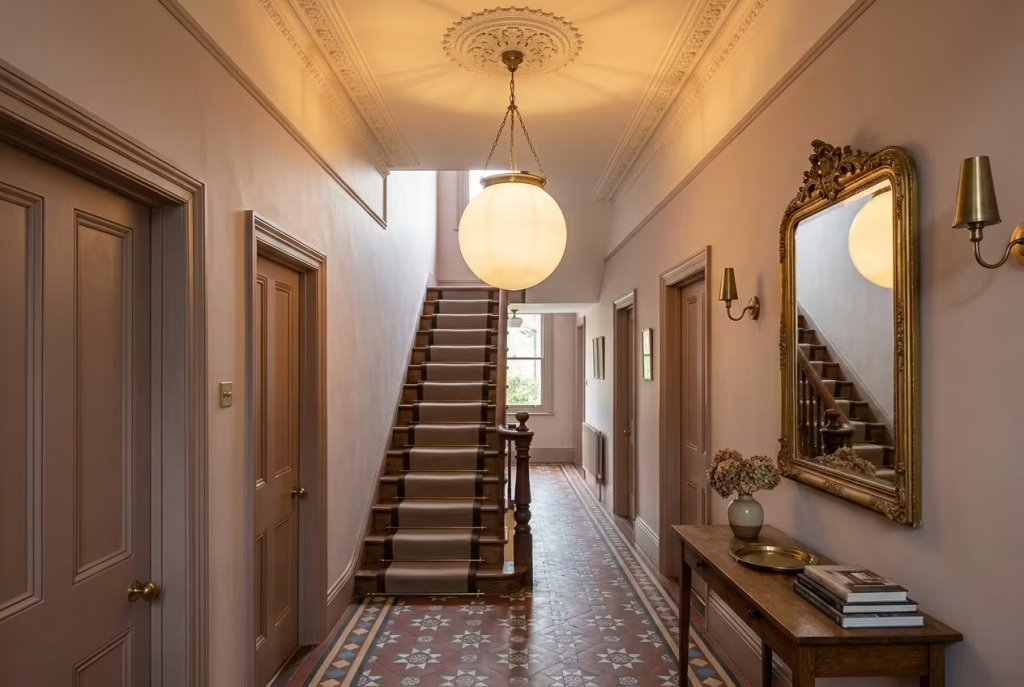
22. Hang a statement pendant if your ceiling height allows. High Victorian ceilings are, frankly, a gift that modern new-builds simply cannot offer at any price, so it seems almost rude not to use that height to full advantage. A single oversized pendant, or a cluster of smaller fittings arranged in a contemporary style, fills that vertical space rather than leaving it empty and entirely unremarked, turning a structural quirk into a genuine design feature.
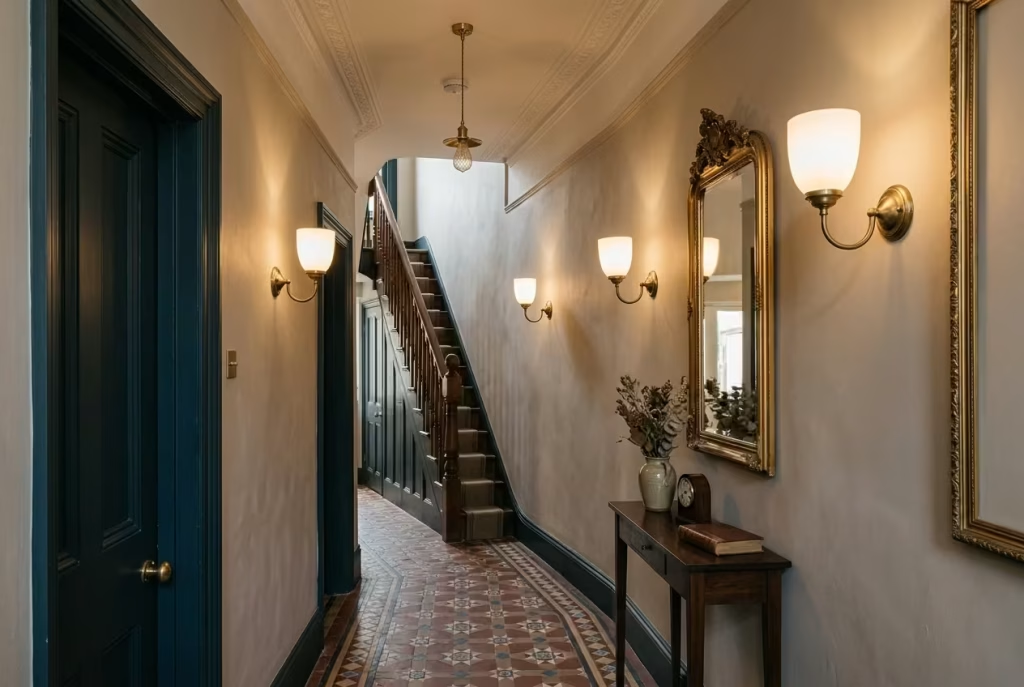
23. Layer in wall sconces alongside your main light. A single overhead pendant working alone in a narrow corridor tends to create harsh pools of light interrupted by equally harsh shadows, which does the space no favours whatsoever. Wall sconces, spaced evenly along the run, free up ceiling space entirely and cast a softer, altogether more flattering glow that suits the intimate scale of a hallway far better than one lonely bulb ever could.
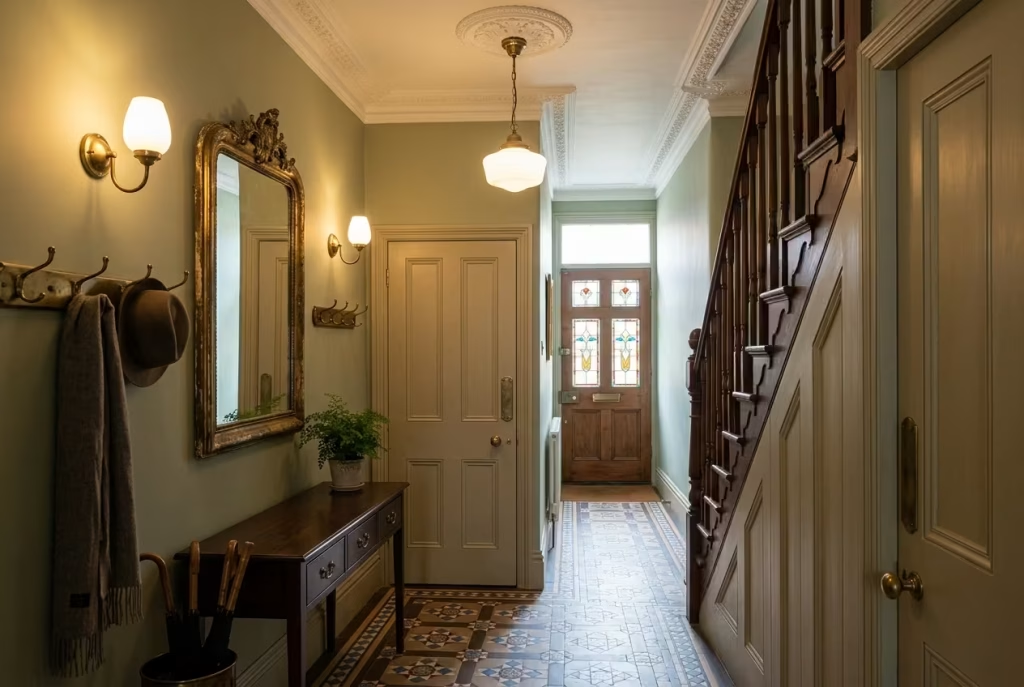
24. Choose antique brass, bronze, or wrought iron fittings. Ultra-modern chrome or brushed steel fittings can feel jarring, almost like an uninvited guest, against original cornicing and panelling. Warmer metals sit far more naturally alongside period features and tend to age with genuine grace too, developing a soft patina over the years rather than simply looking tired and dated the way cheaper finishes often do.
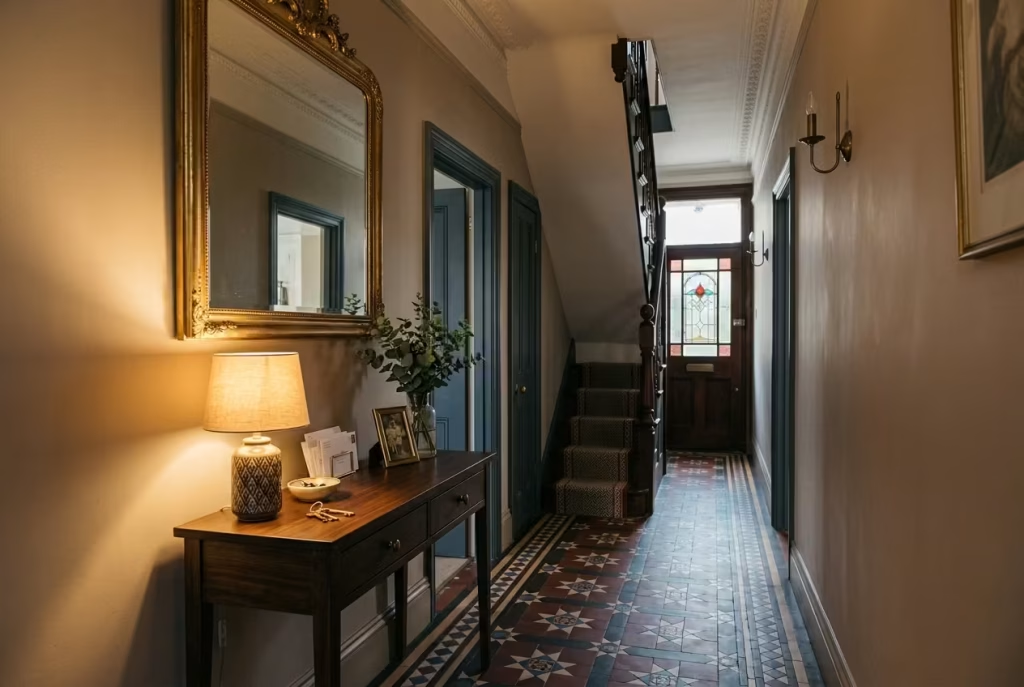
25. Add table lamps to your console table. A lamp does something no overhead light ever quite manages: it creates a small pool of warm, low-level light exactly where people actually pause, by the console, checking their reflection, gathering keys, before heading out the door into the world. It’s a small gesture that pays back disproportionately in atmosphere.
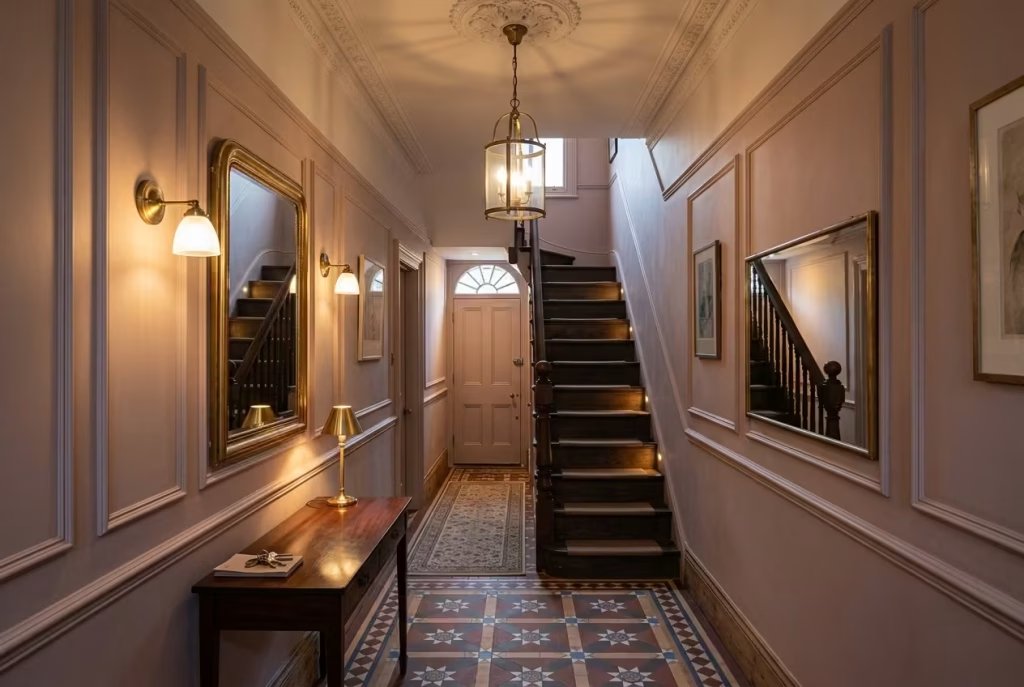
26. Fit dimmers on your main hallway lighting. A hallway performs double duty as both a practical thoroughfare during the busiest hours of the day and a softer, more atmospheric space once evening rolls around. Dimmers let you switch effortlessly between the two without needing two separate light fittings or flicking a switch and squinting.
Here’s a simple layering plan worth following, whatever the size of your hallway:
- Ambient layer: one central pendant or a run of flush ceiling lights for general, everyday illumination
- Task layer: a table lamp or two on the console, aimed at the spot where post and keys get sorted
- Accent layer: wall sconces or a picture light trained on a mirror, artwork, or original feature
- Safety layer: a low-level stair light strip, particularly valuable on original, uneven treads
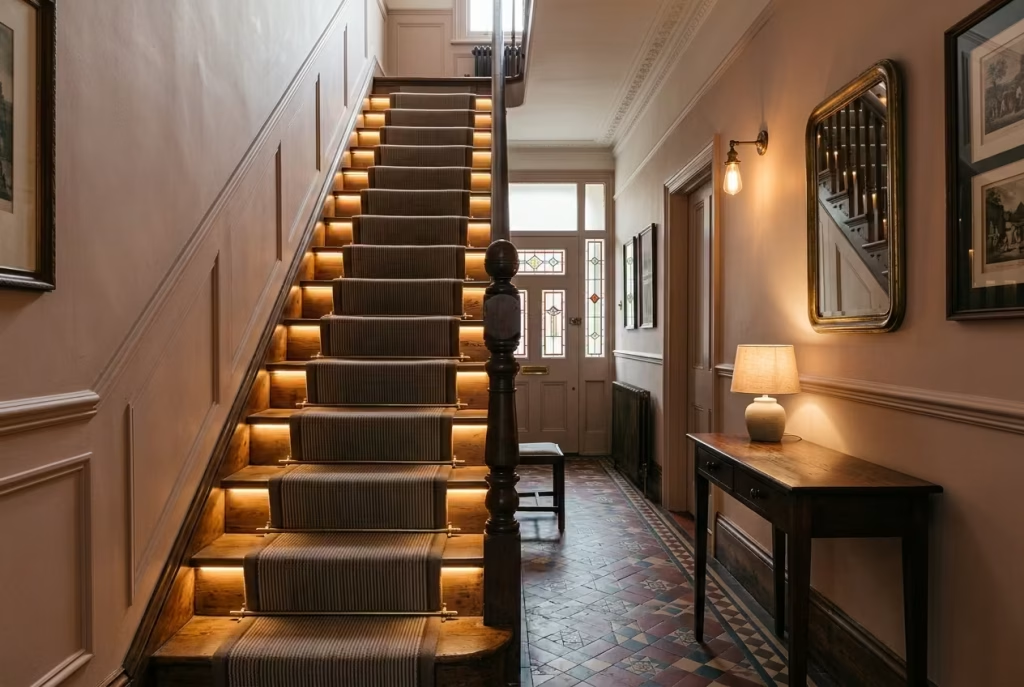
27. Run a subtle light strip along the stairs. Beyond the obvious safety benefit on worn or slightly uneven period treads, a soft light strip fitted along the base of each stair adds a genuinely lovely ambient glow after dark, and it’s a small detail that guests notice and remember long after they’ve left, even if they couldn’t quite tell you why the staircase felt so inviting.
The Front Door & Stained Glass: Your First Real Statement
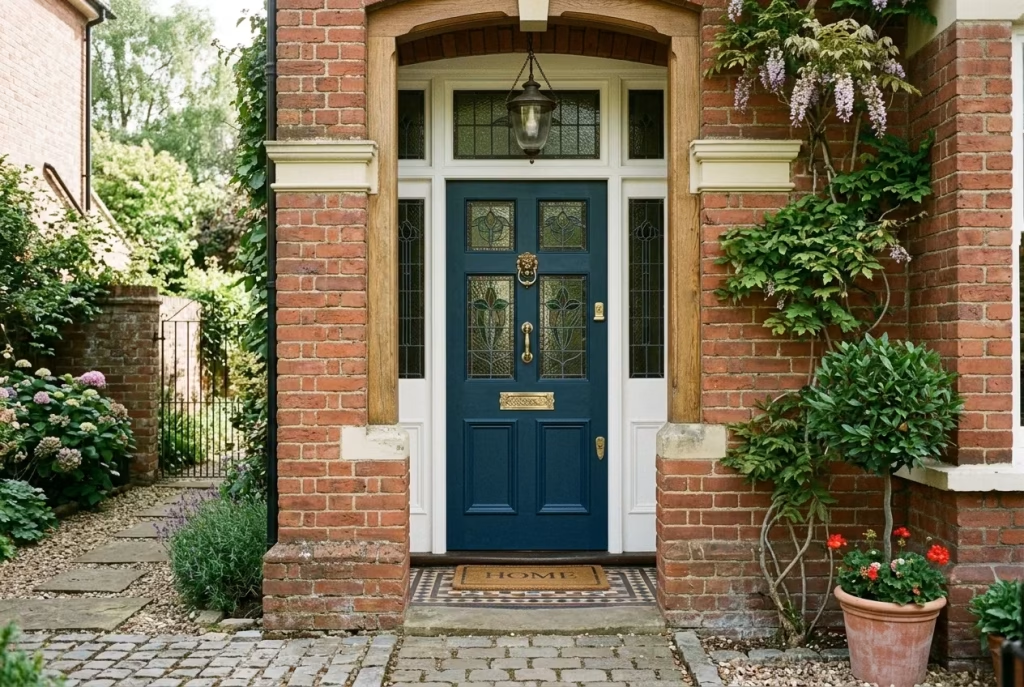
28. Restore or reinstate an original front door. Nothing signals “cared-for period home” faster than an authentic front door, and nothing undermines that impression quite as thoroughly as an ill-fitting uPVC replacement bolted on in the eighties. If the original door is beyond saving, a joinery-made replica in the correct style and proportions is worth every penny, since it’s the very first thing anyone touches before they’ve even crossed your threshold.
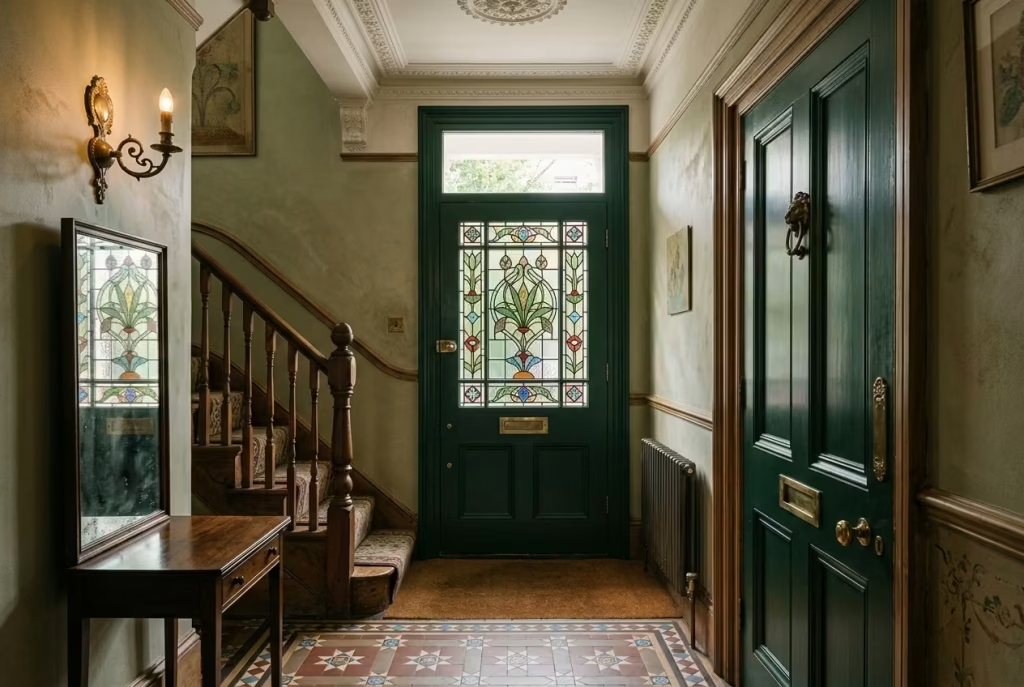
29. Recreate stained glass in real leaded glass where budget allows. The good news for anyone nervous about security is that modern manufacturing has genuinely cracked the old trade-off between beauty and safety. Real stained or leaded glass can now be encapsulated inside a toughened, double-glazed safety unit, meaning you get the authentic colour, depth, and texture of true stained glass alongside proper modern security and insulation performance. It’s a bigger spend than film, no question, but it’s a one-time decision that will comfortably outlast several rounds of redecorating elsewhere in the house.
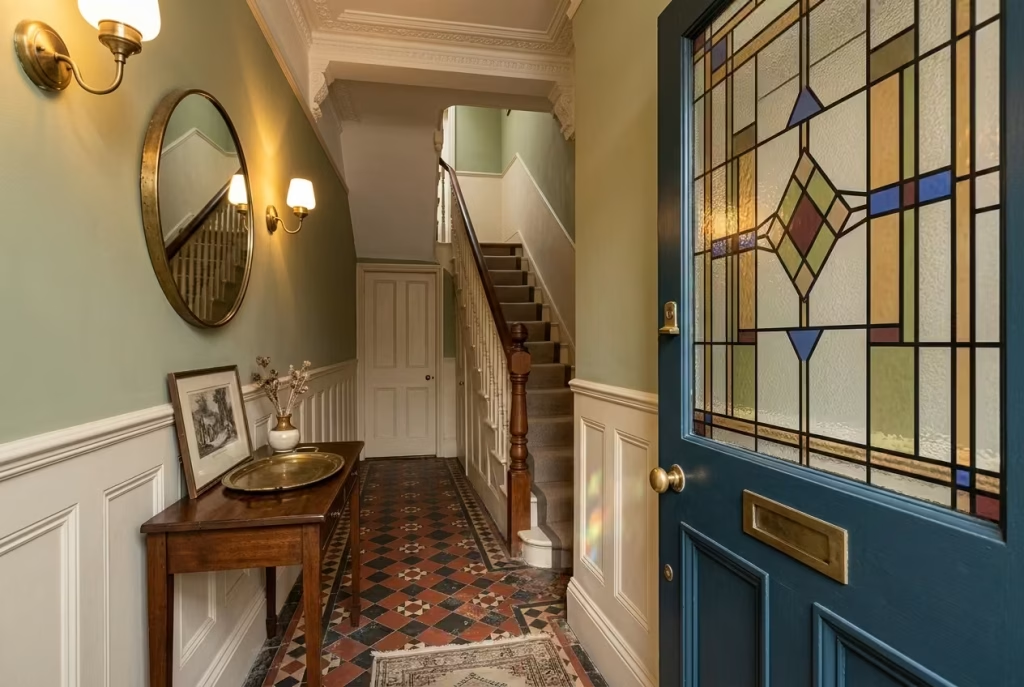
30. Use stained glass window film as a lower-cost, reversible alternative. For rented properties, or simply for tighter budgets, static-cling window film, often available from around £9, genuinely replicates the look of Victorian stained glass, applies without any adhesive using nothing more than water, and comes off cleanly the day you move out without a trace of residue left behind. It also cuts down on UV exposure, meaning noticeably less fading on your hallway floor and furnishings over time. What it won’t do is add any security benefit or the genuine depth and texture of real glass, so it’s worth treating as a decorative stand-in rather than a like-for-like substitute in every sense.
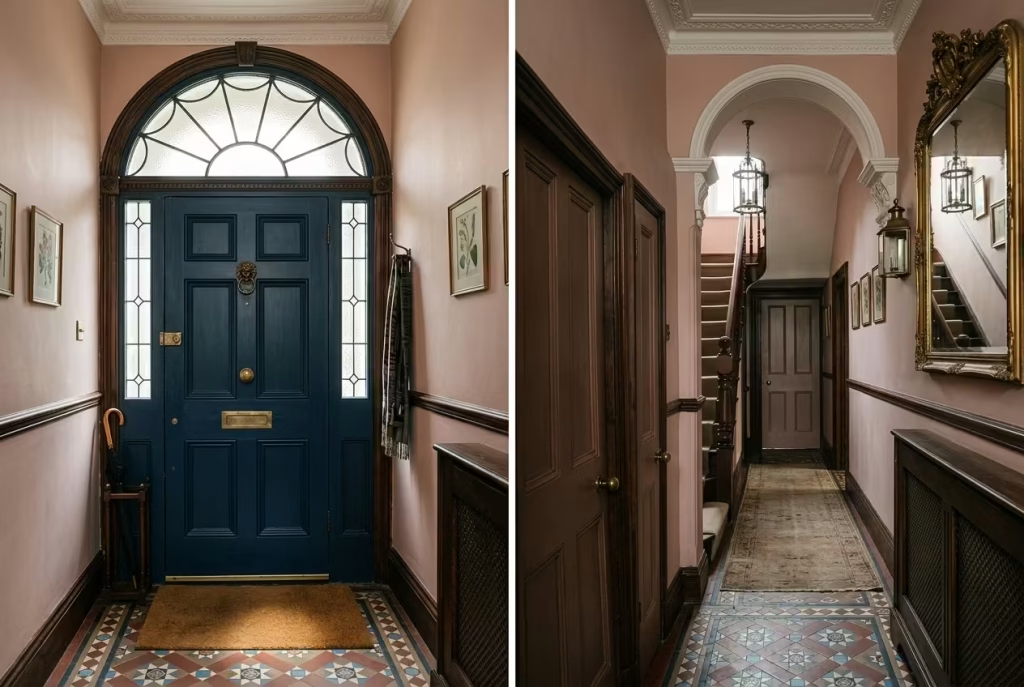
31. Add a fanlight or sidelight where the door itself has no glazing. Not every original Victorian front door came with stained glass built into its panels, but many were flanked by narrow sidelights or topped with a fanlight above. Both are excellent, relatively affordable routes to bringing natural light and a touch of period pattern into a hallway that would otherwise depend entirely on artificial lighting during daylight hours.
You May also Like: What an English Country Entrance Is Actually Trying to Do
Styling & Accessories: The Finishing Touches
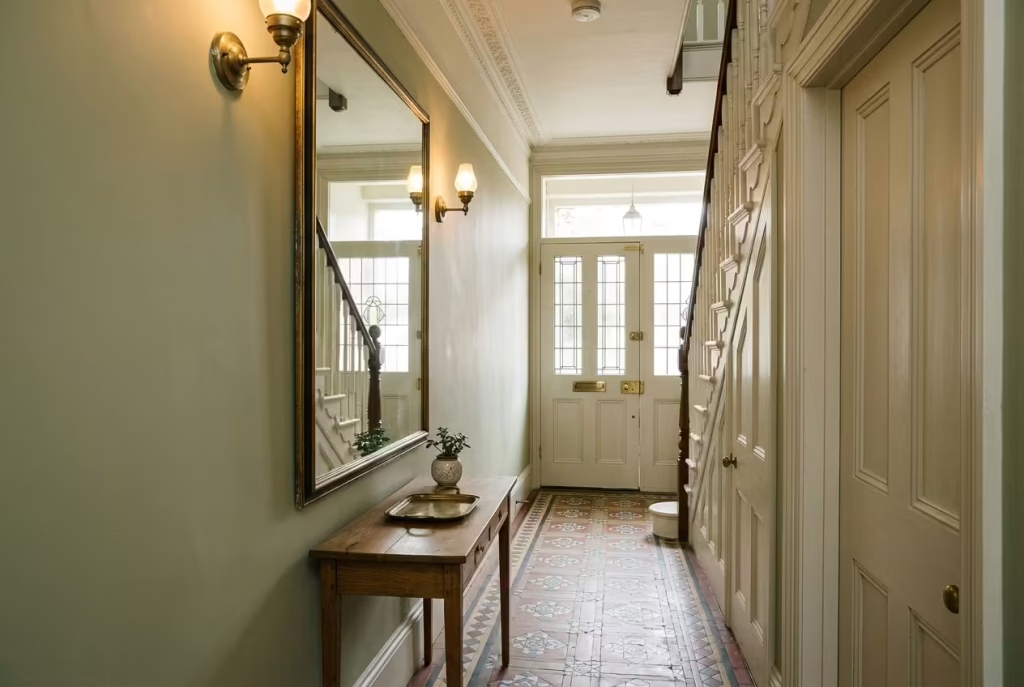
32. Hang an oversized mirror. This is, without question, the single most effective trick in the entire narrow-hallway playbook, and it costs a fraction of what a full retiling job would set you back. A large mirror bounces available light back into the space and tricks the eye into reading the hallway as significantly wider than it actually is on paper. Scale matters enormously here. A small, dainty mirror will simply look lost against a full run of wall, so go bigger than feels instinctively comfortable.
| Hallway Width | Suggested Mirror Width |
| Under 90cm | 40 to 50cm, positioned at eye level |
| 90cm to 120cm | 60 to 80cm |
| Over 120cm | 80cm or more, or a full-length option |
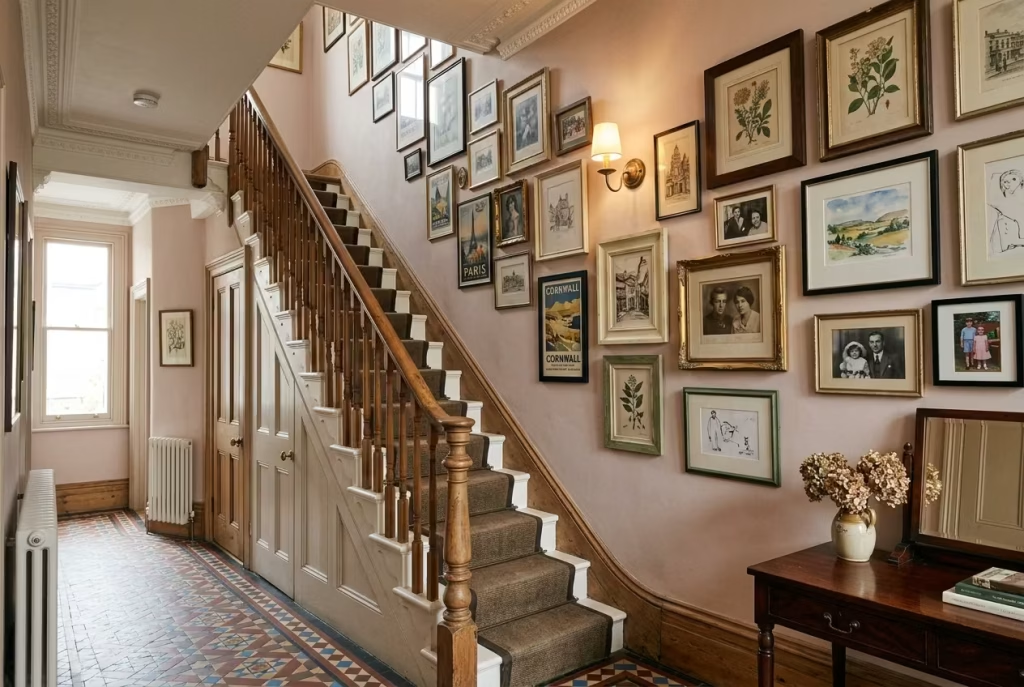
33. Build a gallery wall up the staircase. Mixing photographs, prints, and posters in a variety of frame styles and colours adds genuine personality and warmth without demanding a huge outlay from the outset. The slight informality of mismatched frames also stops the wall from feeling like a stiff, curated gallery rather than a living record of the people who actually call the house home.
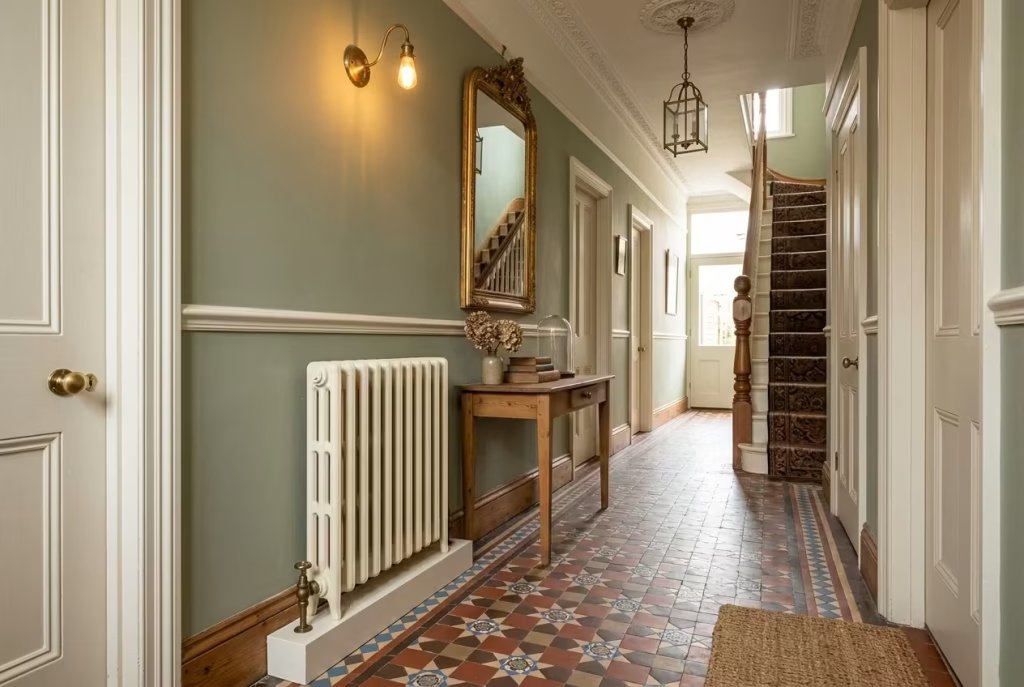
34. Install a cast iron radiator. If your budget won’t stretch to fitting period-style radiators throughout the whole house, the hallway is very often the room to prioritise above all others. A cast iron radiator adds genuine character and warmth to the very first impression of your home, and modern reproductions come in far slimmer profiles specifically engineered not to eat into narrow hallway widths the way older, bulkier models could.
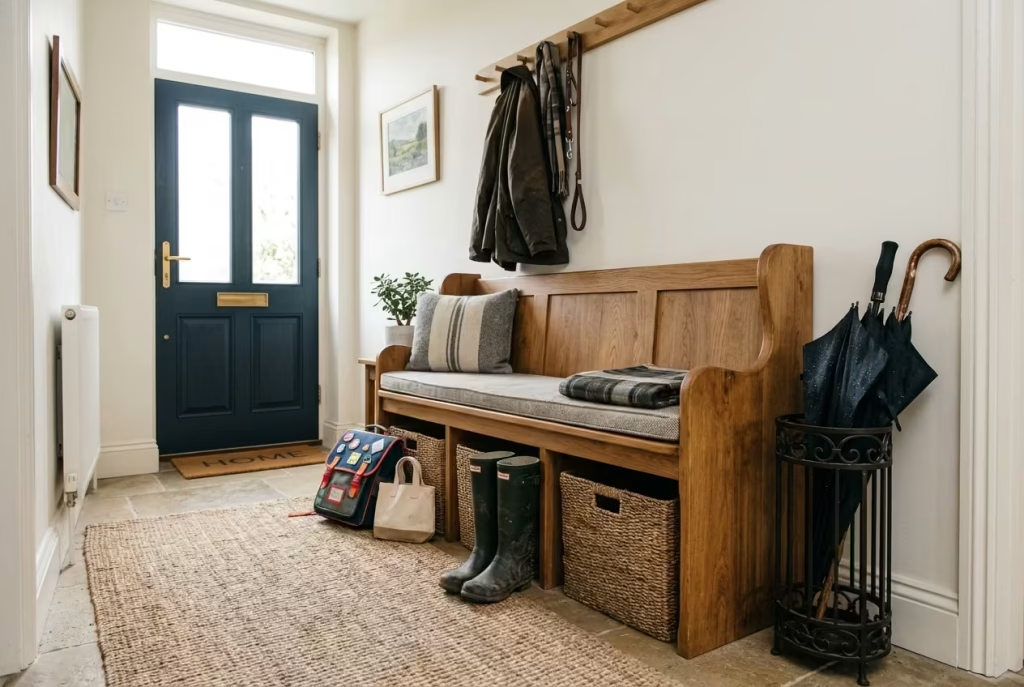
35. Add an umbrella stand or a small hall bench. These aren’t glamorous additions by any stretch, but they solve a problem that crops up every single day without fail: where do wet umbrellas, muddy boots, and school bags actually go the moment someone walks through the front door? Solve that problem elegantly and the whole hallway feels calmer for it, almost as though a weight has been lifted off the entire room.
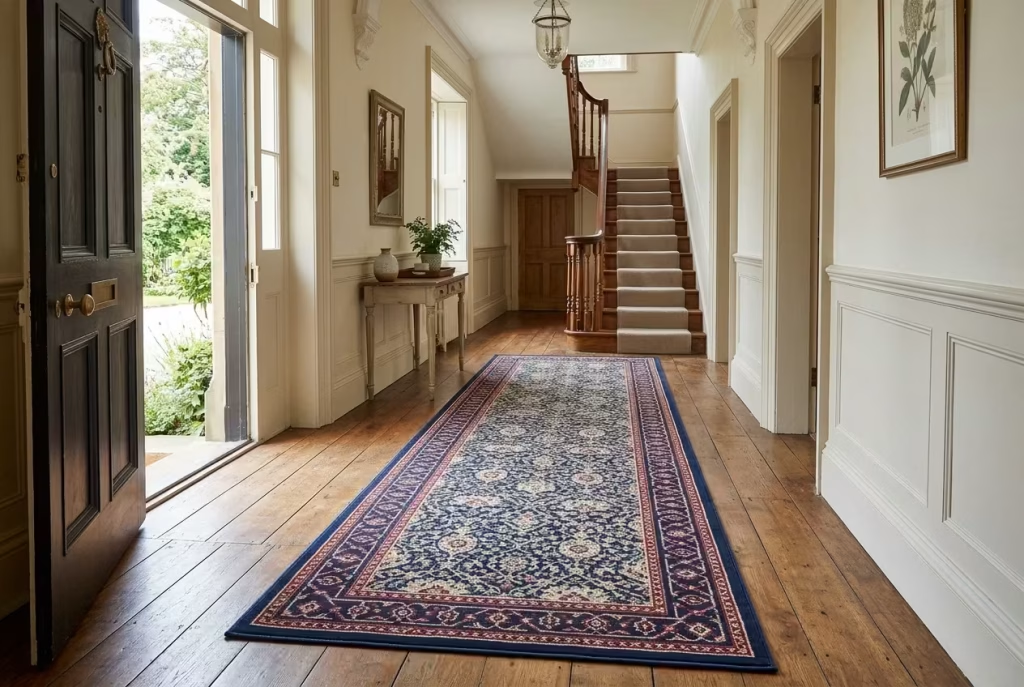
36. Choose a runner-length rug with a decorative border. Rather than scattering a series of separate mats along the floor, one continuous runner with a strong border colour visually stitches the whole hallway together from front door to staircase, which matters enormously in a space that’s so often viewed end to end in a single, sweeping glance the moment the door opens.
Fixing a Small or Narrow Hallway
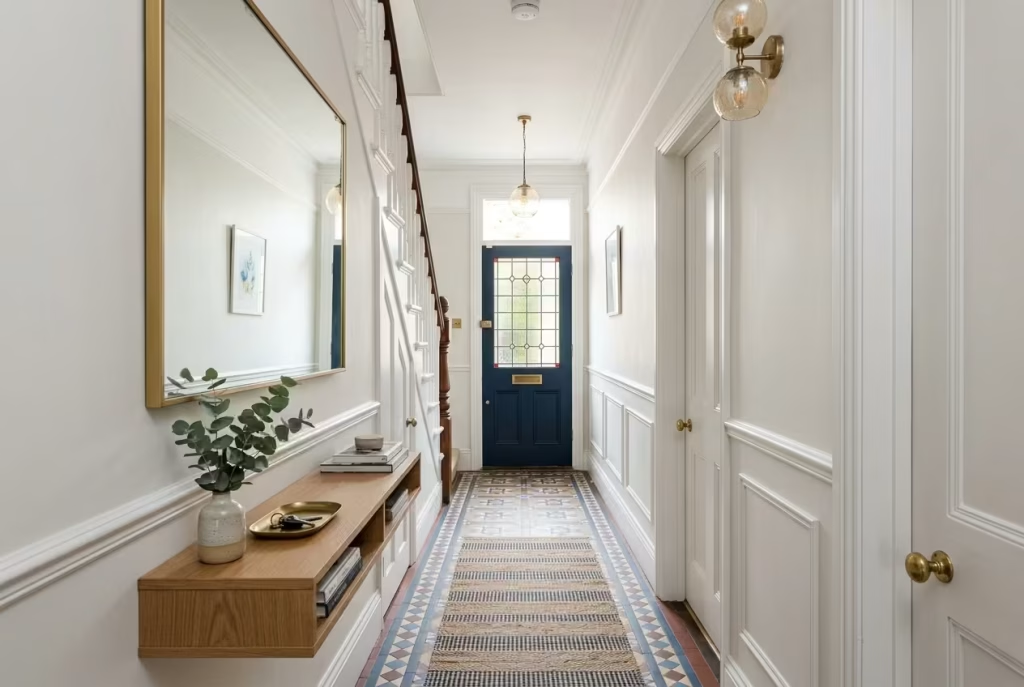
Here’s a genuinely useful piece of context that most guides skip over entirely. UK Building Regulations guidance on minimum corridor widths sits somewhere around 900mm to 1,200mm depending on doorway width and the angle of approach, while US residential code sets a 36-inch, or 910mm, minimum for comparison.
Many original Victorian terrace hallways sit right at, or even below, that comfortable threshold, which is exactly why narrow-hallway styling advice remains in such relentless demand decade after decade. You’re not imagining it. Your hallway probably is tighter than what modern comfort standards would specify, and that’s simply a fact of the era it was built in rather than any failing on your part.
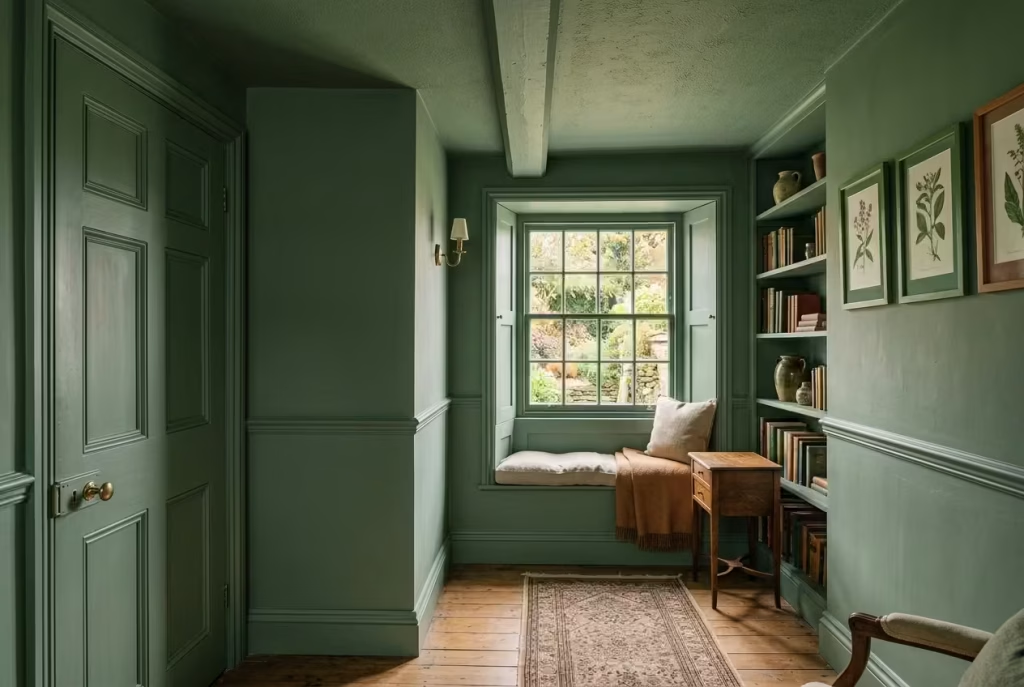
37. Use one continuous colour on walls, woodwork, and ceiling to trick the eye. As covered above under colour-drenching, removing hard visual stops between surfaces reads as noticeably more spacious than chopping the room into contrasting zones, even though the actual floor area hasn’t changed by so much as a single centimetre. It’s a design sleight of hand, and a remarkably effective one at that.
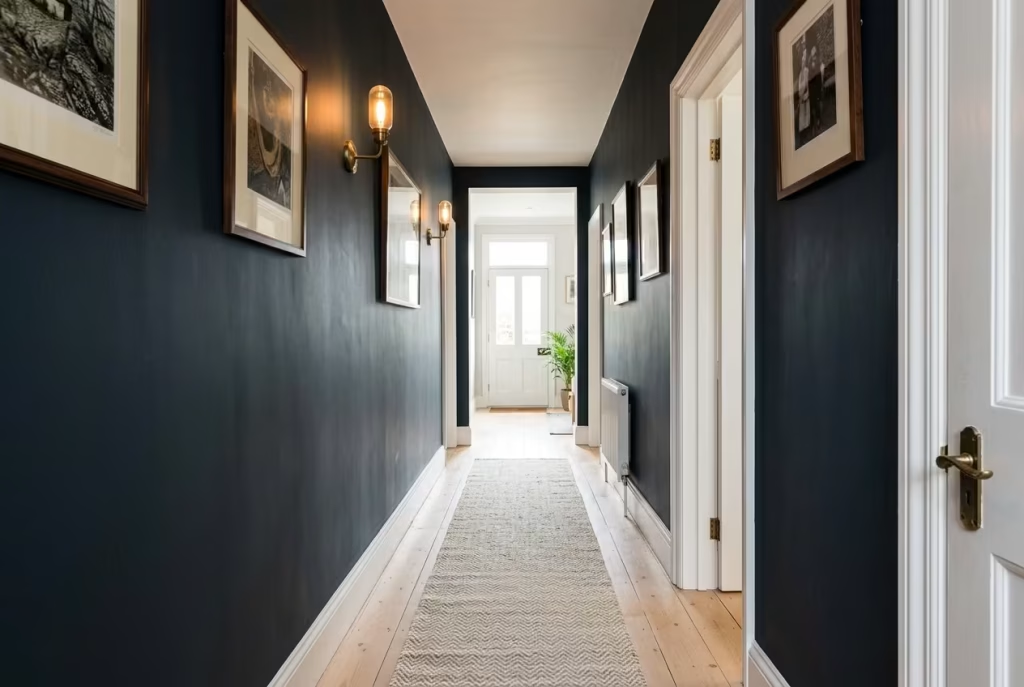
38. Avoid dark carpet or a dark runner on a genuinely tight run. Designers describe dark flooring in a narrow hallway as acting like a black river, pulling in whatever light there is and exaggerating precisely the tunnel effect you’re desperately trying to avoid. If you love a dark palette and can’t imagine life without it, put the drama on the walls instead and keep the floor pale to balance things out.
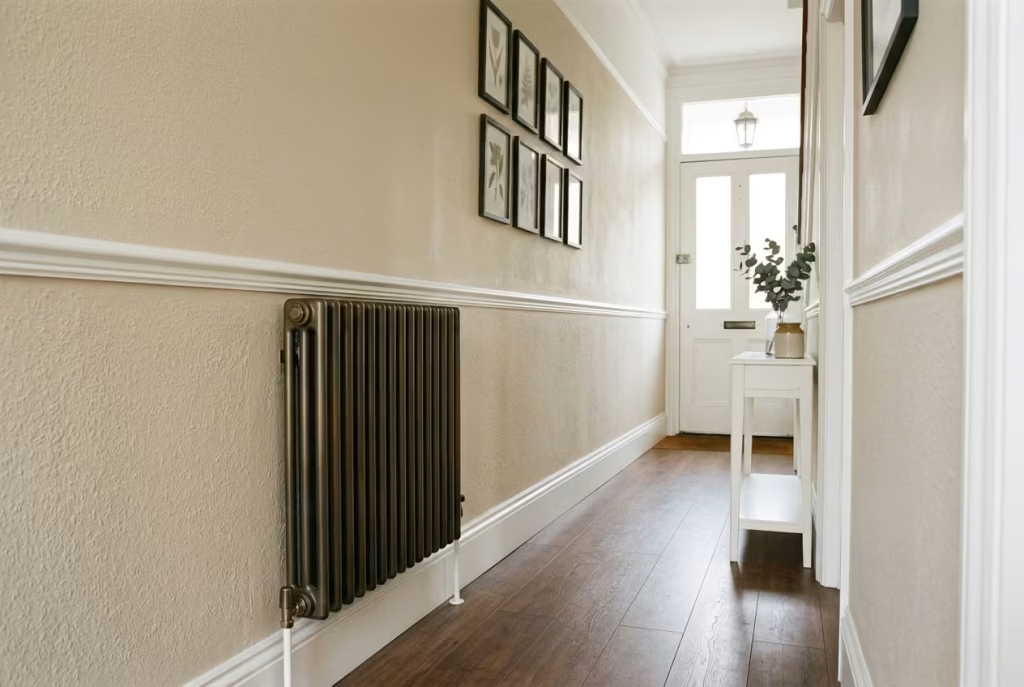
39. Choose a slim 2-column radiator rather than a bulkier 4-column model. Every single centimetre of wall projection counts in a genuinely tight hallway, where the margin between comfortable and cramped can come down to inches rather than feet. A slim 2-column cast iron radiator, with some period-style models sitting at around just 100mm deep, delivers real heat output and authentic period character without eating into the width you need for people, pushchairs, or simply hauling the weekly shop in from the car.
A few quick wins worth bearing in mind if you’re short on both space and budget:
- Keep skirting boards and dado rails lighter than the wall above them to avoid a heavy, closed-in feel underfoot
- Choose furniture with visible legs rather than solid bases, since it lets light travel underneath rather than stopping dead
- Hang art in a single vertical column rather than scattered widely, which respects the narrow proportions rather than fighting them
- Resist the urge to add too many accessories at once; a narrow hallway punishes clutter far more harshly than a spacious one ever would
Restoration vs Reproduction What It Actually Costs
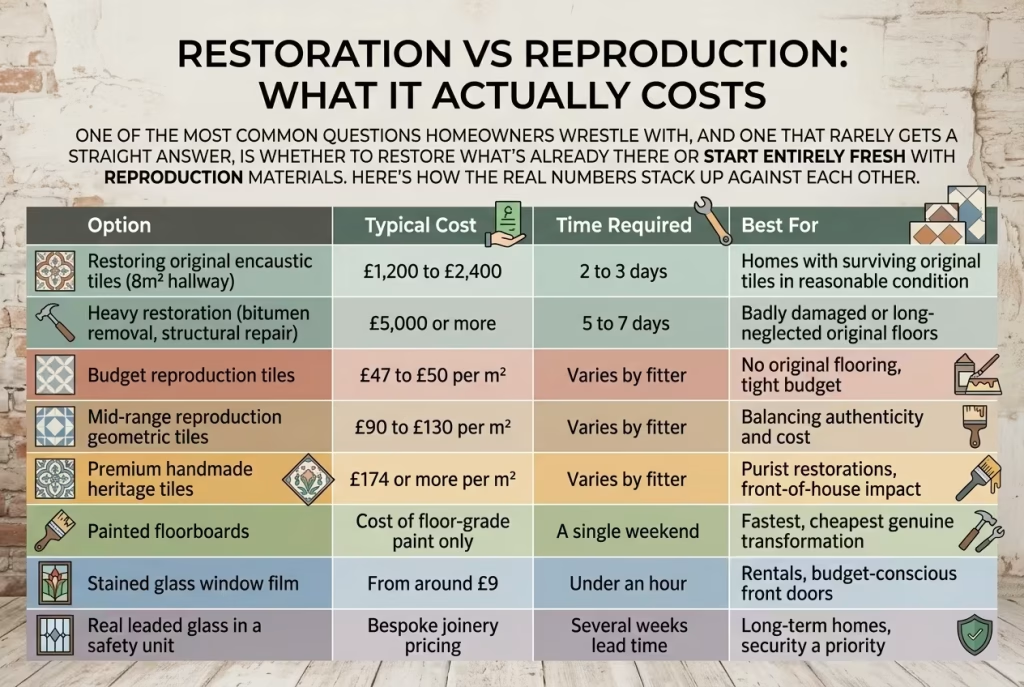
One of the most common questions homeowners wrestle with, and one that rarely gets a straight answer, is whether to restore what’s already there or start entirely fresh with reproduction materials. Here’s how the real numbers stack up against each other.
| Option | Typical Cost | Time Required | Best For |
| Restoring original encaustic tiles (8m² hallway) | £1,200 to £2,400 | 2 to 3 days | Homes with surviving original tiles in reasonable condition |
| Heavy restoration (bitumen removal, structural repair) | £5,000 or more | 5 to 7 days | Badly damaged or long-neglected original floors |
| Budget reproduction tiles | £47 to £50 per m² | Varies by fitter | No original flooring, tight budget |
| Mid-range reproduction geometric tiles | £90 to £130 per m² | Varies by fitter | Balancing authenticity and cost |
| Premium handmade heritage tiles | £174 or more per m² | Varies by fitter | Purist restorations, front-of-house impact |
| Painted floorboards | Cost of floor-grade paint only | A single weekend | Fastest, cheapest genuine transformation |
| Stained glass window film | From around £9 | Under an hour | Rentals, budget-conscious front doors |
| Real leaded glass in a safety unit | Bespoke joinery pricing | Several weeks lead time | Long-term homes, security a priority |
The honest truth is that restoration nearly always wins when it comes to character, but it comes with a genuine risk attached: you won’t know the full extent of what’s lurking underneath until the work has already started, and costs can creep upward once bitumen, damp, or structural issues reveal themselves partway through. Reproduction removes that uncertainty from the equation entirely, at the cost of that slightly indefinable, hard-to-fake quality that original materials carry with them, the sense that this floor has genuinely been here since 1890 and has the scars to prove it.
A Note on Getting the Paint Finish Right
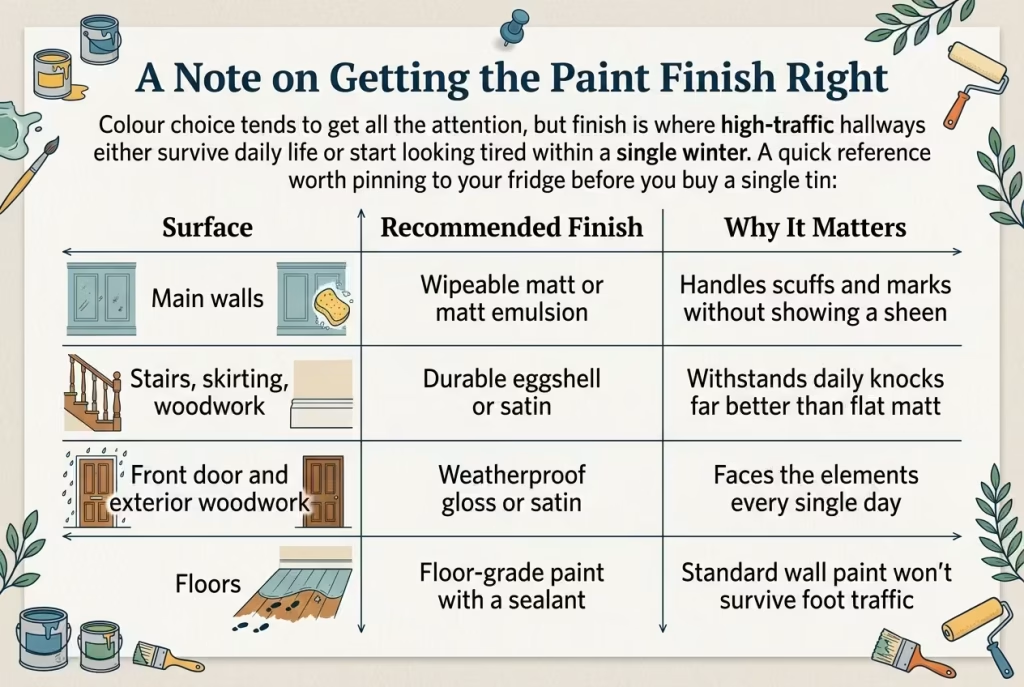
Colour choice tends to get all the attention, but finish is where high-traffic hallways either survive daily life or start looking tired within a single winter. A quick reference worth pinning to your fridge before you buy a single tin:
| Surface | Recommended Finish | Why It Matters |
| Main walls | Wipeable matt or matt emulsion | Handles scuffs and marks without showing a sheen |
| Stairs, skirting, woodwork | Durable eggshell or satin | Withstands daily knocks far better than flat matt |
| Front door and exterior woodwork | Weatherproof gloss or satin | Faces the elements every single day |
| Floors | Floor-grade paint with a sealant | Standard wall paint won’t survive foot traffic |
Safety Notes Worth Taking Seriously
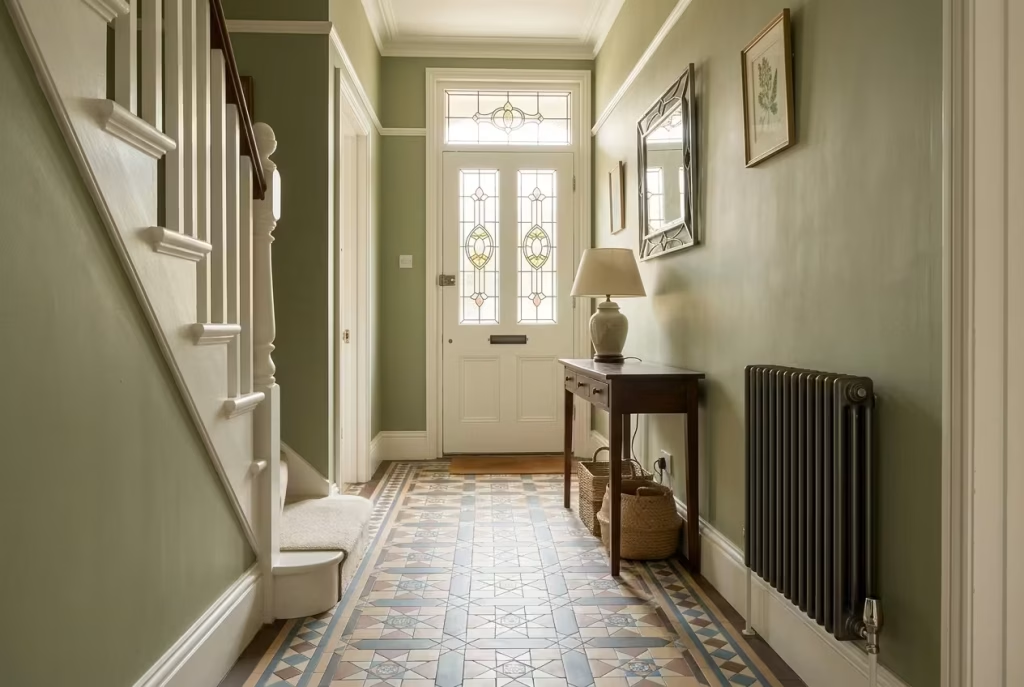
A hallway is the most heavily trafficked room in the entire house, and a handful of styling choices that look wonderful in photographs need a bit of practical thought applied behind the scenes.
- Stained glass and security. Decorative glass in a front door is undeniably beautiful, but it’s also the most vulnerable point of entry in the house. If you’re installing real stained or leaded glass, make certain it’s encapsulated inside a toughened, double-glazed unit rather than left as a single, vulnerable pane that could be easily broken.
- Radiator clearance. Always factor in valve clearance on both sides of a hallway radiator when measuring your available wall run, and choose a slimmer profile in a genuinely tight hallway so you don’t accidentally create a pinch point that catches every passing hip.
- Trailing cables and lamps. Table lamps on a console table are lovely, but a trailing cable running across a high-traffic floor is a trip hazard simply waiting for the wrong moment to happen. Route cables behind furniture or along the skirting wherever you possibly can.
- Encaustic tile cleaning. This bears repeating precisely because it’s so commonly got wrong: never use vinegar, bleach, or any acidic cleaner on encaustic or Minton tiles. It causes permanent damage to the porous clay and breaks down the grout beyond repair.
- Paint finish for high-traffic areas. Use a wipeable, high-quality matt finish on the walls and a more durable eggshell on stairs, skirting boards, and woodwork, since these particular surfaces take the overwhelming majority of day-to-day scuffing and knocking.
Bringing It All Together
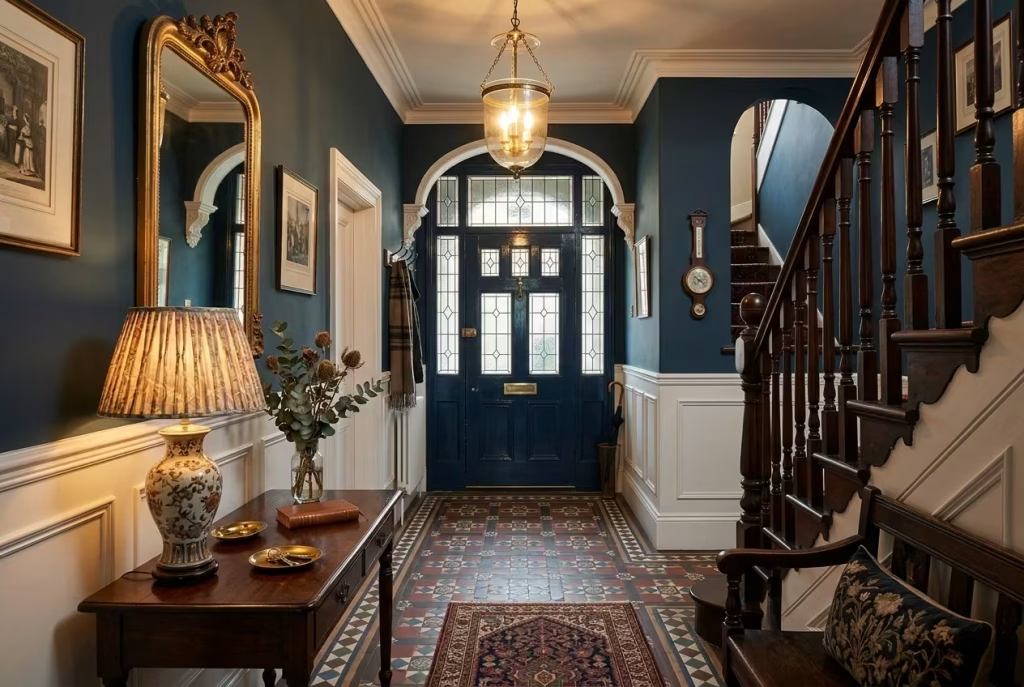
A Victorian hallway will never be the biggest room in your house, and no amount of clever styling is going to change its actual dimensions on the ground. What it can become, with the right combination of colour, lighting, flooring, and a touch of genuine nerve, is the room that sets the tone for absolutely everything else that follows.
Every idea in this guide can stand entirely on its own two feet, but the ones that transform a hallway completely tend to work best in combination: original or reproduction flooring underfoot, a considered colour on the walls, layered lighting that actually gets switched on and used after dark, and one or two genuine statement pieces, a mirror, a pendant, a lovingly restored front door, that make the whole space feel deliberate rather than simply left over from whatever the previous owners couldn’t be bothered to change.
Whichever handful of these 39 ideas you choose to tackle first, the underlying goal remains exactly the one the Victorians themselves had in mind well over a century ago: a first impression worth making, and a homecoming worth looking forward to.
Frequently Asked Questions
What’s the best colour for a narrow, dark Victorian hallway?
Skip brilliant white, since without decent natural light it tends to read as stark and cold rather than genuinely spacious. A warm off-white, a soft plaster pink, or even a confident dark shade finished with some texture, such as limewash or a plaster effect, all work considerably better than a flat, bright white ever will.
Are original Minton or encaustic tiles worth restoring, or should I just replace them?
If they’re structurally sound, restoring them is almost always the right call. Expect somewhere between £1,200 and £2,400 for an 8m² hallway, covering a deep clean, regrout, reseal, and minor tile replacement. Heavier repair work involving bitumen removal or structural issues can push well past £5,000, so it’s worth getting a proper inspection before committing to a fixed budget.
How much does encaustic tile restoration actually cost?
For a typical Victorian terrace hallway of around 8m², £1,200 to £2,400 is a realistic ballpark for straightforward restoration work. Larger halls, or floors requiring extensive tile replacement, will naturally cost more depending on the scale involved.
Is Victorian-style reproduction tile a good alternative, and what does it cost?
Yes, and the quality on offer has improved dramatically in recent years. Budget printed reproductions start from around £47 to £50 per square metre, mid-range geometric mosaic designs sit at £90 to £130 per square metre, and premium handmade heritage tiles run £174 per square metre and upward from there.
What height should a dado rail be?
For a standard 2.4m ceiling, fit it at 900mm to 1,000mm from the floor. For taller Victorian or Edwardian ceilings, roughly 2.7m to 3m, raise it to 1,000mm or 1,100mm to keep the proportions properly balanced.
Is stained glass window film as good as real stained glass?
It’s a genuinely good decorative stand-in, particularly for rentals or tighter budgets, and it adds daytime privacy while cutting UV fade on floors and furnishings. What it won’t give you is any security benefit or the true depth and texture of real leaded glass, which can now be encapsulated inside a modern toughened safety unit if your budget stretches that far.
How do I stop a narrow hallway feeling like a tunnel?
Avoid dark carpet or runners, since designers note they act like a black river and exaggerate the tunnel effect considerably. Instead, use one continuous colour across walls and woodwork, hang a large mirror to bounce light and trick the eye on scale, and keep flooring pale wherever the layout allows.
What colours should I avoid in a hallway?
Cool, concrete-style greys tend to read as cave-like without much natural light to lift them. Very bright reds or oranges can feel overwhelming in a space you pass through quickly rather than settle into. If you’re set on a dark colour, choose one with a textured or plaster-effect finish rather than a flat matt, which can end up looking rather lifeless.
How wide does a hallway actually need to be?
UK guidance for accessible corridor widths sits around 900mm to 1,200mm depending on doorway width and the angle of approach, while US residential code sets a 36-inch, or 910mm, minimum. Many original Victorian hallways sit right at or below this range, which explains exactly why they can feel tight by modern standards.
What’s the best radiator style for a narrow period hallway?
A slim 2-column cast iron radiator, with some models sitting at around just 100mm deep, delivers genuine period character and solid heat output without eating into the usable width the way a bulkier 4-column model inevitably would.
Can I mix modern and Victorian styling without it looking wrong?
Absolutely, and most successful period hallways do exactly this rather than sticking rigidly to one era. The trick is restraint: let one or two original features, cornicing, a fireplace, original tiles, do the heavy lifting for authenticity, then bring in contemporary lighting, art, or furniture that complements rather than competes with what’s already there.
How do I keep a high-traffic hallway looking good for longer?
Use a wipeable, high-quality matt finish on the walls and a more durable eggshell finish on stairs, skirting, and woodwork, since these areas take by far the most daily scuffing. Runners and rugs also genuinely extend the working life of whatever original flooring sits underneath them.