25 outdoor entryways to transform your outdoor arrival into a composed, lasting first impression
The outdoor entryway is not a decorative afterthought. It is the architectural preface to the home. Every arrival should feel intentional, guided by proportion, framed by light, and grounded in materials that age with dignity. A well-composed entry sequence considers the width of the path, the rhythm of steps, the height of planting, the scale of the door, and how evening illumination reshapes the facade. When these elements are resolved together, the approach feels calm and assured rather than improvised.
This article is for homeowners planning a considered renovation and for renovators who want confident direction before speaking to contractors. If you are reworking a tired frontage, extending a porch, refining lighting, or redefining your pathway layout, the ideas ahead will help you approach the project strategically rather than cosmetically.
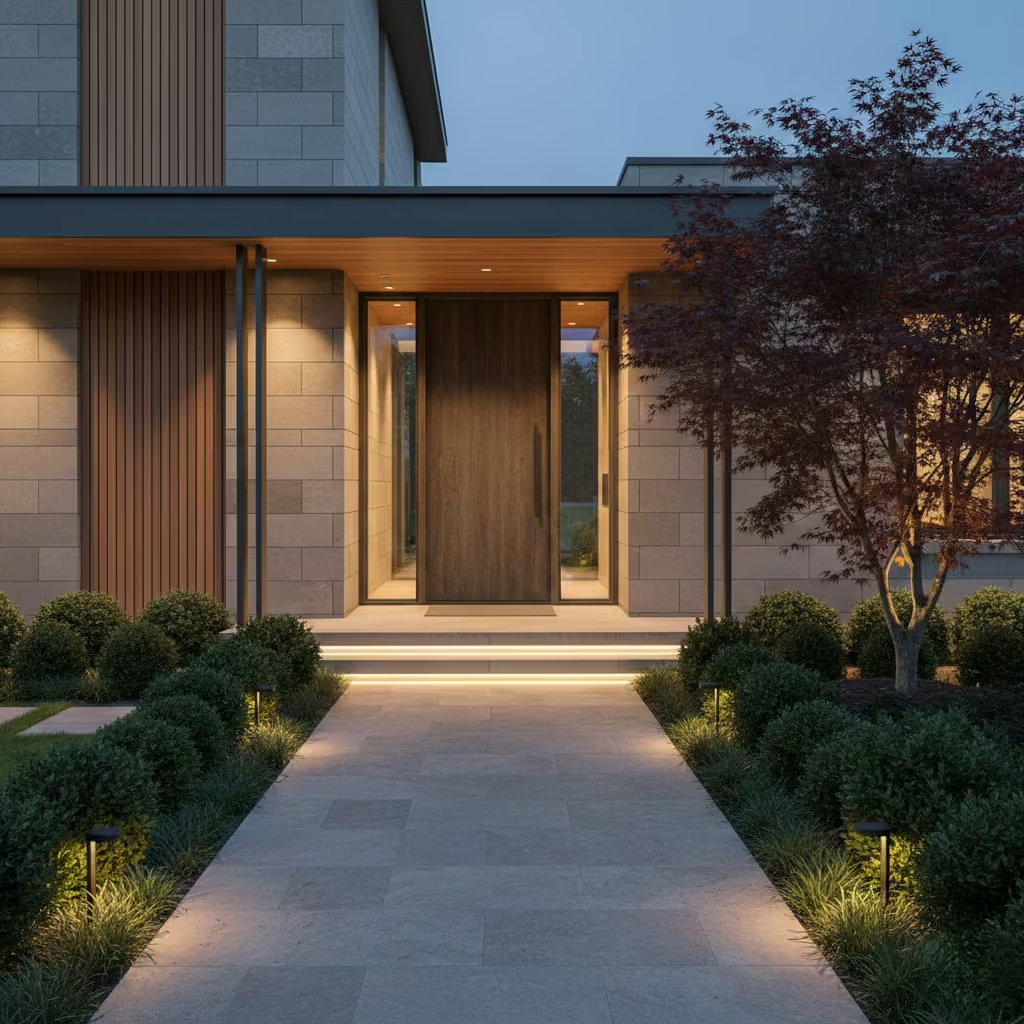
I will share practical measurements in both metric and imperial, material performance insights, realistic budget positioning, and clear pros and cons for each concept. These are drawn from real residential projects I have designed and overseen, where durability, usability, and long-term visual balance mattered just as much as first impressions.
Design Principles Primer
Every successful outdoor entry begins with scale and proportion. The path must relate to the width of the facade and the stature of the user. In residential work, I rarely specify a primary approach narrower than 1,000 mm to 1,200 mm (3 ft 3 in to 4 ft). This allows two people to walk comfortably side by side and prevents the entry from feeling compressed. Sightlines also matter. The front door should be visually legible from the street. If it disappears behind planting or structural elements, the arrival sequence loses clarity. I often align paving joints or introduce a subtle material change to guide the eye forward.
Material behaviour is equally critical. Stone, timber, porcelain, and concrete all weather differently. Honed limestone softens over time. Hardwood silvers if left untreated. Porcelain maintains colour but can feel visually flat if overused. I select finishes based not only on appearance at installation but on how they will mature over five to ten years. Maintenance access must be considered from the outset, particularly for drainage channels and in-ground lighting.
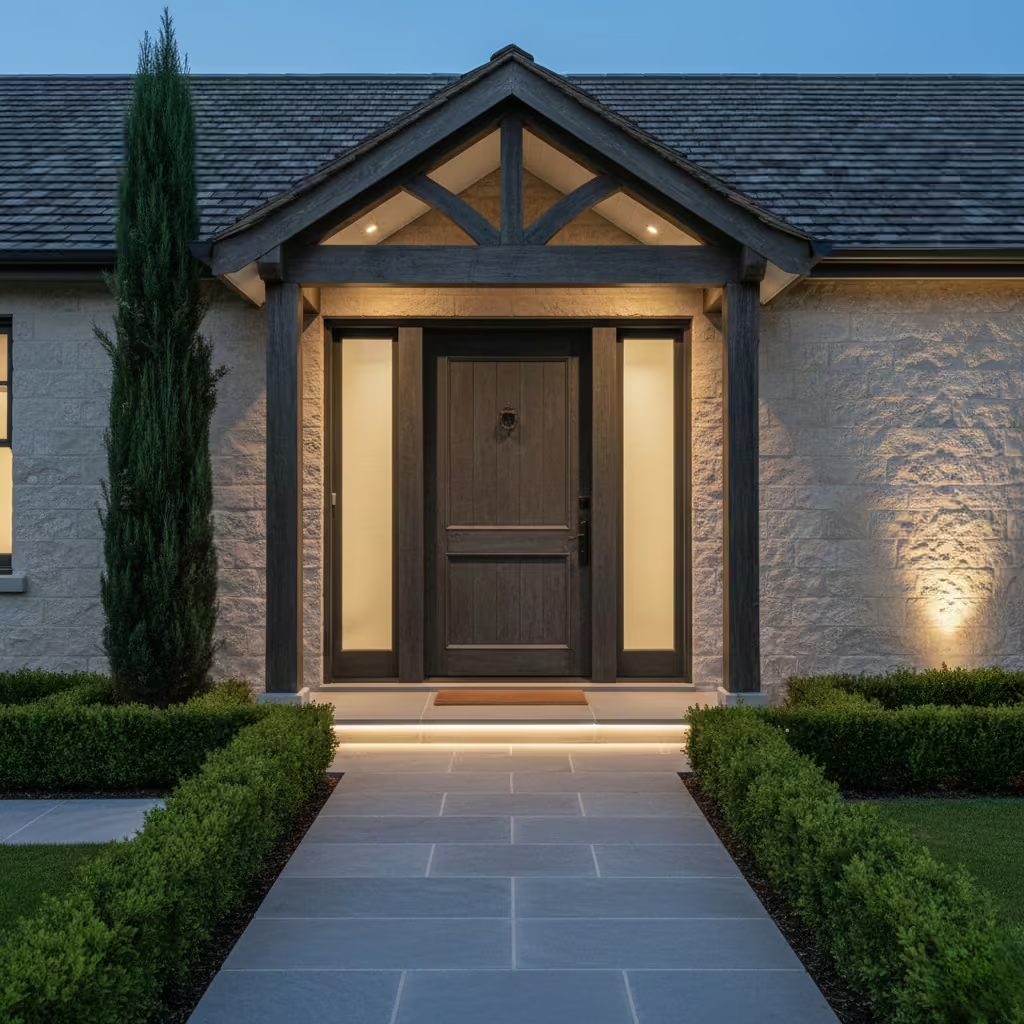
Movement and approach define experience. Paths should follow intuitive circulation rather than decorative geometry. Thresholds must manage water ingress without creating trip hazards. A clear visual anchor, often the door, a specimen tree, or a pendant light, stabilises the composition.
Lighting should follow hierarchy. Step illumination ensures safety. Path lighting supports navigation. Accent lighting enhances architecture. I aim for layered, warm-toned lighting around 2,700K to create depth without glare, always prioritising safe footing and controlled visibility.
25 outdoor entryway ideas
A well-designed entryway is never the result of a single feature. It is the layering of structure, material, light, and landscape working in measured proportion. The following 25 outdoor entryway ideas move from architectural interventions to subtle refinements, each grounded in real residential application. Some focus on spatial composition and circulation, others on material integrity, planting structure, or lighting hierarchy. Together, they demonstrate how considered detailing can transform a simple approach into a composed arrival sequence that feels confident, enduring, and intentionally designed.
Approach and pathway
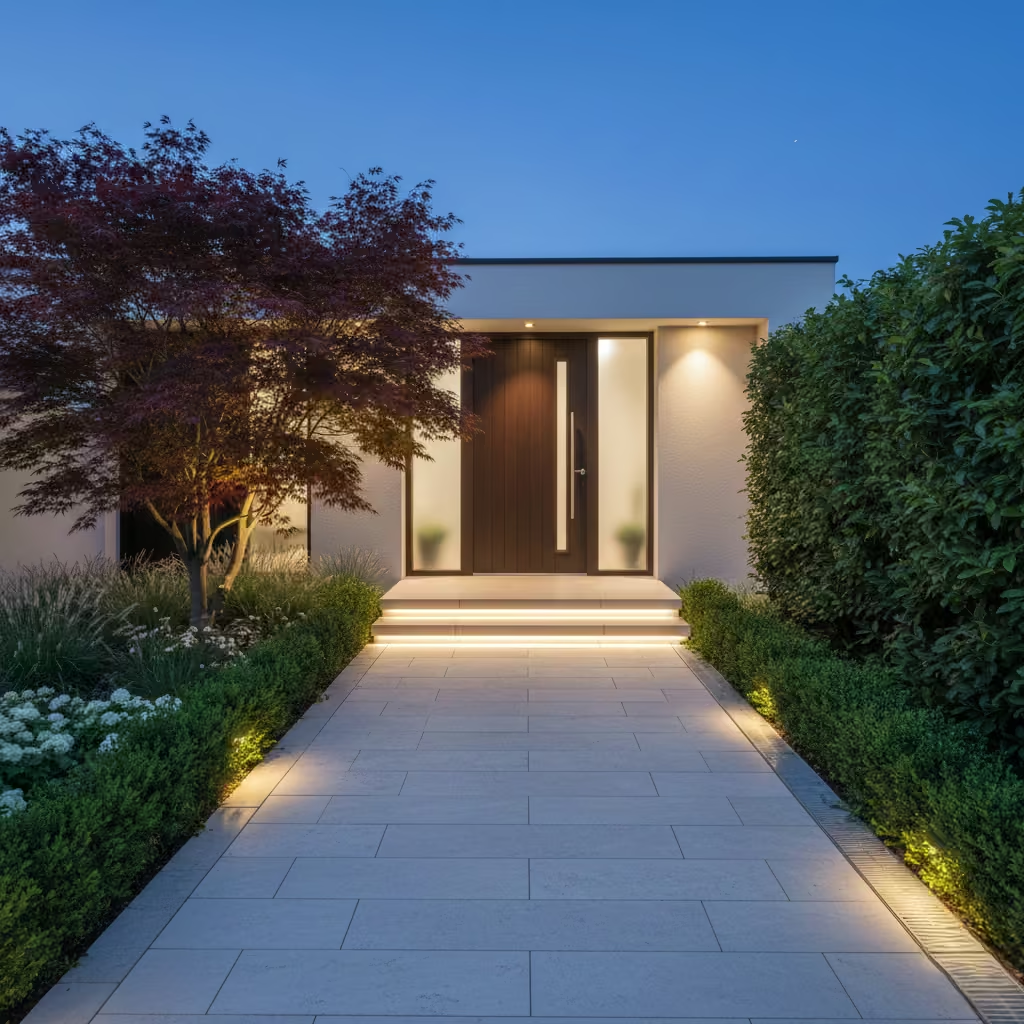
The approach sets the psychological tone of arrival before the door is even reached. Pathway design is not simply about connecting pavement to threshold. It defines movement rhythm, establishes proportion against the façade, and frames the home within its landscape context. When I design approach routes, I prioritise intuitive circulation, comfortable width, drainage logic, and visual alignment with the front door. A well-composed pathway quietly guides guests forward while reinforcing the architectural character of the property.
Graded Tactile Path with Material Contrast
A graded tactile path introduces subtle rhythm to the arrival experience. Rather than laying continuous paving, I often break the surface into measured stepping runs of 300–350 mm (12–14 in), allowing the body to move naturally in cadence with the ground plane. A clear path width of 1.0–1.2 m (3 ft 3 in–4 ft) ensures comfort without visual heaviness. This proportion feels generous enough for two people to walk side by side, yet disciplined enough to maintain architectural clarity.
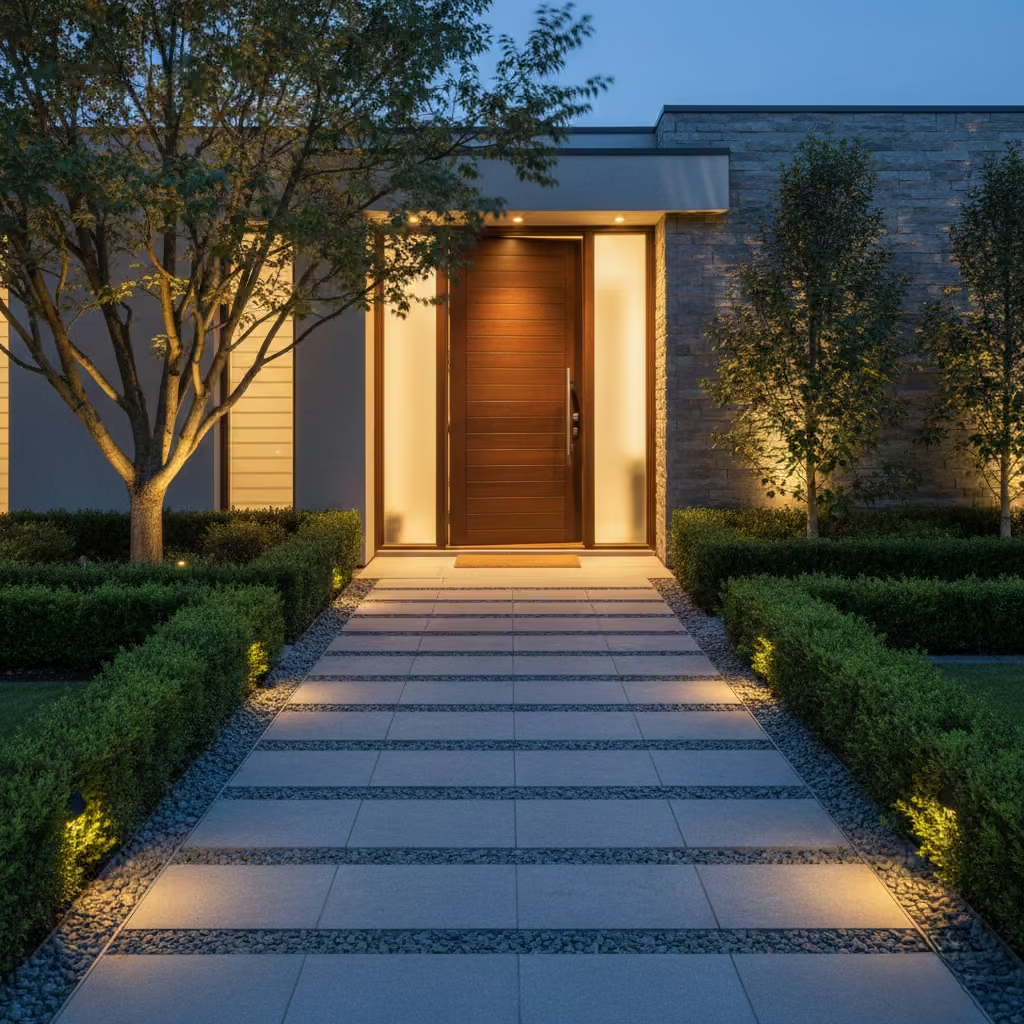
Material contrast elevates the composition from functional to intentional. I typically pair textured natural stone with recessed gravel insets, using the stone for structural stability and the gravel to create permeability and visual softness. The tactile shift underfoot becomes especially valuable in wet conditions. Textured finishes improve slip resistance, while gravel margins assist drainage and reduce surface pooling near thresholds.
Pros
- Durable and structurally robust when installed over a compacted subbase of 150–200 mm (6–8 in).
- Improved traction in damp climates.
- Strong visual guidance toward the front door.
Cons
- Higher installation cost due to excavation depth and edging detail.
- Gravel insets require periodic maintenance to prevent migration.
On a narrow town house renovation, I specified a 1.1 m (3 ft 7 in) bluestone path with precise 300 mm (12 in) stepping runs. Before intervention, the original poured concrete surface felt visually flat and became slippery in rain. After introducing graded stone and fine gravel joints, the entire approach felt composed and secure. The subtle rhythm of the paving naturally directed the eye toward the front door, reinforcing a sense of intentional arrival. What changed was not just the surface, but the emotional tone of coming home.
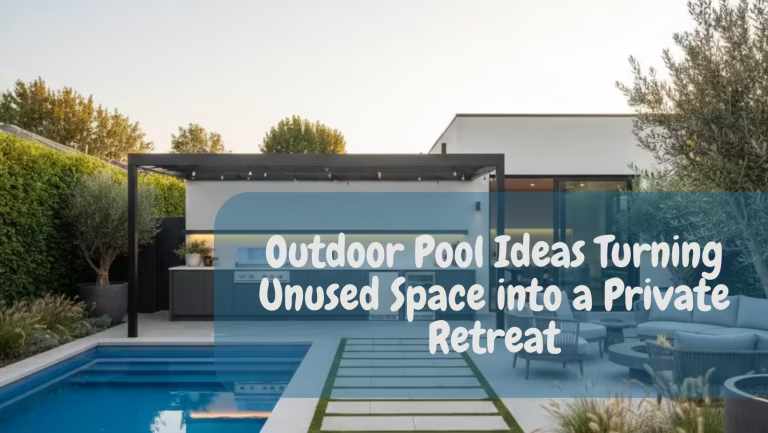
Stepping Stones Across Planted Lawn (Informal Route)
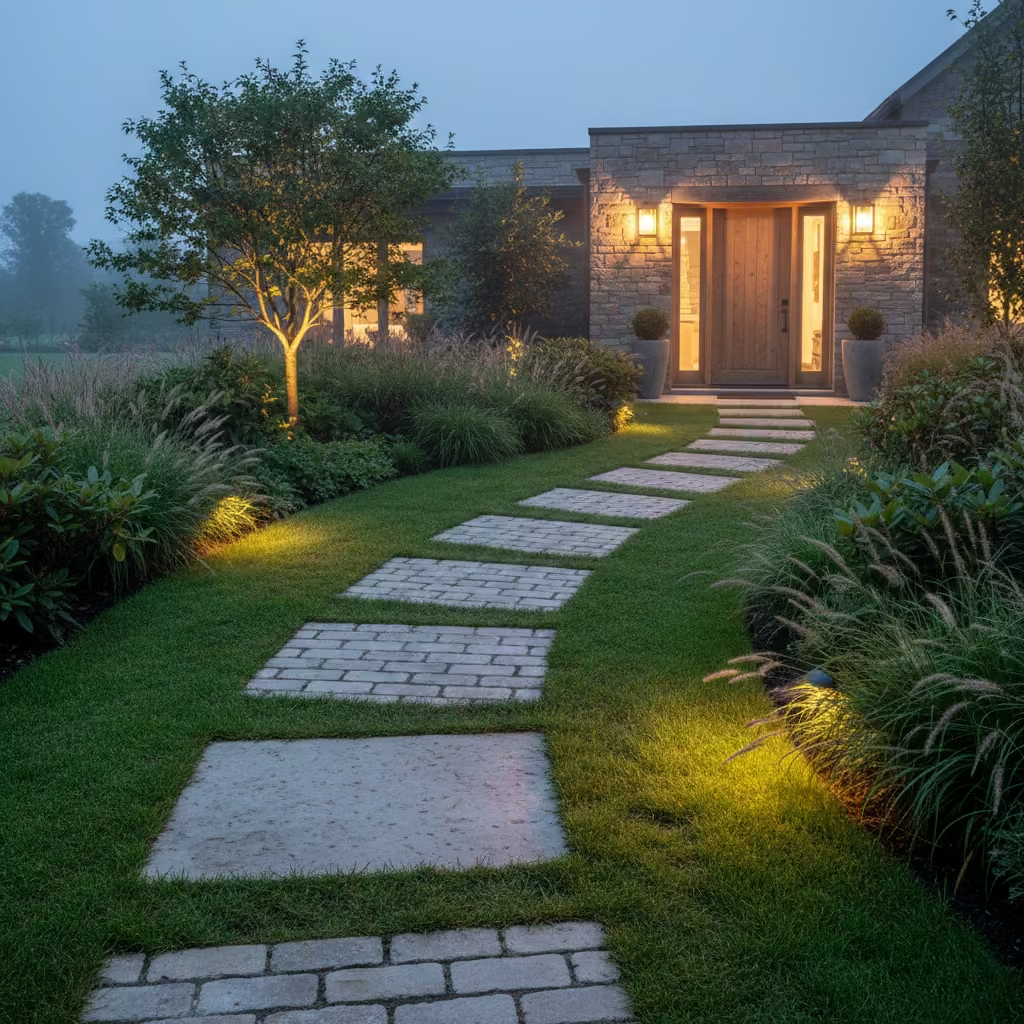
Stepping stones across a lawn create a softer, more humanised arrival experience. This approach is not about rigid geometry but about allowing the home to feel rooted within its landscape. I often use this idea where the property sits quietly behind a garden rather than presenting a dominant street façade. The informal rhythm of stepping stones slows movement slightly, encouraging a gentle transition from public space to personal space.
There is something quietly comforting about walking across grass toward a home entrance. The sensation of solid stone underfoot, framed by living green, creates a subtle dialogue between permanence and nature. For many homeowners, this becomes more than a pathway; it becomes a daily ritual of arrival and departure that feels calm and personal.
Measurements and Spatial Layout
- Stepping stone size: 450–600 mm (18–24 in) square is ideal for residential scale.
- Spacing between centres: 400–500 mm (16–20 in) supports natural walking rhythm.
- Path width should visually align with door opening width for balance.
I prefer spacing stones slightly closer on uphill approaches to reduce physical effort and improve safety perception.
Material Selection
- Sawn limestone provides refined texture and long-term durability.
- Reclaimed setts add character and historical depth, particularly suitable for period-style homes.
Avoid overly polished stone; a lightly textured surface ages more gracefully and improves traction during dew or rain.
Pros
- Creates an organic, landscape-integrated arrival sequence.
- Low visual impact keeps garden space feeling open.
- Allows seasonal grass movement around stones.
- Suitable for compact or medium frontage gardens.
Cons
- Grass edges require trimming and occasional joint cleaning.
- Snow, leaf accumulation, or soil movement may affect alignment over time.
- Not ideal for heavy pedestrian traffic or wheelchair access.
Real-Life Application Insight
In one suburban residential project, I installed stepping stones on a 20 mm (¾ in) sand bedding layer placed above a permeable crushed-stone subbase. This structure allowed rainfall to filter naturally rather than pooling around the stone edges. Before installation, the lawn path became muddy during spring storms. After intervention, the route remained visually light while offering stable footing.
What I value most about this design is how it transforms routine movement into a small moment of reflection. Walking from gate to door becomes slower, softer, and more connected to the garden’s seasonal life. It is a pathway that does not shout for attention but quietly supports the feeling of home.
Linear Paved Runway (Minimal, Modern)
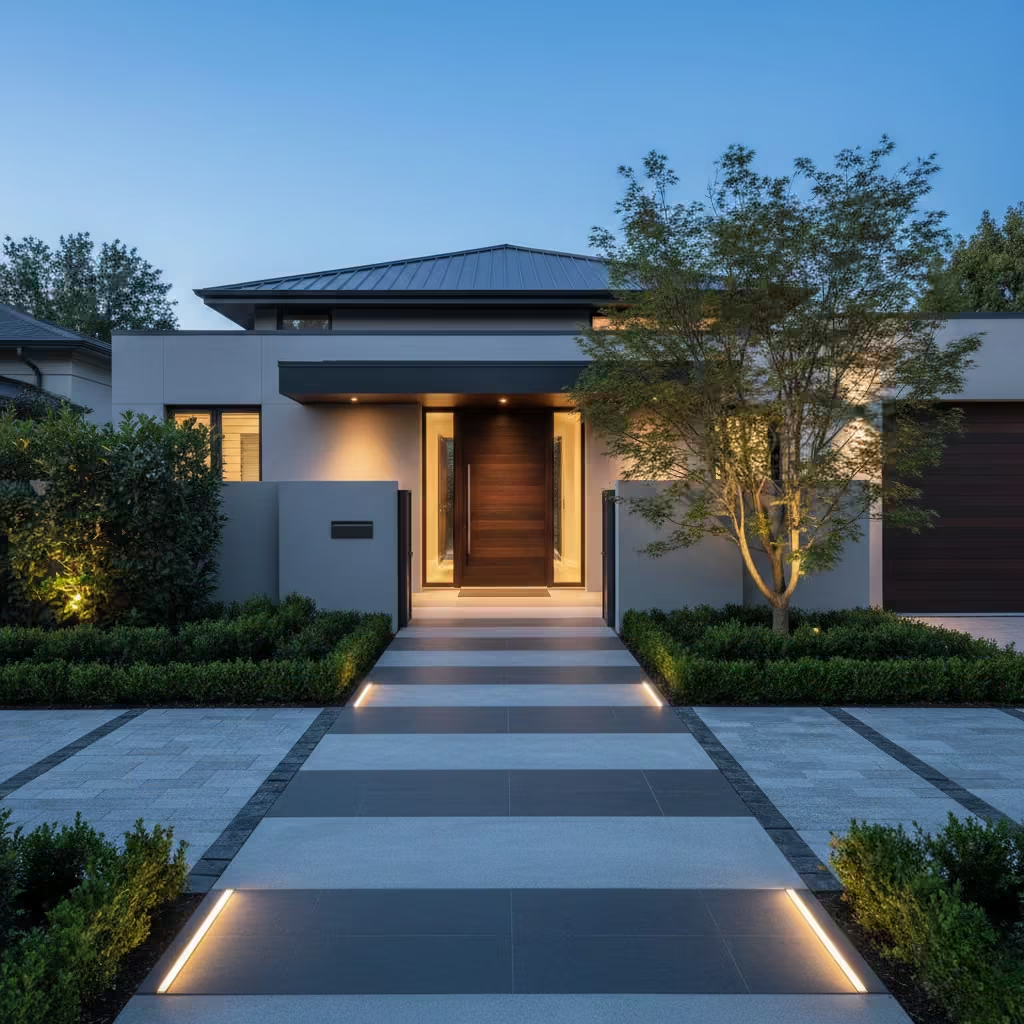
A linear runway approach speaks the language of calm confidence. It removes visual noise and allows architecture itself to become the main character. In modern residential design, I often use this idea when the façade carries strong proportion, clean material expression, or large window openings.
There is a quiet dignity in walking along a straight, resolved surface toward the home. Unlike decorative pathways that distract the eye, a linear runway supports clarity of thought and movement. It gives the arrival experience a sense of certainty, almost like stepping onto a well-composed architectural stage.
For many homeowners, this style suits a lifestyle that values order, simplicity, and long-term visual stability rather than seasonal ornamentation.
Measurements and Spatial Composition
- Central strip width: 900–1,200 mm (36–48 in).
This dimension feels comfortable underfoot while preserving minimalist character. - Planting bands on either side: 400–800 mm (16–32 in) depending on garden scale.
- Surface fall gradient: 1–2% away from the building to manage rainfall naturally.
I prefer slightly wider runways for family homes because they feel psychologically more welcoming when multiple visitors approach together.
Material Choices
Poured Concrete
- Offers monolithic visual continuity.
- Works beautifully with contemporary architecture.
- Requires careful control joints to prevent cracking.
Long-Format Porcelain Pavers
- Excellent durability and colour stability.
- Low water absorption and easy cleaning.
- Creates a refined, almost textile-like surface impression.
Choose matte or lightly textured finishes; highly glossy surfaces can feel visually distant and are less practical in wet climates.
Pros
- Strong modern architectural identity.
- Easy wheelchair and stroller access without level changes.
- Simplifies maintenance compared with fragmented paving.
- Creates a powerful visual axis from street to door.
Cons
- Can feel cold or institutional if planting is neglected.
- Requires disciplined material detailing and edge definition.
- Installation tolerances must be precise.
Real-Life Application Insight
In one renovation project, I introduced a long-format porcelain strip roughly 1.1 m (3 ft 7 in) wide running from gate to threshold. The client originally requested a decorative garden path, but the property façade was already visually strong. The linear runway anchored the architecture rather than competing with it.
The added benefit was accessibility. The smooth, continuous surface allowed wheelchair movement and pram access without ramps or complicated level transitions. What mattered most was not only function but dignity of movement. Visitors felt the approach was effortless.
When sunlight touched the porcelain surface in the afternoon, the path reflected a soft, restrained glow, reinforcing the home’s calm modern character. The experience of arriving became simpler, quieter, and strangely reassuring. That is the power of disciplined minimalism in residential landscape design.
Winding Gravel Alley with Planted Edges
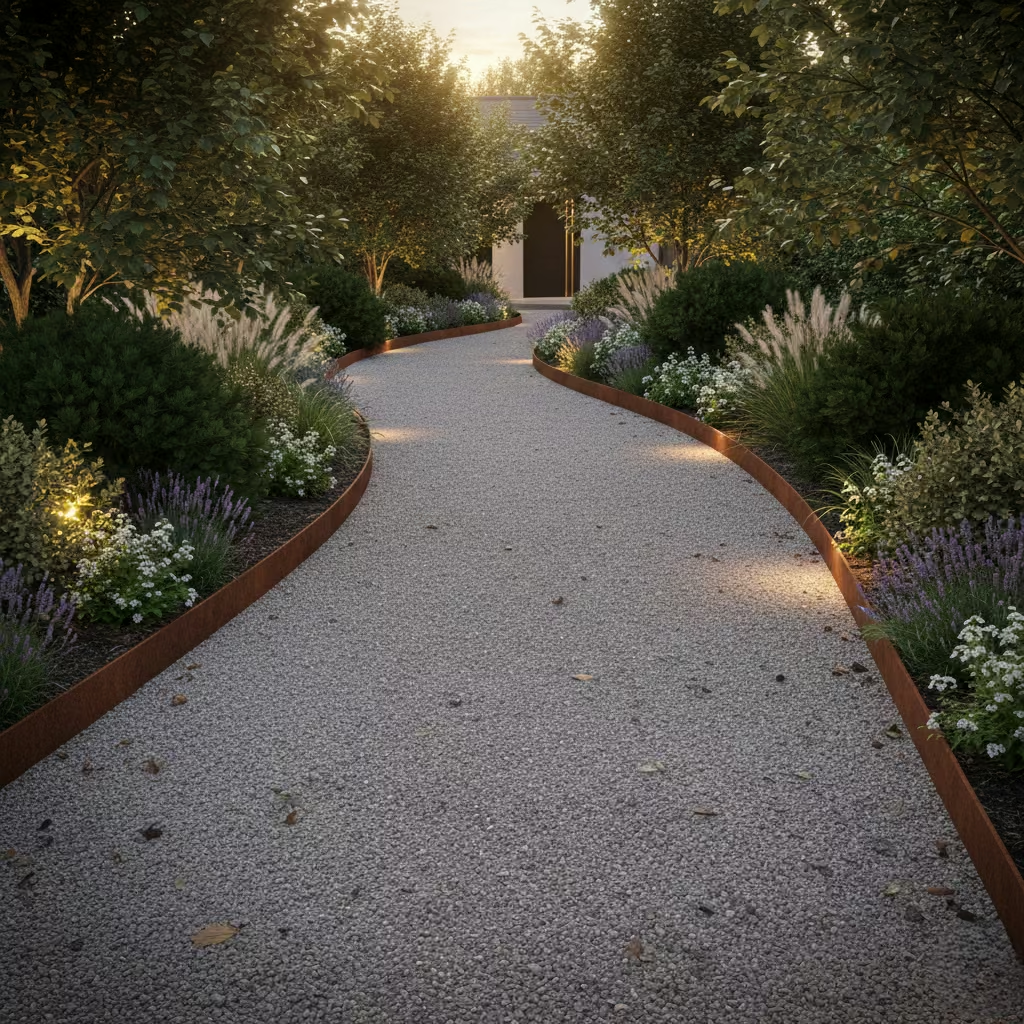
A winding gravel alley carries a gentle sense of discovery. Unlike rigid, straight approaches, the curved movement encourages a slower, more thoughtful arrival. I often recommend this design where the garden is intended to feel lived-in rather than formally composed.
There is something deeply human about walking along a soft, slightly resistant surface like gravel. The quiet crunch underfoot creates a sensory connection to the landscape. For many homeowners, this becomes the moment where the outside world begins to soften, stress begins to release, and the home feels psychologically closer.
The planted edges are equally important. They frame movement the way natural borders frame memory. Evergreen structure, low flowering shrubs, or fine grasses can turn a simple alley into a living corridor that changes subtly through seasons.
Measurements and Spatial Comfort
- Clear pathway width: 1.0–1.2 m (3 ft 3 in–4 ft).
This allows comfortable walking without feeling constrained by planting. - Edging depth: 150 mm (6 in) is generally sufficient to hold gravel mass.
- Curve radius: Avoid very tight bends. I prefer curves that feel natural to human stride rather than decorative geometry.
The path should never feel forced. Even a modest garden benefits when movement feels intuitive.
Material Selection
Pea Gravel
- Comfortable acoustic character underfoot.
- Excellent surface drainage during rainfall.
- Affordable and widely available.
However, gravel must be well graded and installed over a compacted subbase to prevent sinking.
Edging Options
- Galvanised steel edging provides clean modern restraint.
- Natural stone edging suits traditional landscapes.
- Corten steel can mature beautifully as it oxidises.
The key is containment. Gravel without boundary structure slowly escapes into lawn or planting beds.
Pros
- Naturally manages surface water.
- Softens visual transition between street and home.
- Supports biodiversity in planting margins.
- Feels relaxed and welcoming.
Cons
- Requires periodic topping up of gravel.
- Leaf litter removal can be time consuming in autumn.
- Snow clearance is less efficient in cold climates.
- Wheelchair movement is not ideal.
Real-Life Application Insight
On a sloping suburban frontage, I used galvanised steel edging with a 150 mm (6 in) vertical retention profile. The site originally suffered from gravel migration during heavy rain. The containment edge stabilised the surface while maintaining the garden’s informal character.
The most meaningful outcome was emotional rather than technical. The winding alley slowed the approach, allowing visitors to experience planting fragrance, leaf movement, and light shifting across gravel. Homecoming became less about reaching the door quickly and more about transitioning mentally from street life into private space. That quiet journey is often what makes a house feel like a home.
Integrated Drainage Channels Under Stepping Pavers
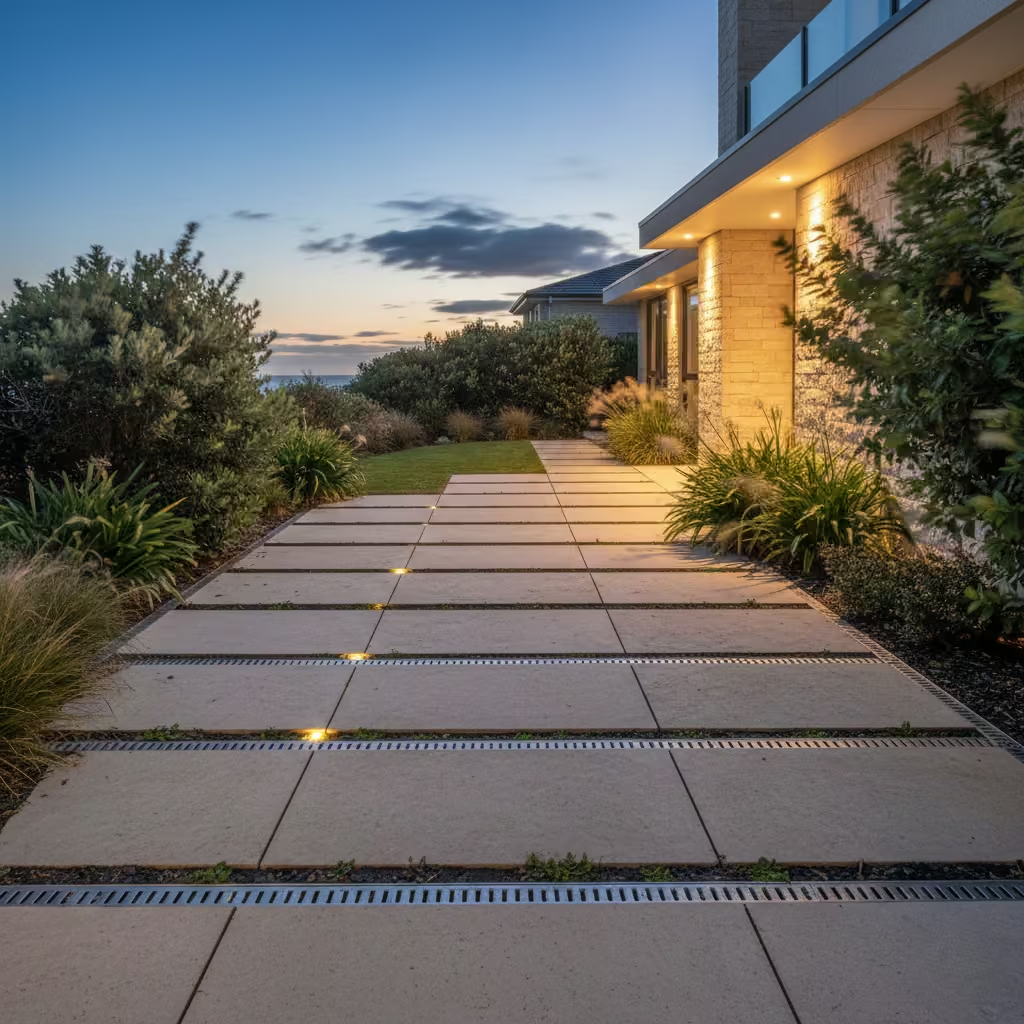
Water management is often the quiet hero of good entryway design. Integrated drainage channels beneath stepping pavers protect the home not only structurally but emotionally, because a dry, stable arrival surface creates subconscious reassurance. I treat drainage as an invisible architectural partner rather than a technical afterthought.
There is a certain dignity in an entry that remains clean after rain. When surface water disappears naturally, the garden and threshold feel composed. Homeowners rarely notice drainage systems when they work well, yet they feel their presence in the comfort of walking without hesitation after a storm.
This solution is especially valuable in regions with seasonal rainfall or coastal exposure.
Technical Measurements and Layout
- Channel width: 100–150 mm (4–6 in).
This allows adequate water capture without visually dominating the paving. - Recommended slope: 1–2% gradient toward the outlet point.
This is enough to move surface water while keeping walking surfaces comfortable. - Paver clearance above channel: Typically 3–6 mm (1/8–1/4 in) to avoid tripping risk.
I always coordinate drainage alignment with the natural fall of the site rather than forcing artificial grading.
Material Selection
Stainless Steel Slot Drains
- Premium durability and corrosion resistance.
- Clean, minimalist appearance suitable for modern homes.
- Higher upfront cost but excellent long-term performance.
PVC Drain Channels with Grating
- More economical solution.
- Suitable where the channel is partially hidden by planting or stone joints.
Grating design should balance safety and debris resistance. Narrow slot openings reduce leaf blockage but require careful fabrication tolerance.
Pros
- Prevents puddling near the threshold.
- Protects building foundations from moisture stress.
- Maintains clean visual continuity of the entry sequence.
- Supports accessibility during rain.
Cons
- Requires accurate site surveying before installation.
- Outlet connection must be planned early in construction.
- Periodic debris clearing is necessary.
Real-Life Application Insight
On a coastal residential project, I integrated a stainless-steel slot drain directly behind the threshold line. The property experienced strong wind-driven rain, which previously collected at the door step.
After installation, rainwater was guided silently beneath the stepping stone layout into a concealed drainage outlet. The entrance remained visually uninterrupted. The homeowner later told me that arriving home during storm weather felt unexpectedly calm, because they no longer had to step over wet patches or worry about slippery surfaces.
Good drainage design is rarely celebrated, but it protects the daily emotional experience of coming home. When executed well, it disappears into the architecture while quietly preserving comfort, safety, and long-term material health.
You May also Like: 25 Creative Ways to Transform Your Spanish Reading Nook This Weekend
Formal Colonnade or Covered Approach
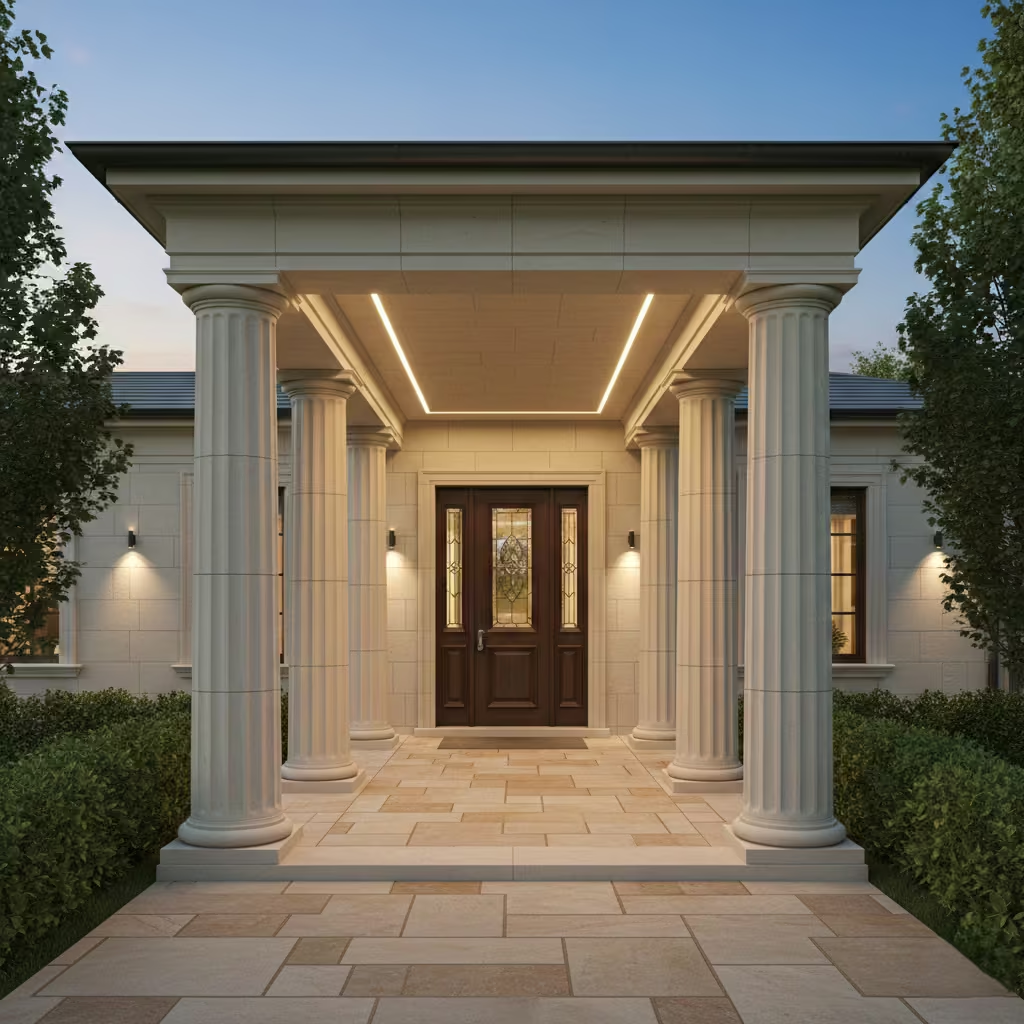
A colonnade transforms an entryway from a simple transition into a ceremonial experience of arrival. I use this design when a home deserves gravity, rhythm, and architectural dignity. The repetition of columns creates a quiet procession that guides visitors toward the door while offering shelter and spatial clarity.
There is something psychologically reassuring about walking beneath a covered structure. Rain, wind, or strong sunlight becomes less intrusive. The body feels protected even before entering the house. Many homeowners are surprised by how much comfort increases simply by adding overhead structure.
This approach works especially well for homes where the façade is visible from the street and benefits from a stronger vertical articulation.
Measurements and Proportional Logic
- Minimum clearance height: 2.1–2.4 m (7–8 ft).
Lower ceilings feel restrictive; higher spaces may lose human intimacy. - Column spacing: Typically 2.0–3.5 m (6.5–11.5 ft) depending on façade rhythm and structural loading.
- Porch depth: I prefer 1.2–1.8 m (4–6 ft) to allow comfortable standing, door opening, and light furniture if needed.
Column dimensions should respond to the house scale rather than follow a universal template.
Material Selection
Painted Timber Columns
- Warm residential character.
- Cost-effective construction.
- Requires weather sealing and periodic maintenance.
Stone or Masonry Piers
- Superior durability and long-term prestige appearance.
- Higher structural cost and foundation requirement.
Roofing above the colonnade should include concealed guttering to maintain visual purity.
Pros
- Creates a strong, memorable arrival identity.
- Provides weather protection during unlocking and entry.
- Enhances façade depth perception.
- Supports lighting installation.
Cons
- Requires structural design approval in many regions.
- Higher upfront construction cost.
- Maintenance access for roofing and joints is necessary.
Real-Life Application Insight
On a compact suburban frontage, I introduced a shallow colonnade with approximately 1.5 m (5 ft) depth and 2.3 m (7 ft 6 in) clearance. The client initially worried that the structure might overwhelm the small garden.
After construction, the opposite occurred. The colonnade visually pulled the façade forward, creating an illusion of greater house depth. During heavy rain, visitors could stand under cover while searching for keys or waiting for the door to open. The experience felt dignified rather than hurried.
The most satisfying outcome was the way light moved across the column surfaces in late afternoon. Shadows became part of the architecture, giving the home a calm, established character that felt settled into its landscape rather than placed upon it.
Threshold & Door Treatments
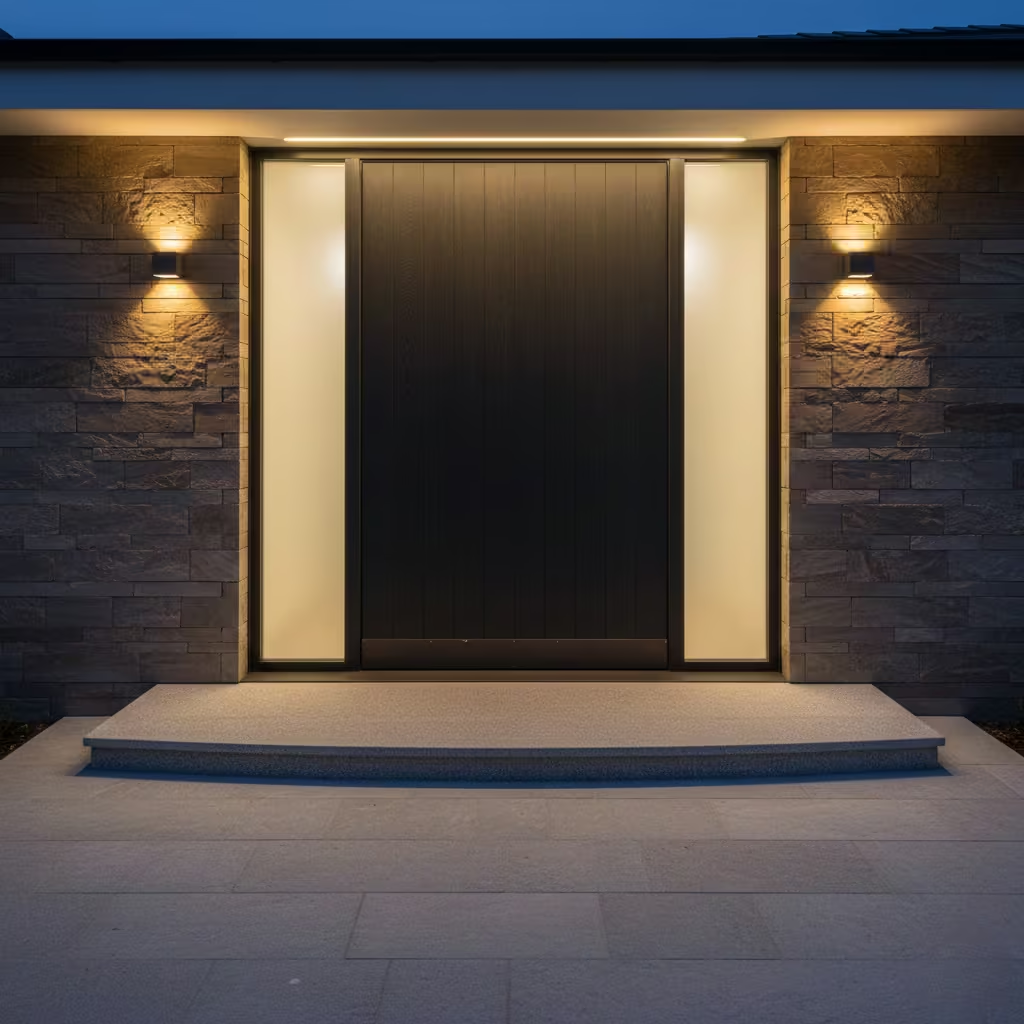
The threshold and door are the emotional and architectural focal point of arrival. While pathways and landscape structure guide movement, the door marks the moment where public space quietly transforms into private life. I approach threshold design as a balance between practicality, safety, and visual identity. A well-considered threshold controls water ingress, reduces trip risk, and strengthens the architectural character of the façade. Door treatments should never feel ornamental for their own sake; instead, they should reinforce material continuity, proportion, and the quiet confidence of the home’s design language.
You May also Like: Outdoor Tiles for Floor Stylish Patio, Garden and Terrace Flooring Ideas
Statement Door in Contrasting Finish
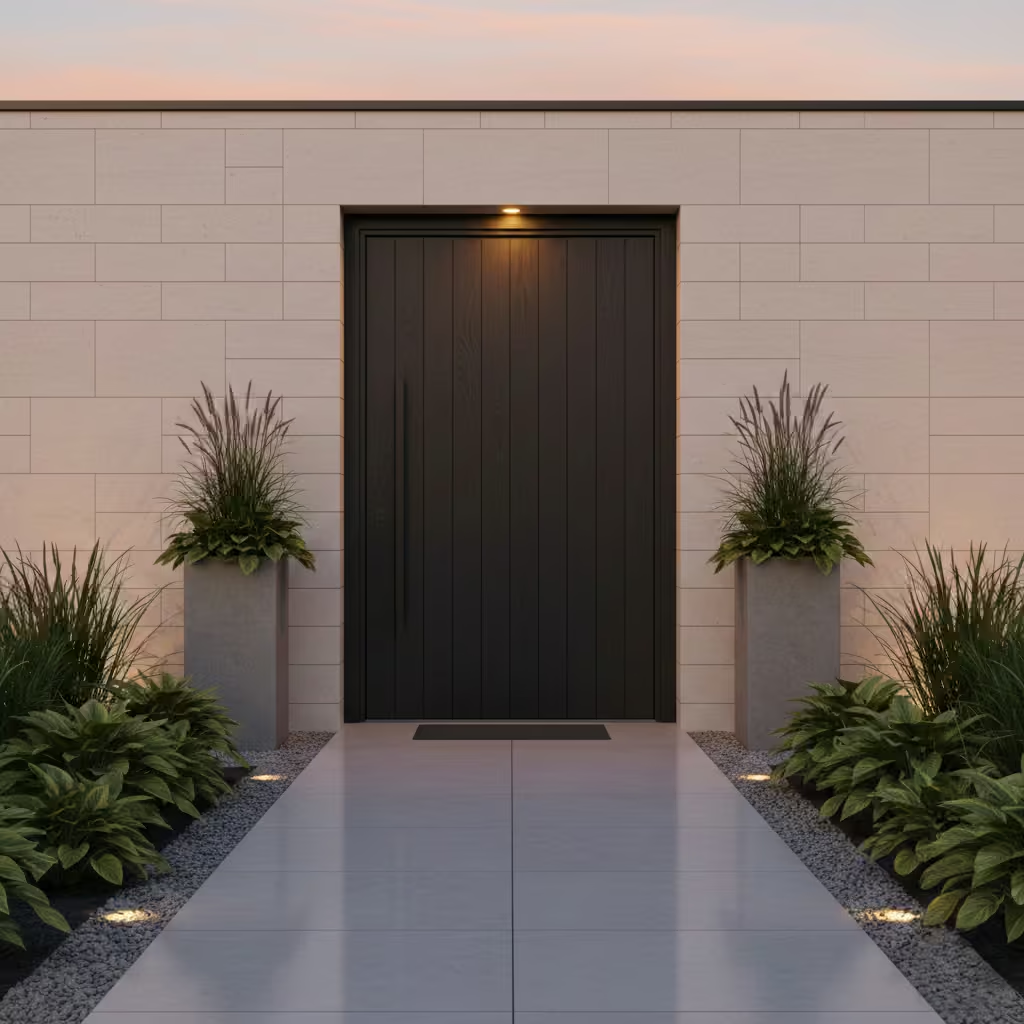
A statement door is often the simplest way to give a home confidence. When chosen carefully, contrast finish doors act as architectural punctuation rather than decoration. I prefer this approach when the façade palette is light, neutral, or visually soft, because the door becomes the moment of recognition in the arrival sequence.
There is something psychologically grounding about seeing a distinct entrance when approaching home. The door should feel deliberate, not decorative. It should signal stability, warmth, and permanence. Homeowners often tell me that a well-chosen entry door makes the house feel “ready” to welcome them after long or stressful days.
Measurements and Spatial Scale
- Standard residential door width: 900 mm (36 in) clear opening is common.
- For premium or visually generous entrances, I recommend 1,000–1,200 mm (40–48 in).
Wider doors feel more welcoming and age better visually, especially on detached homes.
Door swing direction must respect interior circulation and threshold safety. I always check wind exposure and entry clearance before finalising design.
Material Selection
Hardwood Doors
- Natural warmth and tactile richness.
- Excellent for traditional or transitional architecture.
- Must include high-quality weatherproof coating.
Powder-Coated Metal Doors
- Modern architectural clarity.
- Superior resistance to moisture and temperature fluctuation.
- Minimal maintenance when fabrication quality is high.
Dark tones such as deep charcoal, forest black, or oxidised bronze often work best for contrast.
Pros
- Creates immediate visual focus at arrival.
- Improves façade hierarchy.
- Enhances resale perception of quality.
- Works across modern and classic architectural styles.
Cons
- Premium finishes increase fabrication cost.
- Dark doors may absorb heat in very sunny climates.
- Requires precise installation to avoid air leakage.
Real-Life Application Insight
In one refurbishment project, I selected a charcoal-stained oak door for a façade finished in pale lime render. The original house lacked arrival definition, appearing visually flat from the street.
The dark timber tone created a grounding anchor point. From a distance, visitors instinctively recognised the entrance. Up close, the oak grain softened the architectural contrast, preserving warmth rather than introducing harsh modernism.
What mattered most was balance. The door did not shout for attention. Instead, it quietly held the composition together, allowing the pale facade, planting, and light reflection to frame it naturally. The client later mentioned that returning home felt more “certain”, because the entrance was always visually clear even in twilight.
You May also Like: 25 Stylish Modern Small House Exterior Ideas You’ll Love
Recessed Glazed Side-Lights for Daylighting
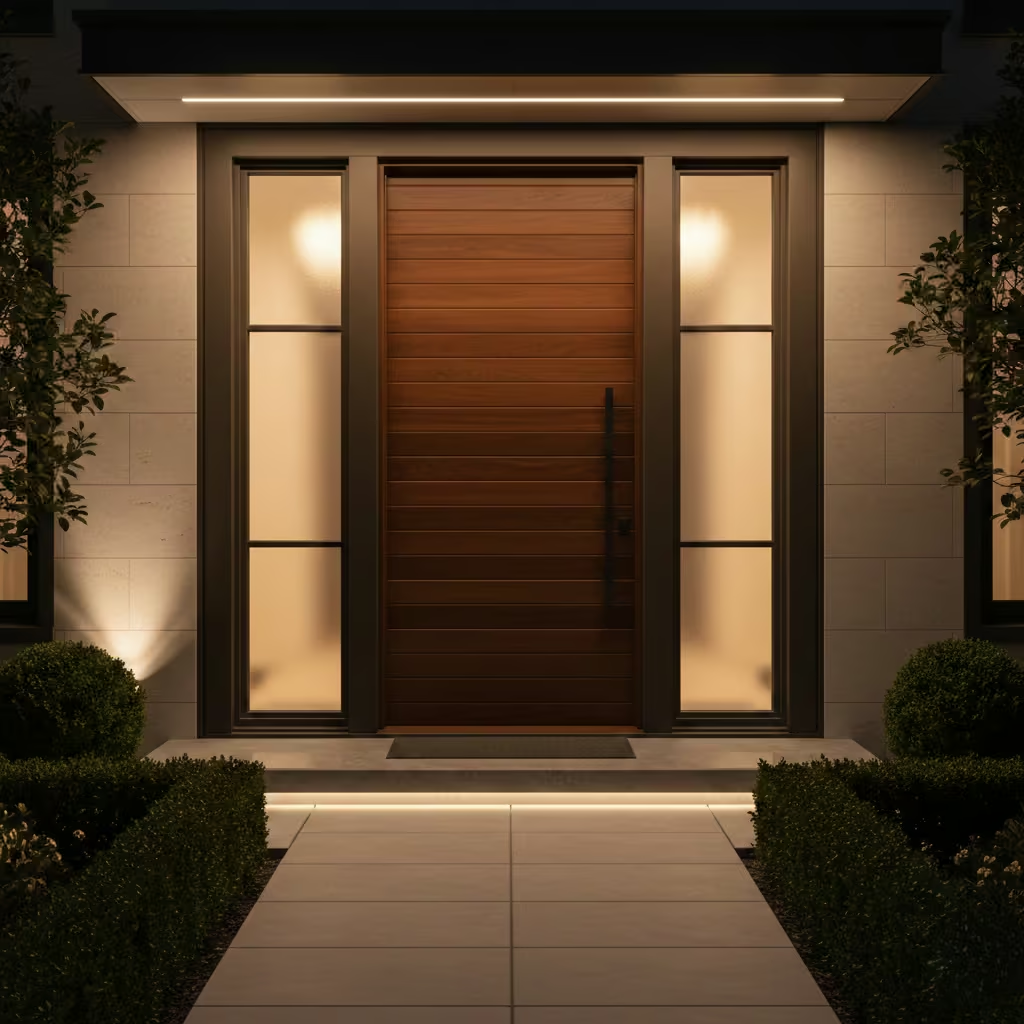
Side-lights are not merely architectural accessories; they shape the quality of life inside the home by controlling how daylight enters the entry hall. I often recommend recessed glazed panels when the interior corridor is naturally dark or when the façade needs visual refinement without adding structural volume.
Natural light at the threshold carries psychological value. Walking into a softly illuminated hall feels welcoming after evening travel or winter darkness. The goal is not maximum brightness but balanced diffusion of light that protects privacy while allowing the interior to breathe.
Recessed placement also adds depth to the doorway composition. The entrance feels slightly protected, as if the building is creating a quiet pause before opening into private space.
Measurements and Technical Layout
- Side-light width: 300–400 mm (12–16 in) is typical for residential scale.
- Height should generally align with door height for visual continuity.
- Frame setback depth: 50–100 mm (2–4 in) recess improves shadow definition.
Avoid excessively wide side-lights on narrow façades, as they can weaken structural rhythm.
Material Selection
Low-E Double Glazing
- Reduces heat transfer and improves energy efficiency.
- Maintains interior thermal comfort across seasons.
Thermally Broken Frames
- Prevent condensation formation.
- Extend frame lifespan in variable climates.
Privacy can be managed through glazing treatment rather than eliminating daylight.
Pros
- Improves interior daylight quality.
- Creates a refined architectural entrance.
- Reduces reliance on artificial lighting during daytime.
- Enhances perceived home value.
Cons
- Potential privacy exposure depending on street proximity.
- Higher installation cost than solid wall construction.
- Requires precise sealing to avoid moisture infiltration.
Real-Life Application Insight
On a residential renovation where neighbouring houses were close, I specified obscure or frosted low-iron glazing for the side-lights. This solution allowed daylight to enter the hallway while preventing direct visual penetration from the street.
The homeowner originally worried that privacy would be compromised. After installation, the entry hall felt unexpectedly calm. Sunlight filtered gently through the textured glass, creating a soft atmospheric glow rather than sharp brightness.
The most meaningful result was that the entrance felt “quietly protected”. Visitors could see light inside, suggesting life and warmth, but not the personal details of the interior. That balance is often where good residential architecture lives.
Raised Threshold Board (Timber or Stone)
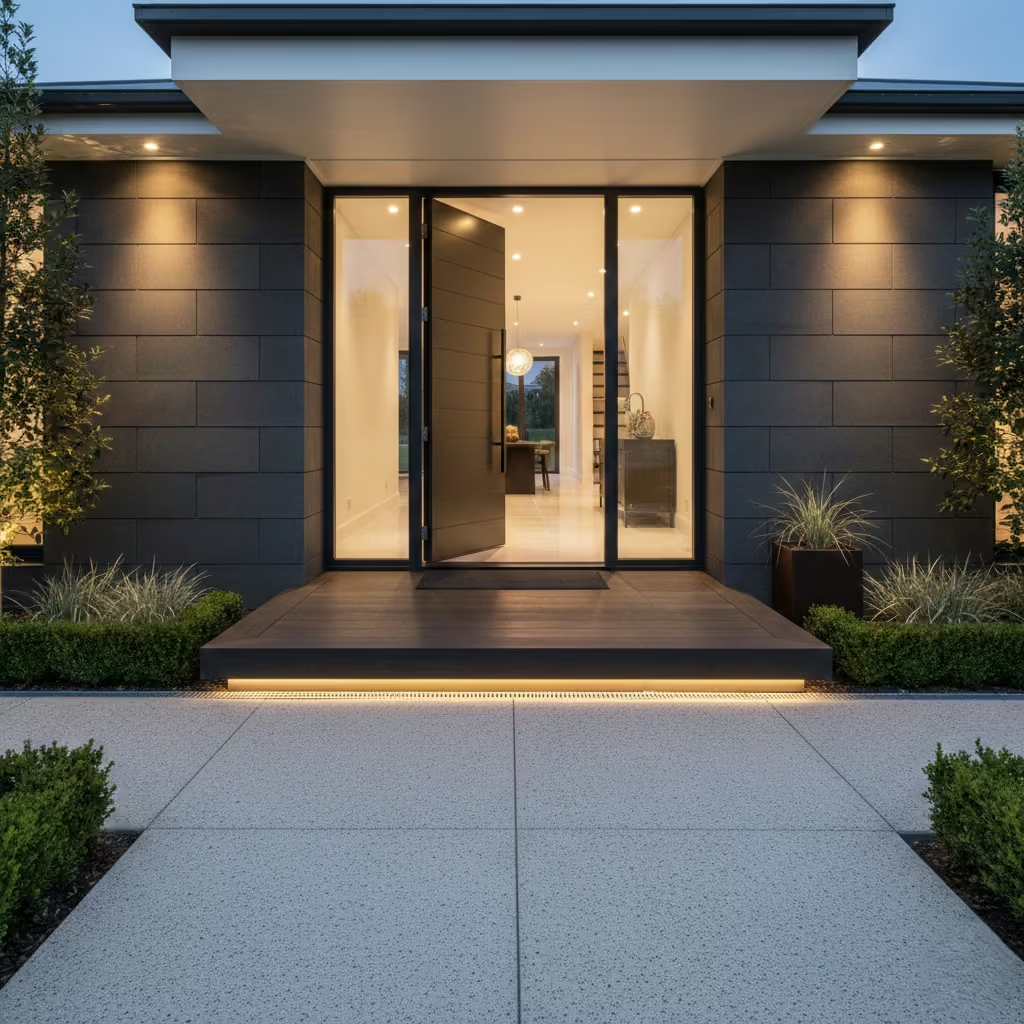
The threshold is where the exterior world politely pauses before entering the private realm of the home. A raised threshold board is a small architectural gesture that carries disproportionate functional and sensory importance. I use this detail when weather exposure, wind-driven rain, or ground moisture risk threatens the doorway.
The experience of stepping over a carefully calibrated threshold feels intentional rather than accidental. It creates a subtle moment of awareness as the body transitions from outside to inside. When executed well, the detail feels reassuring underfoot, providing tactile certainty without drawing visual attention.
In residential design, the threshold should never feel like an obstacle. Instead, it should behave like a protective boundary that supports long-term durability while preserving comfort.
Measurements and Technical Detailing
- Threshold depth: 150–200 mm (6–8 in) is generally sufficient for weather protection and structural stability.
- Height lift above exterior ground: 10–20 mm (3/8–3/4 in) is usually ideal.
- Chamfer edge: 15–20 mm (5/8–3/4 in) chamfer improves safety and softens visual hardness.
The chamfer is important because sharp vertical edges can create tripping perception even when the height difference is small.
Material Selection
Hardwood Thresholds
- Warm tactile quality underfoot.
- Suitable for traditional or transitional homes.
- Requires high-quality exterior sealants and periodic inspection.
Natural Stone Thresholds
- Superior longevity and weather resistance.
- Strong architectural presence.
- Works well with masonry or rendered façades.
I typically specify dense stone varieties with low water absorption to reduce freeze-thaw risk in colder climates.
Pros
- Improves rainwater resistance at door junction.
- Enhances structural finish quality.
- Provides a clear tactile boundary between zones.
- Supports long-term façade durability.
Cons
- If height difference exceeds recommended range, it may create accessibility challenges.
- Timber versions require maintenance coating.
- Installation accuracy is critical to avoid settlement gaps.
Real-Life Application Insight
In one retrofit project, I increased the threshold height by 12 mm (roughly half an inch) to reduce rainwater ingress during heavy storms. The change was visually invisible but functionally significant.
What I valued most was that the entry still felt natural. Visitors did not consciously notice the adjustment, yet the hallway floor remained dry even during wind-driven rain. The homeowner later remarked that opening the front door after rainfall no longer revealed damp flooring or edge staining.
This is the essence of good threshold design. It protects the house quietly, without announcing itself, while preserving the dignity of daily movement.
Covered Porch with Integrated Seating
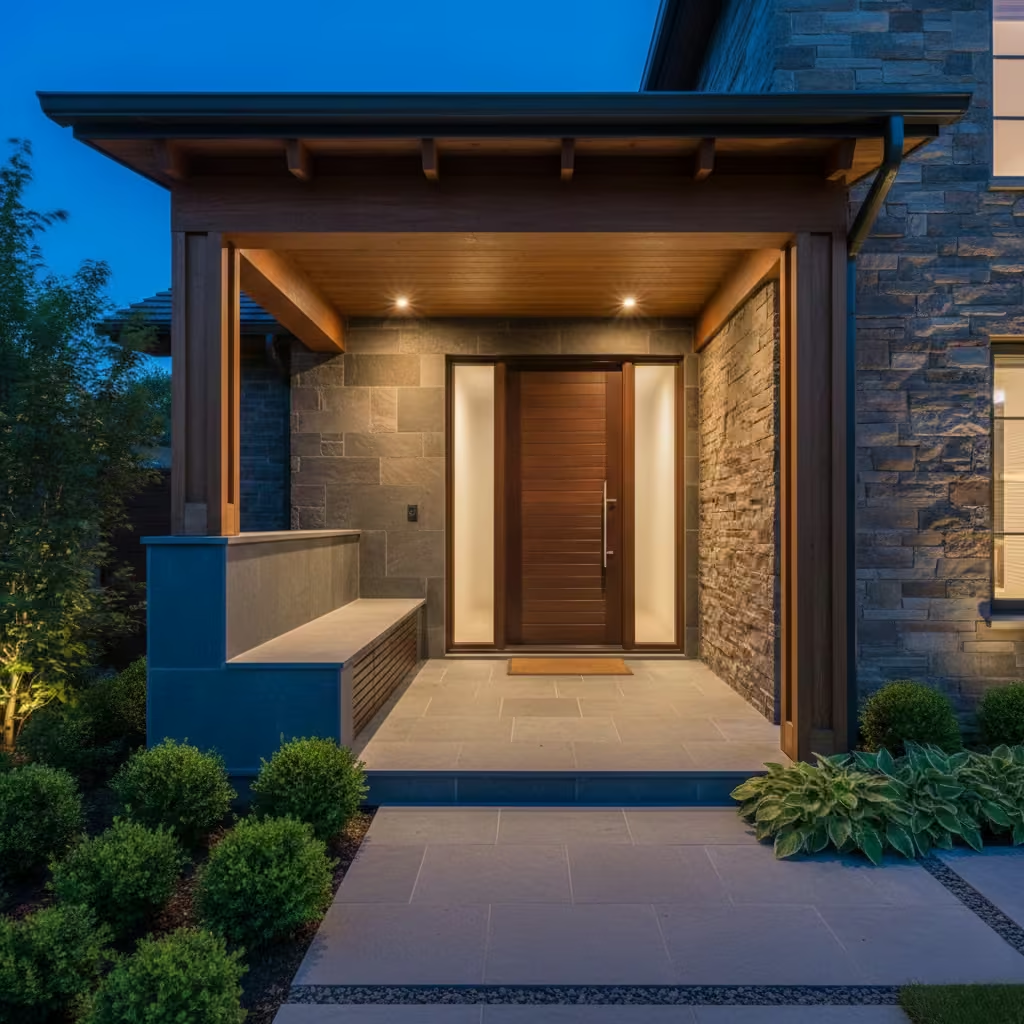
A covered porch is where architecture begins to slow down life. I often see entryways that move directly from street to door without giving the body or mind time to transition. A porch introduces a quiet interval. It offers protection from sun, wind, or rain while allowing visitors to gather themselves before entering the home.
The addition of seating transforms the porch from circulation space into lived space. People naturally want somewhere to rest for a moment, place a bag, or wait for someone to answer the door. In my experience, even a modest bench can change how a home is used socially and emotionally.
This design is particularly valuable for family homes, elderly visitors, and climates where weather can be unpredictable.
Measurements and Spatial Planning
- Minimum porch depth: 1.2–1.5 m (4–5 ft) to allow comfortable sitting posture and door operation.
- Bench seat height: 420–450 mm (17–18 in) from finished floor level.
- Seat depth: 400–450 mm (16–18 in) supports relaxed posture.
If space is limited, I prioritise bench functionality over decorative porch volume.
Overhead clearance should generally be 2.1–2.4 m (7–8 ft) to preserve human scale.
Material Selection
Timber Canopy Structures
- Warm visual character and residential familiarity.
- Works well with painted, stained, or natural finishes.
- Requires weather treatment and roof drainage integration.
Stone or Engineered Stone Seating
- Excellent durability.
- Minimal maintenance.
- Creates architectural weight and permanence.
All porch roofs should include concealed guttering where possible. Visible drainage hardware can weaken the refined appearance.
Pros
- Provides weather protection during door unlocking.
- Extends usable living space outdoors.
- Improves arrival dignity and guest comfort.
- Adds façade depth and architectural layering.
Cons
- Increases construction cost and structural complexity.
- Requires careful waterproofing detailing.
- Porch depth must be balanced against garden frontage size.
Real-Life Application Insight
In a narrow terrace renovation, I designed a shallow porch with a continuous timber bench along one side. The client initially wanted only a sheltering canopy, but space efficiency was critical.
The bench became more than seating. The hollow structure beneath was used for shoe storage, keeping the interior hallway uncluttered. Visitors could sit briefly while removing footwear before entering.
What made this successful was restraint. The porch was not oversized, not overly ornamented, and not visually dominant. Instead, it quietly improved daily living rhythm. The homeowner later shared that rainy mornings felt less rushed because there was finally a sheltered place to pause, organise belongings, and enter the house with composure. That is the real luxury of a well-designed porch.
Bold Hardware and Tactile Pulls
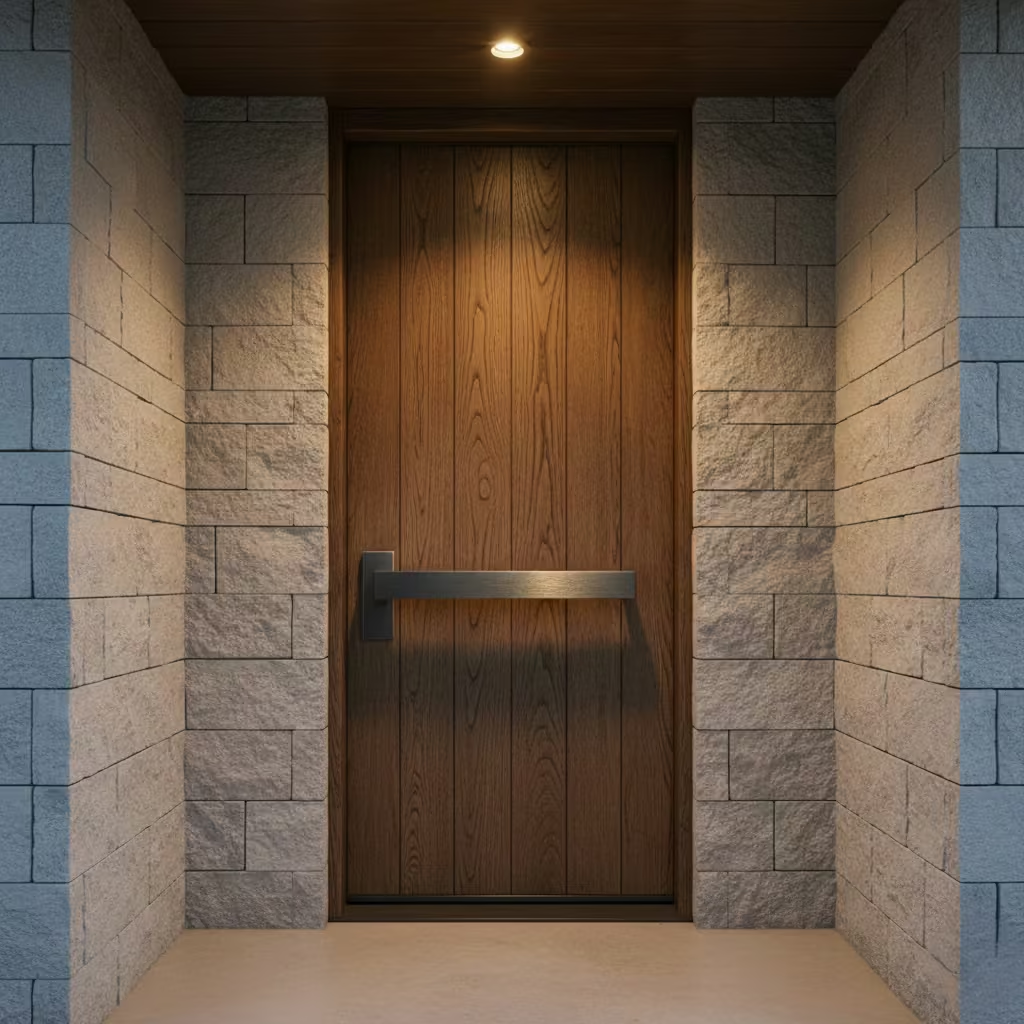
Hardware is the jewellery of the doorway. While structure and material define the home’s architectural character, tactile pulls introduce intimacy through touch. I favour bold, confident hardware when the façade is restrained, because a single well-proportioned detail can elevate the entire entry composition.
There is a subtle emotional pleasure in grasping a handle that feels solid and purposeful. It reassures the visitor that the house is built with care. Good hardware should feel weighty in hand, stable in movement, and visually aligned with the door’s geometry.
In residential renovation work, I often remind clients that entry hardware is one of the few design elements you physically interact with every day. Durability and comfort matter more than ornamentation.
Measurements and Ergonomic Positioning
- Pull handle height: 900–1,050 mm (35–41 in) above finished floor level.
This range accommodates most adult hand reach patterns. - Handle projection should allow at least 40–60 mm (1.5–2.5 in) finger clearance behind the grip.
- For double doors, I prefer symmetrical hardware placement unless architectural asymmetry is intentional.
Positioning must also consider door thickness and structural reinforcement behind the mounting plate.
Material Selection
Brass Hardware
- Develops a warm patina over time.
- Suits traditional, heritage, or refined modern façades.
Stainless Steel
- Highly resistant to corrosion.
- Clean contemporary appearance.
Blackened or Oxidised Steel
- Strong modern architectural statement.
- Works well with charcoal, stone, or concrete palettes.
Finish consistency across door hinges, letter plates, and lighting fixtures is important for visual coherence.
Pros
- Provides immediate tactile quality at arrival.
- Enhances perceived craftsmanship of the home.
- Long service life when sourced from quality fabrication.
- Small investment can create luxury perception.
Cons
- Poor-quality hardware will tarnish or loosen quickly.
- Must be matched carefully with overall façade colour and texture.
- Installation alignment must be precise to avoid functional stiffness.
Real-Life Application Insight
In a renovation project with a cool grey rendered façade, I selected aged brass pull handles rather than matching the metallic cool tone of the door. The warm metal created visual contrast without introducing additional colours into the palette.
The client was initially hesitant because brass is often associated with traditional homes. However, once installed, the hardware softened the modern façade and added a sense of maturity. Sunlight reflecting from the aged brass produced a subtle golden warmth during afternoon hours.
What made the result successful was restraint. The handle was bold in scale but simple in form. It did not compete with the architecture. Instead, it acted like a quiet signature detail, something you feel before you consciously notice it. Good hardware should feel like the natural extension of the hand that opens the home.
You May also Like: Best Warm Neutral Paint Colours That Never Feel Flat
Lighting & Safety
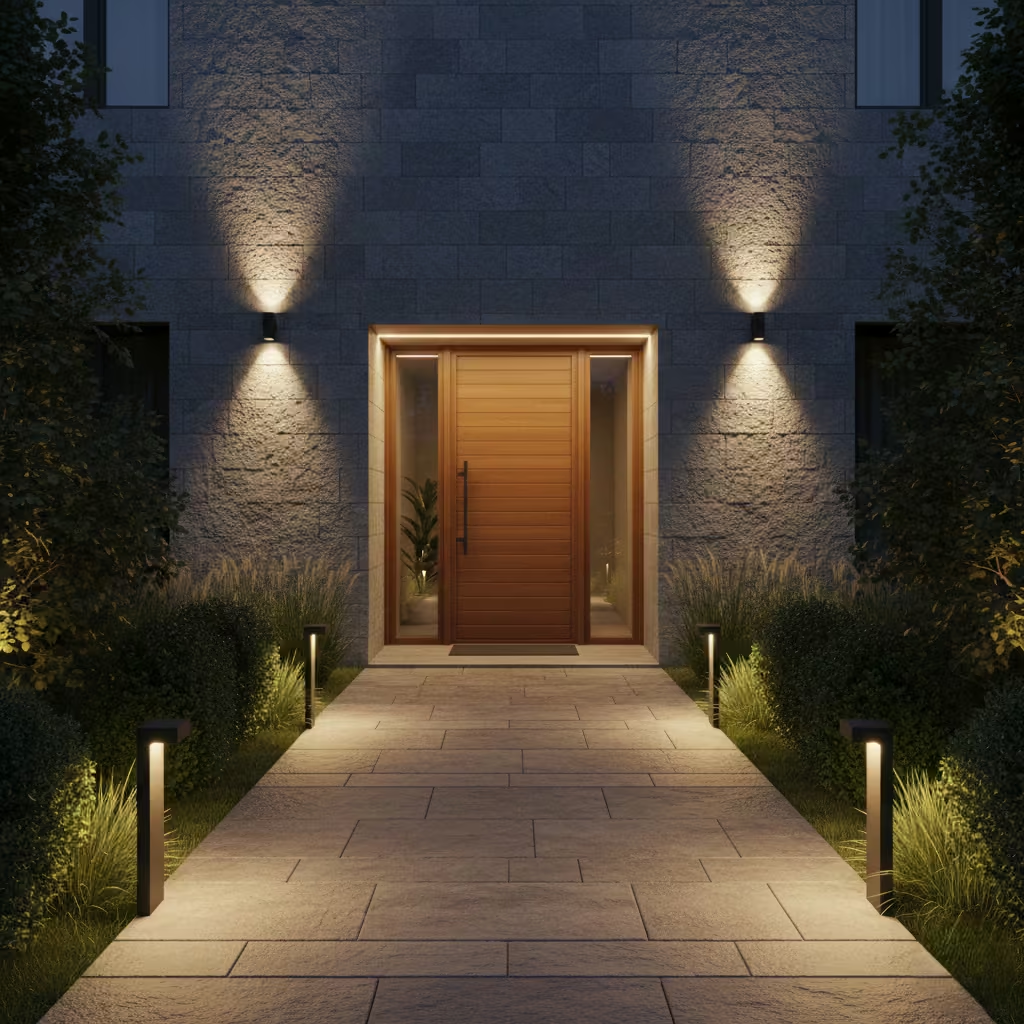
Lighting at the entryway is both a safety measure and an architectural language. I treat outdoor lighting as a layered system that guides movement, protects footing, and shapes the evening character of the façade. Good entry lighting should never feel harsh or theatrical. Instead, it should reveal surfaces gently, support natural navigation after sunset, and preserve visual comfort for eyes adjusting from street brightness to the softer interior glow of home. When designed carefully, lighting becomes a silent guardian of the arrival experience.
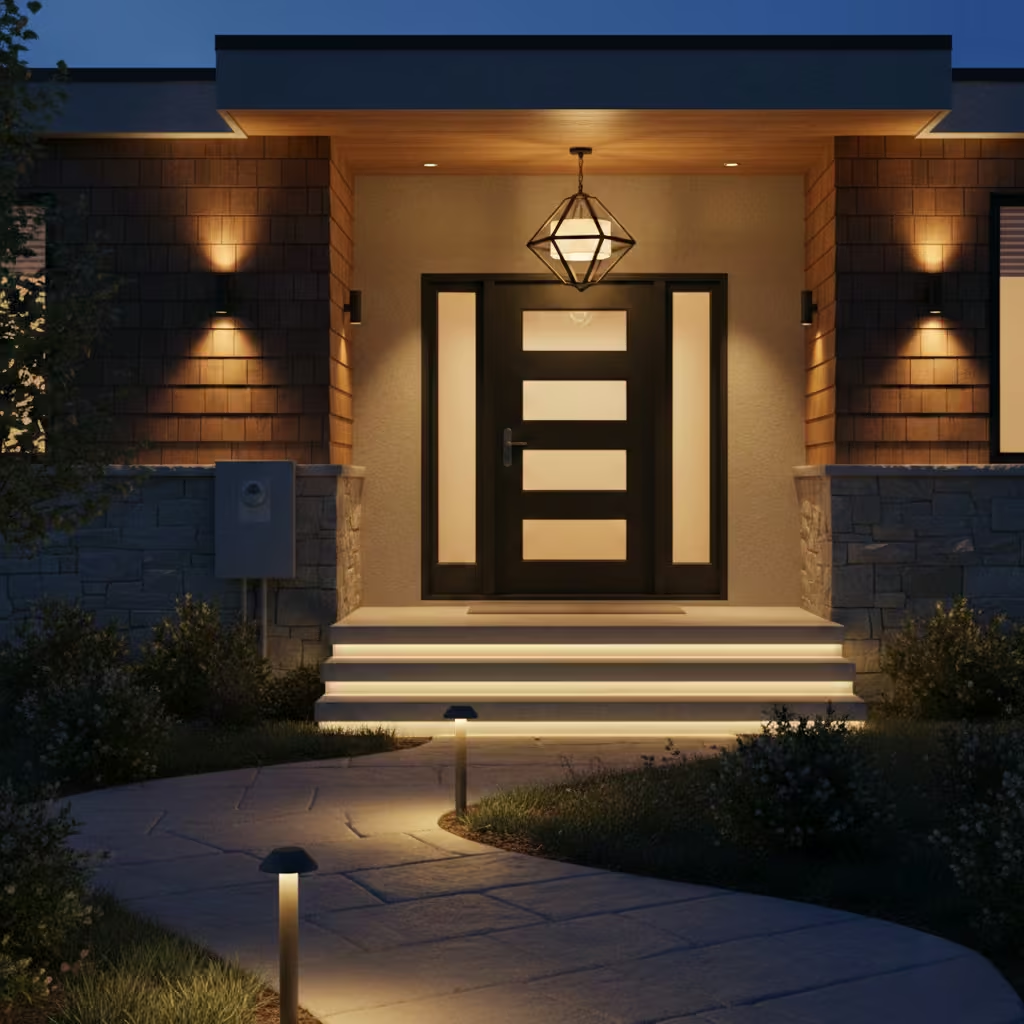
Layered Lighting: Path, Wall, and Step Illumination
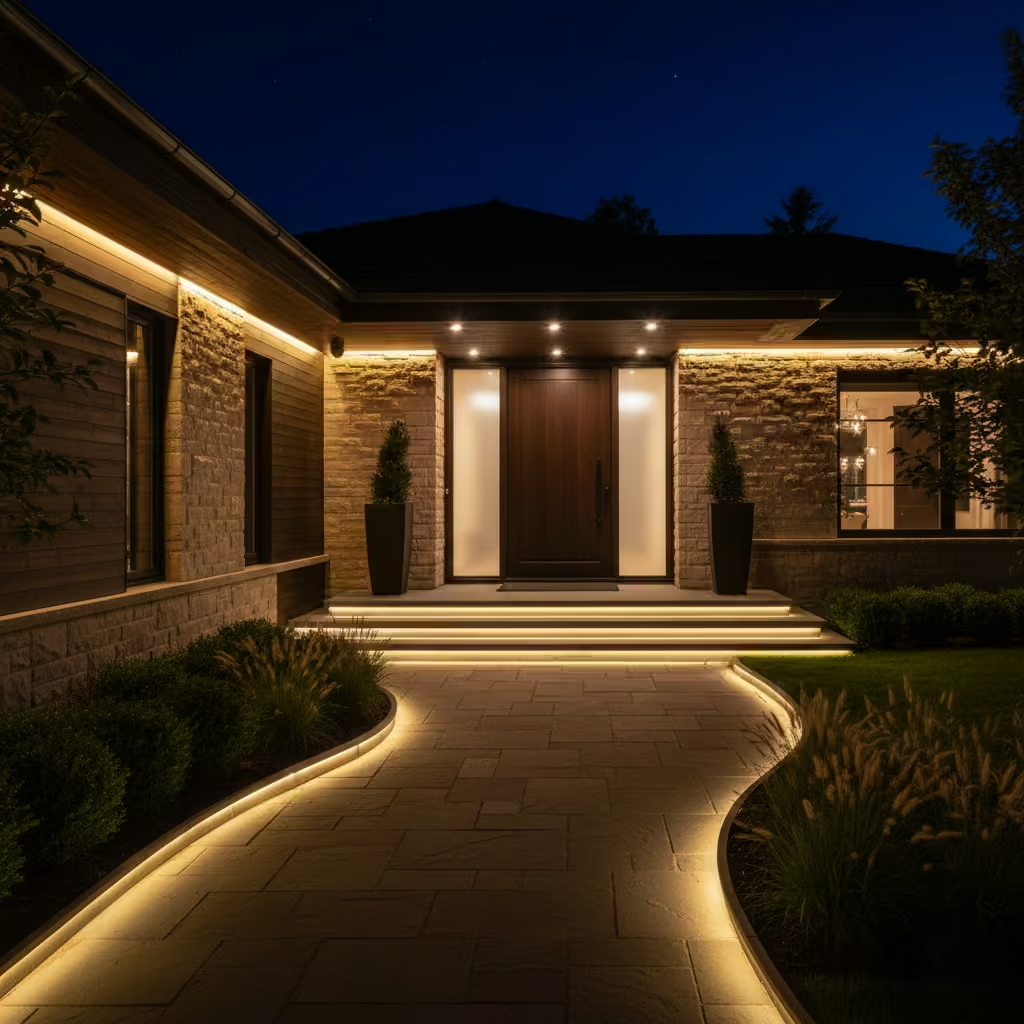
Layered lighting transforms an entryway into a living space after sunset. I design outdoor arrival lighting not only to help people see where they are walking but to allow the home itself to remain visually confident in the evening. The goal is balance: enough light for safety, but not so much that the garden loses its calm character.
Path lighting should guide movement without drawing attention to the fixtures themselves. Wall lighting reveals architectural texture, while step lighting protects the most vulnerable transition points in the arrival sequence. When these layers work together, the entry feels naturally visible rather than artificially bright.
Night-time arrival is an emotional moment. After long travel or daily fatigue, stepping toward a softly illuminated home can feel surprisingly comforting. That feeling of security is one of the quiet successes of good lighting design.
Technical Lighting Targets
- Pathway illumination: 100–150 lux provides safe pedestrian visibility without glare.
- Step edge lighting: 150–200 mm (6–8 in) mounting height along riser edges improves depth perception.
- Fixture protection rating: IP65 or higher is recommended for exposed residential frontage.
Low-voltage LED systems are my preferred choice for residential outdoor work because they reduce electrical risk and allow flexible control zoning.
Material and Colour Temperature
- Light colour temperature: 2,700K warm white supports natural evening ambience.
- Avoid cool blue-white lighting for residential entries, as it can feel institutional and reduce landscape warmth.
I often specify fixtures with anti-glare diffusers so that the light is felt more than seen.
Pros
- Improves safety during evening arrival.
- Enhances façade texture and planting structure.
- Supports accessibility for visitors and family members.
- Creates layered architectural depth at night.
Cons
- Requires early planning for electrical conduit routing.
- Poorly shielded LEDs can cause light spill or neighbour disturbance.
- Installation cost increases with zoning control systems.
Real-Life Application Insight
In several front garden projects, I used warm 2,700K LED lighting to protect the natural colour perception of stone, timber, and planting during evening hours. One particular client previously had bright cool-white security lights that made the garden feel harsh after dark.
After redesigning the lighting layers, the entryway felt softer. The pathway was visible but not dominating. The wall wash lighting revealed façade texture rather than flattening it. Step edges glowed gently, almost like guiding lines rather than visible fixtures.
The homeowner later told me that returning home at night felt calmer because the house seemed to “wait quietly” in warm light. That is the purpose of good residential lighting: not to announce the building loudly, but to make arrival feel safe, dignified, and emotionally gentle.
You May also Like: 39 Stunning Victorian Hallway Design Ideas for a Timeless, Elegant Home
Sculptural Pendant in Covered Entry
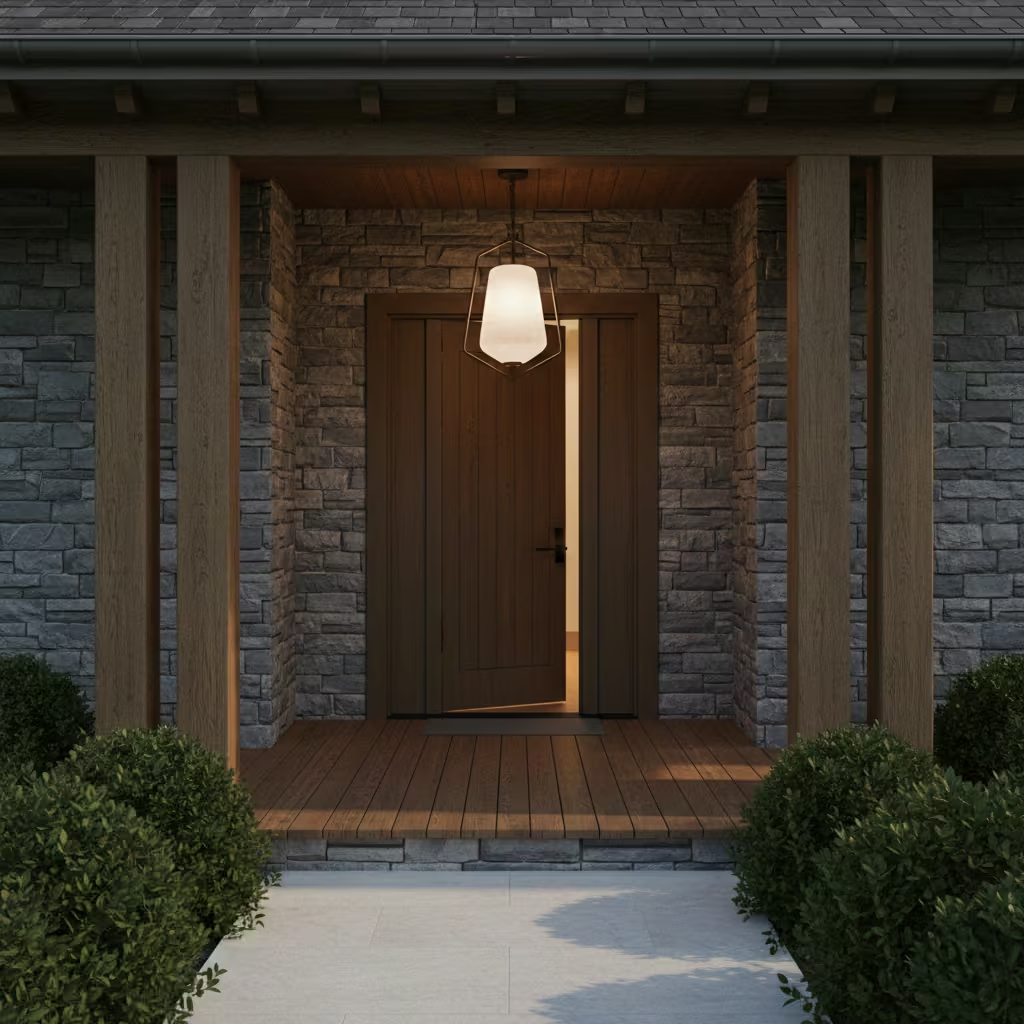
A sculptural pendant light at the covered entry is less about illumination and more about character. I use this detail when a porch feels structurally sound but visually quiet. The pendant becomes a suspended moment of presence, drawing attention to the centre of arrival without overwhelming surrounding surfaces.
Human perception is sensitive to light positioned slightly above eye level. A low-hung pendant inside a sheltered porch creates intimacy and architectural gravitas. It helps compress and define the entry space, making a deep porch feel more purposeful rather than empty.
This design works especially well when the porch depth is generous or when the façade needs a singular visual anchor.
Measurements and Spatial Balance
- Minimum clearance below pendant: 2.1 m (7 ft) from finished floor level.
This ensures comfortable head movement and avoids visual crowding. - Porch depth alignment: The pendant diameter should generally be 30–50% of porch depth for proportional harmony.
- If seating exists under the porch, maintain at least 600 mm (24 in) horizontal clearance around the fixture.
The pendant should feel suspended naturally rather than forced into position.
Material Selection
Exterior-Rated Metal Fixtures
- Excellent durability against moisture and temperature variation.
- Suitable for modern and transitional architecture.
Composite Luminaires
- Lightweight and structurally easier to mount.
- Often offer better corrosion resistance in coastal climates.
Always verify IP rating and seal integrity when installing overhead outdoor lighting.
Pros
- Creates strong visual identity at night.
- Anchors deep porch spaces architecturally.
- Adds perceived luxury without complex landscaping.
- Enhances arrival ceremony and guest perception.
Cons
- Requires professional electrical installation and load safety verification.
- Poor scale selection can make the porch feel crowded.
- Cleaning and maintenance access must be planned.
Real-Life Application Insight
In one residential project, I installed a single low-suspended pendant light inside a deep porch canopy. The client originally requested multiple ceiling fixtures for brightness, but I advised restraint.
The solitary pendant worked like a signature mark. During evening hours, it became the first visual signal of homecoming. The porch itself remained mostly in shadow, allowing the glowing centre light to hold attention.
What surprised the client was how the space felt larger rather than smaller. By reducing visual clutter and focusing light at one architectural node, the porch gained emotional depth. Visitors instinctively slowed down under the light, paused briefly, and then moved toward the door. That moment of pause is what transforms entry design from functional passage into meaningful arrival.
Motion-Sensor Ambient Uplights (Subtle Security)
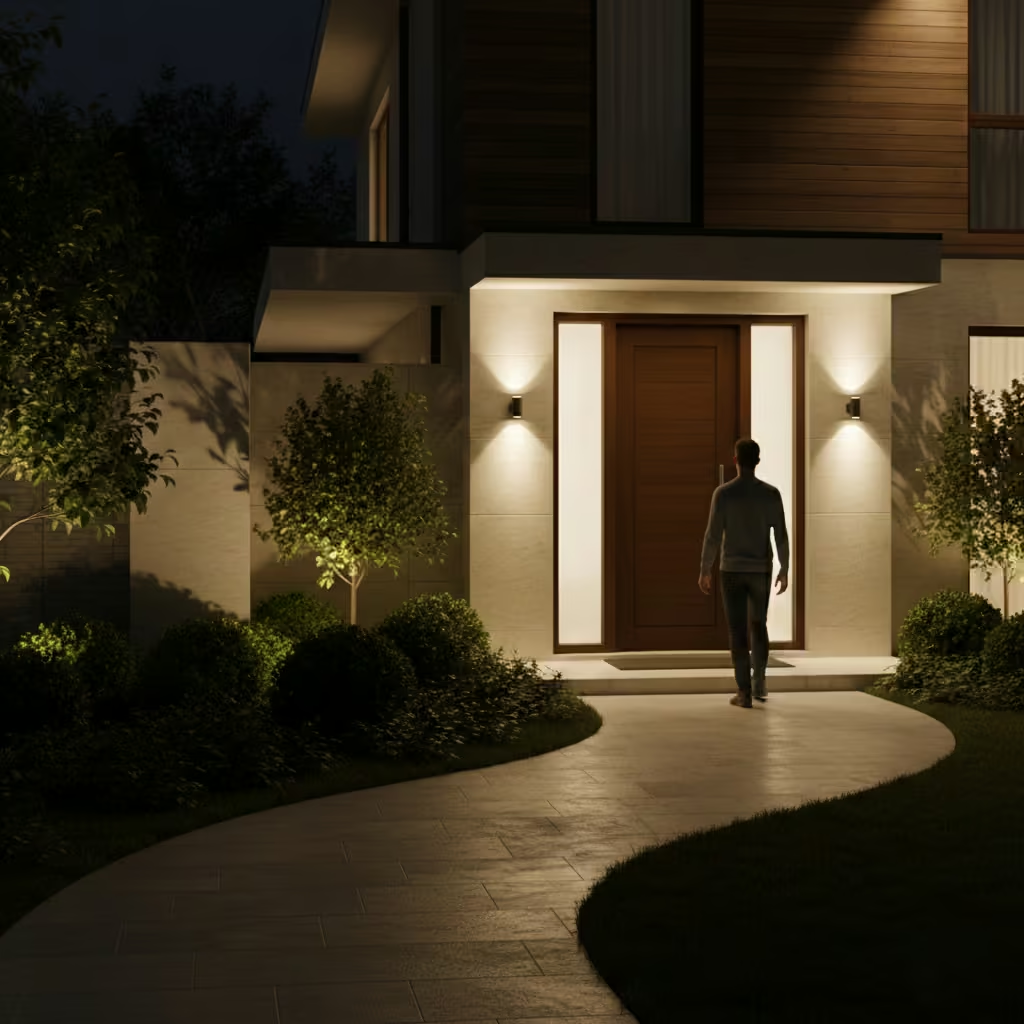
Motion-sensor uplighting is not about surveillance feeling or aggressive brightness. I approach this as a psychological comfort layer that allows the home to respond gently when someone approaches. The best security lighting is the kind you notice only when it activates.
At night, uncertainty is what makes people feel vulnerable. A soft uplight that responds to movement reduces that uncertainty. It creates a sense that the home is aware of its surroundings without appearing defensive.
I prefer ambient motion lighting rather than harsh floodlight activation because residential frontage should feel welcoming even after dark.
Technical Coverage and Placement
- Light throw distance: 2–4 m (6.5–13 ft) from mounting point.
This zone is usually sufficient for porch approach detection. - Mounting height: Typically 1.8–2.2 m (6–7.2 ft) depending on façade structure.
- Detection angle: Choose PIR sensors with controlled horizontal spread to reduce false triggering.
Fixtures should be shielded slightly from direct street movement if the home is close to public sidewalks.
Material and System Selection
Low-Voltage PIR Fixtures
- Safer for residential installation.
- Lower energy consumption.
- Compatible with smart home integration.
I avoid overly powerful security-style luminaires in entry gardens because they disturb landscape atmosphere.
Pros
- Reduces energy use through automatic activation.
- Provides psychological reassurance at night.
- Supports accessibility for late arrivals.
- Extends façade visibility without constant lighting.
Cons
- Tree branches, moving foliage, or animals can trigger sensors.
- Requires careful zoning calibration.
- Wiring must be protected from moisture ingress.
Real-Life Application Insight
During a suburban renovation, I installed motion-sensor uplights but intentionally divided the detection zones.
The entry path sensor was calibrated for human movement height and distance, while nearby planting areas were slightly desensitised to avoid tree movement triggering lights during windy evenings.
Before adjustment, the lights would activate repeatedly when branches moved, which annoyed the homeowners at night. After tuning sensor orientation and sensitivity, activation became purposeful and rare.
The result was subtle but powerful. When someone actually approached the house, the light activated with calm certainty. The family described the feeling as if the home was “politely opening its eyes” when guests arrived. That is the kind of security lighting I believe residential architecture should offer.
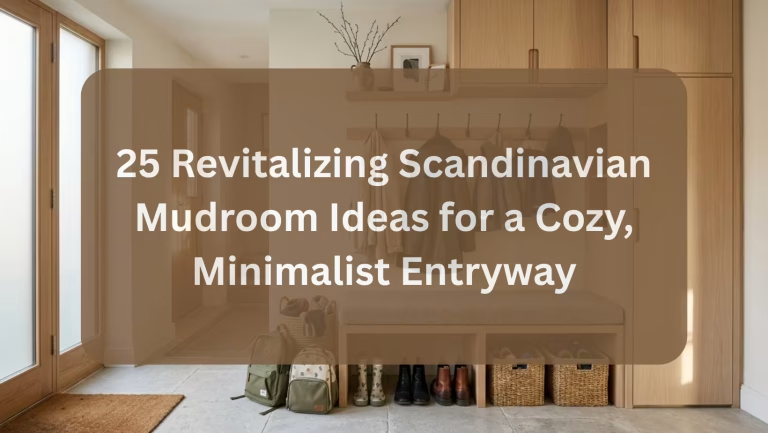
You May also Like: 25 Revitalizing Scandinavian Mudroom Ideas for a Cozy, Minimalist Entryway
In-Ground Uplights for Facade Washing
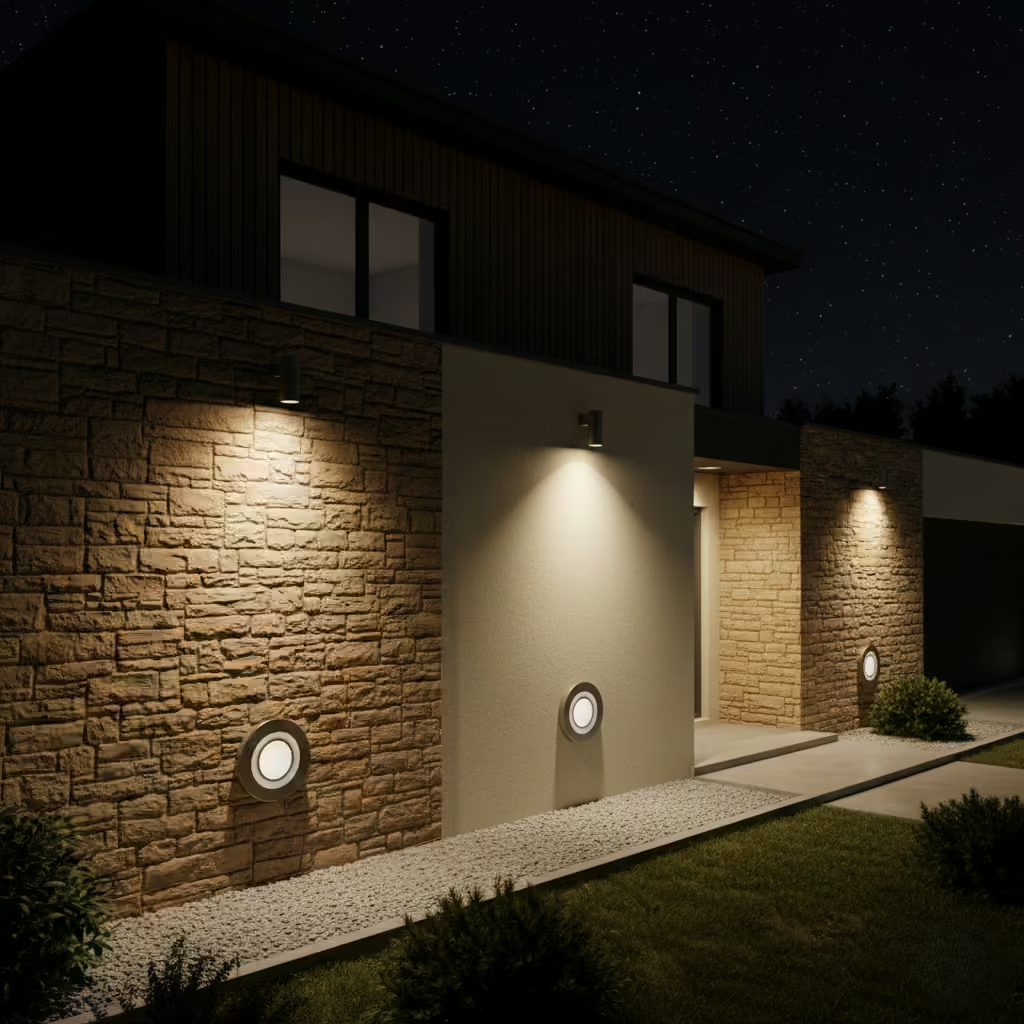
Facade washing with in-ground uplights is about revealing architecture rather than advertising it. I use this technique when the house possesses texture, proportion, or material expression worth observing after sunset. The light should feel like it belongs to the building’s natural behaviour at night.
The emotional effect is subtle but powerful. When the façade is softly washed with warm light, the home appears stable and grounded in its landscape. Shadows become part of the design language, giving depth to stone joints, window reveals, and surface planes.
This method works especially well for homes where street lighting is weak or where the owner wants the property to feel quietly distinguished after dark.
Placement and Technical Measurements
- Fixture distance from wall: 0.6–1.0 m (2–3 ft) ensures balanced light spread.
- Beam tilt angle: 10–20 degrees upward wash prevents harsh vertical glare.
- Mounting flushness: Fixtures should sit perfectly level with finished ground surface.
I avoid placing uplights too close to foundations because moisture accumulation and glare reflection can become issues.
Material and Environmental Performance
Stainless Steel IP67 In-Ground Fixtures
- High resistance to dust and water ingress.
- Suitable for exposed residential gardens.
Coastal environments require additional corrosion protection and regular inspection.
Pros
- Creates strong night façade identity.
- Enhances architectural depth perception.
- Supports safety by revealing building edges.
- Works well with stone, render, or timber surfaces.
Cons
- Requires proper drainage design beneath fixtures.
- Leaf litter and soil may accumulate around housings.
- Installation is more complex than wall-mounted lighting.
- Replacement access should be planned.
Real-Life Application Insight
On a coastal residential project, I specified in-ground stainless steel uplight housings with internal drainage channels.
The site was exposed to sea air, and salt deposition was a serious concern. Without drainage, condensation and saline moisture would gradually degrade electrical components.
By using ventilated housings and ensuring the fixture base sat slightly above compacted gravel drainage layers, I reduced long-term maintenance risk.
At night, the result was striking. The façade appeared softly lifted from the landscape rather than harshly illuminated. Salt wind, humidity, and coastal brightness were all respected in the design.
The homeowner later told me that the house felt “quietly proud” after sunset, standing calmly against the night sky without trying to dominate it. That is the kind of restrained architectural presence good lighting should create.
Smart Lighting Control with Scenes
Smart lighting is the invisible architecture of modern arrival experience. I use scene-based control not simply for convenience but to shape how a home behaves when someone approaches it. The house should respond gently, almost politely, rather than switching lighting abruptly.
The emotional value of smart control lies in anticipation. When path lights soften, porch lighting strengthens, and facade accents activate together, the entrance feels aware rather than mechanical. Homeowners often describe this experience as feeling “welcomed” before they even reach the door.
Smart lighting is particularly meaningful for families who return home late, elderly occupants, or properties where security and comfort must coexist quietly.
System Layout and Control Zoning
There is no fixed measurement for smart lighting systems. Instead, I focus on behavioural zones.
- Arrival Zone: Pathway lighting activated first.
- Transition Zone: Step and threshold lighting follow.
- Identity Zone: Porch or facade lighting strengthens last.
Switch and controller placement should allow manual override even when automation is enabled.
Weatherproof controllers are essential for outdoor installation. I prefer concealed mounting locations protected from direct rain exposure.
Material and Equipment Selection
- Smart switches should be compatible with low-voltage LED drivers.
- Outdoor control modules must carry at least IP65 protection rating.
- Systems should allow scene memory and gradual brightness transition.
I avoid overly complicated multi-platform systems unless the homeowner is comfortable with digital maintenance.
Pros
- Creates effortless arrival ambience.
- Improves energy efficiency through automation.
- Supports security lighting without constant manual control.
- Allows personalised home behaviour patterns.
Cons
- Higher upfront installation and configuration cost.
- Requires technical setup and occasional software updates.
- Network or power disruption may affect scene execution.
- Over-automation can reduce manual simplicity.
Real-Life Application Insight
In one residential project, I programmed an arrival scene that activated when the homeowner’s vehicle approached the property.
The system worked in layers. Pathway lights gradually brightened first, helping the driver orient toward the entrance. The porch pendant then rose gently in brightness, acting as a visual signal of home readiness. Finally, subtle facade washing lights activated, giving the house a composed evening presence.
What mattered most was timing. The transition was set to occur over several seconds rather than instantly. The homeowner told me that driving into the driveway felt surprisingly peaceful because the house seemed to “wake up slowly” and wait for them.
Good smart lighting should never feel automated in a mechanical way. It should feel attentive, almost patient, as if the home understands the rhythm of human arrival.
Landscaping & Planting
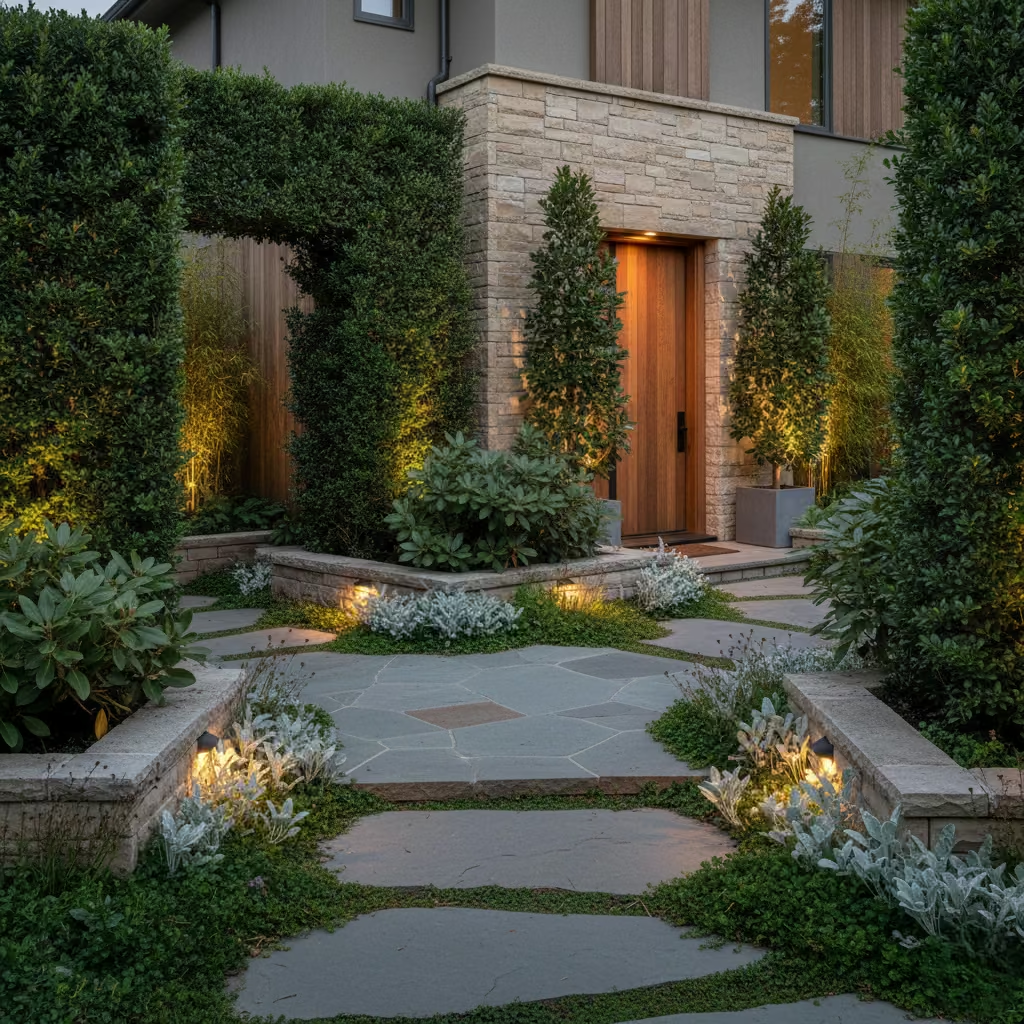
Landscaping and planting shape the living skin of the entryway. I treat plants not as decoration but as architectural partners that soften hard surfaces, control visual scale, and guide movement toward the door. Evergreen structure is particularly valuable because it maintains composition through winter as well as summer. Planting beds should balance height variation, seasonal texture, and maintenance practicality. When chosen carefully, vegetation brings colour, fragrance, and seasonal memory to the arrival experience while allowing the house to age gracefully within its natural setting.
Framed Planting Beds to Define the Approach
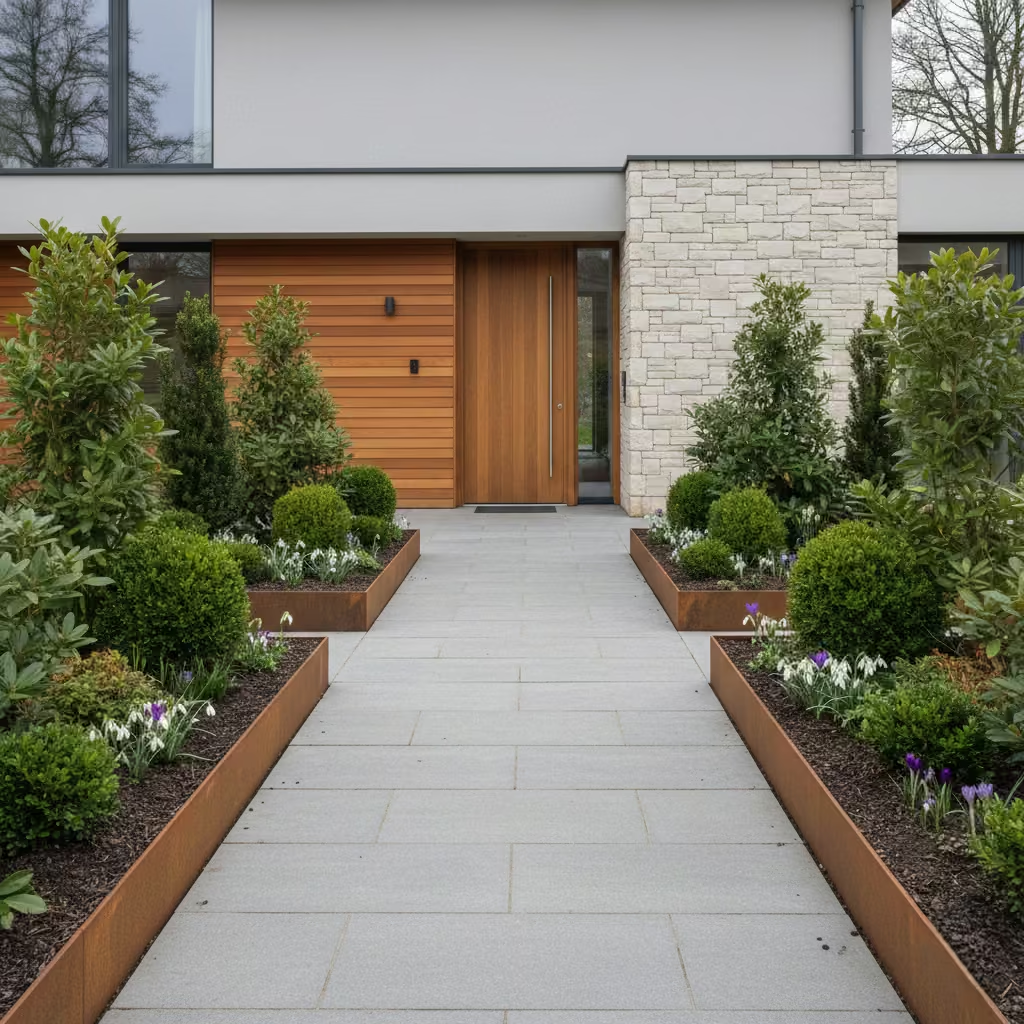
Framed planting beds are one of the most reliable ways to give direction to movement without forcing geometry. I use planting frames when the pathway needs quiet guidance rather than physical enclosure. The bed becomes a living edge that separates circulation from garden softness while preserving openness.
The emotional value of framed planting is often felt more than seen. Visitors subconsciously follow the path because the vegetation forms a natural corridor of life and colour. In winter, when flowers disappear, structure must remain. That is why evergreen framework planting is essential in long-term residential design.
This technique is particularly effective for north-facing front gardens where sunlight is limited and structural greenery is needed to maintain visual warmth.
Measurements and Layout
- Planting bed width: 600–1,000 mm (24–40 in) depending on frontage scale.
Narrower beds suit compact urban entries; wider beds support layered planting. - Bed soil depth: Minimum 300–450 mm (12–18 in) for shrub health.
- Path edge to plant centre spacing should allow foliage growth without crowding circulation.
I prefer slightly irregular planting composition inside framed beds rather than rigid symmetry because natural variation improves seasonal appearance.
Material and Plant Selection
Native Shrubs
- Adapt better to local climate stress.
- Require less irrigation once established.
Evergreen Structural Plants
- Provide winter form and visual stability.
- Reduce the feeling of architectural emptiness during dormant seasons.
Seasonal Bulbs
- Add subtle colour change without overwhelming structure.
Avoid high-maintenance exotic species unless long-term horticultural care is guaranteed.
Pros
- Softens masonry, concrete, and paving edges.
- Improves microclimate around the entryway.
- Supports biodiversity.
- Creates layered visual depth.
Cons
- Requires pruning and seasonal plant management.
- Poor soil preparation can lead to weak plant growth.
- Overplanting may narrow the path visually over time.
Real-Life Application Insight
On a north-facing residential frontage, I once used evergreen hedging as the primary planting framework because sunlight exposure was limited.
The goal was not seasonal flower display but long-term structural presence. I selected dense evergreen species with moderate growth rate and positioned them along the path edge at roughly 400–500 mm (16–20 in) centre spacing.
During winter, when sunlight was weak and gardens often feel visually empty, the hedging maintained a strong vertical rhythm. The house did not feel exposed or cold. Instead, the greenery acted like a quiet protective boundary.
The homeowner later told me that approaching the house in colder months felt warmer because the garden retained life even when flowers were absent. That is the true purpose of structured planting: to hold spatial memory across seasons rather than chase temporary beauty.
You May also Like: 20 Cozy Modern Farmhouse Entryway Designs for a Welcoming Home
Specimen Tree for Vertical Anchor
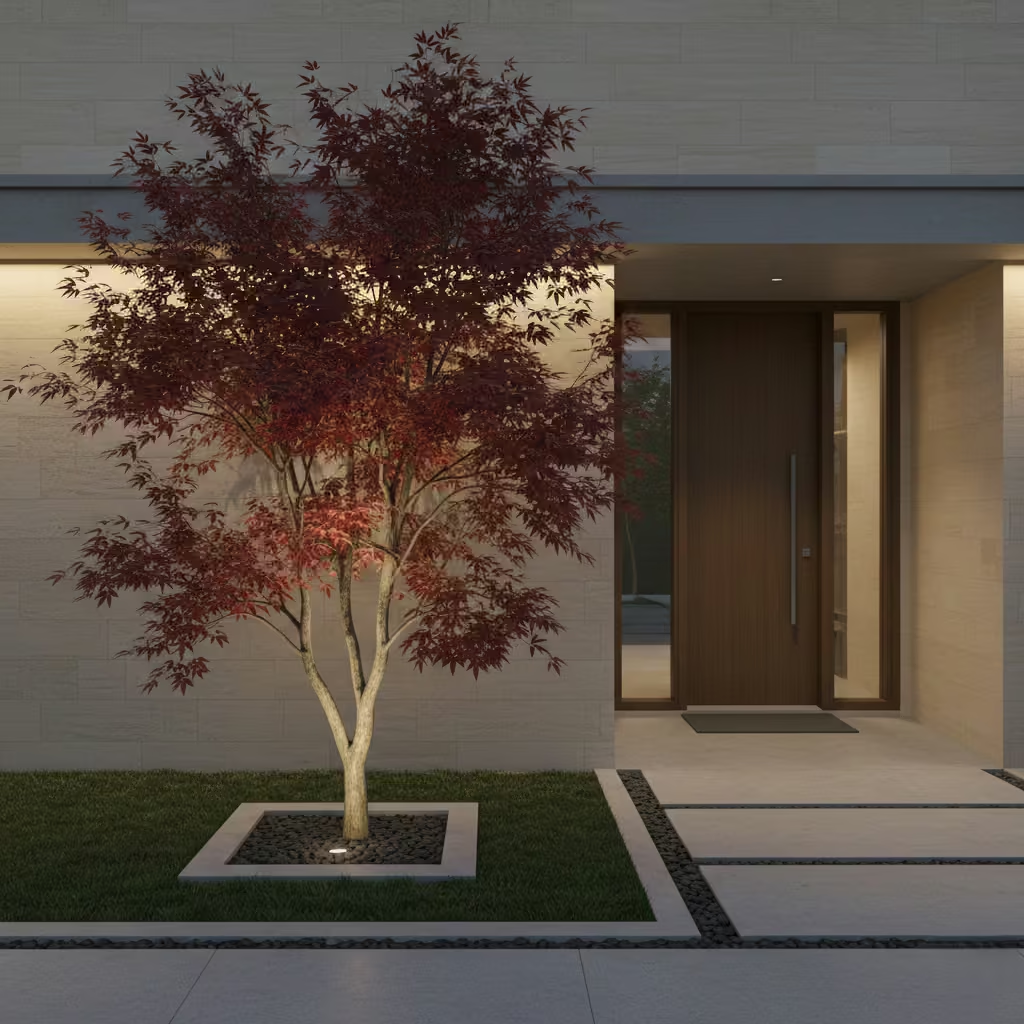
A specimen tree is the emotional centre of many successful entry approaches. I use a single, carefully positioned tree when the frontage needs vertical rhythm, seasonal character, and long-term architectural grounding. Unlike mass planting, the specimen tree behaves like a sculpture that grows slowly over time.
The presence of a mature-looking tree at the entrance gives the home a sense of permanence. People respond instinctively to vertical living forms because they soften building mass and create visual breathing space between ground surface and sky. I prefer species that age gracefully rather than trees that grow aggressively or lose form under pruning pressure.
This idea is particularly valuable for compact frontage gardens where space is limited but character is important.
Measurements and Spatial Placement
- Canopy clearance above approach path: minimum 2.4 m (8 ft).
This prevents head obstruction and maintains comfortable movement. - Planting pit size: Ideally 1.2 m × 1.2 m (4 ft × 4 ft) for small to medium specimen trees.
- Root zone preparation depth: 600–800 mm (24–32 in) with good drainage.
Tree placement should respect façade windows, lighting fixtures, and future canopy spread.
Material and Species Selection
Hornbeam
- Excellent structural form.
- Tolerates pruning.
- Suitable for temperate climates.
Japanese Maple
- Provides refined seasonal colour variation.
- Works best in sheltered frontage gardens.
Olive Tree
- Strong Mediterranean character.
- Very suitable for modern minimalist frontage design.
Climate compatibility should always guide species selection.
Pros
- Creates instant vertical architectural anchor.
- Adds seasonal movement through leaf texture and light shadow.
- Improves microclimate around entryway.
- Enhances property prestige perception.
Cons
- Growth must be managed over years.
- Root expansion may affect paving if planting pit is poorly prepared.
- Some species require winter protection in colder regions.
Real-Life Application Insight
On a compact street-front renovation, I specified a specimen olive tree approximately 1.8 m (6 ft) tall at installation.
The client wanted Mediterranean character but had limited frontage depth. Instead of waiting decades for maturity, I selected a well-shaped nursery-grown specimen with naturally balanced branching.
The tree was positioned slightly off the central axis of the pathway so it would frame rather than block the door view. As the tree grows, pruning will maintain canopy elevation above 2.4 m (8 ft).
What made this project memorable was how quickly the frontage gained personality. The silver-green foliage caught afternoon light, creating gentle movement against the façade render. Visitors began describing the house as “established” even though the renovation was newly completed.
That is the power of a specimen tree. It does not shout for attention. It quietly tells the story that the home belongs to its land, and that it will continue to grow there for years to come.
You May also Like: Terracotta Interior Design: 51 Warm & Stylish Ideas for Every Room
Low Evergreen Hedging for Year-Round Form
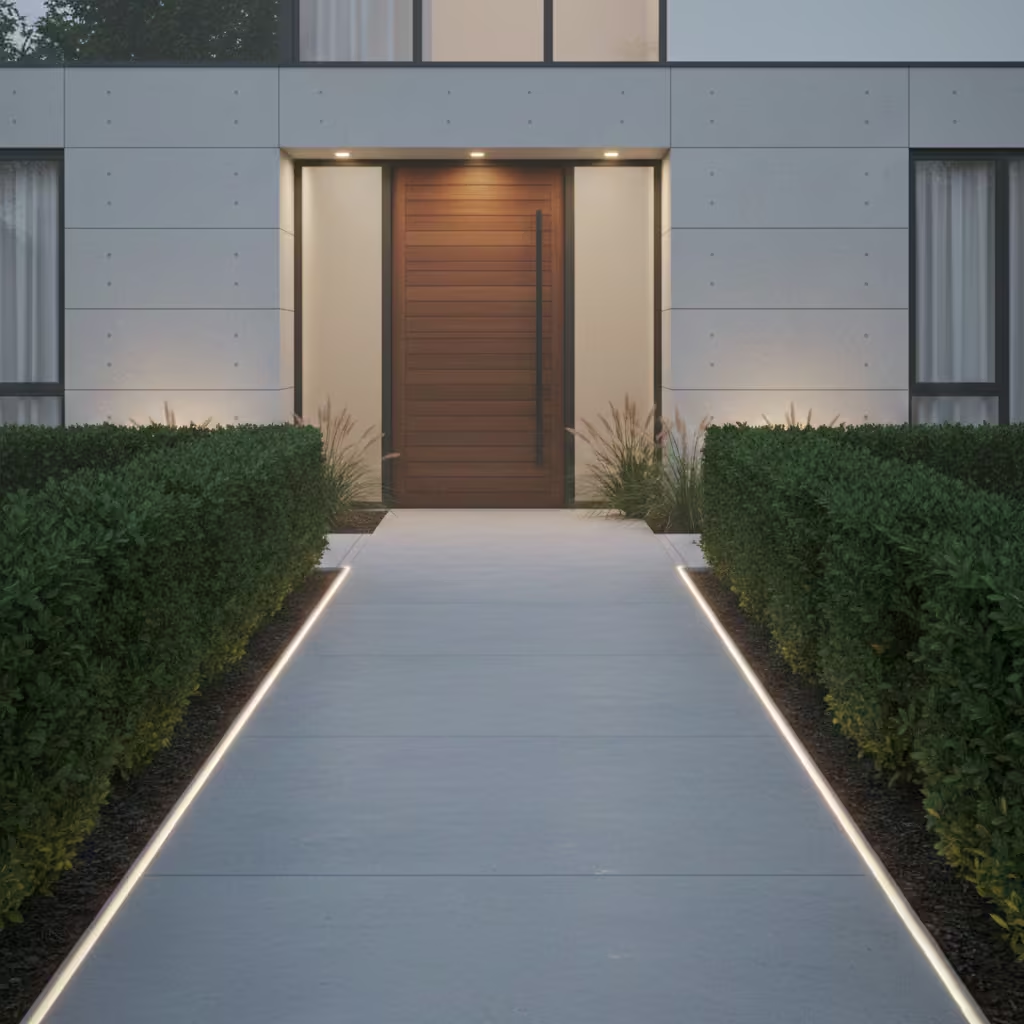
Low evergreen hedging is one of the most dependable ways to hold frontage composition together across seasons. I use this technique when the entry sequence needs visual continuity even during winter dormancy. The purpose is not to create a barrier but to establish a quiet horizontal rhythm that stabilises the garden edge.
Unlike flowering borders that change dramatically through the year, evergreen hedging behaves like architectural trim. It frames pathways, softens paving junctions, and prevents the frontage from feeling visually fragmented. Many homeowners are surprised by how much emotional comfort comes from a simple, consistent green boundary.
This approach works particularly well for formal or contemporary residential façades where clean lines and restrained planting support the architectural language.
Measurements and Layout
- Hedge height: 400–800 mm (16–32 in) is ideal for low frontage definition.
- Plant spacing: 300–500 mm (12–20 in) centre-to-centre depending on species density.
- Bed depth: Minimum 300 mm (12 in) quality prepared soil.
I prefer slightly taller hedges on larger properties because they balance building scale without blocking street views.
Plant Material Selection
Box (Buxus varieties)
- Traditional formal appearance.
- Excellent for geometric trimming.
- Requires monitoring for pest disease in some climates.
Dwarf Ilex Species
- Strong structural resilience.
- Tolerates pruning well.
- Good choice for clean modern edges.
Clipped Ornamental Grasses
- Softer contemporary character.
- Moves gently with wind, adding subtle life.
Local climate tolerance should always guide species choice.
Pros
- Maintains garden structure throughout the year.
- Defines circulation edges naturally.
- Supports architectural frontage clarity.
- Reduces visual clutter near pathways.
Cons
- Requires regular trimming to preserve form.
- Poor soil preparation can cause patchy growth.
- Overgrowth may gradually narrow perceived path width.
Real-Life Application Insight
In one frontage project, I specified dwarf ilex hedging to create a precise, formal boundary along the pathway.
The homeowner wanted a clean modern appearance but also needed a plant that could tolerate frequent pruning because the garden was exposed to street wind and sunlight variation.
The dwarf ilex responded well. Its dense leaf structure maintained a consistent green line even during winter. Over time, the hedge formed a disciplined horizontal frame that guided visitors toward the entrance without feeling restrictive.
What I value most about low evergreen hedging is its patience. It does not demand attention. It simply holds space, quietly supporting the house’s architectural presence while allowing other design elements to speak.
Planter-Built Privacy with Integrated Seating
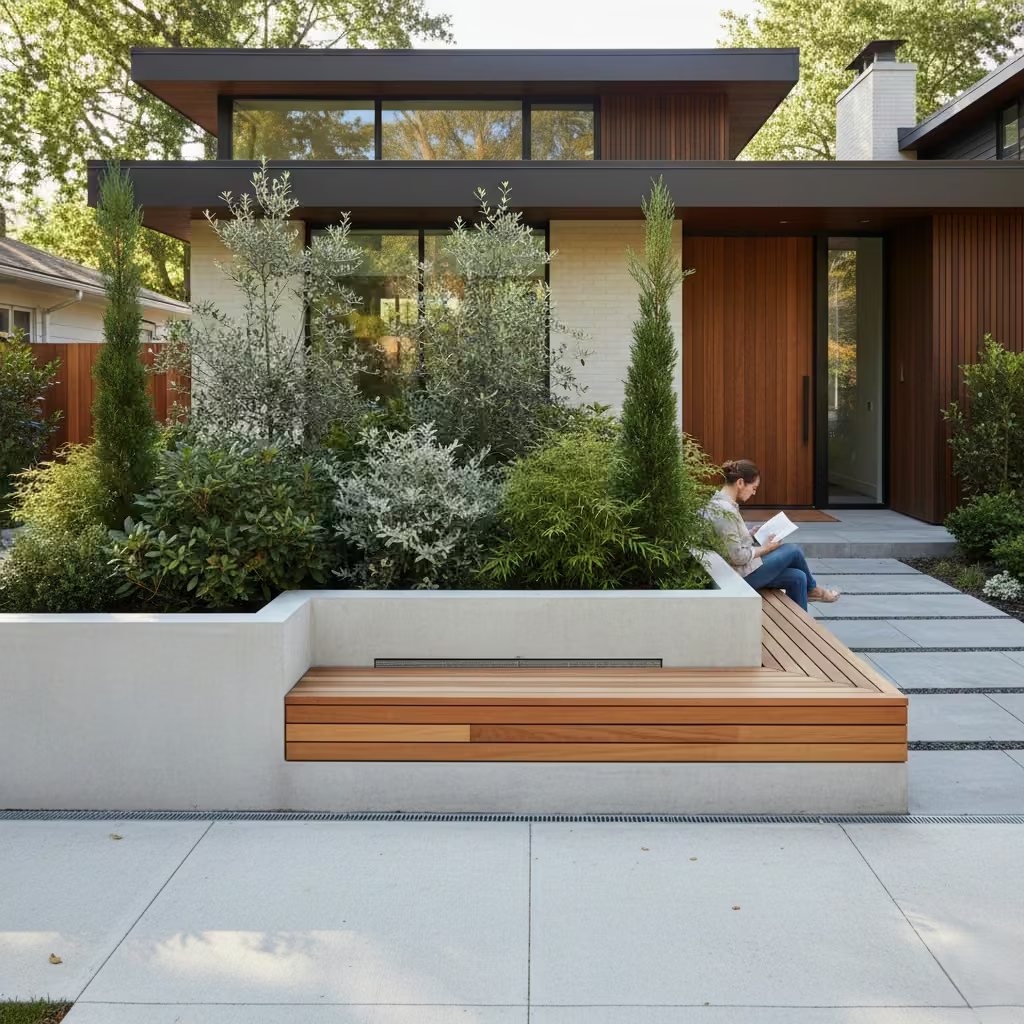
Planter-built seating is one of the most efficient ways to combine privacy, structure, and usability in compact frontage gardens. I often use this solution when the entryway lacks depth but still needs psychological separation from the street. Instead of erecting solid walls, the planter creates a living screen that grows softer and more natural over time.
Privacy in residential design is rarely about complete concealment. It is about allowing occupants to feel protected while still maintaining visual connection with daylight, sky, and garden life. Raised planters with seating achieve this balance by lifting planting to eye level while providing a place to pause.
This approach works especially well for urban homes where frontage space is limited.
Measurements and Structural Layout
- Planter width for small trees or structural shrubs: 450–600 mm (18–24 in).
This depth supports healthy root development for compact species. - Bench seating depth: 400–450 mm (16–18 in) for comfortable posture.
- Seat height: 420–450 mm (17–18 in) above finished ground level.
- Internal waterproof membrane lining is essential to protect masonry or timber.
Drainage must be designed with hidden outlet channels to prevent water stagnation.
Material Selection
Rendered Masonry Planters
- High structural durability.
- Suitable for modern or minimalist façades.
- Must include expansion joints and waterproof coating.
Hardwood Planter Structures
- Warm residential character.
- Requires treated exterior-grade timber.
Plant choice is more important than planter finish because vegetation defines privacy quality.
Pros
- Combines storage, seating, and planting function.
- Reduces visual exposure from street level.
- Supports specimen shrubs or small trees.
- Adds architectural weight to weak frontage compositions.
Cons
- Structural load increases with soil saturation.
- Poor drainage design can damage masonry.
- Construction cost is higher than simple fencing.
- Requires long-term maintenance of plants and waterproofing.
Real-Life Application Insight
In a narrow terrace frontage project, I designed a raised planter bench approximately 500 mm (20 in) wide along one side of the approach path.
The property was located close to pedestrian traffic, and the client wanted privacy without building a solid wall that would make the garden feel enclosed. I combined evergreen shrubs with a narrow timber seating top.
The result was surprisingly effective. People walking past the house could not directly see into the entrance, yet the garden still felt open and alive. The bench became a practical waiting point for visitors and a place where the homeowner could sit in the morning with coffee.
The greatest success of this design was psychological. The street felt distant, but the home never felt hidden. That is the delicate balance good residential frontage design should achieve.
You May also Like: 25 Modern Barn House Exteriors That Redefine Rural Living
Surface Finish & Texture
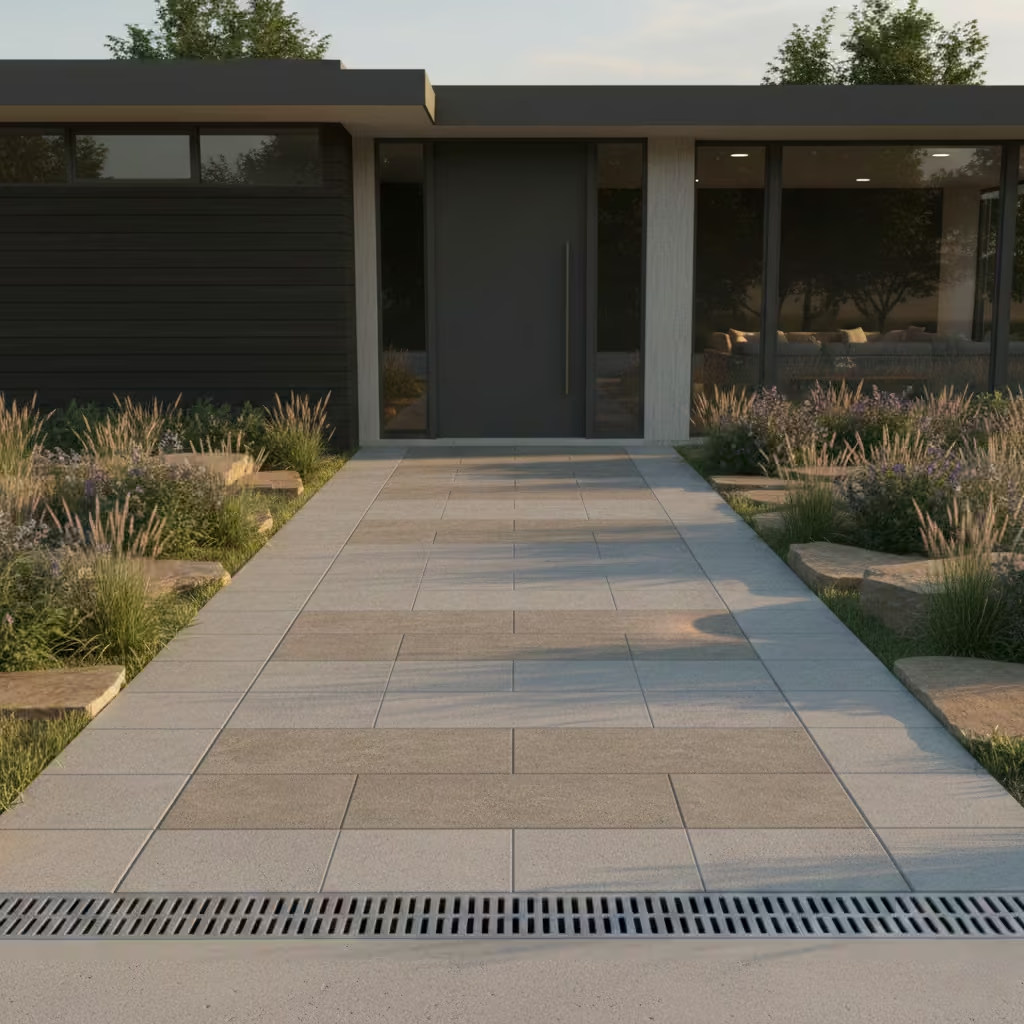
Surface finish and texture play a quiet but powerful role in shaping how an entryway feels underfoot and within sight. I approach surface selection with long-term performance in mind, choosing materials that age gracefully, resist weather stress, and maintain tactile comfort during rain or dew. Texture should provide gentle friction for safety while avoiding overly rough surfaces that become difficult to clean. The best finishes are those that remain visually stable across seasons, allowing light, shadow, and natural wear to enhance rather than damage the architectural character of the frontage.
Tactile Mixed Materials (Stone + Timber Banding)
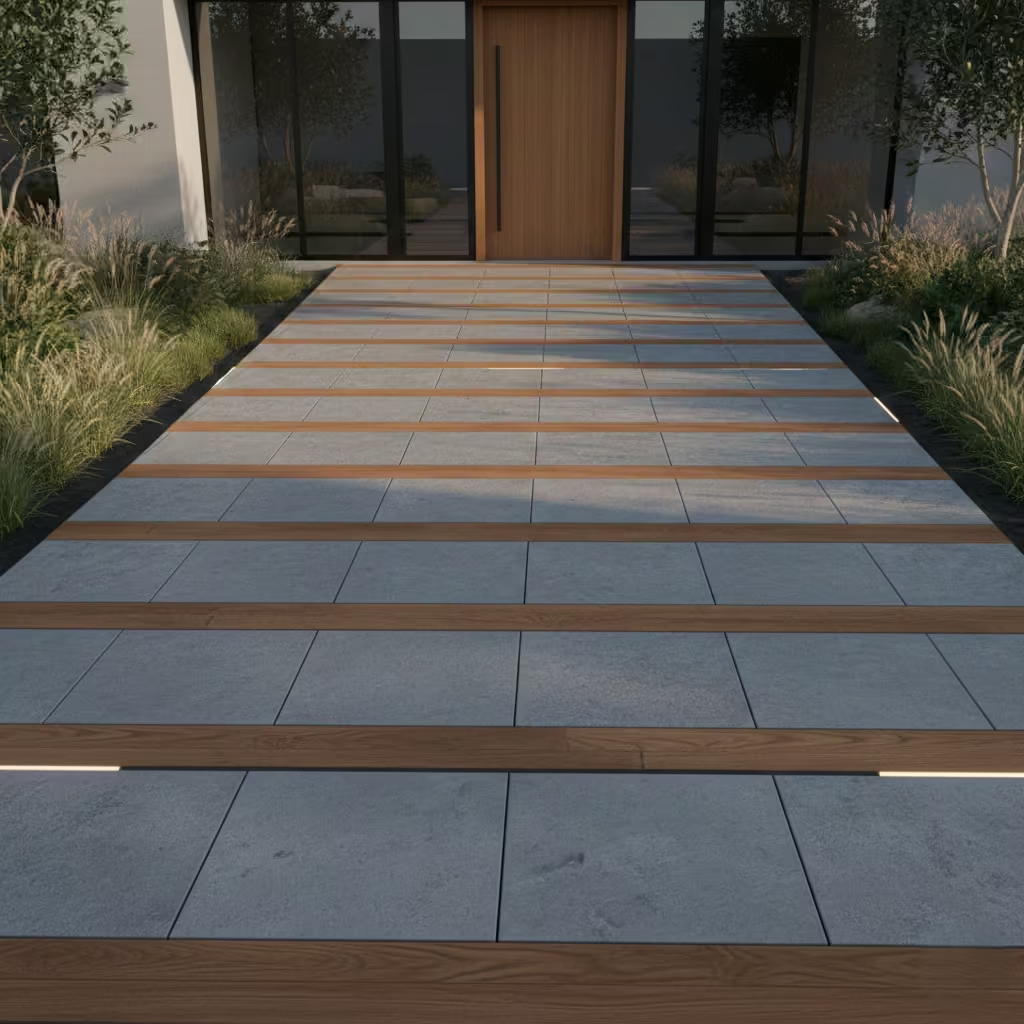
Mixed material surfacing is about creating quiet warmth within a structured frontage. I often combine stone and timber because stone provides architectural permanence while timber introduces softness and human scale. The contrast should feel intentional but not dramatic.
Timber banding works particularly well as a directional element. I use it to guide sightlines subtly toward the front door or to break long expanses of stone paving that might otherwise feel visually heavy. The sensation underfoot also changes slightly, which adds a sensory rhythm to movement.
This design is especially suitable for modern homes that risk feeling too cold if composed entirely of mineral surfaces.
Measurements and Layout
- Timber inset band width: 120–200 mm (5–8 in) is ideal for visual clarity.
- Band placement should follow circulation direction rather than decorative symmetry.
- Stone paving modules should align with timber joints to reduce cutting waste.
I recommend slightly recessed timber inserts (2–3 mm below stone surface) to reduce water pooling.
Material Selection
Rot-Resistant Hardwood
- Ipe, oak (treated), or similar dense species perform well outdoors.
- Requires exterior-grade sealing treatment.
Honed Stone
- Provides refined matte finish.
- Reflects light softly rather than creating glare.
Surface texture should remain comfortable for barefoot summer use when possible.
Pros
- Creates layered architectural depth.
- Improves visual warmth in minimalist frontage designs.
- Supports directional movement toward the entrance.
- Ages gracefully when materials are selected carefully.
Cons
- Timber and stone weather differently over time.
- Requires periodic timber sealing.
- Installation alignment must be precise.
- Differential expansion may occur in extreme climates.
Real-Life Application Insight
In one frontage renovation, I introduced timber banding within a cool-toned stone pathway because the client preferred modern architecture but felt the stone alone was emotionally too cold.
The timber insets acted like visual punctuation along the approach. During afternoon light, the warm wood reflected sunlight softly, balancing the cooler mineral surface.
Over time, the timber developed a natural silvery patina, which did not damage the design but added maturity. Visitors often described the pathway as “comfortable to walk on” even before they entered the house.
The success of this detail was not visual complexity but emotional calibration. The stone provided stability. The timber provided warmth. Together, they allowed the entryway to feel both disciplined and welcoming.
You May also Like: 15 Victorian Mudroom Design Secrets for a Timeless, Elegant Entryway
Permeable Paving for Sustainability
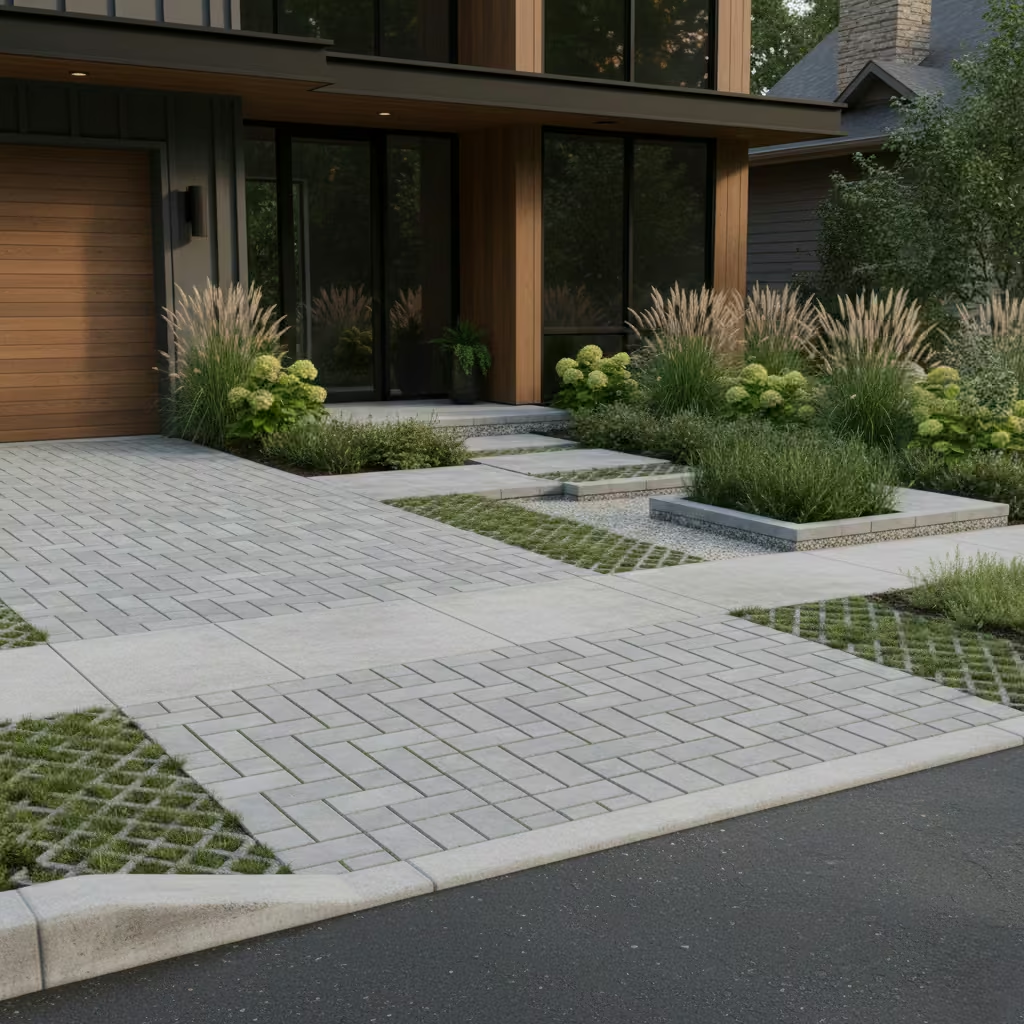
Permeable paving is one of the most practical ways to integrate environmental stewardship into residential frontage design. I favour this solution where surface water management, soil respiration, and urban runoff reduction are priorities. Instead of forcing water away quickly, permeable surfaces allow rainfall to return slowly to the ground, supporting natural hydrological balance.
From a living experience perspective, permeable paving also reduces the visual hardness of large paved areas. When combined with planting or gravel infill, the surface feels more landscape-like rather than infrastructural. This is especially valuable in frontage gardens where driveway or approach paths occupy significant ground area.
Measurements and Structural Requirements
- Paving module alignment: Should follow pathway width and circulation geometry.
- Subbase depth:
- 150–200 mm (6–8 in) for pedestrian entry paths.
- 250–300 mm (10–12 in) for light vehicle loading.
The subbase must include graded aggregate layers to ensure proper drainage. Poor foundation preparation is the most common cause of permeable paving failure.
Surface joints should remain free of compacted soil and organic debris.
Material Selection
Permeable Concrete Units
- Strong structural integrity.
- Suitable for modern architectural frontage.
Grass Pavers
- More landscape-integrated appearance.
- Requires seasonal vegetation maintenance.
I avoid installing permeable paving on heavily shaded sites with poor airflow because moss growth can reduce permeability.
Pros
- Reduces surface runoff during heavy rain.
- Supports groundwater recharge.
- Improves frontage sustainability rating.
- Less puddling near thresholds.
Cons
- Requires precise engineering of subbase layers.
- Joint clogging may occur without maintenance.
- Snow or leaf accumulation needs removal.
- Initial installation cost is higher than standard paving.
Real-Life Application Insight
On a council-regulated residential driveway project, permeable grid paving became essential because local planning guidelines required controlled stormwater discharge.
The property sat on slightly compacted urban soil where rapid runoff would otherwise overwhelm the street drainage system. I specified a three-layer subbase structure consisting of compacted crushed stone, filtration aggregate, and permeable surface units.
After installation, rainfall absorbed slowly into the ground rather than pooling near the entry path. The homeowner noticed that after heavy storms, the driveway still felt walkable within a short time.
What made this solution successful was not only compliance with drainage regulation but comfort. The frontage no longer produced splashback from passing vehicles, and the garden retained moisture balance for nearby planting beds. Sustainability, in this case, became an invisible improvement to daily life.
Reclaimed Materials for Character
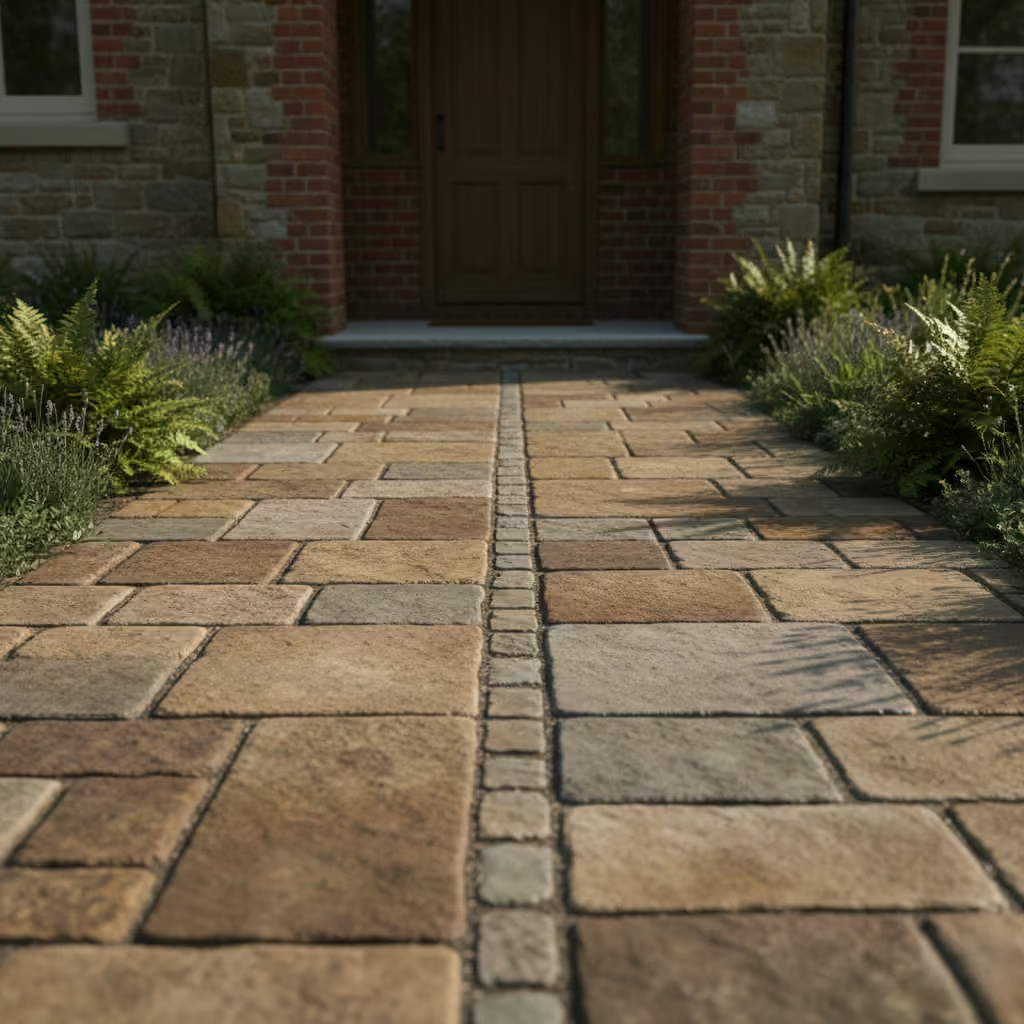
Reclaimed materials bring history into the present frontage without copying architectural style artificially. I often recommend this approach when a home needs authenticity, maturity, or a sense of place that cannot be achieved through new construction alone. Patina, irregularity, and subtle wear are not imperfections here; they are emotional qualities that tell a story.
There is a quiet dignity in walking on surfaces that have already lived a long life. Reclaimed stone or timber carries small traces of previous environments, sunlight exposure, and weathering cycles. When used thoughtfully, these traces enrich the character of the home rather than making it look old.
This design philosophy works particularly well for heritage properties or frontage gardens that aim to feel established rather than newly constructed.
Measurements and Installation Considerations
- Select reclaimed units that closely match project module dimensions to minimise cutting.
- Pathway width and paving grid should adapt to available material size rather than forcing uniformity.
- Subbase preparation remains critical even when using aged materials.
I prefer mixing reclaimed units with a small proportion of new matching material to maintain structural continuity.
Material Selection
Reclaimed Flags or Stone Slabs
- Develop natural surface variation.
- Provide strong historical architectural expression.
Reclaimed Timber
- Requires careful structural inspection.
- Should be treated for exterior durability.
Always verify material stability before installation.
Pros
- Unique frontage identity that cannot be mass replicated.
- Mature aesthetic immediately after construction.
- Lower environmental impact by reusing materials.
- Excellent fit for period or classical architecture.
Cons
- Material quality varies between batches.
- Hidden cracking or structural weakness may exist.
- Sourcing can be unpredictable.
- Installation alignment requires skilled labour.
Real-Life Application Insight
On a heritage frontage consultation, I used reclaimed stone setts to restore character to a property that had lost its historical context after previous modernisation.
The setts were carefully sorted before installation. Sound, structurally stable pieces were used in circulation zones, while slightly weathered pieces were placed along edges where visual softness was acceptable.
The most striking result was not visual perfection but emotional continuity. The entrance suddenly felt as though it had always existed in that form. Visitors could not easily tell whether the paving was new or original to the building.
The homeowner later told me that the house “felt older in a good way”, meaning it finally matched the architectural personality of the neighbourhood. That is the true strength of reclaimed material design.
You May also Like: Essential Approaches to Contemporary Facade Design: Architectural Principles, Material Choices, and Real-World Application
Accessories & Finishing Touches
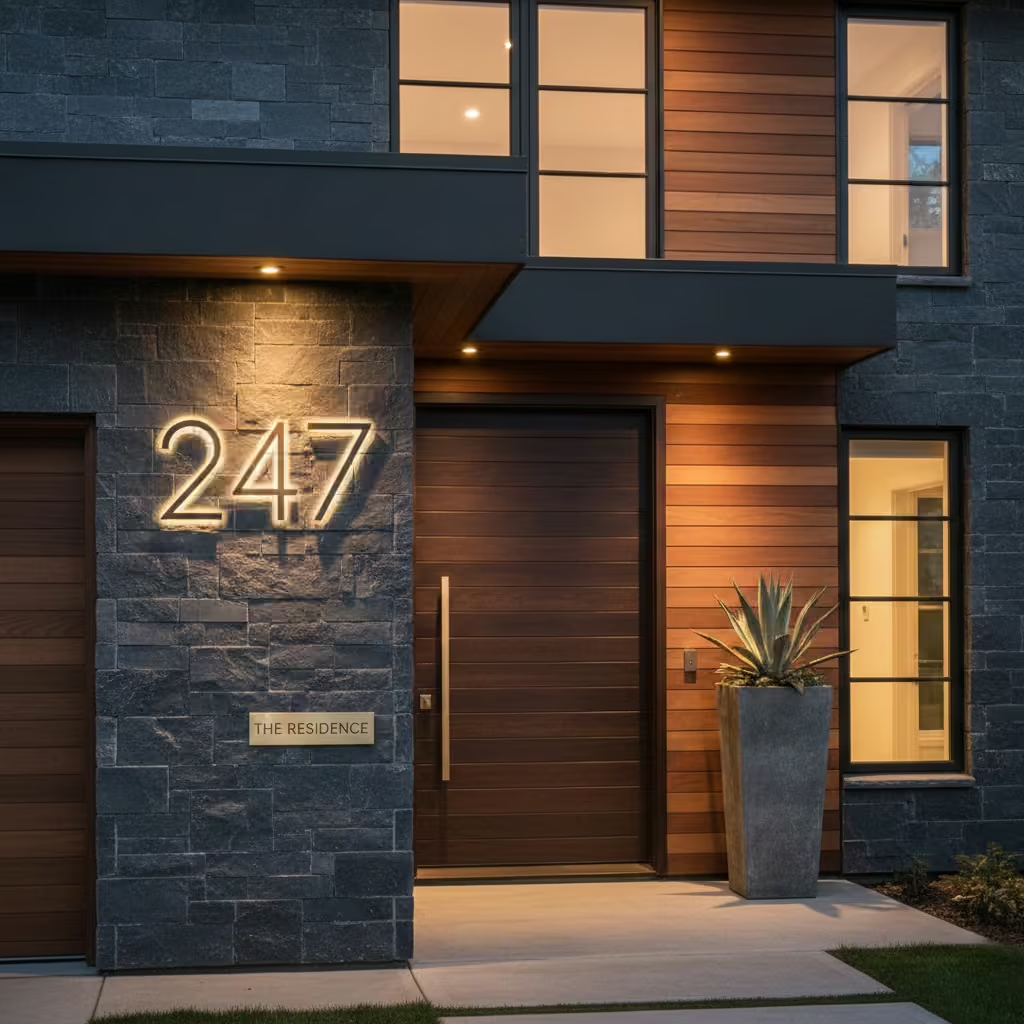
Accessories and finishing touches are the quiet signatures that complete an entryway without overpowering its architecture. I approach these details with restraint, selecting elements that support rather than compete with the main structural composition. House numbers, signage, small sculptural objects, or carefully chosen pots should feel natural within the frontage rhythm. The best finishing accents are durable, weather-resilient, and visually consistent with the material palette of the home. When done well, these small details give the arrival space a sense of craftsmanship and care that is felt immediately
Layered Door Furniture and Bespoke Signage
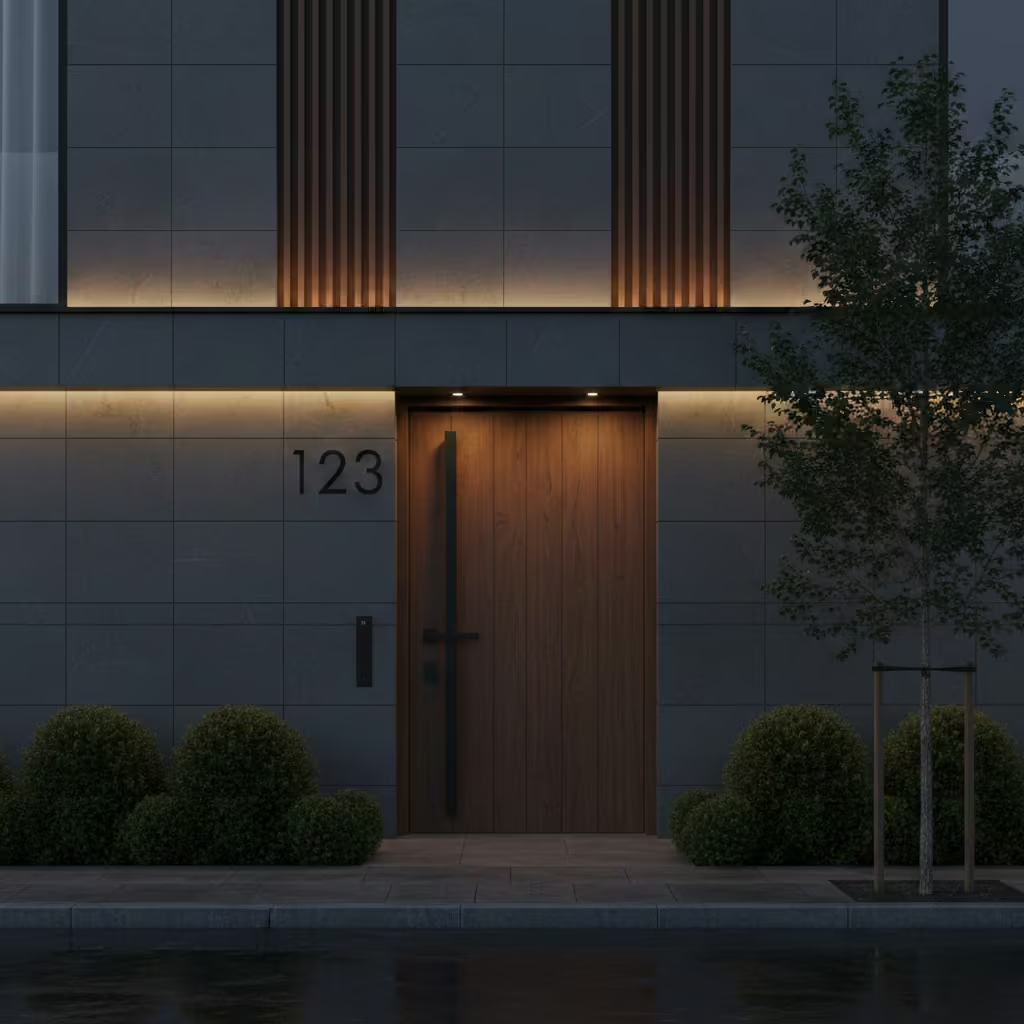
Layered door furniture and signage are about giving the home a clear, confident identity without introducing visual noise. I use this detail when the frontage needs personality but must remain architecturally respectful. The best signage feels as though it was always part of the building rather than added later.
House numbers and lettering serve a practical function first: helping visitors locate the home quickly. Beyond utility, they also influence how the property is perceived from the street. Clean, proportionate signage suggests care, permanence, and attention to detail.
In heritage areas, signage design should follow local conservation guidance. Overly decorative modern lettering can sometimes conflict with historical façade character.
Scale and Placement
- Signage width should relate to door width and façade panel proportions.
- Typical house number height: 50–120 mm (2–5 in) depending on viewing distance.
- Mounting height: Usually 1,400–1,600 mm (55–63 in) from ground level for optimal visibility.
I avoid oversized lettering on small frontage homes because it weakens architectural balance.
Material Selection
Cast Metal Signage
- Strong durability.
- Excellent heritage and classical aesthetic.
Powder-Coated Aluminium or Steel
- Modern minimalist appearance.
- Resistant to corrosion when properly finished.
Finish consistency across door hardware, lighting trims, and signage improves design coherence.
Pros
- Improves property recognition from street approach.
- Adds refinement without structural renovation.
- Low physical footprint but high visual impact.
- Suitable for both modern and traditional homes.
Cons
- Poor alignment can disrupt façade symmetry.
- Cheap lettering materials may fade or loosen over time.
- Heritage zones may restrict style choices.
- Requires careful colour contrast selection.
Real-Life Application Insight
In one Victorian façade refurbishment, I replaced worn plastic house numbers with simple brass house numerals mounted beside the entry door.
The previous signage was visually weak and did not age well with the rendered wall surface. The brass finish introduced warmth against the cooler façade tone.
Over several months, the brass developed a subtle natural patina. Interestingly, the property began to look more established rather than newly renovated. Neighbours commented that the house “fit better” into the street character.
The improvement was not dramatic. It was architectural diplomacy. Small, thoughtful signage allowed the frontage to regain dignity without altering historical personality. That is the value of restrained finishing detail.
Seasonal Styling and Low-Maintenance Planting Pots
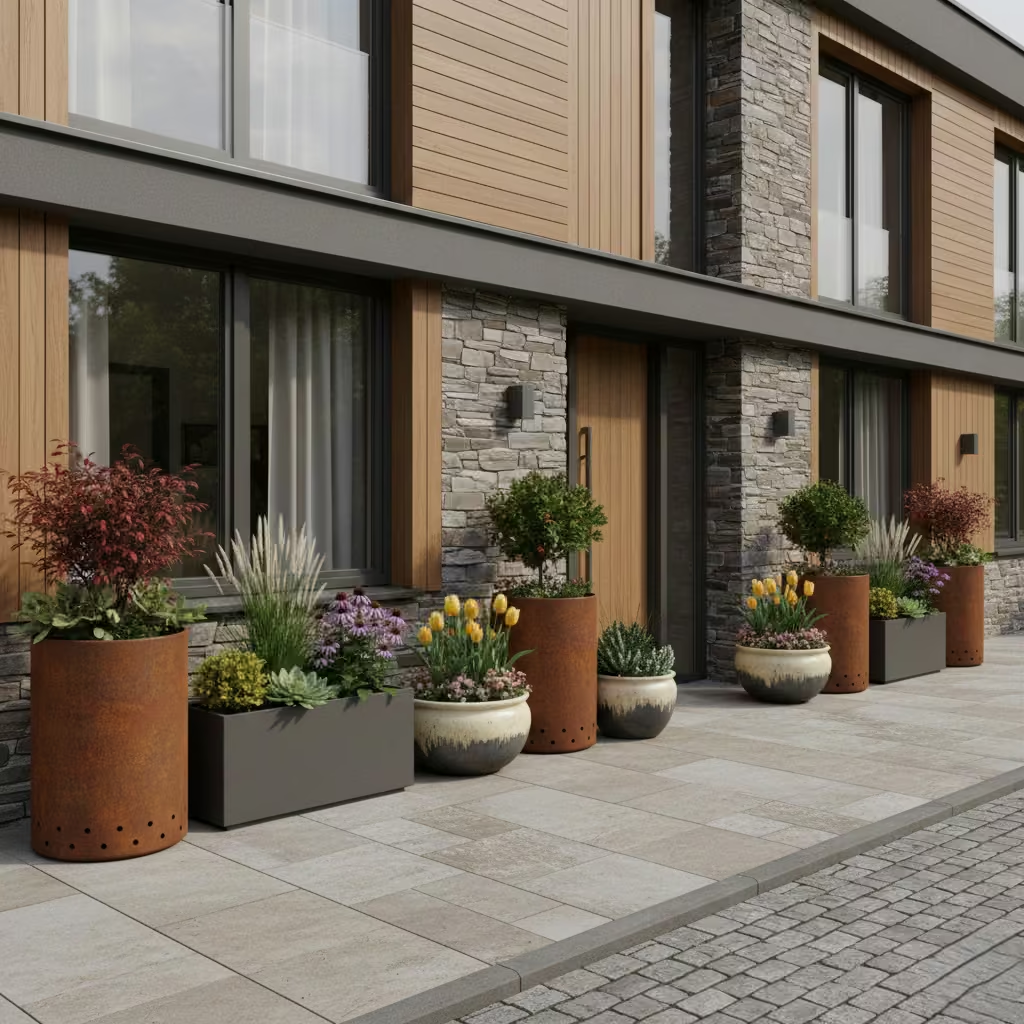
Seasonal planting pots allow an entryway to remain visually alive without committing to permanent landscape alteration. I often use this approach when homeowners want flexibility, simplicity of maintenance, and the ability to refresh the frontage character across the year.
There is emotional value in seeing small changes at the door through seasons. Spring bulbs bring renewal, summer foliage provides fullness, autumn tones introduce warmth, and winter structure maintains dignity when gardens are quiet. Pots act as movable architectural accents rather than permanent ground planting.
This method is particularly useful for compact front gardens, rental properties, or homes where ground excavation is restricted.
Measurements and Container Selection
- Minimum pot volume: 30–40 litres for healthy root development of medium ornamental plants.
- Larger specimen pots: 60–100 litres improve plant stability and moisture retention.
- Pot diameter should visually relate to door width or porch scale.
I prefer heavier containers in windy frontage locations to reduce movement risk.
Material Selection
Glazed Ceramic Pots
- Elegant residential appearance.
- Retains moisture well.
- Requires frost protection in cold climates.
Corten Steel Planters
- Develops natural rusted patina that stabilises over time.
- Excellent for modern or industrial architectural frontage.
Fibreglass Containers
- Lightweight and versatile.
- Suitable where structural load is a concern.
Drainage holes and internal saucers are essential.
Pros
- Immediate visual improvement without construction work.
- Easy seasonal flower replacement.
- Supports personal styling preferences.
- Low landscape disruption.
Cons
- Requires watering management.
- Frost-sensitive materials may crack in winter.
- Wind exposure can move lighter pots.
- Overplanting may cause root restriction.
Real-Life Application Insight
During one entryway transformation, I used matching corten steel planters placed symmetrically along the approach path.
The goal was not colourful planting but architectural framing. The oxidised steel surface developed a warm earthy tone that complemented stone paving and timber accents. Even when plants were replaced seasonally, the visual structure remained constant.
The client appreciated that the frontage felt organised year-round. In summer, flowering plants softened the composition. In winter, evergreen foliage preserved form.
The greatest success of this solution was flexibility. The entryway could evolve without reconstruction, yet the architectural language remained consistent. That is the advantage of well-designed seasonal container planting.
You May also Like: 25 Outdoor Bar Ideas That Turn Backyards Into Social Hotspots
Case Studies: Real-Life Frontage Transformations
Case Study 1: Narrow Terrace Entry
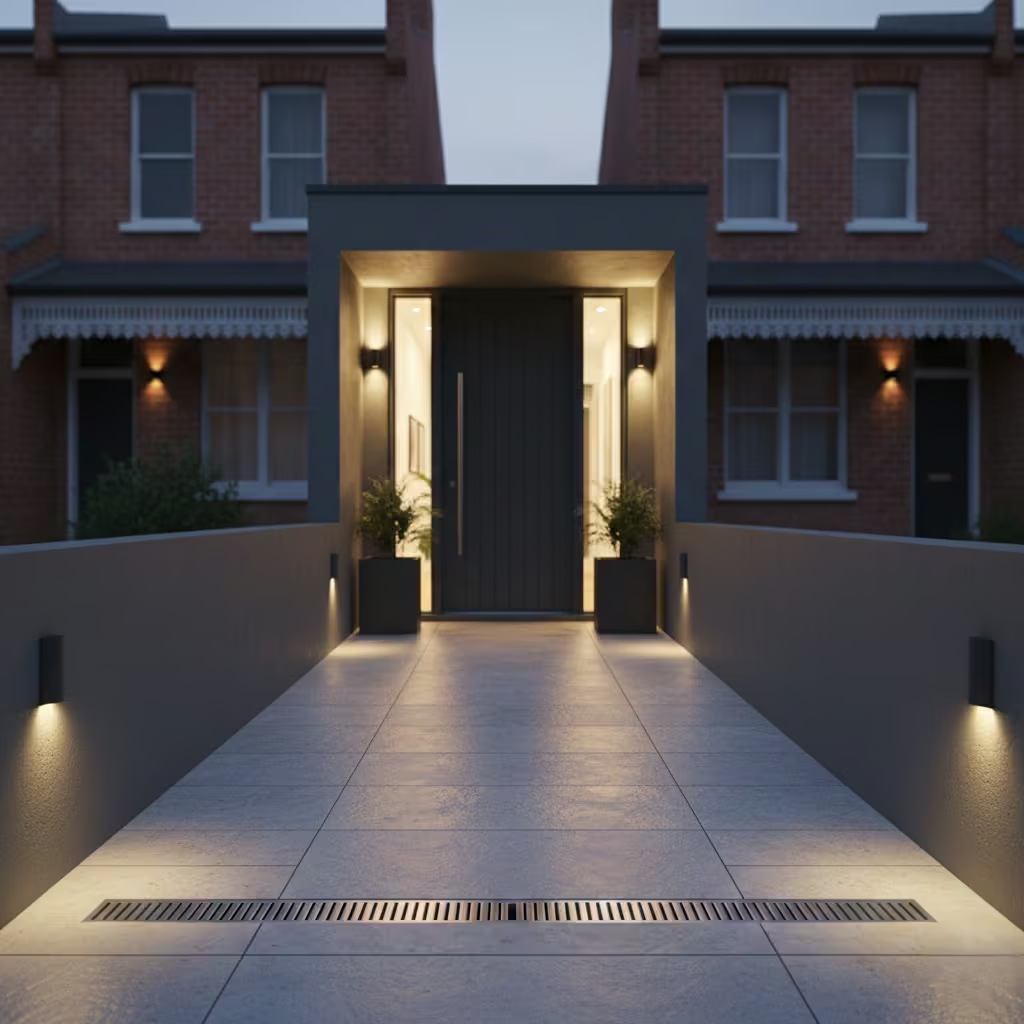
- Intervention: 1.1 m bluestone path, recessed glazed side-lights, integrated slot drain.
- Budget: £5–8k
- Outcome: Improved safety, enhanced perception of width, tactile and slip-resistant surface.
- Real-Life Insight: The slot drain resolved a persistent puddling problem on a sloped terrace approach. The homeowner reported that evening arrivals felt safer and more confident.
- Contractor/Sourcing Note: Bluestone sourced from a local quarry; drainage components supplied by a specialist landscape contractor.
Before/After Photo Placeholder: Narrow terrace entry – bluestone path and integrated drainage
Case Study 2: Detached House Refront
- Intervention: Formal colonnade, specimen olive tree, warm in-ground uplighting, charcoal-stained hardwood front door.
- Budget: £25–40k
- Outcome: Elevated curb identity, stronger arrival sequence, improved resale appeal, and Mediterranean character.
- Real-Life Insight: The olive tree acted as a vertical anchor, while the layered lighting hierarchy created an inviting evening presence. Visitors consistently noted the home “felt composed and welcoming.”
- Contractor/Sourcing Note: Colonnade timber from specialist joinery; olive specimen sourced from a regional nursery with acclimatised stock; LED uplights installed by certified electrical contractor.
Before/After Photo Placeholder: Detached house refront – colonnade, specimen tree, and lighting
These examples show how considered detailing—materials, planting, and lighting—can transform arrival sequences, regardless of frontage size or budget. They illustrate the practical application of principles discussed in the article, giving readers a blueprint for real-world implementation.
Common Mistakes to Avoid in Outdoor Entryway Design
1. Prioritising Decoration Over Spatial Comfort
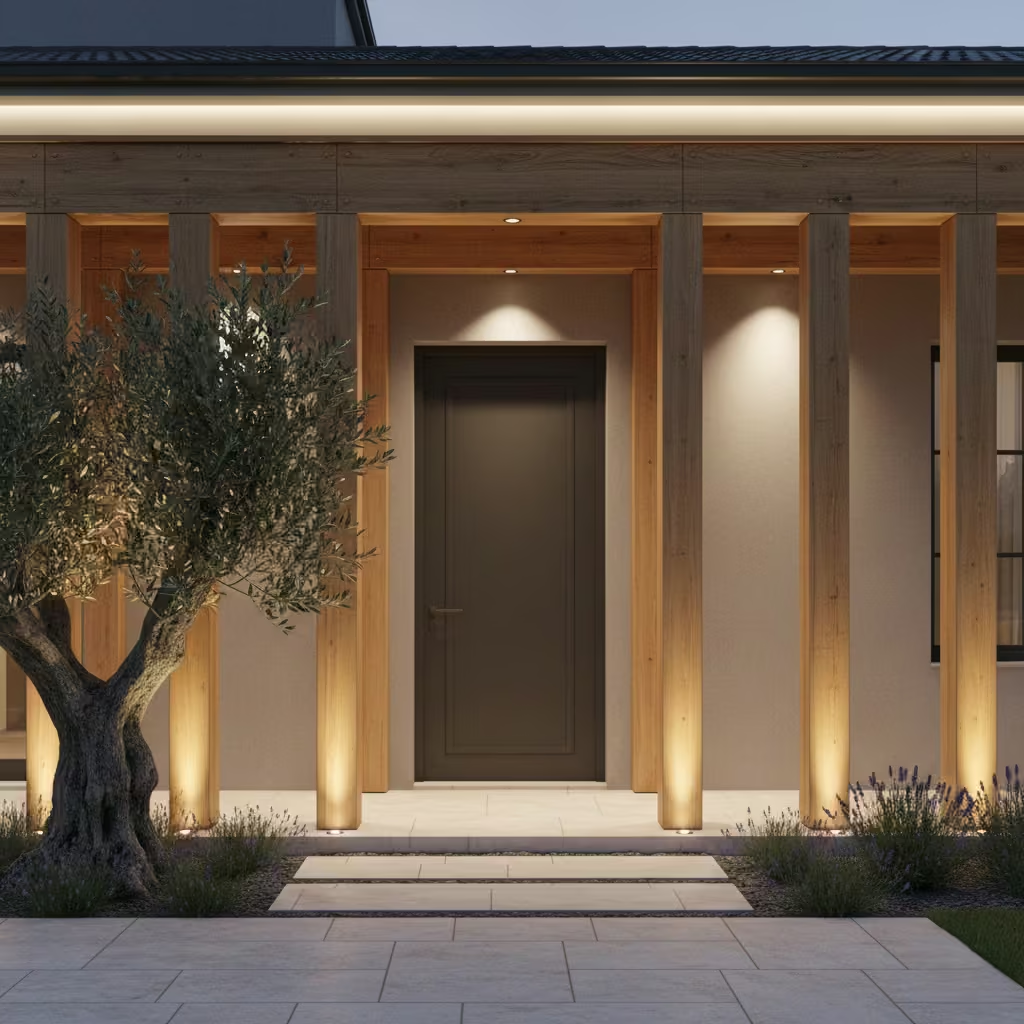
One of the most frequent errors is treating the entryway as a decorative zone rather than a living circulation space. Overloading the frontage with ornaments, excessive planters, or fragmented paving can make arrival feel visually chaotic. I always begin with movement comfort, path clarity, and proportional balance. A well-designed entry should reduce cognitive effort when approaching the door, allowing visitors and family members to feel naturally guided home.
2. Ignoring Drainage and Weather Behaviour
Water management is often overlooked. Poorly planned surfaces may retain rainwater near the threshold, creating slip risk and long-term material damage. I recommend subtle gradients of 1–2% fall away from the building and integration of concealed drainage channels where rainfall exposure is high. Good drainage quietly protects both safety and property durability.
3. Choosing Materials Without Considering Aging Performance
Some materials look beautiful when newly installed but degrade visually or structurally over time. Highly polished surfaces can become slippery in wet climates, while low-quality timber may warp or lose colour. Select materials that improve or remain stable with natural weathering cycles rather than those that depend on constant maintenance.
4. Poor Lighting Layer Structure
Single bright security lights are a common residential mistake. Harsh lighting can flatten architectural texture and create uncomfortable glare. Instead, use layered lighting: path guidance, step safety lighting, and gentle façade accent illumination around 2,700K warm colour temperature for residential comfort.
5. Overcrowding Small Frontages
Small entry gardens suffer when too many design elements compete for attention. I encourage homeowners to think in terms of spatial breathing room. A specimen tree, structured hedge line, or single architectural light can be more powerful than multiple decorative features.
6. Neglecting Long-Term Maintenance Reality
Entryway beauty should not require constant effort to sustain. Choose plants that tolerate pruning, surfaces that resist staining, and lighting systems that allow simple servicing. If maintenance becomes difficult, the space will gradually lose its design intention.
7. Incorrect Scale Relationships
Door size, pathway width, plant height, and porch depth must relate to each other. For example, a large specimen tree planted too close to a small house entrance can visually overpower the façade. Always evaluate frontage design as a single composition rather than independent objects.
Conclusion: The Architecture of Arrival
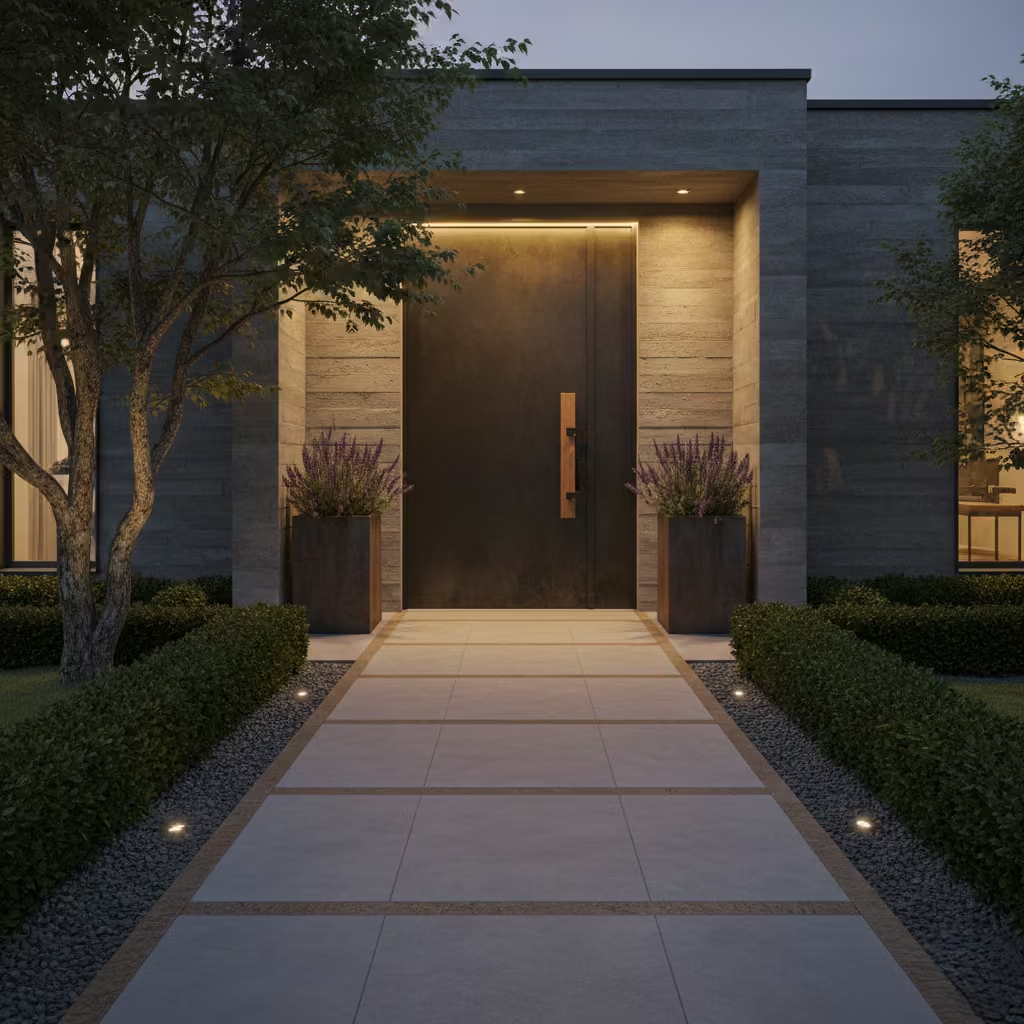
An entryway is more than the point where a visitor crosses a boundary. It is the first chapter of the home’s story, written in material, light, planting, and proportion. The most successful entry designs do not seek attention through complexity but earn respect through clarity, balance, and restraint. I believe an entry should feel composed rather than decorated, allowing architecture, landscape, and human movement to work in harmony.
Across the ideas explored, the underlying principle is consistency of experience. Pathways should guide rather than confuse. Materials should age gracefully rather than demand constant repair. Lighting should reveal safety and character without overwhelming the night. Planting should provide structure and seasonal life without becoming maintenance burden. When these elements are aligned, the entryway becomes emotionally reassuring as well as visually refined.
Good frontage design is a long-term conversation between the home and its environment. Trees mature slowly. Stone weathers quietly. Light changes with season and time of day. The best entryways improve with age, gaining dignity rather than losing relevance.
If you are planning a frontage renovation, begin with purpose rather than decoration. Consider how you arrive home in rain, sunlight, evening, or winter. Design for comfort, durability, and proportion first, and beauty will follow naturally.
A well-designed entryway does not announce itself loudly. It simply makes coming home feel certain. And that certainty is one of the most valuable qualities a house can offer.
Frequently Asked Questions About Designing Outdoor Entryways
How wide should an outdoor entry pathway be?
A comfortable residential entry path is usually 1.0–1.2 m (3 ft 3 in–4 ft) wide. This allows two people to walk side by side and keeps the approach visually balanced against the façade.
What is the best material for outdoor entryway paving?
There is no single best material. Natural stone, high-quality porcelain, permeable concrete, and reclaimed setts all perform well when installed over a properly engineered subbase. Durability, climate exposure, and maintenance capacity should guide selection.
How can I improve privacy at the entryway without building high walls?
Use layered strategies such as low evergreen hedging, planter-built screening, and recessed glazing near the door. These solutions provide privacy while preserving daylight and openness.
Is lighting important for entryway design?
Yes. Layered lighting improves safety and architectural character after sunset. I recommend combining path lighting, step lighting, and subtle façade washing rather than relying on a single bright fixture.
Do I need planning permission for a porch or colonnade?
Regulations depend on local planning authority rules. Small porches are often permitted, but structural additions, colonnades, or frontage extensions may require approval.
What plants are best for low-maintenance entry gardens?
Evergreen structural shrubs, native species, and slow-growing specimen trees are practical choices. Avoid high-maintenance flowering varieties unless regular gardening care is available.
What is the most common entryway design mistake?
Over-decoration and lack of structural planning. The best entryways prioritise proportion, movement comfort, and weather performance over visual complexity.