25 Outdoor Tiles for Floor Stylish Patio, Garden and Terrace Flooring Ideas
Outdoor Tiles for Floor is often approached as a finishing layer; something applied after the structure is resolved. In practice, I treat it as an architectural decision from the outset. The floor is not simply a surface you walk on; it defines how the space is read, how it performs, and how it connects to the house. The right tile does not decorate a patio or terrace; it anchors it.
Material choice directly influences how people move through space. Large-format tiles, for example, create longer visual lines and encourage slower, more deliberate movement, which suits open terraces. Smaller modules or heavily jointed layouts introduce rhythm and friction, often better suited to garden paths or transitional zones. I have found that getting this balance right early avoids spaces that feel either too static or unnecessarily busy.
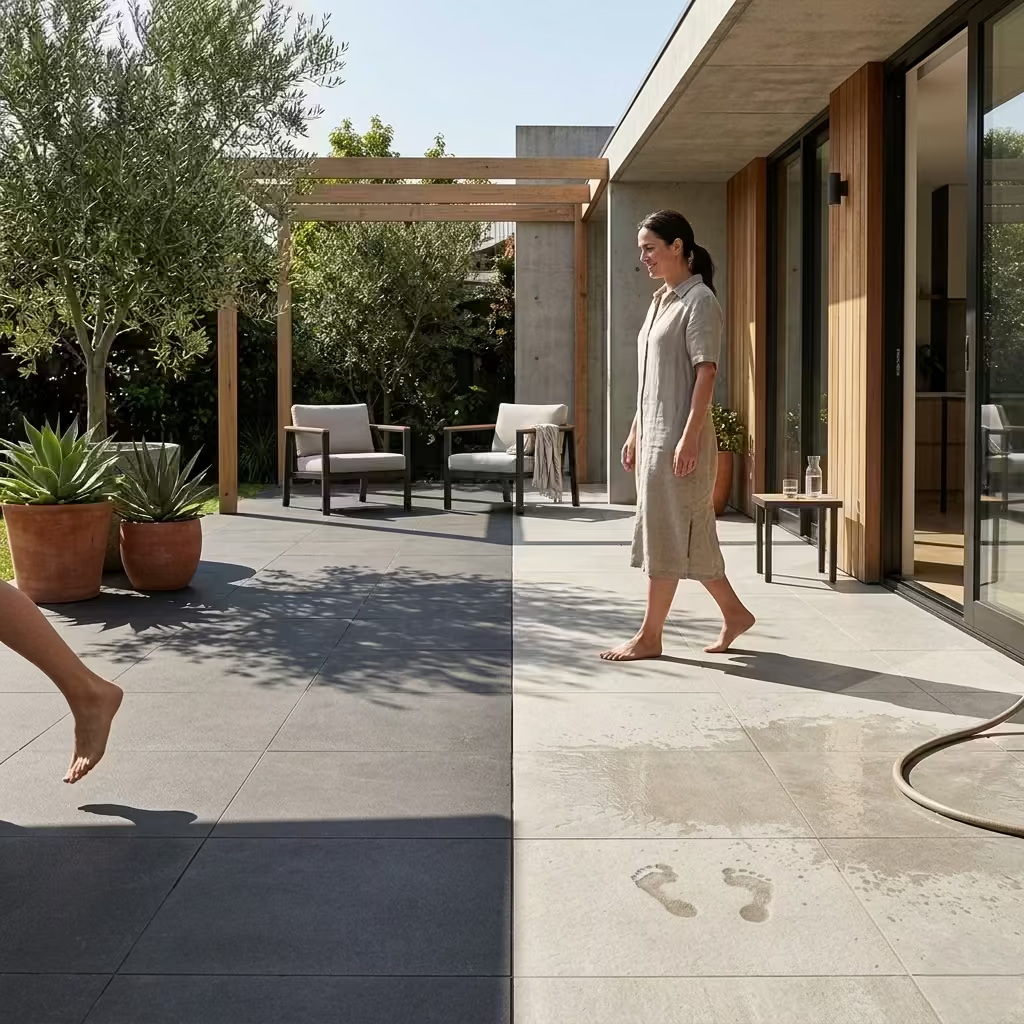
Thermal behaviour is equally critical, particularly in exposed outdoor environments. Some stones retain heat well into the evening, which can be beneficial in cooler climates but uncomfortable underfoot in hotter regions. Porcelain, depending on its finish and colour, can reflect or absorb heat differently. These are not abstract considerations. They determine whether a space is genuinely usable throughout the day.
Maintenance is another factor that should inform design decisions rather than follow them. Natural stone, while visually rich, often requires sealing and periodic care. Engineered materials like porcelain offer consistency and lower upkeep, but must be specified correctly for slip resistance and external durability. I have seen well-designed spaces fail simply because the material was chosen for appearance without considering long-term performance.
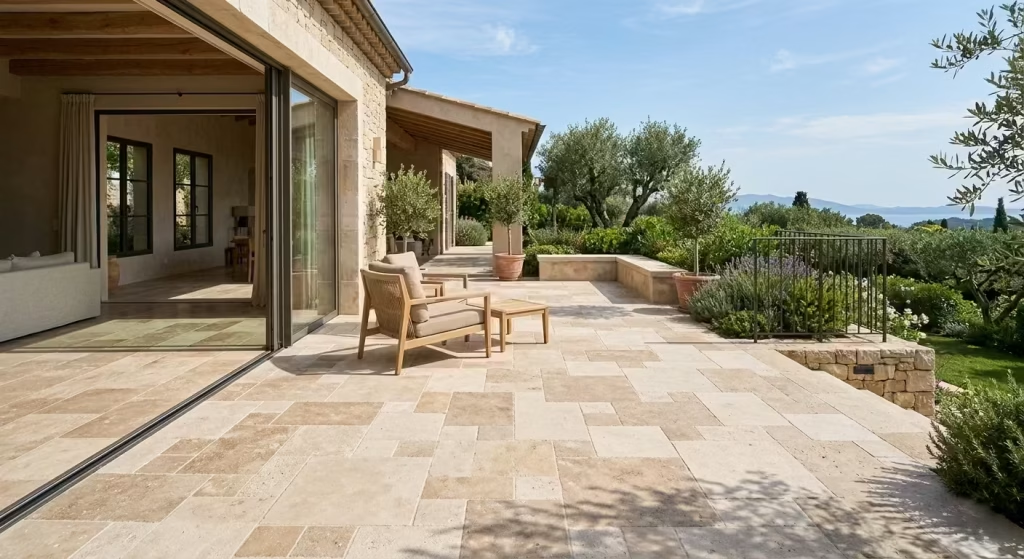
Equally important is visual continuity. Outdoor flooring should not feel disconnected from the architecture it extends. When handled carefully, tiles can blur the boundary between interior and exterior, allowing spaces to read as a cohesive whole rather than separate zones. This is where proportion, tone, and finish become more important than pattern or ornament.
The 25 ideas that follow are not presented as trends or quick fixes. They are material-led design directions, each with a specific purpose, context, and set of performance characteristics. Throughout, I will draw on real project experience to explain where each option works, where it does not, and how it behaves over time. The aim is not just to inspire, but to guide decisions that will continue to feel resolved and functional years after installation.
Climate, Slip Resistance, and Load – The Non-Negotiables
Before considering colour, pattern, or style, I prioritise performance. Outdoor tiles are exposed to far more stress than interior finishes, and if the fundamentals are wrong, even the most refined material will fail prematurely.
Frost resistance vs heat retention
In colder climates, frost resistance is essential. Porous materials that absorb water can crack when temperatures drop below freezing. Dense porcelain and certain granites perform reliably here, while softer stones require careful specification and sealing.
In hotter regions, the issue shifts to heat retention. Dark, dense materials absorb and hold heat, often becoming uncomfortable underfoot. I have seen terraces become unusable during peak afternoon hours simply due to poor material selection. In these cases, lighter-toned porcelain or limestone with a honed finish tends to perform better, reflecting rather than storing heat.
Slip ratings (R11 or higher for exposed areas)
Slip resistance is not optional outdoors. For fully exposed patios, gardens, and poolside zones, I specify a minimum of R11 slip rating. Textured finishes, matte porcelain, and naturally riven stone surfaces provide better grip, particularly in wet conditions.
One common mistake I encounter is selecting tiles based on showroom appearance, where lighting and dry conditions mask real-world performance. A tile that feels acceptable indoors can become hazardous outdoors when exposed to rain, algae, or dust.
Load-bearing requirements for terraces and rooftops
Not all outdoor spaces sit on solid ground. Terraces and rooftop gardens require a structural understanding of load limits. Tiles, adhesive, screed, and any pedestal systems all contribute to weight.
In my projects, I always coordinate with structural engineers when working on elevated surfaces. For example, large-format porcelain slabs (20 mm thickness) can weigh significantly more than standard tiles, and when combined with wet installation methods, the cumulative load must be carefully managed. Ignoring this can lead to long-term structural stress or failure.
Scale, Proportion, and Layout Logic
Once performance criteria are satisfied, scale becomes the next critical decision. Tile size is not just a visual choice; it directly affects how a space is perceived and experienced.
Balanced formats for everyday patios
I often use 600 × 600 mm (24 × 24 inch) tiles for patios because they strike a reliable balance. They are large enough to reduce visual clutter but still manageable for installation and slight ground variations. This format works particularly well in medium-sized gardens where proportion needs to feel controlled rather than expansive.
Large formats for open terraces
For larger terraces or open-plan outdoor areas, I typically move to 900 × 900 mm (36 × 36 inch) or similar large-format tiles. These create broader visual planes, reducing grout lines and allowing the space to read as more continuous and architectural.
However, large tiles demand a high level of substrate preparation. Even minor inconsistencies in the base can lead to lippage, which disrupts both appearance and usability.
How grout lines shape visual rhythm
Grout is often overlooked, yet it defines the rhythm of the floor. Narrow joints with colour-matched grout create a seamless, almost monolithic effect. In contrast, contrasting grout emphasises pattern and grid. I tend to use restraint here. In most outdoor settings, subtle grout tones that blend with the tile produce a calmer, more enduring result. Strong contrasts can feel visually busy over time, particularly in larger areas.
Drainage and Installation Realities
Even the most carefully selected tile will fail if water management and installation are not handled correctly. This is where many outdoor projects go wrong.
Minimum slope: 1:60 for water runoff
Outdoor surfaces must be designed to shed water efficiently. I work to a minimum fall of 1:60, meaning for every 60 cm (24 inches) of surface. There is a 1 cm (0.4 inch) drop. This gradient is subtle enough to remain visually undetectable but effective in preventing standing water.
Poor drainage leads to staining, algae growth, and, in colder climates, freeze-thaw damage.
Permeable vs sealed systems
There are two primary approaches to outdoor tile installation.
- Sealed systems involve a fully bonded tile on a prepared concrete base with controlled drainage points.
- Permeable systems allow water to pass through joints or gaps into a sub-base below, often used in garden settings.
I select between these based on context. Rooftop terraces typically require sealed, waterproofed systems, while ground-level gardens can benefit from permeable construction that integrates with natural drainage.
Why poor installation ruins premium materials
In practice, installation quality matters as much as the tile itself. I have seen high-end stone and porcelain installations fail within a year due to inadequate substrate preparation, incorrect adhesives, or missing expansion joints.
Outdoor environments expand and contract with temperature changes. Without proper jointing and flexible installation methods, tiles can crack, lift, or become uneven over time. This is why I always prioritise experienced contractors who specialise in exterior work rather than general tiling.
25 Outdoor Tile Ideas (Material-Led Design Directions)
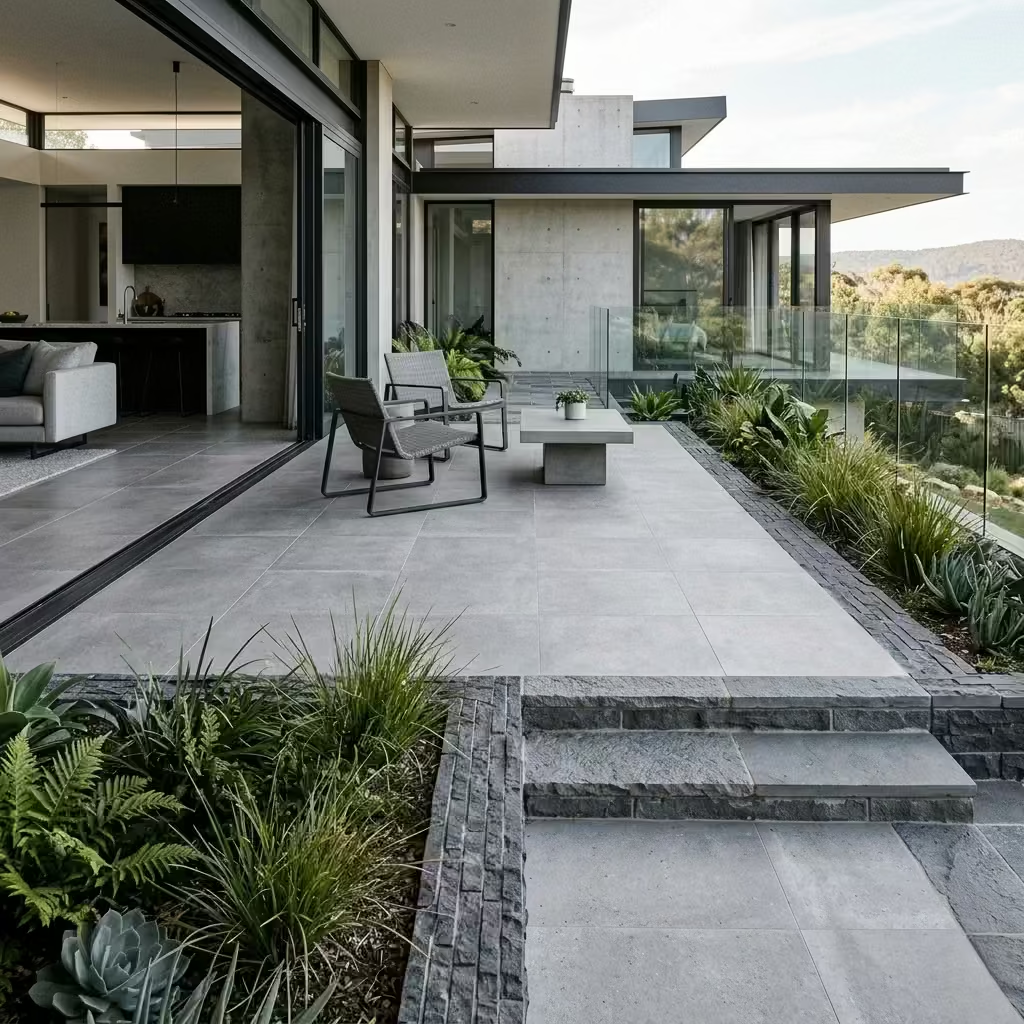
Before moving into individual options, it is important to frame these ideas as material-driven strategies rather than decorative choices. In my work, I approach outdoor tiles by how they perform, age, and integrate with architecture, not simply how they look in isolation. Each of the following 25 ideas represents a distinct material direction with specific spatial applications, proportions, and environmental responses. Some are suited to expansive terraces, others to intimate garden settings, but all are grounded in real-world use, where durability, maintenance, and long-term visual consistency matter as much as initial impact.
Limestone Tiles for Soft, Sun-Washed Patios
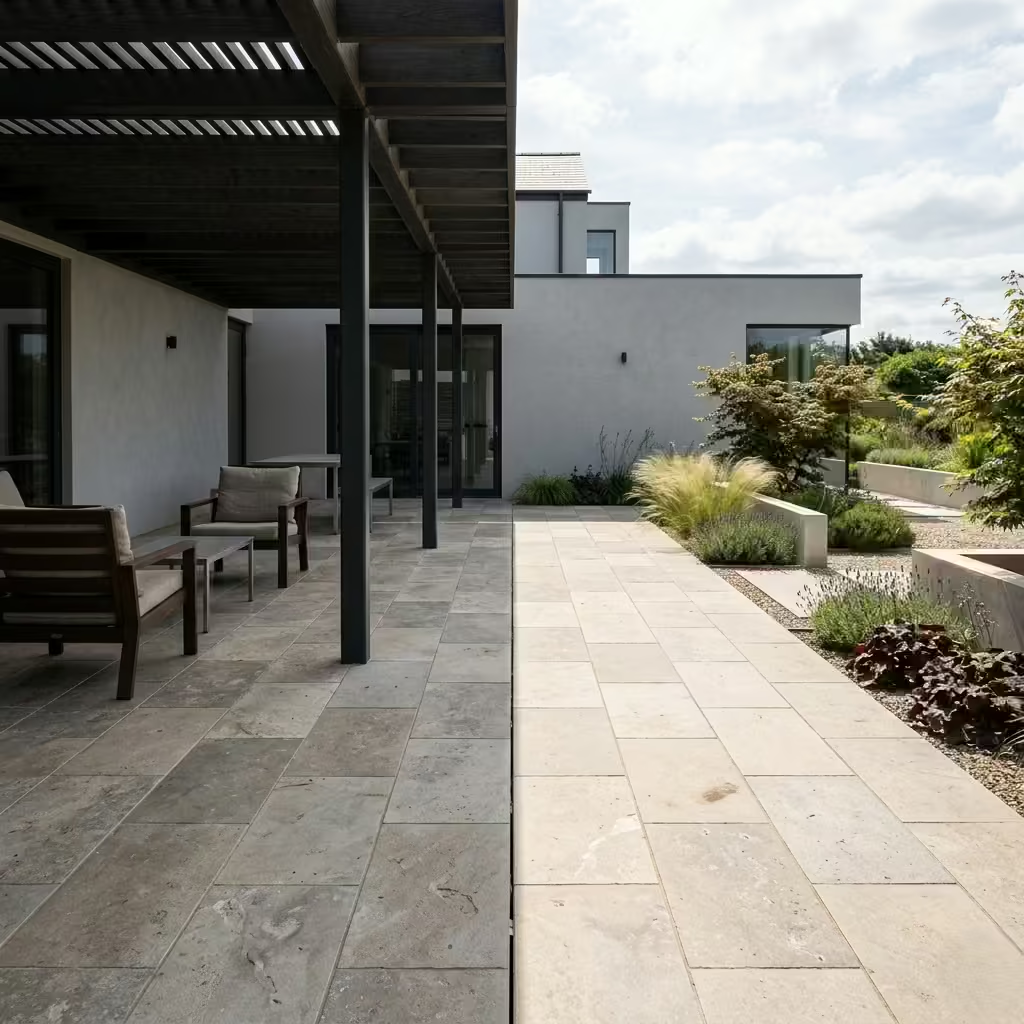
Limestone offers a restrained, architectural surface that softens outdoor spaces without drawing attention to itself. Its naturally muted tones, typically ranging from pale beige to warm grey, create a sun-washed effect that works particularly well in gardens where planting, light, and shadow are intended to take visual precedence. I use limestone when the goal is calm in continuity rather than contrast, allowing the flooring to recede and support the broader composition.
Real-Life Application Insight
I have specified honed limestone across several warm-climate patio projects where clients wanted a refined but understated base. In one instance, the material helped visually connect a shaded seating terrace to a brighter garden beyond, maintaining tonal consistency as light conditions shifted throughout the day. The key advantage was how the surface diffused sunlight rather than reflecting it harshly, creating a more comfortable and visually balanced outdoor environment.
Key Measurements or Proportional Guidance
For most patio settings, I find 600 × 900 mm (24 × 36 inch) tiles strike the right balance between scale and manageability. This rectangular format introduces a subtle directional flow without overwhelming the space.
- Recommended joint width: 3–5 mm (0.12–0.2 inch)
- Typical thickness: 20–30 mm (0.8–1.2 inch) for outdoor use
- Layout approach: staggered or linear depending on desired movement
Larger formats can be used in expansive areas, but limestone’s natural variation often reads best at this mid-scale size.
Pros
- Soft, natural appearance that ages gracefully
- Remains relatively cool underfoot in direct sunlight
- Blends well with planting and natural materials
- Suitable for both traditional and contemporary settings
Cons
- Requires sealing to resist staining and moisture absorption
- Can weather unevenly if exposed to harsh conditions without maintenance
- Softer than granite or porcelain, making it more prone to surface wear
- Colour variation between batches requires careful selection and planning
Limestone is most successful when used with restraint and supported by proper installation and maintenance. When specified correctly, it delivers a timeless foundation that improves with age rather than competing with its surroundings.
Travertine Tiles for Mediterranean-Style Gardens
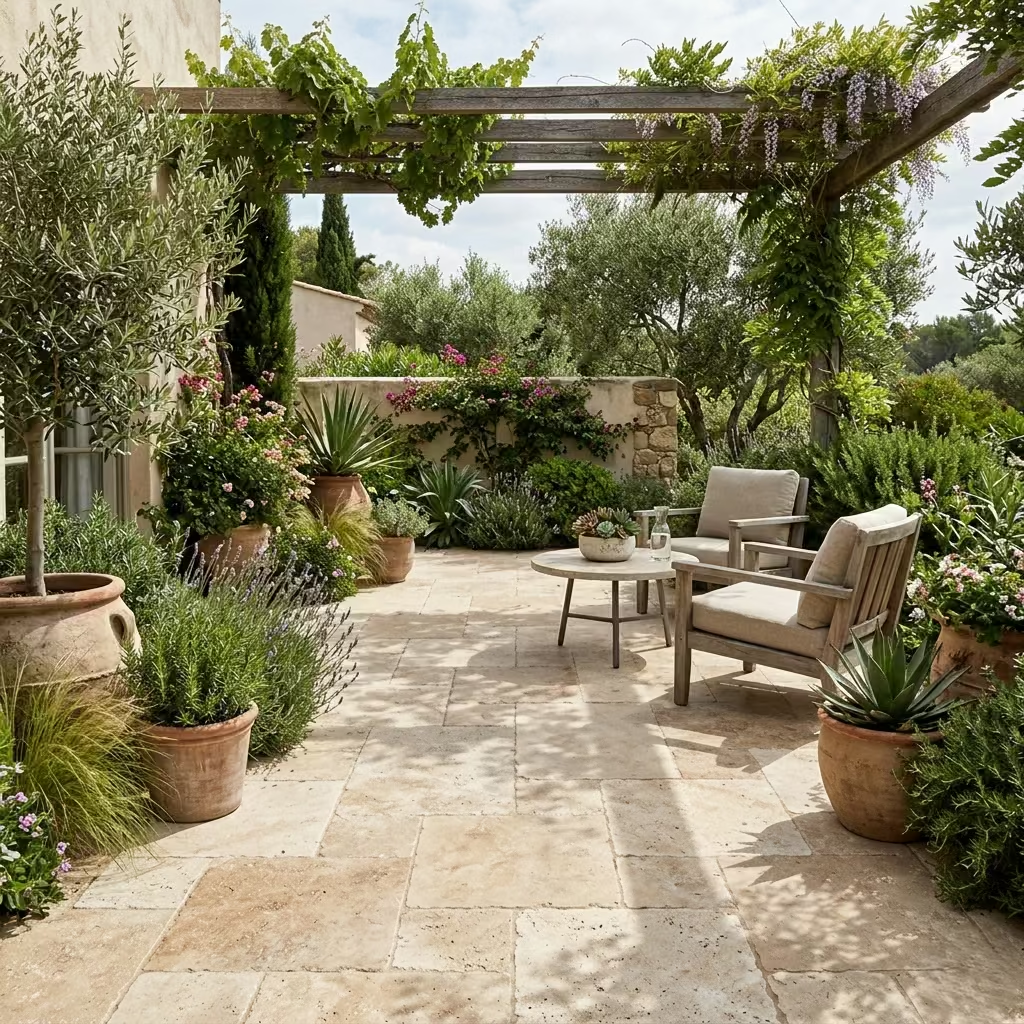
Travertine carries a distinct sense of place. Its softly pitted surface, layered tonal variation, and warm undertones evoke Mediterranean landscapes where outdoor living is relaxed, sun-led, and deeply connected to natural materials. I use travertine when I want a space to feel settled and timeless rather than newly finished. It introduces texture without heaviness and warmth without visual noise, making it particularly effective in gardens where planting, terracotta elements, and dappled light play a central role.
Unlike sharper, more contemporary materials, travertine absorbs light gently. It does not reflect or dominate; it quietens the space. This makes it ideal for patios designed for long afternoons, where comfort, both visual and physical, is the priority.
Real-Life Application Insight
I specified tumbled travertine for a courtyard-style garden where the brief was to recreate a Mediterranean atmosphere without feeling overly styled. The client had olive trees, clay planters, and limewashed walls, and the flooring needed to anchor everything without competing.
What stood out immediately after installation was how naturally the space came together. The subtle imperfections in the stone softened the geometry of the layout, and as the surface settled over time, it developed a lived-in quality that would have been impossible with more uniform materials. Even in peak sun, the tiles remained comfortable underfoot, which made the patio genuinely usable throughout the day rather than just visually appealing.
Key Measurements or Proportional Guidance
Travertine works best when its natural variation is allowed to read across a balanced layout. I typically avoid overly large formats, as they can feel too formal for this material.
- Ideal tile size: 400 × 600 mm (16 × 24 inch) or 600 × 600 mm (24 × 24 inch)
- Thickness: 20–30 mm (0.8–1.2 inch) for outdoor durability
- Joint width: 5–8 mm (0.2–0.3 inch), slightly wider to accommodate natural edge variation
- Finish: tumbled or brushed for improved slip resistance and a softer visual effect
For a more traditional Mediterranean feel, I often use a French pattern layout, which introduces variation in module sizes and creates a more relaxed, organic rhythm across the surface.
Pros
- Warm, natural tones that create an inviting, relaxed atmosphere
- Comfortable underfoot, even in strong sunlight
- Textured surface offers good slip resistance when properly finished
- Ages beautifully, developing character over time
- Works exceptionally well with planting, terracotta, and rustic architectural elements
Cons
- Naturally porous, requiring sealing to prevent staining and moisture ingress
- Surface pits can collect dirt if not maintained regularly
- Less uniform than porcelain, which may not suit highly minimal designs
- Requires careful installation to manage variation in thickness and edges
Travertine is not a material that aims for perfection. Its value lies in its irregularity, its warmth, and the way it evolves. When used in the right setting, it does more than finish a patio; it creates an atmosphere that feels grounded, relaxed, and genuinely lived in.
Slate Tiles for Textured, Slip-Resistant Surfaces
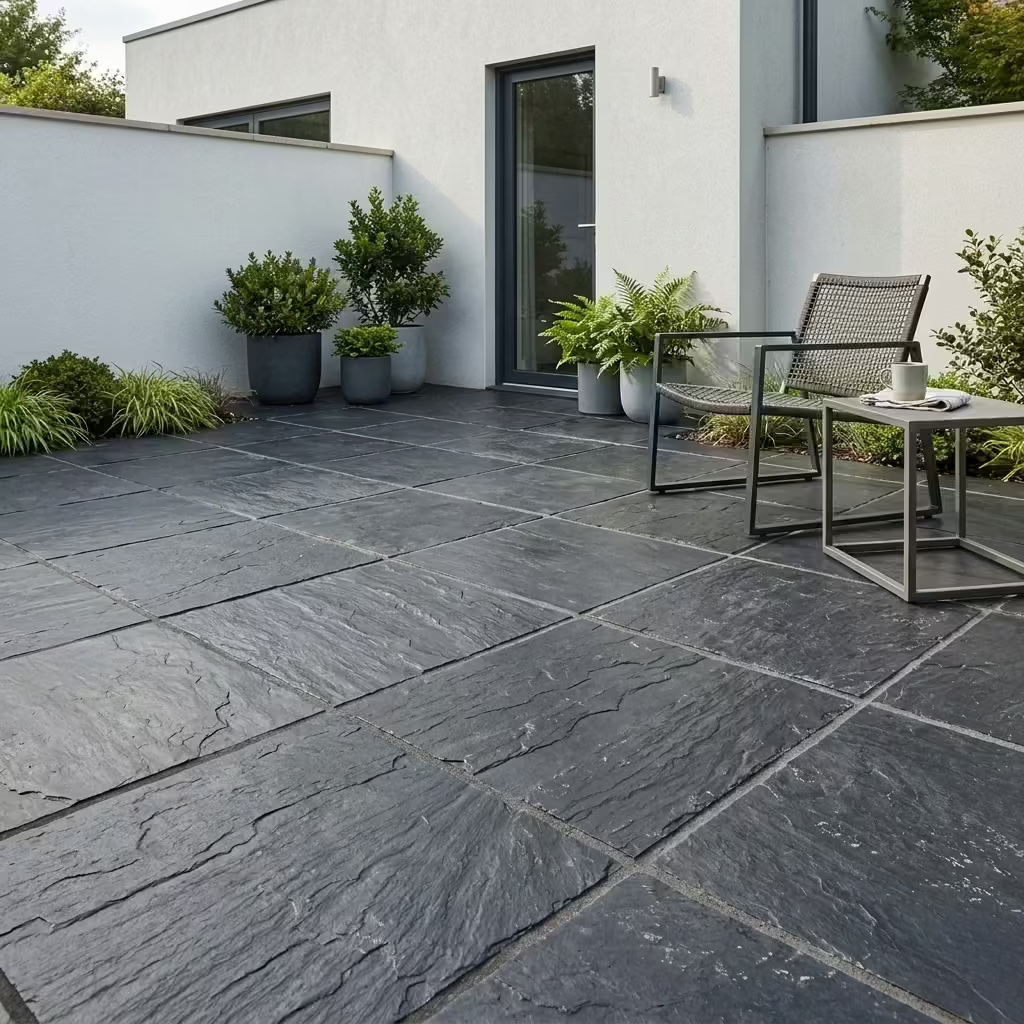
Slate introduces depth and tactility in a way few materials can. Its naturally cleft surface creates a layered texture that feels grounded and robust, making it particularly suited to outdoor areas where safety, durability, and visual weight are essential. I use slate when I want to anchor a space, especially in gardens with strong planting structure or in contemporary schemes that benefit from contrasting against lighter architectural elements.
Visually, slate leans toward darker tones, charcoal, graphite, and deep blue-grey, which absorb light rather than reflect it. This gives outdoor spaces a more defined, composed character, especially in transitional zones like pathways, steps, and rain-exposed patios.
Real-Life Application Insight
I have used a riven slate in a sloped garden pathway where slip resistance was a primary concern. The site was exposed to frequent rain, and smoother materials were not viable. What made slate particularly effective was its natural grip underfoot, even when wet, combined with its ability to visually integrate with surrounding stone retaining walls and dense planting.
Over time, the material developed subtle tonal variation as it weathered, which enhanced the natural feel of the space. Unlike uniform finishes, it did not show wear in a negative way; instead, it added depth and authenticity. The key was selecting a consistent batch and ensuring proper sealing to manage moisture absorption.
Key Measurements or Proportional Guidance
Slate performs best when its texture is balanced with proportion and layout clarity.
- Ideal tile size: 600 × 600 mm (24 × 24 inch) for patios, or 300 × 600 mm (12 × 24 inch) for pathways
- Thickness: 10–20 mm (0.4–0.8 inch) depending on application and substrate
- Joint width: 5–8 mm (0.2–0.3 inch) to accommodate natural edge variation
- Finish: riven (natural split) for maximum slip resistance
For larger areas, I often use a modular or staggered layout to reduce repetition and allow the natural variation of the slate to read more organically.
Pros
- Excellent natural slip resistance, ideal for wet or sloped areas
- Rich, layered texture that adds depth and visual interest
- Durable and suitable for high-traffic outdoor zones
- Integrates well with natural landscapes and structural stone elements
Cons
- Dark colour can absorb heat, making it warm underfoot in hot climates
- Requires sealing to prevent moisture absorption and staining
- Surface texture can trap dirt if not cleaned regularly
- Variation in tone and thickness requires careful selection and skilled installation
Slate is a material I rely on when performance cannot be compromised. It brings a sense of permanence and structure to outdoor spaces, while its natural texture ensures that practicality and design work together rather than in opposition.
You May also Like: Rooftop Decks Turning Unused Space into a Retreat
Sandstone Tiles for Organic Garden Integration
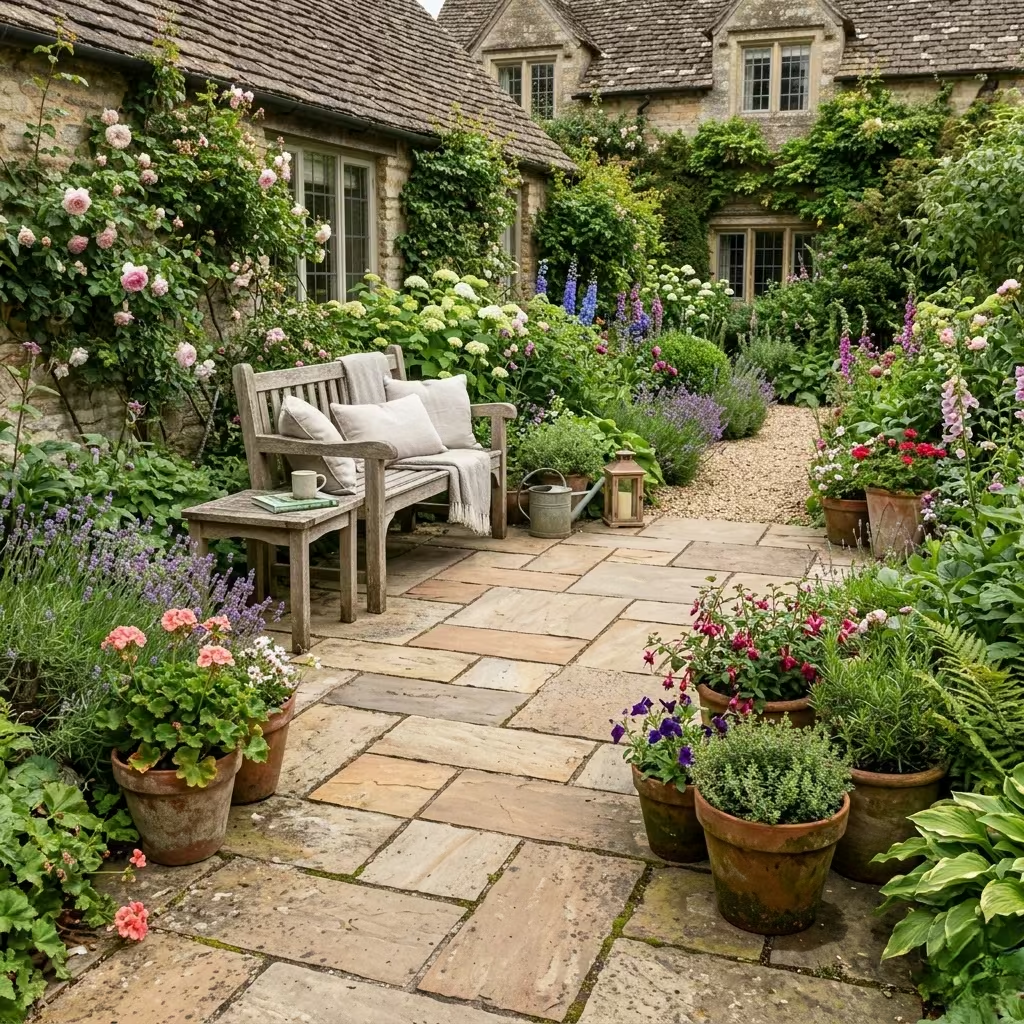
Sandstone is one of the most effective materials for creating a seamless transition between built surfaces and planting. Its granular texture and warm, earthy palette allow it to sit comfortably within the landscape rather than feeling imposed upon it. I use sandstone when the intention is to dissolve boundaries, where the patio should feel like an extension of the garden floor rather than a separate architectural layer.
Unlike more refined materials, sandstones embrace irregularity. Subtle tonal shifts, soft veining, and a slightly weathered appearance give it an organic quality that works particularly well in informal gardens, cottage-style layouts, or spaces with dense planting and naturalistic design.
Real-Life Application Insight
I specified calibrated sandstone for a garden that relied heavily on layered planting and curved borders. The challenge was to introduce a usable patio area without disrupting the relaxed, almost wild character of the space.
What worked exceptionally well was how the sandstone absorbed and reflected the surrounding tones, from soil to foliage, without creating visual contrast. Over time, as planting matured and softened the edges, the patio began to feel less like an addition and more like something that had always been there. This is where sandstone excels. It does not try to stand out, it integrates.
Key Measurements or Proportional Guidance
Sandstone benefits from layouts that emphasise variation and informality rather than rigid geometry.
- Ideal tile size: 600 × 900 mm (24 × 36 inch) or mixed-size packs for a more natural layout
- Thickness: 20–25 mm (0.8–1 inch) for outdoor durability
- Joint width: 8–12 mm (0.3–0.5 inch), slightly wider to suit the material’s character
- Finish: naturally riven or lightly textured for slip resistance
I often use a random or coursed pattern layout, which breaks up repetition and enhances the organic feel. Straight grid patterns can make sandstone feel overly structured, which works against its natural strengths.
Pros
- Warm, earthy tones that integrate seamlessly with planting and natural surroundings
- Naturally textured surface offers good slip resistance
- Less visually formal, ideal for relaxed or informal garden designs
- Weathers attractively, developing a soft patina over time
Cons
- Porous material that requires sealing to reduce staining and moisture absorption
- Colour variation between batches can be significant, requiring careful selection
- Can be prone to algae or moss growth in shaded, damp conditions
- Less precise edges compared to engineered materials, requiring skilled installation
Sandstone is most successful when allowed to remain true to its nature. It is not about precision or sharp definition, but about creating a surface that feels connected to the landscape. When used thoughtfully, it produces outdoor spaces that feel grounded, relaxed, and quietly enduring.
Granite Tiles for High-Traffic Durability
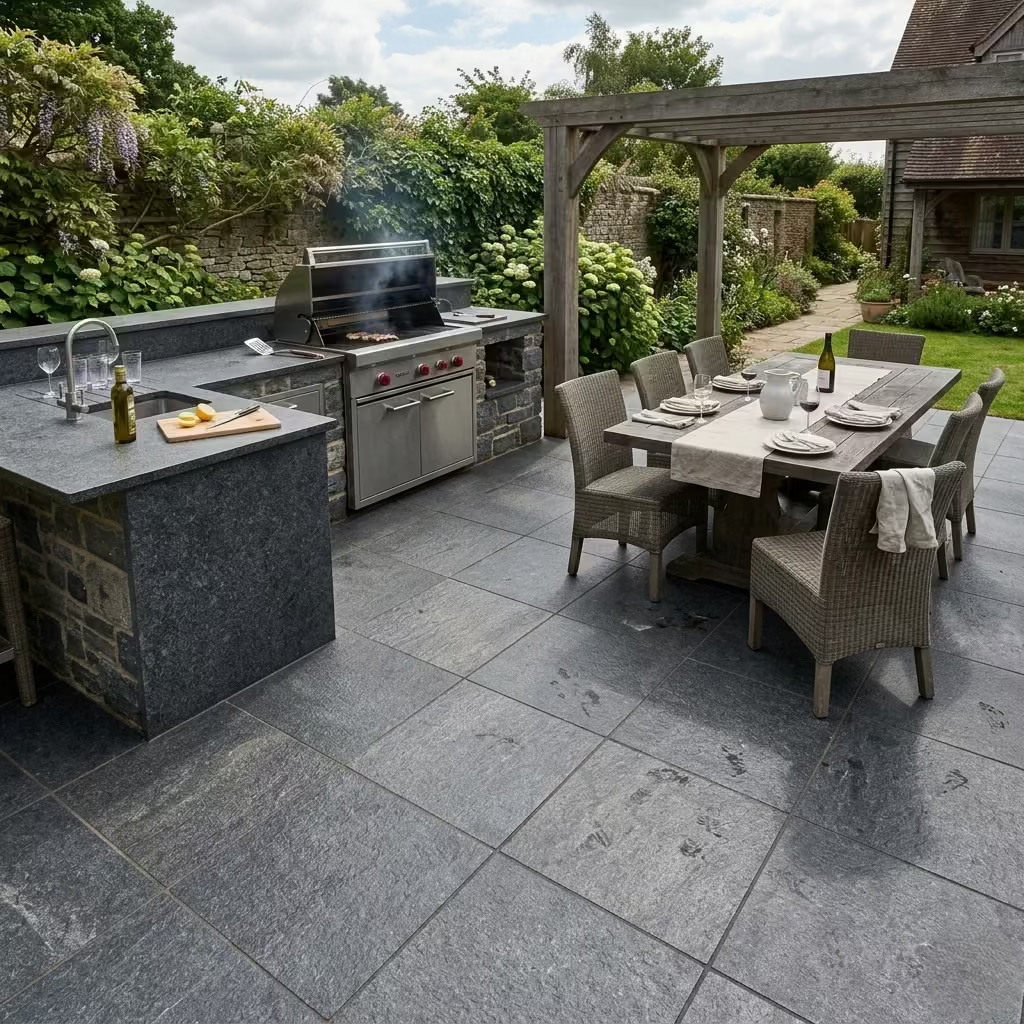
Granite is specified when performance is the priority and the surface must withstand consistent, heavy use without degradation. It brings a sense of permanence and structural clarity to outdoor spaces, making it particularly effective in high-traffic patios, outdoor kitchens, pathways, and entrance zones. Visually, granite is more controlled and uniform than softer stones, which allows it to support contemporary and architectural schemes where precision and clean lines matter.
I use granite when I want the flooring to hold its edge over time, both physically and visually. It does not soften or weather in the same way as limestone or sandstone. Instead, it maintains a crisp, defined appearance, which can be essential in spaces that rely on strong geometry.
Real-Life Application Insight
In one project involving a large family garden with an outdoor dining and kitchen area, I specified flamed granite due to the intensity of daily use. The space had constant foot traffic, furniture movement, and exposure to food spills. Softer materials would have shown wear quickly.
What proved valuable was granite’s resilience. Even after extended use, the surface retained its structure with minimal visible wear. The textured finish provided reliable grip, and the darker tone helped mask minor stains and marks. The result was a space that remained functional and composed without requiring constant maintenance or intervention.
Key Measurements or Proportional Guidance
Granite performs well across a range of formats, but proportion should align with the scale and function of the space.
- Ideal tile size: 600 × 600 mm (24 × 24 inch) for balanced patios, or 600 × 900 mm (24 × 36 inch) for larger areas
- Thickness: 20 mm (0.8 inch) for standard outdoor use; 30 mm (1.2 inch) for heavy-duty applications
- Joint width: 3–5 mm (0.12–0.2 inch) for a clean, precise finish
- Finish: flamed or bush-hammered for slip resistance
For contemporary layouts, I often use a linear or grid pattern to reinforce the material’s structured character.
Pros
- Extremely durable and resistant to wear, ideal for high-traffic areas
- Low porosity compared to other natural stones, reducing staining risk
- Maintains a consistent appearance over time with minimal weathering
- Textured finishes provide strong slip resistance
- Suitable for both residential and commercial-level use
Cons
- Can feel visually heavy, particularly in darker tones
- Retains heat, making it warmer underfoot in hot climates
- Higher material and installation cost compared to softer stones
- Less forgiving aesthetically, as its uniformity can feel rigid in informal garden settings
Granite is a material I rely on when longevity and resilience cannot be compromised. It is not about softness or subtle ageing, but about creating a surface that performs consistently under pressure, maintaining both its function and its architectural presence over time.
Porcelain & Engineered Tiles (Performance Meets Design)
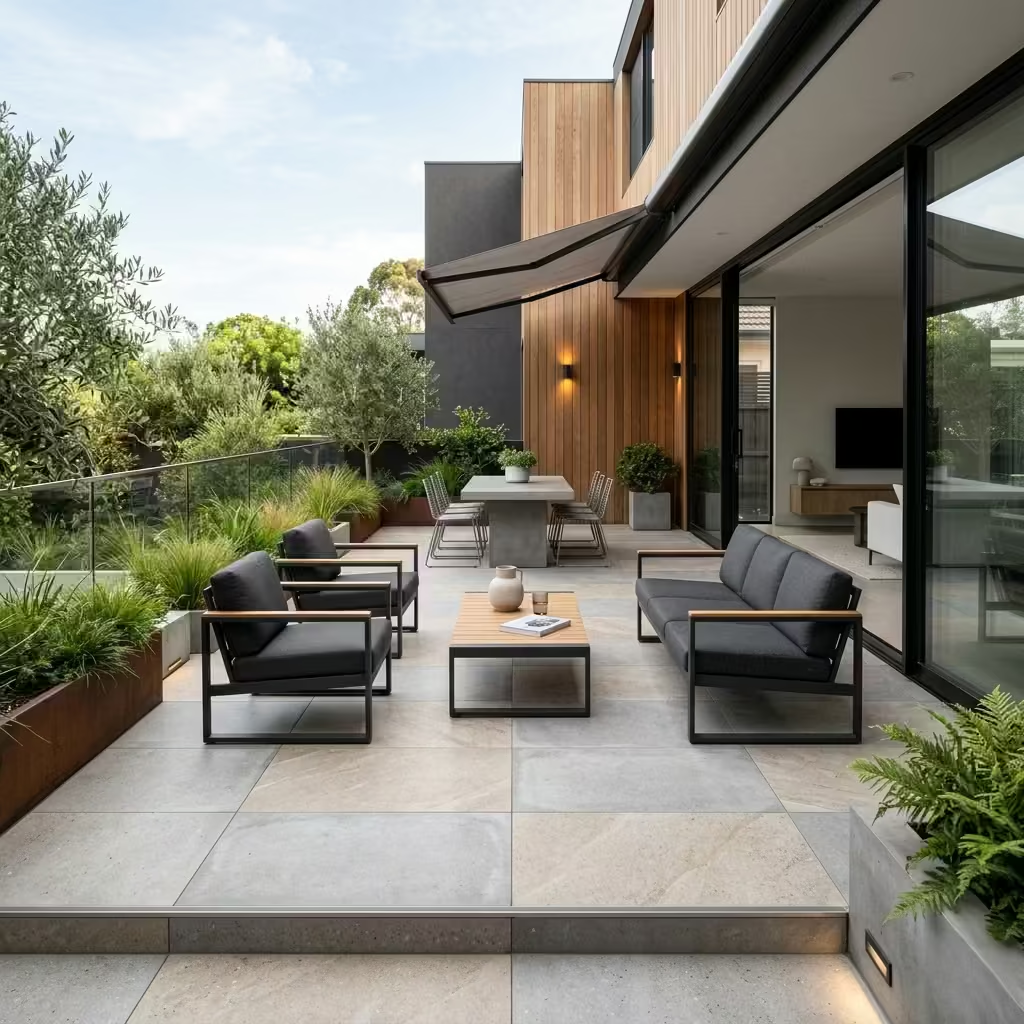
Porcelain and engineered tiles offer a precise balance between durability and refined design, making them one of the most versatile choices for outdoor flooring. In my projects, I often specify 20 mm (0.8 inch) thick exterior-grade porcelain for patios and terraces because it delivers high load resistance, low porosity, and excellent weather performance without the maintenance demands of natural stone. What makes these materials particularly valuable is their consistency. They allow for controlled aesthetics, whether replicating stone, timber, or concrete, while maintaining reliable slip resistance and colour stability over time. When selected with the correct finish and installed properly, they create outdoor surfaces that are both visually composed and technically resilient.
Wood-Effect Porcelain for Low-Maintenance Warmth
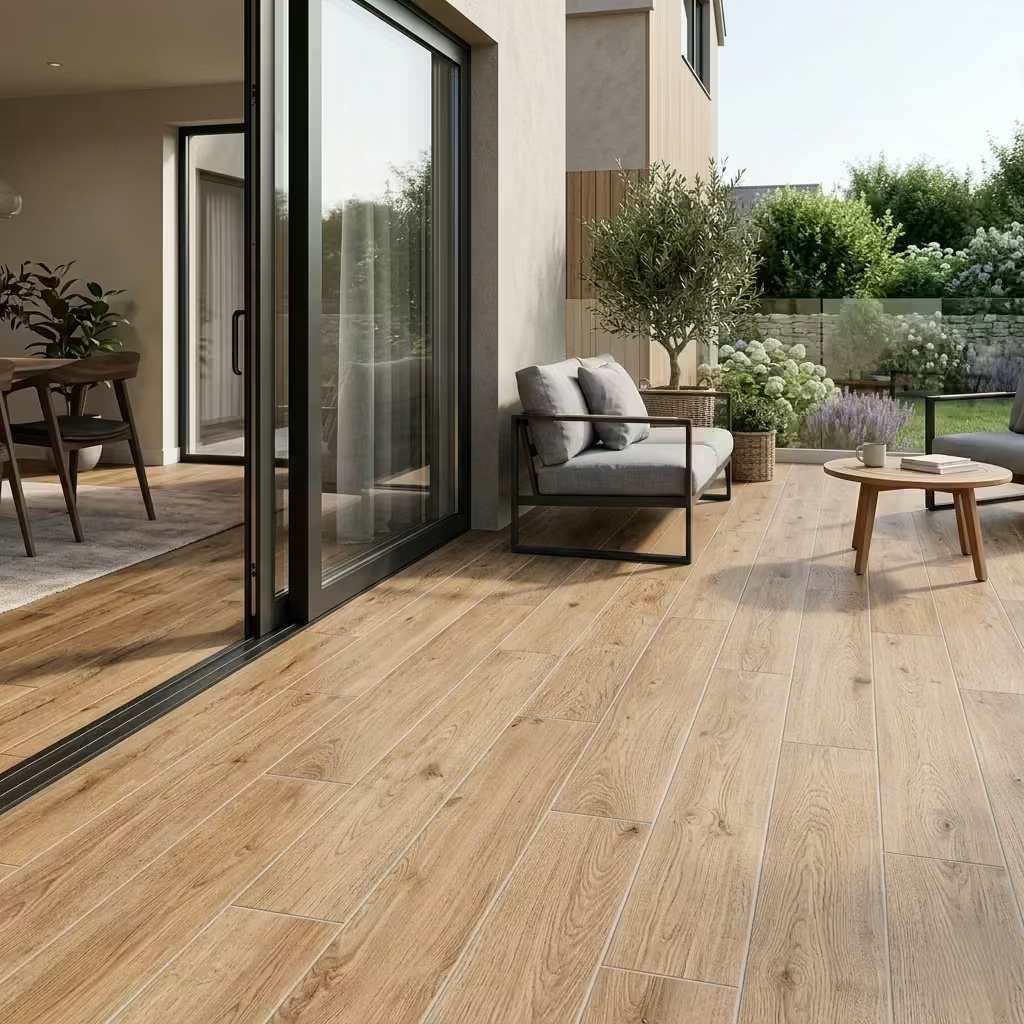
Wood-effect porcelain is designed to replicate the visual warmth and linear character of natural timber while removing its vulnerabilities outdoors. I use it when a project calls for softness and familiarity underfoot, but without the movement, fading, or maintenance associated with real wood. It introduces a more relaxed, human scale to patios and terraces, particularly in spaces that transition directly from interior flooring.
Real-Life Application Insight
I often specify this material where clients are drawn to the look of decking but want a long-term solution. In one terrace project, we extended interior wood flooring visually into the outdoor space using porcelain planks. The result was a seamless transition that felt intentional rather than decorative, and crucially, it performed far better than timber would have in the same exposed conditions. There was no warping, no sealing cycles, and no concern about seasonal movement.
Key Measurements or Proportional Guidance
The success of wood-effect porcelain depends heavily on proportion and layout.
- Typical plank size: 200 × 1200 mm (8 × 48 inch)
- Thickness: 20 mm (0.8 inch) for external applications
- Joint width: 2–4 mm (0.08–0.16 inch) for a tight, realistic finish
- Layout: staggered plank pattern to mimic natural timber installation
I avoid overly uniform repetition by mixing tile batches during installation, which helps achieve a more authentic timber-like variation.
Pros
- Achieves the warmth of wood without weathering, rot, or insect damage
- Low maintenance, no sealing or staining required
- Slip-resistant finishes available for outdoor safety
- Consistent appearance with controlled variation
Cons
- Lacks the tactile authenticity of real timber underfoot
- Repetition in pattern can feel artificial if not carefully installed
- Can heat up in direct sun depending on colour selection
- Requires precise installation to maintain alignment and realism
Wood-effect porcelain is a practical compromise done well. It delivers the visual comfort of timber while ensuring the surface remains stable, durable, and easy to maintain in outdoor conditions.
You May also Like: 25 Low-Maintenance, Long-Lasting Minimalist Garden Ideas for Budget-Friendly Outdoor Spaces
Concrete-Look Porcelain for Contemporary Patios
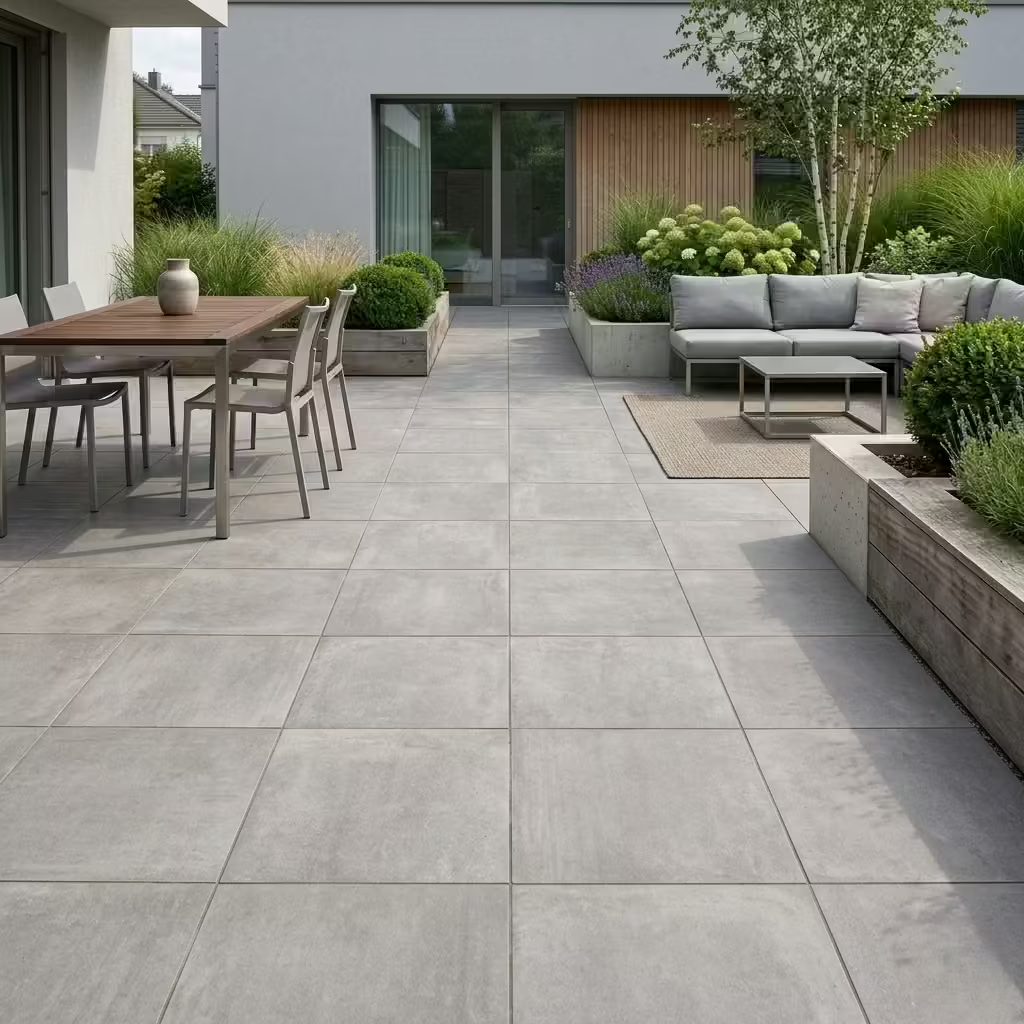
Concrete-look porcelain is defined by restraint and precision. It delivers the visual weight and neutrality of poured concrete without its structural limitations or maintenance concerns. I use it to create calm, architectural outdoor spaces where the focus is on proportion, alignment, and material continuity rather than decorative detail. Its subtle tonal shifts and matte finish allow it to act as a quiet backdrop, supporting planting, furniture, and built elements without competing for attention.
Real-Life Application Insight
In one contemporary garden project, I specified large-format concrete-look porcelain to unify a patio, outdoor dining zone, and circulation path into a single continuous plane. The intention was to eliminate visual breaks and allow the architecture and planting to sit cleanly against a neutral base. What made the difference was the consistency of the material. Unlike real concrete, there were no unpredictable cracks or discoloration over time. Even after heavy use and seasonal changes, the surface remained visually stable, which preserved the clarity of the overall design
Key Measurements or Proportional Guidance
Scale and alignment are critical with this material, as any inconsistency becomes immediately visible.
- Ideal tile size: 900 × 900 mm (36 × 36 inch) or larger for open patios
- Thickness: 20 mm (0.8 inch) for outdoor durability
- Joint width: 2–3 mm (0.08–0.12 inch) for a near-seamless effect
- Layout: strict grid alignment to reinforce architectural order
For smaller patios, I sometimes step down to 600 × 600 mm (24 × 24 Inch) to maintain proportion without overcrowding the space. I also pay close attention to edge detailing, ensuring cuts align with walls and thresholds to avoid awkward slivers that disrupt the visual rhythm.
Pro
- Clean, contemporary aesthetic that complements modern architecture
- Highly durable and resistant to stains, moisture, and temperature changes
- Low maintenance compared to real concrete
- Consistent colour and finish across large areas
- Works well for indoor-outdoor continuity
Cons
- Can feel visually cold if not balanced with planting or warmer materials
- Requires precise installation, as imperfections are more noticeable
- Lighter tones may show dirt or debris more easily
- Lacks the natural ageing character of real stone
Concrete-look porcelain is most effective when used with discipline. It is not about adding interest through the material itself, but about creating a controlled, refined surface that allows the rest of the outdoor space to perform with clarity and intent.
You May also Like: 25 Indoor–Outdoor Living Room Ideas That Redefine Modern Living
Large Format Porcelain for Seamless Terraces
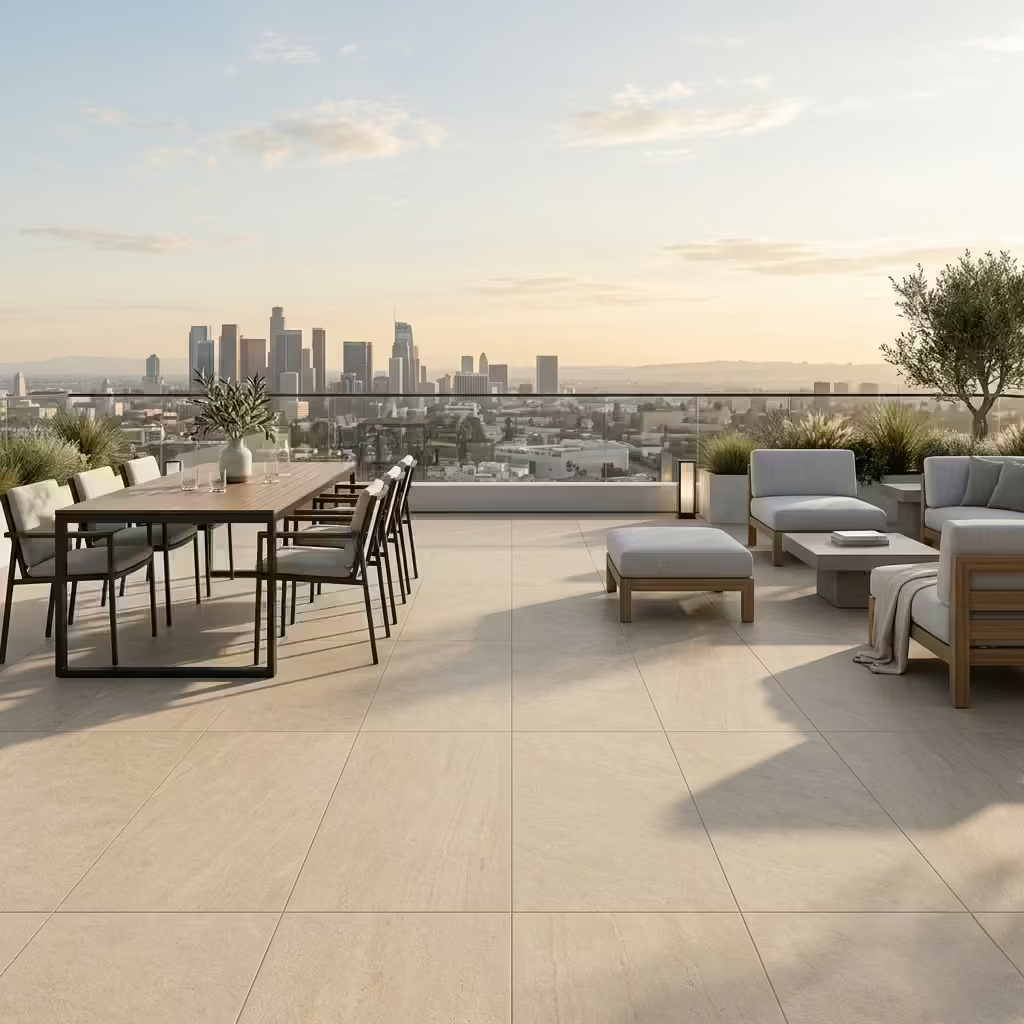
Large format porcelain is about visual continuity and spatial clarity. By reducing grout lines to a minimum, it creates expansive, uninterrupted surfaces that allow terraces to feel larger, calmer, and more architectural. I use this approach when the goal is to simplify the visual field and emphasise proportion, light, and horizon lines rather than surface detail. It is particularly effective in contemporary terraces where clean geometry and a sense of openness are essential.
Real-Life Application Insight
In a rooftop terrace project, I specified oversized porcelain slabs to unify the entire surface, eliminating visual fragmentation caused by smaller tiles. The terrace had multiple functional zones, seating, dining, and circulation, but instead of dividing them with different materials, we used a single large-format tile throughout. The result was a space that felt significantly more expansive and composed. What stood out over time was how the reduced grout lines also meant less maintenance and fewer areas for dirt accumulation, which kept the terrace looking consistently clean with minimal effort.
Key Measurements or Proportional Guidance
Large format tiles demand precision, both in specification and installation.
- Ideal tile size: 900 × 900 mm (36 × 36 inch), 1200 × 600 mm (48 × 24 inch), or larger formats
- Thickness: 20 mm (0.8 inch) for external use
- Joint width: 2–3 mm (0.08–0.12 inch) to maintain a seamless appearance
- Layout: aligned grid or directional layout depending on terrace shape
I ensure that the substrate is perfectly level before installation. Even minor inconsistencies can cause lippage, which becomes highly visible with larger tiles. For elevated terraces, I often pair large-format porcelain with pedestal systems to achieve a level finish while managing drainage below.
Pros
- Creates a seamless, expansive look with minimal visual interruption
- Enhances the perception of space, especially in smaller terraces
- Fewer grout lines reduce maintenance and cleaning effort
- Highly durable and resistant to weather, stains, and fading
- Ideal for modern, architectural outdoor designs
Cons
- Requires extremely precise installation and substrate preparation
- Higher material and labour costs due to size and handling complexity
- Can feel visually stark without layering through furniture or planting
- Lippage risk if installation is not executed to a high standard
Large format porcelain is not forgiving, but when executed correctly, it delivers one of the most refined outdoor flooring results. It allows the terrace to read as a single, continuous surface, supporting architecture and landscape with clarity and confidence.
Matte Finish Porcelain for Slip Resistance
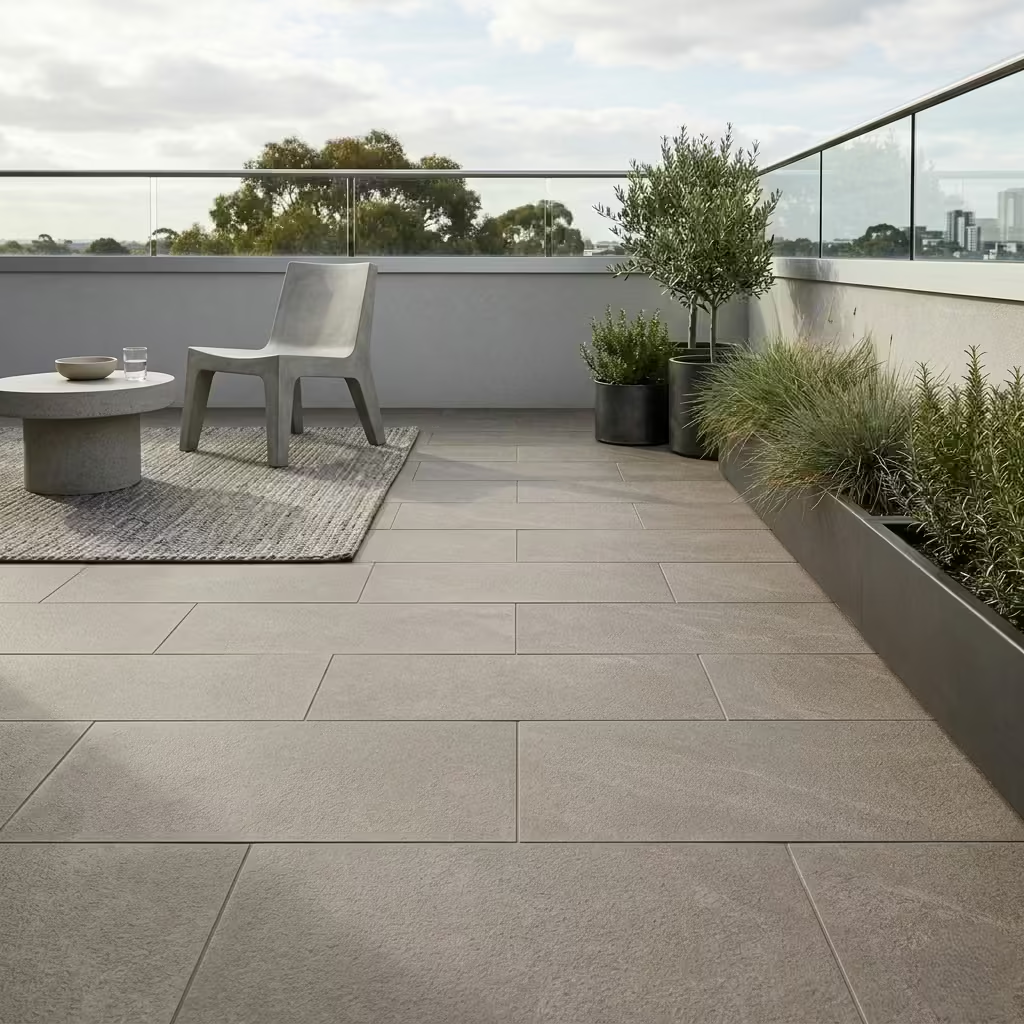
Matte finish porcelain is defined by control and practicality. It removes surface glare and introduces a subtle texture that improves grip, making it one of the most reliable choices for outdoor areas exposed to water, dust, or frequent use. I use matte finishes when safety and usability need to be integrated seamlessly into the design, without compromising the overall aesthetic. It allows the floor to remain visually calm while performing under real conditions.
Real-Life Application Insight
In a family garden project with children and frequent gatherings, I specified matte porcelain across the patio and circulation zones. The key requirement was a surface that remained safe during rain and after cleaning. What proved valuable was how the matte texture provided consistent traction without feeling abrasive underfoot. Even with regular use, the surface maintained its appearance without showing smudges or glare, which often becomes an issue with semi-polished finishes outdoors.
Key Measurements or Proportional Guidance
Matte porcelain works across multiple formats, but proportion should align with the scale of the space.
- Ideal tile size: 600 × 600 mm (24 × 24 inch) for balanced patios, or 600 × 900 mm (24 × 36 inch) for larger areas
- Thickness: 20 mm (0.8 inch) for external durability
- Joint width: 3–5 mm (0.12–0.2 inch) depending on tile rectification
- Slip rating: minimum R11 for exposed outdoor areas
I often select mid-tone colours in matte finishes, as they strike a balance between hiding dirt and maintaining visual clarity.
Cons
- Excellent slip resistance, especially in wet or high-traffic areas
- Reduces glare, creating a softer and more comfortable visual surface
- Low maintenance, with minimal visible smudging or water marks
- Versatile across design styles, from contemporary to traditional
- Durable and resistant to weathering
Cons
- Can feel slightly flat visually compared to textured or natural stone surfaces
- Lighter tones may still show dirt in heavily used areas
- Limited reflectivity may reduce brightness in shaded spaces
- Requires proper cleaning to prevent buildup in textured finishes
Matte finish porcelain is a dependable foundation for outdoor flooring. It prioritises safety and usability while maintaining a refined, understated appearance that supports the overall design without distraction.
Textured Porcelain for Poolside Safety
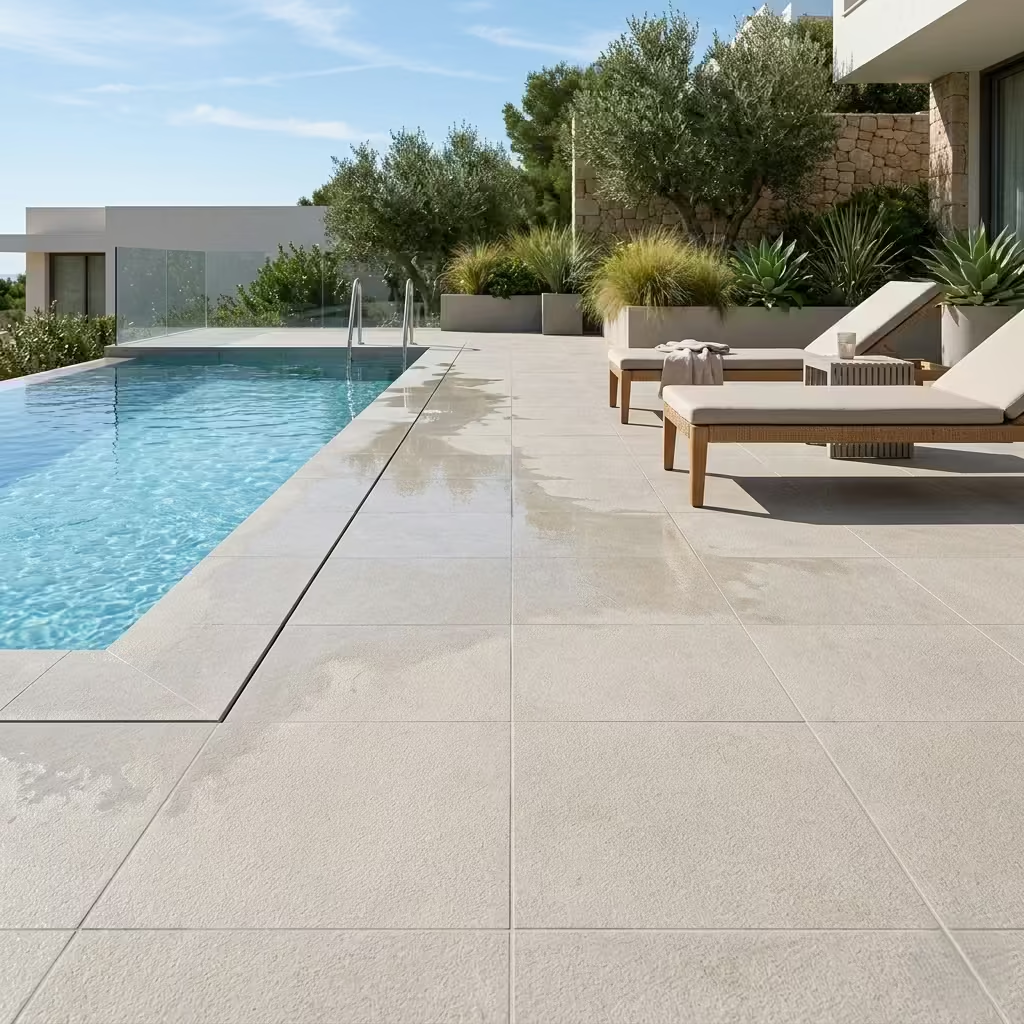
Textured porcelain is specified where water, movement, and safety intersect. Around pools, the surface must provide consistent grip while remaining comfortable underfoot and visually composed. I use textured porcelain to achieve this balance. It introduces micro-relief across the tile surface, enough to improve traction without becoming harsh or overly industrial. The intention is not to highlight texture visually, but to embed performance into the material, so the space feels effortless and secure in use.
Real-Life Application Insight
In a pool terrace project with a continuous indoor-outdoor transition, I specified a lightly textured porcelain with an R11 to R12 rating. The challenge was to maintain a clean, architectural look while ensuring safety for barefoot movement, especially with children using the space. What proved effective was the subtlety of the texture. It performed reliably when wet, even with frequent splashing, yet remained comfortable enough for extended use without the abrasive feel often associated with heavily textured finishes. Over time, it also resisted staining from pool chemicals and sunscreen, which are common issues in these environments.
Key Measurements or Proportional Guidance
Precision in layout and detailing is critical in poolside environments.
- Ideal tile size: 600 × 600 mm (24 × 24 inch) or 600 × 900 mm (24 × 36 inch)
- Thickness: 20 mm (0.8 inch) for durability and stability
- Joint width: 3–5 mm (0.12–0.2 inch) with water-resistant grout
- Slip rating: minimum R11, ideally R12 for high-exposure wet zones
I also ensure a consistent fall away from the pool, typically aligned with a 1:60 slope, so water drains efficiently without disrupting the visual plane. Edge detailing, particularly at pool coping, must be clean and flush to avoid trip points.
Pros
- High slip resistance, essential for wet and barefoot environments
- Durable and resistant to pool chemicals, moisture, and UV exposure
- Comfortable underfoot when properly specified
- Maintains a consistent, refined appearance over time
- Available in a wide range of tones and formats to suit different designs
Cons
- More textured surfaces can trap dirt if not cleaned regularly
- Slightly higher cost compared to standard porcelain finishes
- Requires careful specification to avoid overly rough textures
- Installation must be precise to ensure proper drainage and alignment
Textured porcelain is one of the most reliable solutions for poolside flooring. It allows safety to be integrated into the design without compromising clarity or comfort, resulting in a surface that performs consistently while supporting the overall architectural intent.
Decorative & Patterned Tiles (Used with Restraint)
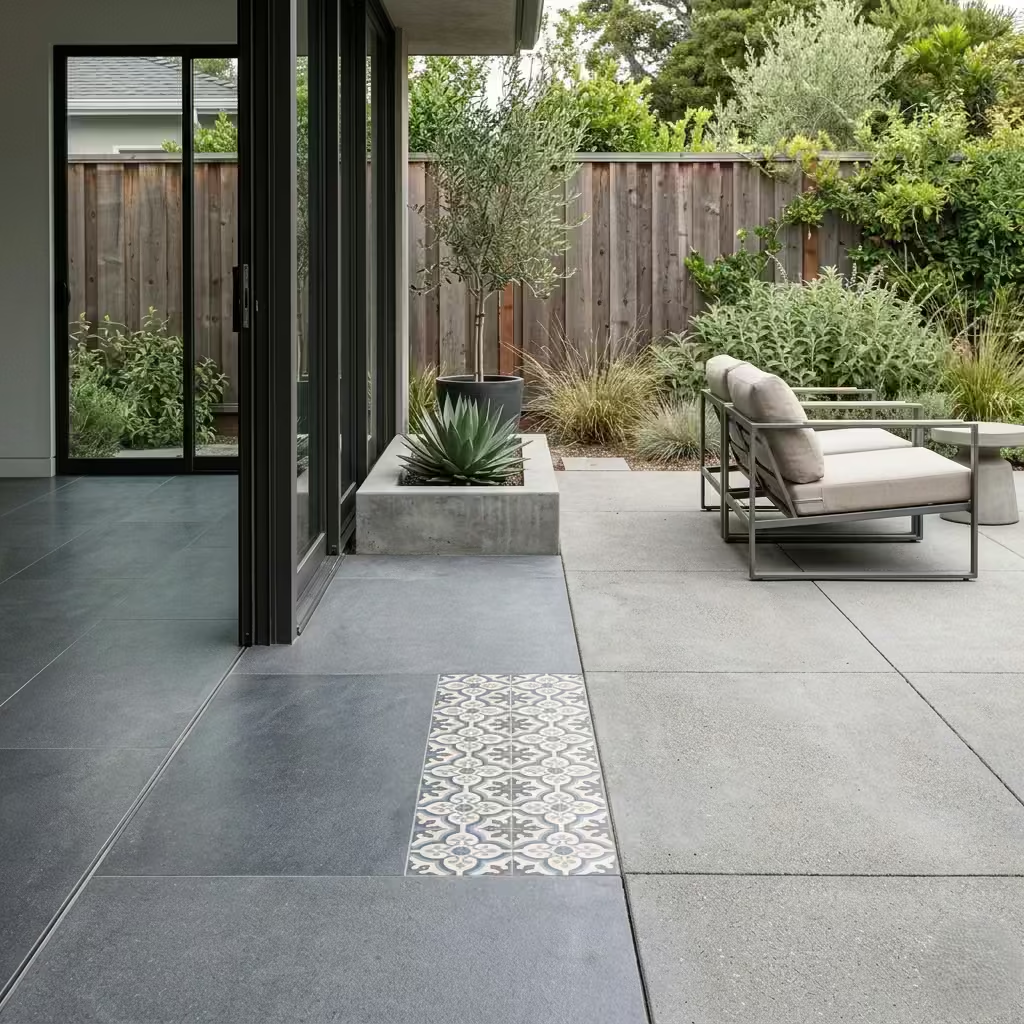
Decorative and patterned tiles should be approached as accents rather than foundations. In my work, I use them to define moments, a seating zone, a threshold, or a focal point, rather than covering entire outdoor surfaces. Their strength lies in contrast and placement, not repetition. When applied with discipline, they can introduce character, rhythm, and cultural reference without overwhelming space. The key is balance. Surrounding them with more neutral materials allows the pattern to breathe, ensuring it enhances the composition rather than competing with it over time.
Moroccan Pattern Tiles for Feature Zones
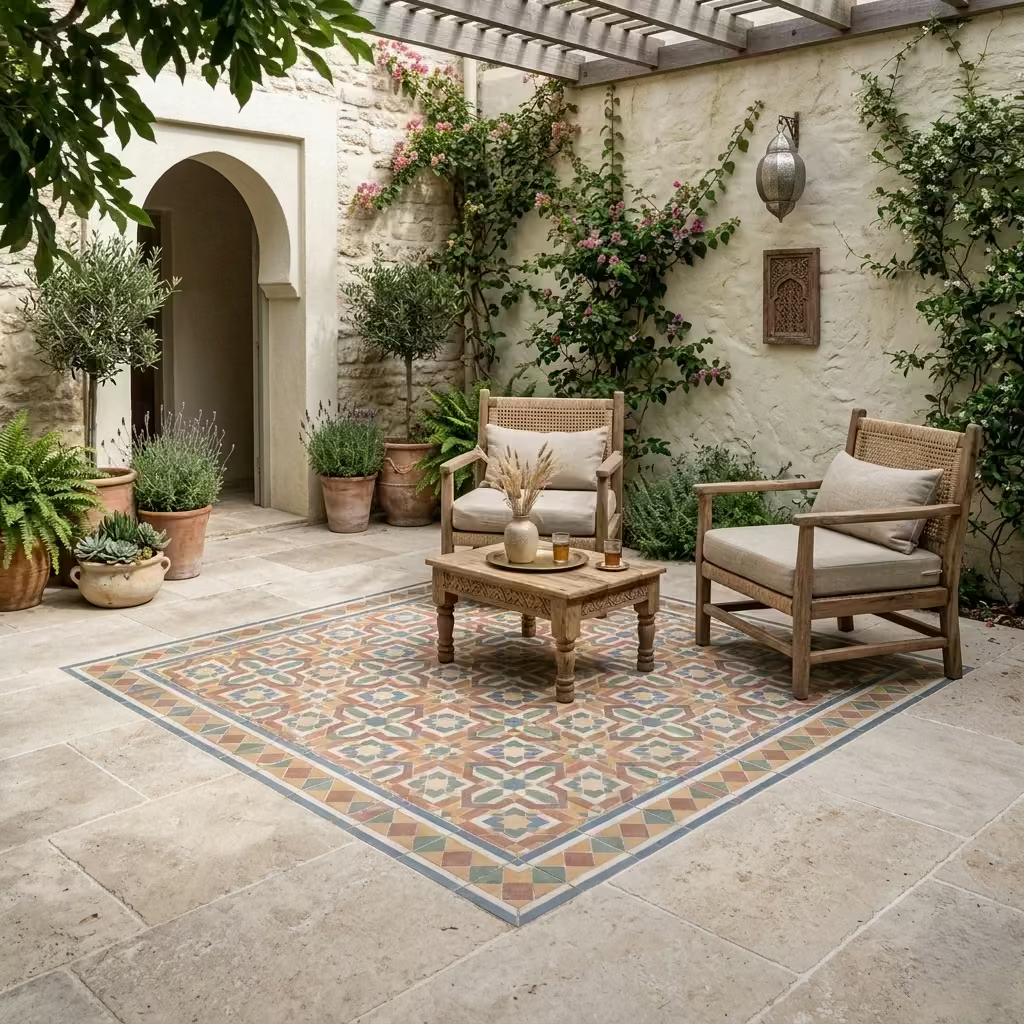
Moroccan pattern tiles bring immediate character, but their real strength lies in how selectively they are used. I treat them as a design accent, not a surface treatment for the entire garden. In the right setting, they can turn a small courtyard, an outdoor dining nook, or a threshold area into a focal point with cultural depth and visual rhythm. The geometry, colour variation, and hand-crafted quality create a sense of atmosphere that feels layered rather than decorative for the sake of it.
What makes these tiles effective outdoors is their ability to define a moment. Used within a larger field of quieter materials, they can frame a seating zone, mark an entry, or give identity to a compact terrace. That contrast is what gives them value. Without it, the pattern can become visually tiring very quickly.
Real-Life Application Insight
I once used Moroccan pattern tiles in a small enclosed patio where the client wanted the space to feel more intimate and expressive without adding unnecessary furniture or clutter. The rest of the garden was kept intentionally restrained with neutral rendered walls and simple planting, so the patterned floor became the main visual event. It changed the entire atmosphere of the space.
What stood out most was how the pattern created a sense of destination. The patio did not feel like a leftover corner anymore. It felt intentional, almost like an outdoor room with its own identity. That said, the success of the scheme depended entirely on restraint. I limited the patterned tile to a defined zone and paired it with plain edging so the design felt composed rather than busy. In outdoor work, that difference matters.
Key Measurements or Proportional Guidance
For patterned tiles, scale must be handled carefully. The wrong proportions can make the pattern feel fragmented or overwhelming.
- Ideal tile size: 200 × 200 mm (8 × 8 inch) or 300 × 300 mm (12 × 12 inch)
- Best use area: feature zones of around 2 x 2 m to 4 x 4 m (approximately 6.5 x 6.5 ft to 13 x 13 ft)
- Border width: 50–100 mm (2–4 inch) plain edging helps contain the design
- Joint width: 3–5 mm (0.12–0.2 inch) depending on tile finish and rectification
- Finish: matte or lightly textured for outdoor slip performance
I usually avoid covering large open terraces with Moroccan patterns unless the surrounding architecture is extremely minimal. A concentrated zone tends to age better and feels more refined.
Pros
- Adds immediate personality and a strong sense of place
- Excellent for defining feature areas or outdoor rooms
- Works beautifully in courtyards, small patios, and sheltered terraces
- Can soften hard architectural lines with colour and rhythm
- Creates a memorable visual focal point without needing extra decoration
Cons
- Can feel overwhelming if used across large areas
- Requires careful pairing with neutral materials to avoid visual clutter
- Pattern scale may not suit very large or highly formal spaces
- Some decorative finishes are less durable outdoors unless properly specified
- Colour can fade or look harsh if exposed without adequate balance from planting or shade
Moroccan pattern tiles are most effective when they are given a clear role. Used thoughtfully, they bring warmth, identity, and a lived-in richness that can transform a feature zone into something far more atmospheric than a standard tiled surface.
You May also Like: 25 outdoor entryways to transform your outdoor arrival into a composed, lasting first impression
Geometric Tiles for Defined Seating Areas
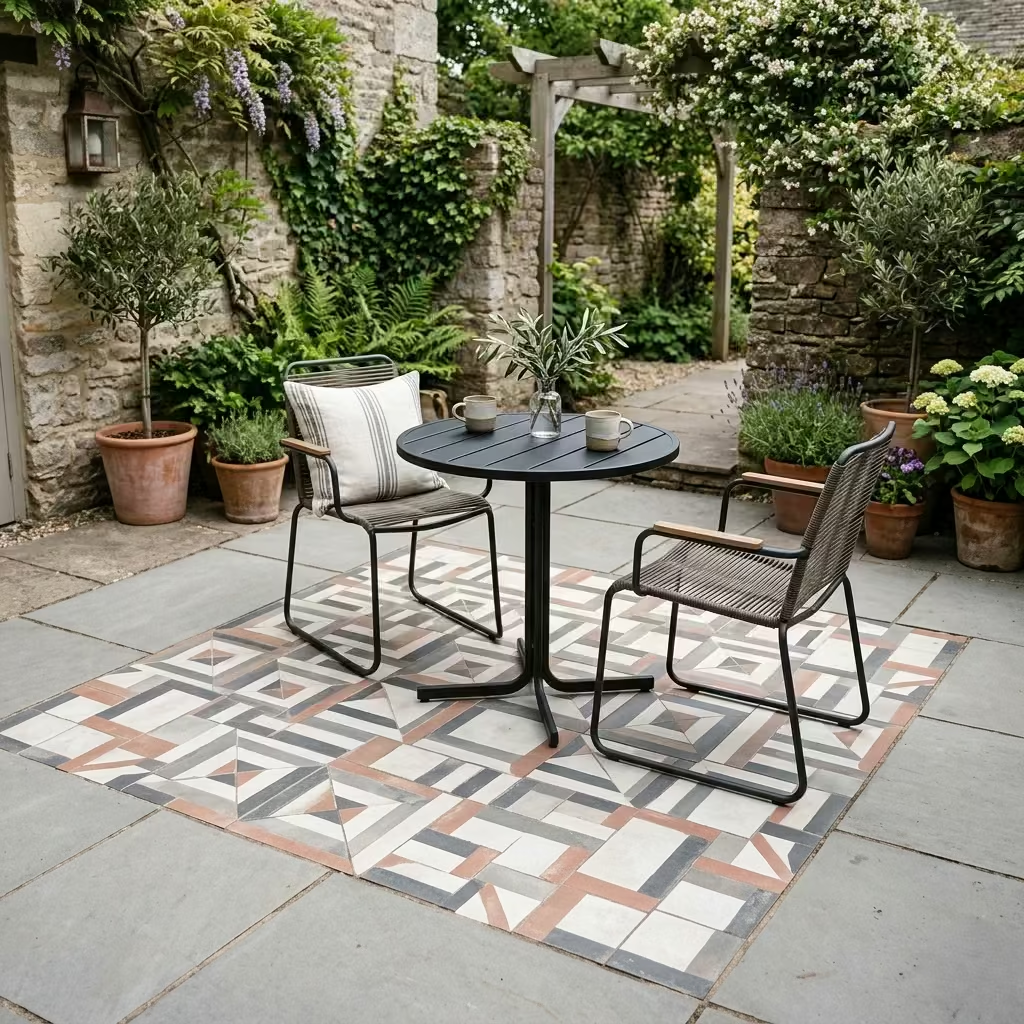
Geometric tiles work best when they are used to give structure to a space rather than simply add decoration. I often specify them for seating areas because they help create a clear visual boundary without the need for physical barriers. A well-chosen geometric pattern can make an outdoor room feel considered and purposeful, drawing attention to the place where people are meant to gather, pause, and stay a while. When handled properly, the pattern becomes part of the architecture of the space, not an overlay.
The real value of geometric tiles is their ability to bring order. In gardens where planting is soft and informal, they can introduce a controlled counterpoint. In more contemporary settings, they can reinforce symmetry, direction, and balance. The key is to let the pattern support the layout, not fight against it.
Real-Life Application Insight
I used geometric tiles in a compact courtyard seating area where the brief was to create definition without adding walls, steps, or heavy landscaping. The surrounding space was fairly simple, so the tiled zone needed to do the work of anchoring the furniture and signalling that this was the heart of the outdoor scheme.
What made the difference was restraint in the pattern choice. Instead of using something highly ornate, I selected a geometric design with a clear repeat and a muted palette. That kept the space feeling refined rather than busy. Once the furniture was placed, the tiles helped hold the composition together. The area felt more intentional, more sociable, and, importantly, more complete. It became the natural place to sit because the flooring itself gave the zone identity.
Key Measurements or Proportional Guidance
Geometric patterns perform best when the scale of the motif suits the size of the seating area.
- Ideal tile size: 300 × 300 mm (12 × 12 inch) or 400 × 400 mm (16 × 16 inch)
- Best application zone: seating areas of around 2.5 x 2.5 m to 5 x 5 m (approximately 8 x 8 ft to 16 x 16 ft)
- Border width: 75–100 mm (3–4 inch) plain perimeter can help frame the design
- Joint width: 3–5 mm (0.12–0.2 inch) for a cleaner visual finish
- Finish: matte or lightly textured for outdoor practicality
I find geometric tiles work especially well when furniture placement is aligned to the pattern. A mismatched layout can weaken the effect immediately, while a considered arrangement makes the whole area feel more resolved.
Pros
- Clearly defines seating zones without additional structural elements
- Adds visual interest while still feeling controlled
- Works well in both traditional and contemporary outdoor schemes
- Can make compact spaces feel more purposeful and designed
- Helps unify furniture, planting, and circulation around one focal point
Cons
- Patterns can become overwhelming if used across too large an area
- Requires careful alignment during installation to avoid visual disruption
- Strong motifs may clash with busy planting or highly decorative furniture
- Needs a restrained palette to remain timeless rather than trend-led
- Mistakes in scale can make a small space feel fragmented
Geometric tiles are most effective when they bring clarity. Used in the right proportion, they give a seating area structure, rhythm, and a sense of destination, which is often what makes an outdoor space feel complete.
Encaustic Cement Tiles for Character-Rich Courtyards
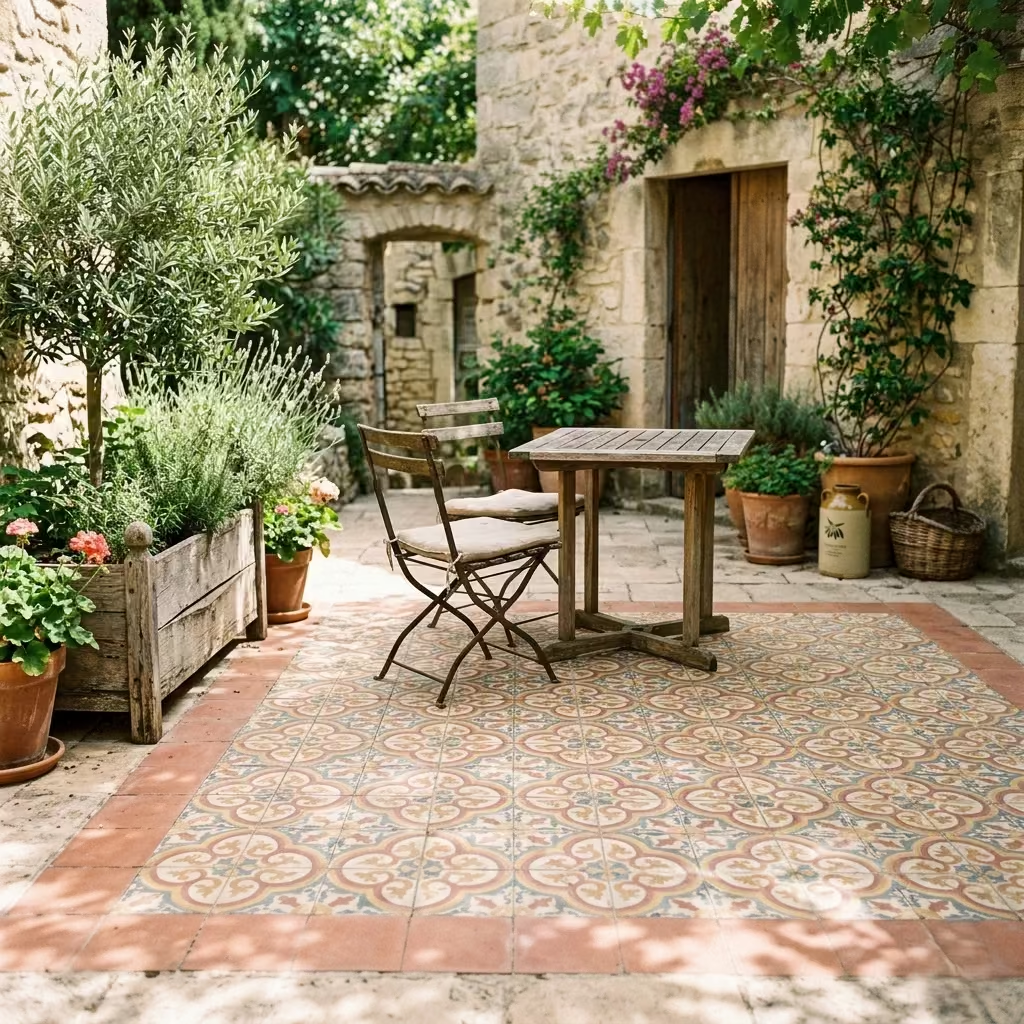
Encaustic cement tiles bring depth, warmth, and a handcrafted quality that can completely change the atmosphere of a courtyard. I use them when a space needs personality and a sense of permanence, not just surface coverage. Their appeal comes from the subtle softness of the finish, the mineral texture, and the way the pattern feels embedded rather than printed on top. In the right courtyard, they can create a space that feels intimate, layered, and quietly expressive. That is why they work so well in enclosed gardens where the architecture benefits from a touch of detail and emotional weight.
Unlike more uniform outdoor tiles, encaustic cement has a lived-in quality from the outset. It does not feel sterile or overly polished. Instead, it introduces a sense of age and character that can make a new courtyard feel established much earlier. I find this particularly valuable in smaller outdoor spaces, where one strong material can do far more than several competing finishes.
Real-Life Application Insight
I specified encaustic cement tiles in a compact courtyard that needed to feel welcoming without becoming visually crowded. The garden was surrounded by brick walls, mature planting, and a modest seating area, so the flooring had to carry some of the atmosphere. A plain surface would have felt too restrained, while a highly dramatic pattern would have overwhelmed the space.
What worked beautifully was the way the tiles gave the courtyard a sense of identity from the moment you stepped into it. The floor became part of the storytelling of the space. It made the area feel like a destination rather than a passage. At the same time, because the surrounding materials were kept calm, the tiles could express their character without competing. That balance is everything with encaustic cement. I have seen it fail when used too broadly, but in a confined courtyard, it can be genuinely transformative.
Key Measurements or Proportional Guidance
Encaustic cement tiles need proportion and restraint to feel resolved rather than overpowering.
- Ideal tile size: 200 × 200 mm (8 × 8 inch) or 300 × 300 mm (12 × 12 inch)
- Best application zone: compact courtyards around 2.5 x 2.5 m to 5 x 5 m (approximately 8 x 8 ft to 16 x 16 ft)
- Joint width: 3–5 mm (0.12–0.2 inch) depending on the tile edge and pattern clarity
- Recommended edge treatment: plain border or perimeter band of 50–100 mm (2–4 inch) to contain the pattern
- Finish: sealed matte surface for outdoor durability and easier maintenance
I usually avoid placing highly intricate patterns across very large external areas, as the visual intensity can become tiring. Encaustic cement works best when it is allowed to act like a woven fabric under the rest of the scheme, grounding the furniture and planting without shouting for attention.
Pros
- Offers strong personality and handcrafted character
- Creates a warm, intimate atmosphere in enclosed courtyards
- Works beautifully with brick, aged timber, metal, and soft planting
- Gives even a small space a distinct identity
- Feels more tactile and emotionally rich than many machine-made alternatives
Cons
- Requires sealing and regular maintenance to protect against staining
- More porous than porcelain, so it is less forgiving in exposed or heavily wet areas
- Pattern can dominate if used without enough visual breathing room
- May not suit highly minimal or ultra-contemporary schemes
- Needs careful installation and consistent batching to avoid variation issues
Encaustic cement tiles are best understood as atmosphere-makers. They are not simply decorative surfaces. When specified with care, they can give a courtyard the kind of depth and personality that makes the space feel memorable, lived in, and far more complete than a standard finish ever could.
Monochrome Pattern Tiles for Modern Contrast
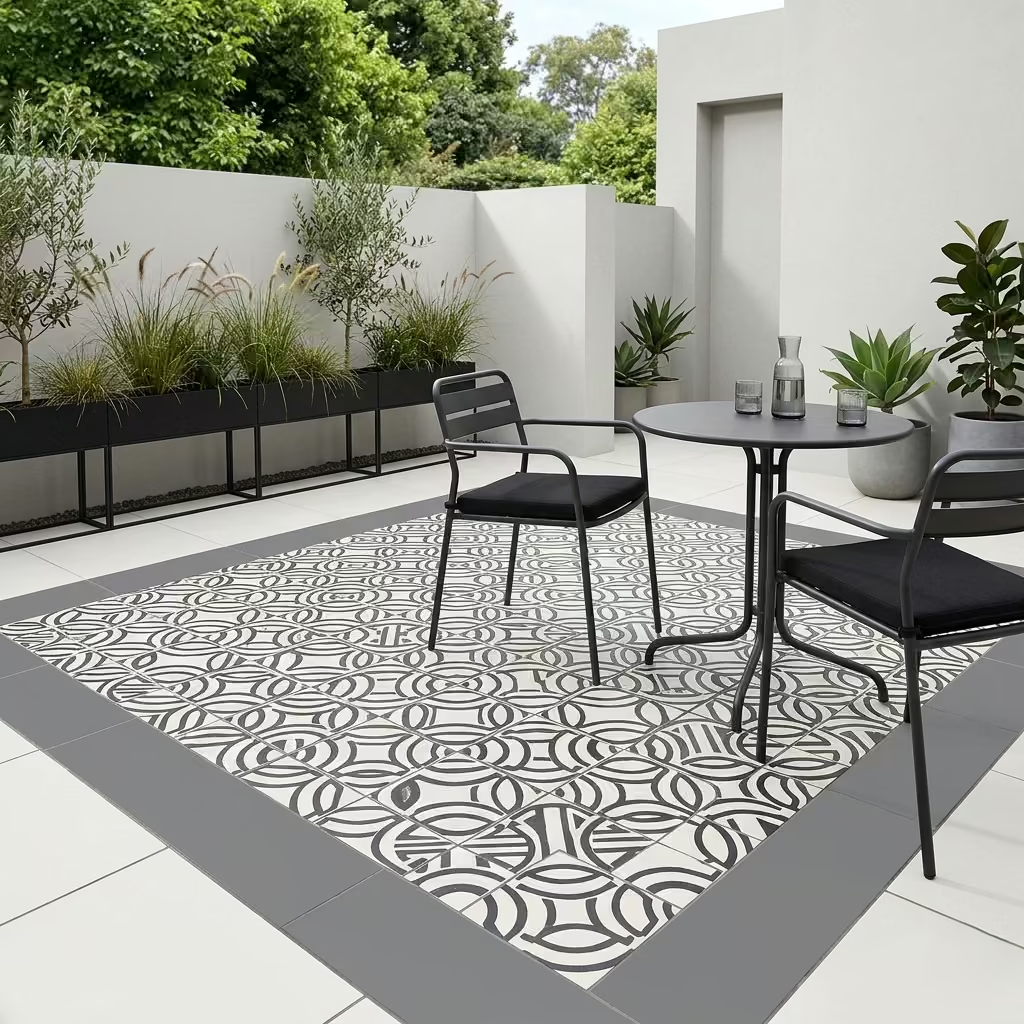
Monochrome pattern tiles work best when the aim is to create clarity rather than excess. In outdoor design, black-and-white or tonal contrast can sharpen a space immediately, giving it definition, rhythm, and a quietly graphic quality. I use this approach when a patio or terrace needs more presence without relying on colour. It is especially effective in modern gardens where architectural lines, simple planting, and restrained furniture benefit from a stronger visual anchor.
The strength of monochrome lies in its discipline. It can feel crisp, elegant, and highly ordered when balanced correctly, but it must be handled with care. I find it works best when the pattern has enough negative space to breathe, allowing the eye to rest rather than constantly react. In that sense, it is less about decoration and more about structure.
Real-Life Application Insight
I used monochrome patterned tiles in a compact terrace where the brief was to introduce character without making the space feel overly styled. The surrounding setting was minimal, with pale walls, a simple planting scheme, and dark metal furniture. Rather than adding colour, I introduced a black-and-off-white tile pattern to give the floor a stronger identity.
What made the scheme successful was the contrast between the flooring and everything around it. The terrace suddenly felt more deliberate, more polished, and more complete. It had the energy of a designed room rather than a leftover outdoor corner. At the same time, because the colour palette was limited, the space remained calm. That is the real value of monochrome. It can create impact without creating visual clutter, which is often exactly what a modern outdoor area needs.
Key Measurements or Proportional Guidance
Pattern scale becomes especially important with monochrome tiles, because contrast makes every proportion more visible.
- Ideal tile size: 300 × 300 mm (12 × 12 inch) or 400 × 400 mm (16 × 16 inch)
- Best use area: terraces or patios around 2.5 x 2.5 m to 5 x 5 m (approximately 8 x 8 ft to 16 x 16 ft)
- Border width: 75–100 mm (3–4 inch) plain edging can help contain the pattern
- Joint width: 3–5 mm (0.12–0.2 inch) for a sharper visual result
- Finish: matte or lightly textured for outdoor grip and reduced glare
I tend to use monochrome patterns in spaces where there is enough calm around them. If the planting is already busy or the furniture highly decorative, the result can feel overstated. With the right framing, though, the effect is elegant and disciplined.
Pros
- Creates strong visual contrast without introducing colour
- Gives patios and terraces a crisp, modern identity
- Works well in compact spaces where structure matters
- Can make simple outdoor furniture feel more intentional
- Pairs well with minimal planting and architectural materials
Pros
- Strong contrast can feel visually harsh if overused
- May dominate smaller spaces if the pattern is too dense
- Requires careful installation to keep lines and repeats aligned
- Dirt and debris may show more clearly on light sections
- Can feel trend-led if not balanced with timeless surroundings
Monochrome pattern tiles are most effective when used with restraint and confidence. They bring order, edge, and definition to an outdoor space, giving it a sharper architectural voice without needing colour to carry the design.
You May also Like: 25 Small Front Porch Ideas That Make Compact Entryways Feel Welcoming and Well Designed
Mosaic Tiles for Small Outdoor Niches
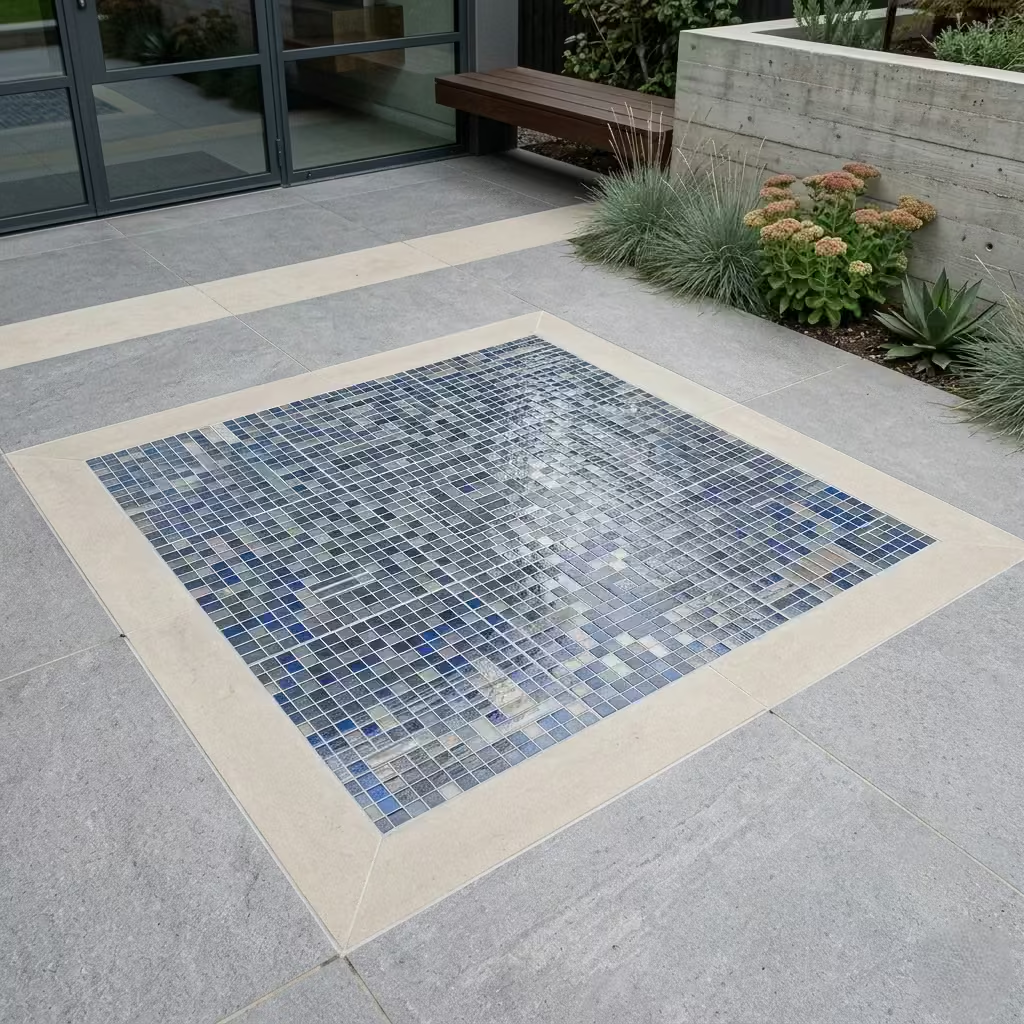
Mosaic tiles are perfect for adding detail and texture to compact outdoor zones without overwhelming the space. I use them in niches, planters, around fountains, or as inset panels within a larger flooring scheme. Their strength is in precision and scale: a small surface covered in mosaic can become a focal point, a visual pause, or a textural accent that elevates the surrounding materials. Unlike larger tiles, mosaics can introduce subtle pattern, colour, or material variation in a way that feels intentional rather than decorative for decoration’s sake.
Real-Life Application Insight
In a narrow courtyard, I incorporated blue-and-neutral glass mosaics around a recessed water feature. The surrounding flooring was large-format porcelain, so the mosaic acted as a contrast and a point of focus without competing with the patio as a whole. The effect was immediate: the space felt layered and considered. Because the mosaic was in a contained zone, maintenance was manageable, and it could showcase intricate patterning without creating visual clutter across the terrace.
Key Measurements or Proportional Guidance
Mosaic tiles are inherently small, so layout and jointing must be precise to achieve cohesion.
- Typical tile sheet size: 300 × 300 mm (12 × 12 inch) sheets made of 20 × 20 mm (0.8 × 0.8 inch) or 30 × 30 mm (1.2 × 1.2 inch) pieces
- Joint width: 1–3 mm (0.04–0.12 inch) for clean alignment
- Ideal application zone: small niches or feature panels 0.5–2 m² (5–22 ft²)
- Finish: matte or lightly textured for outdoor slip resistance
I usually frame mosaic panels with a neutral border to separate them from larger tiles and allow the detail to read clearly. This also helps prevent visual tension with adjacent surfaces.
Pros
- Adds intricate detail and textural interest to small zones
- Excellent for highlighting features without dominating larger surfaces
- Versatile in pattern, colour, and material
- Can integrate seamlessly with surrounding flooring for contrast
- Suitable for vertical and horizontal surfaces
Cons
- Labour-intensive installation requiring precision
- Smaller joints can trap dirt and require regular cleaning
- Not suitable for large high-traffic areas as it becomes busy
- Material and installation costs can be higher per square metre
- Requires sealing if made of natural stone for outdoor durability
Mosaic tiles shine when they are given a defined, contained role. In small outdoor niches or panels, they introduce personality, texture, and subtle colour while keeping the surrounding terrace calm and composed.
Modern Minimal & Architectural Finishes
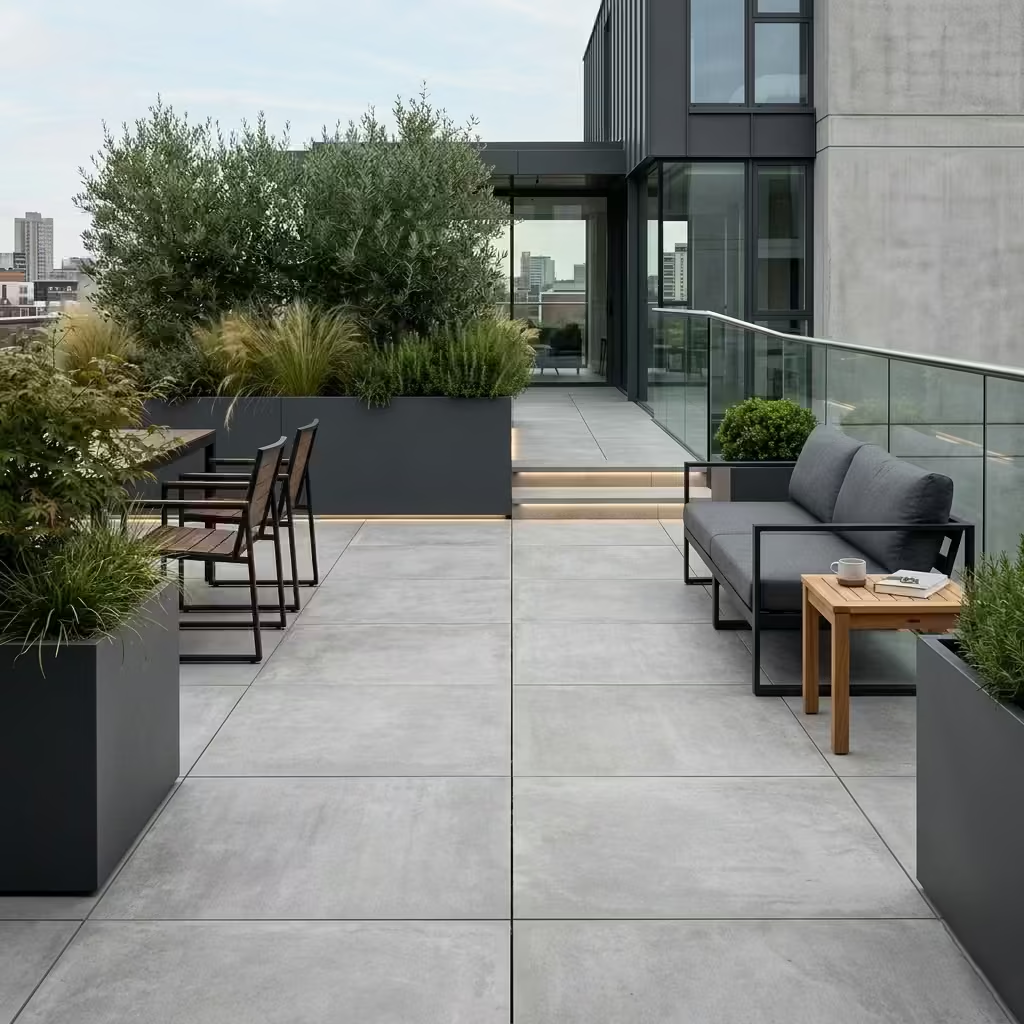
Modern minimal and architectural finishes prioritise clarity, proportion, and material honesty over ornamentation. I often use these finishes to create outdoor spaces that feel deliberate, calm, and composed, where every surface supports the architecture and landscape rather than competing with it. Concrete-effect porcelain, large-format slabs, and subtly textured natural stones allow the structure of the terrace or patio to take centre stage, while furniture, planting, and light bring life to the scene.
The focus is on restraint, precision, and long-term relevance, producing outdoor areas that feel elegant, purposeful, and timeless.
Large Concrete Slab Tiles for Clean Lines
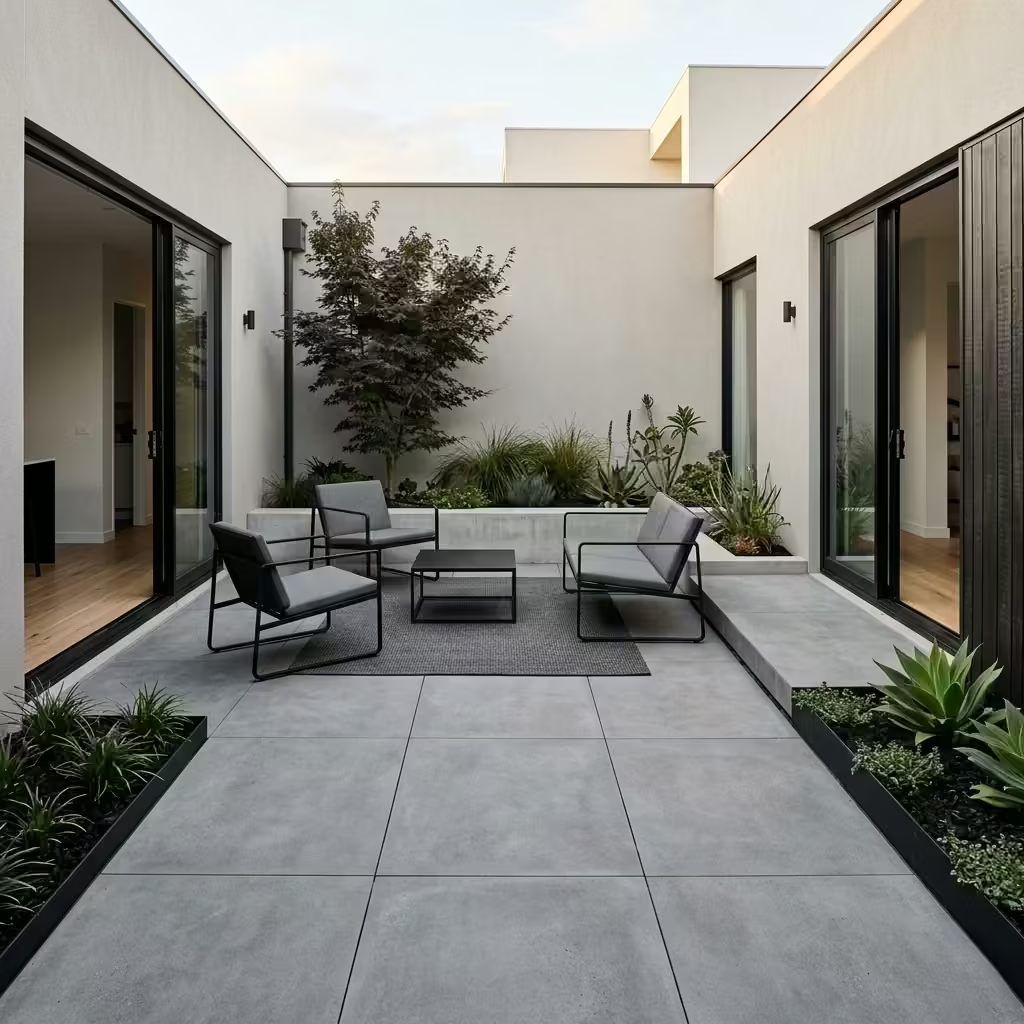
Large concrete slab tiles are ideal when the aim is to create an outdoor surface that feels calm, expansive, and architecturally resolved. Their strength lies in simplicity. By minimising joints and visual interruption, they allow the terrace or patio to read as one continuous plane, which makes the space feel more ordered and spacious. I use them when I want the flooring to act as a quiet framework for the architecture, planting, and furniture rather than a feature in itself.
Real-Life Application Insight
In a contemporary courtyard project, I specified large concrete-look slabs to give the space a stronger sense of direction. The garden had very clean lines, minimal planting, and a restrained material palette, so the flooring needed to reinforce that discipline. What worked especially well was how the slabs created a smooth visual field that made the entire courtyard feel more generous. Instead of breaking the space into smaller fragments, the flooring helped unify it, which is often what makes a compact garden feel far more composed. The effect was understated, but it completely changed the atmosphere.
Key Measurements or Proportional Guidance
Large slab tiles work best when the scale of the space supports their size.
- Ideal tile size: 900 × 900 mm (36 × 36 inch) or 1200 × 600 mm (48 × 24 inch)
- Thickness: 20 mm (0.8 inch) for outdoor applications
- Joint width: 2–3 mm (0.08–0.12 inch) for a clean, minimal finish
- Best suited to: terraces, courtyards, and open patios with a strong geometric layout
- Finish: matte or lightly textured to reduce glare and improve usability
I always pay close attention to alignment with edges, thresholds, and wall lines. With large slabs, even a slight miscalculation becomes visible, so proportion and installation quality are inseparable from the design itself.
Pros
- Creates a clean, modern, and highly architectural look
- Reduces grout lines, which keeps the surface visually calm
- Makes outdoor spaces feel larger and more continuous
- Works well with minimal planting and contemporary furniture
- Low maintenance compared with more joint-heavy layouts
Cons
- Requires excellent substrate preparation and precise installation
- Can feel stark if not balanced with softer materials or planting
- Large sizes may be difficult to handle in tighter spaces
- Imperfections in alignment become highly noticeable
- Lighter tones can show dirt more readily in exposed areas
Large concrete slab tiles are most successful when the goal is clarity. They do not rely on decoration or pattern to make an impression. Instead, they create a disciplined, enduring surface that allows the rest of the outdoor scheme to feel sharper, calmer, and more intentional.
You May also Like: 25 Modern Wooden Garden Fence Ideas DIY Builds, Design Trends & Outdoor Decor Inspiration
Dark Charcoal Tiles for Dramatic Terraces
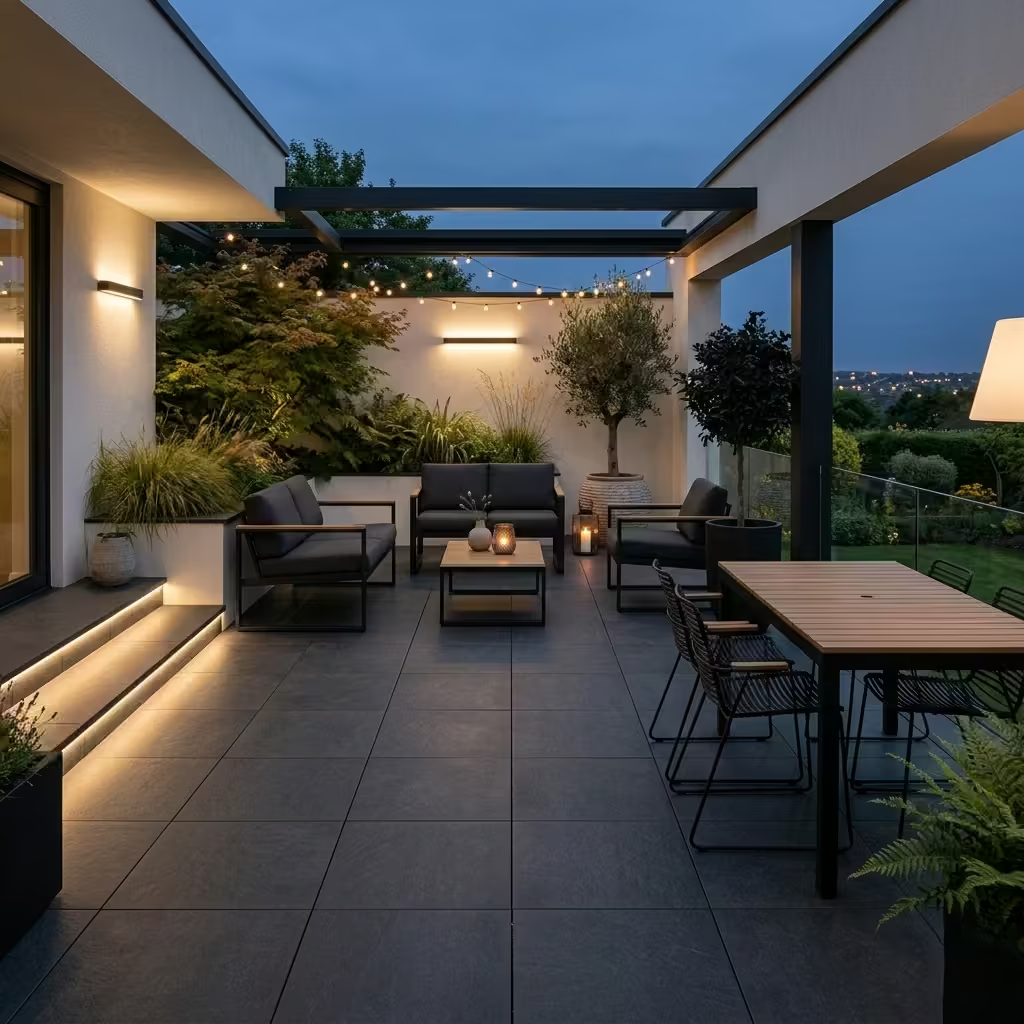
Dark charcoal tiles bring weight, depth, and a strong architectural presence to outdoor spaces. I use them when the brief calls for drama without ornament, especially in terraces that need to feel grounded and sophisticated. The appeal lies in their ability to sharpen geometry and make surrounding materials, planting, timber, pale render, or soft foliage, appear more vivid by contrast. In the right setting, charcoal flooring can make a terrace feel intimate and intentional rather than flat or unfinished.
Real-Life Application Insight
I once specified charcoal-toned porcelain for a terrace that overlooked a planted garden and a pale stone facade. The darker floor gave the entire space more definition, almost like a frame around the architecture. What made it successful was not just the colour itself, but how it shifted the mood after dusk. As daylight faded, the terrace felt more cocooned and atmospheric, which encouraged the space to be used later into the evening. That kind of emotional shift is often what makes dark flooring worthwhile. It changes not just how a terrace looks, but how it feels to spend time in it.
Key Measurements or Proportional Guidance
Dark tiles can intensify visually, so scale and finish matter.
- Ideal tile size: 600 × 900 mm (24 × 36 inch) or 900 × 900 mm (36 × 36 inch)
- Thickness: 20 mm (0.8 inch) for exterior durability
- Joint width: 2–4 mm (0.08–0.16 inch) for a refined finish
- Best use: open terraces, shaded patios, and evening-focused entertaining areas
- Finish: matte or lightly textured to reduce glare and improve grip
I usually avoid high-gloss finishes outdoors in darker tones, as they can feel too reflective and tend to show dust, water marks, and surface irregularities more quickly.
Pros
- Creates a bold, dramatic, and highly composed look
- Makes planting and furniture stand out more clearly
- Works especially well in modern and architectural schemes
- Helps terraces feel more intimate and evening-friendly
- Matte finishes can hide some everyday wear effectively
Cons
- Absorbs more heat, which can make the surface warm in direct sun
- Shows dust, pollen, and water marks more easily than mid-tone finishes
- Can feel visually heavy if the surrounding elements are also dark
- Requires good lighting design to prevent the space from feeling too closed in
- May not suit very small or shaded terraces if not balanced carefully
Dark charcoal tiles are at their best when they are used with confidence and restraint. They create a strong visual foundation, giving terraces a sense of depth and atmosphere that lighter materials often cannot achieve.
Neutral Beige Tiles for Cohesive Indoor-Outdoor Flow
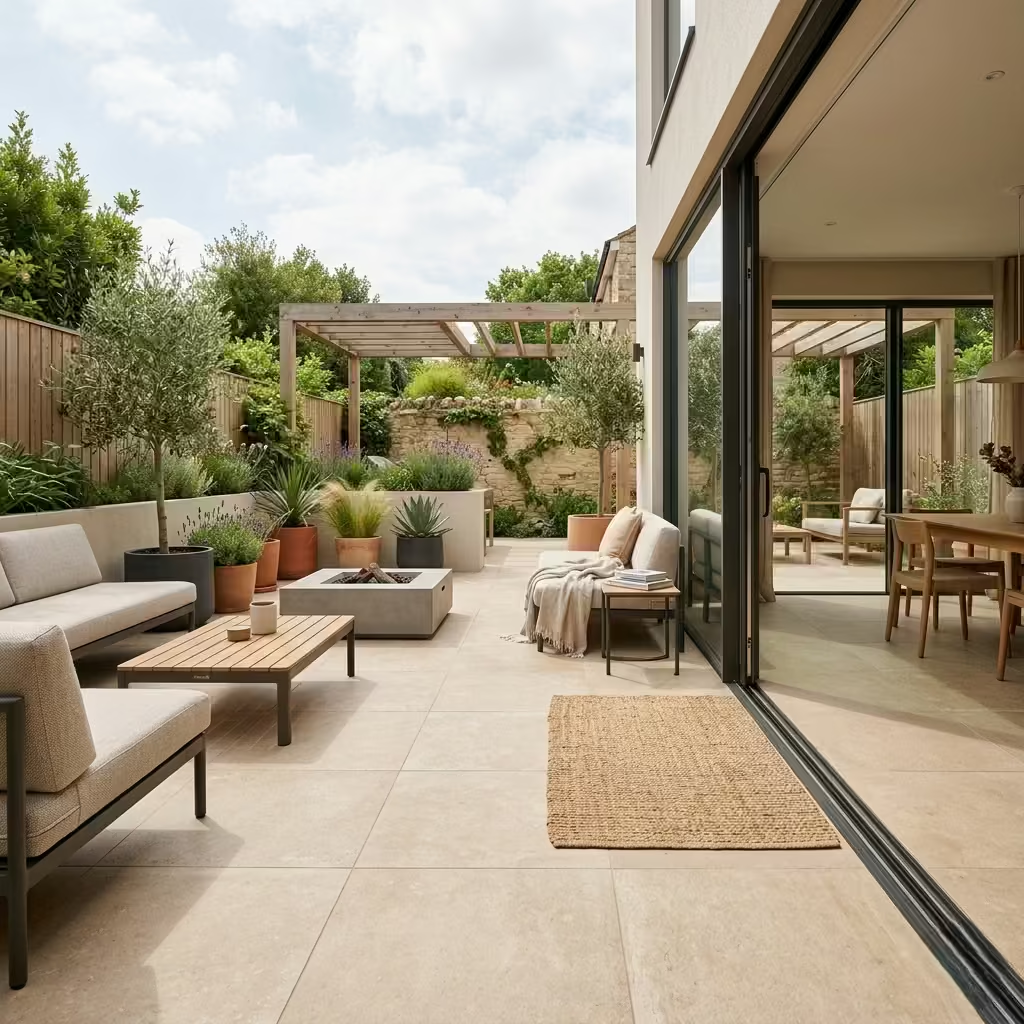
Neutral beige tiles are one of the most effective choices when the goal is to make interior and exterior spaces feel connected. Their strength lies in subtlety. They do not compete with architecture, planting, or furniture, but instead create a calm visual bridge between the house and the garden. I use beige tones when I want an outdoor floor to feel warm, welcoming, and quietly continuous, especially in projects where the client wants the terrace to read as an extension of the living space rather than a separate zone.
What makes this finish so valuable is its adaptability. Beige can lean sandy, stone-like, or slightly taupe depending on the light and surrounding materials. That flexibility allows it to work in both contemporary and more relaxed schemes, while still maintaining a timeless quality that will not date quickly.
Real-Life Application Insight
I specified neutral beige porcelain in a project where the brief was to visually soften the transition from an open-plan kitchen to the patio beyond. The interior flooring had a warm, understated tone, so the outdoor tiles needed to echo that palette without looking identical. The result was a space that felt materially connected from the moment you stepped outside.
What stood out most was how the beige surface changed with the light. In the morning it felt pale and airy, while in the evening it took on a warmer, more grounded character. That shift gave the terrace a sense of atmosphere without relying on pattern or contrast. It also made the outdoor furniture and planting feel more resolved, because the flooring quietly supported everything around it.
Key Measurements or Proportional Guidance
For cohesive indoor-outdoor schemes, proportion and tone need to be carefully controlled.
- Ideal tile size: 600 × 600 mm (24 × 24 inch) or 600 × 900 mm (24 × 36 inch)
- Thickness: 20 mm (0.8 inch) for outdoor use
- Joint width: 2–4 mm (0.08–0.16 inch) for a clean and continuous look
- Best suited to: patios connected directly to living areas, terraces, and sheltered garden rooms
- Finish: matte or lightly textured to keep the surface refined but practical
I often choose a tone that sits just a fraction deeper than the interior floor, so the transition feels natural without becoming too uniform. That slight distinction helps the outdoor area hold its own while still belonging to the same visual language.
Pros
- Creates a smooth and elegant indoor-outdoor transition
- Warm, versatile tone that works with many architectural styles
- Makes outdoor spaces feel brighter and more open
- Easy to pair with timber, stone, metal, and planting
- Timeless and less trend-dependent than stronger colour choices
Cons
- Can show dirt more readily in heavily used areas
- Requires careful tone matching with adjacent interior finishes
- May feel too understated if the surrounding scheme lacks contrast
- Lighter beige tones can appear washed out in very bright sun
- Needs good detailing to avoid looking generic or flat
Neutral beige tiles are most successful when they are used with discipline. They do not announce themselves, but they shape the experience of a space in a subtle and lasting way. For projects where continuity, warmth, and balance matter, they are often one of the most reliable choices.
You May also Like: 25 Outdoor Area Ideas for Kids That Encourage Adventure, Creativity, and Outdoor Play
Polished-Look (Outdoor Rated) Tiles for Sheltered Terraces
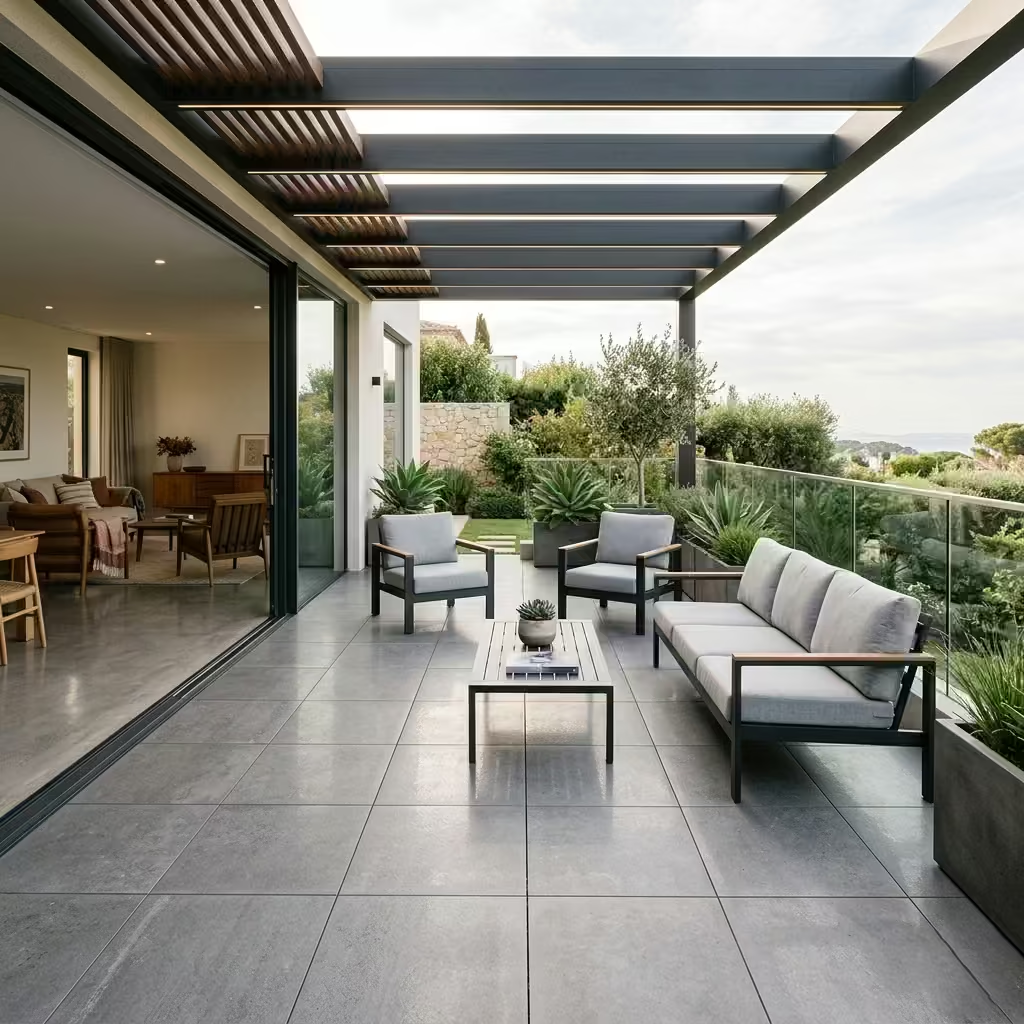
Polished-look outdoor rated tiles bring a more refined, architectural finish to sheltered terraces where exposure is controlled and the design can afford a slightly more elevated surface quality. I use them when the brief calls for subtle sophistication rather than rustic texture, especially in covered or partially enclosed spaces that connect directly to interiors. The effect is more tailored and polished, but still grounded enough for outdoor use when the correct slip rating and specification are in place.
Real-Life Application Insight
I specified an outdoor-rated polished-look tile in a covered terrace that functioned almost like an extension of the sitting room. Because the area was protected from direct rain and heavy debris, we could lean into a smoother, more reflective finish without sacrificing practicality. What made the result work was the way the surface lifted the light and gave the terrace a quieter sense of luxury. It felt more like a dressed room than a hardscape, which suited the client perfectly. The key was moderation. In a sheltered setting, that finish can feel elegant rather than impractical, but only if it is used with discipline and the surrounding details are equally resolved.
Key Measurements or Proportional Guidance
This type of tile works best where the terrace is well protected and visually connected to the interior.
- Ideal tile size: 600 × 600 mm (24 × 24 inch) or 900 × 900 mm (36 × 36 inch)
- Thickness: 20 mm (0.8 inch) for outdoor applications
- Joint width: 2–3 mm (0.08–0.12 inch) for a tighter, more refined finish
- Best suited to: covered terraces, loggias, and partially enclosed outdoor rooms
- Finish: polished-look only if specifically rated for exterior use and slip resistance
I typically avoid this finish in fully exposed areas, where water, dust, and weathering can quickly diminish the effect. In sheltered settings, however, it can bring a level of finish that feels quietly premium without becoming showy.
Pros
- Creates a refined, elegant outdoor atmosphere
- Works beautifully in sheltered or partially enclosed terraces
- Reflects light well, helping darker spaces feel more open
- Can visually bridge indoor and outdoor rooms
- Offers a more tailored aesthetic than heavily textured finishes
Cons
- Less forgiving in wet or exposed conditions
- Can show smudges, dust, and water marks more easily
- May feel too formal for relaxed or rustic garden schemes
- Requires careful confirmation of outdoor slip performance
- Not suitable for fully exposed terraces unless correctly specified
Polished-look outdoor tiles are best viewed as a specialist choice. In the right sheltered setting, they can add refinement and visual calm, giving the terrace a more finished, composed quality that sits beautifully alongside interior spaces.
Grid-Laid Tiles for Structured Layouts
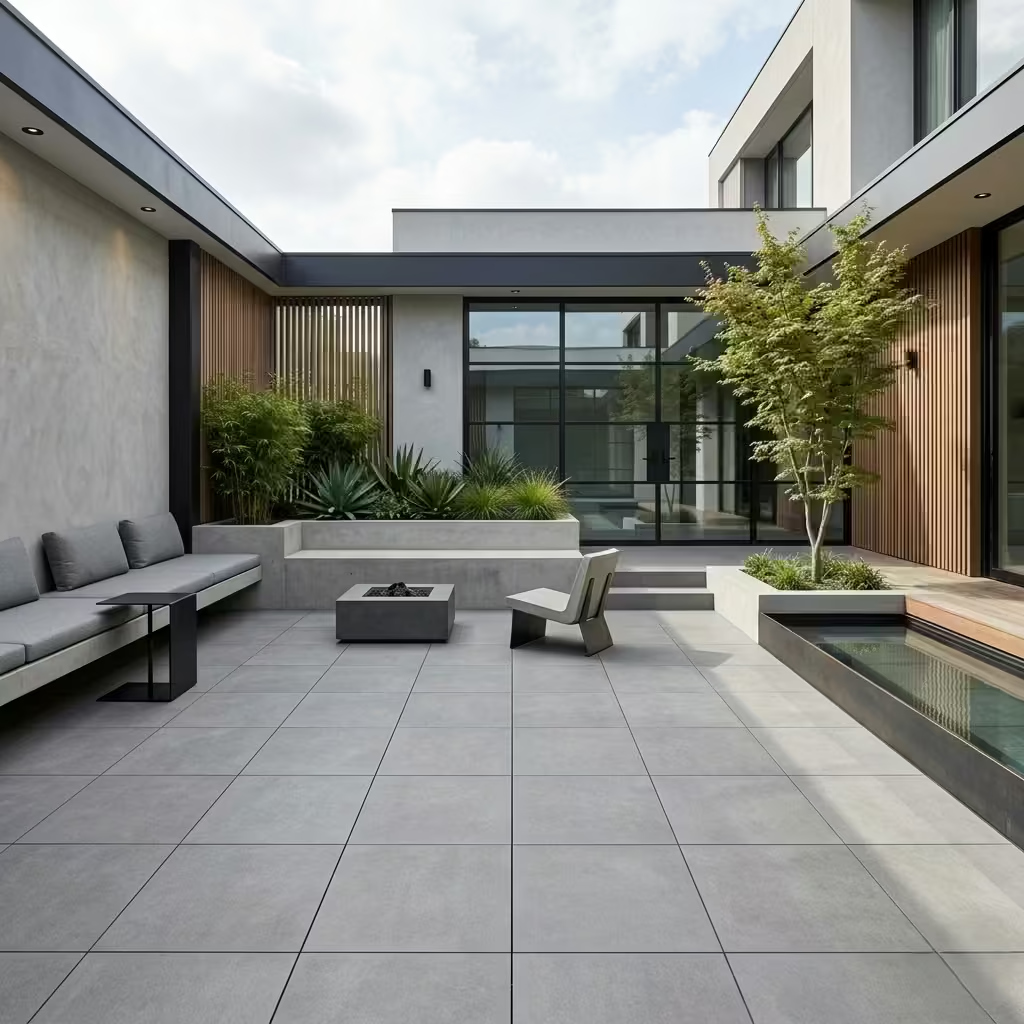
Grid-laid tiles are one of the clearest ways to bring order to an outdoor space. I use this approach when I want the floor to feel disciplined, balanced, and quietly architectural. The appeal is not in decoration, but in structure. A grid layout reinforces straight lines, sharp edges, and a sense of calm geometry, which can be especially effective in contemporary gardens, formal courtyards, or terraces where the architecture itself is strong and deliberate.
What I value most about a grid layout is its honesty. It does not try to disguise the tile format or create unnecessary movement. Instead, it allows the material to speak through proportion and precision. In outdoor design, that kind of restraint often feels more enduring than anything overly styled.
Real-Life Application Insight
I used a grid-laid porcelain floor in a compact urban patio where the client wanted the space to feel cleaner, more open, and easier to read. The garden had very little square footage, so visual clarity mattered more than ornament. By keeping the joints aligned in a strict grid, the patio immediately felt more resolved. It gave the impression of a larger, more intentional space, even though the footprint had not changed.
What made the result work was how the grid supported everything else. The planting looked softer against it, the furniture sat more neatly on it, and the architectural lines of the house felt better connected to the garden. That is the strength of a structured layout. It gives the eye somewhere calm to rest, which is often what makes an outdoor room feel complete.
Key Measurements or Proportional Guidance
Grid layouts work best when the tile size and space are in proportion to one another.
- Ideal tile size: 600 × 600 mm (24 × 24 inch) or 900 × 900 mm (36 × 36 inch)
- Joint width: 2–4 mm (0.08–0.16 inch) for a crisp, ordered finish
- Best suited to: patios, terraces, courtyards, and walkout areas with clear geometry
- Layout alignment: keep cuts symmetrical at edges and thresholds where possible
- Finish: matte or lightly textured for outdoor practicality
I usually recommend a grid layout when the design benefits from calm repetition. It works especially well with rectified tiles, where tight joints help the surface read as one coherent plane rather than a collection of parts.
Pros
- Creates a clear, orderly, and timeless visual structure
- Makes small or awkward spaces feel more intentional
- Works well with modern architecture and minimal planting
- Easier to align with walls, thresholds, and built elements
- Helps the floor feel calm rather than busy
Cons
- Can feel rigid if the surrounding design is already highly formal
- Requires accurate installation, as misalignment is immediately visible
- Less forgiving of uneven substrates
- May feel too static for informal or naturalistic garden schemes
- Strong grid lines can visually highlight dirt if grout colour is poorly chosen
Grid-laid tiles are most effective when the goal is clarity. They do not rely on drama or pattern to create interest. Instead, they give the outdoor space a disciplined foundation, which allows every other element, planting, furniture, light, and structure, to feel more composed.
You May also Like: 16 Stunning Japandi Front Doors That Perfectly Blend Warmth and Minimalism
Functional & Climate-Specific Solutions
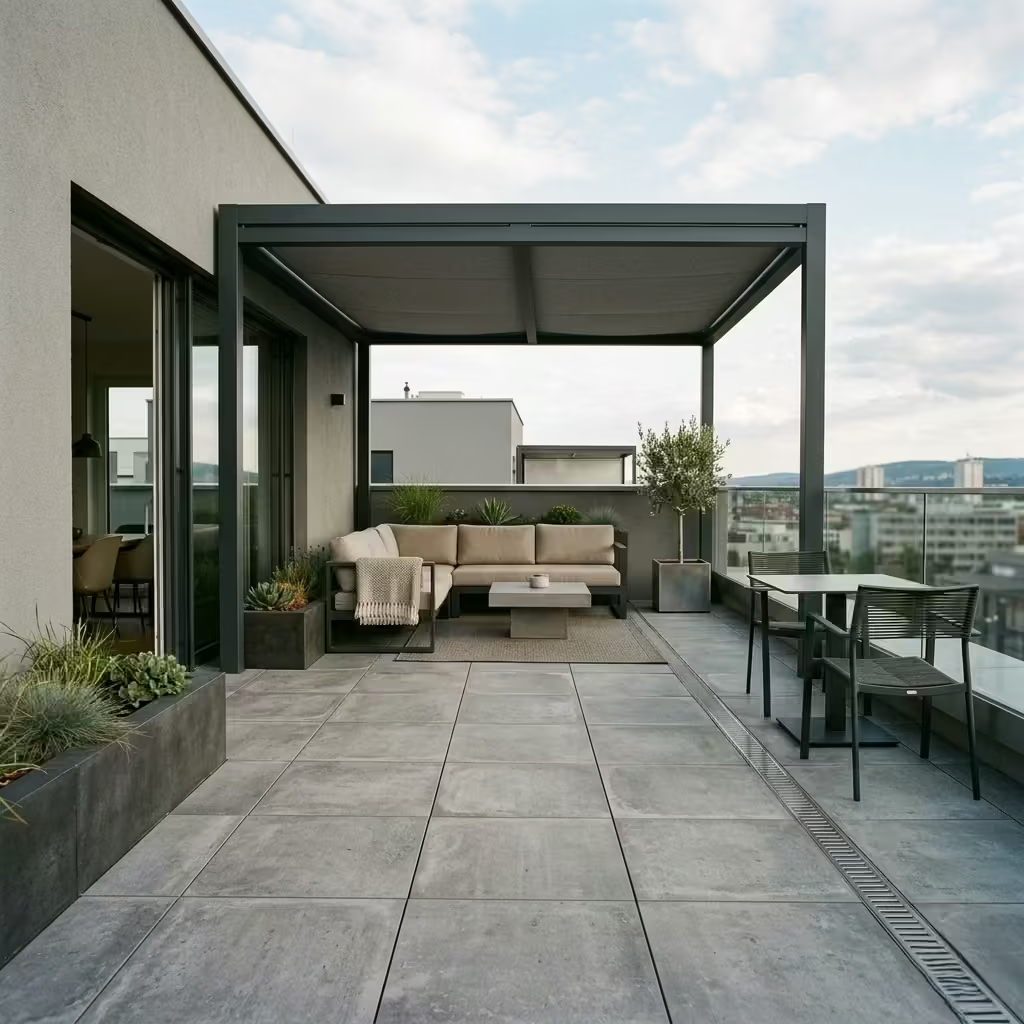
When specifying outdoor tiles, performance must guide material choices as much as aesthetics. I always consider local climate, sun exposure, rainfall, and temperature fluctuations to ensure durability, safety, and comfort. Tiles that perform well under heat, frost, or wet conditions reduce maintenance and prolong the lifespan of the terrace or patio.
By pairing material selection with appropriate finishes, slip ratings, and drainage strategies, it’s possible to create outdoor flooring that not only looks beautiful but functions reliably year-round, supporting both lifestyle and long-term design intent.
Anti-Slip Tiles for Rain-Exposed Gardens
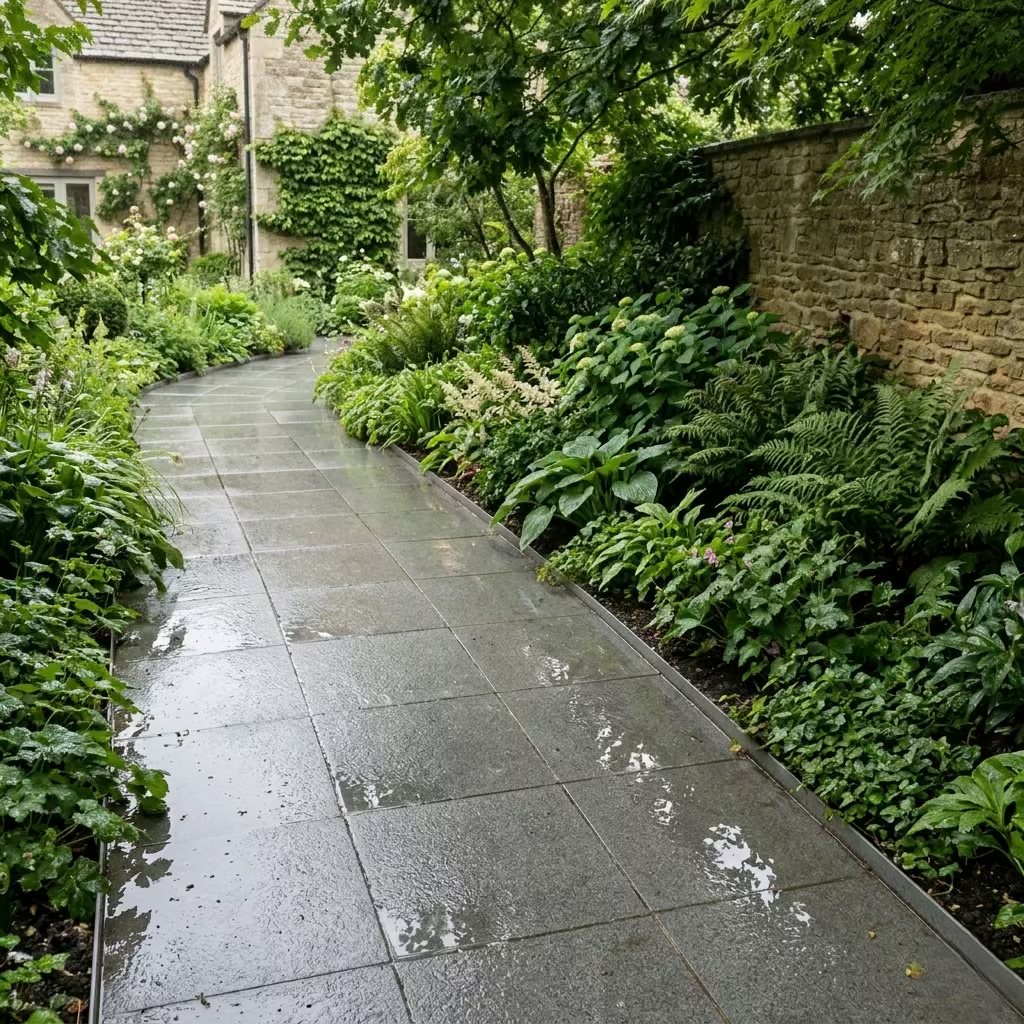
Anti-slip tiles are a practical necessity in gardens that stay wet, shaded, or exposed to frequent rainfall. I use them when safety needs to be built into the design from the beginning, not treated as an afterthought. The best versions manage to be functional without looking technical or harsh, which matters in gardens where the flooring still needs to feel elegant and integrated. In these settings, the surface should support movement quietly, allowing the space to remain usable in all weather rather than becoming something people avoid when conditions change.
Real-Life Application Insight
I specified anti-slip porcelain for a rain-exposed garden path that ran beside dense planting and a shaded boundary wall. Because the area received little direct sun, moisture lingered on the surface for long periods, and standard tiles would have been a risk. What made the project successful was the combination of texture and tone. The tile had enough grip to feel secure underfoot, but not so much texture that it became difficult to clean or visually rough. Over time, this made the path feel dependable in a very real sense. It was no longer a fair-weather route, but a part of the garden that could be used comfortably year-round.
Key Measurements or Proportional Guidance
For rain-exposed areas, I look closely at both size and surface rating.
- Ideal tile size: 300 × 600 mm (12 × 24 inch) or 600 × 600 mm (24 × 24 inch)
- Thickness: 20 mm (0.8 inch) for outdoor durability
- Slip rating: minimum R11, with R12 preferable in especially wet zones
- Joint width: 3–5 mm (0.12–0.2 inch) for stable installation and clean drainage behaviour
- Best suited to: shaded paths, exposed patios, side returns, and boundary walkways
I usually avoid overly dark finishes in persistently wet areas unless the design specifically calls for that tone, because standing water, debris, and algae can become more visible and more demanding to maintain.
Cons
- Improves safety in wet, shaded, or high-moisture garden areas
- Available in finishes that still feel refined and architectural
- Suitable for year-round use in changeable climates
- Helps reduce the risk of slips without compromising the overall scheme
- Durable and easy to integrate with other outdoor materials
Cons
- Heavier texture can collect dirt if maintenance is neglected
- Some anti-slip finishes may feel less refined visually than smoother tiles
- Lighter colours can show stainingmore readily in damp environments
- Requires careful specification to balance grip with comfort
- In very exposed settings, drainage still remains essential, even with a high slip rating
Anti-slip tiles are most effective when they disappear into the experience of the garden rather than call attention to themselves. When chosen well, they provide confidence underfoot, preserve the integrity of the design, and allow outdoor spaces to remain genuinely usable regardless of the weather.
Heat-Reflective Tiles for Hot Climates
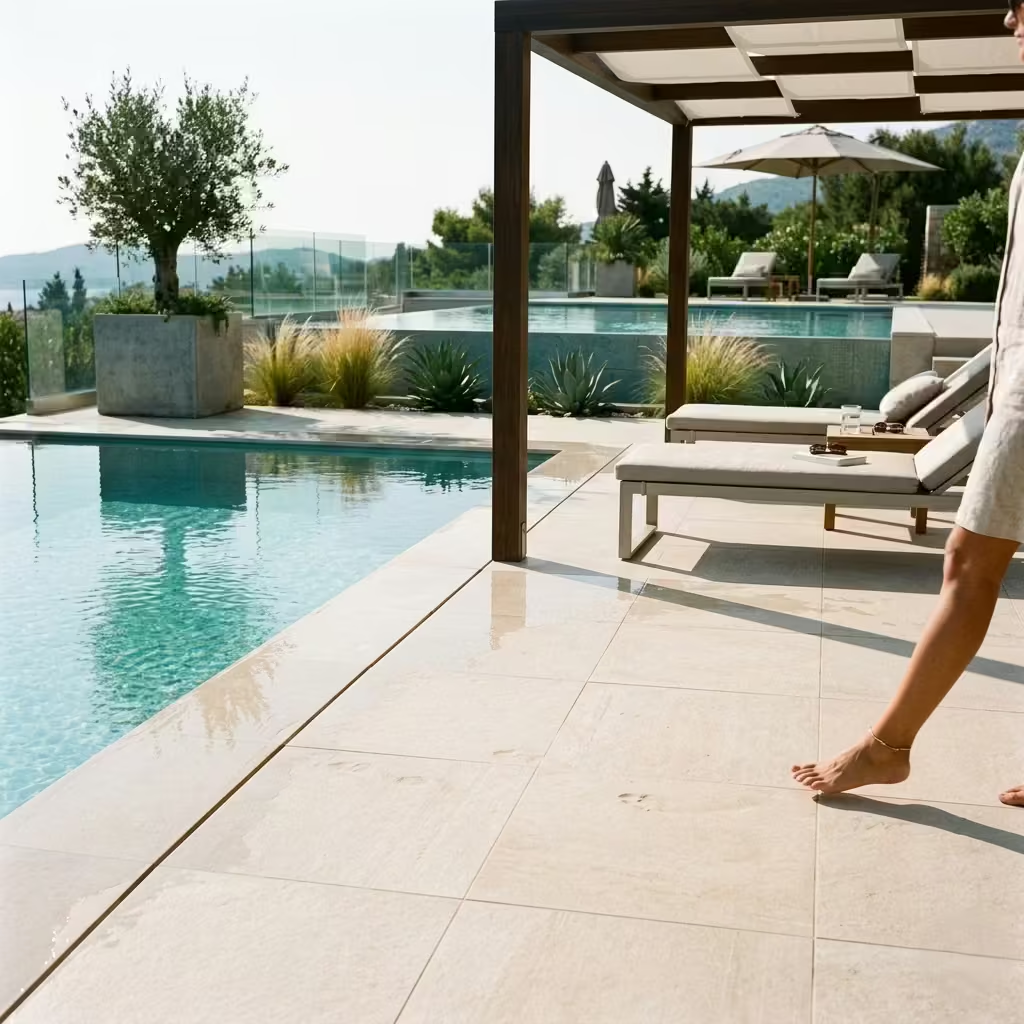
Heat-reflective tiles are essential in sun-drenched climates where standard surfaces can become uncomfortably hot underfoot. I specify them for patios, terraces, and poolside areas where barefoot use is frequent, and the comfort of the space depends on temperature management. The goal is to balance performance with aesthetics tiles that remain visually elegant while actively reducing heat absorption, creating outdoor areas that are usable throughout the day without sacrificing design integrity.
Real-Life Application Insight
In a Mediterranean-style terrace project, I selected light-toned, heat-reflective porcelain with a subtle matte finish. The area received full sun for much of the day, and conventional dark tiles would have made the terrace unusable in summer. These tiles kept the surface pleasantly cool while maintaining a sophisticated, neutral aesthetic. I found that pairing the heat-reflective finish with large-format tiles and minimal grout lines not only improved thermal comfort but also reinforced a calm, expansive feel that visually connected the terrace to the garden.
Key Measurements or Proportional Guidance
Heat management is enhanced by considering size, finish, and installation:
- Ideal tile size: 600 × 600 mm (24 × 24 inch) or 600 × 900 mm (24 × 36 inch)
- Thickness: 20 mm (0.8 inch) for durability
- Finish: matte or lightly textured to avoid glare and improve comfort
- Joint width: 2–4 mm (0.08–0.16 inch) for a seamless visual flow
- Best suited to: fully sun-exposed patios, pool terraces, and rooftop gardens
I also recommend pairing reflective tiles with shading elements like pergolas, retractable awnings, or planting to maximize comfort without compromising design cohesion.
Pros
- Reduces surface heat, making patios and terraces more comfortable
- Maintains visual elegance with lighter, neutral tones
- Works well for barefoot-friendly outdoor spaces
- Enhances usability in high-sun areas without additional shading
- Durable and low-maintenance, particularly in porcelain variants
Cons
- Lighter colours can show dirt and staining more readily
- Reflective surfaces may produce glare if overly polished
- Limited palette compared to standard outdoor tiles
- Does not replace the need for shade in extremely hot climates
- Requires careful selection to ensure slip resistance is maintained
Heat-reflective tiles are a practical yet design-conscious solution for hot climates. They allow outdoor areas to be fully functional, comfortable, and visually composed even under intense sun, making them a cornerstone of climate-responsive outdoor design.
Raised Pedestal Tile Systems for Rooftop Terraces
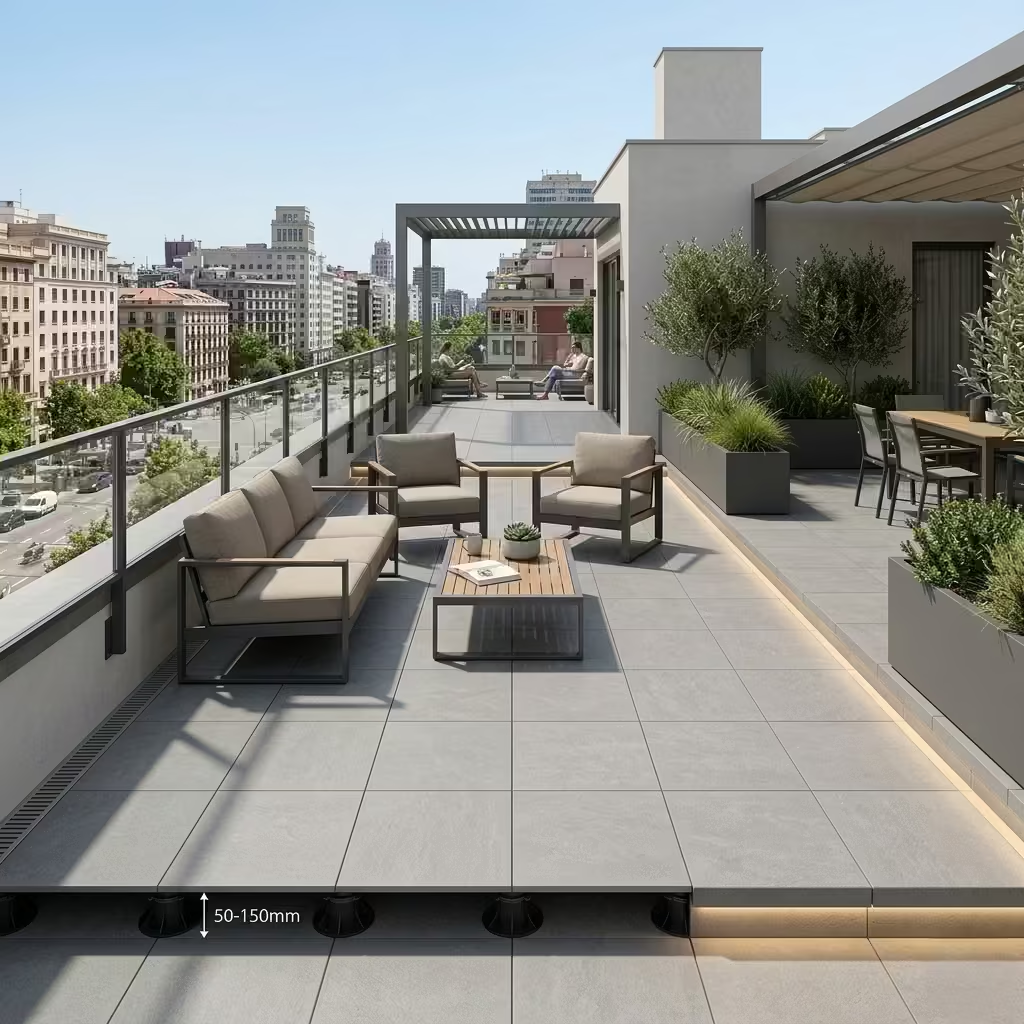
Raised pedestal tile systems are an elegant solution for rooftop terraces where the substrate may be uneven, and proper drainage is critical. I use them when I want a terrace surface that reads clean and flat, without the complications of visible slopes or complex screeding. By elevating the tiles on adjustable pedestals, the system hides services, drainage channels, and slight substrate irregularities, creating a visually seamless outdoor space that is also highly functional. This approach is particularly valuable in urban settings where rooftop terraces double as entertainment zones or outdoor living rooms.
Real-Life Application Insight
I specified a pedestal system for a penthouse terrace where the structural slab was slightly irregular and drainage points were limited. The adjustable pedestals allowed me to achieve a perfectly level surface without compromising the slope required for water runoff. What stood out was the versatility: the terrace felt uniform, comfortable underfoot, and could accommodate outdoor furniture without wobble. The hidden cavity also allowed me to discreetly integrate downlights and irrigation lines, keeping services invisible while maintaining accessibility for maintenance.
Key Measurements or Proportional Guidance
- Typical pedestal clearance: 50–150 mm (2–6 inches) depending on drainage and slope requirements
- Tile compatibility: large-format porcelain, natural stone slabs, or composite decking tiles
- Joint width: 2–5 mm (0.08–0.2 inch) recommended for structural and visual alignment
- Best suited to: rooftop terraces, podium decks, and raised outdoor platforms
- Finish: matte or lightly textured for safety and slip resistance
Pros
- Allows level installation over uneven or sloped substrates
- Provides hidden drainage and service channels
- Simplifies maintenance and future adjustments
- Can accommodate large-format tiles without visible support issues
- Offers flexibility for integrating lighting, irrigation, or cabling
Cons
- Higher initial cost compared with conventional fixed installations
- Requires careful specification to ensure stability and weight distribution
- Pedestal height may restrict vertical clearance in some settings
- Not suitable for fully exposed areas without wind or edge restraint considerations
- Limited choice of compatible tile thickness and type
Raised pedestal systems are most effective when functionality and refinement must coexist. They transform challenging rooftop terraces into level, durable, and visually coherent spaces, allowing both design freedom and practical performance without compromise.
You May also Like: 15 Modern Outdoor Sofa Ideas to Transform Your Patio Into an Outdoor Oasis
Permeable Tile Systems for Drainage-Friendly Gardens
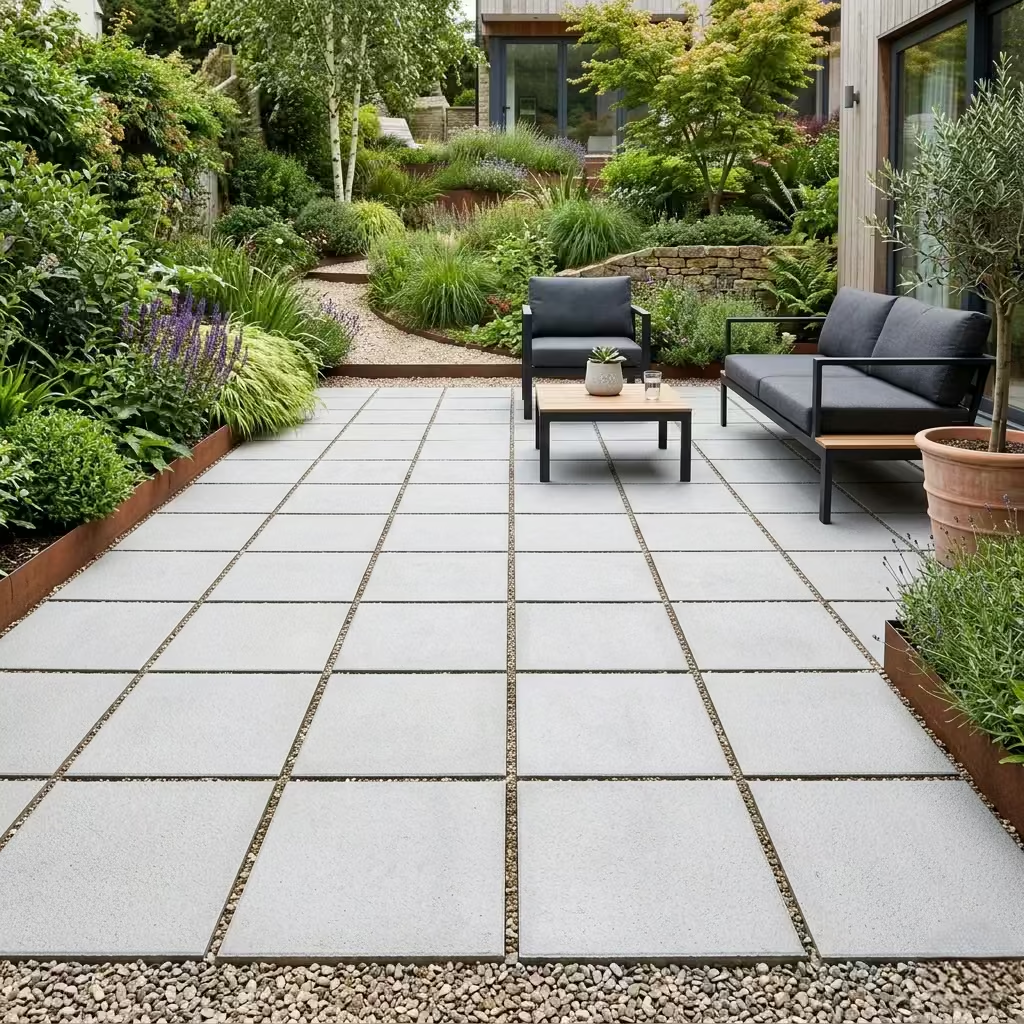
Permeable tile systems are ideal for gardens where water management is a priority. I use them when the goal is to combine a hardscape surface with responsible drainage, particularly in areas prone to heavy rainfall or where water runoff needs to be carefully controlled. By allowing water to pass through joints or the substrate, these tiles prevent pooling, reduce soil erosion, and support healthier planting. Beyond functionality, permeable systems can be visually refined, giving the garden a composed and contemporary appearance while performing a vital environmental role.
Real-Life Application Insight
In a riverside property with a sloped garden, I specified permeable porcelain tiles laid over a gravel substrate. The design intention was to create a terrace and pathways that could handle frequent rain without becoming slippery or waterlogged. The system allowed rainwater to filter through naturally, keeping surfaces usable and preventing muddy patches. From an aesthetic perspective, the tiles maintained a clean, structured look, while the subtle gaps between them introduced a rhythmic texture that complemented the surrounding planting. It created a garden that felt practical, resilient, and considered in equal measure.
Key Measurements or Proportional Guidance
- Tile size: 300 × 300 mm (12 × 12 inch) or 400 × 400 mm (16 × 16 inch) recommended for pathways and terraces
- Joint width: 5–10 mm (0.2–0.4 inch) to allow sufficient water permeability
- Substrate: compacted gravel or sand to support drainage while stabilizing tiles
- Best suited to: sloped gardens, rain-exposed patios, pathways, and permeable terraces
- Finish: lightly textured to reduce slip while enhancing water dispersion
Pros
- Supports natural drainage and prevents water pooling
- Reduces erosion and protects surrounding planting
- Keeps outdoor areas usable in all weather conditions
- Can be combined with environmentally friendly landscaping strategies
- Adds subtle texture and rhythm to the surface
Cons
- Requires careful substrate preparation for long-term stability
- Grout gaps can collect debris and may need occasional maintenance
- Not suitable for extremely compact urban terraces without additional drainage management
- Limited tile selection compared with conventional non-permeable systems
- Installation can be more labour-intensive than standard outdoor tiles
Permeable tile systems are most effective when performance is integrated into the design from the start. They allow gardens to remain practical, safe, and beautiful, making outdoor spaces resilient and functional while supporting both aesthetic and environmental goals.
Mixed Material Tile Layouts for Zoning Outdoor Spaces
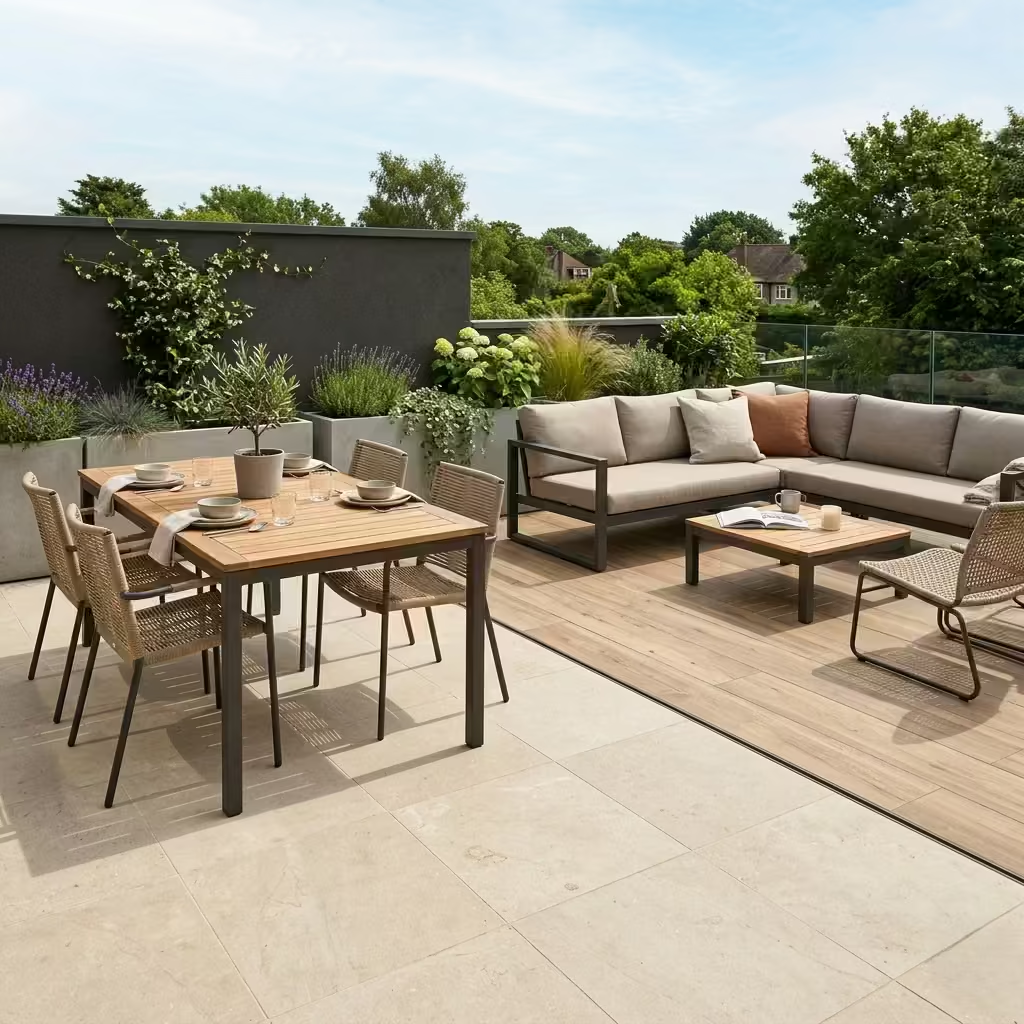
Mixed material tile layouts are an effective way to define separate zones in a single outdoor space without relying on walls or fences. I use this strategy when a terrace, patio, or garden needs distinct areas for dining, lounging, planting, or circulation. By combining materials such as natural stone, porcelain, or textured tiles you can create subtle transitions, signal activity areas, and add tactile and visual interest. The key is restraint: the materials must complement each other in tone, scale, and finish to feel cohesive rather than chaotic.
Real-Life Application Insight
In a modern townhouse garden, I combined honed limestone with wood-effect porcelain to differentiate a dining zone from a lounging area. The limestone was laid in a traditional grid to anchor the dining table, while the wood-effect porcelain extended into the seating zone, providing warmth underfoot and a softer feel. This subtle contrast helped each area feel purposeful without breaking the visual continuity of the garden. The arrangement also guided movement naturally, allowing guests to flow from one area to another intuitively.
Key Measurements or Proportional Guidance
- Tile sizes: 600 × 600 mm (24 × 24 inch) for larger zones; 200 × 1200 mm (8 × 48 inch) planks for linear or lounging areas
- Joint width: 2–5 mm (0.08–0.2 inch) depending on material compatibility
- Transition strategy: use border tiles or a narrow joint to separate materials without creating visual tension
- Best suited to: terraces, multi-use patios, garden extensions, and rooftop outdoor spaces
- Finish: consider slip resistance, texture, and weathering when mixing materials
Pros
- Defines outdoor zones clearly without physical barriers
- Adds tactile and visual richness to large terraces or gardens
- Supports practical use: dining, lounging, circulation, or planting areas
- Allows flexibility in combining aesthetics and functionality
- Creates a dynamic, layered outdoor experience
Cons
- Requires careful planning to ensure materials are compatible in scale, colour, and maintenance
- Installation is more complex, especially with varying thicknesses or substrates
- Poor transitions can look disjointed if not executed precisely
- Some material combinations may weather differently over time
- Requires foresight in cleaning and upkeep strategies
Mixed material tile layouts are most successful when they are considered at the design stage. When planned well, they make outdoor spaces more legible, functional, and visually engaging, turning a simple terrace or garden into a series of complementary, purpose-driven zones.
Real-Life Design Applications (Where These Tiles Actually Work)
Small Patio vs Expansive Garden
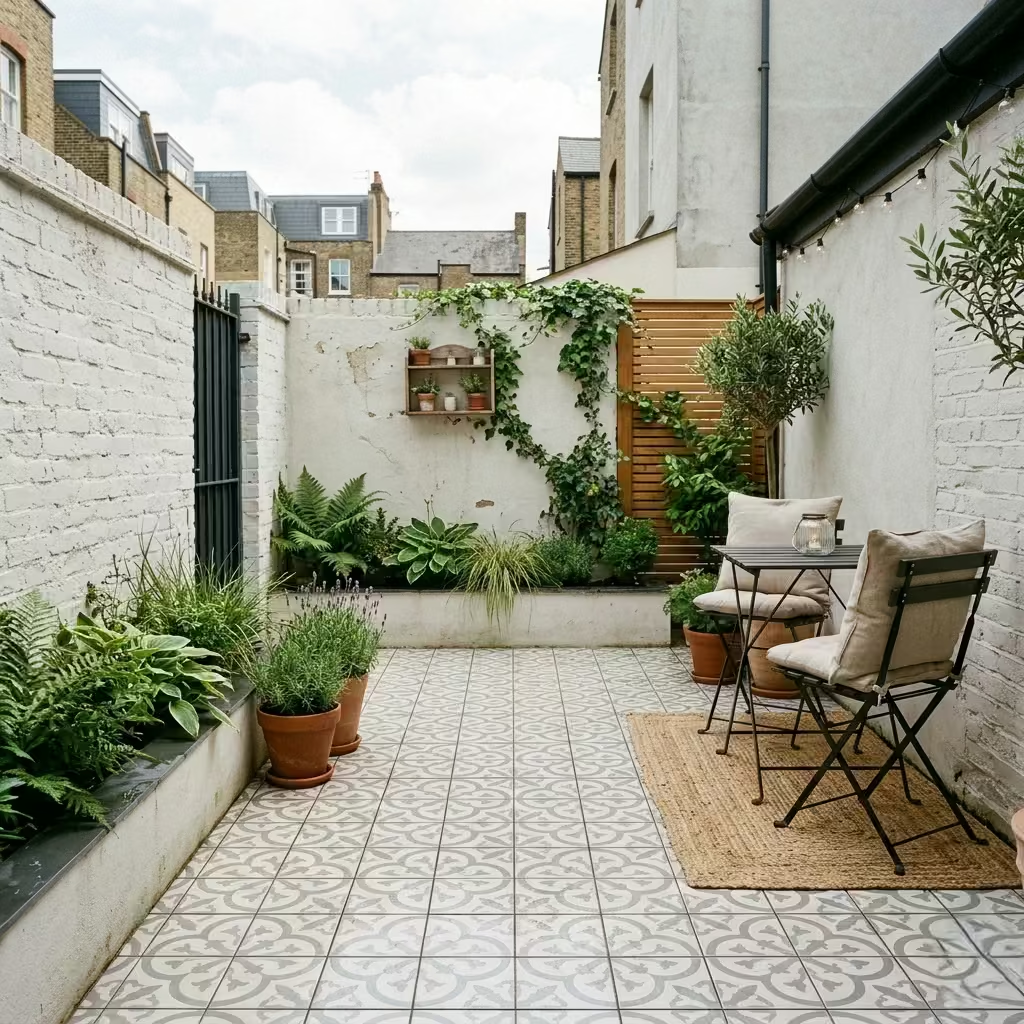
Tile selection starts with understanding the scale of the space. In compact patios, I often use smaller-format or patterned tiles, such as mosaics or 300 × 300 mm porcelain, to prevent the surface from feeling heavy or fragmented. Larger-format tiles can overwhelm a small area, while carefully scaled patterns or neutral tones create the illusion of openness. In expansive gardens, conversely, large-format porcelain, natural stone slabs, or grid-laid layouts work beautifully to maintain visual continuity, reducing unnecessary grout lines and giving the landscape a composed, intentional feel. Avoiding visual fragmentation is key: repeated tile formats, restrained patterns, and proportionate joint widths help unify terraces, pathways, and patio zones.
You May also Like: 15 Red Brick House Facades That Look Bold, Modern, and Timeless
Terrace and Rooftop Constraints
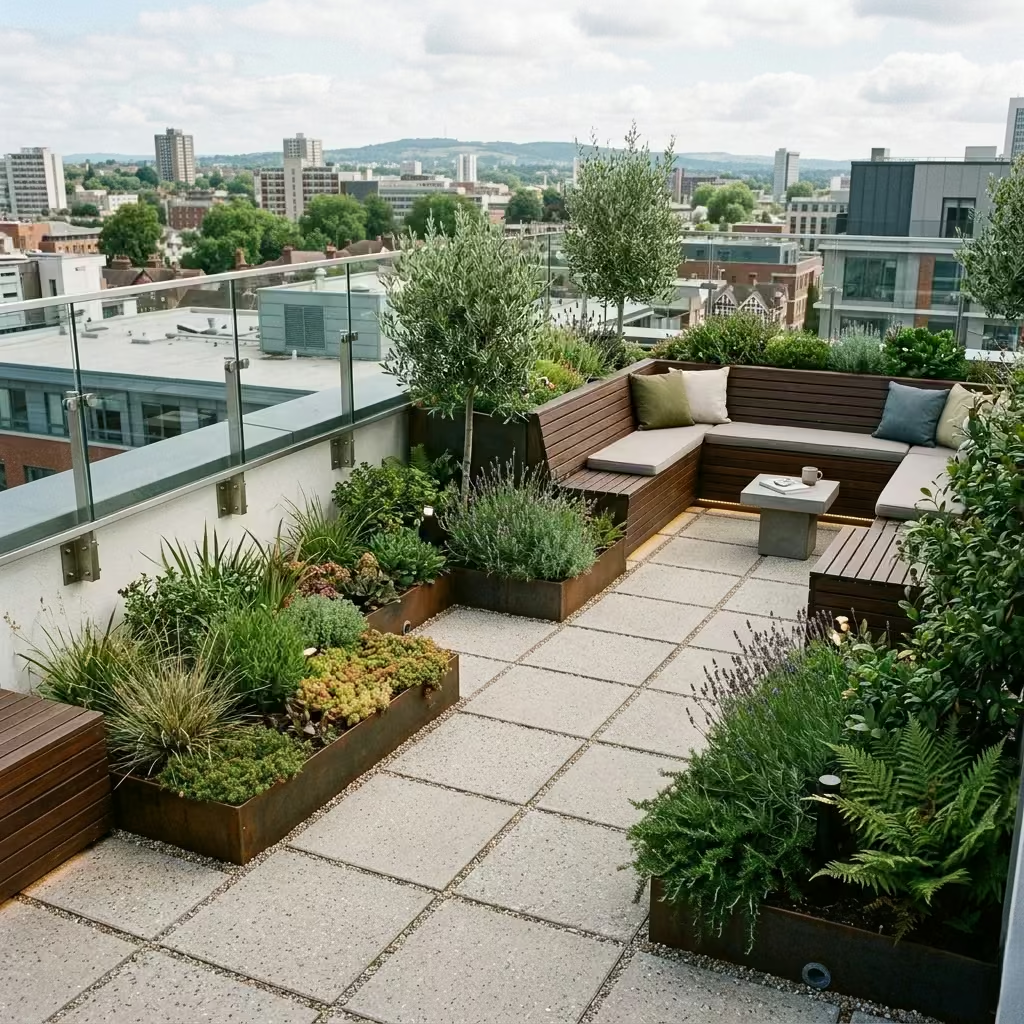
On terraces and rooftop gardens, structural and functional considerations heavily influence tile choice. Weight limits often dictate material thickness 20–25 mm is typical for large-format porcelain or natural stone tiles, while raised pedestal systems can help accommodate heavier slabs without stressing the structure. Coordination with contractors on waterproofing layers is critical; poorly integrated tiles can compromise drainage and roof membranes. I find that tiles with hidden drainage systems or permeable substrates allow terraces to remain both elegant and safe, ensuring performance under all weather conditions.
Indoor-Outdoor Continuity
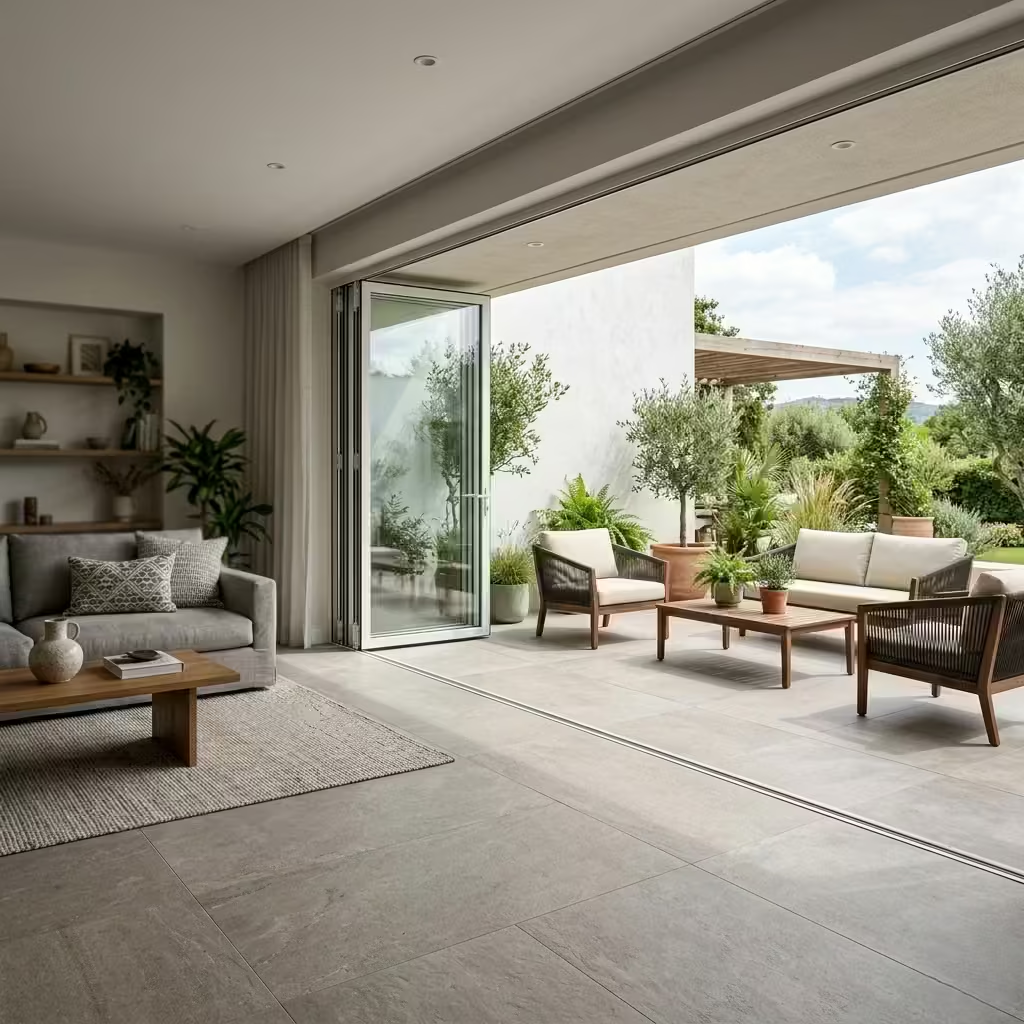
Creating a seamless flow between interior and exterior spaces is one of the most transformative strategies in outdoor design. I frequently extend the same tile from inside the house to the patio, ensuring only minimal thickness variation (often around 10 mm) to avoid tripping hazards and maintain a clean threshold. Neutral tones, large-format slabs, and subtle textures reinforce visual expansion, making patios and terraces feel like natural extensions of living rooms or kitchens. Proper joint management and thoughtful transitions sometimes framed with a slim border or matching threshold strip ensure continuity while accommodating thermal movement and drainage.
By considering space scale, structural constraints, and visual continuity, these real-life applications ensure that outdoor tiles are not just decorative, but functional, durable, and fully integrated into the lifestyle and architectural intent of the home.
Common Mistakes I See in Outdoor Tile Projects
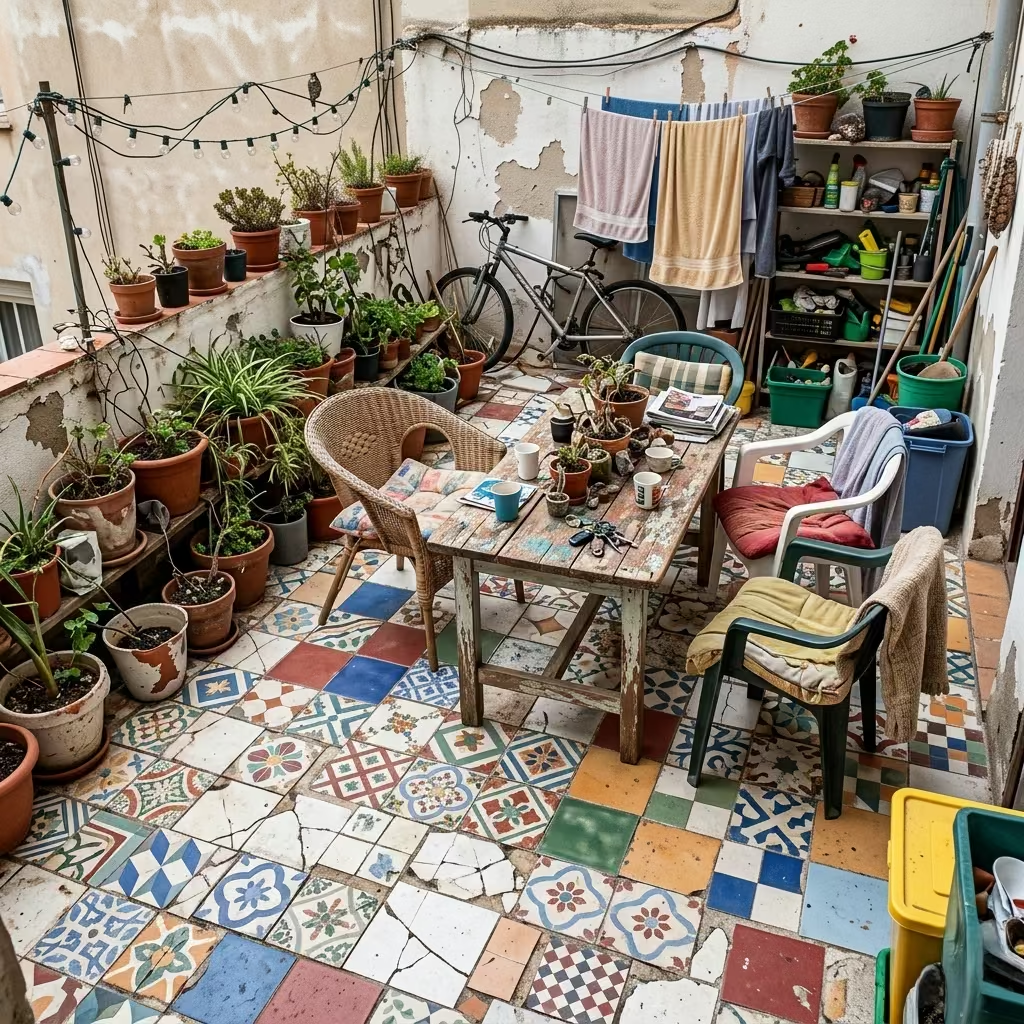
Even the most carefully designed outdoor spaces can fall short if basic principles are overlooked. One of the most frequent errors is choosing tiles based on showroom appearance. Tiles often look very different once installed outdoors, where light, weather, and context affect colour, texture, and finish.
Another common issue is ignoring slip ratings. I’ve seen clients select beautiful, polished porcelain or stone for patios and pool edges without considering R11 or higher slip resistance, which compromises safety in wet conditions.
Poor grout colour selection is also a recurring problem. Too light, and it quickly looks dirty; too dark, and it can break visual flow or make small spaces feel fragmented. Skipping expansion joints is another critical mistake. Outdoor tiles expand and contract with temperature fluctuations, and without properly placed joints, cracking or lifting can occur.
Finally, I often notice overusing decorative tiles. While feature or patterned tiles are tempting, saturating a space with them can overwhelm the overall design, making it feel cluttered rather than composed. Successful outdoor tile projects balance beauty with function, restraint, and attention to long-term performance.
Material Comparison (Quick Decision Guide)
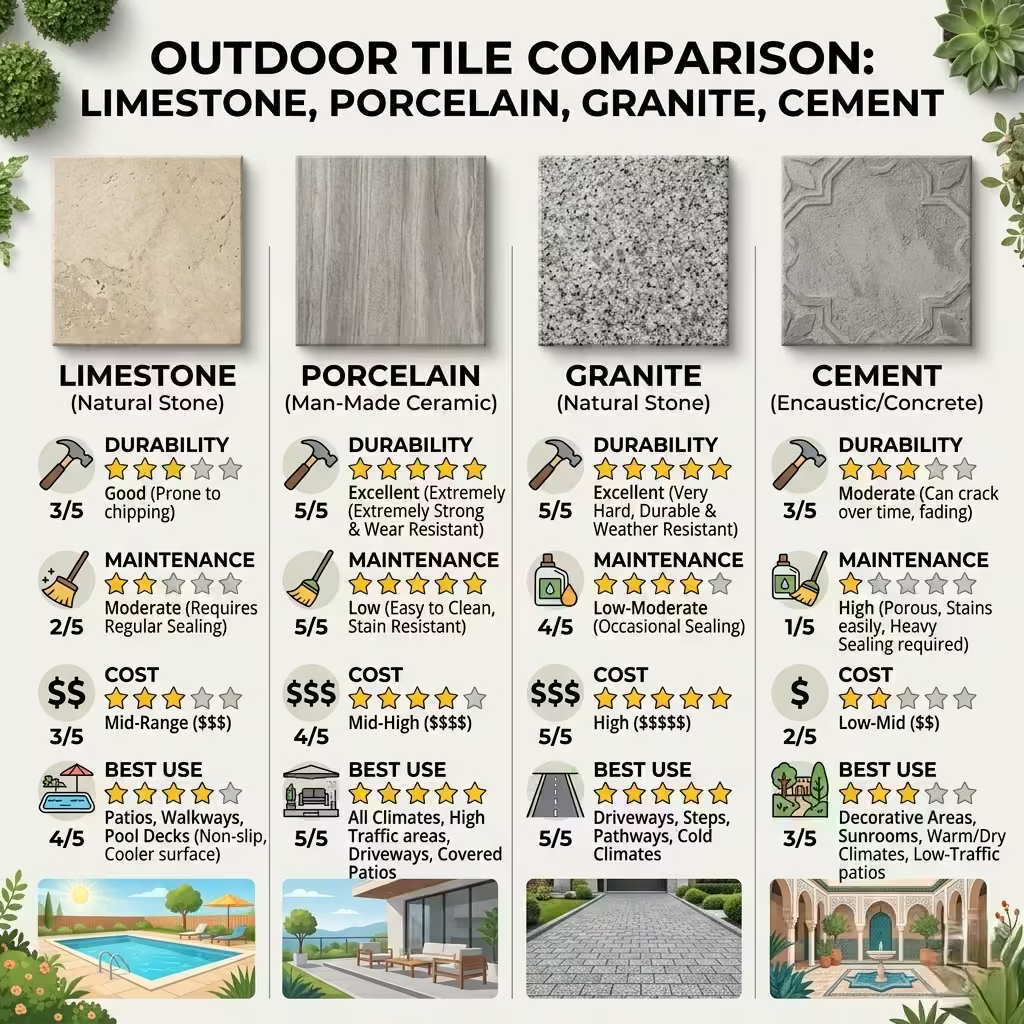
| Material | Durability | Maintenance | Cost Level | Best For |
| Limestone | Medium | Medium | Mid–High | Soft, sun-washed patios, subtle elegance |
| Porcelain | High | Low | Mid | Versatile terraces, modern patios, poolside |
| Granite | Very High | Low | High | High-traffic areas, rooftops, public terraces |
| Cement Tiles | Medium | High | Mid | Decorative feature zones, courtyards, inset panels |
This guide allows quick assessment of performance, upkeep, and budget while aligning material choice with the intended outdoor use. For example, porcelain is my go-to when combining durability with low maintenance, while limestone or cement tiles are better suited for spaces where visual character and texture are prioritized. Granite is reserved for heavy-use or high-impact zones where longevity and toughness outweigh cost.
Contractor & Sourcing Notes (Often Overlooked)
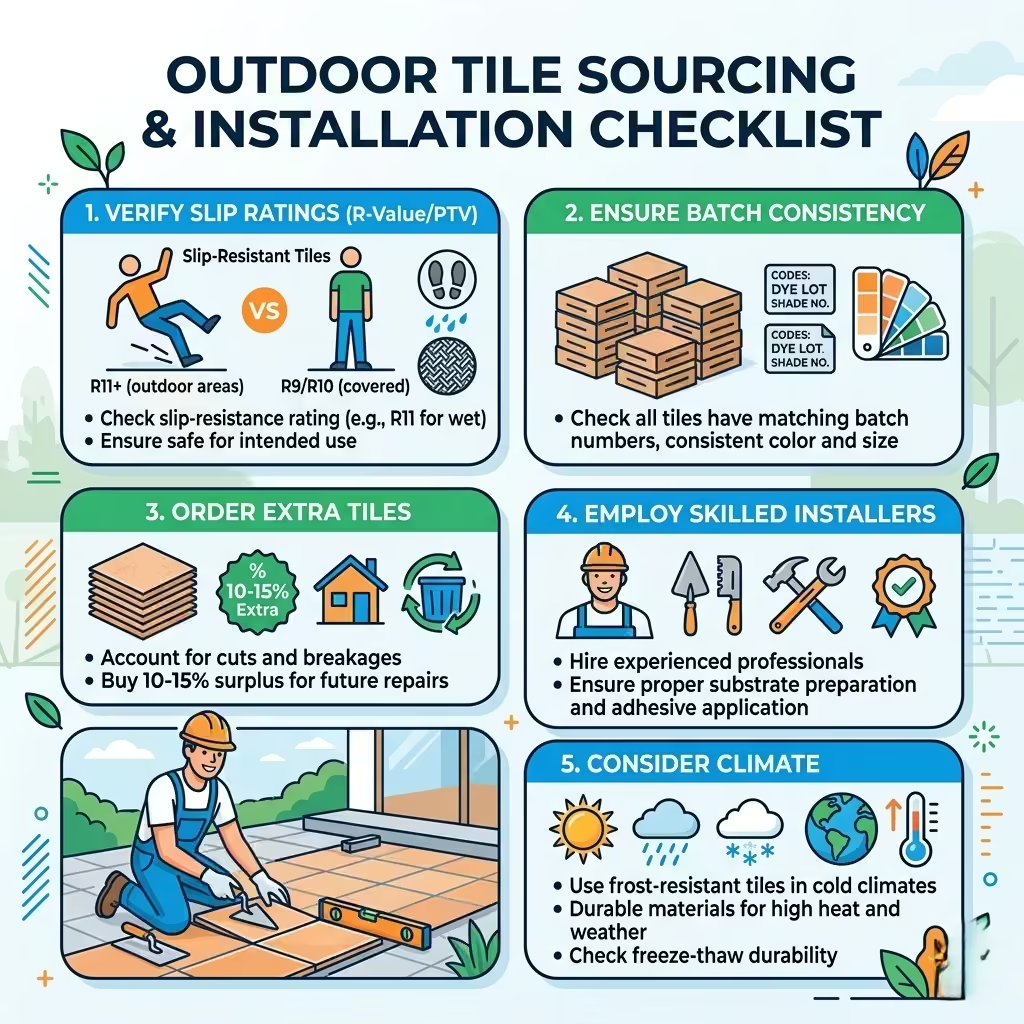
Selecting the right tiles is only part of creating a successful outdoor space; sourcing and installation decisions are equally critical. One detail I always emphasise is to confirm slip rating certifications. Tiles that appear suitable visually may not meet the required R11 or R12 standards for wet, exposed areas, and using unverified products can compromise safety.
Batch consistency is another often-overlooked factor. Colour, tone, and finish can vary slightly between production batches. I always request that large orders come from the same batch, or that multiple batches are blended during installation to prevent noticeable differences across a terrace or patio.
I also recommend ordering 10–15% extra tiles to account for cuts, irregular edges, and future repairs. Outdoor projects inevitably involve adjustments, and having spare tiles ensures you can maintain a consistent look without hunting for matching material years later.
Installation costs are often underestimated. In my experience, the cost of skilled installation can match or even exceed the cost of the tiles themselves, particularly for large-format slabs, patterned layouts, or rooftop terraces requiring pedestals and precise leveling. Cutting corners here can result in uneven surfaces, water pooling, or misaligned patterns that compromise both performance and aesthetics.
Finally, always vet installers with outdoor-specific experience. Outdoor tile work involves considerations like substrate preparation, drainage, expansion joints, slip resistance, and climate-specific materials. An experienced installer will understand how to manage these challenges while achieving a finished surface that is safe, durable, and visually composed.
By giving attention to sourcing and installation alongside tile selection, you safeguard both the longevity and functionality of your outdoor spaces, ensuring the design performs beautifully in real life, season after season.
Conclusion: Flooring That Anchors Outdoor Living
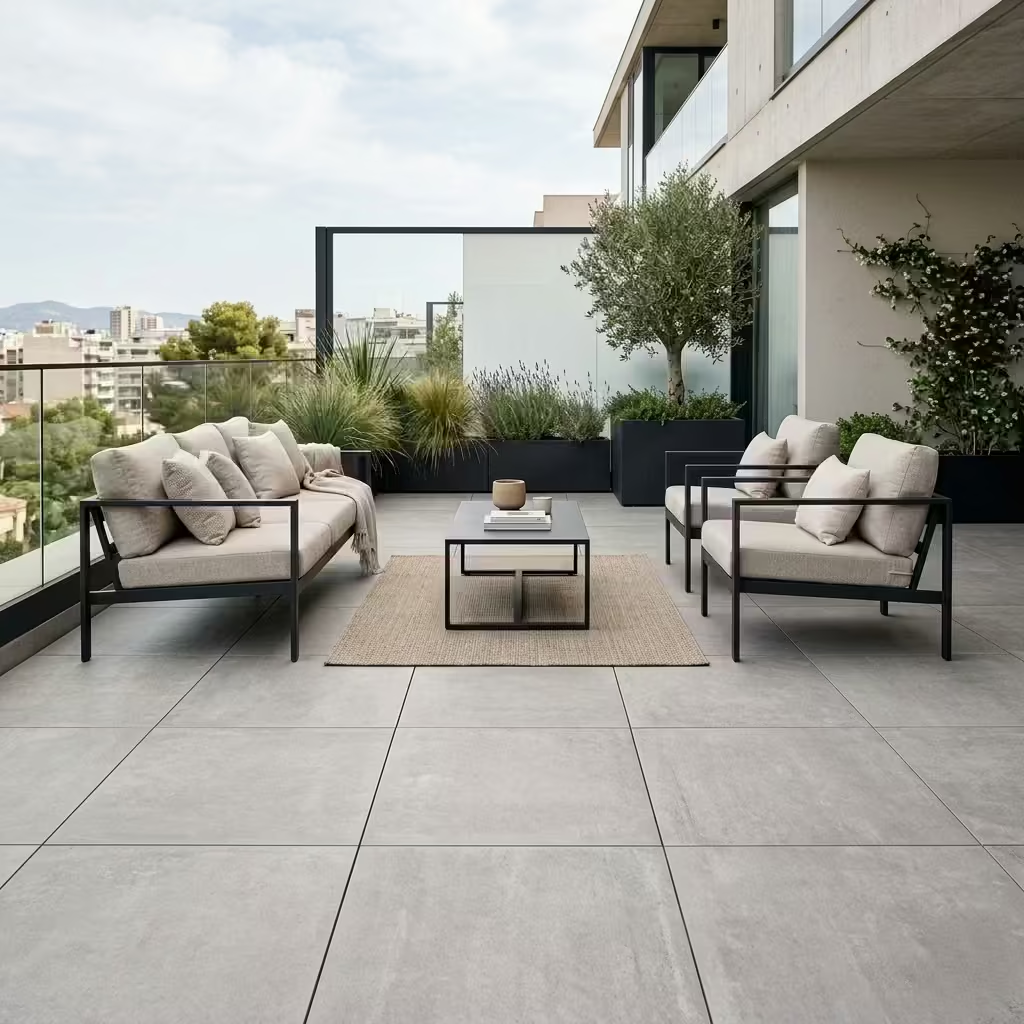
Outdoor tiles do more than cover the ground they define how a terrace, patio, or garden feels, guides movement, and shapes the overall experience of a space. I always emphasise restraint, material honesty, and long-term thinking when specifying surfaces. The best outdoor floors are those that quietly support architecture, planting, and furniture, rather than competing for attention.
When selecting tiles, consider how materials will age gracefully, perform under changing weather, and accommodate lifestyle needs. A design-led approach that prioritises durability, proportion, and subtle texture will ensure your outdoor spaces remain elegant and functional for years to come. Rather than chasing trends, focus on choices that feel intentional, timeless, and connected to both the architecture and the natural environment.
This way, your flooring becomes the true foundation of outdoor living, anchoring every moment spent outside while standing the test of time.
Frequently asked questions about Outdoor Tiles for Floor Stylish Patio, Garden and Terrace Flooring Ideas
What types of tiles are best for outdoor use?
For durability, slip resistance, and weather performance, I typically recommend porcelain, granite, limestone, and textured cement or natural stone tiles. Porcelain is extremely versatile and low-maintenance, granite is ideal for high-traffic areas, and limestone or cement tiles work well in decorative or sun-washed settings.
How do I choose the right size and format?
Tile size should be proportional to the space. Small patios benefit from 300–600 mm tiles or mosaics to avoid visual fragmentation, while large gardens or terraces suit 600–1200 mm slabs for a seamless, expansive feel. Large-format tiles also reduce grout lines and make maintenance easier.
How important is slip resistance?
Slip resistance is critical, particularly in wet or poolside areas. Look for R11 or higher ratings for exposed patios and paths. Textured, matte, or anti-slip finishes help prevent accidents without compromising the design.
Can I use the same tiles indoors and outdoors?
Yes, extending tiles from inside to a terrace or patio can create a seamless indoor-outdoor flow. Ensure thickness variations are carefully managed (typically 10 mm or less) and choose a finish suitable for outdoor use, such as matte or lightly textured surfaces.
How do climate and exposure affect tile selection?
Consider local weather conditions. In hot climates, heat-reflective tiles improve barefoot comfort; in wet or shaded areas, anti-slip and permeable tiles prevent pooling and maintain safety. Frost-prone regions require frost-resistant natural stone or porcelain.
What are common mistakes to avoid?
Avoid choosing tiles based solely on showroom appearance, ignoring slip ratings, poor grout colour choices, skipping expansion joints, or overusing decorative tiles. These errors can compromise safety, durability, and visual coherence.
How should I budget for installation and sourcing?
Installation can often match or exceed the cost of tiles, especially for large-format slabs, rooftop terraces, or pedestal systems. Always order 10–15% extra tiles for cuts and replacements, confirm batch consistency, and work with installers experienced in outdoor surfaces.
Can I mix materials to define zones?
Absolutely. Mixed material layouts allow you to create separate seating, dining, or circulation zones while maintaining a cohesive look. Balance is key materials should complement each other in scale, tone, and finish.
How long do outdoor tiles last?
With proper installation and maintenance, durable options like porcelain or granite can last decades. Natural stones like limestone and travertine require periodic sealing, but still offer a long-lasting, elegant finish.
How do I maintain outdoor tiles?
Maintenance varies by material. Porcelain and granite are low-maintenance occasionally sweeping and washing are sufficient. Limestone, sandstone, and cement tiles may need sealing and stain management, especially in high-traffic or exposed areas. Textured and patterned tiles may require extra care to keep grout lines clean.