25 Outdoor Area Ideas for Kids That Encourage Adventure, Creativity, and Outdoor Play
A thoughtfully designed outdoor area can become one of the most valuable spaces a child experiences at home. Unlike indoor playrooms, outdoor environments naturally invite movement, exploration, and curiosity. When children have access to dedicated outdoor zones designed with intention, they gain opportunities to climb, run, experiment, and interact with nature in ways that support both physical development and creative thinking. In my experience working on residential gardens, these spaces often become the most actively used areas of the property, shaping daily routines and encouraging families to spend more time outdoors together.
Well-designed children’s play areas also foster imagination and social interaction. A small climbing structure, a sand area, or a shaded corner for creative play can quickly transform into an adventure landscape in a child’s mind. These environments allow children to invent games, collaborate with siblings or friends, and develop independence as they explore their surroundings.
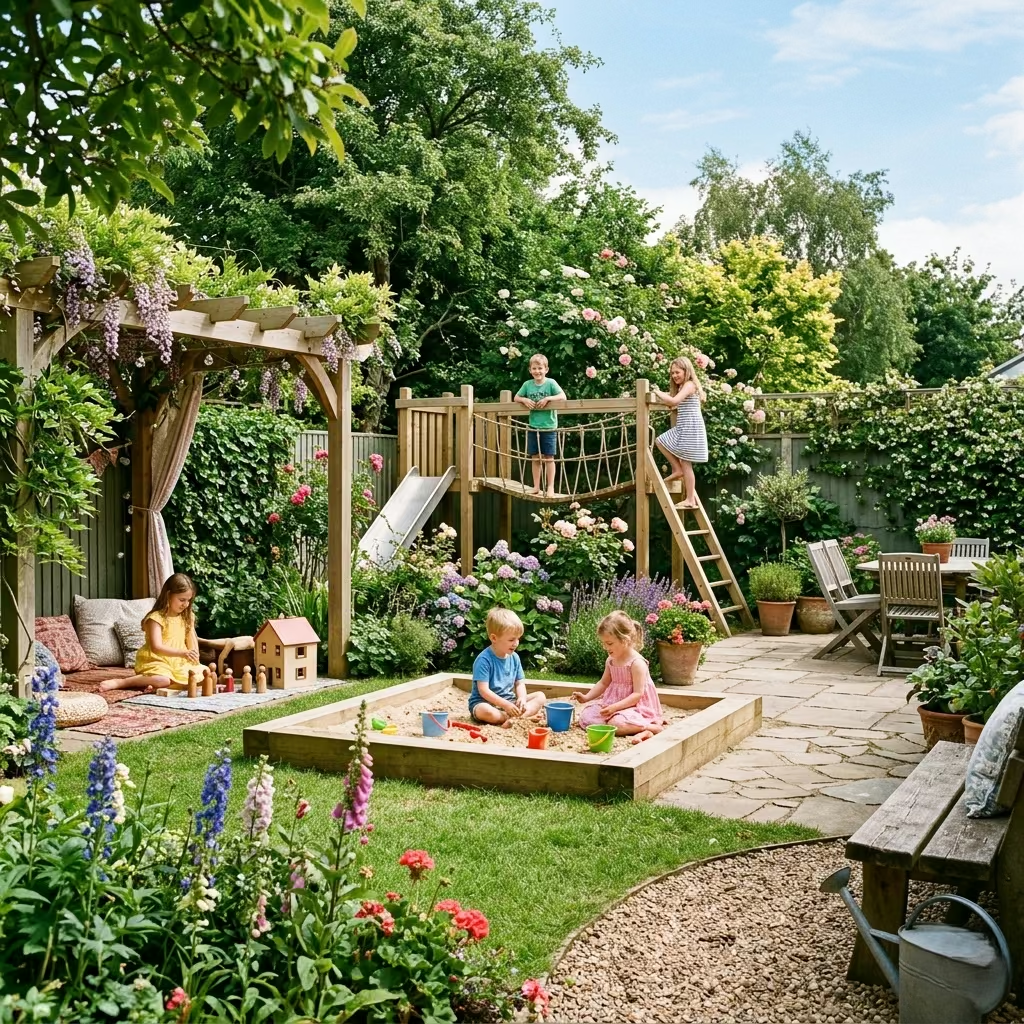
Importantly, creating an outdoor area for children does not mean compromising the visual harmony of a garden. With careful planning, materials, and spatial zoning, children’s play spaces can coexist beautifully alongside patios, planting beds, and entertaining areas. In many residential projects I’ve worked on, families initially assume a children’s zone will disrupt the garden design. In reality, when play areas are thoughtfully positioned and proportioned, they often make the entire landscape feel more dynamic, lively, and welcoming for everyone who uses it.
Planning an Outdoor Space Designed for Kids
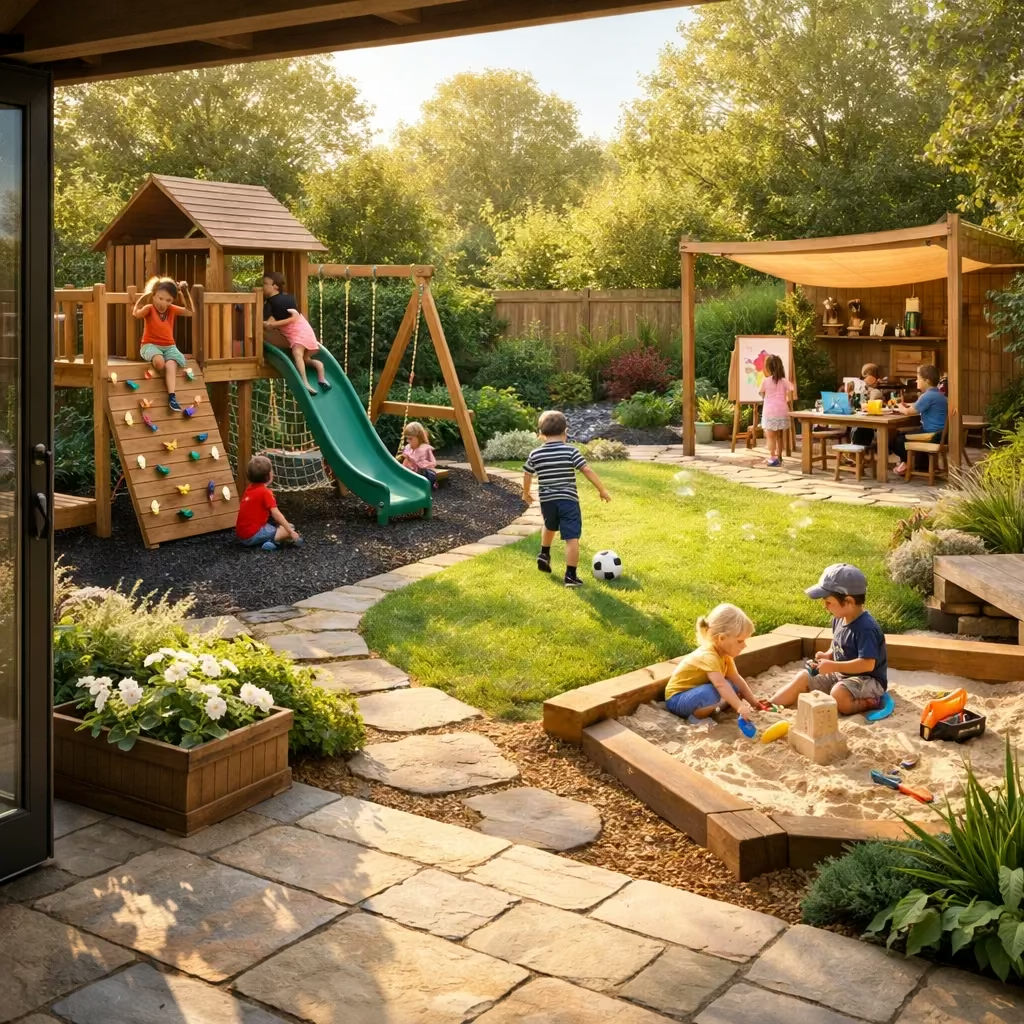
Before introducing specific ideas, it is important to approach children’s outdoor spaces with thoughtful planning. A successful play environment rarely happens by accident. It is the result of deliberate decisions about safety, spatial zoning, durable materials, and long-term usability. In residential garden projects I have worked on, the most successful family gardens are those where children’s areas feel intentionally integrated rather than added as an afterthought.
When outdoor play zones are carefully positioned and proportioned, they support children’s development while maintaining the visual balance and usability of the overall landscape.
Safety Without Limiting Adventure
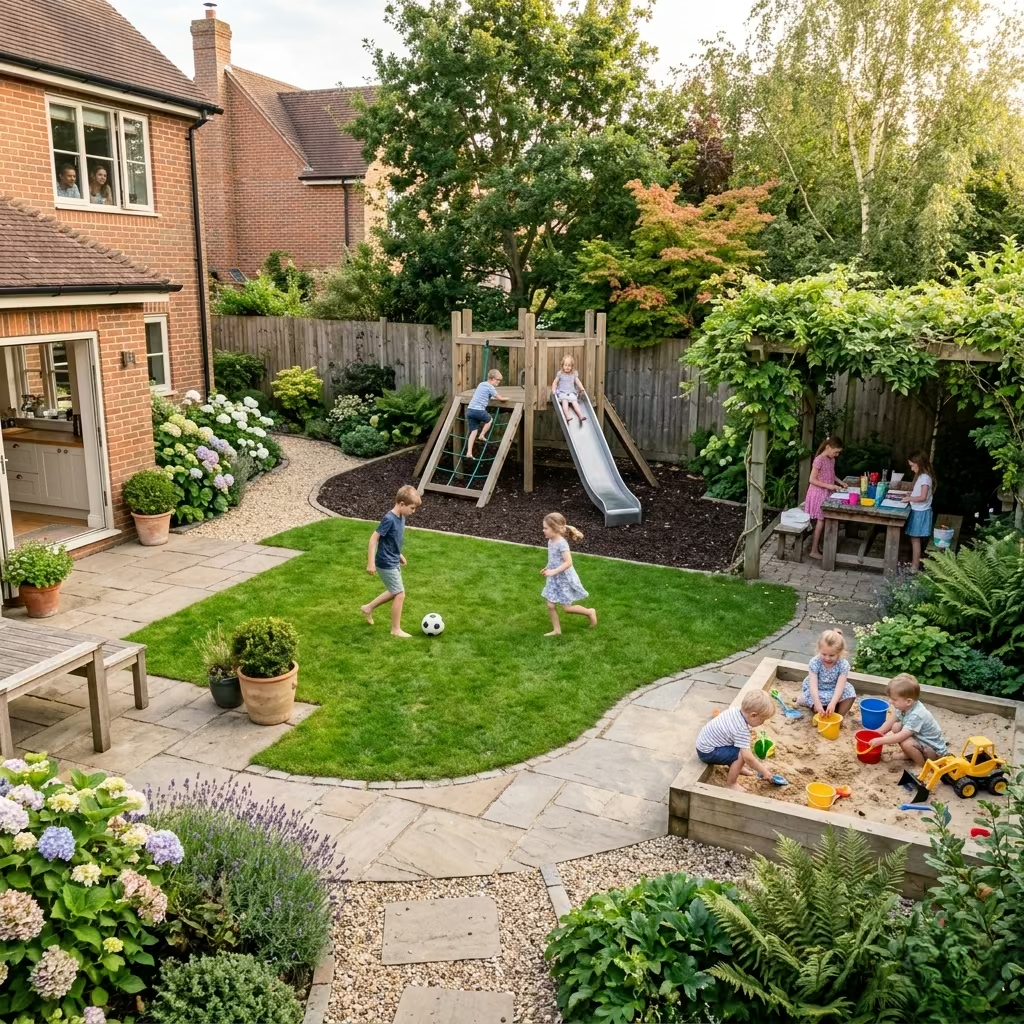
Children benefit most from outdoor environments that encourage exploration while still maintaining clear safety considerations. Overly restrictive spaces can discourage curiosity, yet poorly planned areas may create unnecessary risk. The goal is to design for managed adventure.
Soft landing surfaces such as engineered wood fibre, rubber mulch, or lawn areas can reduce injury risk around climbing structures and swings. Equipment should also allow for adequate circulation of space. For example, swings typically require at least 2–2.5 m (6.5–8 ft) of clear space in front and behind the seat.
From a design perspective, safety should feel almost invisible. The space should still appear playful and natural rather than overly controlled.
Zoning Outdoor Spaces for Different Ages
Children use gardens differently depending on their age. Younger children typically need spaces close to the house, while older children may enjoy more independent play zones deeper in the garden.
One practical approach is to divide the garden into functional zones:
- Active play zones for climbing, running, and sports
- Creative play zones for sand pits, art tables, or building activities
- Quiet zones for reading, relaxing, or imaginative play
In many residential landscapes I design, placing the primary play area within 6–12 m (20–40 ft) of the main living areas works best. This allows parents to supervise easily from kitchens, patios, or indoor living spaces while children still feel they have a dedicated environment to explore.
Materials That Withstand Weather and Play
Outdoor children’s areas experience far more wear than decorative garden spaces. Surfaces, structures, and furniture must be chosen for durability as well as safety.
Timber structures should ideally be pressure-treated or naturally durable for hardwoods to resist moisture and insects. Metal frames require rust-resistant coatings, while play surfaces benefit from materials that drain quickly after rain.
Ground materials also influence usability. For example:
- Artificial turf provides a consistent surface for sports and play
- Natural lawn offers softness but requires maintenance
- Rubber surfacing works well beneath climbing equipment
- Wood chips or bark mulch provide natural cushioning
Selecting materials that balance durability with visual harmony ensures the play space integrates with the rest of the garden rather than appearing temporary or improvised.
Designing Spaces That Grow with Children
One of the most common mistakes homeowners make is designing a play area suited only to very young children. Outdoor spaces should evolve as children grow, supporting changing interests and activities.
Flexible layouts are particularly valuable. A climbing frame used by younger children might later be replaced with a sports area, seating zone, or garden studio. Open lawn spaces can transition from playgrounds to gathering areas as family needs to shift over time.
I often recommend incorporating multi-purpose zones rather than fixed installations wherever possible. This allows the garden to adapt naturally as children develop new interests, ensuring the outdoor space remains useful and engaging for many years.
25 Outdoor Area Ideas for Kids
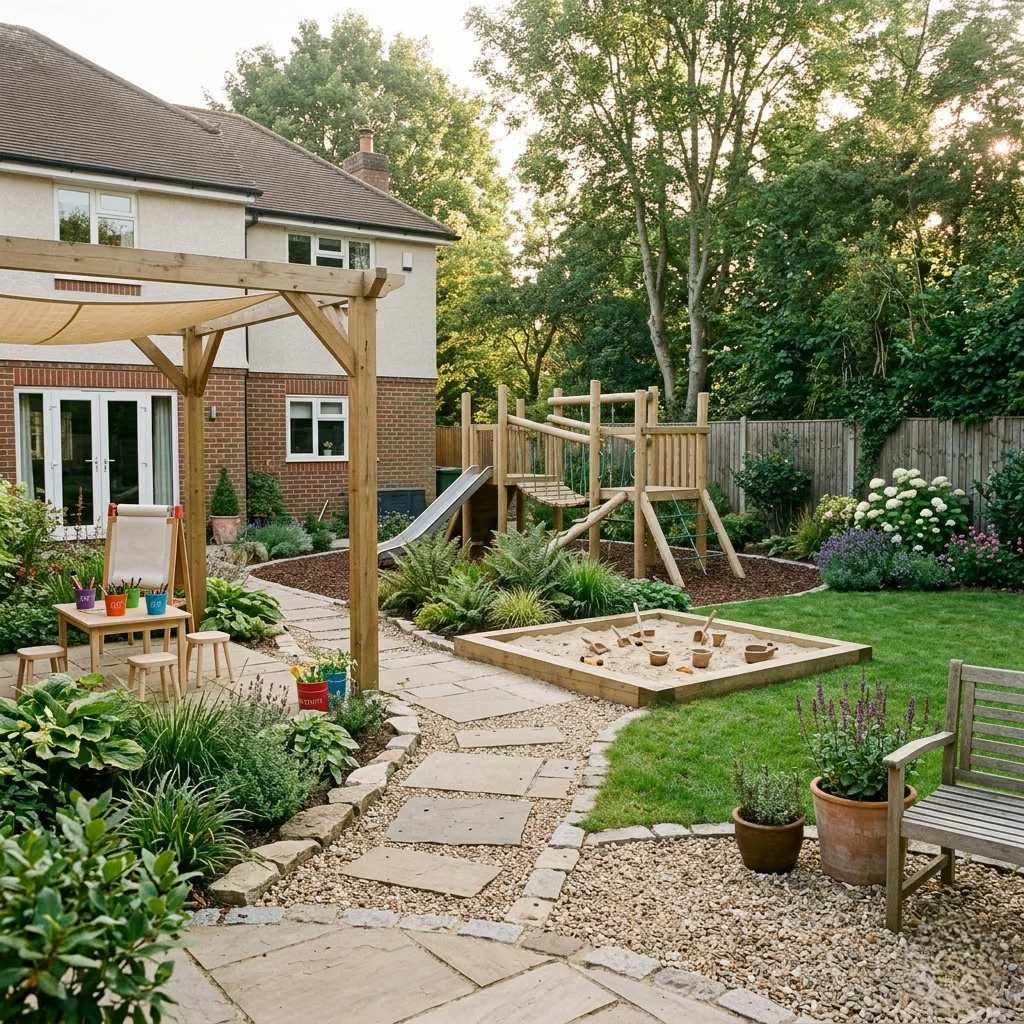
Before introducing specific play features, it helps to step back and consider how children naturally use outdoor environments. Unlike adult gardens, which are often designed around visual composition or entertaining, children interact with space through movement, curiosity, and exploration. In my experience working on family landscapes, the most successful outdoor areas for kids are those that balance visibility, flexibility, and durability.
When the play space sits within comfortable sightlines of the home, uses materials that tolerate constant activity, and leaves room for evolving interests, the garden becomes more than a decorative backdrop. It becomes a living environment where children can develop independence, creativity, and a lasting connection to the outdoors.
Backyard Adventure Playground
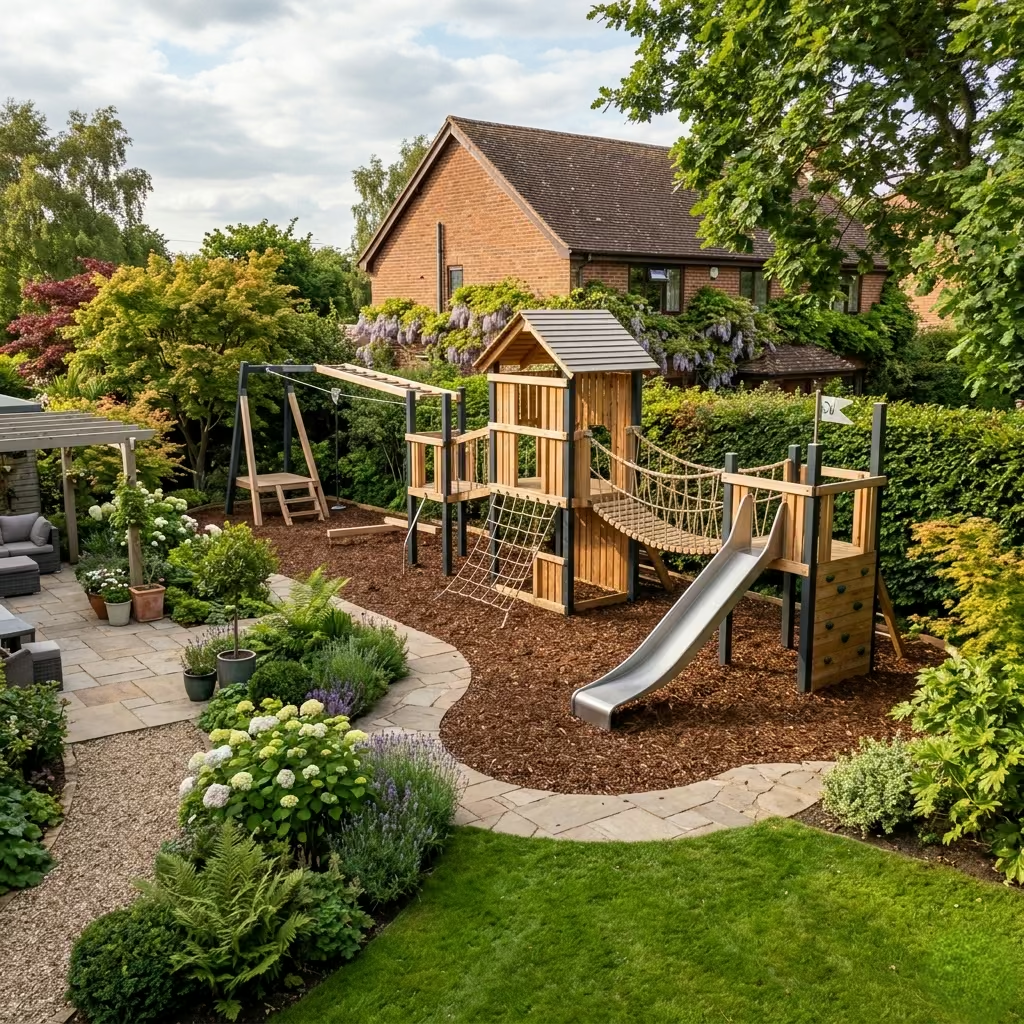
A backyard adventure playground creates a dedicated environment where children can climb, swing, balance, and explore freely within the safety of their own garden. In residential landscapes I have worked on, these spaces often become the heart of family activity because they encourage children to spend more time outdoors while developing coordination, strength, and confidence. The key to designing a successful adventure playground is balancing excitement with thoughtful spatial planning so that the equipment feels integrated into the garden rather than dominating it.
A well-designed setup usually combines climbing structures, slides, and rope-based elements that allow multiple types of movement. Climbing frames help develop balance and upper-body strength, while slides introduce speed and excitement that younger children particularly enjoy. Rope elements such as rope ladders, cargo nets, or hanging bridges add an extra layer of challenge, encouraging children to test their abilities while improving coordination.
From a planning perspective, allocating enough space around the structure is essential. A minimum footprint of 4 × 5 m (13 × 16 ft) works well for a compact play structure, although larger gardens can accommodate expanded configurations with multiple climbing routes and swings. In my experience, placing the playground along one edge of the garden helps preserve central lawn space for running and ball games while keeping the play equipment visually organized.
Surface materials also deserve careful attention. Areas beneath climbing structures should use shock-absorbing surfaces such as engineered wood fibre, rubber mulch, or thick natural lawn to help reduce injury risk during falls. Equipment frames are typically best constructed from pressure-treated timber or powder-coated steel, both of which can withstand outdoor exposure and frequent use.
Strategically positioning the playground also improves everyday usability. Many families benefit from placing play areas within sight of the house or main patio, allowing parents to supervise comfortably while children remain engaged in active play.
Pros
- Encourages physical activity, climbing skills, and coordination
- Provides an engaging outdoor space that reduces screen time
- Supports imaginative play and social interaction with friends
- Can be adapted with additional features such as swings or rope bridges
Cons
- Requires durable safety surfaces beneath equipment
- Larger structures may require adequate garden space
- Equipment may need occasional maintenance to remain safe and stable
You May also Like: 25 Outdoor Privacy Screen Ideas That Elevate Your Garden with Architectural Confidence
Treehouse or Elevated Play Deck
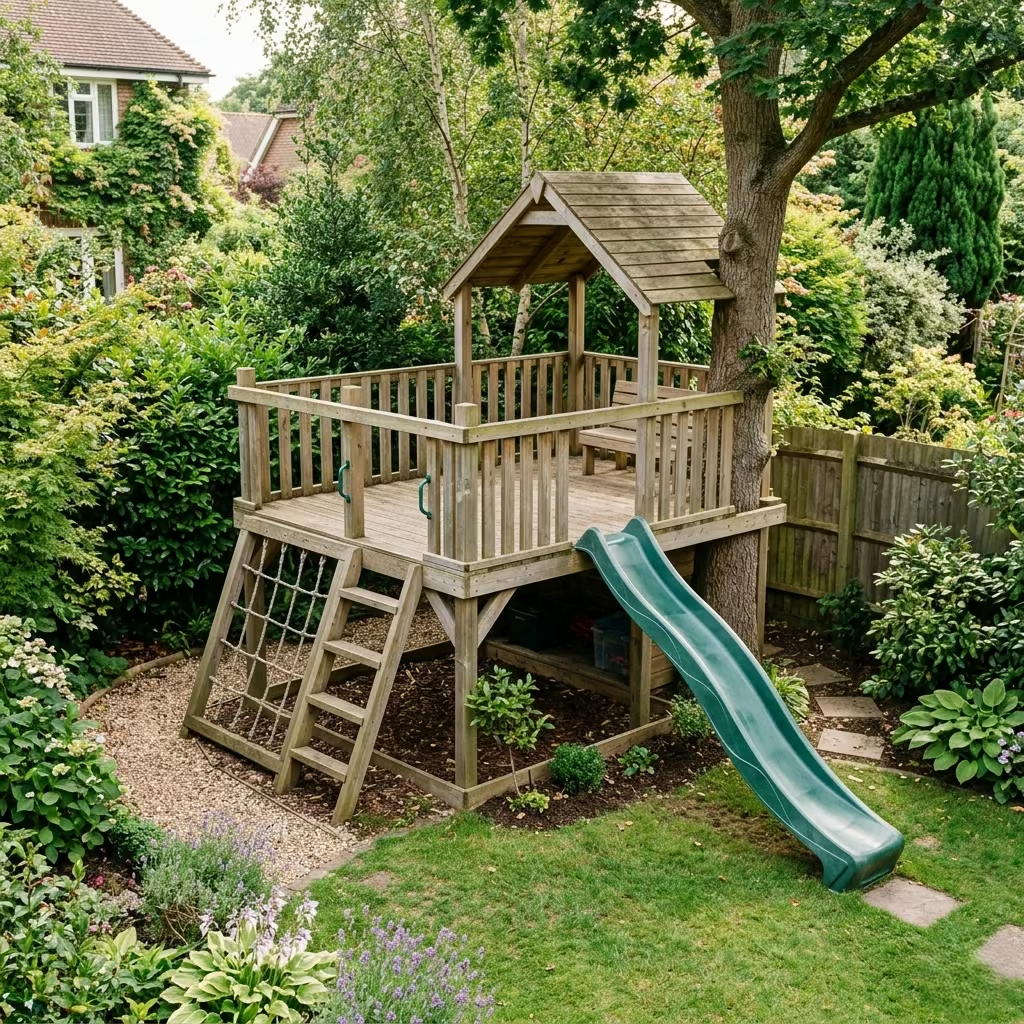
A treehouse or elevated play deck introduces a sense of adventure that few other backyard features can replicate. Elevated play spaces naturally spark imagination because they change a child’s perspective of the garden, transforming a familiar outdoor area into a lookout point, hideaway, or imaginary fortress. In many family garden projects I have worked on, an elevated play structure quickly becomes one of the most memorable elements of the landscape, often used for years as children invent new games and stories around it.
From a design standpoint, the structure does not necessarily need to be attached to a mature tree. Many modern installations function as elevated timber platforms supported by structural posts, which allows greater flexibility in positioning and ensures long-term stability. A platform height between 1.8–2.4 m (6–8 ft) typically offers the right balance between excitement and safety for most residential gardens. At this elevation, children experience the thrill of height without creating excessive risk or requiring overly complex access systems.
Access to the platform can be provided through a timber ladder, climbing wall panels, rope ladders, or compact staircases, depending on the children’s age. Adding features such as small railings, a canopy roof, or a slide can further enhance usability while improving safety and weather protection.
Placement within the garden plays a significant role in how successful the structure feels. In my experience, positioning treehouses along the edges or corners of a garden works particularly well. This preserves the central lawn area for open play while allowing the elevated structure to blend more naturally with boundary planting or existing trees. When integrated with surrounding shrubs or small woodland-style planting, the play structure feels like part of a miniature adventure landscape rather than a standalone piece of equipment.
Materials should be chosen carefully to ensure longevity. Pressure-treated timber or naturally durable hardwoods are commonly used for the structural frame, while decking boards benefit from non-slip finishes to improve safety in wet weather. Guardrails should typically be at least 90–100 cm (35–40 inches) high to provide secure protection for children using the platform.
Pros
- Creates a highly imaginative play environment that encourages creativity
- Provides a unique elevated perspective of the garden
- Can double as a quiet retreat for reading or relaxing
- When placed at garden edges, preserves open lawn space
Cons
- Requires careful structural design and durable materials
- Elevated structures may require periodic safety checks
- Not suitable for very small gardens without adequate clearance space
Natural Sand Play Zone
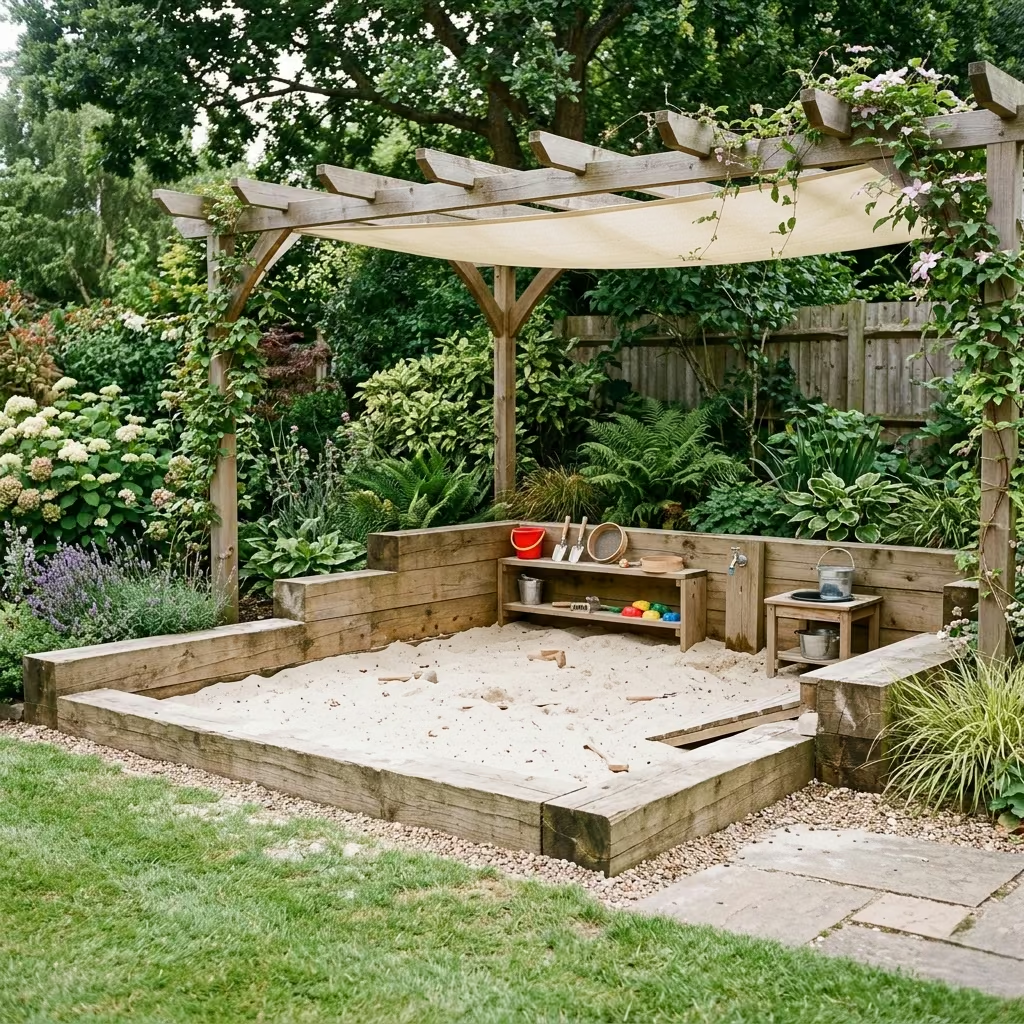
A natural sand play zone offers one of the most versatile and developmentally beneficial play environments for younger children. Unlike fixed playground equipment, sand areas encourage open-ended, imaginative play, allowing children to build, dig, shape, and experiment freely. In many family garden projects I have worked on, a well-positioned sand area quickly becomes a daily destination where children spend long periods inventing structures, creating miniature landscapes, or collaborating with siblings and friends.
From a design perspective, sand play works best when it feels integrated into the garden rather than appearing like a temporary feature. A square pit measuring around 1.8 × 1.8 m (6 × 6 ft) provides enough space for multiple children to play comfortably without occupying too much of the garden. For larger families or social play, expanding the pit to 2.4 × 2.4 m (8 × 8 ft) allows for more creative building and group activity.
Positioning is equally important. In practice, sand zones perform best when placed near patios or seating areas, so adults can supervise comfortably. However, partial shades are beneficial to keep the sand cooler during summer months. Locating the pit beneath a pergola, shade of sail, or near light tree canopy can significantly improve comfort.
A durable border helps contain the sand while defining the play area visually. Common edging materials include timber sleepers, stone blocks, or composite landscape edging, all of which can double as informal seating edges for children. Beneath the sand, a permeable landscape fabric or drainage layer helps prevent mixing with soil while allowing rainwater to drain naturally.
Adding a few simple elements can greatly enhance usability. Low wooden shelves for buckets and tools, small water containers for sand-and-water play, or adjacent flat stones for building surfaces can turn a basic sand pit into a much richer play environment.
In my experience, sand areas are particularly effective because they encourage sensory play and creative problem-solving, activities that are increasingly valuable in outdoor environments where children often gravitate toward screens indoors.
Pros
- Encourages imaginative and sensory play
- Supports cooperative play among multiple children
- Relatively simple feature that fits into many garden sizes
- Can be integrated with natural landscaping elements
Cons
- Sand requires occasional cleaning and replenishment
- Open pits may collect leaves or debris without a cover
- Children may track sand onto patios or indoor spaces if located too close to entrances
Outdoor Art and Craft Station
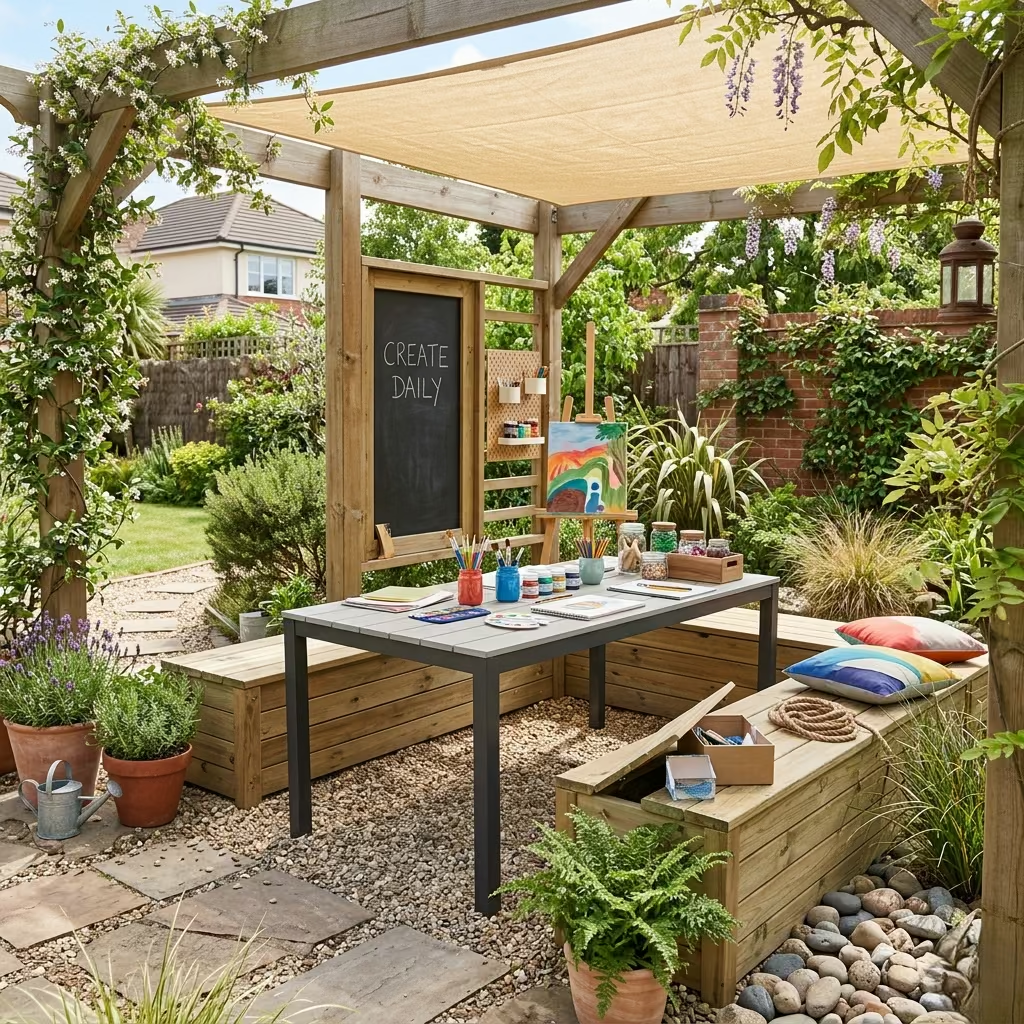
An outdoor art and craft station creates a dedicated space where children can paint, draw, build, and experiment creatively without the restrictions of indoor mess or limited workspace. In many residential garden projects I have worked on, families appreciate having a creative zone outdoors because it encourages children to spend longer periods outside while engaging in imaginative activities. Unlike active playground equipment, this type of space supports quiet creativity, focus, and hands-on learning.
At the centre of the station is typically a weather-resistant table, which serves as the primary workspace for painting, sculpting clay, drawing, or assembling small craft projects. A table measuring roughly 120–150 cm long and 60–75 cm wide (47–59 inches by 24–30 inches) provides comfortable working space for two or three children at a time. Materials such as treated timber, powder-coated metal frames, or composite outdoor furniture surfaces perform well because they tolerate paint spills, water exposure, and constant use.
Adding storage benches around the workspace helps keep art supplies organized while also providing flexible seating. Benches with internal compartments can store items such as chalk, paintbrushes, craft paper, small tools, or outdoor-safe paints. In practice, I often recommend benches measuring 90–120 cm (35–47 inches) wide with hinged lids so children can easily access materials while keeping the space tidy when not in use.
Placement within the garden also influences how often the space is used. Outdoor craft areas work best when positioned in partially shaded locations, such as under a pergola, beside a garden wall, or beneath a shade sail. This prevents glare and keeps children comfortable during warmer months while still allowing plenty of natural light for creative work.
To enhance the environment further, nearby vertical surfaces can be used for chalkboards, magnetic boards, or washable mural panels, giving children opportunities to work on larger creative projects. Incorporating natural surroundings such as nearby plants, stones, or garden materials can also inspire craft activities that connect children with nature.
From a design standpoint, the outdoor art station introduces a calmer play zone that balances more energetic features like climbing structures or sports areas. In family gardens, these quieter corners often become places where children gather to focus, collaborate, and express creativity in ways that extend far beyond traditional play equipment.
Pros
- Encourages creativity, artistic expression, and hands-on learning
- Provides a quieter activity zone that balances active play areas
- Outdoor setup prevents indoor mess from paints and craft materials
- Flexible design that can evolve with children’s interests
Cons
- Art materials require organized storage to prevent clutter
- Tables and benches may need periodic cleaning after messy projects
- Direct sunlight can make the space uncomfortable without shade
Mini Sports Court
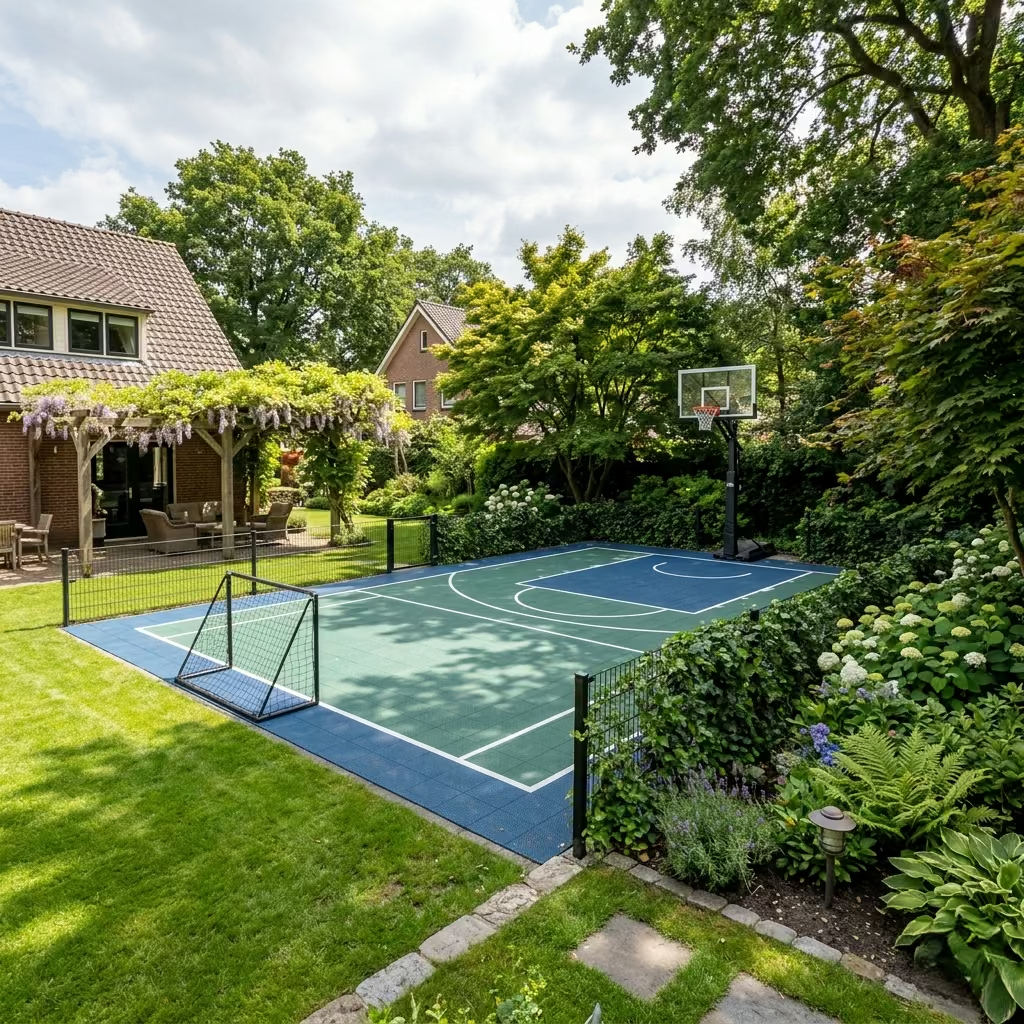
A mini sports court transforms a portion of the backyard into a versatile zone for active play, encouraging children to engage in structured or free-form sports such as basketball, football, or even tennis. Unlike single-purpose playground equipment, a compact court supports physical development, coordination, and social interaction, making it an excellent addition for families who want a high-activity outdoor space without dedicating their entire garden to sports. In projects I’ve worked on, even modest-sized courts quickly become daily destinations for children and their friends, often integrating seamlessly with the rest of the garden when thoughtfully positioned.
For a small but functional setup, a recommended size is 6 × 9 m (20 × 30 ft). This footprint allows for half-court basketball, small-sided football games, or multi-sport play without overwhelming the garden. Surface choice is critical: resilient, level materials such as all-weather artificial turf, sport-grade rubber tiles, or painted concrete provide consistent footing, reduce injury risk, and withstand frequent use. Surrounding the court with a low fence or boundary markers helps keep balls within the play area and protects nearby planting or patio zones.
Placement is equally important. I usually position mini courts along garden edges or near open lawns so that central spaces remain free for other activities. Incorporating shading elements, such as a pergola over part of the court or nearby trees, ensures comfort during sunny days while preserving natural airflow. Optional accessories, like portable basketball hoops or removable goals, add flexibility for different games and can be adjusted as children grow.
Pros
- Encourages physical activity, coordination, and teamwork
- Supports multiple sports and adaptable play options
- Integrates with open lawn areas for flexible garden use
Cons
- Requires a durable, level surface and occasional maintenance
- Needs adequate garden space to avoid crowding other areas
- Equipment may require supervision for younger children
You May also Like: Outdoor Chair Ideas: A Design-Led Guide to Comfort, Style, and Long-Term Use
Kids Garden Patch
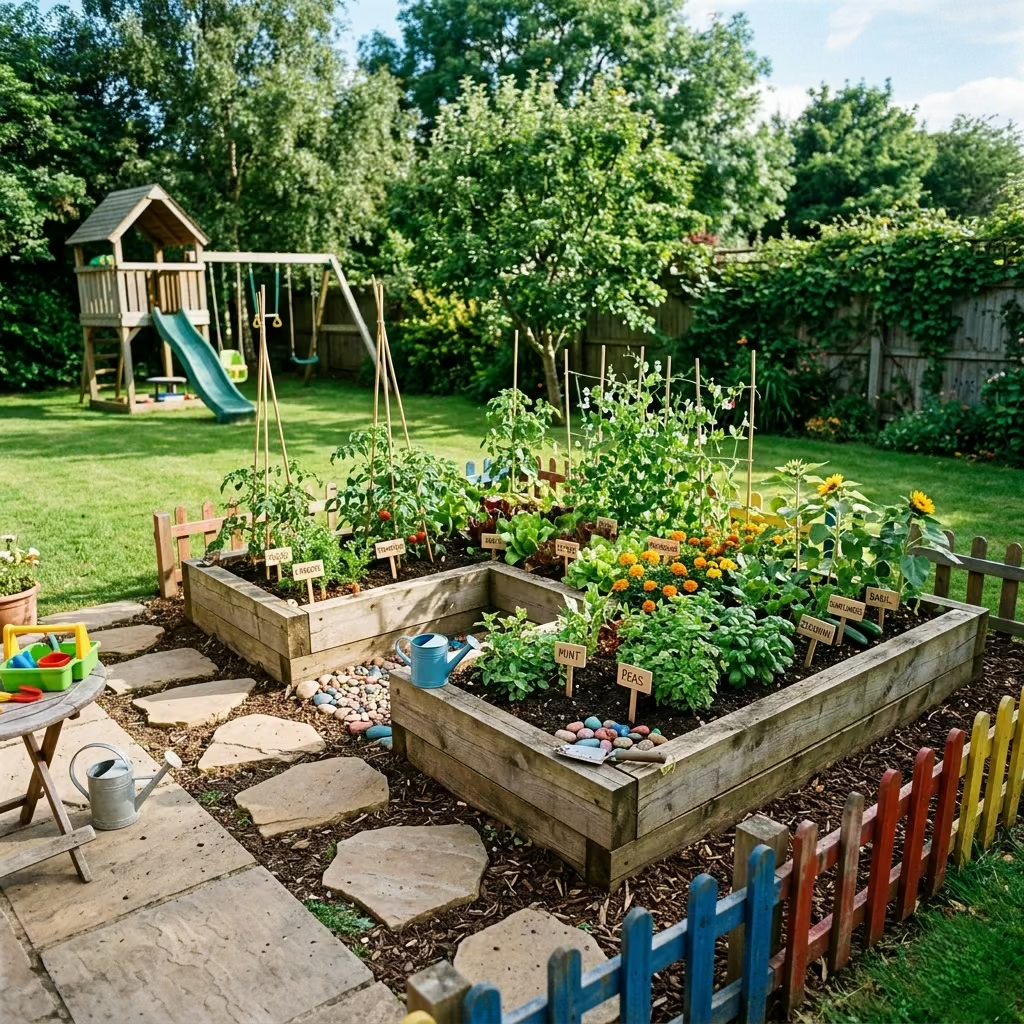
A dedicated kids’ garden patch is an excellent way to introduce children to nature, seasonal planting, and hands-on learning while keeping them actively engaged outdoors. In my experience designing family gardens, children’s garden zones are particularly effective because they combine education with play, giving young ones a sense of responsibility and ownership over a small corner of the backyard. Whether growing flowers, vegetables, or herbs, a garden patch encourages curiosity, teaches patience, and fosters a connection with the natural world from an early age.
A practical size for a children’s garden patch is approximately 2 × 2 m (6.5 × 6.5 ft), though this can be adjusted depending on available space. Raised timber beds or low planter boxes work well because they are easy to reach for small hands, help define the area visually, and can improve soil quality. Using lightweight, safe tools and child-friendly watering can encourage hands-on participation while reducing the risk of accidents.
Positioning the patch in full or partial sunlight ensures healthy plant growth while keeping the garden accessible from the main patio or living area for supervision. In some projects, I’ve integrated the patch near seating zones or alongside play structures so children can alternate between active play and gardening tasks. Companion features, such as steppingstones, small decorative fencing, or labeled plant markers, enhance the sense of ownership and make the area feel like a miniature, personal garden.
The kids’ garden patch also serves as a flexible learning space. Children can experiment with composting, seasonal rotation, and wildlife observation, creating natural science opportunities that extend beyond the garden itself. Over time, this patch often becomes a central point of pride for the child, encouraging ongoing care and engagement.
Pros
- Teaches responsibility, patience, and hands-on learning
- Encourages connection with nature and seasonal awareness
- Flexible space that can grow with children’s interests
Cons
- Requires regular maintenance to keep plants healthy
- Children may need supervision to avoid misuse of tools or plants
- Soil and plants can be affected by weather, pests, or pets if not protected
Backyard Obstacle Course
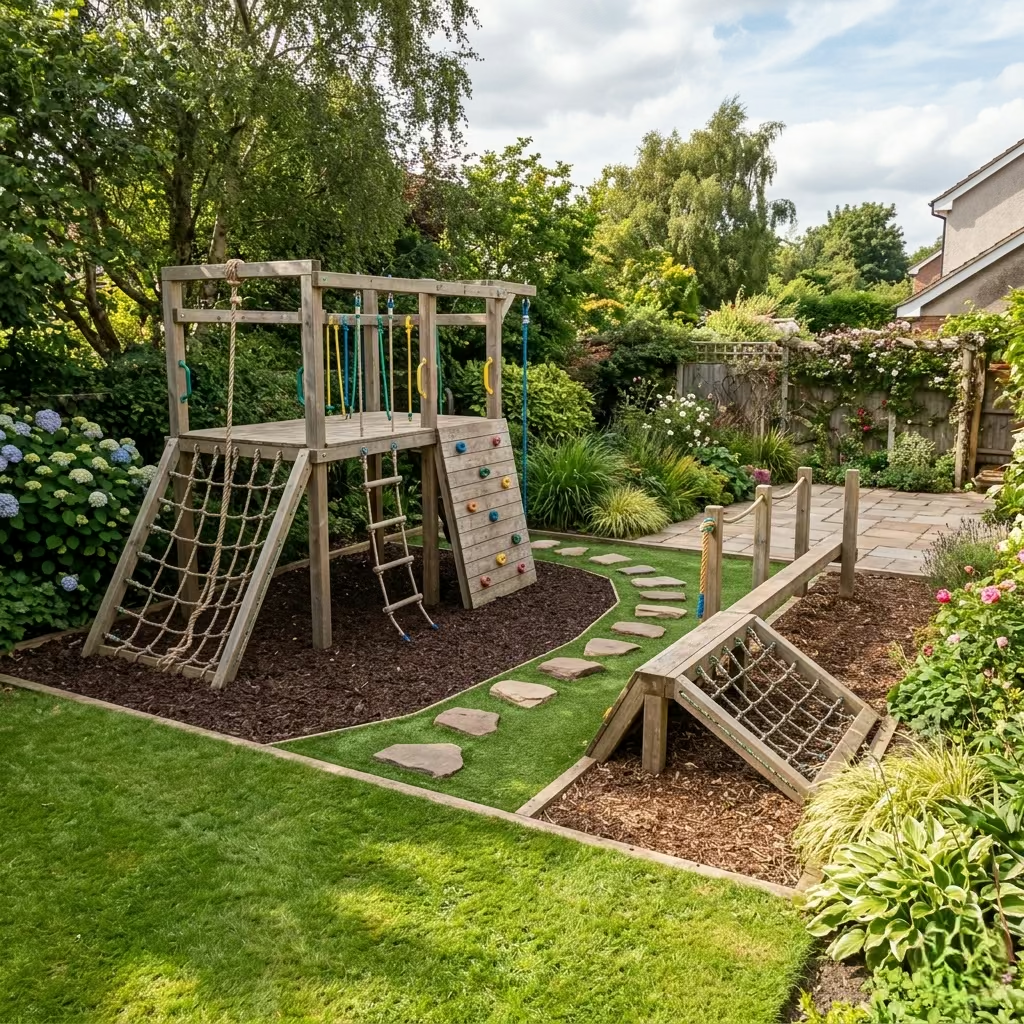
A backyard obstacle course is a dynamic way to encourage children to develop physical strength, coordination, and problem-solving skills while engaging in active outdoor play. In my experience designing family gardens, obstacle courses are particularly successful because they are highly flexible and can be adapted for children of different ages, making them a long-lasting addition that evolves with the family. Unlike traditional playground equipment, obstacle courses provide continuous variety, keeping children challenged and entertained as they navigate different stations.
A practical obstacle course can be laid out in a compact area of 5 × 8 m (16 × 26 ft), though larger spaces allow for more varied challenges. Typical elements might include balance beams, steppingstones, rope ladders, climbing nets, tunnels, and low walls. Using a combination of natural and manufactured materials creates an engaging and visually appealing course: timber beams and logs blend with the garden, while weather-resistant ropes, nets, and rubberized stepping pads add durability and safety.
Placement within the garden should allow for clear circulation and visibility. I often position courses along edges or around open lawn areas so that children have space to run between obstacles without interfering with other garden zones. Soft, impact-absorbing surfaces such as engineered wood fibre, artificial turf, or rubber mulch are recommended beneath climbing or jumping elements to minimize injury risk.
Obstacle courses also encourage social play and friendly competition. Multiple children can navigate the course simultaneously, learning to take turns, support each other, and celebrate small victories. The course can be reconfigured periodically to maintain novelty and accommodate different skill levels, ensuring long-term engagement.
Pros
- Promotes physical fitness, coordination, and confidence
- Flexible design can grow and change with children
- Encourages cooperative and social play
Cons
- Requires safe, impact-absorbing surfaces beneath all climbing and jumping areas
- Larger setups need sufficient garden space
- Ongoing maintenance may be required for wooden or rope elements
Outdoor Reading Nook
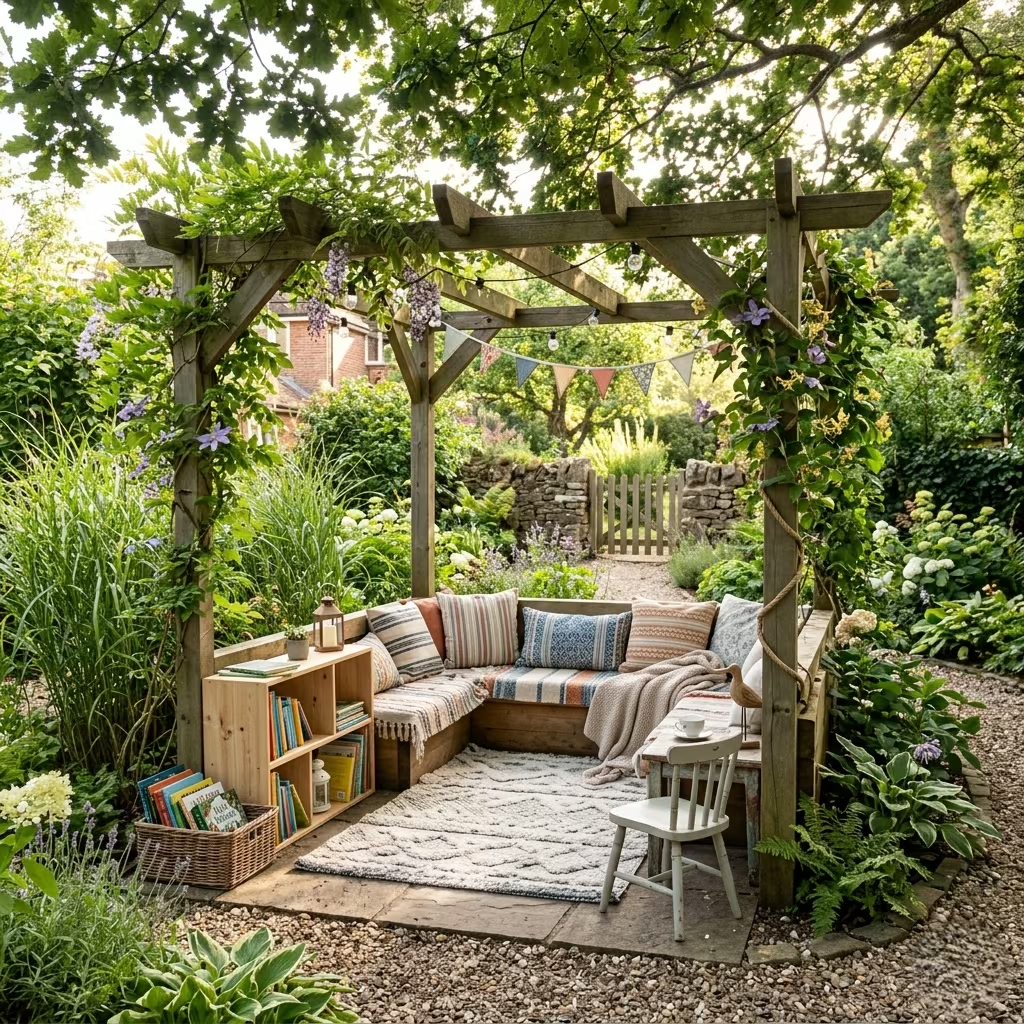
An outdoor reading nook provides children with a quiet, contemplative space within the garden where they can relax, read, or engage in imaginative storytelling. In the family gardens I’ve designed, these corners often become cherished retreats, balancing the more active areas like playgrounds or sports courts. Unlike conventional play structures, reading nooks encourages focused, independent activity while fostering a lifelong love of books and learning in a natural, sensory-rich environment.
A comfortable reading nook can be created in a space as small as 2 × 2.5 m (6.5 × 8 ft). Key elements include weather-resistant seating such as cushioned benches, small chairs, or low timber platforms, combined with soft outdoor rugs or cushions to provide a cozy atmosphere. Incorporating a shaded area whether through a pergola, canopy, or tree canopy is essential to protect children from direct sunlight while allowing filtered natural light for reading.
Adding functional and decorative elements enhances the appeal and usability of the nook. Low shelves or waterproof storage boxes can hold books, while lightweight side tables provide space for notebooks, drawing materials, or snacks. Surrounding planting, such as flowering shrubs or tall grasses, can create a sense of enclosure and privacy, making the nook feel like a small garden retreat. I often use natural materials like timber and woven fabrics to ensure the space feels integrated with the overall landscape rather than a standalone feature.
A well-designed reading nook can also serve as a multi-use space. It can double as a quiet area for homework, drawing, or even small imaginative games, providing versatility as children grow. Placing the nook within sight of other play zones allows parents to supervise younger children while still giving them a sense of independence.
Pros
- Encourages reading, focus, and imaginative play
- Provides a calm retreat within a more active backyard
- Flexible design for multiple uses as children grow
Cons
- Requires shade or weather protection to remain comfortable
- Cushions and fabrics need weather-resistant materials and occasional cleaning
- May require thoughtful placement to remain accessible yet private
You May also Like: Outdoor Tiles for Floor Stylish Patio, Garden and Terrace Flooring Ideas
Nature Exploration Zone
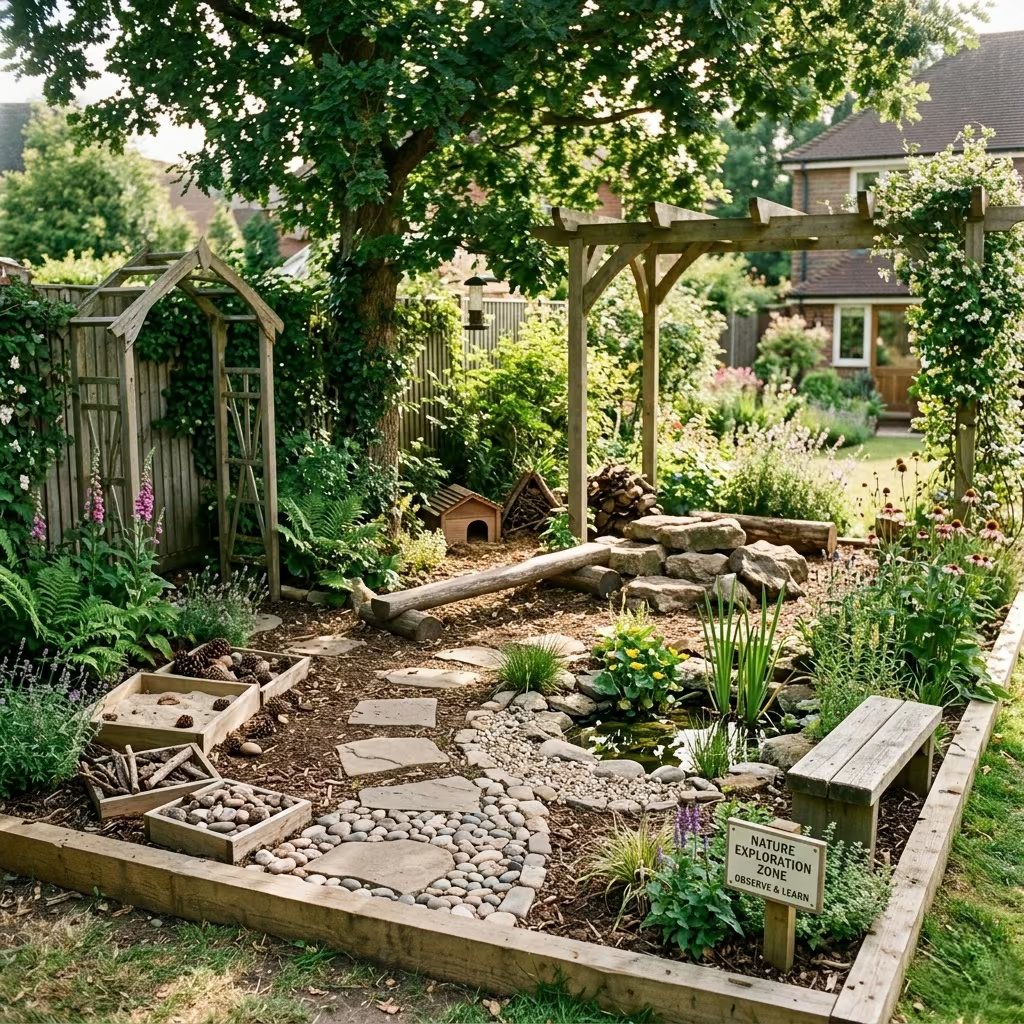
A nature exploration zone transforms a section of the garden into a hands-on environment where children can connect with wildlife, plants, and natural textures while developing curiosity and observation skills. In my experience designing family gardens, these zones become highly engaging because they offer open-ended learning opportunities that combine play with science, creativity, and sensory exploration. Unlike traditional playground equipment, a nature-focused area encourages children to observe, investigate, and experiment in ways that evolve with their age and interests.
A practical nature exploration area can fit within 3 × 4 m (10 × 13 ft) for smaller gardens, though larger zones provide space for multiple stations or more elaborate natural features. Key elements include small wildlife habitats, rock and log arrangements, shallow water features, and native plantings that attract birds, insects, and small mammals. Incorporating loose natural materials such as pebbles, pine cones, sand, and sticks allows children to handle, sort, and experiment safely. Raised beds or low planters with herbs, flowers, or vegetables can further enrich the sensory experience and provide opportunities for seasonal learning.
Placement is important for both supervision and integration into the garden. I often position exploration zones along edges or near other play areas so children can move seamlessly between active and quieter exploratory activities. Including partial shade from trees or pergolas keeps children comfortable, while defined paths or stepping stones reduce wear on surrounding plantings. In addition, incorporating observation points like small benches or low platforms allows children to watch wildlife or study plants closely.
A nature exploration zone also encourages cooperative play. Children can collaborate on mini gardening projects, track insect activity, or construct small natural structures, fostering teamwork while deepening their appreciation for the environment. Over time, these areas often become living classrooms, offering countless learning opportunities throughout the year.
Pros
- Promotes curiosity, observation skills, and environmental awareness
- Provides an open-ended, flexible learning and play environment
- Integrates seamlessly with natural landscaping
Cons
- Requires ongoing maintenance to keep habitats healthy
- Natural materials may shift or need replacement over time
- Close supervision may be needed for younger children around water features or loose elements
You May also Like: 25 Farmhouse Garden Ideas That Feel Timeless, Practical, and Full of Charm
Water Play Area
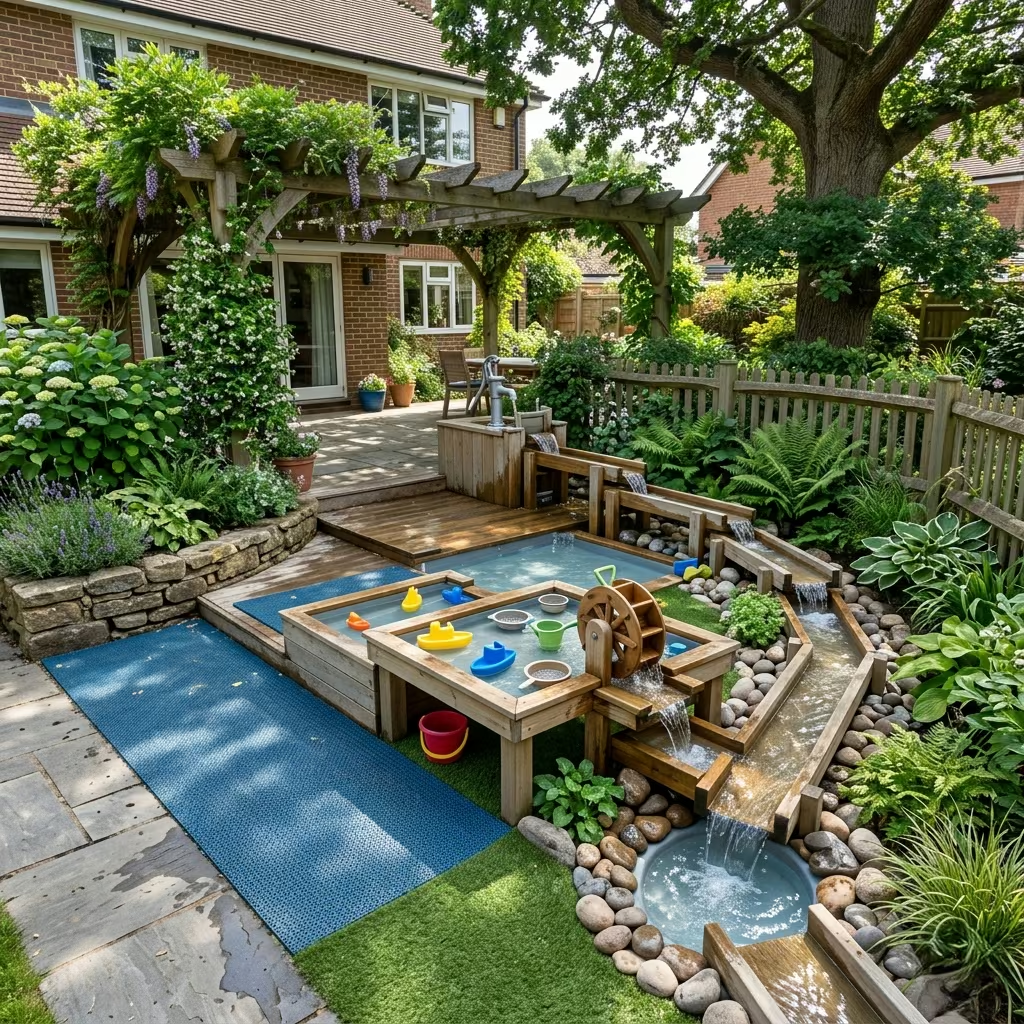
A water play area introduces a dynamic and sensory-rich environment where children can engage in active, hands-on exploration. In the family gardens I have designed, water features consistently become high-traffic zones because they combine fun with developmental benefits such as fine motor skills, coordination, and imaginative play. Unlike static playground equipment, a water play area encourages continuous experimentation, from pouring and splashing to floating objects or creating simple water channels.
For a compact backyard, a practical water play zone can be created within 2.5 × 3.5 m (8 × 11 ft). Features may include shallow splash pools, water tables, small channels or rills, and movable elements like floating boats or small water wheels. Raised troughs and tables allow younger children to play safely while keeping the water level manageable. Materials should be durable and slip-resistant, such as treated timber, reinforced concrete, or composite decking, and surfaces around the water should incorporate non-slip rubber mats or artificial turf to reduce the risk of falls.
Placement is critical for both usability and safety. I usually position water play areas within sight of the house or patio, allowing adults to supervise easily while children explore. Partial shade is ideal, as it prevents prolonged sun exposure and keeps water temperatures comfortable. In addition, surrounding planting or low garden walls can help define the area visually and minimize water splashing onto other parts of the garden.
Water play areas also encourage cooperative and imaginative games. Children can experiment with building channels, constructing dams, or creating small garden “rivers,” which promotes problem-solving and social interaction. Seasonal adaptations, such as draining or covering the feature in winter, ensure longevity and year-round usability.
Pros
- Provides sensory-rich, imaginative, and active play
- Supports social interaction, problem-solving, and motor skill development
- Can be adapted for different ages and interests
Cons
- Requires regular maintenance to ensure water hygiene and safety
- Needs careful surface selection to prevent slips and falls
- May involve additional plumbing or drainage considerations depending on the feature
You May also Like: 25 Ranch Garden Ideas Where Authentic Western Charm Comes to Life
Outdoor Chalk Wall
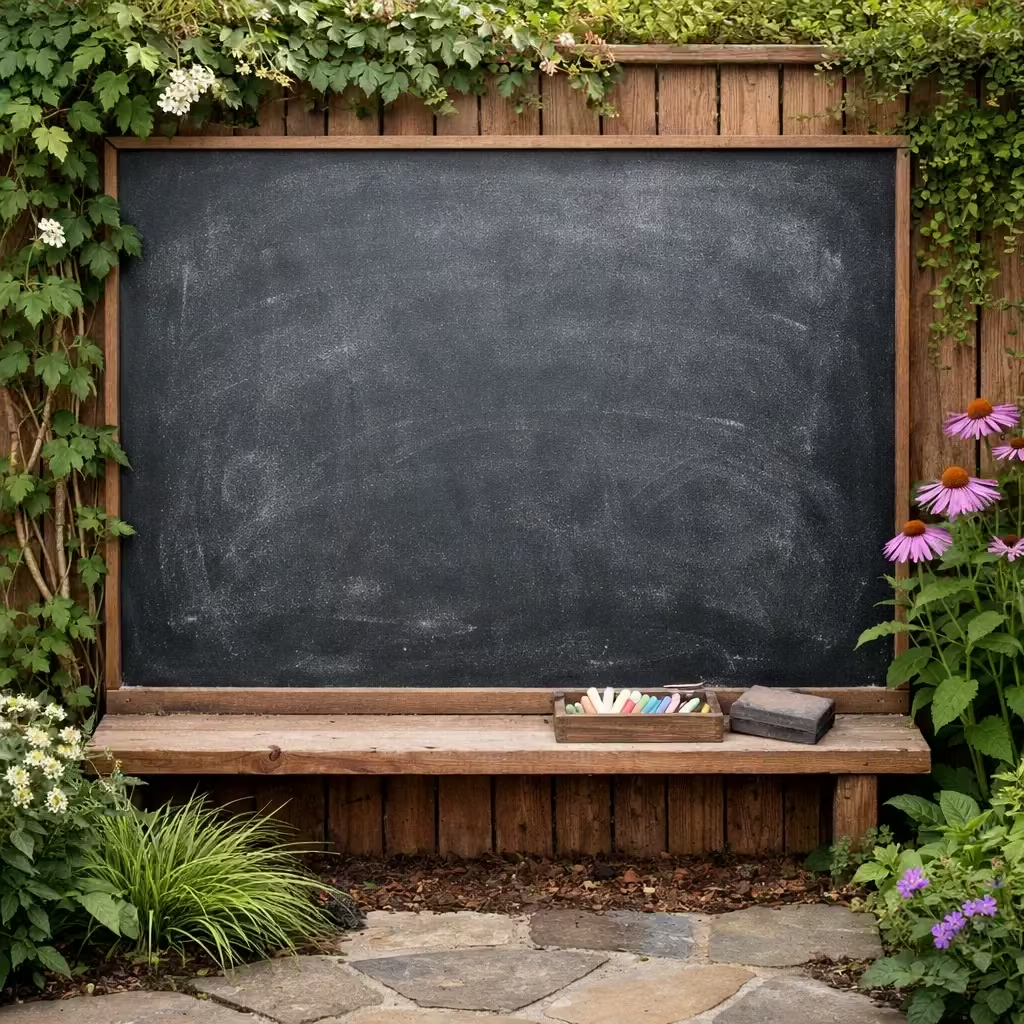
An outdoor chalk wall provides a simple yet highly engaging creative outlet where children can express themselves through drawing, writing, and collaborative art. In the family gardens I have designed, chalk walls often become focal points for imaginative play because they encourage creativity, problem-solving, and social interaction while remaining flexible and low maintenance. Unlike permanent murals or artwork, chalk allows children to experiment freely, erase, and start again, making it a sustainable and reusable play feature.
A practical size for a chalk wall is approximately 1.5–2 m wide by 1.2–1.5 m high (5–6.5 ft × 4–5 ft), positioned at a comfortable height for the intended age group. The wall can be created using smooth timber panels coated with chalkboard paint, masonry walls finished with chalkboard plaster, or freestanding chalkboards mounted on posts. To enhance durability, consider weather-resistant paint or materials that can withstand rain and sun exposure.
Placement is key for usability and supervision. Chalk walls work well along garden edges or adjacent to patios, keeping children visible while leaving central lawn or play areas free. Adding a small bench or shelf below the wall provides storage for chalk sticks and a resting spot for children. Surrounding landscaping, such as low shrubs or climbing plants, can soften the visual impact and make the chalk wall feel integrated with the garden.
In practice, outdoor chalk walls are versatile. They can serve as learning stations, practice spaces for writing or drawing, or imaginative backdrops for role play. Multiple children can use the wall simultaneously, fostering collaboration and sharing. Because the wall is non-permanent, it allows creativity to flow without consequences, supporting continuous engagement.
Pros
- Encourages creativity, self-expression, and cooperative play
- Flexible and reusable for endless artistic experimentation
- Simple to install and integrates well into garden design
Cons
- Requires periodic cleaning to maintain a usable surface
- Chalk dust may be tracked onto patios or clothing
- Limited interest for children as they grow unless combined with other creative elements
You May also Like: 25 Outdoor Dinner Party Ideas That Make Backyard Hosting Feel Special
Backyard Camping Corner
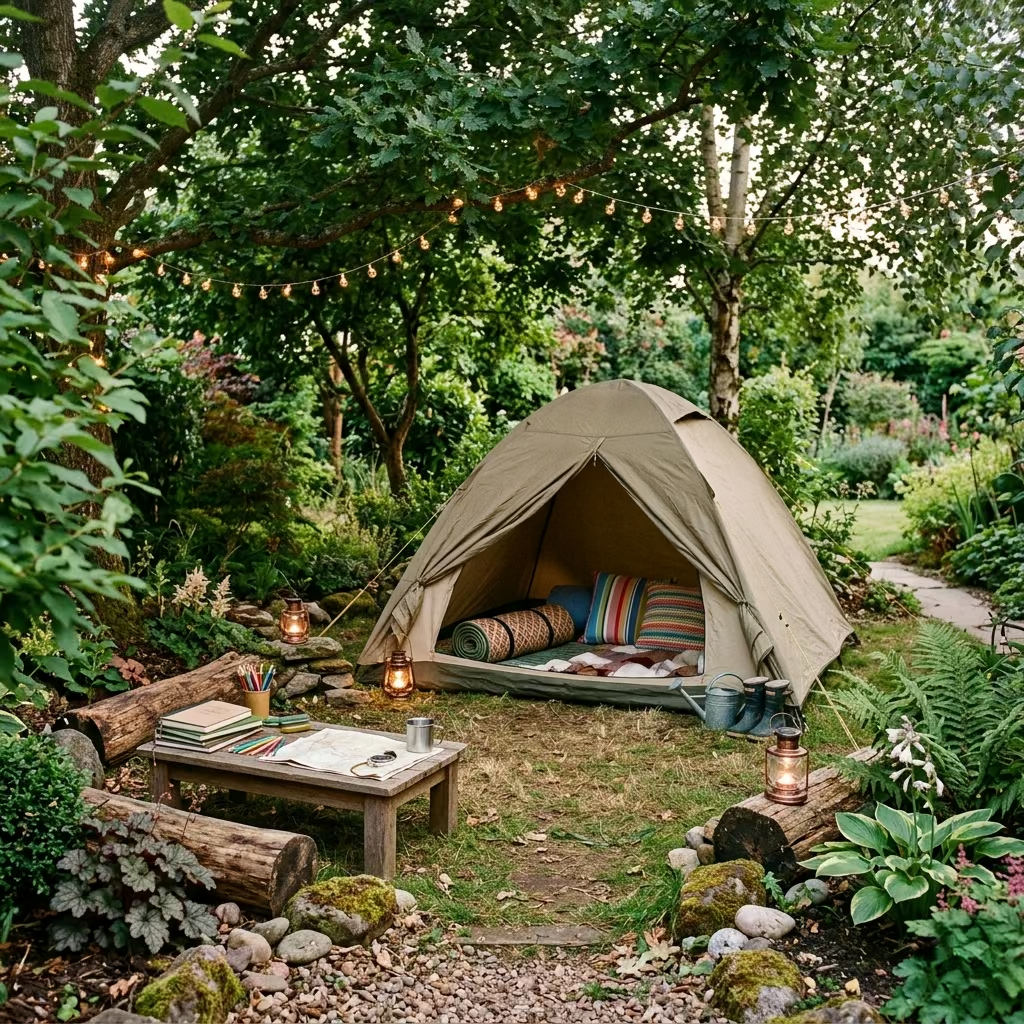
A backyard camping corner transforms a section of the garden into a small-scale adventure zone where children can experience the thrill of camping without leaving home. In the projects I have worked on, these spaces consistently become favorites because they combine imaginative play with practical learning about nature, outdoor skills, and independence. Unlike standard play equipment, a camping corner encourages children to plan, organize, and personalize their space, which fosters problem-solving, collaboration, and confidence.
The corner can comfortably fit within an area of 3 × 4 m (10 × 13 ft), providing enough room for a small tent, sleeping mats, or teepees, as well as additional space for activity stations. Choosing weather-resistant tents or open-sided shelters ensures durability and usability throughout the year. Soft outdoor rugs, foldable seating, and cushions create a comfortable environment for reading, storytelling, or resting, while portable lanterns or solar lights add ambience and safety after dusk. In larger gardens, multiple tents or a combination of shelters and small play structures can provide zones for group play or sibling interaction.
Placement of the camping corner is critical for both safety and engagement. I typically position these zones near other play areas or within sight of the house, allowing parents to supervise while maintaining a sense of independence for the children. Partial shade from a pergola, canopy, or adjacent trees keeps the space comfortable during warmer months while still allowing children to enjoy a sense of enclosure and privacy.
In addition to imaginative play, a camping corner can include interactive learning elements such as small fire pit simulations, compass or map activities, or nature journals where children observe plants and insects. Incorporating natural features like rocks, logs, or low shrubs helps the space feel integrated into the garden and inspires creative outdoor storytelling. Seasonal adjustments, such as waterproof covers in wet weather, ensure that the space remains usable year-round.
Pros
- Encourages imaginative, independent, and cooperative play
- Provides a flexible space for storytelling, reading, or small group activities
- Connects children with nature and basic outdoor skills
- Easily adaptable for seasonal or growth-related changes
Cons
- Requires weather-resistant materials and occasional maintenance
- Space must be thoughtfully placed to ensure safety and supervision
- Accessories such as lanterns or mats may need storage when not in use
Trampoline Zone
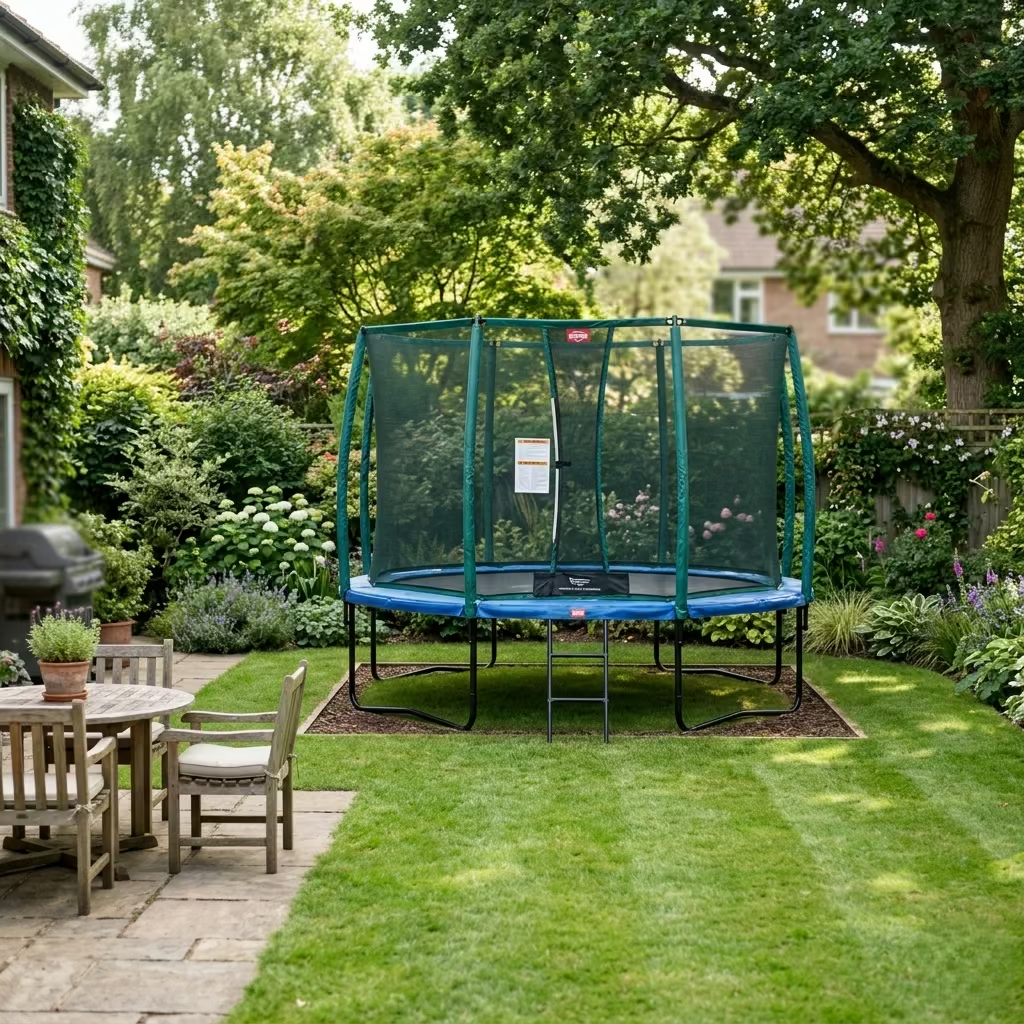
A trampoline zone introduces a high-energy play element that promotes physical fitness, coordination, balance, and confidence in children. In many of the family gardens I’ve designed, trampolines become a central outdoor attraction because they provide a space for children to engage in vigorous activity independently or with friends, while parents can supervise from nearby patios or seating areas. Unlike static playground equipment, trampolines offer continuous variation in movement and encourage children to explore body control, timing, and spatial awareness.
For safe and effective use, a trampoline zone should occupy a minimum of 4 × 4 m (13 × 13 ft) for smaller backyard models, while larger spaces allow for rectangular trampolines or multiple units. Ground preparation is critical: the surface should be level and clear of obstacles. Installing a trampoline with a safety enclosure net is strongly recommended to prevent falls, and shock-absorbing pads around the frame provide additional protection. I often position trampolines slightly away from walls, fences, or hard landscaping to maximize clearance and reduce the risk of collisions.
Placement within the garden should consider visibility, supervision, and integration with other zones. Locating the trampoline near the edge of the lawn or adjacent to active play areas ensures it does not dominate the garden, leaving open space for other activities. Partial shading can help reduce heat on sunny days, although it’s important that the netting and frame remain free of obstructions to allow full bounce and visibility.
Trampoline zones also offer social benefits, allowing children to play together, take turns, and practice cooperative games. Older children can safely use higher or rectangular trampolines for skill-based exercises, while younger children benefit from smaller, lower-height models. With appropriate spacing, safety measures, and supervision, the trampoline zone can provide years of engaging, healthy play.
Pros
- Promotes physical fitness, balance, and coordination
- Engaging for multiple age groups and social play
- Flexible placement that can integrate with other play zones
Cons
- Requires significant garden space and clearance for safety
- Needs regular inspection of frame, springs, and safety net
- High-energy use may require nearby noise consideration in residential areas
You May also Like: 25 Ranch Garden Ideas Where Authentic Western Charm Comes to Life
Minibike Track
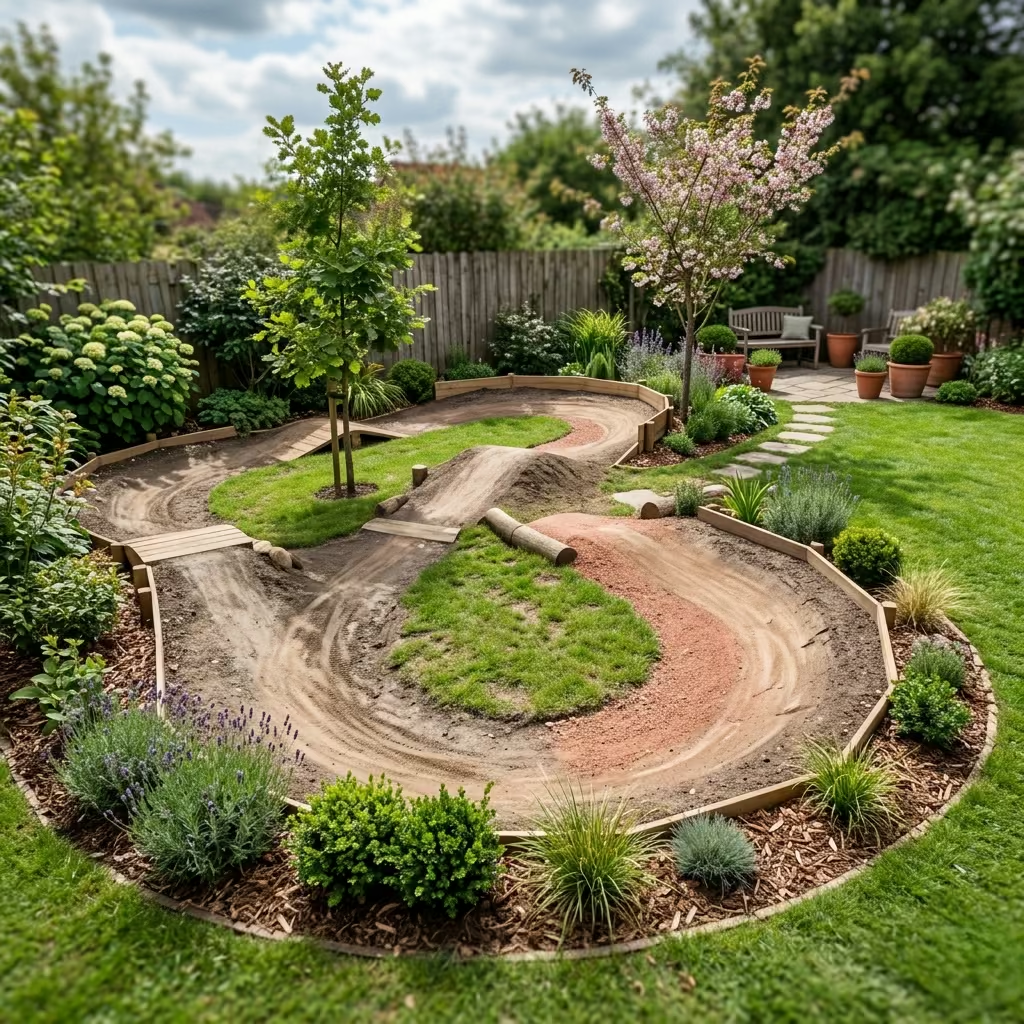
A minibike track offers children an adventurous, active play area that combines exercise, coordination, and imaginative outdoor fun. In the family gardens I’ve designed, dedicated bike tracks become a hub of activity, encouraging children to practice balance, steering, and spatial awareness while enjoying the thrill of speed in a safe, controlled environment. Unlike traditional playground equipment, a minibike track provides continuous movement and challenge, allowing multiple children to ride simultaneously and develop both physical skills and confidence.
A practical layout for a backyard track requires a space of approximately 6 × 8 m (20 × 26 ft), although longer looping tracks are ideal for larger gardens. Tracks can be defined using paved paths, compacted soil, artificial turf, or a combination of soft and hard surfaces to ensure safe, consistent riding conditions. Small ramps, gentle slopes, and low obstacles add excitement and skill-building opportunities while remaining safe for children of various ages. Curves should have sufficient width, ideally 1.2–1.5 m (4–5 ft), to allow smooth turns without collisions.
Placement within the garden should prioritize visibility and circulation, ensuring the track does not interfere with other play zones or central lawn areas. I often position tracks along garden edges or around perimeter planting beds, which maximizes space efficiency while creating a clear boundary between riding and quieter areas. Safety features such as low fencing, soft landing zones, or mulch edging further reduce injury risk.
In addition to physical benefits, a minibike track encourages social interaction and cooperative play. Children can race, practice tricks, or set up small challenges together, fostering teamwork and friendly competition. Tracks are also adaptable over time; as children grow, features such as ramps or obstacles can be modified or expanded to maintain engagement.
Pros
- Encourages physical activity, coordination, and balance
- Supports imaginative play and social interaction
- Can be integrated with garden edges to maximize space
Cons
- Requires regular maintenance of surfaces and obstacles
- Needs sufficient garden space and clear circulation
- Safety precautions, including supervision, are essential for younger children
Backyard Science Exploration Area
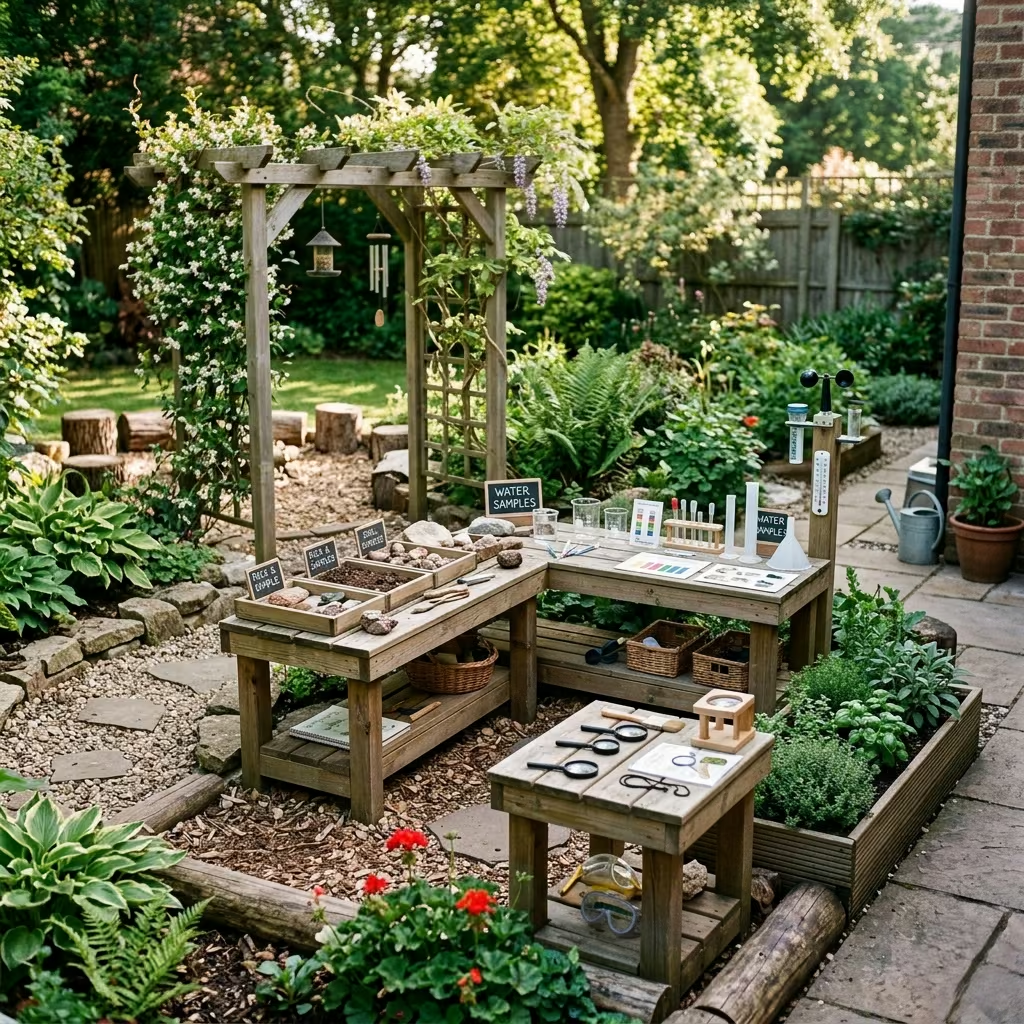
A backyard science exploration area transforms a portion of the garden into an interactive learning environment where children can experiment, observe, and discover through hands-on activities. In my experience designing family gardens, these zones are highly effective because they combine play with education, encouraging children to engage in problem-solving, critical thinking, and curiosity-driven learning without feeling like formal lessons. Unlike standard playgrounds, a science-focused space invites experimentation and creativity, making the backyard a living classroom.
A practical science zone can fit within 3 × 4 m (10 × 13 ft), though larger spaces allow for more elaborate setups. Key features might include mini weather stations, magnifying stations for insects and plants, water tables for experiments, small solar-powered gadgets, and rock or soil investigation areas. Modular tables or raised platforms with storage for tools, measuring instruments, or science kits help keep the area organized and accessible. Materials should be durable, weather-resistant, and non-toxic, as the space will frequently involve water, soil, and outdoor conditions.
Placement is critical for both supervision and integration into the garden. Science areas are most effective when positioned near patios or main pathways, allowing parents or caregivers to monitor activities easily. Partial shade is ideal for comfort during warm weather and to prevent instruments or experiments from overheating. Incorporating natural elements like logs, rocks, and planting beds not only enhances the learning experience but also makes the zone visually cohesive with the rest of the garden.
The space can be used for a variety of learning activities, including observing plant growth, tracking insects, studying water flow, or experimenting with simple physics projects. By rotating challenges and materials, the zone remains stimulating as children grow and develop new interests. In practice, children often treat these areas as both educational and imaginative play zones, blending science with creative exploration.
Pros
- Encourages curiosity, problem-solving, and hands-on learning
- Combines education with imaginative outdoor play
- Flexible design allows activities to evolve as children grow
Cons
- Requires durable, weather-resistant materials and regular upkeep
- Some experiments may need supervision to ensure safety
- Smaller gardens may need creative layouts to accommodate multiple features
You May also Like: 15 Mid-Century Modern Garden Ideas to Transform Your Outdoor Space
Climbing Boulder Garden
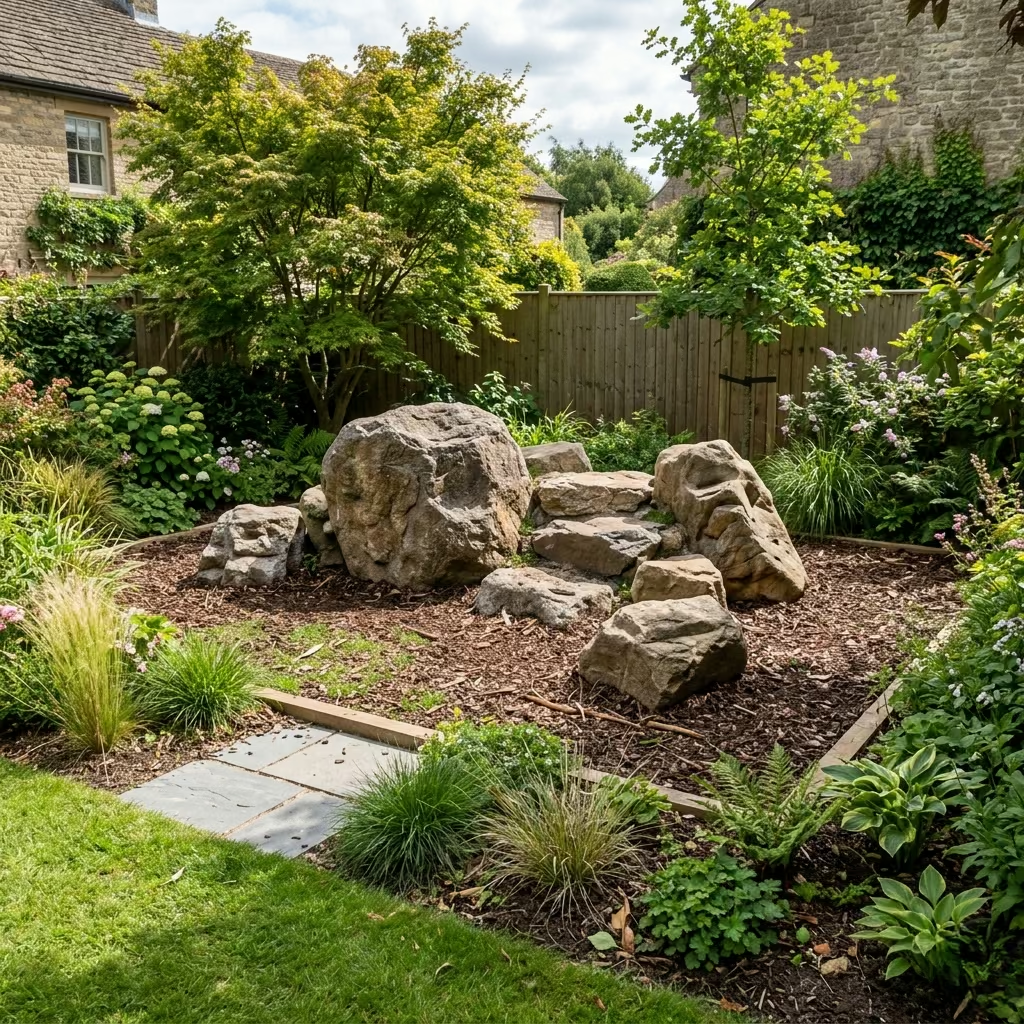
A climbing boulder garden introduces a naturalistic, physically challenging play element that encourages children to develop strength, coordination, and confidence while interacting with the landscape. In my experience designing family gardens, boulder features quickly become focal points because they blend seamlessly with planting and natural terrain, creating a play environment that feels adventurous yet integrated. Unlike conventional playground equipment, climbing boulders offer open-ended movement and imaginative use, allowing children to create obstacle challenges, hideouts, or make-believe scenarios.
For a practical setup, a small climbing boulder area can fit within 3 × 4 m (10 × 13 ft), using one or multiple natural or manufactured boulders. Heights of individual boulders should typically range from 0.6–1.2 m (2–4 ft) to ensure they are challenging but safe for children. Larger gardens can accommodate a cluster of boulders with varied shapes and heights, allowing multiple children to play simultaneously and navigate different climbing paths.
Placement is key for both safety and garden integration. I often position boulders along edges of lawn areas or within garden corners, leaving open spaces for running and other activities. Soft landing surfaces beneath the climbing zones such as engineered wood fibre, rubber mulch, or reinforced grass help reduce the risk of injury while maintaining a natural look. Surrounding planting can soften edges and visually integrate the boulders into the garden’s aesthetic.
Climbing boulder gardens encourage both independent and social play. Children can challenge themselves individually, race friends, or create cooperative obstacle sequences, which promotes teamwork and spatial awareness. Additionally, the natural form and texture of boulders inspire imaginative play, from mountaineering adventures to pirate hideouts. Over time, these spaces often become a core element of garden activity, appealing to children across a wide age range.
Pros
- Promotes strength, balance, coordination, and imaginative play
- Integrates naturally with landscape design
- Offers long-term engagement as children’s abilities grow
Cons
- Requires impact-absorbing surfaces for safety
- Larger boulders may require professional installation
- Maintenance may be needed to prevent slipping surfaces or erosion around edges
Outdoor Music Wall
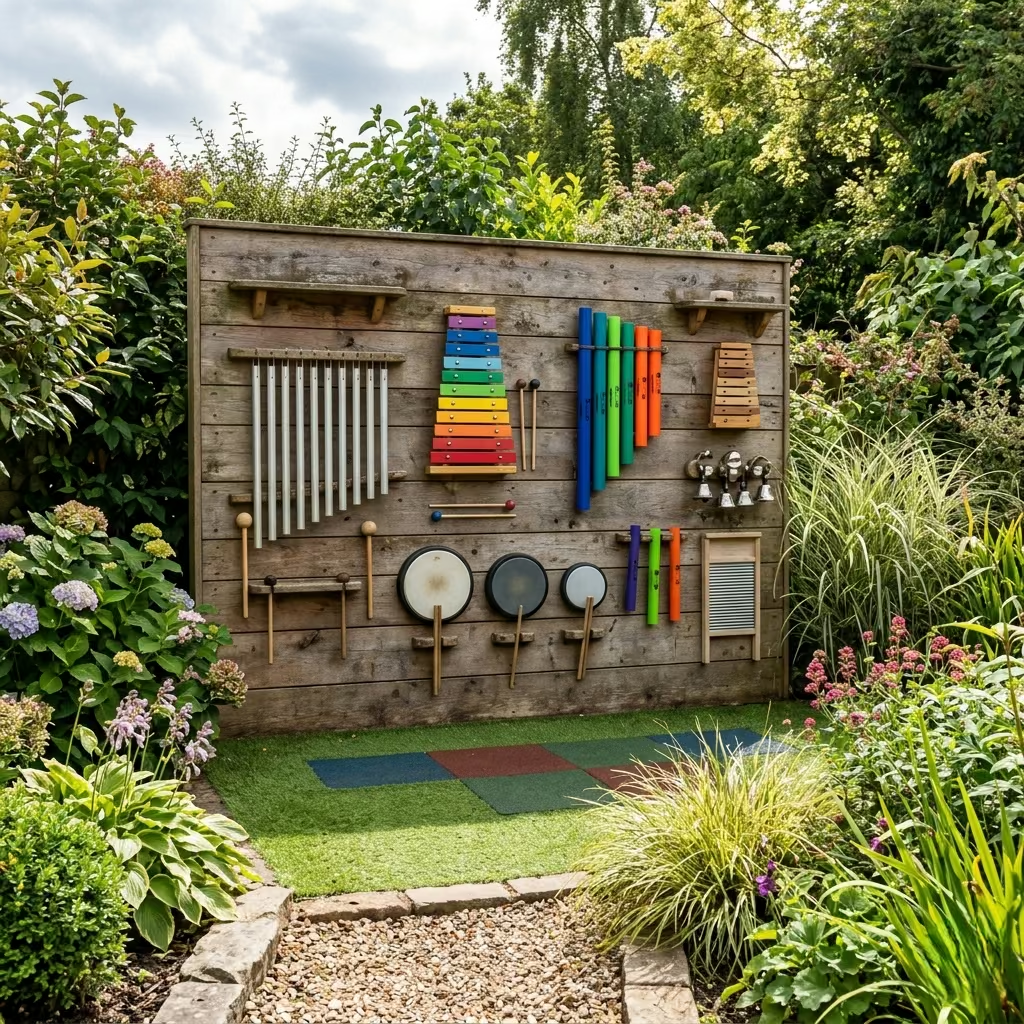
An outdoor music wall transforms a section of the garden into an interactive, sensory-rich play environment where children can explore rhythm, sound, and creativity. In my experience designing family gardens, music walls are particularly effective because they engage multiple senses simultaneously, encourage collaborative play, and provide a quieter yet stimulating alternative to high-energy physical activities. Unlike standard playground equipment, a music wall allows children to experiment with cause-and-effect, develop coordination, and explore musical expression in a safe, outdoor setting.
A practical music wall can fit within 2 × 2.5 m (6.5 × 8 ft), though larger walls allow more instruments and collaborative use by multiple children. Components may include metal chimes, drums, xylophone bars, PVC pipe instruments, or water-based musical elements, all mounted securely on a weather-resistant timber, metal, or composite wall. Height should be adjustable or tiered to accommodate different ages, typically 60–120 cm (2–4 ft) for younger children, with higher elements for older children. Materials must be durable and weather-resistant, capable of withstanding sun, rain, and repeated use while producing clear sound.
Placement within the garden should allow easy supervision while integrating visually with surrounding landscaping. Positioning the wall along a garden edge, near a patio, or next to a quiet seating zone ensures children can enjoy the music without interfering with other play areas. Soft surfaces beneath the wall, such as rubber tiles, artificial turf, or mulch, enhance safety and comfort during play. Incorporating nearby seating or small platforms can also create a “performance” area, encouraging imaginative games and cooperative interactions.
Outdoor music walls are highly adaptable. Instruments can be swapped or added over time to maintain novelty, and walls can be themed to match the garden aesthetic natural timber panels for a rustic look, bright painted elements for a playful feel, or metallic finishes for a modern edge. In practice, children often return to music walls repeatedly, exploring sound patterns, inventing rhythms, and collaborating creatively with siblings or friends.
Pros
- Encourages creativity, musical exploration, and sensory development
- Supports cooperative play and imaginative games
- Flexible and adaptable for different ages and garden designs
Cons
- Requires durable, weather-resistant materials
- Noise levels may need consideration in residential settings
- Instruments may require occasional maintenance or replacement
Fairy Garden or Imagination Corner
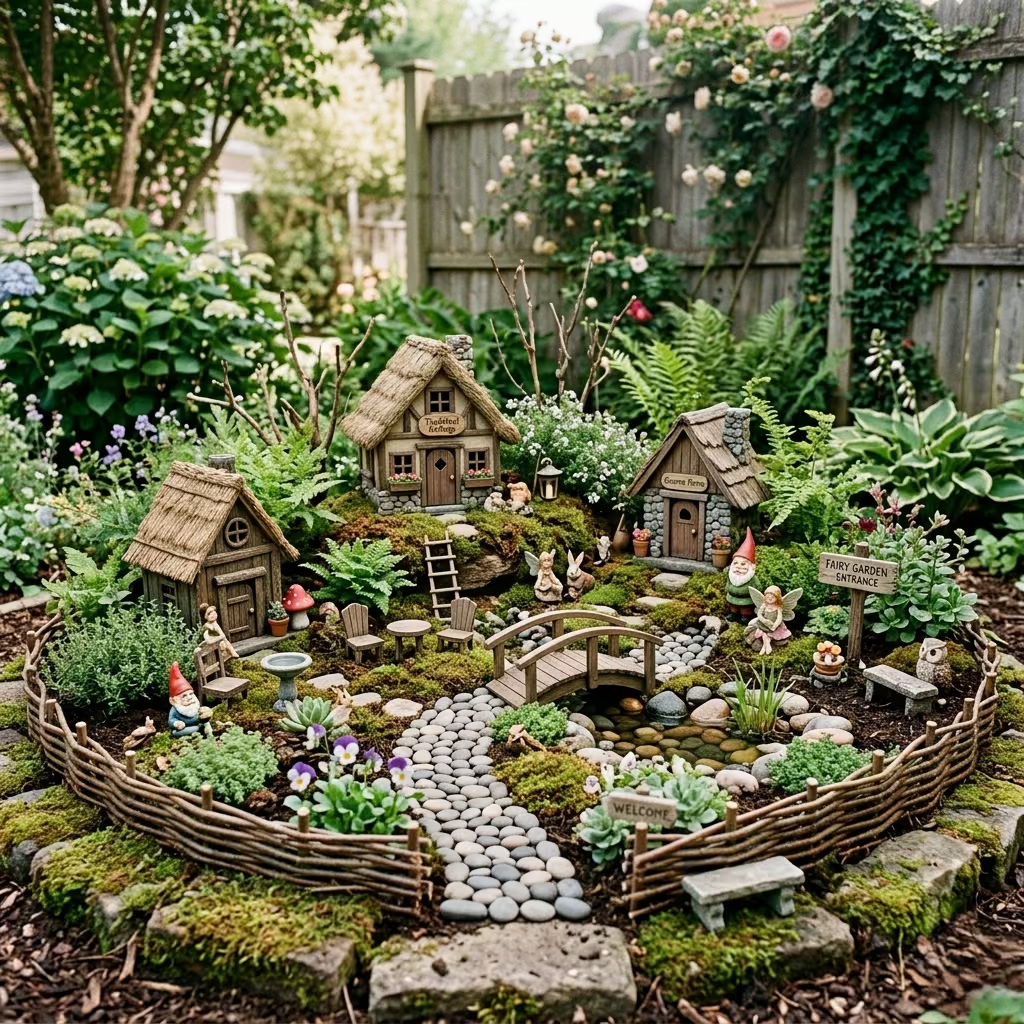
A fairy garden or imagination corner is a small, enchanting space that encourages children to explore storytelling, creativity, and imaginative play within a garden setting. In my experience designing family gardens, these corners become magical retreats where children can invent miniature worlds, role-play, and connect with nature in a tactile and engaging way. Unlike conventional play structures, imagination corners are highly flexible, allowing children to personalise the space with toys, natural elements, and seasonal decorations, fostering a strong sense of ownership and creativity.
A practical layout for a fairy garden can fit within 2 × 2 m (6.5 × 6.5 ft), though larger areas allow for multiple miniature features and play zones. Key elements include miniature houses, bridges, steppingstones, fairy figurines, plantings, and small water or sand features. Using natural materials such as timber, stone, and moss ensures the space feels integrated into the garden, while bright, durable accessories can add playful charm. Raised edges, low fencing, or small pathways help define the area and protect delicate features from accidental trampling.
Placement is essential for both visibility and magic. I typically position imagination corners along garden edges, under partial shade, or near flower beds, allowing the area to feel hidden and magical while still within sight for supervision. Low planting or small shrubs around the corner can create a sense of enclosure, enhancing the feeling of entering a miniature world. Incorporating steppingstones, small benches, or removable play elements adds layers of interaction and allows children to modify the space over time.
Fairy gardens and imagination corners are particularly effective because they encourage storytelling, role-play, and quiet, focused play. Children can build, rearrange, and invent scenarios independently or with friends, supporting social skills as well as creative thinking. Over time, these spaces often evolve alongside the child, with seasonal updates, new figurines, or additional natural elements keeping the corner fresh and engaging.
Pros
- Encourages imaginative play, storytelling, and creative thinking
- Provides a calm, sensory-rich retreat within a busy garden
- Flexible and adaptable with age or seasonal themes
Cons
- Requires ongoing attention to maintain miniature features and planting
- Small elements can be fragile or easily displaced
- Limited physical activity unless integrated with adjacent play features
Hideaway Play Hut
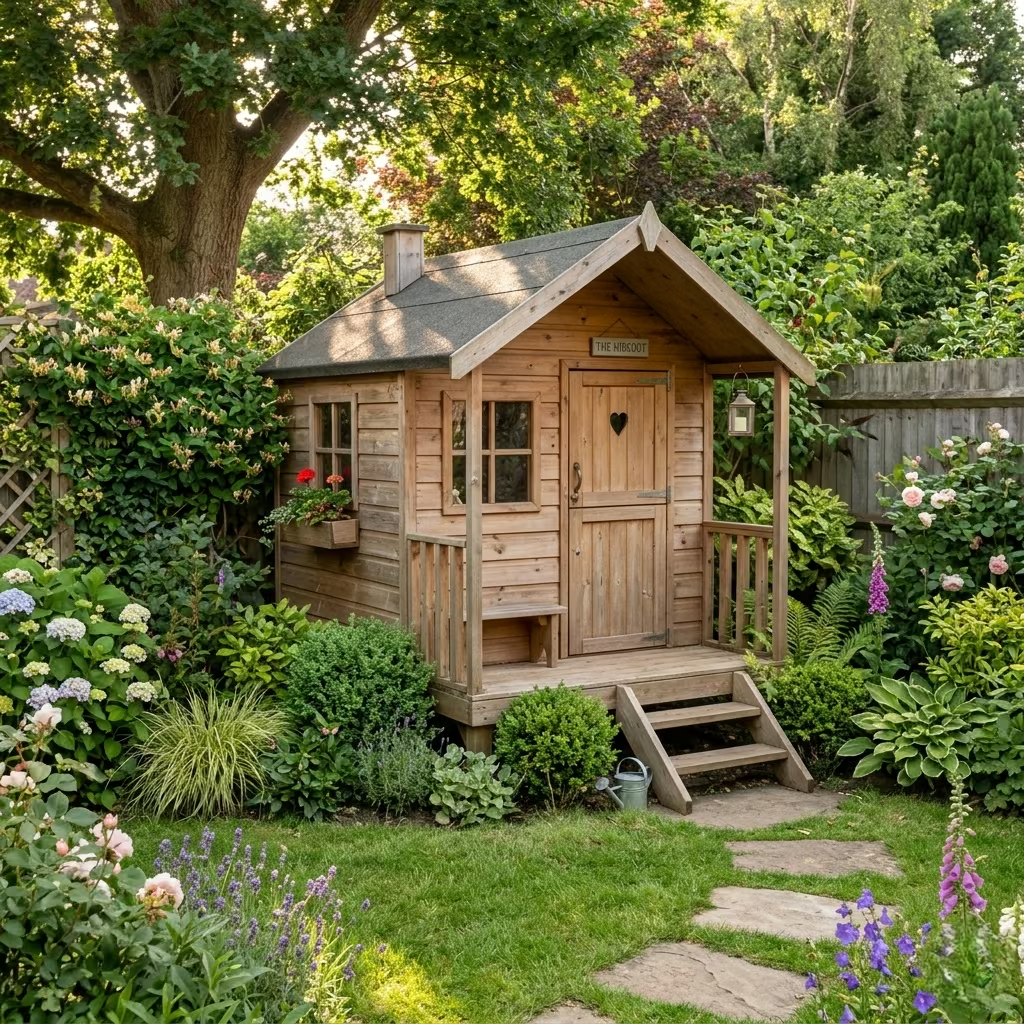
A hideaway plays hut offers children a private, imaginative retreat within the garden, where they can create, role-play, or simply enjoy a quiet corner of their own. In the family gardens I’ve designed, these huts often become a central element of outdoor play because they combine adventure with security, giving children a space where they feel in control while exploring creativity and independence. Unlike standard play equipment, hideaway huts encourage imaginative role-play, social interaction, and autonomous exploration, supporting both mental and emotional development.
For a practical backyard setup, a small hut can fit within 2.5 × 2.5 m (8 × 8 ft), with enough space for two or three children to play comfortably. Common designs include timber or composite panel structures with windows, doors, and optional loft or decked platforms, which add layers of interest and functionality. Roofs can be pitched, flat, or covered with weather-resistant fabric to provide shelter from sun and rain. Interiors can include built-in seating, low shelves, or chalkboards to encourage creative activities, while external features like climbing steps, ladders, or small porches can extend play beyond the hut itself.
Placement is crucial to maintain both usability and integration into the garden. I often situate play huts along garden edges or within partially enclosed planting areas, which preserve open lawn space while giving children a sense of privacy and immersion. Partial shade from nearby trees or pergolas ensures comfort during sunny periods, and surrounding planting can make the hut feel like a hidden retreat, sparking imaginative play scenarios such as secret hideouts, forts, or storybook cottages.
Hideaway play huts also foster social and cooperative play, allowing children to host small gatherings, role-play with friends, or enjoy quiet solo activities. Over time, these huts can be adapted with seasonal decorations, additional interior features, or connected play elements like rope bridges or slides, ensuring long-term engagement and versatility.
Pros
- Encourages imaginative, independent, and cooperative play
- Provides a private, immersive play environment
- Flexible design allows adaptation as children grow
Cons
- Requires durable, weather-resistant materials and occasional maintenance
- Limited space may restrict the number of children playing simultaneously
- Needs careful placement to balance visibility, safety, and garden integration
You May also Like: 15 Overlooked ’70s Home Exterior Ideas Worth Rediscovering
Swing Garden
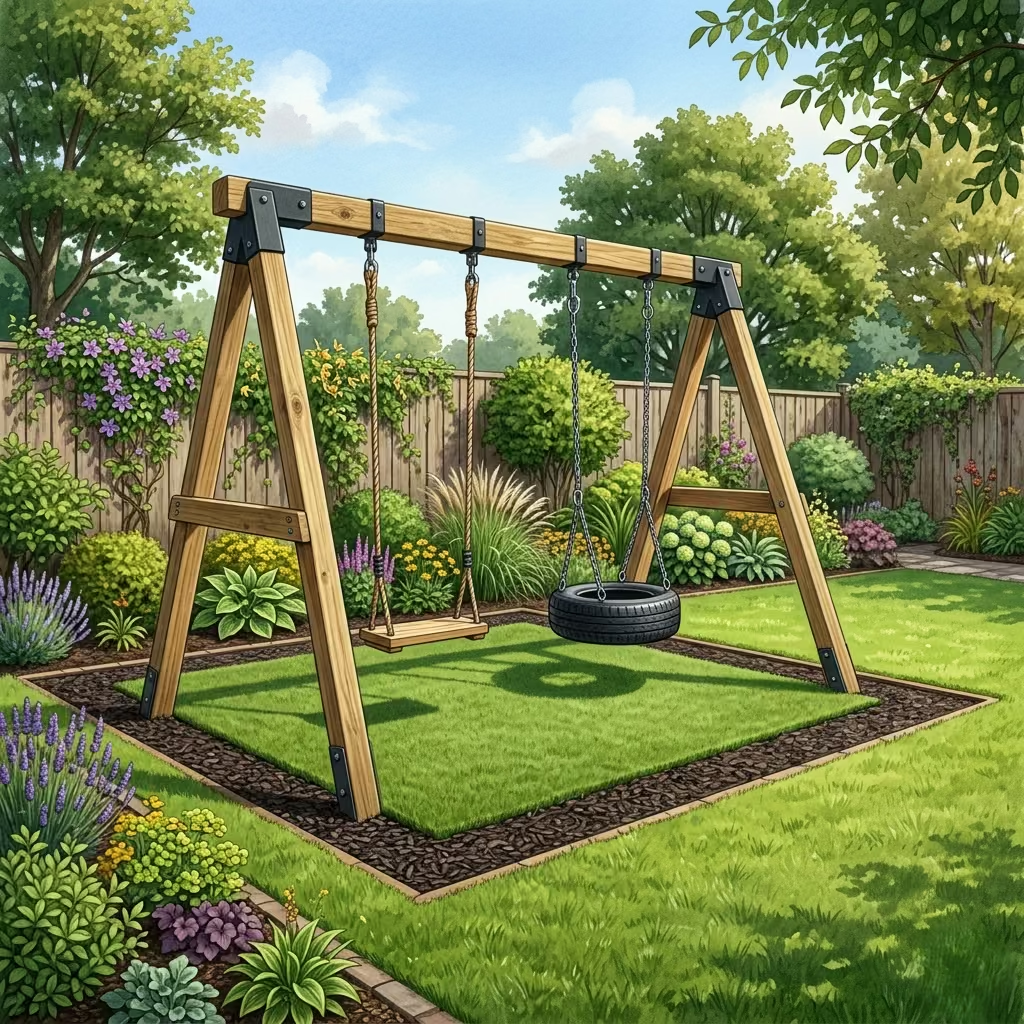
A swing garden is a timeless addition to a backyard, offering children a simple yet highly engaging play feature that encourages physical activity, coordination, and outdoor enjoyment. In the family gardens I’ve designed, swings consistently become one of the most used elements because they combine fun with sensory development, helping children develop balance, strength, and spatial awareness while enjoying the outdoors. Unlike static play structures, swings provide dynamic movement that appeals to a wide age range, from toddlers to older children.
For a practical installation, a swing area typically requires a footprint of 3 × 4 m (10 × 13 ft) for a single swing, though larger setups can accommodate multiple swings or a combination of rope, tyre, and traditional seat swings. Frames can be constructed from timber, steel, or composite materials, depending on design preference and durability requirements. Timber frames naturally integrate with garden aesthetics, while steel or powder-coated frames offer long-term weather resistance. Swings should be suspended at a height of 0.6–1.2 m (2–4 ft) from the ground for younger children, with clearance beneath and around the swing to allow safe movement.
Placement within the garden should prioritize visibility and safety, typically near open lawns or along edges where surrounding plants do not interfere with swinging motion. Soft landing surfaces, such as engineered wood fibre, rubber mulch, or artificial turf, are essential to minimize injury risk. Partial shading from trees or shade sails helps maintain comfort during sunny periods and reduces wear on swing seats.
Swing gardens also support social interaction, as multiple children can take turns, race, or invent games around the swinging motion. Adding elements such as low platforms, climbing attachments, or rope ladders can increase the versatility of the swing structure and integrate it seamlessly into larger play zones. Over time, swings remain popular because they are both physically stimulating and emotionally satisfying, offering children a sense of freedom and fun.
Pros
- Promotes physical activity, balance, and coordination
- Suitable for a wide range of ages and abilities
- Can be integrated with other garden play zones
Cons
- Requires safe, impact-absorbing surfaces
- Needs sufficient clearance space around swings
- Regular maintenance of frame and ropes is necessary to ensure safety
Backyard Maze Garden
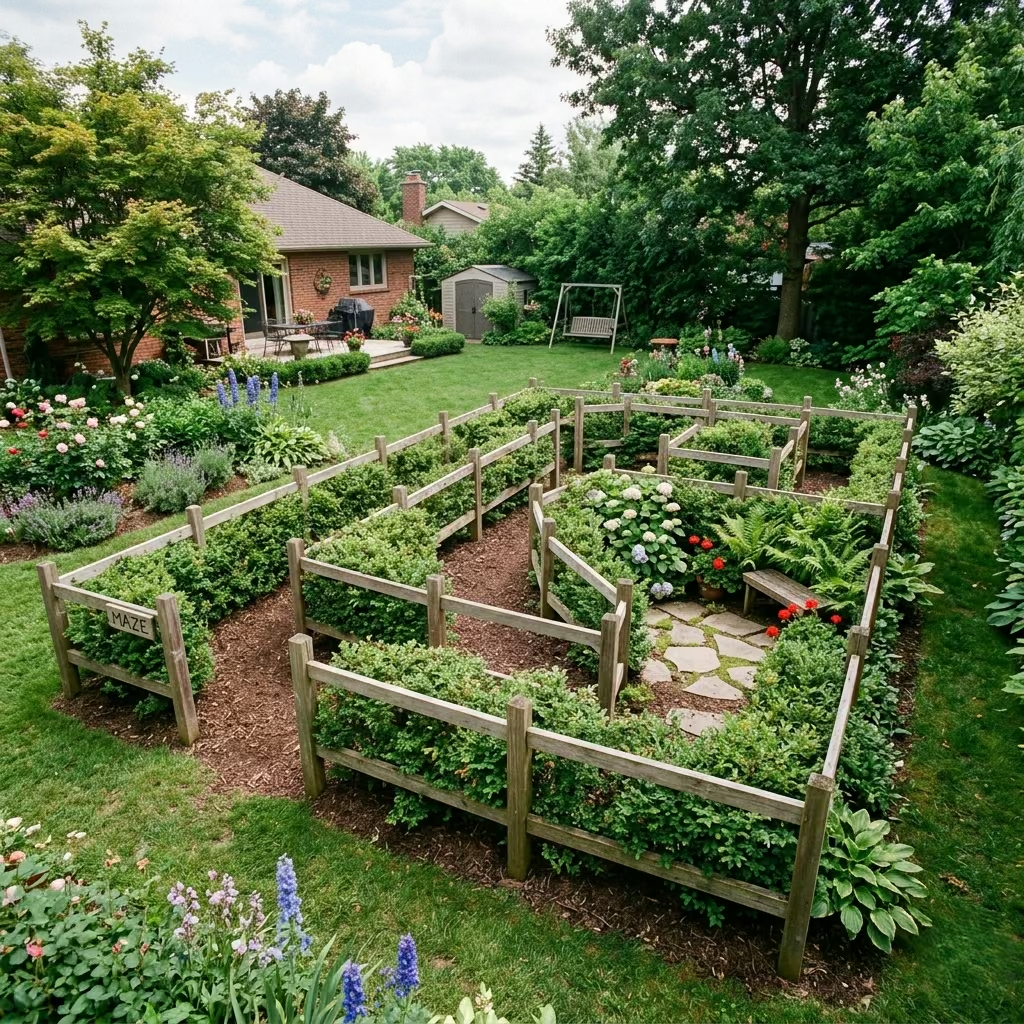
A backyard maze garden transforms an outdoor space into a playful, immersive experience where children can explore, problem-solve, and engage in imaginative adventures. In the family gardens I’ve designed, maze gardens are particularly effective because they combine physical activity with cognitive challenges, encouraging children to navigate paths, make decisions, and collaborate with friends or siblings. Unlike static playground structures, a maze introduces a sense of discovery and curiosity, making children eager to return and explore repeatedly.
For a practical setup, a small maze can fit within 4 × 6 m (13 × 20 ft), using a combination of hedges, tall grasses, shrubs, or low wooden fencing to create defined pathways. The height of the walls should generally range from 0.8–1.2 m (2.5–4 ft) for younger children, allowing visibility for supervision while still creating a sense of enclosure and mystery. Paths should be wide enough for a child to walk comfortably, typically around 60–80 cm (24–32 inches), and can incorporate gentle turns, dead ends, and open spaces to enhance problem-solving and exploration.
Placement within the garden should balance accessibility and integration with other zones. I often position maze gardens along garden edges or in corners, preserving central lawn areas for active play while using plantings or fences to naturally delineate the maze. Soft surfaces such as turf or mulch beneath paths help prevent slips, while surrounding planting can add sensory interest through texture, scent, or seasonal color.
Maze gardens also encourage cooperative and imaginative play. Children can race through the paths, role-play treasure hunts, or design games that involve teamwork and strategy. Additionally, incorporating small features like steppingstones, low bridges, or hidden nooks adds variety and keeps the space engaging as children grow. In practice, even small mazes can provide hours of entertainment and foster a love for exploration and problem-solving.
Pros
- Encourages physical activity, spatial awareness, and problem-solving
- Supports imaginative and cooperative play
- Can be integrated seamlessly with garden plantings
Cons
- Requires regular maintenance of hedges, shrubs, or path materials
- Needs sufficient garden space to be engaging
- Younger children may need supervision to navigate safely
Mud Kitchen Area
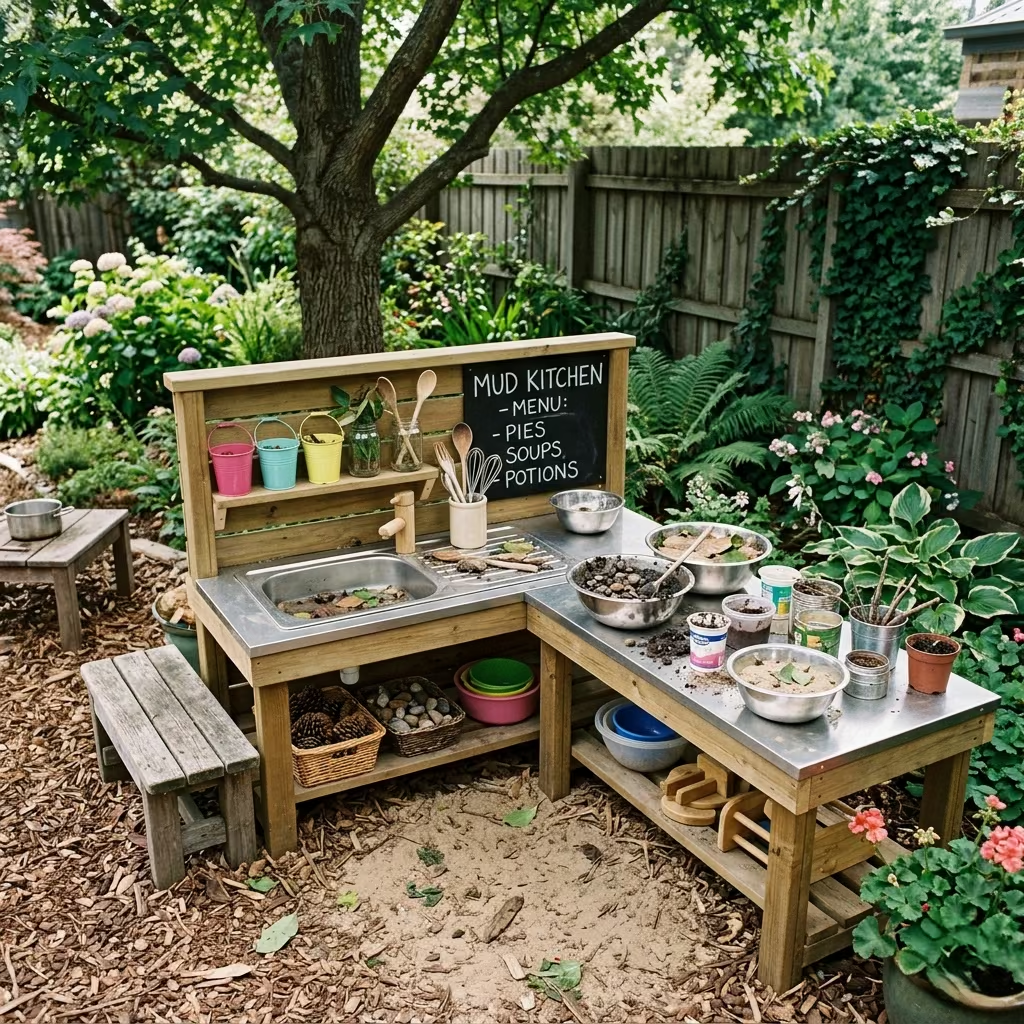
A mud kitchen area offers children a hands-on, sensory-rich play environment where they can explore textures, experiment with natural materials, and engage in imaginative cooking or science play. In the family gardens I’ve designed, mud kitchens are highly effective because they combine creative expression with outdoor exploration, giving children a space to develop problem-solving skills, collaboration, and fine motor coordination while enjoying messy, tactile fun. Unlike conventional play equipment, mud kitchens encourage experimentation and imaginative role-play that evolves as children grow.
A practical mud kitchen can fit within 2 × 2.5 m (6.5 × 8 ft). Key components include a water source or basin, countertop surface, shelving, and storage for utensils, made from weather-resistant materials such as treated timber, stainless steel, or composite panels. Adding features like small sinks, mixing bowls, and repurposed containers enhance creativity, allowing children to mix mud, sand, water, leaves, and other natural elements safely. Surfaces should be at a height of 50–60 cm (20–24 inches) for younger children and 70–80 cm (28–31 inches) for older kids to ensure comfortable access.
Placement is critical for practicality and supervision. I usually position mud kitchens near patios or under partial shade, so children remain visible while staying protected from prolonged sun exposure. Soft ground surfaces such as mulch, artificial turf, or compacted sand beneath and around the kitchen minimize slips and keep surrounding garden areas cleaner. Nearby seating or benches allow children to take breaks or for adults to observe comfortably.
Mud kitchens also promote social play and creativity, enabling children to role-play cooking, experiment with “recipes,” or collaborate on garden-themed projects. Over time, these areas can be adapted with seasonal elements, such as pumpkin or leaf-based “recipes” in autumn, or sand and water play stations during summer, maintaining engagement throughout the year.
Pros
- Encourages imaginative play, creativity, and sensory exploration
- Supports social interaction and cooperative activities
- Flexible design that can evolve with children’s interests
Cons
- Requires regular cleaning and maintenance of surfaces and utensils
- Can be messy and may need designated surrounding areas to protect lawns or patios
- Weather exposure may limit use during colder or wet seasons
Backyard Water Stream or Rill
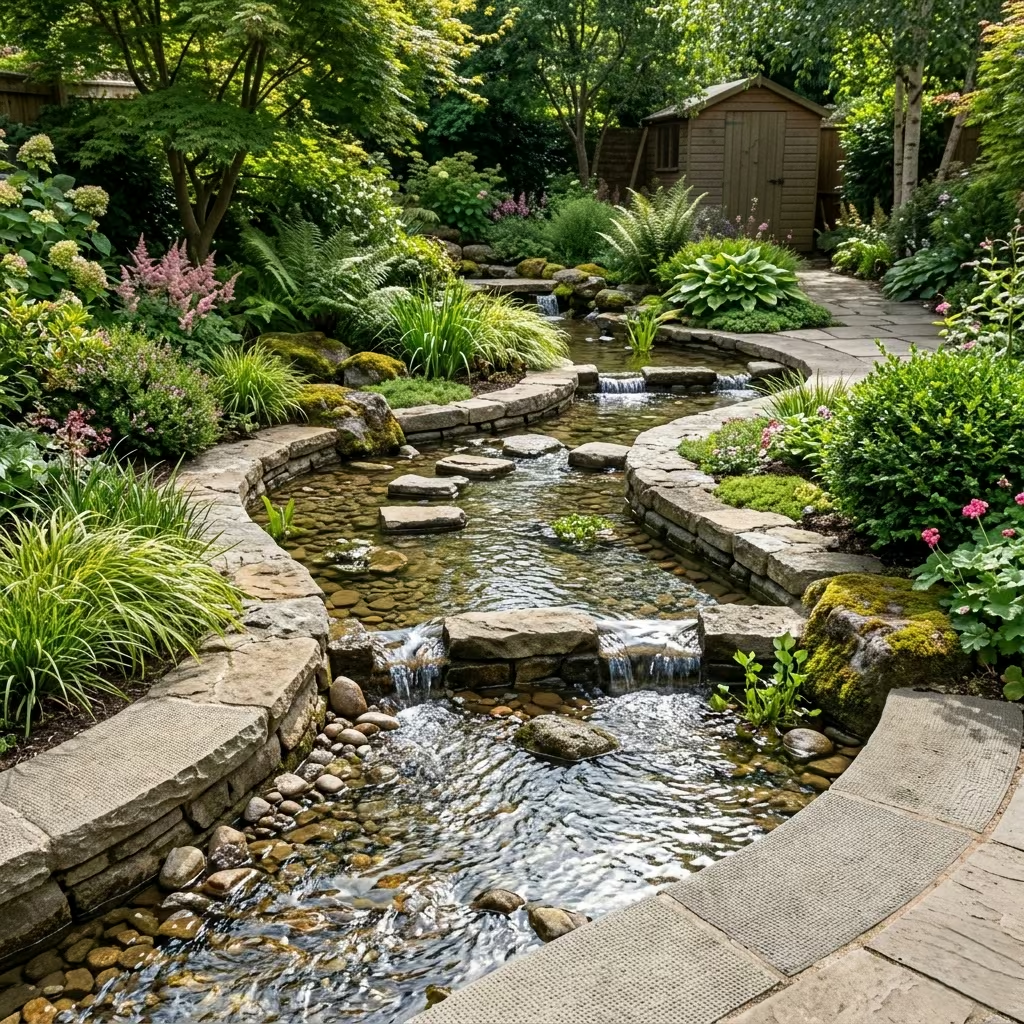
A backyard water stream or rill creates a dynamic, sensory-rich play feature where children can interact with flowing water, experiment with movement, and explore natural elements. In the gardens I’ve designed, water rills are highly engaging because they combine imaginative play, hands-on learning, and visual appeal, making them both an educational and aesthetic addition to the outdoor space. Unlike static water features, a stream or rill encourages children to manipulate flow, build channels, and observe cause-and-effects in a safe, contained environment.
A practical installation can fit within 3 × 6 m (10 × 20 ft), though larger designs allow for winding channels, multiple access points, and interactive stations. Key features include shallow channels, steppingstones, small dams, or water wheels, constructed from durable, weather-resistant materials such as natural stone, reinforced concrete, or composite panels. Depth should be shallow, typically 10–15 cm (4–6 in) for younger children to allow safe play while maintaining adequate water flow. Incorporating a small pump or gravity-fed system ensures continuous circulation, reducing stagnation and supporting water quality.
Placement is important for both usability and garden integration. I often position water rills along garden edges or adjacent to patios, preserving open lawn areas while keeping the feature visible for supervision. Surrounding planting, such as low grasses or decorative shrubs, softens edges and integrates the feature naturally with the landscape. Non-slip surfaces or steppingstones enhance safety and allow children to interact directly with the water.
Water streams also foster imaginative and cooperative play. Children can create dams, float objects, observe insects, or conduct simple experiments with flow and obstacles, supporting both social and cognitive development. Seasonal adaptations, like draining or covering the rill in winter, ensure longevity and safe year-round use.
Pros
- Promotes hands-on learning, sensory exploration, and imaginative play
- Encourages teamwork and problem-solving through interactive features
- Integrates visually and naturally with garden landscaping
Cons
- Requires maintenance to ensure water circulation and hygiene
- Needs safe, slip-resistant surfaces to prevent accidents
- Installation may require plumbing or water management expertise
Outdoor Lego or Building Table
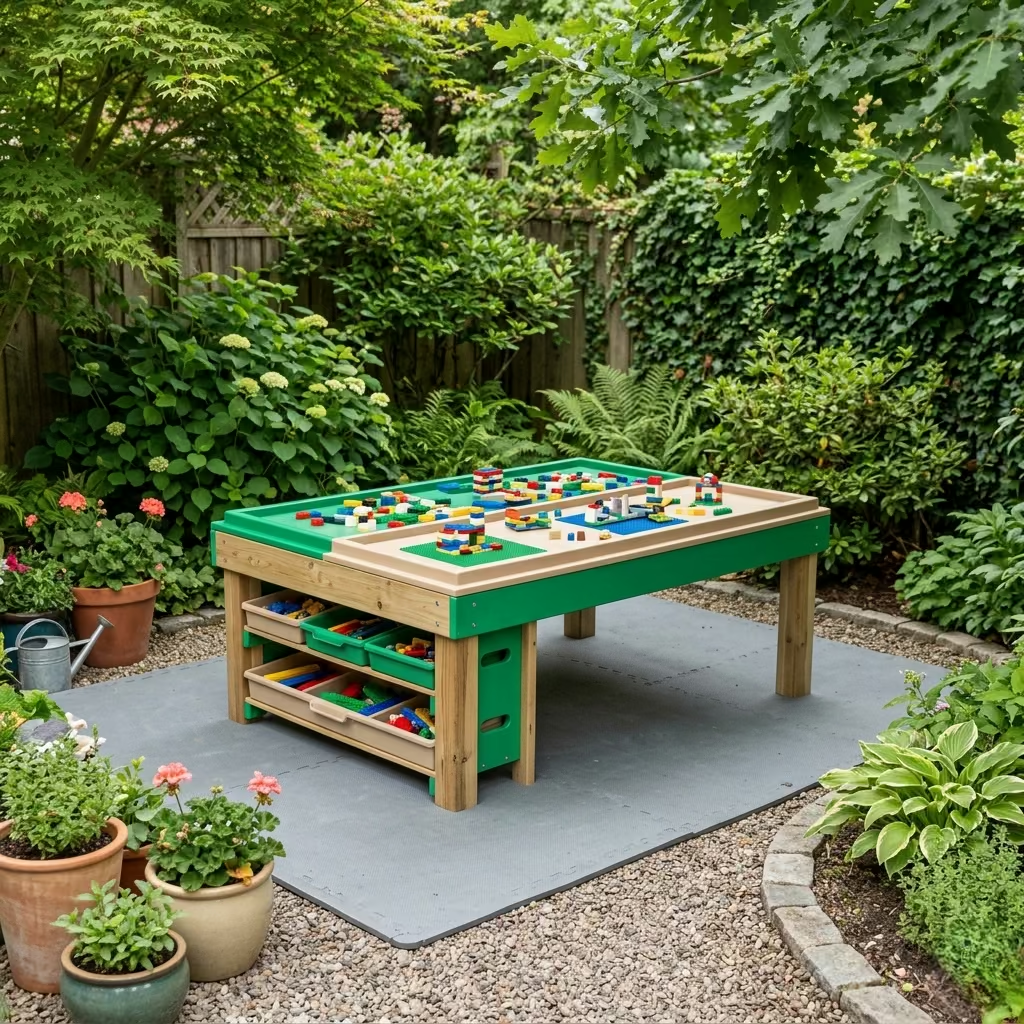
An outdoor Lego or building table provides children with a creative, hands-on activity space that encourages problem-solving, fine motor skill development, and imaginative construction. In the family gardens I’ve designed, these tables become a favourite play zone because they combine the benefits of structured play with the freedom of outdoor exploration. Unlike indoor-only setups, an outdoor table allows children to build, sort, and experiment without the constraints of indoor space, while benefiting from fresh air and natural light.
A practical outdoor building table can fit within 1.5 × 2 m (5 × 6.5 ft). Key features include a weather-resistant table surface, built-in storage bins or drawers, and raised edges to keep pieces contained. Materials such as treated timber, powder-coated metal, or high-density polyethylene (HDPE) provide durability against sun, rain, and frequent use. Table height should be 50–60 cm (20–24 inches) for younger children and 70–80 cm (28–31 inches) for older kids, ensuring ergonomic access while seated or standing.
Placement is important for both supervision and integration into the garden. I often situate building tables near patios, under pergolas, or within partially shaded garden corners, keeping children visible while protecting them from prolonged sun exposure. Soft surfaces such as artificial turf or rubber mats underneath help reduce slips and provide a comfortable area for extended play. Adjacent seating for adults allows supervision or participation, making it a social and collaborative activity space.
Outdoor building tables also encourage collaborative play and imaginative scenarios. Children can construct entire miniature worlds, engage in themed building challenges, or combine Lego creations with other garden elements like miniature figures, sand, or water features. Over time, the table can evolve with children’s interests, accommodating different building sets, tools, and creative projects, ensuring long-term engagement.
Pros
- Encourages creativity, problem-solving, and fine motor development
- Supports collaborative and imaginative play outdoors
- Durable and weather-resistant when properly designed
Cons
- Requires storage for building pieces when not in use
- Exposure to weather may affect longevity of materials
- Limited space may restrict multiple users unless the table is larger
Multi-Zone Play Garden
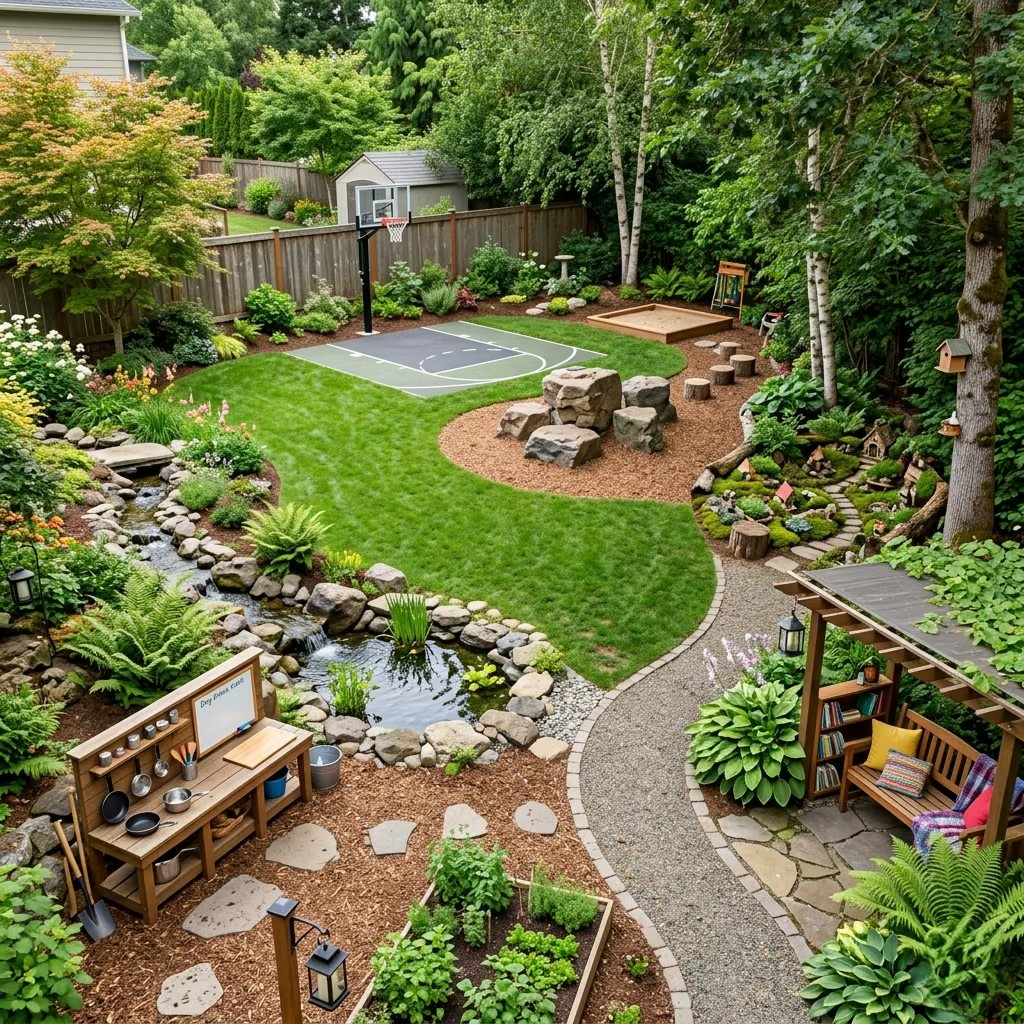
A multi-zone plays garden combines a variety of play elements into a cohesive, thoughtfully designed outdoor space that caters to children of different ages, abilities, and interests. In the family gardens I’ve designed, multi-zone layouts are particularly successful because they balance active, imaginative, and sensory play while maintaining visual harmony with the overall garden design. Unlike single-focus play areas, multi-zone gardens provide variety and flexibility, keeping children engaged and allowing spaces to evolve as their skills and interests develop.
A practical multi-zone garden can occupy 8 × 10 m (26 × 33 ft) or larger, depending on available space. Zones may include a backyard adventure playground, mini sports court, water play station, mud kitchen, climbing boulders, reading nook, and imagination corners. I always ensure that each zone has clear circulation paths, ideally 90–120 cm (36–48 inches) wide, so children can move safely between activities without interfering with other play areas. Using natural boundaries such as hedges, low walls, or planting beds helps define each zone while keeping the overall layout visually cohesive.
Placement and integration are key. I typically position active zones like trampolines or minibike tracks towards open lawn areas, while quieter or creative zones like reading nooks or fairy gardens sit along edges or in partially shaded corners. Ensuring sightlines from patios or main living areas allows for supervision while giving children a sense of independence. Soft, impact-absorbing surfaces under climbing or high-activity equipment enhance safety, and durable, weather-resistant materials ensure longevity for all elements.
A multi-zone garden encourages parallel play, social interaction, and skill development across multiple domains. Children can move between zones to switch from energetic play to imaginative or sensory-focused activities, catering to a range of moods and abilities. The design also supports long-term engagement, as features can be adapted or rotated seasonally to maintain interest, and zones can evolve as children grow.
- Provides diverse play opportunities for children of different ages and interests
- Supports physical, creative, and cognitive development
- Flexible and adaptable for seasonal changes and growth
Pros
Cons
- Requires significant space and careful planning to avoid clutter
- Ongoing maintenance needed for multiple play zones
- Initial installation may be complex and involve professional guidance for safe integration
Design Mistakes to Avoid When Creating Kids Outdoor Spaces
Creating a children’s outdoor space requires a careful balance between fun, safety, and long-term usability. In my professional experience, I’ve seen many well-intentioned designs fail because these core principles were overlooked. Here are the most common mistakes and how to avoid them.
Ignoring Sightlines from the House
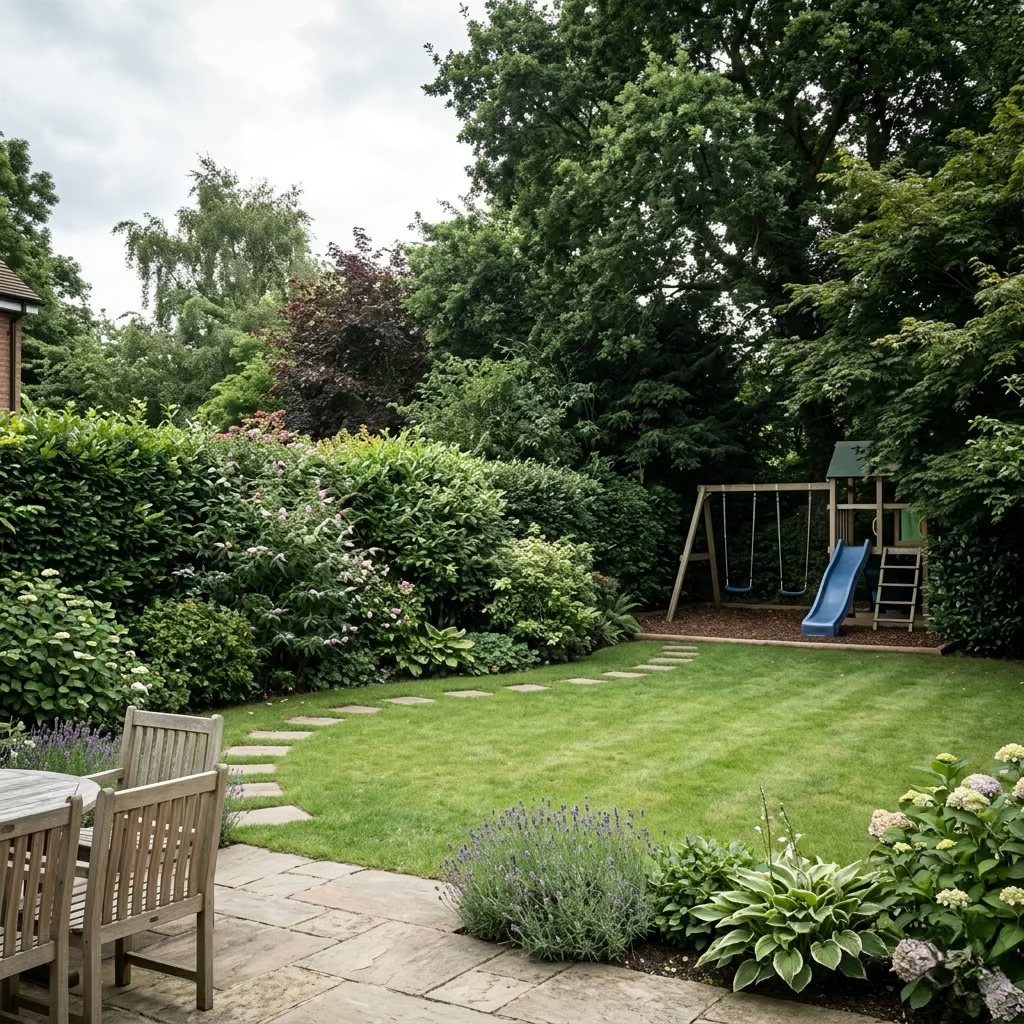
One of the biggest oversights is positioning play areas where children are out of view. In many projects I’ve managed, parents assumed a play zone tucked behind hedges or at the far end of a garden would be fine. In practice, this makes supervision difficult and can lead to safety issues. I always ensure that children’s zones are visible from main living areas or patios, ideally within 6–12 m (20–40 ft). Strategic placement allows children to gain independence while parents can monitor effortlessly.
Choosing Unsafe Ground Materials
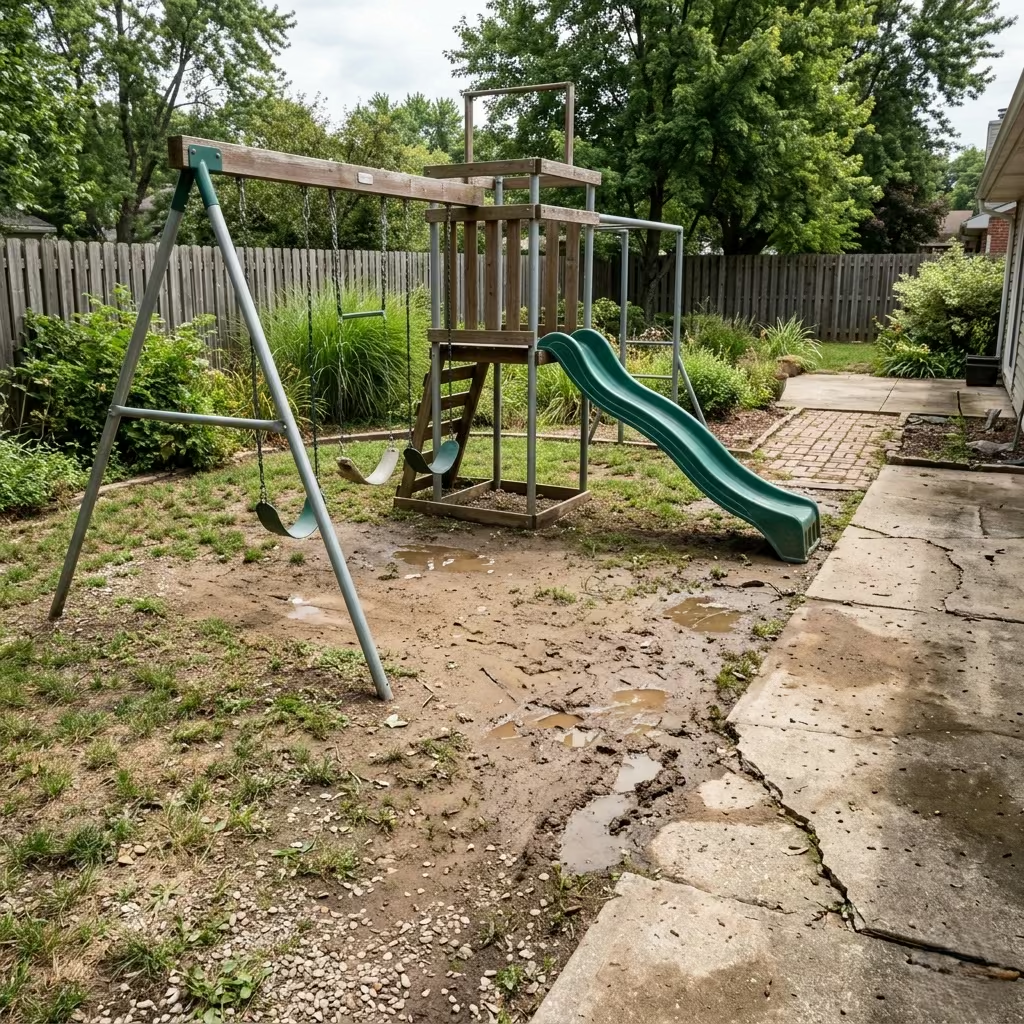
The surface beneath the play equipment is critical. Grass alone can become muddy and slippery, and hard surfaces like concrete increase injury risk. I always recommend impact-absorbing surfaces such as engineered wood fibre, rubber mulch, or artificial turf in active zones. These surfaces reduce injury from falls while blending aesthetically with the garden. Incorrect material choices often lead to ongoing maintenance of headaches and compromise safety.
Overcrowding the Garden
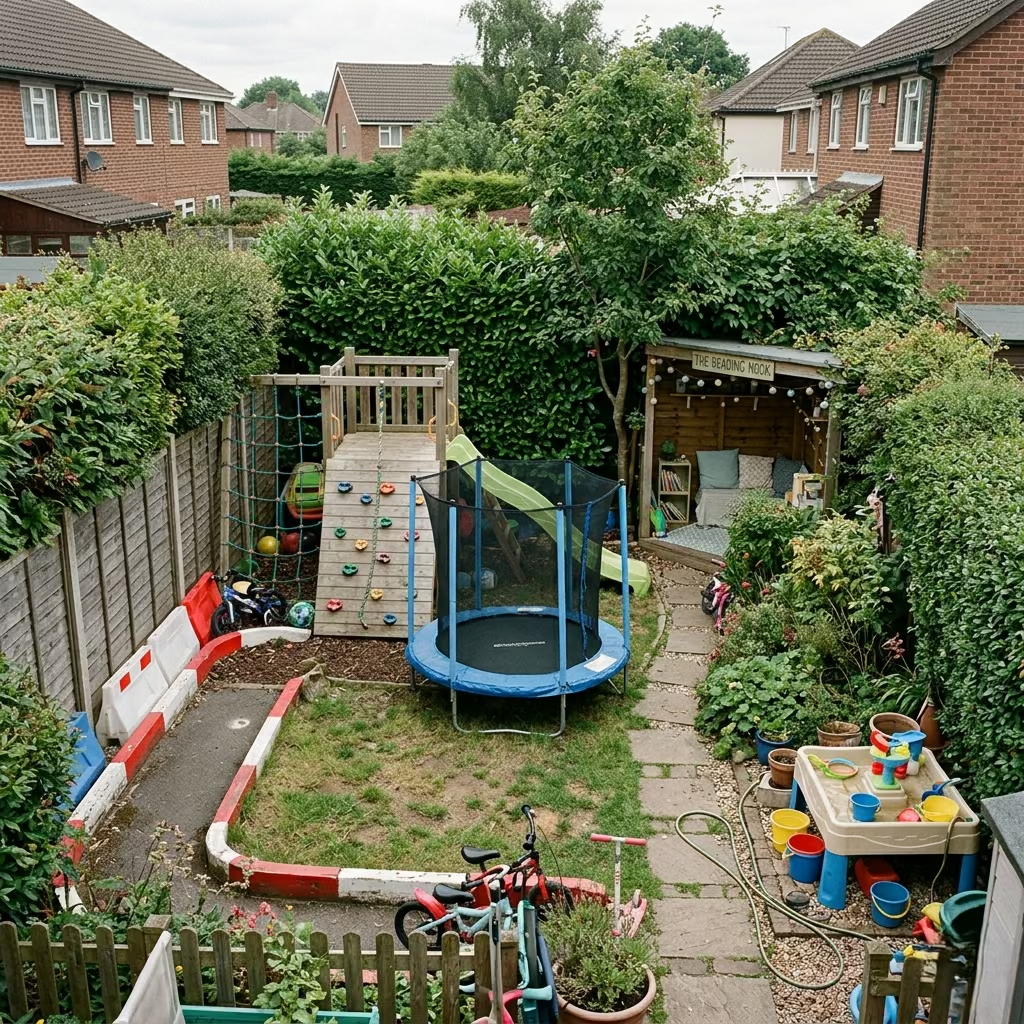
Fitting too many features into a small space can create visual and functional chaos. I’ve worked on gardens where homeowners wanted every popular play element in a single yard, resulting in cramped circulation, tripping hazards, and limited usable lawn space. Thoughtful zoning is essential for each play area to have clear paths of 90–120 cm (36–48 in) to allow safe movement and prevent the garden from feeling cluttered. Sometimes less truly is more, and leaving open areas enhances both play and aesthetic appeal.
Designing Spaces Children Quickly Outgrow
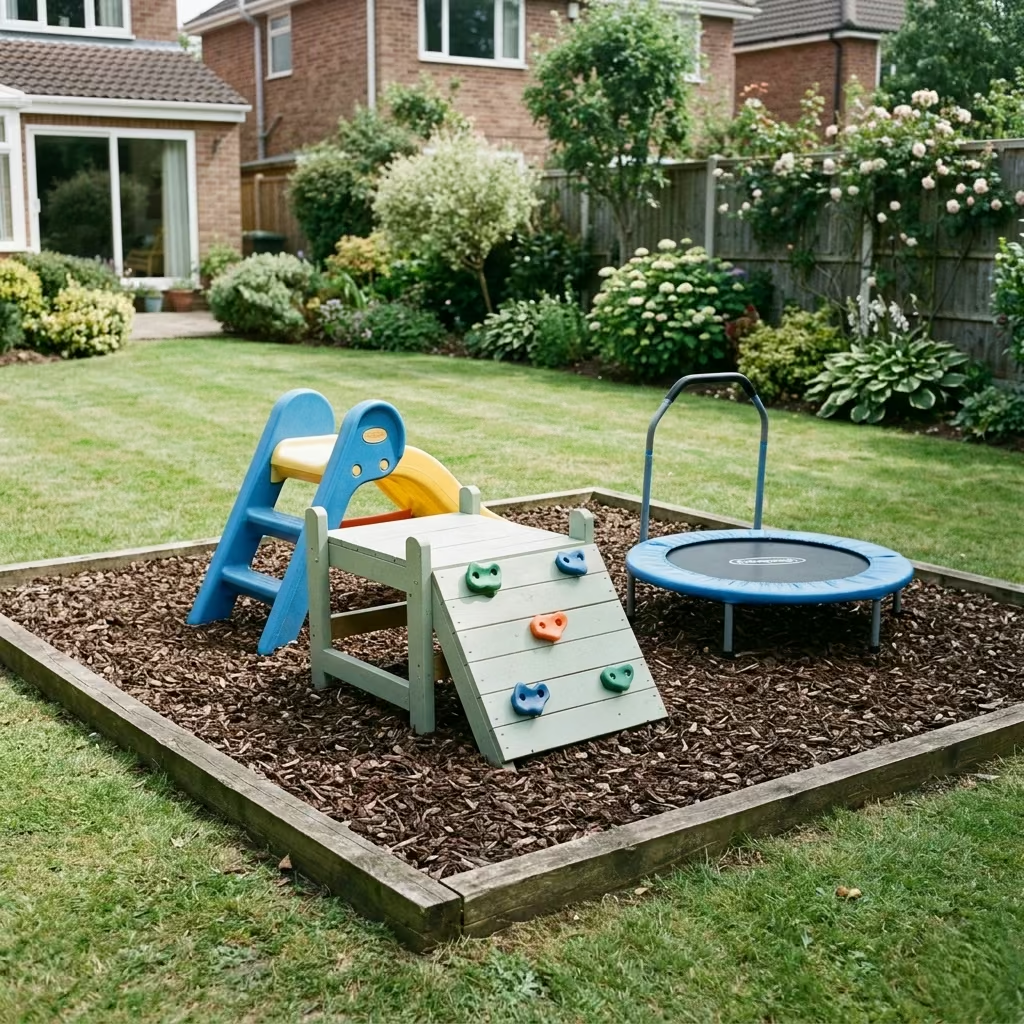
Another frequent mistake is designing zones too specifically for one age or skill level. For instance, a trampoline or climbing structure placed for toddlers may soon be too small, limiting longevity. I always plan for adaptable, multi-age features, such as modular climbing walls, adjustable swings, or zones that can evolve into imaginative or quiet play as children grow. This ensures the outdoor space remains relevant and engaging over time, protecting the family’s investment and minimizing redesign costs.
By avoiding these mistakes, children’s outdoor spaces can be safe, inspiring, and flexible, integrating seamlessly with the garden while supporting years of play, creativity, and development.
Designing Outdoor Spaces That Grow with Children
Good design treats a children’s garden as an evolving sequence rather than a single snapshot in time. Adaptable solutions extend longevity by allowing features to change function as children develop, which protects the family’s investment and keeps the garden useful for years. In my practice I prioritise flexibility, robust materials, and simple mechanisms that convert one use into another, so the landscape can move from toddler play to teenage hangout without wholesale reconstruction.
Modular play structures
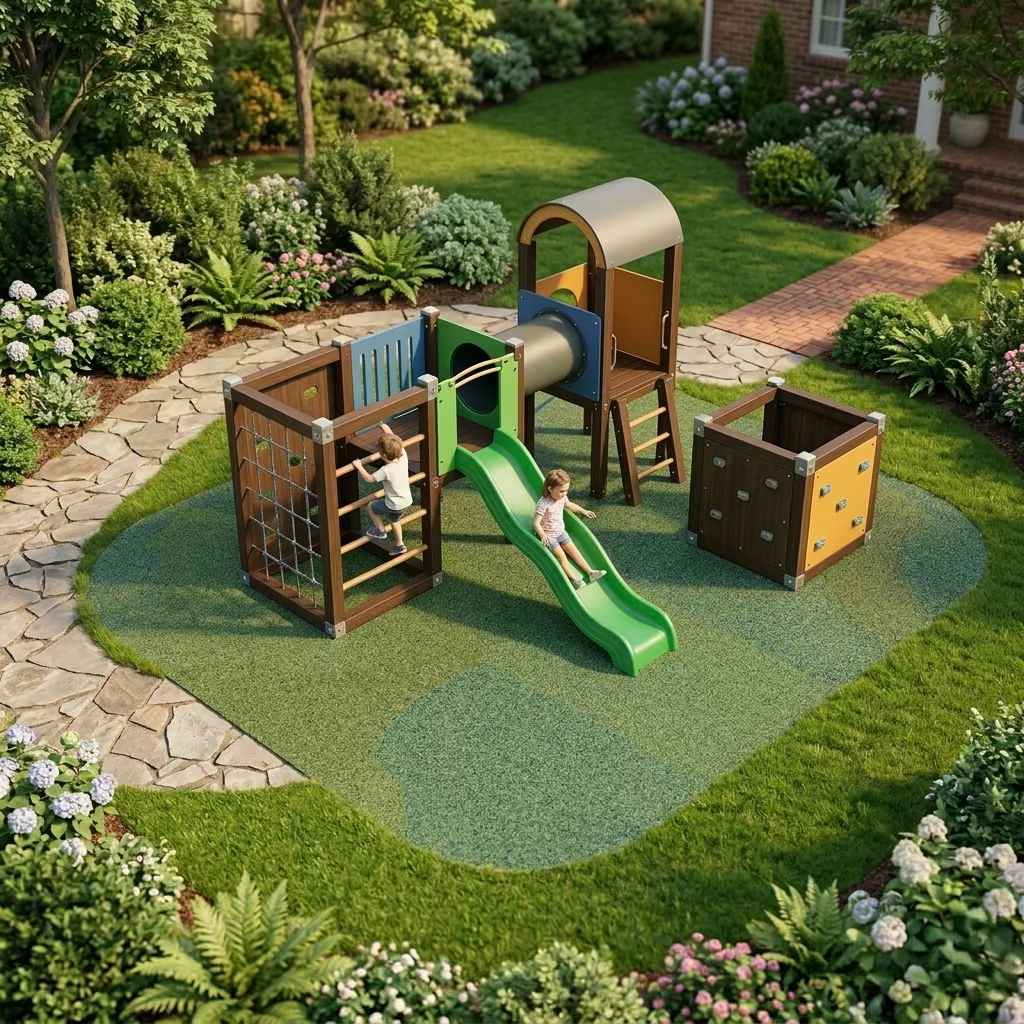
Modular systems are the single most effective way to futureproof active play. Rather than a fixed frame, use discrete modules that can be reconfigured, removed, or added to over time. Typical module footprints are 1.5 × 1.5 m (5 × 5 ft) for single elements such as a climb box or slide platform; an initial cluster of modules usually sits within 4 × 5 m (13 × 16 ft) and can expand as space allows. Key design points:
- Use bolted connections and replaceable fixings so elements can be swapped without demolition.
- Specify pressure-treated or naturally durable hardwoods, or powder-coated steel for load-bearing frames.
- Keep clearance and circulation of 2–2.5 m (6.5–8 ft) around moving components.
Pros: highly adaptable, staged investment, parts can be upgraded.
Cons: initial coordination needed to ensure later compatibility, modular systems require secure anchoring.
Contractor note: ask for modular play systems from specialist suppliers or a joiner who uses removable stainless steel fixings, and confirm that installation and fall-surface work are handled by a single contractor to avoid warranty issues.
Convertible sports areas
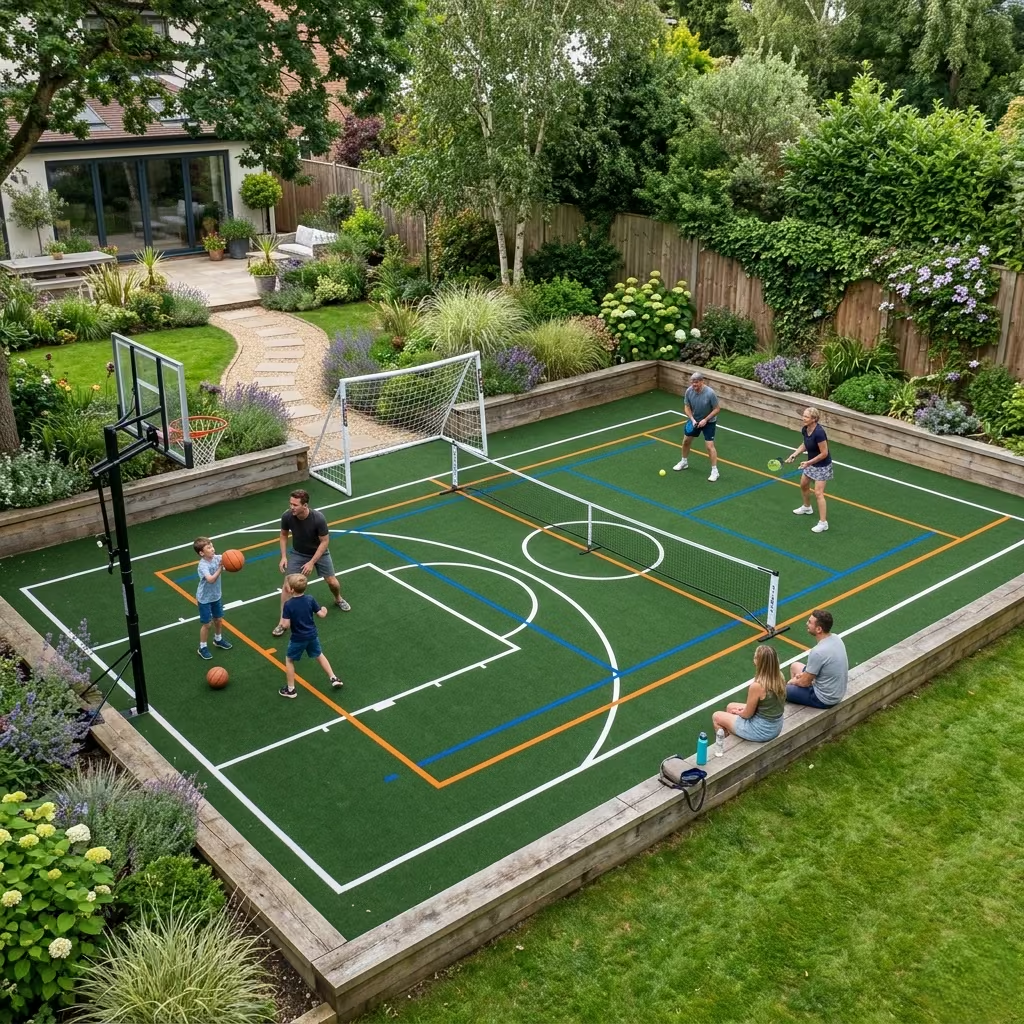
A sports surface that converts between uses maximises utility. Design a multi-sport pad sized at 6 × 9 m (20 × 30 ft) as the baseline for small gardens. Use a resilient, level surface such as sport-grade artificial turf, interlocking rubber tiles, or painted Portland cement with a flexible joint system. Features that increase longevity:
- Removable goals and portable hoops that can be stowed when not needed.
- Painted multi-line markings that accept different game layouts.
- Edge detailing that allows conversion to seating or stage use, for example a low timber curb that doubles as benching.
Pros: supports many activities, ages, and seasonal uses.
Cons: fixed surfacing cost and drainage considerations, potential noise in dense neighbourhoods.
Contractor note: coordinate surfacing, fall resilience, and drainage with a landscape contractor experienced in sports installations; request material samples and a cross-section showing sub-base, fall-layer, and surface.
Flexible open lawn spaces
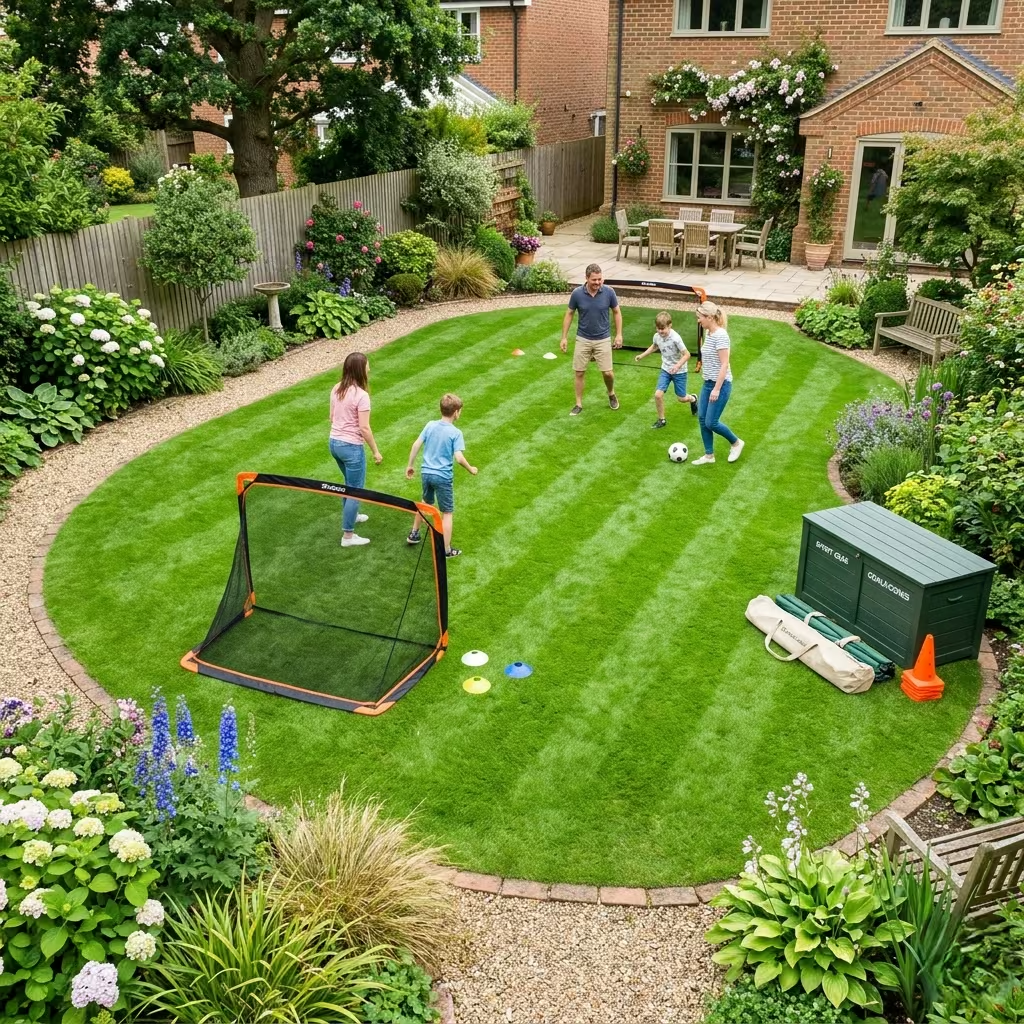
The simplest and most durable strategy is to retain an area of generous, well-constructed lawn that can host everything from ball games to pop-up play structures. For meaningful versatility, aim for at least 6 × 8 m (20 × 26 ft); larger sites of 8 × 10 m (26 × 33 ft) enable parallel activities and temporary installations. Technical essentials:
- Build a free-draining, consolidated soil profile with appropriate sub-base under high-use zones to avoid churned mud.
- Use a wear-resistant turf species or high-quality artificial turf in very high-use gardens.
- Design discreet storage close by for roll-up goals, cones, and modular elements.
Pros: lowest visual impact, easiest to adapt, lowest long-term cost if constructed correctly.
Cons: heavy use increases maintenance, turf recovery time required after intensive activity.
Contractor note: for lawn-heavy schemes, insist on a landscape contractor who specifies soil amelioration, topsoil depth, and irrigation to ensure recovery after wear.
Practical checklist for adaptable design
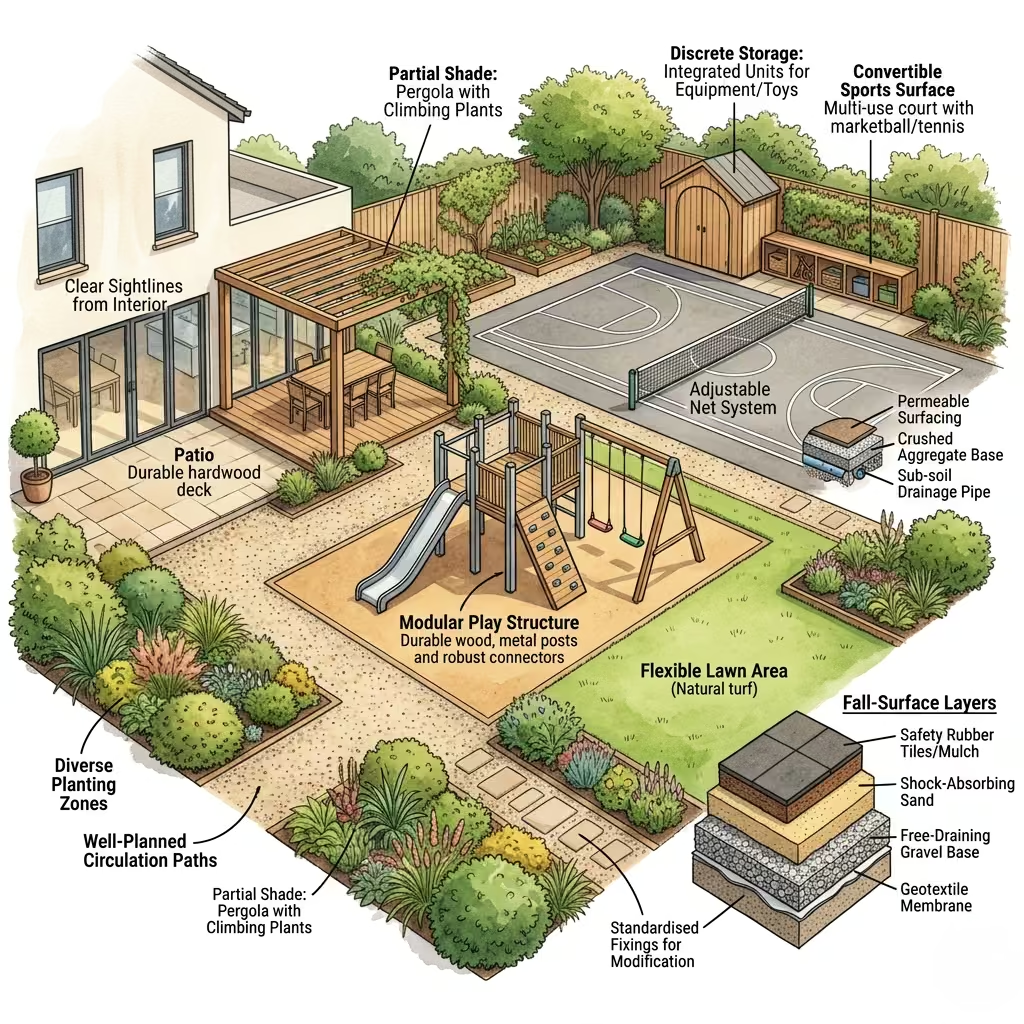
- Prioritise sightlines so that changing play modes remain visible from living areas.
- Choose durable, replaceable materials and standardised fixings.
- Insist on clear details for fall-surface construction and drainage up front.
- Design for storage so movable equipment is protected and easy to deploy.
- Stage the project: install core infrastructure (surfacing, drainage, sightline planting) first, then add play elements in phases.
Conclusion: Outdoor Spaces That Encourage Curiosity and Confidence
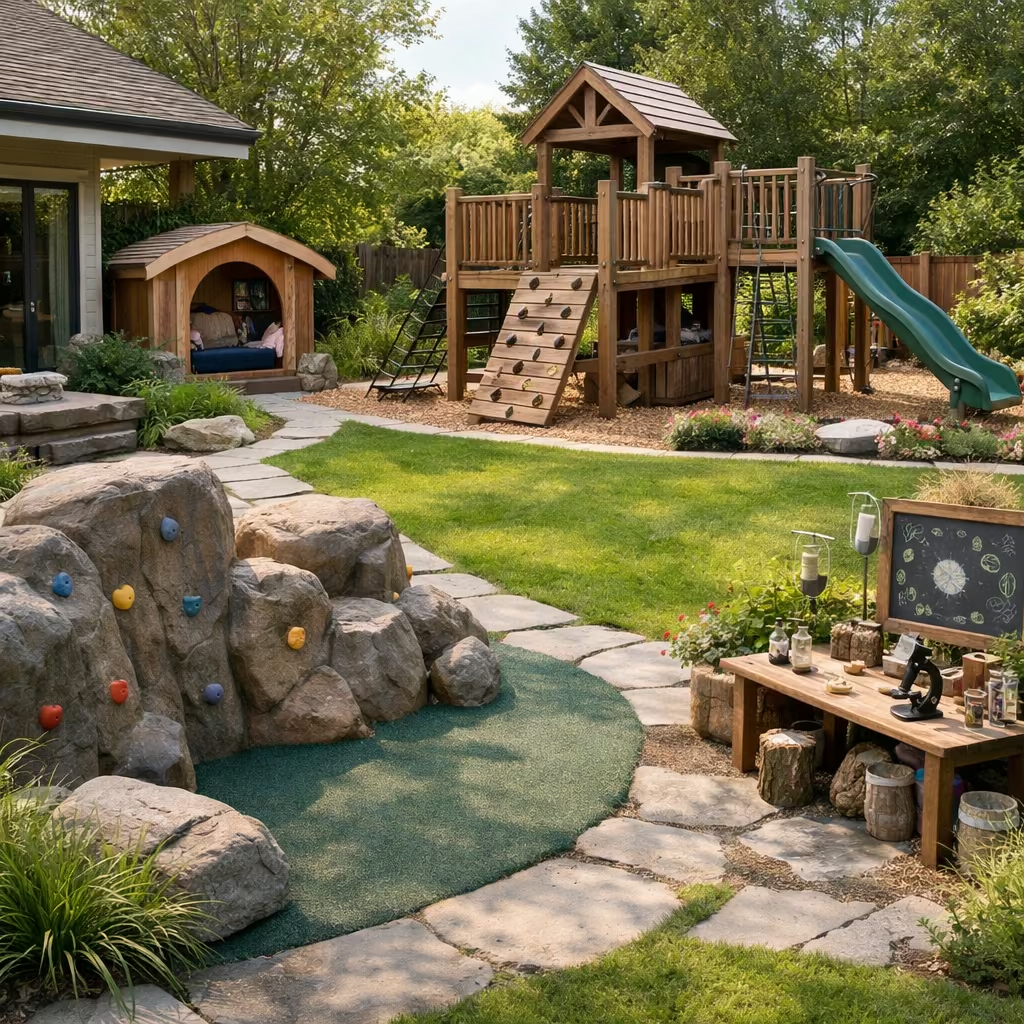
Well-designed outdoor play areas are more than a collection of equipment—they are environments that nurture imagination, curiosity, and confidence. From climbing boulders and modular play structures to reading nooks and science corners, each element should invite exploration while respecting the garden’s overall composition. In my experience, children thrive when spaces allow both adventure and autonomy yet remain visible from main living areas and integrated into circulation patterns.
A successful children’s garden balances physical activity, creative play, and sensory engagement, ensuring every zone is thoughtfully positioned, safely constructed, and visually harmonious. Open lawns, adaptable structures, and imaginative corners coexist when the layout considers age, movement, and growth, creating a dynamic environment that evolves with the child. Thoughtful selection of materials, impact-absorbing surfaces, and modular components not only protect children but also extends the usability of the garden over time, avoiding quick obsolescence.
Ultimately, the most inspiring outdoor spaces are those that support discovery without dominating the landscape. They allow children to engage fully with their environment, experiment, invent, and develop confidence, all within a garden that remains elegant, purposeful, and timeless. When adventure, safety, and thoughtful design converge, a children’s outdoor space becomes both a playground and a valued extension of the home.
Frequently Asked Questions: Outdoor Area Ideas for Kids
How much space do I need for a children’s outdoor play area?
The space required depends on the types of activities you plan. Small zones like a fairy garden or mud kitchen can fit within 2 × 2.5 m (6.5 × 8 ft), whereas adventure playgrounds, mini sports courts, or multi-zone gardens often need 6 × 9 m (20 × 30 ft) or more. Planning circulation paths of at least 90–120 cm (36–48 in) ensure safe movement between areas.
How can I ensure outdoor play areas are safe?
Safety begins with impact-absorbing surfaces under climbing or high-energy equipment, such as engineered wood fibre, rubber mulch, or artificial turf. Equipment should be age-appropriate, securely anchored, and visible from main living areas for supervision. Avoid sharp edges, hard surfaces, or enclosed structures with limited sightlines.
How can I make play areas adaptable as children grow?
Design with modular or multi-purpose features: climbing modules that can be reconfigured, convertible sports areas, and flexible lawn spaces. These allow zones to evolve from toddler-friendly activities to challenging spaces for older children, extending usability over time.
Can outdoor play areas blend with the garden design?
absolutely. Thoughtful zoning, natural materials, and planting integration can make play spaces feel like part of the garden rather than an intrusion. For example, placing a treehouse along garden edges or a fairy corner under shrubs preserves lawn space while maintaining aesthetic harmony.
How do I balance creative play with active play?
Include a variety of zones: high-energy areas like trampolines, climbing boulders, or minibike tracks for physical development, alongside quiet, imaginative spaces such as reading nooks, science corners, or art stations. This balance ensures children can explore different types of play without clutter or conflict.
What materials are best for outdoor kids’ areas?
Durable, weather-resistant materials are essential. Treated timber, powder-coated metal, HDPE panels, and reinforced fabrics withstand sun, rain, and wear. For soft surfaces, engineered wood fibre, rubber mulch, or artificial turf reduce injury risk while maintaining aesthetic appeal.
How do I manage maintenance in a children’s outdoor area?
Plan for easy cleaning, modular replacement, and seasonal adjustments. Surfaces should drain well, equipment inspected regularly, and delicate features in imagination or craft zones monitored. Choosing resilient materials and designing clear access paths simplifies upkeep while keeping the space safe and engaging.
Can outdoor play areas encourage social interaction?
Yes. Multi-zone layouts, shared climbing structures, and collaborative features like mud kitchens or music walls encourage cooperative play, teamwork, and imaginative storytelling, fostering both physical and social development.