25 Outdoor Dinner Party Ideas That Make Backyard Hosting Feel Special
Outdoor dining is often approached as a temporary arrangement, something assembled quickly for a single evening and then forgotten. In practice, the most memorable outdoor dinners are never accidental. They are composed with the same level of intent as an interior space, where proportion, light, and material choices work together to shape how people gather, move, and linger.
From my experience working across residential gardens, terraces, and compact urban balconies, the difference is immediately noticeable. A table placed without considering circulation feels awkward within minutes, while one aligned with natural movement patterns allows guests to settle effortlessly. I typically maintain at least 90–120 cm (36–48 inches) of clearance around the dining area, not as a rule to follow blindly, but because it consistently improves comfort, flow, and usability over the course of an evening.
Lighting plays an equally defining role. Outdoor spaces rarely benefit from layered lighting by default, which means every source must be deliberate. I tend to avoid overly bright, cool-toned fixtures and instead work with warm light temperatures around 2200K–2700K, combining subtle overhead glow with low-level accents. This creates depth, softens edges, and allows materials to read more naturally after sunset.
Materiality is where the atmosphere becomes tangible. Timber that retains warmth, stone that grounds the setting, linen that moves slightly with the breeze, all of these details contribute to how a space is experienced rather than just how it looks. When these elements are considered together, the result is not simply a styled table, but a setting that feels resolved, comfortable, and quietly elevated.
This article brings together a collection of outdoor dinner ideas drawn from real projects and lived use. Each one is grounded in practical spatial reasoning and material understanding, designed to help you create an outdoor setting that works effortlessly, not just visually, but experientially.
How I Approach Designing Outdoor Dinner Settings
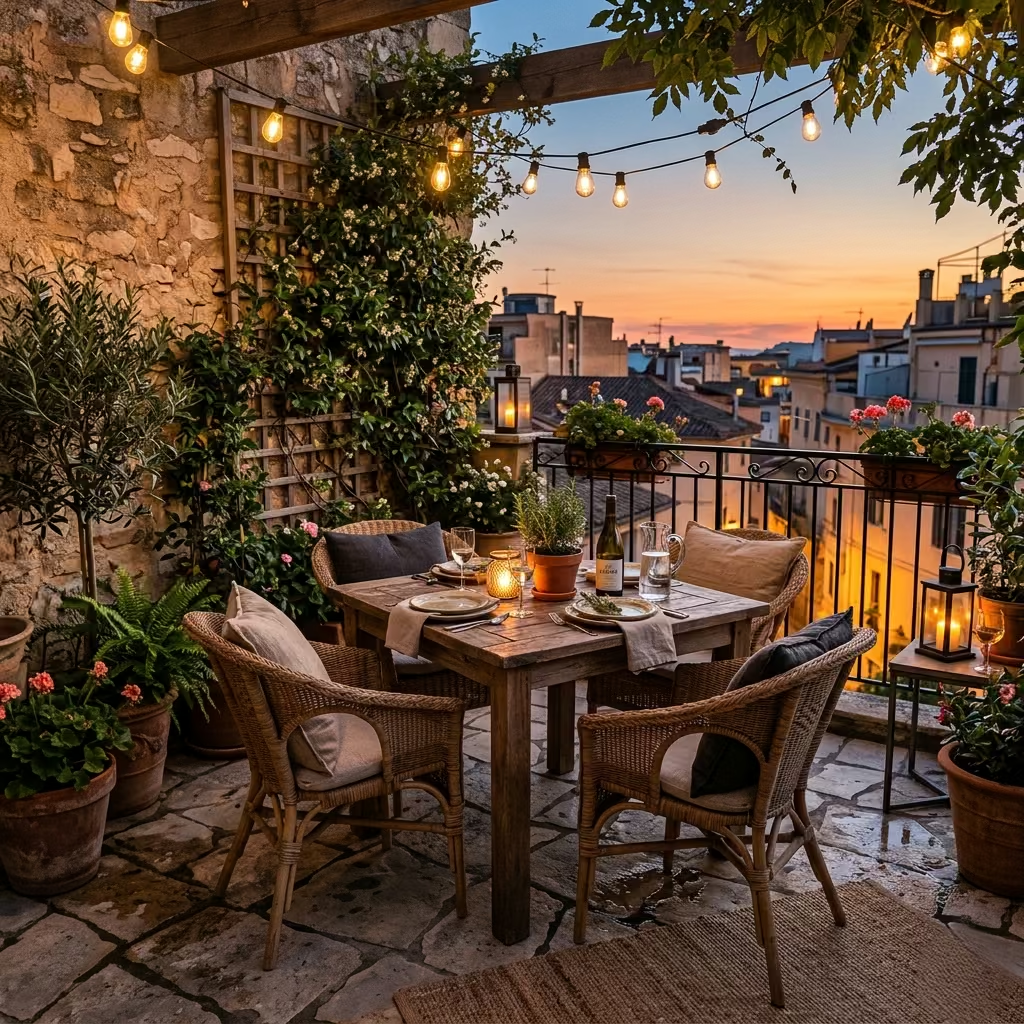
Before I even begin exploring styling or themes, I always anchor the design in spatial logic. It is tempting to jump straight into table décor or lighting choices, but in reality, the success of an outdoor dinner setting is decided much earlier, in how the space is planned, proportioned, and quietly resolved. Get this foundation right, and everything else falls into place almost effortlessly; overlook it, and even the most beautiful setup can feel slightly off, like something you cannot quite put your finger on.
What follows is the framework I use across real projects, from compact city terraces to larger garden layouts. It is not about rigid rules, but about understanding how people naturally move, sit, and experience a space over the course of an evening.
Circulation Space: Designing for Ease, Not Obstruction
If there is one principle I never compromise on, it is circulation. A well-designed outdoor dinner setting should feel intuitive to move through, not something guests have to navigate carefully.
In most projects, I maintain a minimum clearance of 90–120 cm (36–48 inches) around the dining table. This allows chairs to be pulled out comfortably while still leaving enough space for someone to pass behind without disrupting the entire table. In tighter spaces, I may reduce this slightly on one side, but I always protect the main access route, typically from the house to the table.
I have seen beautifully styled setups fall short simply because movement feels restricted. Guests hesitate, chairs scrape, and the flow of the evening becomes subtly interrupted. When circulation is resolved properly, on the other hand, everything feels second nature. People move, gather, and settle without thinking twice, which is exactly how it should be.
Practical insight:
For rectangular tables, I often align the long edge parallel to the primary movement path. It is a small adjustment, but it can make the difference between a space that feels cramped and one that breathes.
Table Proportions vs. Outdoor Footprint
A common mistake is choosing a table based purely on guest count, without considering the scale of the outdoor space. In reality, the table should feel anchored within the setting, not oversized or visually dominant.
As a guideline, I ensure there is always a minimum of 120 cm (48 inches) between the table edge and any fixed boundary such as a wall, planter, or railing. This creates a comfortable buffer zone and prevents the layout from feeling compressed.
For seating, I typically allow:
- 60 cm (24 inches) per person for casual dining
- 70–75 cm (27–30 inches) for a more relaxed, generous setting
From experience, slightly underfilling a table often creates a more refined atmosphere than trying to maximise every seat. It gives guests room to breathe, allows for better table styling, and avoids that “packed-in” feeling that can make even a large garden feel smaller than it is.
Design perspective:
Think of the table as part of the architecture of the space, not just furniture. Its scale, position, and relationship to surroundings should feel considered, almost inevitable.
Layering Light: Creating Atmosphere That Evolves After Sunset
Lighting is where outdoor dining either comes to life or falls flat. Unlike interiors, where layered lighting is often built in, outdoor spaces require a more deliberate approach.
I always work with three layers:
- Ambient lighting: The overall glow that defines the space
- Task lighting: Focused light for dining surfaces
- Decorative lighting: Accent elements that add depth and character
The key is restraint. I avoid anything too bright or harsh and instead focus on warm light temperatures between 2200K and 2700K, which create a softer, more inviting atmosphere. A combination of overhead string lighting, low-level lanterns, and subtle landscape lighting often works best.
There is a fine line here. Too little light, and the space feels impractical; too much, and you lose the intimacy that makes outdoor dining special. When balanced correctly, lighting should feel almost invisible in its intention, quietly shaping the mood without drawing attention to itself.
Real-life observation:
Some of the most memorable outdoor dinners I have designed were not the most elaborate, but the ones where lighting softened the entire setting, allowing conversations to stretch late into the evening without anyone noticing the time passing.
Material Durability vs. Tactile Comfort
Outdoor materials need to withstand the elements, but durability alone is not enough. A space that feels hard, cold, or overly utilitarian will never invite people to linger.
I tend to balance robust materials with softer, more tactile elements:
- Stone or concrete for structure and grounding
- Timber to introduce warmth and visual softness
- Linen or natural fabrics to add movement and comfort
For seating, I always consider how materials feel over time. Metal chairs may look refined, but without cushions, they can become uncomfortable quickly. Similarly, highly polished surfaces may look striking during the day but can feel stark under evening lighting.
Practical approach:
I often layer a timber table (200–300 cm / 6.5–10 ft) with linen runners and textured ceramics. This combination holds up outdoors while still feeling considered and inviting, striking that balance between resilience and comfort.
Acoustic Considerations in Open Environments
This is one of the most overlooked aspects of outdoor dining, yet it has a profound impact on how a space feels. Open environments can either amplify noise or dissipate it too quickly, leaving conversations feeling exposed.
To create a more comfortable acoustic environment, I use:
- Planting layers to soften sound reflection
- Textiles, such as outdoor rugs or cushions, to absorb noise
- Boundary elements, like walls, fences, or pergolas, to create a sense of enclosure
Even in larger gardens, defining a subtle “room” around the dining area makes a noticeable difference. Without it, sound tends to drift, and the setting can feel less intimate, even if visually it appears well designed.
Design insight:
A good outdoor dining space should feel like a conversation naturally gathers and stays within it, not something that disperses into the surroundings.
Bringing It All Together
When these elements are considered collectively, circulation, proportion, lighting, materiality, and acoustics, the result is a space that feels effortless but is anything but accidental. It is the difference between a setup that looks good for a moment and one that continues to work as the evening unfolds.
In many ways, designing an outdoor dinner setting is about reading between the lines. It is not just what you see, but how the space supports movement, comfort, and atmosphere over time. Get the fundamentals right, and everything else, from styling to hosting, begins to feel like second nature.
25 Outdoor Dinner Party Ideas
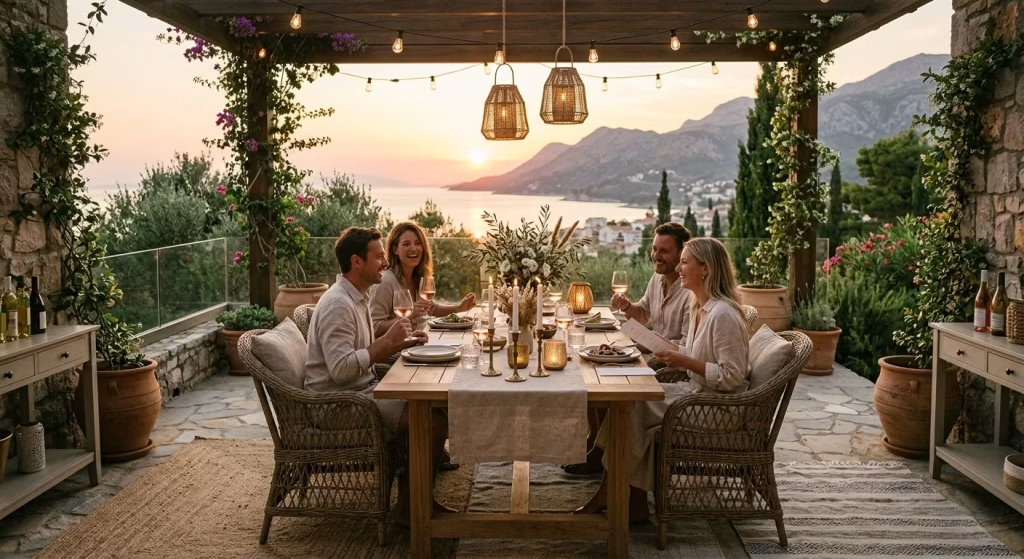
Once the groundwork is properly resolved, the ideas themselves begin to carry real weight. These are not surface-level styling moments, but considered approaches drawn from how people actually use their outdoor spaces, season after season. Each idea is designed to help you shape an atmosphere that feels natural, lived-in, and quietly elevated, the kind of setting where conversations linger and the evening unfolds at its own unhurried pace.
Long Communal Table Under Soft String Lighting
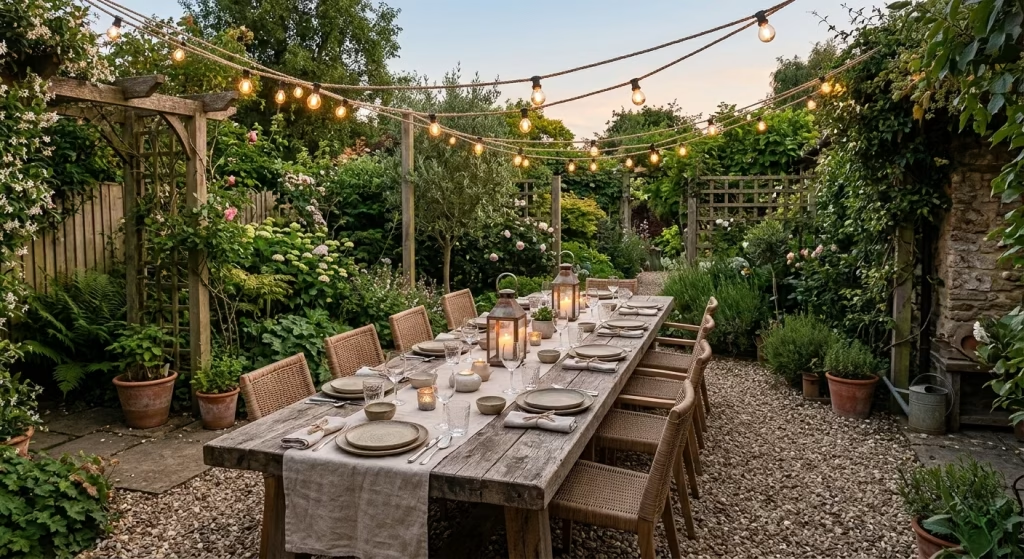
There is a quiet confidence in a long communal table. It draws people in, almost instinctively, creating a setting where conversations overlap, glasses are passed along, and the evening gathers its own rhythm. Unlike fragmented seating arrangements, this linear layout brings everyone into one continuous moment, where no one feels on the edge of the experience. It is, in many ways, the backbone of relaxed outdoor entertaining, simple in form but rich in atmosphere.
Real Insight: Why this works particularly well in narrow gardens
I often return to this layout when working with long, narrow outdoor spaces where width is limited but depth is generous. Instead of fighting the proportions, I lean into them. In one project, a garden measuring just under 4 m (13 ft) wide and 12 m (39 ft) long initially felt restrictive. By positioning a 3 m (10 ft) table along the central axis, the space began to read as intentional rather than constrained.
What makes this approach effective is how it aligns with natural movement. Guests enter, move alongside the table, and take their seats without crossing awkward paths. It feels effortless, almost as if the space was always meant to function this way, which, in design terms, is often the ultimate goal.
Measurements: Getting proportions right from the outset
Proportion is where this idea either succeeds quietly or falls apart completely. A communal table should feel generous, but never overwhelming.
- Table length: Typically 240–360 cm (8–12 ft), depending on guest count
- Table width: Around 90–100 cm (35–39 inches) for comfortable place settings
- Seating allowance: Minimum 60 cm (24 inches) per person
- Clearance: At least 100 cm (40 inches) on both sides for circulation
If space allows, I often stretch the clearance slightly beyond the minimum. That extra breathing room makes a noticeable difference once chairs are pulled out and the evening is in full swing. It is one of those details that quietly earns its keep.
Materials: Creating warmth through layered textures
Material selection carries the atmosphere here. A long table, by its nature, becomes the visual anchor, so it needs to feel grounded and inviting.
- Solid timber (oak, teak, or acacia): Brings warmth and subtle texture
- Linen runners or tablecloths: Softens the surface and introduces movement
- Warm LED string lights (2200K–2700K): Suspended overhead to create a gentle canopy
I tend to avoid overly polished finishes. Slightly weathered timber, natural fibres, and matte ceramics work far better, catching light softly and aging gracefully over time. It is the difference between a setting that looks staged and one that feels lived in, in the best possible way.
Lighting Approach: The element that ties everything together
String lighting, when handled with restraint, can transform the entire setting. I usually hang lights at a height of 2.4–2.7 m (8–9 ft), ensuring they sit low enough to create intimacy but high enough to avoid visual clutter.
Rather than stretching lights too tightly, I allow a slight drape. This softens the line and creates a more relaxed, organic feel, almost like the space is exhaling rather than holding tension.
A subtle addition of low-level candles or lanterns along the table, spaced every 50–70 cm (20–28 inches), helps to layer the light. The result is a setting that glows rather than shines, where faces are softly lit and the edges of the space gently fall away.
Pros
- Naturally social, encourages shared conversation and connection
- Visually cohesive, creates a strong focal point
- Works particularly well in long or narrow outdoor spaces
- Easy to scale depending on guest numbers
Cons
- Needs sufficient linear space to avoid feeling cramped
- Can feel overly formal if materials are too rigid or polished
- Lighting must be carefully positioned to avoid harsh shadows
Final Design Perspective
When done well, a long communal table does more than organise seating, it sets the tone for the entire evening. It invites people to settle in, to stay a little longer, to lean into conversations that stretch past what was planned. It is, in many ways, a case of letting the layout do the heavy lifting.
And that is often the thread that runs through the most successful outdoor dinners. They do not try too hard. They simply create the right conditions, then step back and allow the experience to unfold naturally.
Courtyard Dining with Enclosed Warmth
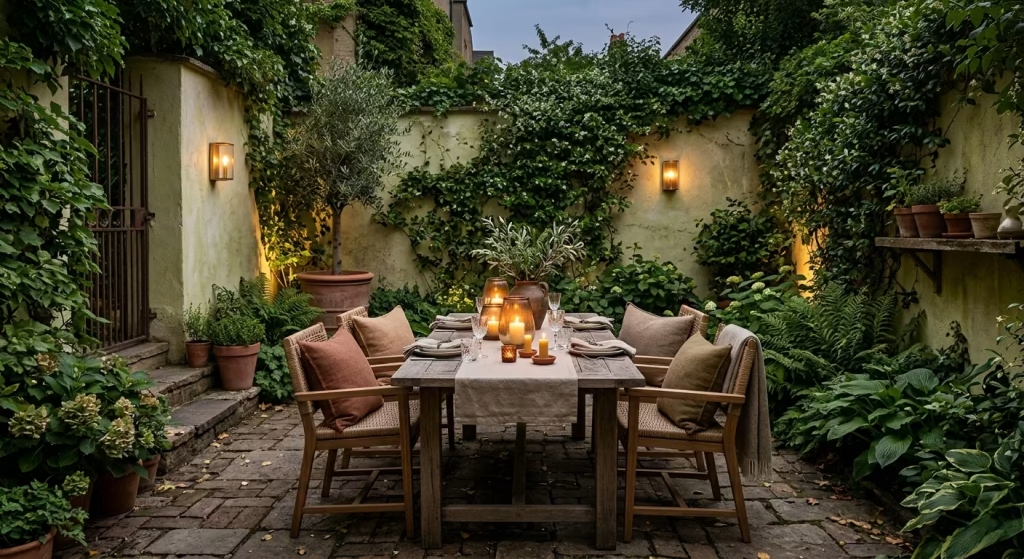
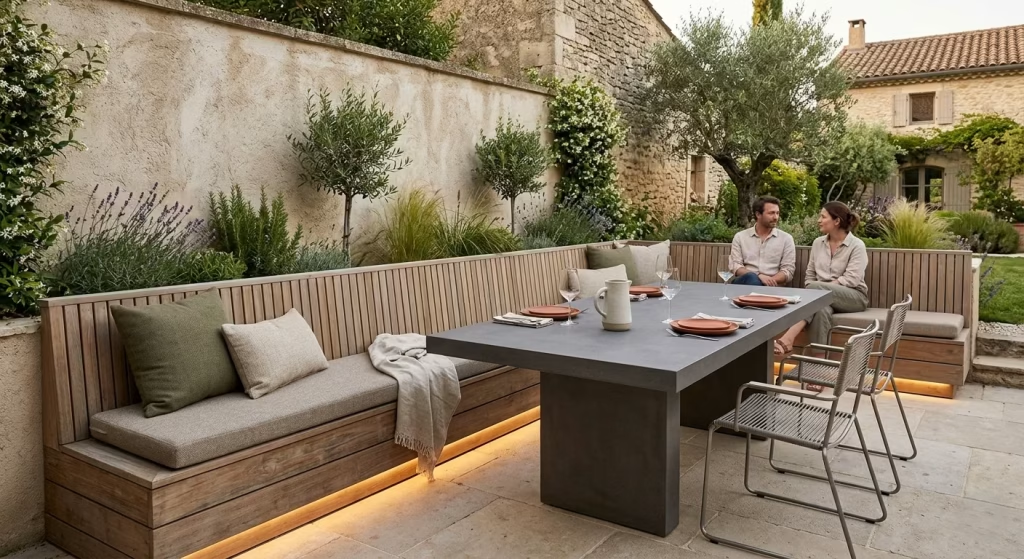
A courtyard, when properly resolved, feels less like an outdoor area and more like a room without a ceiling. It holds warmth, contains sound, and creates a sense of retreat that is hard to replicate in open garden settings. This idea leans into enclosure, using vertical surfaces not as limitations but as assets, shaping a dining experience that feels grounded, calm, and quietly immersive.
Unlike expansive layouts that rely on views, courtyard dining works by turning inward. It draws focus to the table, the light, and the immediate surroundings, creating an atmosphere where distractions fall away and conversation naturally takes centre stage.
Real Insight: Why enclosed spaces often feel more comfortable
In my experience, courtyards consistently outperform larger open spaces when it comes to evening dining. There is a psychological comfort in subtle enclosure, people tend to settle more quickly, speak more freely, and linger longer.
In one project, a compact courtyard measuring 3.5 m x 4.5 m (11.5 ft x 15 ft) initially felt underwhelming. By introducing textured plaster walls, climbing greenery, and carefully placed wall lighting, the space shifted entirely. What once felt like a leftover area became the most used part of the home, especially in the evenings.
It is a classic case of “small but mighty.” When every surface works a little harder, the result often feels richer and more intentional.
Measurements: Balancing intimacy without restriction
Courtyard dining thrives on proportion. The goal is to feel enclosed, not confined.
- Table size:
- Round: 120–150 cm (4–5 ft diameter) for 4–6 people
- Rectangular: 180–220 cm (6–7 ft) for tighter layouts
- Clearance to walls: Minimum 90 cm (36 inches)
- Ideal wall height: 2–3 m (6.5–10 ft) to maintain enclosure without overshadowing
Round tables often work best in courtyards. They soften the geometry, improve circulation, and prevent the layout from feeling too rigid. There is also a subtle social advantage, everyone remains equally connected, which suits the intimate nature of the space.
Materials: Building warmth through texture and age
Materiality is where courtyard dining either feels inviting or falls flat. Hard surfaces dominate by default, so the balance lies in introducing texture and softness.
- Plaster or lime-rendered walls: Reflect light softly and age beautifully
- Climbing greenery (jasmine, ivy, or vines): Adds vertical movement and seasonal change
- Stone or brick flooring: Grounds the space with a sense of permanence
- Timber or woven seating: Introduces warmth against harder surfaces
I tend to favour finishes that are slightly imperfect, surfaces that catch light unevenly, materials that develop character over time. It is these subtle variations that give the space depth, almost like it has been evolving quietly in the background.
Lighting Strategy: Layered, low, and intentionally restrained
lighting in a courtyard is less about brightness and more about atmosphere. Because the space is enclosed, even small light sources can have a significant impact.
- Wall-mounted sconces at 1.6–1.8 m (5.2–6 ft): Create a soft perimeter glow
- Accent lighting on planting: Highlights vertical greenery without overpowering
- Table-level candles or lanterns: Add warmth and movement
I avoid overhead lighting in most courtyard settings. It tends to flatten the space and diminish the intimacy. Instead, I build light from the edges inward, allowing shadows to remain where they should. It is this contrast, light against texture, that creates a sense of depth and quiet drama.
Acoustic Advantage: Why courtyards naturally feel more intimate
One of the understated benefits of courtyard dining is acoustics. Walls gently reflect sound, allowing conversations to stay within the space rather than dissipating into the open air.
To enhance this, I often introduce:
- Soft furnishings: Cushions or upholstered seating
- Textured surfaces: Which diffuse rather than echo sound
- Greenery: Acting as a natural sound buffer
The result is a setting where voices feel present but never overwhelming, where the atmosphere hums rather than echoes.
Pros
- Naturally intimate and comfortable
- Works well even in compact spaces
- Strong sense of enclosure enhances atmosphere
- Materials age gracefully, improving over time
Cons
- Can feel confined if proportions are too tight
- Requires thoughtful lighting to avoid a flat appearance
- Limited flexibility compared to open layouts
Final Design Perspective
Courtyard dining is a reminder that you do not need expansive space to create something memorable. In fact, when handled well, smaller, enclosed settings often carry more character, more warmth, and more staying power.
It is a bit like a well-kept secret, tucked away, quietly refined, and all the more special because of it. Once experienced, it tends to become the place everyone gravitates towards, almost without thinking, which, in design terms, is about as good as it gets.
Poolside Evening Dining with Reflective Light
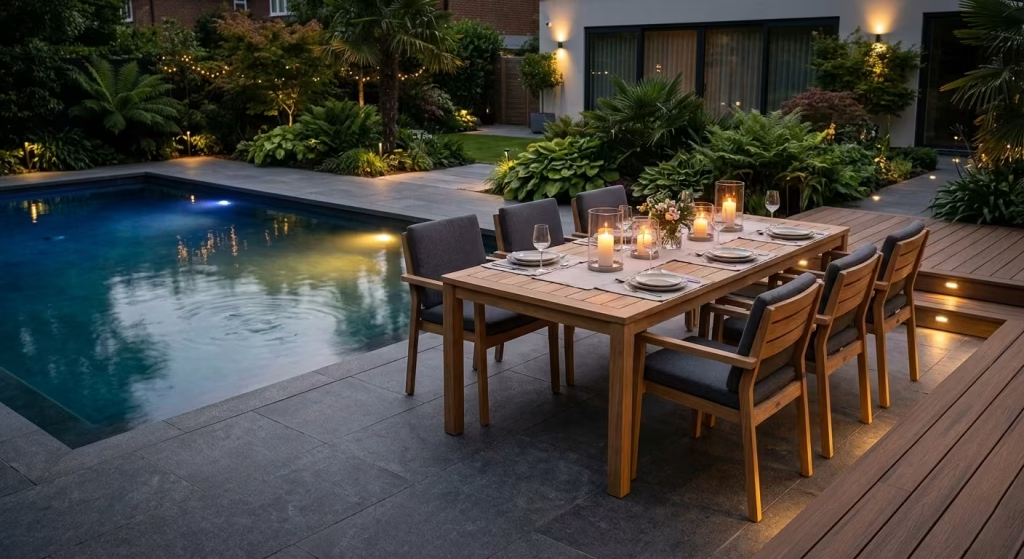
A pool, when thoughtfully integrated into a dining setting, becomes far more than a backdrop. It acts as a reflective surface that amplifies light, softens edges, and introduces a gentle sense of movement that no static material can replicate. The result is a setting that feels layered and atmospheric, almost cinematic, where light dances subtly across surfaces and the entire space takes on a quiet, luminous quality.
Rather than competing with the pool, the goal is to let it do the heavy lifting. When positioned correctly, the dining area benefits from this natural reflection, creating depth and ambience without the need for excessive lighting.
Real Insight: Why positioning is everything in poolside layouts
In practice, the success of poolside dining often comes down to alignment. I typically position the dining table parallel to the pool edge, maintaining a respectful distance that allows for both visual connection and safe movement.
In one project, the table was initially placed perpendicular to the pool, which disrupted both flow and sightlines. By simply rotating the layout and setting the table along the length of the water, with 120–150 cm (48–60 inches) of clearance, the entire space began to feel more composed. Guests could move freely, and the reflective quality of the water became a central feature rather than an afterthought.
It is one of those adjustments that seems small on paper but transforms how the space is experienced, almost overnight.
Measurements: Balancing proximity with safety and comfort
Poolside dining demands a careful balance. Too close, and the space feels risky; too far, and you lose the visual and atmospheric benefits.
- Distance from pool edge: Minimum 120 cm (48 inches) for safe circulation
- Table size: Typically 200–300 cm (6.5–10 ft) depending on space
- Clearance behind chairs: At least 100 cm (40 inches)
- Pathway zones: Ideally 120–150 cm (48–60 inches) for main access routes
I always prioritise a clear, uninterrupted path between the house, the dining area, and the pool. When movement feels natural and unobstructed, the space reads as intentional rather than precarious.
Materials: Where durability meets safety underfoot
Material selection around a pool is not just about aesthetics, it is about performance under real conditions. Surfaces will inevitably get wet, so slip resistance becomes non-negotiable.
- Non-slip stone (textured limestone, travertine): Durable and visually grounded
- Porcelain outdoor tiles (R11 rating or higher): Reliable grip and low maintenance
- Composite or treated timber decking: Warmer underfoot, but requires maintenance
For the dining table and seating, I tend to use:
- Teak or weather-resistant hardwoods for longevity
- Powder-coated metal frames for structural durability
- Outdoor fabrics that can handle humidity and occasional splashes
It is a balancing act, materials need to stand up to the elements while still feeling refined enough for a dining setting. When done right, they age gracefully rather than deteriorate.
Lighting Strategy: Letting reflection do the work
Lighting around a pool should feel understated. The water itself will amplify whatever light is introduced, so subtlety becomes your greatest asset.
- Low-level pool lighting: Creates a soft internal glow
- Perimeter lighting (spike lights or recessed fixtures): Defines edges without glare
- Table lighting (candles or lanterns): Adds warmth at eye level
I avoid overly bright overhead lighting in these settings. It tends to flatten the reflections and diminish the atmosphere. Instead, I layer light gently, allowing the pool to mirror and diffuse it.
There is a certain magic in watching light ripple across water as the evening progresses. It is not something you can manufacture, only enhance.
Safety Considerations: Designing with awareness, not compromise
Safety is often where poolside dining either succeeds quietly or fails noticeably. The key is to integrate it seamlessly into the design rather than treating it as an afterthought.
- Ensure non-slip surfaces throughout circulation zones
- Avoid placing chairs too close to the pool edge
- Use subtle boundary cues such as changes in material or level
- Keep pathways well-lit but not glaring
In my experience, the safest spaces are the ones where people do not have to think about safety at all. Movement feels natural, edges are clearly defined, and the layout supports rather than challenges the user.
Pros
- Naturally atmospheric due to reflective light
- Visually striking without excessive styling
- Works particularly well for evening gatherings
- Enhances the sense of space and depth
Cons
- Requires strict attention to safety and material choice
- Can feel exposed without proper zoning or planting
- Lighting must be restrained to avoid overpowering reflections
Final Design Perspective
Poolside dining, when handled with care, feels like stepping into a different rhythm. The reflections soften everything, the movement of water adds a subtle energy, and the entire setting takes on a sense of calm that is hard to replicate elsewhere.
It is not about doing more, but about knowing when to hold back. Let the water reflect, let the light settle, and allow the space to speak for itself. When all the elements align, the result feels less like a setup and more like an experience that unfolds naturally, almost as if it was always meant to be there.
You May also Like: 25 Outdoor Area Ideas for Kids That Encourage Adventure, Creativity, and Outdoor Play
Garden Dining Framed by Planting Layers
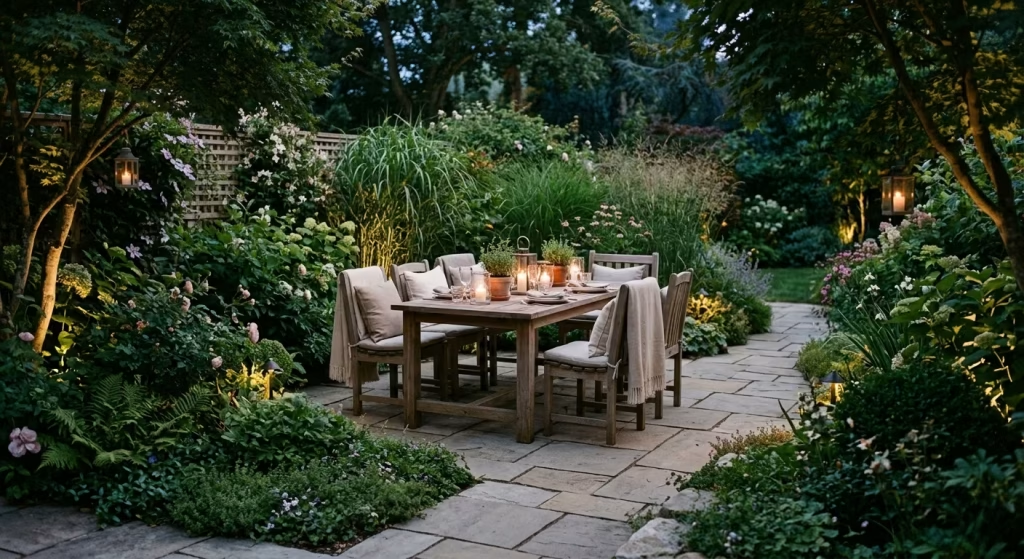
Planting, when approached deliberately, does far more than decorate a space, it defines it. I often treat planting as a form of soft architecture, shaping boundaries, guiding movement, and creating a sense of enclosure without the rigidity of built structures. The effect is subtle but powerful. Instead of walls, you have layers. Instead of hard edges, you have transitions that feel natural and gently resolved.
This approach works particularly well for outdoor dining because it creates a setting that feels nestled rather than exposed. Guests are held within the space, almost instinctively, while still maintaining a connection to the wider garden. It is a fine balance, like walking a tightrope between openness and intimacy, but when achieved, it feels effortless.
Real Insight: Why layered planting transforms how a space feels
In many gardens, the dining area is simply placed within an open lawn or patio, leaving it visually disconnected. I have found that introducing planting layers around the table changes everything. It gives the space a sense of purpose, almost like it has been carved out rather than dropped in.
In one project, a flat garden with minimal structure felt directionless. By introducing a planting scheme with staggered heights, low ground cover, mid-height shrubs, and taller grasses and trees, we effectively “framed” the dining area. The transformation was immediate. What once felt like an exposed setup became a sheltered, inviting zone that naturally drew people in.
It is a classic case of letting the garden do the talking, quietly shaping the experience without overwhelming it.
Layering Strategy: Building depth through height variation
The key to this approach lies in layering planting at different heights, creating depth and visual rhythm.
- Low layer: Around 30 cm (12 inches)
- Ground cover, herbs, or low perennials
- Softens edges at floor level
- Mid layer:60–90 cm (24–35 inches)
- Shrubs, ornamental plants
- Defines the boundary without blocking views
- Tall layer:150 cm+ (5 ft+)
- Grasses, small trees, or vertical planting
- Provides enclosure and a sense of privacy
This tiered approach allows the space to feel enclosed without becoming heavy or restrictive. It is about creating a gentle gradient rather than a hard stop, where the eye moves naturally from one layer to the next.
Measurements: Positioning the dining area within planting
Getting the spacing right is crucial. Planting should frame the dining area, not compete with it.
- Table size: Typically 240 cm (8 ft) for balanced proportions
- Clearance around table: Minimum 100–120 cm (40–48 inches)
- Distance from planting to table edge: Ideally 60–90 cm (24–35 inches)
This buffer zone ensures that plants enhance the setting without interfering with movement or seating. It also prevents the space from feeling overgrown or crowded, which can quickly undermine the intended effect.
Materials & Plant Selection: Balancing structure and softness
The success of this idea depends heavily on choosing plants that work with the overall design language.
- Ornamental grasses: Add movement and lightness
- Evergreen shrubs: Provide structure year-round
- Seasonal perennials: Introduce variation and colour
- Climbers or espalier trees: Add vertical interest without bulk
I tend to favour a restrained palette. Too many species can feel chaotic, whereas a more curated selection allows texture and form to take centre stage. It is about creating harmony, not a botanical showcase.
For the dining elements:
- Timber tables pair beautifully with greenery
- Natural stone paving grounds the space
- Neutral textiles keep the focus on the surroundings
Lighting Integration: Letting planting shape the glow
Lighting in planted settings should feel almost incidental, as if it has emerged naturally from within the garden.
- Low-level spike lights within planting: Highlight textures and create depth
- Soft uplighting on taller elements: Adds vertical emphasis
- Subtle table lighting: Keeps the dining area gently illuminated
I avoid over-lighting. When planting is involved, shadows become just as important as light. They add contrast, depth, and a sense of quiet drama that evolves as the evening progresses.
Pros
- Creates a sense of enclosure without hard boundaries
- Enhances atmosphere through texture and movement
- Adapts seasonally, keeping the space dynamic
- Softens the overall appearance of outdoor dining areas
Cons
- Requires ongoing maintenance and seasonal care
- Can feel overgrown if not properly managed
- Initial planning and plant selection need thoughtful consideration
Final Design Perspective
Garden dining framed by planting layers is less about decoration and more about composition. It is about allowing the space to feel as though it has evolved naturally, even if every element has been carefully considered.
There is a quiet satisfaction in sitting within a space that feels alive, where leaves move gently in the background, light filters through layers, and the boundaries are felt rather than seen. It is, in many ways, the difference between placing a table outdoors and truly designing an experience around it.
And when it all comes together, it feels less like an arrangement and more like a setting that has found its place, as if it has always belonged there.
Minimalist Stone Table Setting
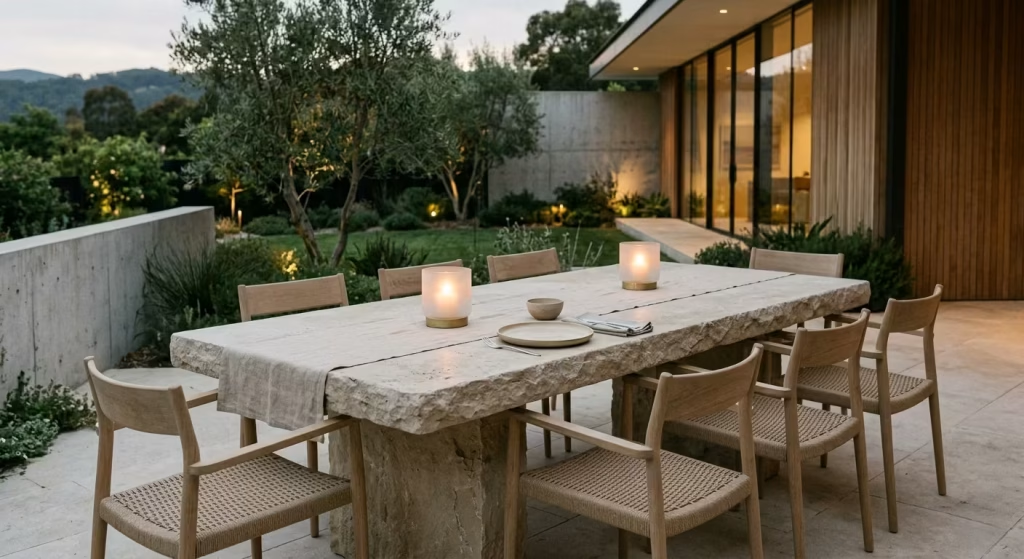
There is a certain confidence in doing less, provided what remains is carefully chosen. A minimalist stone table setting is not about stripping things back for the sake of it, but about allowing material, proportion, and light to take centre stage. It leans into clarity rather than decoration, where every element earns its place and nothing feels like an afterthought.
In modern homes especially, where architectural lines are already clean and intentional, this approach feels right at home. It does not try to compete with the surroundings, it complements them, almost like a natural extension of the built form.
Real Insight: Why restraint often creates a stronger atmosphere
I have worked on several contemporary outdoor spaces where the instinct was to “add more” to create impact. In most cases, the turning point came when we began removing rather than adding. Excess styling, layered décor, competing textures, all stripped back until the table itself became the focal point.
In one project, a 260 cm (8.5 ft) honed limestone table was initially surrounded by decorative elements that felt forced. Once simplified to just neutral ceramics and a single linen runner, the entire setting shifted. It felt calmer, more grounded, and significantly more refined.
It is a reminder that sometimes, less is not just more, it is everything.
Measurements: Letting proportion carry the design
In minimalist settings, proportion does the heavy lifting. Without decorative distractions, scale becomes immediately noticeable.
- Table length: Typically 200–300 cm (6.5–10 ft)
- Table width: Around 90–100 cm (35–39 inches)
- Clearance: Minimum 100–120 cm (40–48 inches) around all sides
- Seating allowance: 60–70 cm (24–28 inches) per person
I often allow slightly more spacing between place settings than usual. This subtle generosity enhances the sense of calm and prevents the table from feeling crowded, even with fewer decorative elements.
Materials: Where quality speaks louder than quantity
Material selection is the backbone of this approach. When you remove layers, what remains must hold its own.
- Stone surfaces: Limestone, travertine, or concrete with a honed or matte finish
- Seating: Minimal timber, powder-coated metal, or upholstered outdoor chairs
- Textiles: Neutral linen in soft, muted tones
- Tableware: Ceramic or stoneware with subtle variation
I avoid high-gloss finishes or overly intricate detailing. Instead, I focus on materials that age well and develop character over time. Slight imperfections, tonal shifts, and natural textures are what give the setting depth, almost like it has a story to tell without saying a word.
Lighting Strategy: Soft, directional, and understated
Lighting in a minimalist setting should never steal the spotlight. Its role is to support the material palette and enhance the atmosphere without becoming a feature in itself.
- Warm lighting: 2200K–2700K to maintain softness
- Overhead lighting (if used): Subtle and diffused
- Table lighting: A few well-placed candles or low-profile lanterns
I tend to keep lighting deliberately restrained. Too many sources can break the calm, while too little can make the space feel incomplete. The aim is a gentle, even glow that allows the stone surface to catch light naturally, revealing its texture without exaggeration.
Styling Approach: Editing with intention
Styling in this context is more about editing than adding. Each piece should feel considered, almost inevitable.
- Limit decorative elements to 2–3 key items
- Use repetition rather than variety for cohesion
- Keep colour palettes neutral and tonal
It is a bit like fine-tuning a composition. Remove one element too many, and the space feels empty; add one too many, and it loses clarity. Finding that balance is where the design truly comes to life.
Pros
- Clean, uncluttered aesthetic that ages well
- Highlights material quality and craftsmanship
- Low visual noise, creating a calm atmosphere
- Works seamlessly with modern architecture
Cons
- Relies heavily on high-quality materials
- Can feel stark if not balanced with warmth
- Limited scope for decorative flexibility
Final Design Perspective
A minimalist stone table setting is not about making a statement in the traditional sense. It is about creating a space that feels resolved, where nothing is competing for attention and everything works in quiet harmony.
There is a certain elegance in that restraint, a sense that the space knows exactly what it is doing without needing to prove it. And in a world where outdoor settings are often over-styled, that kind of clarity feels not only refreshing but enduring.
It is, in many ways, the design equivalent of letting things breathe, allowing the materials, the light, and the space itself to carry the experience, naturally and without effort.
Pergola-Covered Dining with Filtered Light
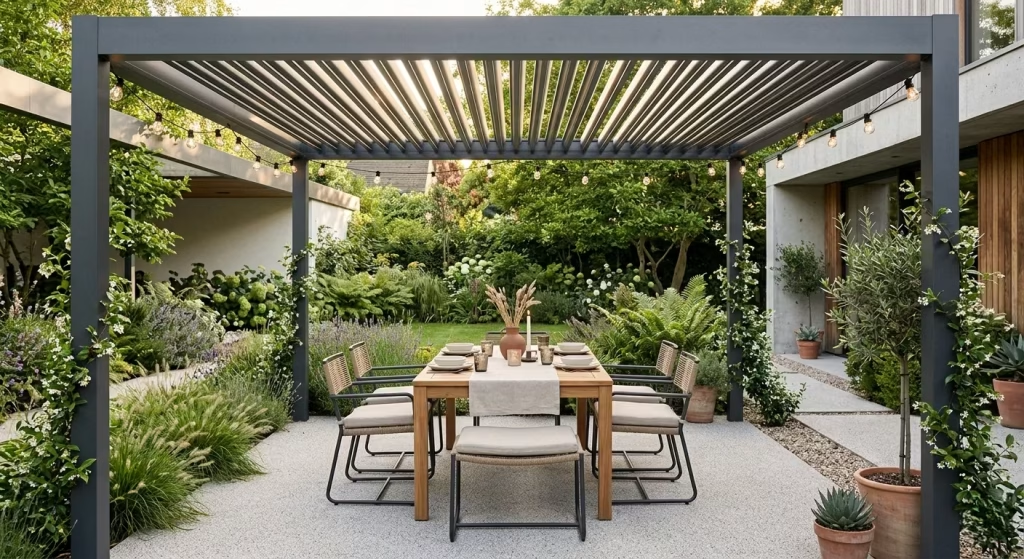
A pergola does more than provide cover. It gives outdoor dining a clear architectural frame, turning an open patch of garden or terrace into something that feels deliberate, anchored, and quietly complete. The filtered light it creates is part of the appeal. Rather than flattening the setting with heavy shade, it allows daylight to move gently across the table, shifting through the course of the afternoon and softening as evening arrives.
This is one of those ideas that works particularly well when a space feels a little too exposed. The pergola introduces order without shutting the garden down, striking that sweet spot between openness and enclosure. It is, quite literally, a roof without the fuss, and when designed well, it becomes the backbone of the entire dining area.
Real Insight: Why pergolas often feel more resolved than temporary shade
In my experience, temporary shade solutions can do the job for a season, but they rarely give a dining space real permanence. Parasols move, sails flutter, and freestanding covers often feel detached from the architecture around them. A pergola, by contrast, settles into the landscape and gives the dining zone a sense of belonging.
On one project, a terrace that felt overexposed during late afternoon was transformed by adding a 3 m x 4 m (10 ft x 13 ft) timber pergola above a 240 cm (8 ft) dining table. The result was immediate. The space stopped feeling like a staging area and started reading as a proper outdoor room. The light became softer, the heat more manageable, and the atmosphere considerably more inviting.
It is one of those design moves that pays dividends every single day, not just when guests arrive.
You May also Like: Navy Blue Dining Room Ideas: 15 Show-Stopping Ways to Style This Sophisticated Hue
Measurements: Getting the scale right from the outset
Pergolas need proportion just as much as furniture does. Too small, and they feel like an afterthought; too large, and the dining zone can lose intimacy.
- Recommended pergola height: 2.4–2.7 m (8–9 ft)
- Ideal width over dining table: Allow at least 60–90 cm (24–35 inches) beyond the table edge on each side
- Table size: Commonly 200–300 cm (6.5–10 ft) depending on the site
- Clearance around seating: Minimum 100 cm (40 inches)
If the pergola is too low, it can feel oppressive, especially once lighting and planting are added. Too high, and the sense of shelter disappears. I usually aim for a height that feels generous overhead but still visually connected to the table below, so the whole composition reads as one complete gesture.
Material Considerations: Timber vs. metal pergolas
The choice between timber and metal changes the character of the entire setting. Neither is inherently better, but they create very different atmospheres and demand different levels of maintenance and visual commitment.
Timber pergolas
Timber brings warmth, tactility, and a more natural relationship to planting and garden materials. It tends to sit beautifully in traditional gardens, Mediterranean-inspired settings, and spaces where softness matters.
Pros
- Warm and inviting appearance
- Works well with greenery and natural finishes
- Ages gracefully if maintained properly
Cons
- Requires regular treatment
- Can weather unevenly over time
- May feel heavier in very contemporary settings
I often choose timber when the goal is to create something that feels rooted and lived-in, rather than overly crisp or architectural.
Metal pergolas
Metal, especially powder-coated steel or aluminium, offers a cleaner, more minimal profile. It suits modern homes and sharper architectural lines, where the pergola should feel visually light and precise.
Pros
- Sleek, slimline appearance
- Lower maintenance than timber
- Excellent for contemporary homes
Cons
- Can feel cooler or more industrial
- May need careful detailing to avoid looking stark
- Can heat up more in direct sun
In a modern setting, a black or deep bronze metal frame can act almost like a drawing line in space, subtle but deliberate, giving the dining area structure without shouting for attention.
Shade Strategy: Permanent structure versus temporary fixes
This is where the long-term value becomes clear. A pergola is not simply about shading today’s lunch or tonight’s dinner. It is about shaping how the space will function across seasons.
Temporary solutions such as parasols or shade sails can be useful, especially in the short term. They offer flexibility and lower upfront commitment. But they often lack the composure and spatial authority of a fixed structure. A pergola, by contrast, creates a dependable framework that supports lighting, climbing plants, and even outdoor curtains if desired.
For this reason, I usually treat a pergola as part of the architecture rather than furniture. It becomes a permanent layer in the outdoor room, one that improves usability while also raising the visual standard of the whole area.
A well-planned pergola does not just cast shade, it gives the space a spine.
Lighting Integration: Making the structure work after dark
One of the strongest benefits of a pergola is how easily it accommodates lighting. Because the frame already defines the space, lighting can be integrated in a way that feels natural rather than added on.
- Warm LED strips or spotlights: Discreet, functional, and unobtrusive
- String lights: Best used with restraint, especially in softer garden settings
- Pendant lighting: Effective if the structure is tall enough and the dining table is clearly centred
I tend to favour warm light temperatures around 2200K–2700K, especially under a pergola. The filtered light during the day and the layered glow at night create a beautiful continuity, almost as though the same atmosphere is simply changing register.
Planting and Softening: Preventing the structure from feeling too hard
A pergola can easily become too rigid if it is not balanced with softness. I often use climbing plants, curtains, or nearby planting to temper the structure and stop it from feeling overly boxy.
- Climbers: Jasmine, wisteria, or grapevine for seasonal character
- Curtains: Useful in exposed spaces or for extra evening privacy
- Nearby planting: Helps blur the boundary between structure and garden
This is where the whole design begins to breathe. The hard frame provides the order, but the soft layers bring the life. Without that contrast, the setting can feel a little all hat and no cattle.
Pros
- Creates a clearly defined dining zone
- Provides reliable shade and improves comfort
- Supports lighting and planting beautifully
- Adds long-term architectural value
Cons
- Requires more planning and commitment than temporary shade
- Timber needs maintenance, metal needs the right finish
- Poor proportions can make the structure feel heavy or awkward
Final Design Perspective
A pergola-covered dining area has a way of making outdoor living feel more intentional, more settled, and more usable across the seasons. It brings order to open space, softens the light, and creates a setting that feels as though it has always belonged there.
Whether timber or metal, the success lies in proportion, detail, and restraint. Get those elements right, and the pergola becomes more than a shaded frame. It becomes the place where the house quietly extends outward, and where the evening, quite naturally, begins to unfold.
Coastal-Inspired Outdoor Dinner Setting
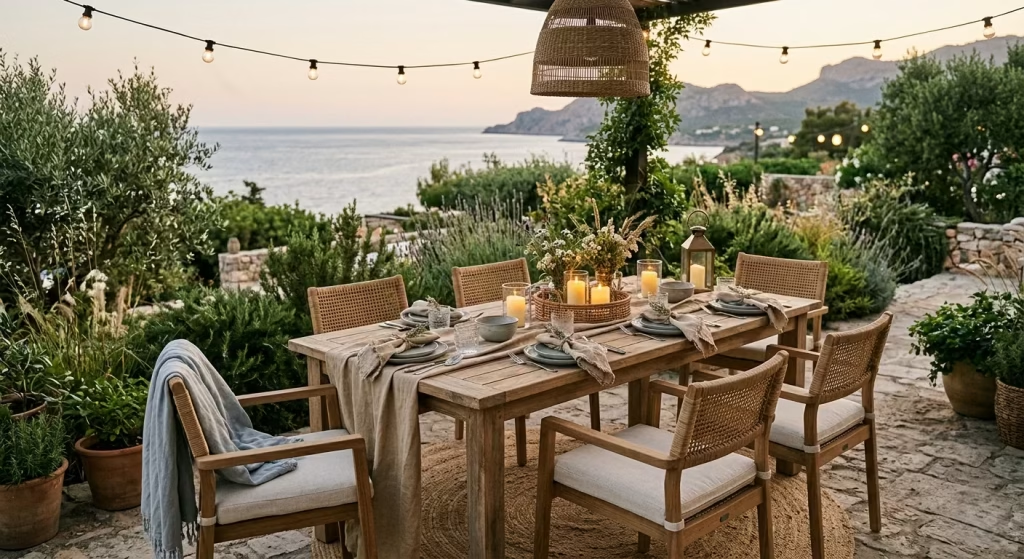
A coastal-inspired dining setting is less about literal seaside references and more about how a space feels, light on the eye, easy to inhabit, and quietly unforced. It leans into pale tones, breathable fabrics, and textures that look better with a bit of wear, rather than worse. The overall effect should feel effortless, almost as if the setting has been shaped by sun, air, and time rather than deliberate styling.
Done well, it avoids clichés entirely. No overt nautical motifs, no overworked colour schemes. Instead, it relies on a restrained palette and natural materials that allow the space to breathe, creating an atmosphere that feels calm, open, and inherently livable.
Real Insight: Why this style works beyond coastal homes
One of the most common misconceptions is that this approach only suits seaside properties. In reality, I have used this style successfully in urban gardens and inland terraces where the goal was to soften the environment and introduce a sense of ease.
In one project, a compact city patio surrounded by hard boundaries felt overly rigid. By introducing washed timber furniture, off-white textiles, and soft blue-grey accents, the space shifted entirely. It felt lighter, less constrained, almost like it had exhaled. The transformation was not dramatic in terms of structure, but in atmosphere, it was night and day.
It is a reminder that coastal design is not about location, it is about mood. And when done right, that mood tends to linger.
Measurements: Keeping proportions relaxed yet functional
Coastal-inspired settings benefit from slightly more generous spacing. The goal is to avoid anything feeling tight or overly composed.
- Table size: Typically 220–280 cm (7–9 ft) for a relaxed communal feel
- Clearance around table: Minimum 100–120 cm (40–48 inches)
- Seating allowance: Around 65–75 cm (26–30 inches) per person
I often allow a little extra room between chairs. It subtly reinforces that sense of openness, giving the setup a more laid-back rhythm rather than a formal, tightly packed arrangement.
Materials: Weathered textures that age with grace
Materiality is where this style truly comes into its own. The aim is to create a palette that feels sun-washed and tactile, with surfaces that improve over time rather than needing to be preserved.
- Timber (teak, oak, or acacia): Preferably with a slightly weathered or matte finish
- Linen or cotton fabrics: Breathable, soft, and naturally textured
- Rattan or woven elements: Adds lightness and visual softness
- Ceramics and stoneware: Subtle variation in tone and finish
I tend to avoid anything too polished or high-gloss. Coastal-inspired spaces should feel a little undone, in the best possible way, like they have been shaped by use rather than styled to perfection.
Colour Palette: Soft, tonal, and easy on the eye
Colour plays a quiet but important role. Instead of bold contrasts, I work with tonal layering:
- Base tones: Whites, off-whites, and soft neutrals
- Accent tones: Muted blues, sandy beiges, and pale greys
- Natural variation: Allowing materials to introduce subtle shifts
The key is restraint. Too much contrast can break the calm, while too little can feel flat. It is about finding that middle ground where everything feels cohesive without becoming predictable.
Textiles & Styling: Where comfort meets movement
Textiles are essential in softening the setting and making it feel inviting rather than staged.
- Linen tablecloths or runners: Slightly oversized, allowing a natural drape
- Seat cushions: In breathable fabrics that add comfort without bulk
- Light throws: Useful for cooler evenings
I often let fabrics fall naturally rather than arranging them too precisely. That slight imperfection adds authenticity, like the space has settled into itself rather than being carefully orchestrated.
Textiles & Styling: Where comfort meets movement
Textiles are essential in softening the setting and making it feel inviting rather than staged.
- Linen tablecloths or runners: Slightly oversized, allowing a natural drape
- Seat cushions: In breathable fabrics that add comfort without bulk
- Light throws: Useful for cooler evenings
I often let fabrics fall naturally rather than arranging them too precisely. That slight imperfection adds authenticity, like the space has settled into itself rather than being carefully orchestrated.
Lighting Approach: Soft, warm, and gently diffused
Lighting should feel like an extension of the natural light rather than a replacement for it.
- Warm LED lighting: Around 2200K–2700K
- Lanterns or glass hurricane lamps: To diffuse and soften light
- Subtle overhead lighting: If needed, kept minimal
The goal is to create a glow rather than a spotlight. As the light fades, the setting should transition seamlessly, maintaining that same easy, unforced atmosphere.
Pros
- Light, airy, and visually calming
- Works across a range of outdoor environments
- Materials age gracefully and require less visual upkeep
- Encourages relaxed, informal gatherings
Cons
- Can feel washed out if not enough tonal variation is introduced
- Requires restraint to avoid slipping into themed décor
- Light fabrics may need more frequent maintenance
Final Design Perspective
A coastal-inspired outdoor dinner setting is not about recreating the seaside. It is about capturing that same sense of ease, where everything feels lighter, softer, and just a little less hurried.
It is the kind of space where guests instinctively relax, where shoes come off without thinking, and where the evening stretches out in that unspoken, unplanned way. When done right, it does not demand attention. It simply invites you in, quietly, confidently, and lets the experience unfold on its own terms.
You May also Like: 25 Ranch Garden Ideas Where Authentic Western Charm Comes to Life
Candlelit Evening Dining with Layered Lighting
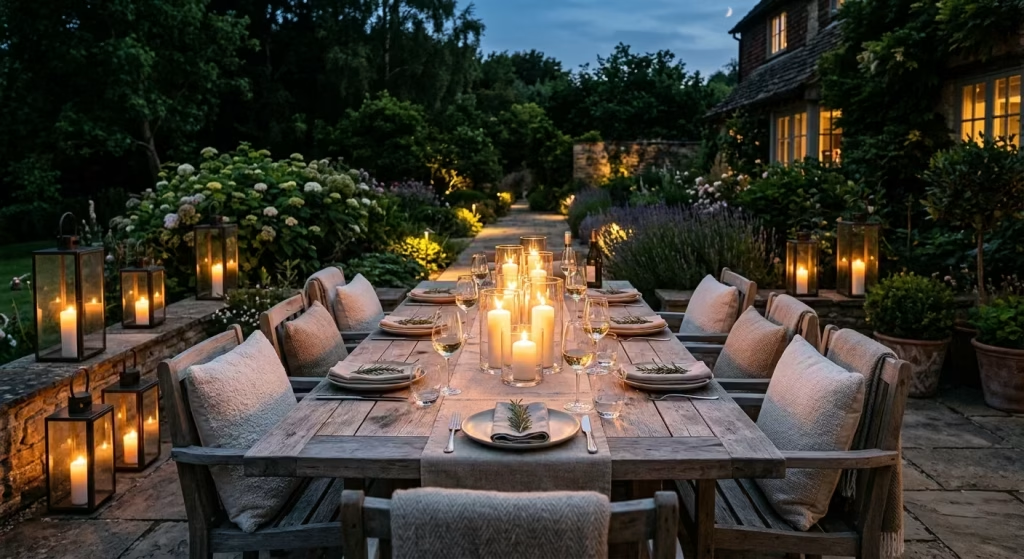
Candlelit dining has a way of changing the pace of an evening almost instantly. It lowers the visual temperature of the space, softens hard edges, and creates a sense of intimacy that feels unmistakably inviting. When combined with lanterns and low-voltage lighting, the result is far richer than any single light source on its own. The setting begins to feel layered, composed, and quietly atmospheric, like the space has been tuned rather than simply lit.
This approach works especially well for outdoor dinners because it allows the evening to unfold gradually. As daylight fades, the lighting does not arrive all at once. It settles in stages, preserving a sense of movement and mood. That is where the magic lies. It is not just illumination, it is orchestration.
Real Insight: Why layered lighting always feels more considered
In my experience, outdoor dining spaces often fall flat when they rely on one dominant light source. A single pendant or overhead fixture may be practical, but it rarely creates depth. Layered lighting, by contrast, gives the eye places to rest. It creates shadow, contrast, and visual rhythm, all of which make a setting feel more alive.
I have often used this approach in gardens and terraces where the goal was to move from bright afternoon use into a more intimate evening atmosphere. In one project, a simple dining setup was transformed by combining table candles, two oversized lanterns, and discreet low-voltage path lighting. Nothing about the furniture changed, yet the mood shifted completely. The space began to feel longer, softer, and far more composed. It was a textbook example of how lighting can make or break a setting.
Measurements: Getting the balance right without overdoing it
Layered lighting works best when each element has a clear role. Too much overlap can feel fussy, while too little leaves the space undercooked.
- Candles: Place in clusters of 3 or 5, rather than in isolated pairs
- Lanterns: Position at intervals of 90–150 cm (36–60 inches) around the dining area
- Low-voltage path or perimeter lights: Space roughly 120–180 cm (48–72 inches) apart, depending on the scale of the space
- Table height for candle visibility: Keep candles at or slightly below eye level, typically 30–45 cm (12–18 inches) high
I usually aim for a combination of low, mid, and subtle background light. That vertical layering keeps the table feeling warm and animated without turning the space into a stage set.
Candles: The heart of the atmosphere
Candles are the most immediate way to create intimacy. Their flame has movement, warmth, and softness that no bulb can quite replicate. Even a modest arrangement can make a big difference.
- Best containers: Glass hurricanes, ceramic holders, or simple metal lanterns
- Best placement: Down the centre of the table, or grouped slightly off-centre for a more relaxed look
- Best effect: Use varying heights to avoid a flat, uniform line
I tend to prefer unscented candles for dining areas. It keeps the experience clean and unobtrusive, allowing food and conversation to remain at the forefront. Scented candles can be lovely, but they often muddle the atmosphere rather than enhance it.
Lanterns: Adding structure without stealing the show
Lanterns provide visual weight and anchor the lighting scheme. They work particularly well on terraces, patios, and larger garden tables where candles alone might not be enough to define the space.
- Large floor lanterns: Help frame the dining zone
- Mid-height lanterns: Add warmth near seating edges or steps
- Glass-sided lanterns: Protect flames from wind while keeping the glow visible
I like to use lanterns as the “middle voice” in the lighting composition. Candles are intimate, path lighting is functional, and lanterns sit between the two, bridging atmosphere and structure.
Low-Voltage Lighting: Quiet support that holds the scheme together
Low-voltage lighting should never compete with candlelight. Its job is to support the overall experience, ensuring guests can move comfortably while preserving the mood.
- Path lighting: Guides movement without glare
- Uplighting for planting: Adds depth and dimension
- Subtle wall or step lights: Defines boundaries safely
I usually keep these fixtures concealed or visually understated. The best low-voltage lighting is the kind people notice only when it is absent. It allows the space to function beautifully without interfering with the romance of the candlelight.
Materials and Placement: Let the light sit naturally within the space
The surfaces around a candlelit table matter more than people often realise. Reflective materials can amplify the glow, while matte finishes soften it.
- Matte ceramics and stoneware: Keep the table feeling grounded
- Textured timber: Catches light beautifully without glare
- Glass lanterns: Reflect and diffuse the flame
- Soft textiles: Linen runners and napkins help absorb excess brightness
I tend to avoid highly polished surfaces in this type of setting. They can create visual noise and pull attention away from the very thing that makes the arrangement work, the gentle, flickering quality of the light itself.
Wind and Weather Considerations: Preventing the wheels from coming off
Candlelit dining looks simple, but it does require a little planning, especially outdoors. Wind can flatten a candlelit arrangement in seconds if it is not protected.
- Use hurricane glasses or enclosed lanterns in exposed spaces
- Keep taller flames away from direct drafts
- Place candles low enough to remain stable but high enough to be seen
If the setting is particularly breezy, I usually combine candles with sheltered low-voltage light so the atmosphere is not entirely dependent on flame. That way, the design holds together no matter what the weather decides to do.
Pros
- Creates immediate intimacy and warmth
- Adds visual depth and movement
- Flexible enough for small or large spaces
- Supports both function and atmosphere
Cons
- Candles require wind protection and supervision
- Too many lighting layers can feel overcomplicated
- Low-voltage fixtures must be discreet to avoid flattening the mood
Final Design Perspective
Candlelit evening dining is one of those ideas that never really goes out of style because it works on a deeply human level. People respond to soft light. They settle into it. They stay longer, speak more easily, and become more present in the moment.
When candles, lanterns, and low-voltage lighting are combined with care, the result is not just a well-lit table. It is a setting with atmosphere, depth, and a sense of occasion that feels effortless rather than forced. And that is the sweet spot, where everything seems to fall into place without trying too hard.
Outdoor Dining with Built-In Bench Seating
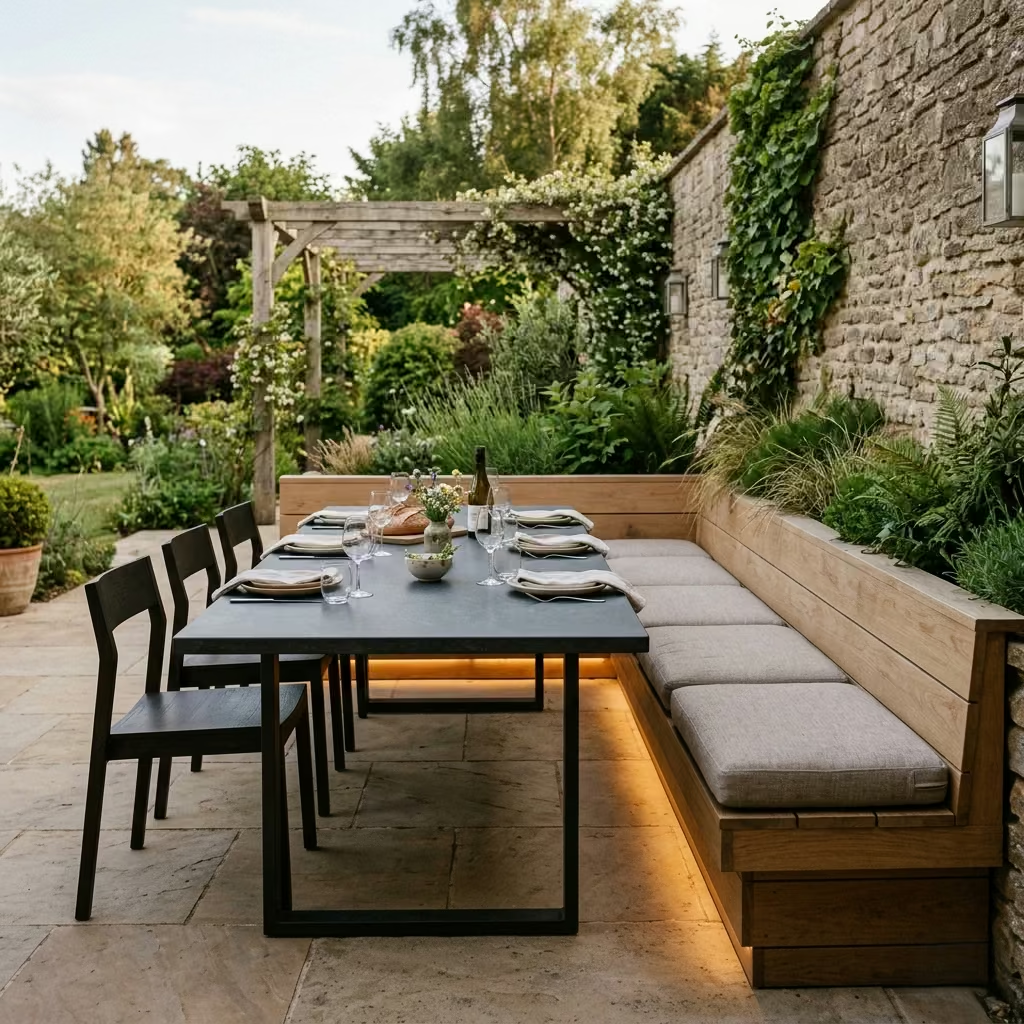
Built-in bench seating is one of those understated moves that transforms an outdoor dining area from “functional” to “considered.” Unlike freestanding chairs, benches define the space, creating a sense of cohesion and permanence. They are particularly effective in narrow gardens, patios, or terraces where circulation is tight, yet visual continuity is essential. By anchoring the dining table with a long, low-profile element, you immediately give the area structure and order almost like giving the space its own spine.
This approach works because it balances form and function. The bench becomes both a sculptural component and a practical seating solution, subtly guiding guests’ movements while reinforcing the outdoor room’s proportions. From my experience, it’s one of the best ways to make a casual outdoor setting feel intentionally designed rather than ad-hoc.
Real Insight: Why benches often outperform chairs in outdoor settings
Freestanding chairs can feel scattershot in smaller or irregularly shaped spaces, particularly when hosting multiple guests. Built-in benches, by contrast, encourage gathering without creating clutter. I’ve found that the social energy around a continuous bench often feels warmer, encouraging conversation to flow naturally along its length.
In one garden renovation, we replaced a set of mismatched chairs with a custom timber bench running 3.5 m (11.5 ft) along the garden wall, paired with a 200 cm (6.5 ft) rectangular table. The space immediately felt anchored. Guests could move freely around the perimeter, and the area retained a sense of intimacy despite accommodating more people than the original chair layout. It was a small change with an outsized impact on both usability and mood.
Measurements: Proportion and comfort are key
For built-in seating to feel comfortable and practical, attention to standard dimensions is critical:
- Bench height: Approximately 45 cm (18 inches) from the ground
- Seat depth: 40–50 cm (16–20 inches) for comfort without overcrowding
- Backrest height (optional): 30–40 cm (12–16 inches) above seat for support
- Clearance around table: Minimum 100–120 cm (40–48 inches) for ease of circulation
I recommend leaving a small overhang on either side of the table to allow guests to slide in comfortably. A slightly generous seating depth, combined with soft cushions, ensures the bench doesn’t feel rigid, even when it doubles as a long dining perch.
Materials: Durability meets tactile warmth
Material choice is where built-in benches truly shine or stumble. Outdoors, benches must endure sun, rain, and temperature swings without losing their aesthetic appeal.
- Timber: Teak, iroko, or oak for a warm, tactile finish
- Stone or concrete: Minimalist, durable, and sculptural but can be hard under prolonged seating
- Integrated cushions: Weather-resistant fabrics in muted or tonal shades
- Accents: Recessed LED strips beneath bench edges can add subtle ambient lighting
I tend to favour timber for warmth and adaptability, particularly when combined with soft linens or weatherproof fabrics. Harder surfaces like concrete are striking but require thoughtful cushioning to avoid sacrificing comfort.
Design Nuances: Integrating benches into the environment
A built-in bench is not merely a seating solution; it’s a design gesture. Consider:
- Linear vs. L-shaped: Linear works for narrow boundaries, while L-shaped arrangements create corners for intimacy
- Integration with walls or planters: Embeds the bench into the garden architecture
- Hidden storage: A clever way to combine seating with functionality without visual clutter
In my projects, I often integrate planters along the back of the bench. This adds softness, draws the eye upward, and creates a buffer that helps define the dining area without erecting walls.
Styling & Comfort: Balancing hard and soft
Even the most beautifully crafted bench benefits from careful textural layering:
- Seat cushions: 5–10 cm (2–4 inches) thick, in neutral or tonal fabrics
- Throws or small bolsters: Encourage lounging without compromising formality
- Decorative accents: Keep them minimal; a single low-profile centerpiece maintains clarity
I find that overstuffing a bench with pillows ruins the clean line that makes built-in seating so visually effective. Less really is more: select one or two key elements that complement the materials and light.
Pros
- Optimises circulation in compact spaces
- Creates a cohesive, architectural feel
- Encourages informal, social dining arrangements
- Can integrate storage, planting, or lighting seamlessly
Cons
- Permanent fixture; difficult to move once installed
- Comfort depends on seat depth, backrest, and cushions
- Requires precision in design to avoid visual heaviness
Final Design Perspective
Built-in bench seating is one of those design choices that quietly elevates an outdoor dining area. It merges practicality with compositional elegance, encouraging social interaction while maintaining architectural clarity.
When proportion, material, and comfort align, a bench can transform an ordinary table into a well-anchored gathering space one that invites lingering conversation, relaxed evenings, and a subtle sense of order that never feels forced. In essence, it’s the outdoor equivalent of a room that knows its own rhythm and welcomes you in without fanfare.
Rooftop Dinner Party with City Views
Rooftop dining is an opportunity to turn a meal into an experience defined by height, light, and the sweep of the city skyline. Unlike ground-level patios, rooftops give you a sense of detachment from the urban bustle, offering a rare combination of intimacy and spectacle. The view becomes part of the design, shaping the mood and rhythm of the evening.
It is important to remember, however, that the rooftop environment is more exposed and dynamic than a garden or terrace. Wind, weight limits, and zoning restrictions all influence what is possible. In my experience, rooftop dining works best when these constraints are embraced as design opportunities rather than treated as hurdles. A carefully composed table layout, combined with appropriate barriers and weighted furnishings, allows the skyline to dominate without compromising comfort or safety.
Real Insight: Making rooftops feel grounded despite exposure
A rooftop can feel thrilling or precarious depending on how the space is composed. On one project in a central London apartment, the challenge was a 5 m x 7 m (16 x 23 ft) terrace with panoramic city views but frequent gusts of wind. We introduced low, wind-protective screens on the perimeter, strategically positioned planters as visual anchors, and weighted outdoor furniture to prevent movement.
The result was transformative. Guests were able to linger without disruption, and the space felt contained and intentional, rather than exposed or precarious. Rooftops, when designed with care, offer the unique thrill of dining in the sky while remaining functional and safe.
Measurements: Safety and circulation
Rooftops require attention to both circulation and structural limits. The stakes are higher than in a garden, so careful planning is essential:
- Table size: Usually 180–250 cm (6–8 ft) to maintain circulation
- Clearance around dining zone: Minimum 100–120 cm (40–48 inches)
- Seating height: Standard 45 cm (18 inches)
- Barrier height: Compliant with local codes, typically 100–110 cm (40–44 inches) for guardrails
I also advise leaving open zones for wind relief; overly dense layouts can create turbulence and discomfort, undermining the rooftop’s appeal.
Materials: Lightweight, durable, and visually light
Materials need to withstand wind, sun, and occasional rain without becoming a hazard:
- Aluminium or powder-coated steel furniture: Lightweight yet strong
- Teak or composite wood: Adds warmth without excessive mass
- Glass or acrylic tables: Avoids visual heaviness, keeps skyline uninterrupted
- Weighted cushions and accessories: Prevent displacement during gusts
I always recommend avoiding overly heavy furniture that risks tipping or damaging the roof surface, and conversely, steering clear of items that are so light they blow away. Weighted, low-profile elements strike the balance between security and comfort.
Zoning and Layout: Defining functional areas
A rooftop is often multi-purpose, so zoning is critical:
- Dining zone: Central or along the skyline edge for maximum impact
- Lounge or conversation area: Can be a few steps away from the table, giving a sense of flow
- Service or prep area: Keep minimal and compact to avoid clutter
In one rooftop project, we used subtle pergola-like trellises and planters to define zones. The effect was spatial clarity without closing off sightlines, allowing guests to move freely while maintaining intimacy at the dining table.
Lighting Strategy: Enhancing the skyline without overpowering
Lighting on rooftops must account for the environment and cityscape:
- Warm LED strips along guardrails: Creates subtle definition
- Lanterns or tabletop candles: Provides intimate pockets of light
- Overhead string lights: Best used sparingly, preferably tensioned along structural anchors to withstand wind
I usually aim for layered lighting that frames the table but does not compete with the city lights beyond. The goal is to complement the view, not overshadow it.
Pros
- Provides spectacular, unique backdrop for dining
- Enhances sense of occasion and luxury
- Encourages social engagement in a memorable setting
- Flexible layout when zoned thoughtfully
Cons
- Exposure to wind and sun requires strategic planning
- Weight restrictions limit some furniture options
- Must comply with local zoning and safety codes
- Circulation can be tight on smaller terraces
Final Design Perspective
Rooftop dinner parties are all about framing the experience around the view. The table, furniture, and lighting exist to support the spectacle, not compete with it. When proportion, zoning, and safety are respected, the space transforms into a stage where guests feel elevated both literally and metaphorically.
A well-designed rooftop dinner setting is a rare blend of thrill, intimacy, and composure. It is the place where the city becomes the backdrop, the conversation flows more freely, and the evening stretches on, long after the skyline lights have shifted from day to night.
Rustic Farmhouse Garden Table Setting
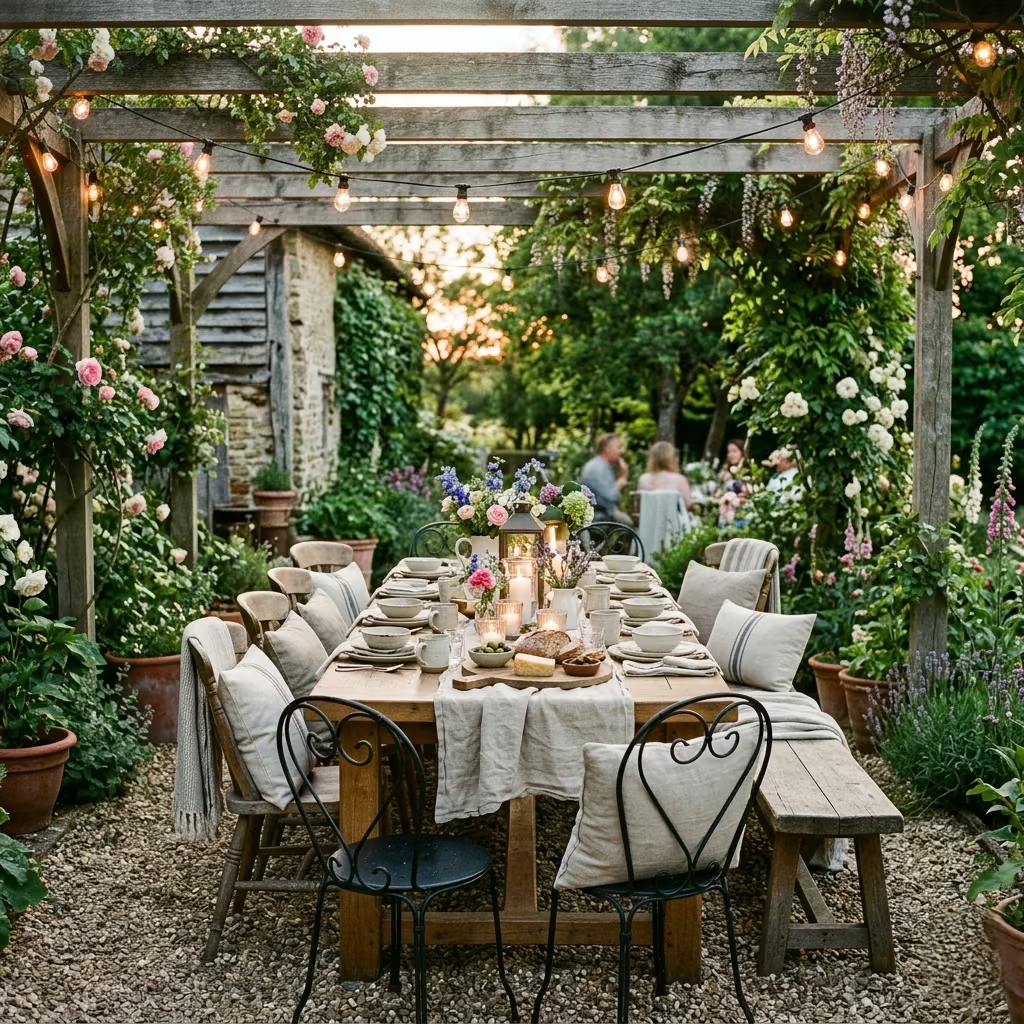
A rustic farmhouse garden table setting is all about creating a space that feels effortlessly inviting, where the materials speak as loudly as the meal itself. Think weathered timber, robust joinery, and surfaces that show character with age. The goal is to evoke a sense of heritage and comfort, without veering into kitsch or contrived “country chic.” It is a style rooted in authenticity, where every element from the table’s grain to the hand-thrown ceramic plates tells a subtle story.
In my experience, the best rustic farmhouse settings don’t just look cozy, they feel grounded, tactile, and quietly elegant, encouraging guests to linger, relax, and connect with both the space and each other. Unlike modern minimalism, which demands restraint, farmhouse design thrives on warmth and the careful layering of textures and imperfections.
Real Insight: Why this style resonates
I often use this approach in medium-to-large gardens where outdoor dining can feel expansive but lacks intimacy. One project involved a 350 cm (11.5 ft) solid oak table paired with mismatched vintage chairs and a bench, all beneath a simple pergola entwined with climbing roses. The weathered textures contrasted with the softness of linen napkins and loose, casual florals. Guests immediately gravitated to the table, lingering far longer than anticipated.
Rustic farmhouse settings work particularly well because the materials age gracefully. Timber darkens, metals patina, and linens soften, all of which adds to the narrative of the space over time. In short, a rustic farmhouse table grows richer with use, becoming part of the story of your garden rather than a static display.
Measurements: Balancing scale and comfort
Rustic farmhouse dining is generous without being oppressive. Comfort and circulation remain key:
- Table length: 220–300 cm (7–10 ft) for medium to large gatherings
- Table width: 90–110 cm (36–44 inches) for ample serving space
- Clearance around table: Minimum 100–120 cm (40–48 inches) for circulation
- Seating height: Bench or chair approximately 45 cm (18 inches)
I often allow a little extra elbow room, particularly with benches. The farmhouse ethos leans into shared meals and extended evenings, so spacing that encourages ease of movement is crucial.
Materials: The soul of rustic design
Materiality defines the farmhouse aesthetic. It is about authenticity and tactile warmth:
- Tables & benches: Solid timber with visible grain and knots
- Seating: Mix of timber, wrought iron, or vintage-painted pieces
- Tableware: Hand-thrown ceramics, matte stoneware, wooden serving boards
- Textiles: Linen or cotton runners, cushions in muted natural tones
- Accents: Clay or terracotta pots, weathered lanterns, wrought iron candle holders
I tend to blend old and new. A reclaimed timber table paired with subtle contemporary glassware maintains refinement without losing the rustic character.
Styling: Layering for approachable elegance
Farmhouse dining thrives on a layered, “lived-in” look:
- Runners: Linen or cotton, casually draped for softness
- Centerpieces: Loose flowers, herbs in small vases, or seasonal produce
- Candles & lanterns: Introduce warmth for evening gatherings
- Mismatched chairs/benches: Adds casual charm while remaining functional
The key is intentional imperfection. Nothing should feel overly curated; small asymmetries and irregularities enhance authenticity rather than distract from it.
Lighting: Soft, welcoming, and unobtrusive
Lighting should enhance the warmth of the materials:
- Low-voltage lanterns or fairy lights: Soft, ambient glow
- Candles in clusters: Create pockets of intimacy across long tables
- Subtle uplighting for plants or pergola: Adds depth without overpowering
I often combine these elements so that the table becomes a focal point, with the surrounding garden gently receding into shadow. Evening meals feel calm, enveloping, and inviting.
Pros
- Timeless, adaptable across garden sizes and styles
- Materials age gracefully, increasing character over time
- Creates warmth, intimacy, and approachability
- Flexible styling allows casual or slightly formal dining
Cons
- Heavy timber furniture may need seasonal care or weather protection
- Textiles and cushions require regular cleaning outdoors
- Without careful layering, rustic spaces can feel cluttered or unrefined
Final Design Perspective
A rustic farmhouse garden table setting is less about replicating a look and more about crafting a space that feels alive, welcoming, and tactile. The interplay of weathered timber, soft textiles, and subtle lighting fosters connection not just between diners, but between the people and the environment itself.
When done thoughtfully, it becomes a stage for memorable evenings where conversation flows as easily as wine, meals linger longer, and the garden feels less like a backdrop and more like an extension of home. It is a space that grows richer with each gathering, carrying the echoes of laughter, shared stories, and long, leisurely meals into every subsequent season.
Contemporary Black and Neutral Palette Dining
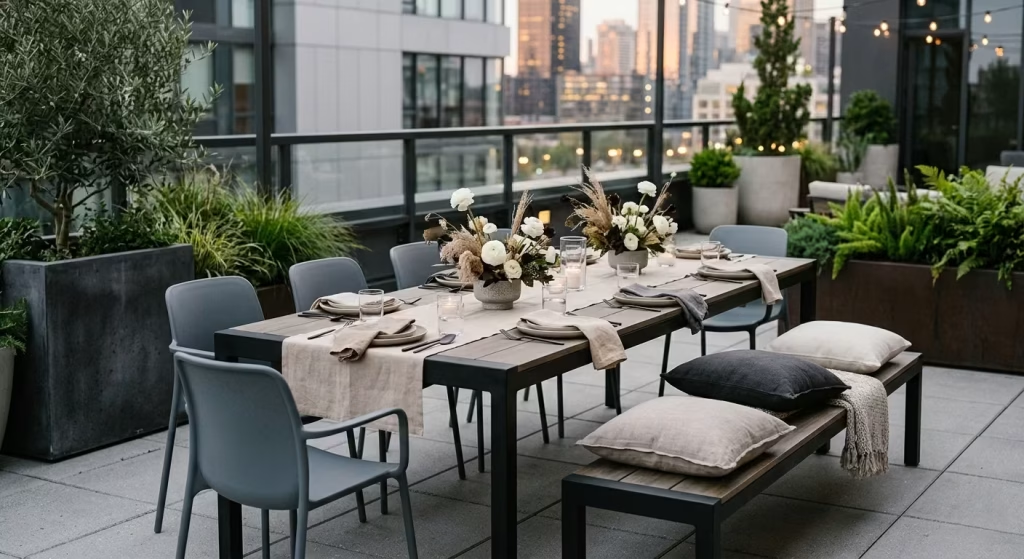
A contemporary black and neutral palette is all about confidence in restraint. By leaning into dark tones like matte black, charcoal, or deep slate, paired with soft neutrals ivory, beige, stone, or linen you can create an outdoor dining space that feels considered, modern, and quietly dramatic. Unlike lighter, airy schemes, this approach relies on contrast, materiality, and texture rather than color alone, producing a space that feels grounded and composed.
From my experience, black and neutral outdoor dining works best when it is layered and tactile. A purely monochrome palette risks feeling cold or austere, but when combined with natural timber, stone, or woven textures, it becomes unexpectedly inviting. It is a design that whispers sophistication rather than shouting it, commanding attention through subtle cues and intentional details.
Real Insight: Why black works outdoors
I have often used black furniture and tableware in urban terraces or compact garden settings where the goal was to create a modern, cohesive frame for the space. In one project, a 240 cm (8 ft) blackened steel table was paired with slate-grey chairs and a timber bench, with linen runners in soft beige. By contrast, the greenery around the perimeter became more prominent, and the overall space felt simultaneously sculptural and approachable.
The secret is balance: black anchors the design, neutrals soften it, and textures tie it all together. This palette gives a timeless backdrop for both casual lunches and elegant evening dinners, making it highly adaptable to changing seasons or table styling.
Measurements: Proportion for comfort and circulation
Even in a high-contrast palette, scale remains paramount:
- Table length: 180–240 cm (6–8 ft) for small-to-medium gatherings
- Table width: 90–100 cm (36–40 inches) to accommodate serviceware
- Clearance: Minimum 100 cm (40 inches) around the dining zone
- Seating height: Standard 45 cm (18 inches), with cushions optional
In tighter urban settings, I sometimes select narrower tables (80–85 cm / 32–34 inches wide) to ensure circulation remains fluid without sacrificing elegance.
Materials: Texture drives warmth and tactility
In this style, materials are the hero. Black can feel stark unless combined with tactile surfaces:
- Tables & chairs: Powder-coated aluminium, blackened steel, or deep-stained timber
- Cushions & textiles: Linen, cotton, or weatherproof fabrics in soft neutrals
- Accent surfaces: Slate, concrete, or dark stone planters
- Decorative elements: Glassware, metallic touches, or subtle ceramics
I usually avoid glossy finishes outdoors; matte surfaces absorb light and reduce glare, creating a sophisticated, grounded mood. Even in sunlit gardens, these textures maintain depth and visual interest.
Styling: Minimalist layering with subtle richness
Black and neutral schemes thrive on controlled layering rather than clutter:
- Table runners or placemats: Linen or woven textures in sand, ivory, or stone
- Centerpieces: Low, sculptural arrangements or small clusters of seasonal flowers
- Seating cushions: Optional, softening edges without disrupting the palette
- Accent lighting: Warm LED strips or lanterns to prevent the space from feeling cold at dusk
I often layer small touches of timber or rattan to break up the intensity of black. Even a single natural accent can lift the space without detracting from its sophisticated coherence.
Lighting: Soft, warm, and directional
Lighting is critical in dark-toned outdoor spaces. Without it, black surfaces can feel heavy or oppressive:
- Overhead string lights: Low-wattage, warm white to gently illuminate without glare
- Tabletop candles or lanterns: Provide intimacy and pockets of softness
- Uplighting for plants or textured walls: Creates depth and contrast
I usually combine all three, ensuring the seating area feels illuminated and inviting without losing the sculptural qualities of the furniture.
Pros
- Creates a confident, timeless, and sculptural space
- Highlights textures and architectural features
- Works for both urban terraces and modern garden layouts
- Flexible backdrop for seasonal décor and table styling
Cons
- Black surfaces absorb heat in direct sunlight; comfort can be affected
- Too much contrast without texture may feel austere
- Needs intentional layering of textiles, greenery, or accents to prevent visual flatness
Final Design Perspective
A contemporary black and neutral outdoor dining space is proof that sophistication often lies in subtlety. By anchoring the space with darker tones and layering texture, light, and natural accents, the result is an outdoor room that feels refined, inviting, and compositional.
This approach allows the eye to linger on detail rather than color, encourages conversation around a confident, cohesive table, and makes every evening feel deliberate and composed. It is a palette that ages gracefully, adapts seamlessly to changing seasons, and remains instantly photogenic yet inherently liveable, a balance few designs achieve so effortlessly.
You May also Like: 25 Farmhouse Garden Ideas That Feel Timeless, Practical, and Full of Charm
Dining Around a Fire Pit Feature
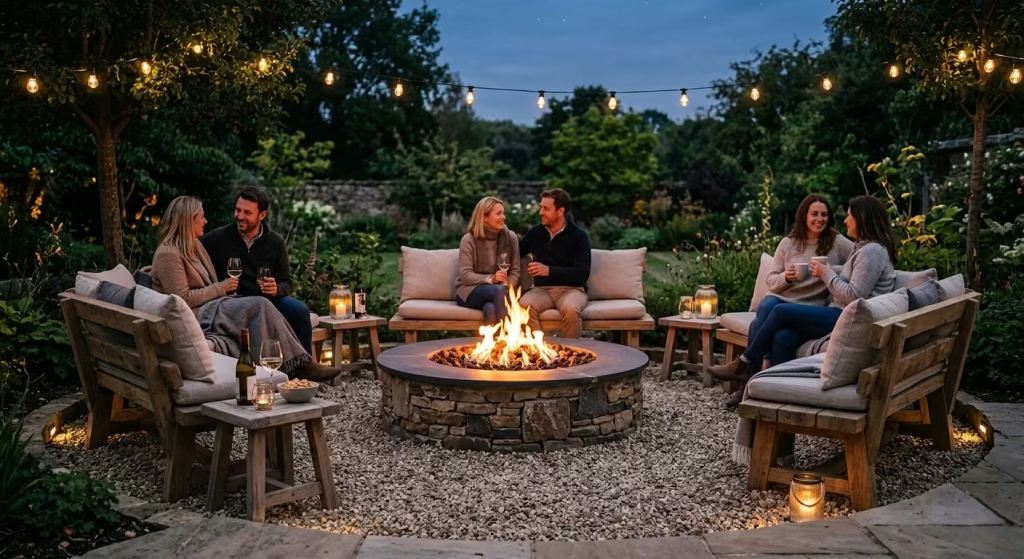
Dining around a fire pit is the ultimate expression of outdoor conviviality. Unlike traditional tables, a fire pit becomes the central anchor, drawing guests together and creating a sense of intimacy that spans both seating and conversation. The flickering flames provide a natural focal point, framing the evening with movement, warmth, and a subtle rhythm that encourages people to linger long after the meal ends.
From my experience, fire pit dining is less about the size or grandeur of the installation and more about how the surrounding seating interacts with it. Circular or semi-circular arrangements are particularly effective, allowing everyone to share proximity to the fire, while still maintaining comfortable circulation. The design is inherently social, and when executed thoughtfully, it transforms a casual garden meal into a ritualized experience that feels both grounded and elevated.
Real Insight: Why fire pits change the dynamic
In one project, we integrated a built-in gas fire pit, 100 cm (40 inches) in diameter, into a gravel terrace surrounded by low timber benches with weatherproof cushions. Guests instinctively gravitated toward the fire, clustering in semi-circles rather than sitting rigidly at a table. The fire dictated both movement and conversation, and even though the seating arrangement was informal, the space felt purposeful and composed.
Fire pit dining is particularly powerful in cooler climates, where the added warmth extends the usability of outdoor dining well into autumn and early spring. The interplay of light and shadow adds depth to textures, highlighting timber grain, stone surfaces, and textile layers in a way that daytime seating cannot replicate.
Measurements: Ensuring comfort and safety
Safety is paramount when introducing open flames into a dining setting:
- Fire pit diameter: 80–120 cm (32–48 inches) depending on the space
- Seating distance: Minimum 90–120 cm (36–48 inches) from fire edge for comfort and safety
- Bench height: 40–45 cm (16–18 inches), with cushions optional
- Circulation zone: At least 100 cm (40 inches) around the outer perimeter
These dimensions allow guests to enjoy the fire’s warmth without feeling cramped or at risk. I always account for airflow and potential wind direction when positioning the pit and surrounding furniture.
Materials: Durable, tactile, and safe
The choice of materials can make or break a fire pit dining area:
- Fire pit body: Stone, concrete, or metal with high heat tolerance
- Surrounding seating: Timber, concrete, or weatherproof metal
- Surface accents: Gravel, stone pavers, or tile to provide fire-safe flooring
- Textiles: Heat-resistant cushions or removable fabrics for comfort
I prefer integrating natural stone or dark concrete, which grounds the space and complements the flames, while ensuring materials are heat resistant and easy to maintain.
Layout & Styling: Framing the fire without clutter
The fire pit dictates the arrangement, so planning the surrounding environment is key:
- Seating: Circular, semi-circular, or U-shaped arrangements work best
- Tables or surfaces: Small side tables between benches rather than a large central table
- Plants & screens: Low planting can frame the area, adding privacy without obstructing sightlines
- Lighting: Minimal let the fire be the main source, supplemented with subtle recessed LED or lanterns
I often avoid placing the main dining table directly in front of the fire, as the flames become the show rather than a backdrop. Instead, side tables or small surfaces for drinks allow the fire to remain the focal point.
Lighting & Atmosphere
The fire itself is the hero of the visual experience, but additional lighting enhances usability and ambience:
- Lanterns on the periphery: Provide soft navigation light without competing
- Recessed pathway lights: Guide circulation to and from seating areas
- Candle clusters: On side tables to reinforce warmth and intimacy
The effect is layered but subtle: movement of shadows and warm glows creates a dining environment that feels cinematic yet approachable.
Pros
- Instantly creates a focal point and intimate atmosphere
- Extends outdoor dining season with warmth
- Encourages conversation and social engagement
- Complements a variety of garden styles, from contemporary to rustic
Cons
- Requires careful planning for safety and clearance
- Fire maintenance and fuel management are ongoing concerns
- Strong wind or inclement weather can limit use
- Seating must balance proximity to the fire with comfort
Final Design Perspective
A fire pit transforms outdoor dining from a meal into an experience rooted in warmth, rhythm, and social energy. It frames both space and conversation, creating a magnetic center around which guests naturally gather. With the right proportions, materials, and subtle lighting, a fire pit dining area becomes a timeless outdoor stage, one that invites lingering, sparks connection, and elevates every meal into an evening of intentional design and relaxed elegance.
It is the kind of space where the flicker of flames mirrors laughter, where shadows dance across timber and stone, and where an ordinary night outdoors becomes memorable long after the embers fade.
Terrace Dining with Outdoor Rugs and Zoning
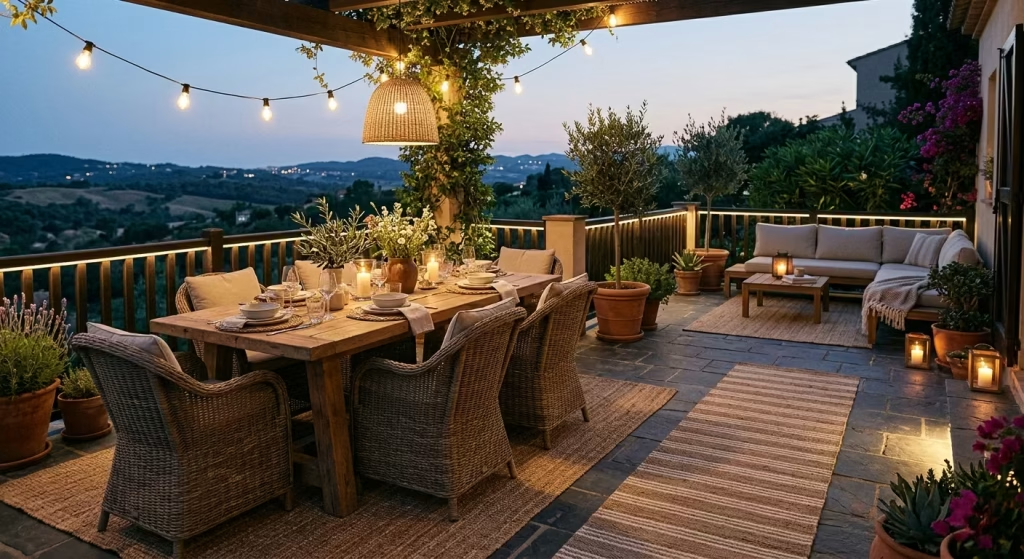
Terrace dining can easily feel like furniture simply placed on a hard surface, which is exactly why zoning matters. Outdoor rugs are one of the simplest ways to give a terrace real compositional clarity. They define the dining area, soften the visual plane, and make the space feel more like an outdoor room than an exposed platform. When handled well, the rug does not just sit underneath the table. It anchors the entire arrangement, giving the layout weight, warmth, and a much more settled feel.
I often use this approach when a terrace is visually open but lacks definition. A rug creates an immediate boundary, almost like drawing a line in the sand, and once that happens, the rest of the space begins to fall into place. The effect is subtle, but it is the kind of subtlety that pulls its weight beautifully.
Real Insight: Why zoning changes how a terrace is experienced
In many terrace projects, the challenge is not size, but ambiguity. Without clear zoning, the eye does not know where to rest, and the furniture can feel adrift. I have found that dividing the space into distinct functions, dining, lounging, and circulation, transforms the entire experience.
On one project, a 6 m x 4 m (20 ft x 13 ft) terrace felt oddly flat despite having excellent proportions. By placing a 200 cm x 300 cm (6.5 ft x 10 ft) outdoor rug beneath the dining table and using a narrower runner-style rug to define the adjacent circulation path, the terrace instantly read as intentional. The zones were not hard-edged or overdesigned. They simply made sense. That is often the difference between a terrace that looks furnished and one that feels fully considered.
Measurements: Getting the rug size and zoning right
Scale is everything here. A rug that is too small can make the table feel awkwardly perched, while one that is too large can swallow the space.
- Dining rug size: Ideally extends 60–75 cm (24–30 inches) beyond the table on all sides
- Typical dining rug dimensions:
- 200 x 300 cm (6.5 x 10 ft)
- 240 x 340 cm (8 x 11 ft)
- 270 x 360 cm (9 x 12 ft) for larger terraces
- Clearance around zones: Minimum 90–120 cm (36–48 inches) for circulation
- Lounge zone separation: Leave at least 120 cm (48 inches) between dining and seating areas
I usually advise clients to size up rather than down. A rug that properly frames the table makes the zone feel grounded and generously proportioned, whereas a rug that is too tight undercuts the whole composition.
Materials: Choosing rugs that can handle the real world
Outdoor rugs need to do more than look good. They must stand up to sun, moisture, and regular use without losing their shape or character.
- Flat-weave polypropylene rugs: Durable, weather-resistant, and easy to clean
- Recycled PET rugs: A sustainable option with a softer hand feel
- Textured synthetic blends: Useful for adding depth without sacrificing practicality
- Low-pile construction: Better for dining areas, as it keeps chairs stable and movement smooth
I tend to avoid overly shaggy or plush textures outdoors. They may look appealing in photos, but they are rarely practical under dining furniture. A flatter weave keeps things tidy, makes chair movement easier, and holds up better over time.
Design Strategy: Using rugs to separate, not divide
The best zoning never feels chopped up. It feels fluid, with each area clearly defined but still connected to the whole. That is where outdoor rugs do their best work.
- Dining zone: A rug under the table creates a visual anchor
- Lounge zone: A softer, lower-textured rug can signal a more relaxed area
- Transition zone: Bare paving or decking can act as a buffer between the two
I often use a rug to “hold” the dining area while allowing the rest of the terrace to breathe. It is a bit like setting the table without overfilling the plate. The structure is there, but the composition still feels open and easy.
Styling Approach: Layering texture without overcomplicating the scene
Once the rug establishes the base, styling should reinforce the zone without making it feel busy.
- Dining table: Solid timber, stone, or powder-coated metal works well
- Chairs: Keep them visually light if the rug has a strong pattern, or more substantial if the rug is neutral
- Accessories: Use one or two textural accents, such as linen napkins, woven placemats, or ceramic tableware
- Colour palette: Muted, tonal, and cohesive for a calm result
I find that a terrace often benefits from quiet confidence rather than overt styling. A good rug, a well-proportioned table, and a restrained palette can do more heavy lifting than layers of decoration ever will.
Lighting Integration: Defining each zone after dark
When the sun goes down, lighting becomes the invisible hand that holds the terrace together. It should reinforce the zoning without flattening the atmosphere.
- Low ambient lighting: Soft wall lights or integrated perimeter lighting
- Dining lighting: A subtle pendant, lanterns, or string lights overhead
- Transition lighting: Small recessed or path lights to connect the zones
Warm light temperatures between 2200K and 2700K work particularly well outdoors. They preserve the softness of the rug and textiles while keeping the terrace feeling intimate and usable.
Pros
- Defines outdoor rooms without permanent construction
- Makes terraces feel warmer and more visually resolved
- Helps larger spaces feel organised and coherent
- Adds texture and softness underfoot
Cons
- Rugs must be sized correctly or they can look awkward
- Lower-quality outdoor rugs can fade or shift over time
- Too many zones can make the terrace feel fragmented
- Rugs need regular cleaning to stay looking sharp
Final Design Perspective
Terrace dining with outdoor rugs and zoning is one of the easiest ways to bring order and atmosphere to an otherwise plain surface. It gives the eye direction, softens the ground plane, and helps each part of the terrace earn its place.
When the rug is the right size and the zones are drawn with a light but deliberate hand, the terrace stops feeling like an afterthought. It starts to feel like a sequence of connected spaces, each one doing its part. That is where the real value lies. Not in making the terrace look styled for a moment, but in making it work beautifully, day after day, season after season.
Mediterranean-Inspired Alfresco Dining
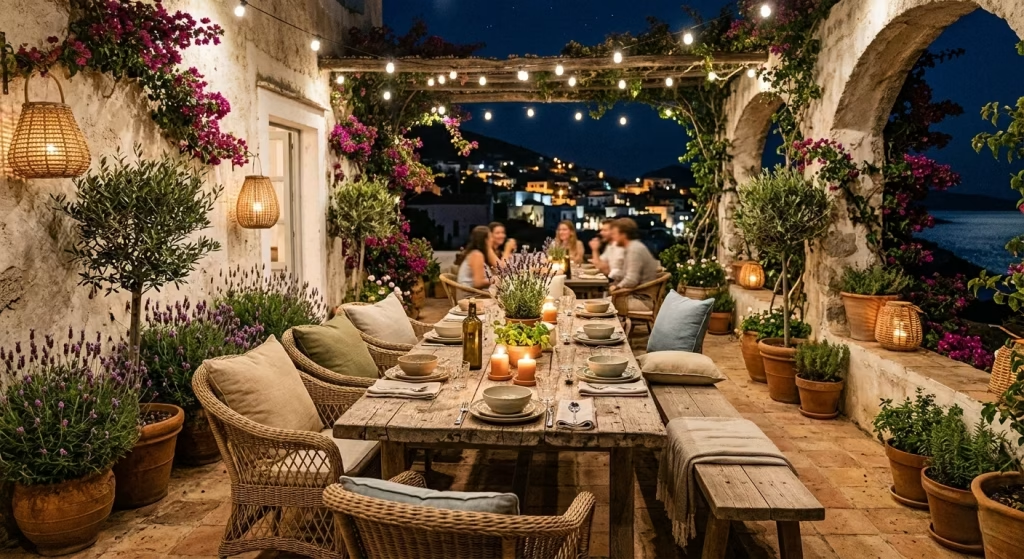
Mediterranean-inspired alfresco dining is about capturing the essence of sun, sea, and timeless craftsmanship in an outdoor setting. The key is to blend earthy textures, natural stone, sun-washed timber, and breathable textiles to create a space that feels both relaxed and deliberately composed. This style leans into layered materials, tactile surfaces, and a palette drawn from sand, terracotta, olive, and soft blues echoing the coastal villages of Southern Europe.
From my experience, the charm of Mediterranean dining lies not in lavish ornamentation but in everyday elegance: stone or terra-cotta tiles underfoot, a rustic timber table, and simple, loose linen tablecloths. Lighting is subtle lanterns, string lights, or a few candles but it enhances the warmth and intimacy, particularly at dusk. The result is a space that encourages lingering meals, easy conversation, and a sense of timelessness.
Real Insight: Why this style works outdoors
I often recommend Mediterranean-inspired designs for terraces, courtyards, or gardens that receive ample sunlight. On one project, a 320 cm (10.5 ft) reclaimed timber table was paired with wicker chairs and a mix of terracotta and ceramic serving pieces. The surrounding planting included lavender, olive trees in pots, and climbing bougainvillea along the walls. Guests immediately gravitated toward the table, drawn in by both the visual warmth and the tactile surfaces.
The style excels in translating a relaxed, coastal lifestyle into functional dining: meals are casual yet considered, and the space feels alive yet ordered. Because materials are naturally weathered or robust, the setup improves over time, much like a well-loved villa terrace.
Measurements: Proportions for comfort and flow
Mediterranean alfresco dining thrives on generous spacing to promote conviviality:
- Table length: 220–350 cm (7–11.5 ft) for small-to-large gatherings
- Table width: 90–110 cm (36–44 inches) for ample serving space
- Seating height: ~45 cm (18 inches) with cushions for comfort
- Circulation: Minimum 100–120 cm (40–48 inches) around the table for free movement
I often allow a slightly wider clearance than standard, as this style benefits from airy, open movement reminiscent of coastal terraces.
Materials: Layering natural textures
Material selection is essential for capturing Mediterranean authenticity while ensuring durability:
- Tables & chairs: Reclaimed timber, sun-bleached oak, or natural rattan
- Flooring: Terracotta tiles, stone, or concrete with natural finish
- Textiles: Linen or cotton runners, cushions in muted or sun-bleached hues
- Accents: Terracotta pots, ceramic tableware, and woven lanterns
I encourage mixing textures rough timber against smooth ceramic, soft linens against stone to create depth and tactility without cluttering the palette.
Styling: Casual layering that feels curated
Mediterranean dining is effortless yet deliberate. Styling should support the laid-back yet sophisticated character:
- Table centerpiece: Loose herbs, lemons, or olives in simple bowls
- Lighting: Hanging lanterns, tea lights, or subtle string lights
- Serving style: Rustic platters and communal serving encourage interaction
- Seating: Mix chairs and benches for an informal, lived-in feel
The goal is for the table to feel welcoming, not staged a place where guests instinctively relax and the meal unfolds organically.
Lighting & Ambiance
Evening meals are magical when lighting mirrors the Mediterranean sun:
- Lanterns and low-voltage uplights to highlight key textures
- String lights or fairy lights draped casually over beams or trellises
- Candles in clusters to add flickering warmth and soft shadows
I prefer warm, golden light (2200–2700K) to enhance the natural hues of wood, stone, and terracotta, creating a space that feels intimate yet open.
Pros
- Timeless, approachable elegance suitable for various outdoor layouts
- Materials naturally weather and gain character over time
- Encourages relaxed, communal dining experiences
- Easily adaptable to terraces, gardens, and courtyards
Cons
- Natural materials may need periodic maintenance (sealing timber, cleaning stone)
- Strong sun can fade textiles without UV protection
- Open terraces may require shading for comfort during midday
- Overuse of decorative elements can feel cluttered if not curated
Final Design Perspective
Mediterranean-inspired alfresco dining is more than a style; it’s a way of orchestrating outdoor life with ease, warmth, and quiet sophistication. When done thoughtfully, the space encourages extended meals, relaxed conversation, and a strong sense of place. The combination of textured materials, sun-washed colors, and layered lighting transforms a simple garden or terrace into a terrace that feels like a coastal retreat, evoking the timeless magic of Mediterranean summer evenings.
It is a design that invites guests to slow down, linger over wine and conversation, and feel connected to both the environment and the rhythm of the meal. The space lives and evolves, becoming richer with each gathering and season, perfectly embodying the Mediterranean ethos of beauty, comfort, and conviviality.
Compact Balcony Dinner Setup
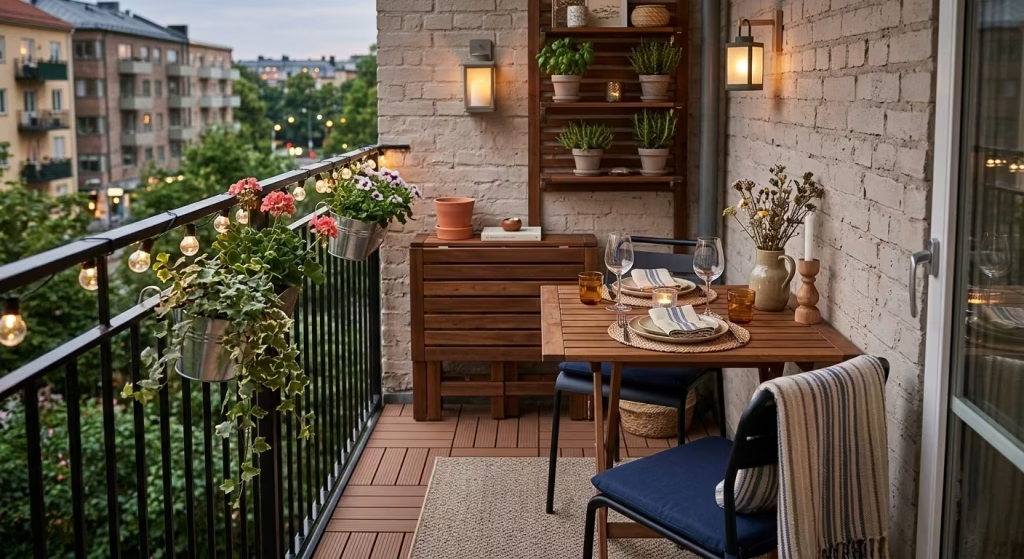
A compact balcony presents both a challenge and an opportunity: how to create a fully functional dining experience within tight proportions. The key is space-conscious design, flexible furniture, and clever layering of textures and lighting. Even a balcony of 2–3 m² (20–30 ft²) can feel spacious and inviting if planned with precision.
From my experience, small-scale outdoor dining thrives when every element is intentional. Foldable tables, wall-mounted drop-leafs, or narrow cantilevered surfaces allow the balcony to perform multiple functions dining, lounging, and entertaining without ever feeling cluttered. The visual trick is to make the space feel larger than it is, using verticality, light-colored textiles, and reflective surfaces to bounce light and air through the area.
Real Insight: Why compact spaces demand deliberate thinking
On a recent city apartment project, a 120 cm (4 ft) foldable timber table paired with two streamlined chairs turned a narrow balcony into an unexpectedly sociable spot. By adding a small shelf for drinks and lanterns mounted on the wall, the space felt layered without being crowded. Guests could enjoy the evening, lean back comfortably, and still have room to circulate, all within just 1.8 m (6 ft) of width.
Small balconies excel when design focuses on intimacy and proximity. The lack of sprawling space encourages thoughtful choices: materials, lighting, and placement matter far more than in larger gardens. A well-configured compact balcony can feel cozier, more personal, and instantly inviting qualities often lost in expansive layouts.
Measurements: Practical proportions for comfort
Even on small balconies, circulation and ergonomics are non-negotiable:
- Table dimensions: 60–90 cm (24–36 inches) deep, 90–120 cm (36–48 inches) wide for 2–4 guests
- Chair clearance: Minimum 60 cm (24 inches) behind seating for easy movement
- Seating height: Standard 45 cm (18 inches), with foldable cushions for comfort
- Edge safety: At least 50–60 cm (20–24 inches) from balcony railing to avoid feeling cramped
Wall-mounted or drop-leaf tables can be folded down when not in use, freeing the circulation zone for lounging or potted plants.
Materials: Durability meets tactility
Compact balconies demand materials that are robust, weather-resistant, and visually light:
- Tables: Foldable timber, aluminium, or powder-coated metal
- Seating: Stackable chairs, stools, or benches with waterproof cushions
- Flooring: Outdoor decking tiles or artificial grass to soften hard surfaces
- Accents: Lightweight planters, small lanterns, or miniature herb gardens
I always prefer materials that age gracefully; timber develops warmth, metals can be powder-coated in light neutrals, and cushions can be swapped seasonally to refresh the look.
Layout & Styling: Make every inch count
For compact balconies, layout is about efficiency without sacrificing comfort:
- Linear or L-shaped setups: Use corners to your advantage
- Vertical elements: Shelves, railing planters, or wall-mounted lights to free floor space
- Textiles & layering: Small outdoor rugs, seat cushions, and throws add texture and comfort
- Visual breathing room: Avoid overcrowding; a few well-chosen pieces create a sense of openness
I often treat compact balconies like a stage: each element has a purpose, and nothing obstructs circulation or sightlines.
Lighting & Atmosphere
In small spaces, lighting is key to creating depth and warmth without clutter:
- String lights along railings: Add whimsy and brightness
- Wall-mounted lanterns: Save space while providing cozy illumination
- Candles or small LED tealights: Introduce flickering warmth for evening meals
The goal is to make the balcony feel expansive and inviting, even in a dense urban context, and lighting is central to achieving that perception.
Pros
- Makes tight spaces fully functional for dining and entertaining
- Encourages intimacy and conversation
- Flexible furniture allows multi-use functionality
- Can be visually expanded with light colors, textiles, and verticality
Cons
- Limited capacity 2–4 people is usually maximum
- Furniture must be carefully chosen for scale and foldability
- Exposure to wind or rain may limit usability without retractable protection
- Styling must balance coziness with not overcrowding the small footprint
Final Design Perspective
A compact balcony dining setup proves that good things come in small packages. By combining foldable furniture, layered textures, and clever vertical planning, even the tightest urban outdoor space can feel inviting, functional, and surprisingly intimate.
With precise proportions, robust yet lightweight materials, and layered lighting, a small balcony becomes more than an afterthought. It becomes a curated micro-environment, encouraging lingering dinners, evening conversations, and moments that feel personal, intentional, and beautifully designed despite the square footage.
It is a space where every inch matters, every choice counts, and where a simple dinner outdoors can feel extraordinary, thoughtful, and utterly memorable.
Outdoor Kitchen Adjacent Dining Setup
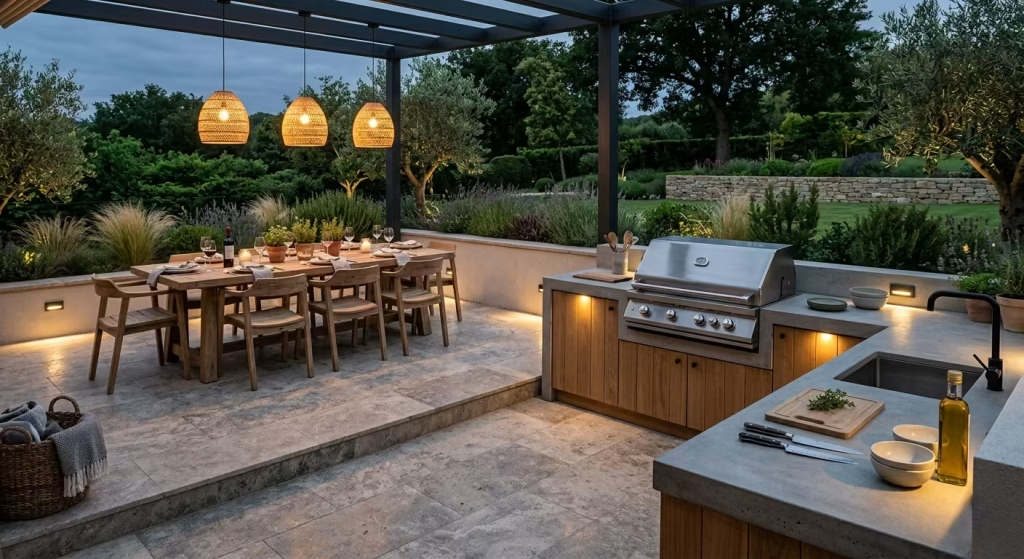
An outdoor kitchen paired with an adjacent dining area is the ultimate in functional al fresco living. This arrangement blurs the line between food preparation and consumption, allowing hosts to engage with guests while cooking. From my experience, success here is less about flashy appliances and more about spatial choreography, workflow efficiency, and material harmony. The goal is a setup that feels effortless, encourages social interaction, and makes outdoor dining feel like an extension of the home.
When executed well, the dining zone becomes part of the culinary theatre. Guests can watch, chat, and participate without impeding circulation, while the host remains fully engaged in creating the experience. The combination of tactile surfaces, natural materials, and thoughtful lighting ensures the space feels both practical and immersive, rather than a mere staging area.
Real Insight: How adjacency elevates outdoor dining
On a recent project, I designed a 3 m (10 ft) linear outdoor kitchen with a dining table positioned 1.2 m (4 ft) away. The materials were carefully chosen: a granite countertop, powder-coated steel cabinets, and a reclaimed timber table. This spacing allowed the chef to move freely between grill, prep, and dining, while guests remained comfortably seated. The result was an interactive, sociable environment, where conversation flowed as easily as the wine, and the outdoor meal became an orchestrated experience rather than just a dinner.
This layout is particularly effective when entertaining larger groups. Guests can gather around the prep area for drinks, nibble on appetizers, or simply enjoy the ambience, all while preserving a clear circulation path. In essence, the design transforms outdoor dining into a multi-sensory, participatory experience.
Measurements: Ensuring comfort and workflow
Proper spacing and proportions are key to balancing functionality and intimacy:
- Dining table distance from kitchen: 1–1.5 m (40–60 inches) for free movement
- Table dimensions: 220–300 cm (7–10 ft) long, 90–100 cm (36–40 inches) wide
- Counter height: Standard 90 cm (36 inches), with prep space depth 60–70 cm (24–28 inches)
- Circulation around kitchen: Minimum 90 cm (36 inches) to allow multiple users
These measurements ensure the space is ergonomic, safe, and fluid, even when multiple people are cooking, serving, or socialising simultaneously.
Materials: Durability meets aesthetic cohesion
Materials must withstand the elements while remaining tactile and inviting:
- Countertops: Granite, engineered stone, or heat-treated concrete
- Cabinetry: Powder-coated steel, teak, or marine-grade plywood
- Table & seating: Reclaimed timber or weatherproof metal for continuity with the kitchen zone
- Flooring: Stone pavers, large-format tiles, or composite decking for durability and easy cleaning
From my perspective, continuity in materiality between kitchen and dining areas creates a cohesive visual story, while practical surfaces stand up to heat, moisture, and spillages without compromising elegance.
Layout & Styling: Creating harmony and flow
- Kitchen orientation: Linear, L-shaped, or U-shaped depending on terrace dimensions
- Dining placement: Adjacent but distinct, ideally on a slightly raised or zoned surface to define the space
- Accessories: Minimal clutter; use integrated storage for utensils, dishware, and condiments
- Visual connection: Low planting, pergola beams, or subtle dividers can subtly frame the dining area without obstructing the chef’s line of sight
I often treat the adjacent dining zone as a pause point: close enough to feel part of the culinary activity, yet distinct enough to provide comfort and space for eating.
Lighting & Ambience
Layered lighting is critical to maintaining both functionality and mood:
- Task lighting: Recessed or under-counter LED strips for the cooking zone
- Ambient lighting: Warm pendant lights, string lights, or lanterns over the dining table
- Accent lighting: Small uplights for planters, perimeter floor lights, or subtle spotlights to highlight architectural features
I recommend warm-toned lighting (2200–2700K) to create a cozy, inviting atmosphere while preserving natural material textures and colour fidelity.
Pros
- Enhances social interaction between host and guests
- Streamlines food preparation, serving, and dining in one flow
- Allows flexible arrangements for casual or formal dining
- Adds a sense of ceremony and sophistication to outdoor meals
Cons
- Requires adequate space to avoid crowding between cooking and dining zones
- Needs durable, weather-resistant materials to withstand outdoor conditions
- Ventilation or smoke management must be considered for enclosed terraces
- Lighting and storage need careful integration to avoid clutter
Final Design Perspective
An outdoor kitchen with an adjacent dining setup is the embodiment of living outdoors with ease, elegance, and social grace. It transforms meals into shared experiences where food, conversation, and ambience interlace seamlessly.
By carefully proportioning space, choosing materials that are both tactile and durable, and layering light and textures, the design achieves a refined balance between practicality and beauty. Guests can linger, chefs can engage, and the space functions as both a stage and a sanctuary, a thoughtfully choreographed outdoor dining experience that feels natural, connected, and utterly inviting.
This arrangement turns even ordinary evenings into memorable gatherings that celebrate food, environment, and togetherness, elevating outdoor living from functional to exceptional.
You May also Like: 25 Outdoor Privacy Screen Ideas That Elevate Your Garden with Architectural Confidence
Shade Sail Covered Dining Area
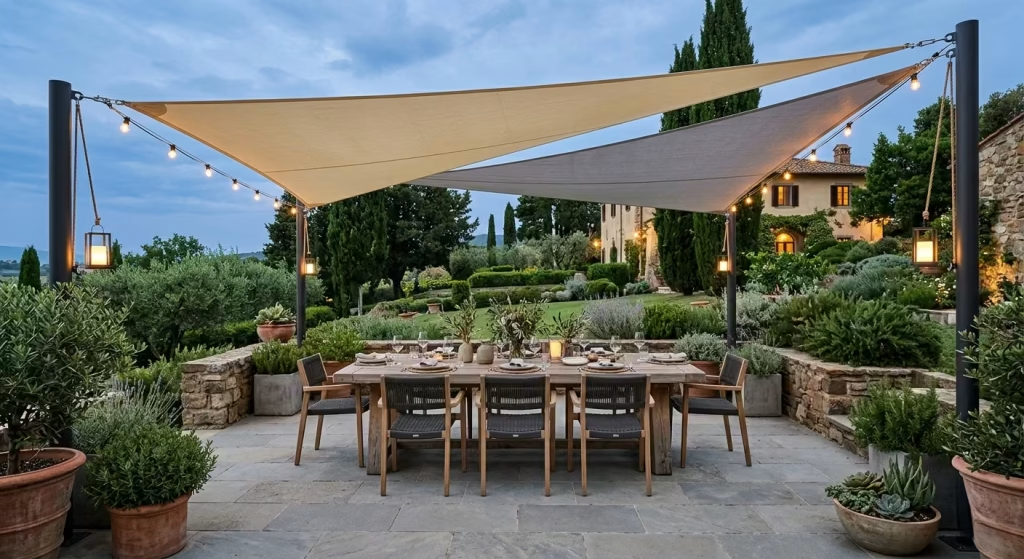
A shade sail-covered dining area offers practical protection from sun and light rain while adding sculptural interest to outdoor spaces. Unlike rigid pergolas or fixed roofs, shade sails introduce a sense of movement and dynamism almost like a living piece of architecture floating above your dining zone. From my experience, a well-tensioned sail not only defines the dining space but also softens the brightness of summer sun, creating a more intimate, comfortable environment without enclosing the area.
The beauty of this solution is its flexibility. You can adjust the height, angle, and layering of multiple sails to suit sun paths, wind, and desired aesthetics. It also works for terraces, gardens, or poolside settings, giving you a lightweight yet visually compelling canopy that elevates the dining experience from ordinary to intentional.
Real Insight: How shade sails transform outdoor dining
On a recent project with a rectangular garden of 8 m x 4 m (26 x 13 ft), I installed two triangular UV-protective sails over a timber dining table. The sails were angled asymmetrically to provide afternoon shade while allowing morning sun to spill onto the surrounding planters. Guests commented on the “sense of shelter without enclosure,” which perfectly captures the Mediterranean-inspired feeling I aim for in open-air dining.
The sails also contribute to acoustic comfort: by partially breaking up open air, they reduce echo from hard surfaces and help make conversation more intimate, especially in larger gardens. Combined with well-placed plants and subtle lighting, the effect is a dining nook that feels cozy, sculptural, and deliberately framed, rather than just shaded.
Measurements: Proportion and placement
Proper sizing is crucial for comfort, circulation, and aesthetic balance:
- Sail coverage: At least 1.5 times the table footprint for effective shade
- Table dimensions: Typically 220–300 cm (7–10 ft) long, 90–100 cm (36–40 inches) wide
- Clearance: Minimum 2.5–3 m (8–10 ft) above table to allow airflow and movement
- Anchor points: Ensure strong attachment to posts, walls, or trees at the correct tension
I often recommend overlapping sails for larger setups that not only enhances sun coverage but creates visual layering and a sense of enclosure without walls.
Materials: Durable, elegant, and weather-resistant
- Fabric: UV-stable, waterproof, and breathable polyester or acrylic
- Fixings: Stainless steel tensioners, marine-grade ropes, and wall brackets for longevity
- Supporting structures: Timber posts, powder-coated steel poles, or existing architecture for anchor points
I usually select light, neutral tones such as warm cream, soft grey, or sandy beige. These hues reflect heat, complement natural materials, and maintain a timeless palette that feels both premium and adaptable to changing seasons.
Layout & Styling: Harmonising function and form
- Table placement: Directly beneath the sail, leaving 90–120 cm (36–48 inches) of circulation on all sides
- Layering with plants: Low greenery around edges or potted olive trees soften edges and integrate the sail into the garden
- Furniture choice: Weatherproof timber, rattan, or powder-coated metal tables and chairs
- Accents: Linen runners, neutral cushions, and ceramic tableware enhance tactile and visual richness
The goal is to frame the dining area while keeping the overall space light, airy, and inviting, rather than feeling blocked off or heavy.
Lighting & Atmosphere
Shade sails can double as support for overhead lighting, creating layers of glow after sunset:
- String lights can be attached along sail edges or draped beneath
- Lanterns hung from supporting posts add depth
- Low-level accent lighting on planters or deck edges enhances the visual footprint
Warm, soft lighting (2200–2700K) complements the sail’s muted tones and maintains a cozy, inviting mood for evening dining.
Pros
- Provides flexible sun and light rain protection
- Creates visual interest and a sculptural focal point
- Enhances intimacy and acoustic comfort
- Easy to adjust, remove, or layer for different effects
Cons
- Requires proper tensioning and strong anchoring to avoid sagging or wind damage
- Fabric may fade over time if exposed to intense UV
- Limited protection in heavy rain or storms
- Installation can be more technical than simple umbrellas or pergolas
Final Design Perspective
Shade sail-covered dining areas are an elegant solution for bringing intentionality, comfort, and style to outdoor entertaining. When proportioned correctly, anchored securely, and combined with layered lighting and planting, the space feels sheltered yet open, intimate yet airy.
It transforms a typical backyard or terrace into a dining stage that balances function and visual drama, where meals linger, conversation flows, and the outdoor environment is not a challenge but an integral part of the experience. The subtle sculptural lines of the sail, paired with thoughtful furniture and textures, create a setting that is timeless, sophisticated, and effortlessly inviting, making every alfresco dinner feel like a curated retreat.
Seasonal Floral Styling Dinner Table
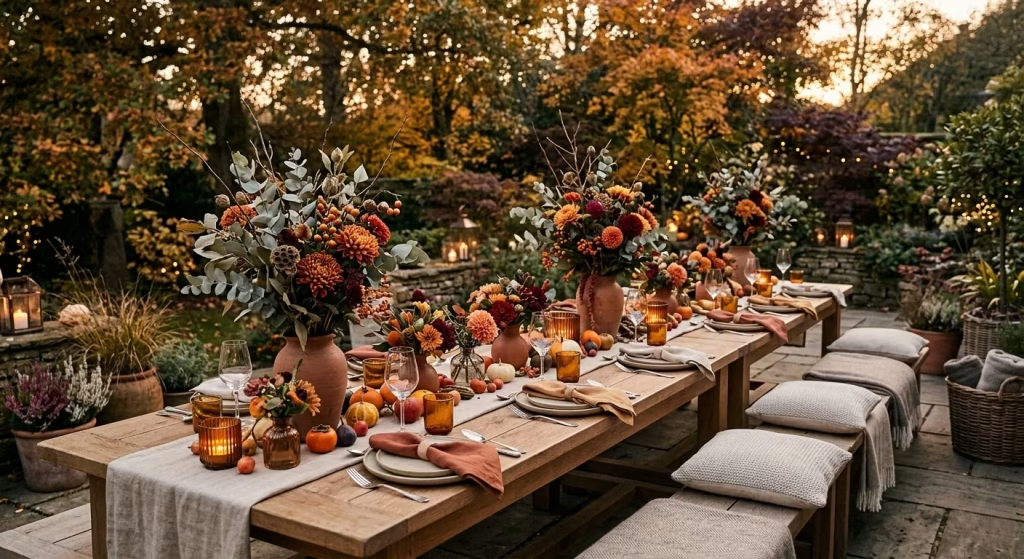
A dinner table adorned with seasonal flowers transforms a simple meal into a multisensory experience. Beyond mere decoration, flowers provide colour, fragrance, and tactility all of which influence mood, perception, and the rhythm of a gathering. From my experience, the most impactful floral arrangements are restrained, layered, and thoughtfully integrated with the table’s scale and surrounding materials, rather than being over-the-top or purely decorative.
Seasonal styling encourages a dialogue with the environment: spring blooms bring freshness and vibrancy, summer flowers add warmth and softness, autumn foliage offers texture and muted tones, and winter arrangements convey coziness and structure. By aligning floral choice with seasonality, the dining space feels alive, relevant, and subtly curated, inviting guests to linger longer and engage more deeply with the setting.
Real Insight: Why seasonal flowers elevate outdoor dining
On one project, I designed a long 280 cm (9 ft) timber table for a summer dinner gathering. I layered lavender sprigs, potted herbs, and clusters of daisies in small ceramic vases, interspersed with linen napkins and candlelight. Guests consistently commented that the table felt “welcoming and alive,” and it naturally encouraged conversation around the scents and colours.
Seasonal arrangements also dictate rhythm and layering: taller flowers at intervals provide focal points, low clusters ensure unobstructed views, and textured foliage adds depth. In essence, the table itself becomes part of the narrative of the evening, reflecting the broader natural environment rather than existing in isolation.
Measurements & Proportions: Scaling flowers to the table
Proper sizing ensures that floral styling enhances rather than obstructs:
- Tall centerpieces: 40–60 cm (16–24 inches) above table height for visual impact
- Low clusters or runners: 20–30 cm (8–12 inches) height to avoid blocking sightlines
- Spacing: 60–90 cm (24–36 inches) between vases to create rhythm and avoid overcrowding
- Table width: 90–110 cm (36–44 inches) accommodates both place settings and decorative clusters comfortably
Scaling is crucial to maintain balance, circulation, and intimacy. Overly tall or densely packed arrangements can make even a spacious table feel crowded and formal rather than inviting.
Materials: Layering natural textures
- Vessels: Ceramic, glass, or terracotta vases for tactile variation
- Table runners: Linen or soft cotton to complement the blooms
- Accents: Twine, small stones, or seasonal fruits add subtle textural interest
- Complementary elements: Candles or small lanterns for warmth and cohesion
I often mix textures deliberately, pairing rough ceramics with smooth glass, delicate blooms with sculptural foliage, to create a table that feels curated yet organic.
Styling & Layout: Orchestrating visual rhythm
- Linear arrangement: For long tables, alternate tall and low groupings to guide the eye along the table
- Clustered arrangements: Small, repeated groupings for intimate conversation zones
- Colour palette: Use seasonal tones to unify or contrast subtly with surrounding environment
- Integration: Flowers should harmonize with place settings, textiles, and surrounding lighting
I treat floral styling like orchestrating a narrative: each bloom, vase, or accent is a note that contributes to the overall ambience without overpowering it.
Lighting & Ambience
Seasonal flowers interact beautifully with light:
- Natural daylight: Enhances colours, particularly pastels and vibrant summer tones
- Evening lighting: Candlelight or low-voltage string lights cast soft shadows, highlighting texture and form
- Layered glow: Combine small uplights on planters or lanterns along the table edge to accentuate depth
Lighting should highlight the natural beauty of flowers while complementing surrounding materials like timber, linen, and stone.
Pros
- Creates a dynamic, sensory-rich dining experience
- Enhances connection to seasonality and environment
- Encourages conversational touchpoints for guests
- Flexible and adaptable to table size, style, or occasion
Cons
- Requires periodic maintenance; some blooms wilt quickly in heat or sun
- Overcrowding can impede sightlines or circulation
- Some flowers may have strong scents that conflict with food
- Material choice for vases must be weather-appropriate if outdoors
Final Design Perspective
Seasonal floral styling elevates an outdoor dinner table into a living composition that engages sight, smell, and tactility. By thoughtfully layering height, texture, and colour, the table becomes a canvas where nature and design meet, creating a space that encourages lingering, conversation, and delight.
When flowers are chosen with intention reflecting the season, harmonising with materials, and scaled to the table they transform a meal into a multi-layered experience. The result is not just beautiful, but memorable, interactive, and deeply engaging, proving that the smallest design gestures, like a sprig of lavender or a cluster of sunflowers, can resonate long after the last course has been cleared.
This approach turns dining into a ritual of seasonal appreciation, tactile richness, and effortless elegance, making every meal a sensory celebration that feels intimate, intentional, and unmistakably curated.
You May also Like: 16 Ibiza-Inspired Spanish Dining Room Ideas for a Stunning Mediterranean Home
Evening Dinner with Integrated Landscape Lighting
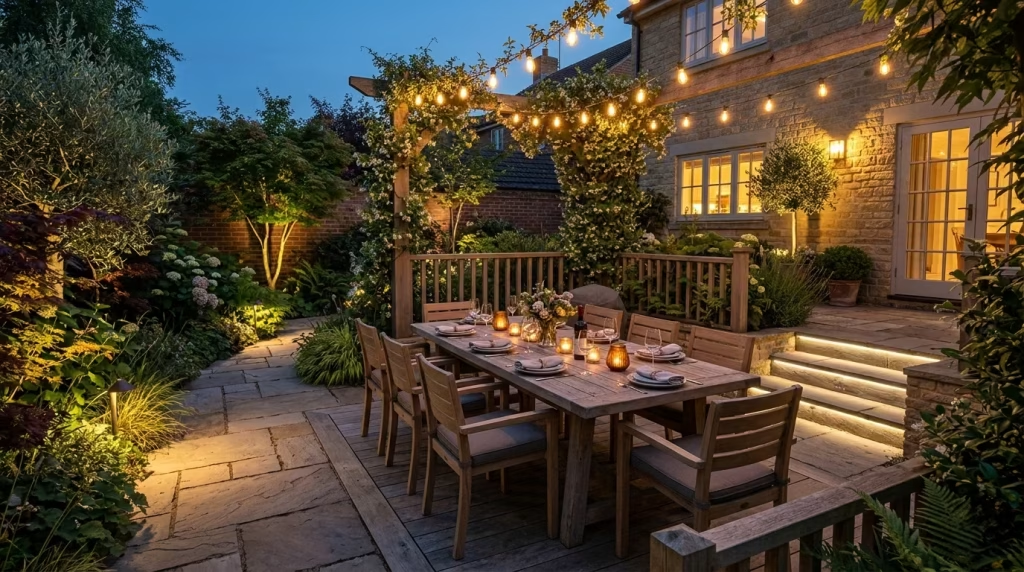
An evening dinner becomes truly magical when the surrounding landscape is considered part of the dining experience. Integrated landscape lighting elevates outdoor meals from functional to immersive, design-led moments, shaping perception, mood, and spatial hierarchy. From my experience, the secret lies not in sheer brightness but in layered, subtle illumination that accentuates textures, defines zones, and guides circulation. Properly integrated lighting makes guests feel enveloped by warmth and intimacy, while still connected to the larger outdoor environment.
The philosophy behind this approach is simple: light sculpts experience. It draws attention to architectural details, planting layers, and outdoor features, creating a narrative that unfolds as daylight fades. A well-lit landscape can transform a standard dinner into a curated evening event, where the interplay of shadow and glow subtly reinforces the setting’s elegance.
Real Insight: How integrated lighting enhances outdoor dining
In a recent project with a garden dining terrace of 7 m x 5 m (23 x 16 ft), I installed low-level path lights, uplights for key planting, and recessed LED strips under timber steps. The dining table, positioned centrally, was illuminated by a combination of warm string lights and small lanterns, creating a layering effect. Guests remarked that the space felt cozy yet expansive, with each corner of the garden contributing to the mood without stealing focus. The integration of lighting into the landscape, rather than hanging it arbitrarily, enhanced flow, safety, and visual harmony.
I often use lighting to guide the eye and subtly define functional zones: steps and paths are lit for circulation, focal trees or architectural elements for visual drama, and table areas for intimacy. This ensures the garden feels alive, composed, and deeply considered, even after dark.
Measurements & Proportions: Ensuring safety and balance
Lighting design must respect both practicality and visual impact:
- Pathway clearance: 90–120 cm (36–48 inches) for safe circulation
- Step illumination: Recessed or low-profile lights no higher than 5–8 cm (2–3 inches) above step surface
- Table lighting height: 1.8–2 m (6–6.5 ft) for ambient glow without glare
- Spacing for planting uplights: 1–2 m (3–6 ft) apart depending on plant size and density
Correct proportions ensure guests move safely, enjoy visual depth, and avoid harsh shadows or glare.
Materials & Fixtures: Durable yet elegant
- Fixtures: Stainless steel, powder-coated aluminum, or brass for longevity
- Bulbs: Warm LED (2200–2700K) to maintain cozy ambience
- Integration: Recessed, embedded, or shielded to avoid clutter and maintain a clean aesthetic
- Accessories: Light-scattering elements like frosted glass or textured lanterns to soften glow
I prefer materials that weather gracefully and complement surrounding surfaces, whether timber decking, stone terraces, or gravel paths.
Layout & Styling: Harmonising light and landscape
- Zoning: Separate circulation, planting, and dining areas subtly through intensity and direction of light
- Layering: Combine uplights, downlights, and accent points for depth
- Focal points: Highlight specimen trees, sculptures, or water features to draw attention
- Subtlety: Avoid over-lighting; darkness between highlights enhances mystery and intimacy
In my design practice, the key is integration, not ornamentation. Light should feel inevitable, natural, and part of the environment rather than an added afterthought.
Pros
- Enhances safety and circulation after dark
- Elevates atmosphere, creating a sense of intimacy and drama
- Highlights landscape features and architectural details
- Flexible; lighting can adapt to seasons, events, or moods
Cons
- Requires careful planning to avoid glare, shadows, or light pollution
- Electrical work must be professionally executed for safety
- Maintenance of fixtures and bulbs is ongoing, especially in exposed outdoor environments
- Over-illumination can reduce the subtlety and intimacy of the setting
Final Design Perspective
Evening dinners with integrated landscape lighting transform outdoor dining into a choreographed visual and sensory experience. Thoughtful layering, placement, and fixture selection create a space that feels enveloped in warmth, yet open to the garden beyond. The interplay of light and shadow not only frames the dining experience but tells a story guiding guests, highlighting textures, and creating intimacy without constriction.
In essence, integrated landscape lighting is the silent co-host: it sets the scene, directs attention, and enhances mood while allowing the culinary and social experience to shine. Done correctly, it elevates every dinner into a curated evening ritual, where the garden itself becomes a partner in the hospitality, ensuring that each meal lingers in memory long after the last course has been cleared.
It proves that light, like design, is never trivial; it shapes perception, deepens engagement, and leaves guests feeling that the evening was thoughtfully composed, effortless, and entirely exceptional.
Casual Lounge Dining Hybrid Setup
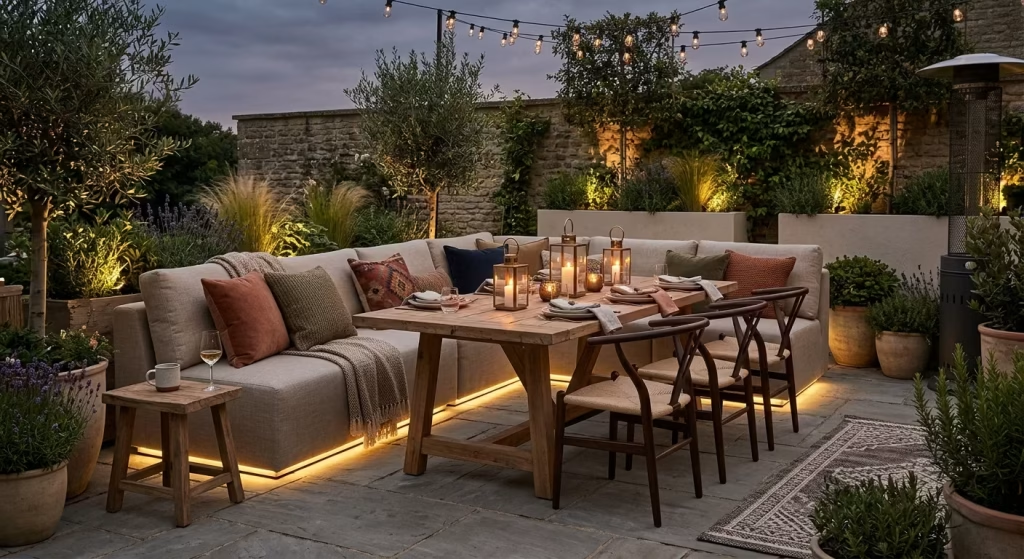
A casual lounge dining hybrid setup is the perfect way to invite relaxation without sacrificing formality, creating a space where guests can drift from cocktails to dinner effortlessly. From my experience, the most successful hybrid areas balance the intimacy of lounge seating with the functionality of a dining table, ensuring that the space feels deliberate, comfortable, and socially conducive rather than haphazard.
This approach is ideal for informal summer gatherings, rooftop terraces, or larger patios where you want people to linger, converse, and move freely. By merging low seating, modular sofas, and dining-height tables, you create an environment that encourages serendipitous conversation, playful circulation, and relaxed elegance.
Real Insight: How hybrid setups enhance social flow
On a project with a 7 m x 5 m (23 x 16 ft) terrace, I combined a modular outdoor sofa with a central dining table of 180 cm x 90 cm (6 x 3 ft), and scattered side tables for drinks and appetizers. The sofa was set 45 cm (18 inches) from the table, allowing guests to lounge without compromising access for dining. This configuration encouraged guests to shift naturally between seated dining and relaxed lounging, creating a sense of intimacy while maintaining clear circulation paths.
I find that mixing lounge and dining elements invites a more informal, interactive experience, giving even formal gatherings a feeling of spontaneity and ease. Guests gravitate toward their preferred comfort zones, and the host can move fluidly between entertaining and dining tasks without feeling trapped.
Measurements & Proportions: Comfort and flow
Hybrid setups require careful attention to scale and ergonomics:
- Table dimensions: 180–220 cm (6–7 ft) long, 90–100 cm (36–40 inches) wide
- Seating height: Lounge sofas 35–40 cm (14–16 inches), dining chairs 45–50 cm (18–20 inches)
- Clearance: Minimum 90–120 cm (36–48 inches) around tables and lounge clusters for circulation
- Side tables: 40–50 cm (16–20 inches) from lounge seating to reach comfortably
Correct spacing ensures that dining doesn’t feel cramped, and lounging doesn’t obstruct traffic, maintaining the natural rhythm of the gathering.
Materials & Textures: Durable, layered, and tactile
- Seating: Weatherproof rattan, teak, or powder-coated aluminum
- Cushions: Quick-dry, fade-resistant fabrics in muted tones for layering
- Table surfaces: Timber, stone, or composite that can withstand spills without losing tactile warmth
- Accents: Woven throws, low planters, or textured rugs to soften edges and define zones
I often layer textures to create a sense of touchable luxury, ensuring that materials feel inviting underfoot, on hands, and to the eye, giving every seat a deliberate sense of comfort.
Layout & Styling: Orchestrating zones within one space
- Zoning: Use sofa clusters or low planters to subtly define lounge and dining areas
- Flow: Ensure visual and physical connections between zones for continuity
- Furniture arrangement: Tables and lounge pieces should encourage natural conversation and movement, with no more than 1.2 m (48 inches) of travel between lounge and dining spots
- Accents: Candles, lanterns, or low pendant lights over the dining area complement the soft glow from lounge-level LED strips or fire bowls
I treat hybrid areas as microcosms of the larger outdoor environment; each seating cluster, table, and plant placement is part of a carefully curated narrative that encourages interaction while feeling effortlessly organic.
Lighting & Ambience
Layered lighting is essential for hybrid setups:
- Task lighting: Soft table lanterns or small overhead pendants for dining
- Ambient lighting: Low-level LED strips, uplights on planters, or fire bowls for lounge zones
- Accent lighting: Spotlights on vertical surfaces or garden features to create depth and visual drama
I always recommend warm tones (2200–2700K) to unify both zones and maintain a sense of intimacy across the hybrid space.
Pros
- Encourages fluid social interaction between lounging and dining
- Accommodates diverse guest preferences and moods
- Flexible for small or large gatherings
- Creates a relaxed yet refined atmosphere
Cons
- Requires careful measurement to avoid congestion or awkward circulation
- Mixing seating heights can be challenging if not proportioned correctly
- Materials must withstand varied use, from lounging to dining
- More complex styling and furniture layering may require professional guidance
Final Design Perspective
A casual lounge dining hybrid setup is about orchestrating comfort, flexibility, and social rhythm. Done thoughtfully, it transforms an outdoor space into a living, breathing environment where guests can shift seamlessly from drinks to dinner, and back to relaxation, without ever feeling constrained.
By layering seating heights, tactile materials, and carefully considered lighting, the space becomes both visually cohesive and functionally fluid, encouraging lingering, conversation, and enjoyment. In my experience, hybrid setups turn ordinary gatherings into immersive experiences, where design and interaction are harmoniously intertwined, leaving guests feeling welcome, comfortable, and fully engaged with both the space and the occasion.
This approach proves that outdoor dining does not have to be rigid or formal; it can be an adaptable, curated canvas where every seat, surface, and light source contributes to a memorable, intentionally designed experience.
Formal Outdoor Dining with Structured Symmetry
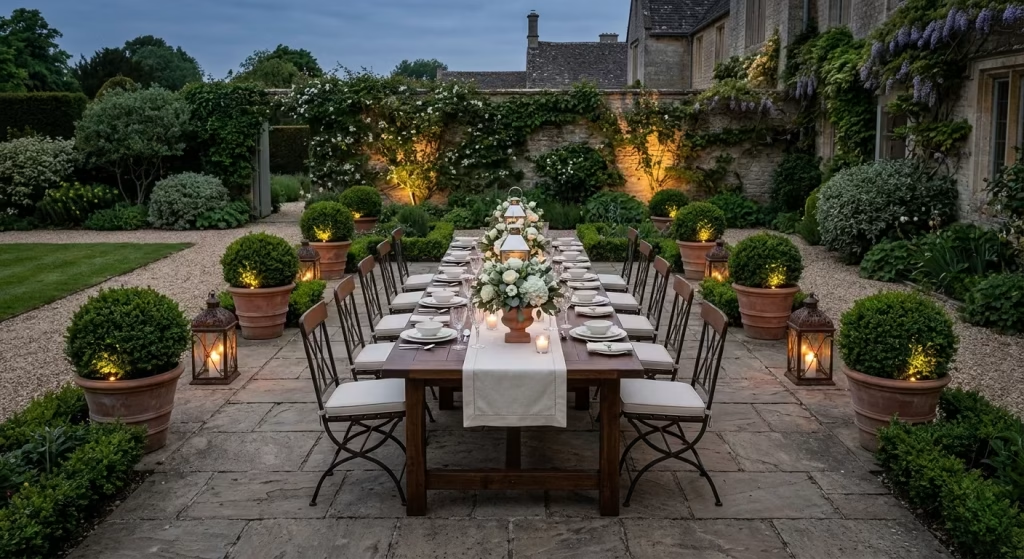
Formal outdoor dining with structured symmetry is all about creating a sense of order, refinement, and visual harmony. From my experience, symmetrical arrangements mirrored chairs, balanced centerpieces, and evenly spaced tables instantly convey sophistication without relying on excessive decoration. This approach works exceptionally well for large terraces, formal gardens, or expansive patios where the architecture and landscape support a grand, intentional composition.
Symmetry appeals to our innate sense of balance, making spaces feel orderly, calm, and inviting. The key is to harmonize furniture, textiles, and table settings with surrounding materials, so that the design feels elevated yet livable, not rigid or staged.
Real Insight: How symmetry shapes the dining experience
On a project with a rectangular garden of 12 m x 6 m (40 x 20 ft), I positioned a 10-seat timber table centrally, flanked by identical planters and lanterns on each side. Chairs were mirrored, and floral arrangements were repeated at equal intervals along the table. Guests immediately felt a sense of ritual and occasion, with each place setting naturally highlighted and the table appearing anchored within the landscape.
Structured symmetry also simplifies decision-making: mirrored elements create a visual rhythm that guides circulation, seating, and lighting placement. The result is a space that feels cohesive, deliberate, and effortlessly refined, where the design quietly communicates confidence and intentionality.
Measurements & Proportions: Precision is key
Formal symmetry requires exact spacing and proportion for elegance:
- Table dimensions: 240–300 cm (8–10 ft) long, 100–110 cm (40–44 inches) wide
- Chair spacing: 60 cm (24 inches) between seats for comfort
- Clearance: 100–120 cm (40–48 inches) around the table for circulation
- Centerpiece alignment: Heights should be uniform, 30–50 cm (12–20 inches) to avoid blocking sightlines
Attention to these details ensures balance, visual comfort, and functional ease, critical in formal settings where perception is as important as practicality.
Materials & Styling: Sophistication through restraint
- Furniture: Solid timber, wrought iron, or powder-coated aluminum for durability and timeless appeal
- Tabletops: Marble, stone, or high-quality composite that conveys gravitas
- Accents: Repeating elements such as vases, lanterns, or candlesticks for rhythm
- Textiles: Linen runners or placemats in neutral tones to maintain a subtle, cohesive palette
I often favour materials with tactile richness, so that guests feel the quality under hand and eye, a cornerstone of formal design that elevates the experience without ostentation.
Layout & Styling: Orchestrating harmony
- Mirrored seating: Chairs on either side aligned precisely to maintain balance
- Repeating decorative elements: Centerpieces, candles, or planters repeated symmetrically
- Pathways: Ensure circulation is mirrored on each side to maintain flow
- Lighting: Symmetrical lanterns or string lights to reinforce alignment and rhythm
In formal settings, symmetry is both visual and functional, guiding movement and providing a sense of reassurance and elegance.
Lighting & Ambience
Lighting reinforces structure and mood:
- Overhead lanterns or chandeliers aligned with the table axis
- Candle clusters mirrored along the table to enhance intimacy
- Accent uplights on surrounding plants or architectural features to frame the space
I recommend warm, consistent tones (2200–2700K) to unify the formal composition while preserving a soft, inviting atmosphere.
Pros
- Conveys elegance and refinement without excess
- Simplifies circulation and table setup
- Creates visual cohesion and balance
- Works well for both small and large gatherings
Cons
- Can feel rigid if overdone or applied without variation
- Requires careful measurement and planning
- Limited flexibility for spontaneous layouts
- Symmetry may feel formal rather than casual or intimate
Final Design Perspective
Formal outdoor dining with structured symmetry is about curating a space that exudes calm confidence. By meticulously aligning furniture, lighting, and decorative elements, the table becomes a stage for social interaction, where guests naturally gravitate into a rhythm dictated by the environment.
From my perspective, symmetry should never feel forced; it should support the experience rather than overshadow it. When executed with care, it elevates outdoor dining to a deliberate, tactile, and visual experience, where every element feels intentional, inviting, and anchored in design-led reasoning.
This approach proves that even in open-air settings, precision, proportion, and subtle repetition can transform an ordinary dinner into a memorable, curated occasion, leaving guests with a sense of order, elegance, and effortless sophistication.
Bohemian Layered Textile Dining Setup
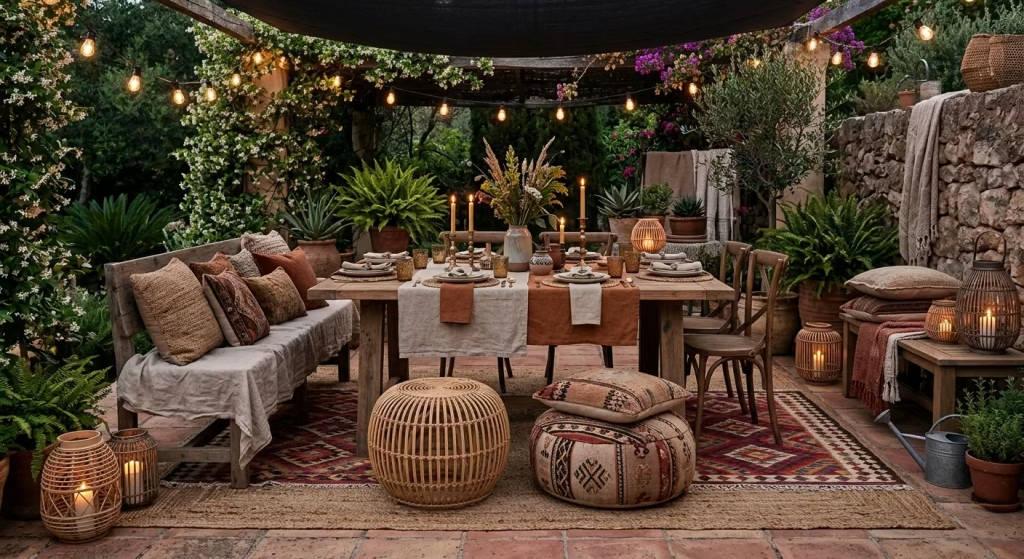
A Bohemian layered textile dining setup is all about creating a warm, inviting, and tactile environment where each piece rugs, cushions, throws, and table linens tells a story. From my experience, Bohemian tables work best when layers are deliberate rather than chaotic, balancing color, pattern, and texture to produce a space that feels relaxed yet thoughtfully curated. This approach is ideal for patios, garden terraces, or even rooftops where the goal is to foster a welcoming, informal atmosphere without losing visual sophistication.
The beauty of Bohemian styling lies in its ability to make spaces feel lived-in and personal, yet still designed with intention. By layering textiles, mixing materials, and introducing unexpected accents, the dining area transforms into a multi-sensory experience, engaging touch, sight, and comfort simultaneously.
Real Insight: How layered textiles elevate outdoor dining
On a project involving a 5 m x 4 m (16 x 13 ft) backyard terrace, I combined a timber dining table of 200 cm x 90 cm (6.5 x 3 ft) with a mix of patterned kilim rugs, low pouf seating, and linen-draped benches. Cushions of varying textures and colors were arranged to invite lounging, while layered table runners and placemats tied together the eclectic mix. Guests instinctively gravitated toward the textured zones, lingering longer than in a standard table setup, enjoying both comfort and visual intrigue.
I’ve found that layered textiles allow for flexibility: you can change color schemes seasonally or swap textures based on lighting and occasion, making the space feel continuously evolving yet consistently cohesive.
Measurements & Proportions: Scaling for comfort and usability
Proper sizing ensures that layered elements enhance rather than overwhelm:
- Table dimensions: 180–240 cm (6–8 ft) long, 90–100 cm (36–40 inches) wide
- Rug layering: Base rug 200 x 300 cm (6.5 x 10 ft) with smaller rugs (120 x 180 cm / 4 x 6 ft) to define seating zones
- Cushion depth: 40–50 cm (16–20 inches) for seating comfort
- Clearance: 90–110 cm (36–44 inches) around table and lounge elements for circulation
Scaling and layering correctly ensures visual depth without clutter, while maintaining practical use for dining.
Materials & Textures: Creating tactile depth
- Rugs: Kilim, jute, or flatweave for durability and pattern
- Seating: Poufs, bench cushions, or low lounge chairs with layered throws
- Table textiles: Linen runners, embroidered mats, and woven placemats
- Accents: Macramé hangings, lanterns, or soft sheepskin throws
I like to combine rougher natural fibers with soft, tactile textiles, creating a sense of warmth and richness that invites lingering and touch.
Layout & Styling: Curating a visually rich yet functional space
- Layering: Stack rugs, cushions, and throws in complementary color palettes to define zones
- Seating flexibility: Mix benches, poufs, and chairs to accommodate different groupings
- Visual rhythm: Alternate colors, patterns, and heights to avoid monotony while maintaining cohesion
- Integration: Textiles should harmonize with plantings, lighting, and surrounding surfaces for a seamless effect
The goal is controlled eclecticism: it should feel effortless yet curated, like a space that has evolved naturally but with an eye for balance.
Lighting & Ambience
Textiles interact beautifully with soft, layered lighting:
- Lanterns: Scatter metal, glass, or woven lanterns along the table and seating zones
- Candles: Varying heights to complement textiles and add warmth
- String lights or festoon bulbs: Draped above or around the perimeter for soft, diffuse glow
- Accent uplights: Highlight plants or outdoor features to tie the textile richness into the broader environment
Lighting should enhance textures and patterns, bringing depth and intimacy to the Bohemian ensemble.
Pros
- Creates a relaxed, intimate, and tactile environment
- Flexible and adaptable to seasonal or thematic changes
- Encourages guests to linger and socialize in comfort
- Visually rich without appearing forced or rigid
Cons
- Requires maintenance: rugs and cushions must withstand outdoor exposure
- Over-layering can obstruct movement or sightlines if not scaled properly
- Patterns and colors need careful curation to avoid visual chaos
- Some textiles may fade in strong sunlight or require rotation
Final Design Perspective
A Bohemian layered textile dining setup celebrates comfort, texture, and visual richness. From my experience, the most successful spaces balance playful eclecticism with intentional structure, creating a welcoming environment that feels both luxurious and approachable.
By thoughtfully layering rugs, cushions, throws, and table textiles, the dining area becomes a tactile, interactive canvas, where guests can move seamlessly between dining and lounging, while still being enveloped in a carefully composed visual narrative.
This approach demonstrates that design-led Bohemian styling is more than decoration; it’s a philosophy of comfort, engagement, and sensory delight, proving that even informal outdoor dining can feel curated, intentional, and memorably immersive.
Modern Concrete Patio Dining
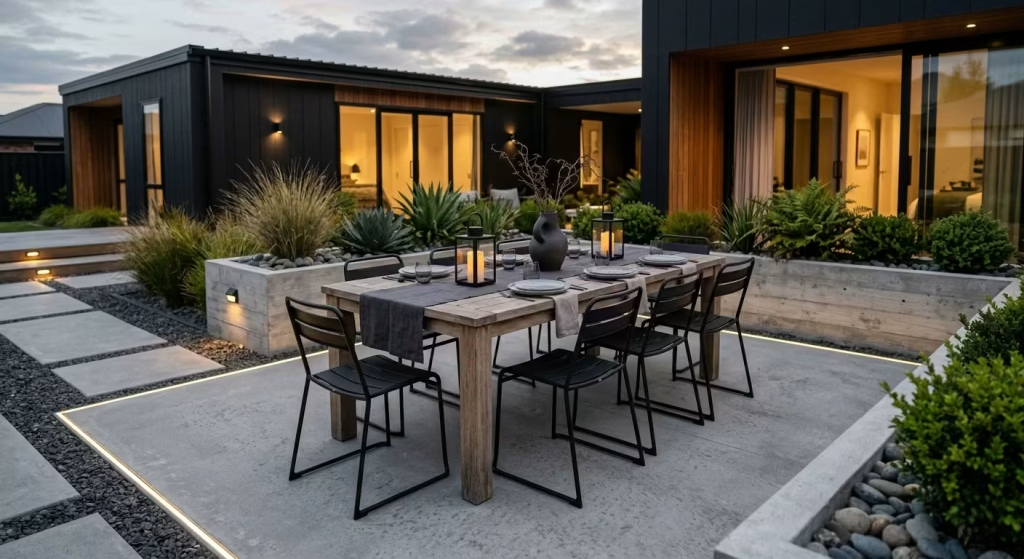
A modern concrete patio dining setup is built on restraint, clarity, and material confidence. Concrete has a way of grounding a space without calling attention to itself. It gives the dining area weight, permanence, and a sense of order, which is exactly why it works so well in contemporary gardens and urban terraces. The appeal lies not in ornament, but in proportion, texture, and the calm that comes from knowing every element has a clear purpose.
This style suits homes where the architecture already speaks a modern language. The patio becomes an extension of that language, almost like an outdoor room drawn with a steady hand. When the surface, furniture, and lighting are handled well, the result feels composed and effortless, the kind of setting that does not try too hard and never needs to.
Real Insight: Why concrete works so well in contemporary outdoor spaces
I often use concrete patios when a space needs to feel both practical and refined. In one project, a rectangular garden with a 5 m x 4 m (16 ft x 13 ft) patio became much more coherent once we embraced the concrete surface rather than trying to soften it too early. A 240 cm (8 ft) dining table in weathered oak sat comfortably on the slab, while slim black chairs and low planting around the perimeter prevented the patio from feeling stark.
The shift was subtle but powerful. Once the proportions were right and the textures were balanced, the patio began to feel deliberate, not cold. That is the key with concrete. It does not need to be disguised. It needs to be framed properly, so the material feels like a confident backdrop rather than an unfinished idea.
Measurements: Getting scale and circulation right
Concrete patios are often chosen for their clean geometry, which means measurement matters more than ever. A strong layout depends on generous spacing and clear circulation.
- Table length: Typically 200–300 cm (6.5–10 ft) depending on the size of the patio
- Table width: Around 90–100 cm (35–39 inches) for comfortable dining and serving
- Clearance around the table: Minimum 100–120 cm (40–48 inches) on all sides
- Seating allowance: 60–70 cm (24–28 inches) per person
- Patio edge buffer: Leave at least 60 cm (24 inches) between the dining zone and hard edges or planters where possible
A concrete patio can feel extremely polished when the furniture is spaced correctly. Too little room, and the whole thing reads as rigid. Enough breathing room, and the layout starts to feel calm, crisp, and easy to live with.
Materials: Balancing hardness with tactility
Concrete brings structure, but it should never stand alone. The best modern patio dining schemes layer it with softer, more tactile materials so the space remains inviting.
- Patio surface: Smooth or lightly textured concrete, exposed aggregate, or large-format concrete slabs
- Dining table: Timber, stone, or concrete-topped table with softened edges
- Seating: Powder-coated metal, timber, or upholstered outdoor chairs
- Textiles: Linen runners, cushions, or outdoor rugs in muted neutrals
- Accents: Ceramic tableware, matte glass, and minimal planters
I tend to avoid pairing concrete with too many glossy finishes. Matte and natural textures sit more comfortably against it. That contrast is what gives the patio depth. It keeps the design from feeling flat or industrial for the sake of it.
Styling Approach: Let the material lead, then soften the edges
Modern concrete dining benefits from a light hand. The patio already provides strong visual structure, so styling should sharpen the composition rather than clutter it.
- Keep decorative objects low and restrained
- Use repetition in chairs, vessels, or planters for coherence
- Introduce one or two warmer materials, such as oak or aged brass, to break the hardness
- Choose a tonal palette rather than strong contrast for a more settled effect
I often think of this style as a case of less being more, but only if the less is carefully edited. A single sculptural vase, a clean-lined lantern, or a linen runner can do more than a table full of objects ever will. It is about letting the patio breathe.
Lighting: Creating warmth against a cool surface
Concrete can look beautifully refined in daylight, but after dark it needs thoughtful lighting to avoid feeling severe. Warm light softens the surface and brings out the subtle variation in tone and texture.
- Warm LED lighting: Around 2200K–2700K for a softer, more flattering glow
- Wall lights or recessed lighting: Useful for defining the perimeter
- Table lanterns or candles: Bring intimacy to the dining zone
- Up-lighting for nearby planting: Helps balance the hard surface with movement and depth
The trick is to make the lighting feel integrated rather than added on. A concrete patio with good evening light has a quiet kind of drama. It does not shout. It settles in, and that restraint is what gives it lasting appeal.
Pros
- Strong architectural presence without visual clutter
- Highly durable and suited to modern homes
- Creates a clean, timeless backdrop for furniture and planting
- Easy to pair with a wide range of materials and finishes
Cons
- Can feel cold if not balanced with warmth and texture
- Poor proportions make the space feel overly hard or sterile
- Light furniture and thoughtful planting are needed to prevent visual flatness
- Surfaces may need maintenance depending on finish and weather exposure
Final Design Perspective
Modern concrete patio dining is at its best when it feels composed, not clinical. The surface provides the structure, but the atmosphere comes from how everything around it is handled, the furniture, the planting, the light, and the quiet confidence of the layout. It is a style that rewards precision and proportion.
When done well, the space feels like it belongs to the architecture of the home, not just the garden. It has presence without fuss, clarity without chill, and enough softness to keep people at the table long after the plates are cleared. That is the sweet spot, where modern design meets everyday living and gets it exactly right.
Woodland or Naturalistic Garden Dining
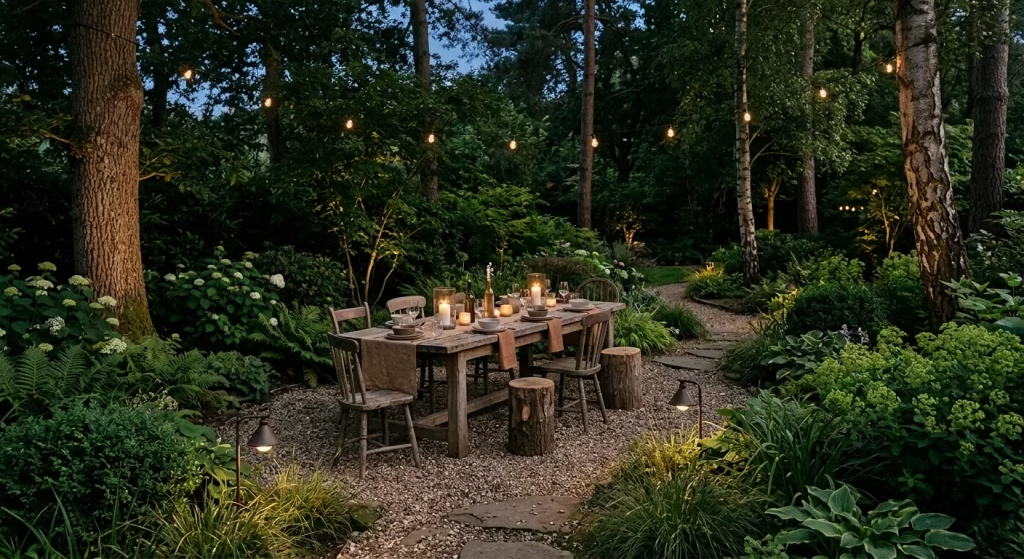
Woodland or naturalistic garden dining is about creating a setting that feels as though it has emerged from the site itself, rather than being imposed on it. Instead of crisp edges, formal symmetry, or heavily styled surfaces, this approach leans into dappled shade, layered planting, and materials that sit quietly within the landscape. The result is softer, more atmospheric, and often far more memorable because it feels rooted in place.
From my experience, this style works best when the dining area is treated as a clearing rather than a destination in the conventional sense. It should feel slightly tucked away, almost discovered rather than announced. That subtle sense of arrival gives the space its charm. You are not stepping into a set piece. You are stepping into a place that feels lived with, seasonal, and naturally composed.
Real Insight: Why naturalistic settings create such lasting appeal
I have found that woodland-style dining spaces often become the most loved areas in a garden because they feel calm without being contrived. In one project, a long border of mixed planting, small trees, and native shrubs surrounded a simple 240 cm (8 ft) timber table placed on compacted gravel. There was no formal boundary, only a gentle transition from lawn to planting to dining zone. Guests consistently said the space felt like a retreat, even though it sat just a few steps from the house.
That is the strength of this style. It does not shout for attention. It settles into the background and lets the atmosphere do the heavy lifting. The trees soften the skyline, the planting gives movement, and the setting becomes something people want to return to, almost without thinking.
Measurements: Keeping the dining zone practical within a softer landscape
Naturalistic spaces still need structure underneath the softness. If the proportions are off, the effect can tip from relaxed to untidy very quickly.
- Table length: 180–300 cm (6–10 ft) depending on the scale of the garden
- Table width: Around 90–100 cm (35–39 inches) for comfort and serving space
- Clearance around the table: Minimum 100–120 cm (40–48 inches)
- Seating allowance: 60–70 cm (24–28 inches) per person
- Planting buffer: Ideally 60–90 cm (24–35 inches) between the dining edge and surrounding planting to avoid a cramped feel
I usually recommend allowing the dining area to sit slightly off-centre within the wider garden composition. That way it feels nested into the landscape rather than dominating it.
Materials: Honest textures that age gracefully
This style depends heavily on materials that feel connected to the natural environment. Nothing should read as overly polished or overly precious.
- Table surface: Aged timber, weathered oak, or reclaimed wood
- Seating: Timber chairs, simple woven seating, or metal frames with a muted finish
- Flooring: Gravel, stepping stones, bark chip, or irregular paving depending on the setting
- Textiles: Linen runners, wool throws, or cushion covers in muted earth tones
- Accents: Clay pots, forged lanterns, ceramic vessels, and unglazed tableware
I favour materials with texture and a little irregularity. Perfectly uniform finishes can feel out of place in a woodland setting, while surfaces that show grain, patina, and time immediately feel more at home. That is where the soul of the design lives.
Layout & Styling: Letting the garden do the talking
In woodland or naturalistic dining, restraint is everything. The best spaces are never overworked. They are edited with a light touch.
- Let planting wrap around the dining area without enclosing it too tightly
- Use one strong table form rather than too many competing furniture pieces
- Allow irregular paving or gravel edges to soften the transition into the garden
- Keep styling minimal, with just a few grounded pieces rather than a crowded arrangement
I often think of this style as a quiet conversation between the table and the planting. Neither should overpower the other. Instead, they should complement one another, with the garden acting almost like a living backdrop that shifts with the seasons.
If there is one thing to avoid, it is over-tidying. A woodland garden should never look overly controlled. A little looseness is part of the charm. It gives the space its easy rhythm and keeps it from becoming too precious.
Lighting: Subtle, low, and never overplayed
Lighting in naturalistic settings should feel like it belongs to the landscape rather than sitting on top of it.
- Low-level lanterns: Create warmth without disrupting the mood
- Soft uplights: Highlight tree trunks, trunks, or key planting points
- Hidden path lighting: Guides movement without flattening the atmosphere
- Candles on the table: Add intimacy and flicker to an otherwise grounded palette
I usually avoid anything too bright or too uniform here. Woodland dining needs pockets of light, not a blanket of it. Shadows are part of the experience. They give depth to the planting and make the illuminated areas feel all the more special.
Warm light temperatures around 2200K–2700K work beautifully, especially when paired with timber, stone, and foliage. The whole scene begins to glow gently, rather than simply being lit.
Pros
- Naturally calming and immersive
- Strong seasonal interest as planting changes through the year
- Works beautifully with informal hosting and longer, slower meals
- Feels rooted in the landscape rather than imposed on it
Cons
- Can feel messy if planting is not well maintained
- Requires enough space to avoid the table being swallowed by greenery
- May need more lighting planning than a formal layout
- Ground surfaces such as gravel or bark may feel less polished underfoot
Final Design Perspective
Woodland or naturalistic garden dining has a quiet kind of power. It does not rely on precision or spectacle. Instead, it draws its strength from atmosphere, texture, and the simple pleasure of sitting within a space that feels alive. When the planting is layered well, the materials are honest, and the lighting is handled with restraint, the result is deeply engaging without ever feeling forced.
This is the sort of dining setting that lingers in memory because it feels so easy to inhabit. The air is softer, the sounds are gentler, and the table feels like part of the landscape rather than separate from it. In design terms, that is the sweet spot. A space that knows exactly what it is, says it quietly, and leaves people wanting to stay just a little longer.
Common Mistakes I See in Outdoor Dinner Setups
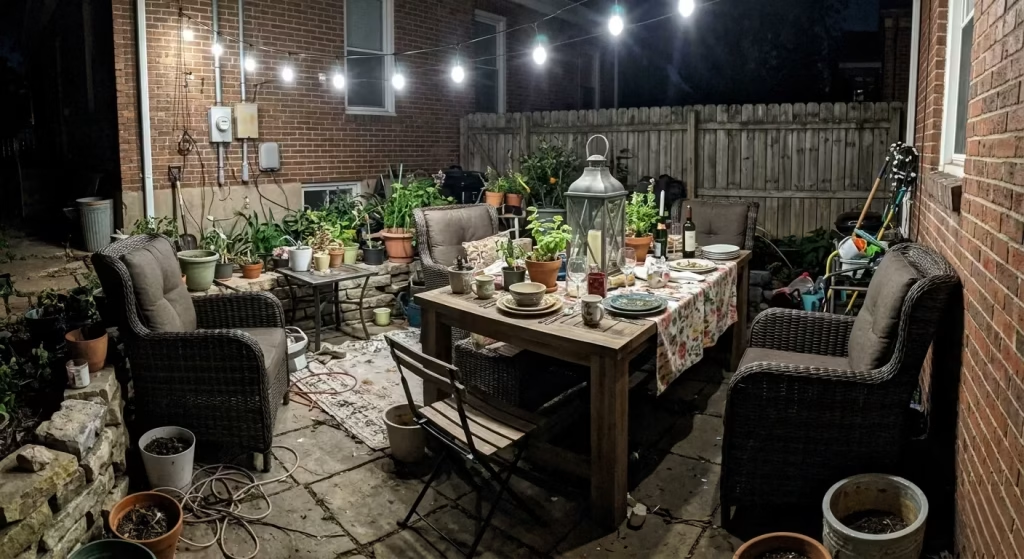
Outdoor dining often looks straightforward at first glance, yet the details are where the whole thing either sings or falls flat. In my experience, the most common mistakes are rarely about expensive furniture or dramatic styling. They are usually quieter, more fundamental issues: lighting that feels harsh, layouts that are too tight, or a setting that looks beautiful in daylight but loses all its charm once the sun drops. Get these basics right, and the space feels effortless. Miss them, and even the most polished setup can feel like a missed note.
Poor Lighting Temperature: When the Atmosphere Gets Lost
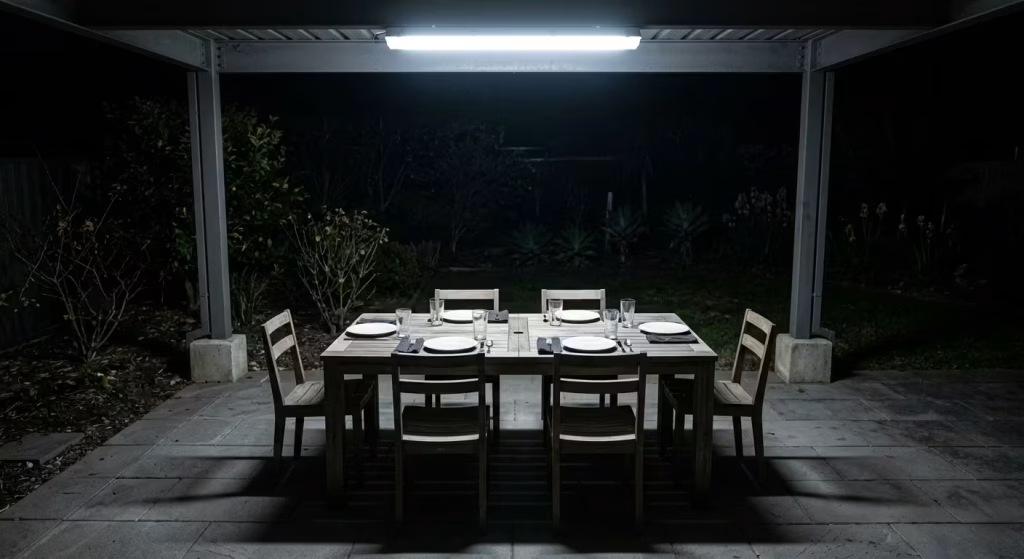
One of the quickest ways to drain warmth from an outdoor dinner is to use lighting that is too cool. Light in the 4000K to 6000K range can feel clinical outdoors, especially once evening arrives. Instead of softening the space, it sharpens everything in a way that feels more practical than pleasurable. The table may be visible, but the mood is gone.
I always favour warm lighting around 2200K to 2700K for dining areas because it flatters natural materials, settles the eye, and makes the whole scene feel more inviting. Warm light has a way of smoothing over hard edges and drawing people in without making them think about it. That is the sweet spot. The setting should glow, not glare.
A common error is relying on a single bright overhead fixture and calling it a day. That is usually the wrong end of the stick. It flattens texture, throws hard shadows, and leaves the table feeling more like an operating surface than a place to linger. A better approach is to layer softer sources so the light feels lived in, not laboured.
Overcrowded Layouts: When the Space Cannot Breathe
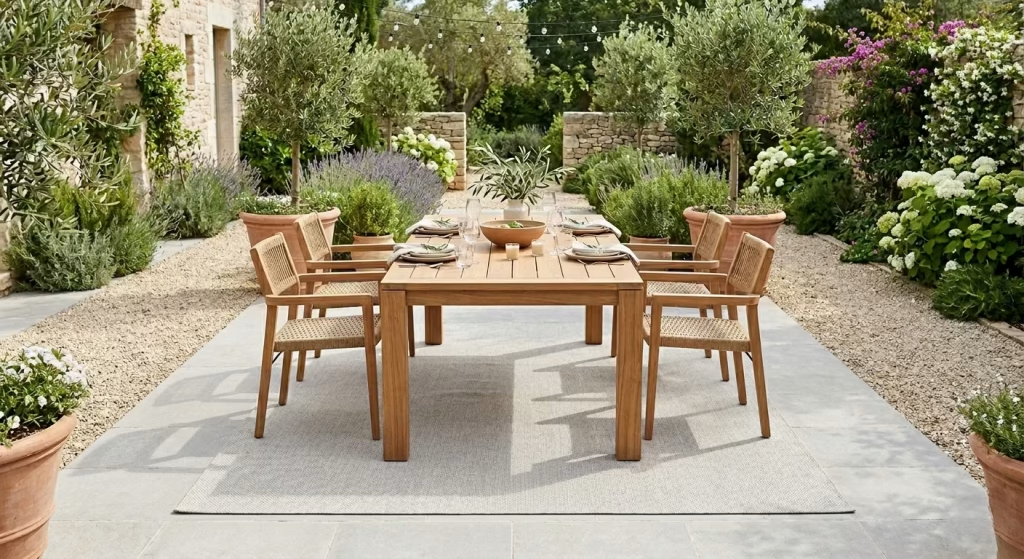
Another mistake I see all the time is trying to fit too much into too little. A dinner setup may look generous on paper, but if chairs are scraping against planters, guests are squeezing past one another, or the table sits too close to a wall, the space stops working almost immediately. It becomes a case of style over substance, and that never ends well.
As a rule, I like to maintain at least 90 to 120 cm (36 to 48 inches) of clearance around a dining table, depending on the layout. That space allows chairs to move comfortably and lets people circulate without disturbing the table. It also gives the eye a place to rest, which is just as important as physical comfort. When a layout is too compressed, everything feels on top of itself, and the whole mood tightens up.
I often see people choose furniture first and leave the spatial planning until later. That is backwards. The layout should lead the furniture, not the other way round. If the room cannot breathe, the design will always feel one step behind.
Ignoring Wind Direction and Sun Path: A Recipe for Regret
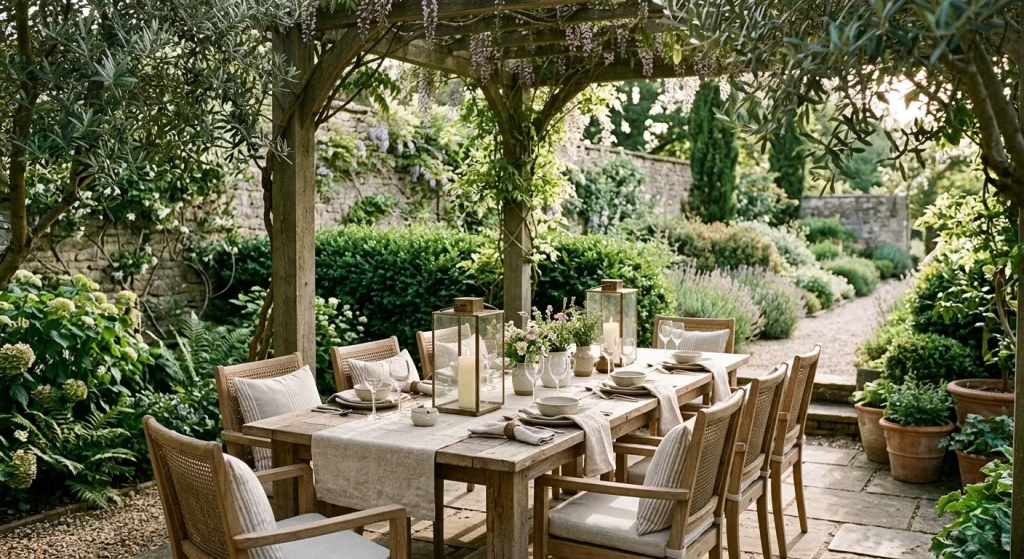
This is one of those details that is easy to overlook at the planning stage and painfully obvious once the space is in use. Wind and sun are not background conditions. They shape how the dining area performs, sometimes minute by minute.
If seating is placed where the evening breeze blows directly across the table, candles will flicker out, napkins will fly, and guests will spend more time adjusting than enjoying themselves. Likewise, a table positioned in harsh afternoon sun can become uncomfortable long before the first course is served. I always study the site carefully before finalising a layout, because a beautifully styled setting is no use if it fights the climate every step of the way.
The fix is usually simple once you know the conditions. Place dining zones where they benefit from natural shelter, use planting or screens to break the wind, and think about how shade moves across the space through the day. A little site awareness goes a long way. It is the difference between a setup that works hard and one that works smart.
Choosing Style Over Comfort: All Show and No Substance
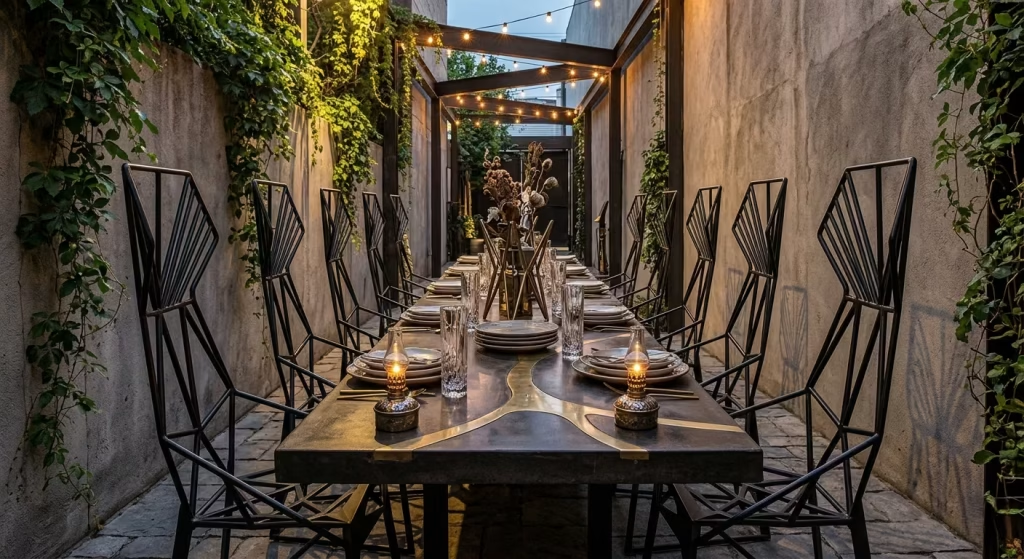
This is where many outdoor dinner schemes come unstuck. It is tempting to chase a look, especially with so much visual inspiration online, but outdoor dining lives or dies by comfort. If the chairs are beautiful but unforgiving, if the table is striking but awkward to use, or if the surface looks impressive but leaves no room for practical serving, the design is missing the point.
Outdoor spaces need to earn their keep. Guests should feel they can sit, eat, relax, and stay longer without shifting constantly or feeling the need to get up after twenty minutes. Comfort is not the enemy of elegance. In fact, it is what allows elegance to last.
I always ask myself whether the space is merely photogenic or genuinely liveable. There is a world of difference between the two. A setup that looks the part but fails in use is all smoke and mirrors. A good outdoor dining area should feel as good at the end of the evening as it does at the beginning.
Lack of Layered Lighting: Flat, Functional, and Forgettable
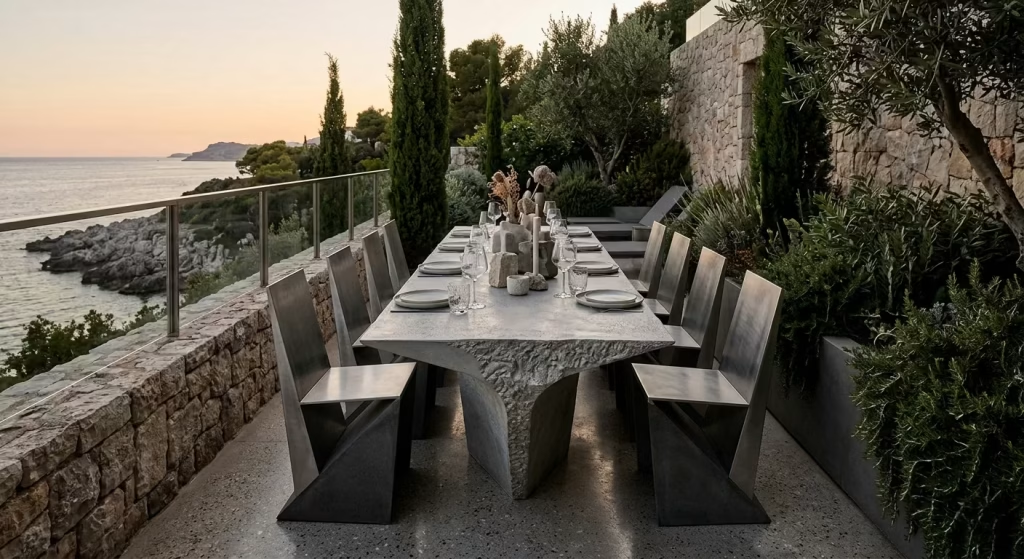
Even when the main lighting temperature is right, another common oversight is failing to layer the light properly. One source is rarely enough. Without variation in height and intensity, the space can feel flat, regardless of how beautiful the furniture or planting may be.
A strong outdoor dining scheme usually combines three layers: ambient light to establish the general mood, task light to make the table usable, and decorative light to add depth and atmosphere. Candles, lanterns, wall lights, string lights, or discreet landscape lighting each play a different role. When used together with restraint, they create a sense of richness that a single light source simply cannot deliver.
Layered lighting also helps the space evolve as the evening goes on. Early in the night, the dining table may need a little more visibility. Later, the softer surrounding light takes over and the atmosphere settles in. That progression gives the dinner a natural rhythm, which is often what makes people stay longer without quite realising why.
Bringing It All Together
The best outdoor dinner setups are rarely the most extravagant. They are the ones that have been quietly thought through from the ground up. Lighting temperature, circulation, climate, comfort, and layering all work together behind the scenes, making the whole setting feel seamless. When these fundamentals are treated with care, the space gains that elusive quality every good design needs: ease.
And ease, in the end, is what people remember. Not the fuss, not the flourish, but the feeling that everything was in the right place without needing to shout about it.
How to Choose the Right Outdoor Dinner Style for Your Space
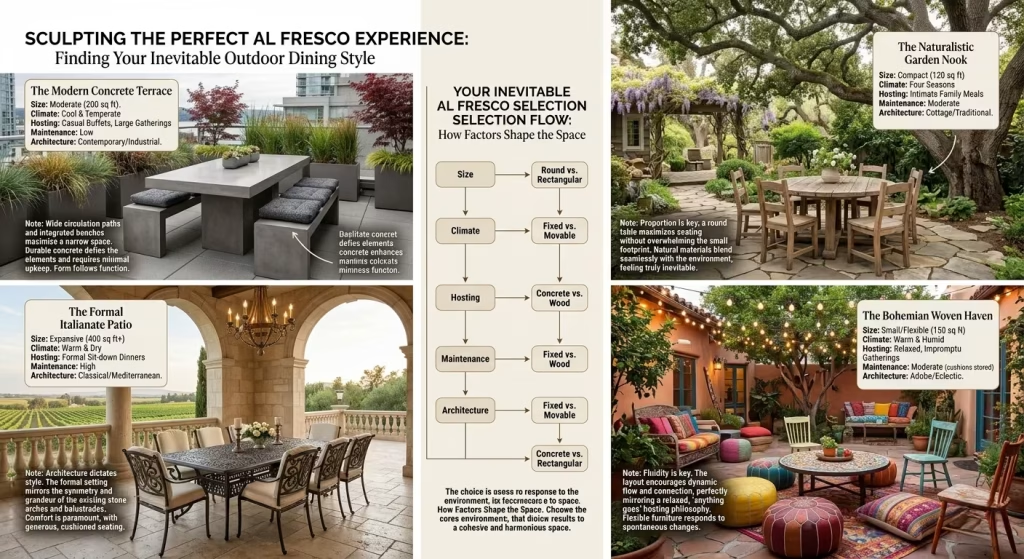
Choosing the right outdoor dinner style is less about chasing a look and more about reading the space properly. The best setups always feel inevitable, as though they belong exactly where they are. In my experience, that happens when the dining style responds to five things first: the size of the space, the climate, the way you like to host, how much upkeep you are willing to live with, and the architectural language already present in the home. Get those fundamentals right, and the rest tends to fall into place without forcing the issue.
Garden Size and Proportions
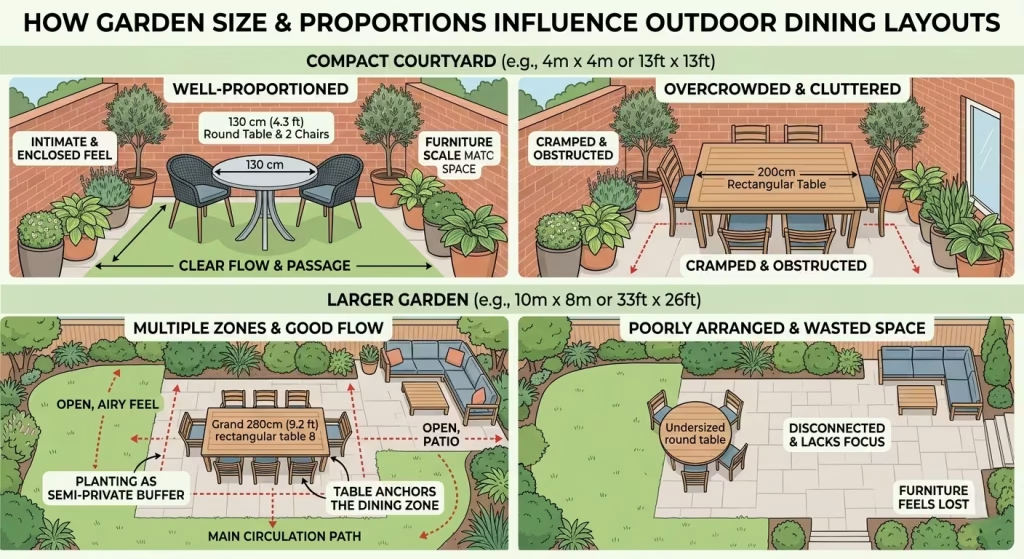
The scale of the space should lead the design. A generous garden can comfortably support a long communal table, layered planting, and multiple zones, while a compact terrace or courtyard needs a lighter touch. I always start by asking whether the layout should feel open and expansive, or intimate and enclosed.
In a smaller space, a round or narrow rectangular table often works better than a heavy, oversized dining set. For example, a 120 to 150 cm (4 to 5 ft) round table can make a compact courtyard feel more usable, while a 240 to 300 cm (8 to 10 ft) rectangular table suits a larger garden where circulation is not compromised. The wrong scale can throw everything out of balance. Too much furniture in too little space is a classic case of trying to squeeze a quart into a pint pot.
I often think of proportion as the silent architecture of outdoor dining. You may not notice it immediately when it is right, but you certainly feel it when it is wrong.
Climate and Seasonal Use
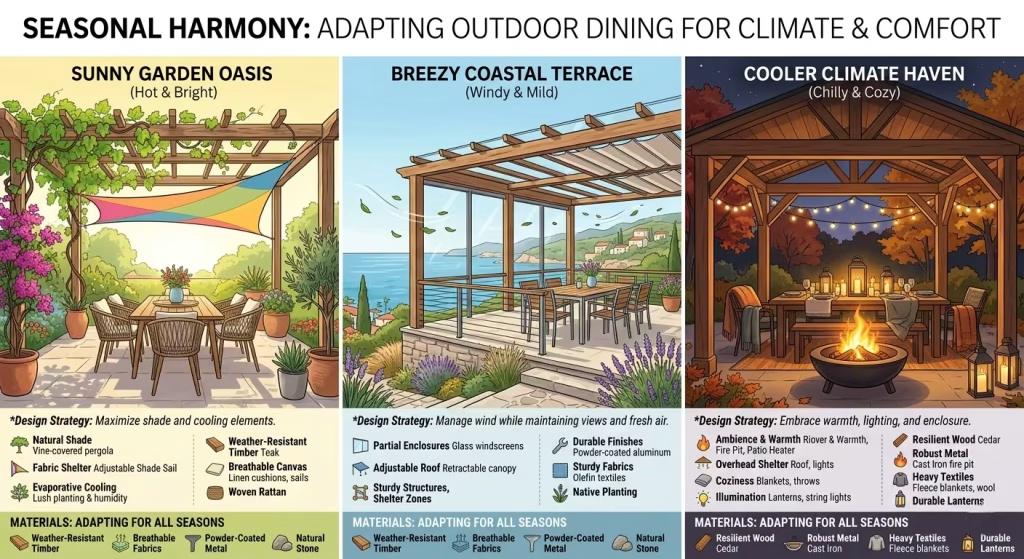
Climate is one of the biggest factors in determining which style will actually work over time. A dining area that looks lovely in spring may become unusable in high summer without shade, or uncomfortable in autumn without some form of shelter or heat source. This is where the design has to earn its keep.
If the space is exposed to strong sun, I tend to look at pergolas, shade sails, or planting that can soften harsh light. In breezier climates, enclosed courtyards or sheltered terraces often provide a much better dining experience than open layouts. Where cooler evenings are common, fire pits, lantern lighting, or overhead structures can extend the use of the space well beyond daylight hours.
Seasonality also affects materials. Breathable fabrics, weather-resistant timber, and finishes that age well are essential if the space will be used across multiple seasons. I usually tell clients that the best outdoor dinner setting is not just beautiful in July, but still practical in October. That is where real value lies.
Hosting Style: Formal vs Relaxed
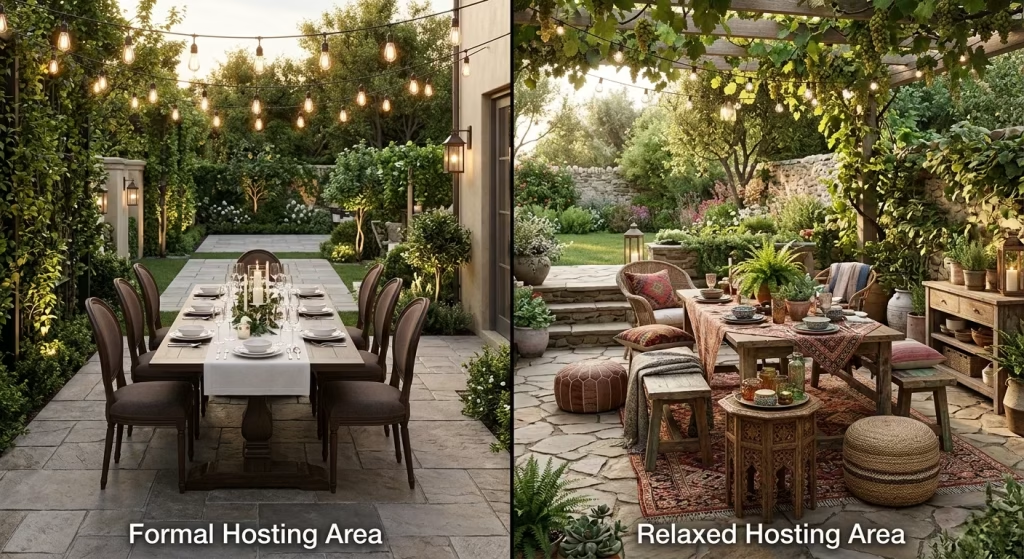
How you like to host should shape the entire mood of the space. Some people naturally gravitate toward formal dining, with clear seating, structured layouts, and a more polished table presentation. Others prefer a looser, more social atmosphere, where guests drift between dining, lounging, and conversation with very little ceremony.
A formal hosting style usually suits symmetrical layouts, long tables, structured planting, and more deliberate lighting. It works well when the aim is to create a sense of occasion. By contrast, a relaxed hosting style is often better served by mixed seating, soft lighting, casual layering, and spaces that feel flexible rather than fixed.
There is no right answer here, but there is a right fit. A highly formal layout can feel stiff if your gatherings are informal and easygoing. Likewise, a very relaxed arrangement can feel undercooked if you enjoy more polished entertaining. The key is to design for the way you actually live, not for the version of hosting that only exists in magazine spreads.
Maintenance Tolerance
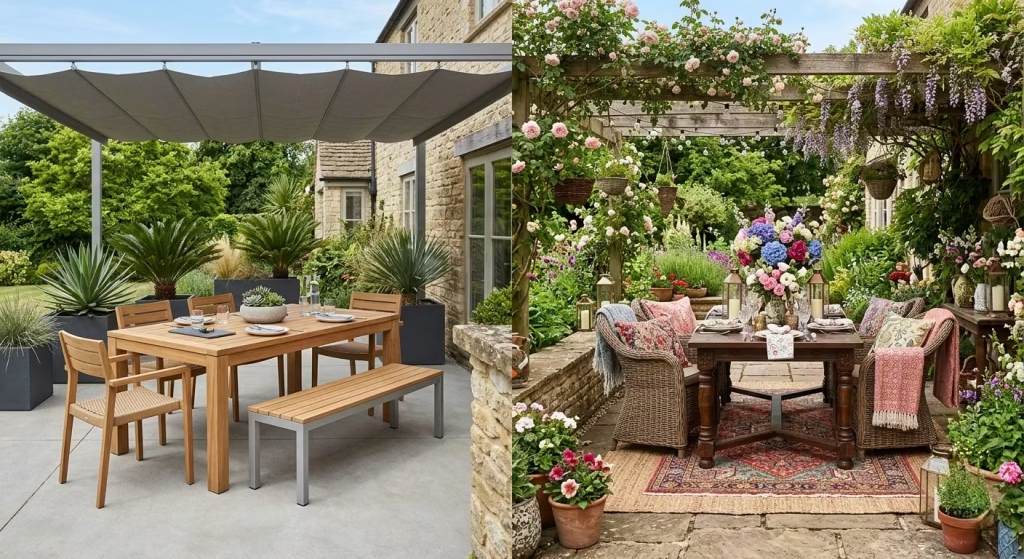
This is the bit people often underestimate. A beautiful outdoor dinner setup that demands constant upkeep can quickly become more burden than pleasure. Some styles are naturally low maintenance, while others need regular attention to keep them looking their best.
If you want something that feels easy to live with, I would lean toward durable materials, minimal textile use, and planting that does not require constant shaping. Concrete, stone, teak, powder-coated metal, and weather-resistant upholstery tend to be more forgiving. On the other hand, layered textiles, abundant floral styling, or heavily planted schemes may need more care, cleaning, and seasonal adjustment.
I always recommend being honest about this. If you know you will not have time to fuss over cushions, candles, and foliage every week, then build a design that does not depend on them. A good outdoor space should support your life, not eat into it. Otherwise, it becomes all hat and no cattle.
Existing Architectural Language
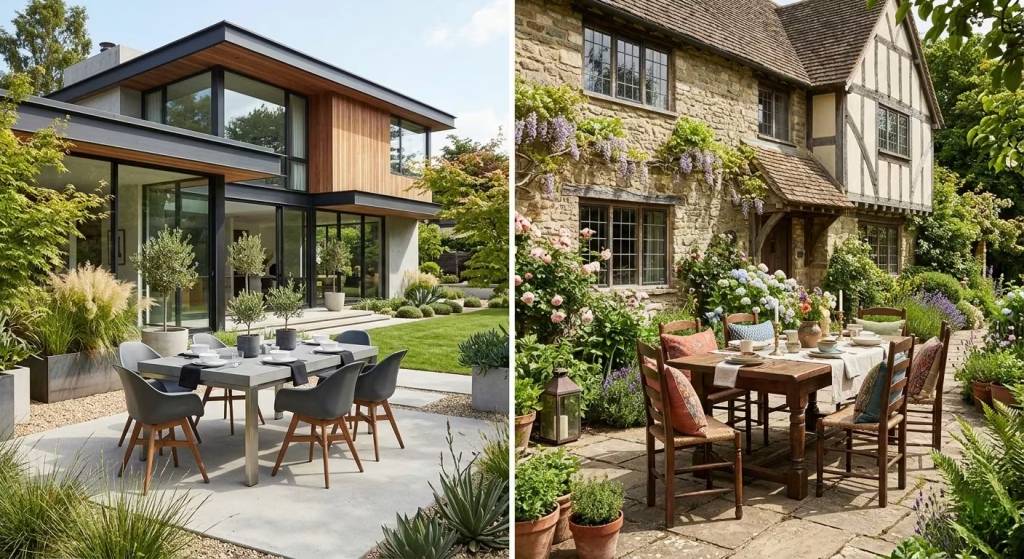
The most successful outdoor dinner styles usually respond to the architecture of the house rather than competing with it. A contemporary home often calls for clean lines, restrained materials, and a more sculptural dining setup. A traditional house may suit a warmer, softer, more layered style. Mediterranean, farmhouse, coastal, and woodland-inspired schemes all make sense in different contexts, but they need to feel connected to the building and the garden as a whole.
I often look at the details already present in the architecture. Is the home crisp and minimal, or textured and characterful? Are the windows large and modern, or smaller and more traditional? Does the exterior use brick, render, stone, timber, or something more industrial? These clues help determine whether the dining area should feel integrated, contrasted, or gently echoed.
When the outdoor style speaks the same language as the house, the entire setting feels more coherent. It does not mean everything has to match exactly. In fact, a little contrast can be powerful. But the relationship should feel deliberate, not accidental.
Bringing It All Together
The right outdoor dinner style is the one that fits the space, supports the way you host, and works with the realities of your climate and maintenance habits. That is the sweet spot. Not just beautiful in theory, but comfortable in use and satisfying over time.
When I design these spaces, I am always looking for that balance between atmosphere and practicality. A setting should feel good at a glance, but it should also keep working after the plates are cleared, the light has faded, and the evening has settled in. That is what separates a styled outdoor space from one that truly lives well.
Conclusion Designing for Atmosphere, Not Just Occasions
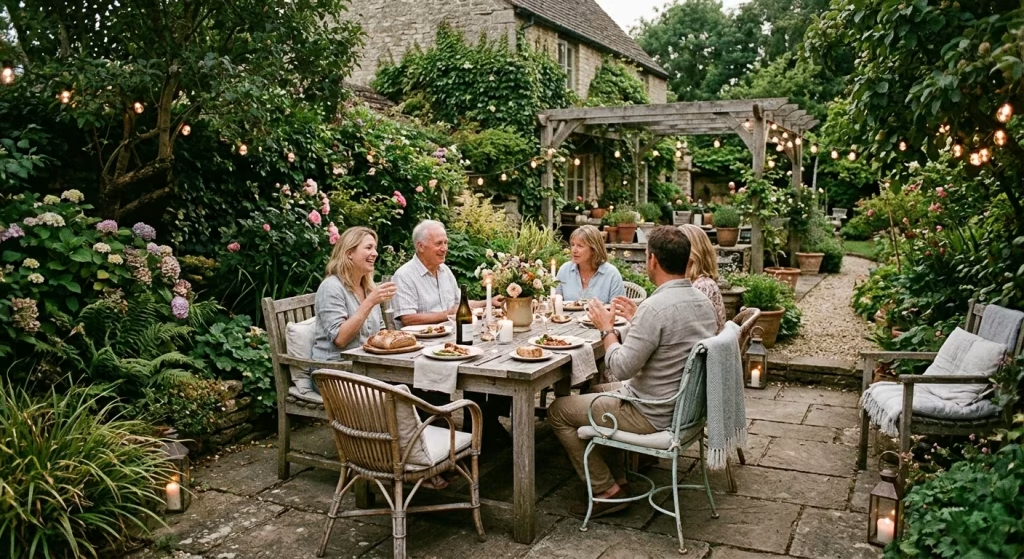
Outdoor dining is at its best when it feels like a natural extension of the home, not a temporary arrangement assembled for special occasions and then forgotten. The most successful spaces are never just about the table, the chairs, or the styling. They are about how the setting makes people feel once they sit down, how easily conversation flows, how long the evening lingers, and how gracefully the space supports real life beyond the first impression. That is the real measure of good design.
From my experience, the difference between an outdoor dining area that looks attractive and one that truly works is often hidden in the details. Proportion, circulation, lighting temperature, material choice, and shelter all pull their weight quietly in the background. When these elements are considered properly, the result feels effortless. Not because it was thrown together quickly, but because every decision has been carefully resolved. That is where the magic lies. The space does not need to shout to be memorable. It simply needs to feel right.
A well-designed outdoor dining area also has staying power. It does not depend on a single season, a passing trend, or a highly styled moment. It should remain useful, comfortable, and visually strong as the garden changes through the year. That means choosing materials that age well, layouts that support movement, and a style that reflects how the space will actually be used over time. In other words, design for the long haul, not just the photo opportunity. That approach always pays dividends.
If there is one principle worth carrying forward, it is this: outdoor dining should serve the rhythm of your life, not interrupt it. Whether the setting is formal, relaxed, compact, or expansive, the best result comes from thoughtful planning and a clear understanding of what the space needs to do. Get that right, and the atmosphere takes care of itself. The whole thing starts to sing, almost without trying.
In the end, the most rewarding outdoor dining spaces are the ones that feel calm, considered, and deeply lived in. They invite people to stay a little longer, eat a little slower, and enjoy the moment without fuss. And that, more than anything else, is what makes them worth designing well.
Frequently asked Questions about designing Outdoor Dinner Party area
What is the most important thing to get right in an outdoor dinner area?
The layout. If the circulation, table placement, and seating proportions are off, the entire space will feel slightly strained no matter how beautiful it looks. I always start with movement first, then layer in lighting, materials, and styling. When the bones are right, everything else falls into place with far less effort.
How much space do I need around an outdoor dining table?
As a rule, I allow 90 to 120 cm (36 to 48 inches) around the table so chairs can move comfortably and guests can pass without disruption. In tighter spaces, you can reduce this slightly on one side, but the main circulation route should always stay generous. A space that feels easy to move through will always feel more relaxed and better resolved.
How much space do I need around an outdoor dining table?
As a rule, I allow 90 to 120 cm (36 to 48 inches) around the table so chairs can move comfortably and guests can pass without disruption. In tighter spaces, you can reduce this slightly on one side, but the main circulation route should always stay generous. A space that feels easy to move through will always feel more relaxed and better resolved.
What kind of lighting works best for outdoor dinner parties?
Warm lighting is the sweet spot. I usually recommend 2200K to 2700K, because it softens the setting and flatters natural materials. A good mix is best: candles for intimacy, lanterns for warmth, and low-voltage lighting for structure and safety. One light source alone rarely does the job properly.
Should outdoor dining style match the architecture of the house?
Yes, absolutely. The strongest designs usually echo the language of the home rather than fighting it. A contemporary property often suits cleaner lines and restrained materials, while a more traditional house can carry rustic, Mediterranean, or layered naturalistic styling beautifully. When the relationship feels coherent, the whole scheme has more authority.
Should outdoor dining style match the architecture of the house?
Yes, absolutely. The strongest designs usually echo the language of the home rather than fighting it. A contemporary property often suits cleaner lines and restrained materials, while a more traditional house can carry rustic, Mediterranean, or layered naturalistic styling beautifully. When the relationship feels coherent, the whole scheme has more authority.
What materials work best for outdoor dining furniture?
I tend to favour materials that age well and feel honest to the touch: teak, oak, stone, concrete, powder-coated metal, and weather-resistant upholstery. The best choice depends on the style of the space and how much maintenance you are prepared to do. A good outdoor setting should look better with time, not just survive it.
What is the biggest mistake people make when designing outdoor dining spaces?
Trying to make the space look finished before thinking about how it will actually work. Style without comfort, or beauty without function, usually leads to disappointment. The best outdoor dining areas feel calm and effortless because the planning underneath is solid. That is what gives them staying power.
Do I need a pergola or shade structure for outdoor dining?
Not always, but some form of shelter is often worth considering if the space gets strong sun or frequent rain. A pergola, shade sail, or even planted shade can make the area more usable and more comfortable. It also helps the dining space feel more grounded and intentional.
How do I choose the right style for my outdoor dinner area?
Start with the space itself. Then look at the climate, the way you host, how much upkeep you want, and the architectural style of the property. The best design is not the most elaborate one. It is the one that fits the setting so well that it feels completely natural.