
18 Last-Minute Halloween Decorations for Kids’ Rooms: Easy and Cute Ideas
Halloween lands on a Saturday this year, and if your child has only just announced that their bedroom needs to look “properly spooky”, you are not alone. Most of us leave it until the eleventh hour, then stand in the doorway with a roll of sticky tape and a faint sense of dread.
The good news is that a child’s room does not need a haunted-house budget to feel magical. It needs a handful of clever, safe touches that a seven-year-old can help with and a toddler can sleep beside without a worry. This guide gives you 18 of them, sorted by how long they take, with real costs, age advice and the safety checks that most decorating articles skip.
Here is the thing that rarely makes it into decorating guides: your child is not really asking for a prettier room. They are asking for a bit of magic that belongs to them. Years from now they will not remember whether the bats were perfectly spaced. They will remember the evening you cut paper ghosts at the kitchen table, the torch under the sheet, the sleepy giggle when a teddy appeared in a witch hat. So treat these ideas as a recipe for that kind of evening, with a room that happens to look wonderful at the end of it.
The quick answer
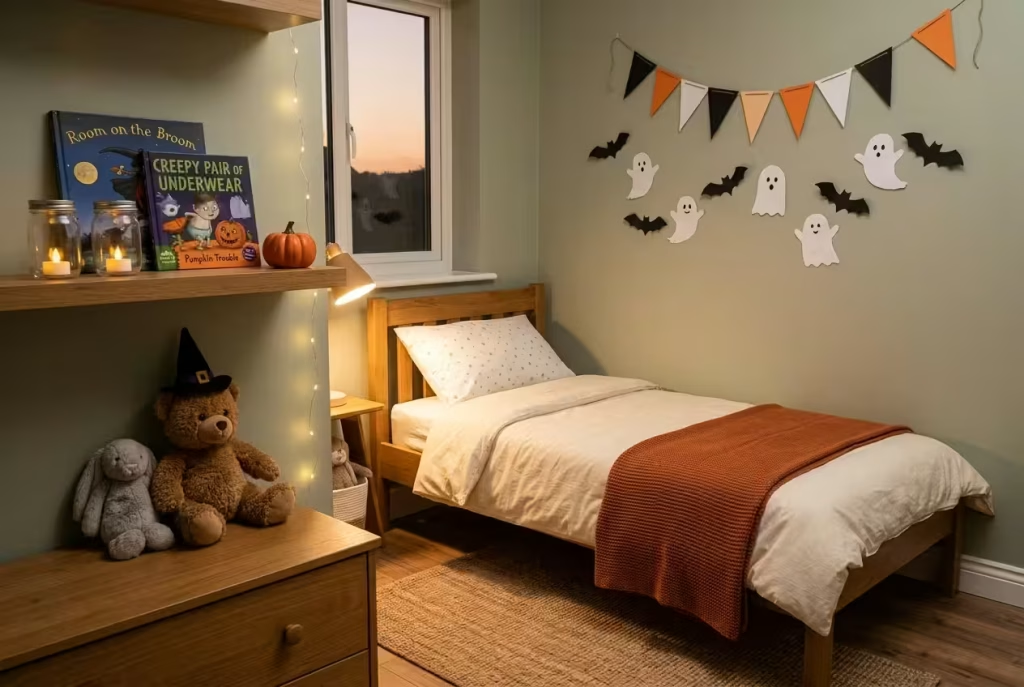
The fastest safe way to decorate a child’s room for Halloween is to use what you already own: swap in themed pillows, stick paper bats to a smooth wall, put witch hats on toys, and light shelves with flameless candles kept out of reach. Most ideas below take under 30 minutes and cost under £10. Keep everything away from beds, cots and blind cords.
The three quickest wins, if you only have ten minutes:
- Paper bats on one smooth, painted wall (far from the bed)
- Witch hats perched on teddies, lamps and bedposts
- Battery tealights in jars, placed high on a shelf
Turn the spook dial before you pick up the scissors
Before a single bat goes up, decide how spooky the room should be, and let your child have the casting vote. What makes a grown-up grin can make a small child’s stomach flip.
Child-development guidance notes that fears of the dark, masks, ghosts and monsters tend to peak between ages 3 and 5, which happens to be a neat list of Halloween’s greatest hits. A licensed clinical social worker quoted by Memorial Behavioral Health adds that decorations and costumes can frighten preschool and primary-age children and may even disturb their sleep. Her advice is to avoid brushing the fear aside and instead explain, gently, what is real and what is pretend. A Denver psychologist interviewed by TODAY recommends cute, non-scary touches such as pumpkins and leaves for children who startle easily.
So think of a three-notch dial:
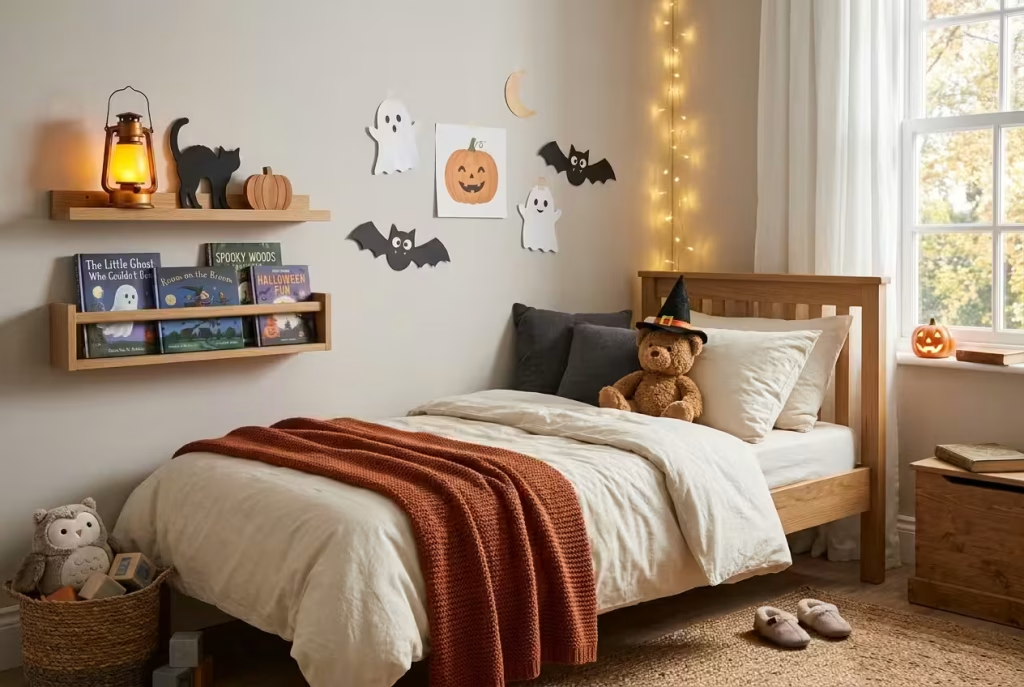
- Cute: smiling ghosts, pumpkins, stars, bats with big eyes. Right for under-fives and anyone who sleeps with a night light.
- Mild: friendly monsters, cobweb-style yarn, silhouettes, a little glow. Right for most 5 to 9-year-olds.
- Spooky-ish: skeletons, moonlit shadows, darker palettes. Right for confident tweens, and still best kept away from the bed.
A small, practical test: show your child the plan before you hang anything, and ask them to point at the one thing they would rather skip. That tiny veto does more to stop bedtime wobbles than any amount of reassurance after the event.
To see how the dial works in real life, picture three children in three bedrooms. A four-year-old who sleeps with a night light gets a witch hat on her favourite bear, a silhouette cat on the wall and a lantern glowing high on the shelf: all comfort, no surprises. A seven-year-old who loves anything with a tail gets a bat swarm, a loo-roll mummy squad and a ghost den on Friday night: playful, with room to be a little brave. A twelve-year-old gets a moon wall, a moody lantern corner and a film night with the lights low: grown-up, but still cosy. The trick is not choosing the spookiest option your child can tolerate. It is choosing the one they can enjoy without a second thought at ten o’clock at night.
Your 18 ideas at a glance
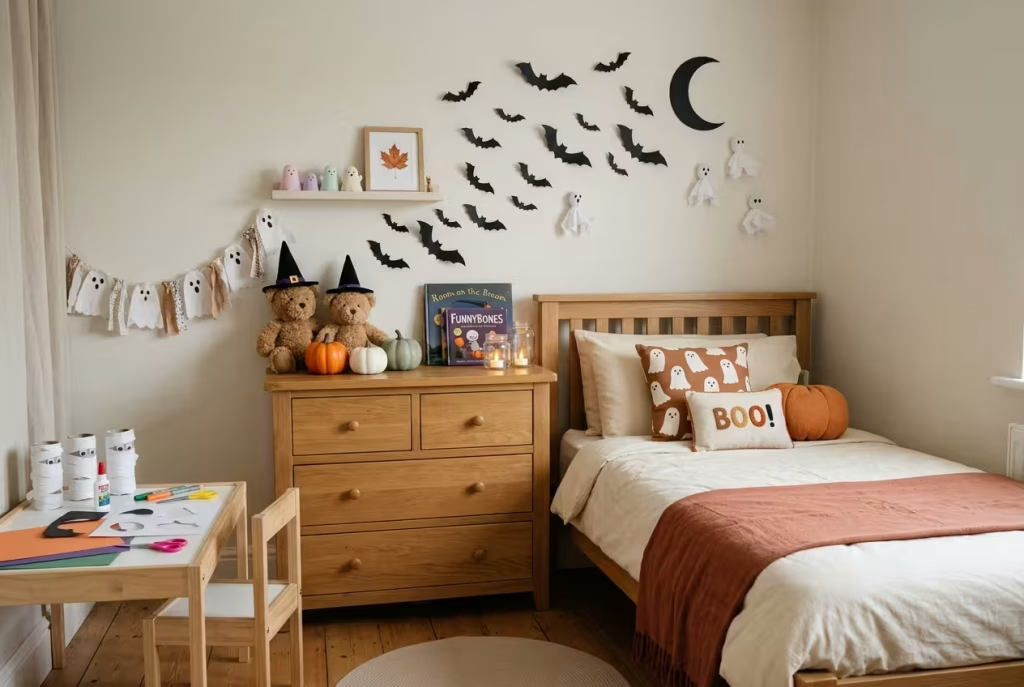
Costs are rough UK estimates for items bought new; many cost nothing if you raid the craft drawer.
| # | Idea | Time | Cost | Best for |
| 1 | Pillow and throw swap | 5 min | Free to £8 | All ages |
| 2 | Paper bat swarm | 10 min | Under £2 | 3 and up |
| 3 | Witch hats on toys and lamps | 5 min | Free to £5 | All ages |
| 4 | Window ghosts | 10 min | Under £2 | 3 and up |
| 5 | Flameless lantern glow | 5 min | £3 to £6 | All ages (supervised) |
| 6 | Spooky story shelf | 10 min | Free | All ages |
| 7 | Painted pumpkins | 25 min plus drying | £2 to £8 | 5 and up |
| 8 | Ghost bunting | 25 min | Under £3 | 5 and up |
| 9 | Loo-roll mummies | 20 min | Under £3 | 6 and up |
| 10 | Make-your-own-monster desk | 15 min | Free | 3 and up |
| 11 | Pastel ghost shelf | 20 min | Free to £5 | 3 and up |
| 12 | Moon and black-cat silhouette wall | 25 min | Under £3 | All ages |
| 13 | Yarn spiderweb | 40 min | Under £5 | 5 and up |
| 14 | Toy costume parade | 35 min | Free | 3 and up |
| 15 | Ghost reading den | 30 min | Free to £10 | 4 and up |
| 16 | Trick-or-treat station | 30 min | £3 to £8 | 4 and up |
| 17 | The Boo door | 35 min | Under £4 | 3 and up |
| 18 | Pop-up spooky cinema | 30 min | £2 to £6 | 5 and up |
Three ready-made plans for three kinds of evening
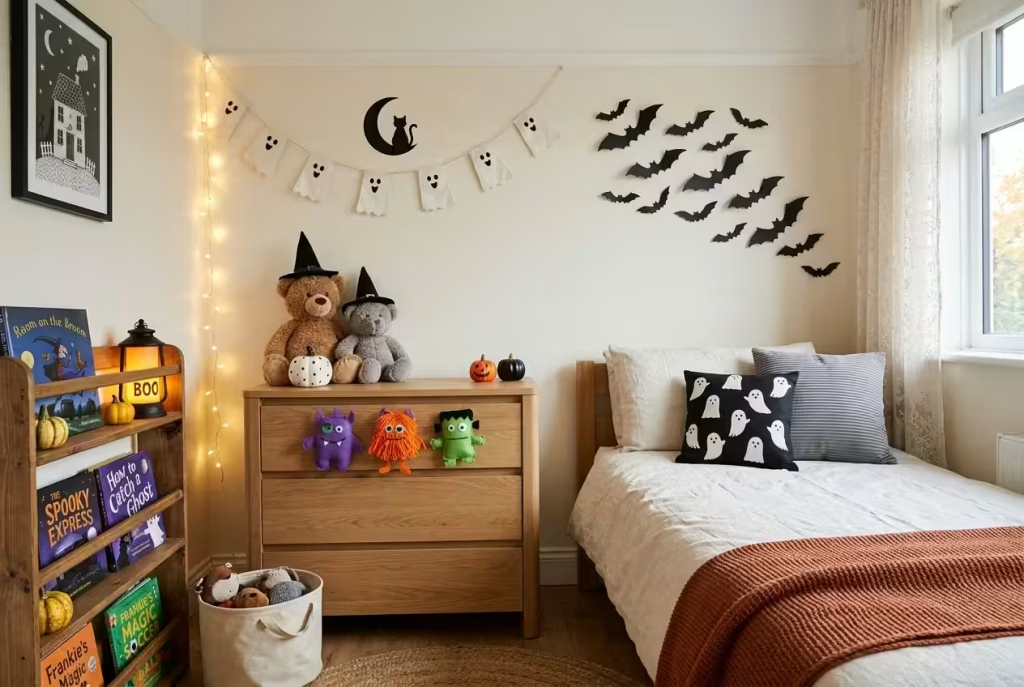
Short on time? Do not pick one idea, combine a few. These three plans mix quick wins with one memorable moment, so the room looks finished and feels loved.
| Plan | Time you have | Ideas to combine | What you end up with |
| The Friday dash | 20 minutes | 1, 3, 5 and 2 | A ghostly bed, toys in witch hats, a high shelf glow and a bat wall |
| The cosy hour | About 1 hour | 6, 7, 8 and 12 | A story shelf, a pumpkin parade, ghost bunting and a moon wall |
| The weekend project | 2 hours with your child | 10, 9, 17 and 18 | A monster gallery, a mummy squad, a Boo door and a spooky cinema night |
Up to 10 minutes the dash-home-from-work ideas
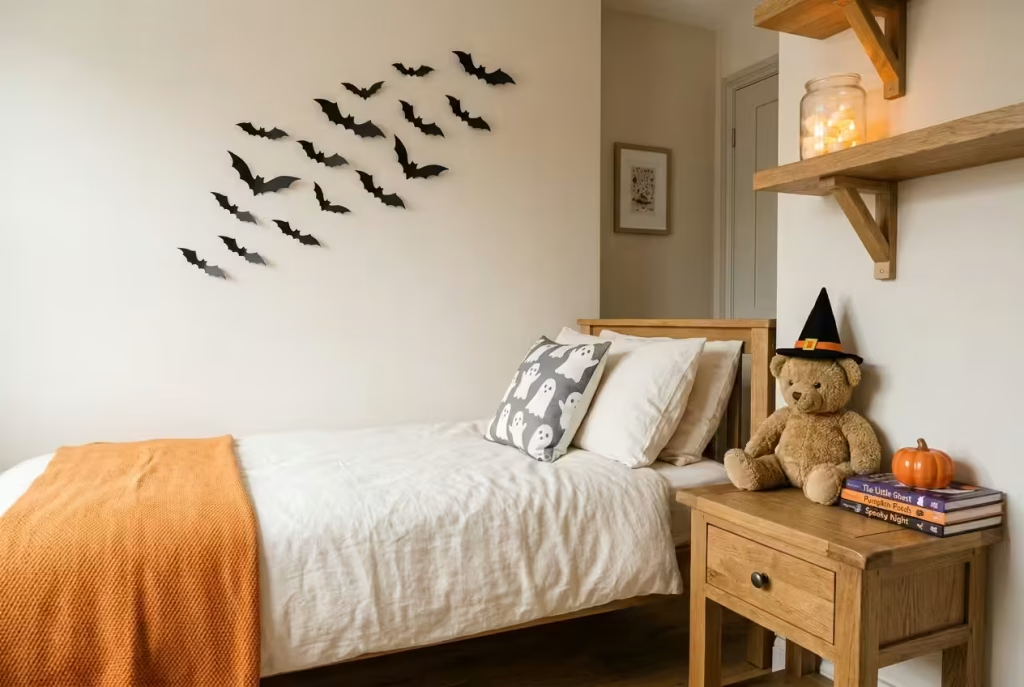
These six are the proof that a decorated room does not need an evening. Think of them as the quick sketch before the painting.
1. Swap the pillows and throws for something ghostly
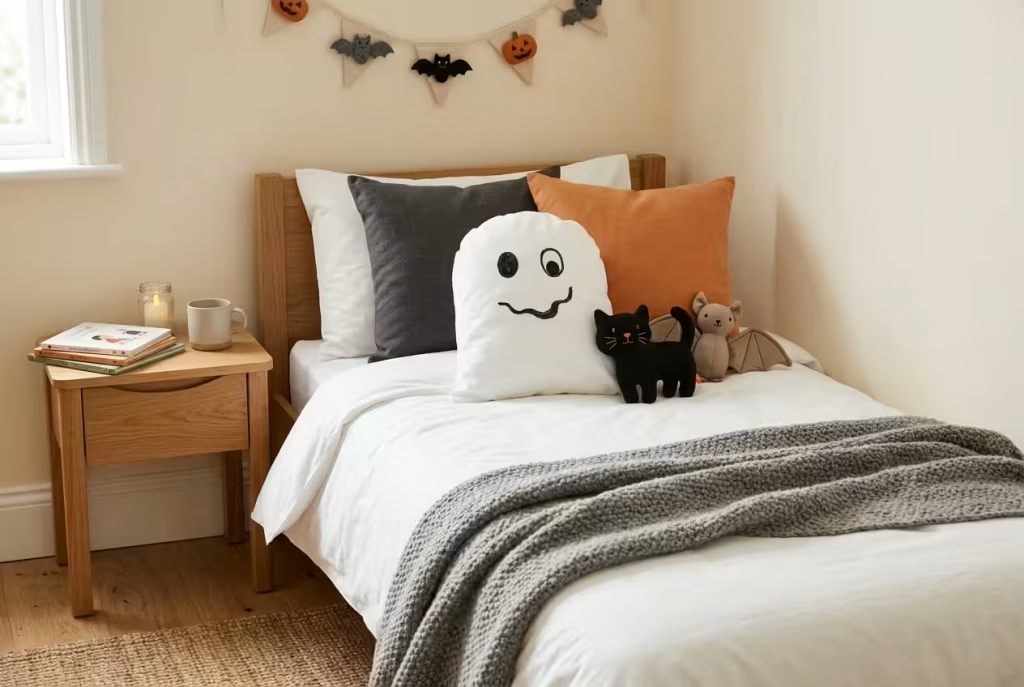
Walk into any child’s room and your eye lands on the bed first, which makes it the cheapest stage you will ever dress. Raid three places: the linen cupboard (a white pillowcase, a grey throw), your own wardrobe (a black-and-white striped jumper makes a surprisingly good cushion cover) and the toy box (a plush bat or black cat to stand guard). Stick to two main colours plus one pop of orange or purple, and the whole thing reads as deliberate rather than dumped.
The star turn is a ghost pillow. Slide a piece of card inside a plain white pillowcase so the ink cannot bleed through, then hand your child a washable fabric pen and let them draw the face. A ghost with one eye bigger than the other and a lopsided grin, drawn by a six-year-old, will be treasured long after a shop-bought version has lost its charm.
One firm boundary: a baby’s cot should stay bare, so keep this idea for toddler beds and older children. Wash everything on 1 November and the room is back to normal before breakfast, with nothing to unpick and nothing lost.
2. Let a swarm of paper bats loose on one wall
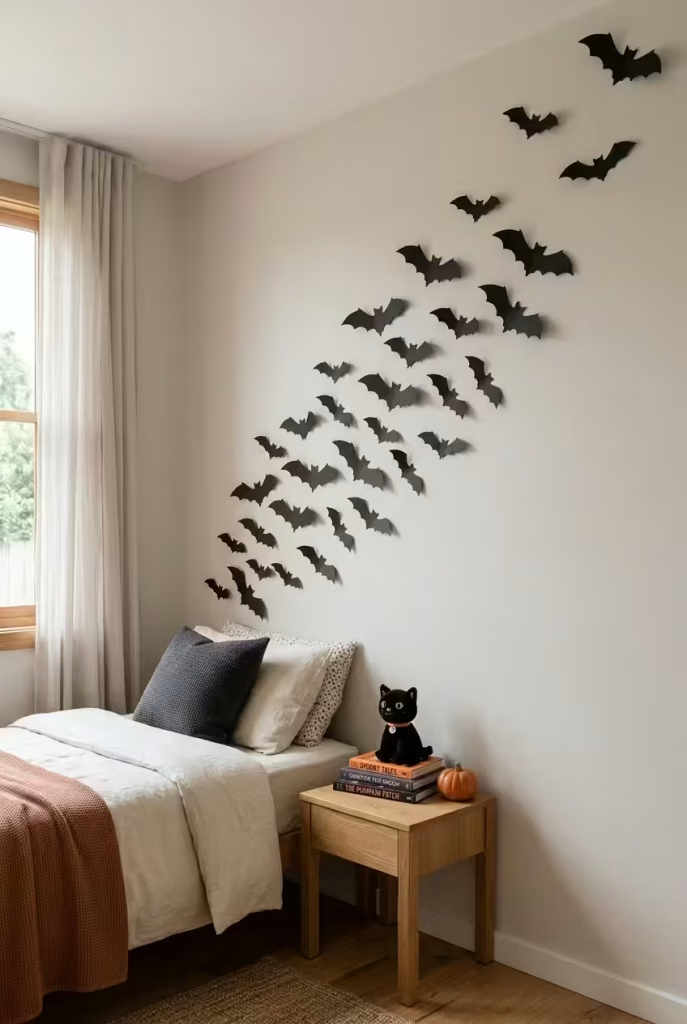
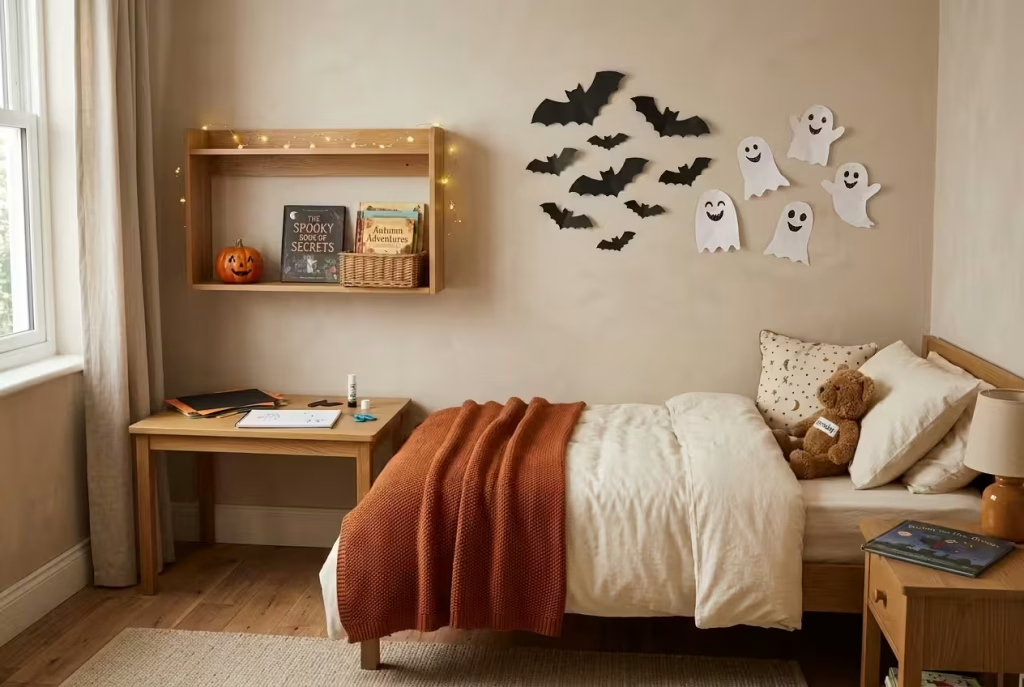
Bats are the decoration that forgives clumsy scissors. Fold a sheet of black card in half, sketch half a bat with a ragged wing edge, cut through both layers and unfold: a symmetrical creature in thirty seconds. Make them in three sizes, roughly 8cm, 12cm and 18cm across. A flock of identical bats looks like wallpaper, while a mixed one looks like movement. Two or three sheets of card will give you a decent colony, and your child can cut a handful while you churn out the rest.
Fly them in a loose diagonal, thick and low in one corner and thinning towards the ceiling, as though the whole lot had just burst out of a cave. Paper weighs next to nothing, so tiny loops of removable adhesive are plenty.
The name game is what turns this from decor into memory. One children’s blogger suggested giving each bat a different colour and naming it after a member of the family. Suddenly the swarm is a family portrait with wings: your seven-year-old names them, your four-year-old picks the colours, and the dog gets a bat too.
The golden rule is non-negotiable: nothing goes above the bed. Command’s own instructions say not to use their strips over beds, on wallpaper or on textured surfaces, and to wait seven days after painting. Choose the wall opposite the bed, or the one beside the window, with the flock flying away from the pillow.
You May also Like: 18 Last-Minute Halloween Terrace Decoration Ideas for a Spooky Outdoor Space
3. A hat trick witch hats on everything
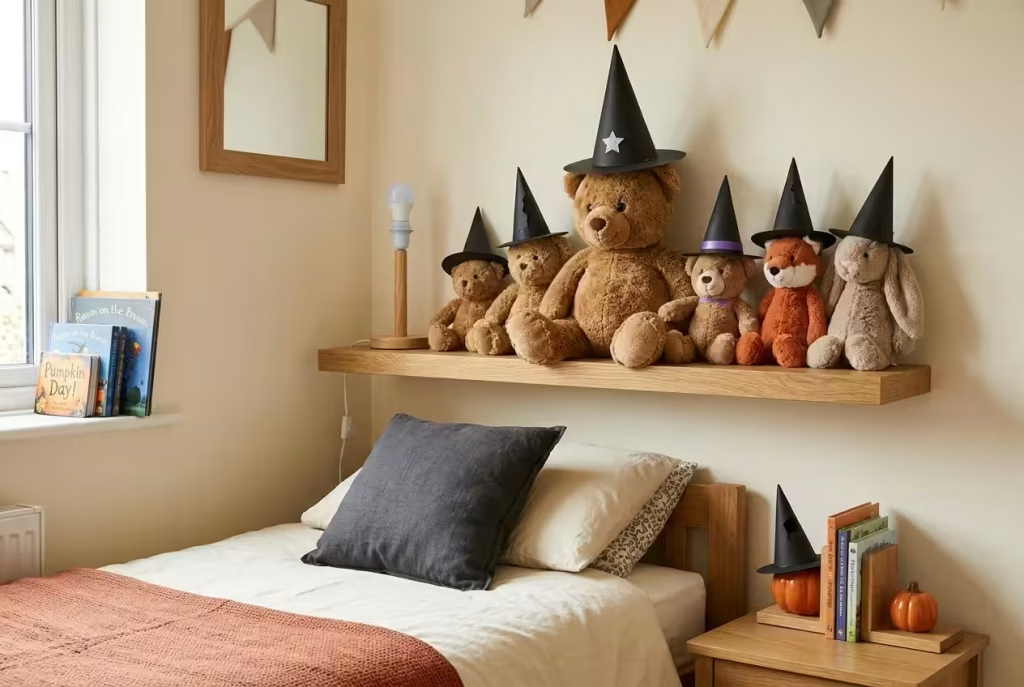
Some ideas earn their place by being almost impossible to get wrong, and this is one of them. A witch hat turns whatever it lands on into a character: the teddy that has slept beside your child for four years becomes Head Witch overnight, the bedpost knob becomes a tiny wizard, the bookend a sentry. No hanging, no fixing, no tape, which makes it the safest idea in the whole guide for little ones.
No hats to hand? Roll an A3 sheet of black card into a cone about 15cm tall, tape the seam, and add a disc of card as a brim. Ten minutes and a few pounds at most, and the wonky ones have the most personality. A pinch of silver foil or a stick-on star turns a plain cone into something worthy of a coven.
Place them where little eyes land at bedtime: on the toys that already keep watch from the shelf, on the lampshade (a cool-running LED bulb only, and never resting on the bulb itself), on a plant pot or a desk tidy. Then let your child announce who is who. Every toy needs a name, a spell and a favourite biscuit, and the conversation alone is worth the five minutes.
One caution from what tends to go wrong: do not dangle hats from the ceiling on fishing line above a sleeping area. Fine line is hard to see, and not something to leave within reach of a curious toddler.
4. Haunt the windowpane with friendly ghosts
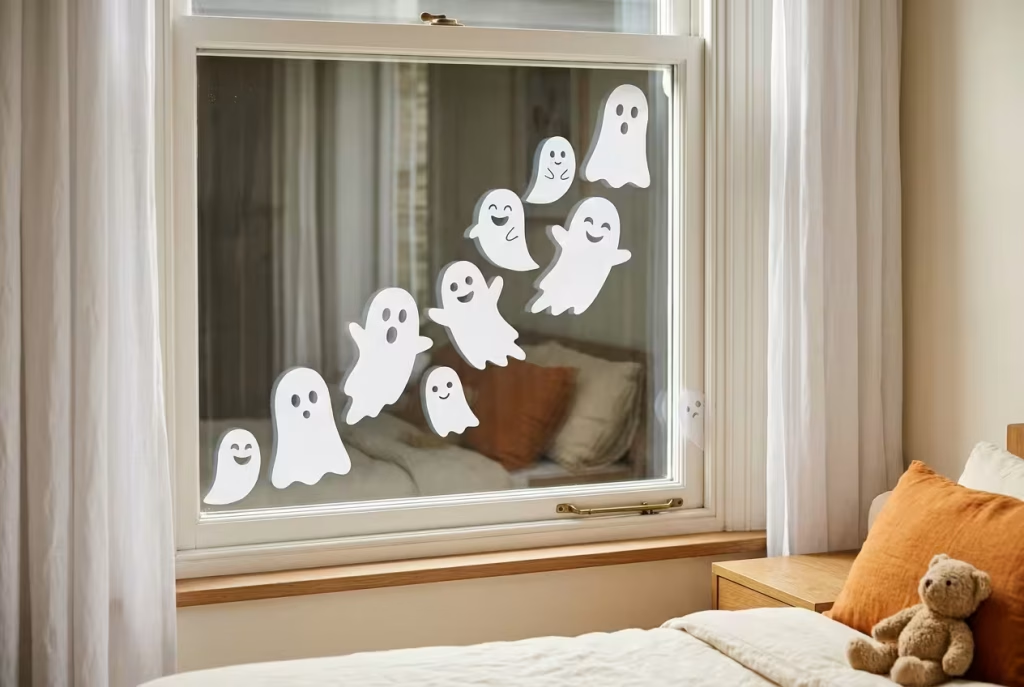
A window works twice over: it decorates the room from inside, and it puts a little show on for everyone on the pavement. Cut ghost shapes from white paper or sticky-backed plastic in a family of sizes (a big 20cm one, a medium 15cm one and a tiny 8cm one), add two oval eyes and a wide grin, and press them to the glass. White tissue glows beautifully when the landing light sits behind it, so a row of tissue ghosts becomes a gentle night-time procession.
Give each ghost a different mood. One is surprised, one is giggling, one is shy and peeking round the edge of the frame. Small touches of personality are what stop a window looking like a shop display and make it look like your child’s own.
While you are standing there, check two things that matter far more than the paper. First, the blind. The Royal Society for the Prevention of Accidents says looped cords should be secured with a cleat or cord tidy, that cords should never be cut, and that a child’s bed should not sit near a window. It also warns that most blind-cord accidents happen in bedrooms, among children aged 16 to 36 months, with more than half at around 23 months. A cleat costs a few pounds from any hardware shop and takes five minutes to fit. Second, keep the window handle and any restrictor clear of decoration: adults need to be able to open the window fully in an emergency.
5. A flameless glow in jars and lanterns
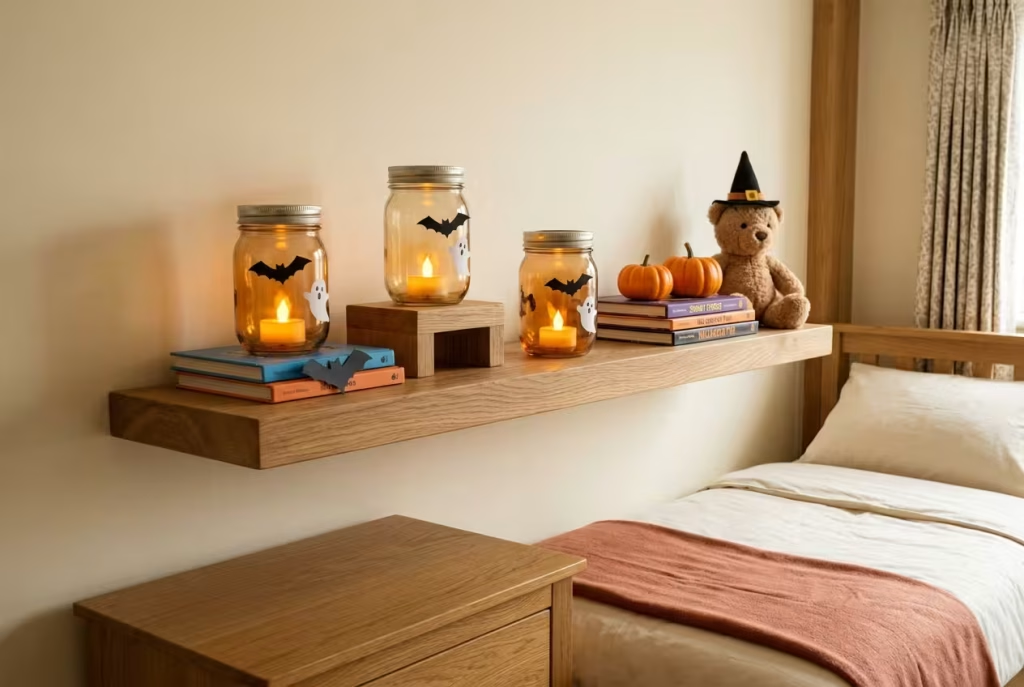
Light is what makes a child’s room feel enchanted rather than merely decorated, and you can have it without a single flame. Pop a battery tealight into a clean jam jar, a paper bag with the top rolled over, or a small lantern. For extra magic, punch a pattern of holes into the paper bag with a hole punch (stars, moons, a wonky bat) and the light spills through like a tiny planetarium.
Group them in threes at different heights on a high shelf or chest of drawers, because odd numbers always look more natural than pairs. Warm, flickering light is soft on the eyes and kinder to a nervous child than anything harsh or coloured. Fire services and consumer bodies in the UK, Canada and Ireland all recommend battery candles for Halloween, and for a child’s room there is no sensible argument against them.
There is one catch that rarely gets a mention. Button batteries can look like sweets to toddlers, and NHS England has warned that they turn up inside festive decorations. Choose lights with a screw-closed battery compartment, tape any loose cover shut with strong tape, and lock spare batteries away. If you ever suspect a child has swallowed one, treat it as an emergency and go straight to A&E. Check the packaging for a timer function too, so the glow switches itself off once your child is asleep.
6. Build a spooky story shelf
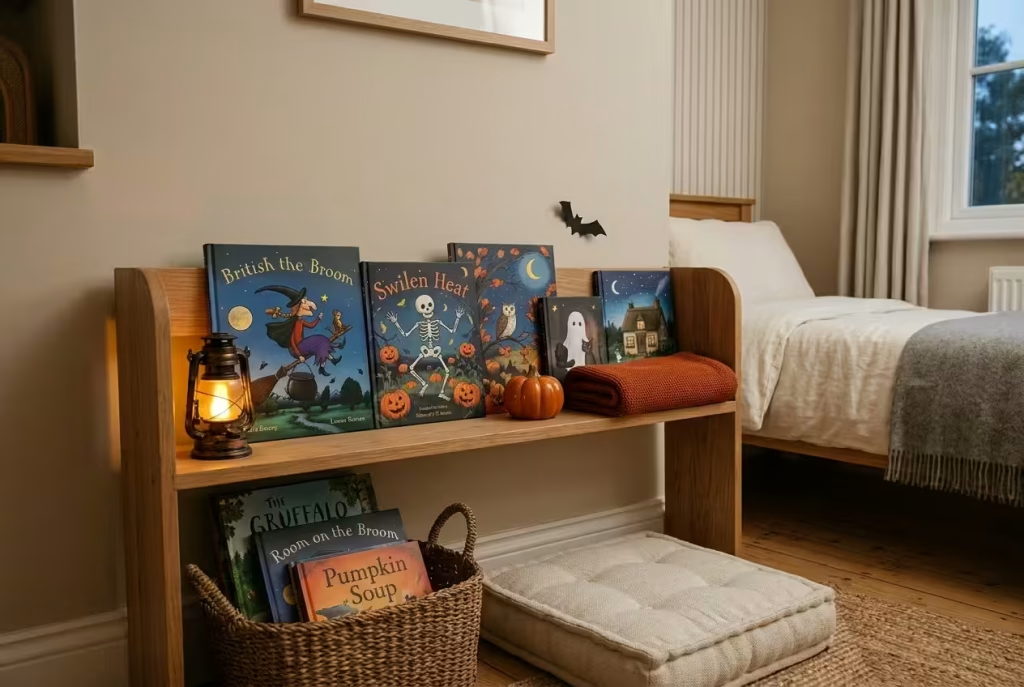
The cheapest decoration in the house is already on the bookshelf. Turn one shelf or windowsill into a Halloween reading corner by facing five or six books outwards, so the covers do the decorating, then add a folded blanket and one lantern from the last idea. Library visits are free, so borrow a few if you are short of the right titles.
Choose stories that are cosy rather than creepy. Julia Donaldson’s Room on the Broom and Winnie the Witch by Valerie Thomas and Korky Paul are warm and funny, the Ahlbergs’ Funny Bones turns skeletons into slapstick, and Jill Tomlinson’s The Owl Who Was Afraid of the Dark is a gentle nudge for any child who finds night frightening. A basket of picture books on the floor does the same job for a toddler.
Then turn it into a countdown ritual: one story a night until the 31st, same blanket, same lamp, same pause before the last page. Children rarely remember the decorations of a particular year, but they remember the feeling of being read to by someone who wasn’t hurrying. Five nights, five stories, and a shelf that earned its keep.
10 to 30 minutes a cuppa and a craft
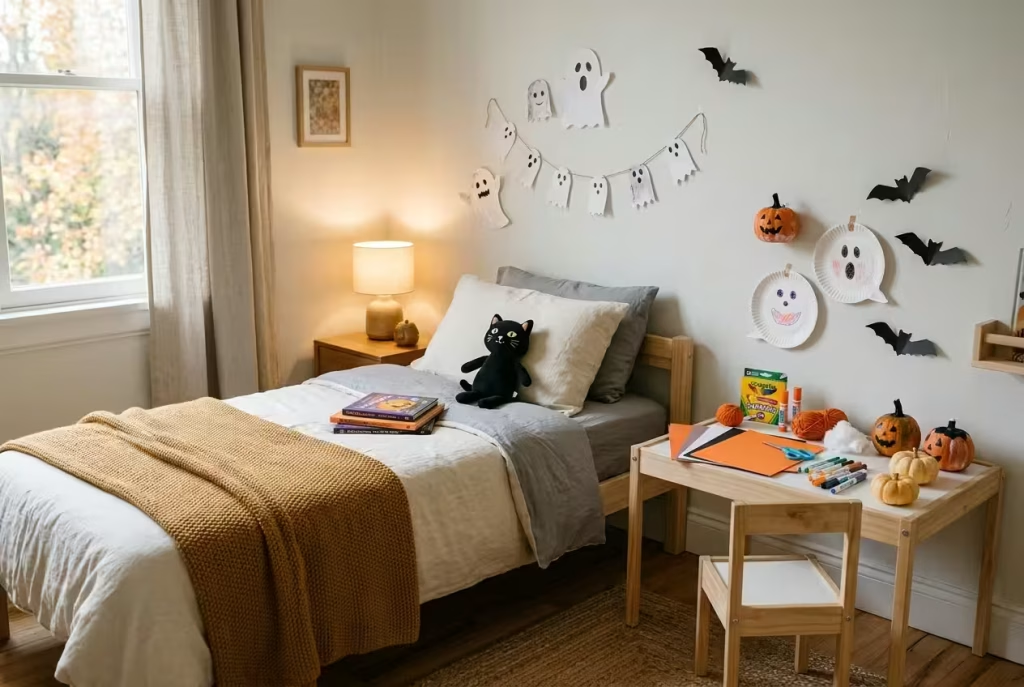
Put the kettle on. These six reward a little patience and give small hands something to do.
7. Paint pumpkins instead of carving them
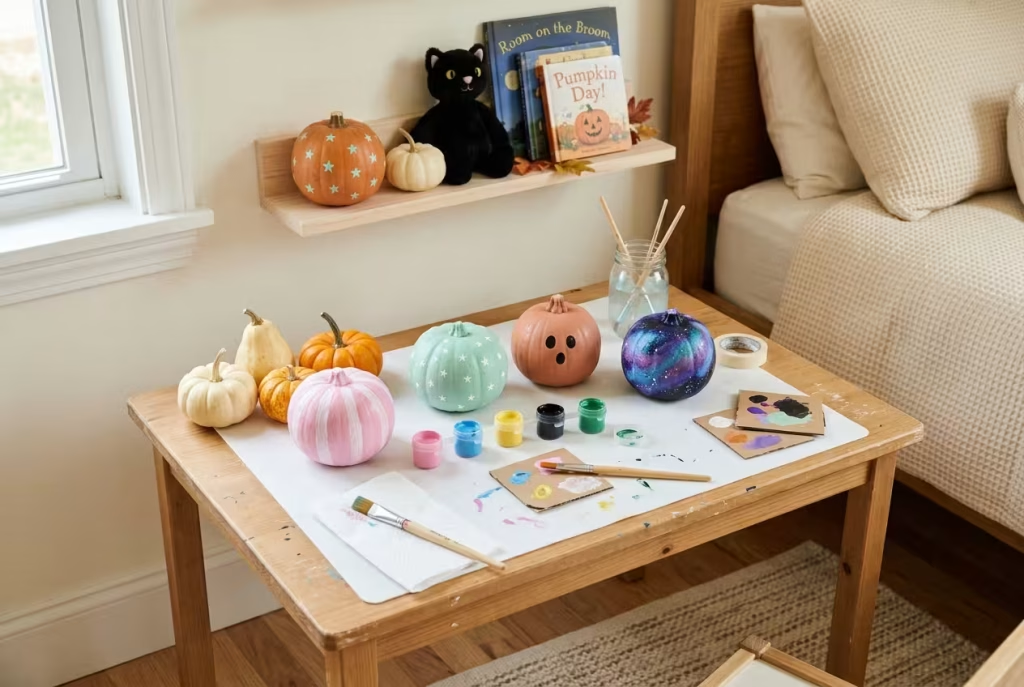
There is a reason painted pumpkins have quietly taken over from carved ones in family homes: they last longer, they make no mess worth mentioning, and every child gets to be the artist. Mini pumpkins and small gourds are ideal, as they fit a bedroom shelf and a small hand. Wipe each one dry, then apply two thin coats of acrylic paint, with the second going on once the first is touch-dry. Acrylic usually dries within half an hour, so a row of pumpkins is ready to line up on the windowsill by the time you have washed the brushes.
Offer a menu rather than a blank page. Stripes are easy with masking tape peeled off after painting. Sponge-dabbed galaxies suit small, enthusiastic hands. Pastel pinks and mints suit children who find orange a bit loud. A paint pen lets an older child write their own name across one, which turns a pumpkin into a claim: this one is mine.
Carving is where the real trouble starts. The US Consumer Product Safety Commission figures, as cited by the charity Kids In Danger, attribute about 44% of Halloween-related injuries to pumpkin carving, so a paintbrush is the sensible tool for children. For under-fives, draw faces with a marker instead of gluing on small parts. Anything smaller than a €2 coin (roughly 2.5cm across) is a choking risk for the very young, according to Ireland’s consumer protection body. When November comes, a painted pumpkin heads to the compost heap, and the memory of an afternoon with a paintbrush stays behind.
8. Hang a ghost bunting along a shelf edge
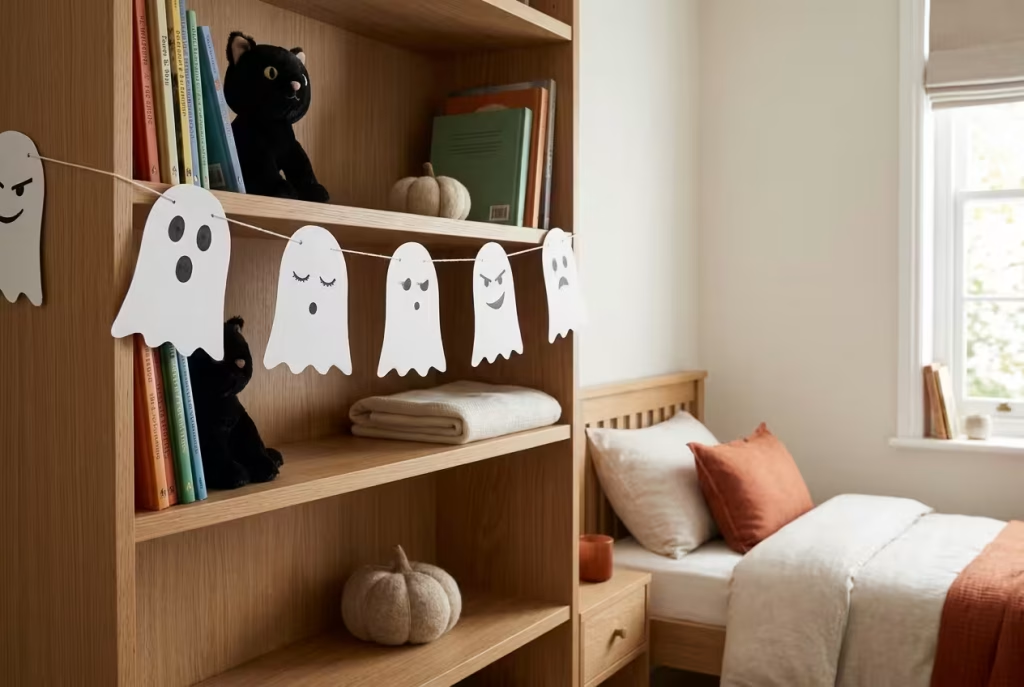
Bunting is the humblest of decorations, yet a line of ghosts bobbing along a shelf can change the mood of a whole room. Cut a family of ghosts from white card, about 10cm wide and 12cm tall, and give them faces: a startled one, a sleepy one, a mischievous one with a raised eyebrow. Punch two holes at the top of each, thread them onto a length of string with roughly a hand’s width between each, and you have 1.5 metres of spooky for the price of a sheet of card.
Where it goes matters more than how it looks. Tie the string taut along the edge of a shelf, the top of a wardrobe or a curtain pole, high up and out of reach. Electrical Safety First warns that strings of lights and garlands can pose a strangulation hazard, so this is one for children old enough to understand that decorations are not toys. For younger ones, skip the string altogether and stick the ghosts directly onto the wall in a wobbly row, which looks just as charming and carries no risk at all.
The bonus is how much children love making them. Cutting, drawing faces and arranging the order (who sits next to whom) is a surprisingly absorbing half hour for a child between five and ten. Let them be the director, and the bunting becomes theirs rather than yours.
9. Wrap a regiment of loo-roll mummies
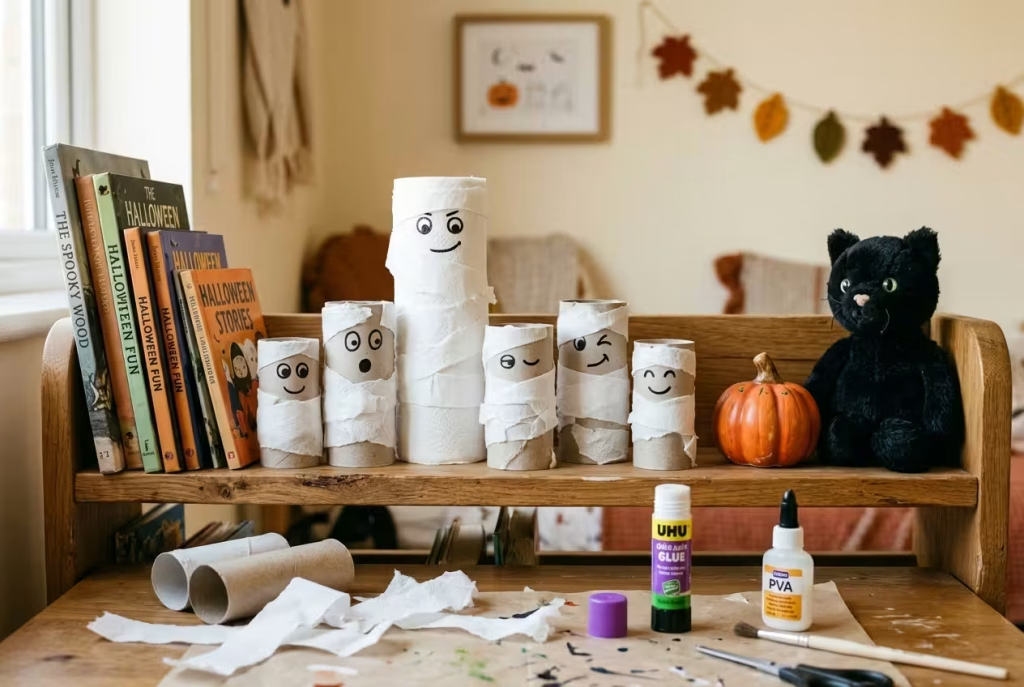
Your recycling bin is better stocked than most craft shops. Save six to ten empty toilet roll tubes, then tear white tissue, kitchen roll or an old pillowcase into strips about 2cm wide. Dab PVA glue on a tube, wind a strip round and round at a slightly untidy angle (tidy mummies look like bandaged fingers), and leave a small gap near the top for the eyes. Two dots of black pen or paper finish the job. The whole squad stands about 10cm tall and fits neatly along a bookshelf.
Make them a family: a tall one from a kitchen-roll tube, a few standard ones, a very small one from a half-cut tube. Give them names, and they stop being craft and become characters. Googly eyes suit children aged seven and over, because they are small and easy to peel off; for younger children, draw the eyes on. Hot glue guns are for grown-ups only, and PVA with a spare pair of hands does the job just as well.
There is a gentle bit of psychology at work here too. A child who begins the afternoon bored and ends it proudly presenting a row of mummies has had a small but real taste of making something from nothing. That confidence outlasts the decorations by a long way.
10. Set up a make-your-own-monster desk
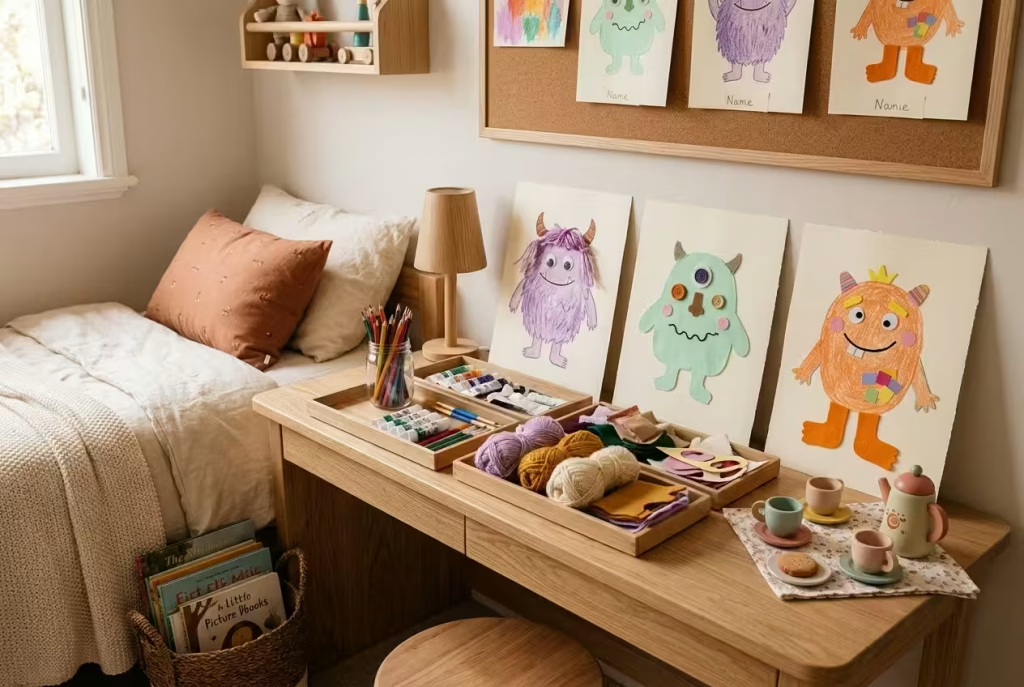
This idea comes from a charming UK retailer’s blog, and it is a gem. Instead of chasing monsters out from under the bed, invite them to tea. Lay out paper, colouring pencils, paints, wool, felt and fabric scraps, then ask your child to design the friendliest monster they can imagine. Prompt them with questions that nudge the imagination: What is its name? What does it eat for breakfast? What is it secretly scared of? What job does it do in this room?
That last question is the clever one. A monster who guards the bookshelf, or watches over the teddies, or keeps the sock drawer safe, has stopped being a threat and become a protector. The clinical social worker quoted earlier advises acknowledging a child’s fear and gently separating what is real from what is pretend, and a child who has drawn the monster knows exactly how silly its teeth are. Fear has a hard time surviving that much giggling.
Pin the finished creatures to a board or along a high, taut string, and give each one a name label in your child’s handwriting. In a shared room, each sibling designs one, and then the two monsters meet. A toy tea set on the desk finishes the scene, in keeping with the idea of inviting monsters for tea.
11. Style a pastel ghost shelf
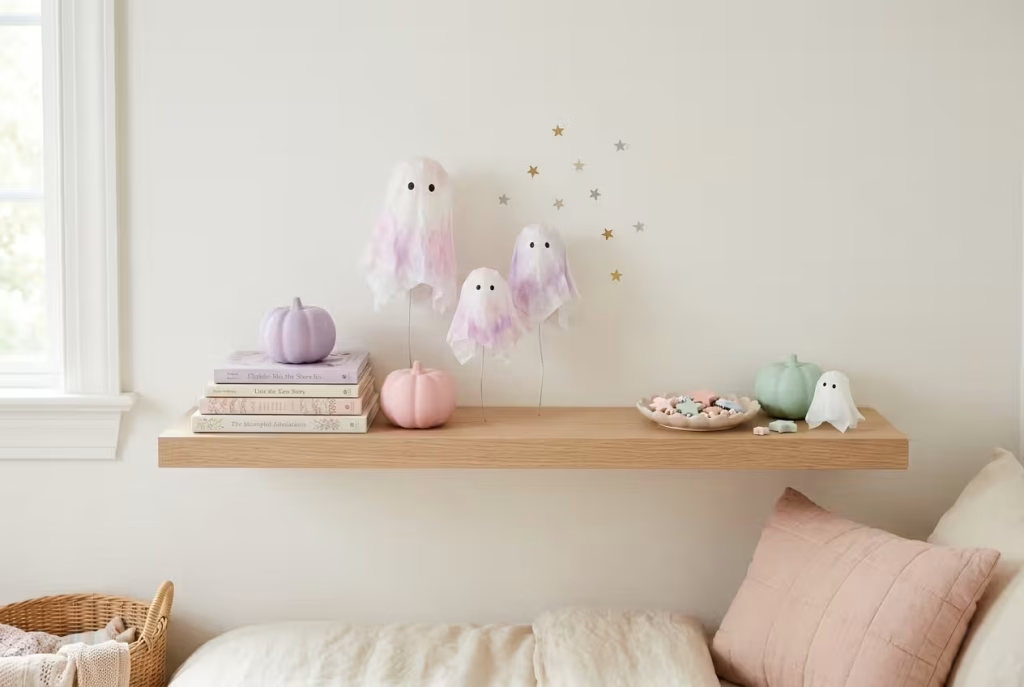
Not every child loves orange and black, and plenty feel uneasy under heavy colour. A palette of pink, lilac, mint and white turns Halloween into a sweet shop: pastel paper ghosts, soft-coloured pumpkins, a sprinkle of star stickers. The look is popular with UK children’s decor brands, and it works because it cuts the spookiness while keeping the sparkle.
Shelf styling has a few simple rules that make cheap items look considered. Group things in odd numbers (three pumpkins beat two). Vary the height by propping some items on a stack of books, so the eye travels up and down rather than straight along. Leave breathing space, because a crowded shelf looks cluttered, while a few well-placed treasures look curated. If you want shimmer, glitter glue or sticker sheets give the sparkle without the glitter that finds its way into every corner of the house for months.
If your supply of props runs short, make tissue-paper ghosts and tint them with a swipe of watercolour: a pink wash here, a lilac one there. It suits a shared room especially well, because nobody feels the spook has been forced on them, and it fits comfortably into a child’s room long after Halloween.
12. Cut a moon and black-cat silhouette wall
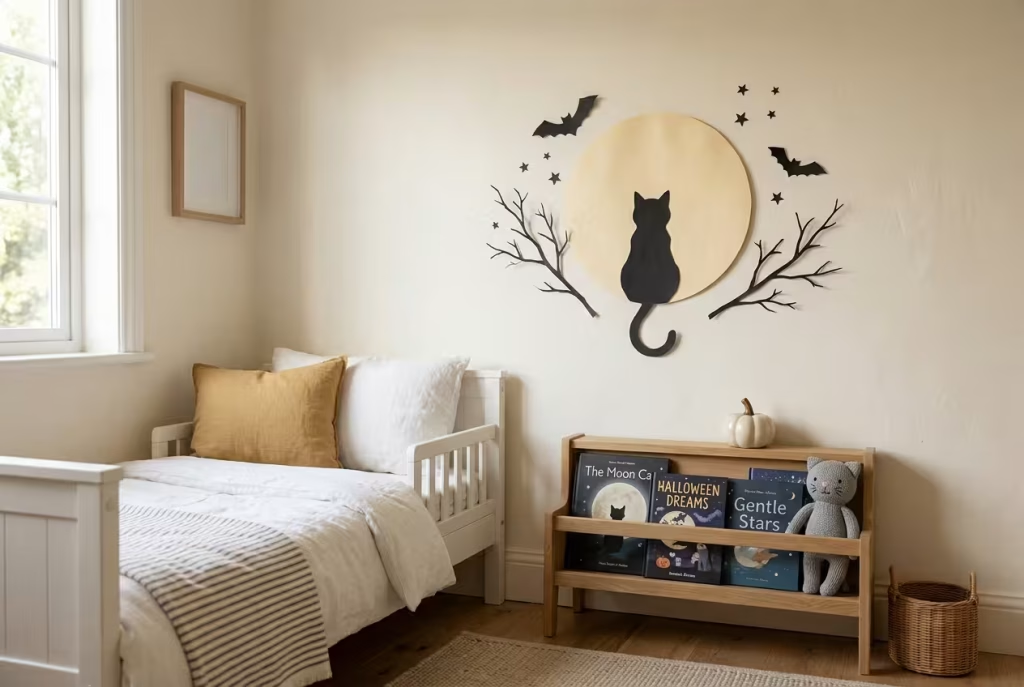
Sometimes the gentlest decorations are the most beautiful. Use a dinner plate to trace a circle about 30cm across on cream or pale yellow paper for the moon, then cut black card silhouettes to sit in front: an arched cat about 20cm tall, a leafless branch, a couple of bats, a scattering of tiny stars. Cut the black shapes first and arrange them on the floor before sticking anything, so you can rearrange until the picture feels right.
The finished scene works on a plain wall or on the back of a door, and it has a quality few Halloween decorations have: it is quiet. There are no faces, no grins, no staring eyes, just a cat and the moon. For a very young child, or one who finds eyes unsettling, that calm makes all the difference.
For an extra moment of magic at bedtime, shine a torch through a cut-out held a few inches from the wall and let your child watch a cat shadow stretch and shrink. Shadow play costs nothing, takes no time at all, and gives the last five minutes of the day a tiny flicker of wonder.
30 to 45 minutes when you have a little time to play
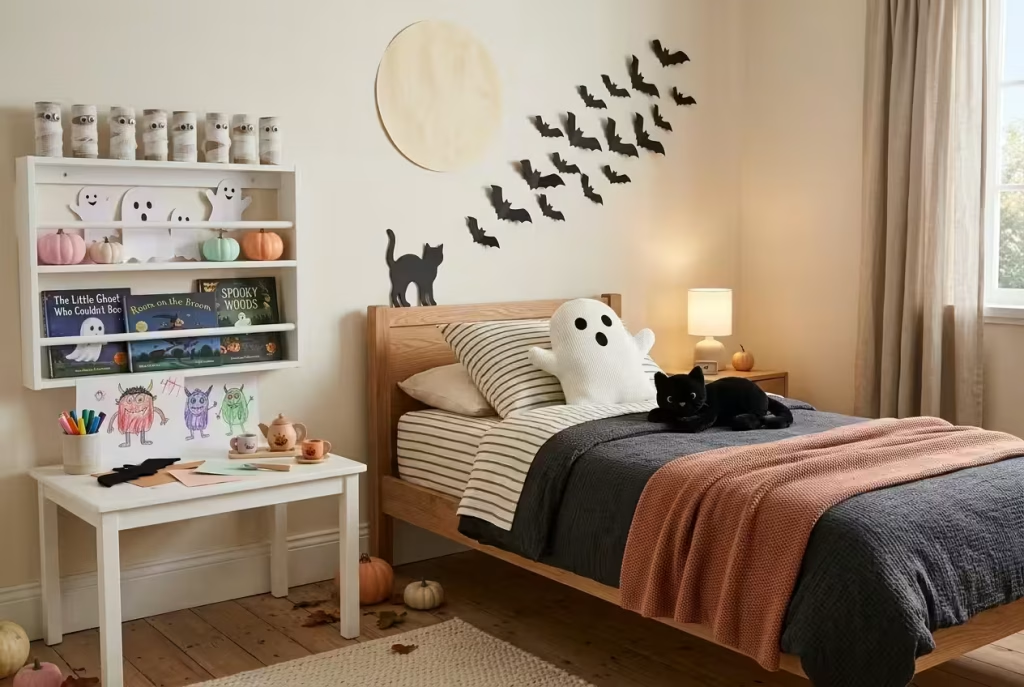
Have an hour in hand on Friday night? These last six turn a room from “decorated” into an event.
13. Spin a yarn-and-string spiderweb
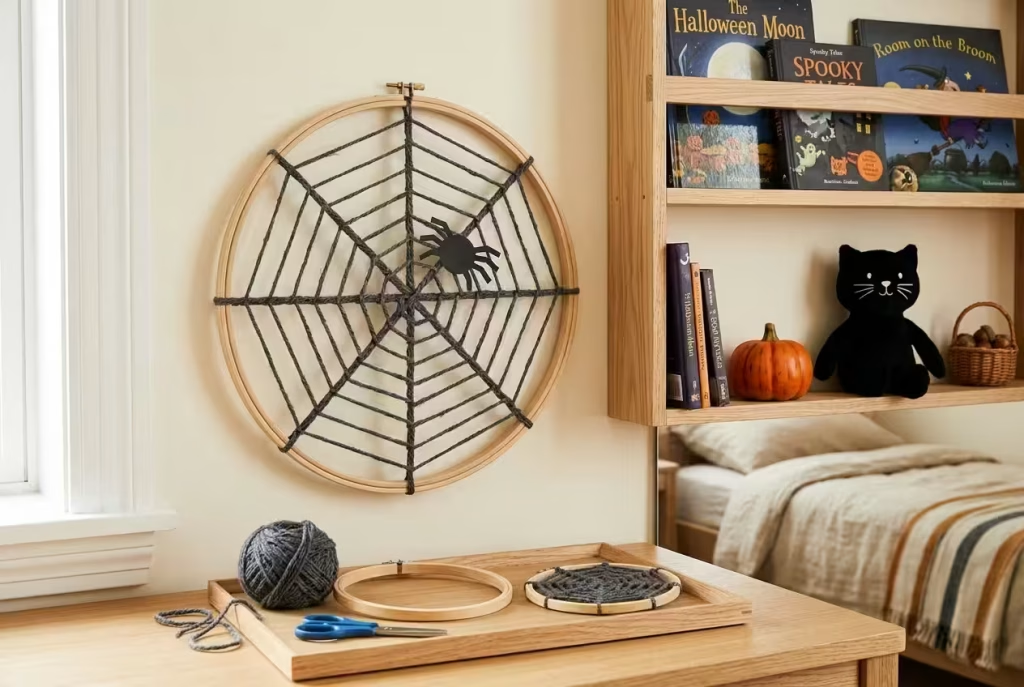
Classic stretchy cobweb looks the part, yet it is a poor guest in a family home. It is highly flammable, and left outdoors it traps birds, bees and other wildlife. Mix it with lights or candles and it is easy to see why fire-safety writers steer well clear.
A yarn web gives you the same shiver without the worry, and it is a proper craft. The neatest version uses an embroidery hoop: tie the end of a ball of wool to the frame, run eight straight spokes across the middle like the lines on a compass, then wind round and round in a spiral, over and under each spoke. It takes about forty minutes, costs under £5, and the finished web looks surprisingly handsome hung on a wall hook or propped on a shelf.
For younger children, try a paper plate with a ring of holes punched around the rim. Threading yarn from hole to hole is brilliant practice for small fingers, and the web emerges almost by accident. Top either version with a paper spider, or a pom-pom with felt legs. Pipe-cleaner legs are fine for children of seven and over, but too small and bendy for the youngest.
Whatever you make, keep it away from any heat source, lit lamp or radiator, and leave real cobweb for the garden spiders, which do it better.
You May also Like: 27 Halloween Bedroom Decor Ideas to Create a Spooky, Cozy, and Stylish Space
14. Throw a toy costume parade
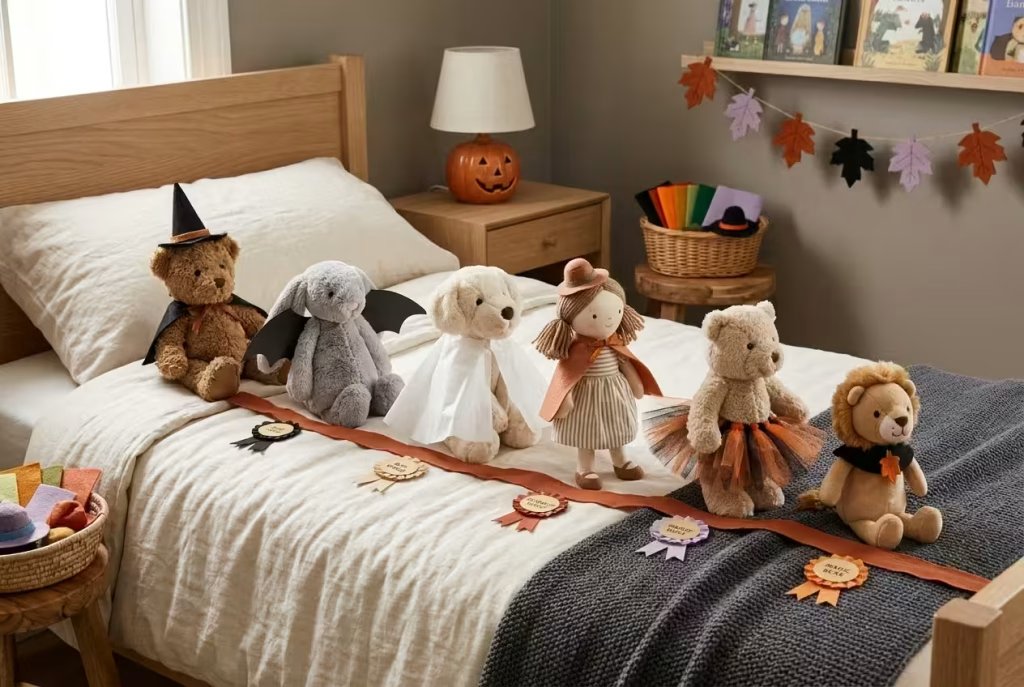
Here is a decoration that is really a game wearing a disguise. Gather the soft toys and dolls on the bed or along a shelf and dress each one for Halloween: felt capes cut from 10cm rectangles, card cone hats scaled down to fit a teddy’s head, black card bat wings pinned behind a stuffed bunny, a frill of tissue paper for a tutu. Anything fixed on loosely and easy to remove will do.
Let your child decide who is the ghost, who is the witch and who is the unexpected guest of honour. Add a ribbon runway down the middle of the bed, take it in turns to announce each contestant, and award prizes for Most Dramatic and Best Hat. Taking toys seriously is one of the great pleasures of childhood, and being allowed to run the show gives a small person real authority over the room.
The tidy-up is the best bit. Costumes slip off in a minute on Sunday morning, and the whole lot sits in a sandwich bag labelled with the year, ready for next October. Take a photo of the parade before it goes. Years from now it will say more about being six than any glossy shot of a perfectly styled room.
15. Make a ghost reading den
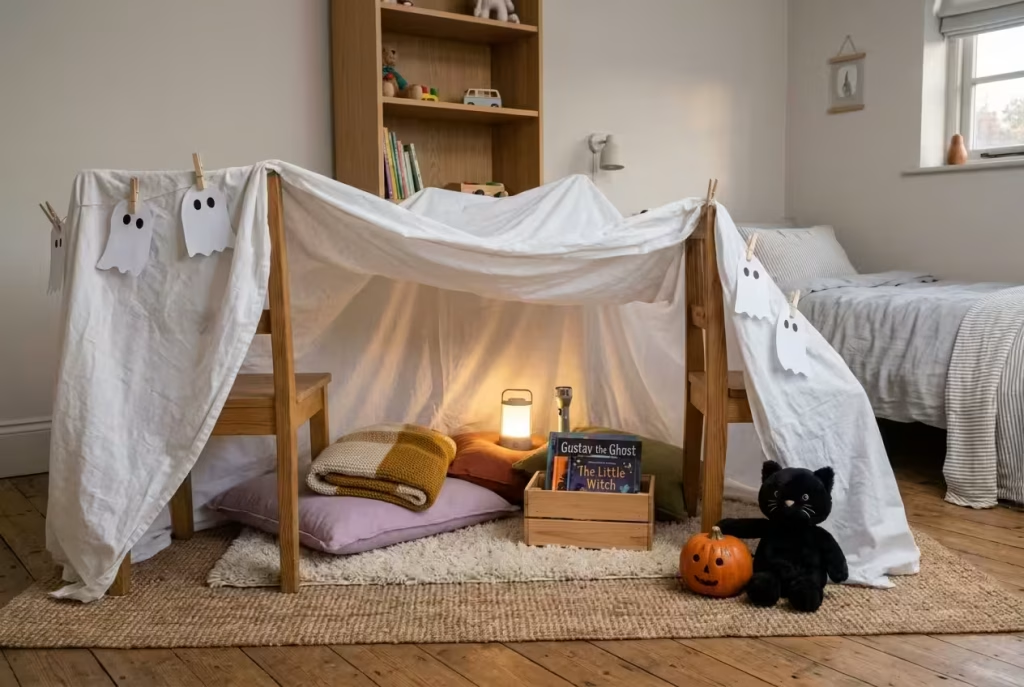
Every child should build a den at least once a year, and Halloween hands you the perfect excuse. Drape a lightweight cotton sheet over two chairs or a clothes airer (a heavy duvet tends to drag the chairs over), peg it in place with clothes pegs or bulldog clips, and tuck in cushions, a rug and a pile of books. A torch for each person finishes the interior. Leave one side open so you can see in and your child never feels shut away.
Safety here is mostly common sense. Use battery LED lights only, with no mains cords inside, keep the sheet well clear of heaters and radiators, and treat the den as a place for reading and whispering rather than for sleeping. For the youngest, sit inside with them.
Why does it work so well? Because dens turn fear upside down. The dark corner that might have been unsettling becomes a cosy cave that your child built and controls, with a story, a torch and a parent a few inches away. Many a nervous child has discovered that the dark is quite friendly when it is on your terms. Read one short story in there, collapse the den in the morning, and the carpet is clear again.
16. Open a trick-or-treat station
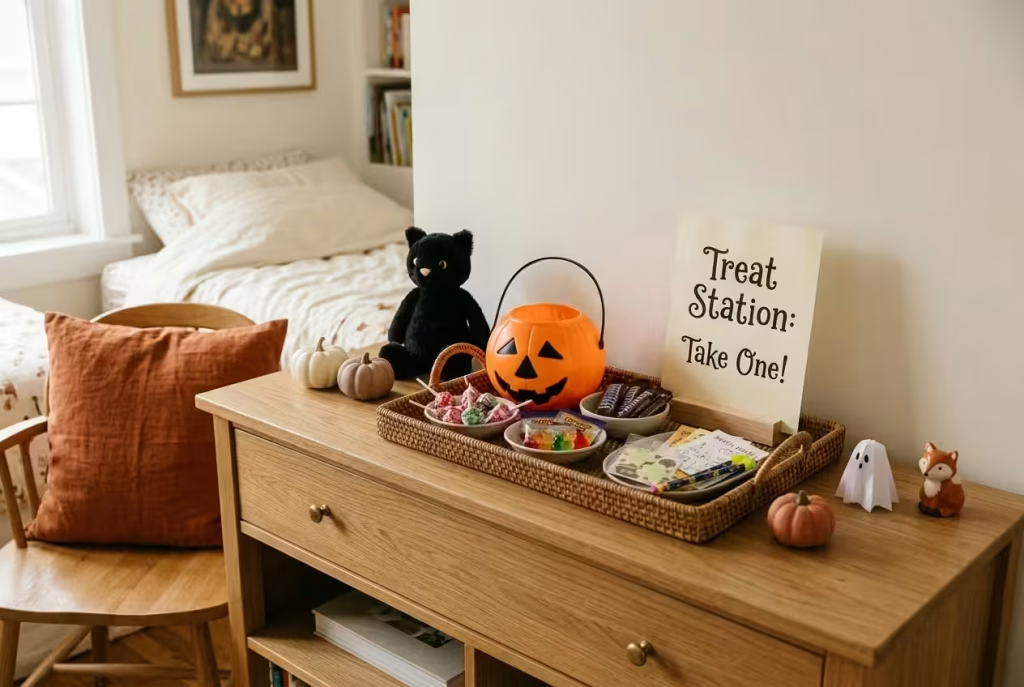
There is something deeply satisfying about being the host rather than the guest. Set a small tray on a chest of drawers with a pumpkin bucket, a few wrapped sweets and a handwritten sign: “Treat Station: Take One!” On the night itself, your child can “visit” their own station before heading out, or hand treats out to toys in a ceremonial line. Giving, it turns out, is half the fun of Halloween.
Fill it with care. Health Canada advises removing choking hazards such as hard sweets and small toys from the treat bags of young children, so keep the contents age-appropriate and avoid loose small sweets for the under-threes. If your child or a visiting friend has an allergy, read the labels and keep anything unsuitable out of the mix.
A sugar-free version works equally well: stickers, mini pencils, a small bouncy ball, a tiny pot of play dough. Children are often more thrilled by a sparkly sticker than by a fourth fun-size bar, and parents rarely mind the swap. Place the station on a surface high enough to supervise, and hand over the “opening hours” as a small power for your child to enjoy.
17. Turn the bedroom door into a Boo door
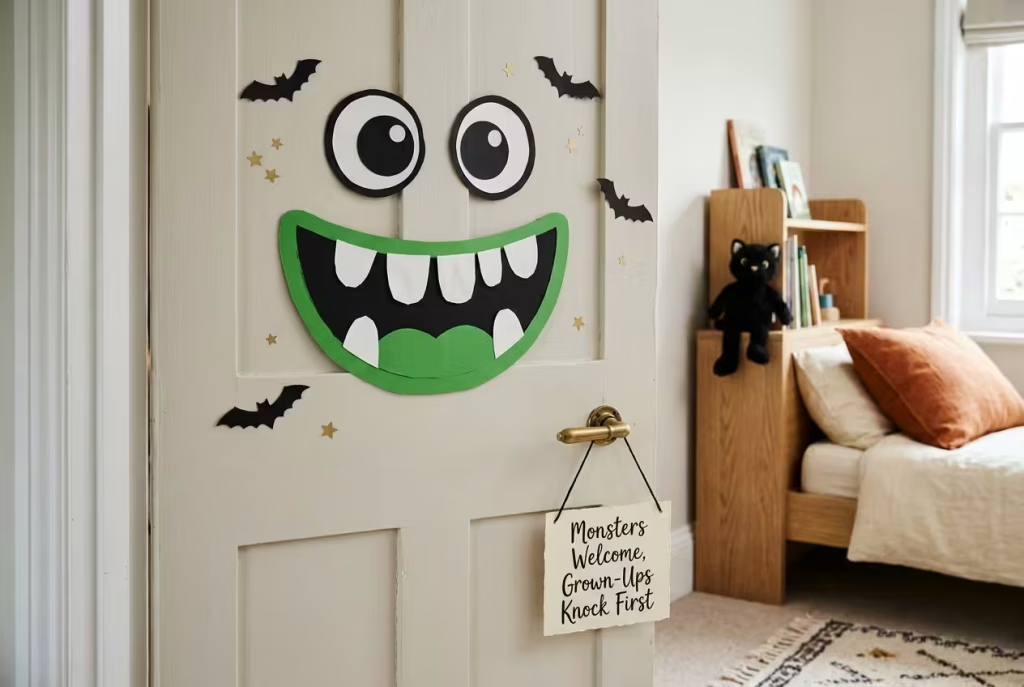
Doors are the most underrated surface in the house. A bedroom door is a threshold between the busy house and a child’s private world, and decorating it says: this is someone’s place. Cut a wide monster mouth from card with a row of paper teeth, add two big eyes above it, and write “Monsters Welcome, Grown-Ups Knock First” on a card hung beneath the handle. Your child will love the swagger of it.
A few practical rules keep it safe and neat. Use light card and removable strips on a painted door (wait seven days after painting, as ever), keep everything away from the hinge side where little fingers can get trapped, and never cover the handle or let anything catch when the door swings. Anything heavy, gluey or fiddly stays off.
On the inside, a “Sleeping Monster, Do Not Disturb” sign is a lovely, funny touch at bedtime. Let your child design both signs themselves, however messy, and the door becomes a miniature portrait of their sense of humour. Older children and tweens often take to this one most of all, because it respects their privacy while letting them show off.
18. Open a pop-up spooky cinema
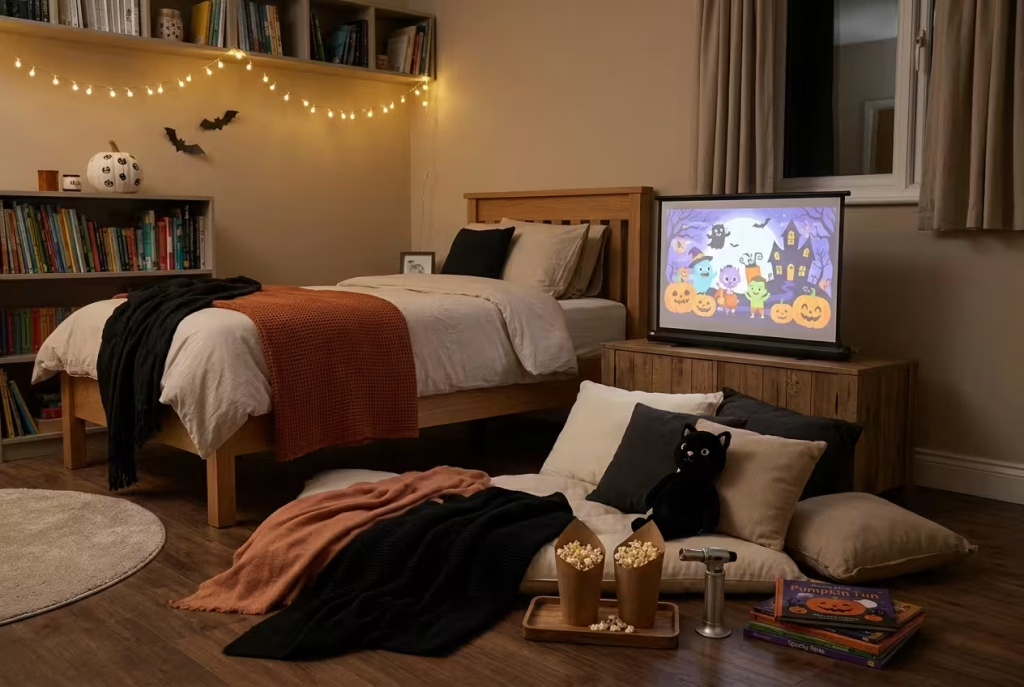
The best decoration of all is what happens inside the room. Dim the main light, switch on a string of battery fairy lights, pile floor cushions and blankets in front of a screen, and put on something gentle. A UK children’s retailer suggested this idea years ago for a child who is nervous of the dark: a little darkness, a screen, and fairy lights for comfort. It still works beautifully.
Choose the film with care, because a cosy night can go wrong with one misjudged scene. Monsters, Inc. and the short animated film of Room on the Broom are both gentle options, and the British Board of Film Classification publishes ratings and content advice for every title, so check it before you press play. Set the screen on a stable surface away from the edge of the bed, and keep any cables tucked out of reach.
Then add the sensory finishing touches: popcorn in paper cones made from rolled sheets of card, a blanket for each person, a torch for pretend scary bits. Agree beforehand that anyone can say “pause” at any point, and mean it. A small ritual like that is how a children’s film night becomes a family tradition, and how the room becomes a place they remember.
The safety checks that matter most
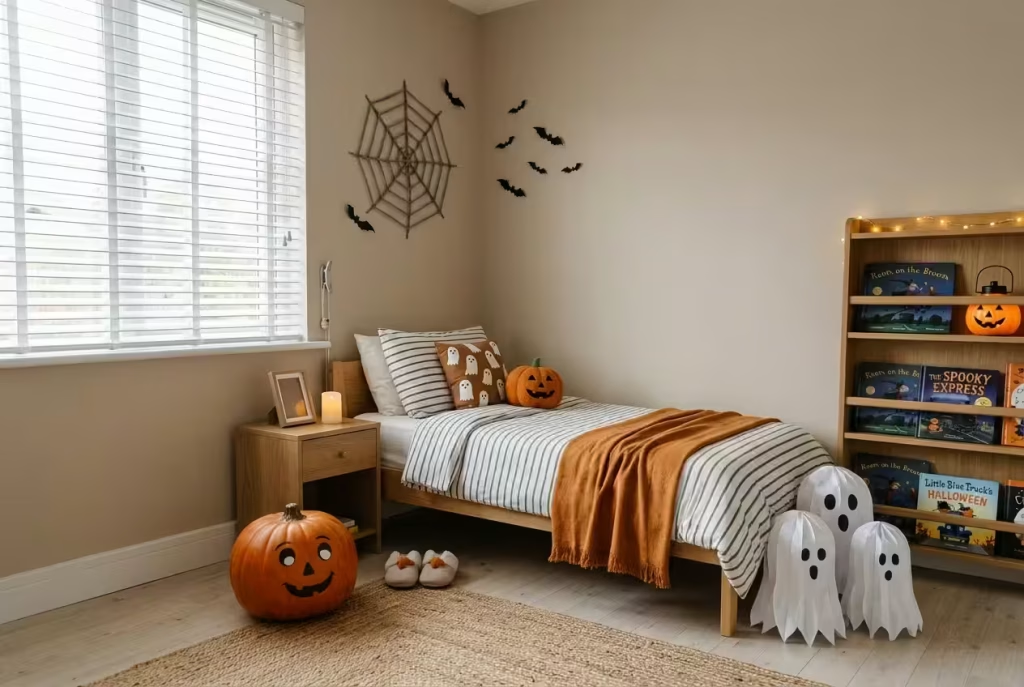
Most Halloween guides skip this part. It is the section a good parent would read first, so here it is in one place.
| Hazard | Why it matters | Simple fix |
| Hanging items over a bed or cot | RoSPA advises against hanging hazardous objects on or above a bed; Command strips are not rated for over-bed use | Keep every decoration on the far wall |
| Looped blind cords | Most blind-cord incidents happen in bedrooms, with children aged 16 to 36 months | Secure cords with a cleat; keep beds away from windows; never cut cords |
| Garlands and light strings | They can be a strangulation risk | Keep them short, taut and high; never leave them within reach |
| Small parts | Anything smaller than a €2 coin is a choking risk for very young children | Draw faces instead of gluing eyes on; use large decorations |
| Button batteries | They can look like sweets to toddlers | Choose screw-closed compartments; tape them; lock spares away |
| Real flames | Hot wax, fabric and decorations are a poor mix | Use battery candles only |
| Fake cobweb | It is highly flammable and traps wildlife | Use a yarn or paper web |
| Pumpkin carving | Around 44% of Halloween injuries in US figures | Paint, don’t carve |
Stick it, don’t nail it the damage-free hanging rules
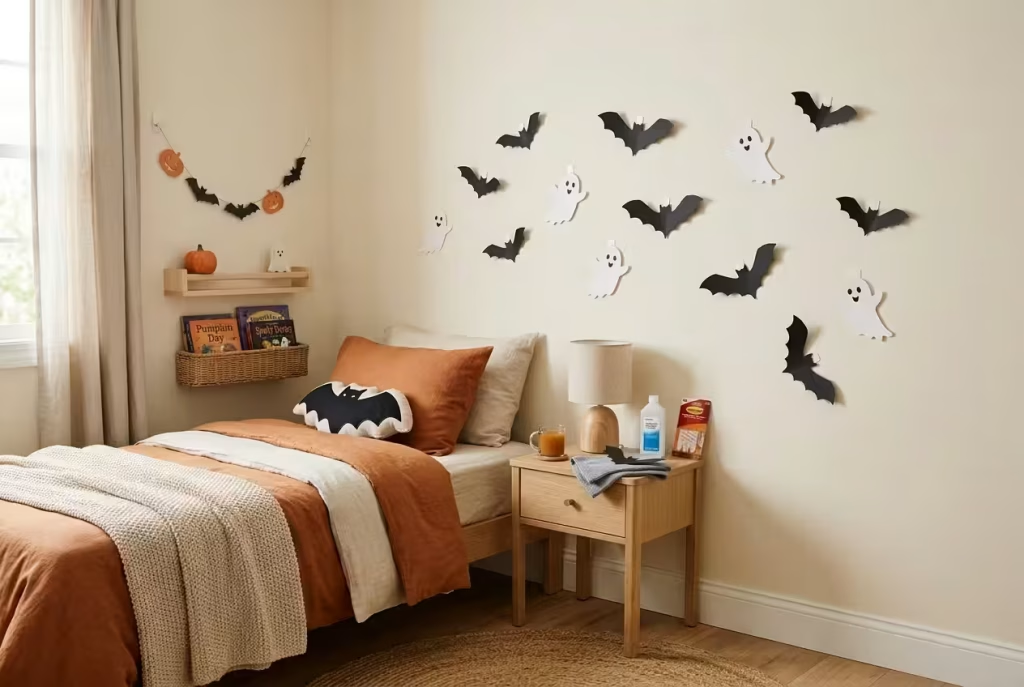
If the room is rented, or you simply like your walls intact, these are the rules that stop decorations coming off in the night:
- Smooth surfaces only. Strips grip painted walls, wood, tile and glass, not wallpaper or textured plaster.
- Wipe first. Clean the spot with isopropyl rubbing alcohol so the adhesive bonds properly.
- Wait for paint. Give freshly painted walls seven days to cure before sticking anything on them.
- Press and pause. Press firmly, then wait about an hour before hanging a hook’s load.
- Mind the weight. A common UK adjustable hook holds about 225g and can be repositioned up to three times, so use these for paper bats, not for heavy items.
- Pull down, not out. Peel the tab slowly straight down towards the floor to avoid pulling off paint.
What to raid from your own cupboards (and the one shop trip)
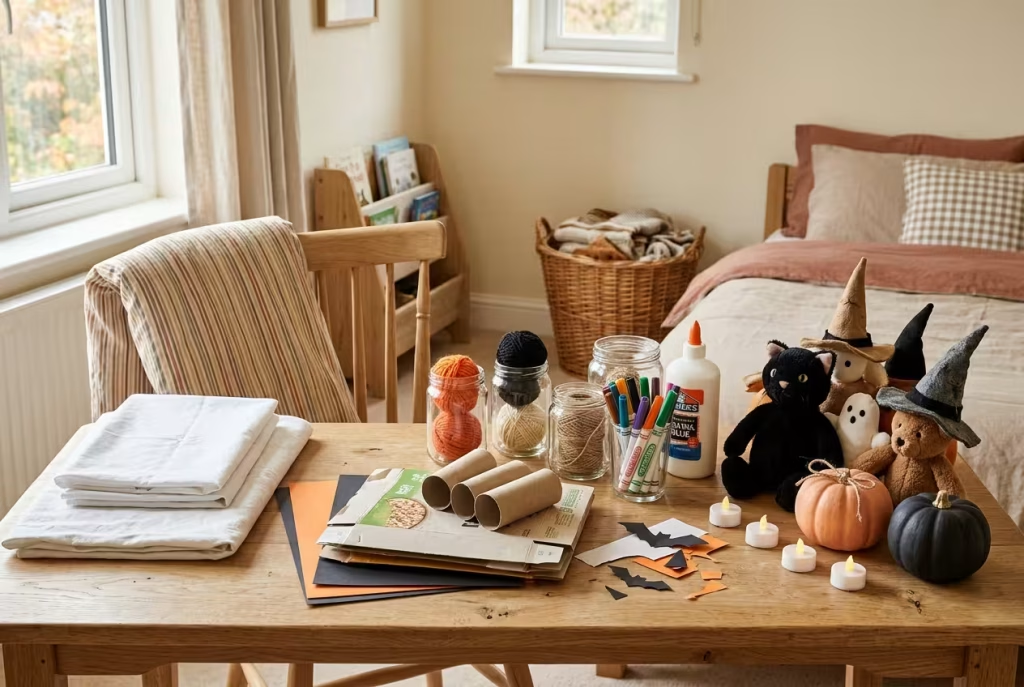
You probably own more of this than you think:
- White pillowcases, old sheets and a spare duvet cover
- Black and orange card, sugar paper or old cereal boxes
- Empty loo-roll tubes and clean jam jars
- Wool, string, felt-tip pens and PVA glue
- Battery tealights (check the drawer of Christmas leftovers)
- Soft toys, teddies and any hats that vaguely look witchy
If you do need a shop trip, a single supermarket or discount-store visit covers it: a pack of mini pumpkins, acrylic paint, a pack of battery tealights, a roll of black card and a pack of removable adhesive strips. Budget around £10 to £15 for the lot.
Why helping makes it better the psychology of a shared make
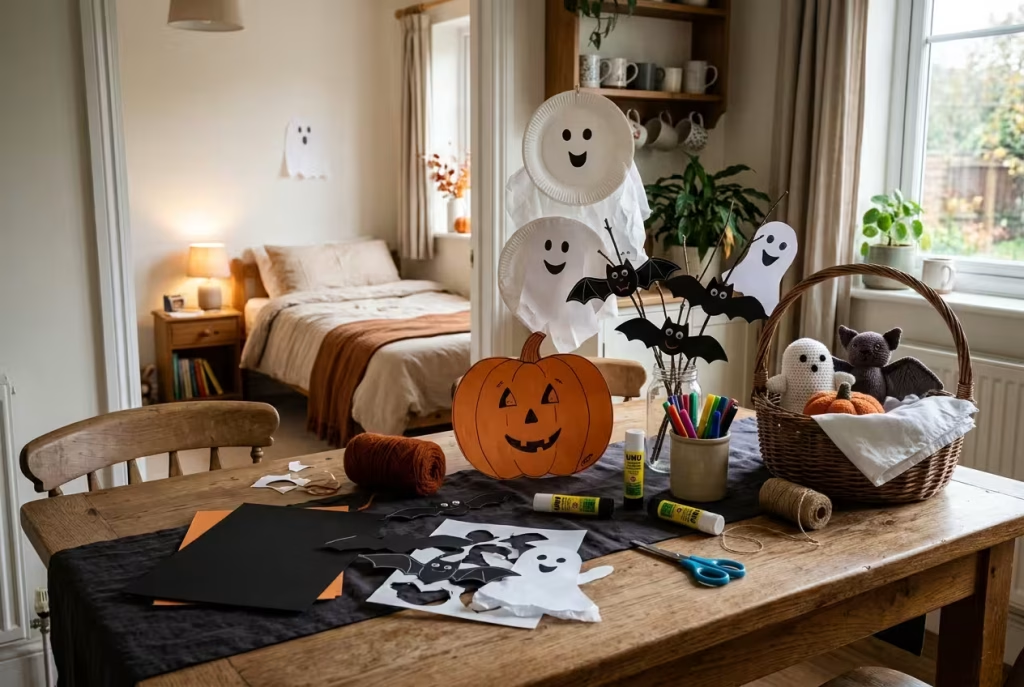
It is tempting to do the whole thing as a surprise, but the evidence from child-development guidance points the other way. Toddler-health writers recommend involving little ones in the decorating, so they understand what Halloween is and have a say in the result. Cornell Cooperative Extension adds that bedtime and being alone can be the scariest part of the day for a young child, which is why a calm, comforting bedtime routine matters most of all around the 31st.
There is a deeper reason the shared version wins. Children feel safest when they have some control, and a room they have helped to shape is a room they can read. They know where each bat came from, who cut out which ghost, why the lantern sits on the left. The unknown, which is where most Halloween worries live, simply has less room to grow. A nervous child who has made the decoration is rarely frightened of it, because it began as a pile of paper on the kitchen table.
It also changes the mood of the whole week. Preparing together turns the days before Halloween into a countdown rather than a looming event, with small, happy jobs each evening: cut the bats tonight, paint the pumpkins tomorrow, build the den on Friday. Anticipation is half the pleasure of any celebration, and a child who spends a week looking forward to something has been given a gift that no decoration can wrap.
Practically, that gives you four habits to borrow:
- Let them choose one thing to add and one thing to leave out.
- Name the pretend. A quick “that’s just a paper bat, you made it” turns an unknown into a friend.
- Keep the bedside plain. A cheerful room is great; a bedside with nothing odd to look at in the dark is even better.
- Stick to the routine. Bath, story, lights, as always.
Taking it all down without a tear
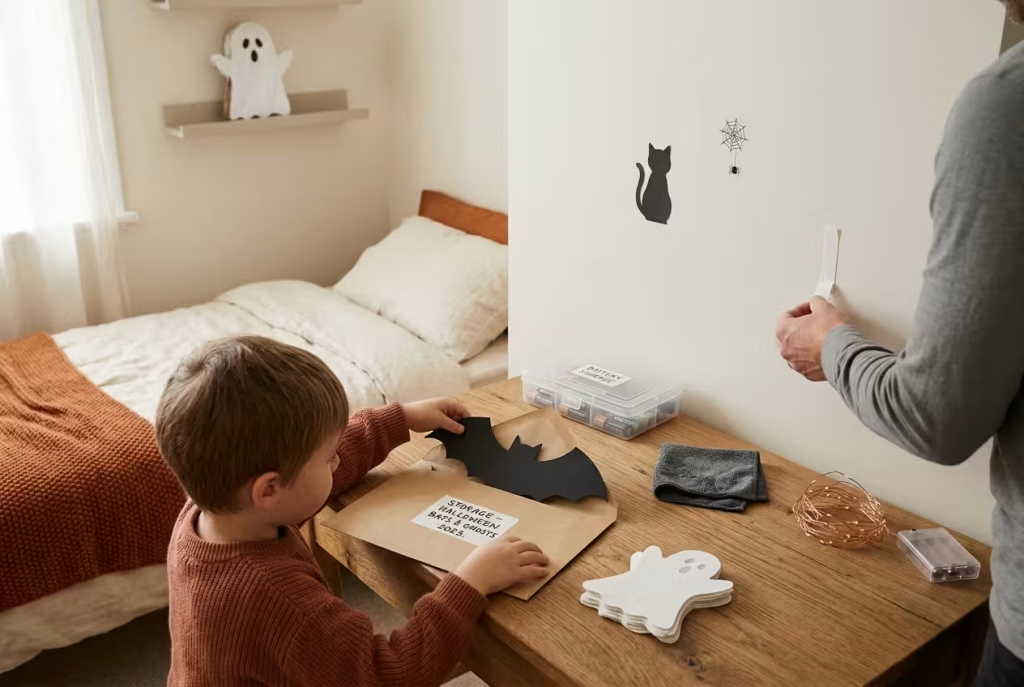
By 1 November the room should be your child’s again, ideally without a fuss:
- Photograph the room first, so the memory outlasts the paper.
- Peel adhesive strips slowly downwards, then wipe the wall with a damp cloth.
- Pop flat decorations (bats, ghosts, silhouettes) in a large envelope labelled by year.
- Keep the batteries out of the lights and store them somewhere high and locked.
- Let your child choose one favourite item to keep out until the end of November.
A last word before the witching hour Room
The best Halloween room is rarely the most elaborate one. It is the one a child helped to build, where the bats are wonky, the ghosts are grinning and bedtime still feels safe. Pick three ideas, give your child the scissors for at least one, and leave the rest for next year. A room made with a bit of laughter will always beat one made in a rush, and that, as they say, is the real trick and the real treat.
Questions parents ask
How do I decorate a child’s room for Halloween without frightening them?
Keep faces friendly, use cute shapes such as ghosts, pumpkins and stars, and avoid anything with blood, realistic masks or sudden noises. Show your child the plan first and let them veto anything. Children aged 3 to 5 are most likely to be unsettled by darkness, ghosts and monsters.
What are the quickest Halloween decorations for a kid’s bedroom?
The fastest are swapping pillows and throws, putting witch hats on toys and lamps, sticking paper bats to a wall, adding window ghosts, and placing battery tealights in jars. All of these take 10 minutes or less and mostly use things you already own.
Is it safe to hang decorations over a child’s bed?
No. RoSPA advises against hanging hazardous items on or near a cot or bed, and Command’s own instructions say not to use their adhesive strips over beds. Keep decorations on the opposite wall, and nothing above the pillow.
What can I use instead of candles in a child’s room?
Battery-operated flameless candles, ideally in a jar or lantern on a high shelf. Choose ones with a secure, screw-closed battery compartment, since button batteries are a serious risk to toddlers.
Are fake cobwebs safe around children?
They are not ideal. Stretchy cobweb is highly flammable and can trap birds and wildlife outdoors. A yarn, string or paper web gives the same look more safely, kept away from lamps and heaters.
How do I stop decorations falling off the wall?
Wipe the wall with rubbing alcohol, use removable adhesive strips on smooth, painted surfaces, wait seven days after painting, and press firmly. Adjustable hooks hold roughly 225g, so keep to light items such as paper.
What decorations suit toddlers and under-threes?
Large, soft, fixed items: big witch hats on toys, a story shelf, a silhouette wall high up. Avoid small parts (anything smaller than a €2 coin), loose garlands, button-battery lights and anything near the cot.
What if my child is scared of the decorations?
Take them down or move them, and talk it through. Acknowledge the feeling, then explain what is real and what is pretend. A calm bedtime routine helps, and a child who made the decoration is usually far less afraid of it.
How can I decorate a shared bedroom or bunk beds?
Agree the spook level together, keep decorations on walls and shelves rather than bunk rails, and avoid anything hanging near the top bunk. A shared make-your-own-monster desk works well for siblings of different ages.
How do I decorate a rented child’s bedroom without damage?
Use removable adhesive strips on smooth painted walls, window stickers on glass, and freestanding props such as hats, jars and bunting on shelves. Peel strips slowly downwards when you take everything down.
Can older children and teens enjoy these ideas too?
Yes. Swap pastel and cute for darker palettes, silhouettes, a moon wall and a spooky cinema night. The treat station and ghost den work well for tweens who want a more grown-up look.
When should I start decorating, and when should I take it down?
A weekend or a few days before the 31st is plenty for a last-minute job. Take decorations down the day after, ideally with your child, so the room feels like theirs again by 1 November.