25 Stunning Mountain Bedroom Design Ideas That Feel Like a Luxury Escape
Mountain bedroom design works because it taps into something instinctive. The connection to nature, the weight and honesty of materials, and a quieter, more grounded colour palette all contribute to spaces that genuinely help you switch off. Timber, stone, wool, and linen do not just look good together, they perform well in colder climates, regulate temperature, soften acoustics, and age with character. When done properly, a mountain bedroom feels calm and protective rather than heavy or rustic for the sake of it.
In my own projects, I treat a mountain bedroom as a careful balance between raw materials and refined comfort. Exposed wood or stone should never feel harsh, and softness should never feel decorative only. I pay close attention to proportions, lighting levels, and tactile contrast, because these are the details that determine whether a bedroom feels like a retreat or just a themed room. I have seen beautifully located homes fail simply because finishes were too dark, beds were undersized, or lighting was treated as an afterthought.
This guide is designed to be practical, not aspirational fluff. You will find 25 mountain bedroom design ideas that range from small, low-cost upgrades to more structural changes. Each idea is written to help you decide what is realistic for your space, your budget, and your level of renovation experience. You can implement one idea at a time or combine several to create a layered, authentic mountain feel that lasts beyond trends.
Core design principles for a mountain bedroom
A successful mountain bedroom starts with restraint and intention. The goal is not to recreate a ski lodge cliché, but to design a space that feels grounded, warm, and quietly sophisticated.
Colour palette
I always begin with warm neutrals as the base. Soft stone, mushroom, warm taupe, and off-white create a calming backdrop that reflects limited natural light well, especially in wooded or north-facing locations. From there, deeper tones add depth rather than contrast. Charcoal works well for accent walls or bed frames, while forest greens and deep blues reference the surrounding landscape without overwhelming the room. I generally limit the palette to three main colours plus one accent to avoid visual clutter.
Materials and texture
Mountain bedrooms rely heavily on tactile materials. Reclaimed timber brings warmth and history, whether used for beams, headboards, or flooring. Natural stone works best in controlled doses, such as a fireplace surround or feature wall, to prevent the room from feeling cold. Leather adds richness and durability to benches or headboards, while wool and linen soften hard surfaces and improve acoustics. I prefer natural, breathable materials that age well and develop patina rather than looking worn.
Lighting and layering
Lighting is often underestimated in mountain homes, yet it is one of the most critical elements. I design lighting in three layers. Ambient lighting provides overall illumination, usually via ceiling fixtures or recessed lights. Task lighting supports specific activities, particularly bedside reading, where I aim for approximately 300 to 500 lux at the task plane. Accent lighting, such as wall washers or concealed LED strips, highlights textures like timber grain or stone. Dimmers are essential to adjust mood throughout the day.
Proportions, scale, and layout
Heavy materials demand correct proportions. Ceiling treatments such as beams should be scaled to the room height, as oversized beams in low ceilings can feel oppressive. A single focal wall behind the bed is often enough. For rugs, I follow a simple rule: at least the front two legs of the bed should sit on the rug. For a king-size bed, a 240 × 300 cm (8 × 10 ft) rug typically provides balanced coverage.
When to involve a contractor
Some elements require professional input. Structural beams, fireplace installations, and insulation upgrades should always be handled by qualified contractors. These features affect safety, building regulations, and long-term performance, and getting them right makes a significant difference to comfort and energy efficiency.
25 Mountain Bedroom Ideas Worth Trying for a Cozy, Scenic Retreat
Before diving into the individual ideas, it is worth stepping back and thinking about how you want the room to feel as a whole. A mountain bedroom should read as calm, cocooning, and intentional, with every element earning its place. The following 25 mountain bedroom ideas are designed to help you build that feeling layer by layer, whether you are making subtle updates or planning a full renovation, so you can create a cozy, scenic retreat that feels authentic rather than overdesigned.
Exposed Timber Beam Ceiling
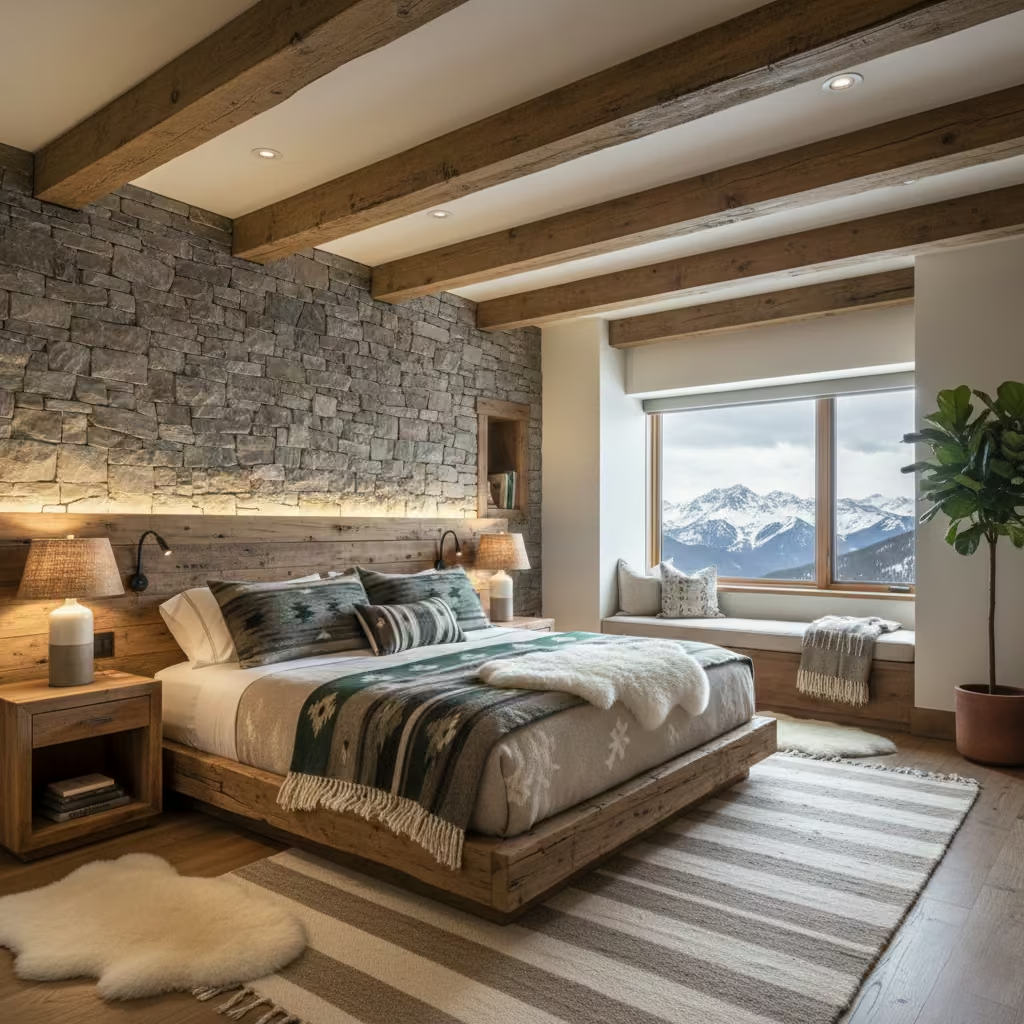
Exposed timber beams are one of the most effective ways to introduce authentic alpine character into a mountain bedroom. In my own projects, I use beams to add visual weight and rhythm to the ceiling, especially in rooms that might otherwise feel plain or overly modern. They create a sense of shelter and permanence that suits mountain settings particularly well.
Measurements:
For decorative beams, I typically specify a depth of 120–180 mm (4.7–7 in). Spacing them at 600–900 mm (24–36 in) centre-to-centre keeps the ceiling visually balanced without overcrowding the space. In lower rooms, fewer, deeper beams often work better than many slim ones.
Materials:
Reclaimed oak offers the most character and patina, while engineered wood beams provide a lighter, more consistent alternative. Polyurethane replicas are useful when ceiling load is limited or budgets are tighter, and modern versions can look convincing when detailed correctly.
Installation steps:
First, assess the ceiling load to confirm whether structural beams are required. Next, decide between structural or purely decorative beams based on function and budget. Finally, fix beams using concealed brackets or battens to maintain a clean, authentic look.
Pros and cons:
The main advantage is instant mountain atmosphere, with the added benefit of concealing wiring or ducting. The downside is cost if beams are structural, and the fact that dark timber can visually lower the ceiling if not balanced with light walls.
Budget:
Mid to high, depending on whether beams are structural or decorative.
You May also Like: Walk-In Wardrobes Designs: A Complete Design-Led Guide for Long-Term Use
Stone Accent Wall (Real or Veneer)
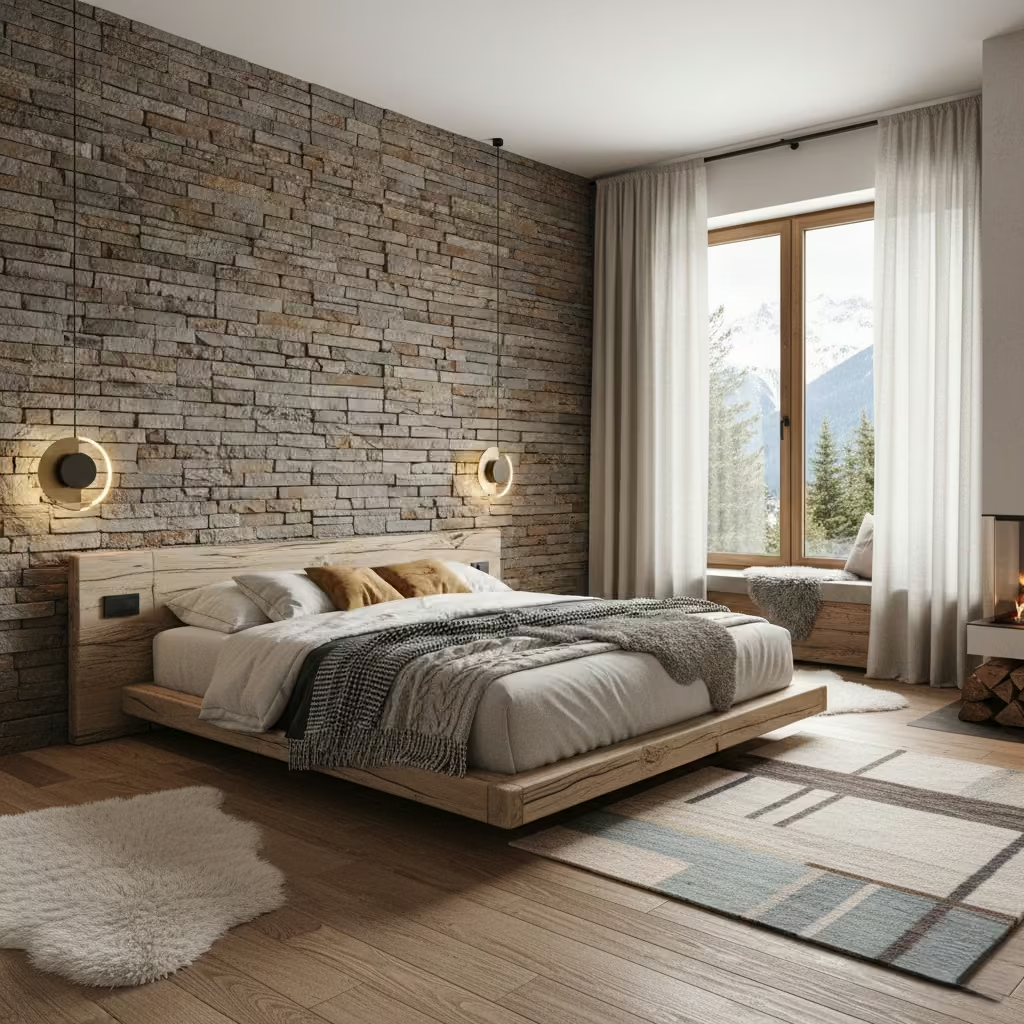
A stone accent wall brings texture, depth, and a strong connection to the landscape, which is why I often use it as a focal point behind the bed or around a fireplace in mountain bedrooms. When handled with restraint, stone adds warmth and authenticity rather than making the room feel cold or overly rustic.
Measurements:
Standard stone veneer panels are typically 600 × 300 mm (24 × 12 in). For impact without overwhelming the space, I usually take the feature wall to a height of 2.4–3.0 m (8–10 ft), depending on ceiling height and room proportions.
Materials:
Natural stone delivers the most character and variation, but it is also the heaviest option. Thin-cut stone veneer offers a similar look with reduced weight and easier installation. Porcelain tiles with a stone finish are a practical alternative where moisture control, budget, or structural limits are a concern.
Installation steps:
Begin by preparing a flat, stable substrate. Install a waterproof membrane where moisture or temperature fluctuations are expected, particularly on external walls. Finish by fixing the stone, then grouting and sealing to protect the surface and enhance durability.
Pros and cons:
Stone is highly tactile, long-lasting, and visually grounding. However, full-height natural stone walls are heavy and may require a structural assessment, which adds complexity and cost.
Budget:
Mid to high, depending on material choice and installation requirements.
You May also Like: 21 Earthy Cottage Home Decor Ideas for a Cozy, Soul-Calming Retreat
Layered Wool Textiles and Pendleton-Style Throws
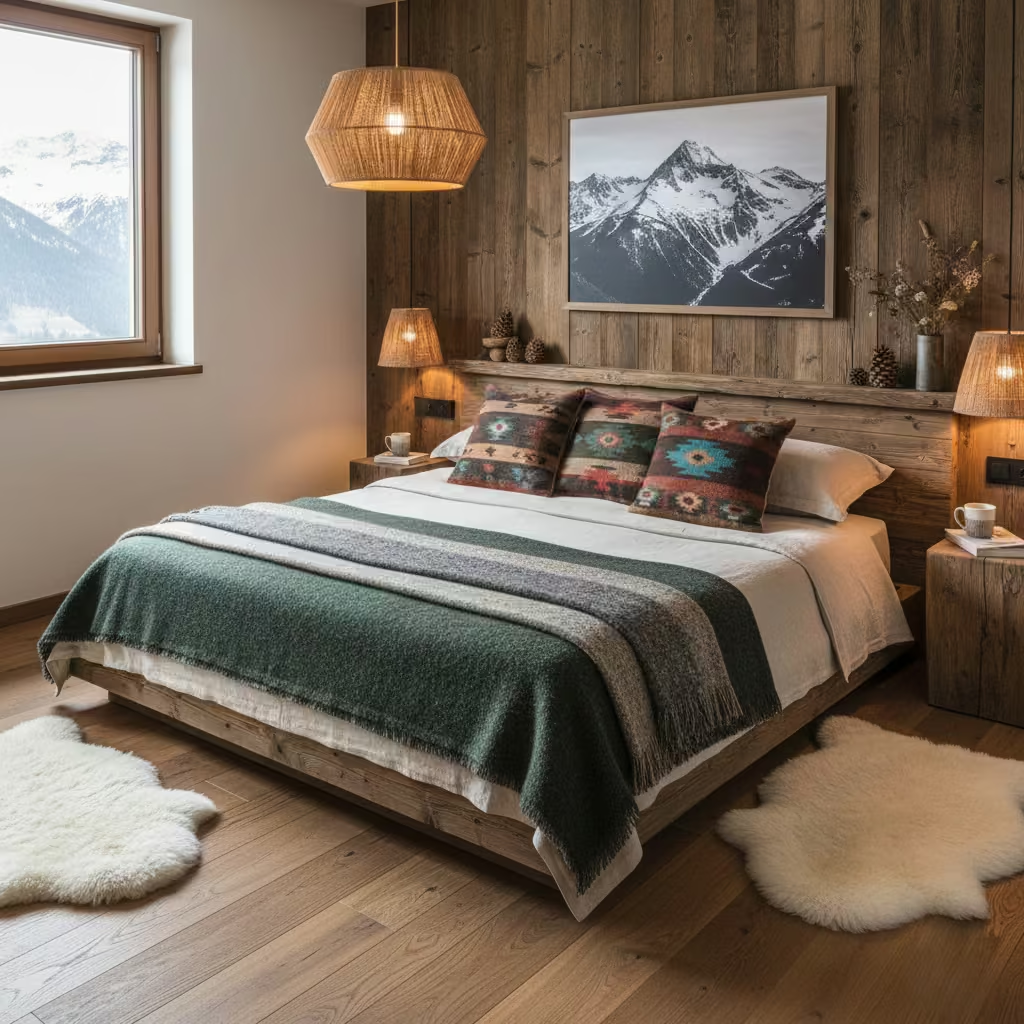
Layered textiles are one of the simplest ways to make a mountain bedroom feel warm and inviting without structural work. In my own projects, I often start here because textiles introduce colour, texture, and comfort instantly, and they can be updated seasonally without committing to permanent changes.
Measurements:
Standard throw blankets work best at around 130 × 180 cm (51 × 71 in), allowing them to drape naturally across the foot or side of the bed. For cushions, I mix sizes between 40–60 cm (16–24 in) to create depth without overcrowding the headboard.
Materials:
Boiled wool throws provide warmth and durability, while sheepskin rugs add softness underfoot or over a bench. Heavyweight linen sheets balance the look by keeping the bedding breathable and relaxed rather than overly rustic.
Styling steps:
Start with neutral base bedding in linen or cotton. Layer one or two textured wool throws across the bed, then add cushions in complementary tones. I always aim to balance colours by keeping one dominant shade and two supporting tones to avoid visual noise.
Pros and cons:
The biggest advantage is instant coziness at a relatively low cost. The main drawback is maintenance, as natural fibres require more care and occasional professional cleaning.
Budget:
Low to mid, depending on material quality and brand selection.
Alpine Color Palette with Accent Leather
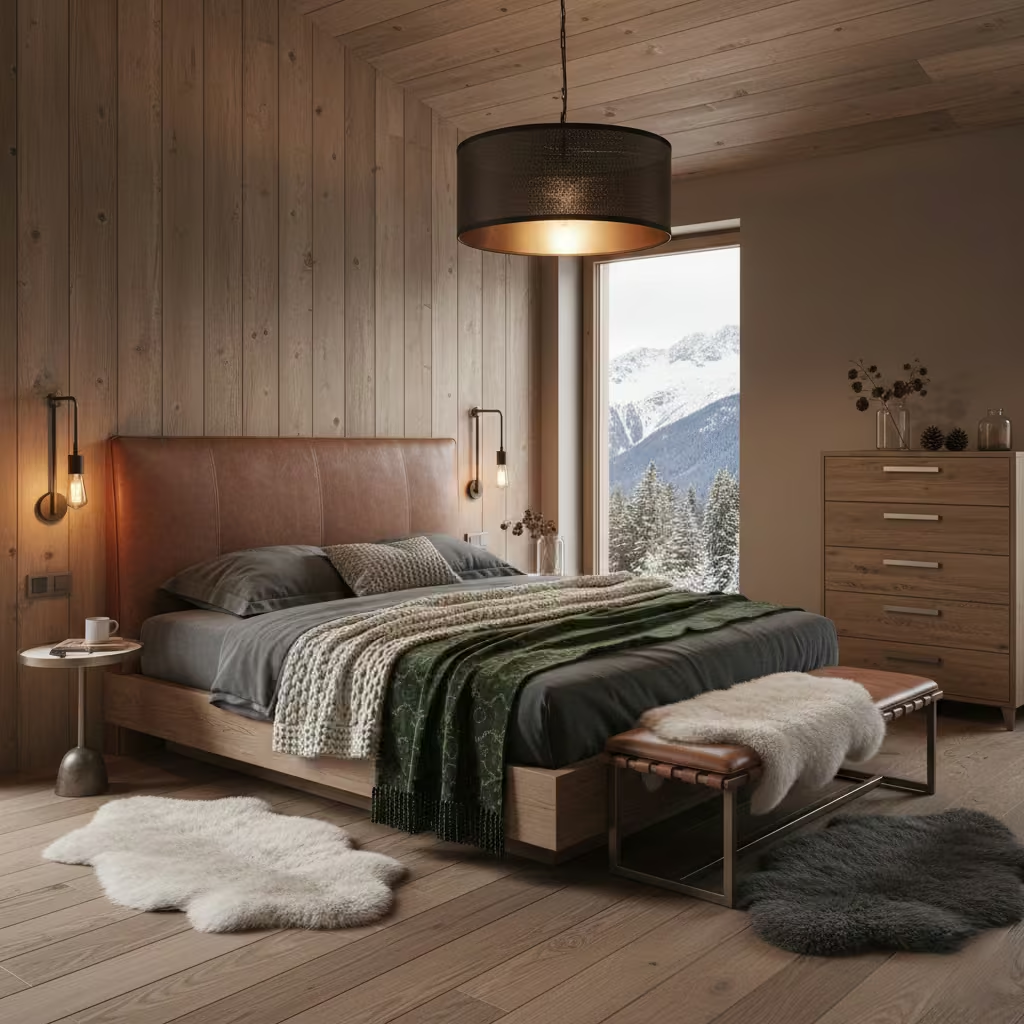
Using an alpine-inspired colour palette combined with leather accents is a subtle way to inject sophistication into a mountain bedroom. In my projects, I often pair warm neutrals with deep forest greens or charcoal and anchor the space with a leather headboard or bench to create a rich, tactile contrast.
Measurements:
For a leather headboard, I typically recommend a height of 90–120 cm (35–47 in). This provides a strong visual anchor without overpowering the room, while allowing bedding and wall accents to balance the composition.
Materials:
I use full-grain leather for durability and character, complemented by matte metal fixings on beds or benches to maintain an alpine-modern feel. The leather develops patina over time, enhancing the room’s warmth.
Styling steps:
Start by selecting your base neutrals for walls, floors, and larger furniture pieces. Introduce leather through a headboard or a low bench at the foot of the bed. Finally, add warm metal accents, such as bedside lamps or picture frames, to tie the palette together.
Pros and cons:
The combination feels luxurious and timeless, with materials that age gracefully. However, high-quality leather can be expensive and is sensitive to scratches or spills, so careful placement and care are essential.
Budget:
Mid to high, depending on leather grade and size of the accent piece.
Built-in Window Seat with Mountain Views
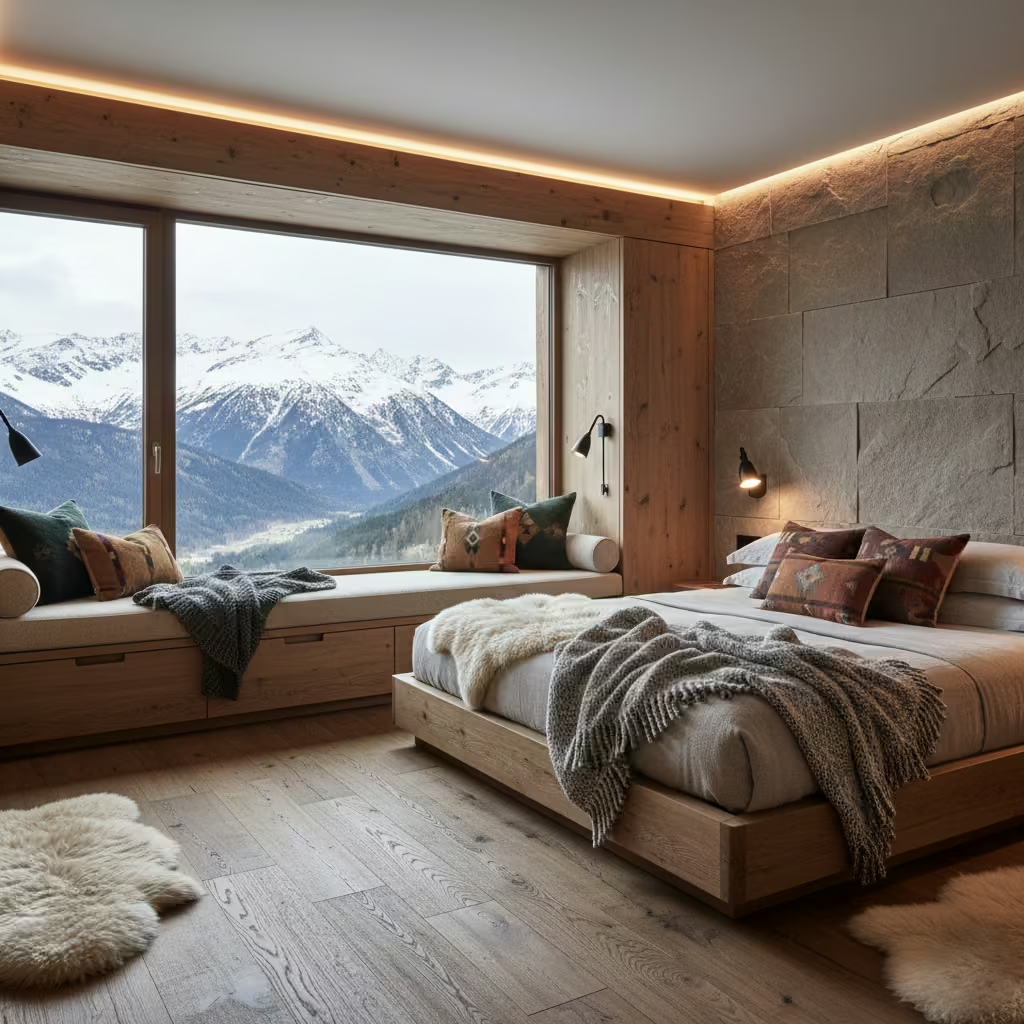
A built-in window seat is one of my favourite ways to make a mountain bedroom feel connected to its surroundings. It transforms a simple window into a cozy nook for reading, relaxing, or enjoying the view, while often doubling as hidden storage beneath the seat.
Measurements:
I typically set the seat height at 430–460 mm (17–18 in) for comfortable seating and a depth of 450–600 mm (18–24 in) to allow for cushions without feeling cramped. These dimensions balance comfort with practicality in most bedroom layouts.
Materials:
A solid timber carcass provides structural stability, while high-density foam cushions and water-resistant fabrics ensure durability and comfort. I often select fabrics that complement the alpine palette, such as wool blends or linen.
Installation steps:
First, plan exact dimensions to fit the window recess and ensure proper circulation. Next, consider insulation and glazing, particularly in colder climates, to prevent heat loss and condensation. Finally, add cushions, throws, and optional storage boxes to finish the nook.
Pros and cons:
The main advantage is that it maximizes both the view and functional storage, creating a versatile feature. On the downside, it requires accurate carpentry skills and may involve additional glazing or insulation costs.
Budget:
Mid, depending on timber choice, cushion quality, and any structural adjustments needed for the window area.
Low, Platform Bed with Natural Timber Slats
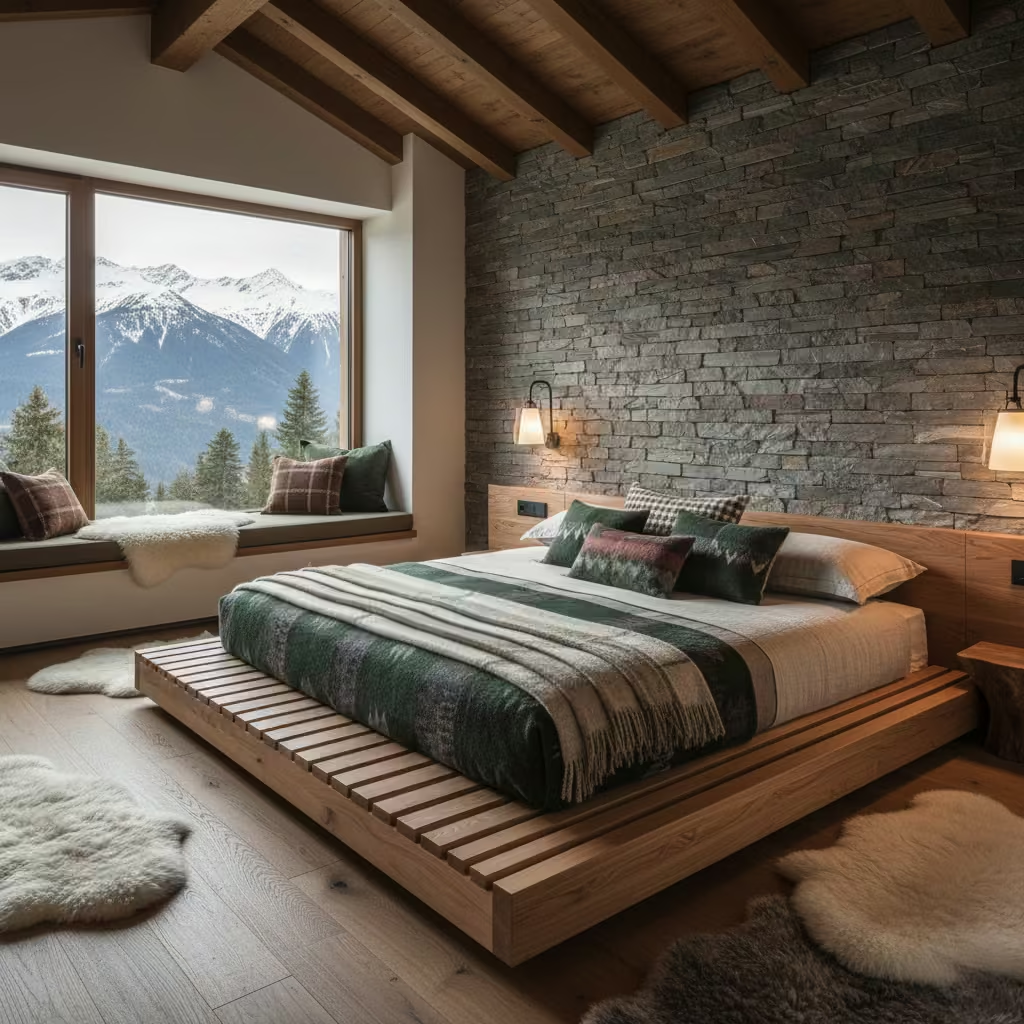
A low, platform bed is a simple yet effective way to give a mountain bedroom a modern alpine feel. In my experience, these beds ground the space, highlighting the textures of the surrounding timber and textiles while maintaining clean lines that don’t compete with other features.
Measurements:
I typically set platform clearance at 150–300 mm (6–12 in) from the floor, with the mattress inset by 10–20 mm to create a streamlined look. Standard bed sizes work well, such as a queen at 160 × 200 cm (63 × 79 in).
Materials:
Solid timber provides durability and natural warmth. I prefer dovetail joinery or metal brackets for structural strength, ensuring the bed remains stable over time.
Installation steps:
Measure the mattress carefully to ensure a perfect fit. Build the timber platform with the chosen joinery method, then finish with natural oil or wax to enhance the wood grain and protect the surface.
Pros and cons:
The platform bed delivers a clean, modern alpine aesthetic and is very stable. The main downside is that low beds can feel colder in mountain climates, and under-bed storage is limited.
Budget:
Low to mid, depending on timber choice and joinery method.
Feature Fireplace (Gas or Electric)
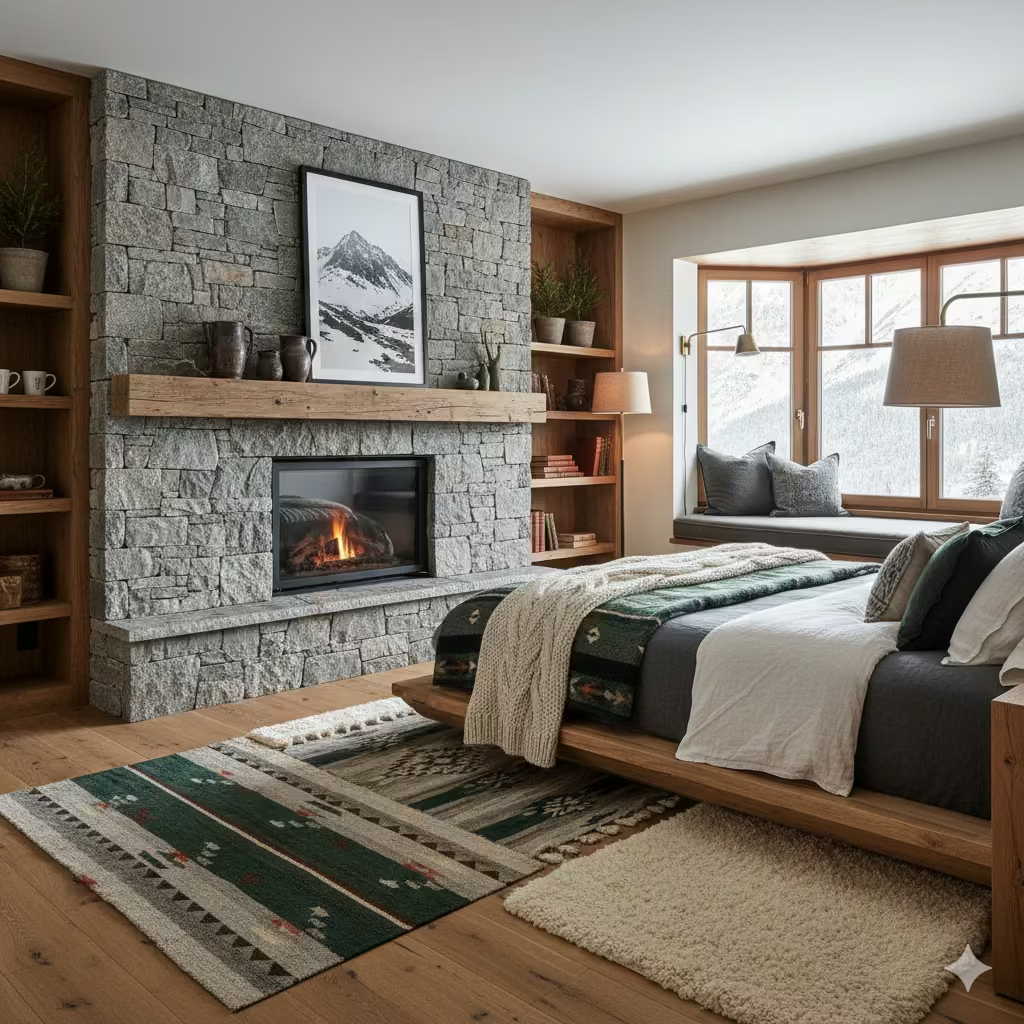
A feature fireplace instantly anchors a mountain bedroom, adding both warmth and atmosphere. In my projects, I often use fireplaces as a visual and functional focal point, particularly in rooms with limited natural light or where cosy, layered textures need an additional point of interest.
Measurements:
For visual balance in small to medium bedrooms, the hearth width should be 900–1,200 mm (35–47 in). The mantel height or top of the surround typically sits between 1,000–1,200 mm (39–47 in) to ensure proportionate scale with the ceiling and furniture.
Materials:
A steel cassette is ideal for clean, efficient heating, paired with a stone surround for alpine character. For retrofits or spaces without flues, flueless electric options are practical and easier to install while still providing visual impact.
Installation steps:
First, choose your fuel type gas, electric, or wood-burning sbased on lifestyle, budget, and building regulations. Next, obtain the necessary permits and arrange professional installation to meet safety standards. Finally, finish the surround with stone, timber, or plaster to complement the bedroom’s palette.
Pros and cons:
Fireplaces provide immediate warmth and a natural focal point, enhancing the alpine atmosphere. However, they come with ventilation, safety requirements, and higher installation costs that need careful planning.
Budget:
Mid to high, depending on fuel type, surround materials, and installation complexity.
Antler or Organic Sculptural Lighting
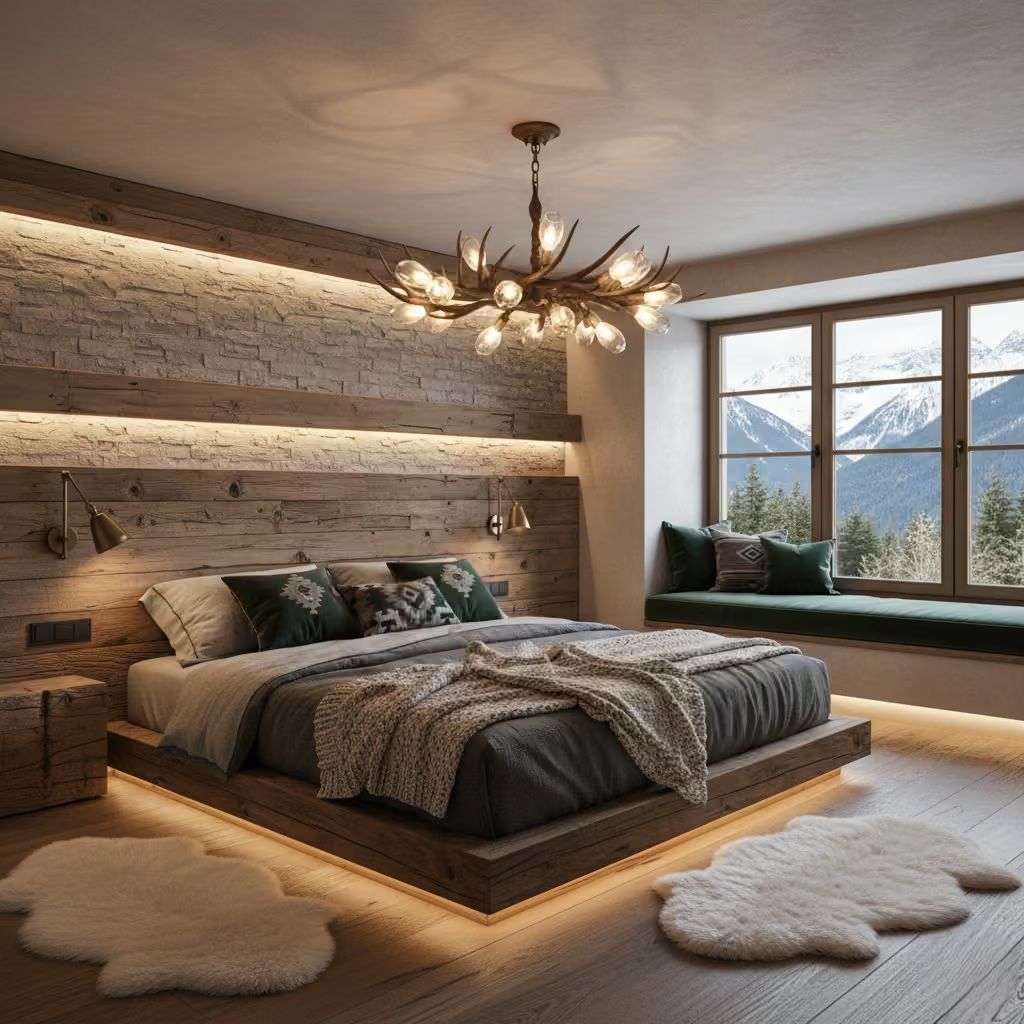
Antler-inspired or organic sculptural lighting brings drama and a sense of nature into a mountain bedroom. I often use these pieces sparingly in my projects to create a striking focal point above the bed or central seating area without overwhelming the space.
Measurements:
For standard ceiling heights, allow a chandelier drop of 600–900 mm (24–36 in). Ensure at least 2.1 m (7 ft) of clearance above the floor if the fixture is placed over circulation areas to avoid head bumps.
Materials:
Traditional antler chandeliers use real antler with brass fittings, but resin or sculpted alternatives provide the same organic feel ethically. I combine these with matte or warm metallic finishes for a balanced, modern alpine aesthetic.
Installation steps:
Start by selecting the right scale for your room. Check that the ceiling can support the weight of the fixture and install appropriate fixings. Finally, wire the chandelier with a dimmer to control ambiance and layer lighting effectively.
Pros and cons:
The main advantage is the immediate visual drama and sculptural interest it adds. The downside is that it can feel kitschy if overused or paired with other heavy textures, so restraint is key.
Budget:
Low to mid, depending on material choice and fixture size.
Layered Lighting: Ambient + Task + Accent
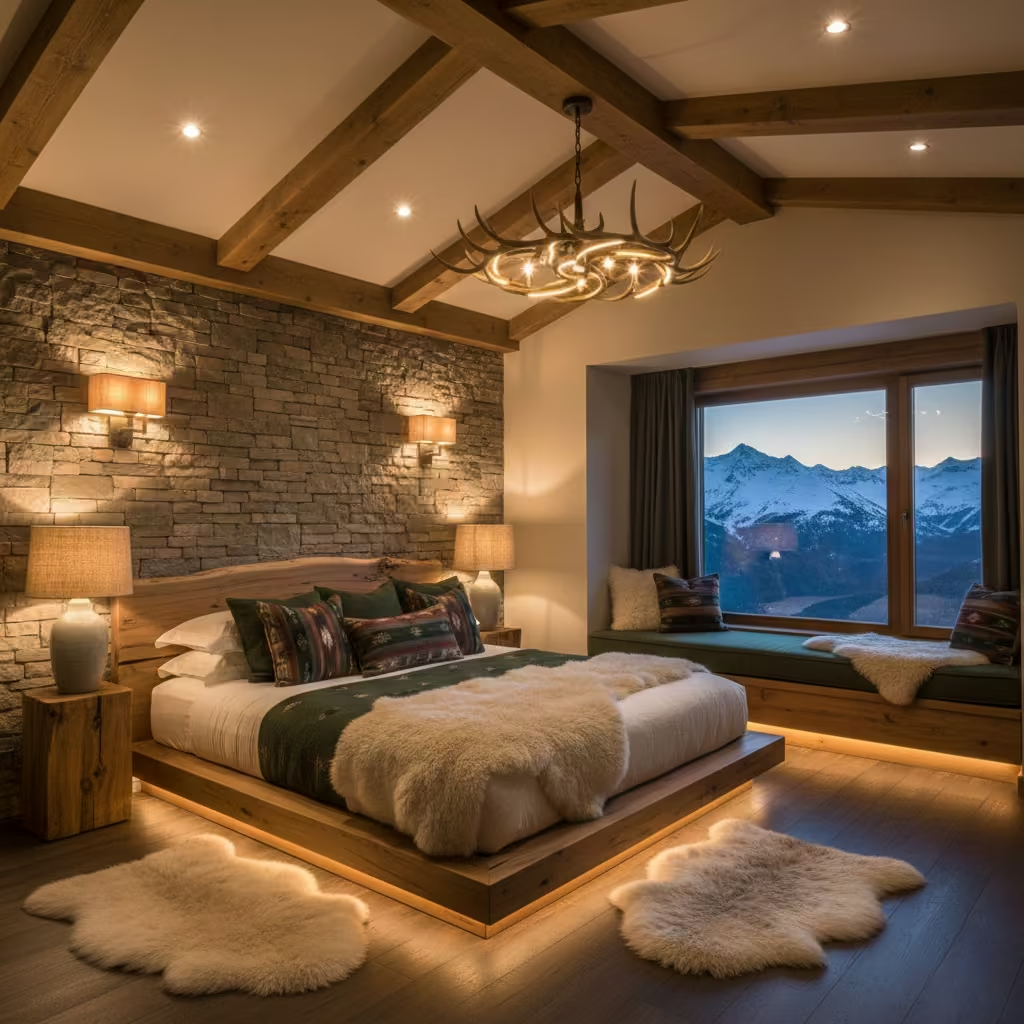
Layered lighting is essential in a mountain bedroom to balance mood, functionality, and the natural textures of the space. In my projects, I always plan three layers ambient, task, and accent to ensure the room feels both cosy and practical, whether for reading, dressing, or relaxing by the fire.
Measurements:
For bedside reading, aim for 300–500 lux at the task plane. General ambient lighting can be lower, around 100–150 lux, to maintain a soft, relaxing atmosphere without glare.
Materials:
Recessed downlights provide general illumination, wall sconces add ambient or accent lighting, and bedside lamps handle focused task lighting. I often combine warm LED sources to enhance timber and stone textures.
Installation steps:
Begin by creating a lighting plan that identifies each functional zone. Install the layers accordingly, ensuring circuits are separate where needed. Finally, add dimmers to control intensity and create a layered, adaptable atmosphere.
Pros and cons:
Layered lighting makes the bedroom functional and inviting while highlighting textures and architectural details. The main drawback is the need for careful wiring planning and professional electrician installation.
Budget:
Mid, depending on fixture quality and wiring complexity.
You May also Like: Industrial Chic loft bedroom Design: A Perfect Blend of Raw Character and Modern Comfort
Rustic Sliding Barn Door for Bedroom Entrance
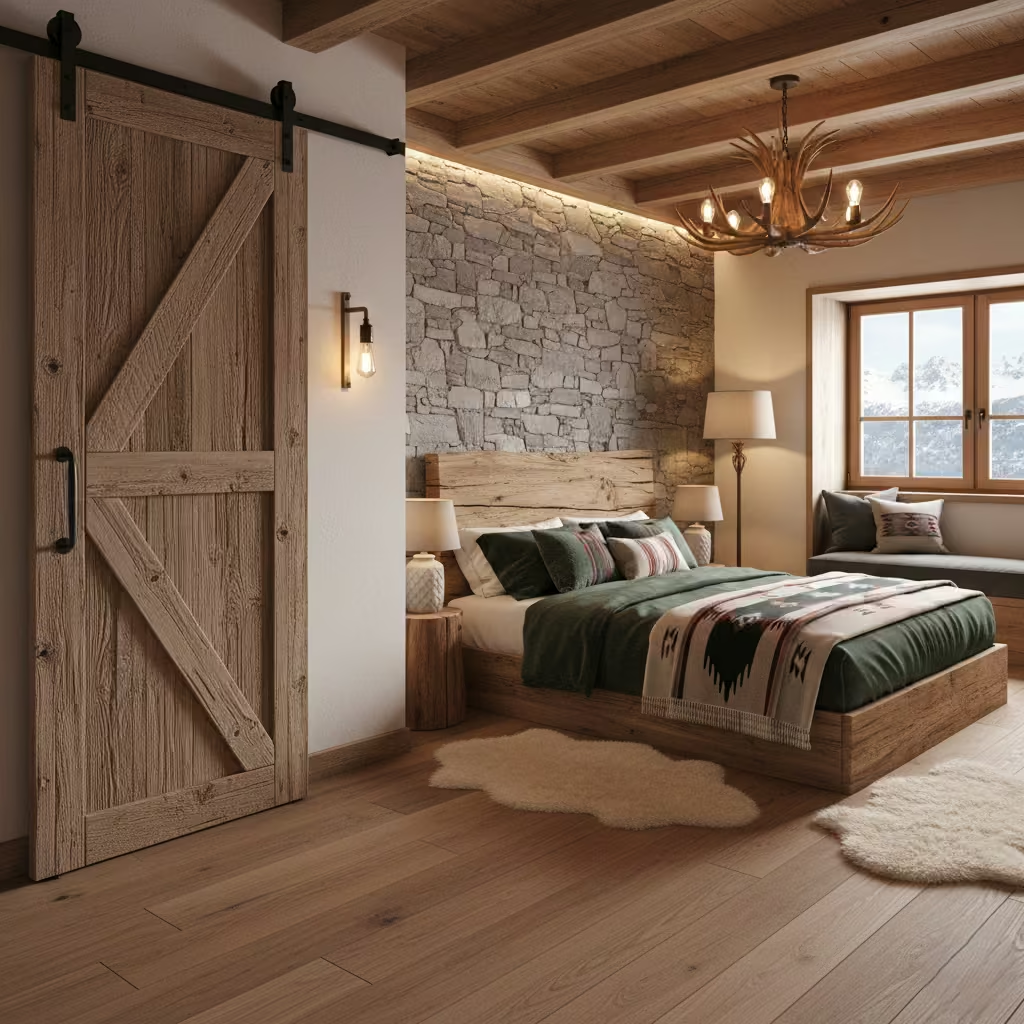
A rustic sliding barn door instantly adds character to a mountain bedroom while saving space compared with a traditional swing door. In my projects, I use barn doors to create a statement entry or to separate en-suite bathrooms without interrupting circulation.
Measurements:
Standard door height is 2,030 mm (80 in), with a track overrun of 150–200 mm (6–8 in) to allow smooth sliding beyond the opening. Width depends on your doorway, typically matching or slightly exceeding the rough opening for full coverage.
Materials:
Reclaimed timber works beautifully for authenticity, paired with a durable steel track. I often choose matte black or dark bronze finishes for the hardware to complement alpine textures.
Installation steps:
First, measure the rough opening accurately. Install a reinforced header to support the door weight. Finally, fit the track and hang the door, checking for smooth operation and alignment.
Pros and cons:
Barn doors save space and provide a striking visual feature. The main downside is reduced soundproofing compared with conventional doors, and careful installation is essential to prevent sagging.
Budget:
Low to mid, depending on timber quality and track hardware.
Blackened Metal Window Frames
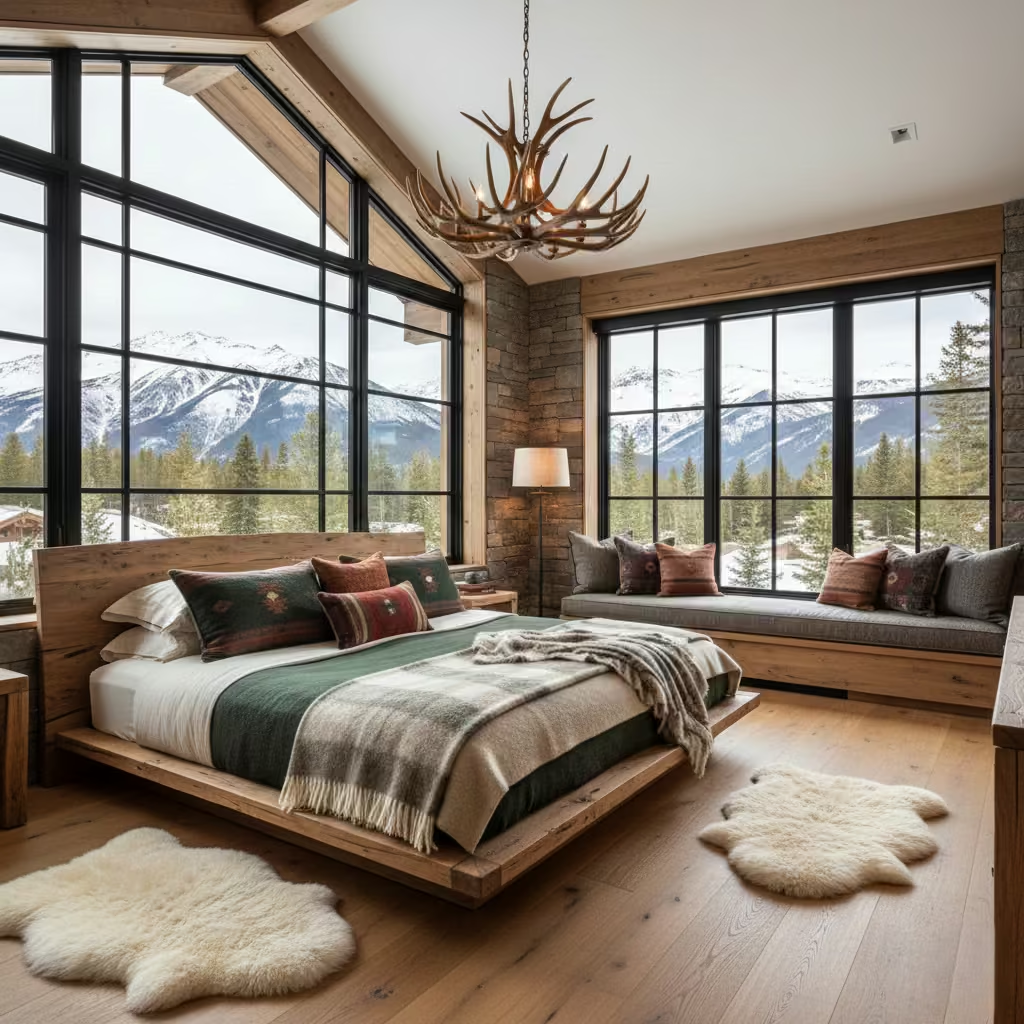
Blackened metal window frames are a modern alpine detail that instantly sharpens a mountain bedroom’s aesthetic. In my projects, I often specify steel or aluminum frames to contrast with warm timber and stone finishes, creating a clean, contemporary edge without compromising the cozy feel.
Measurements:
A standard frame sightline is 20–30 mm (0.8–1.2 in), providing a sleek profile while maximizing glass area and natural light. Exact dimensions depend on the window size and manufacturer specifications.
Materials:
Powder-coated steel delivers a crisp, long-lasting finish, while aluminum with a thermal break ensures energy efficiency. Both options pair well with thick glazing to retain heat in colder climates.
Installation steps:
Order frames made to measure for precise fit. Confirm the U-value meets your climate requirements to avoid heat loss. Finally, install professionally to maintain structural integrity and proper sealing.
Pros and cons:
The main advantage is a strong, modern contrast that complements alpine materials. Potential drawbacks include higher costs for bespoke steel frames and the risk of thermal bridging if the frames are poorly specified or installed.
Budget:
Mid to high, depending on material choice and window complexity.
Textured Plaster or Limewash Walls
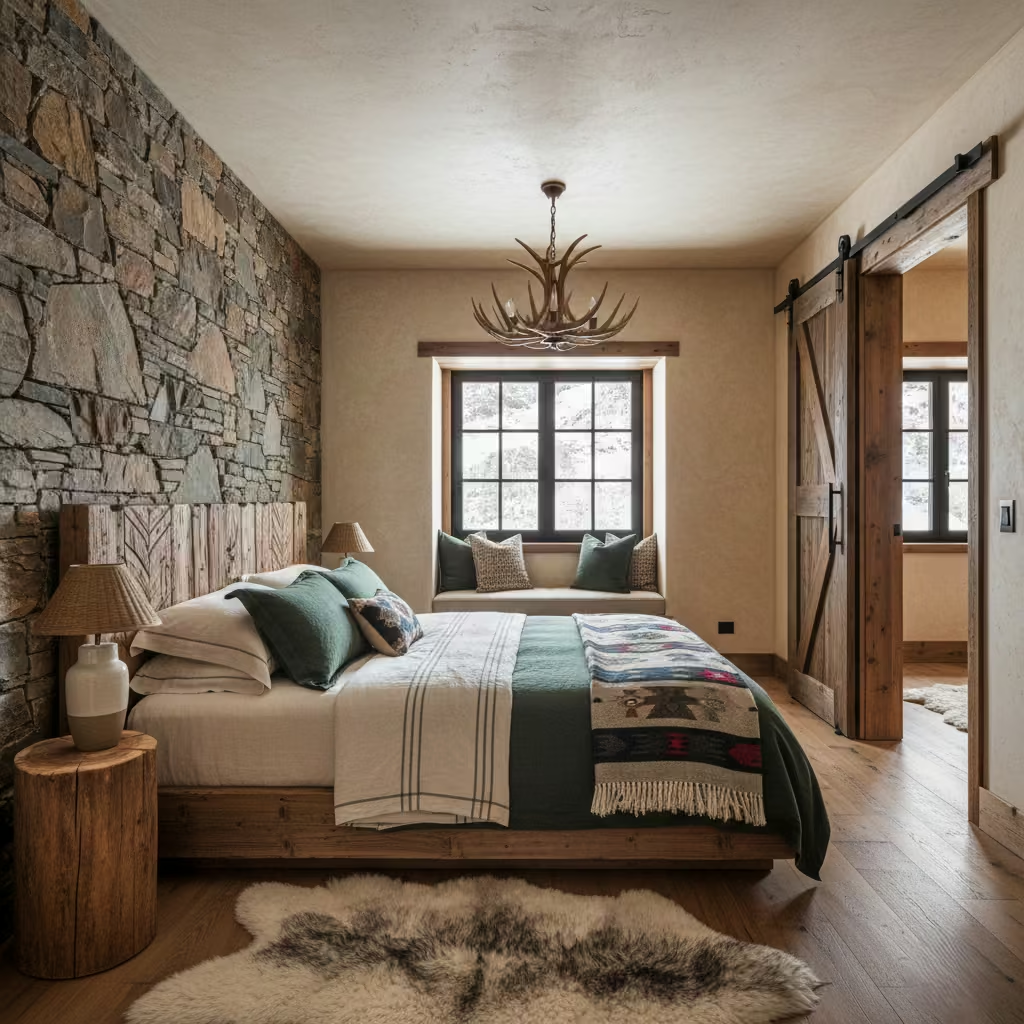
Textured plaster or limewash adds depth and a soft, tactile quality to mountain bedrooms, creating walls that feel alive rather than flat. In my projects, I often use limewash to complement timber and stone, giving the room a handcrafted, earthy character that evolves with light and shadow.
Measurements:
Always start with a small test patch of 0.5–1 m² (5–10 ft²) to ensure colour, texture, and finish meet expectations before committing to the entire wall.
Materials:
Options include limewash for a breathable, matte finish, tadelakt for a polished, water-resistant surface, or Venetian plaster for subtle sheen and depth. Each brings a slightly different tactile and visual effect.
Installation steps:
Prepare the substrate by cleaning and priming the surface. Apply a base coat to even out imperfections. Finally, finish with the limewash or chosen plaster technique, applying in layers as recommended by the manufacturer or artisan installer.
Pros and cons:
The main advantage is a soft, natural finish that improves breathability and pairs beautifully with alpine textures. The downside is that achieving a professional result often requires a skilled applicator, which can increase cost.
Budget:
Mid, depending on the material selected and whether you hire a professional applicator.
Neutral Rug Layering with Natural Fibres
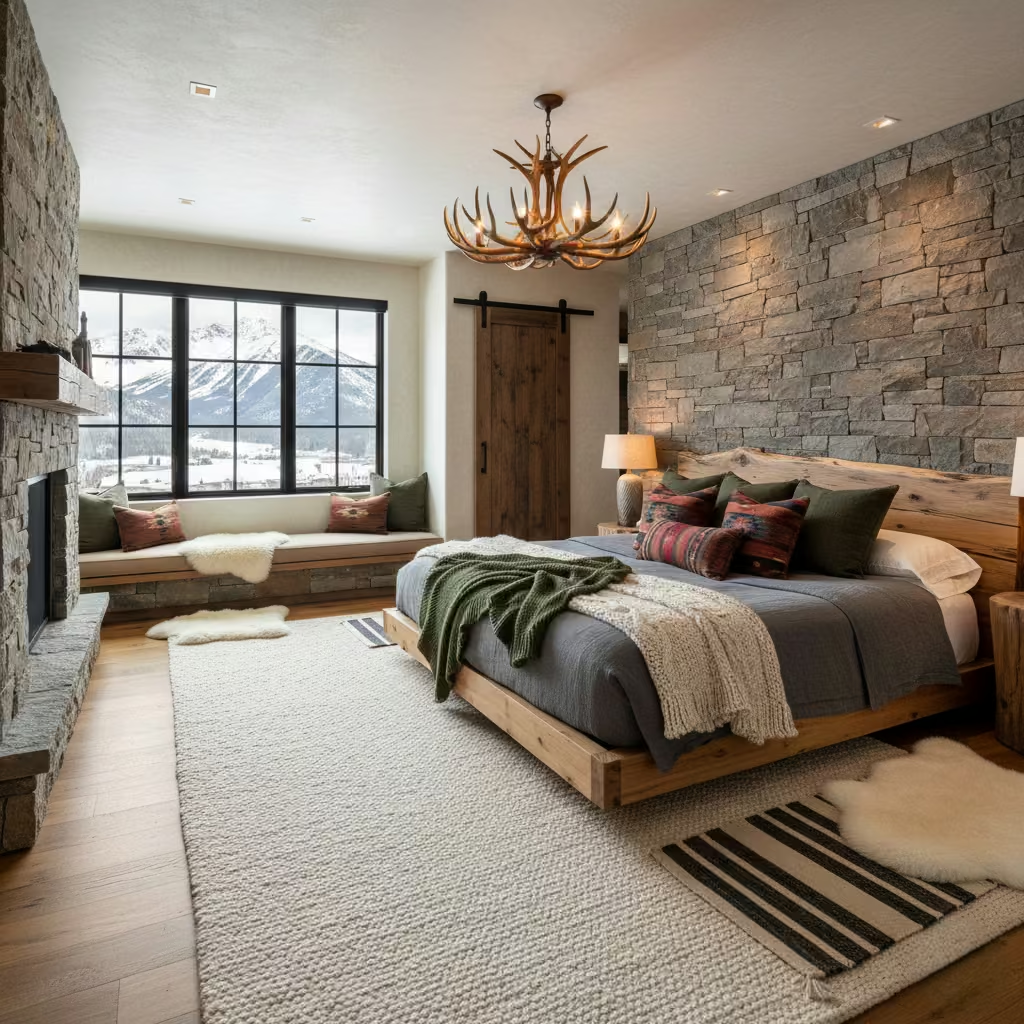
Layering rugs in a mountain bedroom instantly adds warmth, texture, and a sense of comfort underfoot. In my projects, I often combine neutral wool rugs with sheepskin or jute accents to create depth without competing with other alpine textures.
Measurements:
For larger beds, I use a primary rug of 240 × 300 cm (8 × 10 ft) to anchor the space. Bedside runners typically measure 60 × 180 cm (2 × 6 ft), providing soft landing zones beside the bed.
Materials:
I favour wool for durability and warmth, jute underlays for traction, and sheepskin accents to soften hard flooring. These natural fibres complement timber, stone, and linen finishes beautifully.
Installation steps:
Select your base rug size to define the seating or sleeping area. Layer a smaller textured runner or sheepskin on top for visual interest. Finally, secure all layers with a non-slip underlay to prevent shifting.
Pros and cons:
The main advantage is the immediate warmth and layered texture that enhances coziness. The downside is that jute can shed initially, and natural fibres require care to maintain their appearance.
Budget:
Low to mid, depending on rug quality and size.
Dark, Moody Accent Wall Behind Headboard
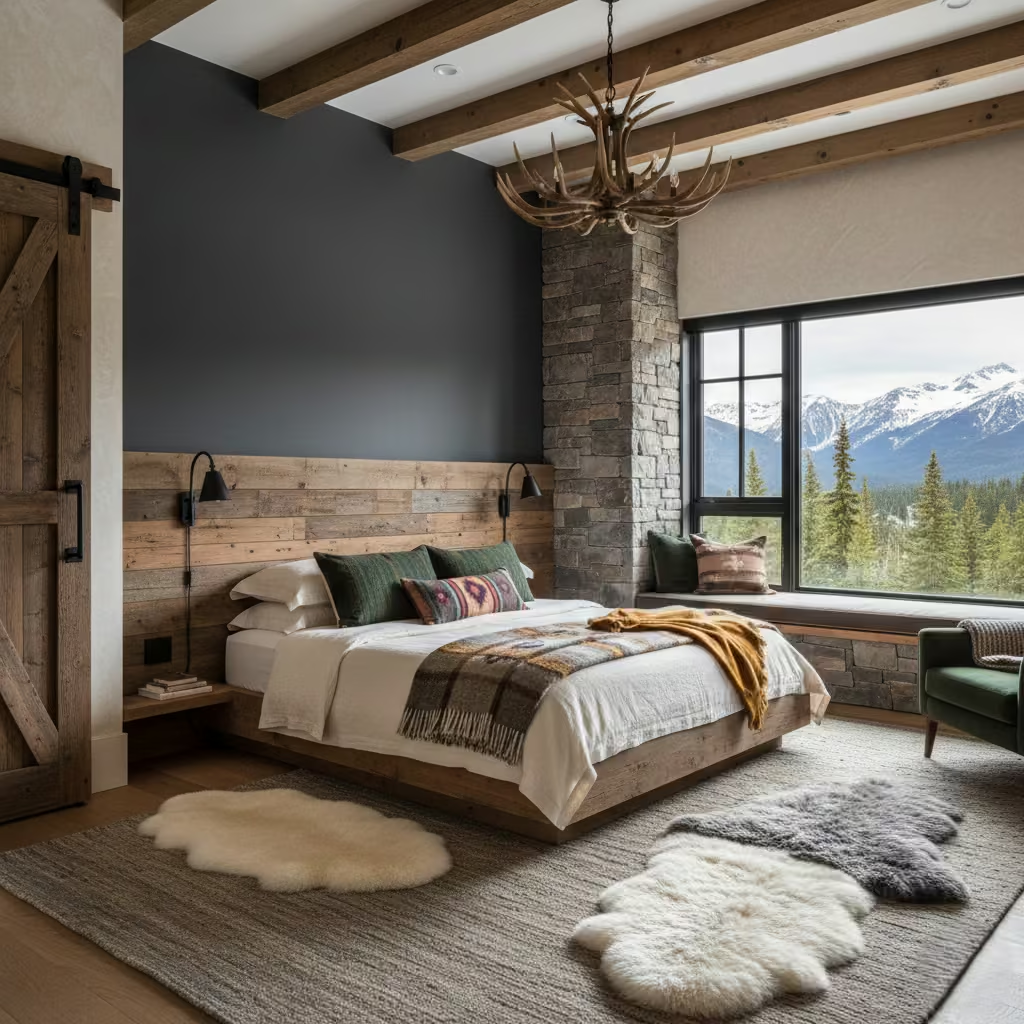
A dark, moody accent wall behind the bed instantly defines the sleeping area and adds depth to a mountain bedroom. In my projects, I often use this technique to create a dramatic backdrop that complements timber, stone, and layered textiles without overpowering the space.
Measurements:
For a full-wall effect or partial panel, I typically target 900–1,200 mm (35–47 in) in height behind the headboard. This frames the bed visually while keeping proportions balanced with ceiling height.
Materials:
I use matte paint for most of the wall to absorb light and enhance texture, sometimes paired with a satin-finish trim or feature for subtle contrast.
Installation steps:
Prime the wall to ensure even coverage. Apply two coats of your chosen colour for depth and consistency. Finally, accessorise with artwork, sconces, or a headboard to complete the feature.
Pros and cons:
The accent wall provides a dramatic focal point and clearly defines the bed area. However, dark colours can reduce perceived room size if overused, so it’s best balanced with lighter tones elsewhere.
Budget:
Low, making it an accessible way to create impact without major renovation.
You May also Like: 25 Creative Ways to Transform Your Spanish Reading Nook This Weekend
Integrated Bedside Storage with Timber Nightstands
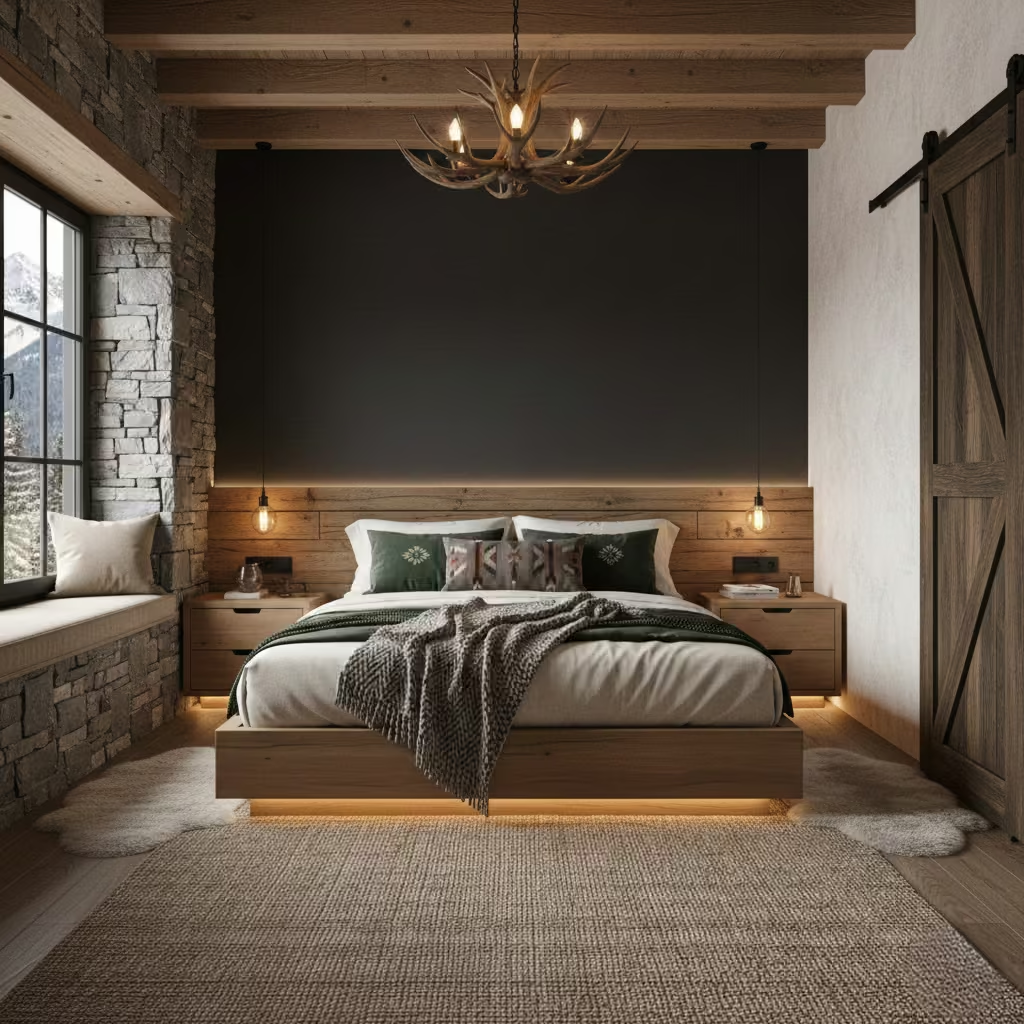
Integrated bedside storage keeps a mountain bedroom tidy while reinforcing the natural, crafted feel of the space. In my projects, I often pair built-in or bespoke timber nightstands with layered bedding and lighting to create a seamless, functional design.
Measurements:
Typical nightstand height ranges from 50–65 cm (20–26 in) to align comfortably with the mattress. Depth is usually 40–45 cm (16–18 in), providing enough storage without crowding circulation.
Materials:
Solid timber ensures durability and a natural finish, while quality drawer runners allow smooth operation. I often include built-in USB ports or wiring channels for bedside lighting and devices.
Installation steps:
Measure the available space and bed height carefully. Either build bespoke units or order made-to-measure nightstands. Finally, wire in USB ports or integrated lighting for maximum functionality.
Pros and cons:
The main advantage is clean lines with functional storage that blends seamlessly into the room. The main drawback is the cost and skill required for bespoke joinery.
Budget:
Low to mid, depending on timber choice and level of customization.
Large-Scale Landscape Art or Backlit Photography
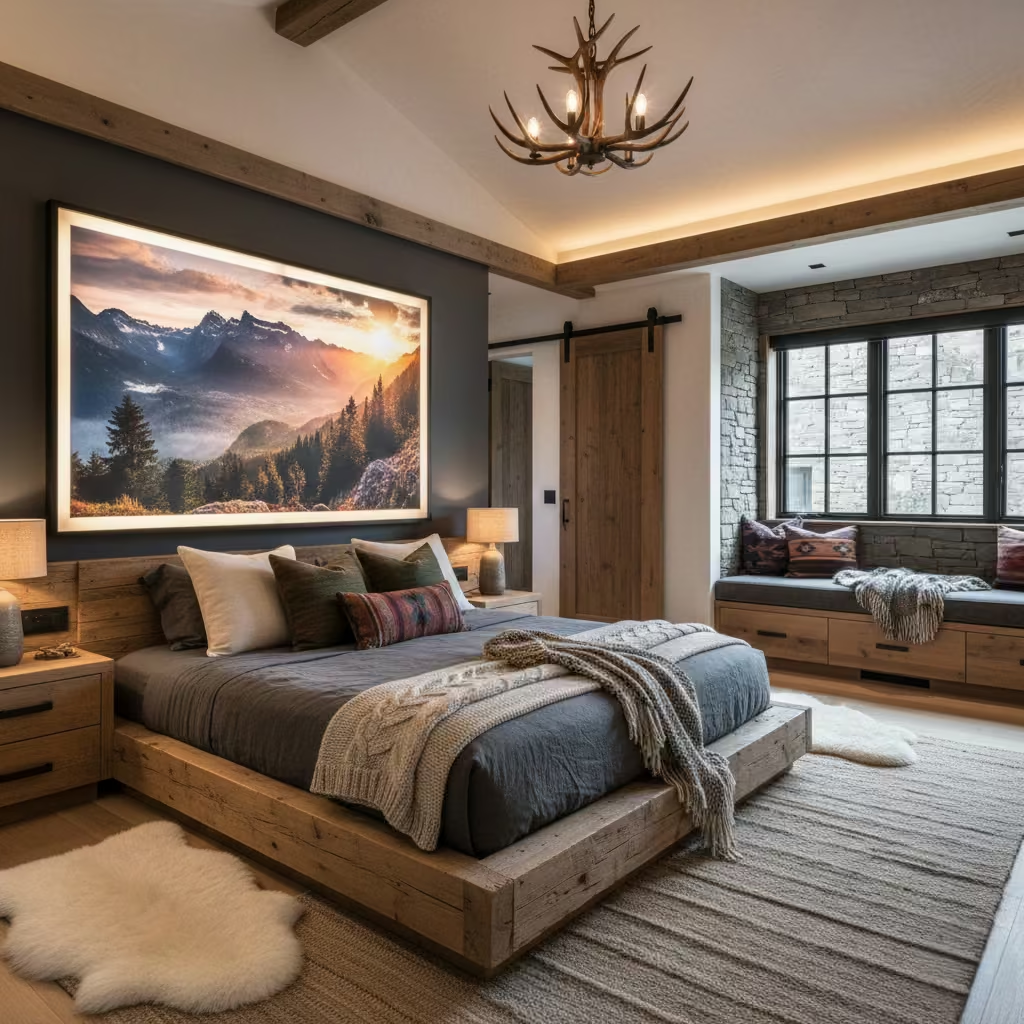
Large-scale landscape art or backlit photography brings the outdoors inside, creating an immediate sense of place in a mountain bedroom. In my projects, I often use a striking piece above the bed or on a feature wall to complement natural materials and reinforce the alpine vibe.
Measurements:
For medium-sized rooms, a hero piece around 120 × 180 cm (47 × 71 in) works well. Allow 150–200 mm (6–8 in) of clearance from the ceiling and nearby furniture to give the artwork space to breathe.
Materials:
Options include framed photography or backlit LED panels for dramatic effect, which add depth and ambient glow in the evenings.
Installation steps:
Select an image that resonates with the room’s palette and mood. Resize or print to suit the wall dimensions, then mount securely using appropriate fixings to ensure safety and stability.
Pros and cons:
The key benefit is an instant sense of place and visual drama. The drawback is cost, especially for high-quality custom prints or large backlit panels.
Budget:
Low to mid, depending on size, framing, and whether backlighting is incorporated.
You May also Like: 25 Kids Room Renovation Ideas That Are Trending Like Crazy Right Now
Biophilic Touch: Indoor Plant Corner or Dried Grasses
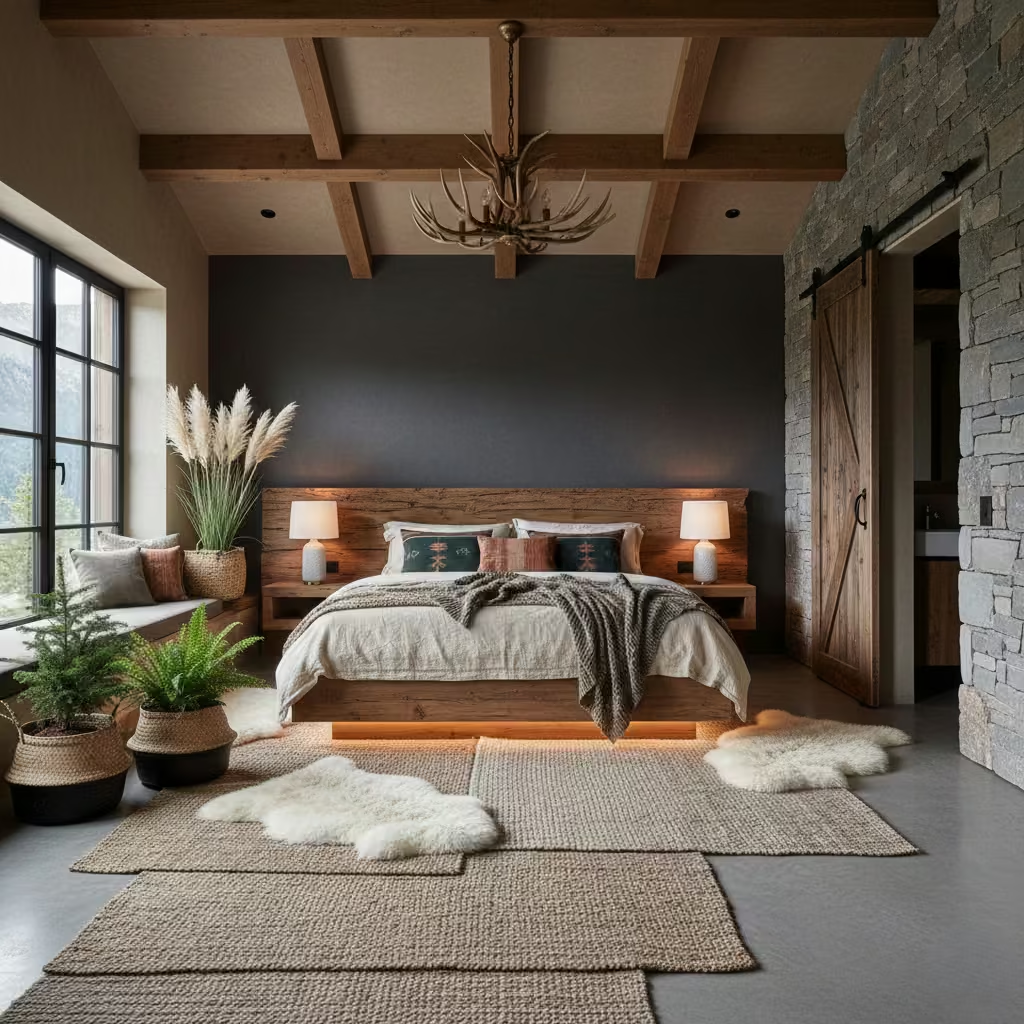
Adding plants or dried grasses brings life, texture, and a natural alpine feel to a mountain bedroom. In my projects, I often dedicate a corner near the window for greenery or display tall dried grasses to complement timber and stone elements without overwhelming the space.
Measurements:
Pot sizes typically range from 20–40 cm (8–16 in) diameter for small trees or large plants, creating a balanced visual scale with furniture and architectural features.
Materials:
Options include potted conifers, large ferns, or dried pampas grass in woven baskets. I select plants that are suited to low-light conditions if windows are limited.
Installation steps:
Choose plants suited to your light levels and maintenance capacity. Position them near natural light and use trays to protect floors from water. Dried grasses can be grouped in vases or floor pots for a no-maintenance option.
Pros and cons:
The main benefits are improved air quality, texture, and a stronger connection to nature. The main drawback is that living plants require ongoing care and attention.
Budget:
Low, with options for both live and dried arrangements depending on style and maintenance preference.
Underfloor Heating for Cold-Climate Comfort
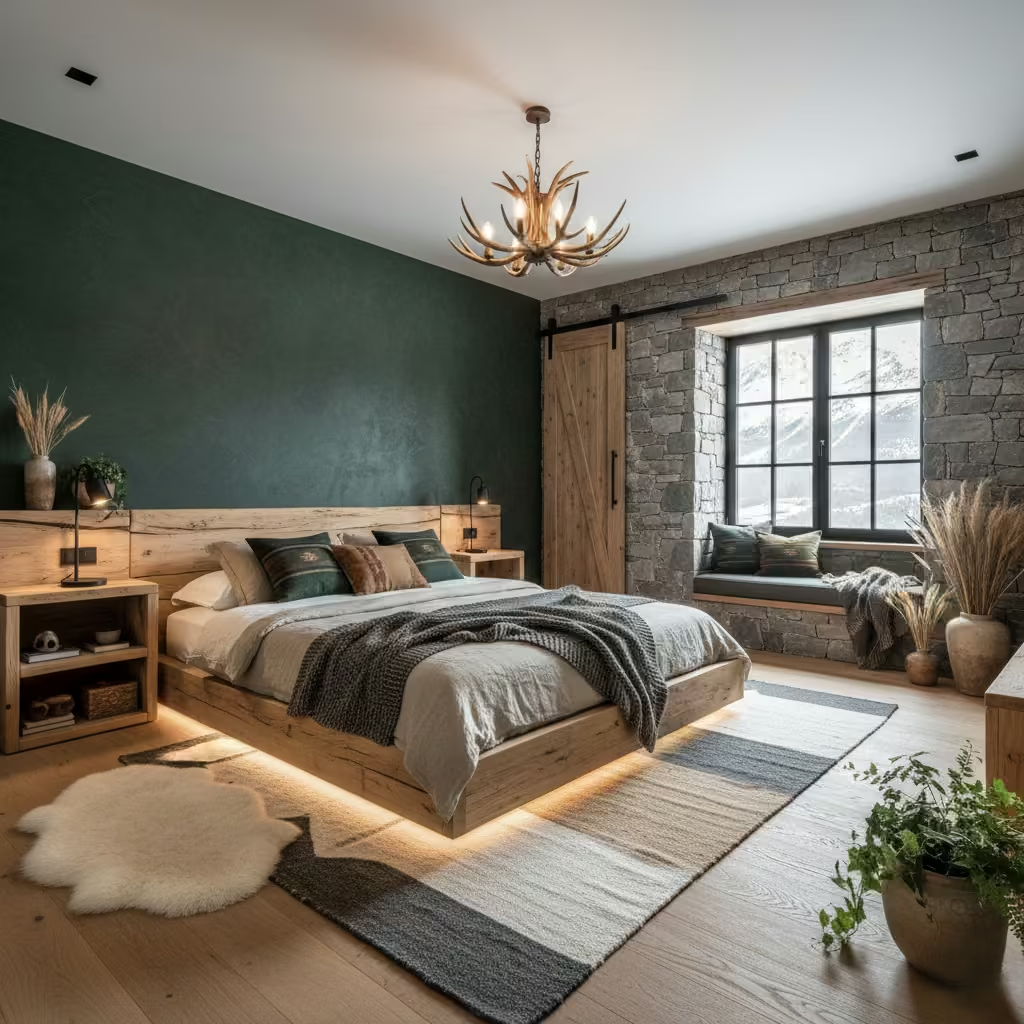
Underfloor heating is a luxurious yet practical addition to a mountain bedroom, especially in cold climates. In my projects, I often specify this system under timber or stone floors to provide even, invisible warmth that enhances comfort without compromising aesthetics.
Measurements:
Floor sensor placement depends on the installer’s plan, ensuring accurate temperature control. Typical system rise time is 24–48 hours to reach full warmth, depending on floor type and insulation.
Materials:
Electric mats are ideal for retrofit projects, while hydronic circuits suit larger renovations or new builds. Both systems work well under timber, stone, or tile finishes.
Installation steps:
Consult a qualified installer to design the system and sensor layout. Lay the heating elements beneath the chosen floor finish, then connect and test the thermostat for optimal control.
Pros and cons:
Underfloor heating provides consistent warmth and is ideal for mountain cabins or cold bedrooms. The main drawbacks are higher retrofit costs and potential floor height build-up that may require adjustments to doors or skirting.
Budget:
Mid to high, depending on system type and floor area.
Neutral Minimalism with Alpine Textures
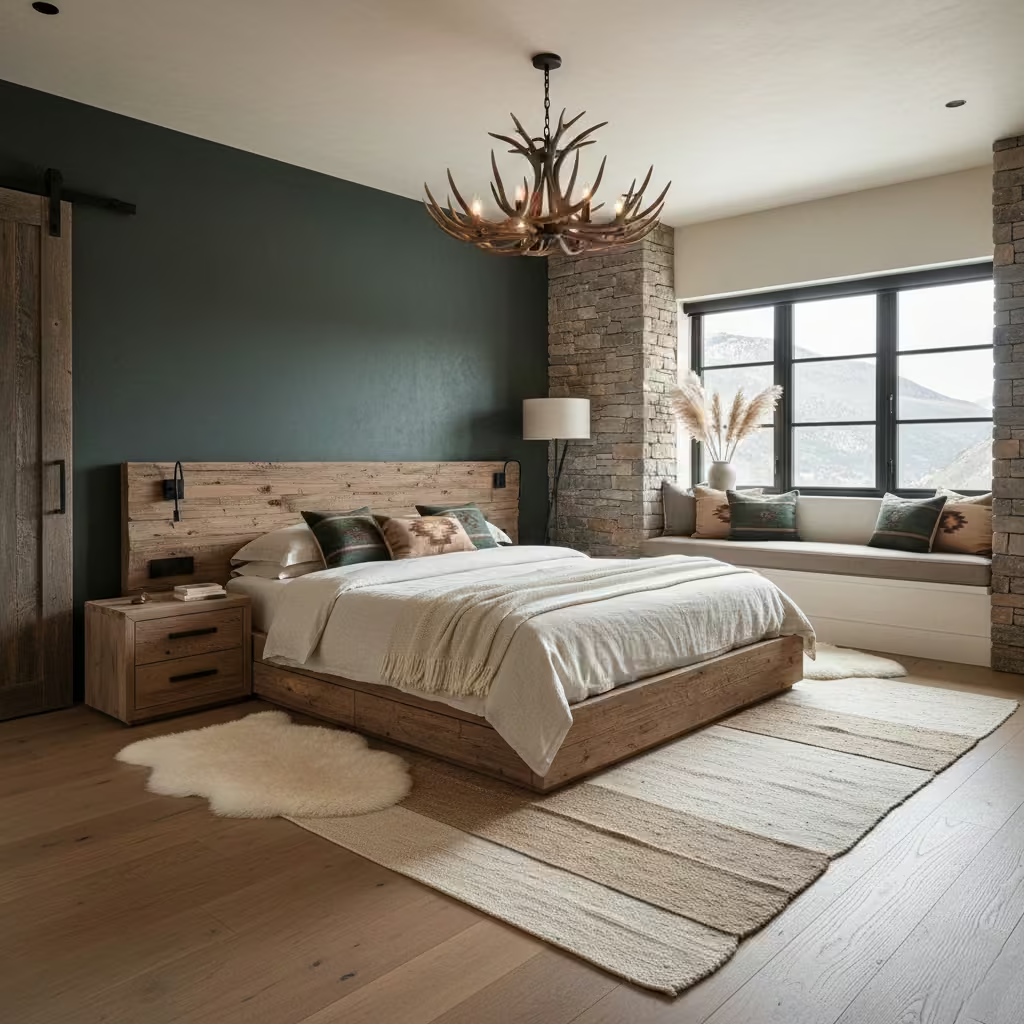
Neutral minimalism is a refined approach to a mountain bedroom, allowing alpine textures like timber, stone, and wool to shine without visual clutter. In my projects, I often combine clean lines with tactile materials to create a serene, timeless retreat that feels both modern and connected to nature.
Measurements:
Maintain 600–900 mm (24–36 in) of clear circulation around the bed for comfort and flow. This ensures the space feels open while still accommodating furniture and storage.
Materials:
I focus on a mix of plaster, timber, and minimal hardware, allowing natural textures to provide warmth and visual interest without competing patterns or colours.
Installation steps:
Start by decluttering the space to identify key design elements. Select three material types to layer thoughtfully, then balance textures across floors, walls, and soft furnishings to maintain cohesion.
Pros and cons:
The main advantage is a timeless, calming environment that highlights natural materials. The downside is that minimalism can feel cold or sparse if textures and layering aren’t carefully considered.
Budget:
Low to mid, making it a versatile and achievable strategy for most mountain bedrooms.
You May also Like: Master Bedroom Design: A Complete Guide to Creating a Space That Restores, Supports, and Endures
Lofted Sleeping Nook for High-Ceiling Cabins
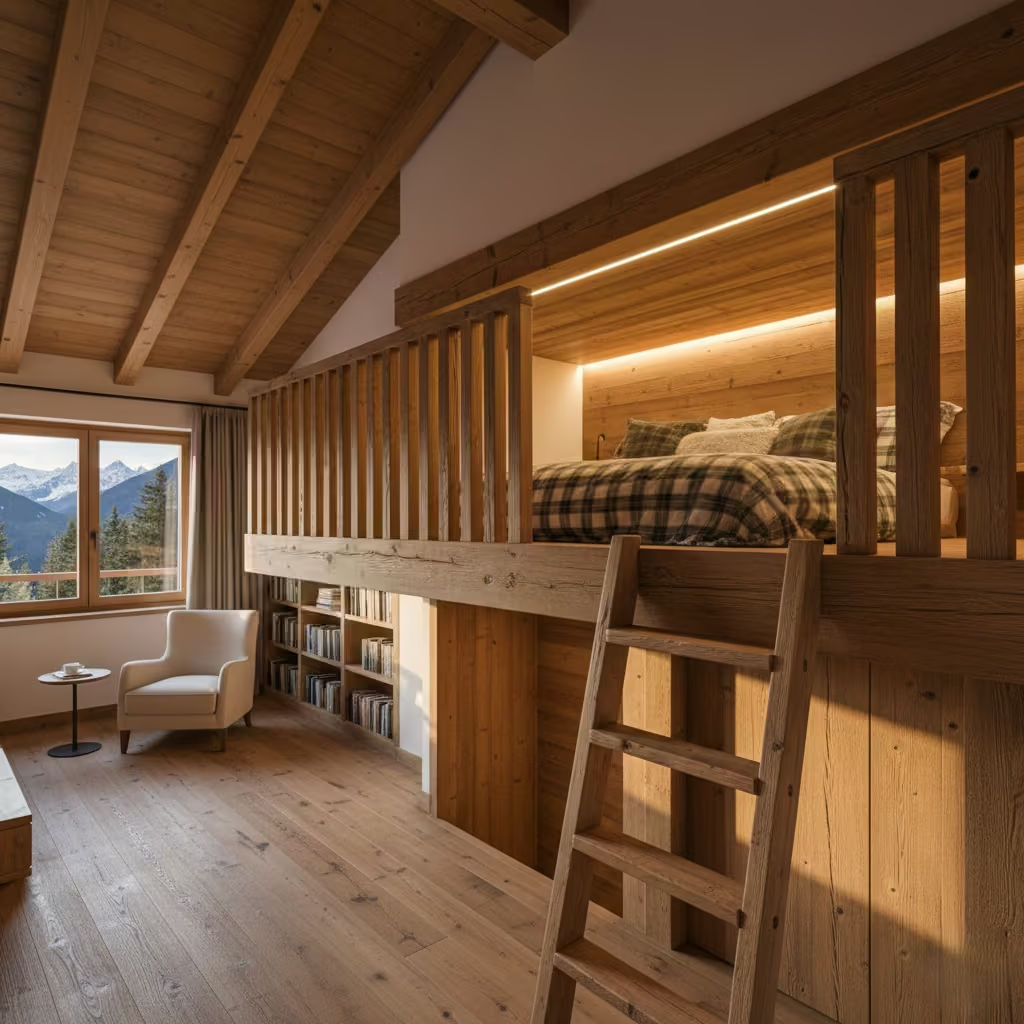
A lofted sleeping nook is a clever way to maximise space in high-ceiling mountain bedrooms while adding a playful, cabin-like character. In my projects, I often use lofts for children’s rooms, guest areas, or reading nooks, making the most of vertical volume without sacrificing floor space.
Measurements:
Ensure minimum headroom of 900–1,200 mm (35–47 in) on the sleeping platform for comfort. The access ladder should be 400–500 mm (16–20 in) wide for safe ascent and descent.
Materials:
Use sturdy timber for the platform and guardrails, and integrate built-in lighting for safety and ambiance. I often choose warm-toned timber to match flooring and beams, reinforcing the alpine aesthetic.
Installation steps:
Begin with a structural assessment to confirm floor joists can support the additional load. Build the platform with appropriately sized joists, install guardrails, and add a ladder. Finish with lighting and soft furnishings to create a cosy, inviting nook.
Pros and cons:
The main advantage is maximising floor area while adding a unique feature. The drawbacks include compliance with building regulations and potential head clearance issues if not carefully planned.
Budget:
Mid to high, depending on timber quality, structural reinforcement, and safety features.
Rustic Headboard from Reclaimed Timber
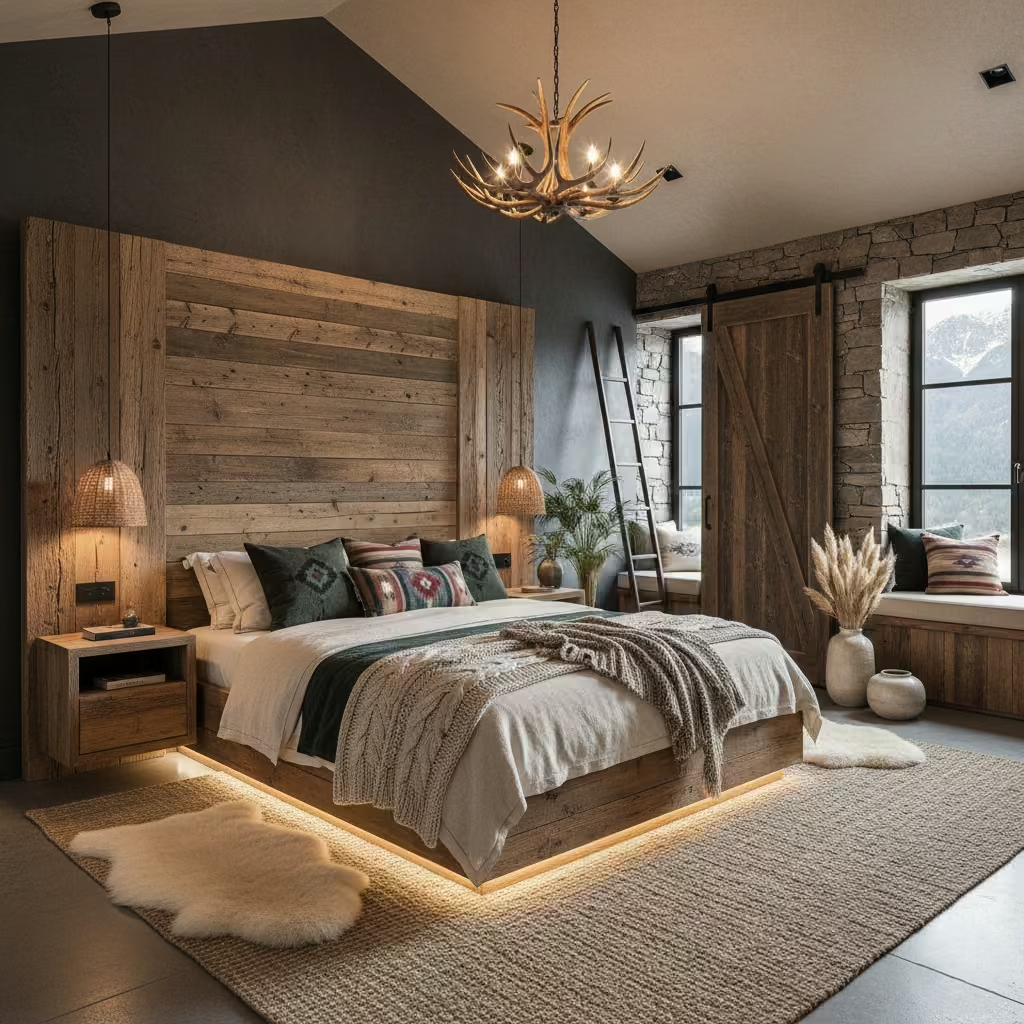
A rustic headboard crafted from reclaimed timber instantly brings character, warmth, and sustainability to a mountain bedroom. In my projects, I often use these as statement pieces to anchor the bed while complementing natural textures throughout the room.
Measurements:
For a striking effect, headboard height typically ranges 100–140 cm (39–55 in). Width should match the bed for a cohesive look.
Materials:
Reclaimed timber planks create authenticity, while concealed battens allow secure fixing and a floating appearance. I always treat timber to preserve its integrity and highlight its natural grain.
Installation steps:
Clean and treat the timber to remove dirt, nails, or pests. Fix the headboard securely to the wall or bed frame. Finish with a sealant or oil to protect the wood and enhance colour.
Pros and cons:
The main advantages are sustainability, unique character, and warmth. The downside is untreated timber may harbour nails, insects, or splinters, so careful preparation is essential.
Budget:
Low to mid, depending on timber sourcing and finishing.
Layered Window Treatments: Heavy Drapes + Sheer Linen
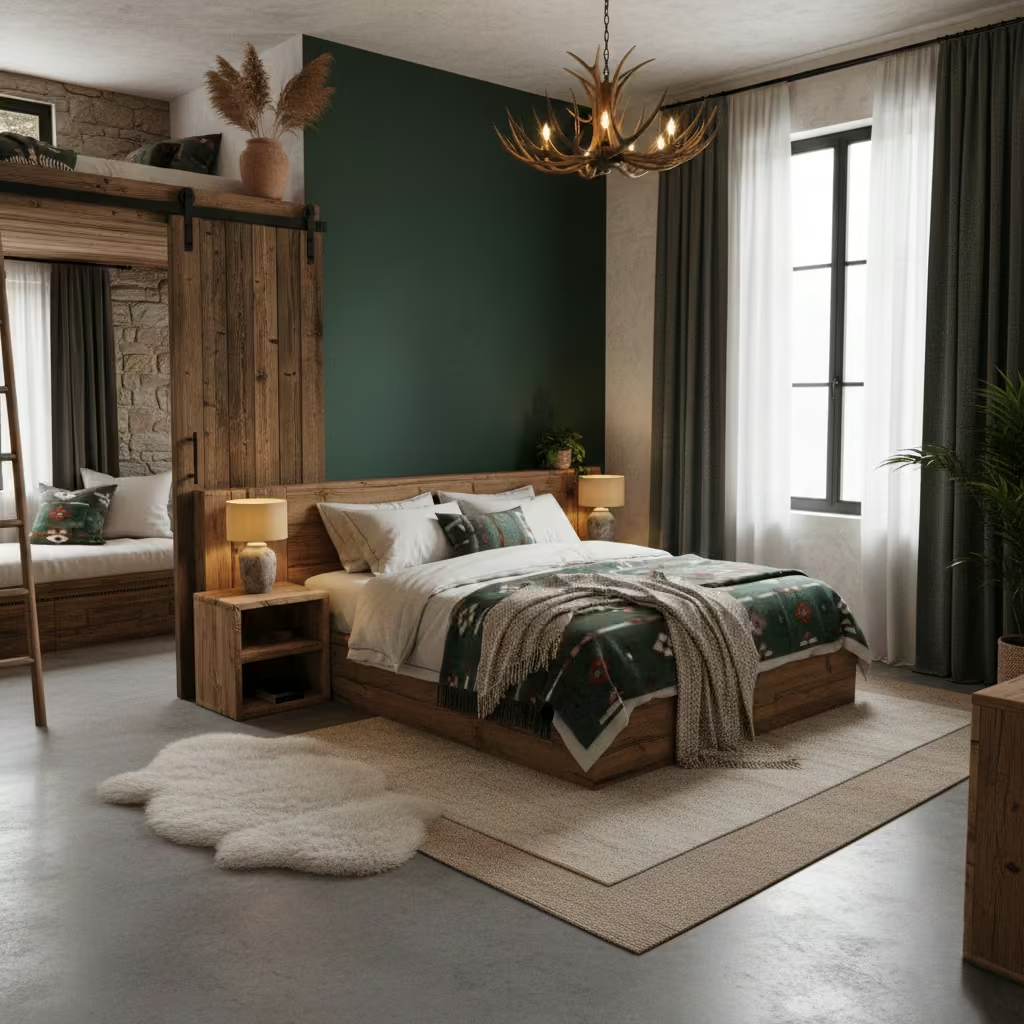
Layered window treatments add both function and style to a mountain bedroom, enhancing warmth, privacy, and texture. In my projects, I combine heavyweight drapes with sheer linen to control light and maintain a soft, airy feel while still providing insulation against cold mountain air.
Measurements:
For a polished look, drapes should drop to the floor with a 150–200 mm (6–8 in) break. Extend each side of the frame by 100–150 mm (4–6 in) to fully cover the window and allow for natural light when drawn open.
Materials:
I use heavyweight wool-blend drapes for warmth and opacity, paired with sheer linen panels for diffused daylight and softness. The combination complements alpine textures like timber and stone.
Installation steps:
Measure the window carefully and order made-to-measure curtains for a tailored fit. Install an appropriate track or pole system, then hang the layers, ensuring smooth operation and even folds.
Pros and cons:
The main benefits are thermal and acoustic performance, plus a layered, cosy look. The main drawback is the higher cost associated with made-to-measure fabrics and hardware.
Budget:
Mid, depending on fabric choice and window size.
Cedar-lined Closet or Headboard Niche for Aroma
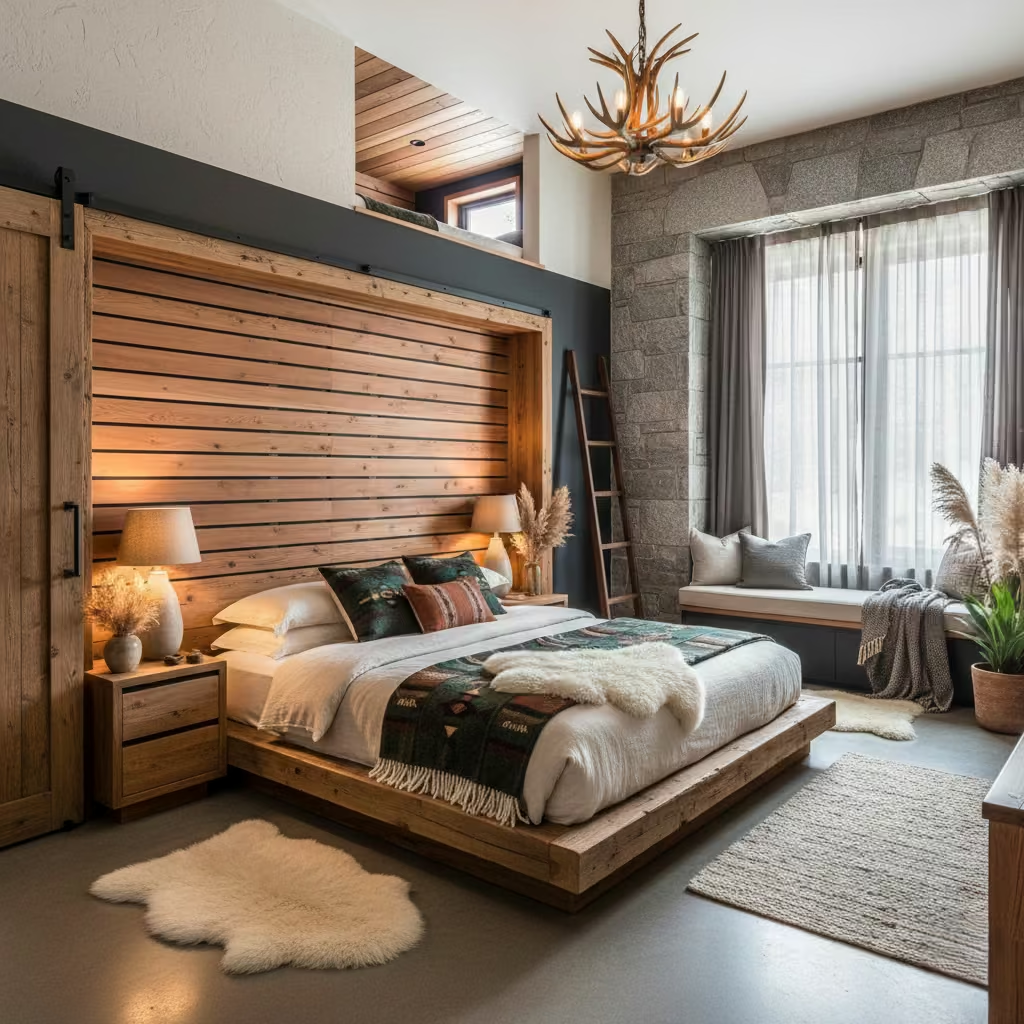
Cedar lining adds subtle fragrance, warmth, and a natural protective quality to a mountain bedroom. In my projects, I often use cedar for closets, wardrobes, or headboard niches to introduce a sensory layer that complements the rustic, alpine atmosphere.
Measurements:
Use planking 12–18 mm (0.5–0.7 in) thick, and leave a 5–10 mm ventilation gap behind boards to allow air circulation and prevent moisture build-up.
Materials:
Western red cedar is ideal for its natural scent and moth-resistant properties. Secure boards with breathable fixings to allow the timber to expand and contract with humidity changes.
Installation steps:
Assess the space for humidity and ventilation to prevent warping. Install the cedar lining with a breathable barrier behind it. Maintain an air gap for proper airflow and longevity.
Pros and cons:
Cedar provides a natural fragrance, subtle warmth, and insect resistance. The main drawbacks are higher cost and occasional maintenance to preserve its aroma and condition.
Budget:
Mid, depending on coverage area and timber grade.
Neutral Built-in Bookshelves for Cozy Reading Corner
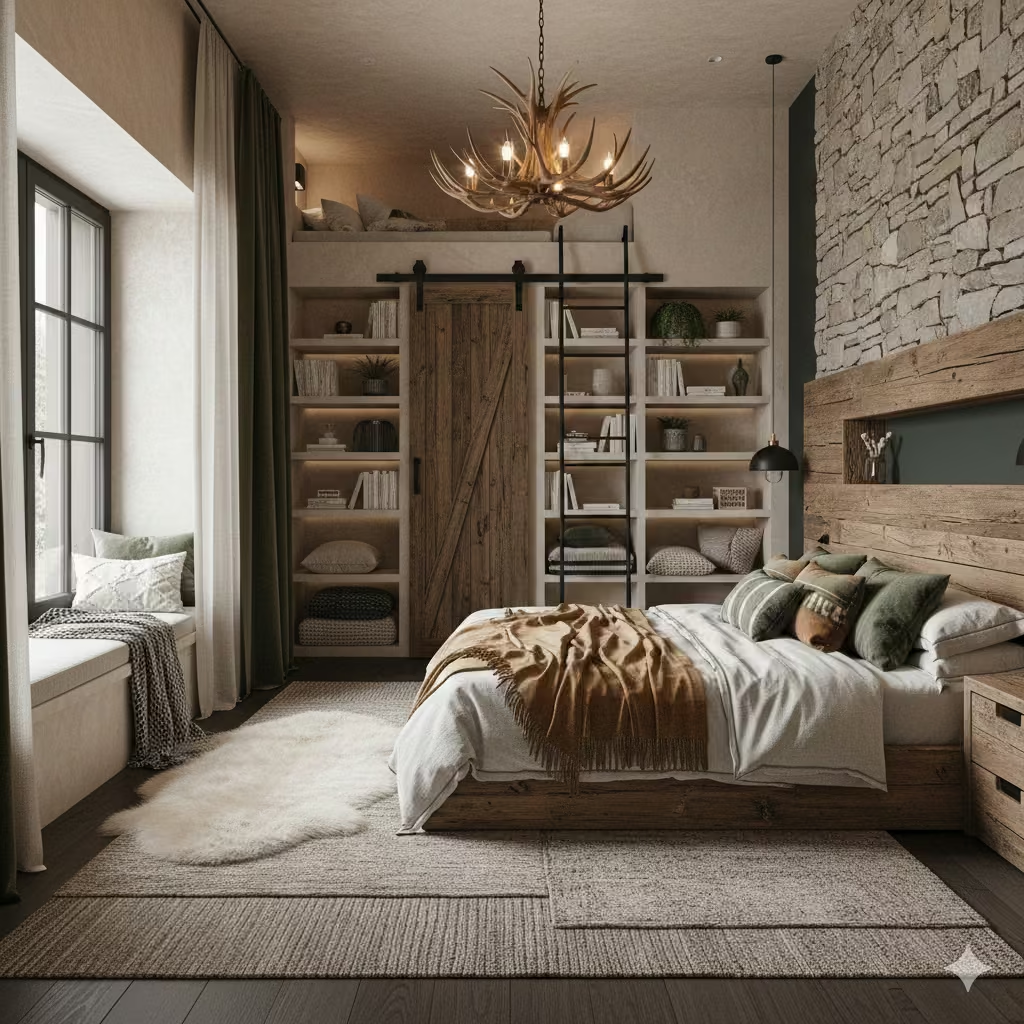
Built-in bookshelves create a dedicated reading corner while adding architectural interest to a mountain bedroom. In my projects, I often combine neutral finishes with integrated seating and lighting to make a cosy, functional nook that blends seamlessly with the room’s alpine textures.
Measurements:
Shelf depth should be 250–300 mm (10–12 in) to comfortably hold books. For a seating alcove, aim for 450–600 mm (18–24 in) depth to provide a comfortable spot for cushions and a small throw.
Materials:
Painted MDF or timber works well for a clean, durable finish. Integrated task lighting enhances usability and atmosphere, while soft cushions and throws add tactile warmth.
Installation steps:
Plan the layout to maximise storage and seating without overwhelming the room. Build the bookshelf carcass, then install task lighting and add cushions to complete the nook.
Pros and cons:
The main advantages are functionality, personalisation, and visual interest. The main drawback is that built-ins reduce flexibility for future wall arrangements or furniture layouts.
Budget:
Low to mid, depending on materials, lighting, and customisation level.
You May also Like: 25 Guest Bedroom Design Ideas to Create a Stylish, Comfortable, and Inviting Space
Subtle Smart Home Integration: Climate & Lighting Scenes
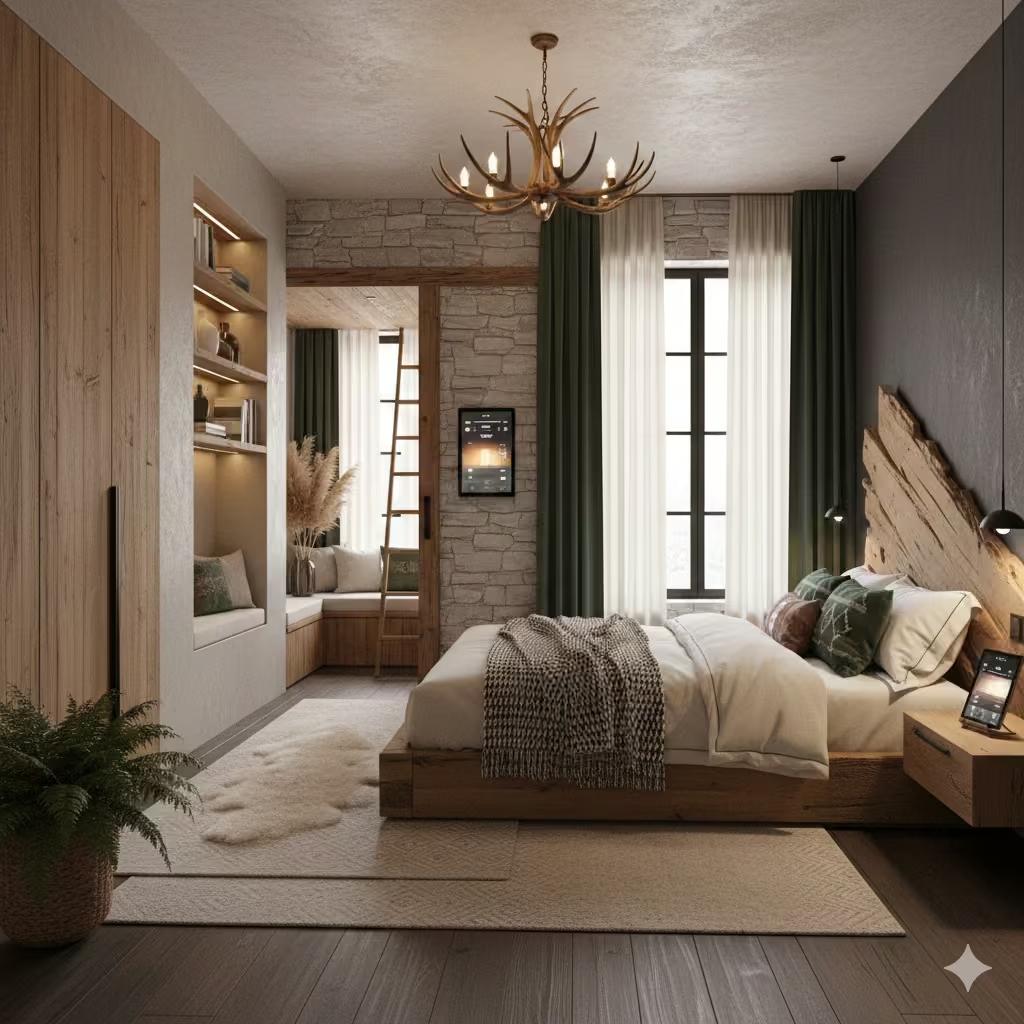
Integrating smart home features into a mountain bedroom adds convenience and modern comfort without compromising its natural, alpine character. In my projects, I often programme lighting and climate scenes to adjust automatically for morning, evening, or cosy reading modes, keeping the space functional and relaxing.
Measurements:
Thermostats should be positioned 1.2–1.5 m (4–5 ft) above the floor and away from direct sunlight or drafts to ensure accurate temperature readings.
Materials:
Key components include a smart thermostat, dimmer switches, and app-controlled lighting or climate systems compatible with your existing wiring.
Installation steps:
First, identify the desired scenes (wake-up, sleep, reading, ambience). Wire in compatible switches and devices. Finally, program the scenes for seamless operation, ensuring user-friendly controls.
Pros and cons:
The main advantages are convenience, energy savings, and easy scene control. The main drawbacks include an initial learning curve and potential compatibility issues with existing systems.
Budget:
Low to mid, depending on device selection and integration complexity.
Practical project plan & materials list
Before you start, I work from a short checklist so nothing important gets missed. Record these measurements and site details precisely: room length × width, ceiling height, window head and sill heights, door widths, radiator/vent locations, floor-to-step changes, and position of existing electrical and plumbing runs. Photograph each elevation and create a sample board (roughly A3 / 30×42 cm) showing proposed floor, wall finish, trim, and two textiles.
Prepare a one-page contractor brief that includes: scope of work, measured drawings or plans, finish schedule, fixed budget range, target start date, and contact/insurance details. Ask for three quotations and a proposed programme.
Typical mid-range materials list (starter): engineered oak flooring, wool area rug, thin-cut stone veneer, reclaimed timber for feature elements, painted MDF for joinery, layered lighting kit (dimmers, sconces, bedside lamps), insulated glazing, quality bedding and wool throws.
Permissions & regulations: always check local building control/permit requirements for fireplaces, structural beam works, or external window changes. For those items I engage qualified trades and insist on written sign-off and compliance certificates.
Budgeting guide & when to hire professionals (H2)
For planning purposes I break costs into three rough tiers, noting these are indicative and will vary by region, specification, and site conditions:
- Low: £1,000–£5,000 / $1,200–$6,000 cosmetic updates, textiles, small joinery.
- Mid: £5,000–£20,000 / $6,000–$24,000 new flooring, built-ins, feature walls, modest electrical work.
- High: £20,000+ / $24,000+ structural alterations, full rewires, glazing replacement, fireplaces.
Hire qualified professionals for any structural work, electrical rewiring, fireplace installation, or glazing upgrades that affect building fabric or safety. I always recommend obtaining at least three written quotes for major trades, checking credentials and references, and allowing a contingency of 10–15 percent for unforeseen costs. For regulated work, insist on compliance certificates and written warranties before final payment.
Final thoughts about achieving a Cozy and calm mountain bedroom
Creating a mountain bedroom that feels both cozy and calm is all about balance. In my experience, the key lies in layering natural materials, textures, and lighting while keeping colour palettes grounded in warm neutrals and deep alpine tones. Timber, stone, wool, and linen work together to create tactile depth, while strategic lighting and well-placed furniture zones enhance comfort and functionality. Small details—like a scented cedar niche, a well-chosen throw, or a view-framing window seat—add personality and connection to nature.
Remember, restraint is just as important as richness. Too many dramatic elements or contrasting finishes can make the space feel busy, so I focus on a few high-impact features combined with subtle accents. With careful planning, smart sourcing, and attention to proportion and scale, a mountain bedroom can become a restorative retreat that feels timeless, inviting, and authentically alpine.
Frequently asked question
What is the ideal colour palette for a mountain bedroom?
I recommend warm neutrals like taupe, cream, and beige, combined with deep greens, charcoal, or navy for contrast. These tones create a calm, grounded atmosphere while highlighting natural materials like timber and stone.
How can I make a small mountain bedroom feel spacious?
Use light wall colours, minimal furniture, and built-in storage. Mirrors, layered lighting, and clear circulation paths also help the room feel larger without sacrificing coziness.
Do I need a professional for a stone accent wall or timber beams?
Yes, particularly for structural beams or full-height stone walls. A qualified installer ensures safety, structural integrity, and a polished finish.
How do I layer textiles without making the room look cluttered?
Mix textures and weights like wool throws, linen sheets, and sheepskin rugs while keeping the colour palette cohesive. Limit patterns and maintain a clear focal point, often the bed.
Can smart home features be integrated without spoiling the alpine aesthetic?
Absolutely. Choose discreet thermostats, dimmers, and app-controlled lighting that blend into walls or furniture. Programming lighting and climate scenes adds comfort while keeping the room visually calm.
How do I balance cost and style for a mountain bedroom?
Layer high-impact, lasting features (timber beams, stone, quality textiles) with lower-cost updates (throws, rugs, accessories). Prioritise professional help for structural and safety-critical elements, and handle decorative updates yourself where possible.