25 Indoor–Outdoor Living Room Ideas That Redefine Modern Living
Indoor–outdoor living is no longer a stylistic flourish reserved for warm climates or contemporary show homes. It is an architectural philosophy grounded in proportion, light, and spatial continuity. When executed correctly, it dissolves the psychological boundary between shelter and landscape without compromising comfort, insulation, or privacy. The threshold becomes less of a dividing line and more of a calibrated transition.
In my own residential projects, I have seen how even a modest rear elevation opening of 3.6 m to 4.8 m (12 ft to 16 ft) can fundamentally alter how a living room performs throughout the day. Natural light travels deeper into the plan. Cross-ventilation improves indoor air quality. Furniture layouts shift to acknowledge garden views rather than ignore them. The atmosphere changes from enclosed to expansive, even when the footprint remains unchanged.
Modern homeowners prioritise this connection because lifestyle expectations have evolved. Living rooms are no longer isolated reception spaces. They operate as social hubs, informal dining areas, remote work zones, and evening retreat spaces. Access to daylight, airflow, and greenery supports wellbeing in a way artificial lighting and decorative finishes simply cannot replicate.
The shift we are seeing is from ornamental patios appended to the rear of the house toward spatially integrated garden rooms conceived from the outset. That integration requires structural strategy. Wide glazing spans often demand concealed steel beams. Level thresholds must account for drainage falls and external paving buildup. Solar orientation influences glazing specification, shading, and overheating risk. Climate responsiveness is not optional. It is fundamental.
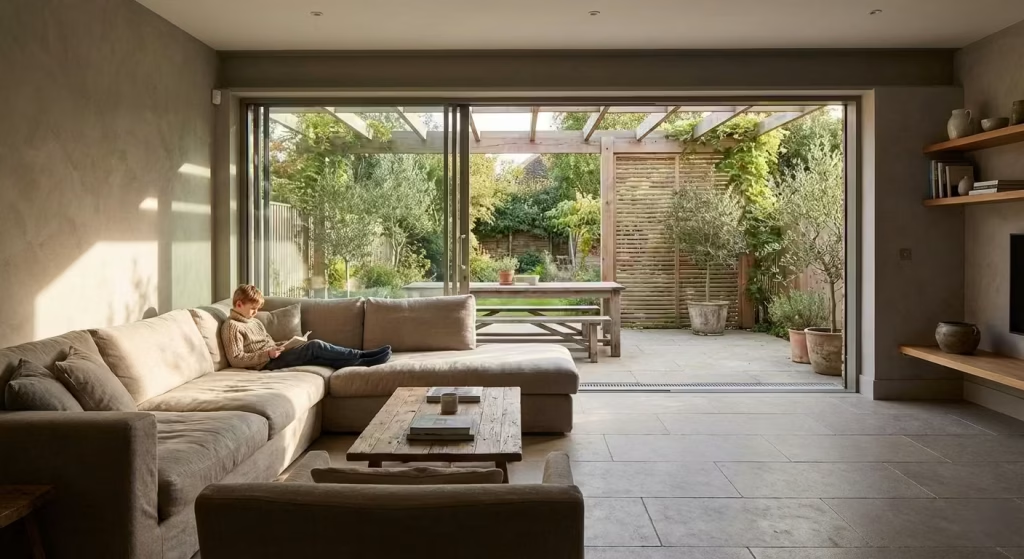
When indoor and outdoor spaces are composed as one architectural sequence, the result feels deliberate rather than decorative. These ideas are not aesthetic gestures. They are spatial strategies that change how a home feels and functions.
The 25 Indoor–Outdoor Living Room Ideas
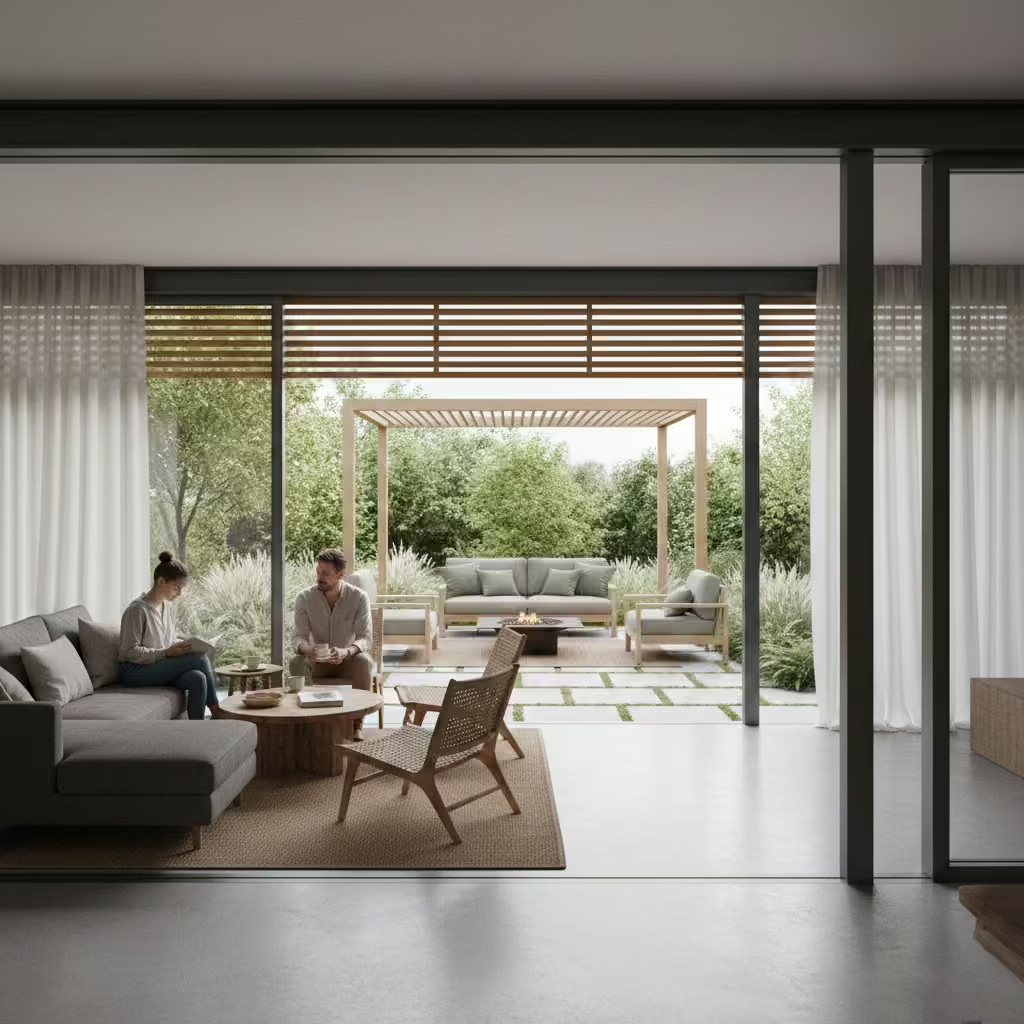
Before exploring the 25 ideas in detail, it is important to understand that successful indoor–outdoor living is rarely achieved through a single design move. It is the cumulative effect of proportion, threshold detailing, structural coordination, and material continuity. In my experience, the most effective schemes are not necessarily the largest or most expensive, but the ones where circulation, sightlines, and climate response have been carefully resolved.
The following ideas are not decorative add-ons. They are spatial strategies that can be adapted to different house types, budgets, and orientations, provided they are approached with architectural discipline.
Full-Width Sliding Glass Walls
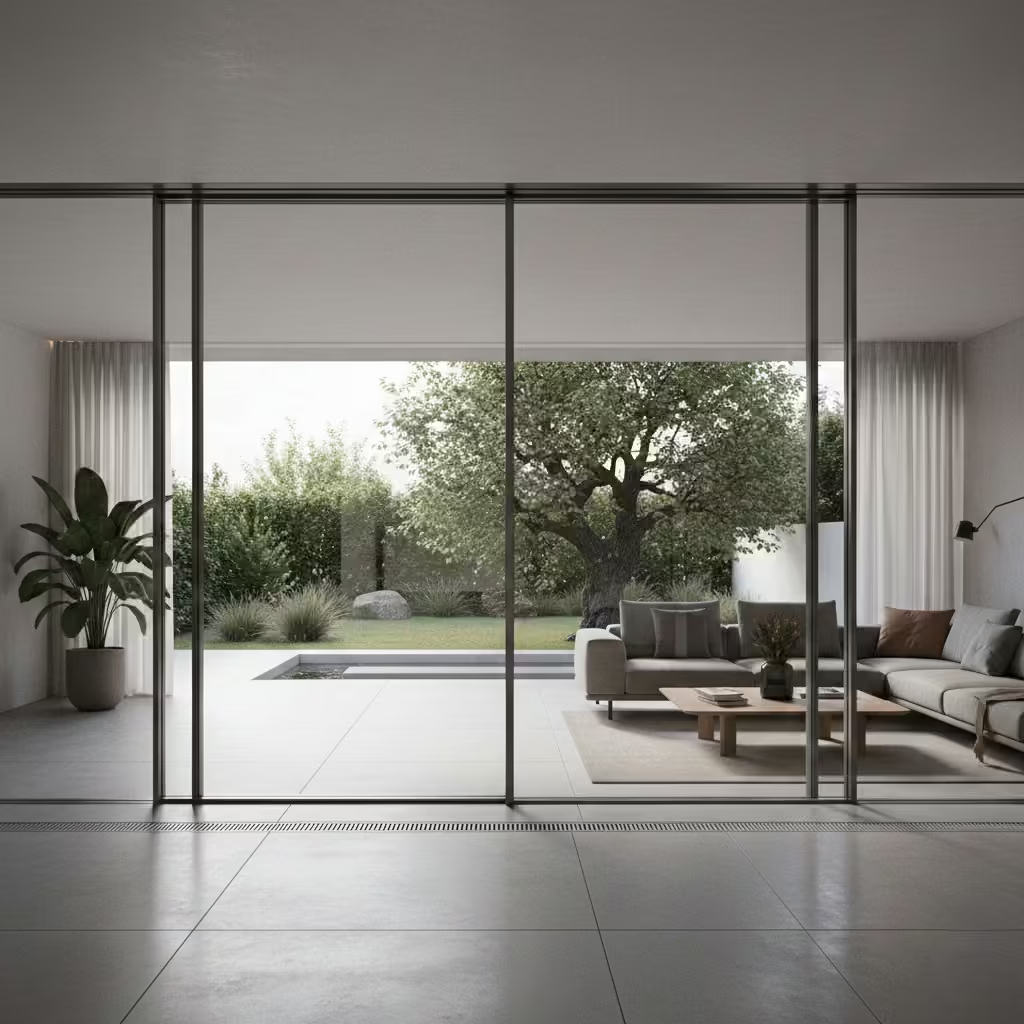
Full-width sliding glass walls remain one of the most transformative architectural interventions in indoor–outdoor living. Rather than puncturing a façade with standard door openings, this approach redefines the entire rear elevation as a transparent plane. When glazing spans between 3 m and 6 m (10 ft to 20 ft), the living room no longer feels like a contained interior. It becomes visually anchored to the garden beyond, with uninterrupted sightlines and significantly deeper daylight penetration.
A critical detail is the floor junction. To achieve true continuity, the internal floor finish and external terrace must align with a flush threshold, maintaining a maximum 15 mm tolerance for drainage and compliance. Anything more visually disrupts the transition and undermines the architectural clarity.
Real-Life Application Insight
On a rear elevation renovation measuring 4.8 m (15.7 ft) wide, I replaced outdated French doors with slimline aluminium sliding panels. Although the overall footprint remained unchanged, daylight levels increased by approximately 40 percent due to the expanded glazing surface and reduced frame thickness. Furniture was reoriented toward the garden, and the room’s perceived depth extended well beyond its physical dimensions.
However, achieving this required a concealed steel beam spanning the full opening to redistribute structural loads. Early collaboration with a structural engineer was essential to avoid compromising ceiling height.
Practical Design Note
Specify thermally broken aluminium systems with high-performance double or triple glazing suited to your climate. In south-facing UK or US properties, solar control glass or external shading may be necessary to mitigate overheating. Drainage channels must be discreetly integrated at the threshold to prevent water ingress.
Pros
- Strong visual continuity between interior and exterior
- Significant daylight optimisation
- Enhances perceived room size
- High resale appeal
Cons
- Structural steel typically required for spans above 3 m (10 ft)
- Higher cost compared to standard door systems
- Potential overheating if orientation is not carefully managed
Pocket Sliding Doors That Disappear
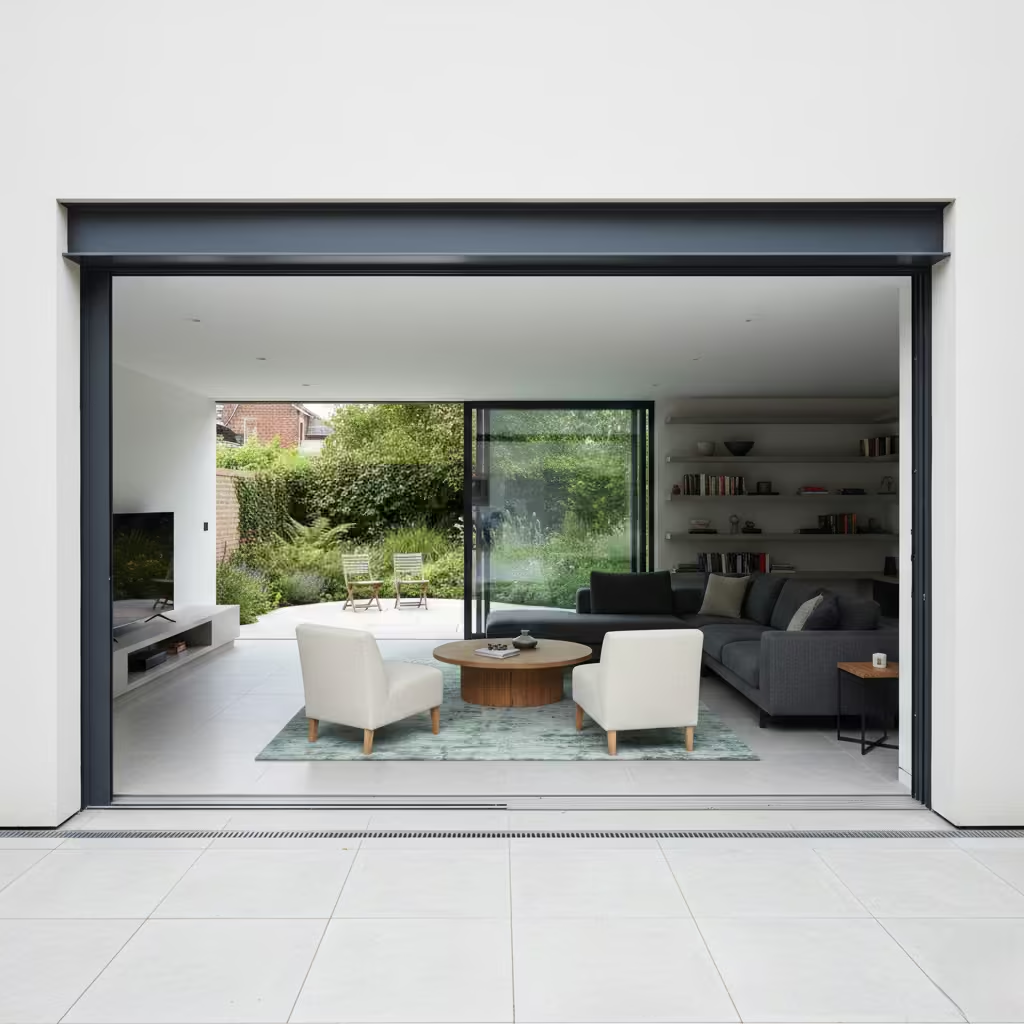
Pocket sliding doors take the principle of large-format glazing a step further by allowing the panels to fully retract into a concealed cavity, leaving the opening entirely unobstructed. When open, there are no stacked panels interrupting the elevation. The living room and terrace read as one continuous plane. Architecturally, this creates a far more resolved indoor–outdoor connection than standard sliders.
This system requires either a cavity wall construction or an external pocket frame system, both of which must be planned from the earliest design stage. Retrofitting into existing masonry is complex and often cost-prohibitive. In my experience, these systems perform best in extensions measuring above 3.5 m (11.5 ft) in width, where the structural opening is generous enough to justify the intervention and where circulation can comfortably flow through the full aperture.
Real-Life Application Insight
On a contemporary garden extension of 5.2 m (17 ft) width, we installed twin pocket sliding panels that disappeared fully into insulated wall cavities. When open, the threshold effectively became a 4.5 m (14.7 ft) uninterrupted opening. The result was not simply visual transparency but behavioural change. Entertaining shifted naturally outdoors because there was no physical reminder of a boundary.
However, this approach only worked because the property faced a private landscaped garden. Pocket systems are most successful where garden views are uninterrupted and privacy is not compromised. In overlooked urban settings, careful screening or strategic planting becomes essential.
Practical Design Note
Structural steel lintels must account for both the glazing load and the pocket cavity void. Insulation detailing around the cavity is critical to avoid thermal bridging. Drainage at the threshold must be discreet but robust, particularly in UK rainfall conditions or humid US climates.
Pros
- Fully unobstructed opening when retracted
- Strong architectural clarity
- Exceptional flow for entertaining and gatherings
- Premium, contemporary aesthetic
Cons
- Higher structural and construction complexity
- Reduced wall space for furniture placement
- Increased cost compared to conventional sliding systems
- Privacy must be carefully assessed before specificationTop of Form
You May also Like: 25 Outdoor Deck Ideas That Turn Your Garden into Usable Living Rooms
Bi-Fold Doors for Flexible Openings
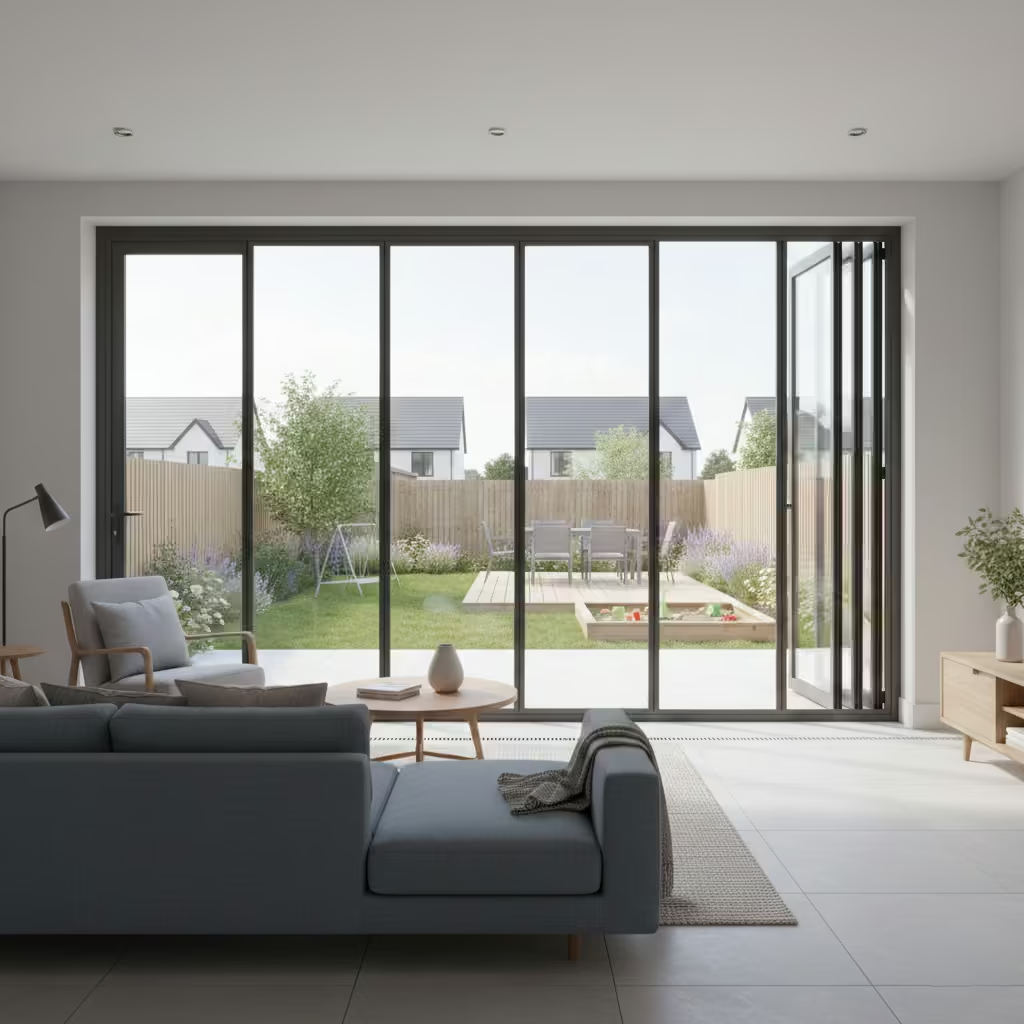
Bi-fold doors remain a popular solution for homeowners who want adaptable indoor–outdoor connection without committing to fixed large-format glazing. Unlike sliding systems, bi-fold panels concertina to one or both sides, allowing you to partially or fully open the elevation depending on weather, ventilation needs, or social use. This flexibility makes them particularly effective in family homes where day-to-day practicality matters as much as architectural impact.
For optimal performance and visual balance, I recommend individual panel widths between 750 mm and 1 m (2.5 to 3.3 ft) per leaf. Wider panels can become heavy and harder to operate, while narrower panels increase frame density and visual interruption. In most residential renovations, openings between 3 m and 5 m (10 ft to 16 ft) provide the best balance between structural feasibility and meaningful garden connection.
Real-Life Application Insight
In a suburban extension measuring 4.2 m (13.8 ft) across the rear elevation, we specified five-panel bi-fold doors with a traffic door integrated into one leaf. This allowed everyday garden access without folding the entire system open. For a family with young children, that operational flexibility was critical. During summer gatherings, the doors folded neatly to one side, opening nearly 90 percent of the façade.
Practical Design Note
Ensure the tracking system is durable and rated for frequent use. Bottom-hung systems typically offer greater long-term stability. Flush thresholds should be carefully detailed with concealed drainage channels to prevent water ingress while maintaining accessibility compliance.
Pros
- High versatility with partial or full opening options
- Well-suited to family lifestyles
- Generally more cost-effective than pocket systems
- Strong cross-ventilation potential
Cons
- Visible frame stacks when fully open
- Sightlines less minimal compared to sliding systems
- Tracks require maintenance to ensure smooth operation
Covered Outdoor Lounge Extension
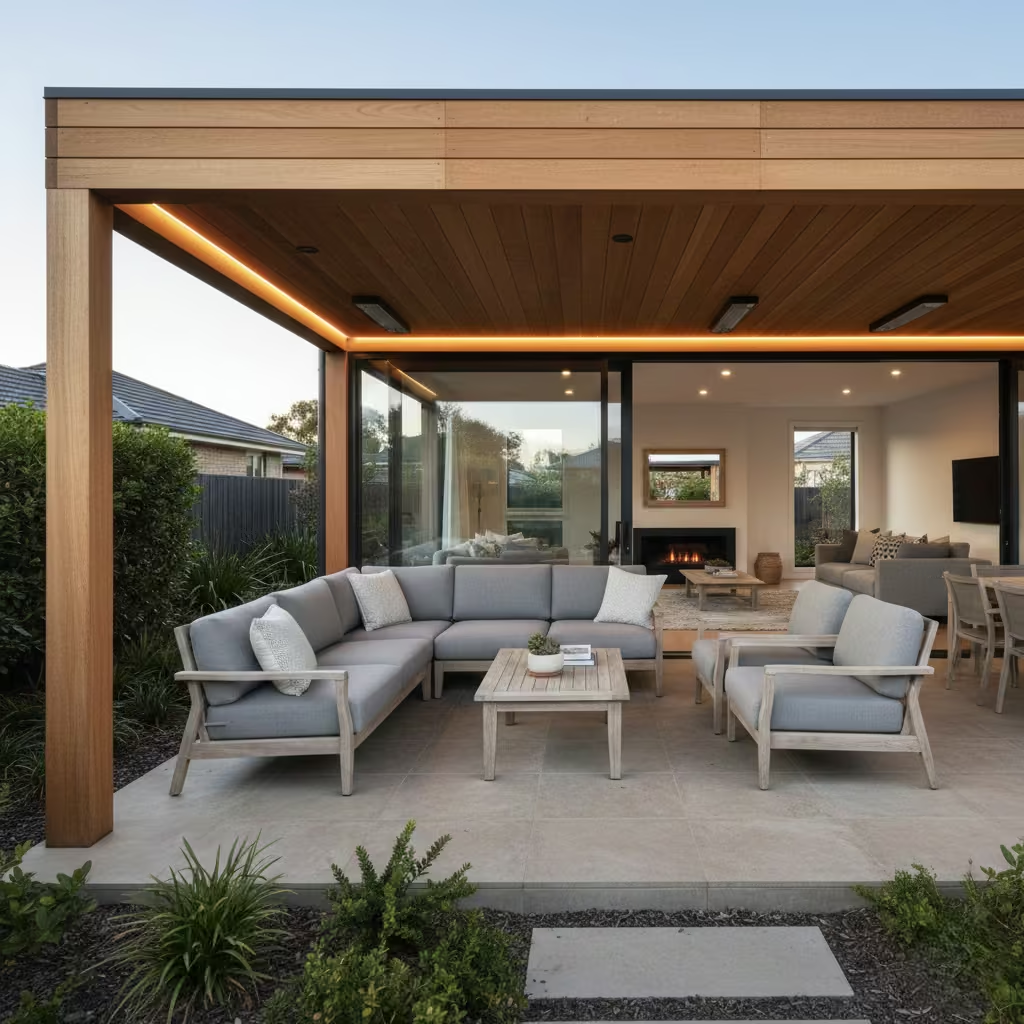
A covered outdoor lounge extension shifts indoor–outdoor living from seasonal novelty to year-round usability. Rather than relying solely on open terraces, a roofed structure creates spatial definition, weather protection, and psychological comfort. The key is proportion. Anything shallower than 2.5 m (8 ft) rarely feels generous enough to accommodate proper seating, circulation, and occasional tables. At this minimum depth, furniture can sit comfortably without feeling compressed against the façade.
Structurally, these spaces are typically formed using powder-coated steel frames for slimmer profiles or engineered timber pergola systems for a warmer architectural expression. The decision should align with the host building. Contemporary brick or render façades often benefit from refined steel detailing, while period or countryside homes respond well to timber beams and expressed rafters.
Real-Life Application Insight
On a wind-exposed coastal renovation, we introduced a 3 m x 4.5 m (10 ft x 15 ft) covered lounge zone directly aligned with the interior living room. Previously, the terrace was rarely used due to prevailing winds and unpredictable weather. By adding a solid roof with integrated drainage and subtle side screening, the space became functional across seasons. Even in cooler months, the covered ceiling allowed discreet infrared heaters to operate efficiently, extending usability without visual clutter.
Practical Design Note
Roof pitch and drainage must be carefully resolved. A minimum fall of 1:40 is typically required for effective water runoff, particularly in high-rainfall climates. Integrate concealed guttering and downpipes to avoid interrupting the visual line. Ceiling height should ideally sit between 2.4 m and 2.7 m (8 ft to 9 ft) to maintain proportion relative to the adjoining living room.
Pros
- Enables year-round outdoor use
- Creates architectural depth and shadow
- Protects furniture from weather exposure
- Enhances perceived living area without full enclosure
Cons
- Additional structural cost
- Requires planning approval in some jurisdictions
- Poor detailing can result in water ingress or visual heaviness
Indoor Flooring That Continues Outside
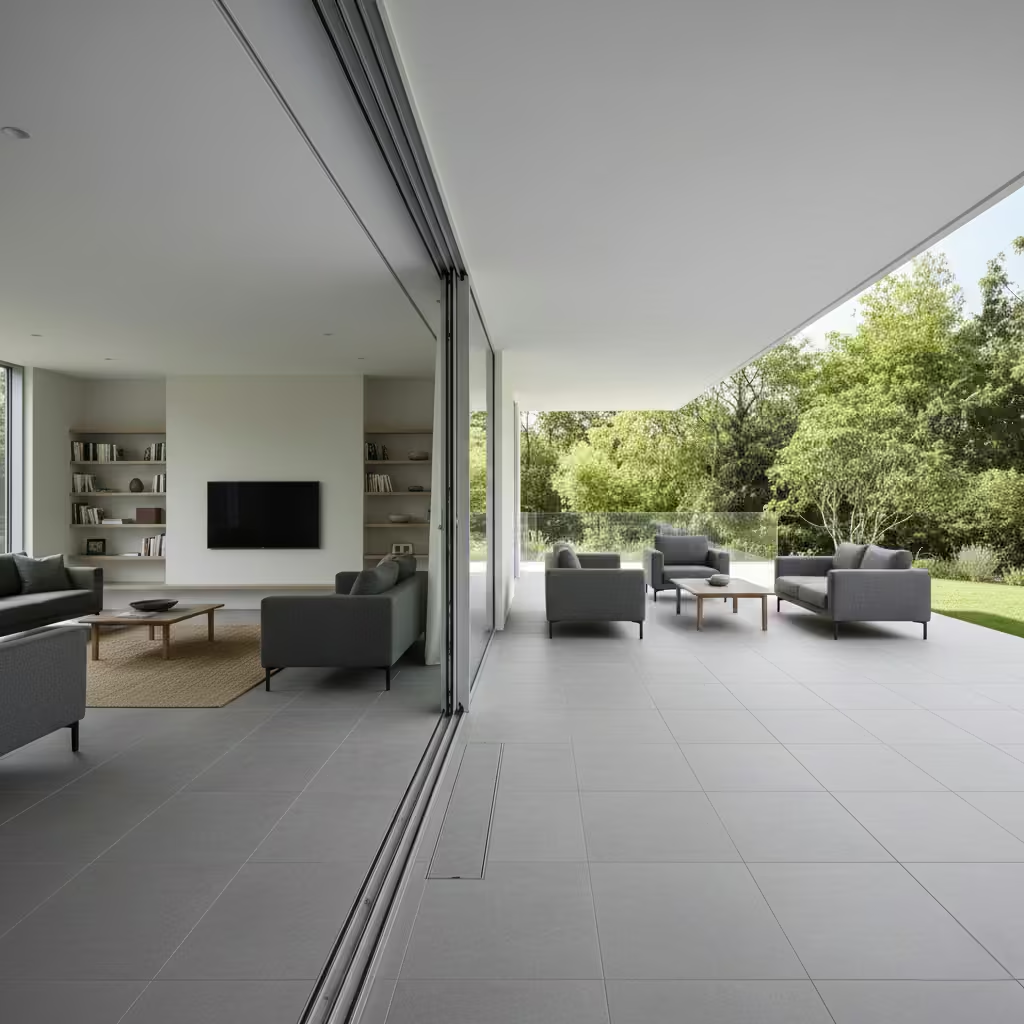
Extending the same flooring material from the living room onto the terrace is one of the most visually powerful ways to dissolve the threshold. When the eye reads a continuous surface plane, the perception of space expands beyond the physical walls. This strategy works particularly well with large-format porcelain slabs in neutral tones, where grout lines can be aligned precisely across the transition.
For safety and durability, exterior slabs should be specified with R11 slip resistance as a minimum rating. In most cases, indoor tiles are approximately 10 mm thick, while exterior porcelain pavers are 20 mm thick to accommodate load-bearing and frost resistance requirements. This thickness variation must be accounted for early in the build-up calculation to achieve a flush threshold.
Real-Life Application Insight
On a contemporary extension with a 5 m (16.4 ft) rear opening, we specified 900 mm x 900 mm porcelain slabs internally and matched them externally in a 20 mm outdoor-rated version. The structural slab and screed levels were adjusted by 10 mm to compensate for the thickness difference. The result was a seamless visual plane extending nearly 8 m (26 ft) from the interior wall to the far edge of the terrace, dramatically enhancing spatial continuity.
Practical Design Note
Precise slab alignment is non-negotiable. Grid lines must be coordinated between interior and exterior zones before installation begins. A recessed linear drainage channel at the threshold is essential to prevent water ingress while preserving the flush finish. Expansion joints should also be carefully positioned to avoid disrupting the visual rhythm.
Pros
- Strong visual continuity and spatial expansion
- Clean, contemporary aesthetic
- Durable and low maintenance when properly specified
Cons
- Requires highly accurate level coordination
- Structural build-up must account for thickness differences
- Installation errors are highly visible and difficult to correct
You May also Like: 25 Modern Spanish Colonial Living Room Ideas That Feel Timeless and Lived-In
Sunken Conversation Pit Transitioning Outdoors
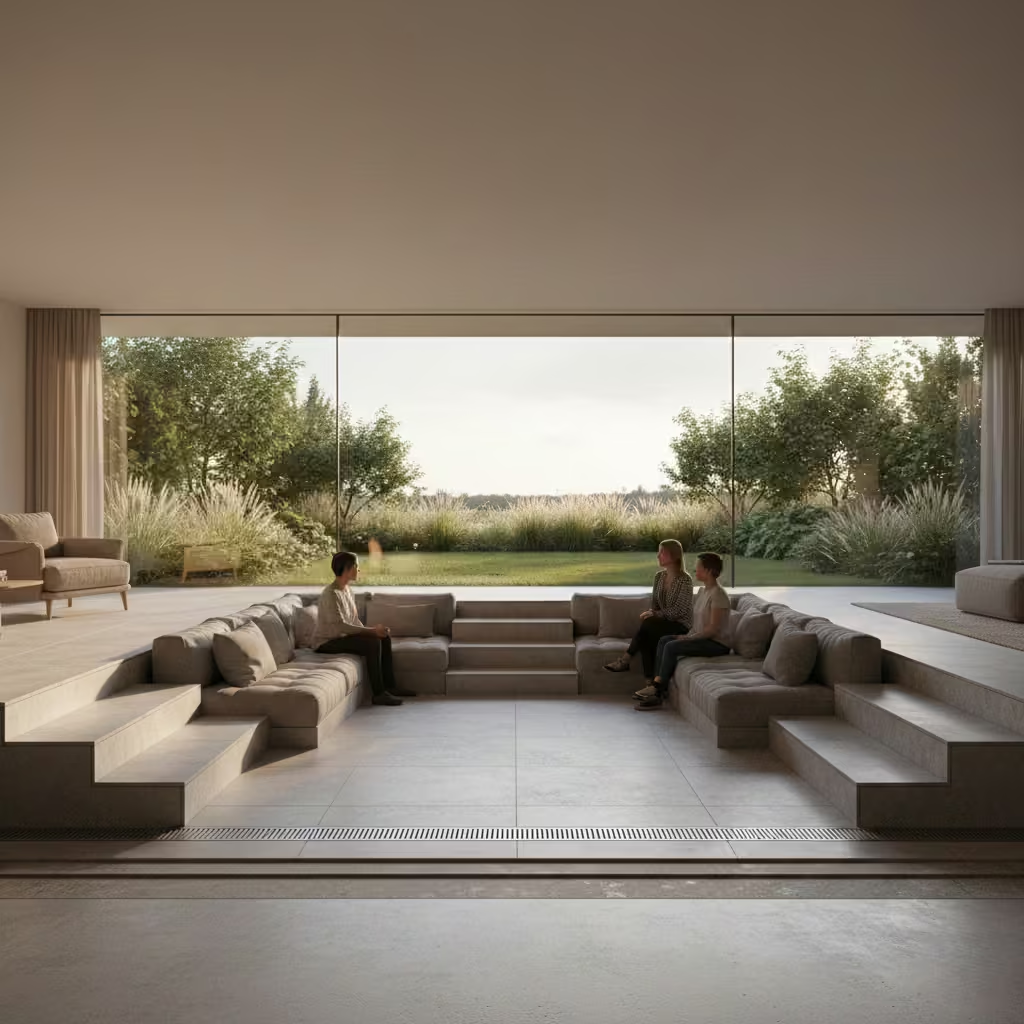
The sunken conversation pit introduces a subtle architectural compression that makes social spaces feel naturally gathered and sheltered. By lowering the seating zone by approximately 300 to 450 mm (12 to 18 inches) below the main floor level, the design creates a quiet sense of enclosure without erecting visual barriers. People instinctively feel more comfortable speaking, relaxing, and lingering in spaces that have a gentle spatial hug rather than a completely open exposure.
This idea works best when the pit is positioned near glazing or a terrace edge where garden sightlines remain unobstructed. The objective is not separation but atmospheric layering. When I design such spaces, I ensure the seated eye level remains aligned with the exterior landscape horizon so occupants can enjoy garden movement and daylight without feeling physically disconnected.
Real-Life Application Insight
On a countryside renovation project, we created a sunken lounge measuring 3.2 m x 3.6 m (10.5 ft x 12 ft) with a 350 mm (14 inch) drop. The client initially worried about mobility and usability. To resolve this, I specified wide 900 mm (35 inch) access steps on two sides rather than a narrow stair. The space soon became the home’s preferred evening gathering zone, especially during summer when ambient light softened the interior–exterior boundary.
Practical Design Note
Drainage design is critical because sunken zones are more vulnerable to surface water accumulation. A concealed perimeter drainage channel should be installed beneath the flooring build-up. Waterproofing membranes must be continuous across the pit structure. Ceiling height relative to the pit base should ideally remain above 2.4 m (8 ft) to avoid psychological compression.
Pros
- Creates intimate, conversation-focused atmosphere
- Enhances garden visibility while offering shelter
- Adds architectural character and spatial layering
Cons
- Requires careful waterproofing and structural detailing
- Accessibility considerations must be addressed
- Construction cost is higher than level-floor terraces
Double-Height Glazing Facing Garden
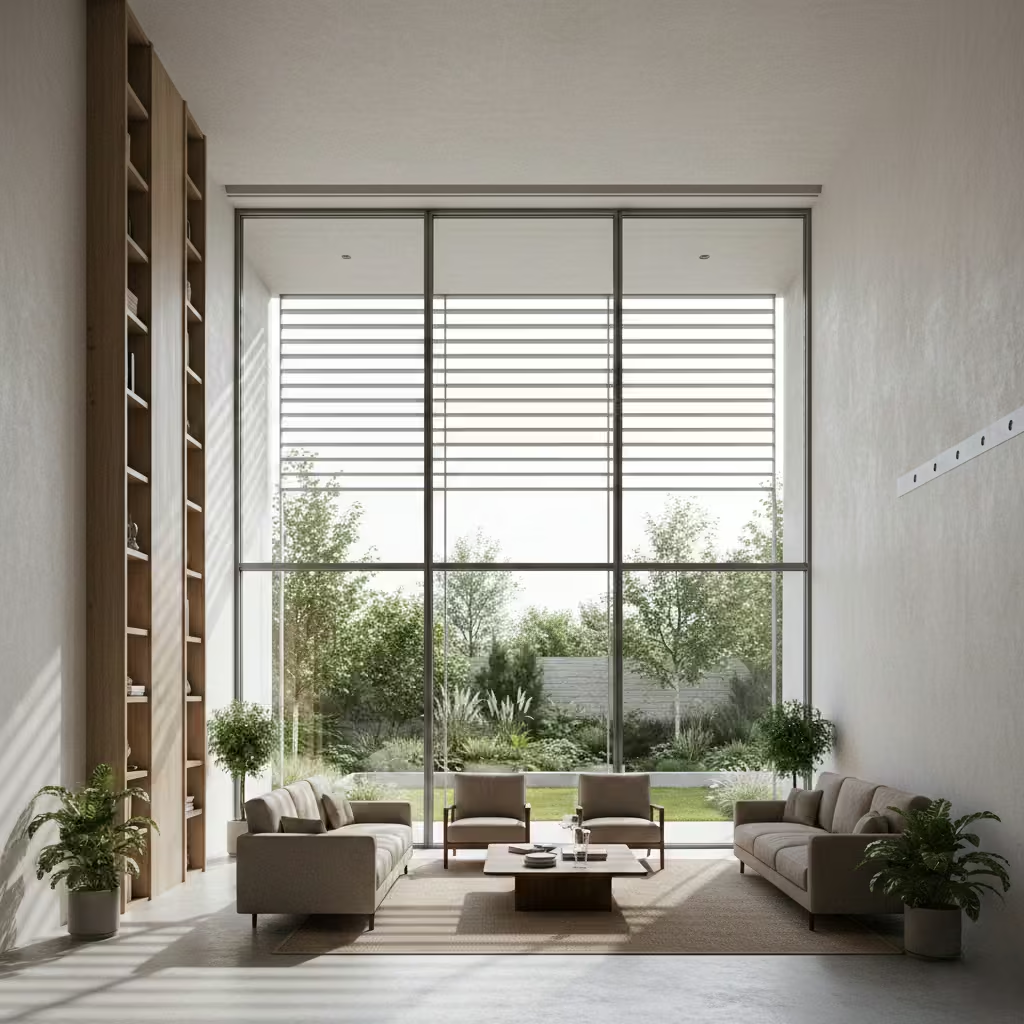
Double-height glazing introduces a powerful vertical rhythm to the living space, allowing daylight to travel deeper into the interior volume while framing the garden as a living backdrop. When ceiling heights reach 4.5 m to 6 m (15 ft to 20 ft), the scale begins to shift from domestic enclosure toward architectural presence. The room feels open without sacrificing structural dignity.
I approach this type of glazing as a light management system rather than a decorative façade. Large vertical glass planes must be specified with solar control or low-emissivity coatings to prevent overheating, particularly in south-facing elevations in temperate climates. Without thermal moderation, winter comfort may improve but summer performance often suffers.
Structurally, double-height glazing almost always requires engineered support. Concealed steel columns or reinforced lintels distribute the load above the glass modules. Frame slimness matters. Excessively thick mullions break visual continuity and weaken the intended sense of vertical openness.
Real-Life Application Insight
On a modern rear extension measuring approximately 5.5 m (18 ft) in width, I designed a double-height garden-facing window rising to 5.2 m (17 ft) internally. The glazing was divided into three vertical modules to balance wind load resistance and installation practicality. During daylight hours, the living room operated almost like a glazed courtyard, with sunlight moving across the wall surface throughout the day.
Practical Design Note
Cleaning access must be considered early. Fixed double-height glazing without maintenance planning becomes impractical over time. External shading elements such as brise-soleil fins or deep roof overhangs are often more effective than internal blinds because they block solar heat before it enters the building envelope.
Pros
- Exceptional daylight penetration
- Strong architectural statement without ornamentation
- Expands perceived spatial volume
Cons
- Higher structural and glazing cost
- Requires thermal and solar performance planning
- Cleaning and maintenance access must be designed in advanceTop of Form
You May also Like: 41 Coastal Living Room Design Ideas That Feel Calm, Fresh, and Timelesss
Retractable Roof Systems
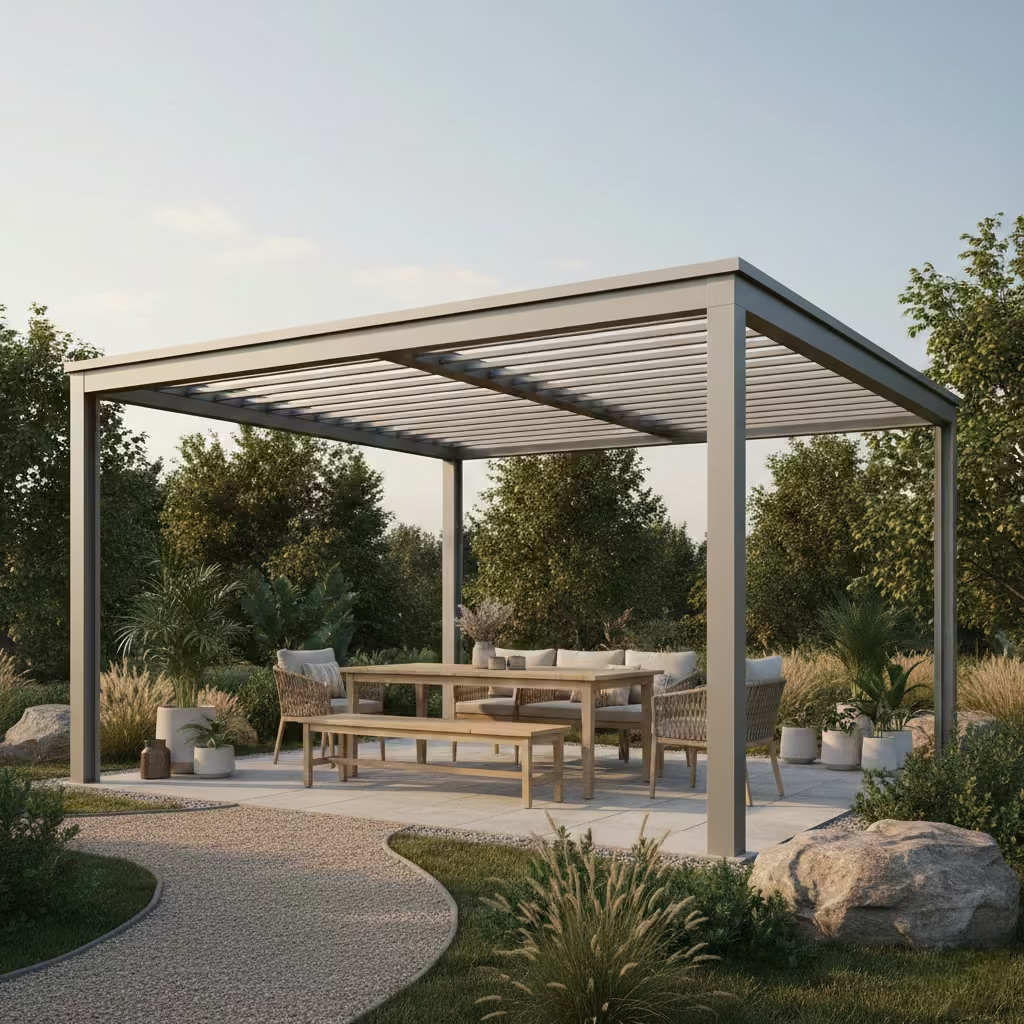
Retractable roof systems represent one of the most sophisticated approaches to adaptive indoor–outdoor living because they allow the environment itself to be modulated rather than simply enclosed. Motorised louvre or sliding panel roofs are especially effective above spans of 3 m (10 ft), where fixed shading would either feel visually heavy or restrict daylight quality.
I tend to treat retractable roofs as climate-responsive architecture rather than mechanical accessories. In practice, these systems perform best when they balance three variables: sunlight admission, rain protection, and air movement. Aluminium louvre blades with integrated seals are commonly specified because they combine structural lightness with durability. Powder-coated finishes help maintain long-term appearance under UV exposure.
Real-Life Application Insight
On a garden pavilion project measuring 4 m x 5.5 m (13 ft x 18 ft), I installed a motorised retractable louvre roof above a dining lounge zone. The structure sat roughly 2.6 m (8.5 ft) above finished floor level. During summer evenings, the client could open the louvres to approximately 70 percent aperture, allowing warm air to escape while preserving partial sky visibility. In rainy weather, the system closed automatically via moisture sensors.
The greatest value of this installation was behavioural. The family began using the outdoor lounge across multiple seasons rather than restricting it to summer.
Practical Design Note
Water management is critical. When closed, the roof must channel rainfall into concealed perimeter gutters with sufficient fall gradient. I recommend minimum drainage fall ratios of 1:40. Electrical motor units should be positioned for maintenance accessibility.
Wind load resistance is another key specification factor. Coastal or exposed sites may require reinforced frame members and certified engineering calculations.
Pros
- Highly flexible climate control
- Extends outdoor usability across seasons
- Provides elegant, minimal visual profile
Cons
- Mechanical components require maintenance
- Higher initial installation cost
- Requires reliable power supply and waterproofing detailing
Fireplace That Faces Both Indoors and Outdoors
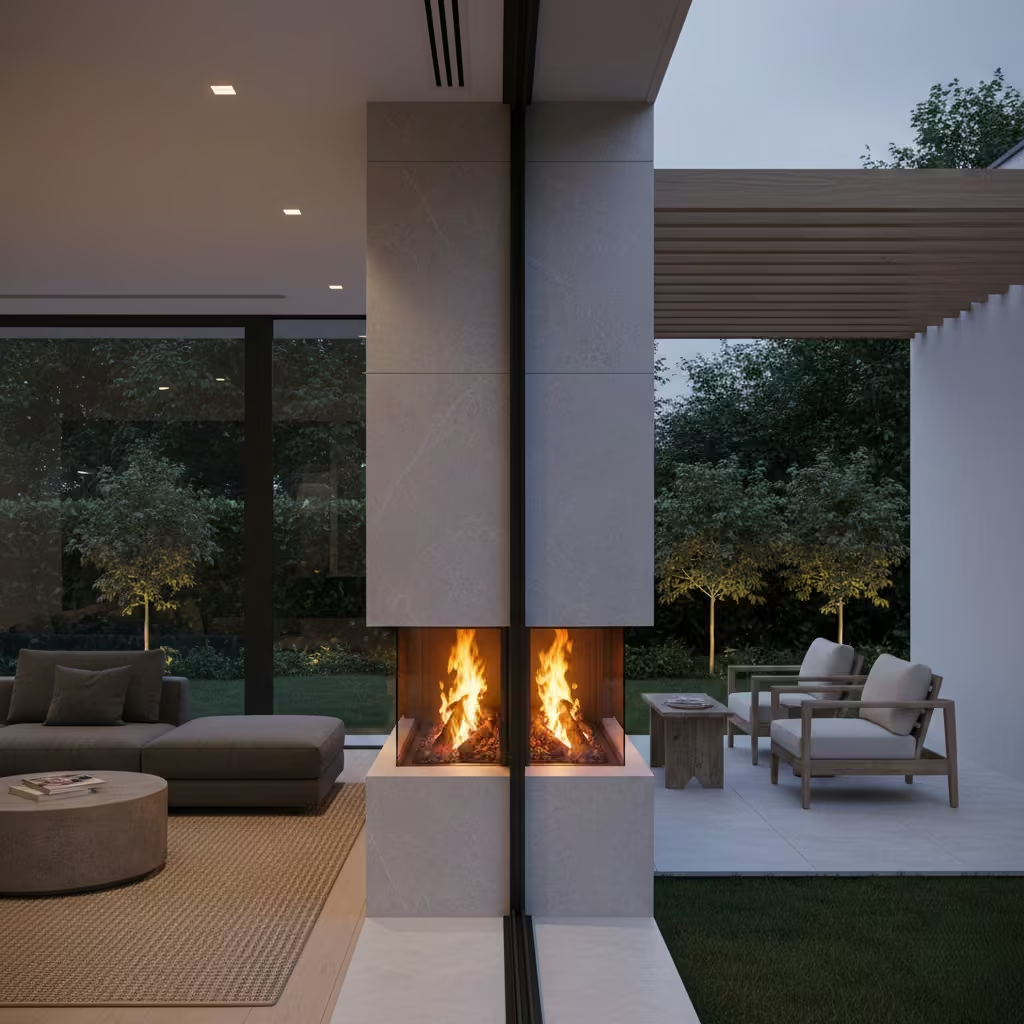
A double-sided fireplace operates as a visual and atmospheric hinge between interior comfort and exterior ambience. Positioned along the threshold wall, it allows living room warmth to project outward while maintaining an elegant, quiet focal point rather than a dominant decorative feature. I prefer this approach when the intention is to create emotional continuity between seating zones rather than simply add a heating appliance.
Most residential installations use either sealed gas combustion units or bioethanol systems. Gas models are more suitable for long-term use because they offer stable heat output and better performance in cooler climates. Bioethanol units provide cleaner installation flexibility but generate lower thermal efficiency and require careful monitoring of flame exposure.
Real-Life Application Insight
On a modern extension project with a garden-facing lounge, I installed a double-sided gas fireplace aligned centrally between the indoor seating arrangement and a 3 m (10 ft) covered terrace zone. The fireplace opening height was approximately 600 mm (24 inches), which maintained a human-scale flame view without overwhelming the wall composition.
The psychological effect was subtle but significant. During evening use, the garden seating area felt visually anchored to the interior space, especially when ambient lighting levels dropped.
Practical Design Note
Ventilation compliance is essential. I always coordinate with building regulations regarding combustion air supply, flue routing, and fire-rated wall construction. The chimney or exhaust pathway should be concealed within structural voids when possible.
Heat-resistant materials must surround the firebox aperture. Natural stone, porcelain panels, or certified fire-rated plasterboard systems are commonly specified.
Pros
- Creates strong indoor–outdoor atmospheric connection
- Serves as architectural focal point without visual clutter
- Provides usable warmth during cooler evenings
Cons
- Requires professional installation and regulatory approval
- Gas line routing or venting increases construction complexity
- Maintenance and safety inspection are necessary over time
Outdoor Kitchen Integrated with Living Room Axis
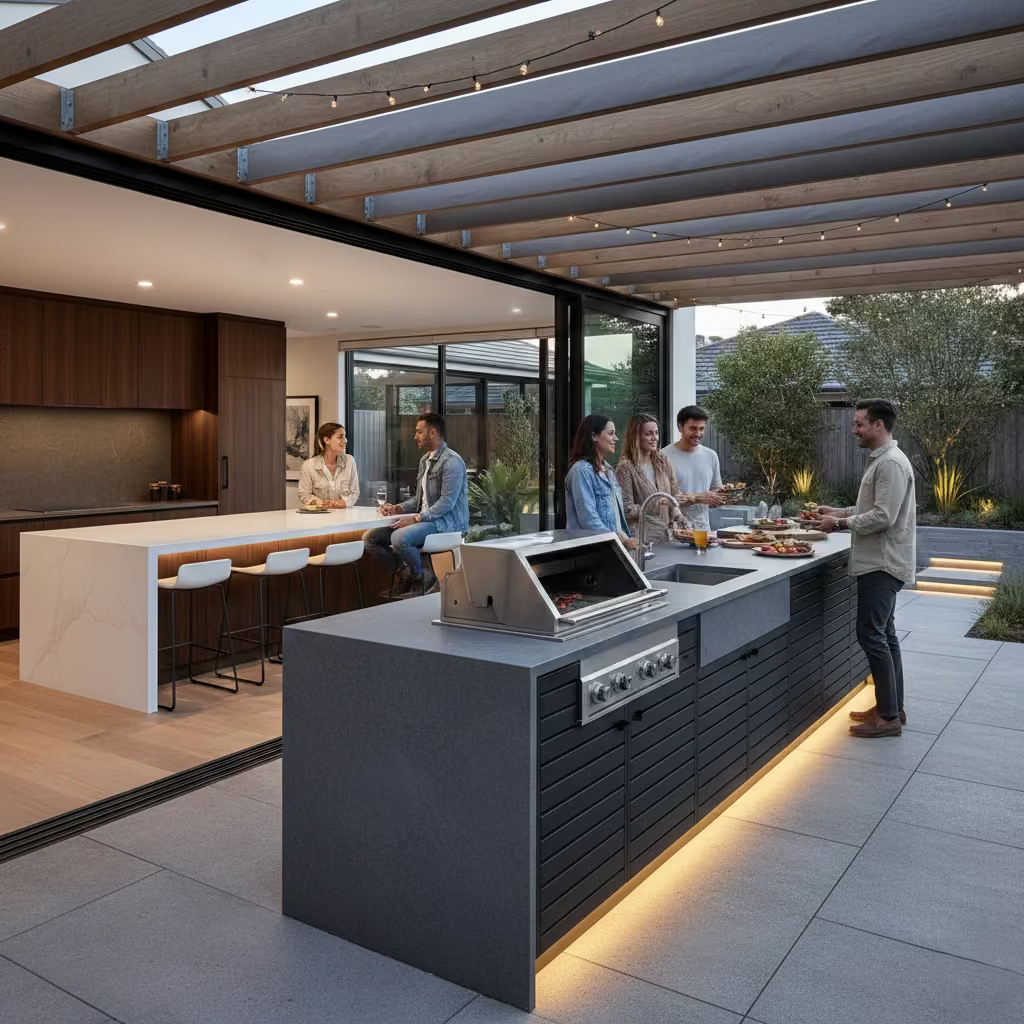
An outdoor kitchen aligned with the interior living room axis represents a more considered approach to entertaining architecture. Rather than treating cooking zones as separate garden features, I prefer positioning them as an extension of the home’s social core. Visual alignment with the interior island helps maintain spatial rhythm when doors are open, allowing movement, conversation, and service flow to feel natural rather than segmented.
The minimum functional counter length I recommend is 2.4 m (8 ft) of linear workspace. This dimension allows for a cooking station, preparation zone, and small serving area without creating congestion. Depth should generally sit between 600 mm and 750 mm (24 to 30 inches), mirroring standard kitchen ergonomics.
Material durability becomes critical outdoors. Worktops are often specified in sealed natural stone, sintered stone, or marine-grade stainless steel, as these surfaces resist moisture, UV exposure, and temperature fluctuation. Cabinetry should be weather-resistant with concealed fixings to maintain architectural clarity.
Real-Life Application Insight
On a contemporary rear garden renovation, I designed an outdoor kitchen along the same sightline as a 3.2 m (10.5 ft) interior kitchen island. The exterior counter measured 2.6 m (8.5 ft) in length and included a built-in gas grill, preparation surface, and under-counter refrigeration. The client reported that entertaining shifted from indoor dining preparation to a more social cooking experience where guests naturally gathered around the garden counter edge.
Practical Design Note
Plumbing and gas supply routes must be planned early in construction. I strongly recommend locating service penetrations beneath fixed flooring zones rather than through visible wall surfaces. Weather protection is equally important; either a covered roof structure or recessed counter positioning helps preserve equipment longevity.
Pros
- Creates seamless entertaining circulation
- Enhances social cooking lifestyle behaviour
- Adds significant functional value to outdoor space
Cons
- Requires utility installation planning
- Equipment must be weather-rated
- Initial construction cost is higher than simple terrace layouts
Garden Courtyard Inserted into Living Room Plan
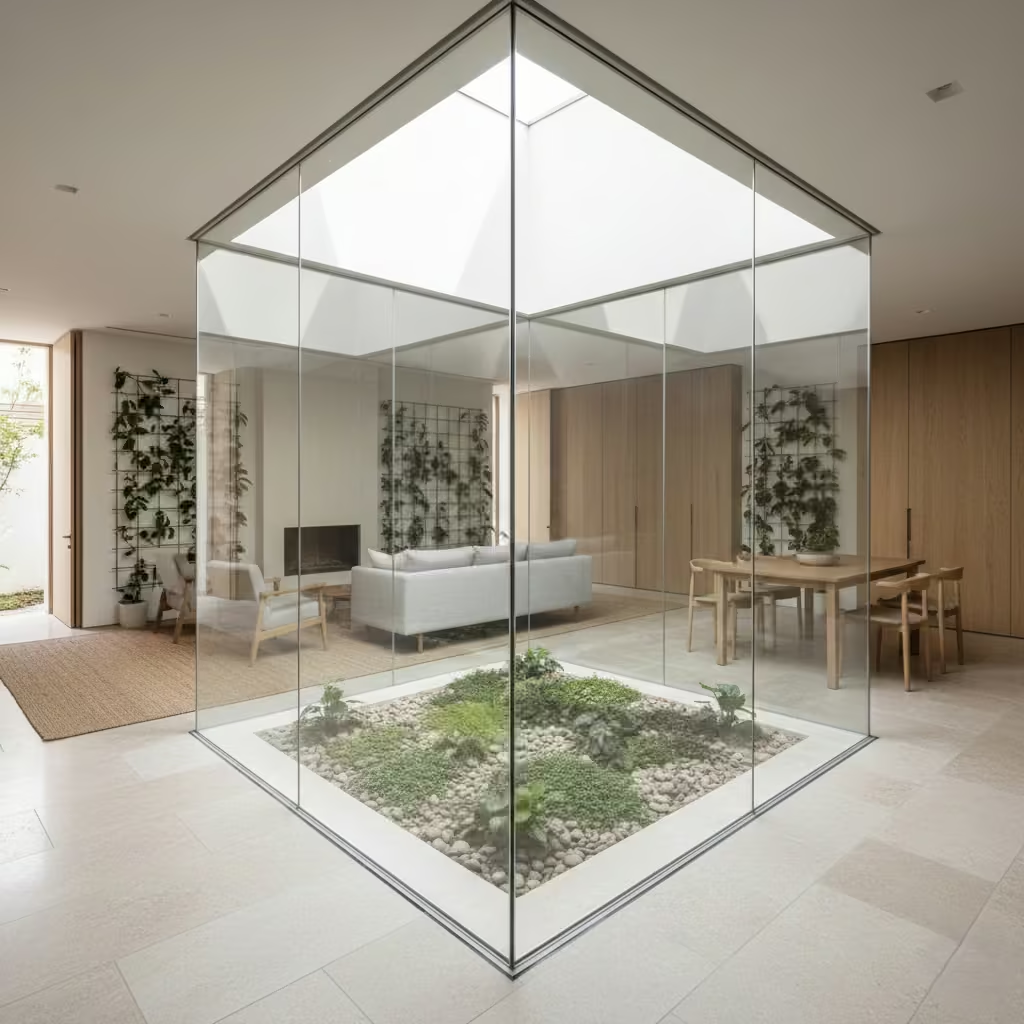
The internal courtyard is one of the most refined strategies for bringing landscape presence directly into the heart of a home. Rather than viewing the garden as something located outside the building envelope, this approach treats planting, air, and daylight as compositional elements inside the spatial plan itself. I often recommend this solution for U-shaped floor plans, where the architecture naturally embraces a central void.
For functionality, a courtyard should rarely be smaller than 2 m x 2 m (6.5 ft x 6.5 ft). While compact courtyards can still provide visual relief, this dimension allows enough ground area for small planting clusters, reflective surfaces, or sculptural landscape features without feeling constrained.
The real power of the courtyard lies in light modulation. Vertical garden walls, soft ground planting, and water features can reduce acoustic hardness and improve microclimatic comfort. In several residential projects, I have observed that even a modest courtyard can improve interior daylight distribution by reducing shadow depth along circulation corridors.
Real-Life Application Insight
On a townhouse renovation, I placed a courtyard measuring 2.8 m x 3.2 m (9 ft x 10.5 ft) between the living room and dining zone. The courtyard was enclosed by frameless glazing on two sides and a timber screen wall on the third. During daytime, sunlight reflected off pale stone paving and filtered gently into adjacent rooms. The home felt quieter and more balanced without increasing overall building footprint.
Practical Design Note
Drainage is critical because internal courtyards collect rainfall and irrigation runoff. A concealed perimeter channel with a minimum fall gradient of 1:40 is recommended. Plant selection should favour low-maintenance species tolerant of microclimatic variation. I avoid dense foliage near glazing edges because moisture accumulation can affect seal longevity.
Pros
- Introduces natural light into deep floor plans
- Improves indoor air and spatial calmness
- Creates architectural focus without large site expansion
Cons
- Requires professional waterproofing detailing
- Maintenance access must be planned
- Construction complexity is higher than external patios
Frameless Corner Glazing
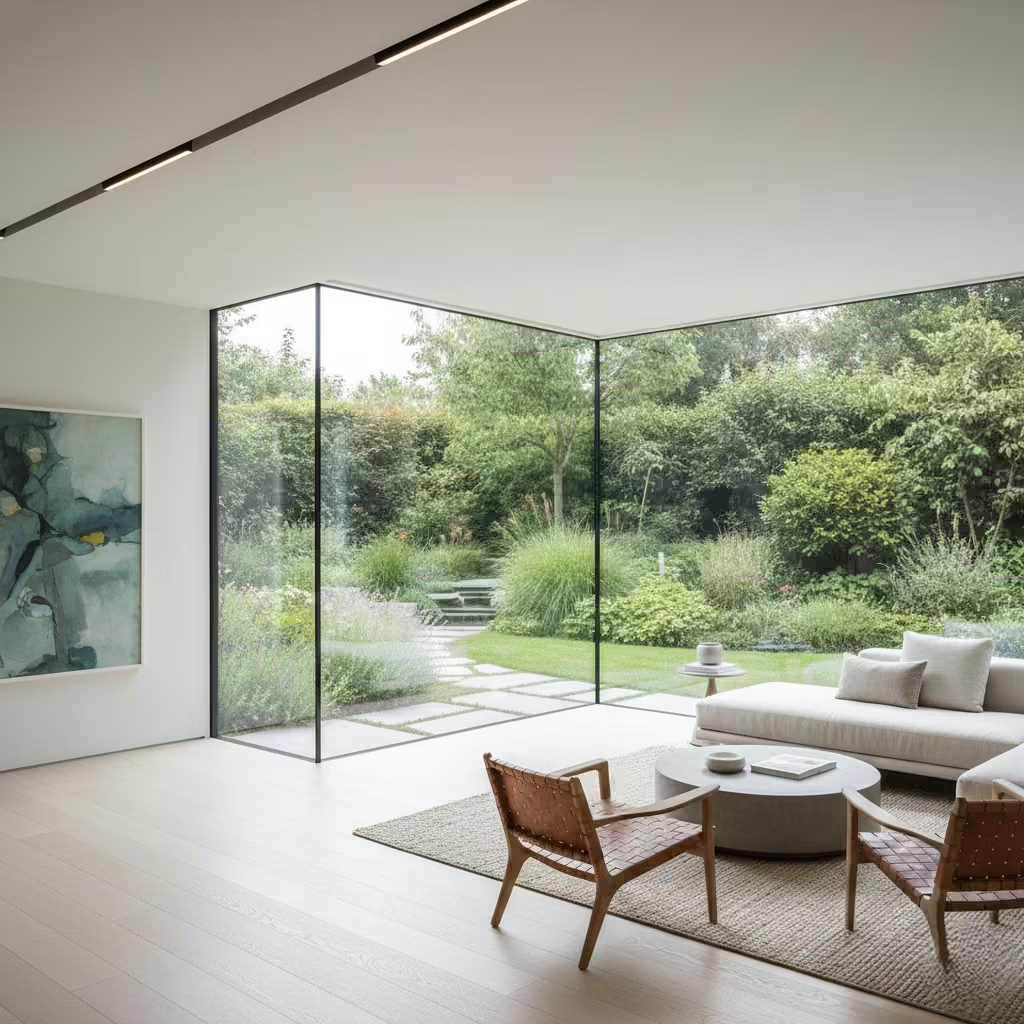
Frameless corner glazing is one of the most visually liberating techniques in contemporary residential design because it removes the structural interruption at the building’s corner, allowing the garden to read as a continuous landscape panorama. The architectural effect is subtle but profound. When the corner post disappears, the living room begins to behave more like a glazed observatory facing nature rather than a conventional enclosed chamber.
Achieving this requires structural load redistribution, as the corner column is typically responsible for supporting vertical and lateral forces. In practice, this means introducing concealed steel reinforcement within floor, ceiling, or adjacent wall zones. I always coordinate this stage with a structural engineer early in the design process.
Frameless corner glazing performs best when oriented toward open or landscaped garden views rather than privacy-constrained urban boundaries. The purpose is to amplify natural scenery, not expose interior life unnecessarily.
Real-Life Application Insight
On a modern countryside renovation, I specified corner glazing with two glass panels meeting at a 90-degree junction without a vertical mullion. The glazing height reached approximately 2.6 m (8.5 ft) from finished floor level. The property overlooked a mature garden with seasonal planting layers, and removing the corner frame allowed the living room to capture movement of light and foliage across both elevations. The psychological effect was a stronger sense of openness without enlarging the building footprint.
Practical Design Note
Use high-performance laminated or toughened glazing to maintain safety performance. Thermal break frames along adjacent wall edges are essential to reduce heat loss. Cleaning access must be considered because corner joints are harder to maintain than standard flat façades.
Pros
- Exceptional panoramic garden connection
- Creates premium architectural character
- Maximises daylight entry
Cons
- Requires structural engineering coordination
- Higher glazing and installation cost
- Cleaning and maintenance are more complex than framed systems
You May also Like: Outdoor Tiles for Floor Stylish Patio, Garden and Terrace Flooring Ideas
Timber Slatted Transition Screens
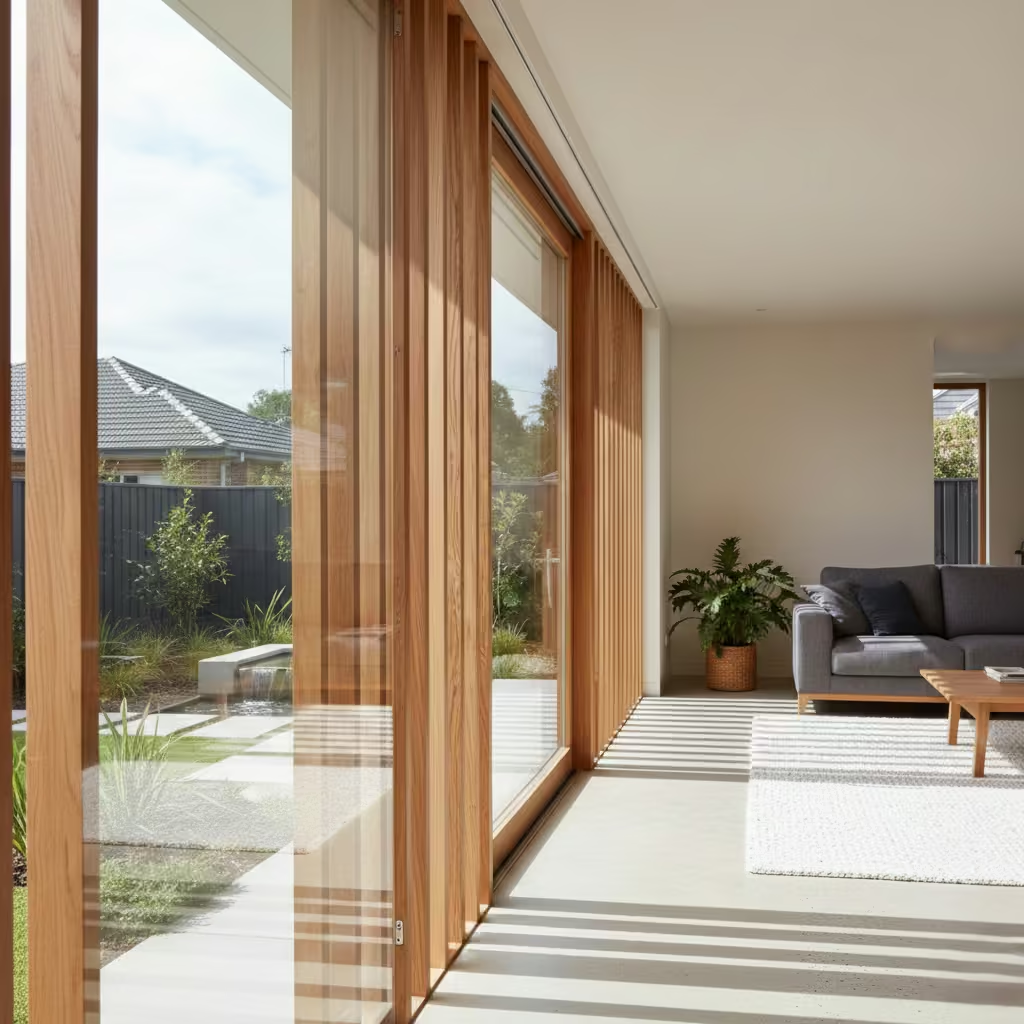
Timber slatted screens function as a soft architectural filter between interior living space and garden environment. Rather than blocking the connection, they modulate it. Light moves through the voids between slats, creating shifting shadow patterns that change throughout the day. I often use this solution where direct glazing alone would introduce glare, privacy concerns, or excessive solar gain.
For balanced performance, I recommend slat spacing between 20 mm and 40 mm (0.8 to 1.6 inches). Tighter spacing improves privacy and reduces low-angle sunlight penetration, while wider spacing enhances airflow and visual openness. The choice depends largely on site orientation and neighbouring building proximity.
Durability matters as much as appearance. Exterior timber should be treated with weather-resistant coatings or specified in naturally durable species such as thermally modified wood or naturally rot-resistant hardwoods. Vertical slat orientation generally ages more gracefully than horizontal layouts because water runoff is more efficient.
Real-Life Application Insight
On a rear garden project where the living room faced a neighbouring property at approximately 12 m (39 ft) distance, I installed a timber screen panel measuring 2.2 m high by 3.6 m wide (7.2 ft by 11.8 ft). The slats were spaced at 30 mm (1.2 inches) intervals. During afternoon hours, sunlight entered the living room in controlled ribbons rather than as harsh direct glare. The space felt private without becoming visually closed.
Practical Design Note
Fixings should be concealed to maintain visual purity. Allow for timber expansion and contraction, particularly in climates with high seasonal humidity variation. I usually specify stainless steel mounting hardware to improve longevity.
Pros
- Softens sunlight and visual exposure
- Adds natural material warmth to modern façades
- Improves airflow while maintaining privacy
Cons
- Requires periodic surface treatment maintenance
- Natural timber will weather over time
- Poor detailing can lead to moisture trapping at joints
Matching Ceiling Treatments Indoors and Out
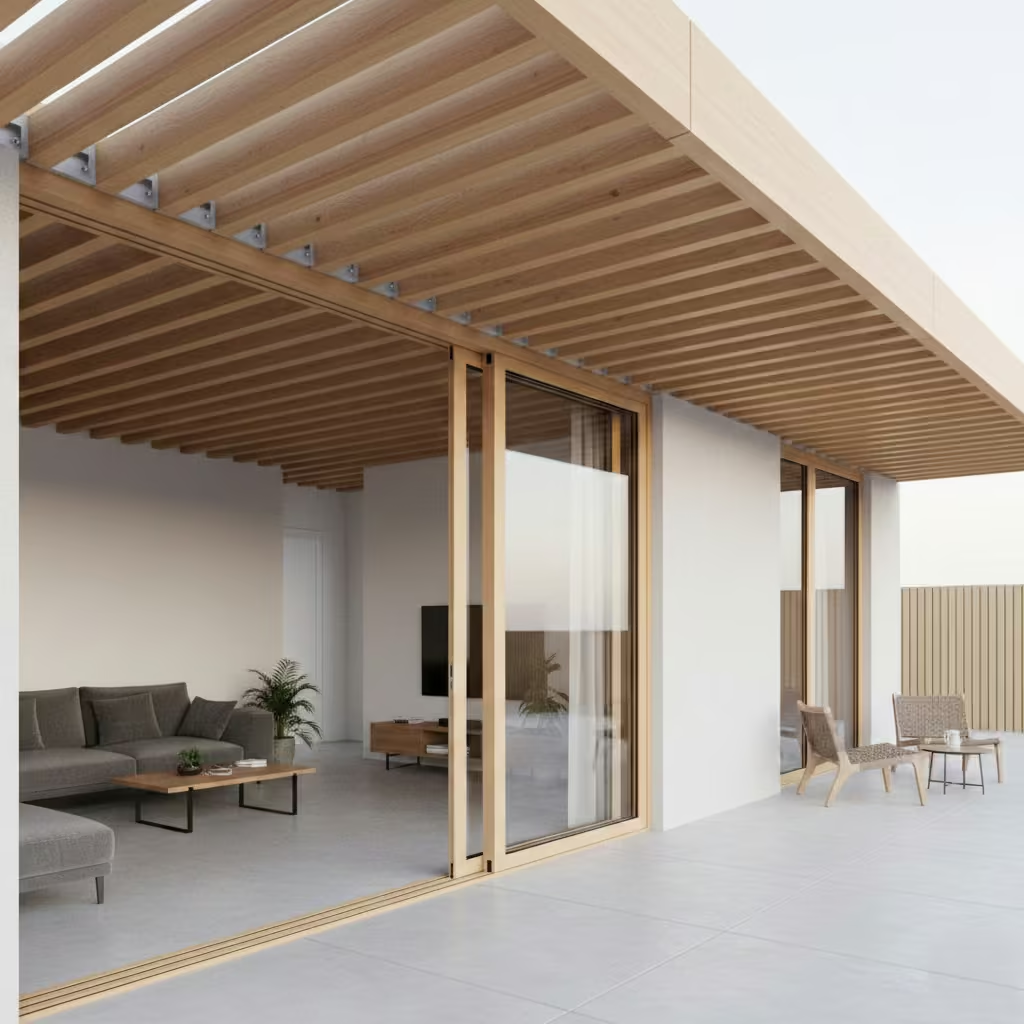
Continuity of ceiling treatment is one of the most understated yet intellectually satisfying strategies in indoor–outdoor composition. When ceiling geometry, material language, and structural rhythm align across the threshold, the architecture begins to read as a single spatial organism rather than two separate environments.
I prefer using exterior-rated timber cladding or architectural aluminium ceiling systems when pursuing this approach. Standard interior finishes deteriorate quickly under UV exposure, moisture, and temperature variation. Engineered timber treated for external performance or powder-coated aluminium slat systems provide the best balance between durability and visual refinement.
The most important design decision is beam or slat spacing alignment. If the interior ceiling features structural or decorative beam rhythms, those intervals should continue outward into the covered terrace zone. Misaligned spacing is one of the most common mistakes I observe in renovation projects because it visually fractures spatial flow.
Real-Life Application Insight
On a pavilion-style extension measuring roughly 4 m x 5 m (13 ft x 16 ft), I extended interior oak beam spacing of 900 mm (35 inches) into the covered outdoor ceiling zone using treated exterior timber members. The result was subtle but powerful. When the sliding doors were fully opened, the ceiling plane felt uninterrupted, and the lounge behaved like a single expanded room.
Practical Design Note
Thermal movement must be accounted for when specifying exterior ceiling materials. Timber components require expansion gaps and protective coatings. Aluminium systems should include concealed mounting rails to preserve clean lines.
Ceiling height should ideally remain between 2.4 m and 2.8 m (8 ft to 9.2 ft) in residential settings. Lower heights can feel compressed when transitioning from interior space, while excessively high roofs weaken intimacy.
Pros
- Creates highly sophisticated architectural continuity
- Enhances perception of spatial quality
- Supports long-term design relevance
Cons
- Requires precise construction coordination
- Exterior ceiling materials are costlier than standard interior finishes
- Installation tolerances must be carefully controlled
You May also Like: Terracotta Interior Design: 51 Warm & Stylish Ideas for Every Room
Outdoor Rugs Mirroring Interior Textures
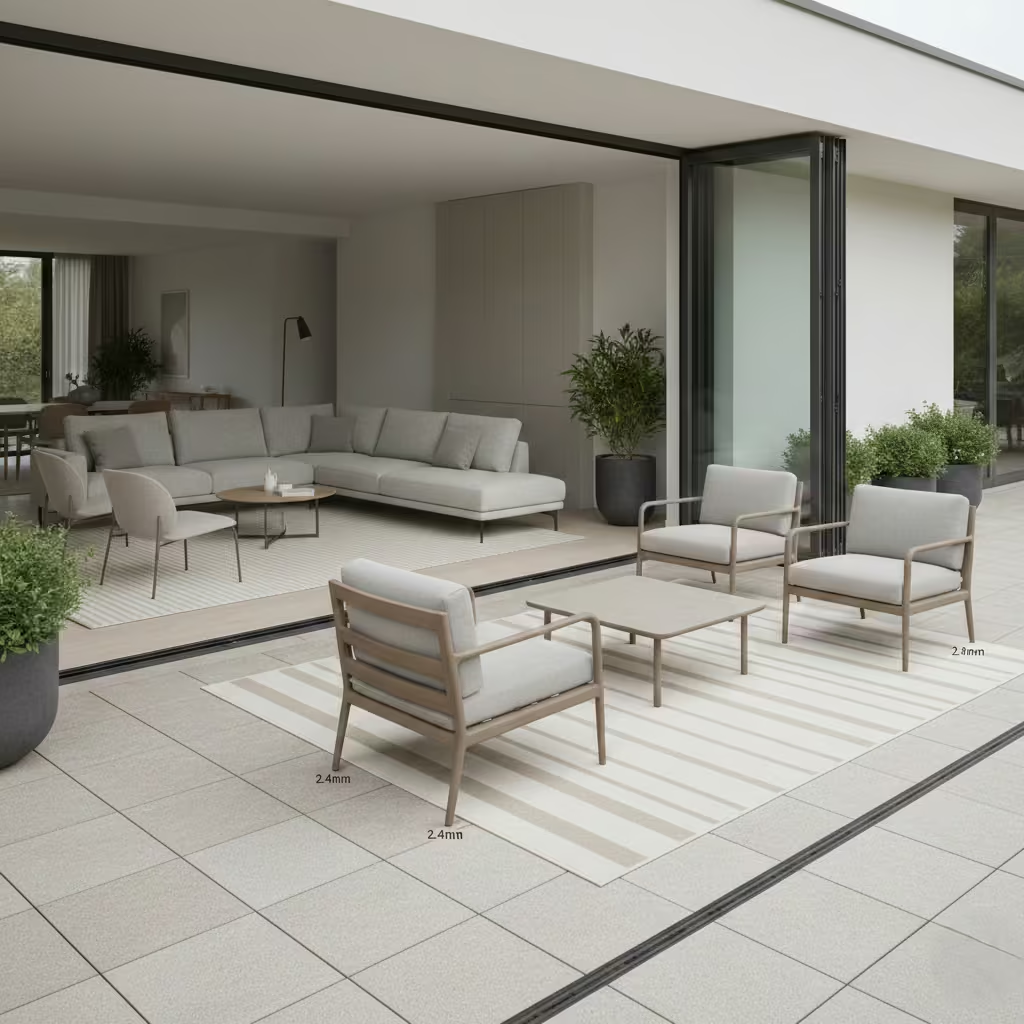
Outdoor rugs are a surprisingly powerful but often overlooked detail in indoor–outdoor composition because they anchor furniture groups and visually confirm that the terrace is an extension of the living room rather than a secondary space. I usually treat the rug as a zoning instrument. It defines the social territory of the lounge area while allowing the surrounding garden to remain visually fluid.
For durability, specify rugs made from polypropylene UV-resistant fibres. This material choice is practical because it resists fading, moisture absorption, and biological degradation better than natural fibre alternatives. The texture should echo, rather than copy, the interior rug. The goal is visual harmony, not duplication.
Pattern restraint is important. I prefer subtle geometric weave structures or low-contrast tonal gradients. Overly decorative outdoor rugs can weaken the architectural calmness of the space.
Real-Life Application Insight
On a garden extension project, I used a 2.4 m × 3 m (8 ft × 10 ft) outdoor rug placed beneath a seating group facing a sliding glass façade. The interior lounge used a wool-blend rug with a muted linear weave. The outdoor polypropylene rug carried a simplified version of that texture. When the bi-fold doors were opened, the eye perceived the interior and exterior seating as belonging to a single social zone.
The psychological effect was notable. Guests naturally moved between indoor and outdoor seating without sensing a boundary shift.
Practical Design Note
Ensure the rug sits on a well-drained surface. Moisture trapped under outdoor rugs can accelerate surface deterioration of paving joints. I recommend leaving 10–20 mm (0.4–0.8 inches) ventilation clearance beneath heavy furniture legs.
Pros
- Reinforces lounge zone identity
- Low-cost method to improve spatial continuity
- Easy seasonal replacement
Cons
- Requires UV-rated material specification
- Wind exposure may require rug anchoring
- Dirt accumulation is more visible than on hard flooring surfaces
You May also Like: 25 Blue Living Room Decor Ideas That Balance Calm, Character, and Longevity
Internal Planting Zones Near Threshold
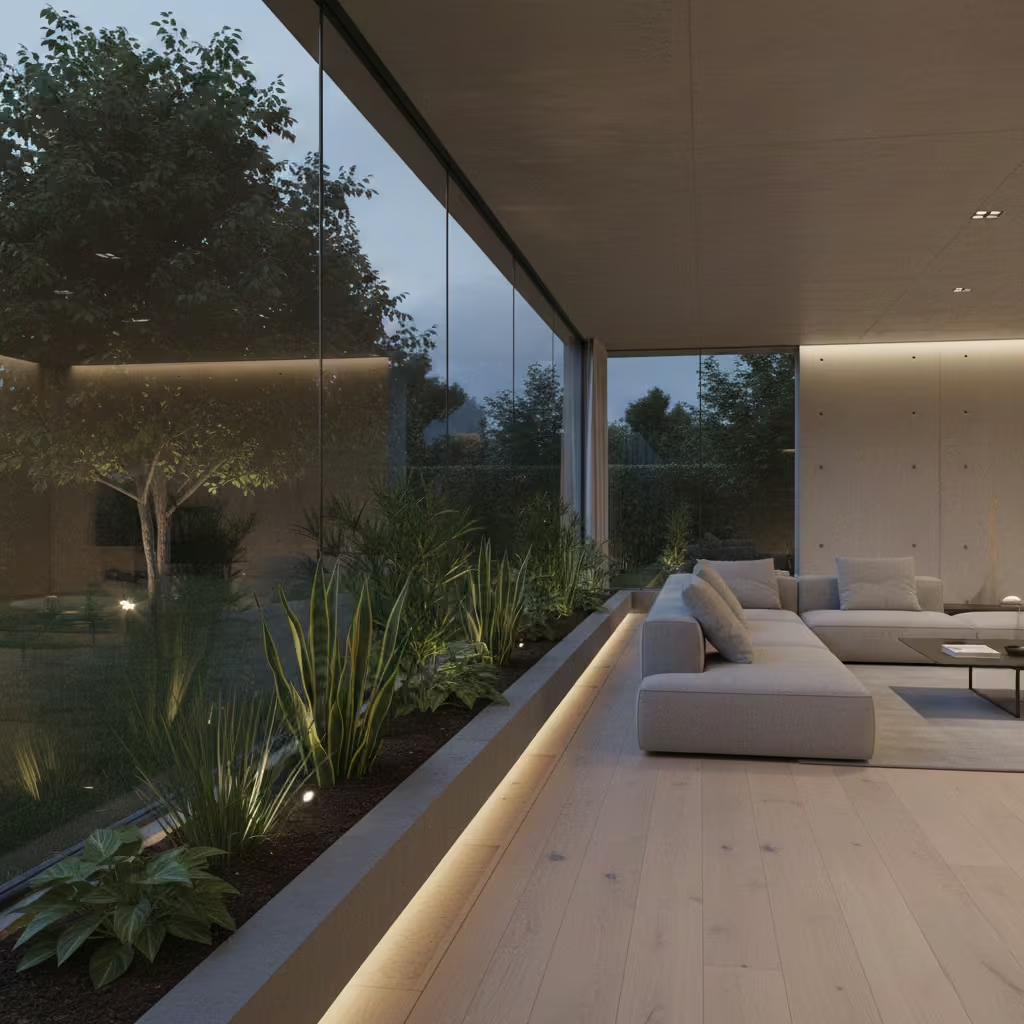
Internal planting zones positioned close to the indoor–outdoor threshold work as a biophilic mediator between architecture and landscape. Rather than placing plants as decorative afterthoughts, I use built-in planting beds to soften the edge where glazing meets terrace or garden. This subtle layer of vegetation reduces visual hardness and helps occupants transition psychologically from enclosed space to open air.
A minimum soil depth of 300 mm (12 inches) is generally required for structural planters to support resilient ornamental foliage. Depths closer to 450 mm (18 inches) are preferable if medium-sized shrubs or structural greenery are intended. Drainage must be carefully engineered with concealed outlet channels and waterproof membranes beneath the planting base.
Real-Life Application Insight
On a contemporary rear living room renovation, I installed a linear planter running along a 4 m (13 ft) glazing wall. The planter depth was 350 mm (14 inches) with low-maintenance evergreen grasses. The planting strip sat approximately 250 mm (10 inches) away from the glass surface to prevent moisture staining and allow cleaning access.
Over time, the client reported that the room felt more grounded and less visually exposed to the garden boundary. The plants acted as a natural foreground layer, particularly during evening lighting when exterior shadows softened the interior atmosphere.
Practical Design Note
I usually specify irrigation drip lines hidden within the planter substrate. Root barrier membranes are essential to protect structural walls. Plant selection should favour species with controlled growth habits and tolerance to microclimatic variation near glazing.
Avoid dense foliage directly against glass panels because condensation and leaf contact can accelerate seal degradation.
Pros
- Improves indoor air quality perception
- Creates natural visual transition zone
- Enhances architectural softness
Cons
- Requires maintenance and watering system planning
- Poor waterproofing detailing can cause long-term damage
- Plant selection must match microclimate conditions
Level Threshold Detailing
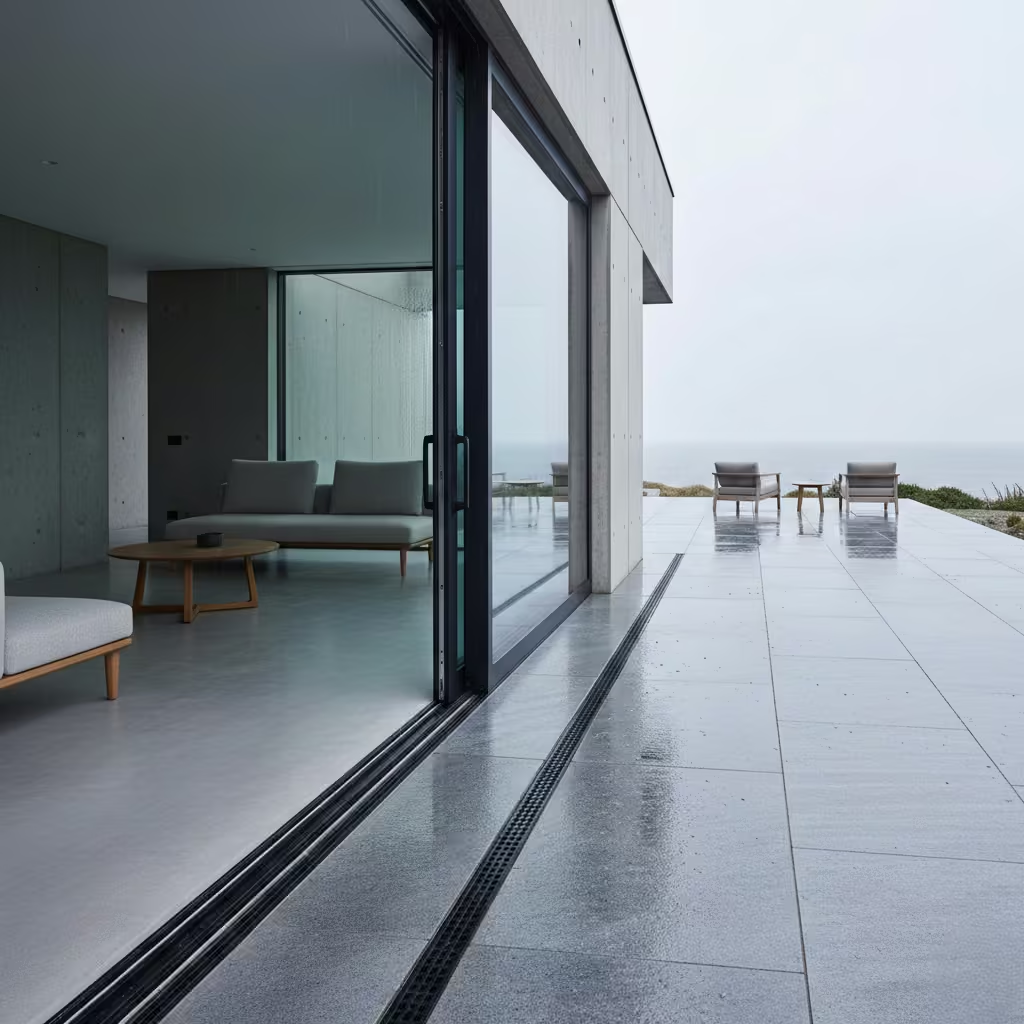
Level threshold detailing is essential when pursuing true indoor–outdoor continuity because it allows movement between interior and exterior spaces without visual or physical interruption. The challenge lies in achieving architectural flatness while still managing water, wind-driven rain, and debris accumulation. I treat this detail as a performance junction rather than a purely aesthetic decision.
In regions with frequent rainfall, such as the UK, concealed drainage becomes non-negotiable. I typically specify a hidden linear drainage channel positioned immediately outside the glazing line. The channel should maintain a minimum fall gradient of 1:40 to ensure water does not pool at the threshold during heavy rainfall events.
The finished level difference between interior flooring and external paving is often kept within 10 mm to 15 mm (0.4 to 0.6 inches). This tolerance supports accessibility while allowing subtle technical allowance for waterproofing layers beneath the external surface.
Real-Life Application Insight
On a garden extension project in a rain-exposed coastal location, I worked with the contractor to install a recessed aluminium drainage tray concealed beneath stone paving slabs. The terrace surface was built slightly lower than the interior floor by approximately 12 mm (0.5 inches). During heavy weather, surface water flowed naturally into the channel rather than crossing into the living room.
The key lesson from this project was that perfect visual levelness must be balanced against controlled hydraulic behaviour.
Practical Design Note
Glazing systems should include factory-sealed threshold gaskets. I avoid relying solely on surface sealant because it degrades faster under UV exposure and foot traffic.
Structural screed preparation is critical. Uneven substrate compaction is one of the most common causes of future threshold movement.
Pros
- Creates elegant, uninterrupted spatial transition
- Improves accessibility and aesthetic quality
- Supports modern minimalist architectural language
Cons
- Requires precise construction execution
- Poor drainage design can lead to water ingress
- Slightly higher installation complexity and cost
Statement Lighting That Extends Outdoors
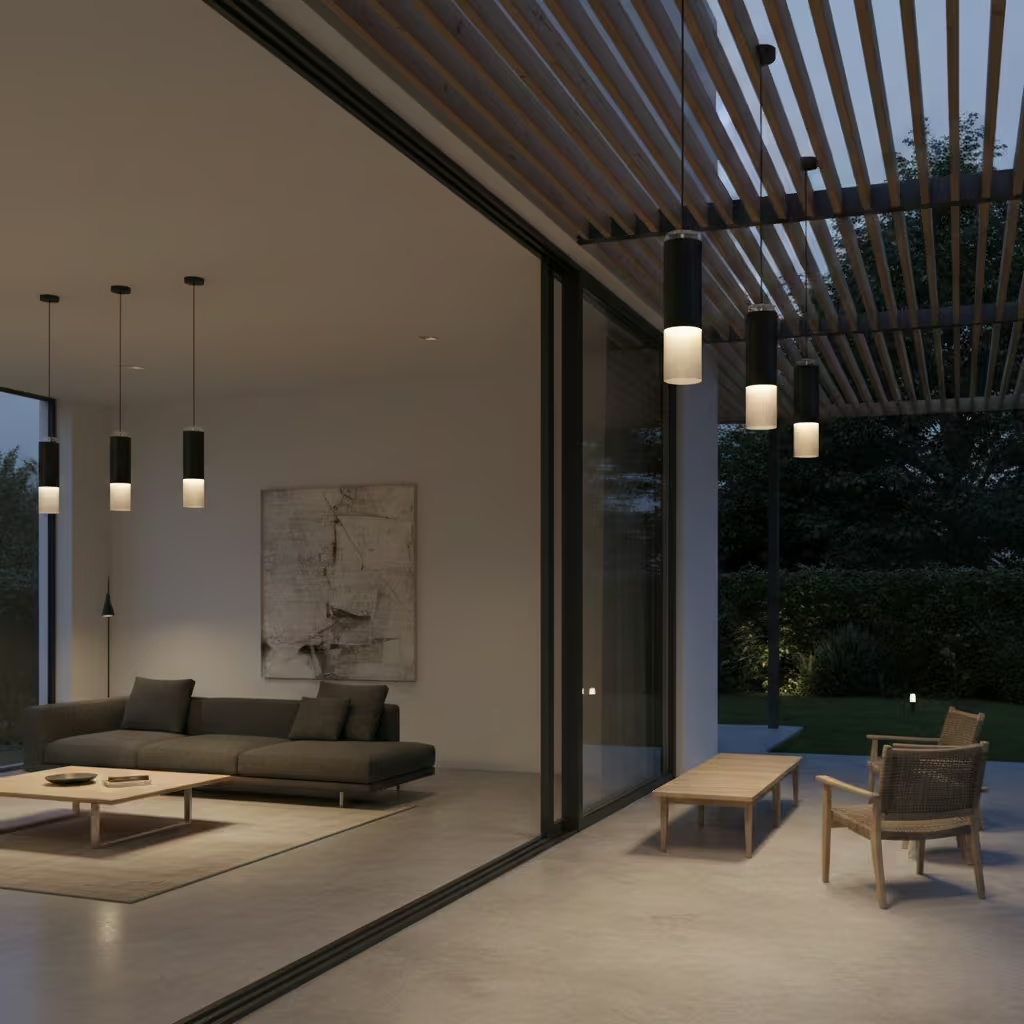
Lighting continuity is as important as material continuity in indoor–outdoor living because it shapes how the space is experienced after sunset. I often treat lighting as an invisible architectural material that guides movement, frames surfaces, and preserves the emotional temperature of the room when natural daylight fades.
For outdoor use, fixtures should carry at least an IP65 protection rating, ensuring resistance to dust ingress and rain exposure. In coastal or high-moisture environments, I sometimes recommend higher protection ratings to extend fixture lifespan. The colour temperature is equally significant. A warm 2700K light output preserves a residential, comfortable atmosphere and avoids the clinical feeling associated with cooler lighting.
The design objective is not brightness but atmosphere. Statement lighting should reinforce architectural form without overwhelming the landscape. Linear wall washers, suspended terrace pendants, or sculptural exterior ceiling fixtures are often used where the indoor living room lighting language continues through the glazing boundary.
Real-Life Application Insight
On a covered garden lounge project measuring roughly 3.5 m × 4 m (11.5 ft × 13 ft), I installed matching pendant-style lighting both inside and under the outdoor roof structure. The fixtures were positioned about 2.4 m (8 ft) above finished floor level.
When the sliding doors were opened, the interior and exterior lighting behaved as a single visual system. The garden seating zone no longer felt detached at night; instead, it functioned as an extension of the living room atmosphere.
Practical Design Note
Cable routing should be concealed within ceiling voids or structural beams. Exterior fixtures must be specified with UV-stable finishes. I avoid placing strong downlight sources directly facing glazing because reflection glare can disrupt interior comfort.
Pros
- Maintains architectural coherence after dark
- Improves safety and wayfinding
- Enhances evening entertainment atmosphere
Cons
- Professional electrical installation required
- Higher specification fixtures increase project cost
- Poor placement can cause interior reflection glare
Indoor Furniture That Can Visually “Float” Toward Garden
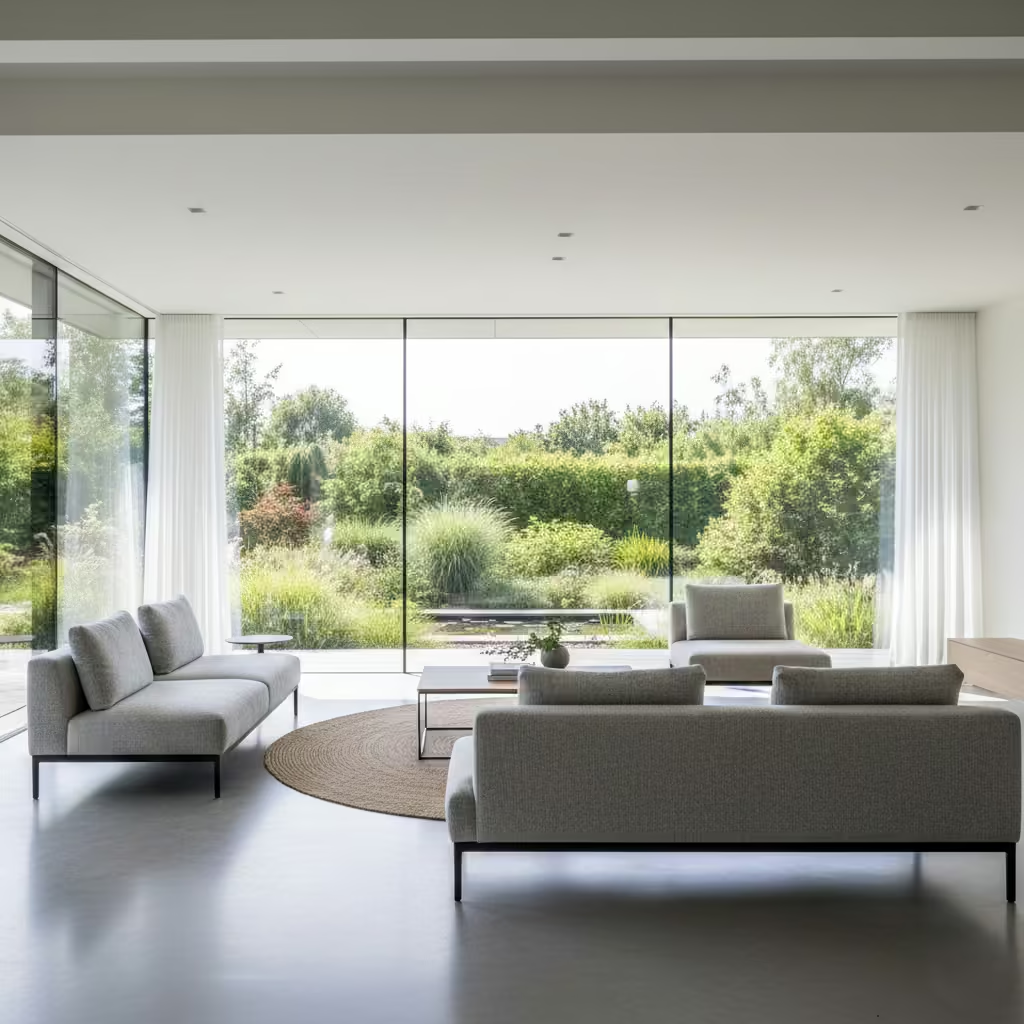
Furniture positioning plays a surprisingly decisive role in whether indoor–outdoor architecture feels unified or fragmented. In my projects, I treat seating layout as part of the spatial circulation strategy rather than as isolated decoration. To preserve visual connection to the garden, I usually avoid placing furniture with high, solid backrests directly against glazing walls, as this creates a barrier effect that weakens the landscape view.
Low-profile furniture performs best in these settings. Keeping sofa back heights below approximately 850 mm (33.5 inches) allows the eye to travel above the seating line toward the garden horizon. The objective is to make the furniture appear to rest lightly within the space, almost as if it could move toward the exterior rather than anchor the room to the interior wall.
I often select sofas with slim armrests and tapered bases. Legged furniture that lifts the main body 150 mm to 200 mm (6 to 8 inches) above the floor helps maintain visual airiness and supports light reflection across the floor plane.
Real-Life Application Insight
On a contemporary rear living room renovation with a 4.8 m (15.7 ft) sliding glass façade, I positioned a modular sofa approximately 1.2 m (4 ft) away from the glazing line rather than directly against it. This allowed a circulation path behind the seating and preserved a continuous visual corridor toward the garden. The room felt deeper even though the physical dimensions were unchanged.
Practical Design Note
Choose upholstery colours with low contrast against flooring and wall finishes. Overly dark or bulky furniture masses tend to collapse spatial perception when placed near large glazing surfaces. I also avoid heavy solid timber backs facing windows because they absorb rather than reflect light.
Pros
- Enhances spatial depth perception
- Maintains garden visibility from seated positions
- Supports modern minimalist interior rhythm
Cons
- Requires careful furniture selection
- Smaller households may need alternative layout planning
- Low furniture may feel less formal in traditional interiorsTop of Form
You May also Like: 25 Small Balcony Decor Ideas for Summer 2026 Stylish Outdoor Inspiration
Pivot Doors for Dramatic Garden Entry
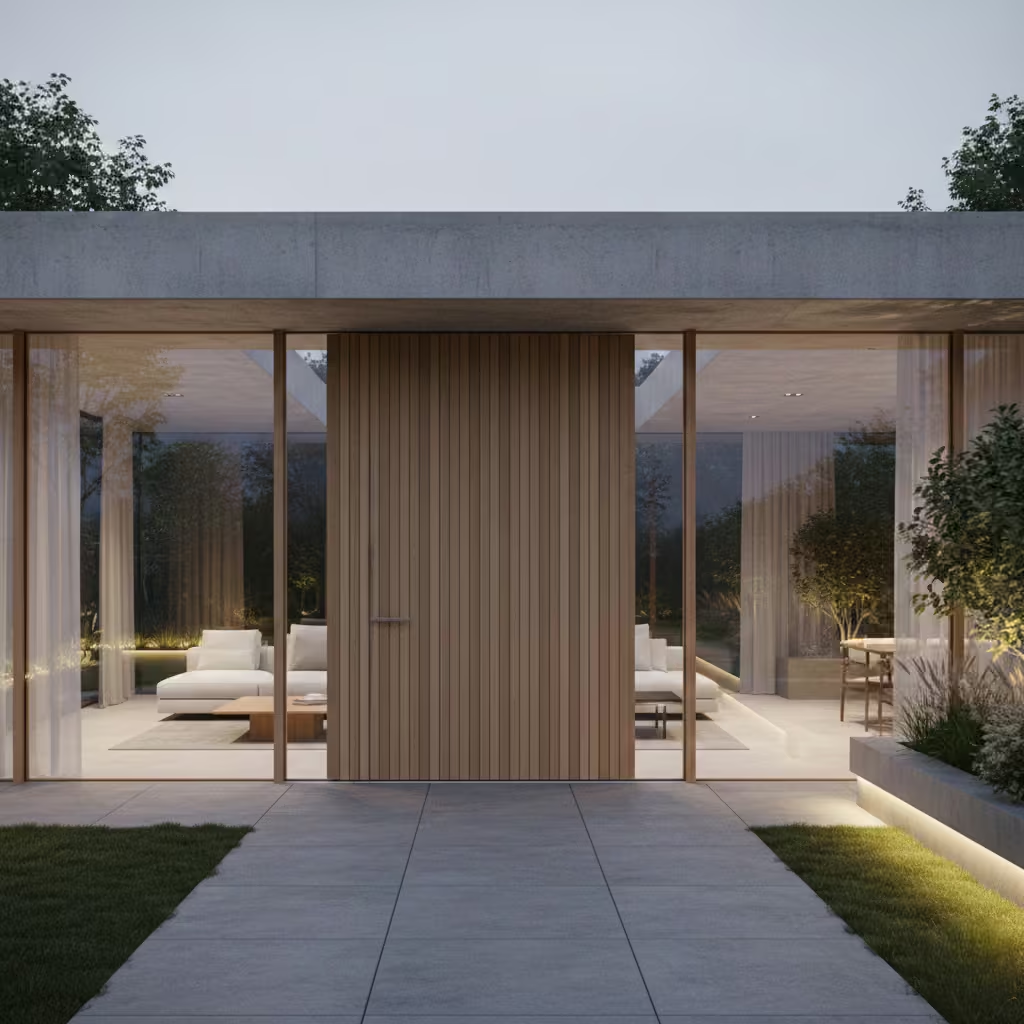
Pivot doors introduce a sculptural quality to indoor–outdoor transition because the rotation occurs around a central or offset vertical axis rather than along a track. I use pivot systems when the entrance is intended to feel ceremonial and spatially confident rather than mechanically functional. The movement itself becomes part of the architectural experience.
In residential settings, pivot doors perform best at approximately 1.2 m (4 ft) width. Wider panels can become heavy and difficult to operate unless high-quality hinge engineering is specified. Door thickness and internal reinforcement are important because the weight is transferred to the pivot mechanism rather than distributed across a frame.
Structural preparation is essential. The opening must incorporate reinforced lintel support and load redistribution detailing. I always involve structural engineers early because pivot doors concentrate stress at two mechanical points: the top pivot bearing and the floor pivot shoe.
Real-Life Application Insight
On a modern garden-facing extension, I installed a timber-clad pivot door measuring 1.2 m × 2.4 m (4 ft × 8 ft). The door was positioned slightly off-centre along the façade to create a subtle ceremonial entry experience when moving from living room to terrace. The client particularly appreciated the quiet, smooth rotation of the door, which made evening garden access feel deliberate and refined.
Practical Design Note
Floor pivot hardware should be rated for the full door weight plus safety margin. I prefer concealed floor closers to maintain clean aesthetic lines. External exposure requires corrosion-resistant hinge assemblies, especially in humid or coastal environments.
Thermal sealing around pivot doors must be carefully specified because traditional perimeter compression seals are less effective than those used in sliding systems.
Pros
- Strong architectural statement
- Smooth, elegant opening motion
- Works well as focal transition element
Cons
- Requires precise structural and mechanical installation
- Higher hardware cost compared to standard doors
- Less flexible than multi-panel sliding systems
You May also Like: 52 Beautiful Fall Exterior Decor Ideas to Make Your Home Cozy & Welcoming
Indoor–Outdoor Bar Counter Connection
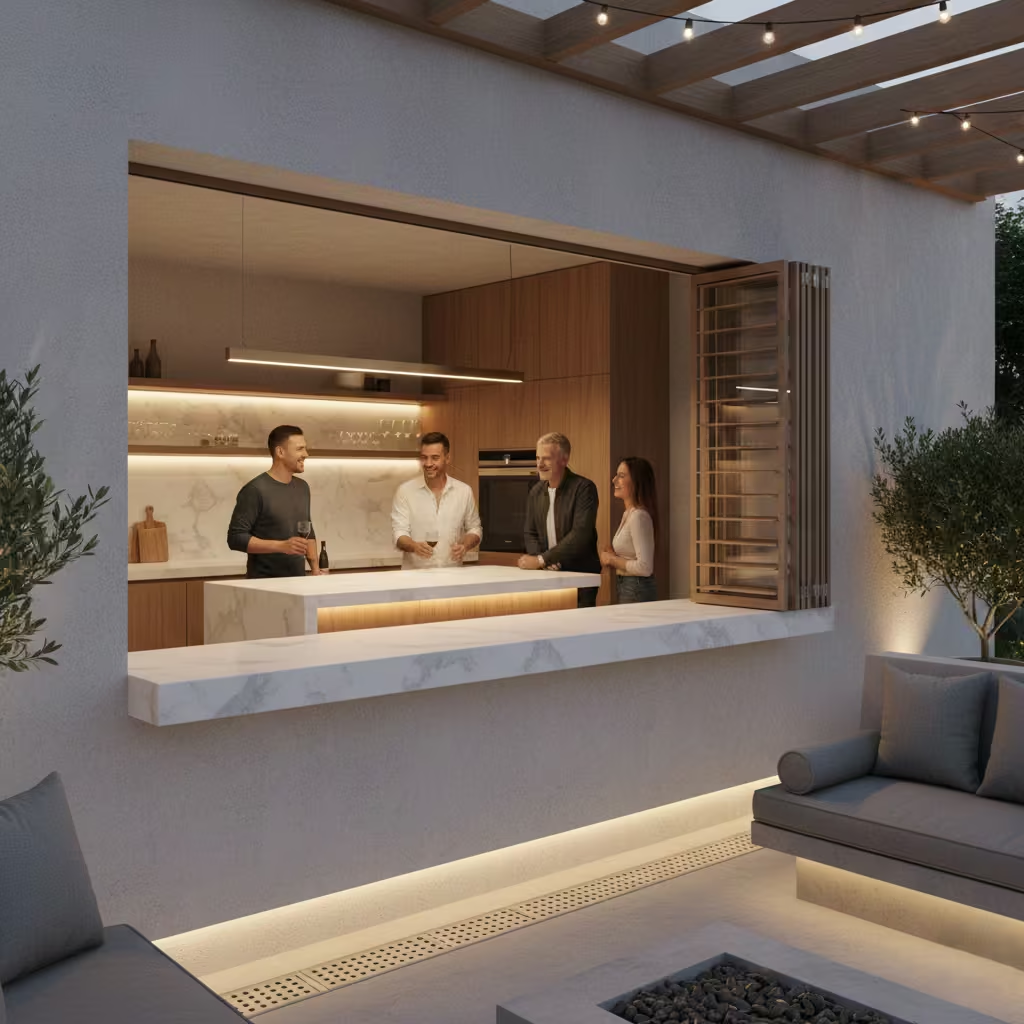
The indoor–outdoor bar counter is a particularly elegant device for social living because it supports interaction without forcing full spatial convergence. I often design this feature as a service interface rather than a dominant architectural element. The goal is to allow drinks, food, and conversation to flow naturally between the kitchen and terrace zones.
A practical pass-through serving window is typically set at a counter height of approximately 1.05 m (41 inches), which aligns closely with standard bar counter ergonomics. This dimension allows standing users on either side of the threshold to exchange items comfortably without excessive bending or lifting.
The width of the opening should generally fall between 900 mm and 1.5 m (3 ft to 5 ft) depending on structural feasibility and intended usage intensity. Wider openings enhance social accessibility but require stronger lintel reinforcement.
Real-Life Application Insight
On a garden entertainment project, I installed a pass-through bar window aligned with a 2.6 m (8.5 ft) outdoor dining counter. The interior kitchen island edge was visually aligned with the exterior serving surface. During gatherings, the homeowners could prepare food indoors while guests remained seated in the terrace lounge zone. The architectural effect was subtle but highly functional.
Practical Design Note
I strongly recommend installing a weather-sealed foldable shutter or sliding panel system to close the opening during rain or winter periods. Drainage detailing beneath the counter is essential to prevent water accumulation.
Service utilities such as lighting circuits or refrigeration lines should be routed through protected wall cavities rather than exposed conduits.
Pros
- Supports social entertaining lifestyle
- Reduces movement between kitchen and garden
- Maintains visual and functional continuity
Cons
- Requires structural opening planning
- Weather protection mechanism needed
- Construction coordination with kitchen layout is essential
Green Roof Visible from Living Room
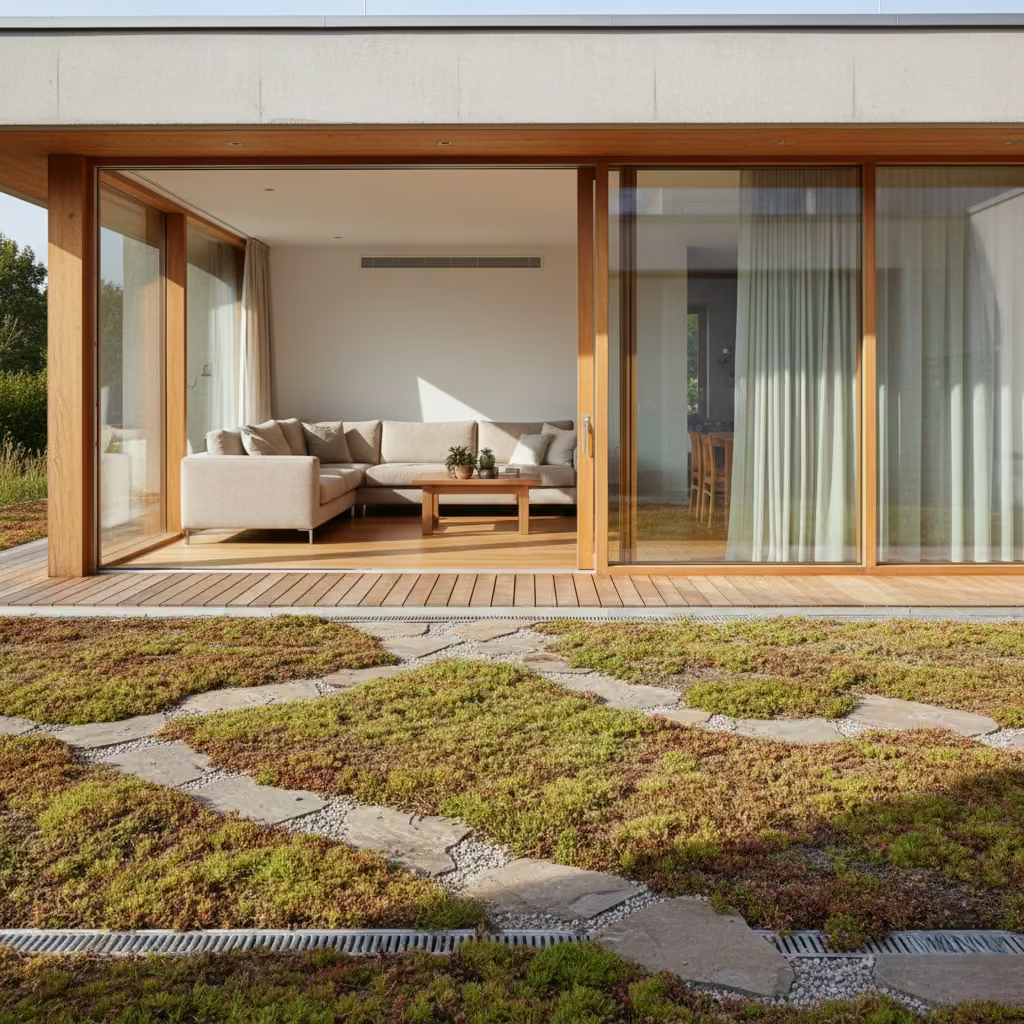
A green roof functions as both a landscape feature and a passive environmental modifier. When positioned so it is visible from the living room, it transforms the roof plane into a living extension of the garden rather than a purely structural cover. I often use this strategy in contemporary single-storey or extension projects where the roofscape itself becomes part of the interior view composition.
Before installation, a structural load assessment is essential because vegetated roof systems add significant weight. Typical extensive green roof assemblies can add approximately 60 kg to 150 kg per square metre (12 to 30 lb per sq ft) depending on substrate depth, saturation level, and planting density. Older buildings may require reinforcement of joists, steel beams, or load-bearing wall sections.
Beyond aesthetics, green roofs offer functional environmental performance. The vegetation layer improves thermal regulation by reducing summer heat gain and providing additional insulation during colder months. In projects where glazing spans are extensive, this passive buffering effect becomes particularly valuable.
Real-Life Application Insight
On a modern rear extension project, I designed a low-pitch roof with sedum planting visible through a double-height living room window measuring about 5 m (16 ft) wide. The roof depth was built up with a lightweight drainage layer, root barrier membrane, and shallow planting substrate. During summer, the green roof reduced internal temperature fluctuations noticeably without relying heavily on mechanical cooling.
Practical Design Note
Drainage is critical. Water must flow toward concealed outlets with a minimum fall of 1:40. I usually specify drought-tolerant species such as sedum varieties because they require minimal maintenance and survive seasonal climate variation.
Pros
- Enhances thermal performance of the building
- Provides natural visual connection to landscape
- Extends architectural lifespan of roof membrane
Cons
- Requires professional structural and waterproofing design
- Maintenance access must be planned
- Initial construction cost is higher than conventional roofing
Sliding Timber Screens for Seasonal Adaptation
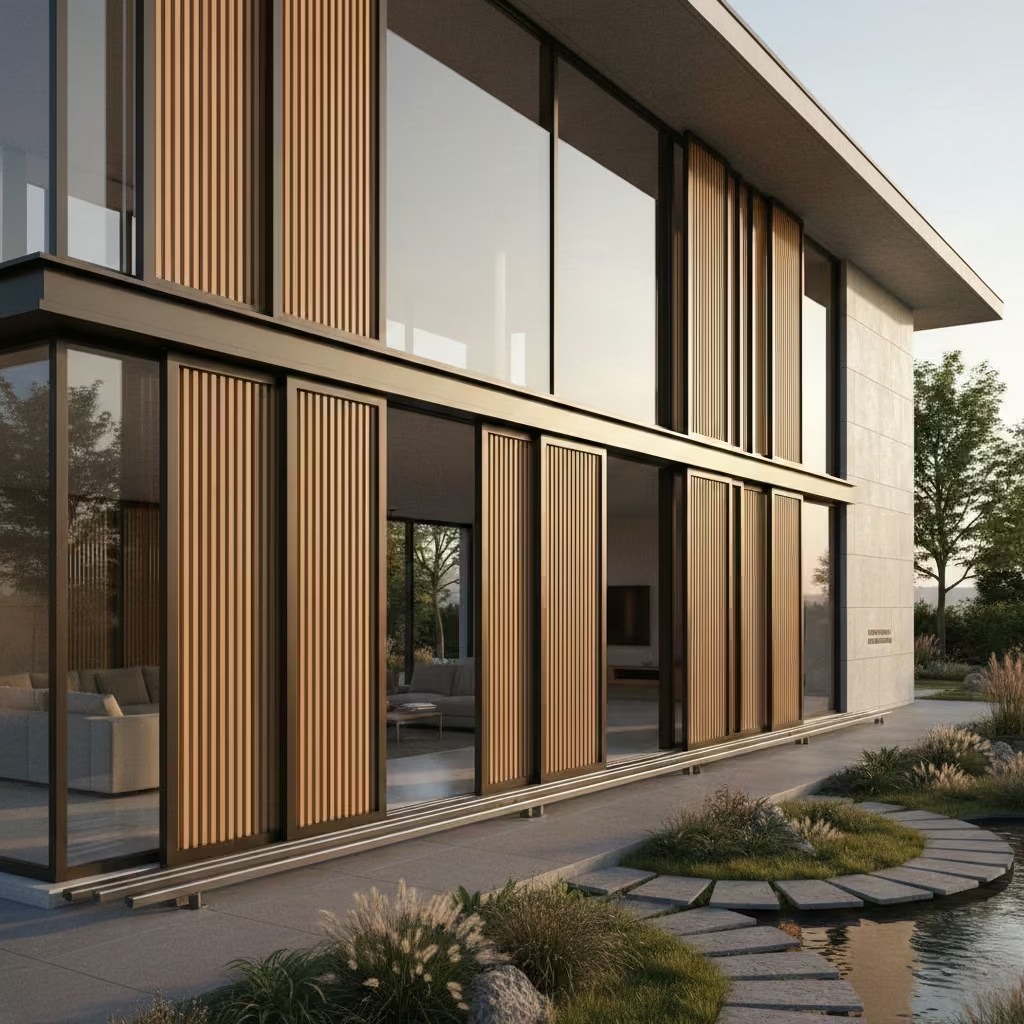
Sliding timber screens are a refined environmental control device that allows the architecture to respond gently to seasonal light, heat, and privacy conditions. I often specify them for south-facing façades, where solar exposure is strongest and where shading flexibility can significantly improve living comfort without sacrificing garden connection.
The beauty of sliding timber screens lies in their behavioural adaptability. During summer months, the panels can be positioned to reduce direct sunlight penetration and glare, while in winter they can be opened to allow low-angle sunlight to warm interior surfaces. The screen itself becomes a dynamic layer between structure and climate rather than a fixed barrier.
Exterior timber should be chosen carefully. I prefer thermally modified wood, cedar, or other naturally durable species with protective coating systems. Panel thickness and frame rigidity must be sufficient to prevent warping under temperature and humidity variation.
Real-Life Application Insight
On a contemporary rear elevation project facing a southern garden exposure, I installed sliding timber screen panels approximately 2.1 m high and 1.8 m wide (7 ft × 6 ft). The slats were spaced at 30 mm (1.2 inches) intervals to balance airflow, privacy, and daylight filtration.
During summer afternoons, the screens were partially closed, producing a soft striped shadow effect across the living room floor. In winter, the panels were fully retracted to maximise daylight gain. The homeowner reported improved comfort without relying heavily on blinds or mechanical cooling.
Practical Design Note
The track system must be engineered for smooth seasonal movement because outdoor dust and moisture can affect performance. I recommend stainless steel or anodised aluminium hardware for longevity.
Allow clearance for timber expansion, particularly in climates with high humidity variation.
Pros
- Excellent passive solar control
- Maintains architectural warmth of natural materials
- Supports seasonal living behaviour
Cons
- Requires periodic surface maintenance
- Mechanical sliding system needs cleaning
- Wood ageing must be monitored over time
You May also Like: 15 Stylish Modern Afrobohemian Living Room Ideas for a Cozy, Chic Home
Outdoor Ceiling Heaters Integrated Invisibly
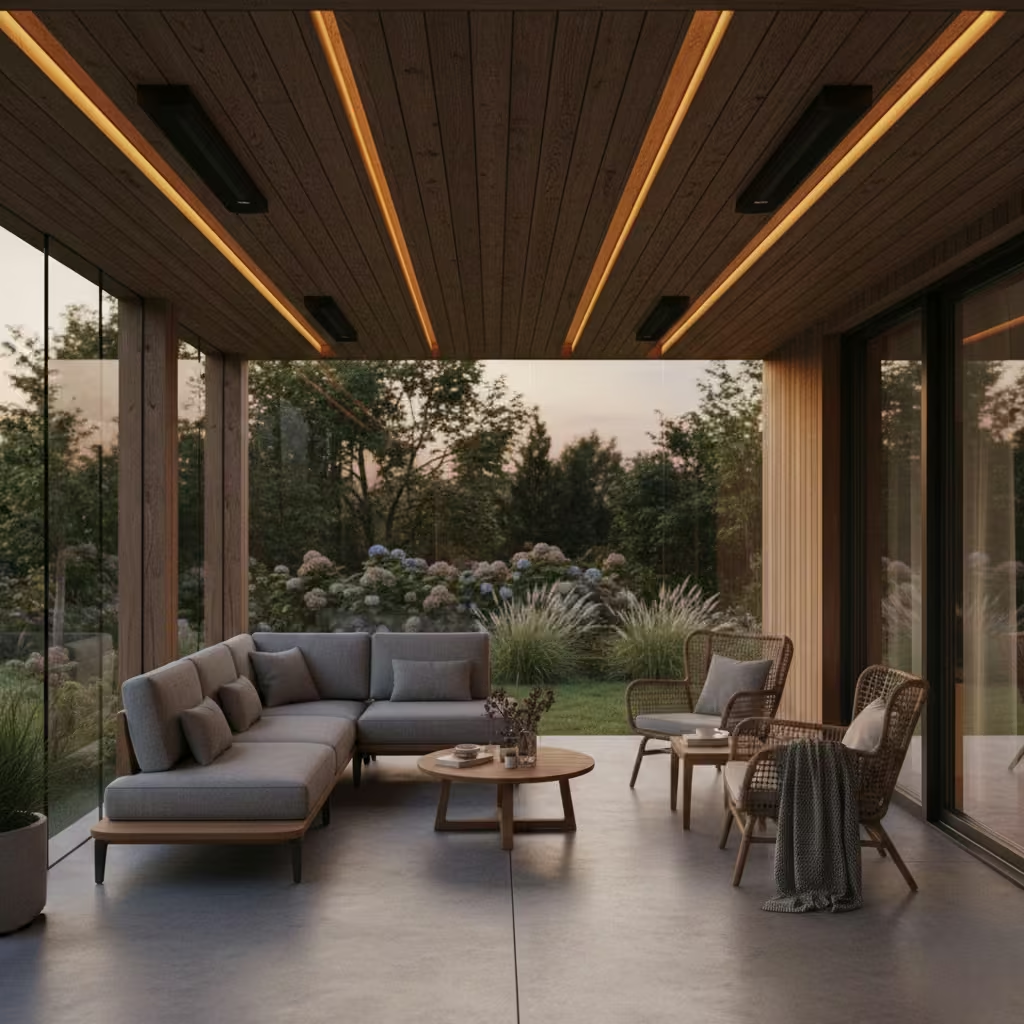
Outdoor ceiling heating should enhance comfort without becoming visually dominant. I approach this as environmental support architecture rather than mechanical installation. The heater’s presence should be felt, not seen, allowing the garden lounge atmosphere to remain calm and refined after sunset.
Infrared radiant heaters are commonly specified because they warm people and surfaces directly rather than heating surrounding air. This improves energy efficiency in semi-open environments. For residential terrace lounges, mounting the heater approximately 2.4 m (8 ft) above finished floor level usually provides the best balance between thermal spread and safety clearance.
Integration is important. I often conceal heating units within ceiling recesses, timber beam voids, or aluminium slatted ceiling systems so the technical equipment does not interrupt architectural continuity. The objective is to preserve the purity of the ceiling plane while delivering functional warmth.
Real-Life Application Insight
On a covered outdoor dining lounge measuring roughly 3.5 m × 4 m (11.5 ft × 13 ft), I installed two infrared ceiling heaters aligned with seating zones rather than centreline geometry. This placement ensured thermal comfort where people actually sat rather than where symmetry suggested the heaters should be.
During spring and autumn evenings, the terrace remained usable even when ambient temperatures dropped. The family extended outdoor dining behaviour by several months without installing enclosed walls.
Practical Design Note
Heaters must be specified with appropriate ingress protection, typically IPX4 or higher for sheltered outdoor zones. Electrical wiring should be routed through protected ceiling cavities with dedicated circuit breakers.
Avoid placing heaters directly facing glazing surfaces because reflected infrared radiation can cause discomfort inside the living room.
Pros
- Extends outdoor usability into cooler seasons
- Preserves clean architectural appearance
- Provides focused comfort heating
Cons
- Requires professional electrical installation
- Running energy cost depends on usage duration
- Incorrect placement can create uneven warmth distribution
You May also Like: What an English Country Entrance Is Actually Trying to Do
Indoor–Outdoor Colour Palette Continuity
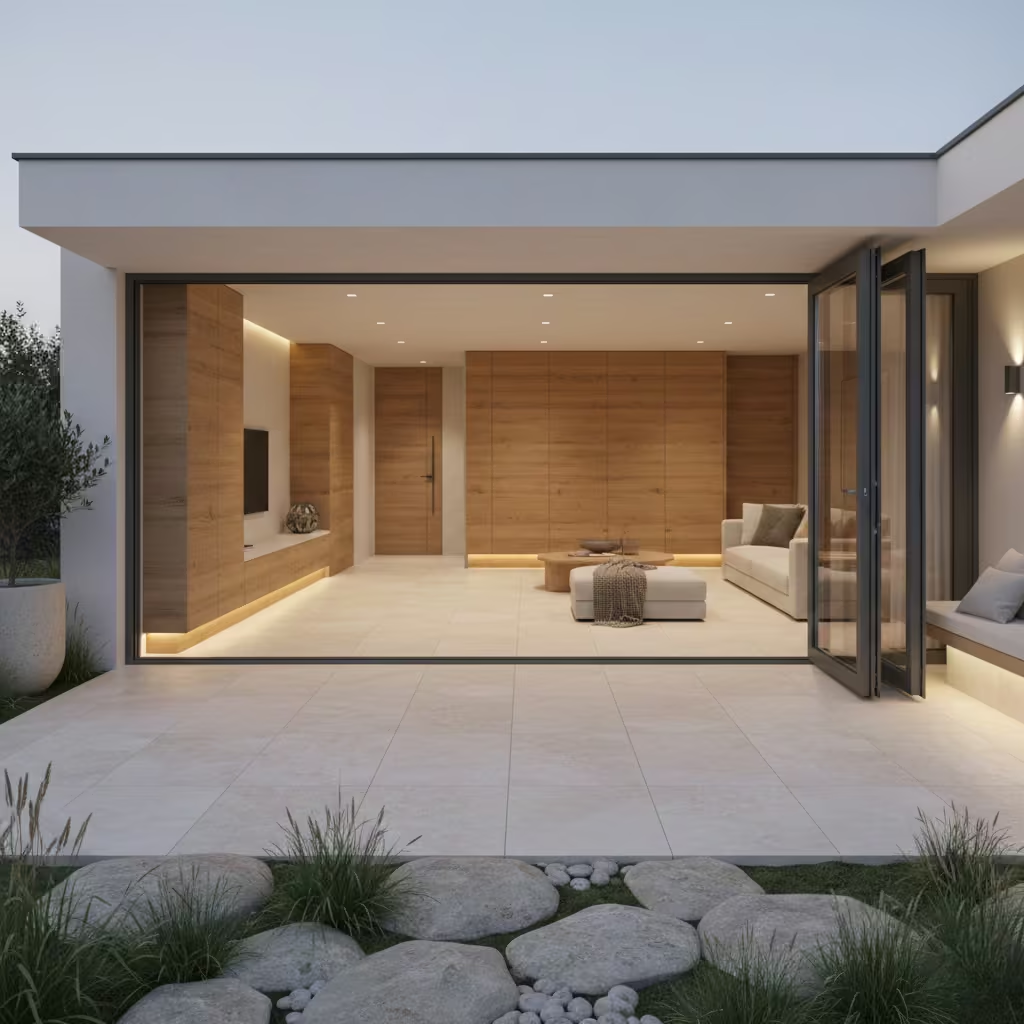
Colour and material continuity is the quiet architecture that makes indoor–outdoor living feel intentional rather than assembled. I approach palette planning as a compositional discipline rather than decoration. When interior and exterior surfaces share a controlled material language, the threshold disappears psychologically even if it remains structurally present.
In practice, I recommend limiting the scheme to 3 to 5 core materials across the living room and garden lounge zone. This restraint prevents visual noise and allows natural light, shadow movement, and landscape colour to become the dominant living elements. Neutral architectural tones generally age better than highly saturated finishes.
Avoiding high-contrast threshold breaks is particularly important. For example, transitioning from dark interior flooring directly to bright exterior paving often creates a perceptual “stop line” that weakens spatial flow. Instead, I favour closely related tonal families. If the interior uses warm stone or timber, the exterior should echo that materiality in weather-rated form.
Real-Life Application Insight
On a modern extension project, I used three primary materials across both zones: light limestone porcelain flooring, natural oak interior joinery, and matte anthracite aluminium framing. The same floor tone continued through the sliding glass boundary into the terrace using 20 mm exterior-rated slabs.
When the bi-fold doors were opened, the room read as a single spatial volume rather than two separate environments. Evening lighting further softened material transitions by washing surfaces with warm 2700K illumination.
Practical Design Note
Consistency does not mean uniformity. Subtle texture variation is desirable because it adds depth without breaking visual rhythm. I avoid mixing more than two strong grain directions in a single sightline.
Material durability must guide colour selection. Exterior finishes should be UV-stable and moisture-resistant.
Pros
- Creates sophisticated architectural calmness
- Strengthens spatial continuity
- Supports long-term design relevance
Cons
- Requires careful material sourcing
- Limited colour contrast may not suit all stylistic preferences
- Poor execution can appear monotonous rather than elegantTop of Form
What Makes Indoor–Outdoor Living Actually Work
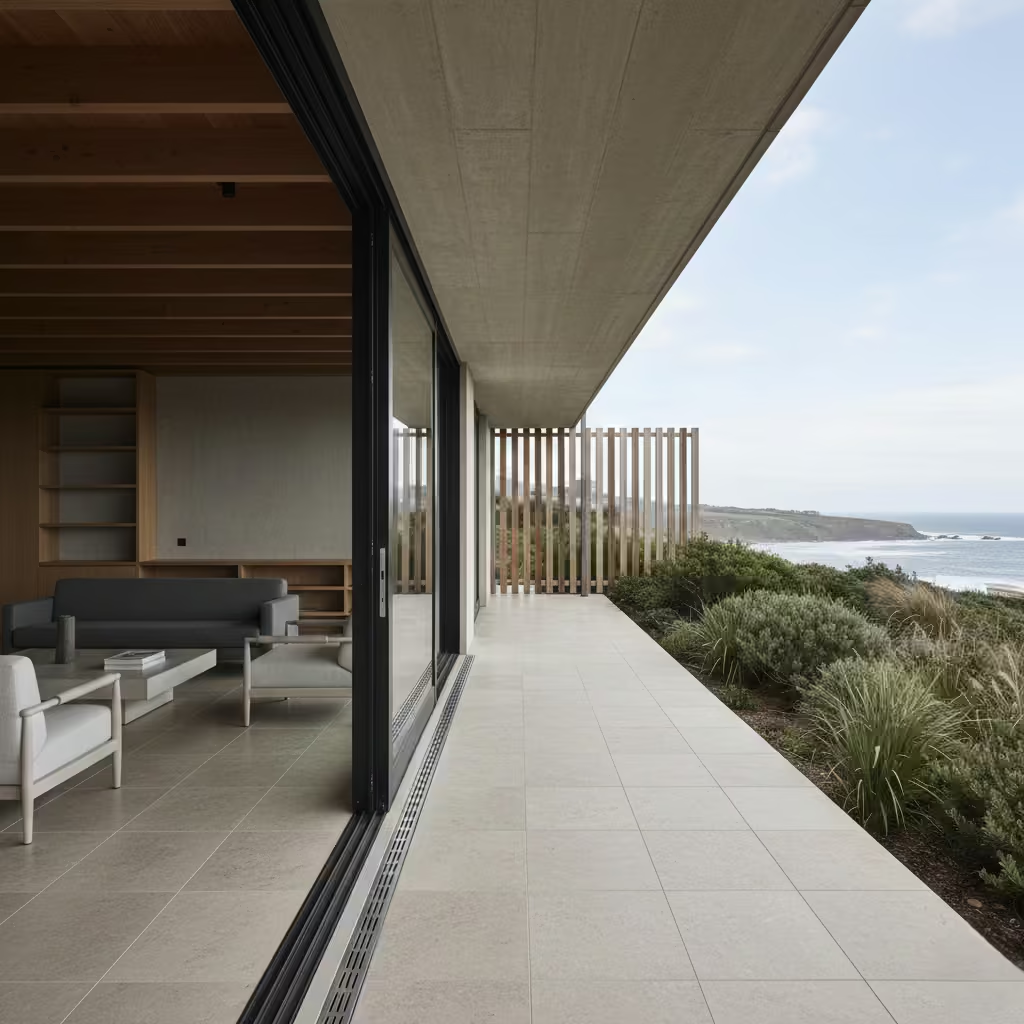
In practice, successful indoor–outdoor living is defined less by visual design and more by environmental control, construction accuracy, and long-term usability. I have seen many beautiful schemes fail because they were treated as aesthetic exercises rather than integrated architectural systems. The spaces that endure are those where climate behaviour, structural planning, and detailing precision were resolved before finishes were considered.
Drainage is one of the most common failure points I encounter. Thresholds that look perfectly level often conceal subtle construction mistakes. I have seen terraces where water slowly migrated toward living rooms because the external fall was reduced to preserve visual flatness. The correct approach is to maintain a controlled gradient, typically around 1:40 to 1:60, while using concealed linear drainage channels beneath paving surfaces. Surface sealants alone are never sufficient in high rainfall exposure.
Wind exposure is another underestimated factor. Homes positioned on open sites or coastal zones often suffer from uncomfortable airflow turbulence when large openings are installed. Large sliding or bi-fold systems should be evaluated not only for view quality but also for pressure resistance. I have worked on projects where installing timber screening elements reduced wind velocity around seating zones without blocking landscape visibility.
Overheating is particularly common with unshaded south-facing glazing. Large transparent façades can act like thermal lenses during summer afternoons. I recommend integrating passive shading through roof overhangs, external louvres, or vegetation buffers rather than relying solely on internal blinds. Solar control glass specification should be considered early, especially when glazing spans exceed 3 m (10 ft).
Budget planning must prioritise invisible performance layers rather than decorative finishes. Structural steel reinforcement, waterproof membranes, and drainage engineering usually consume a larger portion of cost than clients initially expect. In my experience, allocating approximately 20–30% of extension budgets to structural, envelope, and environmental control elements produces the most reliable outcomes.
Collaboration with a structural engineer is essential whenever large openings, corner glazing, or roof alterations are involved. Load paths must be verified before specifying door systems or removing supporting walls.
From a contractor perspective, sequencing matters. Waterproofing should be completed and tested before flooring and glazing installation. Small execution errors at early stages are extremely difficult to correct later.
Ultimately, indoor–outdoor living works when architecture, climate response, and construction discipline are treated as one design problem rather than separate tasks. When this balance is achieved, the space feels natural, comfortable, and quietly enduring.
You May also Like: 25 Rugs for Living Room Comfort, Style, and Layout
Common Mistakes to Avoid
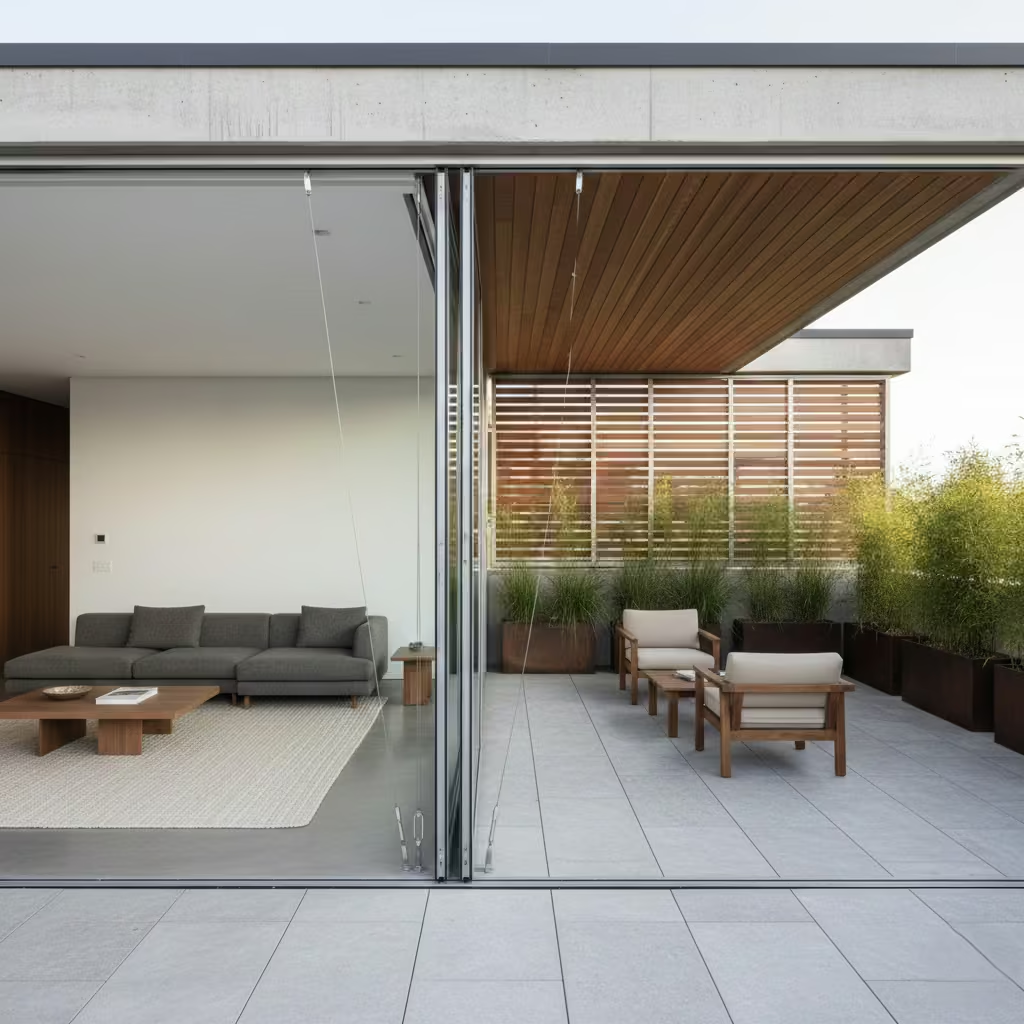
Indoor–outdoor living succeeds when the architecture is allowed to behave as a climate-responsive spatial system rather than a decorative arrangement of doors, furniture, and finishes. One of the most frequent errors I observe is treating large openings as visual accessories rather than structural interventions. Wide glazing, pivot doors, or corner glass assemblies must be planned as part of the building envelope from the earliest design stage. Removing load-bearing elements without proper reinforcement or specifying door systems without engineering coordination often leads to long-term performance problems.
Furniture circulation is another overlooked detail. I often see terraces designed with beautiful materials but insufficient movement space between seating groups and glazing lines. Comfortable social zones generally require at least 900 mm to 1.2 m (3 ft to 4 ft) of clear walking width. Seating placed too close to sliding panels can restrict opening operation and weaken spatial breathing room.
Weather exposure is particularly important in climates with variable rainfall and wind patterns. In regions such as the UK, outdoor living spaces must be prepared for moisture, temperature fluctuation, and wind-driven rain. Shielding strategies such as covered roofs, timber screens, or vegetation layers often improve usability more than simply enlarging glazing areas.
Using interior-rated materials externally is a costly mistake. Flooring, timber finishes, and furniture must be specified with outdoor durability ratings. Interior-grade coatings may appear acceptable initially but tend to degrade under UV exposure and moisture cycles.
Overcomplicated layouts also reduce the quality of indoor–outdoor living. I prefer clean circulation paths, limited material families, and clear spatial hierarchy. The most successful schemes feel simple because complexity has been resolved behind the scenes during design and construction.
The guiding principle is restraint. Indoor–outdoor architecture should support daily living behaviour rather than compete for attention. When structure, climate, and movement logic are respected, the space remains functional, comfortable, and visually calm for many years.
Conclusion: Designing Indoor–Outdoor Living That Feels Intentional
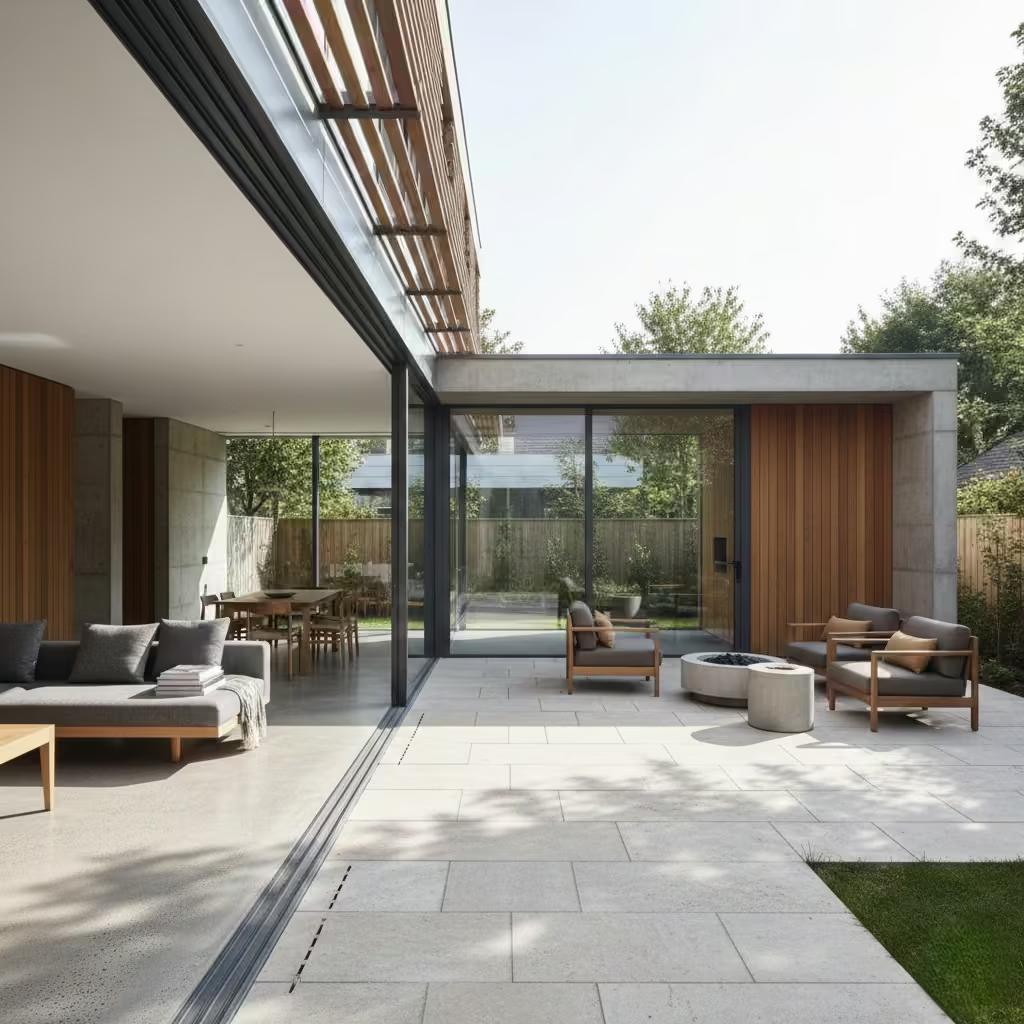
Indoor–outdoor living is not simply about opening doors or creating larger visual apertures toward the garden. In practice, it is a more disciplined architectural philosophy that aligns structure, material behaviour, climate response, and daily lifestyle patterns into a single spatial system. The most successful homes do not announce the transition between inside and outside. Instead, they allow movement between them to feel natural, almost inevitable.
From my experience working on residential renovations and garden-facing extensions, the spaces that age well are those where performance details were prioritised over spectacle. Structural integrity determines whether large glazing spans remain stable over time. Material selection influences how surfaces weather under sun, wind, and moisture exposure. Climate awareness shapes shading, drainage, and ventilation strategies. Lifestyle observation ensures that furniture placement, circulation width, and social zones support real living rather than staged appearance.
The architecture must respond quietly but confidently to its environment. South-facing glass requires solar moderation. Rain-exposed thresholds need concealed drainage systems. Outdoor zones should feel protected without appearing enclosed. When these elements work together, the home begins to behave like a coherent organism rather than a collection of design gestures.
Indoor–outdoor rooms succeed when they are conceived as architectural compositions, not as decorative additions placed after construction decisions are made. Proportion, rhythm, and material honesty matter more than complexity. The goal is not to showcase design, but to create spaces where people feel comfortable lingering, moving, and living naturally across the boundary between house and garden.
In the end, the best indoor–outdoor living environment is one you almost forget was engineered at all. It simply feels right.
Frequently asked questions
What is the main purpose of indoor–outdoor living design?
Indoor–outdoor living aims to create a seamless spatial relationship between interior comfort and exterior environment. The focus is on light quality, ventilation, lifestyle movement, and architectural continuity rather than simply increasing opening sizes.
Which door system is best for indoor–outdoor connection?
The choice depends on site conditions and lifestyle behaviour. Sliding glass walls are excellent for visual continuity, pocket sliding systems provide full opening freedom, and bi-fold doors offer operational flexibility for family use.
How important is drainage in indoor–outdoor spaces?
Drainage is critical. Poor threshold water management is one of the most common causes of long-term performance failure. Concealed drainage channels with controlled fall gradients help prevent water ingress.
Can indoor–outdoor living work in cold or rainy climates?
Yes. In temperate climates, covered terraces, solar control glazing, wind screening, and adaptive heating systems allow outdoor zones to remain usable across seasons.
What is the ideal threshold level difference?
A tolerance of about 10 mm to 15 mm (0.4 to 0.6 inches) is typically maintained between interior and exterior surfaces to balance accessibility and water control.
Do I need a structural engineer for large glazing installations?
Yes. Large openings, corner glazing, and roof modifications usually require structural verification to ensure load distribution and building safety.
What materials are best for outdoor zones?
Weather-rated porcelain, treated timber, aluminium framing, and UV-resistant textiles are commonly used because of their durability and low degradation rate.
What makes indoor–outdoor design truly successful?
Success comes from treating the space as one architectural composition where structure, climate behaviour, circulation, and material continuity work together quietly and consistently.