How to Create a Zen Japandi Utility Room: 15 Calm & Functional Design Ideas
There’s a reason the utility room gets shoved to the bottom of every renovation wish list. It’s the room nobody photographs for their moodboard, the one that ends up as a dumping ground for odd socks, half-empty detergent bottles and a hoover that’s been “temporarily” living behind the door since March. And yet it’s also one of the most-used rooms in the house, often visited two or three times a day, sometimes more if you’ve got small children, muddy dogs or a habit of leaving everything to the last load on a Sunday night. So why does it get treated like an afterthought, tucked behind the kitchen and forgotten about until something breaks?
Japandi design, that quietly popular marriage of Japanese minimalism and Scandinavian warmth, has a genuine answer to this. It isn’t about making your utility room look pretty for the sake of it, or chasing a trend that’ll feel dated in three years. It’s about removing friction from a task you already do far too often, and doing it with materials and colours that don’t fight against the calm you’re trying to build in the rest of your home. Get it right and the utility room stops being a chore zone you avoid and starts being a five-minute-a-day ritual you barely notice, which, frankly, is the whole point. There’s something quietly radical about deciding that even the unglamorous corners of a home deserve a bit of thought.
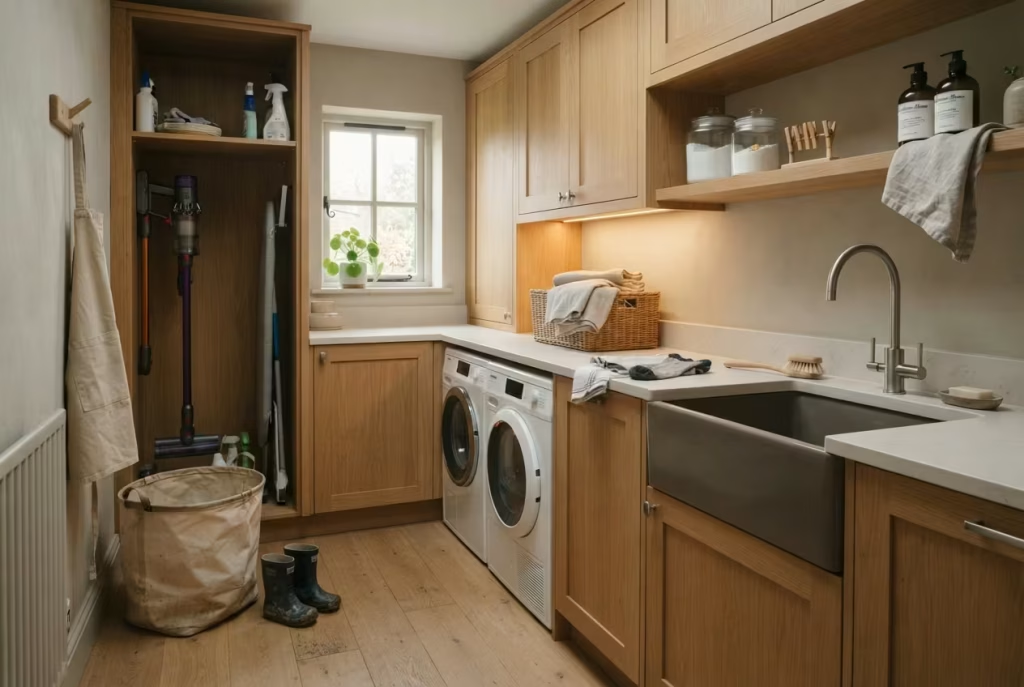
This guide gives you 15 genuinely practical, numbered ideas (not vague design waffle), each one expanded with real detail rather than a one-line suggestion, and backed throughout by real UK regulations, real fire-safety data, real cost figures and real advice pulled from homeowners who’ve actually lived through a utility room build, not just styled one for a photoshoot. No filler, no stock photography captions dressed up as tips.
Quick answer what makes a utility room Japandi
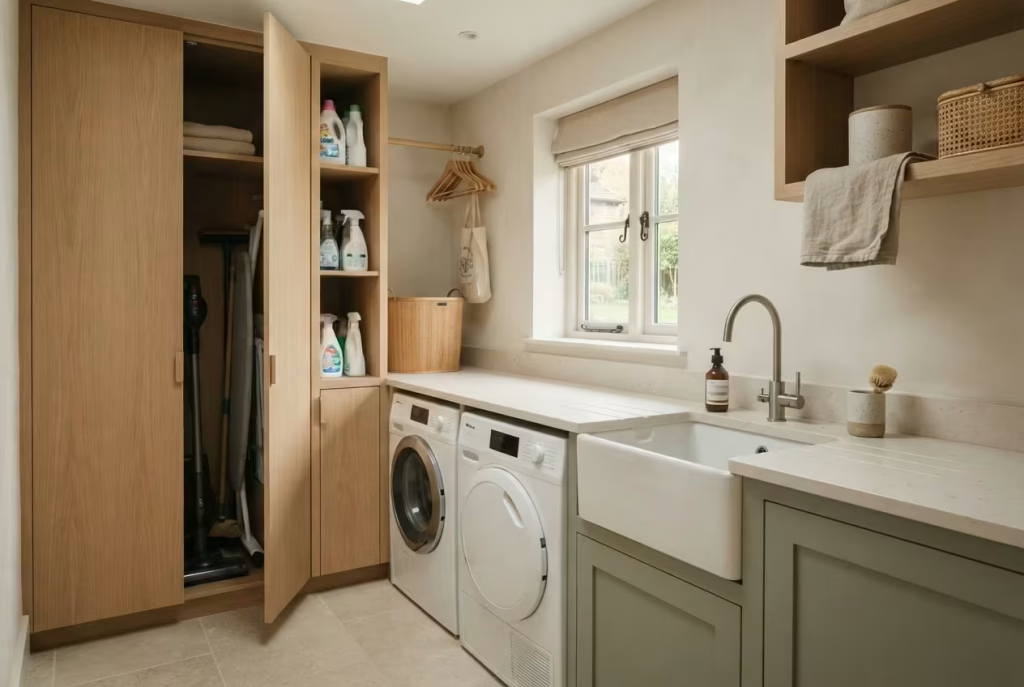
If you’re short on time, here’s the gist. A Japandi utility room combines a muted, earthy colour palette (soft whites, warm greys, taupe, sage, the occasional deep walnut accent) with natural materials (light wood, stone, bamboo, linen), concealed storage that keeps clutter out of sight, and a layout built around genuine workflow rather than just squeezing appliances into a leftover gap. It leans on the Japanese idea of “ma” (intentional empty space, the pause between objects rather than a wall-to-wall crowd of them) and wabi-sabi (finding beauty in natural wear and imperfection rather than chasing showroom perfection), paired with Scandinavian practicality and an obsession with things actually working the way they’re meant to. Below, we break that down into 15 concrete moves you can actually make, each one explained properly rather than left as a caption under a pretty photo.
Why bother making the utility room calm at all?
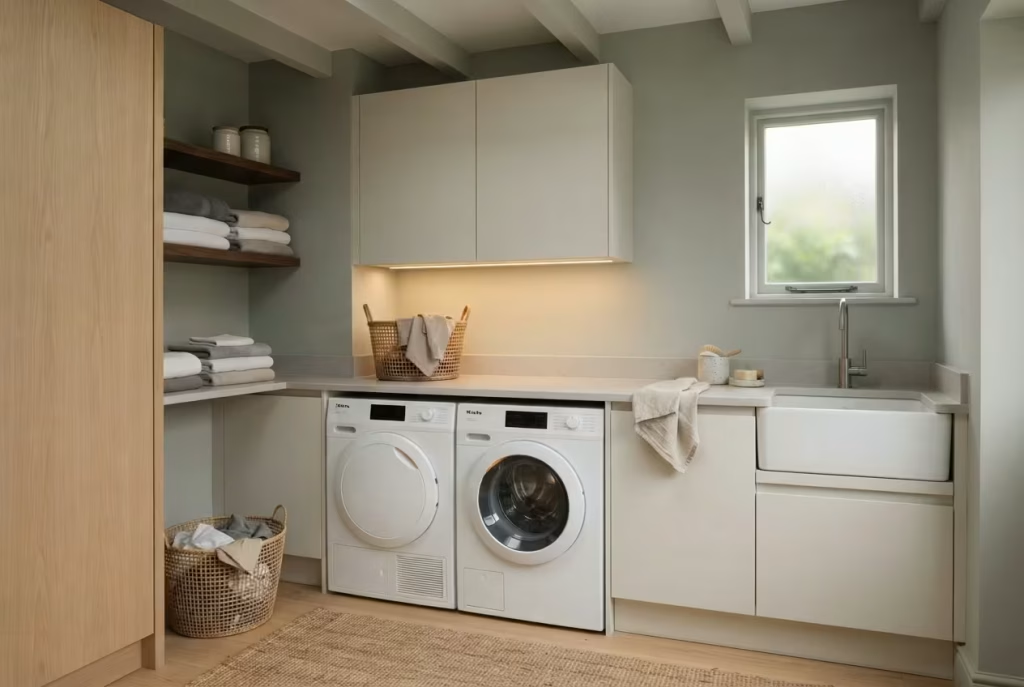
It’s fair to ask. Nobody’s threatening to move house over an ugly laundry room. But there’s real substance behind the “calm space” argument, not just aesthetic fluff dressed up in Japanese vocabulary to sound sophisticated.
Clutter isn’t just visually annoying, it’s measurably distracting. Research from Princeton University’s Neuroscience Institute found that multiple competing visual stimuli, think tangled cables, loose detergent boxes and a mountain of unsorted washing all fighting for attention at once, mutually suppress each other in the brain’s visual cortex. In plain English: physical mess genuinely competes for your limited attention, raising low-level stress even when you’re not consciously registering why you feel frazzled the moment you walk in. A calmer, more ordered utility room isn’t indulgent. It’s one less thing quietly nagging at you before you’ve even had your coffee, and one less low-grade irritation stacked onto a morning that probably has enough of those already.
Colour plays its own quiet role here too. Warmer hues, oranges, rusts, certain golds, tend to be linked with alertness and energy, which is exactly what you don’t want in a room where the goal is to feel unhurried. Cooler, more muted tones (the soft greys and sages that dominate Japandi palettes) are consistently associated with calm and focus instead. It’s a small detail, but it’s part of why a Japandi utility room feels different to walk into than a bright, busy one, even before you’ve noticed a single piece of furniture.
There’s also a practical case that has nothing to do with mindfulness. A utility room designed around real workflow, wash, dry, fold, put away, in that order, without doubling back on yourself, simply gets used more efficiently. You spend less time hunting for the fabric softener at the back of a cupboard and more time getting on with your day. Form and function aren’t in competition here; in a well-planned Japandi utility room, they’re doing the same job, quietly, in the background, the way good design always should.
1. Split the room into a “clean” side and a “dirty” side
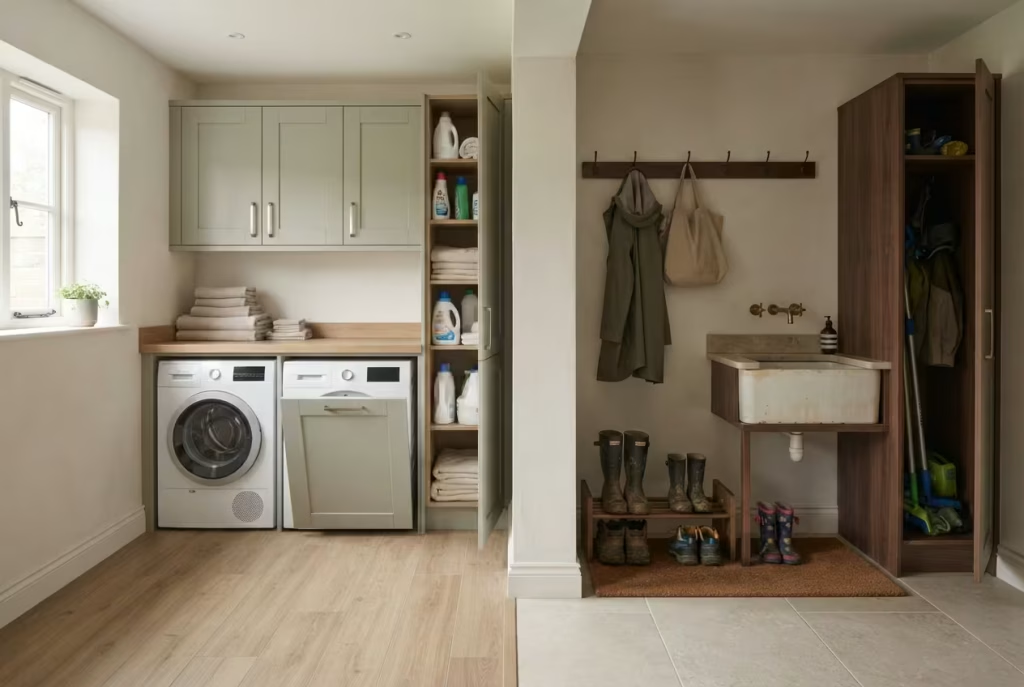
This is the single most repeated piece of advice from homeowners who’ve actually built a utility room, and yet almost nobody puts it in writing. Keep your washing machine, dryer, airer and ironing setup on one side of the room, and your sink, coat hooks, welly rack and cleaning cupboard on the other. It sounds obvious once someone says it out loud, but most utility rooms are designed appliance-first, with everything else squeezed in wherever there’s a gap left over once the big-ticket items are in.
Divide by function first and the room instantly feels less chaotic, because your brain isn’t trying to process “wet coat” and “clean folded towel” in the same three square feet. There’s a genuine sensory logic to it too: the dirty side tends to collect mud, damp fabric and general outdoor grime, while the clean side needs to stay dry and tidy enough that you’re happy folding laundry on it. Muddling the two doesn’t just look messy, it actually undoes the point of doing laundry in the first place. If your layout allows it, even a simple change in flooring, tile on the boot-and-welly side, a warmer wood-look surface on the laundry side, reinforces the split without needing a physical wall.
2. Hang a ceiling pulley (or “Sheila maid”) for indoor drying
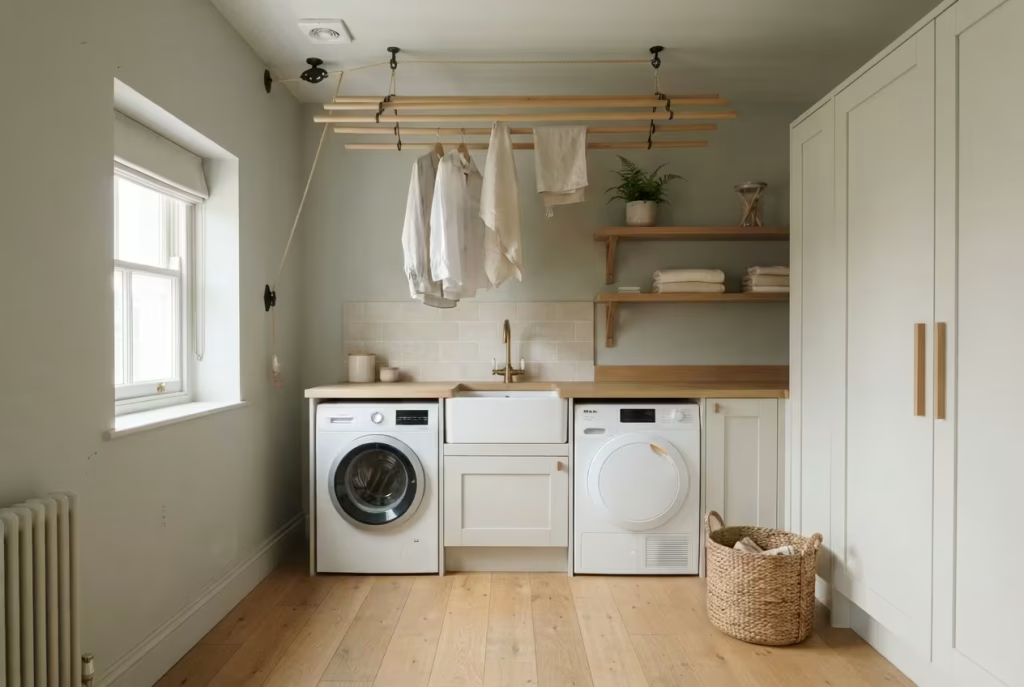
If there’s one addition that comes up again and again from people who’ve actually lived with their utility room for a few years rather than just styled it for a launch photo, it’s this. A ceiling-mounted pulley airer dries a full load overnight without eating an inch of floor space, and it does it using nothing more than rising warm air, no electricity, no running costs, no extra appliance to maintain.
These airers typically hold a decent-sized load, several kilograms of damp washing, and can be raised right up towards the ceiling out of the way when not in use, then lowered on their pulley system for loading and unloading. Traditional wooden versions (the original “Sheila maid” design) sit comfortably at home in a Japandi scheme thanks to their natural, honest materials, and they’re genuinely inexpensive compared to almost anything else on this list. It’s a genuinely old-fashioned bit of kit, but it solves a very modern problem: nobody wants a clunky clothes airer permanently parked in the middle of the room, tripped over on the way to the sink. Just make sure you know where your joists are before you fix one in, since a fully loaded pulley airer carries real weight, and check your ventilation is up to the job (more on that below), since drying laundry indoors releases a surprising amount of moisture into the air.
You May also Like: Laundry Room Renovation Ideas Homeowners Love for Function, Style, and Storage
3. Build upward, not just across
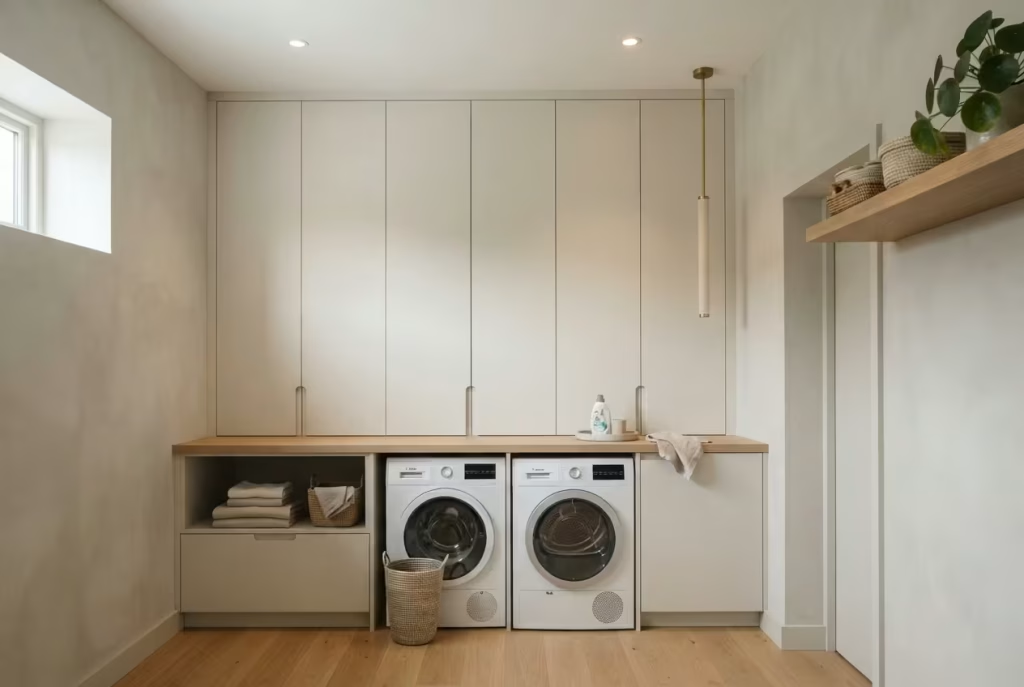
Interior designer Laura Brophy, principal of Laura Brophy Interiors in Newport Beach, puts her finger on the single biggest reason small utility rooms feel poky: “When storage, lighting, and design details are all concentrated at counter height, the eye stops there. The room instantly feels smaller and more cramped.” Her fix is simple: extend cabinetry all the way to the ceiling rather than stopping at the standard 2m or so, add a shelf above the door where most people never think to look, and hang a light fitting that draws the eye upward rather than leaving it fixed on the worktop.
This is one of those ideas that costs almost nothing extra if you plan for it from the start, since a taller cabinet run typically only adds the cost of the extra board, but it’s genuinely expensive to retrofit once everything else is finished. If you’re extending existing units, matching the door style and finish exactly matters more than you’d think; a mismatched top section undoes the whole “seamless, calm wall of storage” effect that makes this trick work in the first place. The psychological effect Brophy describes is real: rooms with nothing above eye level read as low-ceilinged and boxy, even when the actual dimensions are perfectly reasonable.
4. Measure twice, order once
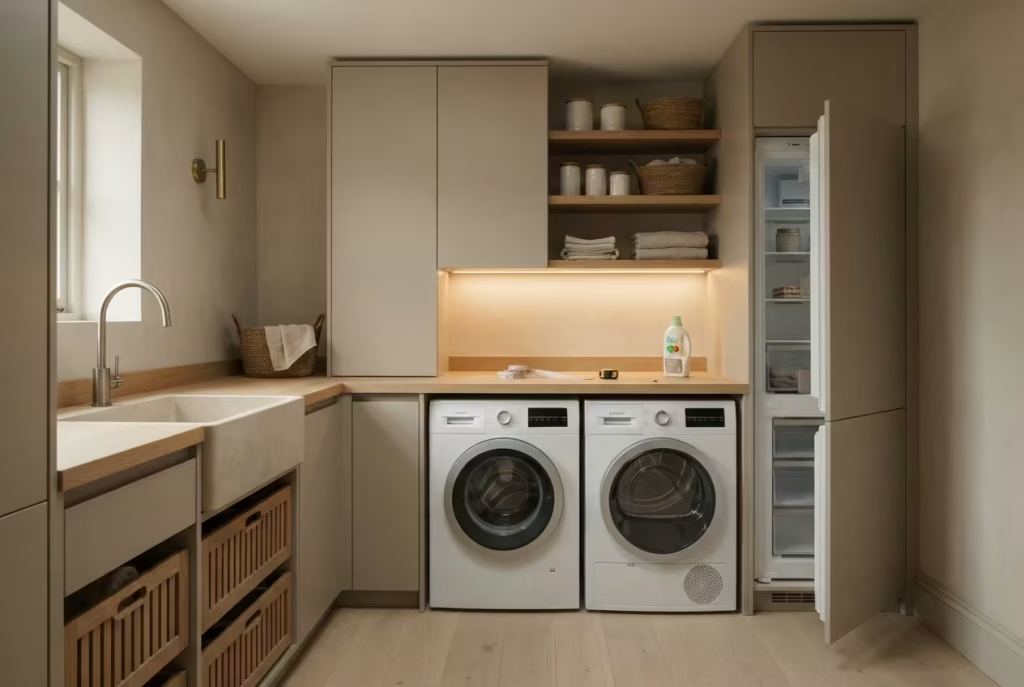
A genuinely underrated tip from real renovation forums: washing machines and tumble dryers have gotten noticeably deeper over the last decade as manufacturers chase bigger drum capacities, and ordering on assumption rather than tape measure is a classic, entirely avoidable mistake. Many modern machines now sit at 60 to 65cm deep before you’ve even accounted for door clearance, and some larger-capacity models run deeper still. Order without checking and you can end up with a door that won’t fully open, or a worktop that’s suddenly six centimetres shallower than planned.
It’s also worth checking that any appliance pushed flush against a wall (a tall fridge-freezer is the usual culprit, but the same logic applies to a chest freezer or an integrated dishwasher) can still open its door past 90 degrees without hitting the adjacent unit. And if you’re planning new plumbing runs, most plumbers will steer you away from routing water pipes along an exterior wall, since a utility room is often one of the coldest, least-heated rooms in the house, and a frozen, burst pipe behind a beautifully tiled wall is not the kind of “wabi-sabi imperfection” anyone signs up for. None of this is Japandi-specific, but a beautifully styled room with an appliance door that won’t fully open is not exactly the picture of harmony you were going for, and it’s a genuinely easy mistake to sidestep with fifteen minutes and a tape measure before you order anything.
5. Go for push-to-open, handle-free cabinetry
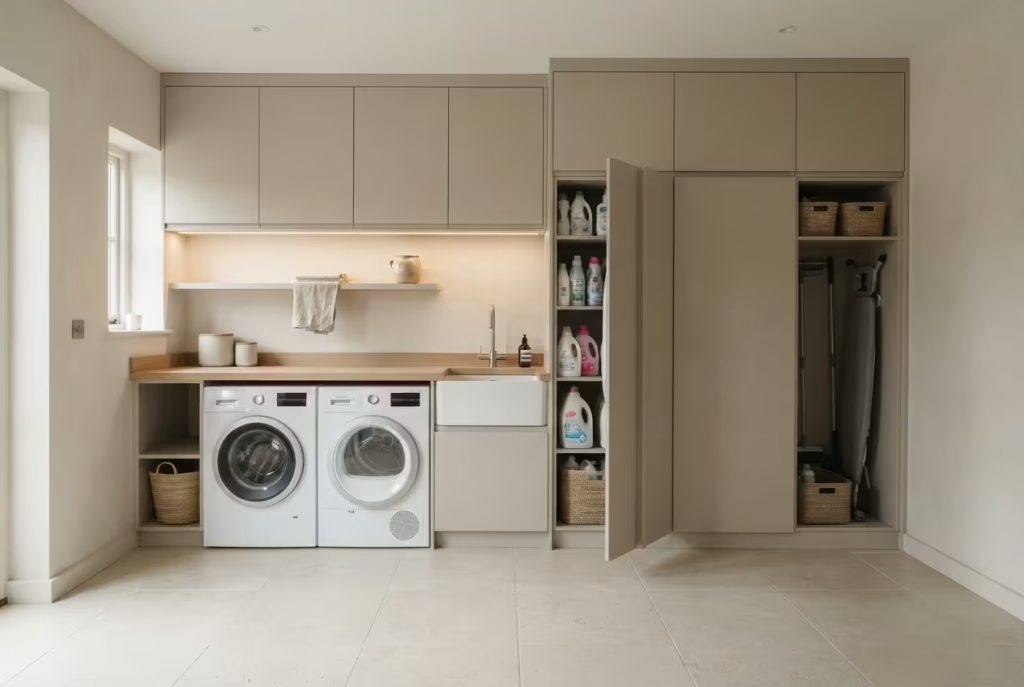
Flat-front doors with concealed or push-to-open mechanisms are a Japandi signature for good reason: they reduce visual noise without sacrificing an ounce of storage. Behind the doors, you can be as practical as you like, detergent, cleaning supplies, the ironing board, the bag of pegs nobody can ever find, and from the outside, the room reads as one calm, unbroken run of cabinetry with nothing jutting out to catch a passing sleeve or a small child’s curious fingers.
This is where the Scandinavian half of Japandi earns its keep: it’s simplicity in service of a genuinely tidier life, not simplicity for its own sake. If push-to-open mechanisms feel like overkill for a budget refresh, a simple recessed finger-pull achieves much of the same visual effect for a fraction of the cost, and it’s a detail worth discussing with a joiner or kitchen fitter even if you’re working with stock cabinetry rather than a full bespoke run. Shaker-style doors, if you’d prefer a slightly softer, more traditional look, can still work within a Japandi scheme provided you keep the palette muted and the hardware minimal; it’s the overall restraint that matters more than any single design rule.
6. Add a rail for the in-between moment
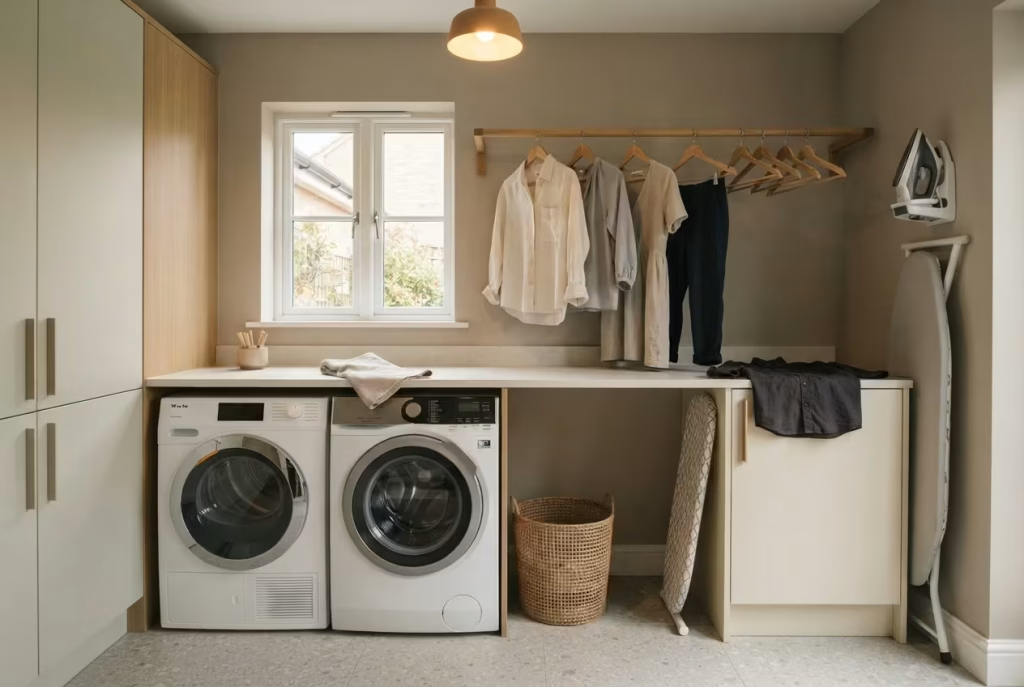
Every household has a laundry limbo stage: clothes that are clean and dry but not yet ironed or put away, currently living in a heap on top of the dryer, on the back of a chair, or, let’s be honest, on the floor. A short hanging rail, ideally positioned between the dryer and the ironing spot, gives that stage somewhere proper to live instead of draped over every available surface in the room.
It’s a small, inexpensive addition, a length of rail and a couple of brackets is genuinely all it takes, but it closes one of the most common gaps in a laundry workflow, the bit between “dry” and “done” that so many utility rooms simply never plan for. There’s a quiet satisfaction to it too: hanging something on a rail the moment it comes out of the dryer takes seconds, and it means the room never quite tips over into disorder even on a busy week, because there’s always a designated place for the in-between stuff to sit rather than nowhere at all.
7. Use small, dedicated hooks for small, easily lost things
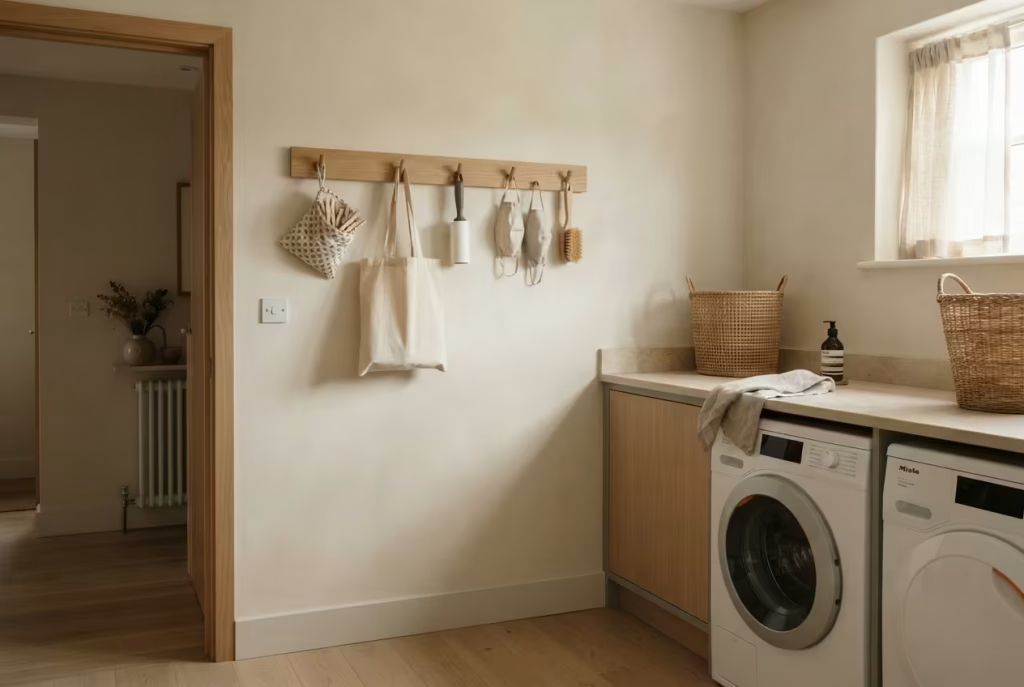
Pegs, dust masks, a spare tote bag for the school run, a lint roller, they all need somewhere that isn’t “wherever there’s space” or, more honestly, wherever they landed last time. A compact multi-hook organiser, mounted low on a wall or the back of a door, keeps these odds and ends visible and grabbable without taking up any real footprint, and it’s the kind of detail that makes the difference between a room that stays organised and one that slowly, quietly, reverts to chaos.
It’s a tiny idea, and it costs next to nothing, but tiny ideas are exactly what stop a utility room sliding back into disarray within a fortnight of the big renovation photos being taken. The trick is choosing a design with enough individual hooks that nothing has to compete for space with anything else; a single hook holding three different bags is barely better than no hook at all.
8. Choose a muted, earthy colour palette
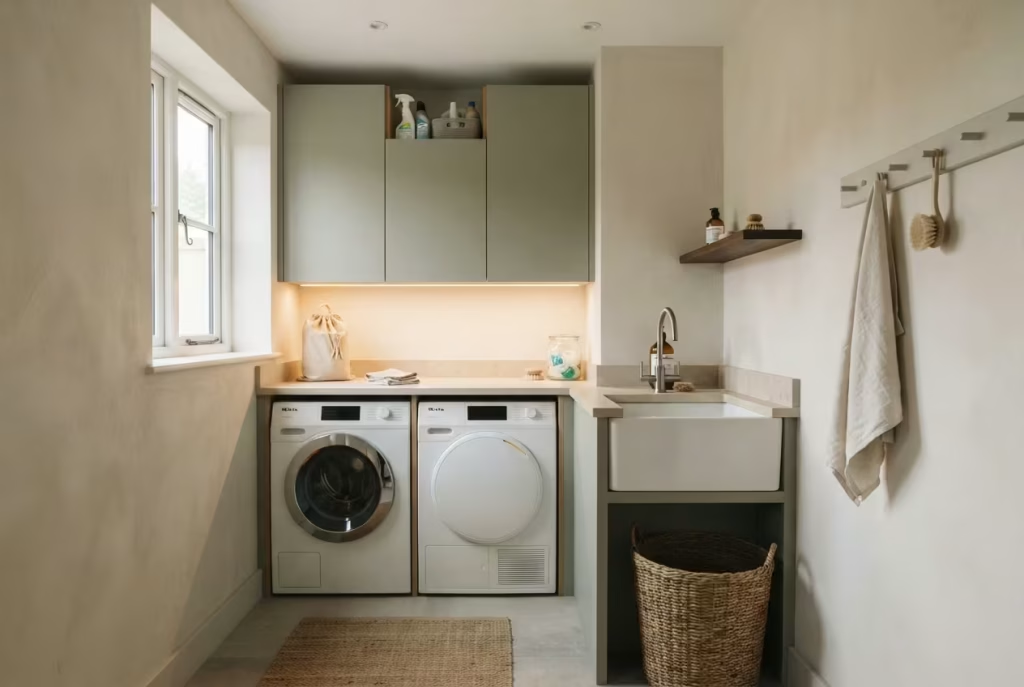
Soft whites, warm greys, taupe, sage green and the occasional deep walnut or charcoal accent: this is the backbone of any Japandi room, and the utility room is no exception. These tones don’t just look calmer, they photograph and age better too, hiding the inevitable scuffs, splashes and detergent drips that come with a genuinely hardworking room far more gracefully than stark white ever will.
It’s worth thinking about where you place the darker accents specifically. A single deep-toned wall, or cabinetry in a muted charcoal or forest green, can add real depth and prevent the room feeling flat or clinical, provided the rest of the palette stays light enough to keep the space feeling open rather than closed in. If you’re nervous about committing to colour in a room this small, test a sample directly next to your worktop and appliance finishes before you decide; utility rooms often get less natural light than the rest of the house, and a colour that looks warm and inviting in a sunny living room can read cold and grey under artificial light alone.
9. Bring in real, natural materials
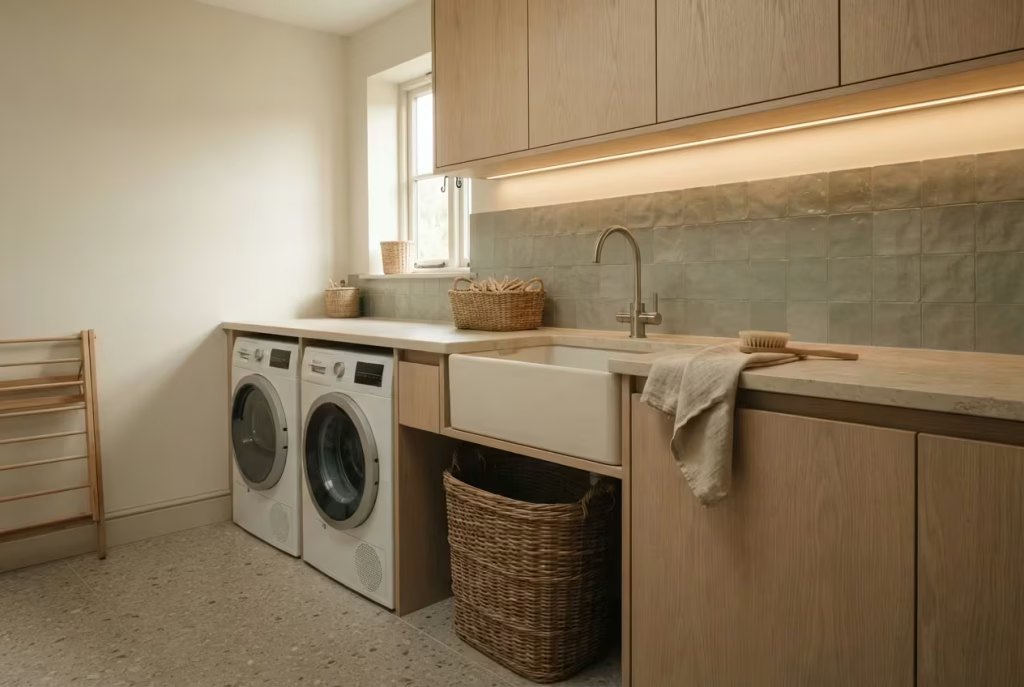
Light oak or ash for cabinetry fronts, a honed stone or engineered-quartz worktop, a woven rattan basket for pegs, these materials do the heavy lifting of a Japandi look, and they’re doing more work than most people realise. Natural materials add warmth against all that neutral paint, and, unlike laminate or high-gloss plastic, they tend to develop a bit of character over time rather than simply looking tired and dated the moment a trend moves on.
There’s a tactile, sensory element to this too that’s easy to underrate. Running a hand along a wooden worktop or a woven basket handle engages touch in a way that smooth plastic or laminate simply doesn’t, and that small sensory detail is part of what makes a Japandi room feel genuinely calming rather than just visually on-trend. Mixing textures matters as much as choosing the right individual materials: pair a smooth stone worktop with a rougher woven basket, or a matte-finish cabinet with a slightly textured tile, so the room has some visual and physical variety rather than reading as one flat surface throughout.
10. Choose materials that can actually cope with damp
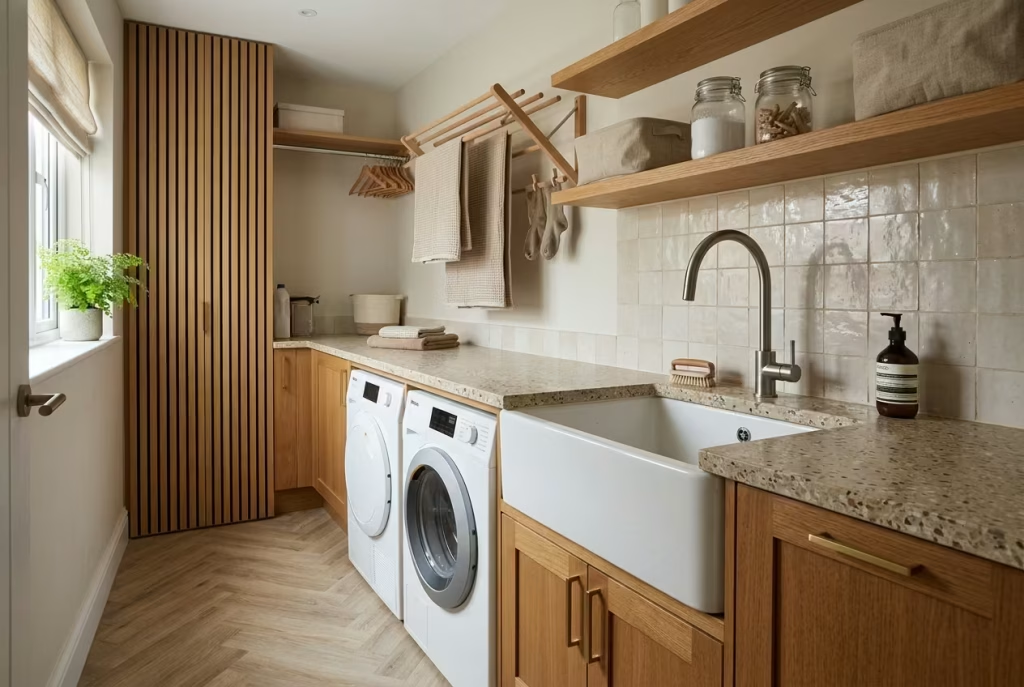
Here’s where a lot of Japandi guides fall down badly: they recommend gorgeous natural materials without ever mentioning that a utility room is, structurally speaking, a wet room in disguise. Untreated timber worktops will cup, warp and stain around a sink within a year, no matter how beautifully they photograph on day one. Wet washing straight out of the machine, steam from a dryer, and general splashback all push the humidity in this room noticeably higher than in the rest of the house, for hours at a time, on a near-daily basis.
Look instead for a sealed or oiled wood finish designed specifically for wet areas, engineered stone (which handles moisture far better than natural marble, since it’s non-porous and won’t stain or etch), and water-resistant laminate or vinyl flooring rather than anything genuinely porous like unsealed natural stone or untreated timber boards. You can still get the warm, textured Japandi look, you just need to be a little more selective about which “natural” material you’re actually buying, and it’s worth asking any supplier directly whether a specific finish is rated for wet-area use before you commit, rather than assuming “natural” automatically means “durable.”
11. Layer your lighting properly
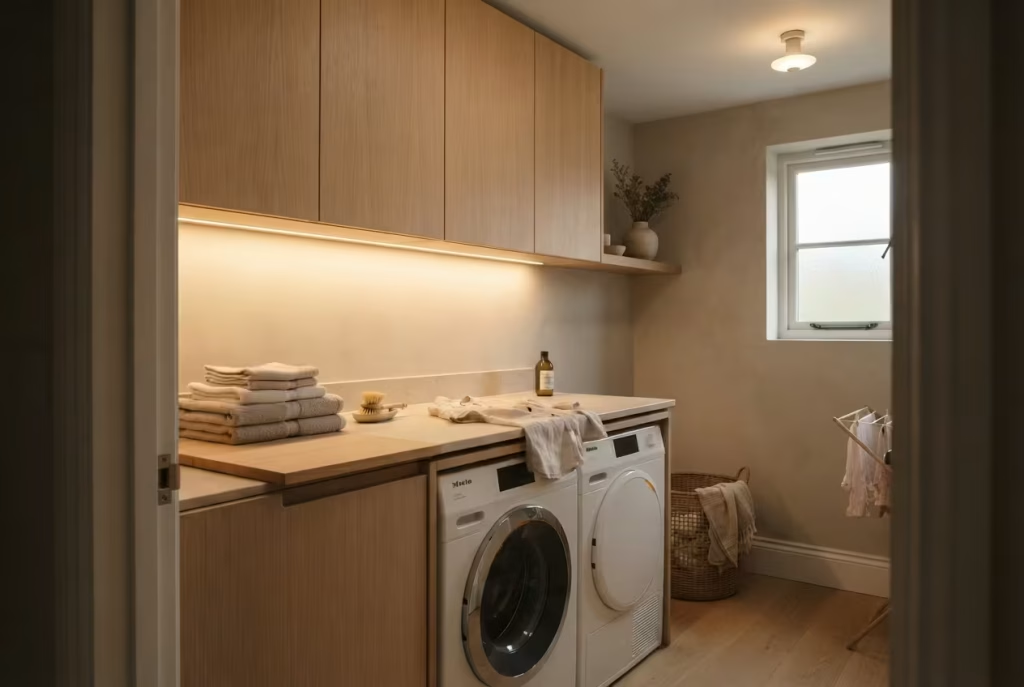
A single ceiling bulb is doing a lot of heavy lifting in most utility rooms, and it shows the moment you try to check a stain in poor light or read a care label in a dim corner. General guidance for task-focused areas suggests noticeably brighter, more focused lighting than ordinary ambient room lighting provides, which is exactly why a single overhead bulb so often leaves a folding counter feeling under-lit even when the rest of the room looks perfectly fine.
Layer in under-cabinet lighting for the folding counter and any spot where you’re checking fabric or treating stains, and add a warmer ambient fixture for general use when you’re just popping in to load the machine. The room instantly feels considered rather than purely functional, and you’ll notice the difference practically too, fewer missed stains, less squinting at wash-care symbols. This is a straightforward borrow from the rest of a Japandi home, where lighting is treated as part of the design rather than an afterthought bolted on at the end once everything else is finished.
12. If you can only afford one fixture, get the colour temperature right
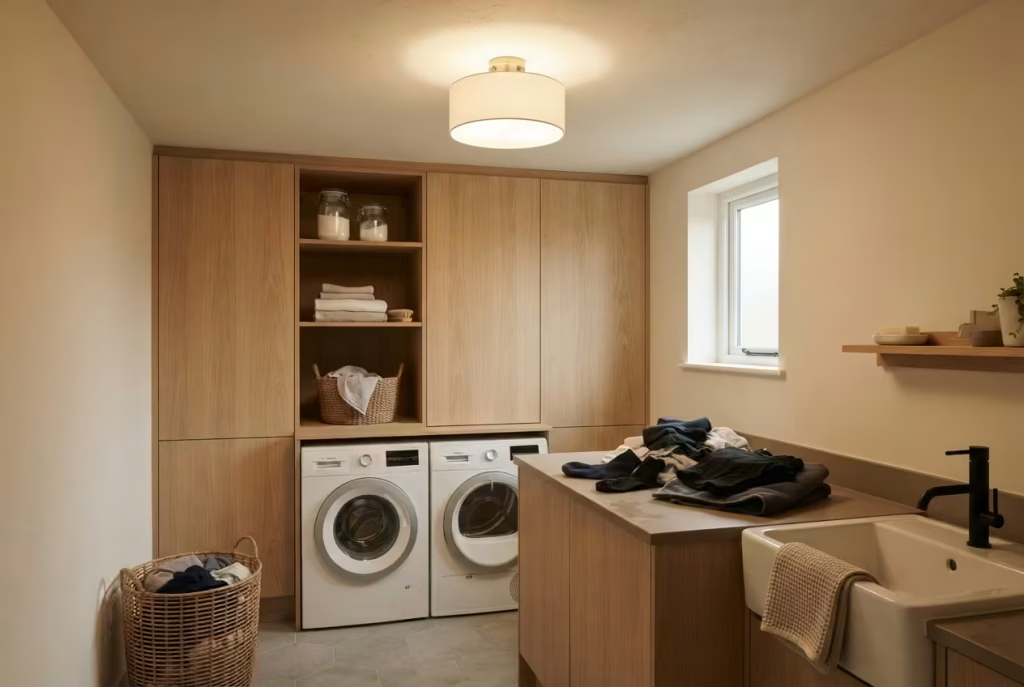
Not everyone has the budget or the ceiling space for a fully layered lighting scheme, and that’s completely fine. If you’re working with one single fixture, aim for a neutral-warm colour temperature of around 3500 to 4000 Kelvin. It’s warm enough to avoid the clinical, hospital-corridor feel of a stark white or blue-toned bulb, but cool enough that you can still tell your navy socks from your black ones, which matters more than you’d think when you’re sorting a mixed wash at speed.
For context, most warm “cosy living room” bulbs sit around 2700 Kelvin, which is lovely for a lounge but genuinely too dim and yellow-toned for accurate colour sorting. Anything above about 5000 Kelvin starts tipping into a cold, bluish, almost clinical light more suited to a garage workshop than a calm Japandi space. The 3500 to 4000 Kelvin range is a genuinely useful middle ground for anyone renovating on a tighter budget or working with a smaller footprint where a single fixture has to do every job at once.
13. Let something living into the room
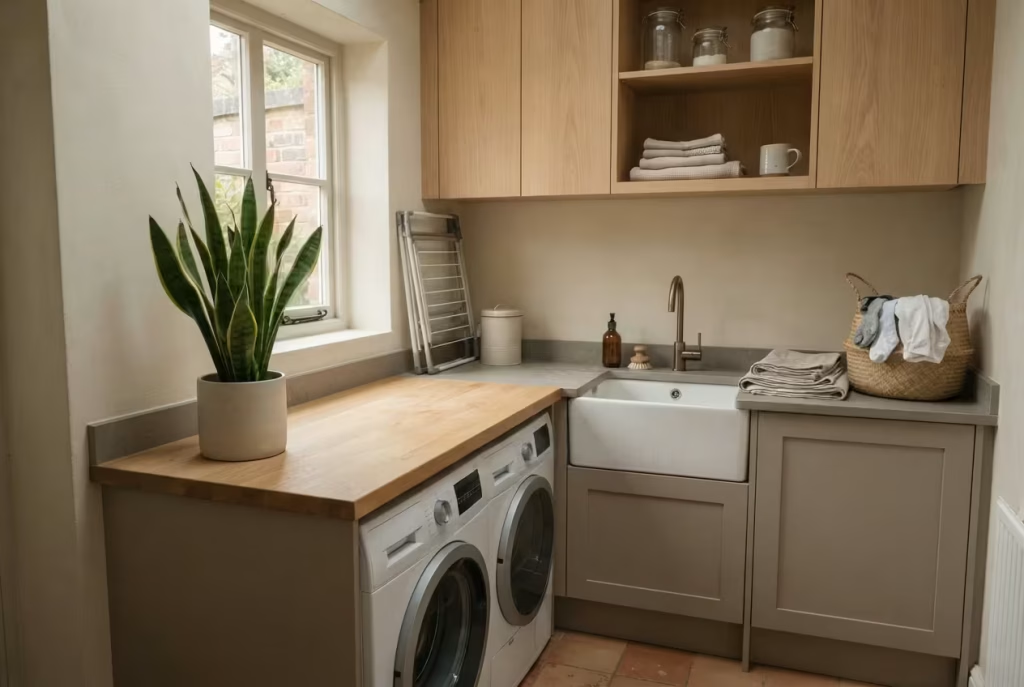
A snake plant, a golden pothos, or a hardy fern tolerates the humidity swings of a utility room far better than most houseplants, since these varieties are naturally suited to the fluctuating moisture levels a laundry space throws at them. Most low-light, humidity-tolerant plants like these only need watering every couple of weeks, which is exactly the kind of low-maintenance addition a busy household actually has a chance of keeping alive.
It does more for the “calm sanctuary” feeling than almost anything else on this list, precisely because it’s alive and slowly changing, in a room otherwise full of hard surfaces, mechanical noise and repetitive tasks. It’s a small, cheap, genuinely effective way to soften a room that could otherwise feel purely utilitarian, and there’s something quietly grounding about tending to one small living thing in the middle of an otherwise entirely functional space.
14. Embrace a bit of wabi-sabi
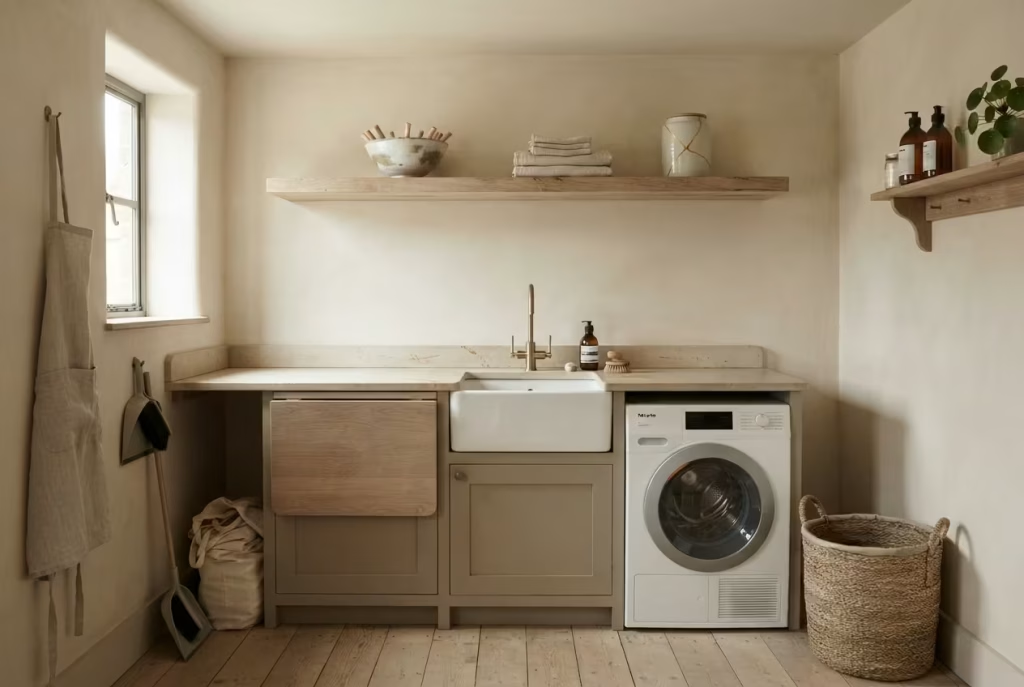
This is where Japandi parts ways with pure, sterile minimalism, and it’s arguably the most emotionally useful idea on this whole list. Wabi-sabi, the Japanese appreciation for natural ageing and imperfection, means you don’t need to panic about a wooden shelf developing a slight patina, a stone worktop picking up the odd honest mark over the years, or a woven basket softening and fraying gently at the edges with use. Rather than fighting that natural progression, let it happen, and let it tell the story of a room that’s actually lived in and used rather than merely photographed once and left untouched.
There’s a genuine kinship here with the idea behind kintsugi, the Japanese practice of repairing broken pottery with gold rather than hiding the crack, the belief that the mark of use and repair can be more beautiful than an untouched, sterile original. A room that looks a little lived-in, rather than showroom-perfect, tends to feel far more genuine and far less like a space you’re anxious about using properly. Given that a utility room, by its very nature, is going to see more daily wear than almost any other room in the house, this mindset isn’t just philosophically pleasant, it’s genuinely practical. It takes the pressure off entirely.
15. Stack it and fold it away for small-space living
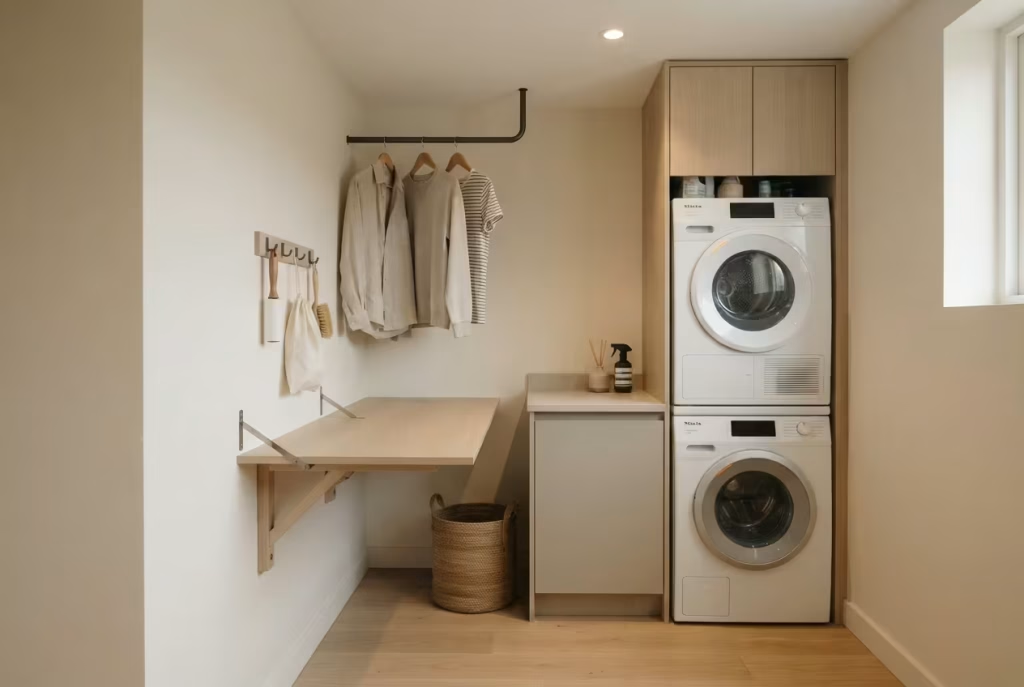
If you’re working with a genuinely compact utility room, a stacked washer-dryer unit (typically standing somewhere around 1.8 to 2 metres tall once stacked) frees up an entire run of floor space that a side-by-side arrangement would otherwise swallow, and a fold-down countertop fitted over the top gives you a folding surface exactly when you need one and nothing in the way when you don’t.
This is the single most effective idea on this list for flats, HDB-style service yards, or anyone converting an existing cupboard rather than building from scratch, since it essentially compresses a full laundry workflow into a footprint barely wider than the appliances themselves. Pair it with idea 6 (a short hanging rail) and idea 7 (small dedicated hooks) and you can fit a surprisingly complete, genuinely calm little laundry setup into a space that might have looked hopeless on paper.
Ventilation: the bit every other guide skips
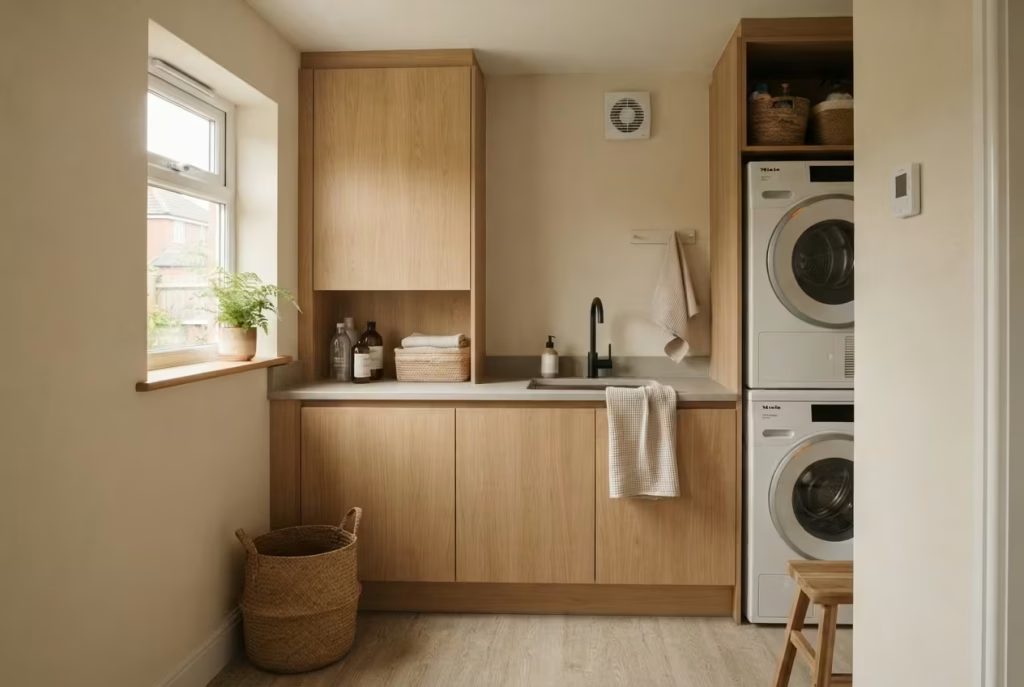
Here’s something worth knowing before you fall too deeply in love with a Pinterest board: in the UK, a utility room isn’t just recommended to have ventilation, it’s a legal requirement under Building Regulations Approved Document Part F. Any room containing a washing machine, dryer, sink or other moisture-generating appliance needs extract ventilation to the outside, at a minimum rate of 30 litres per second on an intermittent extract fan, or 8 litres per second continuous background extraction with a boost to 30 litres per second when the room is actually in use. On top of that, background ventilation (usually trickle vents built into a window) needs to provide at least 2500mm² of equivalent area, and the wider standard governing condensation risk and mould prevention across a home, BS 5250, sits alongside Part F to reinforce the same principle.
This isn’t box-ticking for its own sake. Real homeowner accounts from online forums describe exactly what happens when it’s skipped: a windowless utility room without proper extraction developed visible mould on the walls within months of regular use, fixed only once a dedicated, separately switched extractor fan was fitted, distinct from the ordinary light switch so it could keep running for longer after each wash. Given that a Japandi utility room leans so heavily on natural materials, wood, linen, unsealed stone, this isn’t a minor detail tucked away in small print. Damp air and beautiful natural textures are not friends, and a gorgeous wooden shelf that’s slowly warping from trapped moisture isn’t wabi-sabi, it’s just a maintenance problem waiting to happen.
If you’re renovating from scratch, it’s worth asking your electrician specifically about a humidity-sensor fan or a continuous low-speed extract system rather than a basic light-switch-activated fan, since these tend to shift far more damp air out of the room over a full day than a fan that only runs while someone happens to be standing there with the light on.
Fire safety: the conversation nobody has over Pinterest boards
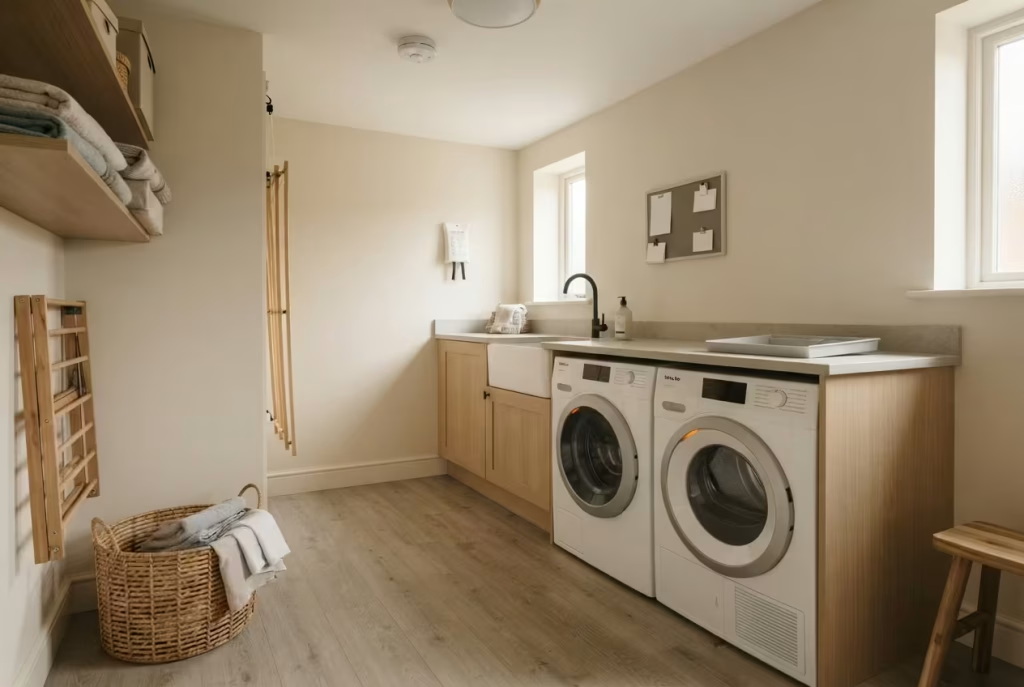
Utility rooms house the two appliances most likely to catch fire in a UK home, and it’s worth taking this seriously rather than treating it as scaremongering. According to Electrical Safety First’s own analysis of insurance claims, there were 1,140 accidental white-goods fires in England in 2023/24 alone, roughly three every single day, and tumble dryers were the standout cause, accounting for 51% of all white-goods fire insurance claims nationally. Washing machine fires were also up 7% year on year over the same period, and earlier national figures recorded 2,661 tumble dryer fires between 2014 and 2019 alone.
Fire and rescue services across the country, Greater Manchester, Staffordshire and Welsh fire services among them, all give the same core advice, and it’s worth repeating here because it’s genuinely easy to overlook in the pursuit of a good-looking room:
- Clear the lint filter after every single load, not just when you happen to remember, since lint buildup is the single most common cause of dryer fires
- Never cover or block vents, even in the name of a cleaner-looking cabinet front or a neater built-in appliance enclosure
- Never run a dryer overnight or while you’re out of the house, no matter how tempting the off-peak electricity rate looks
- Don’t leave warm, damp laundry sitting in a poorly ventilated bag, basket or bin, since trapped heat and moisture together create exactly the conditions that encourage a fire to start
- Fit a smoke alarm in or near the utility room itself, not just in the hallway, given how much unattended appliance running time happens in this specific space
None of this stops you having a beautiful, calm room. It just means the beauty shouldn’t come at the expense of common sense around two appliances that generate real heat, day in and day out, often while nobody’s in the room to notice if something starts to go wrong.
How much does this actually cost?
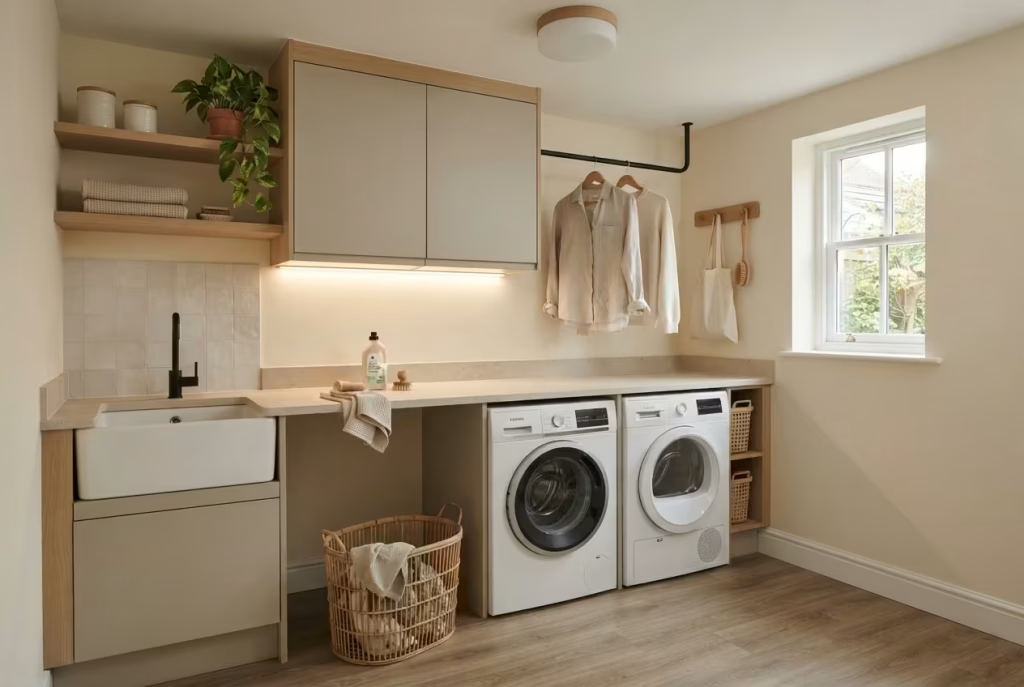
Budgets vary wildly depending on whether you’re refreshing an existing room or building one from scratch, and it’s genuinely useful to know where the real cost thresholds sit before you start pricing up cabinetry. Here’s a realistic UK breakdown based on current renovation cost data.
| Tier | Typical cost | What’s included |
| Basic refresh | £2,000 to £4,000 | Flat-pack or stock cabinetry, laminate worktop, sink reusing existing plumbing, fresh paint and new handles or hardware |
| Mid-range fit-out | £4,000 to £8,000 | Better-quality units, stone-effect worktop, integrated appliances, new flooring and layered lighting, some rewiring or replumbing |
| Bespoke/high-end | £8,000 to £15,000+ | Custom joinery to the ceiling, genuine stone worktop, relocated plumbing, premium appliances, full electrical first fix |
| New extension (shell only, before fit-out) | Roughly £1,250 to £2,500 per m² | Structural build cost alone, averaging around £7,000 for a small single-storey addition before any appliances or finishes go in |
Most homeowners land somewhere in the mid-range tier, and that’s genuinely the sweet spot for most of the ideas on this list, since it comfortably covers layered lighting, decent storage and a proper worktop without stretching to full bespoke joinery. If you’re on a tighter budget, the good news is that several ideas here (the colour palette, the storage discipline, the rail for hanging clean washing, the houseplant, the small hook organisers) cost next to nothing and make a genuinely noticeable difference entirely on their own, well before you touch a single cabinet.
How much space do you actually need?
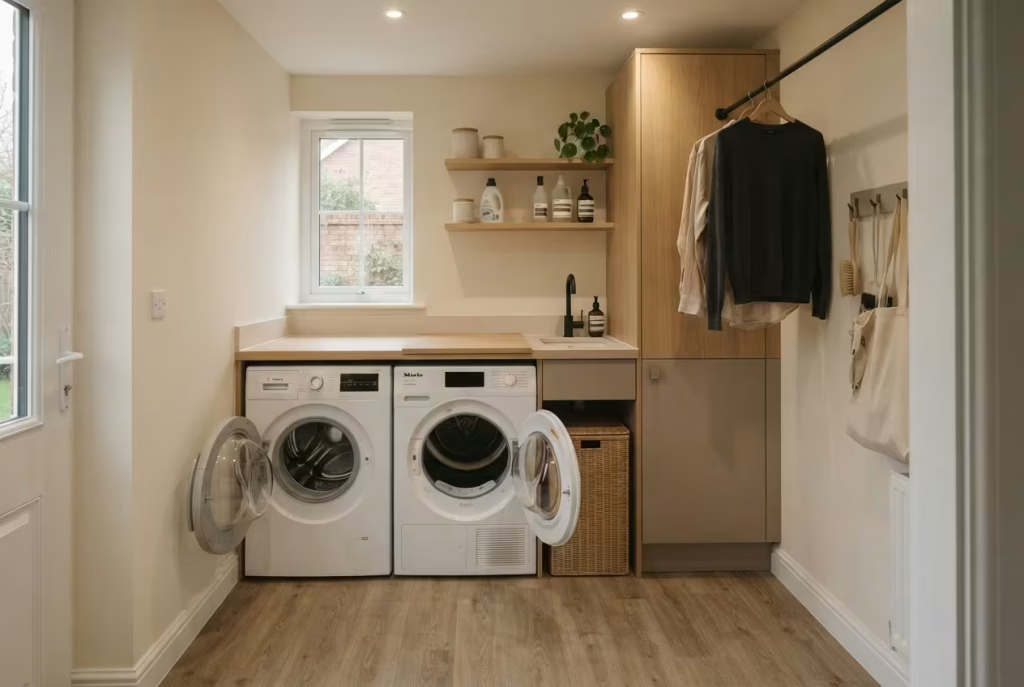
A genuinely workable utility room can be smaller than you’d think. Real-world examples from UK homeowners put a functional minimum at around 1.8m by 2.4m, similar in footprint to a compact bathroom, and one particularly well-planned example shared on a homeowner forum came in even tighter, at 2.2m wide by 1.4m deep, and was still described by its owner as efficient enough to do everything they needed.
As a general rule of thumb, try to leave at least 700mm of clear walkway space in front of any appliance door so it can open fully without you having to shuffle sideways to reach inside. If you’re working with less than the minimum footprint above, lean hard into idea 15 (stack it) and idea 6 (the rail), both of which claw back real, usable floor space without asking you to compromise on function, and consider whether a boot-and-welly zone might work better tucked into a nearby hallway rather than crammed into the same small room as your washing machine.
Keeping the calm going after the renovation photos are taken
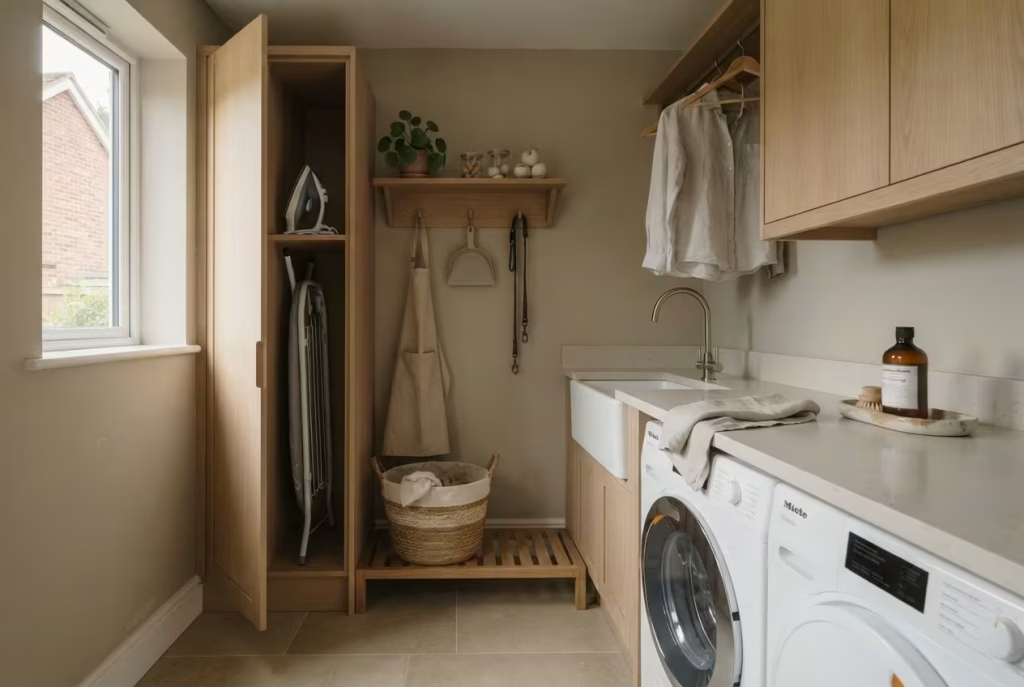
A beautifully finished utility room is only half the job. The other half is keeping it that way once real life resumes. A few small daily habits go a long way here: wiping down the worktop after folding, returning the ironing board to its home rather than leaning it against the wall “just for now,” and clearing the lint filter every single time, not just when the dryer starts smelling faintly of burning.
Beyond the daily basics, it’s worth setting aside a proper deep-clean session every few months, wiping down cabinet fronts, checking behind and underneath appliances for stray socks and dust buildup, and giving the extractor fan a proper clean since a dusty fan grille works far less effectively than a clear one. None of this is glamorous, but it’s the difference between a Japandi utility room that still feels calm a year after the reno and one that’s quietly slid back into being exactly the cluttered chore zone it started out as.
Bringing it all together
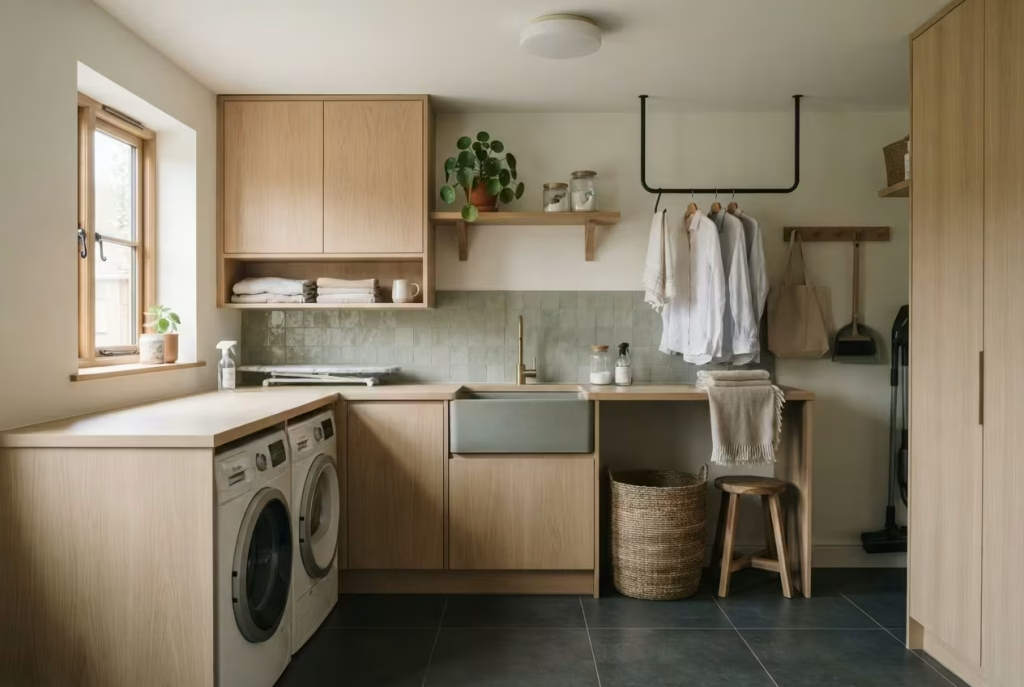
A utility room will probably never be the room you show off first when friends come round. But it doesn’t need to be a source of quiet dread either, the room you rush through with your eyes half-closed to the mess. Get the workflow right, choose materials that can actually survive the job they’re being asked to do, and lean into a calm, muted palette rather than fighting the room’s practical purpose, and you end up with something genuinely rare: a chore that takes a little less out of you every single day. That’s not a small thing. In a house full of rooms designed to impress, there’s something quietly satisfying about the one room designed simply to make your life easier, and about walking into it and feeling, for a moment at least, that even the laundry can wait for a cup of tea first.
Frequently asked questions
Does a utility room legally need an extractor fan in the UK?
Yes. Under Building Regulations Approved Document Part F, any room containing a washing machine, dryer, sink or other moisture-generating appliance needs mechanical extract ventilation to the outside, at a minimum of 30 litres per second intermittent, or 8 litres per second continuous with a boost function to 30 litres per second when the room is in use.
What’s the minimum size for a utility room?
There’s no strict legal minimum, but a genuinely workable space usually starts around 1.8m by 2.4m. Below that, you’re generally looking at a stacked washer-dryer and fold-away or fold-down solutions rather than a full separate laundry counter with space to spare.
Is it safe to leave the tumble dryer running while I’m out or asleep?
No. UK fire services consistently advise against this. Tumble dryers accounted for over half of all white-goods fire insurance claims in recent data, and lint build-up is the most common single cause. Only ever run one while you’re home and awake, and clear the filter after every load.
Can I get the Japandi look on a tight budget?
Yes, and this is genuinely one of the more forgiving styles for a phased approach. A muted, earthy paint colour, decanting detergents into matching containers, adding one or two natural-material accessories (a woven basket, a wooden peg tray) and keeping surfaces clear will get you most of the way there without touching the cabinetry at all, then you can upgrade storage and worktops in a later phase once budget allows.
What flooring copes best with a wet, hardworking room?
Water-resistant laminate, vinyl plank or engineered stone tiles all handle moisture far better than untreated timber or natural marble, while still delivering the warm, textured look Japandi design is built around. Avoid anything genuinely porous unless it’s been properly sealed for wet-area use.
How do I stop my small utility room feeling cramped?
Extend cabinetry to the ceiling rather than stopping at counter height, since this is genuinely the single biggest factor according to professional designers. A stacked washer-dryer and a fold-down worktop also help enormously in a tighter footprint, as does keeping the colour palette light and the surfaces genuinely clear rather than lined with visible clutter.
Should the sink and washing machine be near each other?
Not necessarily, and in fact many well-planned utility rooms deliberately separate the “wet, dirty” jobs (sink, boots, cleaning cupboard) from the “clean laundry” side (washer, dryer, ironing, folding), so the two workflows don’t cross over and muddy fabrics don’t end up brushing against clean, folded ones.
What colour temperature should utility room lighting be?
Somewhere around 3500 to 4000 Kelvin strikes the right balance for a single-fixture room: warm enough to feel calm rather than clinical, cool enough that you can still see colours accurately for sorting laundry and checking stains.
Is Japandi actually practical for a hardworking room like this, or just for show?
Genuinely practical, provided you choose sealed or water-resistant versions of the natural materials involved rather than assuming “natural” automatically means “durable.” The concealed storage, clear workflow zones and calm palette are all functional choices as much as aesthetic ones; this style was never really about minimalism for its own sake, but about things working properly and looking calm while they do it.
How do I dry laundry indoors without a tumble dryer?
A ceiling-mounted pulley airer is the most space-efficient option, drying a full load overnight using rising warm air and taking up no floor space at all, provided you’ve got working ventilation to actually clear the moisture it releases into the room.
Can I create this look in a rented utility room or cupboard?
Yes, within reason. Focus on the changes that don’t require permission or permanent alteration: a woven basket instead of visible plastic tubs, decanted detergents, a small removable hook organiser, a houseplant, and a muted colour scheme through soft furnishings or removable adhesive shelf liner rather than paint, if your tenancy doesn’t allow redecorating.
How often should I properly clean out the utility room?
Aim for a quick daily tidy (worktop wiped, lint filter cleared, ironing board put away) alongside a deeper session every few months, checking behind appliances, wiping cabinet fronts and cleaning the extractor fan grille so it keeps pulling moisture out of the room effectively.