25 Outdoor Pool Ideas Turning Unused Space into a Private Retreat
Water has a quiet pull on the mind in garden design. It slows the clock, hushes the air, and stirs life into spaces that would otherwise sit still. I have seen even the most forgettable patch of ground turn a corner once water takes centre stage. People linger. Paths begin to make sense. What once felt like leftover land begins to feel like somewhere worth being.
Most unused outdoor spaces are not spare rooms waiting to be filled. They are the crumbs of circulation. Skinny side alleys, awkward rear cuts, lawns that stretch too far with no purpose, or terraces laid like an afterthought to meet a threshold. These are spaces with no pecking order. We walk through them, not into them. When I look at a property for a pool, I do not ask first where it might sit. I ask what the garden is crying out for. A focal point? Shelter? A sense of depth? Four walls of its own?
A pool, cut to the right cloth, can pull a whole garden into line. It lays down a spine. Movement falls into step around it. Seating turns to face it. Greenery draws a frame around it. The house, too, begins to play its part. Even a modest plunge pool, no more than 2.4 m x 3 m, can give a garden its sense of order so long as the terrace holds its own and the eye knows where to land. By contrast, a longer lap pool, say 3 m x 9 m, can stretch and civilise a wide garden that once had no bones to speak of.
Still, dreaming must keep company with doing. Climate picks at depth, heating needs, and what materials will last the distance. The budget tells you whether you are looking at a pre‑cast shell, concrete poured on site, or something altogether more tailored. And in tight city plots, planning rules will have their say where you can dig, where the fence must go, where the water can run.
This piece draws together 25 outdoor pool ideas, not as magazine polish, but as grounded thinking rooted in fit, function, and the kind of liveability that wears well over time. The point is not to throw in water for show. It is to turn forgotten ground into a corner you want to come back to. Deliberate. Settled. Built to last.
Rethinking the Site Before Choosing the Pool
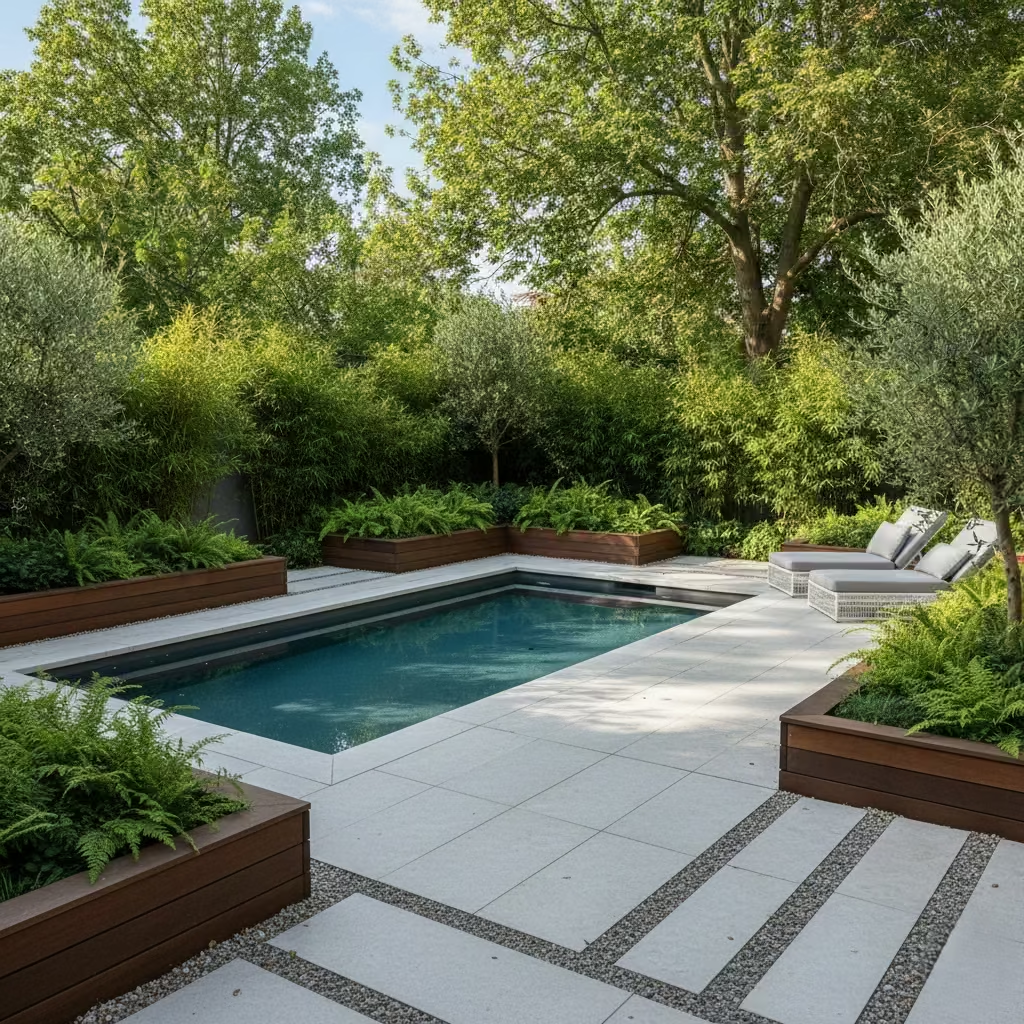
Before you settle on shape, surface, or a single water feature, the ground itself needs a proper read. In my line of work, the jobs that look effortless when finished are the ones where the land was listened to first and the pool brought in after, like a guest invited to the right seat at the table.
Assessing Orientation and Sun Path
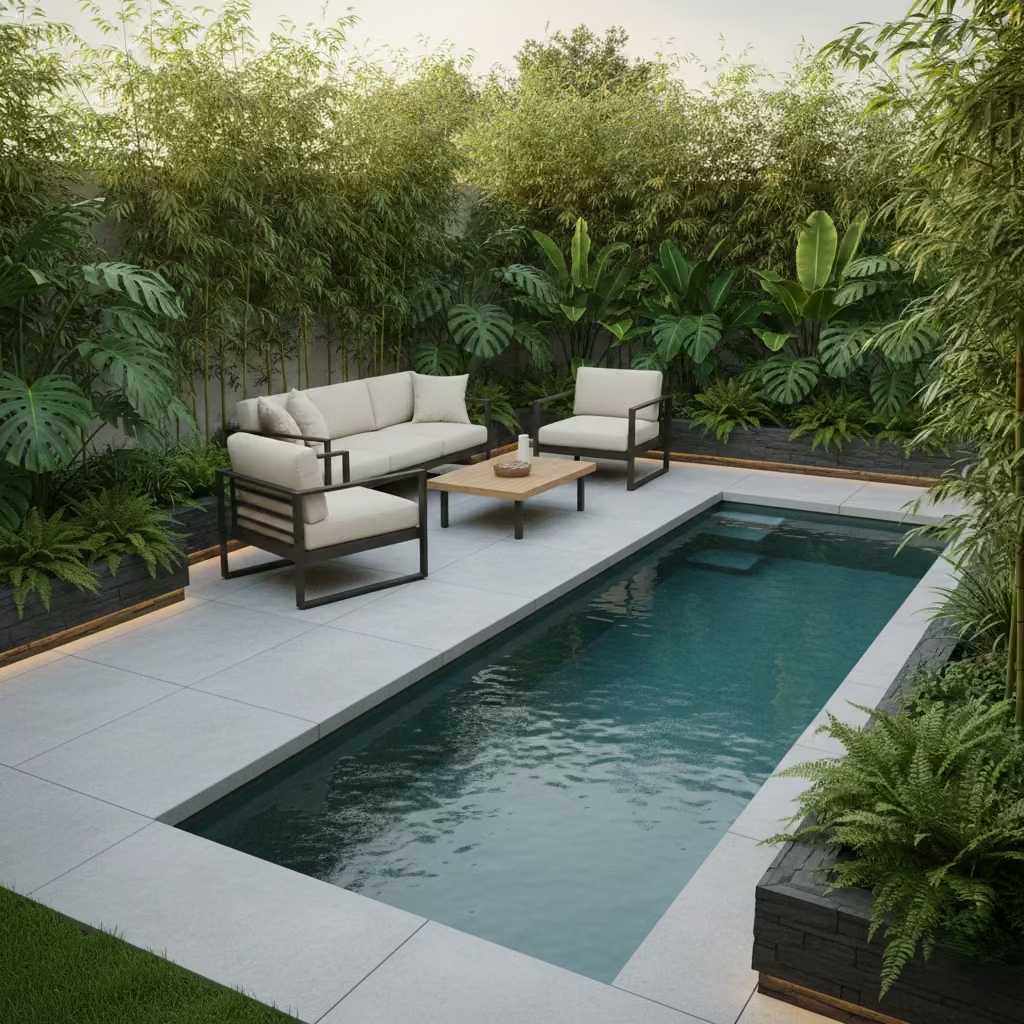
Where the sun falls matters. It warms the water, weathers the materials, and decides whether the pool gets used or just stared at. In the UK, I tend to nudge pools south or south-west where I can chase that late afternoon and early evening gold. In hotter US climates, the trick is keeping the sun on a leash. Too much glare, with no shade to soften it, and the paving turns hostile underfoot. The water, too, starts slipping away faster than it should.
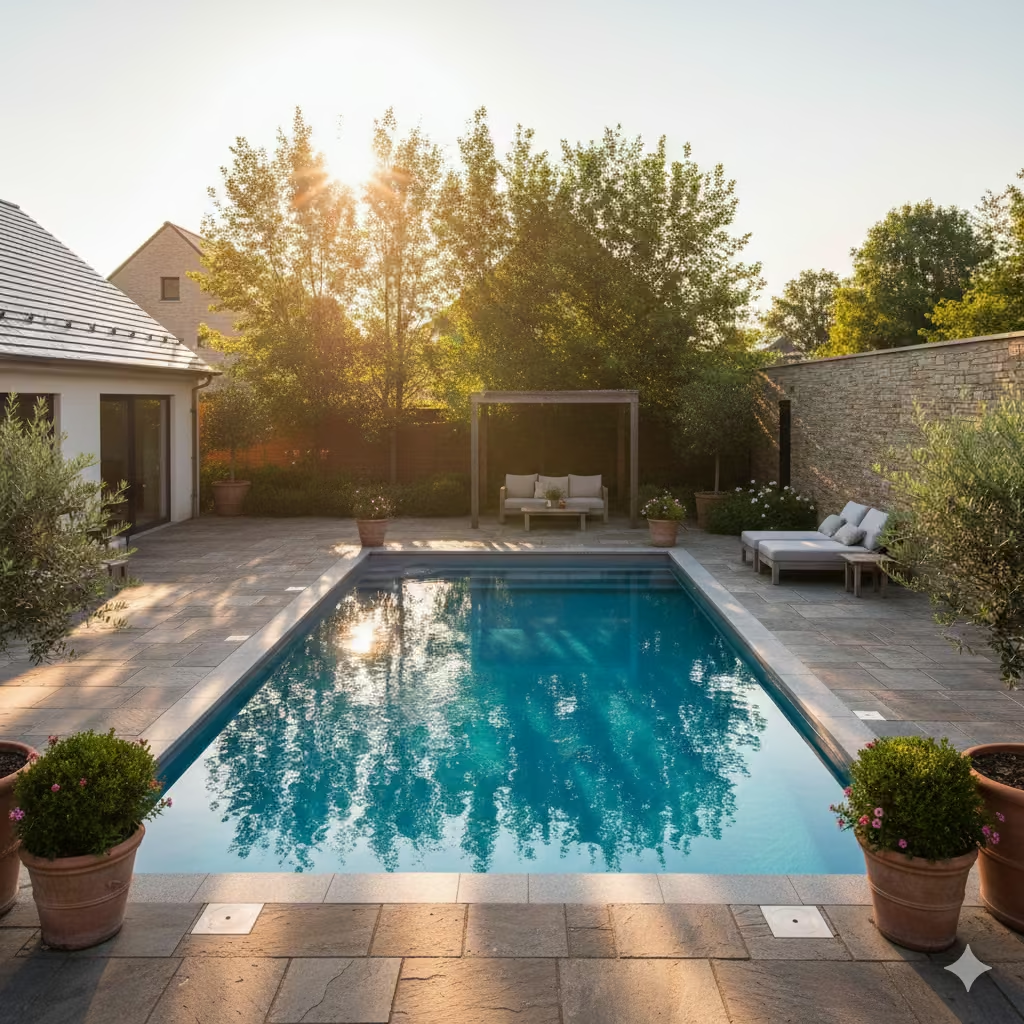
Track the sun’s arc through spring and summer; don’t trust a single site visit to tell the full story. Make a note of what casts a shadow neighbouring roofline, established trees, the boundary wall that never quite catches the light. A pool tucked into permanent shade can look moody, even striking. But without the heating budget to take the edge off, it risks sitting still and silent all season.
Minimum Recommended Dimensions
Proportion is critical. Under sizing leads to frustration. Oversizing can dominate the garden.
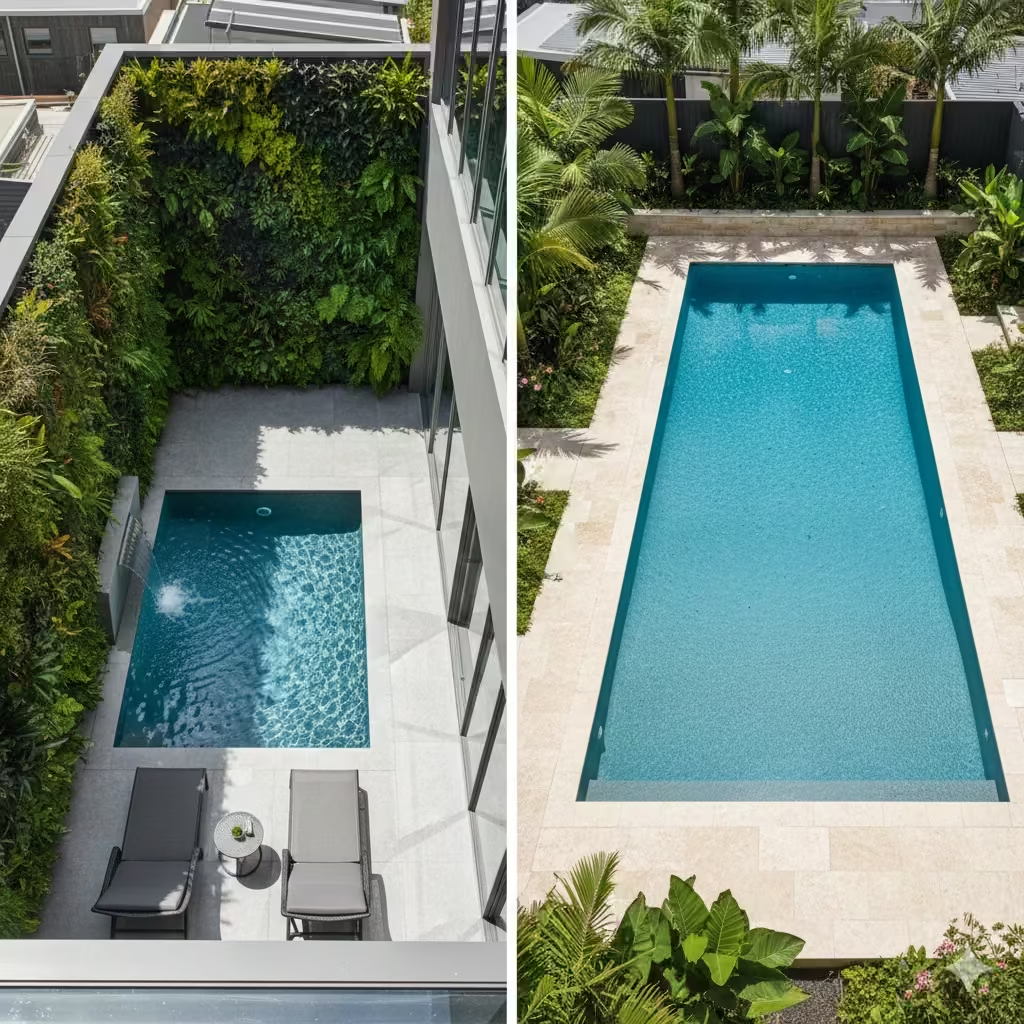
- Plunge Pool: 2.4 m x 3 m (8 ft x 10 ft)
Suitable for compact courtyards or urban gardens. Best used for cooling, lounging, and visual impact rather than active swimming. - Family Lap Pool: 3 m x 9 m (10 ft x 30 ft)
Allows for meaningful movement while preserving circulation space on at least one long side.
Equally important is perimeter clearance. I advise a minimum 1.2 m (4 ft) of usable terrace around primary access points to maintain comfortable movement and furniture placement.
Wind Exposure Considerations
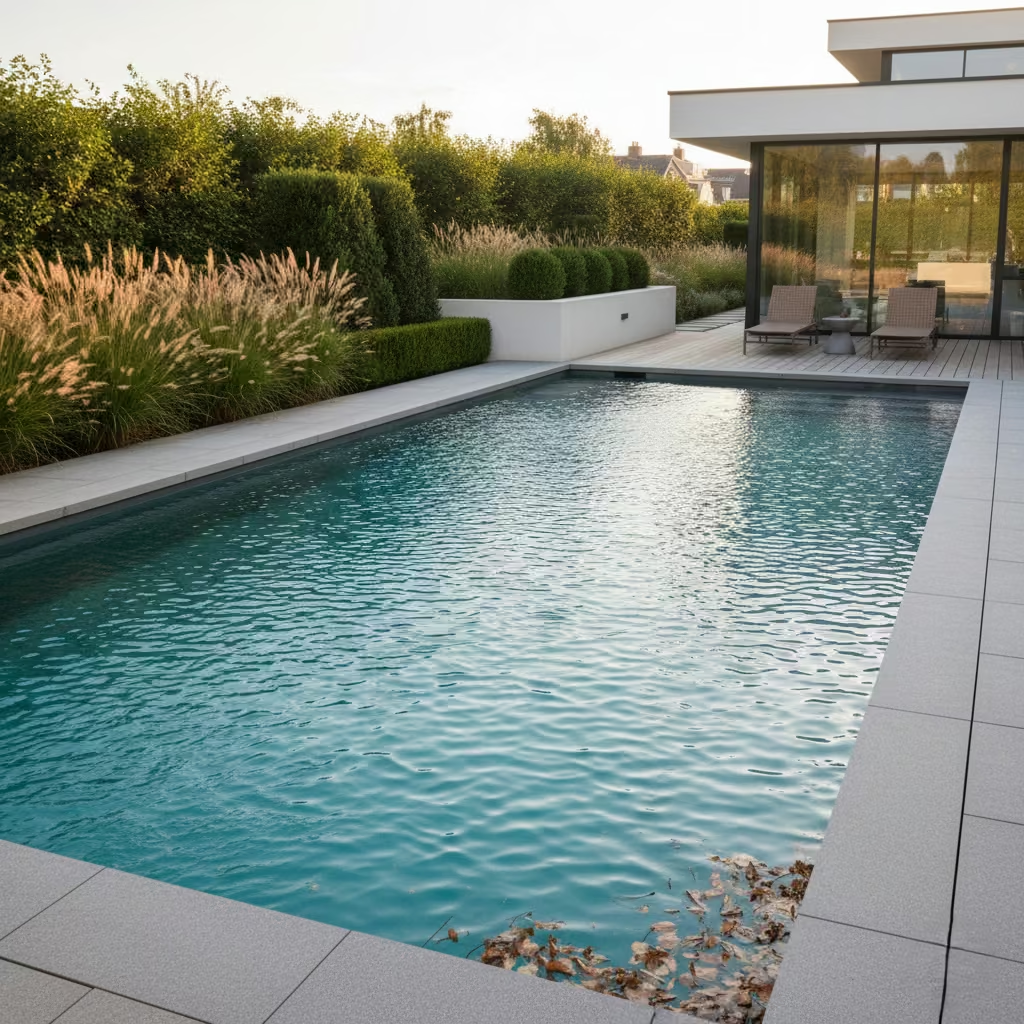
Wind is frequently underestimated. Persistent crosswinds accelerate heat loss and increase maintenance through debris accumulation. I often use planting buffers, low walls, or architectural screens to deflect prevailing winds without fully enclosing the space. In exposed rural plots, wind mitigation can influence whether heating systems become essential rather than optional.
You May also Like: 25 Outdoor Patio Ideas That Elevate Everyday Living
Privacy and Sightlines
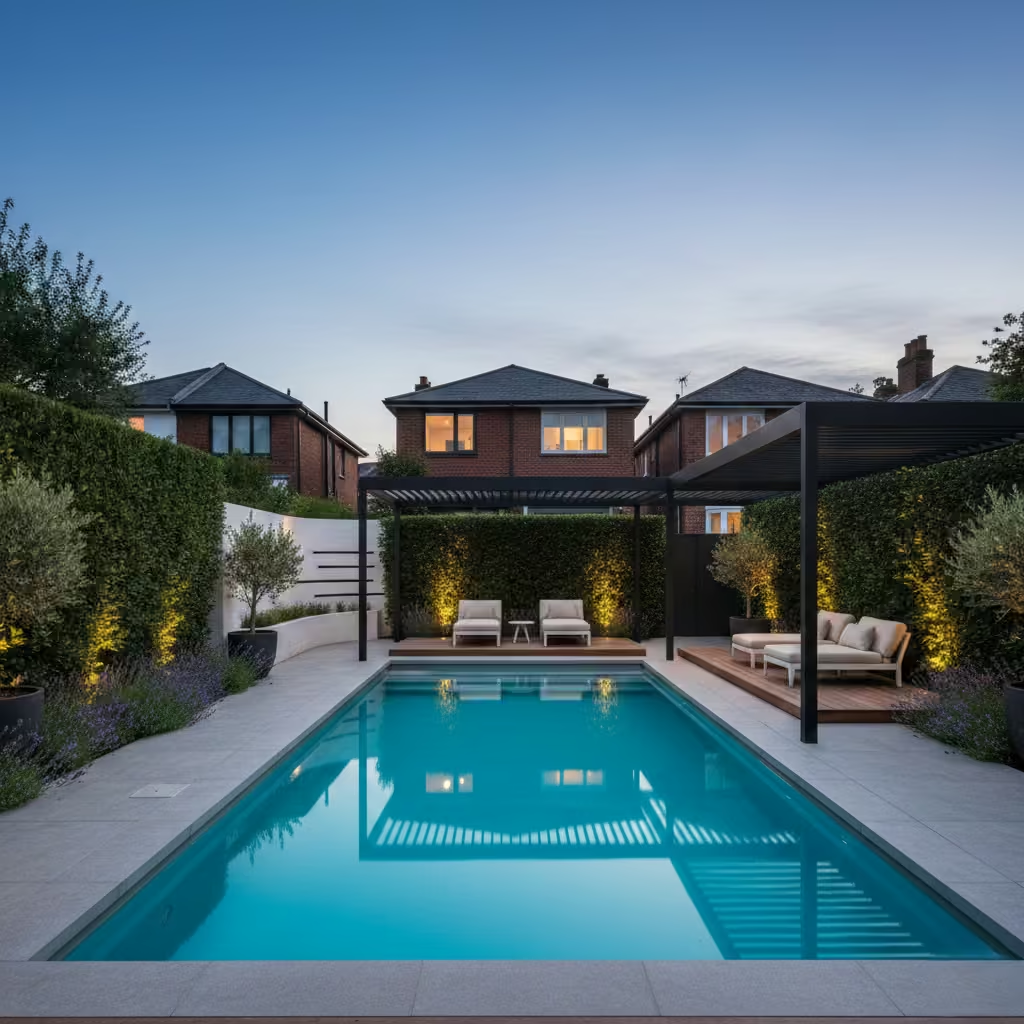
A pool intensifies visibility. Raised neighbouring windows, upper terraces, and overlooking properties must be evaluated early. Strategic planting, pergolas, or carefully positioned feature walls can protect privacy without creating a defensive perimeter. The goal is enclosure without confinement.
Drainage and Ground Conditions
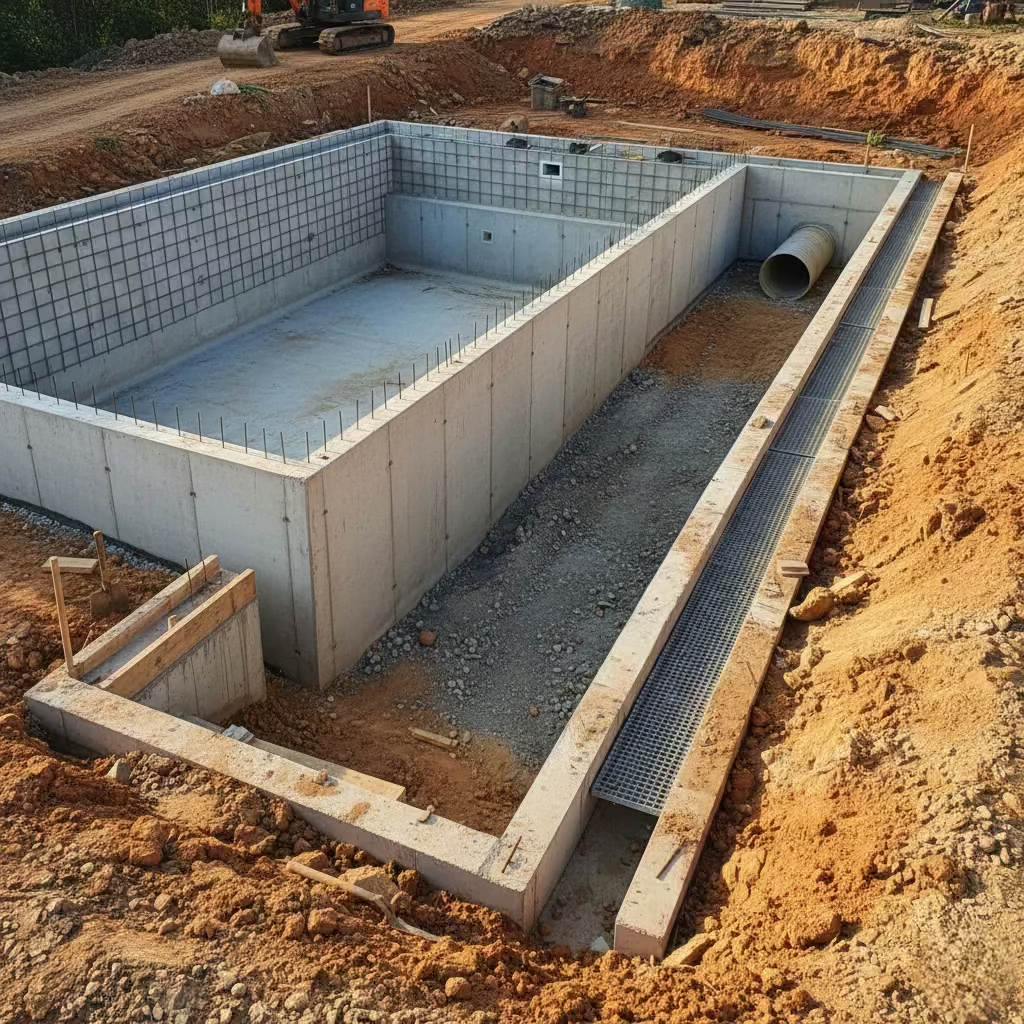
Subsoil composition, water table levels, and site drainage capacity significantly affect structural design and cost. Clay-heavy soils expand and contract, requiring reinforced engineering. Sloped sites may demand retaining structures. Surface water management around the terrace must prevent backflow toward the house. These considerations often influence feasibility more than aesthetic preference.
Professional Insight
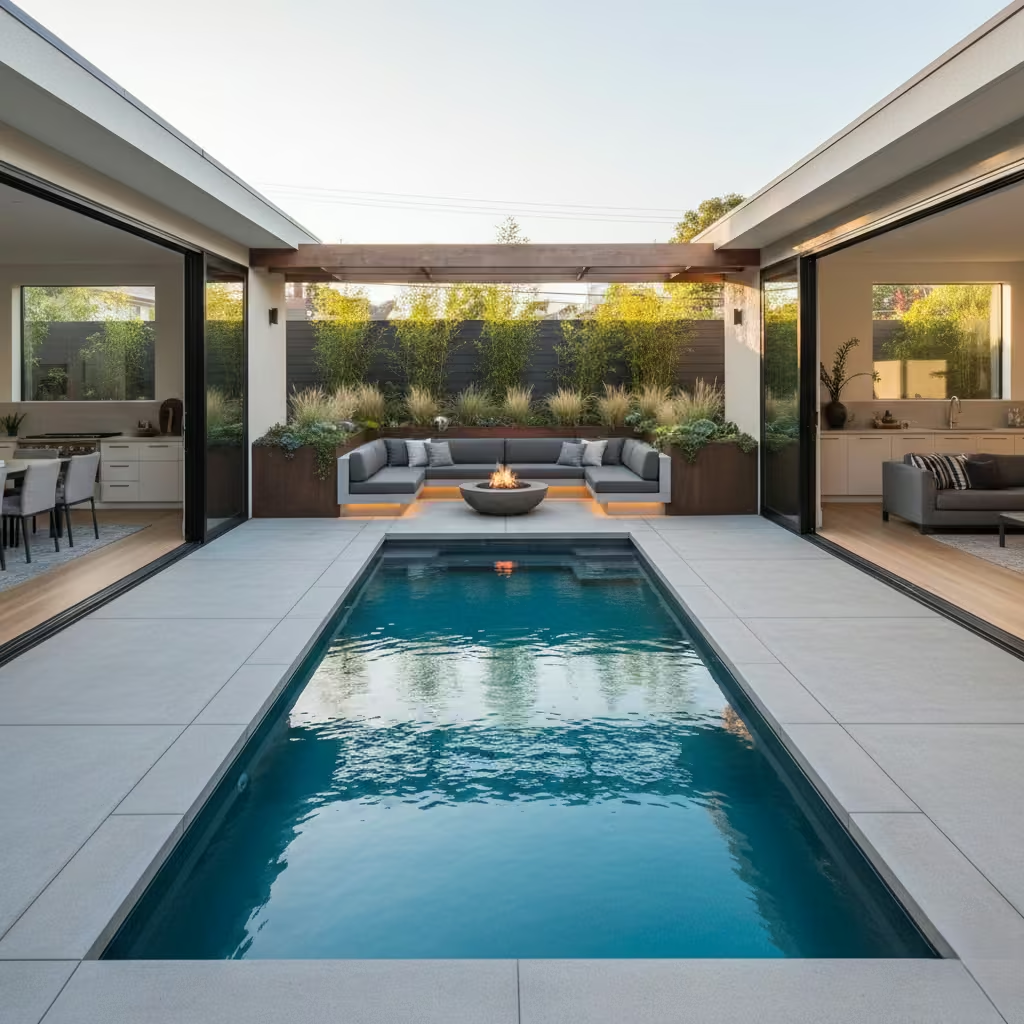
From experience, the success of a pool project is rarely about the pool itself. It is about how circulation routes, seating zones, planting layers, and architectural thresholds are resolved around it. When those relationships are coherent, even a modestly scaled pool can transform an overlooked corner into a purposeful retreat.
Outdoor Pool Ideas
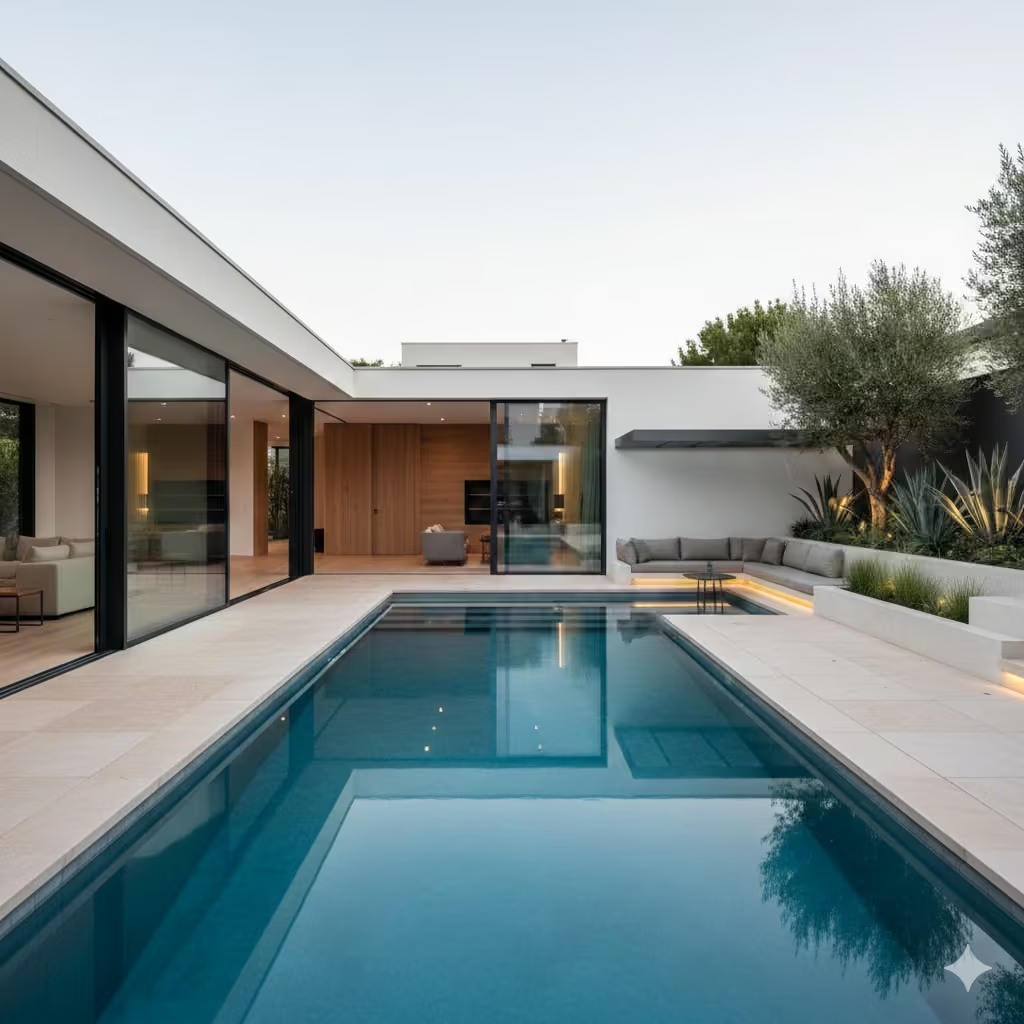
A pool should never be selected purely on appearance. Its geometry, depth, edge detail, and relationship to surrounding architecture must respond to how the space is used and how it is experienced from inside the house. Rather than presenting a random catalogue of shapes, the following ideas are organised by design intent. Each category reflects a different spatial objective, whether that is reclaiming a narrow plot, creating a resort-like retreat, making a strong architectural statement, supporting family life, or elevating the garden into a lifestyle environment.
Small-Space Transformations
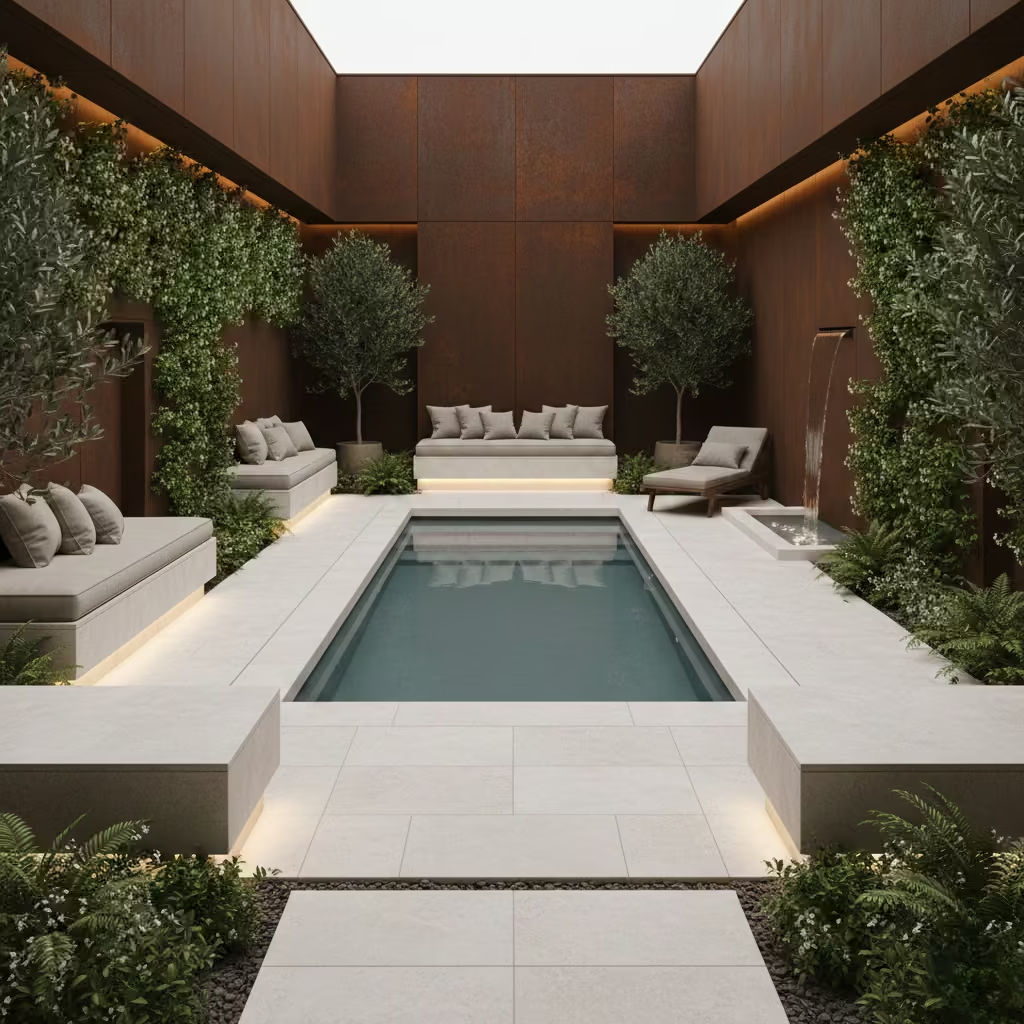
Compact gardens and overlooked side returns often appear unsuitable for a pool, yet in practice they can deliver some of the most refined results. The constraint forces clarity. Every centimetre must justify itself, circulation must be efficient, and materials must work harder visually. When proportion, depth, and surrounding terrace widths are carefully calibrated, even a modest footprint can shift a tight outdoor area from residual space into a composed retreat.
Courtyard Plunge Pool
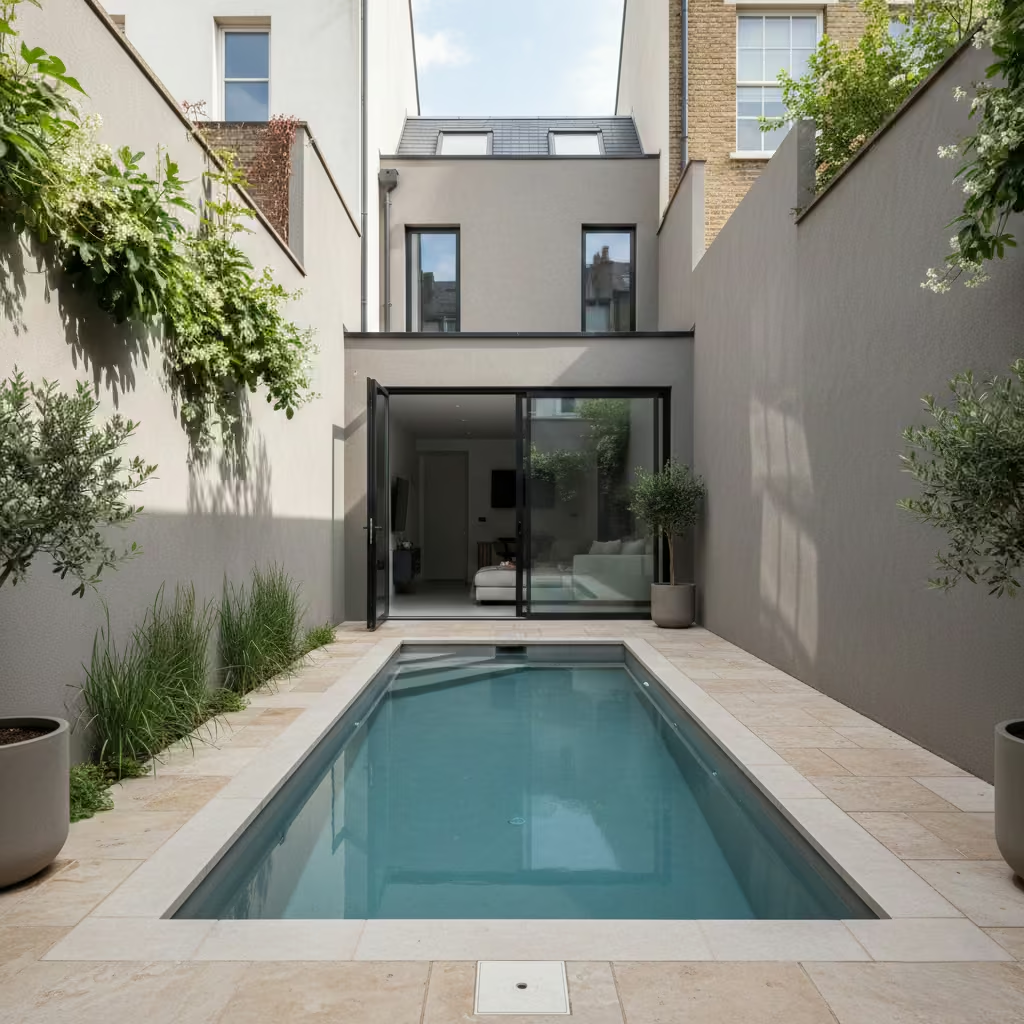
In dense urban settings where gardens are compact and privacy is limited, a courtyard plunge pool offers a disciplined, space-efficient solution. Rather than competing with the architecture, it works as a contained water feature that enhances atmosphere, light reflection, and perceived depth.
Ideal for:
- Townhouses and terrace homes
- Walled courtyards
- Rear extensions with limited external footprint
- Side-return renovations
Recommended Dimensions and Depth
A functional plunge pool typically begins at 2.4 m x 3 m (8 ft x 10 ft). This allows for seated immersion and short movement without overwhelming the courtyard.
For comfort and thermal efficiency, I usually recommend a depth of 1.2 m to 1.4 m (4 ft to 4.6 ft). Deeper installations increase water volume, heating costs, and structural complexity without meaningful benefit in small spaces.
Perimeter clearance should remain disciplined. Ideally, allow 900 mm to 1.2 m (3 ft to 4 ft) of circulation on at least one side to avoid the space feeling compressed.
Material Strategy: Microcement or Dark Porcelain
- Microcement creates a seamless, monolithic effect. It visually enlarges the pool by removing grout lines and works well in contemporary courtyard schemes.
- Dark porcelain enhances depth perception and improves heat absorption in cooler climates. A charcoal or deep slate tone can make even a shallow plunge pool feel substantial.
In shaded UK courtyards, darker finishes also compensate for limited direct sunlight, giving the water a richer tone rather than a flat grey appearance.
Pros
- Works within tight footprints
- Lower water volume reduces heating and maintenance costs
- Creates strong visual focus in small gardens
- Easier to integrate with vertical planting or feature walls
- Planning approval may be simpler compared to larger pools
Cons
- Limited for active swimming
- Surrounding terrace space can feel constrained if poorly planned
- Overheating risk in hot climates if no shading is provided
- Requires precise waterproofing detailing due to proximity to buildings
Real-Life Application Insight
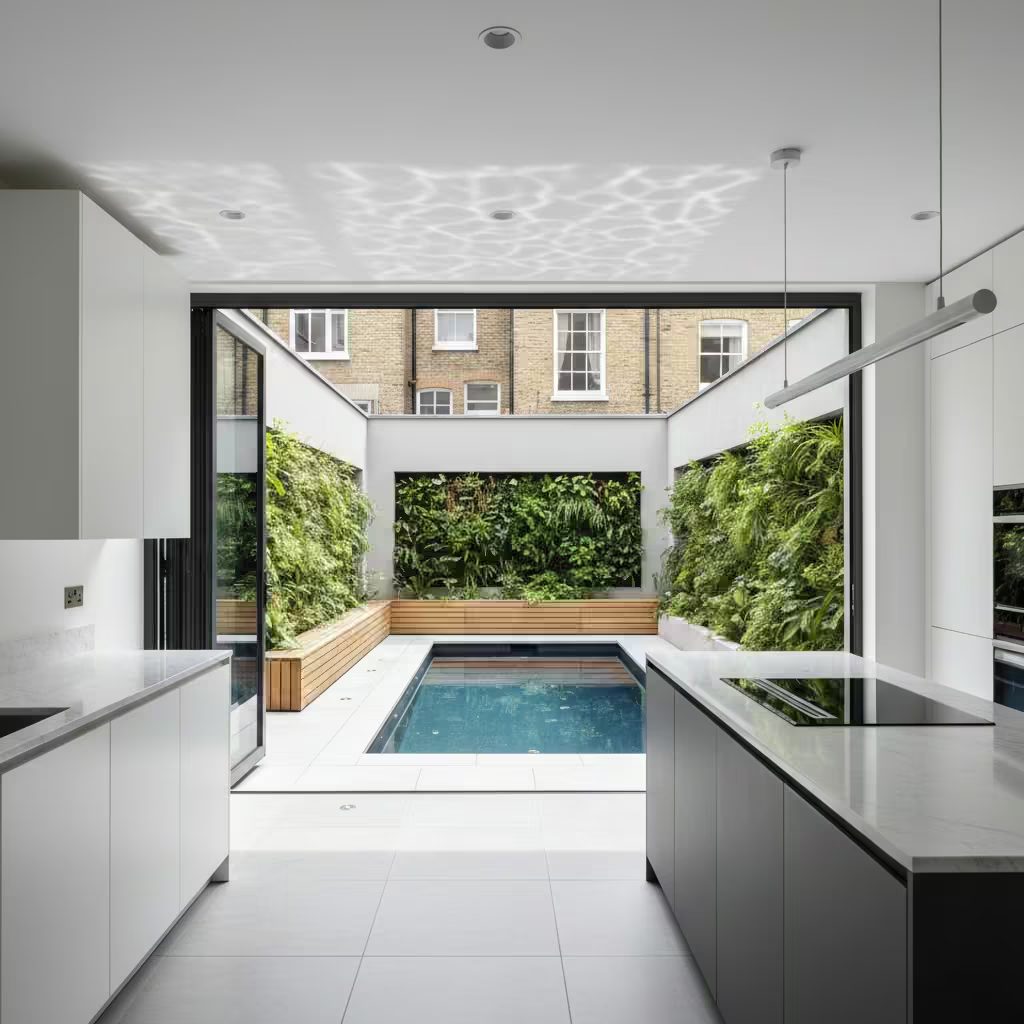
On a recent London townhouse renovation, the rear courtyard measured just under 5 m x 6 m (16 ft x 20 ft). The space had previously been an underused paved rectangle accessed through bi-fold doors. Instead of covering it entirely with decking, we inserted a 2.5 m x 3 m (8.2 ft x 10 ft) plunge pool aligned with the central sightline from the kitchen.
The transformation was not about swimming length. It was about hierarchy. The water established a focal axis from the interior, reflecting light back into the extension. Built-in bench seating along one edge allowed social use without adding freestanding furniture, preserving circulation. Vertical planting softened overlooking windows without creating visual bulk.
Side Yard Lap Pool
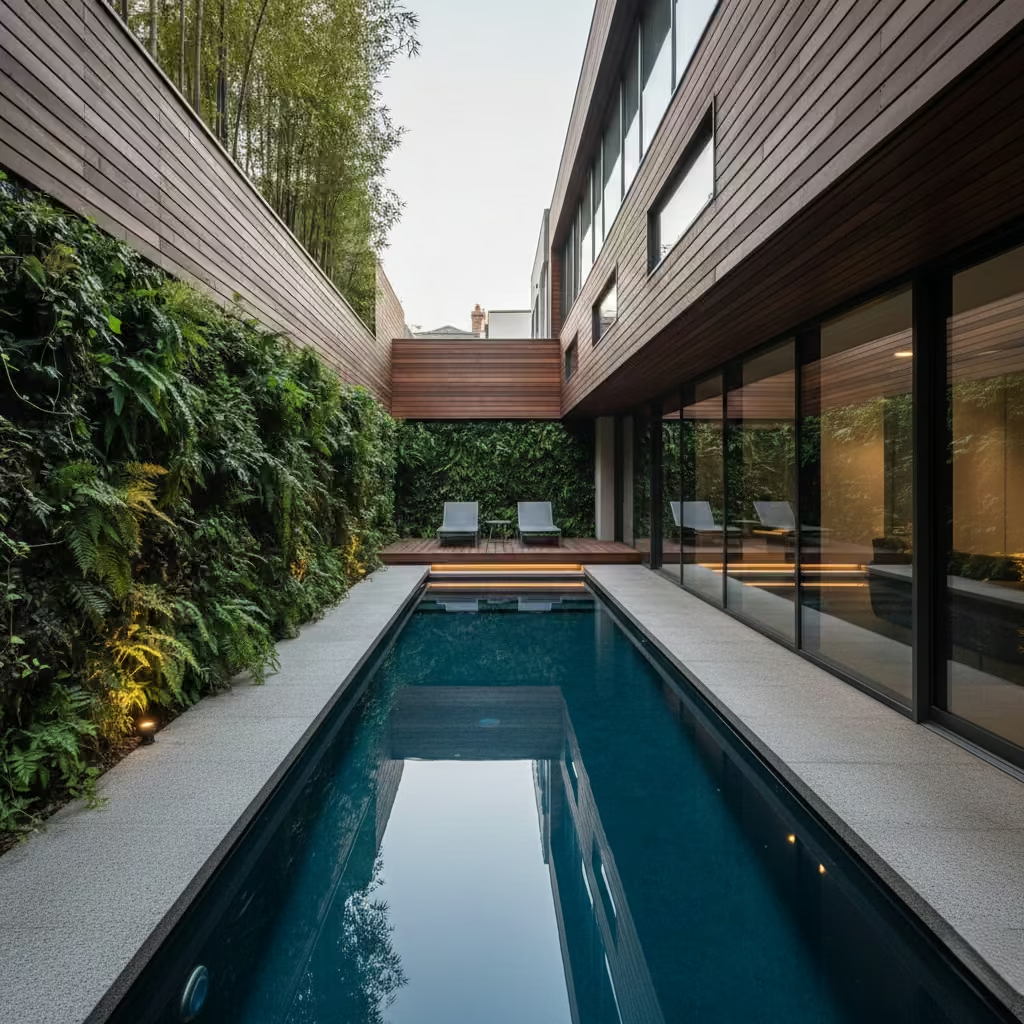
Side yards are frequently dismissed as secondary corridors, long strips of land used only for bins, access, or storage. Architecturally, however, they offer something extremely valuable: linearity. That natural length makes them ideal candidates for a disciplined lap pool that transforms a neglected passage into a purposeful axis.
Ideal for:
- Urban infill plots
- Homes with 2 m to 4 m (6.5 ft to 13 ft) side setbacks
- Properties where rear garden depth is limited but length is available
- Contemporary extensions with strong horizontal lines
Recommended Dimensions and Proportion
A workable side yard lap pool typically begins at:
- Width: 2.4 m to 3 m (8 ft to 10 ft)
- Length: 7 m to 12 m (23 ft to 40 ft) depending on site
For meaningful exercise, I advise aiming for at least 9 m (30 ft) in length where possible.
Depth can remain consistent at 1.2 m to 1.5 m (4 ft to 5 ft) for safe lap swimming while maintaining manageable water volume.
Critically, preserve a minimum 900 mm to 1.2 m (3 ft to 4 ft) circulation zone along one long edge. Without this, maintenance access and usability suffer.
Spatial Strategy
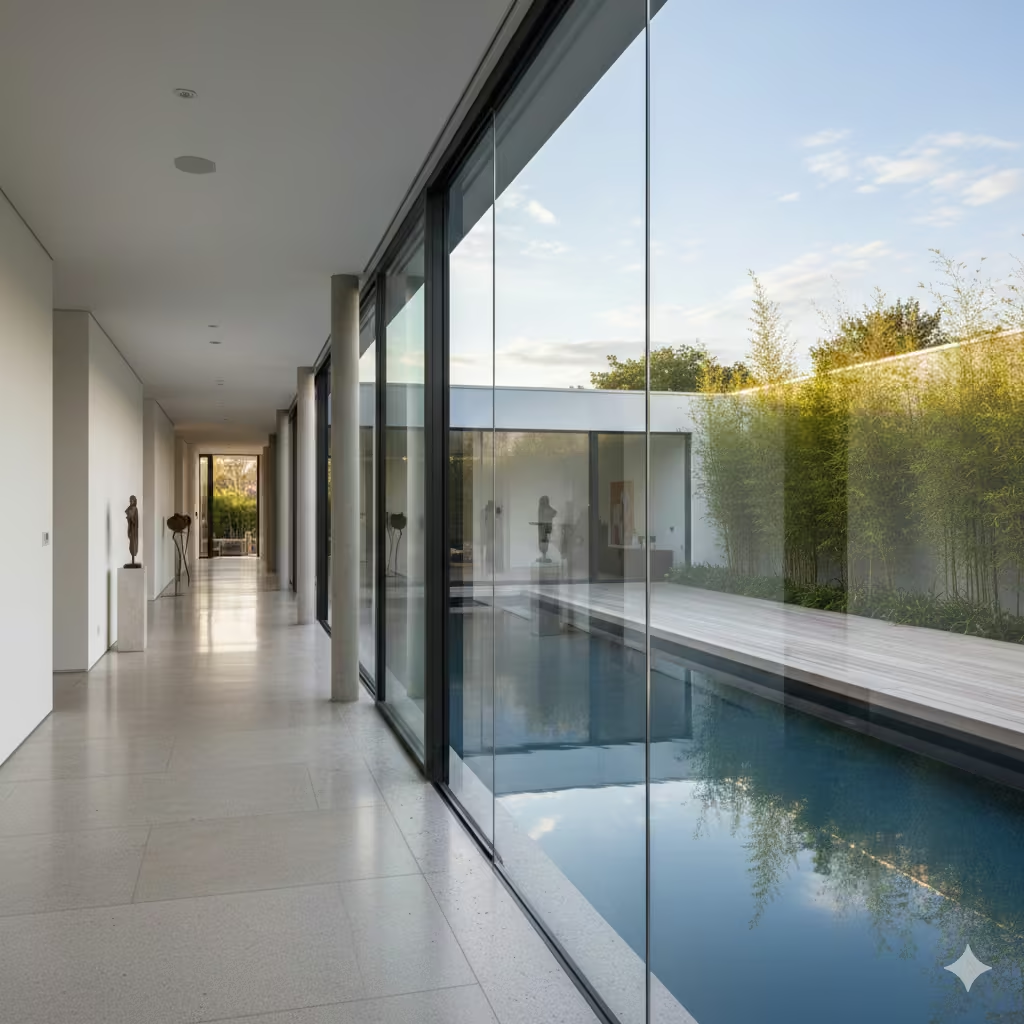
A side yard pool should read as an architectural extension of the house rather than a detached element. Align it with window openings, door thresholds, or internal corridors so that sightlines extend the perceived interior space outward. When viewed from inside, the water becomes a reflective plane that elongates the property visually.
In narrow spaces, I often specify coping that is flush with the surrounding terrace to maintain a clean, uninterrupted edge. Raised coping can visually narrow the space further.
Material Direction
- Large-format porcelain slabs reduce visual clutter in tight areas.
- Linear drainage channels concealed along one edge maintain clean lines.
- Timber or composite decking can soften the geometry if the architecture is rigid.
In cooler UK climates, darker interior finishes help maximise solar heat absorption. In hotter US regions, lighter finishes may be preferable to prevent overheating and excessive glare.
Pros
- Makes productive use of otherwise redundant land
- Ideal for fitness-oriented homeowners
- Strong architectural impact with minimal footprint expansion
- Enhances natural light reflection into adjacent rooms
- Easier zoning for privacy due to linear orientation
Cons
- Narrow widths can feel restrictive if under 2.4 m (8 ft)
- Limited flexibility for social lounging unless one end is widened
- Structural excavation may be complex near foundations
- Overlooking from neighbouring properties may require screening
Real-Life Application Insight
On a recent project involving a modern rear extension, the side yard measured approximately 3.2 m wide by 14 m long (10.5 ft by 46 ft). Originally a service corridor, it offered little aesthetic or functional value. Rather than landscaping it conventionally, we introduced a 2.5 m x 10 m (8.2 ft x 33 ft) lap pool, leaving a 1 m (3.3 ft) walkway between the water and the boundary wall.
By aligning the pool with a long internal hallway glazed along one side, the effect was transformative. What had been a dark corridor became a light-filled gallery space animated by moving reflections. The pool not only introduced exercise potential but redefined the entire spatial experience of the ground floor.
The key lesson was respecting proportion. In narrow sites, precision in width, edge detailing, and circulation is what determines whether the pool feels architectural or accidental.
Narrow Infinity Edge Pool
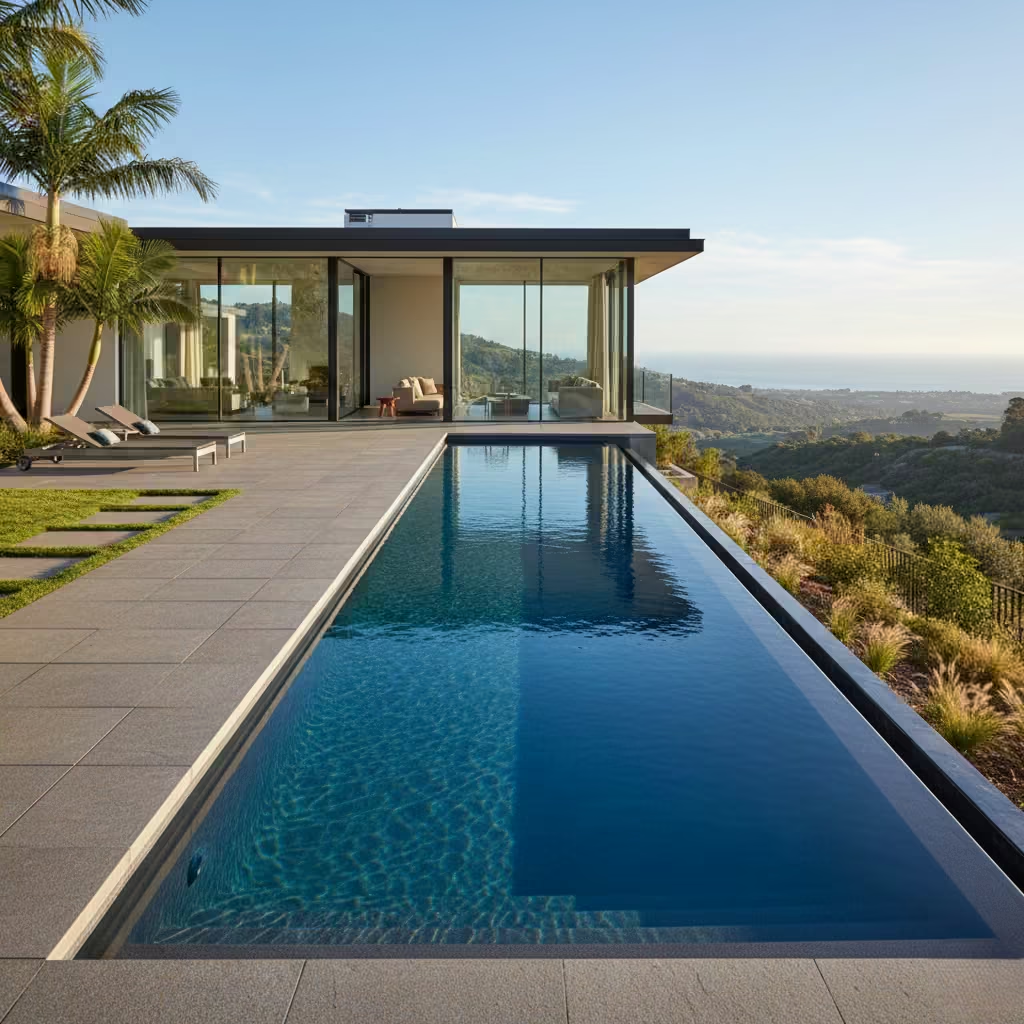
An infinity edge is often associated with expansive hillside properties, yet in disciplined form it can be remarkably effective in narrow plots. When carefully engineered, a slim infinity edge pool transforms a tight garden into a layered visual composition, drawing the eye outward and extending perceived depth beyond the physical boundary.
Ideal for:
- Sloped sites
- Properties backing onto landscape views
- Gardens with rear elevation drops
- Contemporary homes with strong horizontal architecture
Recommended Dimensions and Proportion
For narrow plots, maintain clarity in width:
- Width: 2.4 m to 3 m (8 ft to 10 ft)
- Length: 6 m to 12 m (20 ft to 40 ft), depending on available depth
A minimum 2.4 m (8 ft) width preserves usability without crowding.
Depth typically ranges from 1.2 m to 1.5 m (4 ft to 5 ft). Uniform depth works well in slim formats, simplifying structure and hydraulic systems.
The overflow trough requires additional structural allowance, usually 300 mm to 450 mm (12 in to 18 in) beyond the pool wall. This must be factored into site planning early.
Design Strategy
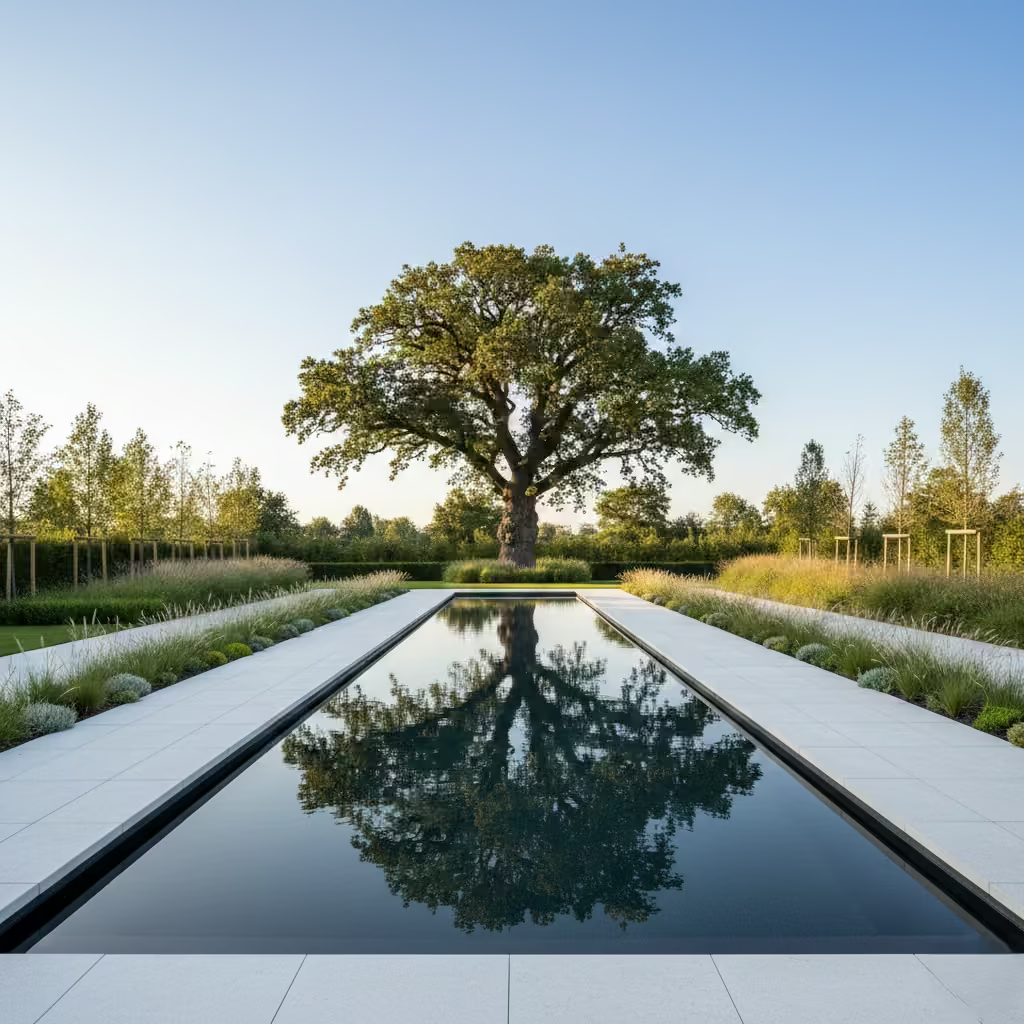
The success of a narrow infinity pool lies in alignment. The vanishing edge should terminate toward the most compelling visual axis, whether that is a distant landscape, a mature tree, or even a deliberately framed wall.
In flat urban sites without natural views, I have used infinity edges against minimalist rendered walls to create a mirror-like reflective surface. The effect is subtle but sophisticated, particularly when paired with dark interior finishes.
The surrounding terrace must remain restrained. In narrow gardens, excessive paving visually compresses the space. I often introduce soft planting bands or architectural screens to balance the linearity.
Structural and Technical Considerations
Infinity pools require:
- Secondary catch basins
- Enhanced waterproofing
- More complex filtration systems
- Pump sizing appropriate for continuous overflow
Wind exposure becomes critical. Strong crosswinds can disrupt the overflow sheet, reducing the intended visual effect and increasing water loss.
Pros
- Visually expands small or narrow sites
- Creates strong architectural focus
- Elevates perceived property value
- Enhances reflections and light movement
- Ideal for modern design schemes
Cons
- Higher construction cost due to overflow engineering
- Increased water evaporation
- Greater maintenance complexity
- Requires precise levelling for clean water sheet effect
Real-Life Application Insight
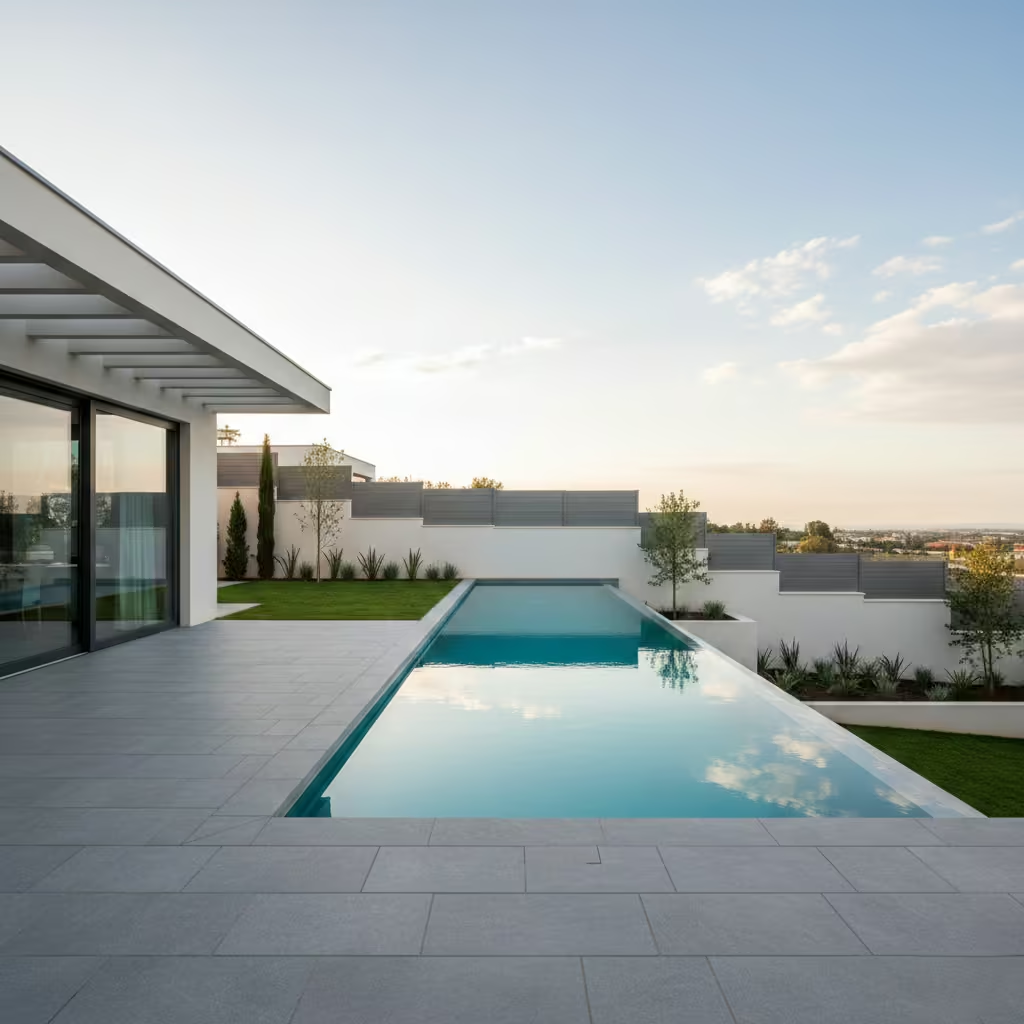
On a sloped suburban property measuring approximately 5 m wide by 18 m deep (16 ft by 59 ft), the garden felt compressed due to fencing and neighbouring structures. We installed a 2.5 m x 8 m (8.2 ft x 26 ft) infinity pool positioned at the natural drop toward the rear boundary.
Rather than exposing the overflow edge directly to the neighbour’s fence, we constructed a low rendered wall beyond the vanishing edge to create a controlled horizon line. The water appeared to dissolve into a calm plane rather than a boundary.
The transformation was architectural rather than decorative. By introducing a precise infinity edge within a narrow footprint, the garden gained depth and visual release without increasing its actual size. The lesson was restraint. In tight spaces, the infinity detail must feel quiet and deliberate, not theatrical.
Raised Pool with Built-In Seating
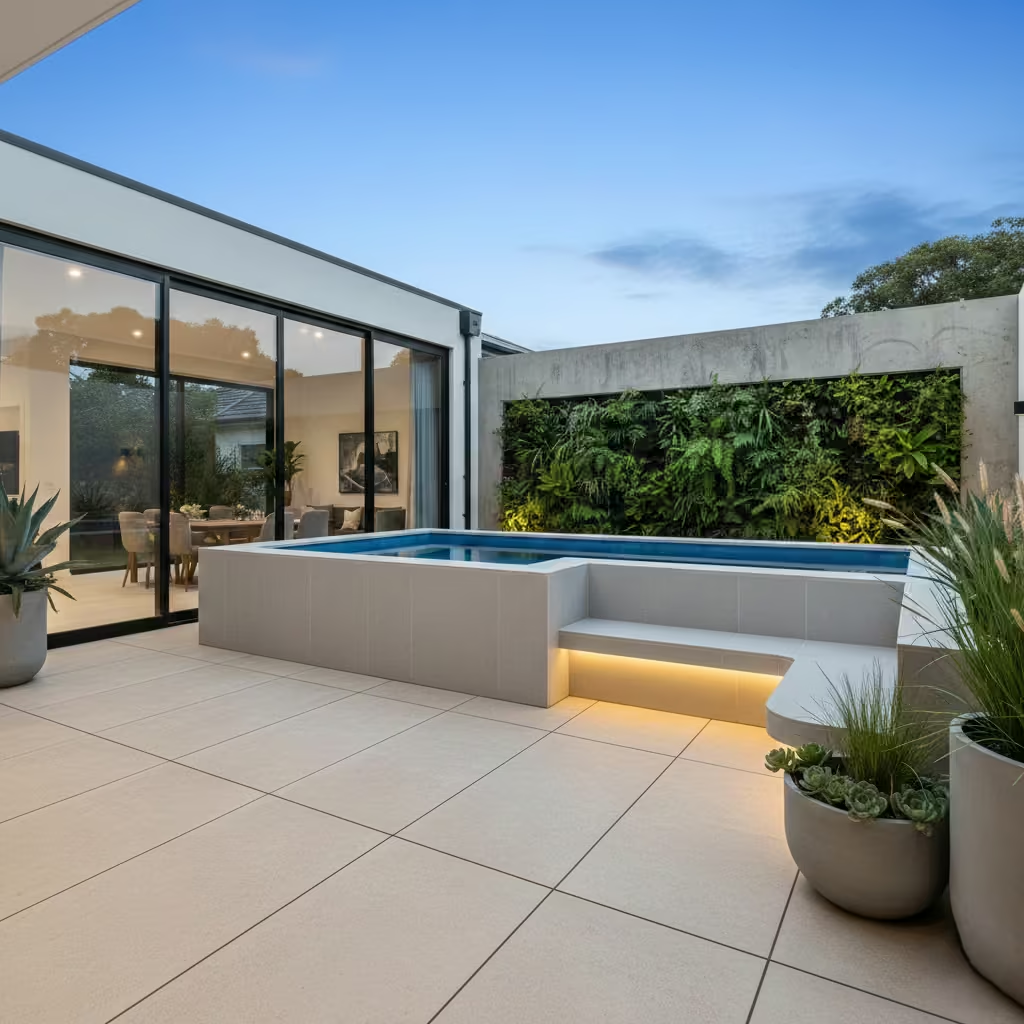
A raised pool can resolve multiple spatial challenges at once. It introduces clear definition, improves visibility from the house, and allows structural integration of seating without relying on additional furniture. In compact gardens or uneven sites, elevating the water level by even 450 mm to 600 mm (18 in to 24 in) can dramatically change how the space is experienced.
Ideal for:
- Sloped gardens requiring level transitions
- Courtyards needing stronger visual structure
- Homes where internal floor level sits above garden grade
- Small plots where integrated seating reduces clutter
Recommended Dimensions and Configuration
For smaller gardens, a raised pool often works well at:
- 2.5 m x 4 m (8.2 ft x 13 ft) for plunge-style layouts
- 3 m x 7 m (10 ft x 23 ft) for compact family use
Depth can remain at 1.2 m to 1.4 m (4 ft to 4.6 ft) for most applications.
Built-in seating ledges should be designed at:
- 450 mm to 500 mm (18 in to 20 in) seat height
- Minimum 400 mm (16 in) seat depth
If submerged bench seating is included within the pool, maintain a water depth of approximately 300 mm to 450 mm (12 in to 18 in) over the ledge for comfortable immersion.
Design Strategy
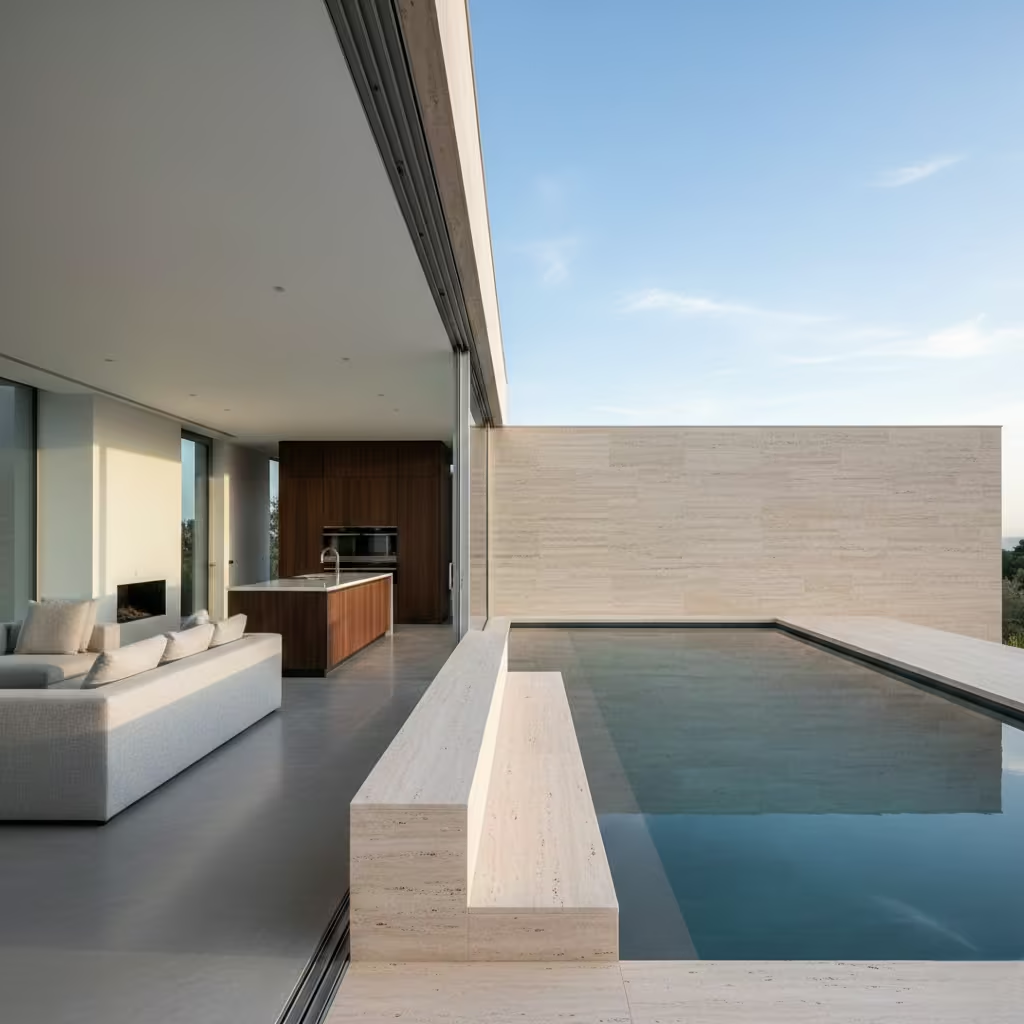
The architectural value of a raised pool lies in its edge detailing. A crisp coping line can double as informal perch seating, while integrated planters or wall backs provide enclosure and privacy.
In tight gardens, built-in seating reduces reliance on freestanding loungers that consume circulation space. I often align raised seating with key sightlines from the kitchen or living room so that the pool reads as an intentional extension of the interior rather than a separate garden feature.
Material continuity is essential. Using the same porcelain or stone for both pool cladding and adjacent terraces avoids visual fragmentation.
Structural and Technical Considerations
Raised pools require reinforced retaining walls and careful waterproofing. Hydrostatic pressure increases with elevation, and structural detailing must account for this. Additionally:
- Exposed exterior faces require frost-resistant finishes in colder climates
- Drainage must prevent water pooling at the base
- Mechanical equipment access should be discreet but practical
Pros
- Defines spatial hierarchy in small gardens
- Provides integrated seating without extra furniture
- Improves visibility of water from interior rooms
- Helps resolve sloped terrain
- Can create privacy when combined with wall structures
Cons
- Higher construction cost due to structural reinforcement
- Visual bulk if proportions are not carefully managed
- Potential overshadowing in very tight spaces
- Requires precise detailing to avoid water staining on exterior faces
Real-Life Application Insight
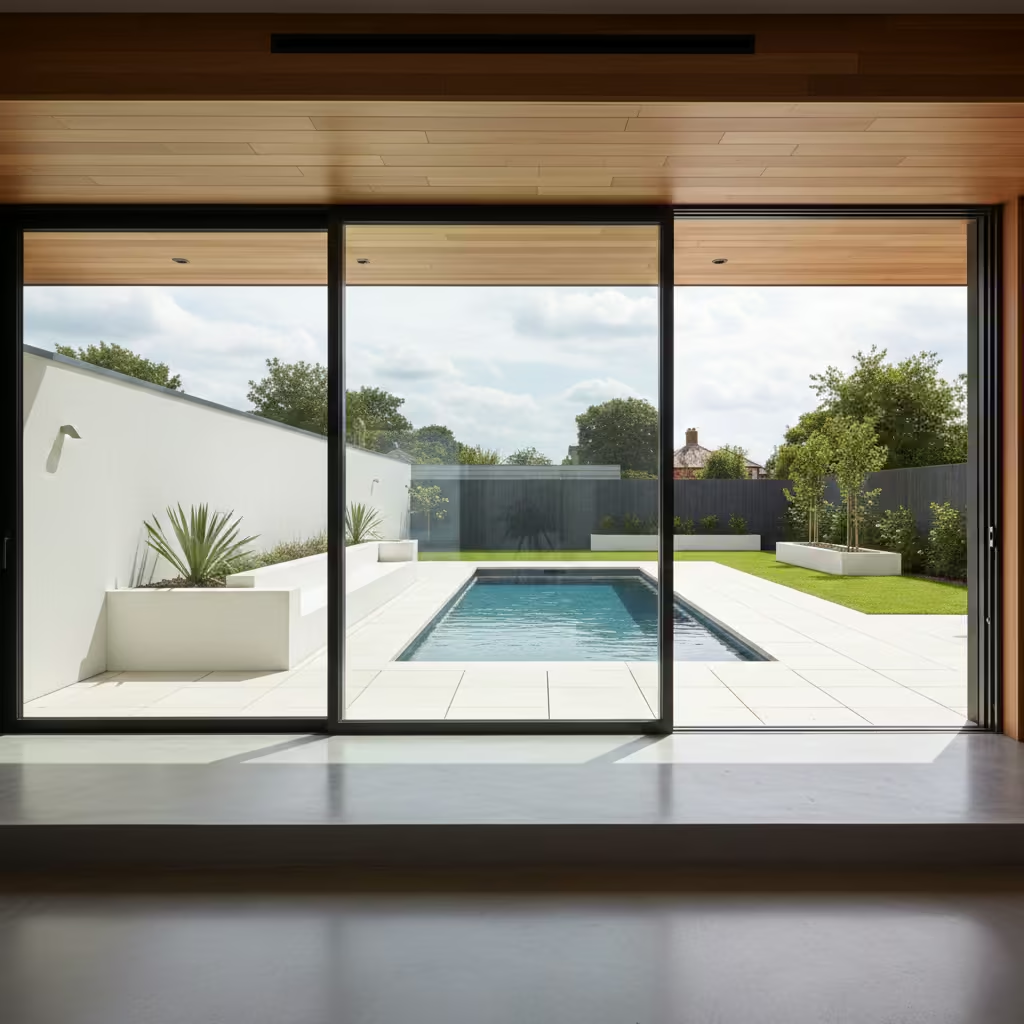
On a compact rear garden measuring approximately 6 m x 8 m (20 ft x 26 ft), the internal floor level of the new extension sat 500 mm (20 in) above the existing patio. Rather than lowering the terrace or introducing multiple steps, we raised the pool to align visually with the interior threshold.
The pool measured 3 m x 5 m (10 ft x 16 ft), elevated by 550 mm (22 in), with a built-in rendered seating wall along one long edge. The seating eliminated the need for additional garden furniture and preserved circulation space around the perimeter.
The effect was architectural clarity. The raised pool became a structured platform rather than a hole in the ground. Most importantly, it corrected a level discrepancy that would otherwise have fragmented the garden layout. The key lesson was integration. When elevation and seating are resolved together, a raised pool can feel deliberate rather than imposed.
Glass-Edge Pool for Compact Gardens
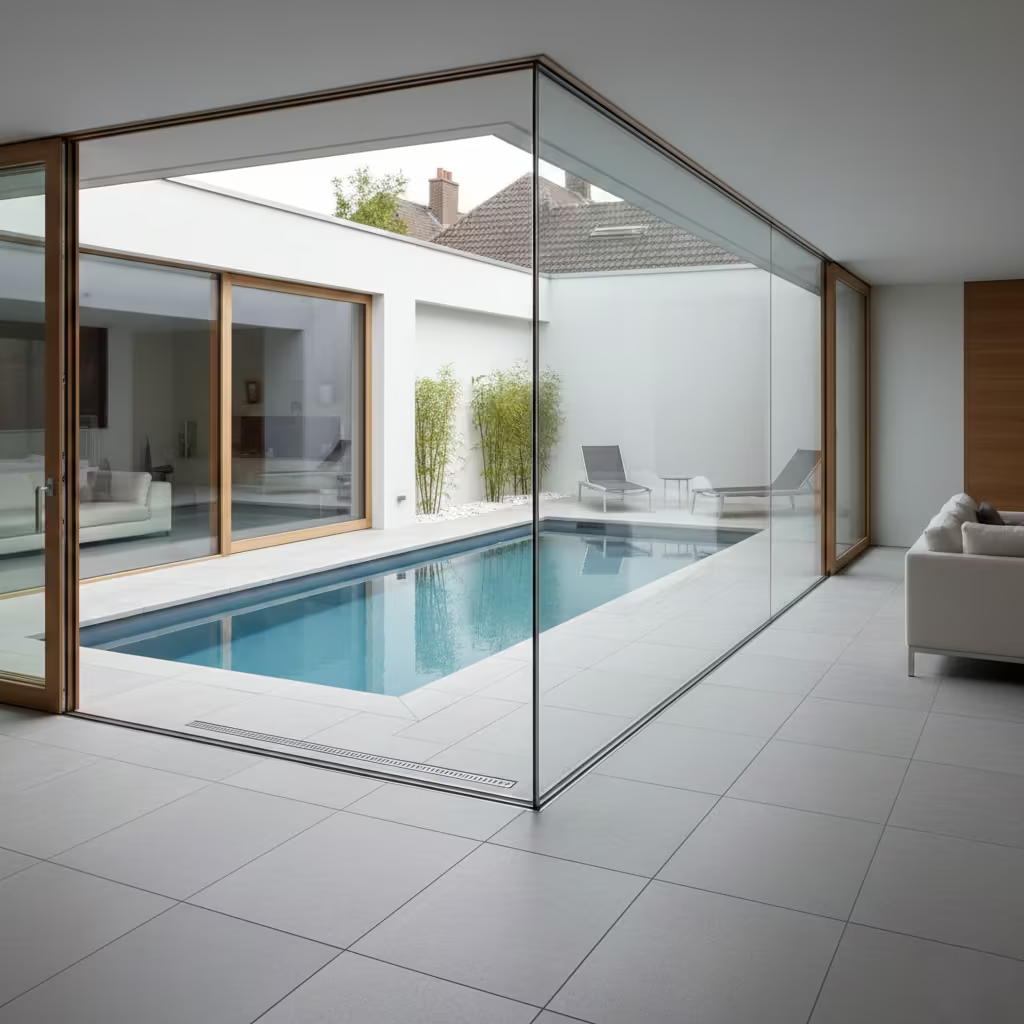
Glass-edge pools bring a sense of transparency and lightness to small or confined gardens. By replacing traditional solid walls with structural glazing, the pool appears less obtrusive, enhancing visual connectivity between interior and exterior spaces. In compact plots, this can be transformative, making the garden feel more expansive while introducing a strong architectural statement.
Ideal for:
- Small courtyards and urban gardens
- Homes with direct indoor sightlines to the pool
- Contemporary architecture prioritising minimalism and visual continuity
- Properties where making the pool “disappear” visually is desirable
Recommended Dimensions and Proportion
For compact gardens, a glass-edge pool typically works at:
- Width: 2.4 m to 3 m (8 ft to 10 ft)
- Length: 4 m to 8 m (13 ft to 26 ft)
Depth can remain at 1.2 m to 1.5 m (4 ft to 5 ft).
Glass panels should generally extend from waterline to coping height (usually 450 mm to 600 mm / 18–24 in) to ensure safety and structural integrity. Panels must be anchored in reinforced concrete or steel framing, and edges must be flush with surrounding terrace finishes to maintain continuity.
Design Strategy
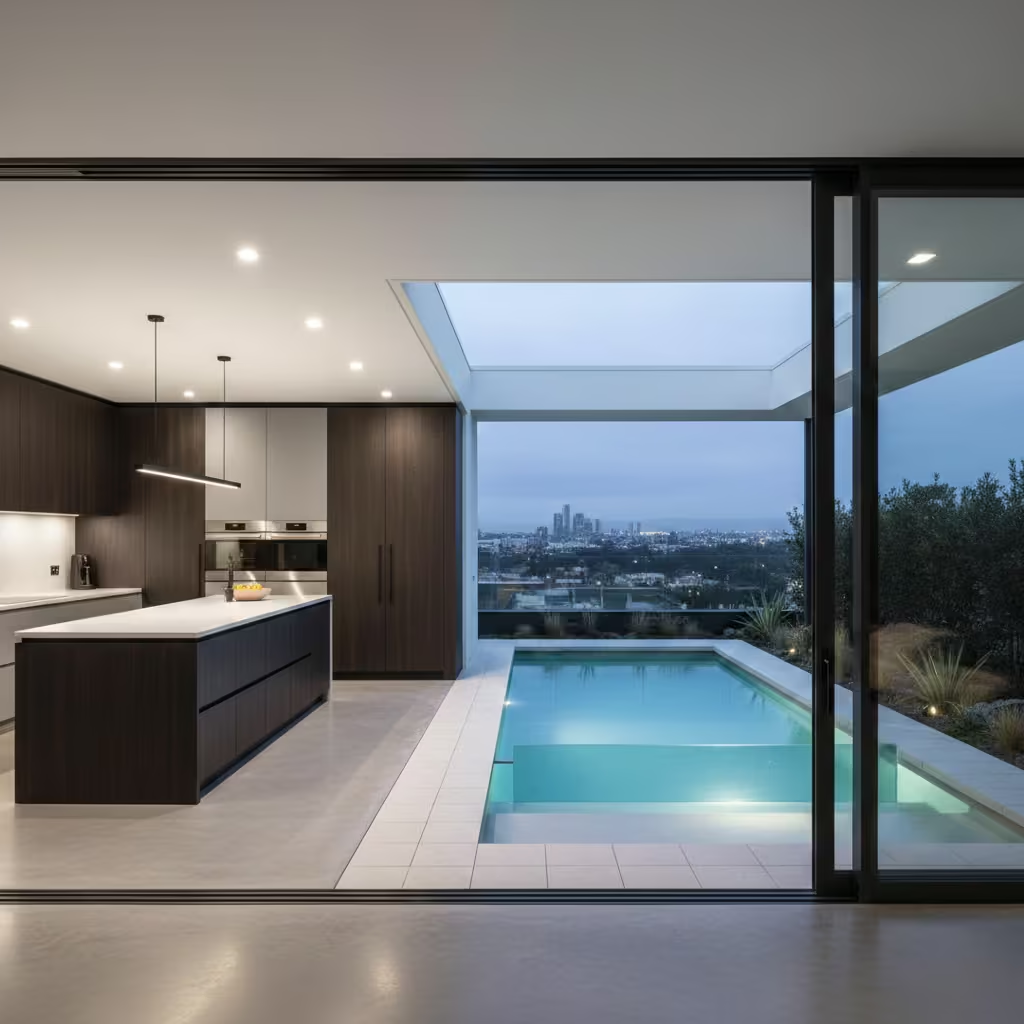
The transparency of glass allows the pool to feel integrated rather than intrusive. I often align the glazed edge with key internal sightlines, such as from a kitchen or living room, so the water visually merges with interior floors. Frosted or tinted panels can be introduced in high-privacy areas, balancing transparency with discretion.
Lighting beneath or behind the glass adds drama in the evenings, enhancing the perception of depth and water movement without visually expanding the footprint. Surrounding planting or low terraces can soften the hard edge and provide privacy while keeping the visual effect clean.
Structural and Technical Considerations
Glass-edge pools require precise engineering:
- Tempered, laminated structural glass rated for water pressure
- Correct anchoring into reinforced concrete or steel frames
- Consideration for thermal expansion and load from users
- Regular inspection of seals to maintain watertight integrity
Glass also increases maintenance responsibility; fingerprints, scratches, or waterline staining are more visible than with traditional finishes.
Pros
- Visually expands compact gardens
- Strong contemporary architectural statement
- Enhances sightlines from interior rooms
- Allows natural light to penetrate surrounding spaces
- Integrates seamlessly with terraces or decking
Cons
- Higher initial construction cost
- Requires skilled contractors for structural glazing
- Glass edges need regular cleaning to maintain appearance
- Careful design required to ensure privacy and safety
You May also Like: 52 Beautiful Fall Exterior Decor Ideas to Make Your Home Cozy & Welcoming
Real-Life Application Insight/
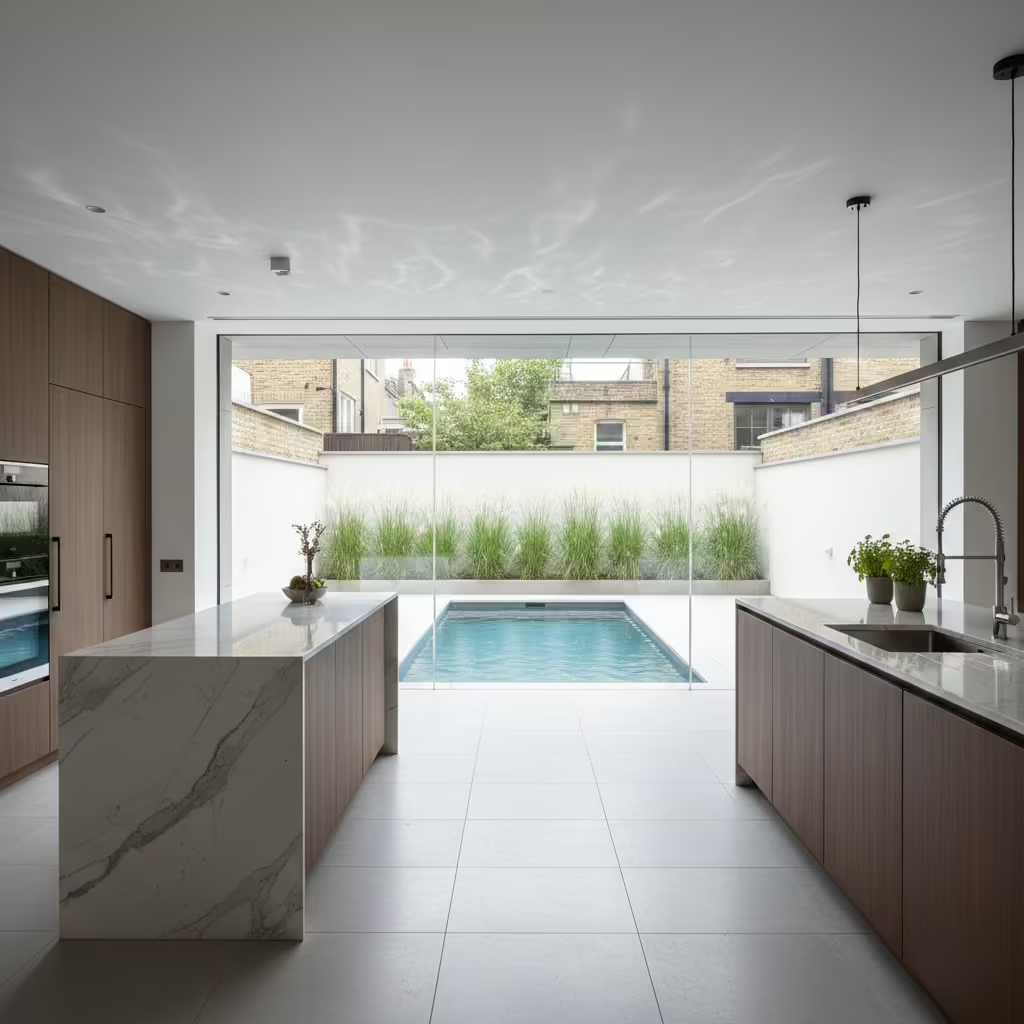
On a small London townhouse garden measuring 5.5 m x 7 m (18 ft x 23 ft), we installed a 2.5 m x 6 m (8 ft x 20 ft) plunge pool with a 2.4 m (8 ft) long glazed side facing the kitchen. The transparency allowed the water to visually merge with the interior, creating the illusion of extended space.
By integrating a shallow planted strip behind the glass, privacy was maintained without obstructing the view. The pool, though compact, felt expansive and intentionally designed. The key takeaway was that in small gardens, transparency and alignment with interior sightlines can amplify space perception far more effectively than increasing scale.
Glass-Edge Pool for Compact Gardens
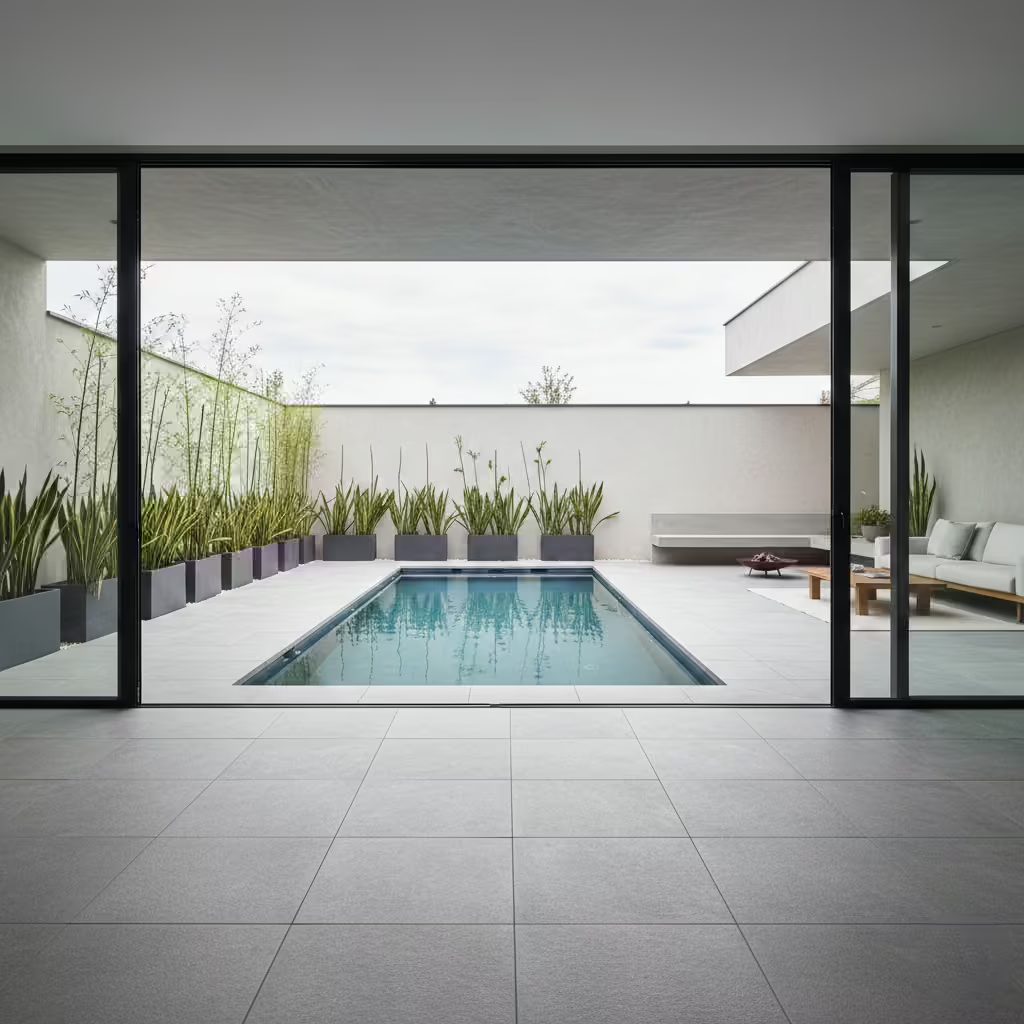
Glass-edge pools bring a sense of transparency and lightness to small or confined gardens. By replacing traditional solid walls with structural glazing, the pool appears less obtrusive, enhancing visual connectivity between interior and exterior spaces. In compact plots, this can be transformative, making the garden feel more expansive while introducing a strong architectural statement.
Ideal for:
- Small courtyards and urban gardens
- Homes with direct indoor sightlines to the pool
- Contemporary architecture prioritising minimalism and visual continuity
- Properties where making the pool “disappear” visually is desirable
Recommended Dimensions and Proportion
For compact gardens, a glass-edge pool typically works at:
- Width: 2.4 m to 3 m (8 ft to 10 ft)
- Length: 4 m to 8 m (13 ft to 26 ft)
Depth can remain at 1.2 m to 1.5 m (4 ft to 5 ft).
Glass panels should generally extend from waterline to coping height (usually 450 mm to 600 mm / 18–24 in) to ensure safety and structural integrity. Panels must be anchored in reinforced concrete or steel framing, and edges must be flush with surrounding terrace finishes to maintain continuity.
Design Strategy
The transparency of glass allows the pool to feel integrated rather than intrusive. I often align the glazed edge with key internal sightlines, such as from a kitchen or living room, so the water visually merges with interior floors. Frosted or tinted panels can be introduced in high-privacy areas, balancing transparency with discretion.
Lighting beneath or behind the glass adds drama in the evenings, enhancing the perception of depth and water movement without visually expanding the footprint. Surrounding planting or low terraces can soften the hard edge and provide privacy while keeping the visual effect clean.
Structural and Technical Considerations
Glass-edge pools require precise engineering:
- Tempered, laminated structural glass rated for water pressure
- Correct anchoring into reinforced concrete or steel frames
- Consideration for thermal expansion and load from users
- Regular inspection of seals to maintain watertight integrity
Glass also increases maintenance responsibility; fingerprints, scratches, or waterline staining are more visible than with traditional finishes.
Pros
- Visually expands compact gardens
- Strong contemporary architectural statement
- Enhances sightlines from interior rooms
- Allows natural light to penetrate surrounding spaces
- Integrates seamlessly with terraces or decking
Cons
- Higher initial construction cost
- Requires skilled contractors for structural glazing
- Glass edges need regular cleaning to maintain appearance
- Careful design required to ensure privacy and safetyReal-Life Application Insight
Real-Life Application Insight
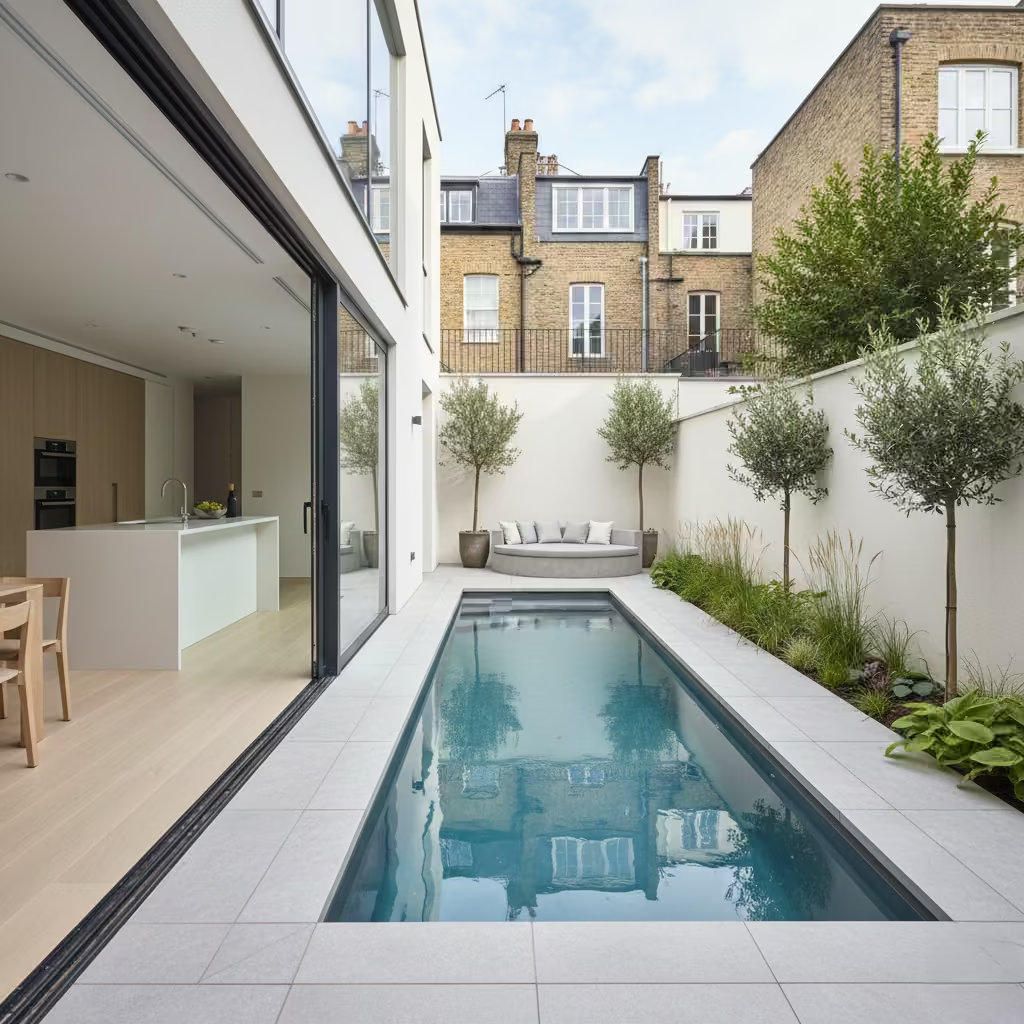
On a small London townhouse garden measuring 5.5 m x 7 m (18 ft x 23 ft), we installed a 2.5 m x 6 m (8 ft x 20 ft) plunge pool with a 2.4 m (8 ft) long glazed side facing the kitchen. The transparency allowed the water to visually merge with the interior, creating the illusion of extended space.
By integrating a shallow planted strip behind the glass, privacy was maintained without obstructing the view. The pool, though compact, felt expansive and intentionally designed. The key takeaway was that in small gardens, transparency and alignment with interior sightlines can amplify space perception far more effectively than increasing scale.
Naturalistic & Resort-Style Retreats
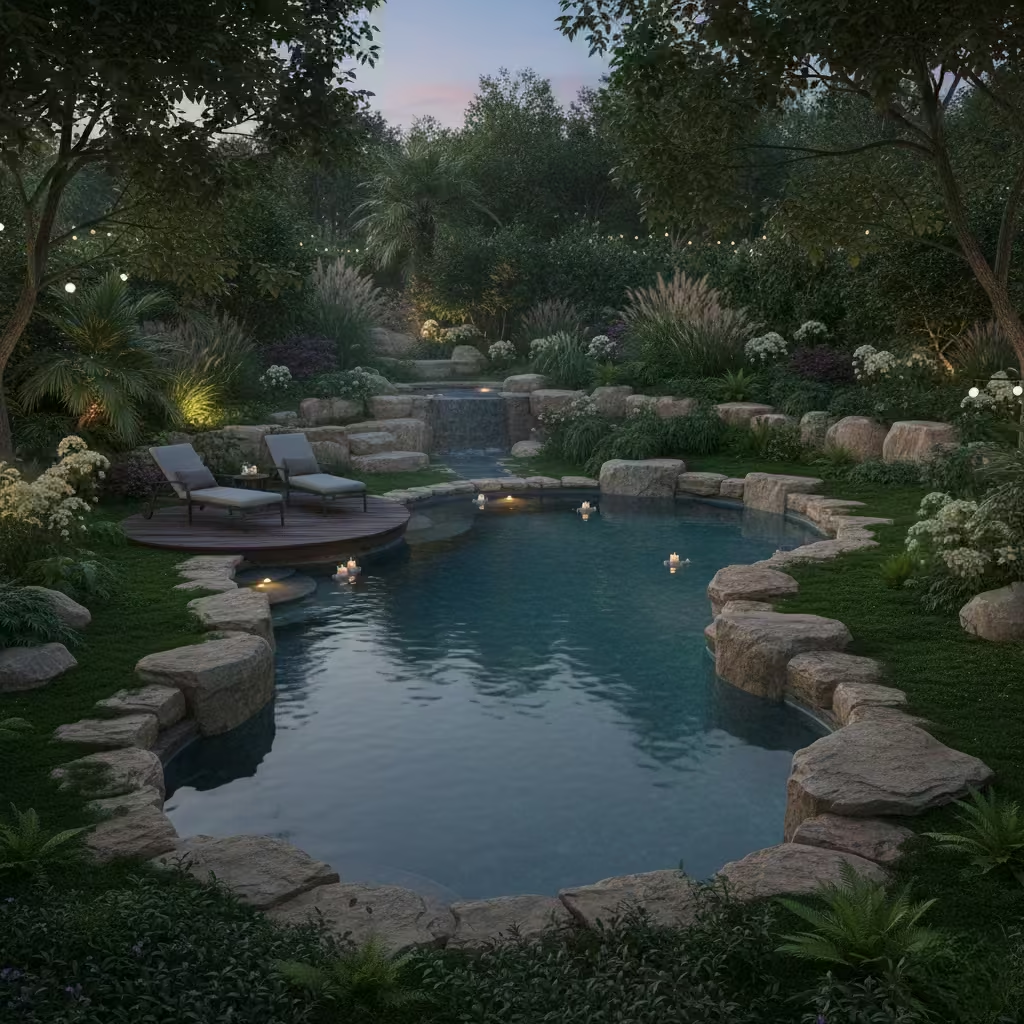
Not every pool needs to read as a sharp architectural insertion. In many gardens, particularly those with generous planting or softer boundaries, the objective is atmosphere rather than geometry. Naturalistic and resort-style pools prioritise immersion, texture, and layered landscaping. Here, the water becomes part of a broader sensory composition, working with stone, timber, foliage, and light to create a retreat that feels removed from everyday domestic rhythm while remaining entirely functional.
Natural Swimming Pond
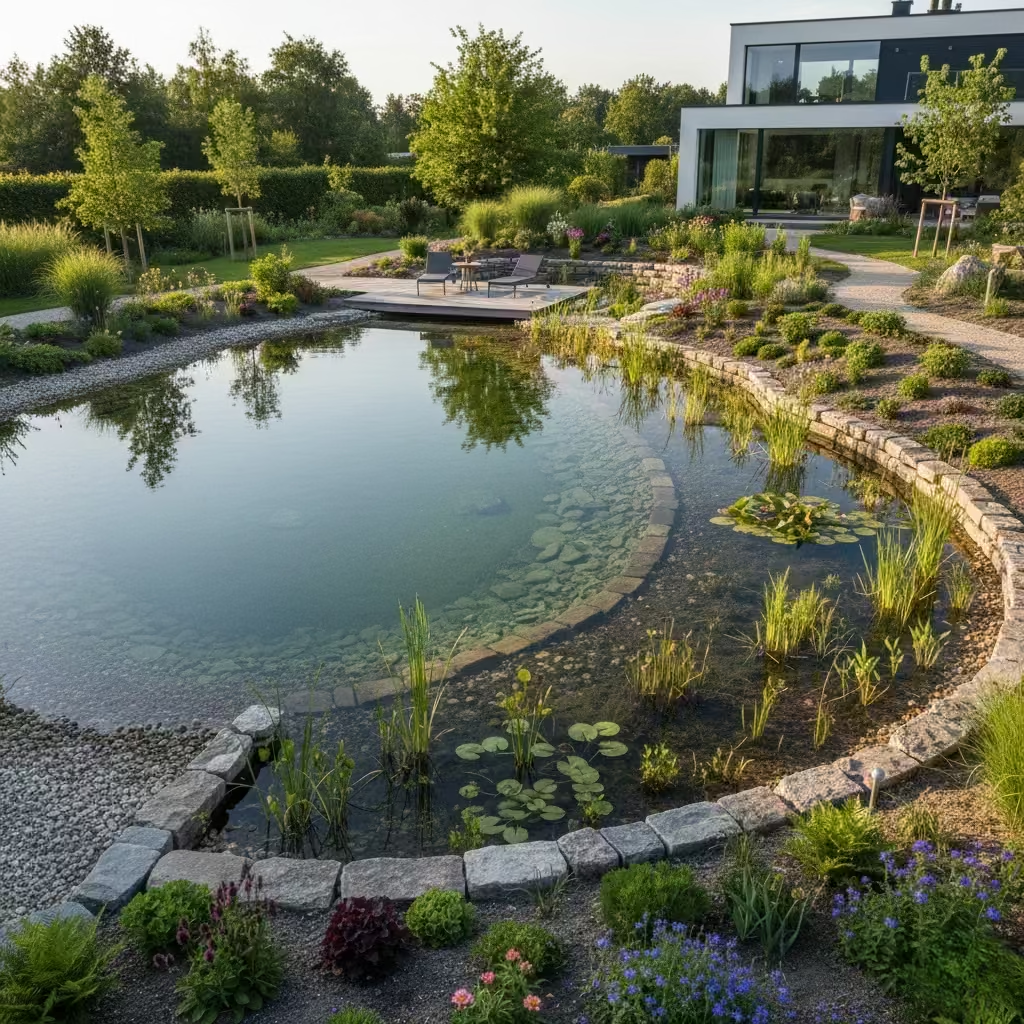
A natural swimming pond replaces chemical treatment with biological filtration, creating water that feels closer to a lake than a conventional pool. The aesthetic is softer, more integrated with planting, and particularly suited to rural or larger suburban gardens. When designed properly, it becomes a living ecosystem rather than a contained recreational basin.
Minimum Space Requirement
Unlike compact plunge pools, natural ponds require room for both swimming and regeneration zones.
- Recommended minimum overall footprint: 30 to 40 m² (320 to 430 sq ft)
- Of this, approximately 50–60% is dedicated to the swimming area
- The remaining 40–50% is allocated to planted biological filtration beds
Depth typically ranges from:
- 1.2 m to 1.8 m (4 ft to 6 ft) in the swimming zone
The regeneration zone is usually shallower, around 300 mm to 600 mm (12 in to 24 in), to support aquatic plants.
Biological Filtration vs Chlorine
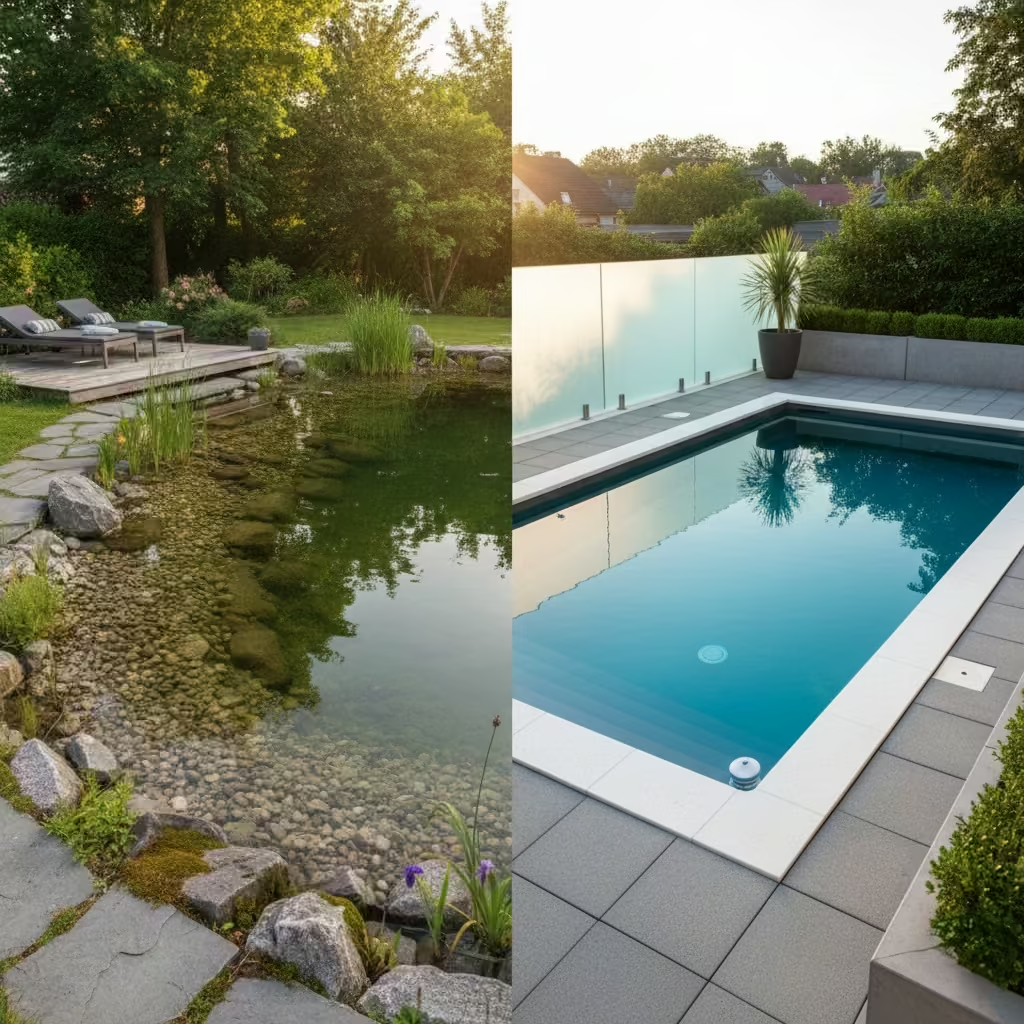
Water is circulated through gravel beds and aquatic planting where beneficial bacteria break down nutrients. No chlorine is used. Instead, ecological balance maintains clarity.
Advantages include:
- No chemical odour
- Softer feel on skin and eyes
- Environmentally lower impact
- Harmonious integration with landscape
However, biological systems require careful design and seasonal maintenance. Plant selection, circulation rates, and nutrient control must be professionally managed.
Chlorine-Based Pools
Conventional pools use chemical sanitisation for predictable clarity and easier control in smaller footprints.
Advantages include:
- More compact overall footprint
- Faster temperature regulation
- Predictable hygiene standards
- Lower initial design complexity
But chlorine systems lack the ecological and aesthetic integration of natural ponds.
Design Strategy
A natural swimming pond works best where the surrounding landscape supports it. I typically frame these installations with native planting, stone edges, and minimal visible coping. The goal is subtlety. Hard-edged porcelain terraces tend to undermine the organic character.
Wind exposure and leaf drop must be carefully considered. While surface skimmers manage debris, heavy leaf fall can destabilise nutrient balance.
Pros
- Chemical-free swimming experience
- Strong ecological and environmental appeal
- Visually integrates with rural or landscaped gardens
- Attracts biodiversity
- Lower long-term chemical costs
Cons
- Requires larger footprint than standard pools
- Higher design complexity
- Seasonal visual variation in planting
- Water clarity may fluctuate slightly compared to chlorinated pools
- Not ideal for very compact urban sites
Real-Life Application Insight
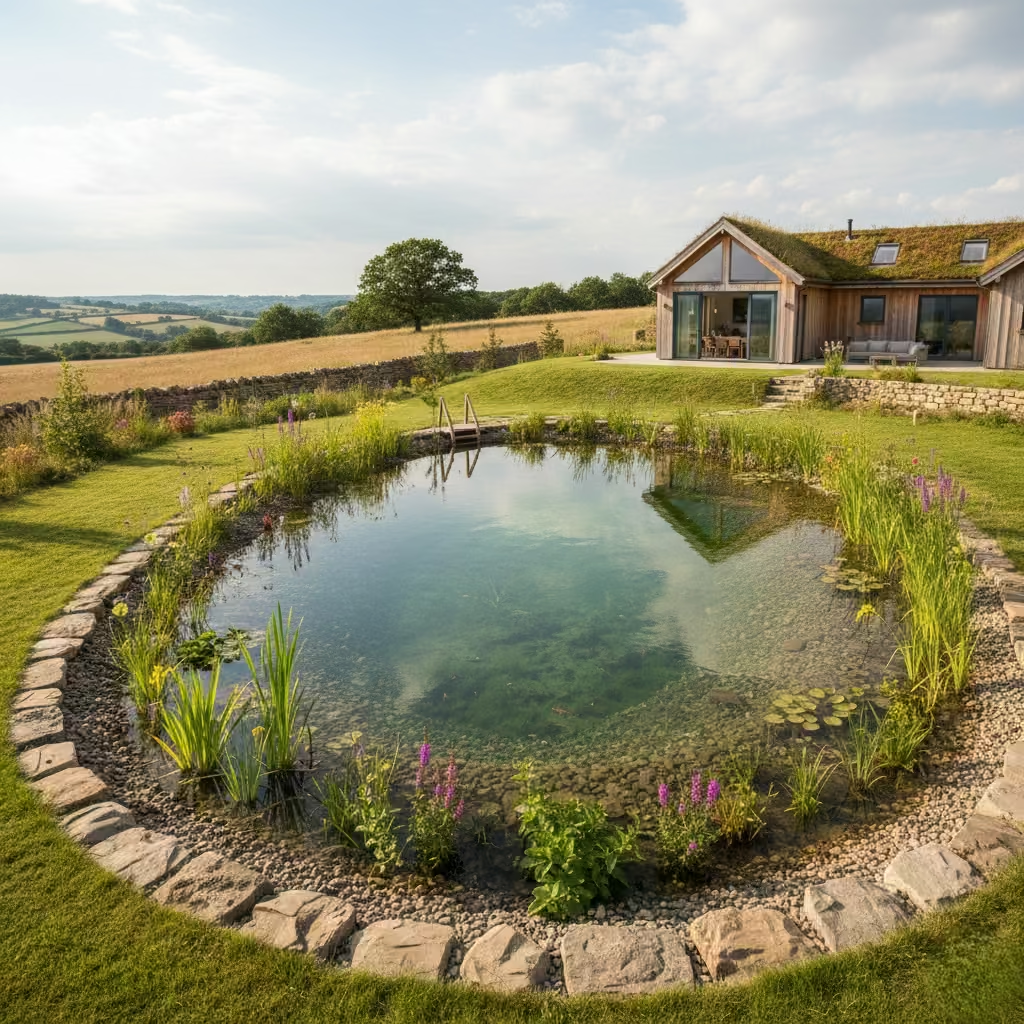
On a countryside property with a 1,200 m² (12,900 sq ft) garden, we replaced a rarely used lawn section with a 38 m² (409 sq ft) natural swimming pond. Roughly half the area was allocated to regeneration planting. The owners were initially concerned about water clarity, but with correct circulation and carefully selected aquatic species, the pond stabilised within its first season.
What made the project successful was context. The house overlooked open landscape, and the pond felt like a continuation of that environment rather than an imposed feature. In urban settings, I am more cautious recommending this approach. In the right setting, however, a natural swimming pond becomes less a pool and more a habitat that supports both recreation and ecology.
Tropical Landscape-Framed Pool
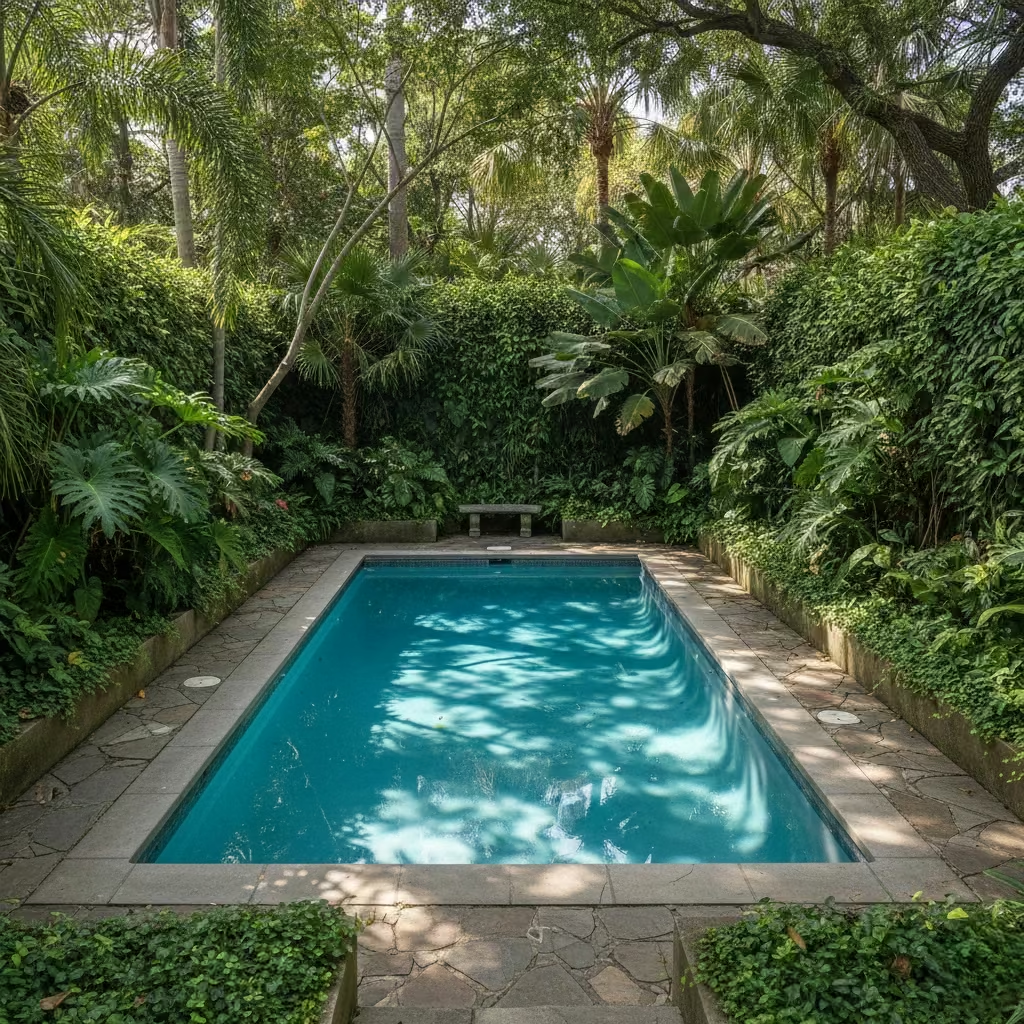
A tropical landscape-framed pool is less about the pool shell itself and more about the immersive environment that surrounds it. The objective is to create enclosure, filtered light, and layered greenery so that the water feels embedded within planting rather than exposed in open lawn. When executed with restraint, this approach can transform a conventional rectangular basin into a secluded retreat.
Ideal for:
- Medium to large gardens with space for layered planting
- Properties seeking privacy without solid boundary walls
- Warmer US climates or sheltered UK microclimates
- Homes where visual softness is preferred over sharp geometry
Recommended Dimensions and Spatial Allowance
While the pool itself can follow standard proportions, the surrounding planting requires adequate depth.
Typical pool sizes:
- 3 m x 8 m (10 ft x 26 ft) for family use
- 2.5 m x 5 m (8.2 ft x 16 ft) for compact gardens
Planting beds should allow a minimum of:
- 900 mm to 1.2 m (3 ft to 4 ft) depth for layered shrubs and palms
Depth of the pool remains at:
- 1.2 m to 1.5 m (4 ft to 5 ft) for general use
Without sufficient planting depth, the tropical concept becomes superficial and lacks immersion.
Design Strategy
The key principle is enclosure through foliage rather than fencing. Large-leaf species, ornamental grasses, and structured evergreens create height variation and movement. In the UK, hardy substitutes such as Trachycarpus (windmill palm), Fatsia japonica, and bamboo varieties can approximate tropical texture while tolerating cooler climates.
I typically combine natural stone or warm-toned porcelain coping with timber or composite decking to soften the visual edge. Hard, pale paving can undermine the intended atmosphere.
Lighting is equally important. Low-level, warm LED uplighting concealed within planting creates evening depth and prevents the pool from feeling isolated after dark.
Pros
- Strong privacy through natural screening
- Creates immersive, resort-like atmosphere
- Softens architectural rigidity
- Encourages year-round visual interest
- Enhances property value through landscaping maturity
Cons
- Requires generous planting space
- Higher ongoing maintenance for foliage
- Leaf drop increases surface cleaning requirements
- In colder climates, plant selection must be carefully adapted
Real-Life Application Insight
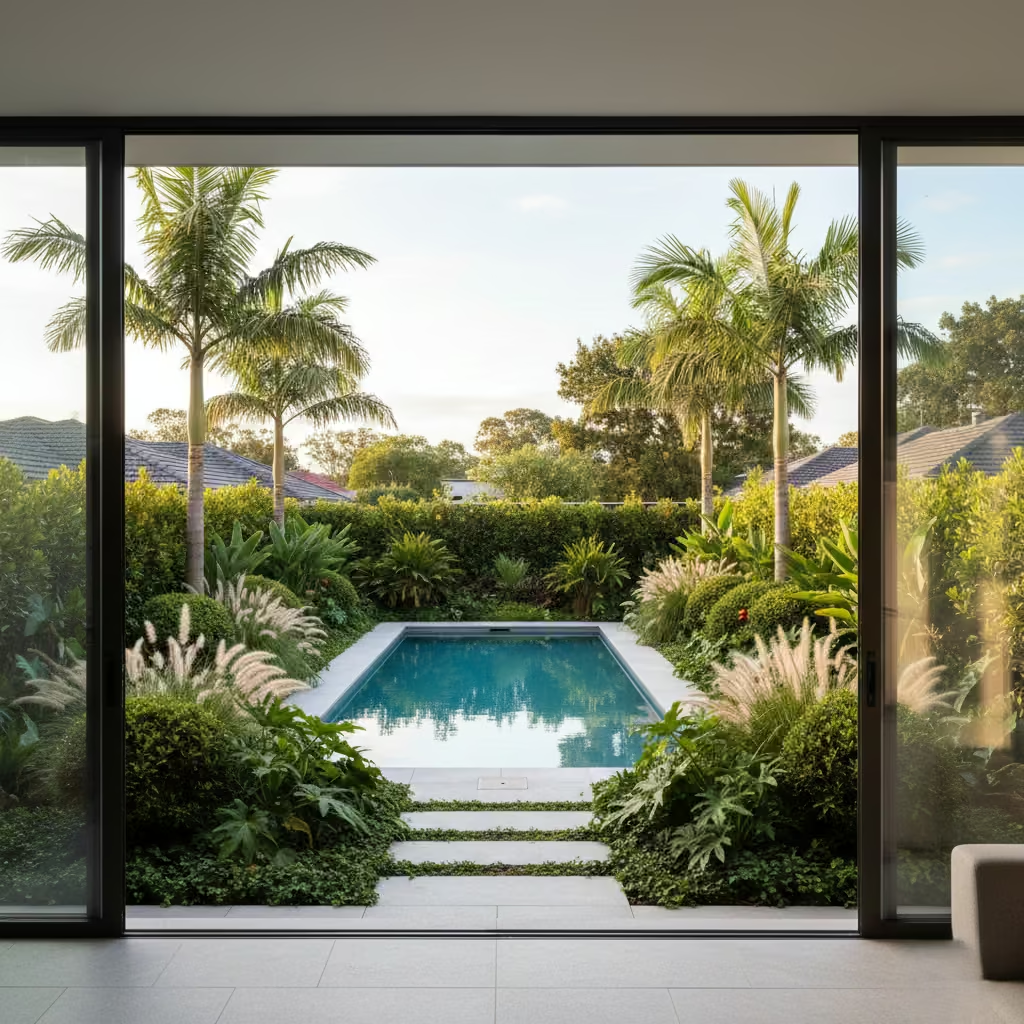
On a suburban US project with a 700 m² (7,535 sq ft) rear garden, the clients initially requested a standard rectangular pool with perimeter fencing. Instead, we repositioned the pool slightly off-centre and introduced 1.2 m (4 ft) deep planting beds along two long edges.
The pool measured 3 m x 9 m (10 ft x 30 ft), but the surrounding planting transformed its character. Tall palms, layered shrubs, and ornamental grasses created visual enclosure without physical barriers. From the house, the water appeared framed by greenery rather than fencing.
In the UK, I have used similar strategies on smaller plots, substituting hardier species while maintaining layered density. The consistent lesson is this: the planting must be planned for maturity. A tropical pool only works when the landscape is treated as equal to the water, not as decoration around it.
Stone-Clad Mediterranean Pool
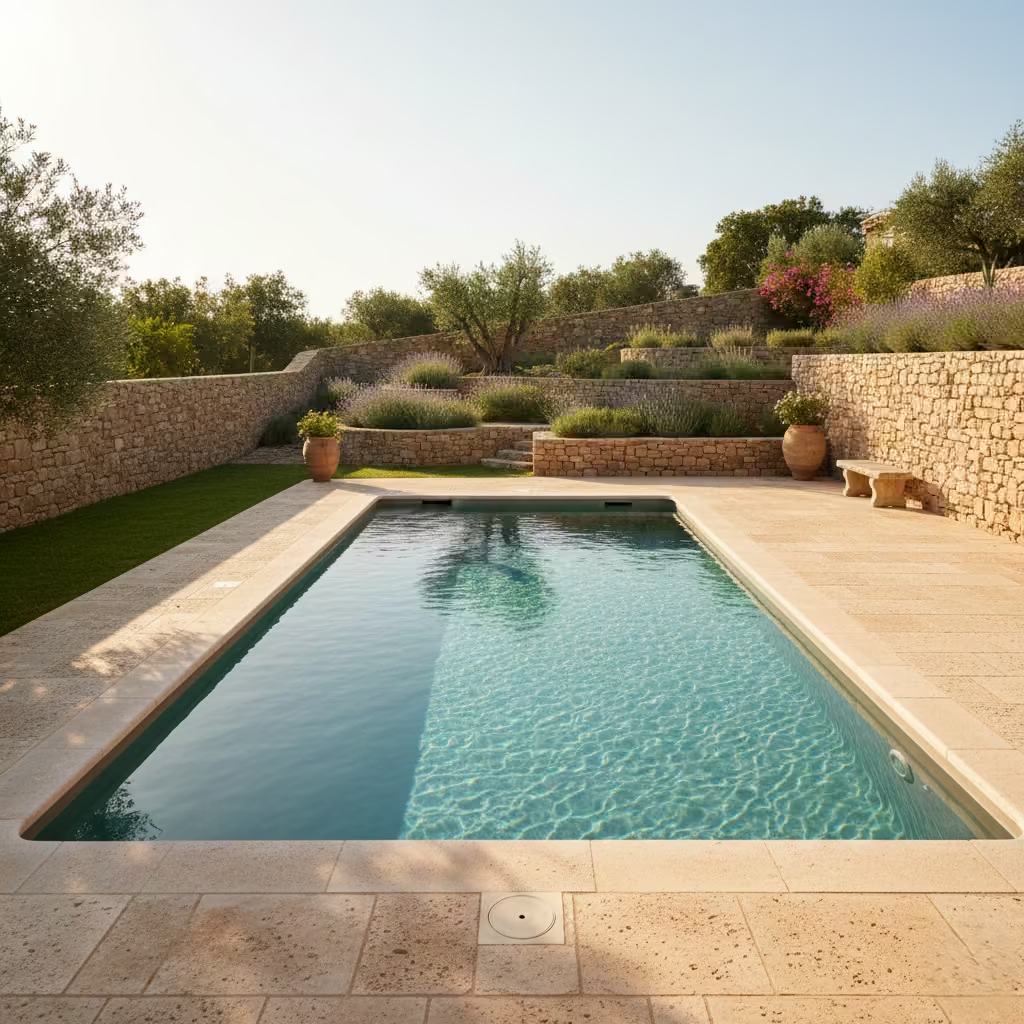
A stone-clad Mediterranean pool relies on material authenticity rather than structural drama. The character comes from texture, warmth, and restraint. When proportioned correctly, it evokes permanence and climatic intelligence, even in non-Mediterranean settings. The water should feel anchored, as though it has always belonged to the site.
Ideal for:
- Properties with rendered or masonry façades
- Gardens with terraced levels
- Warmer US regions or sheltered UK gardens
- Homes seeking timeless rather than contemporary expression
Recommended Dimensions and Proportion
This style works particularly well with classical rectangular forms.
Typical pool sizes:
- 3 m x 8 m (10 ft x 26 ft) for medium gardens
- 4 m x 10 m (13 ft x 33 ft) where space allows
Depth range:
- 1.2 m to 1.6 m (4 ft to 5.2 ft) depending on intended use
Terrace space is critical. Allow a minimum of 1.2 m to 1.5 m (4 ft to 5 ft) around primary lounging zones to prevent the scheme from feeling constrained.
Material Strategy
The defining element is natural stone. Common choices include:
- Limestone
- Travertine
- Tumbled marble
- Sandstone in warmer tones
Edges should feel slightly softened rather than razor sharp. Bullnose or eased coping profiles reinforce the Mediterranean character.
In hotter climates, pale limestone reduces surface heat retention. In the UK, mid-tone stone often performs better visually, as very pale finishes can appear flat under grey skies.
Grout colour selection matters. Overly contrasting joints disrupt the sense of continuity. I typically specify tones that blend with the stone to maintain cohesion.
Design Strategy
The Mediterranean aesthetic depends on hierarchy. The pool should sit within a structured terrace composition, often accompanied by:
- Rendered walls in warm neutrals
- Clay or terracotta pots
- Olive trees or structured evergreens
- Pergolas or shaded seating areas
Water colour plays a role. Lighter interior finishes create turquoise tones reminiscent of southern Europe, while deeper finishes introduce a more reflective blue-green surface.
Drainage and expansion joints must be discreetly resolved. Natural stone moves with temperature fluctuation, and failure to allow for expansion leads to cracking over time.
Pros
- Timeless material palette
- Ages gracefully when properly specified
- Strong resale appeal
- Comfortable underfoot compared to some porcelains
- Integrates well with both classical and transitional architecture
Cons
- Natural stone requires sealing and maintenance
- Some limestones are prone to staining in damp climates
- Higher material cost compared to standard concrete finishes
- Slip resistance must be carefully specified
Real-Life Application Insight
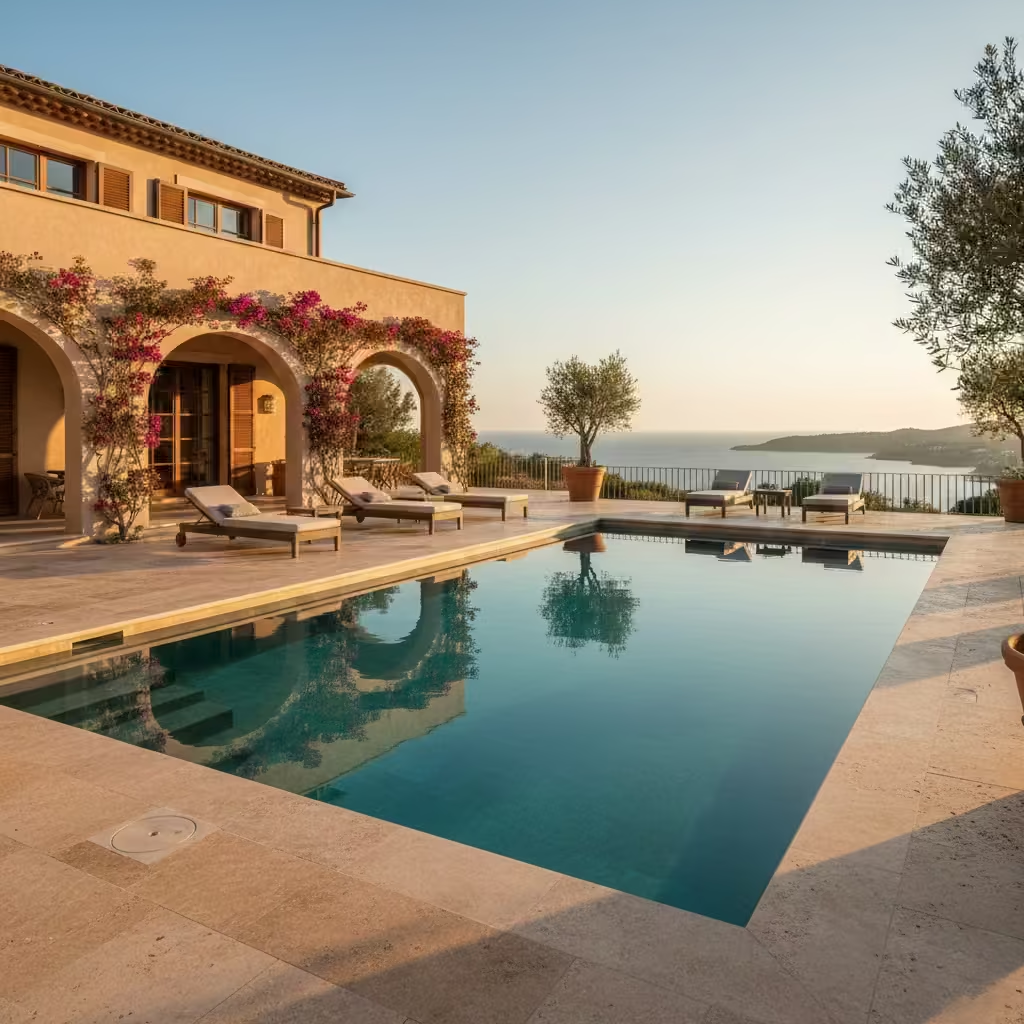
On a coastal property in a warm US climate, we installed a 4 m x 9 m (13 ft x 30 ft) pool clad in honed travertine with matching coping. The house featured soft beige render and arched openings, so a contemporary porcelain finish would have felt incongruous.
We allowed 1.5 m (5 ft) of terrace on the primary sun-facing side to accommodate loungers without crowding the water’s edge. The result was calm and proportionate. After three seasons, the stone had developed subtle tonal variation, enhancing rather than detracting from the aesthetic.
In contrast, I have seen overly porous limestone fail in shaded UK gardens where freeze-thaw cycles were not considered. The lesson is climate awareness. Mediterranean style is not about imitation. It is about using authentic materials appropriately and detailing them to endure local conditions.
Desert Modern Reflective Pool
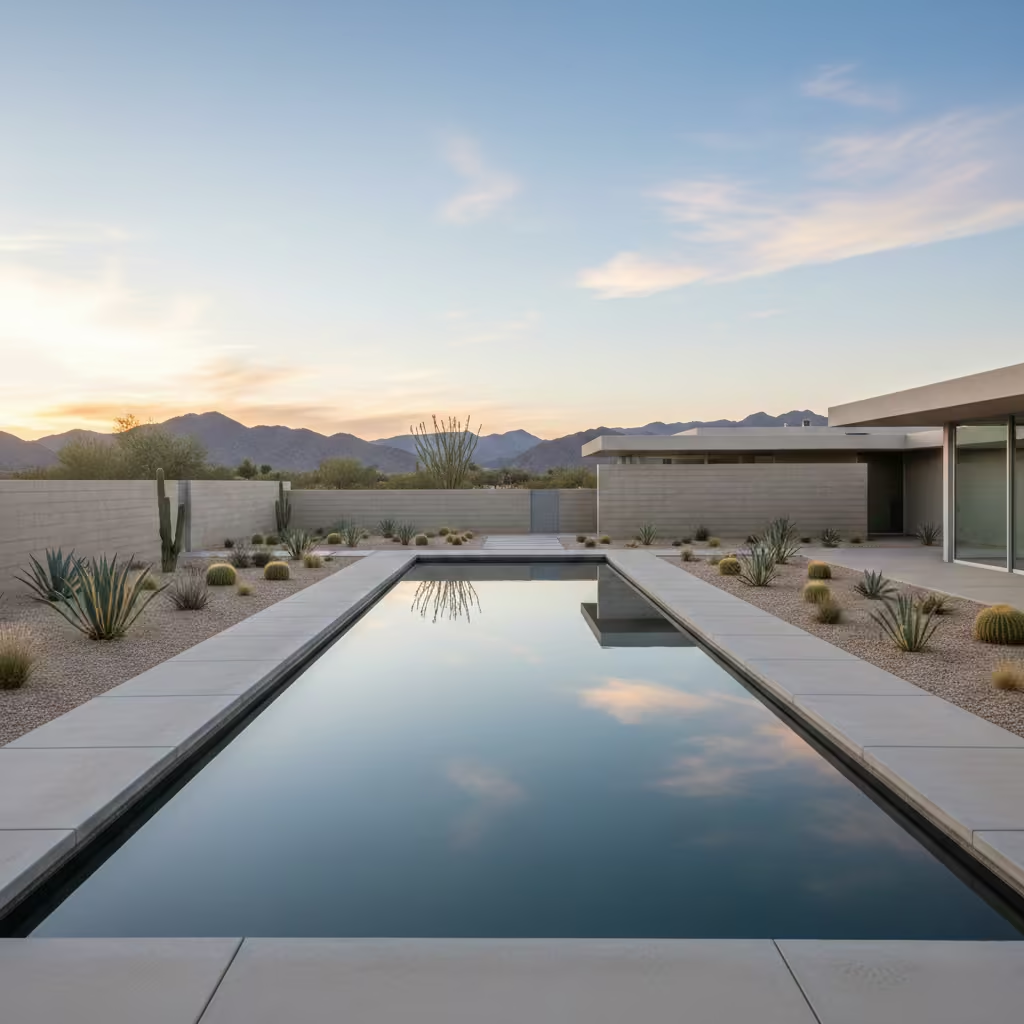
A desert modern reflective pool is defined by restraint, horizontality, and a disciplined material palette. Rather than functioning primarily as a recreational basin, it operates as a mirror, amplifying sky, architecture, and landscape. The water surface becomes a controlled plane that reinforces clean lines and minimal planting.
Ideal for:
- Arid or hot US climates
- Contemporary architecture with strong geometry
- Open plots with expansive sky views
- Homes seeking a calm, sculptural outdoor composition
Recommended Dimensions and Proportion
Reflective pools prioritise proportion over depth.
Typical dimensions:
- 2 m to 3 m wide (6.5 ft to 10 ft)
- 6 m to 12 m long (20 ft to 40 ft)
Depth is often shallower than traditional swimming pools:
- 600 mm to 1.2 m (2 ft to 4 ft)
Shallower water enhances reflection clarity and reduces structural load. Where swimming is intended, depth can increase to 1.4 m (4.6 ft) while maintaining a flat bottom for visual simplicity.
Terrace clearance should remain precise. A 1.2 m (4 ft) circulation strip is typically sufficient in minimalist layouts.
Material Strategy
Material selection must support thermal performance and visual calm.
Common finishes include:
- Dark grey or charcoal porcelain
- Honed concrete
- Basalt or dark stone coping
In desert climates, lighter coping around darker interiors prevents excessive surface heat while preserving visual contrast.
The pool edge should be flush with surrounding paving to maintain a seamless horizon line. Raised coping interrupts reflection and should be avoided in this style.
Design Strategy
The strength of a reflective pool lies in its emptiness. Surrounding planting is sparse and sculptural, often limited to:
- Cacti or succulents
- Architectural grasses
- Low, linear planting beds
I frequently align reflective pools with the primary axis of the house, allowing glazing to capture sky and water in a single frame. In evening conditions, subtle linear LED lighting beneath coping edges enhances the mirror effect without visual clutter.
Wind protection is critical. Even minor surface disturbance compromises reflection quality, so boundary walls or low architectural screens are often incorporated.
Pros
- Strong architectural presence
- Enhances perception of space and sky
- Lower water volume if kept shallow
- Complements modernist architecture
- Minimal planting reduces ongoing garden maintenance
Cons
- Less suitable for active swimming unless dimensions increase
- Surface debris is highly visible
- Wind disruption reduces reflective quality
- Dark interiors can increase water temperature significantly in hot climates
Real-Life Application Insight
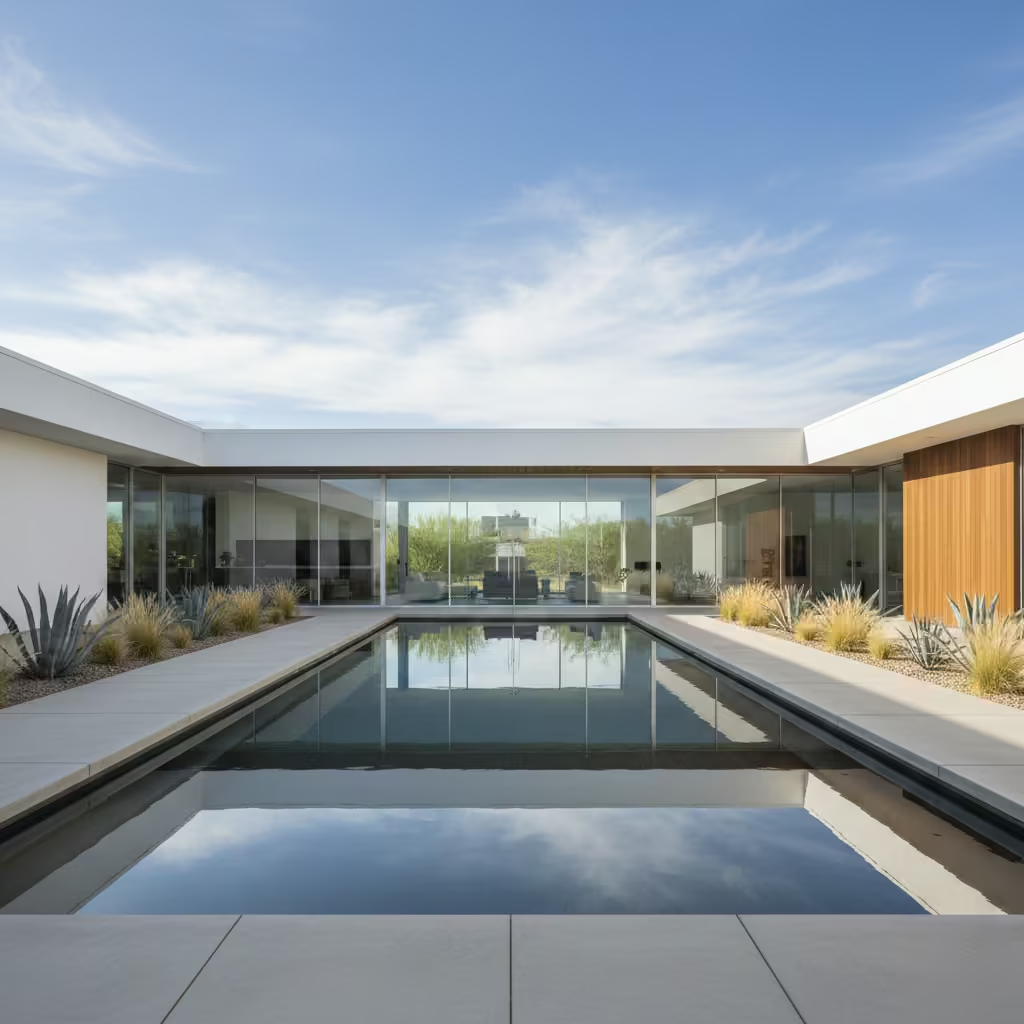
On a desert-adjacent property in the southwestern United States, we designed a 2.5 m x 10 m (8.2 ft x 33 ft) reflective pool aligned directly with the main living room glazing. Depth was limited to 900 mm (3 ft) to prioritise reflection over swimming.
The surrounding terrace was honed concrete in a mid-tone grey, with flush detailing to eliminate visual breaks. Sparse planting of agave and ornamental grasses framed the pool without interrupting the horizontal axis.
The success of the project was not in its size but in its discipline. The water became a compositional tool rather than a feature competing for attention. In reflective pool design, restraint is the defining luxury.
Bali-Inspired Shallow Lounge Shelf
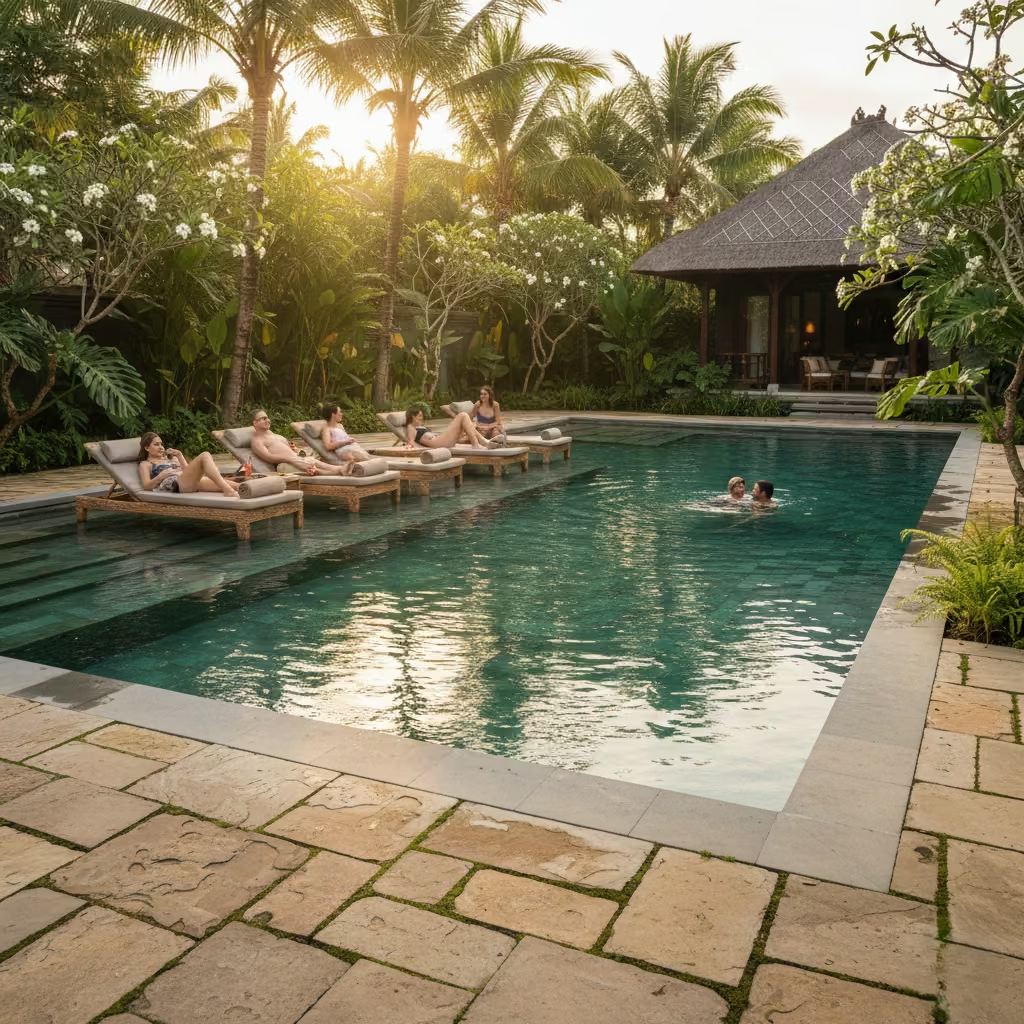
A Bali-inspired shallow lounge shelf, often referred to as a sun shelf or tanning ledge, prioritises relaxation over swimming performance. It introduces a transitional zone between terrace and deeper water, allowing partial immersion while remaining comfortably seated or reclined. When detailed with restraint, it evokes the calm, resort-like atmosphere associated with Southeast Asian villas without becoming ornamental.
Ideal for:
- Warm climates with extended outdoor seasons
- Family pools requiring safe shallow entry
- Homes focused on social lounging rather than lap swimming
- Gardens where the pool acts as a lifestyle anchor
Recommended Dimensions and Depth
The shelf should feel generous rather than symbolic.
Typical proportions:
- Shelf depth (front to back): 1.5 m to 2 m (5 ft to 6.5 ft)
- Full pool width, typically 3 m to 4 m (10 ft to 13 ft)
Water depth over the shelf:
- 200 mm to 400 mm (8 in to 16 in)
This depth allows for submerged loungers or built-in seating while remaining safe for children under supervision.
The main pool beyond the shelf can transition to:
- 1.2 m to 1.5 m (4 ft to 5 ft) depth
Design Strategy
The visual success of a shallow lounge shelf depends on continuity. I typically specify the same interior finish across both shelf and main pool to avoid fragmentation. Pale interiors create luminous aqua tones in shallow water, while mid-tone finishes produce a richer lagoon effect.
Integrated features may include:
- Submerged chaise loungers
- Low-profile water bubblers
- Stepped transitions along one edge
Surrounding materials should feel tactile and natural. Honed stone or timber decking complements the relaxed character more effectively than high-gloss finishes.
Shade planning is critical. Without pergolas, umbrellas, or adjacent planting, shallow shelves can become uncomfortable in peak summer heat.
Pros
- Encourages social interaction and lounging
- Safer shallow zone for children
- Enhances resort-style aesthetic
- Creates layered visual depth within the pool
- Works well for sunbathing and relaxation
Cons
- Reduces overall swim length in compact pools
- Shallow water warms quickly in hot climates
- Furniture selection must be compatible with submerged use
- Requires careful cleaning due to higher visibility of debris
Real-Life Application Insight
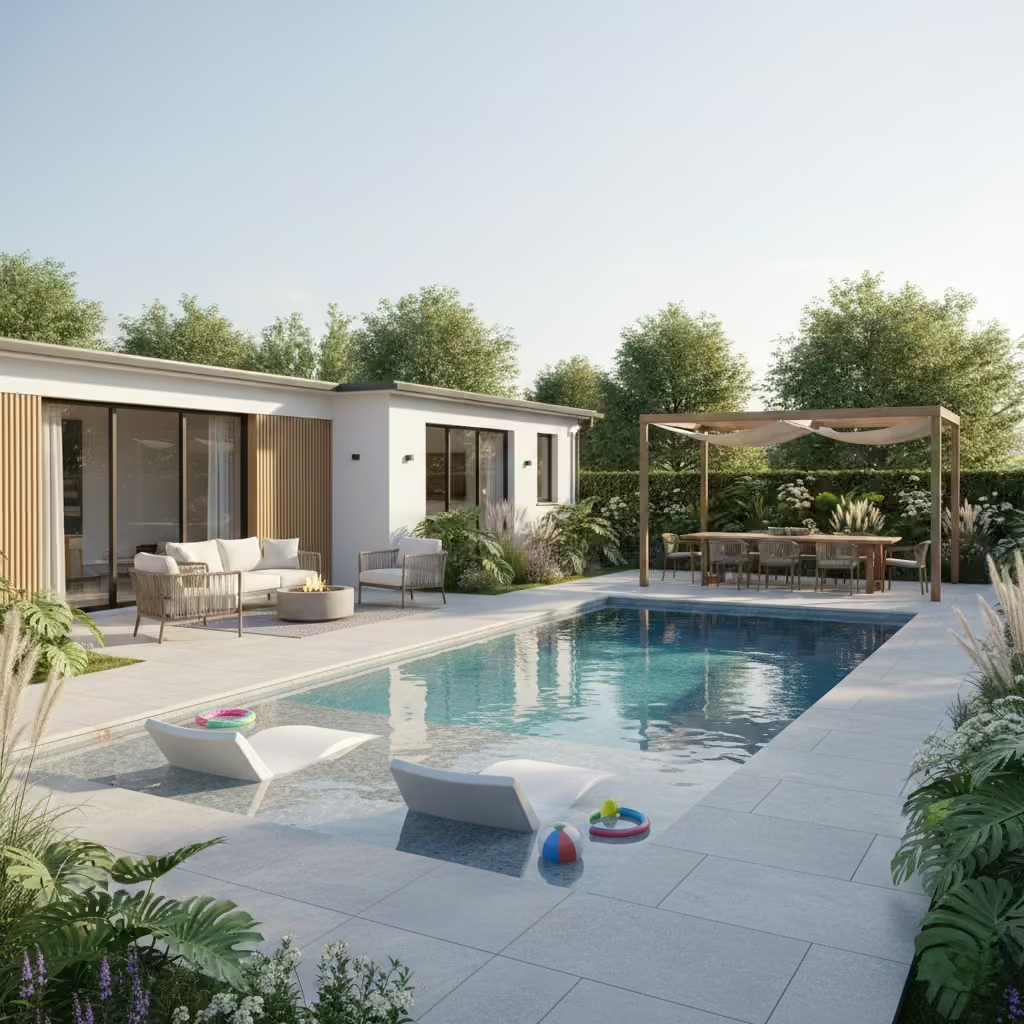
On a contemporary family home in a warm US climate, we designed a 3.5 m x 9 m (11.5 ft x 30 ft) pool with a 1.8 m (6 ft) deep lounge shelf spanning the full width at one end. Water depth across the shelf was set at 300 mm (12 in).
The clients initially considered a separate spa, but the shelf delivered similar social functionality without increasing mechanical complexity. Submerged loungers allowed relaxed seating while children played safely in shallow water.
What made the project successful was proportion. The shelf occupied approximately 20 percent of the total pool length, preserving sufficient swimming area. In compact gardens, I am careful not to oversize this feature. When balanced correctly, the shallow lounge shelf introduces lifestyle value without compromising spatial clarity.
Architectural Statement Pools
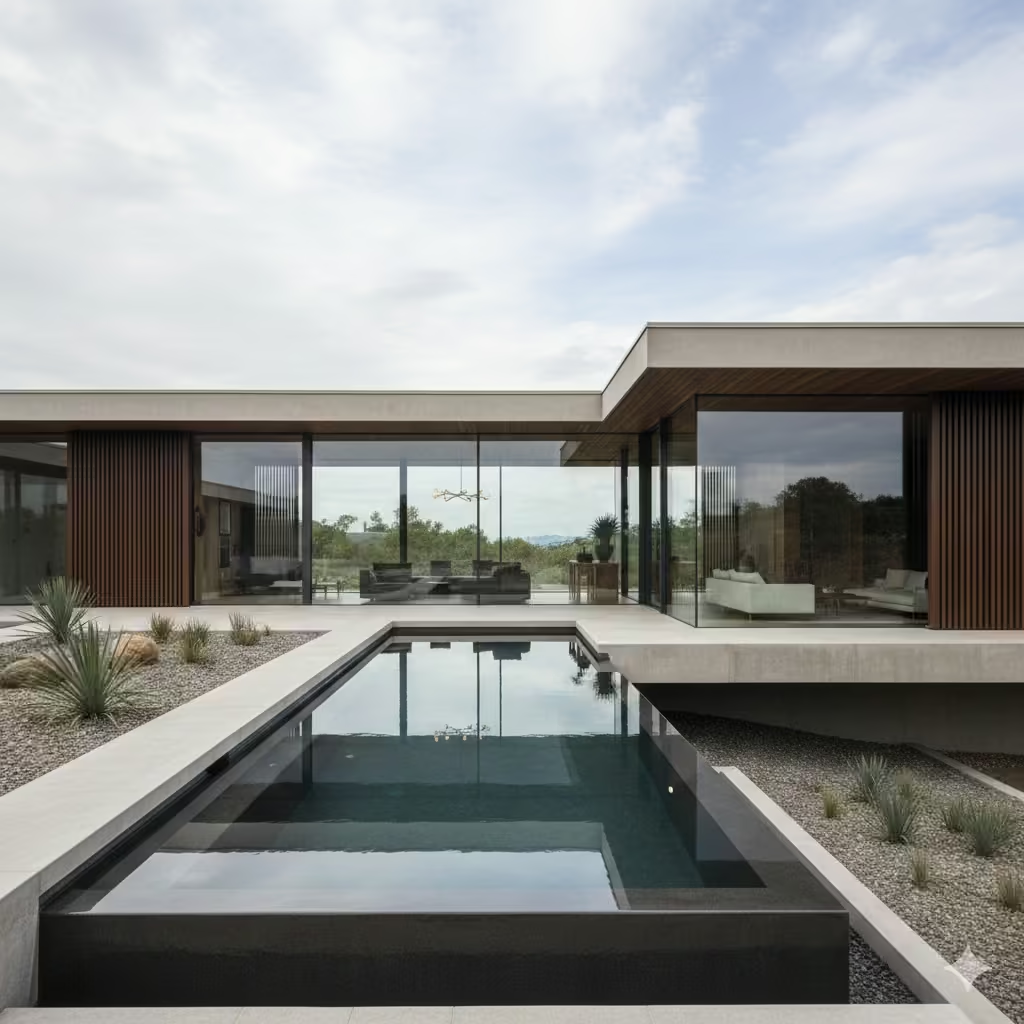
Architectural statement pools are not decorative additions. They are structural interventions that alter how the house meets the landscape. In these schemes, the pool is conceived alongside the architecture, often reinforcing axial alignments, framing views, or introducing dramatic sectional changes. Precision in engineering, detailing, and proportion is non-negotiable. When executed correctly, the pool becomes a defining spatial element rather than an accessory placed within the garden.
Cantilevered Pool
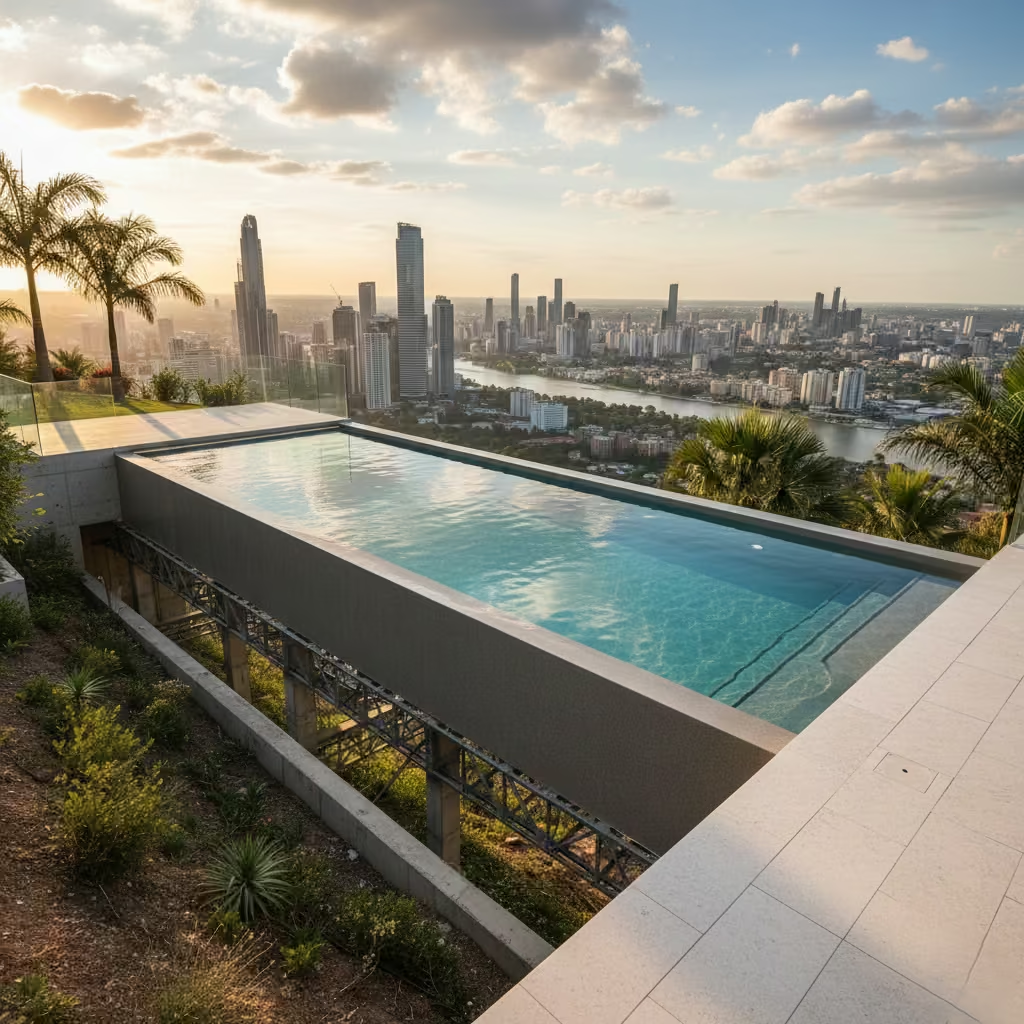
A cantilevered pool is among the most structurally ambitious residential installations. Rather than sitting fully supported on ground, part of the pool projects outward, creating the impression that the water is suspended in space. When aligned with strong architectural geometry or dramatic topography, the effect is controlled and powerful rather than theatrical.
Ideal for:
- Sloped or hillside sites
- Contemporary homes with reinforced concrete or steel frames
- Properties overlooking landscape, water, or city views
- Clients seeking architectural distinction
Recommended Dimensions and Structural Logic
Cantilevered projections are typically partial rather than full-span.
Common configurations:
- Overall pool: 3 m x 8 m (10 ft x 26 ft) or larger
- Cantilever projection: 1 m to 2 m (3.3 ft to 6.5 ft) beyond primary support
Depth often remains consistent at:
- 1.2 m to 1.5 m (4 ft to 5 ft)
The projecting section must be structurally engineered in reinforced concrete or steel with careful load calculations. Water weight is significant, approximately 1,000 kg per cubic metre (62.4 lb per cubic foot), and this load multiplies rapidly with depth and surface area.
Design Strategy
The projection should reinforce the home’s architectural axis. I typically align the cantilever with the main living area glazing so that the water appears to extend from the interior floor plate outward.
Edge detailing is critical. Flush coping enhances the sense of continuity, while glass viewing panels along the cantilever face can heighten the suspended effect. However, restraint is essential. Excessive transparency can shift the scheme from refined to spectacle-driven.
Lighting should be subtle, often concealed beneath the projection to emphasise levitation without overwhelming the composition.
Structural and Technical Considerations
Cantilevered pools require:
- Advanced structural engineering analysis
- Reinforced concrete beams or steel framing
- Vibration control
- Waterproofing layers capable of handling movement
- Careful coordination with foundation systems
In colder climates, freeze-thaw movement must be factored into expansion joint detailing. Wind loads may also influence structural reinforcement.
Construction costs are significantly higher than standard ground-supported pools due to complexity and risk management.
Pros
- Exceptional architectural impact
- Enhances elevated views
- Strong integration with contemporary design
- Increases perceived property prestige
- Creates memorable spatial experience
Cons
- High construction cost
- Complex engineering approvals
- Longer build time
- Structural risks if improperly detailed
- Limited suitability for flat, compact urban plotsReal-Life Application Insight
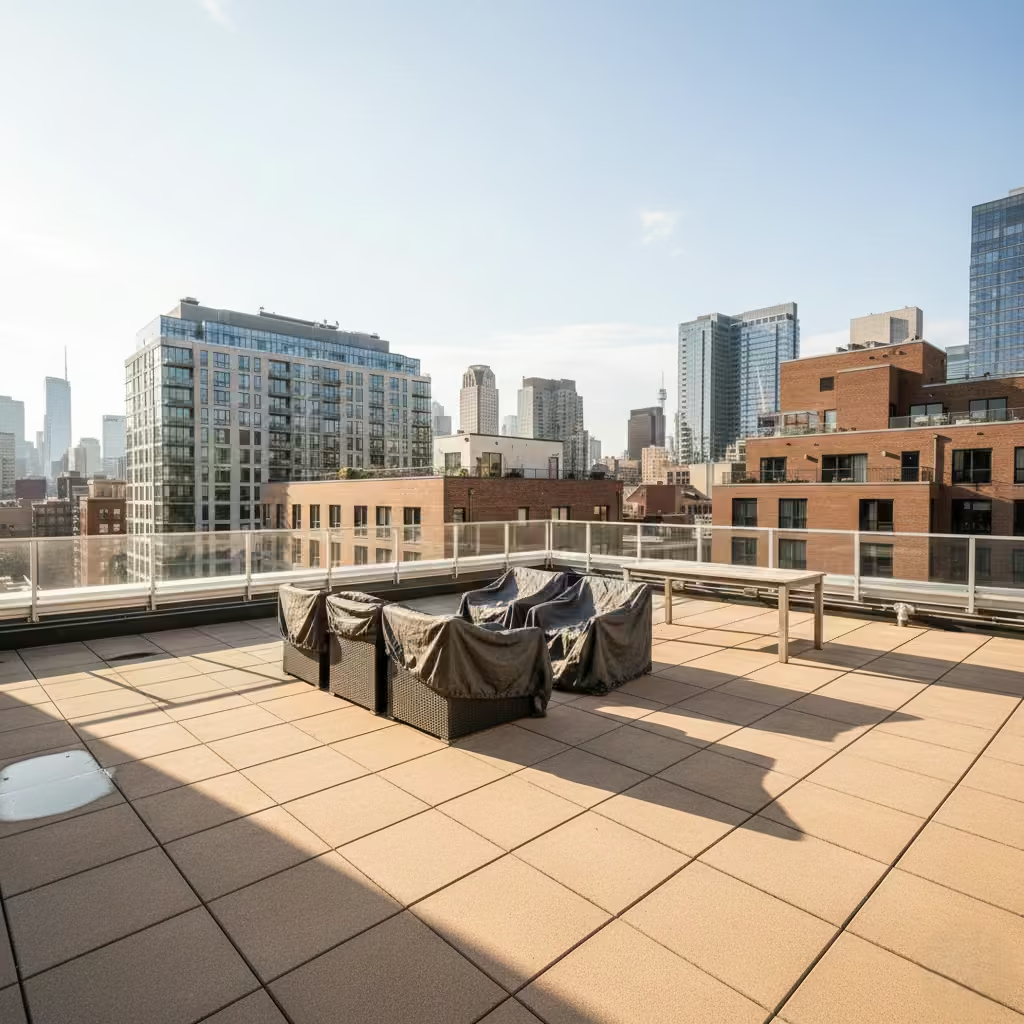
On a hillside property overlooking coastal landscape, we designed a 3.5 m x 9 m (11.5 ft x 30 ft) pool with a 1.5 m (5 ft) cantilever projection extending toward the view. The structural frame was integrated into the house’s reinforced concrete slab system, allowing the projection to feel like a natural continuation of the architecture.
Rather than exaggerating the glass detailing, we kept the underside solid and minimal, using concealed lighting to create a subtle floating effect at dusk. The key decision was limiting the projection depth. Extending further would have increased engineering complexity without improving spatial experience.
In projects of this nature, success depends on collaboration between architect, structural engineer, and pool contractor from the earliest design phase. A cantilevered pool must feel inevitable within the architecture, not applied as an afterthoughtTop of FormBottom of Form
Rooftop Pool
A rooftop pool transforms unused vertical real estate into high-value living space. In dense urban contexts especially, it reclaims square metres that would otherwise serve as mechanical zones or underutilised terraces. The defining characteristic is not elevation alone, but integration structure, waterproofing, drainage, wind mitigation, and privacy must operate seamlessly for the installation to feel effortless rather than engineered.
Ideal for:
- Urban homes with limited ground-level garden
- Contemporary flat-roof extensions
- Townhouses and penthouses
- Projects seeking maximum view exposure
Structural and Load Considerations
Water is heavy. Structurally, rooftop pools demand early engineering coordination.
Water weight:
- Approx. 1,000 kg per cubic metre (62.4 lb per cubic foot)
Typical compact rooftop pool size:
- 2.5 m x 5 m (8 ft x 16 ft)
Recommended depth:
- 1.2 m (4 ft) for multipurpose use
A pool of this size contains roughly 15 m³ of water equating to 15,000 kg (over 33,000 lb) before accounting for shell weight, finishes, and live loads (people, furniture, equipment). This requires reinforced concrete slabs or steel framing designed specifically for aquatic loads. Retrofitting onto an existing roof is significantly more complex than integrating into a new build.
Design Strategy
Proportion is critical. On rooftops, over-sizing feels oppressive. I generally advise allowing at least 1 m to 1.2 m (3–4 ft) of circulation space on at least one long edge for safety and maintenance access.
Wind exposure must be studied carefully. Elevated sites experience higher wind speeds, which can increase evaporation, heat loss, and debris accumulation. Glass balustrades or slatted screening can mitigate wind while preserving views.
Privacy is equally important. Overlooking neighbouring buildings can reduce usability. Strategic planting in raised planters, architectural screening, or pergolas can soften exposure without blocking skyline views.Waterproofing and Drainage
Failure at roof level is costly. A layered waterproofing strategy is non-negotiable:
- Structural waterproof membrane
- Secondary containment layer
- Overflow drainage system
- Dedicated plant room drainage channel
Mechanical systems should be positioned discreetly yet accessible. I prefer locating filtration equipment one level below rather than adjacent to the pool, reducing acoustic disturbance.
Pros
- Maximises unused space
- Elevated views enhance experience
- High visual and property value impact
- Ideal for urban density
- Creates strong lifestyle differentiation
Cons
- Significant structural cost
- Complex waterproofing requirements
- Wind and heat exposure challenges
- Higher maintenance accessibility planning
- Limited feasibility in retrofit projects
Real-Life Application Insight
On a central city townhouse renovation, we installed a 2.4 m x 4.8 m (8 ft x 16 ft) rooftop pool integrated into a rear extension. Depth was limited to 1.2 m (4 ft) to control structural loading and maintain slab efficiency.
The initial client request was for a deeper diving section, but structural modelling showed this would dramatically increase reinforcement and cost. By refining expectations early, we preserved budget for high-quality porcelain decking and integrated lighting.
What ultimately made the project successful was not the pool alone, but how the surrounding roof terrace was designed: built-in seating, wind screening, and clear circulation paths ensured the space functioned as a cohesive outdoor room rather than a novelty feature.
Sunken Lounge with Pool Perimeter
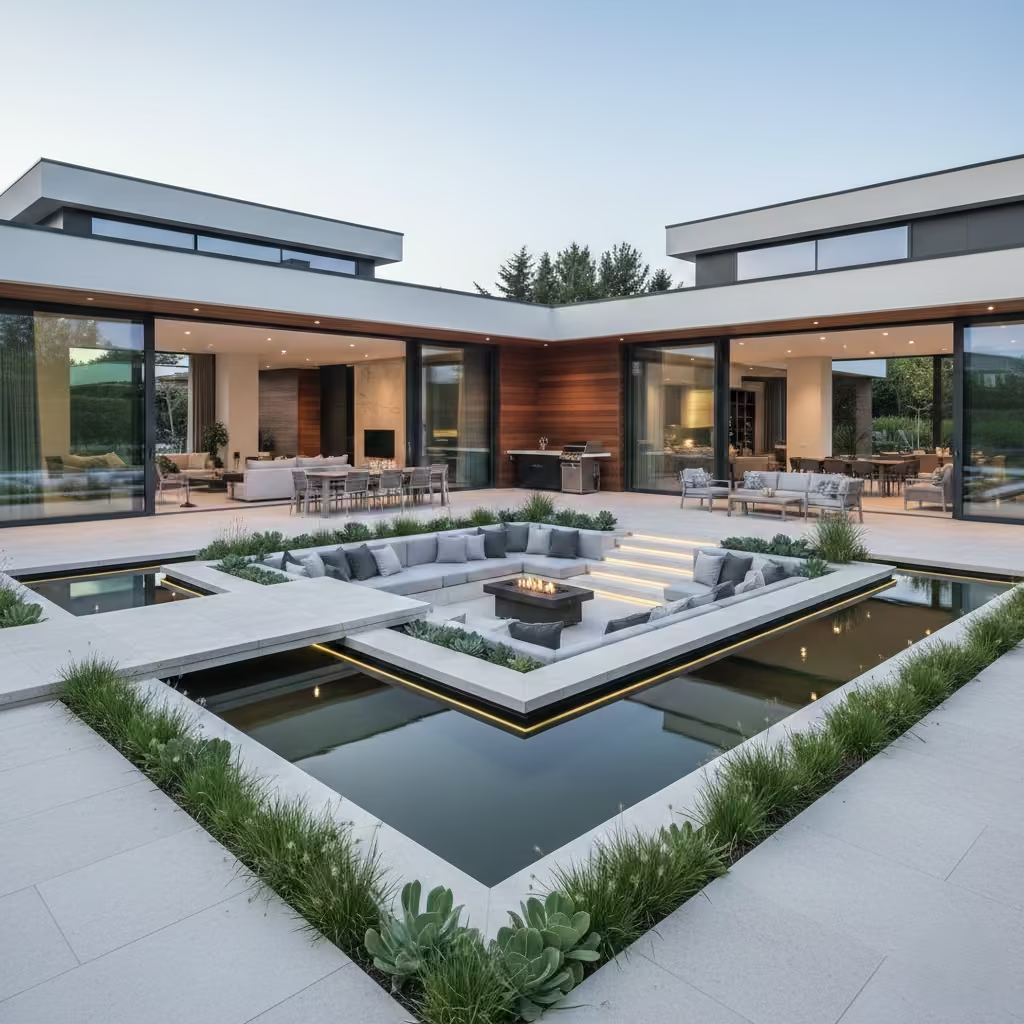
A sunken lounge wrapped by water is a powerful spatial device. Rather than placing seating beside a pool, this approach embeds the social zone within it lowering the floor level to create enclosure, intimacy, and dramatic sectional contrast. When executed correctly, the water becomes an architectural boundary rather than a recreational afterthought.
This concept works particularly well in contemporary homes where indoor–outdoor continuity is strong and entertaining is central to the brief.
Ideal for:
- Entertainment-focused homes
- Warm or temperate climates
- Contemporary architectural schemes
- Medium to large garden footprints
Recommended Dimensions & Layout Strategy
A comfortable sunken lounge typically requires:
- Internal seating zone: 3 m x 3 m minimum (10 ft x 10 ft)
- Step depth: 150–180 mm (6–7 in) per riser
- Lowered floor depth: 450–600 mm (18–24 in) below surrounding terrace
The surrounding water channel (perimeter pool or moat effect) is often:
- 600 mm to 1 m (2–3 ft) wide
- Depth: 300–600 mm (1–2 ft) for aesthetic perimeter sections
If integrated into a full swimming pool, the adjacent main basin can maintain a standard 1.2–1.5 m (4–5 ft) depth.
Clear circulation is essential. I always ensure at least one safe bridge or flush stepping platform of 900 mm–1 m (3–3.3 ft) width to prevent awkward movement patterns.
Design Strategy
The key to success is proportional hierarchy. The sunken zone should feel intentional not like an accidental drop in level. I align it with major architectural axes, often centred to large sliding doors or framed views.
Material consistency is critical. Using the same stone or porcelain internally and externally avoids visual fragmentation. Upholstery must be specified for full exterior performance UV-resistant, quick-dry foam, and concealed drainage channels beneath seating platforms.
Lighting elevates the concept. Recessed LED strips along step risers and subtle underwater lighting in the perimeter channel create depth without glare.
Fire features can be integrated into the centre of the lounge, but structural coordination is essential to separate gas lines from waterproofing systems.
Technical Considerations
- Comprehensive drainage for rainwater inside the sunken zone
- Sump pump integration where natural fall is insufficient
- Waterproofing continuity between pool shell and lounge retaining walls
- Slip-resistant finishes on all steps
- Child safety planning (barriers or cover systems if required by regulation)
In climates with heavy rainfall, I recommend concealed slot drains along the internal perimeter to prevent water accumulation.
Pros
- Highly immersive social experience
- Strong architectural impact
- Natural wind protection due to lowered level
- Encourages evening entertaining
- Integrates water and seating cohesively
Cons
- Complex waterproofing coordination
- Requires careful drainage planning
- Not ideal for very small gardens
- Higher construction cost than standard seating
- Maintenance access must be considered early
Real-Life Application Insight
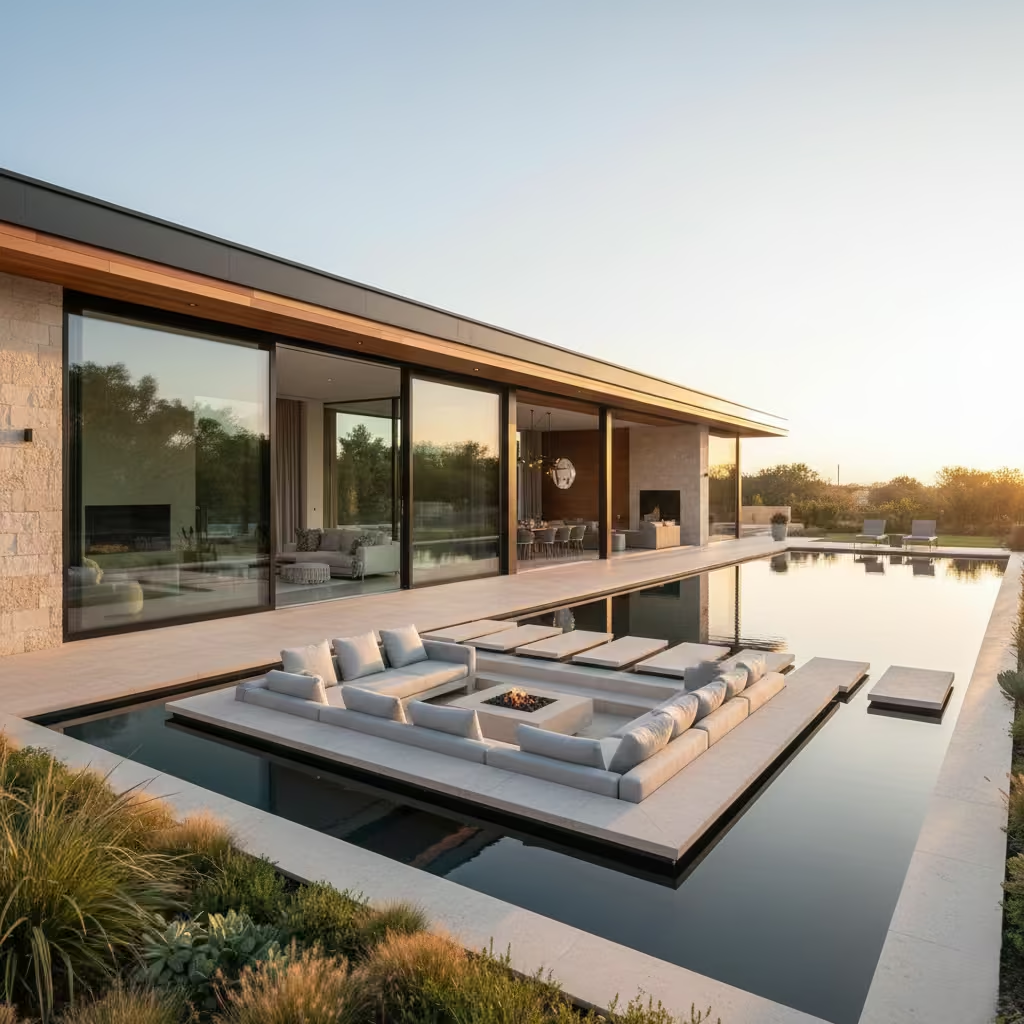
In a contemporary new-build project, we created a 3.2 m x 3.5 m (10.5 ft x 11.5 ft) sunken lounge surrounded on three sides by a shallow 800 mm (2.6 ft) perimeter water channel that connected visually to the main 3 m x 10 m (10 ft x 33 ft) pool.
The initial design placed the lounge too deep, which felt disconnected from the surrounding terrace. By raising the lowered level to 500 mm (20 in) below grade instead of 700 mm, we improved sightlines and maintained intimacy without creating isolation.
What ultimately determined success was circulation. We integrated a 1 m (3.3 ft) flush stepping platform aligned with the interior living space, allowing movement to feel natural. The water did not interrupt flow it defined it.
Black Bottom Reflective Pool
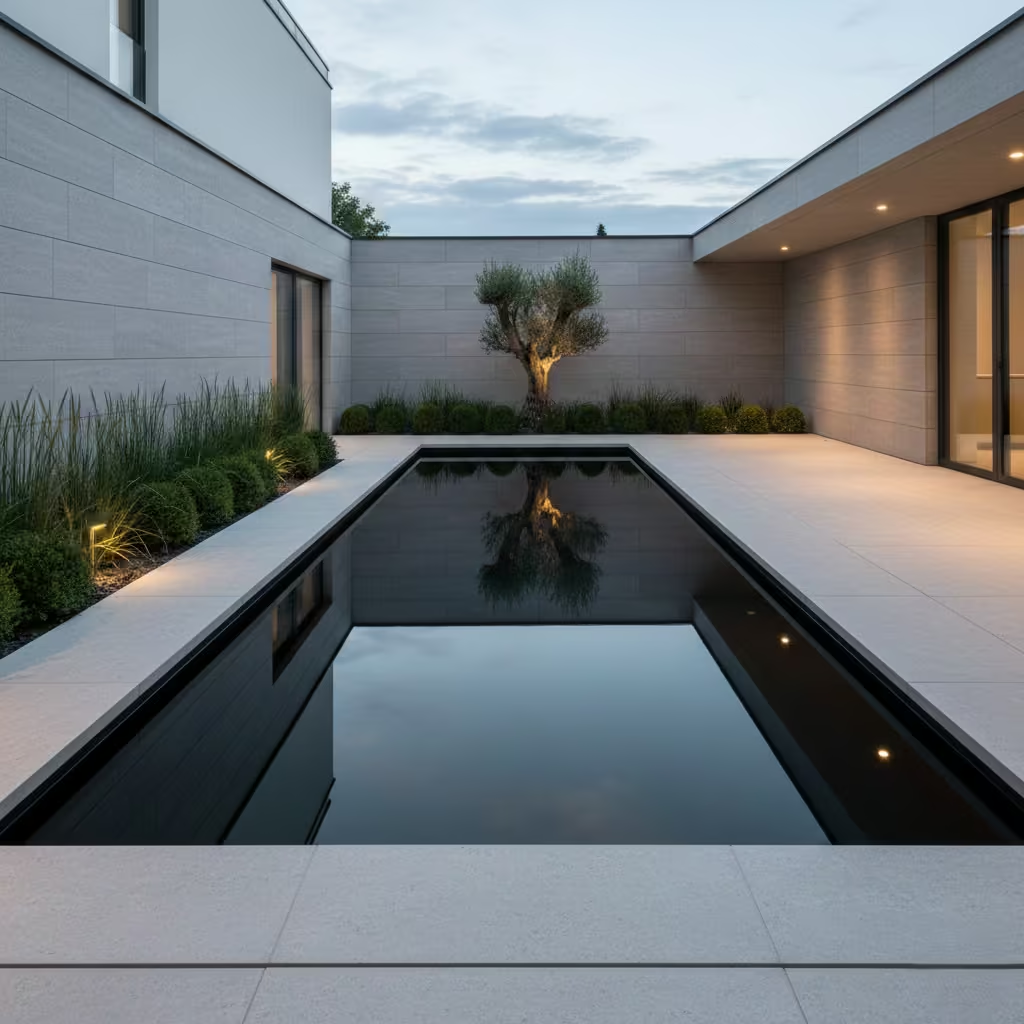
A black bottom reflective pool is less about swimming and more about atmosphere. It functions as a horizontal mirror, amplifying sky, architecture, and planting. When proportioned precisely and detailed with restraint, it creates a contemplative calm that conventional, blue-tiled pools rarely achieve. The water reads deeper than it is, and the surface becomes a compositional device within the landscape.
This typology works particularly well in contemporary and minimalist schemes where geometry and light are central to the architectural language.
Ideal for:
- Modern homes with clean lines
- Courtyard or axial garden layouts
- Properties with strong skyline or tree canopy views
- Clients prioritising aesthetics over active recreation
Recommended Dimensions & Depth
Reflective pools are typically shallower than traditional swimming pools.
Common specifications:
- 3 m x 6 m (10 ft x 20 ft) or proportionally aligned to façade
- Depth: 300–600 mm (1–2 ft) for pure reflection
- If swim-capable: 1.2 m (4 ft) uniform depth
Shallower water increases reflective clarity and reduces structural load and water volume.
Edge detailing should be flush and crisp. I typically specify a minimal shadow gap or fine stone coping with no raised lip to maintain a seamless horizon line.
Material Strategy
The “black” effect is achieved through:
- Dark porcelain or ceramic tile
- Black or charcoal microcement
- Pigmented waterproof render
- Natural basalt or dark stone lining
Water colour will vary depending on sky conditions appearing graphite, mirror-silver, or deep ink blue.
Filtration must remain active but discreet. Surface agitation disrupts reflection, so I often use concealed slot inlets and overflow systems to maintain a still surface.
Technical Considerations
- Debris visibility is higher on dark surfaces
- Requires consistent cleaning schedule
- Balanced water chemistry to avoid staining
- Strong waterproofing to prevent efflorescence on dark finishes
- Subtle perimeter lighting to prevent glare
Drainage around the perimeter must be meticulously planned. Reflective pools rely on visual precision uneven coping lines immediately diminish impact.
Pros
- Striking architectural presence
- Creates illusion of depth
- Lower water volume if shallow
- Excellent for visual cooling in hot climates
- Pairs well with minimalist planting
Cons
- Shows debris more easily
- Not ideal for high-activity family swimming
- Dark finishes can absorb heat in hot climates
- Requires precise detailing
- Can feel stark if surrounding landscape is underdeveloped
Real-Life Application Insight
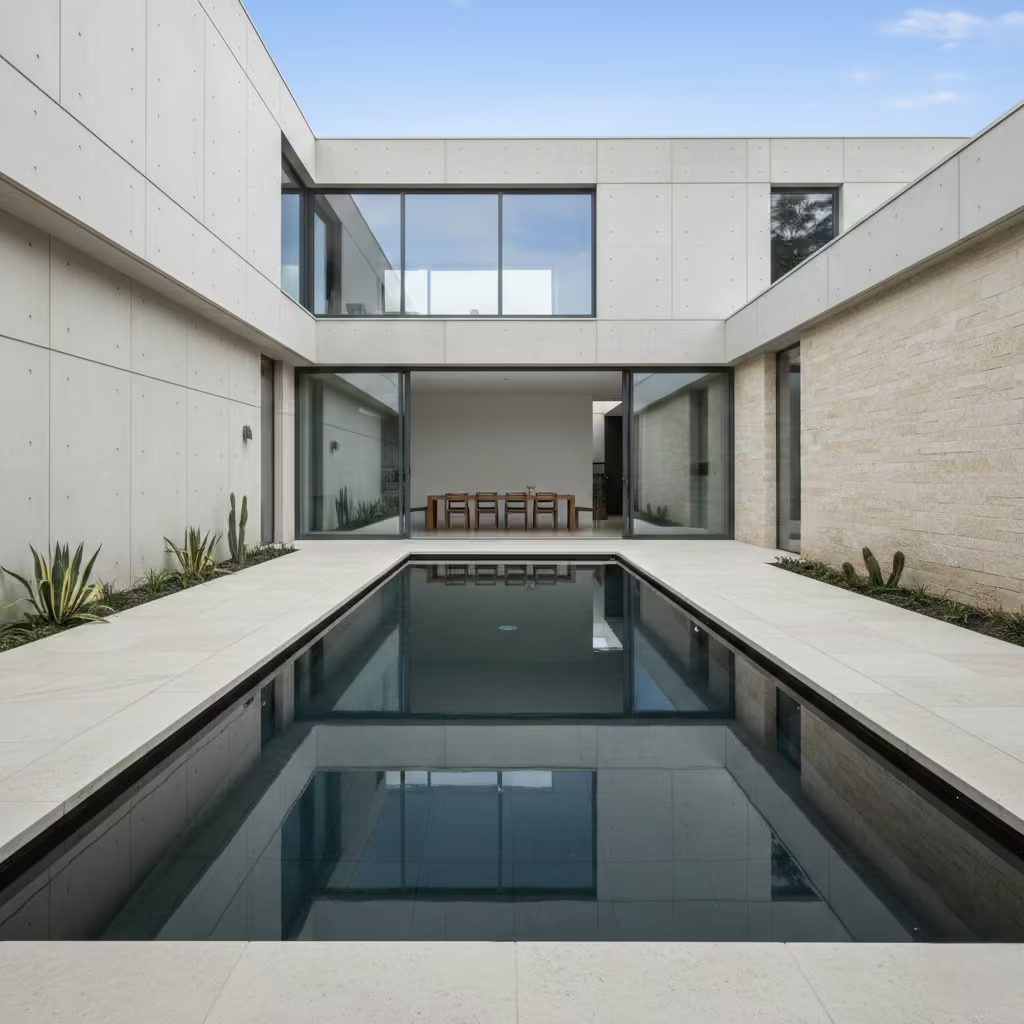
On a rectilinear courtyard project, we installed a 2.8 m x 7 m (9 ft x 23 ft) reflective pool at 450 mm (18 in) depth aligned precisely with the interior dining axis. The client initially requested a standard, blue-tiled pool, but the courtyard scale would have made it feel visually busy.
By opting for a dark porcelain lining and flush limestone coping, the water began to reflect the upper-storey glazing and sky, visually doubling the space. However, maintenance expectations had to be managed clearly. In urban environments with falling leaves and dust, reflective pools demand routine surface skimming to preserve their mirror effect.
The result was not a recreational focal point but a spatial anchor quiet, controlled, and architecturally assertive.
Full-Length Glazed Wall Pool
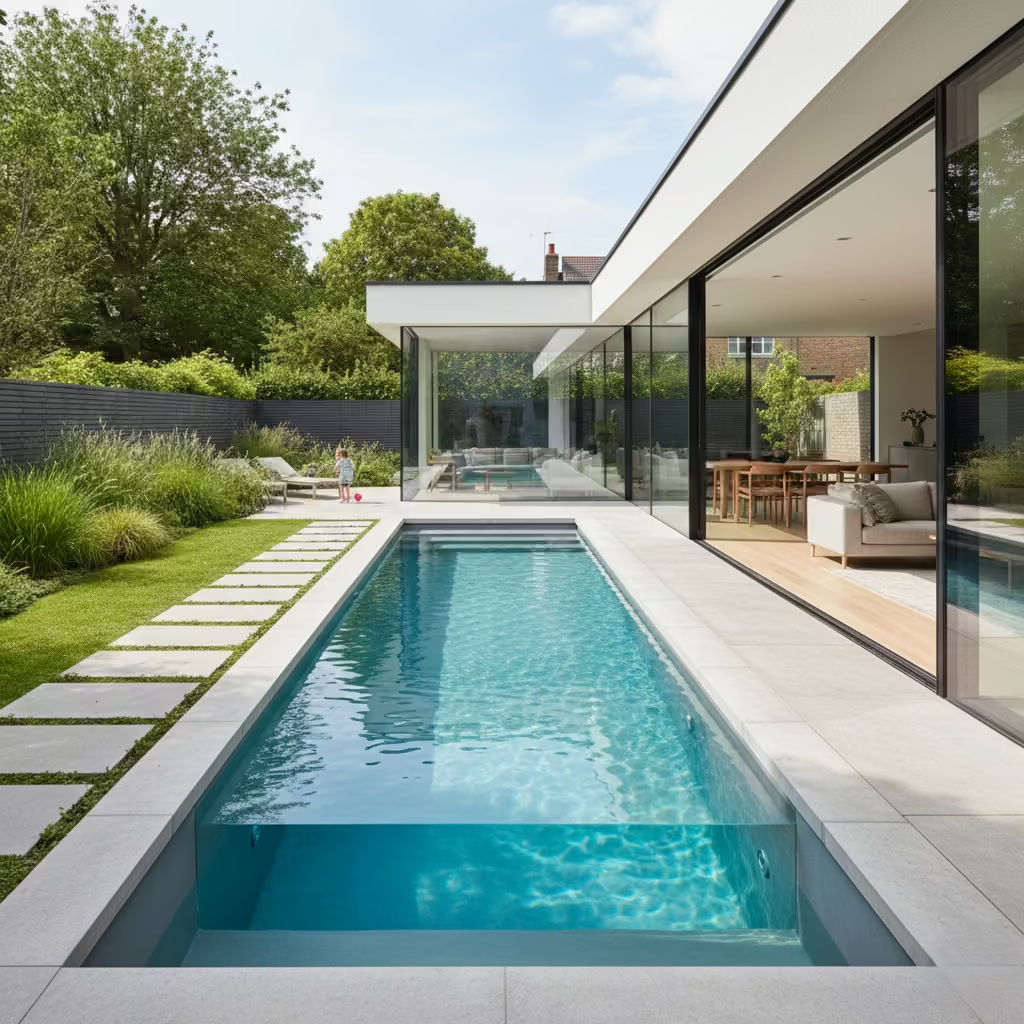
A full-length glazed wall pool replaces one structural face of the basin with reinforced acrylic or laminated structural glass, allowing uninterrupted underwater visibility across the entire length. Unlike small viewing panels, this approach turns the pool into a kinetic architectural façade water, light refraction, and movement become part of the visual language of the home.
When well integrated, it feels precise and engineered. When overused or poorly detailed, it risks becoming theatrical. Proportion and context determine success.
Ideal for:
- Contemporary new builds
- Homes with strong axial design
- Basements with natural light wells
- Indoor–outdoor hybrid pool environments
Recommended Dimensions & Design Logic
Typical configuration:
- Length: 6 m–12 m (20 ft–40 ft)
- Width: 2.5 m–4 m (8 ft–13 ft)
- Depth: 1.2 m–1.5 m (4 ft–5 ft)
The glazed panel usually replaces one long side wall. Panel thickness varies significantly depending on span and water depth, often ranging from 50 mm to 150 mm (2–6 in) acrylic or multi-layer laminated glass.
Longer spans require thicker panels and engineered support rebates. Deflection tolerance must be calculated precisely.
Structural Considerations
This is not a decorative insert. It is a structural element resisting lateral hydrostatic pressure.
Key requirements:
- Engineered reinforced concrete pool shell
- Precisely machined rebates to house glazing
- Structural sealants rated for constant water pressure
- Expansion joint planning for thermal movement
- Independent structural calculations for panel thickness
- Controlled tolerances millimetre accuracy required
Acrylic panels are more impact-resistant and lighter, but can scratch more easily. Laminated glass offers clarity and rigidity but increases structural weight.
Hydrostatic pressure increases with depth. At 1.5 m (5 ft) depth, pressure at the base is substantial and must be engineered accordingly.
Planning Implications (UK / USA Variations)
United Kingdom:
- Planning permission typically not required for standard pools within permitted development limits, but structural glazing visible from the street may trigger scrutiny.
- Listed buildings or conservation areas require formal approval.
- Building Regulations approval is mandatory due to structural loading and safety.
- Safety barriers may be required depending on access and child safety considerations.
United States:
- Regulations vary by state and municipality.
- Many states require engineering sign-off and pool barrier compliance (often 48 in minimum fence height).
- Glazing must comply with safety glazing standards and impact resistance codes.
- Seismic zones (e.g., California) require additional structural review.
In both regions, insurance providers may request engineering certification for non-standard pool designs.
Typical Cost Tier
Architectural (Premium+)
This is among the highest-cost residential pool typologies due to:
- Custom fabrication
- Specialist transport
- Crane installation
- Precision engineering
- Higher liability and insurance costs
Costs increase significantly with panel length and depth.
Pros
- Dramatic architectural impact
- Strong indoor–outdoor visual continuity
- Enhances natural light penetration
- Increases property differentiation
- Creates dynamic visual interest
Cons
- High construction cost
- Complex engineering coordination
- Scratching risk (acrylic)
- Requires specialist cleaning methods
- Not suitable for retrofit without major structural reinforcement
Real-Life Application Insight
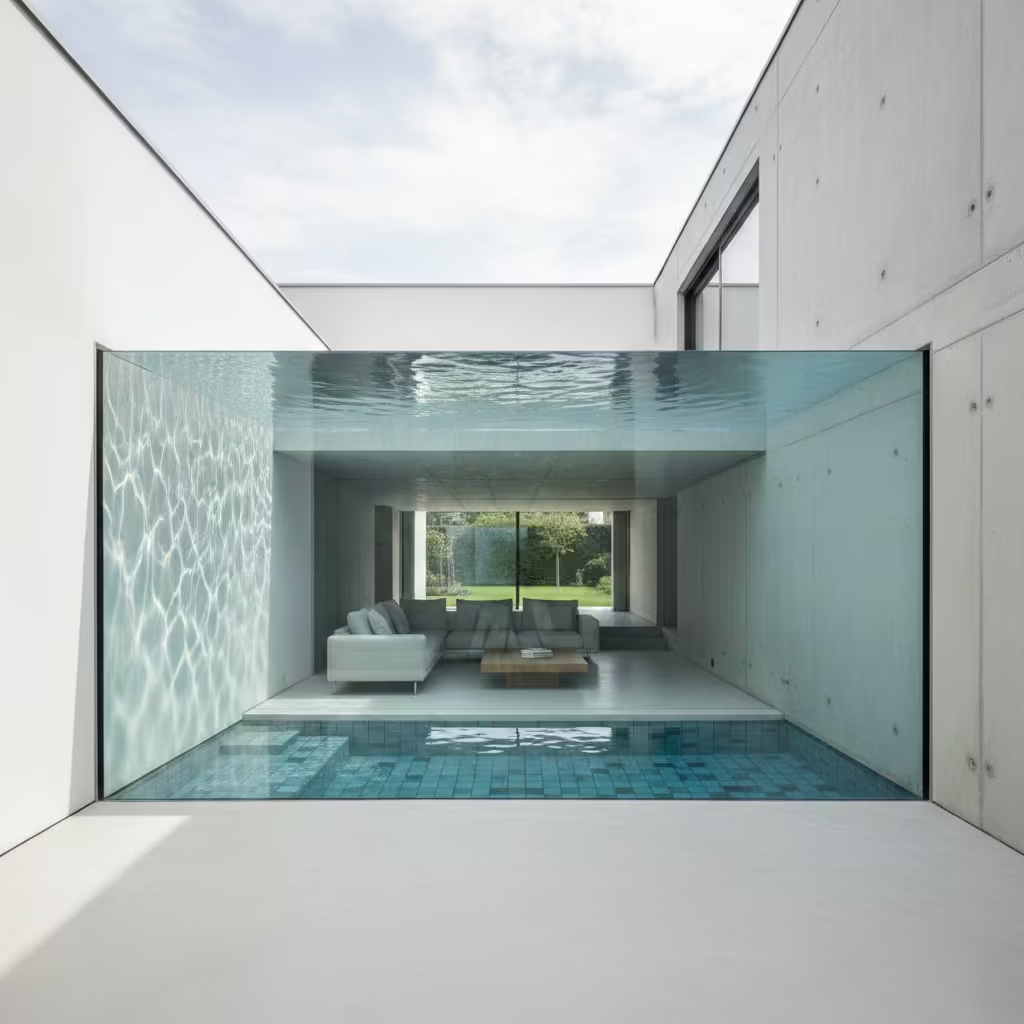
On a modern extension project, we integrated a 9 m (30 ft) long pool with a 7 m (23 ft) continuous acrylic glazed wall facing the garden terrace. Depth was limited to 1.2 m (4 ft) to reduce hydrostatic load and panel thickness.
Early structural collaboration was essential. The glazing rebate had to be cast precisely within the reinforced concrete shell; even minor misalignment would have compromised sealing. We conducted mock-up testing before final installation.
The client initially requested full-depth transparency including the base. We advised against this structurally unnecessary and visually overwhelming. By keeping only one long elevation glazed, the pool remained elegant rather than exhibitionist.
The project succeeded because the glazing aligned with the home’s primary living axis. It felt integrated, not appended an architectural decision rather than a novelty feature.
Family-Oriented Functional Pools
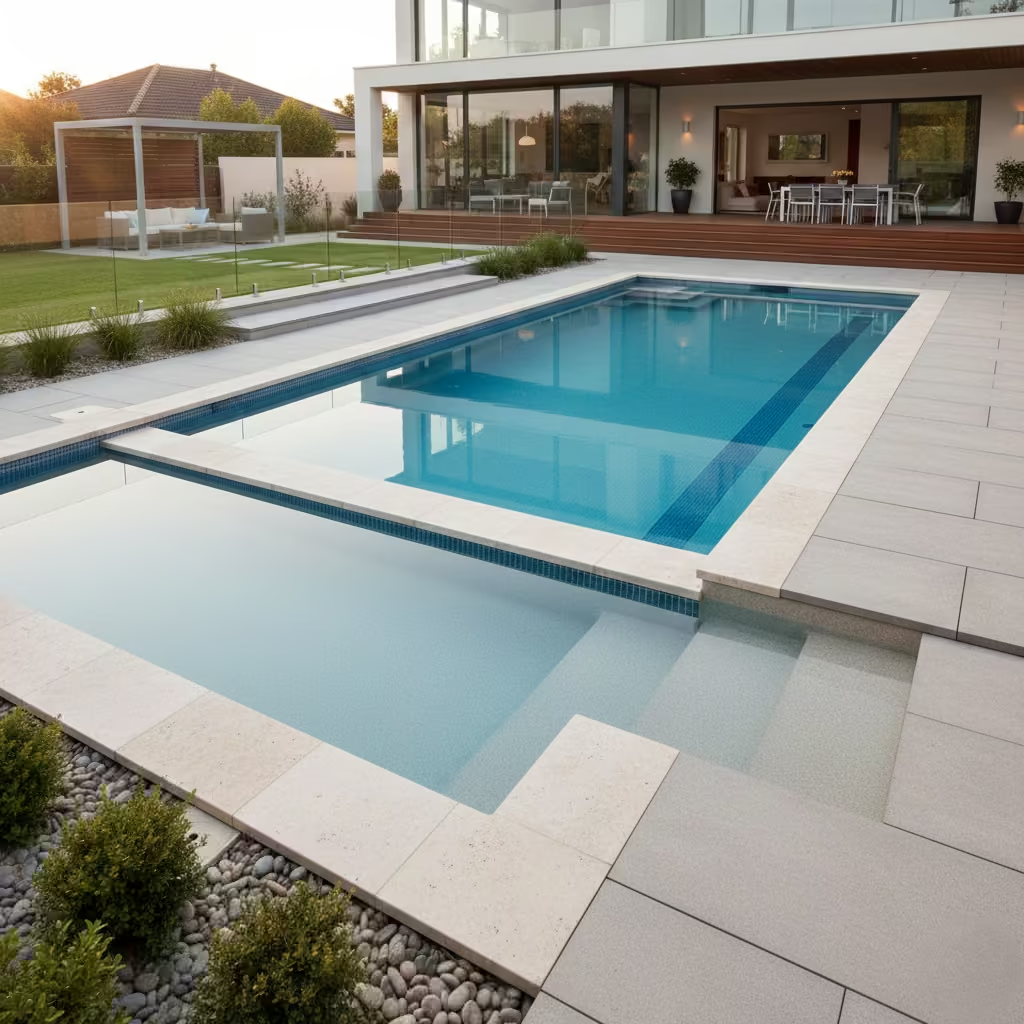
Not every pool is a sculptural statement. In many residential projects, the priority is durability, safety, and multi-generational usability. A well-designed family pool balances recreation with supervision, integrates shallow and deeper zones intelligently, and allows circulation to remain intuitive. When proportion, visibility, and material resilience are handled correctly, these pools become long-term lifestyle infrastructure rather than seasonal luxuries.
Dual-Depth Family Pool
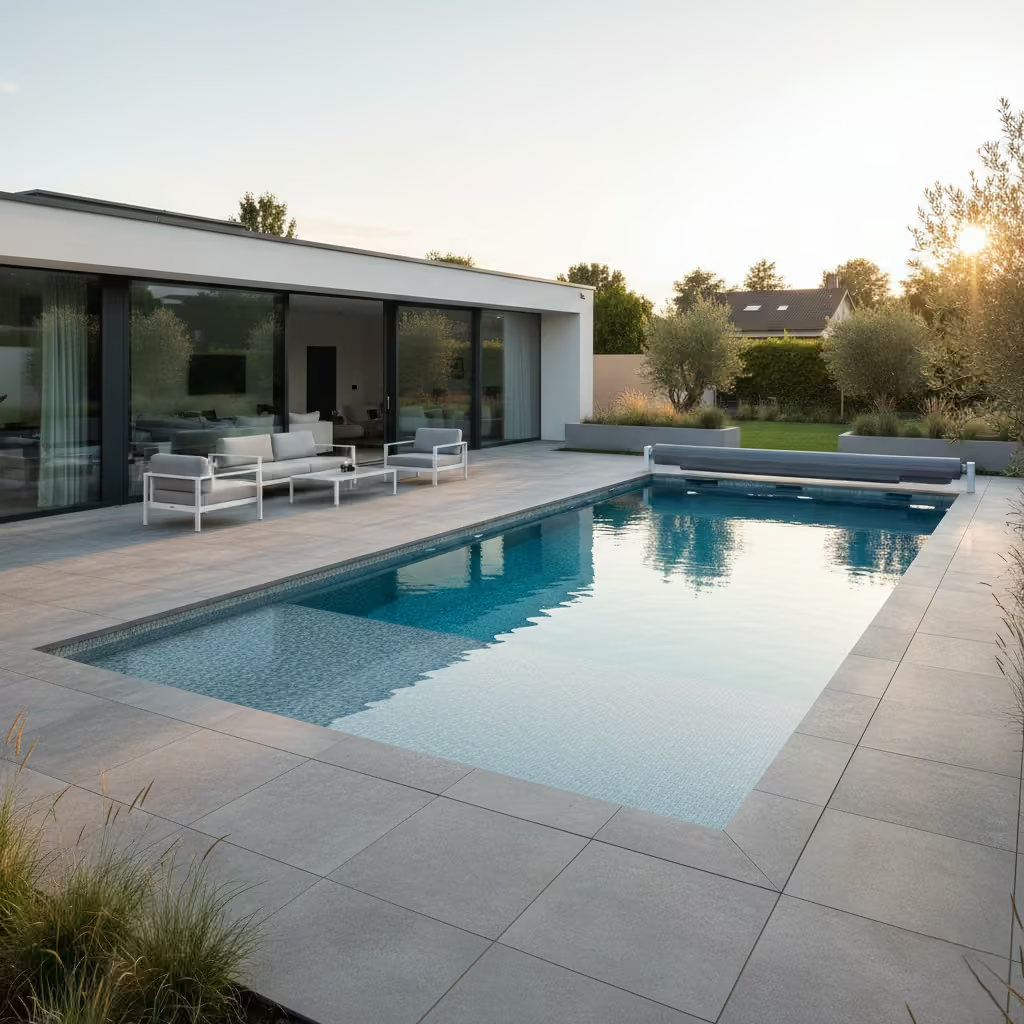
A dual-depth family pool is designed around flexibility. It accommodates younger children, confident swimmers, and adults within one coherent layout. Rather than defaulting to a uniform depth, the basin is zoned to support safe play, supervised learning, and deeper recreational use.
When proportioned correctly, this configuration extends usability across age groups and increases long-term value.
Recommended Dimensions & Depth Zoning
Typical family pool footprint:
- 3 m x 8 m to 4 m x 10 m (10 ft x 26 ft to 13 ft x 33 ft)
Depth configuration:
- Shallow zone: 0.9 m (3 ft)
- Deep zone: 1.8 m (6 ft)
Transition slope should be gradual rather than abrupt. I recommend a sloped gradient over at least 2 m (6.5 ft) to avoid sharp level changes.
The shallow section often occupies one-third of the pool length, positioned closest to the house for easier supervision.
Design Strategy
The shallow end can double as:
- Child play area
- Water-entry platform
- Social standing zone
- Informal lounge area
Wide entry steps ideally 300 mm (12 in) tread depth enhance safety and comfort.
The deeper zone supports:
- Diving (if depth and local regulations allow)
- Confident swimming
- Teenage recreation
Visual clarity is critical. Avoid overly dark finishes in family pools. Mid-tone porcelain or light stone improves underwater visibility for supervision.
Structural & Safety Considerations
- Clearly marked depth indicators
- Non-slip coping and steps
- Handrails for sloped transitions (where appropriate)
- Anti-entrapment compliant drainage systems
- Perimeter fencing in compliance with local code
In the UK, safety barriers must meet Building Regulations standards. In many U.S. states, a minimum 48 in (1.2 m) barrier height with self-closing gates is mandatory.
Heating systems are often specified for family pools to extend seasonal use, particularly in temperate climates.
Pros
- Multi-generational usability
- Safer for children
- Increases property appeal to families
- Flexible for recreation and exercise
- Higher long-term functionality
Cons
- Requires more length to zone effectively
- Slightly higher excavation complexity
- Deep end increases structural load and cost
- Insurance considerations if diving is included
Real-Life Application Insight
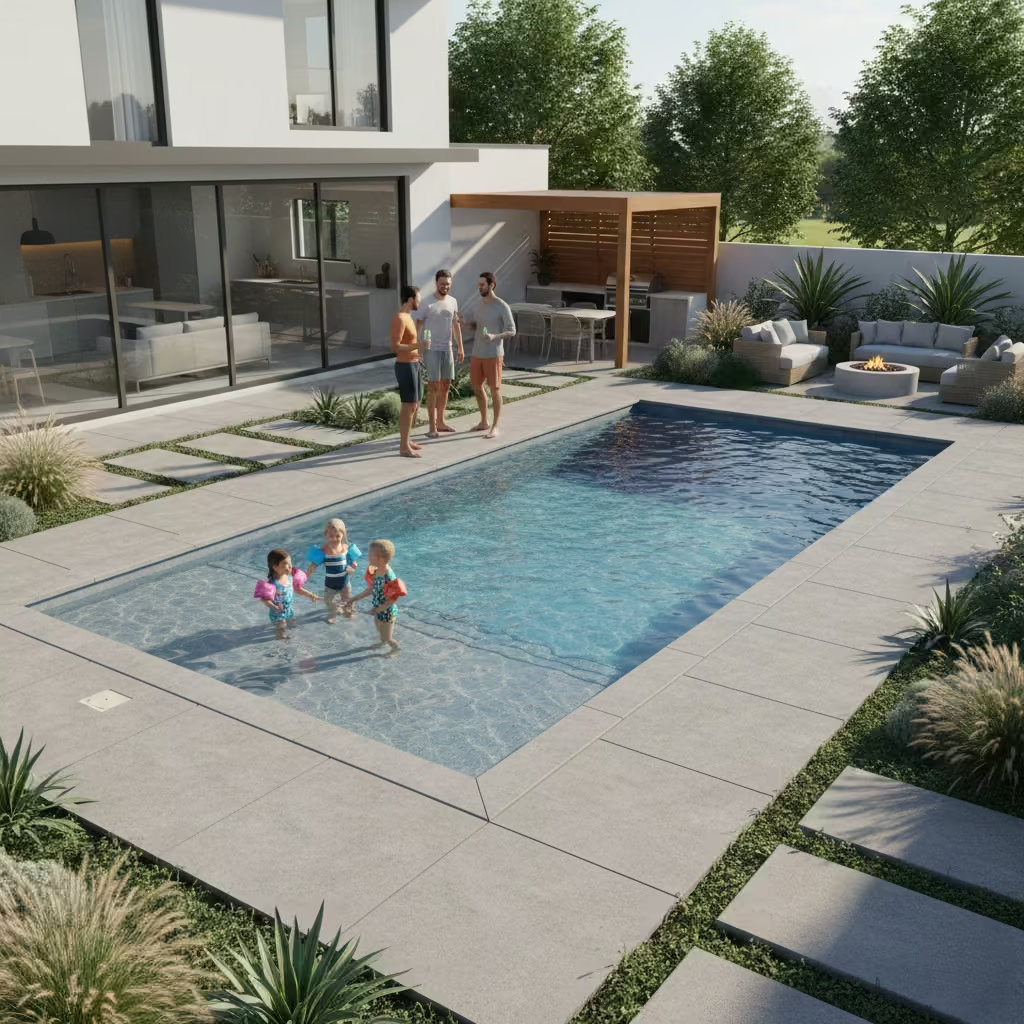
On a suburban renovation, we installed a 3.5 m x 9 m (11.5 ft x 30 ft) pool with a 0.9 m (3 ft) shallow platform occupying the first 3 m of length. The remaining basin transitioned gradually to 1.8 m (6 ft) depth.
Originally, the client wanted a fully deep pool to “grow into,” but after reviewing circulation patterns and child supervision sightlines from the kitchen glazing, we repositioned the shallow zone closest to the house. This improved oversight dramatically.
Five years later, the shallow area remains the most used section not just by children, but by adults standing and socialising. The deeper zone supports swimming, but the success of the pool lies in how intuitively it functions daily.
Integrated Spa + Pool Combination
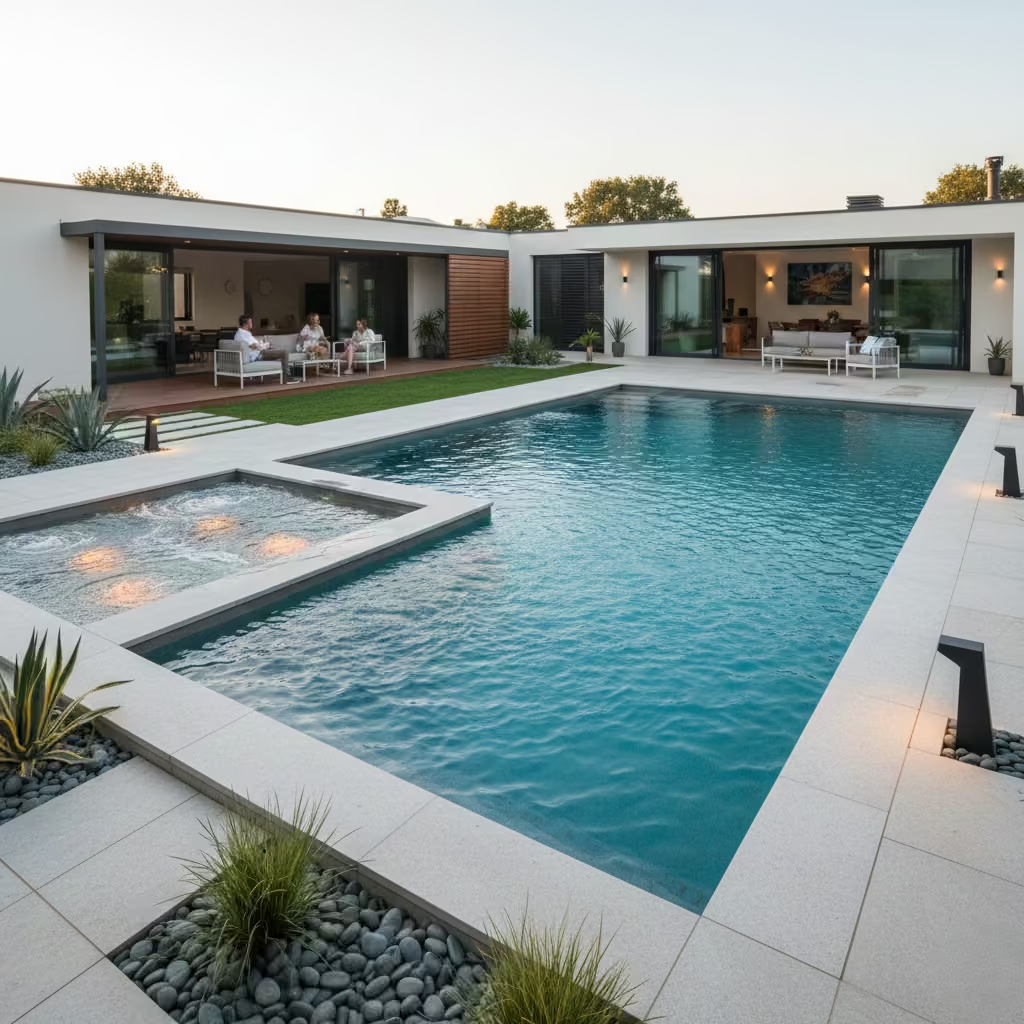
An integrated spa and pool combination delivers thermal contrast, extended seasonal use, and multi-speed relaxation within one cohesive design. Rather than treating the spa as an add-on, the most successful schemes integrate it compositionally and hydraulically into the pool structure maintaining architectural coherence while allowing independent temperature control.
This typology works exceptionally well for families who want both recreation and year-round hydrotherapy without constructing two disconnected water features.
Recommended Dimensions & Configuration
Typical family pool base:
- 3 m x 8 m to 4 m x 10 m (10 ft x 26 ft to 13 ft x 33 ft)
Integrated spa dimensions:
- 2 m x 2 m to 2.4 m x 2.4 m (6.5 ft x 6.5 ft to 8 ft x 8 ft)
- Depth: 900 mm–1 m (3–3.3 ft) seating depth
Spa seating height should allow comfortable immersion to shoulder level when seated, typically with benches at 400–450 mm (16–18 in) height from spa floor.
The spa can be:
- Raised and spilling into the pool (most common)
- Flush-integrated at one corner
- Centrally inset along the pool axis
Hydraulic & Mechanical Considerations
The spa must operate independently from the pool system.
Essential requirements:
- Separate heating loop
- Dedicated jet pump
- Diverter valves
- Independent temperature control
- Check valves to prevent heat loss into pool
Spa water is typically heated to 37–39°C (98–102°F), while pools are maintained at 26–29°C (79–84°F).
Improper hydraulic separation is a frequent mistake. Without it, energy costs increase and temperature stability declines.
Structural Considerations
If the spa is raised:
- Additional reinforcement in retaining walls
- Spillway waterproofing detailing
- Structural allowance for hydrostatic load differential
Raised spas typically project 300–600 mm (12–24 in) above pool level, doubling as a visual focal point and informal seating ledge.
Design Strategy
Integration is critical. I avoid circular fiberglass inserts placed into rectilinear pools they often appear disconnected.
Material continuity between spa and pool enhances cohesion. Lighting should differentiate subtly, warmer tones for spa, cooler for pool.
Acoustics also matter. Spillways should produce a soft cascade, not an aggressive waterfall. Adjustable flow control valves allow clients to modulate sound.
Pros
- Year-round usability
- Hydrotherapy and wellness benefits
- Adds visual focal point
- Enhances entertainment appeal
- Increases perceived property value
Cons
- Higher mechanical complexity
- Increased energy consumption
- More maintenance (jets, heaters, valves)
- Requires precise hydraulic planning
- Higher upfront cost
Typical Cost Tier
Mid to Premium, depending on complexity and heating systems.
Costs increase significantly if automation and smart controls are integrated.
Real-Life Application Insight
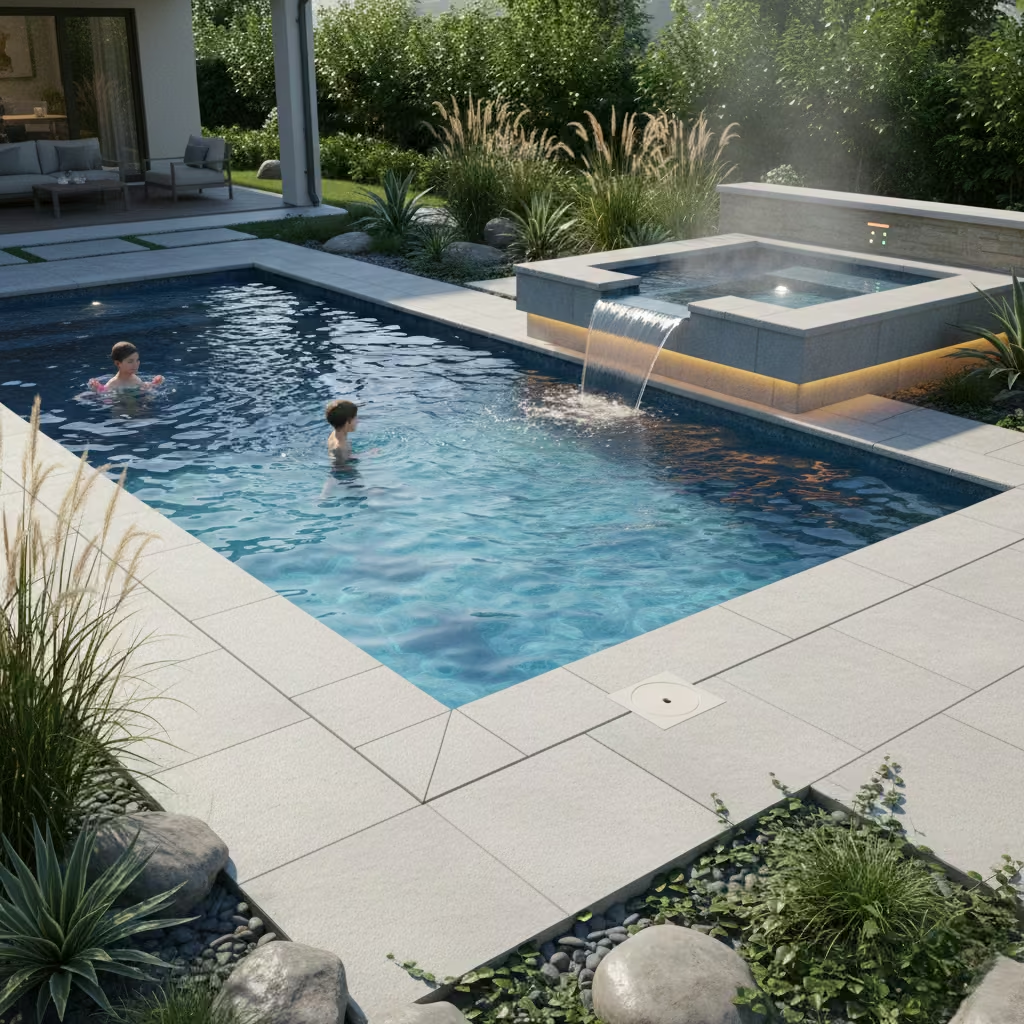
On a family-oriented project, we integrated a 2.2 m x 2.2 m (7 ft x 7 ft) raised spa into a 3.5 m x 9 m (11.5 ft x 30 ft) pool. The spa projected 450 mm (18 in) above water level with a controlled spillway edge.
The client initially wanted a large standalone hot tub at the opposite end of the garden. By integrating the spa into the pool axis, we improved circulation, reduced excavation duplication, and preserved open lawn space.
The most critical decision was specifying an automated control system allowing quick temperature adjustment. Without it, spa usage drops due to heating delay times.
The result was a pool that functions recreationally during the day and transitions into a wellness zone in the evening expanding seasonal use well beyond summer.
Safety-Led Design with Discreet Fencing
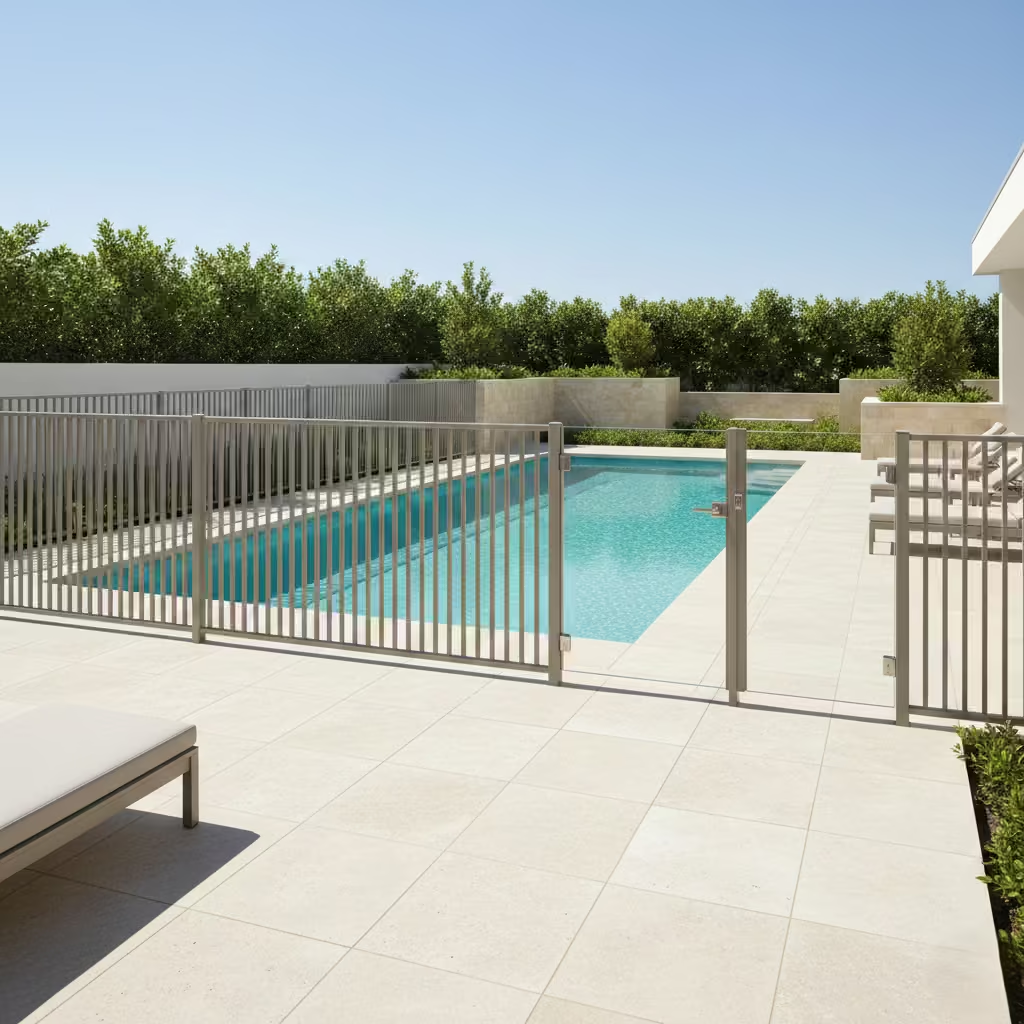
Safety-led pool design is not about visual compromise it is about intelligent integration. The most refined family pools incorporate compliant barriers, controlled access points, and non-slip detailing without disrupting architectural clarity. When fencing and safety elements are considered from the outset rather than retrofitted, they disappear into the composition.
This approach is particularly critical in family homes and properties where resale value depends on meeting code without aesthetic penalty.
Core Safety Design Parameters
While exact regulations vary by jurisdiction, the following are typical benchmarks:
- Barrier height: Minimum 1.2 m (48 in) in many UK and U.S. jurisdictions
- Maximum gap under fence: Usually 100 mm (4 in)
- Self-closing, self-latching gates
- Non-climbable zones around perimeter
Depth visibility also matters. Mid-tone interior finishes improve underwater clarity compared to very dark liners in family settings.
Discreet Fencing Options
1. Frameless Glass Panels
- 10–12 mm toughened safety glass
- Stainless steel spigots or channel-set base
- Minimal visual interruption
2. Slatted Aluminium Screens
- Vertical orientation to prevent climbing
- Powder-coated to match window frames
3. Landscape-Integrated Barriers
- Dense hedging paired with concealed mesh
- Raised planters acting as boundary definition
4. Automatic Safety Covers
- Motorised recessed track systems
- Provides child safety when closed
- Reduces evaporation and debris
Glass fencing remains the most common premium solution because it preserves sightlines from the house, which is critical for supervision.
Structural & Planning Considerations
United Kingdom:
- Building Regulations focus on safety in domestic pools.
- Local authority guidance may apply in conservation areas.
- Listed properties require careful detailing approval.
United States:
- Most states require compliant pool barriers at 48 in (1.2 m) minimum.
- Some municipalities require door alarms if the house forms part of the enclosure.
- Safety covers may count toward compliance in certain jurisdictions.
Always confirm local code before finalising specification.
Design Strategy
The key principle: maintain uninterrupted supervision lines from primary living spaces. I position fencing so that it protects the perimeter but does not block visibility from kitchen or family rooms.
Deck surfaces must be slip-rated (R11 or equivalent for porcelain). Step edges should be visually contrasted to prevent misjudged footing.
Gate placement should align with natural circulation paths. If users must detour awkwardly, gates get left open defeating the purpose.
Typical Cost Tier
Low to Premium, depending on material:
- Mesh fencing: Low
- Powder-coated aluminium: Mid
- Frameless glass or automated covers: Premium
Pros
- Protects children and pets
- Ensures legal compliance
- Increases resale appeal
- Can be visually subtle when designed early
- Reduces liability exposure
Cons
- Adds upfront cost
- Glass requires cleaning
- Automated covers require servicing
- Poorly integrated fencing can disrupt aesthetics
Real-Life Application Insight
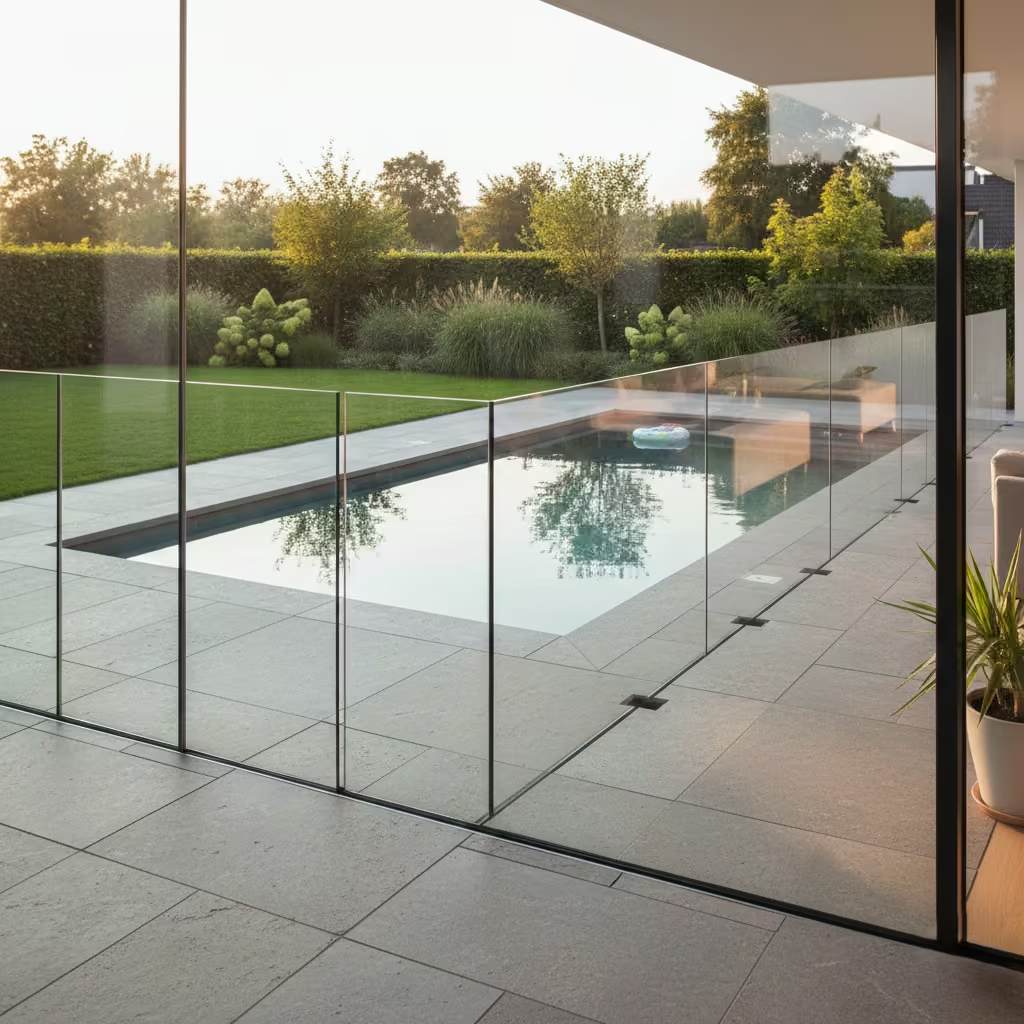
On a recent family renovation, the client initially resisted fencing, concerned it would “break the garden.” After reviewing local compliance requirements and insurance implications, we integrated frameless glass panels set into a recessed channel within the stone terrace.
By aligning panel joints with paving joints and maintaining a consistent 20 mm shadow gap at the base, the fencing became almost invisible from the interior.
The critical success factor was early coordination. Retrofitting fencing after terrace installation would have required surface-mounted spigots, visually cluttering the design.
The lesson: safety should be designed, not added. When integrated from the beginning, it protects without compromising the architectural intent.
Multi-Season Heated Pool
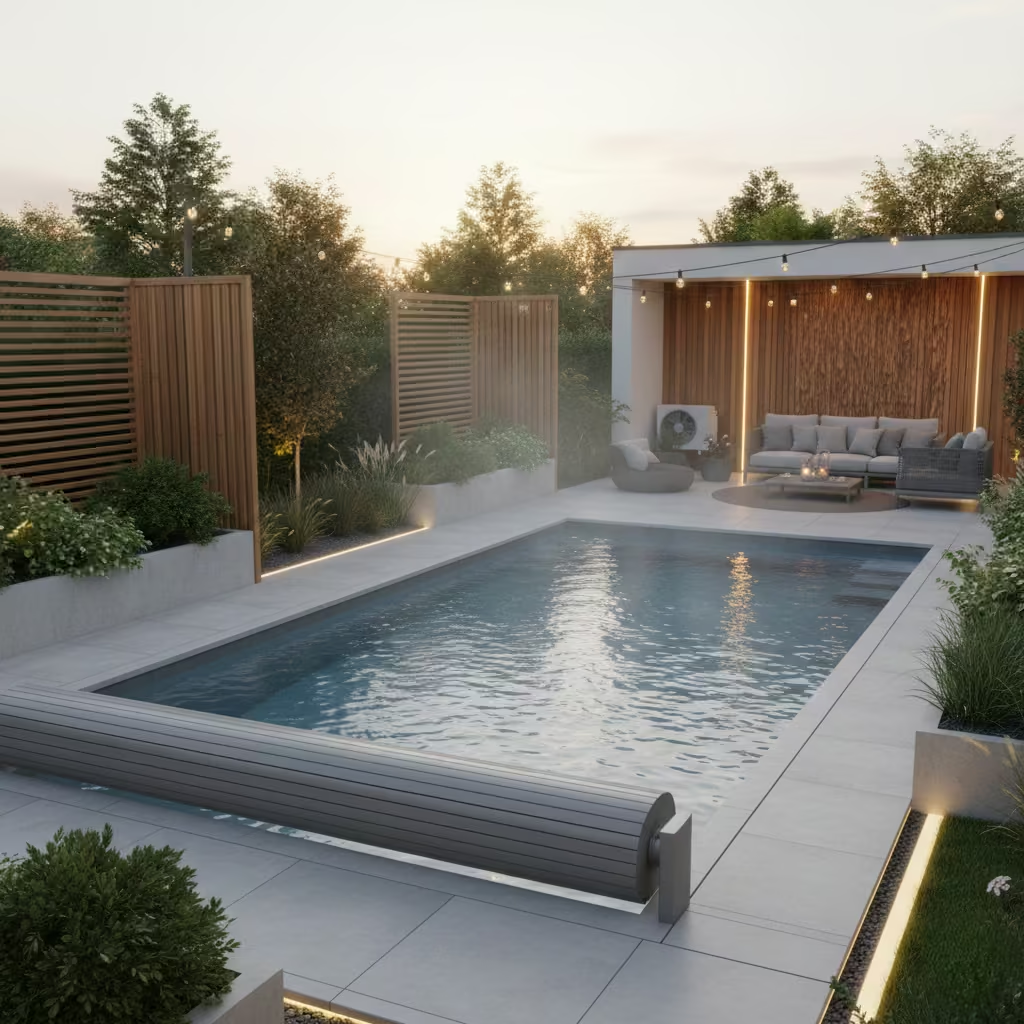
A multi-season heated pool shifts the conversation from “summer feature” to year-round lifestyle infrastructure. In temperate climates especially, unheated pools often sit unused for six to eight months of the year. Strategic heating, insulation, and wind mitigation extend the swimming window significantly sometimes to ten months or more depending on region.
The objective is not simply to add heat, but to manage thermal performance holistically.
Recommended Dimensions & Thermal Logic
Family-scale heated pools typically range between:
3 m x 8 m to 4 m x 10 m (10 ft x 26 ft to 13 ft x 33 ft)
Uniform depth of 1.2–1.4 m (4–4.6 ft) is energy-efficient and adequate for recreation.
Deeper pools increase water volume exponentially, and therefore energy demand. For example, increasing depth from 1.2 m to 1.8 m (4 ft to 6 ft) can raise heating load by nearly 50% depending on surface area.
Insulation beneath the slab and along pool walls is often overlooked. In cooler regions, rigid insulation boards behind the shell significantly reduce heat loss into surrounding soil.
Heating System Options
The appropriate heating system depends on climate, budget, and sustainability goals.
Air-source heat pumps are now common in both the UK and northern U.S. states. They are energy-efficient but perform best in moderate ambient temperatures.
Gas heaters provide rapid heat-up times but come with higher running costs and carbon output.
Solar thermal systems are effective in sunnier regions, particularly in southern U.S. states, but typically supplement rather than replace primary heating.
Automation systems allow temperature scheduling, ensuring the pool is heated only when required. Without smart controls, operational costs escalate quickly.
The Role of Covers
A high-quality insulated cover is not optional in a heated pool. Up to 70% of heat loss occurs through evaporation at the water surface. An automatic recessed slatted cover can reduce heat loss dramatically while also serving as a safety barrier.
In my projects, clients who decline a cover often regret it within the first winter season when energy bills become visible.
Wind & Microclimate Control
Wind strips heat from the water surface rapidly. Strategic planting, glass wind screens, or architectural walls can reduce exposure. Even a 1.5 m (5 ft) wind barrier positioned upwind can noticeably reduce heat loss.
South-facing orientation (in the northern hemisphere) further improves passive heat gain. Designing with orientation in mind can reduce reliance on mechanical heating.
Planning & Regional Considerations
United Kingdom:
Planning permission is generally not required for standard pools under permitted development, but external plant equipment may require acoustic consideration. Noise levels from heat pumps must comply with local authority limits.
United States:
Permitting varies by municipality. Electrical upgrades are often required for heat pumps. In colder northern states, winterisation strategies must be incorporated if year-round use is not feasible.
In both regions, energy efficiency standards are tightening, and insulated covers are increasingly recommended or required.
Typical Cost Tier
Mid to Premium, depending on system type:
- Basic gas heating: Mid
- Heat pump + automation + cover: Premium
- Solar-assisted hybrid systems: Premium+
Operational costs should be evaluated alongside capital expenditure.
Pros
- Extends swimming season significantly
- Increases return on investment
- Enhances wellness and routine use
- Supports early spring and autumn entertaining
- Adds resale appeal in cooler climates
Cons
- Higher upfront mechanical cost
- Ongoing energy expenses
- Requires disciplined use of cover
- Heat pump noise must be managed
Real-Life Application Insight
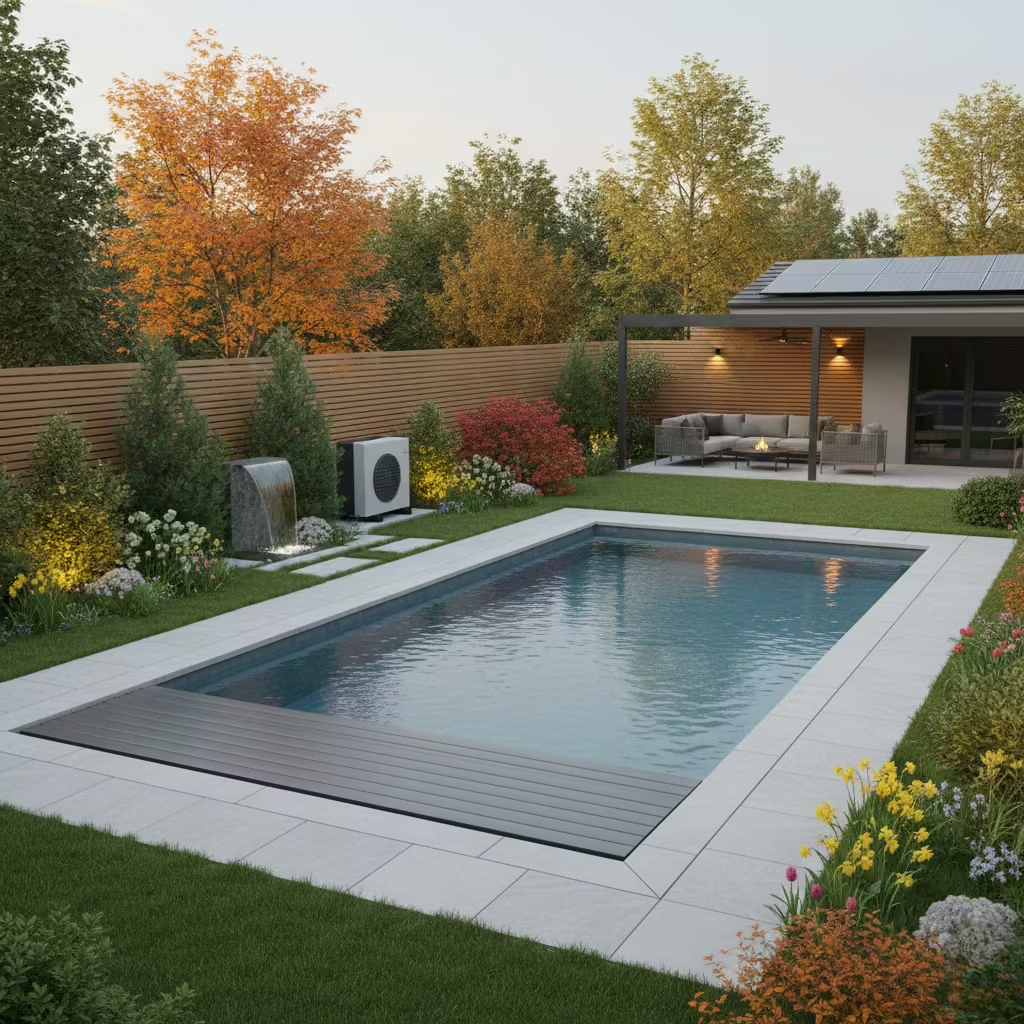
On a UK-based project with a 3.5 m x 9 m (11.5 ft x 30 ft) pool, the client originally planned a seasonal setup. After reviewing usage patterns and cost projections, we installed an air-source heat pump paired with an insulated automatic cover.
Depth was limited to 1.3 m (4.3 ft) throughout to control water volume. We also incorporated wall insulation during shell construction a decision that added modest upfront cost but reduced heating demand long term.
The result extended usable swimming months from May–September to March–November in a mild year. Without insulation and cover integration, the system would have been significantly less efficient.
A heated pool only becomes financially and environmentally viable when designed as a thermal system not when heat iWs added as an afterthought.
Pool with Outdoor Kitchen Integration
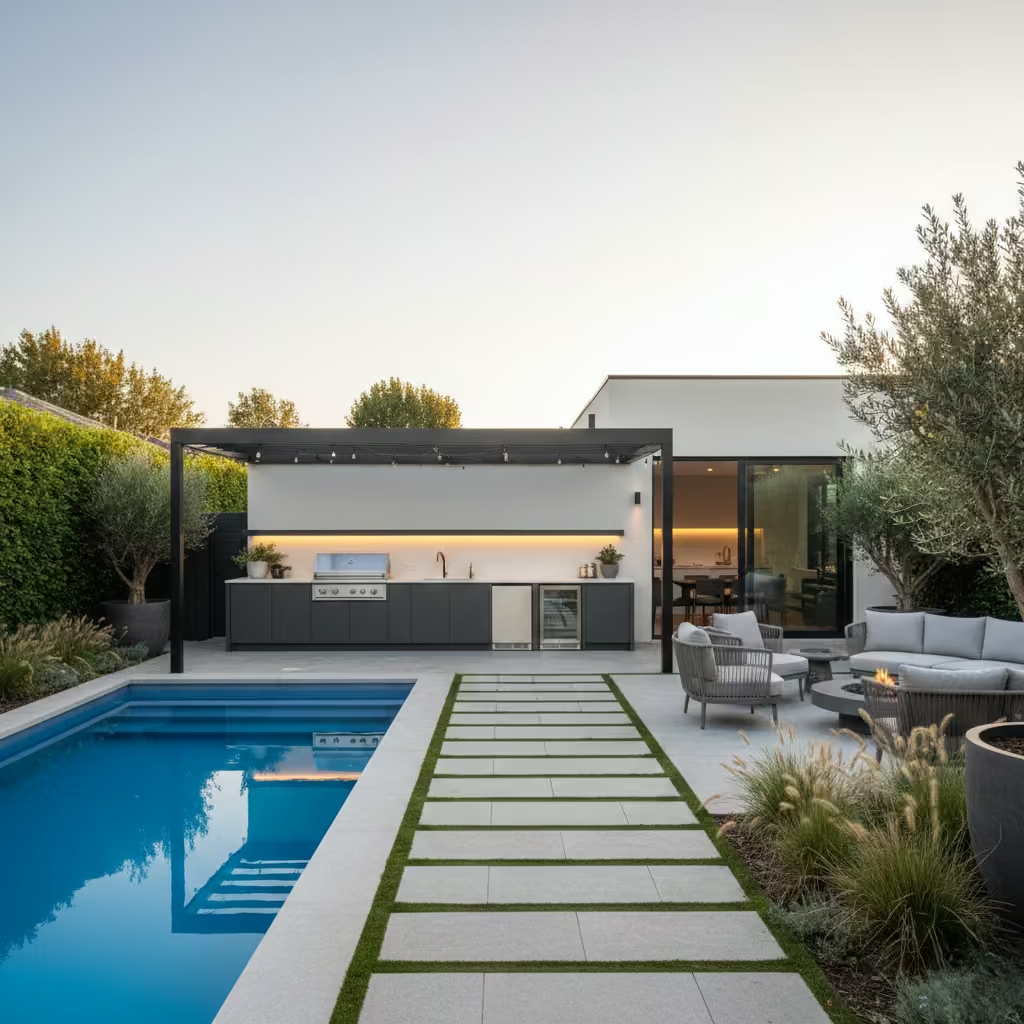
When a pool and outdoor kitchen are designed as a single social ecosystem rather than adjacent features, the entire garden begins to function like an open-air living floor. This configuration supports extended entertaining, multi-generational use, and seamless indoor–outdoor circulation. The key is zoning managing splash, smoke, heat, and movement patterns so that cooking and swimming coexist comfortably.
In successful projects, the kitchen is not positioned randomly at the edge of the terrace. It is strategically aligned with circulation routes between house and pool.
Spatial Planning & Recommended Dimensions
For functional integration, allow clear separation between water edge and cooking zone:
- Minimum 2.4 m–3 m (8–10 ft) between pool coping and kitchen counter
- Circulation zone behind seating: 1 m–1.2 m (3.3–4 ft) minimum
- Kitchen footprint: typically 3 m x 2 m to 4 m x 3 m (10 ft x 6.5 ft to 13 ft x 10 ft)
This ensures safe movement when surfaces are wet and prevents congestion during gatherings.
If incorporating bar seating facing the pool, I typically allow 600 mm (24 in) per stool and maintain a minimum 1 m (3.3 ft) walkway behind.
Zoning Strategy
A refined layout usually follows this hierarchy:
- House threshold (indoor kitchen / dining)
- Outdoor kitchen / grill zone
- Dining table or bar seating
- Open circulation terrace
- Pool edge
Avoid placing grills directly downwind of the pool or adjacent to main seating. Smoke drift and grease splatter quickly undermine usability.
Where possible, align the outdoor kitchen with interior kitchen plumbing walls to simplify water and gas connections.
Utility & Technical Considerations
Outdoor kitchens require:
- Weather-rated electrical outlets
- GFCI/RCD protection
- Proper drainage
- Gas line coordination
- Ventilation clearance for grills
- Non-combustible cladding near heat sources
Slip-resistant flooring (R11 porcelain or textured stone) is essential around both the cooking and pool zones.
In colder climates, winterisation valves and drain-down points should be incorporated into the design.
Shelter & Microclimate
Pergolas or partial roofing enhance usability significantly. Even a 2.5 m–3 m (8–10 ft) deep canopy over the kitchen zone protects appliances and improves longevity.
Wind analysis matters. Wind can disrupt grilling efficiency and reduce comfort. Strategic screens or planting buffers can mitigate exposure without enclosing the space entirely.
Typical Cost Tier
Mid to Premium, depending on appliance specification and structural shelter.
Basic grill + counter: Mid
Full built-in appliances, refrigeration, pizza oven, integrated lighting: Premium
When integrated early in design, cost efficiency improves significantly.
Pros
- Extends entertainment duration
- Reduces indoor traffic during gatherings
- Enhances lifestyle appeal
- Creates cohesive outdoor living zone
- Increases perceived property value
Cons
- Requires larger terrace footprint
- Higher utility coordination complexity
- Ongoing maintenance of appliances
- Smoke and splash management must be resolved
Real-Life Application Insight
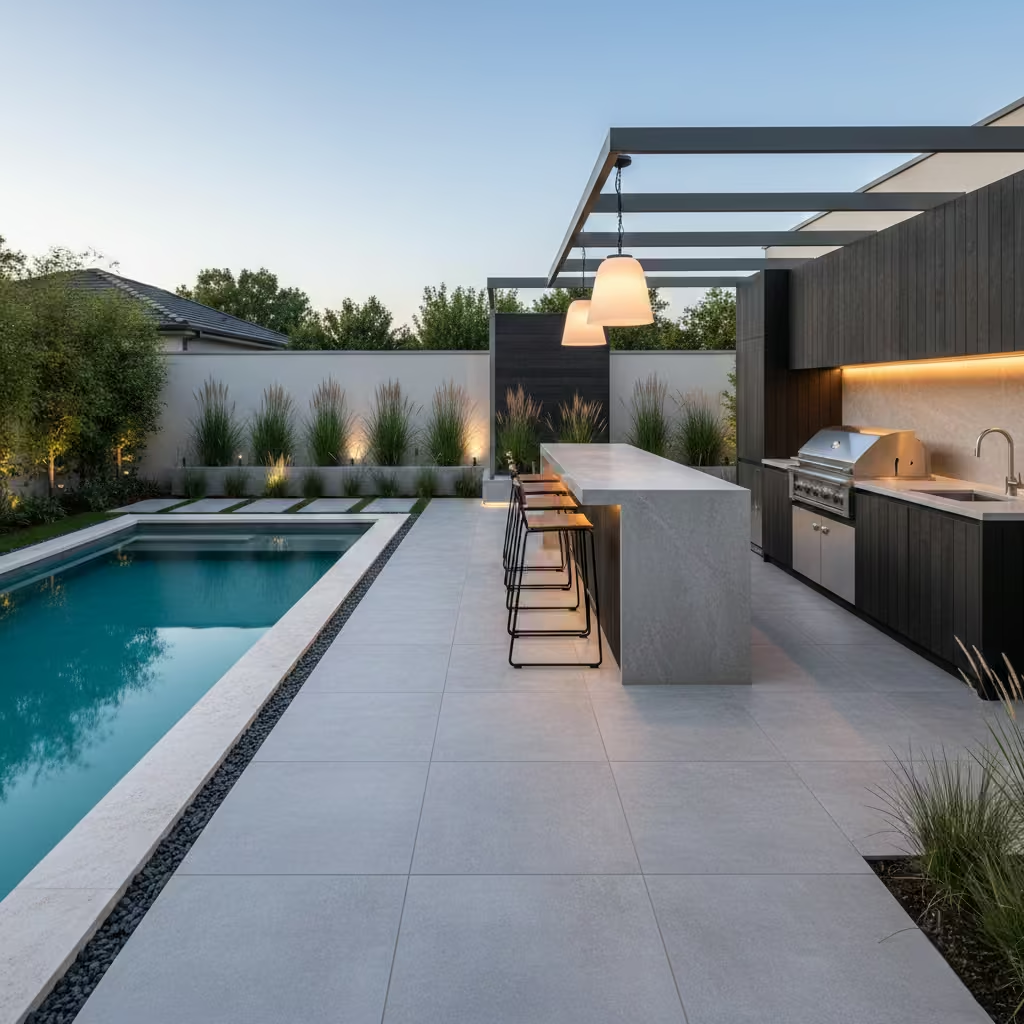
On a suburban family renovation, we integrated a 3.5 m x 9 m (11.5 ft x 30 ft) pool with a 3.5 m (11.5 ft) linear outdoor kitchen positioned parallel to the long pool edge.
Initially, the client wanted the grill immediately beside the coping for convenience. After mapping circulation during peak entertaining scenarios, we repositioned it 2.8 m (9 ft) from the waterline. This preserved a dry circulation path and reduced slip risk.
We aligned the kitchen with the interior cooking wall to minimise new plumbing runs. A simple steel pergola extending 3 m (10 ft) provided shelter without blocking sightlines.
The result is a garden that functions as a single social environment swimmers, diners, and hosts moving comfortably without collision or compromise. Integration, not adjacency, is what makes the design successful.
Luxury Lifestyle Concepts
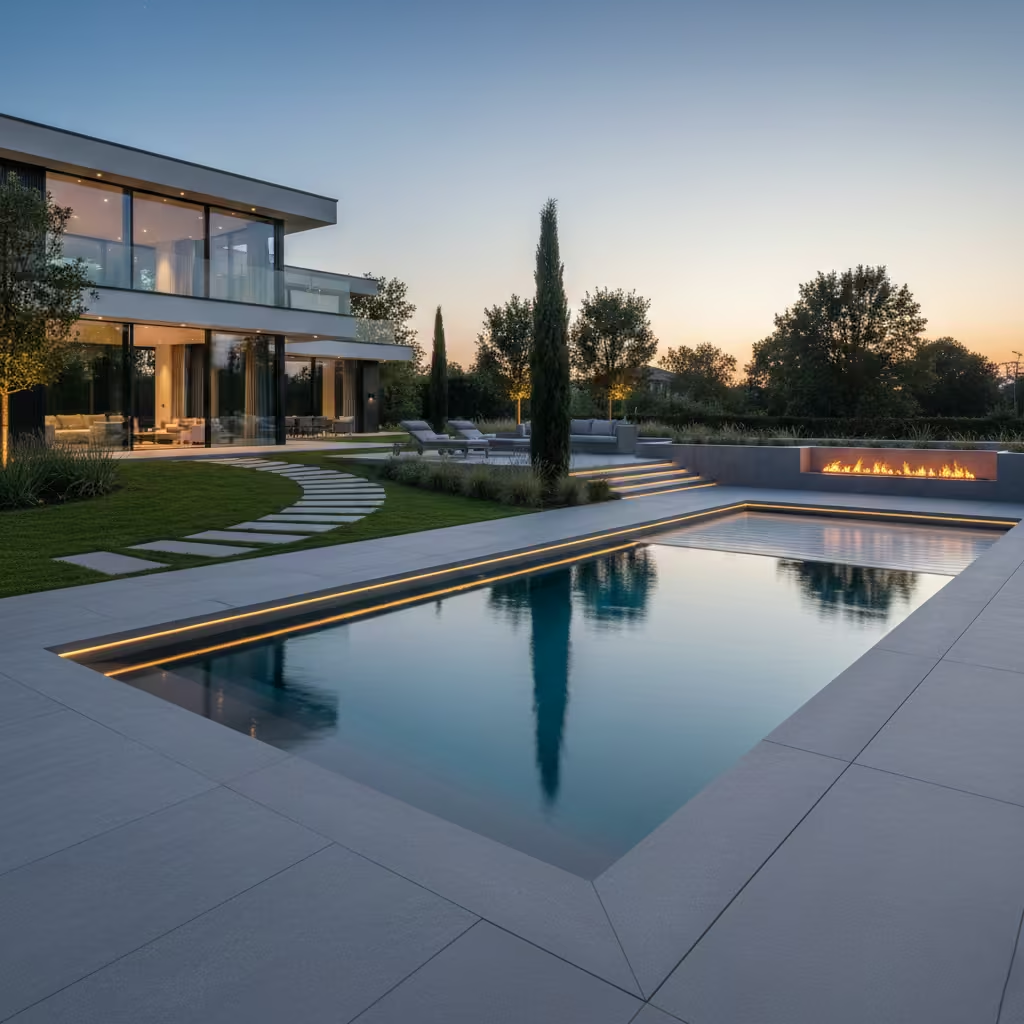
Luxury pool design is not defined by scale alone, but by orchestration. At this level, water becomes part of a broader experiential sequence arrival, transition, immersion, retreat. Materials are elevated, detailing is precise, and supporting elements such as lighting, fire, automation, and landscape architecture are fully integrated. The pool is no longer a feature within the garden; it becomes a curated environment designed to express lifestyle, privacy, and permanence.
Infinity Edge with Landscape View
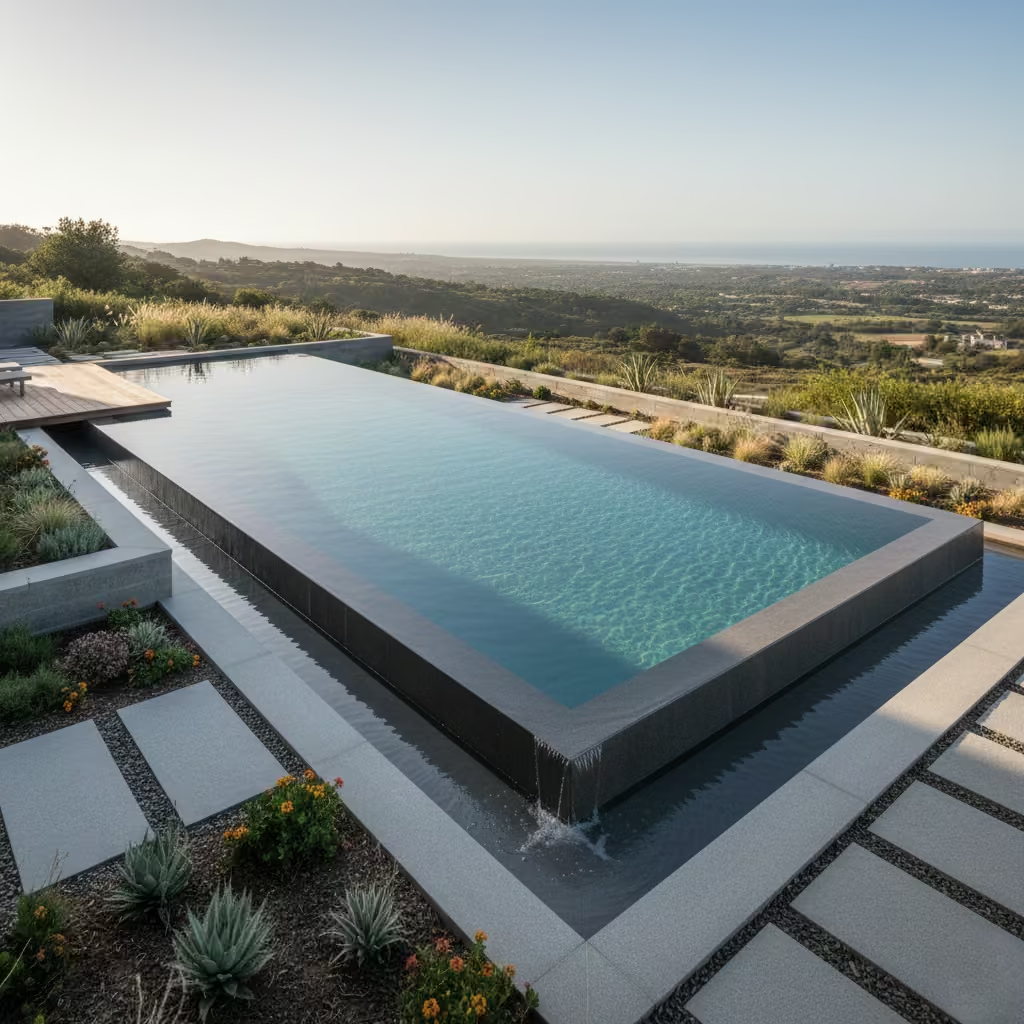
An infinity edge pool often referred to as a vanishing edge is designed to visually dissolve into the surrounding landscape. When aligned with a distant horizon, hillside, ocean, or valley, the water surface appears to merge seamlessly with the view beyond. The effect is not merely aesthetic; it recalibrates spatial perception, extending the garden outward into borrowed landscape.
The success of this typology depends entirely on site orientation and precision detailing. Without a meaningful view, the edge becomes redundant.
Recommended Dimensions & Proportional Logic
Infinity pools are typically medium to large scale to preserve visual drama.
Common dimensions:
- 3 m x 8 m to 4 m x 12 m (10 ft x 26 ft to 13 ft x 40 ft)
- Depth: 1.2 m–1.5 m (4–5 ft) uniform depth for energy efficiency
The vanishing edge is usually positioned along the long axis facing the primary view.
A catch basin below the vanishing edge is required:
- Minimum 600 mm–1 m (2–3 ft) wide
- Engineered to recirculate overflowing water
The weir edge must be perfectly level even a few millimetres of inconsistency disrupts the visual sheet of water.
Structural Considerations
Infinity edges require:
- Reinforced concrete shell with increased edge reinforcement
- Secondary catch basin structure
- Precise hydraulic balancing system
- Continuous waterproofing between primary pool and trough
Water must overflow evenly along the full length. Hydraulic design is more complex than in standard skimmer pools.
On sloped sites, retaining walls and foundation stabilisation must be engineered carefully, especially in hillside conditions.
Planning Implications (UK / USA Variations)
United Kingdom:
- Generally permitted under standard domestic pool allowances if within property boundaries.
- Hillside excavation may require structural review and drainage strategy approval.
- Listed or conservation properties require design approval.
United States:
- Local permitting required in most municipalities.
- In seismic regions (e.g., California), additional structural reinforcement is mandatory.
- Environmental review may apply near coastal or protected landscapes.
Engineering certification is typically required in both regions.
Typical Cost Tier
Premium to Architectural: Costs increase due to
- Dual-structure system (pool + trough)
- Complex hydraulics
- Enhanced structural engineering
- Site-specific excavation challenges
Operating costs are also slightly higher due to continuous circulation at the edge.
Pros
- Exceptional visual impact
- Maximises scenic sites
- Creates resort-level aesthetic
- Enhances property prestige
- Strong alignment with contemporary architecture
Cons
- Requires meaningful view to justify design
- Higher construction complexity
- Increased water evaporation
- Demands precise installation
- Higher maintenance than standard skimmer systems
Real-Life Application Insight
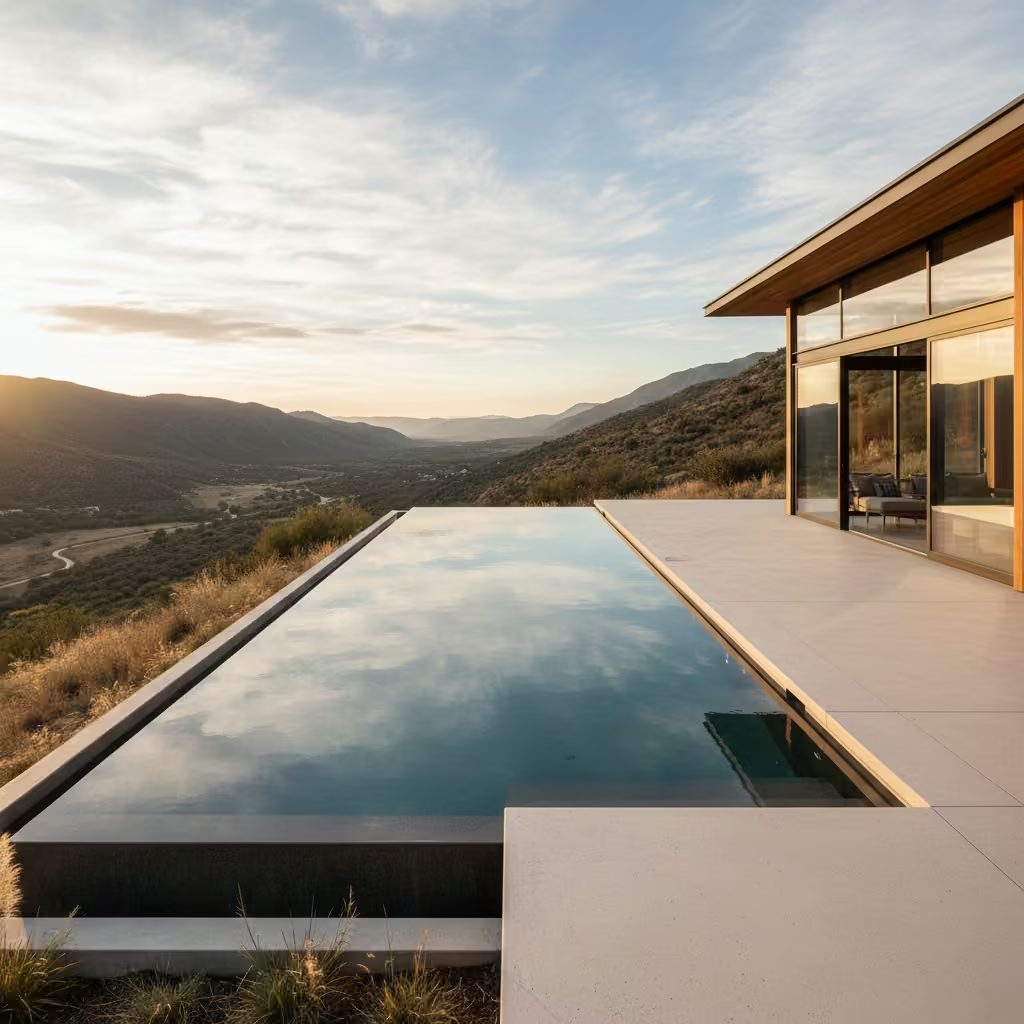
On a hillside property overlooking open countryside, we designed a 3.8 m x 11 m (12.5 ft x 36 ft) infinity edge pool aligned exactly with the valley horizon line.
The critical design decision was lowering the pool elevation by 150 mm (6 in) from the original proposal. This subtle adjustment allowed the waterline to align precisely with the distant landscape, avoiding visual interruption by nearby fencing.
The catch basin was engineered at 800 mm (2.6 ft) width to ensure adequate recirculation capacity. Hydraulic calibration during commissioning was essential; uneven flow initially created dry patches along the weir.
The result was not theatrical but serene = the water appeared to extend infinitely into the valley beyond. The lesson is clear: infinity edges succeed when geometry, view alignment, and engineering precision are handled without compromise.
Fire and Water Feature Combination
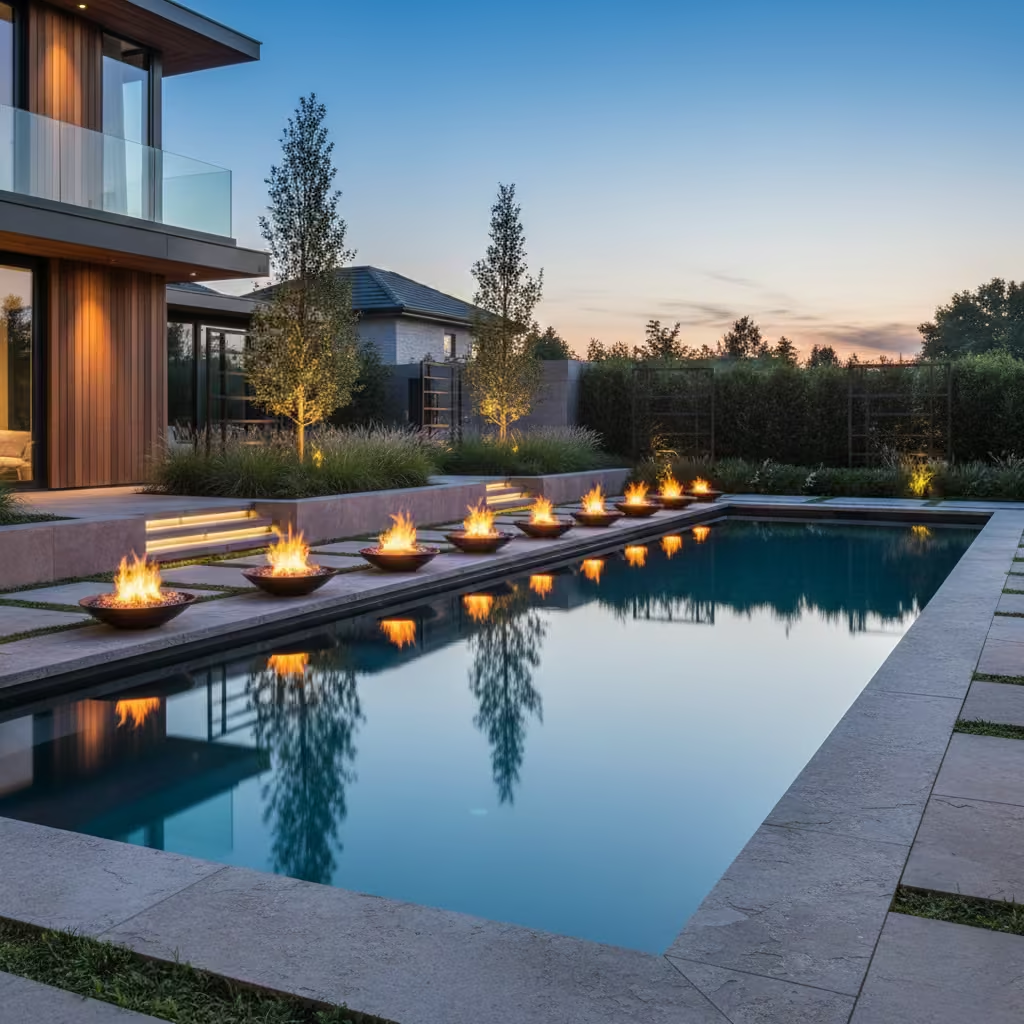
The combination of fire and water introduces elemental contrast movement and stillness, heat and coolness, light and reflection. When carefully integrated, it elevates a pool from recreational amenity to immersive environment. However, this pairing requires disciplined design. Without spatial balance and proper safety coordination, it can feel excessive or contrived.
In refined residential projects, fire is rarely oversized. It is positioned to anchor seating zones, frame views, or create evening ambience without overwhelming the water surface.
Spatial Planning & Proportion
Successful fire-water compositions typically follow one of three configurations:
- Linear fire feature parallel to pool edge
- Raised spa wall with integrated fire bowls
- Central fire element within a sunken lounge adjacent to pool
Clear separation between open flame and water is essential. I typically maintain a minimum of 600 mm–900 mm (2–3 ft) horizontal distance between flame source and waterline to prevent splash interference.
If installing fire bowls along an infinity edge or raised wall, spacing them evenly often at 1.5 m–2 m (5–6.5 ft) centres maintains visual rhythm without clutter.
Structural & Technical Considerations
Fire features require:
- Dedicated gas lines (natural gas or propane)
- Proper ventilation and combustion clearance
- Heat-resistant materials (concrete, stone, steel)
- Electrical ignition systems rated for exterior use
- Waterproofing coordination around penetrations
Penetrations through pool walls must be detailed meticulously. Gas lines should never compromise structural reinforcement or waterproof membranes.
Drainage planning is equally important. Water splashing into fire features can cause ignition failure or long-term corrosion.
Material Strategy
Natural stone, dark concrete, and weathered steel pair well with fire elements. In contemporary schemes, blackened steel fire trays integrated into linear walls produce a restrained, architectural effect.
Flame height should be adjustable. In most residential settings, a controlled 150–300 mm (6–12 in) flame height is sufficient for ambience without excessive fuel consumption.
Lighting design must complement the fire glow rather than compete with it. Overly bright pool lighting diminishes the elemental contrast.
Safety & Planning Considerations (UK / USA)
United Kingdom:
- Gas installations must comply with Gas Safe regulations.
- Local building control may require approval for structural alterations.
- Fire positioning must comply with boundary distance rules.
United States:
- Gas plumbing must meet local building and fire codes.
- Clearance distances from structures vary by state.
- Some municipalities require shut-off valves within accessible proximity.
Insurance providers may require certification for integrated fire systems.
Typical Cost Tier
Premium
Costs increase due to:
- Gas infrastructure
- Structural coordination
- Specialist installation
- Automation controls
Maintenance and fuel costs should be factored into long-term ownership.
Pros
- Dramatic evening atmosphere
- Extends outdoor usability into cooler evenings
- Strong visual focal point
- Enhances entertainment value
- Creates layered sensory experience
Cons
- Increased installation complexity
- Higher fuel costs
- Ongoing maintenance of burners and ignition systems
- Requires strict safety compliance
- Risk of visual overstatement if poorly proportioned
Real-Life Application Insight
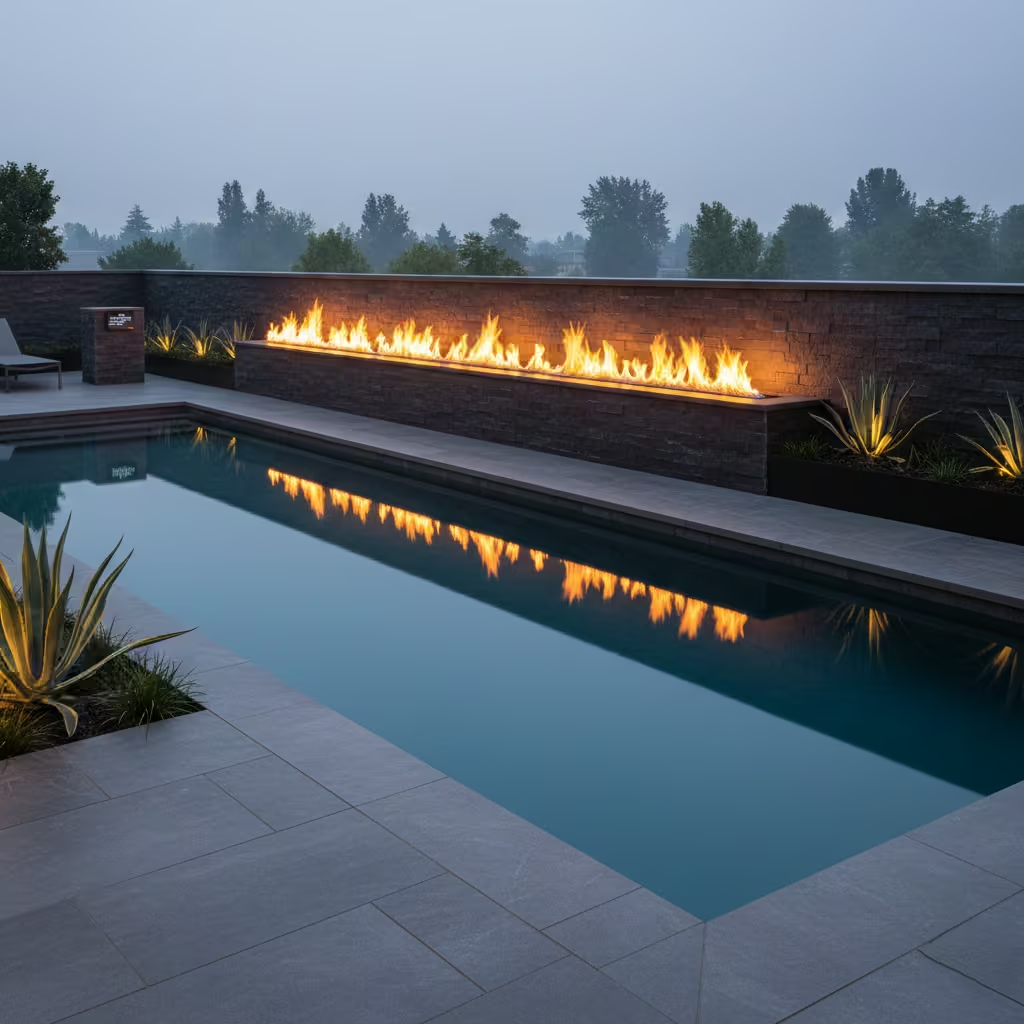
On a contemporary pool project measuring 4 m x 12 m (13 ft x 40 ft), we integrated three linear fire trays into a raised wall along the long pool edge. Each tray was spaced 1.8 m (6 ft) apart to maintain proportional balance.
Initially, the client proposed tall sculptural fire columns at the pool corners. Through 3D modelling, we demonstrated how this would visually compress the terrace and disrupt the horizon line. Instead, we opted for controlled, horizontal flames rising approximately 200 mm (8 in) above a blackened steel channel.
The fire was linked to an automated ignition system tied into the landscape lighting controls. At dusk, the water reflected the flame subtly without glare.
The result was atmospheric rather than theatrical an elemental dialogue between water and fire that reinforced the architecture rather than competing with it.
LED-Lit Nighttime Resort Pool
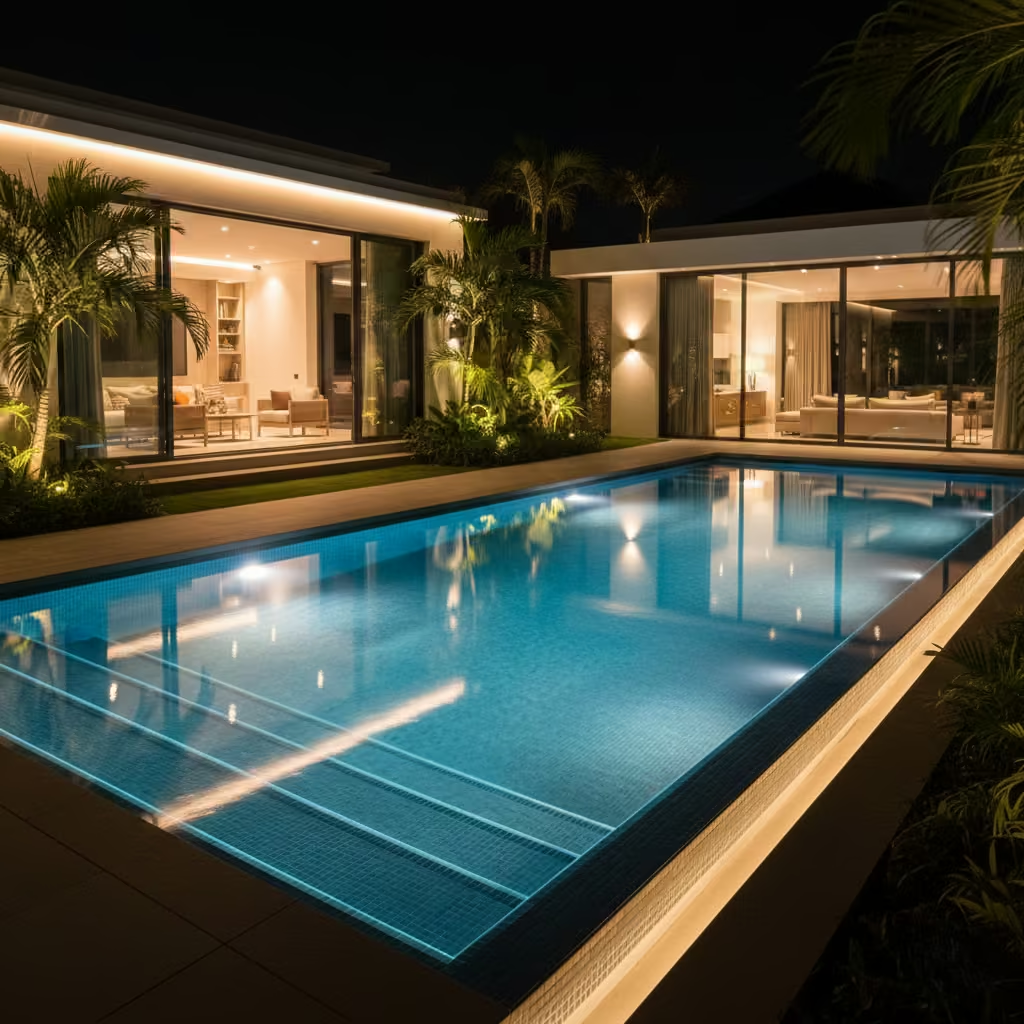
An LED-lit pool transforms entirely after sunset. In daylight, it may read as a clean architectural basin; at night, it becomes an illuminated focal plane — reflective, atmospheric, and immersive. When lighting is layered with precision rather than treated as colour-changing novelty, the result can rival boutique hospitality environments.
The objective is not brightness. It is calibrated glow, shadow control, and visual hierarchy.
Lighting Strategy & Layout
For a residential resort-style effect, lighting should operate on three levels:
- Underwater illumination
- Perimeter and step lighting
- Landscape accent lighting
Underwater LED fittings are typically spaced at 2 m–3 m (6.5–10 ft) intervals along the long wall, depending on pool length and lumen output.
For a standard 3.5 m x 9 m (11.5 ft x 30 ft) pool, three well-positioned fittings on one side wall often provide balanced illumination without over-lighting.
Depth affects beam spread. In pools deeper than 1.5 m (5 ft), additional fixtures may be required to prevent dark zones.
Colour Temperature & Mood Control
Warm white (2700K–3000K) creates a refined, hospitality-driven atmosphere. Cool white can feel clinical unless intentionally aligned with a modern aesthetic.
RGB colour-changing systems are common, but I recommend restraint. Static warm white for everyday use, with programmable scenes for events, maintains sophistication.
Lighting intensity should be dimmable. Over-bright pools flatten water texture and diminish reflection.
Architectural Integration
Step riser lighting at 150–180 mm (6–7 in) intervals enhances safety and depth perception.
Recessed slot lighting along coping edges can create a floating waterline effect. However, glare must be carefully controlled to avoid disrupting views from interior living spaces.
Landscape uplighting around planting beds positioned 600 mm–1 m (2–3 ft) from pool edge adds layered depth without spilling excessive light into the water.
Electrical & Technical Considerations
- Low-voltage LED systems preferred for safety
- IP68-rated underwater fixtures
- Accessible junction boxes for maintenance
- Transformer placement in ventilated, dry plant areas
- Compliance with local electrical codes (RCD/GFCI protection required in UK/USA)
Automation integration allows synchronisation with garden lighting, fire features, and music systems.
Typical Cost Tier
Mid to Premium, depending on system complexity:
- Basic white LED setup: Mid
- Full RGB programmable automation: Premium
Energy consumption is relatively low compared to older halogen systems.
Pros
- Extends usability into evening hours
- Creates resort-level ambience
- Enhances architectural lines
- Improves safety at night
- Energy-efficient compared to legacy lighting
Cons
- Over-lighting can reduce elegance
- RGB systems may date quickly if overused
- Requires electrical coordination early in design
- Underwater fittings require occasional servicing
Real-Life Application Insight
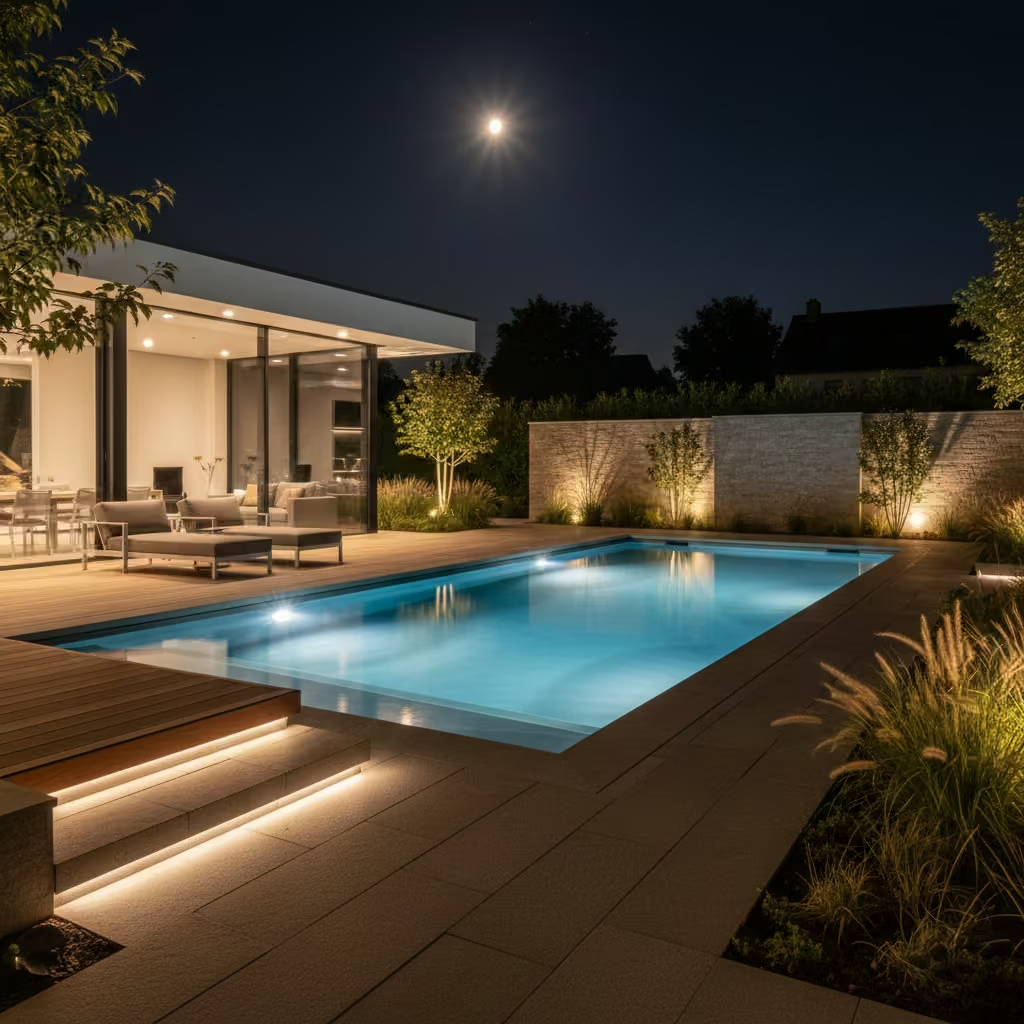
On a contemporary project featuring a 4 m x 10 m (13 ft x 33 ft) pool, we installed three warm white LED fixtures on the long elevation facing away from the house. This avoided direct glare into the interior glazing.
We initially tested four fixtures, but the result was overly bright and flattened the water surface. Reducing to three created subtle gradation and stronger reflection.
Step riser lighting was integrated at 170 mm (6.7 in) intervals, improving nighttime safety without visible fittings.
The key decision was limiting colour-change functionality to controlled preset scenes. The clients rarely use vibrant colours; instead, the warm white glow provides an understated, hotel-level atmosphere that elevates the entire garden after dusk.
The lesson is clear: nighttime design should be intentional and layered never theatrical by default.
Pool with Covered Pavilion
A covered pavilion adjacent to a pool transforms the space from recreational amenity into an outdoor room. It introduces architectural shelter, shade control, and seasonal flexibility allowing the pool zone to function comfortably in strong sun, light rain, or cooler evenings.
The pavilion should never feel like an afterthought pergola dropped onto a terrace. Its scale, roof pitch, and structural rhythm must relate directly to the house.
Spatial Planning & Recommended Dimensions
For balanced proportion, the pavilion footprint typically ranges between:
- 3 m x 4 m to 4 m x 6 m (10 ft x 13 ft to 13 ft x 20 ft)
Minimum clear internal height:
- 2.4 m (8 ft), though 2.7–3 m (9–10 ft) creates stronger presence and airflow.
Maintain at least 1.5 m–2.5 m (5–8 ft) between pavilion edge and pool coping to preserve circulation and prevent splash intrusion.
The pavilion often anchors one long side of a 3 m x 8 m to 4 m x 12 m (10 ft x 26 ft to 13 ft x 40 ft) pool, creating spatial hierarchy.Functional Configurations
A covered pavilion can accommodate:
- Outdoor lounge seating
- Dining table
- Built-in fireplace
- Bar or compact kitchen
- Changing area or storage
Where possible, align the pavilion roofline with major architectural axes. Flat roofs suit contemporary homes; pitched or timber-framed structures pair better with traditional architecture.
Integrated ceiling fans improve air movement in warm climates. In cooler regions, infrared heaters extend evening usability.
Structural & Material Considerations
Structural systems may include:
- Steel frame with timber cladding
- Solid timber posts and beams
- Reinforced concrete columns
- Aluminium architectural systems
Roof finishes range from standing seam metal to tiled systems or insulated flat roof membranes.
Drainage must be carefully resolved. Downpipes should not discharge toward pool areas. I often integrate concealed guttering with drainage directed away from circulation paths.
If the pavilion includes electrical systems, lighting and outlets must meet exterior-rated standards with appropriate RCD/GFCI protection.
Planning Implications (UK / USA)
United Kingdom:
- Small detached pavilions may fall under permitted development if within size and height limits.
- Structures within conservation areas require review.
- Proximity to boundaries may affect approval.
United States:
- Regulations vary by municipality.
- Height, setback, and coverage limits apply.
- Larger pavilions with utilities typically require permit approval.
Early confirmation avoids costly redesign.
Typical Cost Tier
Mid to Premium, depending on materials and complexity.
Basic timber pergola-style cover: Mid
Fully enclosed architectural pavilion with integrated services: Premium
Costs increase substantially when adding kitchens, fireplaces, or glazing systems.
Pros
- Provides shade and weather protection
- Extends seasonal use
- Defines social zone
- Enhances architectural cohesion
- Increases perceived property value
Cons
- Requires adequate terrace space
- Additional structural and planning approvals
- Higher upfront cost
- Must be proportioned carefully to avoid overshadowing pool
Real-Life Application Insight
On a contemporary garden project featuring a 3.8 m x 10 m (12.5 ft x 33 ft) pool, we installed a 4 m x 5.5 m (13 ft x 18 ft) steel-framed pavilion along the western edge.
Initially, the client considered a lightweight pergola. However, afternoon sun exposure and wind made the space uncomfortable during peak hours. By introducing a solid roof with concealed guttering and a ceiling height of 2.8 m (9.2 ft), we created usable shade without enclosing the space.
Positioning the pavilion 2 m (6.5 ft) from the pool edge preserved circulation while maintaining visual connection.
The pavilion now functions as the primary gathering area swimmers move naturally between water and shaded seating. The success lies in proportion and alignment; the structure feels integral to the pool composition rather than appended beside it.
Sunken Firepit Adjacent to Pool
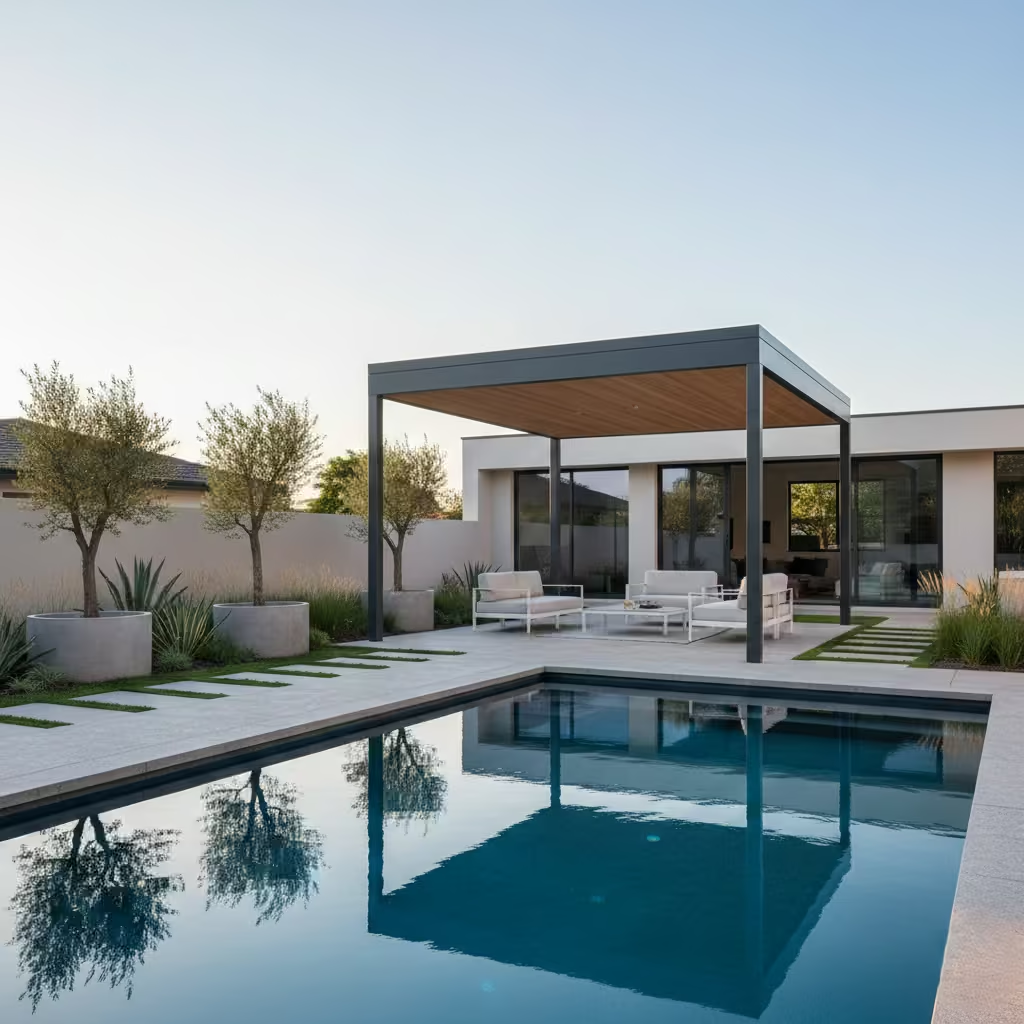
A sunken firepit beside a pool creates a layered experiential zone water at one level, flame at another, conversation anchored at the centre. Unlike freestanding fire bowls, a sunken configuration introduces enclosure, acoustic softness, and visual intimacy. It works particularly well in larger gardens where you want to draw guests slightly away from the waterline without losing connection to it.
The success of this concept depends on sectional balance. If the level change is too dramatic, it disconnects from the pool; too shallow, and the enclosure effect is lost.
Recommended Dimensions & Section Planning
Comfortable sunken firepit lounge dimensions:
- Internal diameter (circular layout): 3 m–3.6 m (10–12 ft)
- Rectilinear layout: 3 m x 3 m minimum (10 ft x 10 ft)
Lowered depth:
- 450–600 mm (18–24 in) below surrounding terrace
Firepit diameter (gas or woodburning):
- 900 mm–1.2 m (3–4 ft)
Maintain at least 1.8 m–2.5 m (6–8 ft) horizontal distance from pool coping to the edge of the sunken zone to preserve safe circulation.
Bench seating height:
- 400–450 mm (16–18 in)
Step risers should be consistent at 150–180 mm (6–7 in) for comfort and safety.
Structural & Technical Considerations
- Reinforced retaining walls around sunken zone
- Integrated drainage channel or concealed sump pump
- Non-combustible materials (stone, concrete, brick)
- Dedicated gas line (for gas firepit)
- Spark arrestor planning (for wood-burning versions)
Drainage is critical. Even in moderate rainfall climates, a lowered zone must include surface drainage or concealed floor drain connected to stormwater systems.
If integrating lighting, step riser LEDs improve safety without glare.
Planning Implications (UK / USA)
United Kingdom:
- Gas installations must comply with Gas Safe standards.
- Open flame placement must respect boundary distances.
- Listed or conservation properties may require review.
United States:
- Fire codes vary by state and municipality.
- Some regions restrict wood-burning firepits.
- Gas shut-off valves typically required within accessible distance.
Always verify local building and fire regulations.
Typical Cost Tier
Mid to Premium Cost drivers include:
- Excavation and retaining structure
- Drainage systems
- Gas infrastructure
- Custom seating fabrication
Premium finishes and integrated lighting elevate cost further.
Pros
- Strong evening focal point
- Encourages social interaction
- Adds vertical layering to landscape
- Extends usability into cooler seasons
- Enhances luxury perception
Cons
- Requires sufficient garden footprint
- Additional drainage complexity
- Higher construction cost than surface-level firepit
- Ongoing fuel or wood maintenance
Real-Life Application Insight
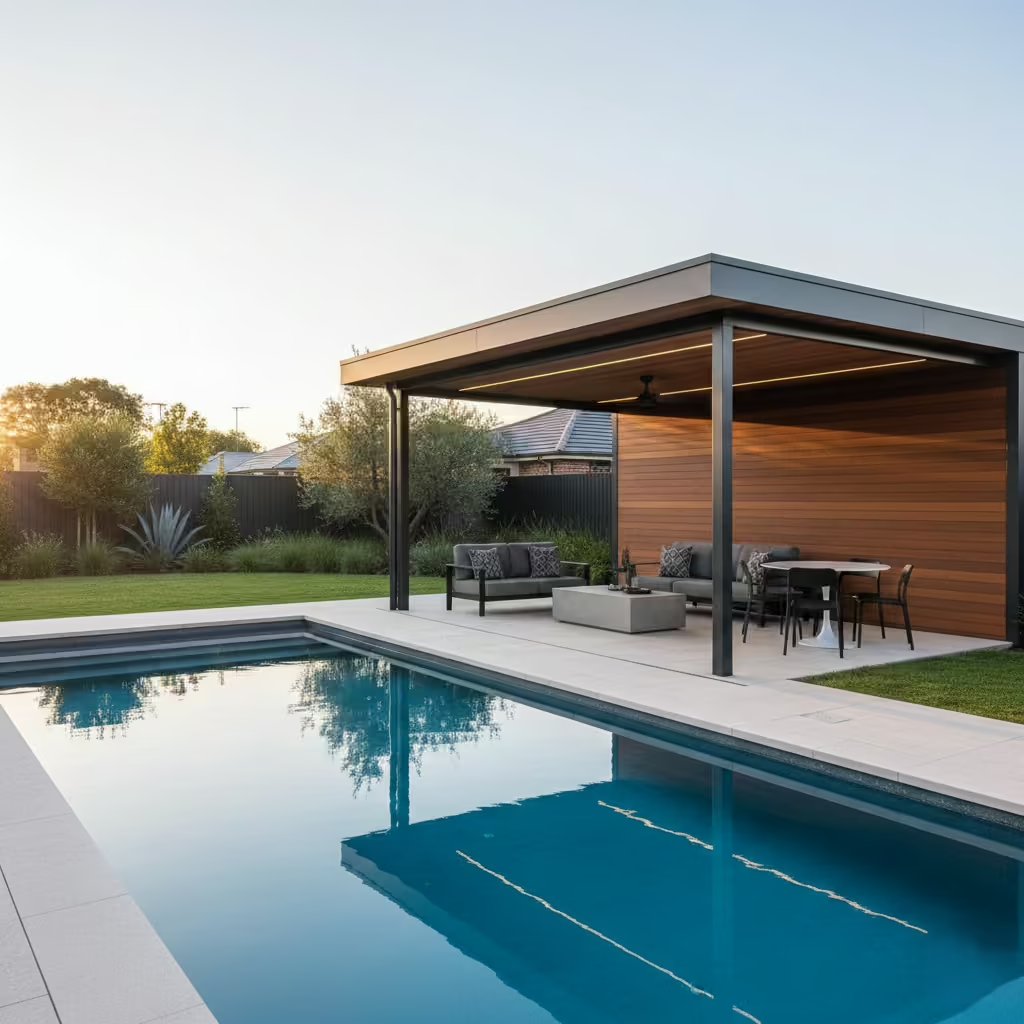
On a contemporary family project featuring a 4 m x 11 m (13 ft x 36 ft) pool, we introduced a circular 3.2 m (10.5 ft) diameter sunken firepit lounge positioned 2.2 m (7 ft) from the pool edge.
The initial proposal lowered the lounge by 700 mm (27 in), but this felt visually detached from the terrace. Reducing the drop to 500 mm (20 in) maintained intimacy while preserving visual connection to the water surface.
A concealed slot drain was installed around the internal perimeter to prevent rainwater accumulation. We opted for gas rather than wood due to local restrictions and maintenance preferences.
The outcome was not about spectacle. It created a secondary gravity point within the garden swimmers transition to warmth at dusk, and the water reflects flame movement subtly.
When proportioned correctly, the sunken firepit does not compete with the pool. It complements it, adding warmth to water-led design.
Section 3: Materials That Age Well Around Pools
The most expensive pool projects I have seen fail aesthetically within five years — not because of poor design, but because of poor material forecasting. Around water, UV exposure, chemicals, freeze–thaw cycles, and foot traffic accelerate wear. The question is not what looks good on installation day; it is what still looks deliberate a decade later.
Material longevity is a performance issue, not just a stylistic one.
Porcelain vs Natural Stone
Porcelain
High-density exterior-grade porcelain has become the benchmark in contemporary pool design for good reason. It offers:
- Low porosity
- Resistance to chlorine and salt systems
- Colour consistency
- Minimal efflorescence risk
- Low maintenance
Thickness for exterior pool terraces should be 20 mm (0.8 in) minimum. When laid on pedestals or mortar beds with proper falls (typically 1:80 slope away from pool), porcelain remains dimensionally stable.
Natural Stone
Limestone, travertine, and sandstone deliver warmth and authenticity but require careful specification.
- Honed limestone: elegant but can stain
- Travertine: cooler underfoot in hot climates
- Sandstone: variable durability depending on grade
Porosity levels vary widely. Without proper sealing and maintenance, discolouration is common particularly in shaded, damp climates.
Real Project Insight:
I’ve seen pale limestone discolour within three seasons in shaded UK gardens. Organic staining and algae growth altered the intended tone significantly. In similar conditions, exterior porcelain has provided greater long-term consistency with less visual drift.
Slip Resistance Ratings
Slip resistance is non-negotiable near water.
In the UK and much of Europe, aim for R11 minimum for pool surrounds.
In the U.S., look for surfaces meeting DCOF ≥ 0.42 (Dynamic Coefficient of Friction).
Texture must balance safety and comfort. Overly aggressive textures trap dirt and feel abrasive underfoot. I typically specify lightly textured porcelain or brushed stone for barefoot comfort.
Timber Decking Around Pools
Timber introduces warmth and contrast, but not all species perform equally.
Recommended options:
- Thermally modified hardwood
- Iroko
- Teak
- Composite decking (high-quality grade)
Board thickness should be 21–28 mm (0.8–1.1 in) minimum for structural stability. Allow 5–8 mm (0.2–0.3 in) expansion gaps between boards.
However, timber near chlorinated or saltwater pools requires regular maintenance. In cooler, damp climates, algae buildup can increase slip risk.
Composite decking reduces maintenance but can appear synthetic if poorly specified. Heat retention is also a factor darker boards in hot climates can become uncomfortable under direct sun.
Coping Detail Dimensions
Coping is where durability and detailing intersect.
Typical coping dimensions:
- Width: 300–600 mm (12–24 in)
- Thickness: 30–50 mm (1.2–2 in) natural stone
- Overhang (if applicable): 25–40 mm (1–1.5 in)
A subtle overhang helps direct water away from vertical faces and reduces staining. Bullnose edges suit traditional schemes; square-edge profiles align with modern architecture.
Precision installation is critical. Uneven coping lines disrupt reflection and age poorly visually.
Grout and Joint Durability
Joint failure is one of the most common long-term issues.
For porcelain and stone terraces:
- Exterior-grade flexible grout
- Movement joints every 3–5 m (10–16 ft)
- Perimeter expansion joints between pool shell and paving
In freeze–thaw climates, rigid grout systems crack quickly. Flexible polymer-modified systems offer better resilience.
Avoid light grout colours unless maintenance commitment is high. Mid-tone joints conceal staining more effectively over time.
Heat Retention & Climate Performance
Material performance shifts dramatically by region.
Hot climates (e.g., southern U.S., Mediterranean regions):
- Light-coloured stone or porcelain reduces surface temperature
- Travertine performs well due to lower heat absorption
- Dark surfaces can exceed comfortable barefoot thresholds
Cooler climates (e.g., UK, northern U.S.):
- Freeze–thaw resistance is critical
- Low-porosity materials prevent water ingress
- Porcelain generally outperforms softer limestones
In heated pool projects, insulated sub-bases beneath terrace zones adjacent to the pool can help reduce heat transfer loss.
Closing Insight
Around pools, materials are under constant environmental stress. The most successful projects I’ve delivered share one common trait: restraint in selection and precision in detailing.
Choosing finishes that maintain tone, texture, and structural integrity over time is what separates a visually impressive installation from one that still feels intentional ten years later.
Budget & Feasibility Overview
What Different Levels of Investment Deliver
Budget planning for a pool project is not simply about “how much it costs.” It is about what performance, longevity, and lifestyle outcome that investment tier makes feasible. A well-calibrated budget aligns spatial ambition with site realities reducing retrofit surprises and unplanned scope creep. Below, I describe how different investment tiers typically translate into quality, durability, and experience, as well as the ongoing costs you should realistically anticipate.
Entry-Level Plunge Pool Ranges
What this tier delivers:
Entry-level pools often manifest as small plunge basins, modular shells, or semi-custom installations with standard finishes. These offer a dramatic transformation of leftover space into purposeful water without structural complexity.
Typical characteristics at this level:
- Pre-manufactured or fibreglass shell in a small footprint (e.g., ~2.4 m × 3 m / 8 ft × 10 ft)
- Standard coping and simple terrace finishes
- Basic skimmer filtration system
- Minimal landscape integration
Performance expectations:
You get a clean design and a functional pool, but material refinement, lighting quality, and long-term adaptive use are limited. In my experience, these installations often become “starter pools” great for initial experience but quickly outgrown or upgraded after a few seasons.
Entry-level projects tend to reduce upfront cost but may carry greater limitations on design integration and durability.
Mid-Range Concrete Pool
What this tier delivers:
This is the most common sweet spot for residential pools. It combines design flexibility, durability, and more expressive detailing.
Typical characteristics at this level:
- Cast-in-situ concrete shell shaped to site conditions
- Porcelain or quality stone terrace finishes
- Enhanced filtration and circulation systems
- Sun shelf, shallow lounge ledge, or simple lap zone integration
- Integrated lighting options
Performance expectations:
Concrete pools here are long-lasting and design responsive. You can tailor proportions, integrate simple elements like tanning shelves, and select finishes that are more robust. In practice, mid-range clients often achieve a pool that feels designed rather than applied.
However, finishes and features are typically standard rather than custom executed good performance without bespoke material calibration.
Premium Architectural Installations
What this tier delivers:
At the architectural level, the pool is part of a coordinated spatial strategy, not an afterthought. Design becomes a driver, not a constraint.
Typical characteristics at this level:
- Bespoke geometry and engineered structures (e.g., cantilever, rooftop, glazed wall)
- Superior material selection (e.g., large-format porcelain, high-grade stone)
- Integrated lighting and automation controls
- Advanced hydraulic systems (e.g., infinity edge, spa integration)
- Landscape design weaving terraces, planting, and water
- Lighting, fire features, and ambience-driven detailing
Performance expectations:
These installations feel effortless and integrated every material choice, threshold condition, and sightline calibrated. In my project experience, architectural pools have become lifestyle anchors: spaces used far beyond peak summer and appreciated as part of the home’s daily rhythm.
Ongoing Annual Maintenance Cost Estimates
Maintenance is real it is not negligible simply because a pool is beautiful.
Key cost drivers:
- Filtration system efficiency and runtime
- Water balance and sanitisation supplies (chlorine or salt)
- Surface cleaning (vacuuming, skimming)
- Winterisation services (where applicable)
- Pump and heater servicing
Maintenance costs vary widely by use and system sophistication. In my installations, simple plunge pools with efficient pumps and covers have remained manageable with quarterly servicing, whereas larger pools with spillways, spas, or automation systems require more frequent specialist attention.
Heating Cost Variables (Climate Dependent)
Heating is often the most misunderstood operational cost.
Warm climates:
- Passive solar gain reduces heating burden
- Heat pumps perform efficiently
- Optional solar thermal supplementation accelerates warm-season comfort
Temperate to cool climates:
- Heat pumps still effective but runtime increases
- Gas heaters provide rapid heat but at higher fuel cost
- Insulated covers and sub-surface insulation become essential to control heat loss
Real-World Insight
On a northern UK site with a mid-range pool, a heat pump extended usable months from late May through September without excessive energy draw primarily due to careful orientation and an automatic cover reducing overnight heat loss. By contrast, in a cooler northern U.S. suburban home, the owner opted for hybrid heating: solar thermal panels pre-heat water, and a high-efficiency heat pump tops it up. The combined strategy flattened energy spikes and improved seasonal utility.
Real Life Factors That Shape Budget Outcomes
Site constraints:
- Poor soils, high water table, or rock can escalate structural works
- Slopes require retaining structures and drainage engineering
- Access limitations increase mobilisation costs
Integration demands:
- Early design coordination with landscape, lighting, and outdoor rooms reduces unforeseen costs
- Late changes (e.g., adding fire features or pergolas) inflate budgets significantly
Long-Term Performance
A cheaper finish may look fine year one but age poorly by year three. In several garden projects I’ve overseen, clients who invested in porcelain terraces with proper slip ratings and expansion joints avoided stain and joint failure that plagued adjacent natural stone patios.
Common Planning & Design Mistakes
Why Some Pools Feel Like Afterthoughts
A pool becomes an afterthought when it is inserted into a garden rather than composed into it. The difference is subtle but immediately perceptible: awkward circulation, poor solar exposure, fragmented views, and under-scaled terraces. Most failures are not aesthetic they are spatial planning errors made too late in the process.
Below are the recurring issues I see in both UK and U.S. residential projects.
Poor Orientation
Orientation governs comfort more than any material choice.
Common errors include:
- Placing the pool in permanent afternoon shade
- Aligning it perpendicular to primary views
- Ignoring solar arc and shadow studies
In cooler climates (e.g., much of the UK or northern U.S.), maximizing southern or western exposure significantly extends usability. In hotter regions, partial shade or adjacent pergola structures may be necessary to avoid excessive surface heating.
A well-oriented pool captures sunlight when desired, frames a view axis from the house, and avoids casting its own shadow during peak use hours.
Undersized Surrounding Terrace
One of the most frequent mistakes is underestimating how much dry space a pool requires.
A comfortable minimum circulation band around the pool should be:
1.2 m (4 ft) clear zone
This allows two people to pass safely and accommodates loungers without creating bottlenecks. Where dining or outdoor kitchens are adjacent, this clearance should increase.
When terraces are undersized:
- Furniture feels cramped
- Circulation becomes awkward
- Visual balance suffers
- The pool dominates rather than integrates
The water should not consume the entire garden. Proportion is critical.
Ignoring Wind
Wind direction dramatically affects comfort, water temperature, and maintenance.
Prevailing winds:
- Accelerate evaporation (raising heating costs)
- Push debris into the pool
- Make lounging uncomfortable
In exposed sites, integrating hedging, architectural screens, or low walls creates microclimate control. In the UK especially, neglecting wind protection can reduce perceived temperature by several degrees materially shortening usable months.
Lack of Storage for Pool Equipment
Equipment visibility is a common oversight.
Filters, pumps, chemical storage, covers, and maintenance tools require:
- Discreet but ventilated enclosure
- Safe chemical storage
- Easy service access
When not planned early, equipment ends up:
- Exposed along a boundary fence
- Audible near seating areas
- Visually disruptive
Allocating a small integrated plant room, concealed cabinet, or below-grade vault preserves design integrity and simplifies maintenance access.
No Integration with Indoor Living Areas
The most successful pools extend from interior space, not sit detached at the rear of the garden.
Common integration failures:
- No direct sightline from kitchen or living room
- Step-down levels that interrupt flow
- Inconsistent material transitions
Where the interior flooring aligns with the terrace material (or at least its tonal family), the pool reads as an extension of the architecture. Large-format glazing aligned with the water axis reinforces cohesion.
In higher-end projects, I often see that the best-performing designs were coordinated simultaneously between architect, landscape designer, and pool engineer. The weaker ones were retrofitted after the house was complete.
Final thoughts about the Outdoor Pool Ideas
A successful pool is never a decorative accessory; it is a spatial anchor that reshapes the garden’s hierarchy. In well-designed projects, water dictates movement, frames sightlines, and organises adjacent terraces, planting, and social zones. It creates a rhythm that supports everyday living as much as seasonal entertainment. When treated as an afterthought, even the most luxurious pool can feel disconnected, underused, or visually awkward.
The most enduring pools emerge from careful planning, where proportion, circulation, and material intelligence guide every decision. Dimensions are balanced to suit furniture, lounging, and active swimming; terraces are generously scaled; and finishes are chosen not just for immediate visual impact, but for how they age gracefully under sun, chlorine, and foot traffic. Lighting, heating, and microclimate management further extend usability while enhancing the pool’s role as the garden’s focal point.
Professional involvement is crucial. Pool engineers, landscape designers, and architects must collaborate early to address structural integrity, drainage, safety, and integration with the home. This coordination ensures the pool is not only technically sound but also visually and experientially coherent. Design solutions that anticipate seasonal variation, maintenance needs, and long-term material performance result in a pool that remains both beautiful and functional for decades.
Ultimately, a thoughtfully conceived pool transforms an unused corner into a retreat. It is about creating a purposeful water feature that supports lifestyle, connects with the home, and frames the broader landscape. By prioritizing proportion, circulation, and material longevity, homeowners can enjoy a pool that feels inherently designed a space that enhances daily life rather than merely occupying space.
Frequently asked questions
What size pool works best for a small garden?
For compact urban gardens, plunge pools from 2.4 m × 3 m (8 ft × 10 ft) are often ideal. They provide meaningful water experience without overwhelming circulation, leaving space for terraces and seating zones. Depth around 1.2–1.4 m (4–4.6 ft) is typical for versatility.
How much clearance should I allow around the pool?
A minimum of 1.2 m (4 ft) circulation around the pool is recommended. Wider terraces improve comfort, accommodate furniture, and allow safe passage without feeling cramped. Integration with seating, dining, or outdoor kitchens may require 1.8–2.5 m (6–8 ft) in key zones.
Which materials age best around pools?
Exterior-grade porcelain is highly consistent over time, resisting stains, chlorination, and freeze–thaw cycles. Natural stone like travertine or limestone can develop patina or discolour in shaded or damp conditions. Timber decking works with proper species selection and maintenance but may require periodic treatment.
What are common mistakes in pool design?
Typical errors include poor orientation (shade or wind issues), undersized terraces, ignoring circulation needs, lack of equipment storage, and failing to integrate the pool with interior spaces. These often make even premium pools feel disconnected.
How much should I expect to spend on ongoing maintenance?
Maintenance varies with size, filtration, heating, and local climate. Key factors include pump operation, chemical balance, surface cleaning, and seasonal winterisation. Heating costs depend on climate and system type (solar, heat pump, gas), and automated covers can reduce energy loss.
Can I integrate lighting and fire features safely?
Yes, with careful planning. LED lighting, fire bowls, or linear flame features should be designed with proper clearance, structural coordination, and compliance with UK Gas Safe regulations or U.S. fire codes. Automation systems can enhance usability and safety.
How do I ensure my pool feels like part of the garden, not an afterthought?
Start with professional design collaboration that considers orientation, circulation, terraces, and microclimate. Align material palettes, levels, and sightlines with the home. Treat the pool as an architectural and social anchor rather than a standalone object.