25 Outdoor Privacy Screen Ideas That Elevate Your Garden with Architectural Confidence
Privacy in the garden should never feel defensive. It should feel deliberate. I approach outdoor privacy as spatial choreography rather than concealment. The objective is not to build barriers, but to guide sightlines, soften exposure, and shape how a space is experienced from both inside and out.
Too often, homeowners default to solid fencing or tall boundary walls. While these solutions may block direct views, they frequently create unintended consequences: reduced daylight, stagnant airflow, and a visually compressed garden. Solid blocking solves a problem in one direction while creating two more in others.
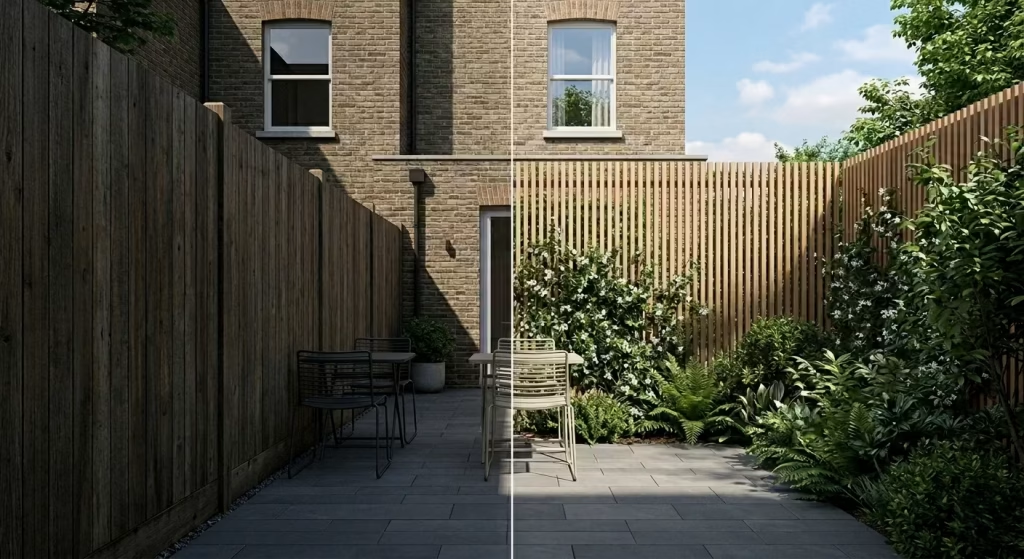
Layered screening, by contrast, works with depth and permeability. Instead of a single opaque boundary, we introduce structured elements such as vertical timber slats, staggered planting, or filtered metal panels. These allow light to pass through while breaking up direct lines of sight. The result is a garden that feels private yet open, protected yet breathable.
Climate and orientation are central to this strategy. A south-facing garden requires different screening density than a north-facing courtyard. A coastal property exposed to prevailing winds demands structural rigidity and airflow gaps. Likewise, neighbouring sightlines must be analysed carefully. A first-floor bedroom window overlooking your patio requires a different design response than a ground-level side boundary. Privacy design begins with mapping angles, not choosing materials.
In my own residential projects, privacy is resolved during the layout planning phase, not after construction. I integrate screening into the architectural composition of the garden, aligning it with seating zones, circulation paths, and sun patterns. When privacy is considered early, it becomes part of the design language rather than an afterthought.
On a recent 5 m x 8 m (16 ft x 26 ft) urban garden renovation, the primary challenge was direct overlooking from a neighbouring first-floor window positioned approximately 6 m (20 ft) away. Installing a 2 m (6.5 ft) solid fence would have darkened the entire rear façade. Instead, we introduced a 1.9 m (6.2 ft) vertical timber slat screen with 20 mm (0.8 in) spacing, positioned 600 mm (24 in) inside the boundary. In front of this, we layered evergreen pleached trees at 2.4 m (8 ft) height.
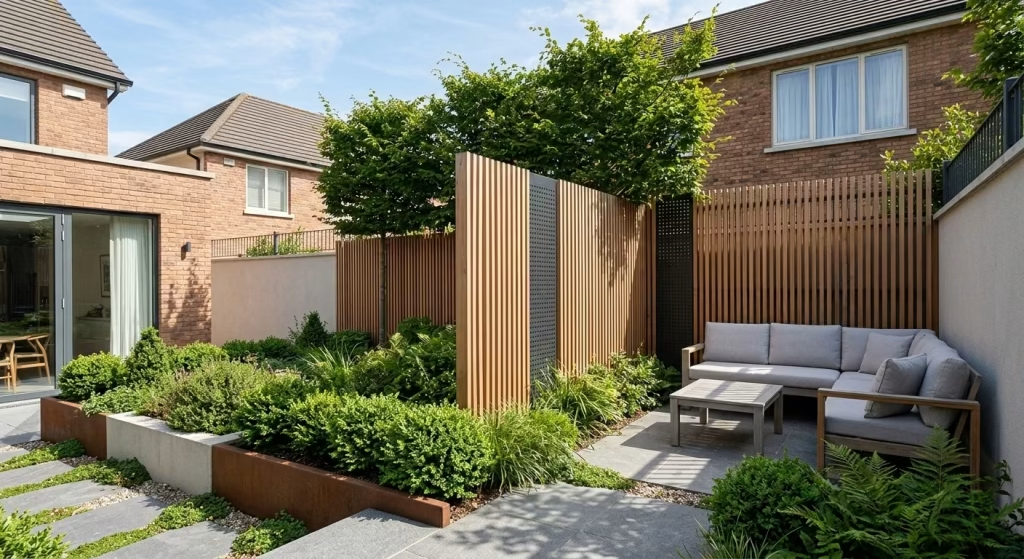
The combination diffused sightlines without eliminating light penetration. Airflow remained strong, and the garden retained visual depth. From inside the house, the view became architectural and textured rather than obstructed.
This is the principle that underpins every effective privacy solution: protect the space without suffocating it. When designed with intention, privacy does not close the garden. It refines it.
25 Outdoor Privacy Screen Ideas
Before exploring the individual concepts, it is important to understand that effective privacy solutions are never one-size-fits-all. Each of the following 25 outdoor privacy screen ideas is framed not just as inspiration, but as a considered architectural response to site conditions, spatial proportion, and long-term usability. I have structured every idea to move beyond surface aesthetics, grounding it in real-world application, dimensional guidance, and practical constraints so you can evaluate what truly suits your garden rather than what simply looks appealing in isolation.
Vertical Timber Slat Screens
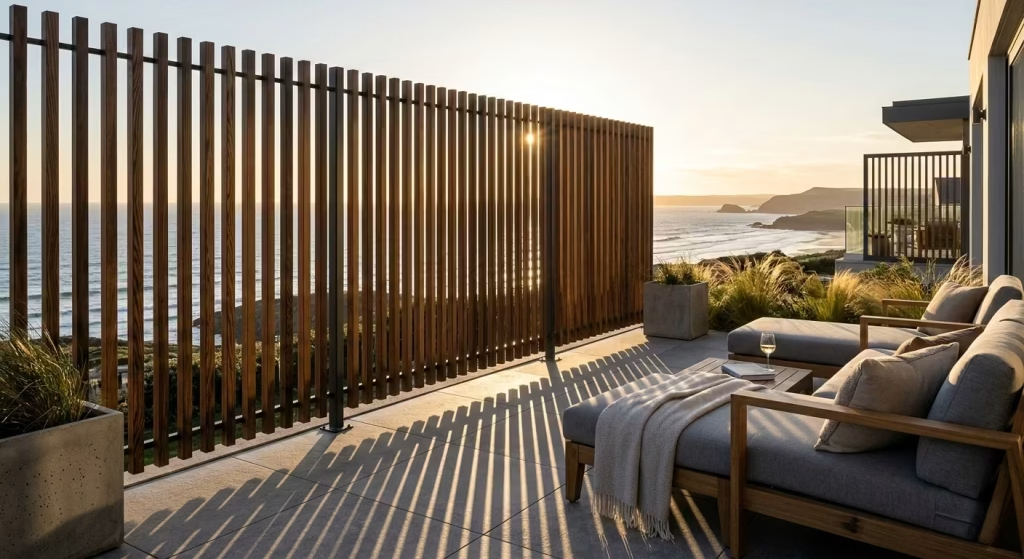
Vertical timber slat screens offer controlled permeability. Rather than forming a solid barrier, evenly spaced slats create visual filtration. They interrupt direct sightlines while preserving light, airflow, and spatial depth. The vertical rhythm also visually elongates boundaries, making compact gardens feel taller and more composed.
I typically specify slats at 40–60 mm (1.5–2.5 in) wide, with 15–25 mm spacing depending on the required privacy density. The overall screen height generally sits between 1.8–2.2 m (6–7.2 ft), calibrated to surrounding floor levels and neighbouring sightlines.
Best Applications
- Urban gardens with overlooking from upper-storey windows
- Contemporary patios requiring architectural definition
- Coastal properties where airflow is essential
- Rooftop terraces exposed to wind
Real-Life Project Insight
On a west-facing coastal terrace measuring 4 m x 6 m (13 ft x 20 ft), afternoon glare and crosswinds made the seating area uncomfortable. A solid wall would have intensified wind turbulence and trapped heat. Instead, we installed a 2 m (6.5 ft) high vertical slat screen in thermally modified timber along the exposed edge.
The 20 mm (0.8 in) spacing allowed prevailing sea breezes to pass through while significantly reducing lateral wind force. At the same time, it shielded the terrace from neighbouring balcony views positioned approximately 7 m (23 ft) away. The result was a space that felt protected but not enclosed, maintaining sunset views without visual intrusion.
Typical Dimensions
- Slat width: 40–60 mm (1.5–2.5 in)
- Gap spacing: 15–25 mm (0.6–1 in)
- Height: 1.8–2.2 m (6–7.2 ft)
- Post spacing: 1.8–2.4 m (6–8 ft) depending on wind exposure
- Recommended setback from boundary for planting integration: 450–600 mm (18–24 in)
Pros
- Maintains airflow and natural light
- Strong architectural aesthetic
- Adaptable privacy density
- Can integrate lighting and climbing plants
- Ages naturally if timber is properly selected
Cons
- Requires periodic maintenance depending on timber type
- Precision installation needed to maintain alignment
- Higher cost than standard fencing
- Wind loading must be calculated for exposed sites
Contractor / Sourcing Notes
For long-term stability, I specify pressure-treated hardwood, cedar, or thermally modified timber over untreated softwood. In high-wind areas, posts should be anchored in concrete footings at least 600 mm (24 in) deep. Stainless steel fixings are essential in coastal conditions to prevent corrosion.
If budget permits, factory-finished panels improve uniformity and longevity. On premium projects, concealed fixings and shadow gaps elevate the finish significantly.
Horizontal Composite Panels
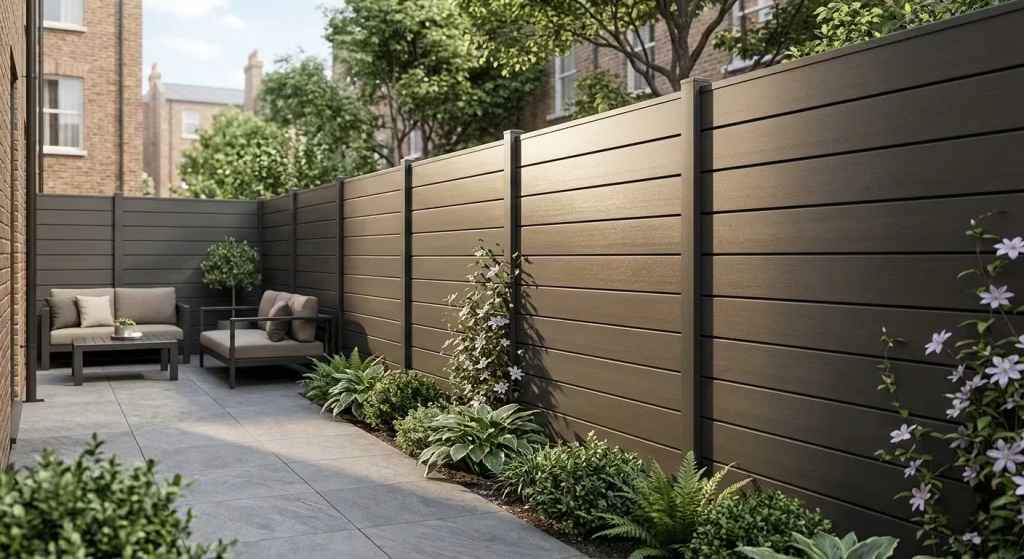
Horizontal composite panels provide a clean, contemporary boundary treatment with minimal maintenance burden. The horizontal orientation visually widens narrow gardens, making tight side returns or urban plots feel broader. Unlike timber, composite boards are engineered from recycled wood fibres and polymers, designed to resist rot, warping, and insect damage.
Panels are typically installed with concealed aluminium channels or steel posts, creating a flush, uninterrupted plane. For privacy, I usually specify full-coverage installation with tight board joints and an overall screen height between 1.8–2.0 m (6–6.5 ft), depending on local planning limits.
Best Applications
- Rental properties requiring durability
- High-traffic family gardens
- Developments where maintenance budgets are limited
- Contemporary suburban boundaries
Real-Life Project Insight
On a rental property renovation with a 12 m (39 ft) rear boundary, the client wanted a long-term solution that would not require repainting, staining, or frequent repair between tenants. Timber fencing had previously warped and discoloured unevenly within four years.
We replaced it with composite horizontal panels installed to a height of 1.9 m (6.2 ft) using powder-coated steel posts anchored in 700 mm (27.5 in) deep concrete footings. The boards were mid-tone grey to minimise visible fading.
Five years on, the panels have retained structural stability with only minor tonal softening from UV exposure. No splitting, bowing, or insect damage has occurred. Maintenance has been limited to occasional pressure washing at low intensity.
Typical Dimensions
- Board thickness: 20–25 mm (0.8–1 in)
- Board height per piece: 120–180 mm (5–7 in)
- Finished screen height: 1.8–2.0 m (6–6.5 ft)
- Post spacing: 1.8–2.4 m (6–8 ft)
- Concrete footing depth: 600–750 mm (24–30 in), depending on soil conditions
Pros
- Extremely low maintenance
- Resistant to rot, insects, and moisture
- Consistent finish across long runs
- Stable in varying climates
- Suitable for rental or investment properties
Cons
- Less natural ageing character compared to real timber
- Can appear visually flat without integrated planting
- Surface may retain heat in strong sun
- Lower-end products may fade unevenly
Long-Term Weathering Analysis
Composite panels generally demonstrate superior dimensional stability compared to untreated timber. High-quality boards incorporate UV inhibitors, reducing colour fade by approximately 10–15 percent over five years. Inferior products, however, can chalk or discolour unevenly.
In colder climates, expansion and contraction must be accommodated with proper spacing tolerances. In very hot regions, darker composites can reach surface temperatures exceeding 60°C (140°F), which may affect comfort if installed near seating areas.
Contractor / Sourcing Notes
Not all composite systems perform equally. I specify boards with aluminium reinforcement cores for long boundary spans exceeding 10 m (33 ft). Ensure the contractor follows manufacturer spacing allowances for thermal expansion.
Budget positioning (installed, UK and USA average ranges):
- Mid-range composite: £150–£250 per m² | $18–$30 per sq ft
- Premium architectural systems: £300+ per m² | $35+ per sq ft
Composite panels work best when softened with planting, such as layered shrubs or climbers, to prevent the boundary from feeling overly rigid or synthetic.
Powder-Coated Aluminium Laser-Cut Screens
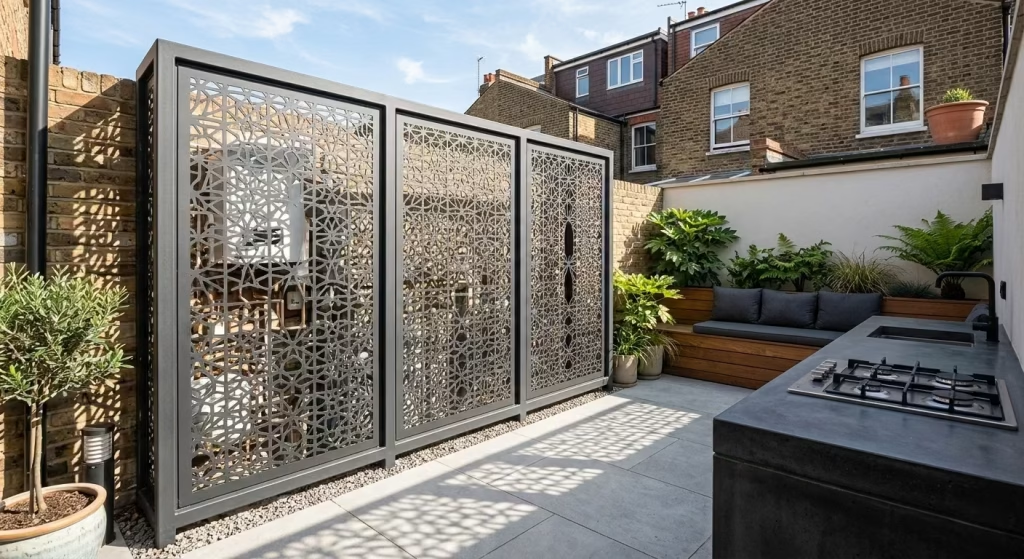
Powder-coated aluminium laser-cut screens function as architectural statements rather than simple barriers. The perforated or patterned surface allows filtered light to pass through while obscuring direct sightlines. Unlike solid fencing, they create shadow play and visual texture throughout the day, particularly in compact courtyards where light movement becomes part of the spatial experience.
Because aluminium is lightweight yet rigid, it allows for larger panel formats without excessive structural bulk. I often treat these screens as design features integrated into walls, pergolas, or freestanding frames rather than as standalone fence replacements.
Best Applications
- Contemporary courtyards
- Outdoor kitchen concealment
- Rooftop terraces
- Urban gardens requiring refined detailing
- Projects where visual identity matters
Real-Life Project Insight
In a 4 m x 4 m (13 ft x 13 ft) courtyard renovation, the client required privacy from a neighbouring property while concealing outdoor kitchen utilities, including gas lines and an extraction unit. A solid wall would have restricted airflow and made the space feel compressed.
We installed three laser-cut aluminium panels, each 1 m (3.3 ft) wide and 2.1 m (6.9 ft) high, mounted within a powder-coated steel frame. The patterned perforation density was calibrated to provide approximately 60 percent visual screening. Utilities were positioned behind the panels with adequate service clearance for maintenance access.
The result delivered privacy, ventilation, and a visually dynamic backdrop that elevated the courtyard from functional to architectural.
Typical Dimensions
- Panel thickness: 3–5 mm (0.12–0.2 in) aluminium
- Panel height: 1.8–2.2 m (6–7.2 ft)
- Standard width per panel: 900–1200 mm (3–4 ft)
- Frame section size: typically 50 mm (2 in) box steel or aluminium
- Post footing depth: 600–800 mm (24–31 in) depending on exposure
Structural Fixing and Wind Loading Considerations
Although aluminium is lightweight, wind loading cannot be underestimated, particularly on elevated terraces or exposed sites. Even perforated panels act as partial wind sails.
Key considerations:
- Posts should be anchored into concrete footings or structural slabs, not surface-mounted alone in high-wind zones.
- For rooftop installations, fixings must tie into structural steel or reinforced concrete, never into insulation or waterproof layers without engineered detailing.
- Larger panels exceeding 1.2 m (4 ft) width may require intermediate bracing to prevent vibration or flexing.
- In coastal environments, marine-grade powder coating and stainless steel fixings are essential to prevent corrosion.
Wind load calculations should be reviewed by a structural engineer if panel height exceeds 2 m (6.5 ft) or if installed in exposed coastal or rooftop locations.
Pros
- Strong architectural impact
- Low maintenance
- Resistant to rot and insects
- Customisable patterns and densities
- Allows airflow while screening utilities
Cons
- Higher upfront cost
- Requires precision fabrication
- Improper fixing can cause vibration noise
- Can feel visually dominant in small gardens if pattern is overly dense
Contractor / Sourcing Notes
I recommend specifying at least 80-micron powder coating for durability. Avoid ultra-thin panels under 3 mm (0.12 in), as they may flex in wind. For premium projects, concealed base plates and recessed channel frames significantly elevate the finish.
Installed cost positioning:
- Mid-range architectural panels: £350–£500 per m² | $40–$60 per sq ft
- Bespoke premium fabrication: £600+ per m² | $70+ per sq ft
When carefully detailed, laser-cut aluminium screens provide privacy that feels intentional and refined rather than defensive, particularly in contemporary outdoor environments.
You May also Like: 25 Outdoor Patio Ideas That Elevate Everyday Living
Frosted or Reeded Glass Privacy Walls
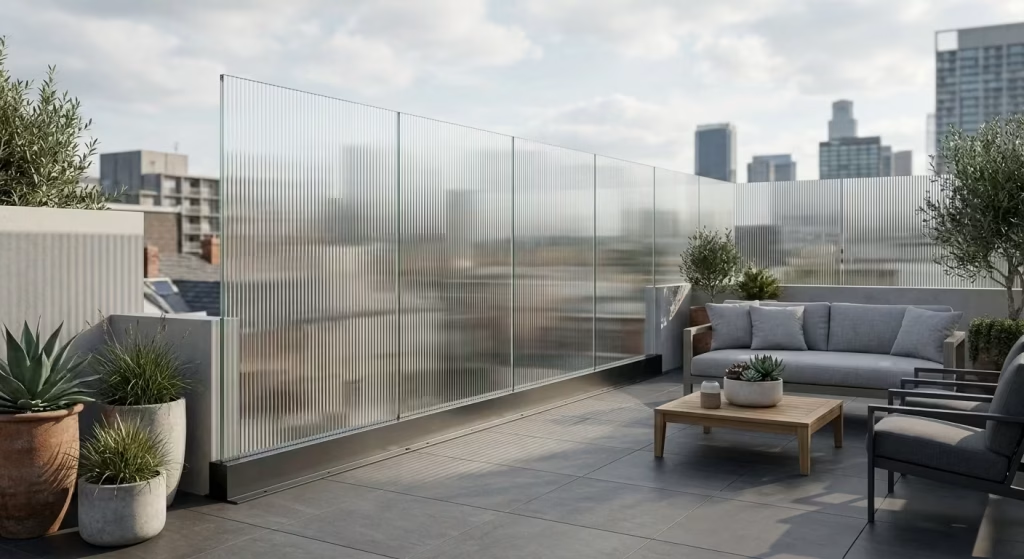
Frosted or reeded glass privacy walls provide visual separation without sacrificing light transmission. Unlike opaque materials, glass maintains spatial openness, making it particularly effective in compact patios or elevated terraces where preserving sky views is essential.
Frosted glass diffuses visibility through acid-etching or film application, while reeded glass introduces vertical texture that distorts sightlines while adding architectural rhythm. In contemporary settings, these solutions feel integrated rather than imposed, especially when detailed with slimline framing.
Best Applications
- Rooftop terraces
- Elevated decks
- Urban patios with close neighbouring properties
- Wind-prone balconies requiring lateral shielding
- Contemporary homes with minimal architectural language
Real-Life Project Insight
On an elevated timber deck approximately 3.5 m (11.5 ft) above ground level, the client required both wind protection and privacy from an adjacent second-floor window located around 8 m (26 ft) away.
We installed a 1.8 m (6 ft) high laminated frosted glass screen along the deck perimeter. The glass panels were 12.8 mm (0.5 in) thick laminated safety glass, mounted within powder-coated aluminium channel bases mechanically fixed into the structural deck beam below.
The frosted finish obscured direct sightlines while allowing daylight to pass freely into the adjacent interior living space. Wind turbulence was reduced significantly, transforming the deck into a usable space throughout more of the year.
Typical Dimensions
- Height: 1.6–1.8 m (5.2–6 ft) for privacy
- Glass thickness: 10–13 mm (0.4–0.5 in) laminated safety glass
- Panel width: 900–1200 mm (3–4 ft)
- Base channel depth: typically 100–150 mm (4–6 in)
- Minimum structural fixing depth: aligned with primary load-bearing member
Safety Glass Considerations
All exterior privacy glass must comply with local building regulations. Laminated safety glass is generally preferred over toughened glass for elevated installations because, if fractured, it remains bonded rather than shattering into fragments.
For rooftop terraces or decks above 600 mm (24 in) from ground level, glass may also need to comply with balustrade standards, including load-bearing capacity for horizontal impact. Structural engineers should verify compliance for installations exceeding 1 m (3.3 ft) in height in load-bearing applications.
Fixing System Considerations
- Base channels must be mechanically anchored into structural framing, not decking boards alone.
- Drainage channels should be incorporated to prevent water pooling within base systems.
- In high-wind zones, lateral bracing or reinforced framing may be required.
- For coastal environments, anodised aluminium or marine-grade stainless steel fixings are essential to prevent corrosion.
Surface-mounted systems are acceptable for low-exposure patios but are insufficient for exposed rooftops without structural reinforcement.
Pros
- Preserves natural light
- Provides effective wind reduction
- Contemporary aesthetic
- Low maintenance
- Visually light, reduces boundary heaviness
Cons
- Higher cost compared to timber or composite
- Requires precise structural detailing
- Can show fingerprints or water spotting
- Limited acoustic privacy compared to solid walls
Contractor / Sourcing Notes
I advise working with glazing specialists rather than general fencing contractors. Poorly installed glass systems can vibrate, leak, or fail under wind load.
Installed cost positioning:
- Frosted laminated glass systems: £450–£650 per m² | $55–$75 per sq ft
- Reeded or bespoke textured glass: £700+ per m² | $80+ per sq ft
When properly detailed, frosted or reeded glass delivers privacy that feels refined and architectural, particularly in contemporary patios and rooftop environments where light is non-negotiable.
Living Green Walls
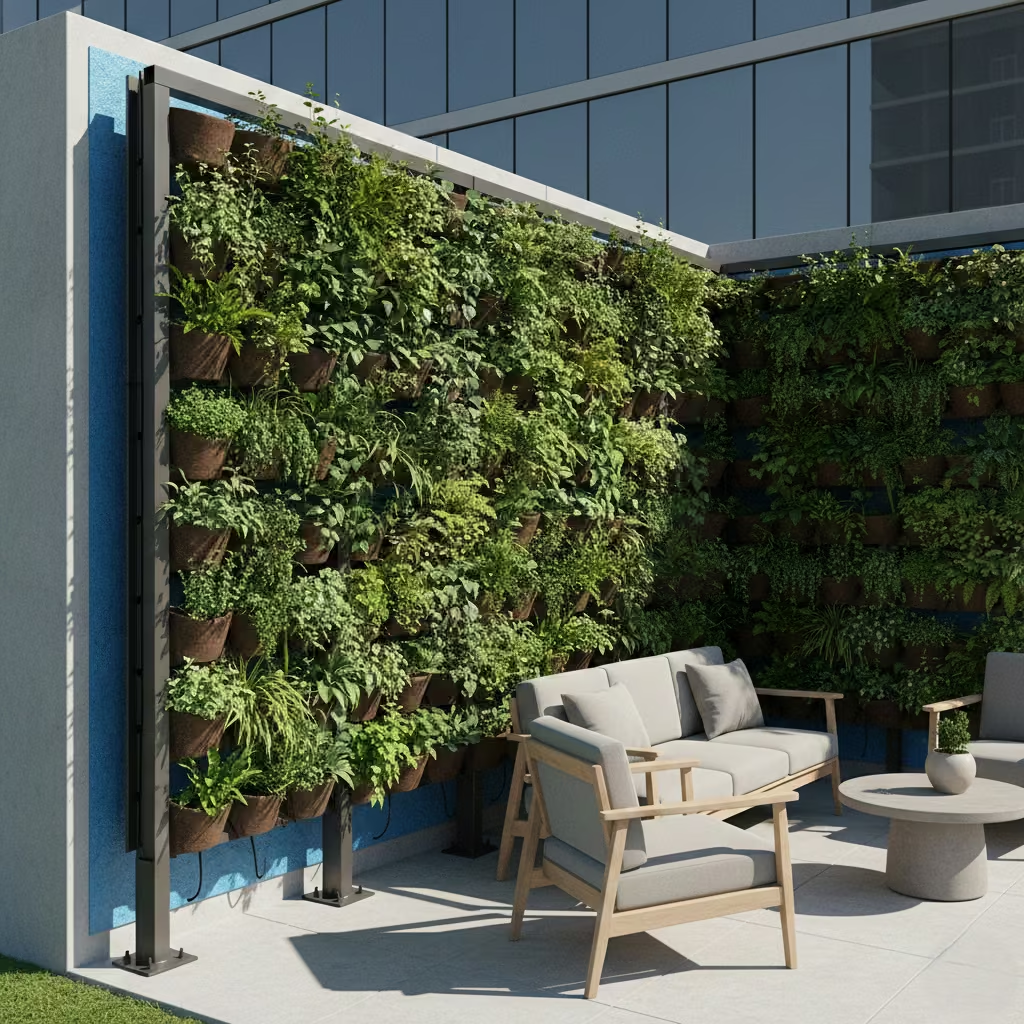
Living green walls offer privacy through density and biological layering rather than hard materials. Unlike hedges planted at ground level, vertical green systems maximise screening in compact footprints, making them particularly valuable in urban courtyards where depth is limited.
They introduce softness, seasonal variation, and microclimate benefits while reducing the visual hardness of masonry or composite boundaries. However, a true living wall is an engineered system, not simply climbing plants attached to fencing.
Best Applications
- Townhouse courtyards
- High-density urban gardens
- Contemporary patios needing organic contrast
- Areas requiring acoustic softening
- Projects seeking environmental performance benefits
Real-Life Project Insight
In a townhouse courtyard measuring 4 m x 6 m (13 ft x 20 ft), overlooking from two neighbouring upper-storey windows required vertical screening without sacrificing ground space.
We installed a 2.4 m (8 ft) high steel-framed support system, fixed into reinforced concrete footings at 700 mm (27.5 in) depth. The frame supported modular planting trays with integrated substrate pockets. A concealed drip irrigation system with automated timer ensured consistent moisture distribution.
The living wall covered approximately 9 m² (97 sq ft) and reduced direct sightlines while introducing year-round greenery. Species selection included evergreen climbers and structured foliage plants for consistent density.
The result was not only visual privacy but measurable cooling during summer months, with surface temperature reductions compared to adjacent masonry.
Typical Dimensions
- Height: 2.0–2.5 m (6.5–8.2 ft)
- Structural frame depth: 100–150 mm (4–6 in)
- Module depth including substrate: 150–200 mm (6–8 in)
- Irrigation reservoir capacity: dependent on wall area
- Concrete footing depth: 600–800 mm (24–31 in)
Structural Support Requirements
Living walls are significantly heavier than they appear, especially when fully irrigated. Saturated substrate can add substantial load per square metre.
Key structural considerations include:
- Galvanised or powder-coated steel framing rated for wet load conditions
- Mechanical anchoring into structural walls or independent footings
- Drainage channels at the base to prevent water pooling
- Waterproof membrane protection if mounted against building façades
On multi-storey installations, structural engineers should verify load capacity, particularly if mounted onto existing masonry.
Maintenance Implications
Living green walls require ongoing horticultural care. Without regular maintenance, plant failure can create uneven coverage and compromise privacy.
Maintenance typically includes:
- Irrigation system inspection every 3–6 months
- Seasonal pruning to maintain density
- Nutrient management through liquid feed systems
- Replacement of underperforming plants
Compared to timber or composite screens, maintenance demands are significantly higher. However, the environmental and aesthetic returns can justify this for the right client profile.
Pros
- Natural and visually dynamic
- Improves microclimate and air quality
- Softens hard architectural lines
- Strong acoustic dampening properties
- High-end, contemporary appeal
Cons
- High installation cost
- Ongoing maintenance requirement
- Structural load considerations
- Irrigation system dependency
- Risk of uneven growth if neglected
Contractor / Sourcing Notes
Engage specialist green wall contractors rather than general landscapers. Integrated irrigation and drainage design is critical. In climates with freezing winters, irrigation lines must be insulated or seasonally drained to prevent damage.
Installed cost positioning:
- Modular green wall systems: £600–£1,000 per m² | $70–$120 per sq ft
- Premium bespoke installations: £1,200+ per m² | $140+ per sq ft
When properly engineered and maintained, a living green wall delivers privacy that feels immersive rather than imposed, transforming even the most compact courtyard into a layered, biophilic retreat.
Bamboo Screening Panels
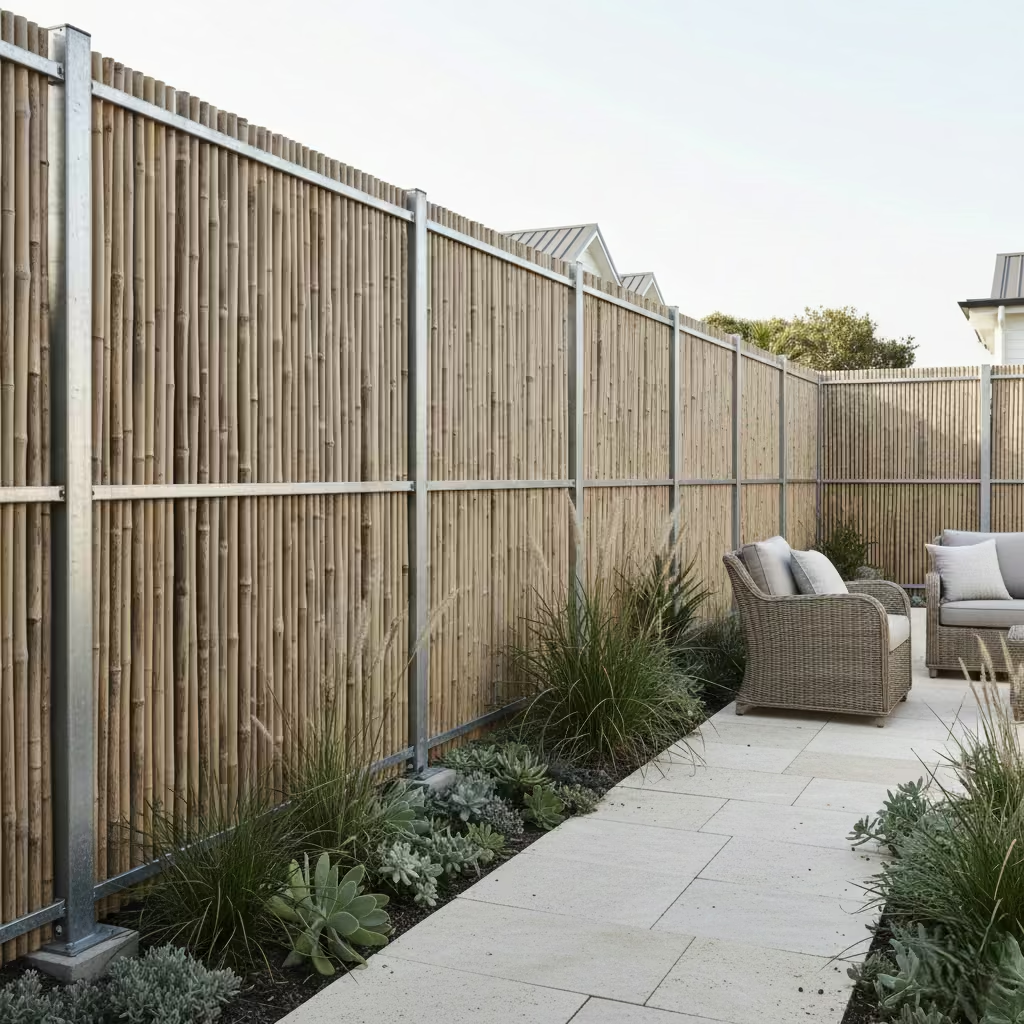
Bamboo screening panels introduce an organic, textural boundary that feels relaxed yet intentional. Visually lighter than solid timber fencing, bamboo provides filtered privacy while reinforcing tropical, coastal, or resort-inspired schemes. The vertical canes create rhythm and depth, softening hardscapes such as concrete patios or rendered walls.
Unlike engineered screens, bamboo’s appeal lies in its natural irregularity. However, performance depends heavily on species selection, treatment, and installation detailing.
Best Applications
- Coastal gardens
- Tropical-inspired patios
- Poolside screening
- Informal courtyard spaces
- Holiday homes or lifestyle-led properties
Real-Life Project Insight
On a coastal garden renovation measuring 6 m x 10 m (20 ft x 33 ft), the client wanted a softer alternative to composite fencing along a 9 m (30 ft) boundary exposed to sea air.
We installed treated bamboo panels to a height of 1.8 m (6 ft), fixed onto a galvanised steel frame set into 650 mm (25.5 in) deep concrete footings. The bamboo was elevated 50 mm (2 in) above ground level to prevent moisture absorption at the base.
The result delivered visual privacy while complementing the surrounding planting scheme. After four years, the panels have weathered to a muted tone, with minimal structural degradation due to proper sealing and airflow allowance behind the screen.
Typical Dimensions
- Panel height: 1.6–2.0 m (5.2–6.5 ft)
- Cane diameter: 20–40 mm (0.8–1.5 in)
- Panel thickness: 30–60 mm (1.2–2.4 in) depending on density
- Frame support spacing: 1.5–2.0 m (5–6.5 ft)
- Ground clearance: minimum 50 mm (2 in)
Treatment Considerations
Untreated bamboo is vulnerable to moisture, insects, and UV degradation. For exterior use, it should be:
- Kiln-dried to reduce internal moisture content
- Treated with borate solutions to resist pests
- Sealed with UV-resistant exterior-grade oils or sealants
In coastal environments, additional sealing is necessary to combat salt exposure. Without proper treatment, bamboo can crack or split within 2–3 years.
Lifespan Expectations
- Untreated bamboo in exposed climates: 2–4 years
- Treated and sealed bamboo: 5–10 years
- Under covered pergolas or reduced exposure: potentially longer
Compared to hardwood or composite systems, bamboo has a shorter lifespan but offers a distinctive aesthetic that cannot be replicated synthetically.
Climate Suitability
Bamboo performs best in:
- Warm or temperate climates
- Coastal settings with good airflow
- Areas without prolonged freeze-thaw cycles
In regions with harsh winters or sustained heavy rainfall, longevity decreases unless protected by overhead structures. It is less suitable for high-wind rooftop applications unless reinforced with robust framing.
Pros
- Natural, relaxed aesthetic
- Lightweight and easy to integrate
- Lower upfront cost than architectural metal systems
- Effective filtered privacy
- Complements planting schemes
Cons
- Shorter lifespan compared to timber or composite
- Requires periodic resealing
- Vulnerable to splitting if poorly treated
- Not ideal for extreme climates
- Can appear temporary if improperly installed
Contractor / Sourcing Notes
Avoid direct ground contact and ensure rear ventilation to prevent trapped moisture. Always mount bamboo panels onto a structural frame rather than relying on the bamboo itself for load-bearing support.
Installed cost positioning:
- Standard treated bamboo panels: £80–£150 per m² | $10–$18 per sq ft
- Higher-grade kiln-treated bamboo systems: £180–£250 per m² | $22–$30 per sq ft
When specified thoughtfully and detailed correctly, bamboo screening panels deliver privacy with warmth and character, particularly in coastal or resort-inspired landscapes where rigidity would feel out of place.
You May also Like: 25 Outdoor Dinner Party Ideas That Make Backyard Hosting Feel Special
Retractable Fabric Privacy Screens
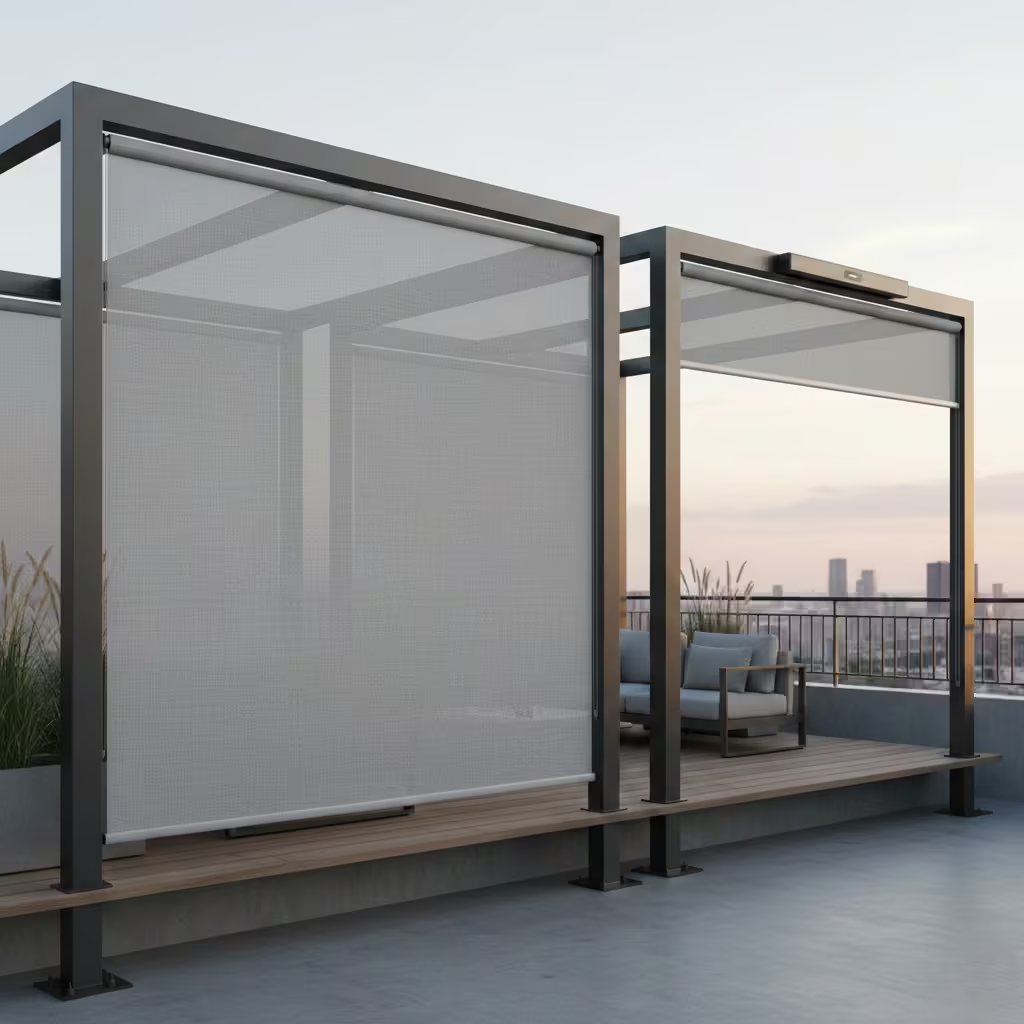
Retractable fabric privacy screens provide adaptable enclosure without permanent visual mass. Unlike fixed panels, they allow a terrace to shift between open and enclosed configurations depending on time of day, sun position, or neighbouring activity. This flexibility is particularly valuable in compact urban settings where spatial adaptability increases perceived square footage.
Motorised systems integrate discreetly into pergola frames or wall-mounted cassettes, deploying vertically or laterally. When retracted, the terrace remains visually open. When extended, the fabric forms a continuous privacy and shade plane.
Best Applications
- Small urban terraces
- Rooftop decks
- Courtyard dining areas
- Properties with fluctuating privacy needs
- Multi-use entertaining spaces
Real-Life Project Insight
In a compact 3 m x 3.5 m (10 ft x 11.5 ft) terrace, overlooking from an adjacent balcony created discomfort during evening dining. A fixed screen would have made the terrace feel enclosed and reduced cross-ventilation.
We specified a motorised vertical drop screen integrated into the pergola beam, extending to a height of 2.1 m (6.9 ft) when deployed. The system was rated for moderate wind exposure and anchored into reinforced structural posts rather than surface-mounted decking.
When retracted, the terrace remained open and visually connected to the skyline. When lowered, it provided full privacy and glare reduction without introducing permanent bulk.
Typical Dimensions
- Screen height: 1.8–2.5 m (6–8.2 ft)
- Cassette width: custom to opening, typically 2–4 m (6.5–13 ft)
- Fabric density: 3–10 percent openness depending on privacy requirement
- Post anchoring depth: minimum 600 mm (24 in) for freestanding supports
Wind Ratings and Structural Considerations
Wind performance is critical. Fabric screens act as flexible sails and can fail if underspecified.
Key considerations:
- Most motorised systems are rated between Beaufort scale 5–6, equivalent to approximately 29–49 km/h (18–30 mph) winds.
- Automated wind sensors can retract screens when gusts exceed safe limits.
- For exposed rooftop installations, side-guide channels are essential to reduce fabric movement and strain.
- Structural posts must be anchored into concrete footings or structural slabs, not timber decking alone.
Failure to observe wind limits can result in motor burnout, fabric tearing, or frame distortion.
Pros
- Fully adaptable privacy
- Minimal visual bulk when retracted
- Integrated sun and glare control
- Ideal for compact terraces
- Enhances seasonal usability
Cons
- Mechanical components require servicing
- Limited wind resistance compared to fixed systems
- Higher upfront cost than static screens
- Fabric replacement may be required over time
Contractor / Sourcing Notes
I recommend specifying high-tensile PVC-coated polyester fabrics with UV resistance and mould protection. Ensure electrical supply planning is coordinated early in the renovation phase to avoid surface cabling.
Installed cost positioning:
- Mid-range motorised drop screens: £1,500–£3,000 per unit | $1,800–$3,500 per unit
- Premium integrated pergola systems: £4,000+ per opening | $4,500+ per opening
Retractable fabric screens are best suited to homeowners who value flexibility. When properly specified and structurally secured, they deliver privacy that adapts to lifestyle rather than dictating it.
Decorative Brick or Breeze Block Walls
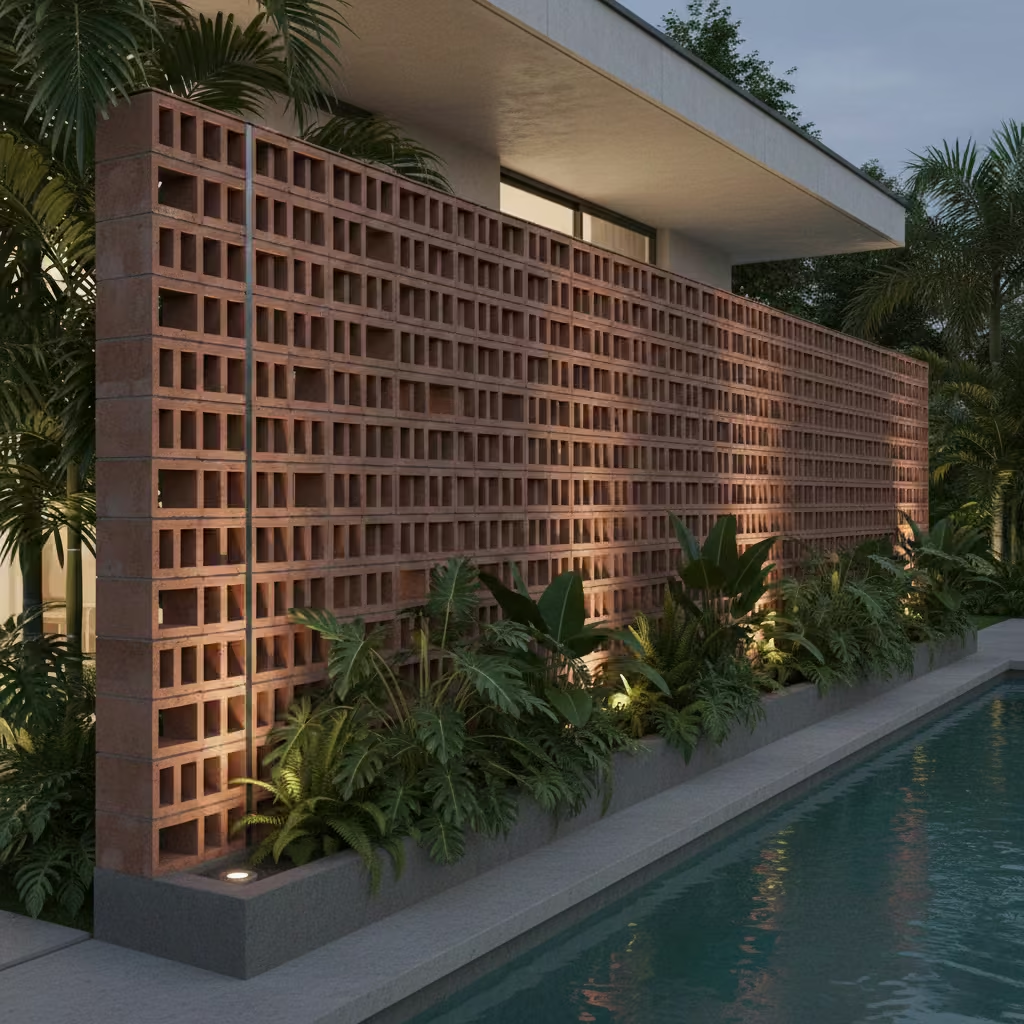
Decorative brick or breeze block walls reference mid-century architecture, where permeability and shadow were integral to façade composition. Rather than creating a solid boundary, patterned masonry introduces geometric voids that filter light and partially obscure sightlines.
The result is privacy with depth. During the day, light passes through the apertures, casting structured shadows across patios. In the evening, interior lighting glows outward, adding architectural presence without sacrificing enclosure.
Best Applications
- Contemporary or mid-century-inspired homes
- Courtyard gardens
- Poolside boundaries
- Front garden screening
- Projects where material permanence is desired
Real-Life Project Insight
On a suburban renovation, we extended an existing boundary wall by 6 m (20 ft) to shield a newly created dining terrace from an adjacent driveway. A solid extension would have blocked morning light into the kitchen.
Instead, we constructed a 2 m (6.5 ft) high breeze block wall using patterned concrete blocks mounted on a reinforced concrete footing 750 mm (30 in) deep. The perforated block design provided approximately 50 percent visual screening while allowing sunlight to penetrate.
The filtered wall created privacy without casting heavy shadows across the 4 m x 5 m (13 ft x 16 ft) patio area. From inside the house, the pattern added architectural interest rather than presenting a blank surface.
Typical Dimensions
- Wall height: 1.8–2.2 m (6–7.2 ft)
- Block size: typically 200 mm x 200 mm x 100 mm (8 in x 8 in x 4 in)
- Wall thickness: 100–150 mm (4–6 in)
- Reinforced concrete footing depth: 600–900 mm (24–35 in) depending on soil conditions
- Steel reinforcement: vertical bars at regular intervals for stability
Structural and Installation Considerations
Decorative masonry walls are heavier than timber or composite systems and require proper structural support.
Key considerations:
- Reinforced concrete foundations are essential to prevent cracking or leaning.
- Steel reinforcement bars should be integrated vertically and, in some cases, horizontally.
- Expansion joints are necessary for longer runs exceeding 5 m (16 ft) to prevent thermal stress fractures.
- Mortar specification must suit exterior exposure and freeze-thaw cycles where applicable.
For taller installations or exposed sites, structural engineer consultation is advisable.
Pros
- Permanent, durable solution
- Strong architectural identity
- Allows filtered light penetration
- Minimal maintenance
- Resistant to wind and weather
Cons
- Higher construction cost
- Requires professional masonry installation
- Fixed design with no adaptability
- Can feel visually heavy if pattern density is too low
Contractor / Sourcing Notes
Select high-quality concrete or clay blocks rated for exterior use. In coastal climates, ensure mortar and reinforcement are corrosion-resistant. For refined finishes, consider rendering or limewashing the wall to soften its texture.
Installed cost positioning:
- Standard decorative block wall: £300–£450 per m² | $35–$55 per sq ft
- Custom or architectural-grade blocks: £500+ per m² | $60+ per sq ft
When proportioned correctly and integrated with planting, decorative brick or breeze block walls provide privacy that feels architectural rather than defensive, anchoring the garden with permanence and structure.
You May also Like: Rooftop Decks Turning Unused Space into a Retreat
Hedge Screening (Layered Planting Strategy)
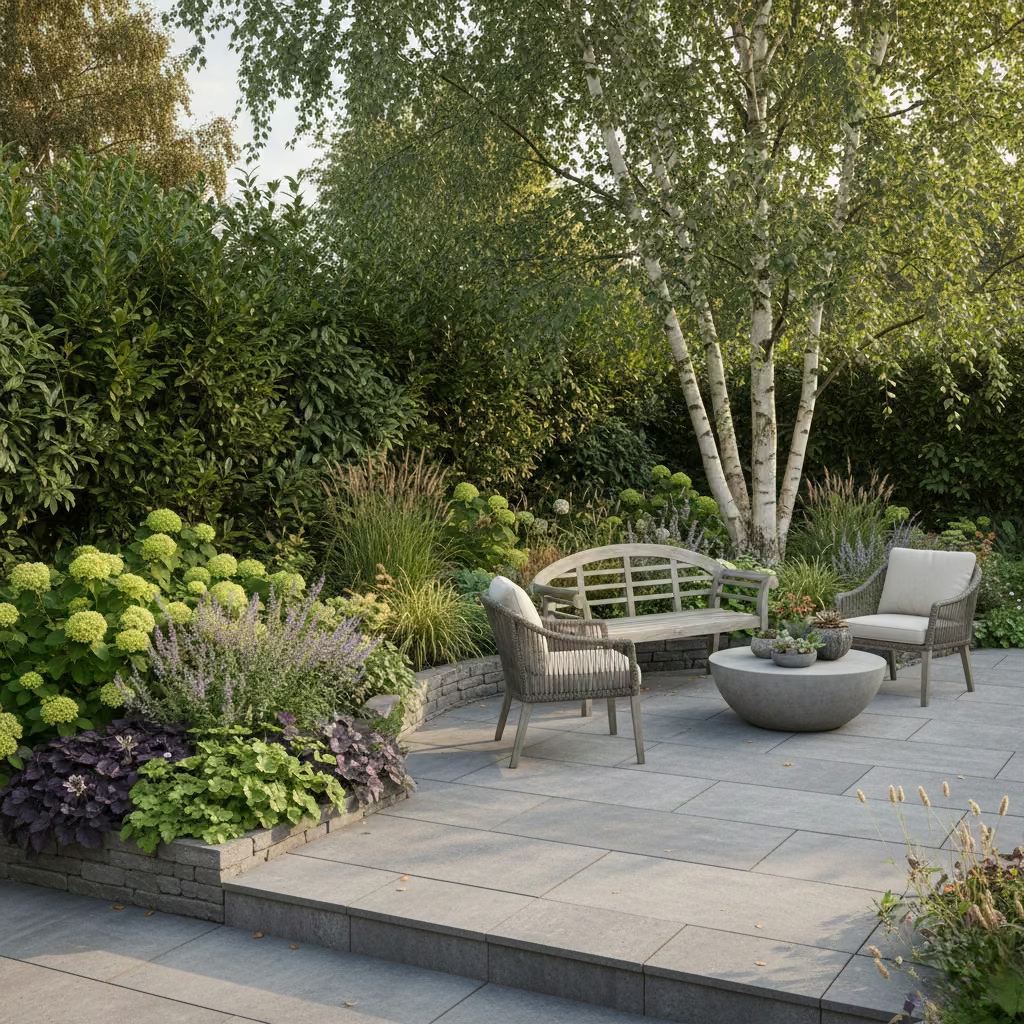
Hedge screening, when executed as a layered planting strategy rather than a single-species row, delivers privacy with ecological richness and long-term resilience. A mono-species hedge can feel flat and uniform. A staggered composition of evergreen structure, mid-height shrubs, and softer foreground planting creates depth, texture, and year-round density.
The objective is not simply to block a view, but to construct a living boundary that feels integrated into the garden’s overall design language. Layering also improves biodiversity, airflow, and seasonal variation.
Best Applications
- Suburban rear boundaries
- Side garden divisions
- Larger plots with planting depth
- Properties seeking naturalistic screening
- Gardens where acoustic softening is beneficial
Real-Life Project Insight
On a 12 m (39 ft) boundary in a family garden renovation, direct overlooking from a neighbouring first-floor window compromised the main seating zone. A standard 1.8 m (6 ft) fence would have felt abrupt and visually hard.
Instead, we allocated a 900 mm (36 in) deep planting bed along the boundary. The rear row consisted of evergreen structural shrubs reaching approximately 2.4 m (8 ft) in height. In front, we introduced a secondary layer of mid-height foliage at 1.2–1.5 m (4–5 ft), followed by lower ornamental planting to soften the base.
The layered arrangement obscured upper-level sightlines while preserving daylight and visual movement. Within two growing seasons, the planting matured into a dense yet visually nuanced privacy screen.
Depth Planning Considerations
Effective hedge screening requires spatial commitment. A minimum depth of 600–900 mm (24–36 in) is recommended to allow proper root development and layering.
- 600 mm (24 in) depth allows for a single row of structural evergreen planting.
- 900 mm (36 in) depth enables staggered dual-row planting for improved density.
- Larger gardens may accommodate 1.2 m (4 ft) depth for full layered schemes.
Without sufficient depth, plants compete for nutrients and fail to achieve optimal screening height or density.
Typical Dimensions
- Mature hedge height: 1.8–2.5 m (6–8 ft)
- Plant spacing: typically 3–5 plants per metre (1–1.5 ft apart), species dependent
- Soil preparation depth: minimum 450 mm (18 in)
- Irrigation provision: recommended during establishment phase
Pros
- Natural aesthetic
- Improves biodiversity and microclimate
- Strong acoustic absorption
- Seasonal interest
- Adaptable to various design styles
Cons
- Requires establishment time
- Ongoing pruning necessary
- Greater space requirement than solid fencing
- Seasonal density may vary if deciduous species are used
Contractor / Sourcing Notes
Invest in high-quality nursery stock rather than smaller, low-cost plants if immediate screening is desired. Soil preparation is critical. Compacted ground should be amended with organic matter to encourage root establishment.
Installed cost positioning:
- Standard evergreen hedge planting: £120–£250 per linear metre | $40–$90 per linear foot
- Mature semi-instant hedging: £300+ per linear metre | $110+ per linear foot
When properly layered and maintained, hedge screening offers privacy that evolves rather than deteriorates. It becomes part of the living architecture of the garden rather than an imposed boundary element.
Pergola with Integrated Slatted Roof
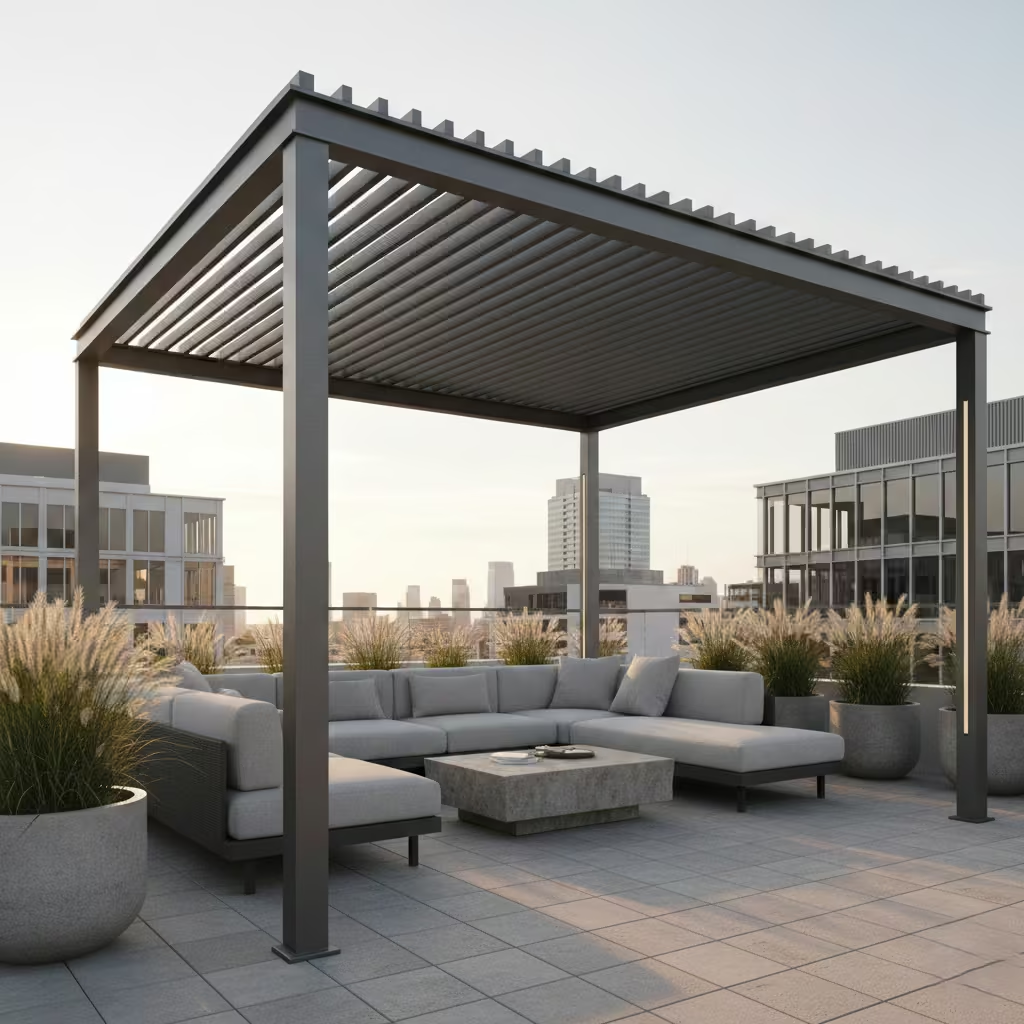
A pergola with an integrated slatted roof creates privacy in three dimensions. Rather than focusing solely on boundary screening, this approach addresses overhead sightlines from neighbouring upper-storey windows or balconies. The slatted roof filters vertical views while still admitting daylight and airflow, transforming an exposed terrace into a defined outdoor room.
When designed as a structural pavilion rather than a decorative add-on, the pergola becomes architectural. The slatted roof, combined with optional lateral screens, establishes enclosure without creating visual heaviness.
Best Applications
- Urban gardens overlooked from above
- Rooftop terraces
- Dining patios requiring sun modulation
- Properties with neighbouring balcony exposure
- Contemporary residential renovations
Real-Life Project Insight
On a rear garden renovation, we designed a 4 m x 5.5 m (13 ft x 18 ft) steel-framed pavilion positioned adjacent to the main house façade. The client’s primary concern was overlooking from a neighbouring balcony located approximately 5 m (16 ft) away and one storey higher.
A solid roof would have reduced natural light into the adjacent kitchen. Instead, we specified a slatted aluminium roof system with 40 mm (1.5 in) wide blades spaced at 30 mm (1.2 in) intervals. The overall height of the structure was 2.6 m (8.5 ft).
The angled slats disrupted vertical sightlines while maintaining daylight penetration and cross-ventilation. From beneath the pavilion, the space felt sheltered and intimate. From the house, it read as an intentional architectural extension rather than a garden accessory.
Typical Dimensions
- Pavilion footprint: typically 3 m x 4 m to 5 m x 6 m (10 ft x 13 ft to 16 ft x 20 ft)
- Height: 2.4–2.8 m (8–9 ft)
- Slat width: 30–50 mm (1.2–2 in)
- Slat spacing: 20–40 mm (0.8–1.5 in)
- Post footing depth: 700–900 mm (27–35 in) depending on soil and wind exposure
Structural Considerations
Pergolas must be engineered to handle wind uplift, particularly with slatted or partially solid roofs.
Key structural factors include:
- Steel or structural-grade aluminium framing for larger spans
- Anchoring posts into reinforced concrete footings
- Cross-bracing where necessary for lateral stability
- Drainage strategy if combined with partial solid roofing panels
For spans exceeding 5 m (16 ft), structural calculations are advisable to prevent deflection over time.
Pros
- Addresses overhead and lateral privacy
- Creates defined outdoor room
- Maintains airflow and filtered daylight
- Adds architectural value
- Can integrate lighting and heating
Cons
- Higher cost than standalone screens
- Requires structural engineering
- Fixed position limits adaptability
- Planning permission may be required depending on height and location
Contractor / Sourcing Notes
Early coordination with structural engineers and fabricators is essential. Electrical provision for integrated lighting or infrared heaters should be planned during groundwork.
Installed cost positioning:
- Steel or aluminium pavilion systems: £6,000–£15,000 depending on size | $7,000–$18,000+
- Bespoke architectural builds: £20,000+ | $25,000+
A pergola with an integrated slatted roof delivers privacy by shaping space rather than blocking it. When proportioned correctly, it elevates the garden from open patio to purposeful outdoor architecture.
Gabion Privacy Walls
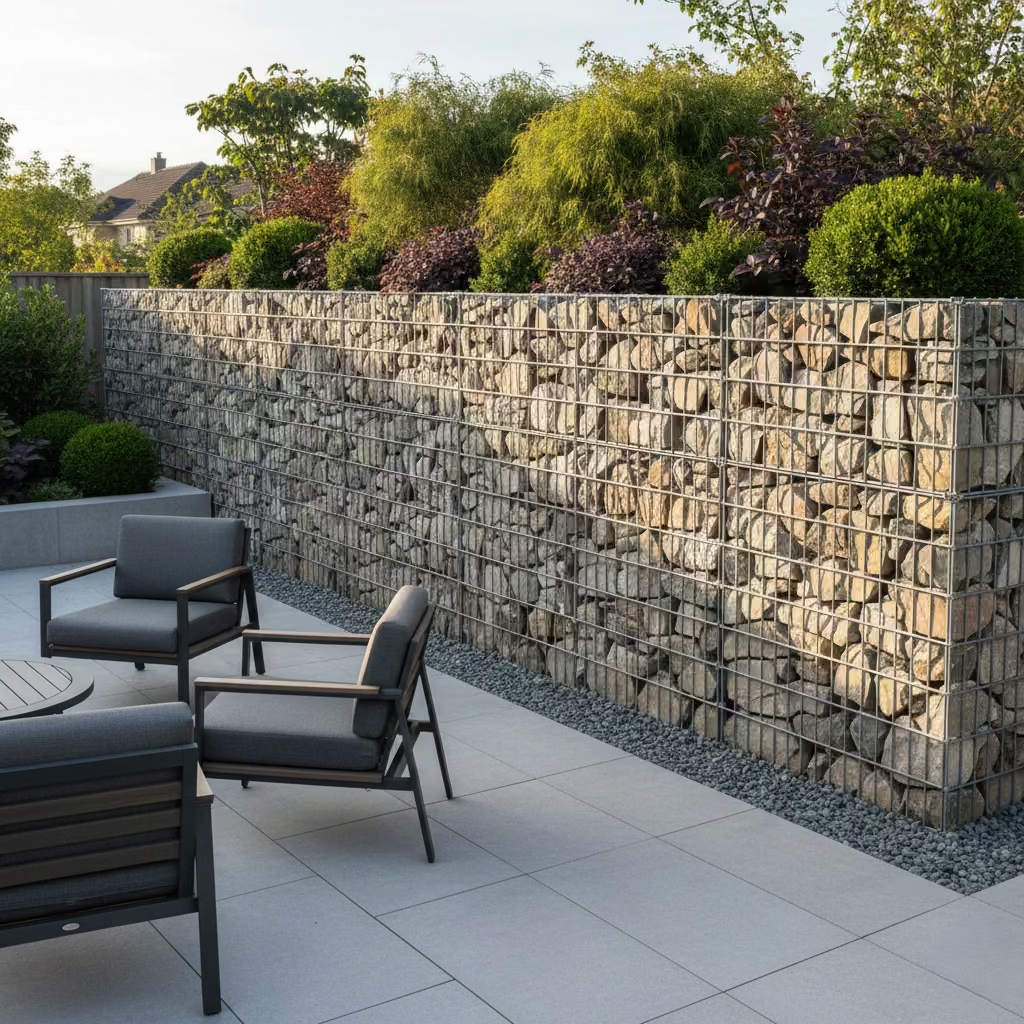
Gabion privacy walls use galvanised steel cages filled with stone to create mass, texture, and permanence. Originally engineered for retaining and civil applications, gabions have been reinterpreted in contemporary residential design as sculptural boundary elements.
They offer complete visual privacy while maintaining subtle permeability through the stone voids. The materiality feels grounded and architectural, particularly in minimalist or modern landscapes where solidity is intentional rather than decorative.
Best Applications
- Contemporary suburban homes
- Sloped gardens requiring partial retaining function
- Noise-prone boundaries near roads
- Large plots where weight and mass enhance proportion
- Wind-exposed sites requiring stability
Real-Life Project Insight
On a corner property exposed to road noise, we installed a 2 m (6.5 ft) high gabion wall spanning 8 m (26 ft) along the primary boundary. The wall consisted of 300 mm (12 in) deep cages filled with locally sourced angular stone.
The added mass provided both privacy and measurable acoustic dampening. Behind the wall, we integrated a 600 mm (24 in) deep planting bed to soften the stone visually. The result felt substantial yet balanced, anchoring the garden composition.
Typical Dimensions
- Height: 1.8–2.4 m (6–8 ft)
- Depth: 200–400 mm (8–16 in)
- Cage module size: commonly 1 m x 1 m x 0.3 m (3.3 ft x 3.3 ft x 1 ft)
- Stone size: typically 75–150 mm (3–6 in) aggregate
- Footing depth: minimum 600–900 mm (24–35 in), soil dependent
Drainage Considerations
One of the key advantages of gabion walls is inherent drainage capacity. The stone fill allows water to pass through freely, reducing hydrostatic pressure compared to solid masonry.
However, proper detailing is still essential:
- A compacted gravel base layer should be installed beneath the cages.
- In retaining applications, geotextile membrane should separate soil from the stone fill to prevent clogging.
- Surface water drainage should be directed away from footings to avoid undermining stability.
While gabions are permeable, they are not immune to settlement if ground preparation is insufficient.
Structural Footing Considerations
Despite their apparent simplicity, gabion walls are heavy. A 1 m³ stone-filled cage can weigh over 1,500 kg (3,300 lbs).
Key structural considerations:
- Compacted sub-base beneath the entire wall length
- Concrete strip footing or reinforced pad foundation for walls exceeding 1.5 m (5 ft)
- Proper tying and bracing of cages to prevent bulging
- Structural engineer consultation for heights above 2 m (6.5 ft)
In high-wind areas, their mass provides inherent stability, but ground bearing capacity must be verified.
Pros
- Extremely durable
- Excellent wind resistance
- Provides acoustic buffering
- Minimal long-term maintenance
- Strong architectural character
Cons
- High material weight requires proper foundation
- Installation labour-intensive
- Higher upfront cost
- Can feel visually heavy in small gardens
- Limited adaptability once installed
Contractor / Sourcing Notes
Specify galvanised or stainless steel cages with heavy-gauge wire to prevent corrosion. In coastal regions, corrosion resistance is critical. Stone selection should prioritise angular pieces for interlocking stability rather than rounded gravel.
Installed cost positioning:
- Standard gabion walls: £400–£600 per m² | $50–$70 per sq ft
- Architecturally detailed systems: £700+ per m² | $80+ per sq ft
Gabion privacy walls are best suited to properties where permanence and structural presence are desired. When integrated with planting and proportioned carefully, they provide privacy that feels engineered rather than improvised.
You May also Like: 15 Mid-Century Modern Garden Ideas to Transform Your Outdoor Space
Outdoor Curtains on Track Systems
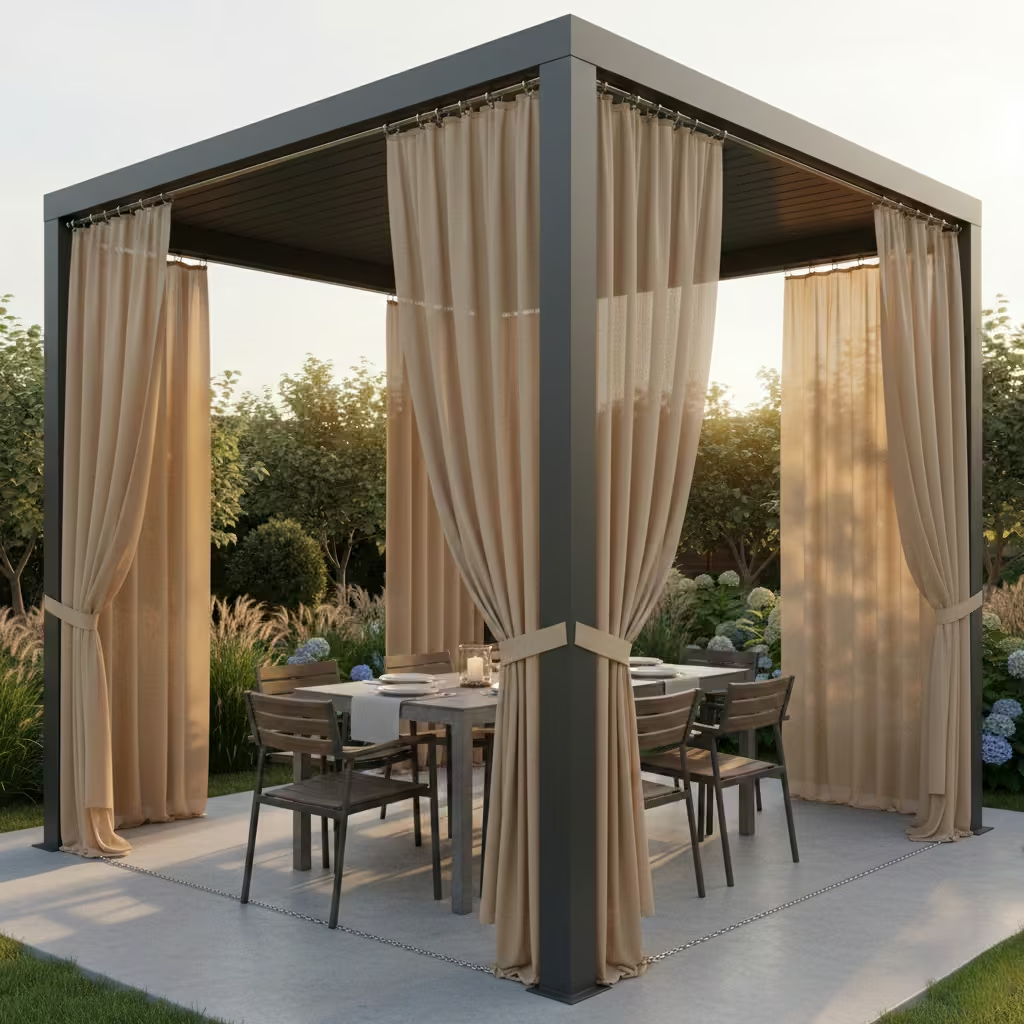
Outdoor curtains on track systems introduce soft, adaptable privacy. Unlike fixed screens, they allow you to choreograph enclosure throughout the day — fully open in the morning, partially drawn in the afternoon, and closed for evening intimacy.
Architecturally, they work best when integrated into pergolas, pavilions, or covered terraces. The fabric becomes a spatial layer rather than a decorative afterthought. When proportioned correctly, they add resort-level softness without compromising structure.
Best Applications
- Pool pavilions
- Covered outdoor dining areas
- Coastal properties requiring flexible wind buffering
- Courtyard schemes where hard materials dominate
- Hospitality-style residential projects
Real-Life Project Insight
In a pool pavilion project measuring 5 m x 4 m (16 ft x 13 ft), we integrated recessed aluminium ceiling tracks on all four sides of the steel-framed structure. The goal was to provide privacy from neighbouring properties while maintaining openness during events.
The curtains were specified in marine-grade solution-dyed acrylic fabric with a weight of approximately 300–350 gsm. Drop height was 2.5 m (8.2 ft), with weighted hems and concealed stainless-steel bottom chains to minimise uncontrolled movement.
When drawn, the pavilion felt enclosed and intimate. When open, the fabric stacked neatly into 300 mm (12 in) wide bunches at the corners, preserving architectural clarity.
Typical Dimensions
- Drop height: 2.2–2.8 m (7–9 ft)
- Fabric weight: 250–400 gsm for wind resistance
- Track projection: 25–40 mm (1–1.5 in)
- Stacked curtain depth: 250–400 mm (10–16 in) per side
- Bottom weighting: integrated chain or 25–40 mm (1–1.5 in) concealed bar
Wind Considerations
Wind performance is the primary technical constraint. Outdoor curtains are not structural wind barriers.
Key considerations:
- In exposed sites, curtains should be tied back when wind speeds exceed manufacturer limits (often 25–35 mph / 40–55 km/h).
- Use stainless steel or powder-coated aluminium tracks to resist corrosion.
- Consider intermediate tie points or discreet side tension cables in windy climates.
- Heavier fabrics reduce flutter but increase load on track systems.
For coastal applications, salt resistance is critical — both fabric and hardware must be marine-grade.
Fabric Selection Considerations
The fabric must balance durability, UV stability, mildew resistance, and breathability.
Recommended characteristics:
- Solution-dyed acrylic or outdoor polyester
- UV resistance rating of 5–8 years minimum
- Water-repellent coating
- Mould-resistant treatment
- Neutral or muted tones for architectural consistency
Avoid lightweight decorative fabrics intended for indoor use — they degrade rapidly outdoors.
Pros
- Fully adaptable privacy
- Softens hard architectural lines
- Adds resort-style atmosphere
- Relatively simple retrofit solution
- Seasonal flexibility
Cons
- Wind limitations
- Ongoing cleaning and maintenance
- Fabric replacement every 5–10 years
- Less secure than fixed screening
- Can appear temporary if poorly detailed
Contractor / Sourcing Notes
Early coordination with the structural fabricator ensures track recessing into beams rather than surface-mounting. Ensure adequate structural backing for track fixing — particularly in timber structures.
Installed cost positioning:
- Track and curtain systems: £150–£300 per linear metre | $50–$100 per linear ft
- High-end custom installations: £5,000–£12,000+ | $6,000–$15,000+ depending on scale
Outdoor curtains succeed when treated as architectural elements, not accessories. In the right context, they transform a pavilion from exposed structure into a composed, flexible sanctuary.
You May also Like: 25 Outdoor Area Ideas for Kids That Encourage Adventure, Creativity, and Outdoor Play
Louvered Adjustable Screens
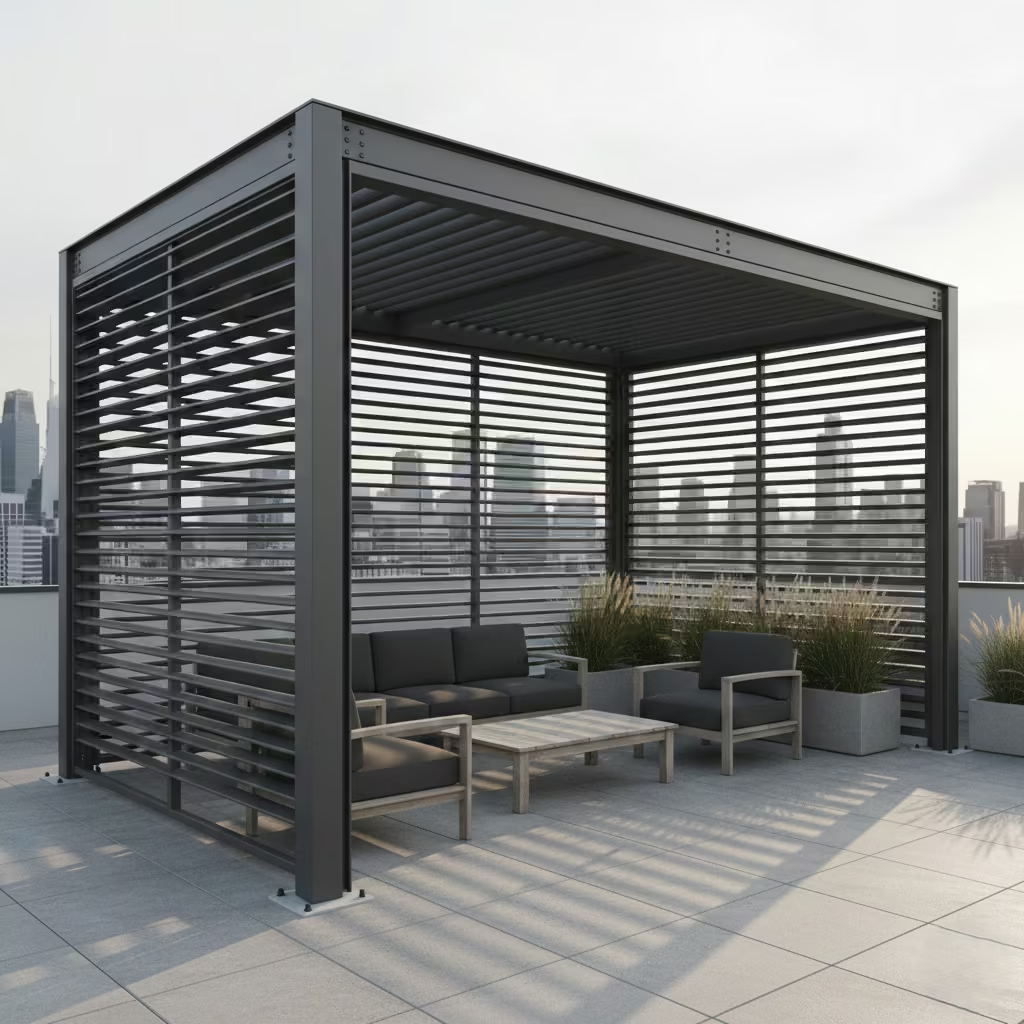
Louvered adjustable screens offer dynamic privacy the ability to modulate visibility, airflow, and sunlight with precision. Unlike fixed slatted panels, adjustable louvers pivot, typically between 0° and 120°, allowing homeowners to fine-tune both shading and sightline control.
Architecturally, they suit contemporary homes where clean lines and functional performance matter equally. When detailed correctly, they read as façade elements rather than add-on screens.
Best Applications
- West- or south-facing terraces requiring sun mitigation
- Rooftop gardens
- Urban courtyards overlooked from multiple angles
- High-spec renovation projects
- Modern coastal properties
Real-Life Project Insight
In a compact urban courtyard measuring 4.5 m x 6 m (15 ft x 20 ft), the primary challenge was afternoon solar gain combined with overlooking from an adjacent first-floor window.
We installed a 2 m (6.5 ft) high aluminium louvered screen spanning 3.2 m (10.5 ft) along the exposed boundary. The blades were 90 mm (3.5 in) deep, powder-coated in matte charcoal to complement the façade.
During peak afternoon sun, the louvers were angled to approximately 45°, blocking direct glare while maintaining airflow. In the evening, they were rotated closer to 80° to maximise privacy without completely sealing off the space. The result was not just screening it was environmental control.
Typical Dimensions
- Height: 1.8–2.4 m (6–8 ft)
- Blade depth: 75–120 mm (3–5 in)
- Frame depth: 100–150 mm (4–6 in)
- Module width: typically 1–1.5 m (3–5 ft) per panel
- Post footing depth: 700–900 mm (27–35 in), soil dependent
Structural & Mechanical Considerations
Louvered systems introduce moving parts, which demand robust detailing.
Key considerations include:
- Powder-coated aluminium or galvanised steel frames
- Concealed pivot mechanisms with stainless steel components
- Manual crank systems or motorised operation
- Wind rating compliance adjustable systems must be locked in high-wind conditions
- Proper drainage detailing in integrated wall systems
Motorised systems require early electrical planning and weatherproof switching solutions.
Sun Control & Privacy Balance
The strength of adjustable louvers lies in their dual function:
- At 0°: maximum airflow and daylight
- At 30–45°: glare reduction with partial visibility
- At 60–90°: increased privacy and shade
This flexibility makes them particularly effective in climates with seasonal variation.
Pros
- Adjustable privacy and solar control
- Strong architectural aesthetic
- Durable, low-maintenance materials
- Enhances energy efficiency when attached to façades
- Suitable for both freestanding and integrated applications
Cons
- Higher cost than fixed screens
- Mechanical components require periodic maintenance
- Wind restrictions when blades are open
- Installation precision critical for smooth operation
- Planning approval may be required in certain jurisdictions
Contractor / Sourcing Notes
Specify systems with certified wind-load testing. In exposed or coastal environments, ensure marine-grade finishes to prevent corrosion. Installation tolerances must be exact; even minor misalignment can affect blade movement.
Installed cost positioning:
- Manual systems: £600–£1,000 per m² | $70–$120 per sq ft
- Motorised architectural systems: £1,200+ per m² | $140+ per sq ft
Louvered adjustable screens are for homeowners who want control rather than compromise. They allow privacy to evolve throughout the day a solution that responds to light, climate, and context in real time.
Corten Steel Panels
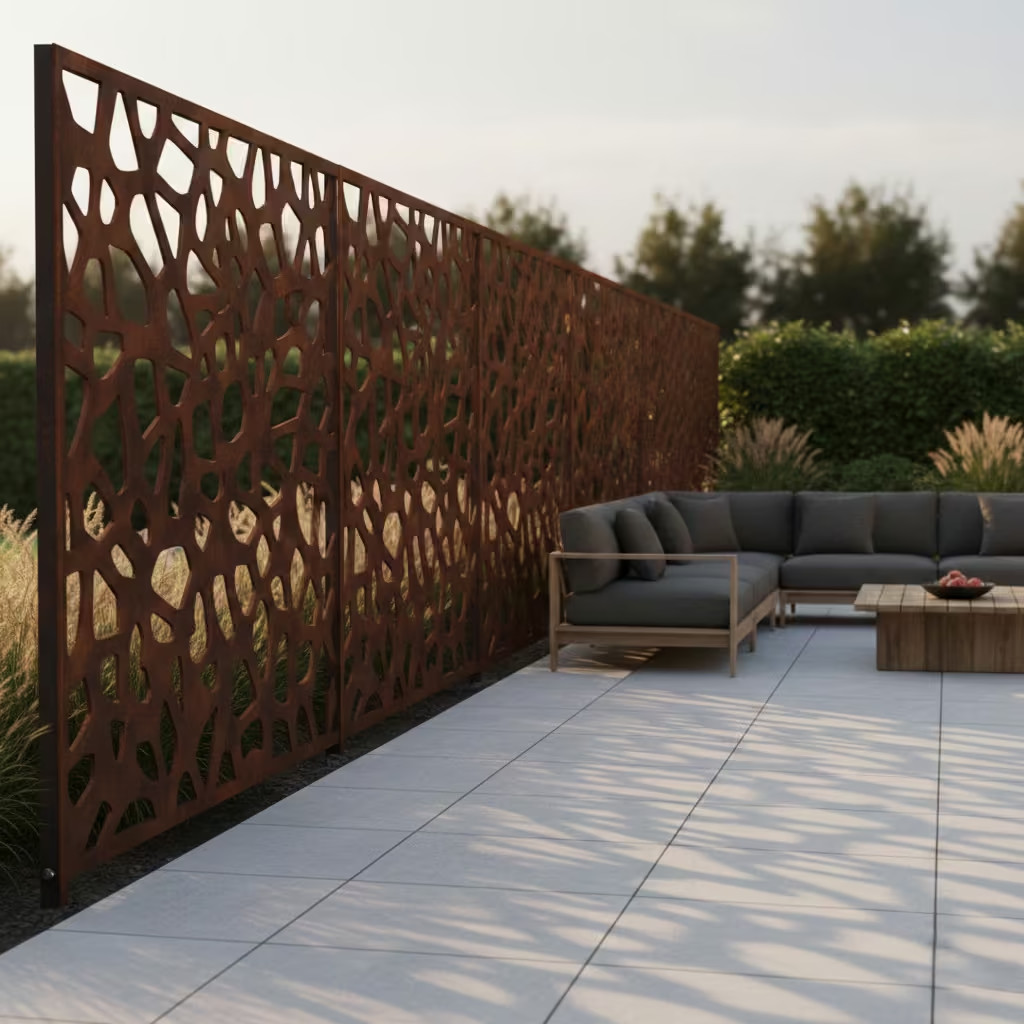
Corten steel panels introduce intentional patina into the landscape. Unlike painted metal, Corten (weathering steel) develops a protective rust-like surface layer that stabilises over time. The finish feels organic yet architectural particularly effective in contemporary or industrial-inspired schemes.
As a privacy solution, Corten panels are typically laser-cut, folded, or installed as solid sheets. They create strong visual presence and complete screening while still feeling textural rather than monolithic.
Best Applications
- Contemporary urban gardens
- Minimalist courtyard designs
- Properties with brick, concrete, or stone façades
- Sloped gardens requiring stepped screening
- Projects aiming for sculptural boundaries
Real-Life Project Insight
In a 3.8 m x 5 m (12.5 ft x 16 ft) rear courtyard renovation, we specified 2.1 m (7 ft) high Corten panels to replace an aging timber fence. The property had exposed brickwork and dark-framed glazing, so the warm oxidised steel complemented the palette.
The panels were 3 mm thick, folded with 25 mm (1 in) returns for rigidity, and mechanically fixed to galvanised steel posts set in 800 mm (31 in) deep concrete footings.
To manage runoff staining, we designed a 150 mm (6 in) gravel strip below the panels rather than paving directly to the base. This prevented rust wash from marking adjacent stone slabs during the initial weathering phase.
Typical Dimensions
- Height: 1.8–2.4 m (6–8 ft)
- Thickness: 2–5 mm depending on span
- Panel width: typically 900–1500 mm (3–5 ft)
- Post footing depth: 700–900 mm (27–35 in)
- Ground clearance: 50–75 mm (2–3 in) above finished surface
Weathering Properties
Corten steel oxidises when exposed to moisture and oxygen. The outer rust layer forms a protective barrier that slows further corrosion.
Weathering timeline:
- Initial bright orange phase (first 3–6 months)
- Darkening and stabilisation over 12–18 months
- Final deep brown patina once fully cured
The process requires alternating wet and dry cycles. In constantly damp or coastal salt-heavy environments, the protective layer may not stabilise correctly, increasing corrosion risk.
Staining Risks
During the early weathering stage, runoff can stain:
- Porcelain or limestone paving
- Light-coloured render
- Adjacent masonry
Mitigation strategies include:
- Installing gravel drainage strips
- Using pre-weathered panels
- Applying sealant after stabilisation
- Ensuring adequate ground clearance
This detailing stage is critical. Poor runoff management is the most common failure in Corten installations.
Structural Considerations
- Panels should be mechanically fixed to steel or heavy-duty aluminium posts.
- Thermal expansion gaps must be allowed.
- For spans over 1.5 m (5 ft), additional reinforcement or thicker material is advisable.
- Wind-load assessment is essential for panels above 2 m (6.5 ft).
Pros
- Distinct architectural character
- Extremely durable when properly detailed
- Low ongoing maintenance
- Complements modern material palettes
- Can be laser-cut for decorative light filtering
Cons
- Initial runoff staining risk
- Not ideal for permanently damp or marine-heavy climates
- Higher material cost than timber or composite
- Heavy requires proper structural support
- Industrial aesthetic may not suit traditional homes
Contractor / Sourcing Notes
Specify certified weathering steel rather than generic “rust-effect” products. Ensure installers understand expansion tolerances and drainage detailing.
Installed cost positioning:
- Solid Corten panels: £700–£1,200 per m² | $80–$140 per sq ft
- Laser-cut bespoke panels: £1,200+ per m² | $150+ per sq ft
Corten steel panels are a deliberate design statement. When detailed correctly, they provide privacy that feels sculptural, grounded, and permanent but they demand precision to age gracefully rather than unpredictably.
You May also Like: 25 Rooftop Terrace Design Ideas That Transform Urban Living
Decorative Metal Mesh with Climbing Plants
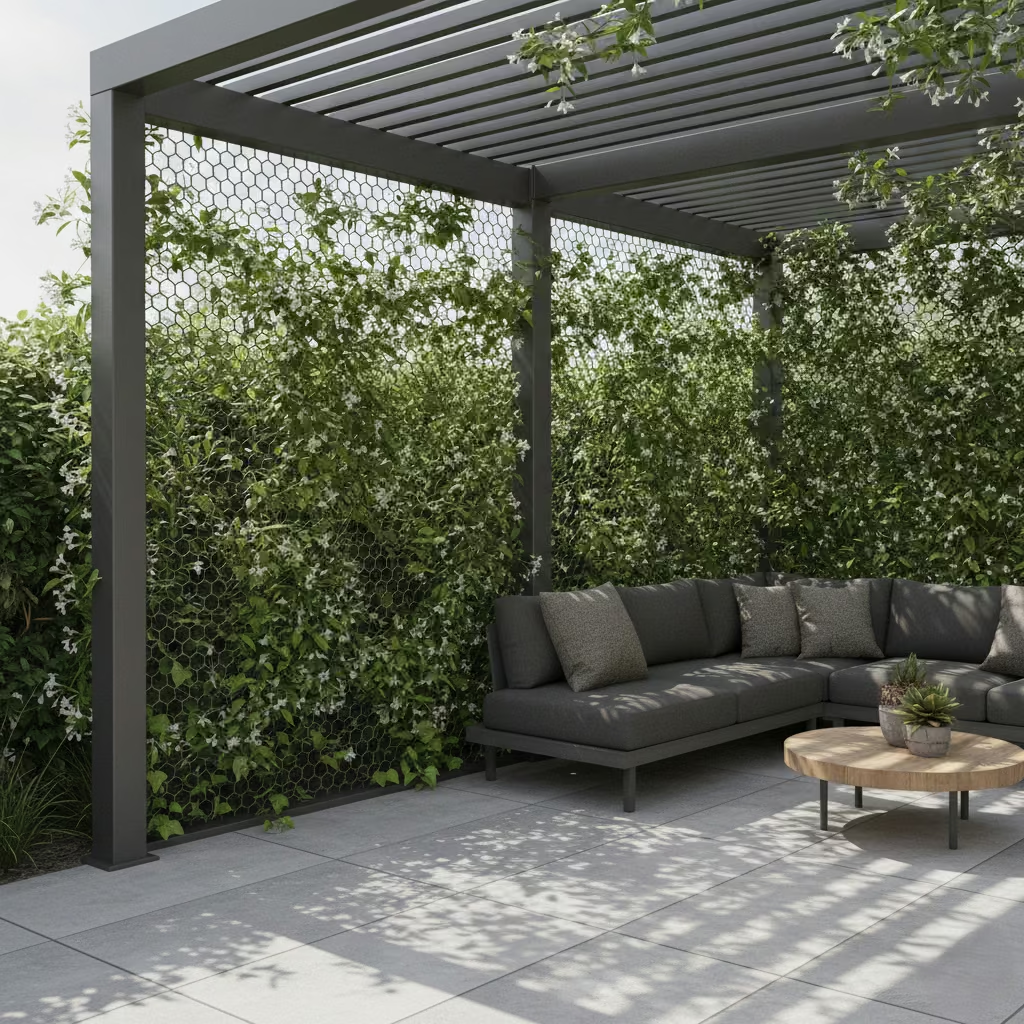
Decorative metal mesh combined with climbing plants represents a hybrid screening philosophy where structure and biology work together. The mesh provides immediate privacy framework, while vegetation matures over time to create depth, softness, and seasonal variation.
This approach is particularly effective in residential landscapes where homeowners want privacy that feels alive rather than constructed. The metal mesh establishes order, and the plants introduce natural movement, texture, and ecological value.
The design works best when the structural screen is treated as a permanent architectural layer and the planting as a living envelope that evolves across seasons.
Best Applications
- Boundary walls requiring softening
- Urban gardens with limited planting depth
- Pergola side screening
- Poolside vertical greenery
- Transitional zones between house and garden
Real-Life Project Insight
In a townhouse courtyard measuring 5 m x 4 m (16 ft x 13 ft), overlooking from a neighbouring staircase window was the primary privacy concern. Instead of installing a solid screen, we specified a 2.2 m (7.2 ft) high galvanised steel mesh frame fixed into 700 mm (27.5 in) deep concrete footings.
The mesh aperture size was approximately 50–75 mm (2–3 in), allowing climbing plants to weave naturally while maintaining airflow. We planted evergreen climbers at 600 mm (24 in) intervals along the base.
Within 18 months, foliage coverage reached roughly 70 percent of the screen surface, creating a dense but organic privacy barrier. The client appreciated that the garden felt greener rather than enclosed.
Typical Dimensions
- Screen height: 1.8–2.4 m (6–8 ft)
- Mesh aperture size: 40–80 mm (1.5–3 in)
- Frame depth: 50–100 mm (2–4 in)
- Post spacing: 1.5–2.0 m (5–6.5 ft)
- Planting bed depth: minimum 450–600 mm (18–24 in)
Planting Considerations
Plant species selection determines long-term performance more than the metal structure itself. Evergreen climbers are preferred for year-round privacy.
Key horticultural factors:
- Initial training of vines onto mesh structure
- Drip irrigation recommended during establishment phase
- Pruning cycle every 2–3 months during active growth seasons
- Avoid aggressive invasive species that may overload mesh structure
Growth density typically develops over 12–24 months depending on climate and soil quality.
Structural Considerations
- Mesh panels should be galvanised or powder-coated for corrosion resistance.
- Steel posts must be anchored in reinforced concrete footings.
- The structure must support both plant weight and wind pressure acting on foliage mass.
- In coastal regions, marine-grade coatings are strongly recommended.
Unlike rigid screens, this system distributes wind load through vegetation flexibility, reducing structural stress in moderate exposure sites.
Pros
- Natural, living privacy solution
- Improves garden microclimate
- Visually soft and elegant
- Supports biodiversity
- Ages gracefully
Cons
- Requires establishment time
- Ongoing horticultural maintenance
- Seasonal growth variation
- Possible mesh corrosion if coating fails
- Can become dense if pruning is neglected
Contractor / Sourcing Notes
Specify heavy-gauge galvanised mesh with at least 80 micron powder coating for exterior durability. Ensure drainage and soil quality are prepared before planting.
Installed cost positioning:
- Standard mesh + planting system: £250–£450 per m² | $30–$55 per sq ft
- Premium architectural frames with mature climbers: £600+ per m² | $70–$90 per sq ft
Decorative metal mesh with climbing plants is best understood as a living architectural boundary. When designed patiently, it delivers privacy that feels natural, evolving, and quietly sophisticated rather than mechanically imposed.
Timber Planter Box Screens
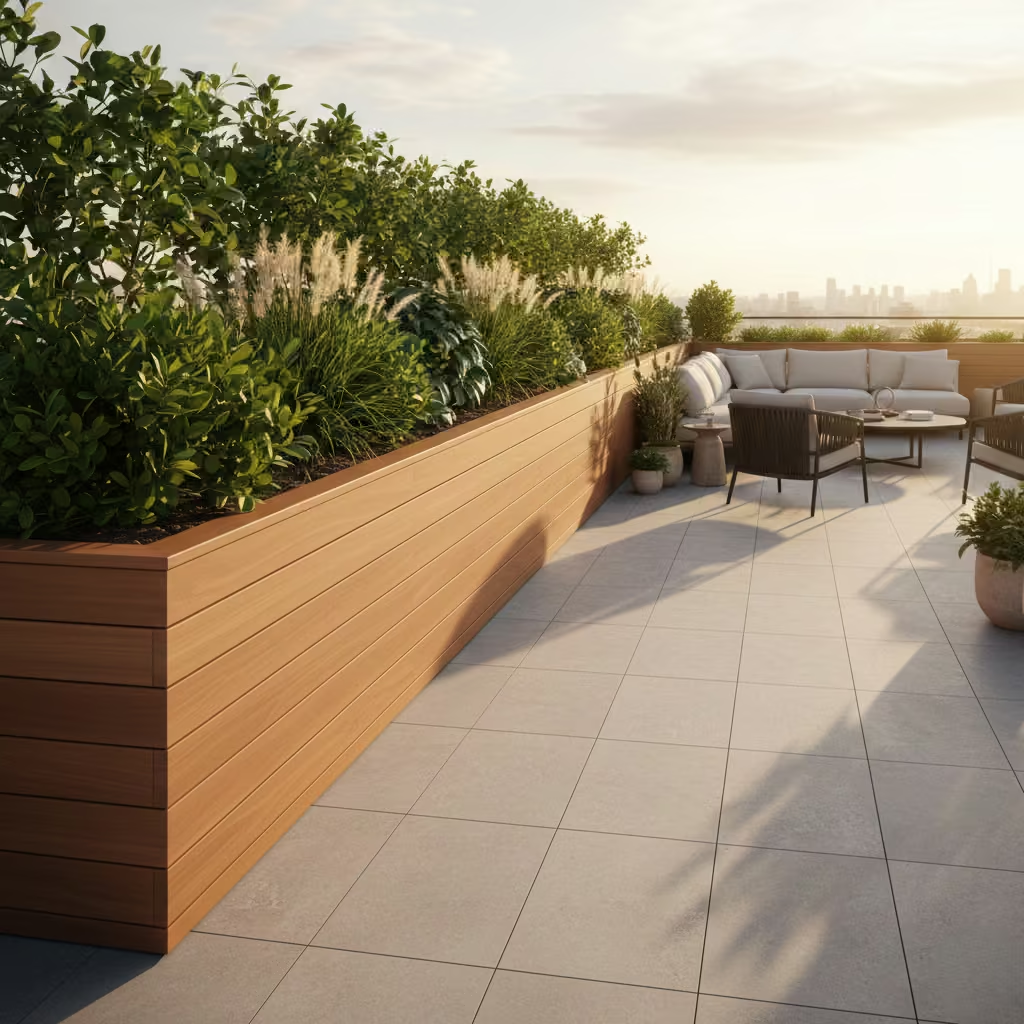
Timber planter box screens combine privacy with functional landscaping by merging vertical screening and ground-level planting into one architectural element. The structure works as a spatial buffer zone, defining boundaries while also supporting seating edges, greenery, and visual softness.
I favour this solution for balconies and terraces where floor area is limited. Instead of installing separate fencing and planting containers, the system compresses multiple functions into one continuous form. The timber surface provides warmth, while the planting introduces seasonal life.
Best Applications
- Balcony edges
- Rooftop terraces
- Small urban outdoor living zones
- Dining patios requiring perimeter seating
- Apartments and townhouse renovations
Real-Life Project Insight
On a 2.5 m (8 ft) deep balcony project, overlooking from a neighbouring window created privacy concerns during evening use. The design solution was a continuous timber planter screen along the exposed side.
The planter box height was set at 700 mm (27.5 in), which is comfortable for casual leaning and allowed the top surface to function as informal seating support. The depth of the planter was 450 mm (18 in), providing sufficient soil volume for medium-sized evergreen shrubs.
The structure was built using pressure-treated hardwood panels fixed to a galvanised steel internal frame. Drainage layers were installed at the base to prevent water accumulation and timber decay.
Typical Dimensions
- Planter height: 600–800 mm (24–32 in)
- Planter depth: 400–600 mm (16–24 in)
- Screen extension height with planting: 1.6–2.0 m (5.2–6.5 ft) above floor level
- Timber thickness: 25–40 mm (1–1.5 in) exterior-grade boards
- Internal soil depth: minimum 350 mm (14 in) for shrub planting
Structural and Drainage Considerations
Water management is critical because planter boxes combine structure and horticulture.
Key detailing points include:
- Multi-layer drainage system with gravel or expanded clay base
- Waterproof membrane lining inside timber casing
- Drainage outlet holes positioned above balcony waterproofing layers
- Internal steel reinforcement if box length exceeds 2.5 m (8 ft)
Balcony applications require particular attention to load calculations. Saturated soil can add significant dead load, so structural assessment is advisable before installation.
Planting Strategy
Choose plants that maintain screening density without aggressive root expansion.
Recommended characteristics:
- Evergreen foliage for year-round privacy
- Moderate growth height (1.2–1.8 m / 4–6 ft)
- Low invasive root behaviour
- Wind-tolerant structure
Drip irrigation is highly recommended in balcony installations because manual watering often leads to uneven moisture distribution.
Pros
- Combines privacy, storage, and seating function
- Softens hard architectural edges
- Supports urban gardening
- Provides immediate boundary definition
- Visually balanced for compact terraces
Cons
- Timber requires periodic treatment
- Heavy when fully planted and watered
- Drainage failure can cause structural damage
- Limited flexibility once installed
- Plant maintenance is necessary
Contractor / Sourcing Notes
Specify exterior-grade timber such as cedar, oak, or thermally modified hardwood. Avoid untreated softwood in exposed balcony conditions.
Installed cost positioning:
- Standard timber planter screen: £400–£700 per linear metre | $50–$90 per linear foot
- Premium hardwood architectural systems: £900+ per linear metre | $110–$150 per linear foot
Timber planter box screens work best when treated as furniture-scale architecture, not simply boundary fencing. When proportion, drainage, and planting density are carefully controlled, the balcony becomes an intimate, habitable extension of indoor living space.
Stone Clad Feature Walls
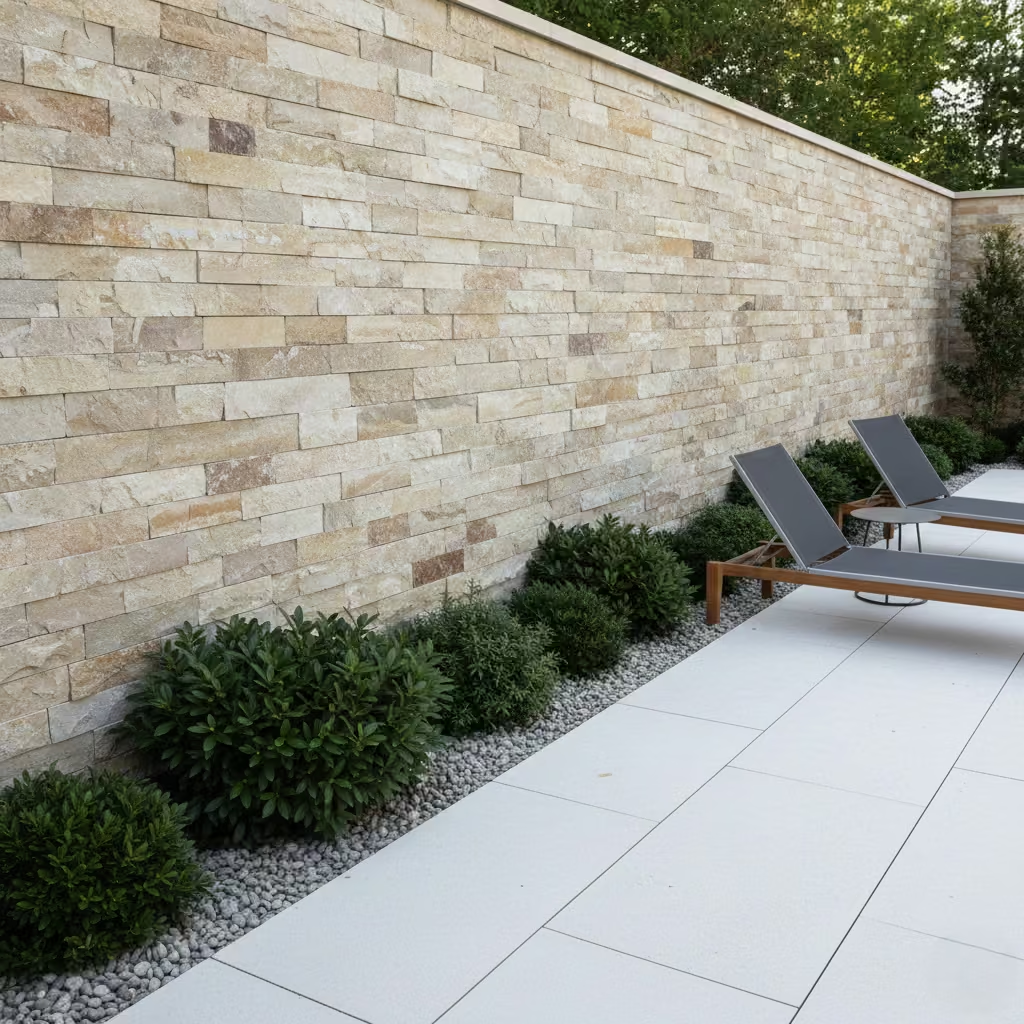
Stone clad feature walls represent permanent architectural privacy. Unlike lighter screening systems, stone introduces mass, visual stability, and timeless material authority. The wall becomes part of the landscape composition rather than a detachable garden element.
I approach stone cladding as structural storytelling. Texture, colour variation, and joint detailing matter more than decorative patterning. Natural stone surfaces interact with daylight differently across morning, afternoon, and evening, giving the garden a quiet sense of permanence.
Best Applications
- Boundary walls requiring full privacy
- Luxury residential gardens
- Poolside backdrops
- Contemporary or rustic architectural schemes
- Properties where durability is prioritised over flexibility
Real-Life Project Insight
On a suburban garden renovation measuring 8 m x 5 m (26 ft x 16 ft), the client wanted complete visual isolation from a neighbouring driveway. We constructed a 2.1 m (7 ft) high stone clad wall using a reinforced concrete core structure.
The cladding thickness was approximately 40–60 mm (1.5–2.5 in), fixed using stainless steel mechanical anchors and exterior-grade mortar bedding. A 150 mm (6 in) gravel drainage strip was placed along the base to prevent moisture accumulation and staining of adjacent porcelain paving.
The finished wall worked visually because it was proportioned as an architectural backdrop rather than a boundary barrier.
Typical Dimensions
- Wall height: 1.8–2.4 m (6–8 ft)
- Cladding thickness: 30–70 mm (1–3 in) depending on stone type
- Structural wall thickness: 150–250 mm (6–10 in) reinforced concrete or masonry core
- Footing depth: 750–900 mm (30–35 in) for freestanding walls
- Expansion joints: recommended every 4–6 m (13–20 ft)
Structural Considerations
Stone cladding adds significant dead load. The supporting structure must be engineered for long-term settlement resistance.
Key technical points include:
- Reinforced concrete or blockwork structural core
- Stainless steel wall ties or mechanical anchoring systems
- Moisture barrier layer between structural wall and cladding
- Proper mortar specification for exterior exposure
- Drainage detailing at wall base
For walls above 2 m (6.5 ft), structural engineering review is strongly recommended.
Pros
- Extremely durable and long-lasting
- Minimal maintenance once installed
- Strong architectural presence
- Excellent wind resistance
- High property value perception
Cons
- High installation cost
- Difficult to modify after construction
- Requires skilled masonry labour
- Heavy material weight
- Potential moisture staining if drainage is poor
Contractor / Sourcing Notes
Use exterior-grade natural stone such as limestone, sandstone, or slate depending on climate. In freeze–thaw regions, porous stones should be avoided unless properly sealed.
Installed cost positioning:
- Standard stone cladding: £600–£1,000 per m² | $70–$120 per sq ft
- Premium architectural stone work: £1,200+ per m² | $140–$180 per sq ft
Stone clad feature walls succeed when treated as permanent landscape architecture. When proportioned correctly, they give the garden a sense of quiet strength, maturity, and long-term design intention.
Sail Shade + Side Panel Combination
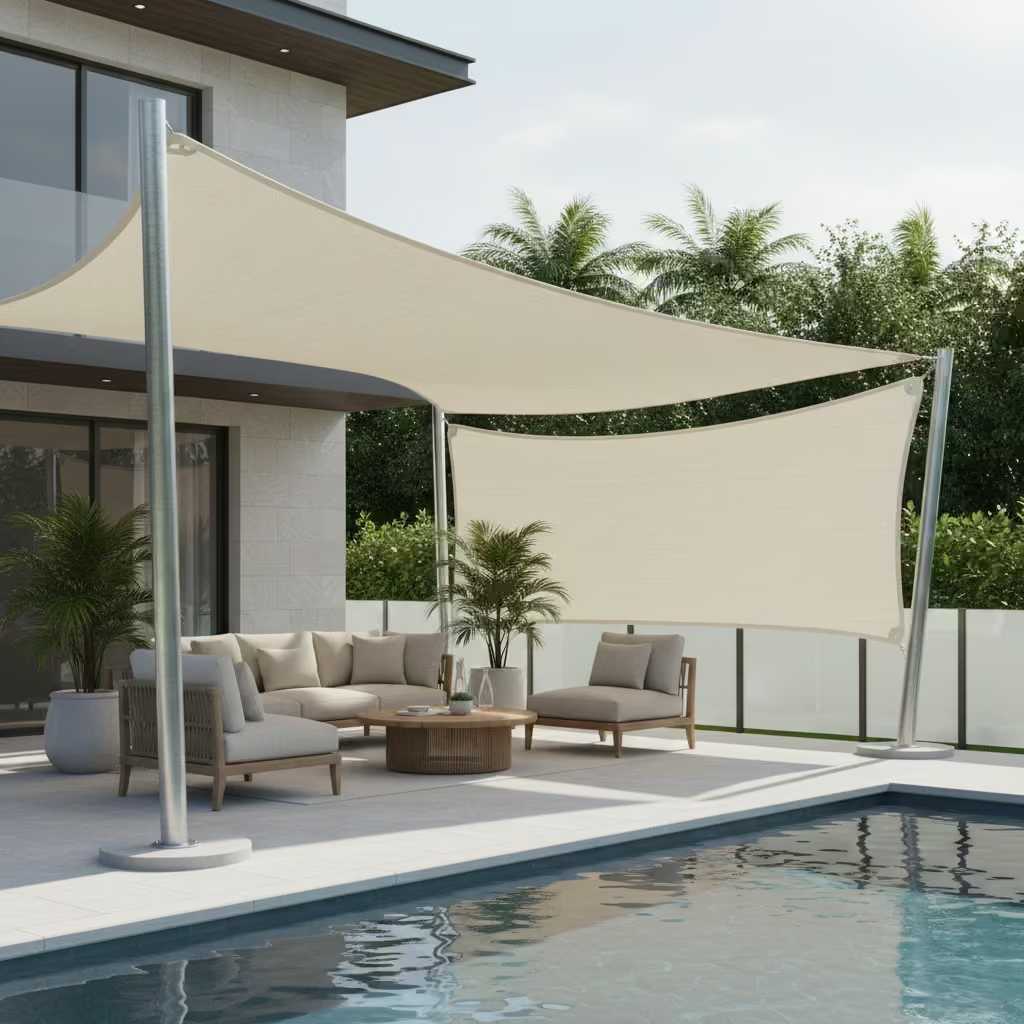
The sail shade and side panel combination is a soft architectural privacy strategy suited to seasonal outdoor living. Instead of forming a rigid enclosure, this system creates a light, breathable canopy that reduces solar exposure while providing partial visual screening.
I often use this approach when the goal is comfort rather than isolation. The curved tension of a sail shade introduces visual movement, while side panels stabilise privacy along the most exposed viewing angle. The overall effect feels relaxed, almost coastal in character.
Best Applications
- Summer terraces and garden lounges
- Poolside relaxation zones
- Holiday homes or seasonal residences
- Transitional outdoor dining areas
- Gardens where full enclosure is unnecessary
Real-Life Project Insight
In a 4 m x 5 m (13 ft x 16 ft) patio lounge, the client wanted protection from afternoon sun and partial privacy from a neighbouring walkway approximately 6 m (20 ft) away.
We installed a triangular tension sail shade fixed to a house façade anchor point and two powder-coated steel posts embedded in 700 mm (27.5 in) concrete footings. The sail drop angle was set to encourage rainwater runoff rather than pooling.
A 1.6 m (5.2 ft) high fabric side panel was added along the pedestrian-facing boundary. The combination reduced glare while preserving airflow and sky visibility.
Typical Dimensions
- Sail width: 3–6 m (10–20 ft) depending on terrace size
- Sail height clearance: minimum 2.2 m (7.2 ft) above walking surface
- Side panel height: 1.5–2.0 m (5–6.5 ft)
- Post spacing: 2.5–4 m (8–13 ft)
- Fabric GSM density: 280–380 gsm for exterior use
Wind and Seasonal Considerations
Sail shades are not permanent structural privacy elements. Their performance depends heavily on tensioning and wind exposure.
Key guidance:
- Remove or retract sails during storms or high wind warnings.
- Maintain fabric tension to avoid flutter fatigue.
- Install reinforced marine-grade fixing rings.
- Ensure posts are structurally independent of lightweight decking.
Most quality systems are rated for moderate wind exposure, typically around Beaufort scale 4–5 (20–40 km/h / 12–25 mph) when properly tensioned.
Pros
- Lightweight and visually soft
- Easy seasonal installation and removal
- Good glare reduction
- Affordable compared to structural screens
- Works well in contemporary leisure gardens
Cons
- Limited protection in strong wind
- Requires seasonal maintenance and storage
- Fabric lifespan typically 5–8 years
- Not suitable as permanent boundary privacy
- Snow or heavy rain loading must be avoided
Contractor / Sourcing Notes
Use UV-stabilised high-density polyethylene or solution-dyed polyester fabrics. Posts should be galvanised or powder-coated steel rather than aluminium in high-tension configurations.
Installed cost positioning:
- Standard sail shade system: £800–£2,000 | $1,000–$2,500 installed
- Custom architectural sail pavilion: £3,000+ | $3,500–$5,000+
The sail shade and side panel combination is best understood as seasonal spatial architecture. It does not attempt to dominate the garden, but instead provides comfort through lightness, airflow, and controlled enclosure during warm months.
Slatted Concrete Panels
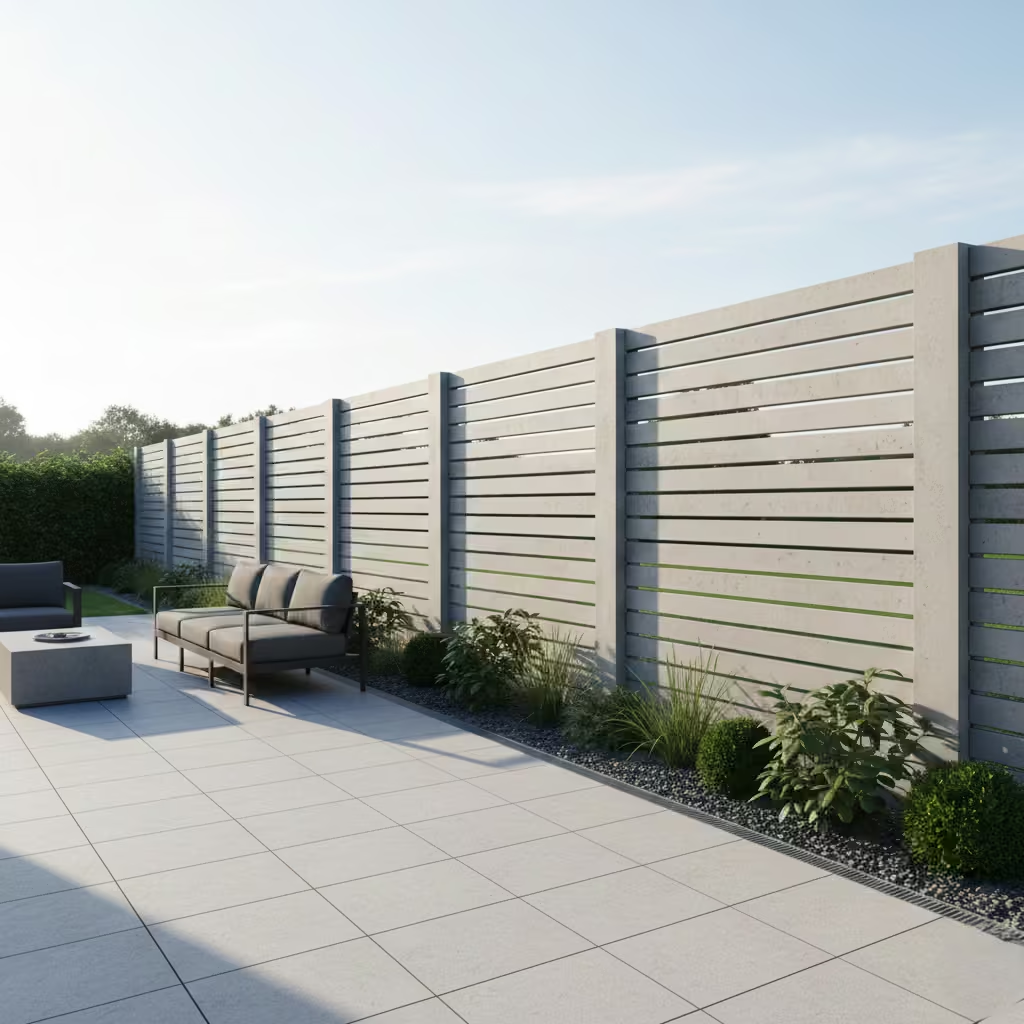
Slatted concrete panels deliver durability with architectural precision. The material combines the permanence of structural concrete with the visual lightness of linear voids created by slat spacing. This makes the system particularly suitable for contemporary gardens where privacy must coexist with daylight and airflow.
Unlike decorative fencing, slatted concrete reads as part of the built landscape. The rhythm of horizontal or vertical openings introduces shadow depth, giving heavy material a surprisingly refined appearance.
Best Applications
- Modern suburban boundary walls
- Front garden screening
- Urban patios requiring strong privacy
- Properties exposed to wind or street noise
- Minimalist architectural homes
Real-Life Project Insight
In a rear garden renovation measuring 7 m x 4.5 m (23 ft x 15 ft), the client wanted a boundary solution that would last decades with minimal maintenance. Timber fencing had previously degraded within eight years due to moisture exposure.
We installed 2 m (6.5 ft) high precast slatted concrete panels mounted on reinforced concrete posts set in 800 mm (31.5 in) deep footings. The slat opening ratio was approximately 35 percent, allowing filtered airflow while blocking direct neighbour sightlines.
The garden retained daylight penetration, particularly in the morning when sunlight passed through the horizontal voids, creating soft shadow bands across the patio surface.
Typical Dimensions
- Panel height: 1.8–2.2 m (6–7.2 ft)
- Slat thickness: 40–80 mm (1.5–3.1 in)
- Slat spacing: 30–60 mm (1.2–2.4 in) depending on privacy density
- Post footing depth: 750–900 mm (30–35 in)
- Panel width: usually 900–1200 mm (3–4 ft)
Structural Considerations
Concrete panels are heavy and require proper foundation engineering.
Key requirements include:
- Reinforced concrete posts with steel core reinforcement
- Mechanical locking joints between panels and posts
- Ground compaction beneath footings to prevent settlement
- Thermal expansion allowance for long boundary runs
- Drainage strip along base to reduce moisture retention
Because of the material mass, wind resistance is naturally strong. However, uneven settlement is the primary long-term risk if groundwork is poor.
Pros
- Extremely long service life
- High privacy performance
- Excellent wind and noise resistance
- Low maintenance after installation
- Strong contemporary aesthetic
Cons
- High installation labour cost
- Heavy material transportation
- Difficult to modify once built
- Can feel visually rigid in small gardens
- Requires skilled structural installation
Contractor / Sourcing Notes
Specify precast architectural concrete with smooth or light-textured finish to avoid excessive dirt accumulation. In freeze–thaw climates, air-entrained concrete is recommended.
Installed cost positioning:
- Standard slatted concrete system: £450–£800 per m² | $55–$100 per sq ft
- Premium architectural precast systems: £900+ per m² | $110–$150 per sq ft
Slatted concrete panels are best suited to homeowners who value longevity and structural confidence. When proportioned carefully, they create privacy that feels permanent, composed, and quietly modern rather than visually imposing.
You May also Like: 25 Low-Maintenance, Long-Lasting Minimalist Garden Ideas for Budget-Friendly Outdoor Spaces
Sliding Privacy Panels
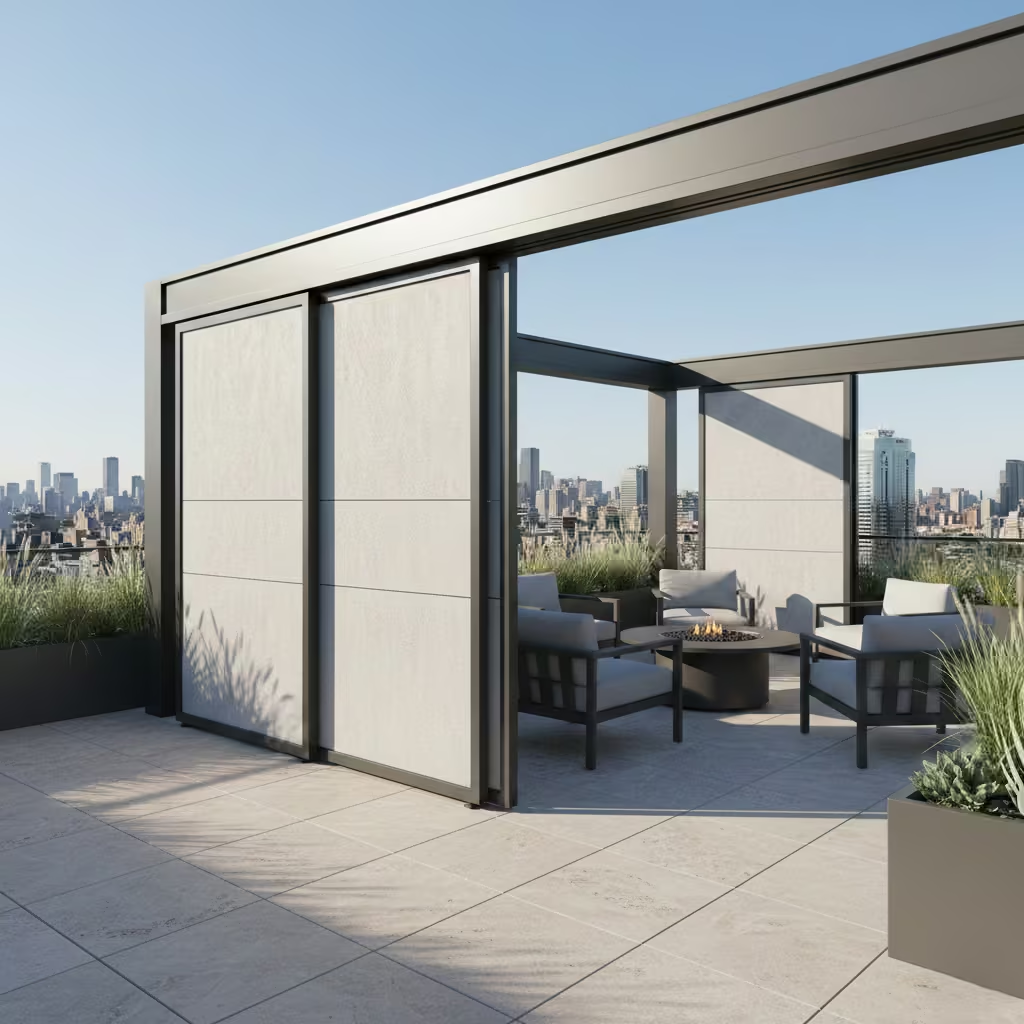
Sliding privacy panels introduce spatial adaptability into outdoor living zones. Mounted on concealed track systems, these panels allow the garden or terrace to be reconfigured depending on activity, sunlight, or privacy requirement. The design is particularly effective for modern residential architecture where outdoor spaces function as flexible living rooms rather than static boundaries.
I often treat sliding panels as zoning instruments. Instead of permanently closing a view, they allow the homeowner to decide when the space should feel open, sheltered, or fully enclosed.
Best Applications
- Rooftop terraces with variable social use
- Courtyard dining areas
- Poolside privacy zoning
- Townhouse gardens with lateral overlooking
- Contemporary minimalist homes
Real-Life Project Insight
On a 5 m x 4 m (16 ft x 13 ft) rooftop terrace, neighbouring apartment windows overlooked the seating area from approximately 7 m (23 ft) distance. A fixed screen would have reduced skyline visibility, which the client wanted to preserve.
We installed three sliding aluminium composite panels, each measuring 1.2 m (4 ft) wide and 2.1 m (6.9 ft) high, running on a recessed ceiling track integrated into the pavilion beam. The panels could be positioned to cover the exposed side of the terrace during evening dining.
The track system was fixed into structural steel framing rather than decorative cladding, ensuring long-term alignment stability.
Typical Dimensions
- Panel height: 1.8–2.2 m (6–7.2 ft)
- Panel width: 900–1500 mm (3–5 ft)
- Track profile depth: 40–70 mm (1.5–2.8 in)
- Panel thickness: 20–40 mm (0.8–1.5 in) depending on material
- Ground or ceiling clearance tolerance: 5–10 mm (0.2–0.4 in)
Structural and Mechanical Considerations
Track alignment is the most critical factor for sliding systems.
Key technical points include:
- Tracks must be fixed to load-bearing structural members.
- Anti-derailment guides should be installed, especially in wind-prone areas.
- Drainage detailing is necessary for ground-level tracks to prevent debris blockage.
- For large panels, soft-close or braking mechanisms improve durability.
Wind exposure must be considered. Panels should be locked or fully closed during strong gusts to prevent vibration damage.
Pros
- Highly flexible privacy zoning
- Clean contemporary appearance
- Saves space compared to swing doors
- Can integrate with lighting or pergola frames
- Enhances terrace usability
Cons
- Mechanical components require maintenance
- Track cleaning is necessary in outdoor environments
- Higher installation precision required
- Wind loads affect performance when panels are open
- More expensive than fixed screening
Contractor / Sourcing Notes
Specify marine-grade aluminium or powder-coated steel for exterior tracks. Avoid lightweight decorative sliding hardware intended for indoor use.
Installed cost positioning:
- Standard sliding privacy system: £800–£1,500 per m² | $90–$180 per sq ft
- Architectural motorised zoning systems: £2,500+ per m² | $3,000+ per zone
Sliding privacy panels work best when viewed as operable architecture, not as movable fencing. When engineered correctly, they allow outdoor spaces to shift between openness and enclosure with quiet precision.
Outdoor Storage Walls as Privacy Barriers
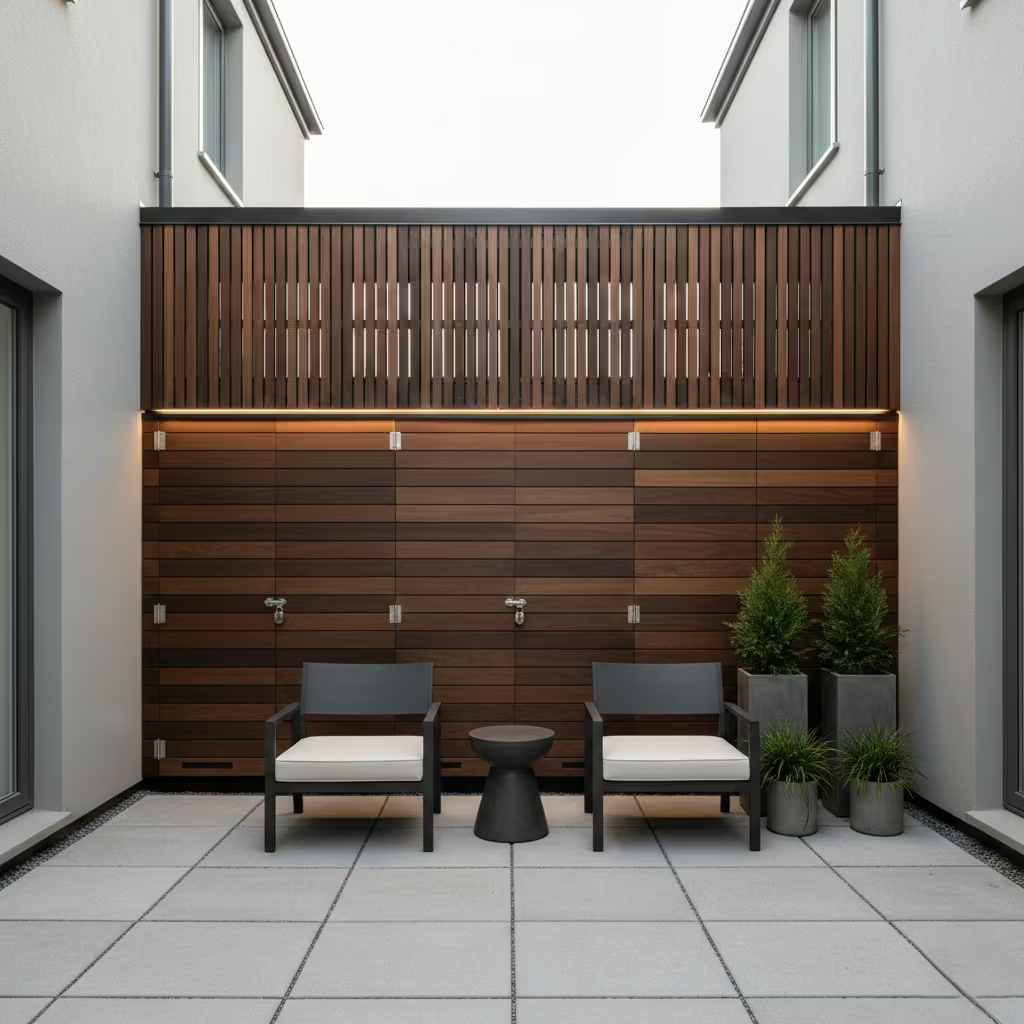
Outdoor storage walls operate as functional boundary architecture, combining privacy screening with concealed storage capacity. In practice, this is one of the most efficient solutions for compact residential gardens where visual order and utility must coexist.
I approach storage walls as continuous structural elements rather than segmented cabinets. When aligned with seating edges or service zones, they help stabilise the garden composition while eliminating clutter created by tools, bins, or mechanical equipment.
The strength of this solution lies in its quiet practicality. Privacy is achieved not through additional height alone but through material mass, controlled enclosure, and integrated function.
Best Applications
- Narrow urban gardens
- Patio dining boundaries
- Side return landscaping
- Pool equipment concealment
- Apartment and townhouse terraces
Real-Life Project Insight
On a 6 m × 3.5 m (20 ft × 11.5 ft) townhouse courtyard, the client required privacy from a service alley and storage for maintenance equipment.
We constructed a 2.1 m (7 ft) high storage privacy wall spanning approximately 4 m (13 ft) along the rear boundary. The lower section contained lockable compartments with moisture-resistant internal lining. The upper section used vertical timber slats to maintain airflow while providing visual screening.
Storage depth was set at 600 mm (24 in), which allowed accommodation of long-handled tools, hoses, and compact garden machinery.
Typical Dimensions
- Total wall height: 1.8–2.4 m (6–8 ft)
- Storage depth: 500–700 mm (20–28 in)
- Door module width: 400–800 mm (16–32 in)
- Structural cladding thickness: 25–40 mm (1–1.5 in)
- Footing depth: 700–900 mm (27–35 in) for freestanding walls
Structural and Moisture Management
Because storage walls combine enclosure and utility use, detailing is more important than exterior appearance.
Key engineering considerations include:
- Waterproof membrane lining inside storage cavities
- Ventilation gaps behind cladding panels
- Raised internal base to avoid ground moisture migration
- Stainless steel hinges and marine-grade locking hardware
- Roof capping or drip edges to protect vertical surfaces
If electrical equipment is stored inside, cable routing must follow weatherproof conduit standards.
Pros
- Highly space-efficient
- Reduces visual clutter
- Provides strong privacy screening
- Supports urban garden functionality
- Integrates seamlessly with seating or planting
Cons
- More complex construction than simple fencing
- Requires moisture protection detailing
- Door mechanisms need periodic adjustment
- Higher installation cost than basic screens
- Poor design can make the wall feel bulky
Contractor / Sourcing Notes
Use exterior-grade hardwood, thermally modified timber, or architectural composite panels. Internal storage compartments should include low-level drainage vents.
Installed cost positioning:
- Standard storage privacy wall: £500–£900 per m² | $60–$110 per sq ft
- Premium architectural integrated systems: £1,200+ per m² | $140–$180 per sq ft
Outdoor storage walls are most successful when treated as quiet infrastructure of living space rather than decorative fencing. When proportion, moisture control, and access ergonomics are carefully resolved, they provide privacy that works every day without demanding attention.
Raised Garden Beds as Visual Barriers
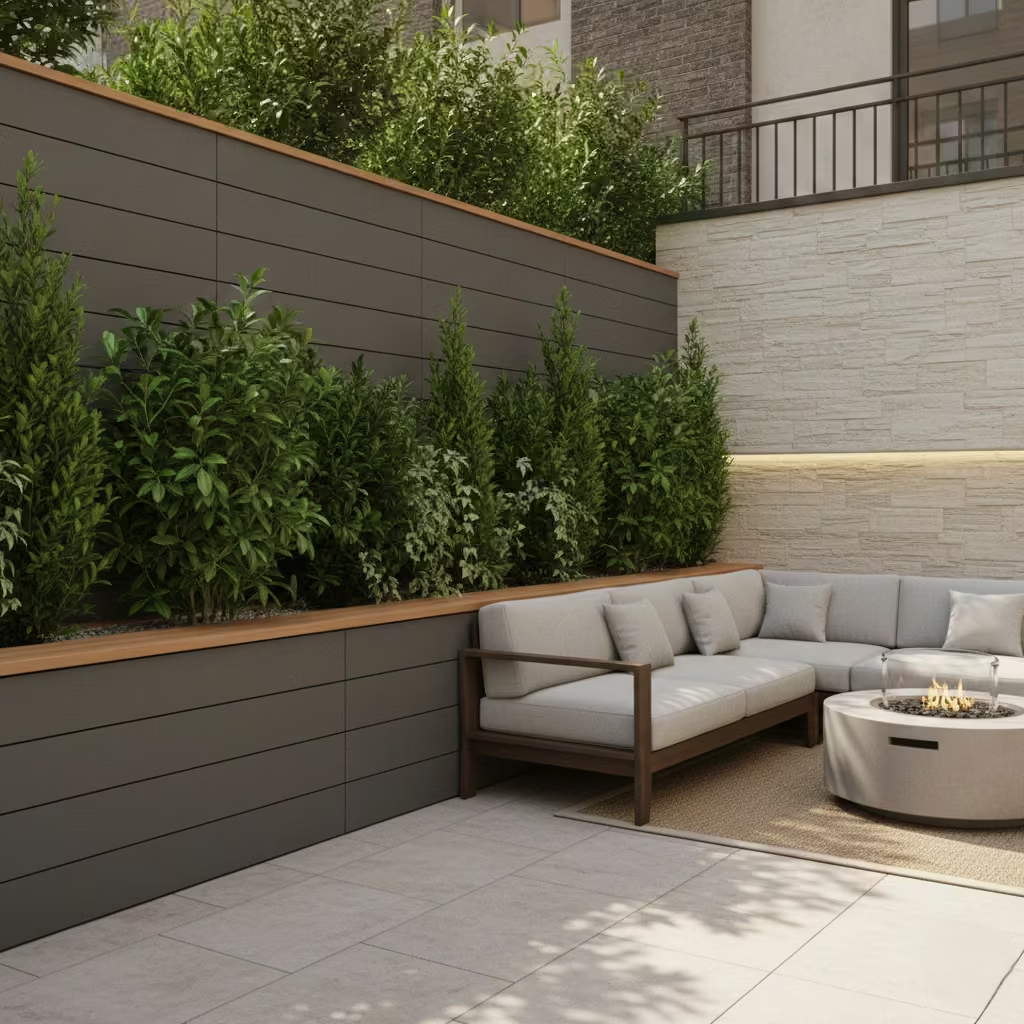
Raised garden beds function as soft architectural privacy buffers rather than rigid screens. By elevating planting zones above ground level, they allow vegetation to reach screening height more quickly while defining spatial edges with natural materiality.
I often use raised beds when the goal is to merge privacy with landscape continuity. Unlike solid fencing, planting density evolves over time, allowing the garden to mature into its final form rather than appearing finished immediately.
Best Applications
- Rear boundary gardens
- Patio edges adjacent to seating zones
- Sloped or uneven terrain
- Urban plots where ground soil quality is poor
- Properties seeking natural privacy layering
Real-Life Project Insight
In a residential garden measuring 7 m × 5 m (23 ft × 16 ft), overlooking from an adjacent upper window required partial visual blocking without constructing a tall boundary wall.
We installed a 700 mm (27.5 in) high raised planter bed running along a 6 m (20 ft) boundary. The internal soil depth was maintained at 450 mm (18 in), which is the minimum practical depth for healthy shrub root development.
Evergreen screening shrubs were planted at approximately 600 mm (24 in) spacing, allowing foliage to merge into a continuous visual layer after two growing seasons.
Minimum Soil Depth Requirement
- Structural planting beds: 450 mm (18 in) minimum
- Medium shrub screening: 500–600 mm (20–24 in) preferred
- Large evergreen hedge species: 600–800 mm (24–32 in) ideal
Shallow soil depth restricts root stability, reduces moisture retention, and limits mature plant height.
Structural and Drainage Considerations
Raised beds must balance horticulture with construction durability.
Key detailing points include:
- Internal waterproof membrane lining to protect timber or masonry structures
- Gravel drainage layer (100–150 mm / 4–6 in) at base
- Drainage outlet holes above external ground level
- Reinforced structural walls if bed length exceeds 3 m (10 ft)
- Expansion joints for long continuous planter runs
Saturated soil can generate significant lateral pressure, so retaining walls should be engineered accordingly.
Typical Dimensions
- Bed height: 500–800 mm (20–32 in) for screening function
- Bed width: 400–800 mm (16–32 in) planting zone
- Top cap width: 150–300 mm (6–12 in) for seating or finishing detail
- Planting spacing: species dependent but typically 400–800 mm (16–32 in)
Pros
- Natural, living privacy solution
- Improves soil quality control
- Supports biodiversity
- Softens hard boundary lines
- Integrates with seating edges
Cons
- Requires irrigation planning
- Plants need establishment time
- Structural pressure from saturated soil
- Seasonal variation in foliage density
- Maintenance pruning required
Contractor / Sourcing Notes
Use rot-resistant timber, concrete blockwork, or composite planter systems for structural longevity. In cold climates, frost-resistant construction materials are advisable.
Installed cost positioning:
- Standard raised planting privacy bed: £250–£500 per linear metre | $35–$70 per linear foot
- Architectural integrated planter walls: £800+ per linear metre | $100–$150 per linear foot
Raised garden beds work best when treated as living landscape architecture. When soil depth, drainage, and planting strategy are carefully balanced, they create privacy that feels natural, evolving, and quietly elegant over time.
Rustic Woven Willow Panels
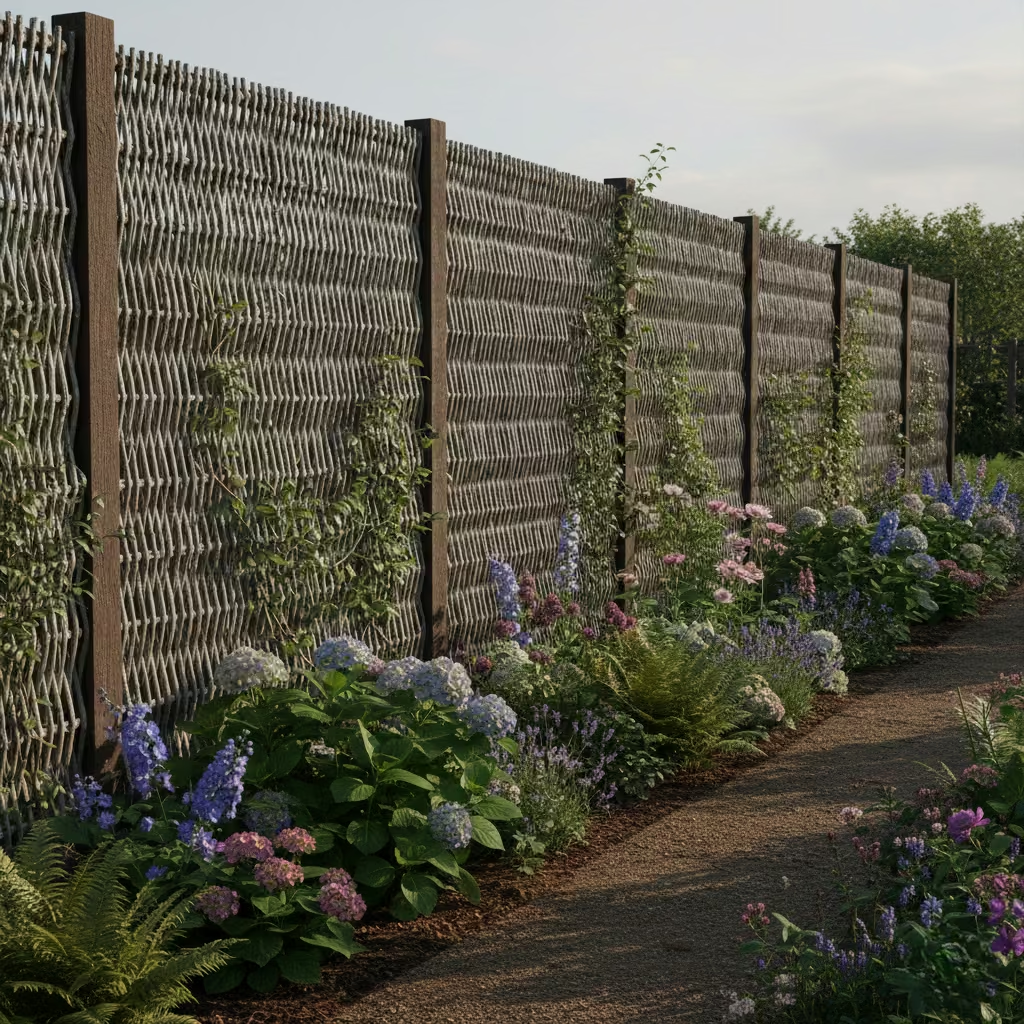
Rustic woven willow panels offer a natural, informal privacy solution suited to traditional, cottage-style, or naturalistic garden designs. The interlaced willow rods create a textured surface that filters visibility rather than completely blocking it, allowing the boundary to feel soft and organic.
This material works best when privacy is not intended to feel defensive. Instead, it contributes to a relaxed landscape character where enclosure blends quietly with planting and soil tones.
Best Applications
- Informal or country-style gardens
- Cottage landscapes
- Temporary seasonal screening
- Boundary softening behind flower borders
- Gardens with abundant natural planting
Real-Life Project Insight
On a suburban garden project measuring 6 m × 4 m (20 ft × 13 ft), the client wanted privacy from a neighbour’s parking area without introducing a rigid structural fence.
We installed 1.8 m (6 ft) high woven willow panels mounted onto treated timber posts set in 700 mm (27.5 in) concrete footings. The panels were positioned approximately 400 mm (16 in) inside the boundary line and combined with foreground shrub planting.
Over two seasons, climbing plants began to intertwine with the willow weave, increasing screening density while maintaining airflow.
Typical Dimensions
- Panel height: 1.5–2.0 m (5–6.5 ft)
- Panel thickness: 25–50 mm (1–2 in) weave density
- Post spacing: 1.5–2 m (5–6.5 ft)
- Ground clearance: minimum 50 mm (2 in) to prevent moisture damage
- Recommended planting buffer depth: 300–600 mm (12–24 in)
Climate and Durability Considerations
Willow is a natural material and responds strongly to moisture and UV exposure.
- Lifespan in exposed gardens: typically 3–7 years
- Under pergola or canopy protection: potentially longer
- High humidity regions may accelerate fibre degradation
- Periodic sealing can extend service life
The panels gradually weather to a muted silver-grey tone, which often enhances their rustic character.
Pros
- Warm natural aesthetic
- Lightweight and easy to install
- Integrates well with planting
- Low structural load
- Good airflow permeability
Cons
- Shorter lifespan than engineered materials
- Can degrade in constant wet conditions
- Limited performance in strong wind exposure
- Requires replacement over time
- Less suitable for high-security privacy
Contractor / Sourcing Notes
Choose tightly woven, kiln-dried willow panels rather than loosely bound decorative versions. Ensure posts are treated or composite to prevent base rot.
Installed cost positioning:
- Standard woven willow screening: £80–£180 per m² | $10–$25 per sq ft
- Premium reinforced natural weave systems: £200+ per m² | $30–$40 per sq ft
Rustic woven willow panels are most successful when used as part of a layered landscape strategy rather than as the sole privacy barrier. When paired with planting and structural screening, they add a gentle, countryside character to outdoor spaces.
Rooftop Privacy Parapet Extensions
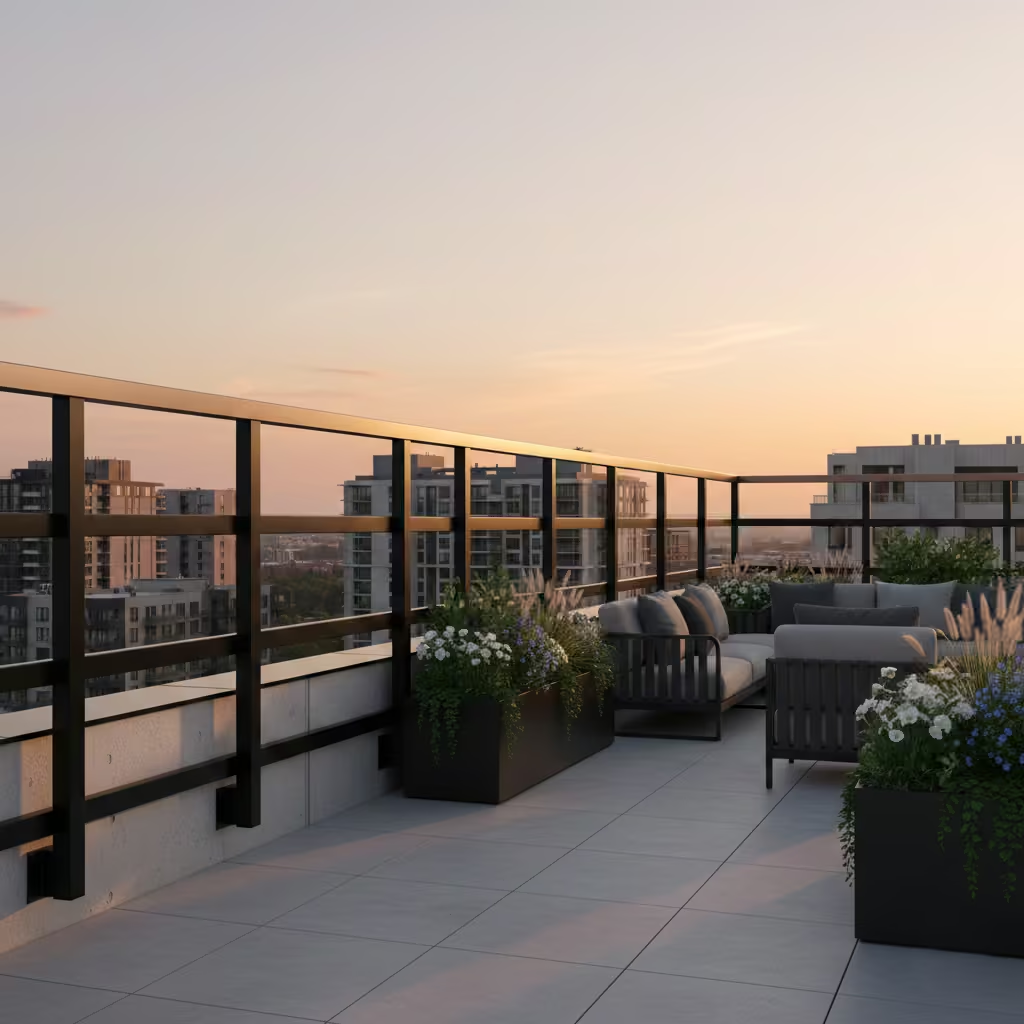
Rooftop parapet extensions are architectural privacy and safety elements rather than decorative additions. They increase boundary height above the original roofline to block overlooking from adjacent taller buildings or upper windows while also improving wind comfort on terraces.
Unlike lightweight screens, parapet extensions must be treated as structural modifications to the building envelope. Material choice, load transfer, and waterproofing integration are critical because the roof edge is a primary weather exposure zone.
I usually approach rooftop privacy as a balance between enclosure and skyline connection. The parapet should protect intimate seating zones without visually compressing long-distance views.
Best Applications
- Urban rooftop terraces
- Apartment top-floor outdoor spaces
- Roof gardens with neighbour overlooking
- High-density city environments
- Wind-exposed elevated properties
Real-Life Project Insight
On a rooftop terrace measuring 5 m × 6 m (16 ft × 20 ft), neighbouring apartment windows overlooked the seating area from approximately one storey higher and 8 m (26 ft) away.
We designed a 400 mm–600 mm (16–24 in) parapet extension using powder-coated aluminium frame panels with internal structural reinforcement. The system was fixed to the building’s reinforced concrete edge beam rather than the waterproof membrane layer.
The extension reduced direct sightlines while maintaining open sky views above the terrace perimeter. Wind comfort improved noticeably because the parapet acted as a wind deflector.
Structural Engineer Requirement
Professional structural assessment is essential for rooftop parapet modifications.
Key considerations include:
- Load transfer into primary structural members
- Wind uplift forces acting on extended surfaces
- Thermal expansion allowance between materials
- Waterproofing continuity across fixing points
- Compliance with local building safety codes
I strongly advise involving a structural engineer before construction begins.
Typical Dimensions
- Extension height above original parapet: 300–800 mm (12–32 in)
- Total parapet height from roof surface: commonly 1.1–1.5 m (3.6–5 ft) for safety + privacy
- Panel thickness: 40–100 mm (1.5–4 in) depending on material
- Post or frame spacing: 1.2–2 m (4–6.5 ft)
- Fixing depth into structural concrete: determined by engineer design
Waterproofing and Drainage Considerations
Roof edge work is highly sensitive to moisture management.
Important detailing requirements include:
- Continuous waterproof membrane protection behind fixings
- Metal flashing caps along parapet tops
- Drainage slope away from building interior
- Sealant joints rated for UV and thermal movement
- Inspection access for long-term maintenance
Poor waterproofing at rooftop edges is one of the most common causes of structural degradation in terrace renovations.
Pros
- Improves privacy from neighbouring buildings
- Enhances wind protection
- Increases terrace usability
- Can integrate lighting or planting
- Adds architectural height definition
Cons
- Requires engineering approval
- Higher construction cost
- Complex waterproofing detailing
- Permanent modification to roof structure
- Installation precision is critical
Contractor / Sourcing Notes
Use marine-grade aluminium, structural steel with multi-layer powder coating, or engineered composite systems. Avoid untreated timber at roof edges because moisture exposure accelerates decay.
Installed cost positioning:
- Standard parapet extension system: £600–£1,200 per linear metre | $80–$150 per linear foot
- Bespoke architectural rooftop screening: £1,500+ per linear metre | $180–$250+ per linear foot
Rooftop privacy parapet extensions should be viewed as structural landscape architecture, not simple screening. When engineered correctly, they improve safety, comfort, and spatial clarity without dominating the skyline.
Mixed Material Layered Screening
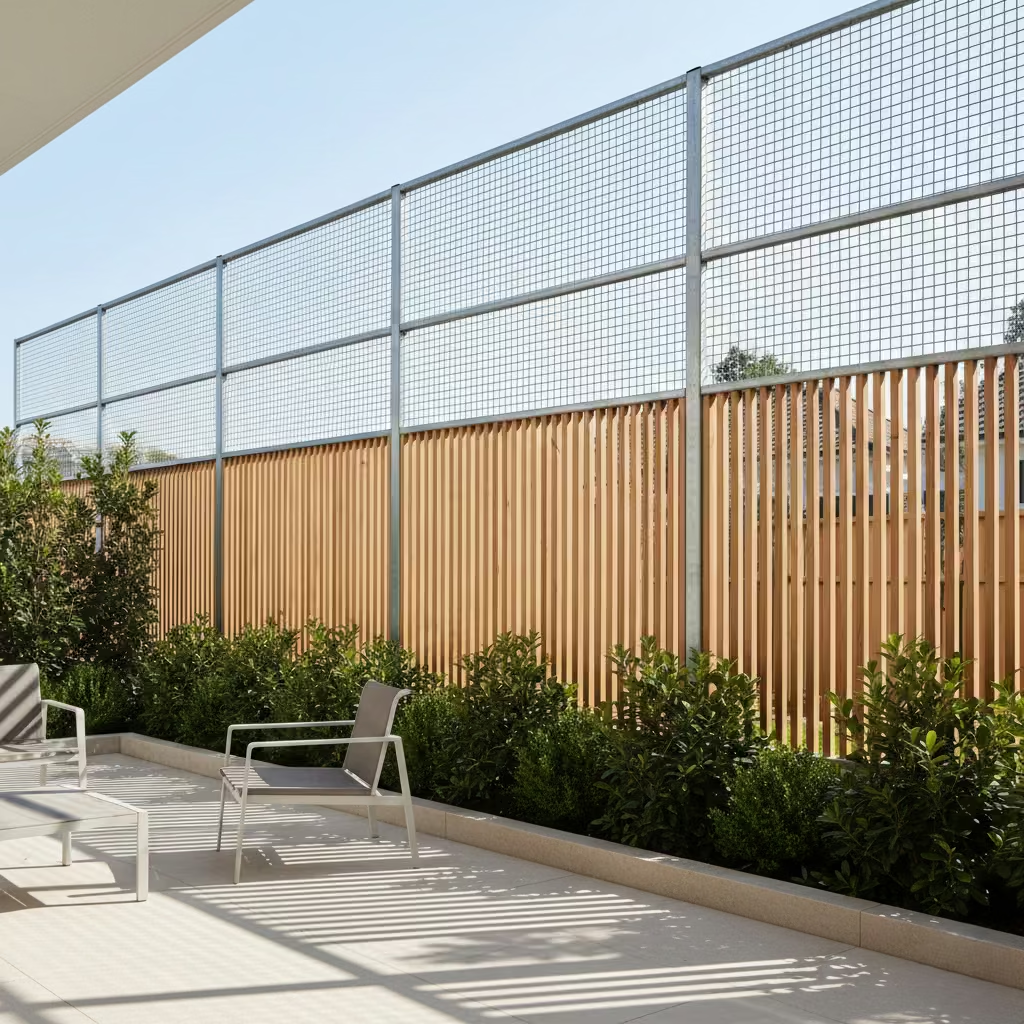
Mixed material layered screening represents the most sophisticated privacy strategy in residential landscape design because it treats privacy as spatial depth rather than a single protective surface. Timber, planting, and metal elements work together in graduated layers, each performing a different architectural function.
In practice, I approach this method as outdoor room composition. The outermost layer often provides structural screening, the middle layer introduces biological softness, and the foreground layer supports human interaction through seating or circulation.
This strategy is particularly valuable for long-term residential renovation projects because it ages gracefully. As plants mature and materials weather, the boundary becomes more integrated into the landscape rather than appearing newly constructed.
Best Applications
- Suburban boundary transformations
- Large rear gardens
- Family outdoor living spaces
- Properties requiring high privacy without solid walls
- Premium residential renovations
Real-Life Project Insight
On a suburban renovation project involving an 8 m (26 ft) boundary, the client wanted privacy from a neighbouring driveway and first-floor window while preserving daylight penetration into the garden.
The transformation was executed using a three-layer screening system:
Structural Rear Layer – Metal Mesh Frame
- 2.2 m (7.2 ft) high galvanised steel mesh panel
- Fixed into 800 mm (31 in) concrete footings
- Aperture size approximately 60 mm (2.4 in)
- Provided airflow and primary sightline interruption
Middle Layer – Vertical Timber Slat Screen
- 1.9 m (6.2 ft) high thermally modified timber slats
- 20–25 mm (0.8–1 in) spacing
- Positioned 500 mm (20 in) inside the boundary to create depth
Foreground Layer – Evergreen Planting
- Shrub planting depth of 700–900 mm (28–36 in)
- Mixed species selection for year-round foliage density
- Plant spacing approximately 600 mm (24 in) centre-to-centre
After approximately 18–24 months, the layered system achieved near-continuous visual screening while maintaining natural airflow and garden brightness.
Typical Dimensions
- Total privacy height: 1.8–2.4 m (6–8 ft)
- Layer setback distance: 400–800 mm (16–32 in) between layers
- Planting bed depth: minimum 600 mm (24 in) preferred
- Post footing depth: 750–900 mm (30–35 in)
Structural and Design Considerations
The success of layered screening depends more on spatial arrangement than material selection.
Key principles include:
- Allowing separation between hard structure and planting zone
- Providing drainage behind timber or metal surfaces
- Using corrosion-resistant fixings for long boundary systems
- Planning mature plant width, not just initial planting size
- Considering seasonal foliage density variation
Layered systems also distribute wind load across multiple elements, reducing stress on any single screen component.
Pros
- Highest quality architectural privacy performance
- Soft, natural aesthetic transition
- Long-term durability and landscape maturity
- Improves biodiversity
- Reduces visual harshness of boundaries
Cons
- Requires more spatial depth than single screen systems
- Higher installation complexity
- Establishment period for planting
- Initial cost is higher than simple fencing
- Requires coordinated design and construction
Contractor / Sourcing Notes
Specify exterior-grade materials across all layers. Use stainless steel or marine-grade coatings near planting zones due to moisture exposure.
Installed cost positioning:
- Standard layered screening system: £600–£1,000 per linear metre | $80–$140 per linear foot
- Premium architectural layered landscape installations: £1,500+ per linear metre | $180–$250+ per linear foot
Mixed material layered screening is the culmination of modern outdoor privacy design. When executed thoughtfully, it produces a boundary that feels natural, permanent, and quietly sophisticated, supporting garden life rather than obstructing it.
Choosing the Right Privacy Screen for Your Property
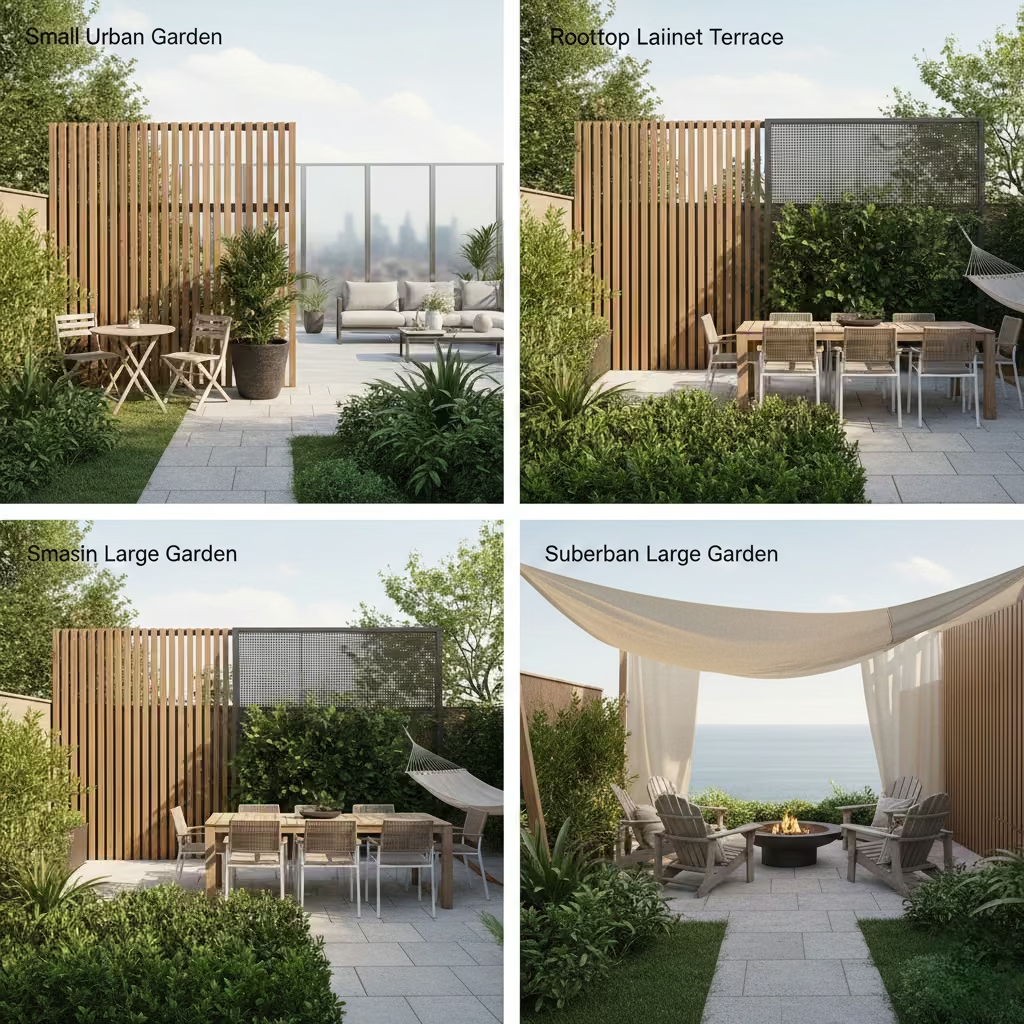
Selecting a privacy screen is not simply a material decision; it is a spatial and environmental judgement. In my experience working on residential outdoor renovations, the most successful privacy solutions begin with understanding how the garden is used throughout the day rather than focusing immediately on structure or style.
Privacy screening should respond to three fundamental layers: visual protection, environmental comfort, and long-term maintenance practicality. The best solution is the one that feels naturally integrated into the property rather than imposed onto it.
Below is a practical breakdown based on property typology.
Small Urban Gardens
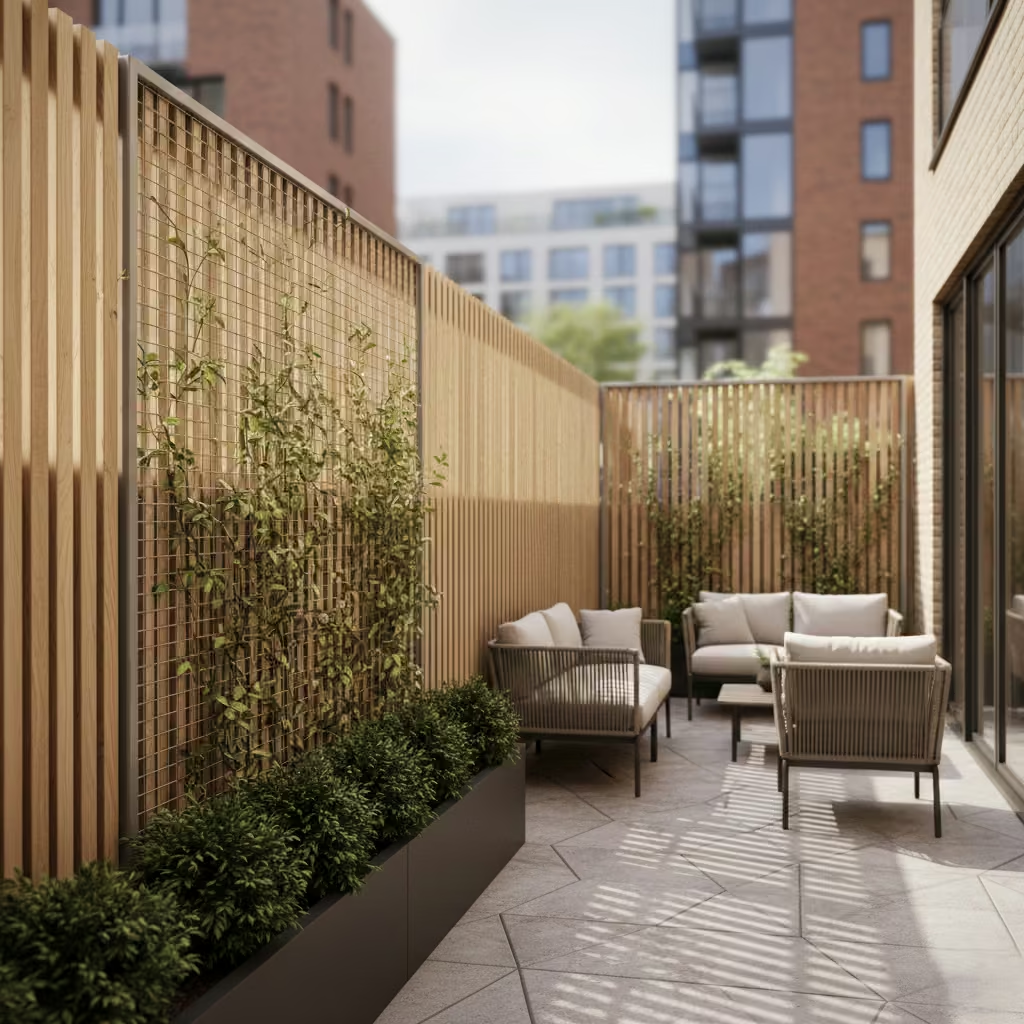
Urban gardens demand depth efficiency more than structural height.
I usually recommend layered or filtered screening rather than solid walls because small plots rely on daylight retention. Vertical timber slats, metal mesh with planting, or planter box screens work particularly well.
Typical priorities:
- Preserve sky visibility
- Maintain airflow between neighbouring structures
- Avoid visually heavy materials
Ideal options:
- Vertical slat timber screens
- Decorative metal mesh with climbers
- Sliding zoning panels
I avoid full masonry walls in very small gardens unless noise or security requirements demand them.
Rooftop Terraces
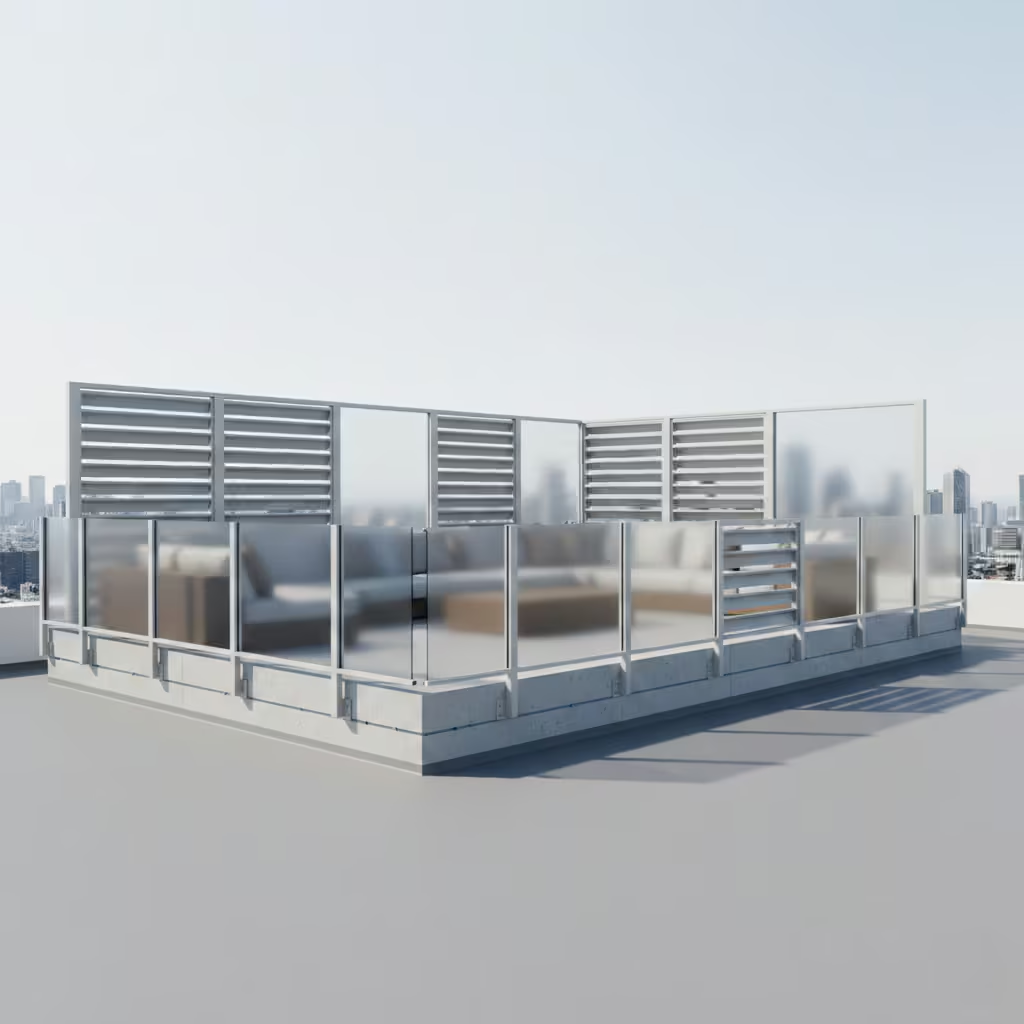
Rooftop privacy is primarily a wind and safety engineering problem.
Overlooking is often vertical rather than lateral, so parapet extensions or adjustable systems are more effective than ground-based landscaping.
In my projects, I focus on lightweight architectural screening that does not overload structural slabs.
Recommended solutions:
- Frosted glass wind screens
- Louvered adjustable aluminium panels
- Retractable fabric systems
- Rooftop parapet extensions
Structural fixing must always connect to load-bearing members rather than waterproofing layers.
Coastal Homes
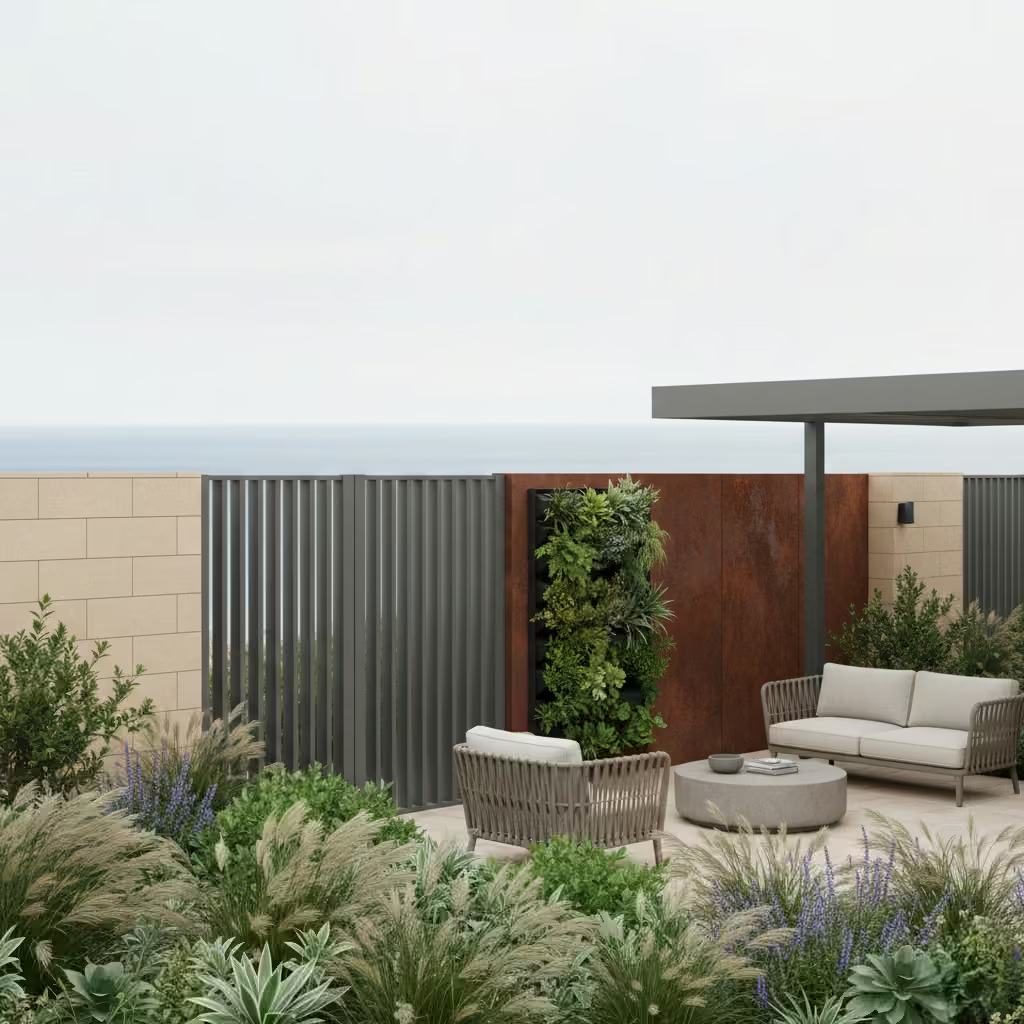
Coastal environments introduce salt corrosion, wind pressure, and humidity cycling.
Materials that age through oxidation control or sealed finishes perform best.
From real project experience, I avoid untreated timber and low-grade steel near marine air exposure.
Strong choices include:
- Marine-grade aluminium systems
- Corten steel after proper weathering stabilisation
- Living green wall systems with irrigation control
- Composite panels with UV inhibitors
Wind permeability is more important than absolute opacity in coastal gardens because airflow reduces structural fatigue.
Large Suburban Gardens
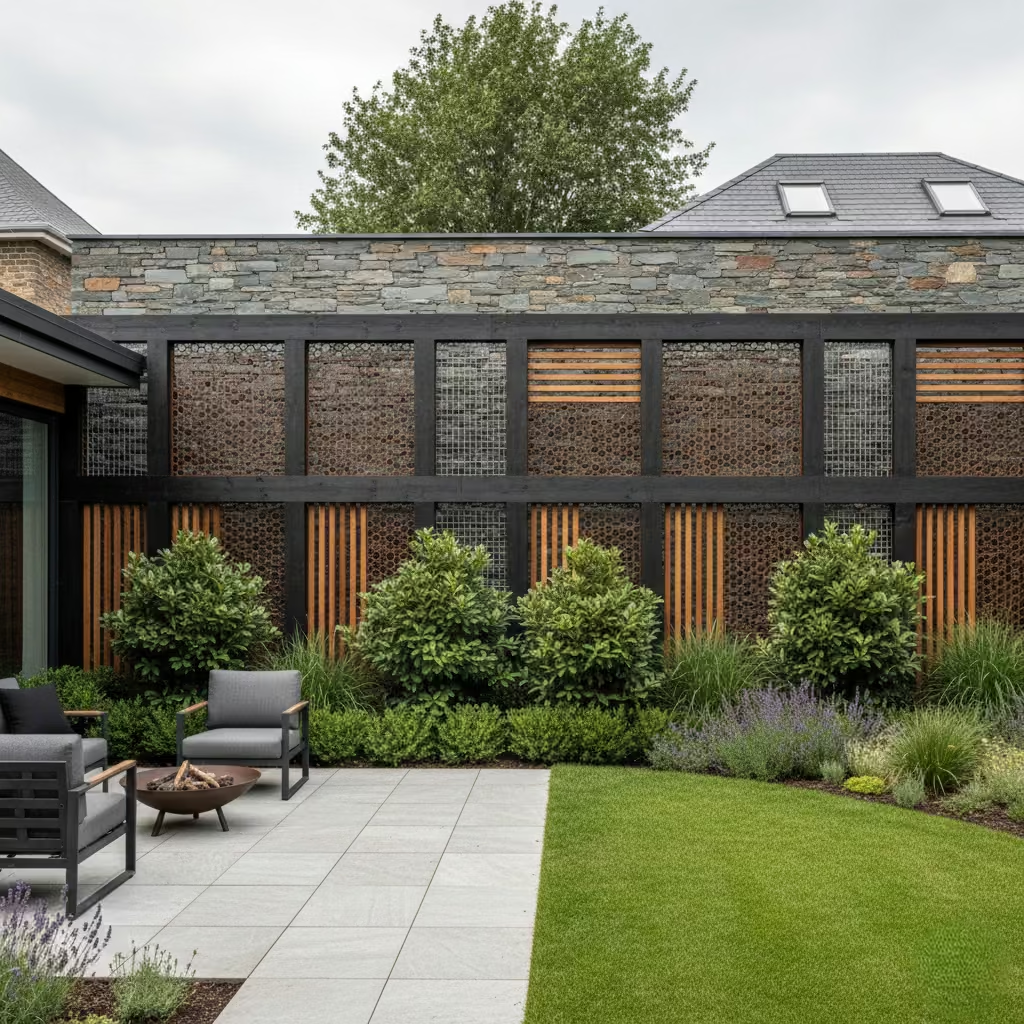
Suburban properties allow layered architectural screening, which is often the highest quality long-term solution.
I typically design boundaries in three zones:
- Structural rear layer (metal, stone, or timber frame)
- Middle texture layer (slats, mesh, or masonry pattern)
- Front living layer (planting)
This approach improves privacy maturity over time.
Suitable options:
- Mixed material layered screening
- Stone clad feature walls
- Gabion privacy walls
- Mature hedge systems
Rental Properties
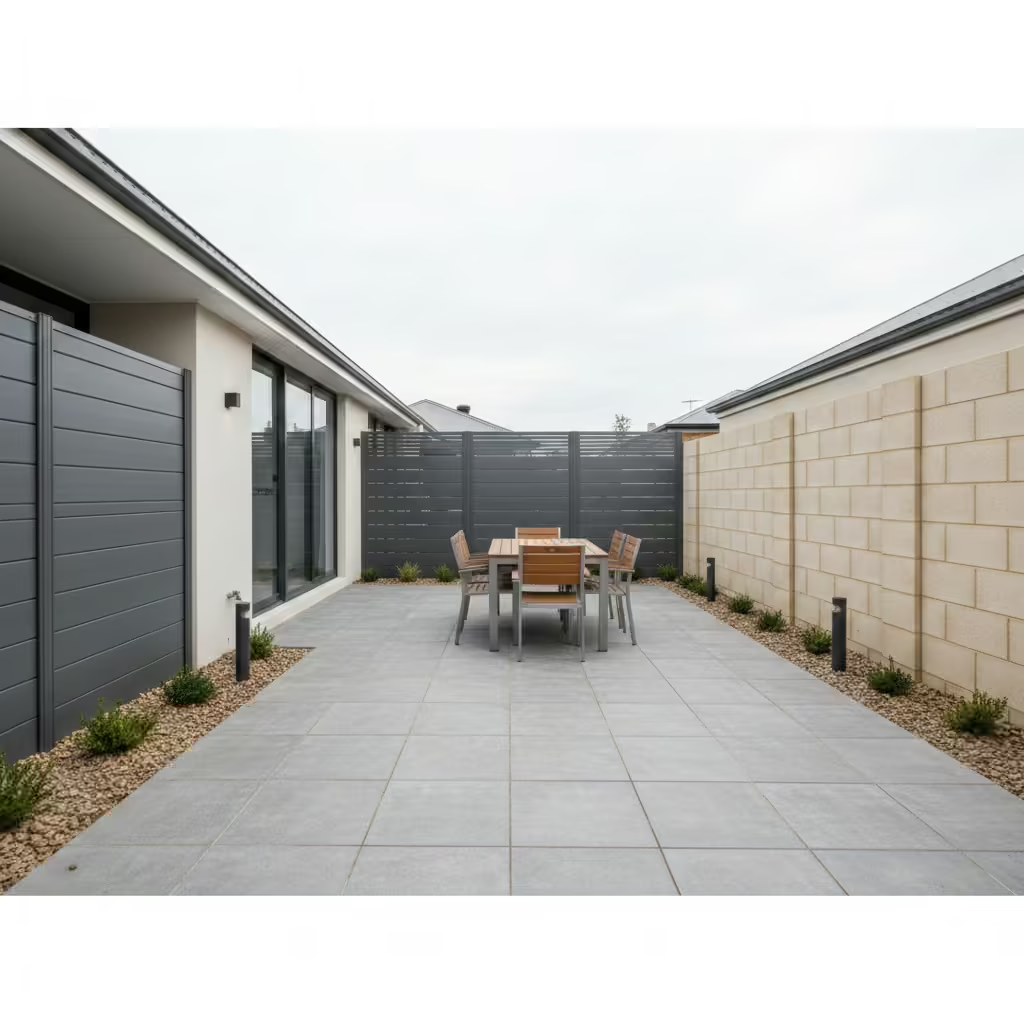
Rental landscapes require durability and low maintenance.
The goal is predictable performance with minimal landlord intervention.
Best choices:
- Composite panels
- Horizontal engineered fencing
- Aluminium architectural screens
- Precast concrete systems
Avoid solutions that depend heavily on horticultural upkeep.
Site Evaluation Checklist
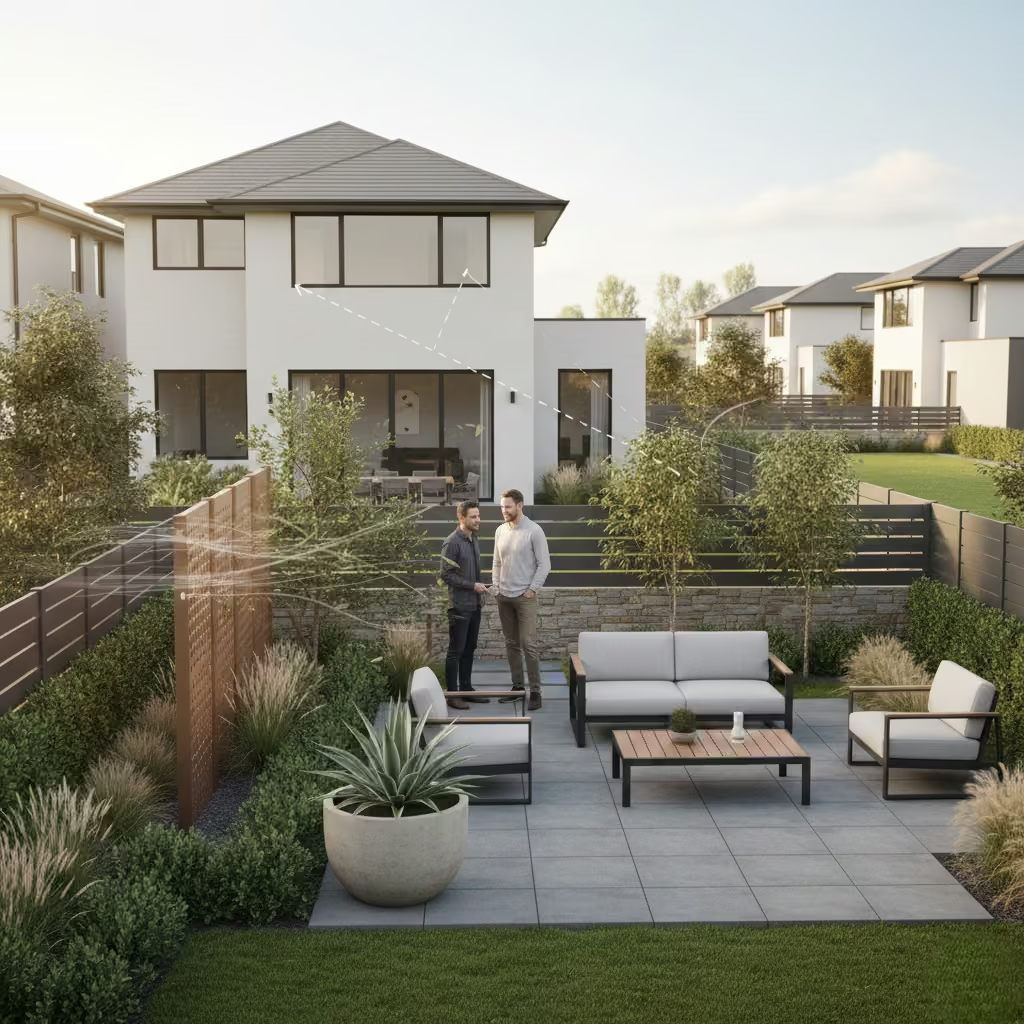
Overlooking Angles
- Identify neighbour window heights relative to garden seating zones.
- Map sightlines from upper floors, not just ground level.
- Consider night-time interior lighting visibility.
In my experience, overlooking from first-floor rooms is the most common privacy complaint in suburban renovations.
Wind Exposure
Wind behaviour often determines screen lifespan.
Evaluate:
- Open field exposure
- Coastal proximity
- Rooftop turbulence zones
- Corner boundary amplification effects
Perforated or layered systems generally outperform solid panels in windy sites.
Sun Path Analysis
Privacy screens should never unintentionally block desirable daylight.
Key observations:
- West-facing boundaries require glare filtration rather than solid blocking.
- South-facing gardens benefit from adjustable shading.
- Dense evergreen screening should be positioned carefully to avoid winter shadowing.
Maintenance Tolerance
Honest assessment of maintenance behaviour is critical.
Ask:
- How often will pruning be acceptable?
- Is repainting or resealing realistic?
- Are mechanical components serviceable?
Homeowners who prefer “install and forget” performance should prioritise composite, stone, or aluminium systems.
Planning Regulations
Local planning policies often limit boundary height.
Typical informal residential guidance (varies by jurisdiction):
- Rear boundary privacy screens: often 1.8–2.2 m (6–7.2 ft) without permission
- Rooftop modifications usually require approval
- Conservation or heritage zones may restrict material choice
Always confirm with local authority regulations before construction.
Cost Positioning Overview (UK + USA Ranges)
When planning outdoor privacy solutions, understanding installed cost expectations helps set realistic budgets and align design ambition with investment scale. The ranges below reflect typical installed pricing including materials, standard labour, and basic site preparation for residential projects in the UK and USA. Local conditions (access, ground quality, planning constraints) may influence final costs, and bespoke fabrication or complex engineering will increase values beyond the brackets shown.
| Tier | UK Installed Cost | USA Installed Cost | Typical Scope |
| Budget | £50–£120 per m² | $6–$15 per sq ft | Simple fencing or screening solutions; basic timber or willow/ bamboo screens; straightforward supply-and-fit installations without extensive engineering; minimal foundation work. |
| Mid-Range | £150–£300 per m² | $18–$35 per sq ft | Durable systems with design qualities — composite fencing, powder-coated aluminium panels, decorative mesh with planting, timber slat screens — including moderate site prep and standard footings. |
| Premium Architectural | £400+ per m² | $50+ per sq ft | Architect-designed or engineered privacy screens: bespoke laser-cut metal panels, integrated pergola systems, engineered glass solutions, layered material assemblies, structural parapet extensions, living green walls with irrigation, or other high-spec boundary treatments. |
Tier Breakdown & What to Expect
Budget Range (£50–£120 / $6–$15)
- Best for short-term or lower-impact screening
- Lighter materials with shorter lifespans (e.g., basic bamboo, simple timber panels)
- Suitable for rental properties or temporary garden use
- Lower installation complexity, minimal structural work
Mid-Range (£150–£300 / $18–$35)
- Balanced durability and design quality
- Materials like engineered composite, treated timber, or powder-coated aluminium
- Standard foundation work and weather-resistant fixings included
- Suitable for long-term residential gardens with performance expectations
Premium Architectural (£400+ / $50+)
- High design intent and structural performance
- Tailored solutions integrated into broader landscape architecture
- Often paired with professional design and engineering input
- Longer lifespan and lower lifetime maintenance risk
Cost Factors That Influence Positioning
- Site Access & Preparation
Difficult access, slopes, or poor soil conditions increase excavation and footing costs. - Material Specification
Natural hardwoods, marine-grade metals, and laminated safety glass carry higher material premiums than standard fencing products. - Engineering & Structural Work
Rooftop parapets, pergola integration, or tall architectural screens often require structural engineer input, adding professional fees. - Finishes & Detailing
Concealed fixings, precision tolerances, premium powder coats, or custom patterns increase fabrication costs. - Planting & Irrigation
Green walls, layered planting, and irrigation systems add horticultural and irrigation infrastructure costs.
Practical Positioning by Screening Type
- Basic timber or bamboo screens: Budget to lower mid-range
- Horizontal composite or aluminium slatted screens: Mid-range
- Laser-cut metal screens with engineered frames: Upper mid-range to premium
- Glass privacy walls with structural fixings: Premium
- Living green walls with irrigation: Premium
- Layered material screening (timber + metal + planting): Premium
Common Mistakes in Outdoor Privacy Design
Outdoor privacy design is often approached as a problem of barrier height rather than spatial quality. In practice, the most successful gardens are not those that eliminate exposure entirely but those that control it intelligently. From my experience working on residential landscape renovations, privacy failures usually arise from overcorrection rather than under-design.
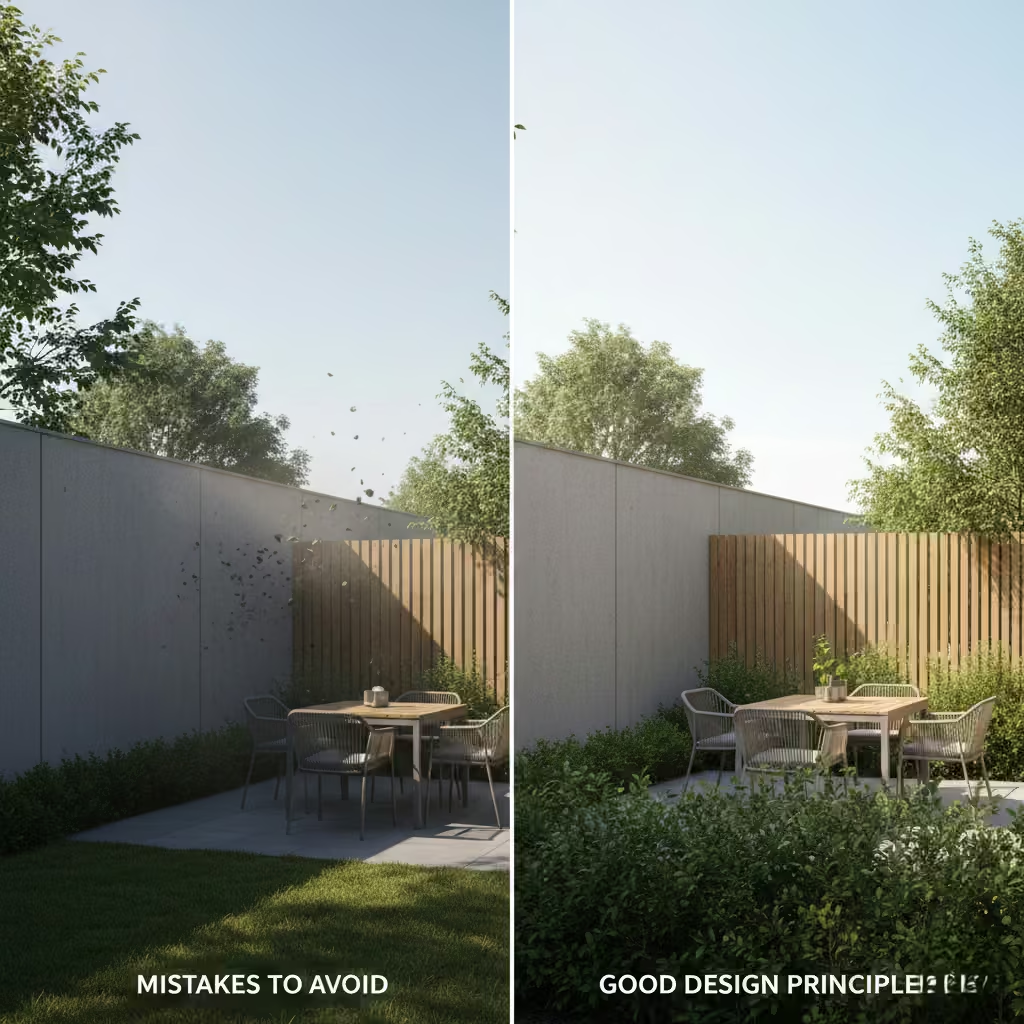
Overbuilding and Blocking Natural Light
The most frequent mistake is treating privacy as absolute enclosure. Solid tall walls can create unwanted shadow zones, making patios feel narrower and less usable throughout the year.
Gardens are living environments. Daylight penetration supports plant health, improves psychological comfort, and preserves the visual connection between house and landscape. I generally favour filtered or layered screening before considering solid structural walls.
A well-designed privacy solution should protect intimate zones without sacrificing sky exposure.
Ignoring Wind Load Calculations
Privacy screens function as semi-structural elements exposed to dynamic environmental forces.
Wind pressure increases significantly in:
- Rooftop terraces
- Corner boundaries
- Coastal regions
- Open suburban fields
Lightweight panels, fabric systems, or perforated metal screens can behave like sails if structural anchoring and permeability are not considered.
I always recommend engineering review for screens above 2 m (6.5 ft) in exposed locations.
Installing Solid Fencing Where Filtered Screening is Better
Full opacity fencing is often chosen for emotional comfort rather than spatial performance.
Filtered screening solutions such as slatted timber, mesh with planting, or louvered systems provide several advantages:
- Airflow maintenance
- Reduced wind turbulence
- Natural light preservation
- More elegant visual transition between properties
In many suburban renovations, replacing solid fencing with layered screening improves the perceived size and quality of the garden.
Failing to Integrate Planting
Planting is not decoration. It is structural landscape softening.
Hard boundary materials alone can appear visually aggressive over time. Introducing vegetation:
- Reduces visual monotony
- Improves acoustic absorption
- Helps screens age naturally
- Supports seasonal variation
Minimum planting depth recommendations:
- 450–600 mm (18–24 in) for screening shrubs
- 700–900 mm (28–36 in) for mature hedge layers
I often design privacy boundaries as three-dimensional systems where structure, texture, and biology work together.
Conclusion: Privacy That Enhances, Not Restricts
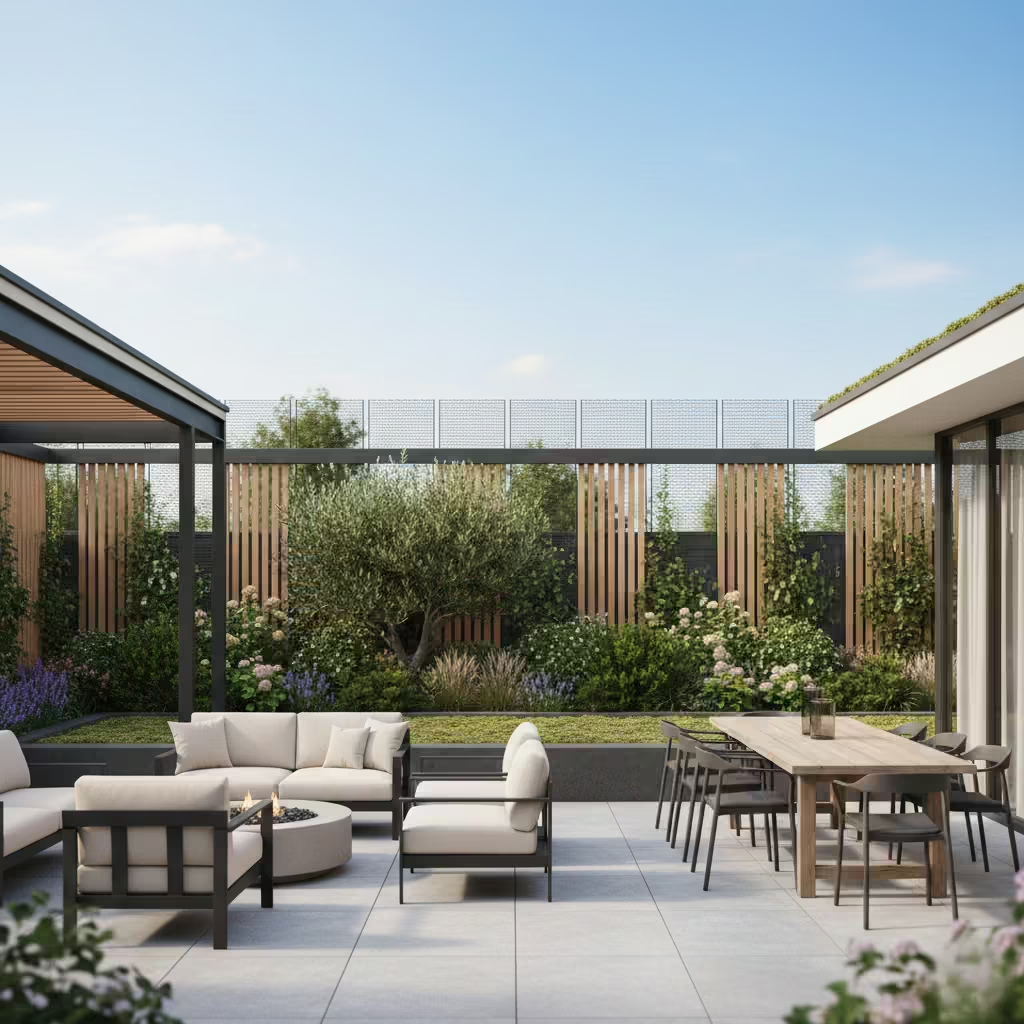
Outdoor privacy is ultimately a question of spatial refinement rather than separation. The best gardens do not feel hidden; they feel composed. Privacy should work quietly in the background, supporting comfort, movement, and light without dominating the landscape.
From a design perspective, privacy is not achieved by simply increasing height or material density. It is achieved through intentional proportion, controlled permeability, and considered placement. The most successful screens feel architectural, as if they belong naturally to the property rather than being added as a corrective measure.
In my experience, the gardens that endure are those where screening systems are treated as part of the living structure of the home. Layering materials is especially effective because it allows privacy to mature over time. Timber, metal, stone, and planting each contribute different performance qualities. Hard materials provide structure and permanence, while vegetation introduces softness and seasonal variation.
Intentional privacy design is also about restraint. The goal is not to eliminate every external view but to protect the moments that matter most, such as dining zones, seating corners, or transition spaces near the house. Screens that filter rather than block preserve daylight, airflow, and visual connection to the sky.
In my projects, the most successful privacy solutions are those that improve how the garden feels when you live in it. When privacy is designed as spatial quality rather than defensive enclosure, the outdoor space becomes calmer, more usable, and more enduring across seasons and lifestyle changes.
Good privacy design does not hide the garden. It allows the garden to feel quietly protected while remaining open to light, air, and life.
Frequently Asked Questions (Outdoor Privacy Design)
What is the best privacy screen for a small urban garden?
Layered or filtered screening works best. Vertical slats, metal mesh with climbing plants, or planter box screens help preserve daylight while reducing overlooking.
How high should a privacy screen be?
For most residential boundaries, privacy screens are typically 1.8–2.2 m (6–7.2 ft). Rooftop or multi-storey overlooking situations may require engineered extensions.
Do privacy screens reduce wind comfort in gardens?
Permeable or layered systems usually perform better than solid walls because airflow reduces turbulence and structural pressure
Is planting alone enough for privacy?
Planting works best as part of a multi-layer strategy. Mature hedging or climbing vegetation can provide effective screening, but establishment time must be considered.
Do I need planning permission for privacy screens?
Regulations vary by location, but many jurisdictions restrict boundary structures above about 2 m (6.5 ft) without approval. Rooftop modifications usually require formal review.
What is the best privacy screen for a small urban garden?
In small urban plots, layered or filtered screening is usually the most effective. Full-height masonry walls can make the space feel claustrophobic and reduce natural daylight. Instead, I recommend solutions that combine structure with airflow and light control, such as vertical timber slats, decorative metal mesh with climbing plants, or integrated planter box screens. These systems allow privacy while maintaining sky visibility and garden depth perception. Sliding or operable panels can add flexibility for rooftop terraces or multi-use courtyard spaces.
Is planting alone enough for privacy?
Planting can provide soft, living screening but is rarely sufficient on its own, especially in small urban gardens or areas with direct sightlines from upper floors. For effective performance, I recommend integrating vegetation with hard structures like timber slats, mesh, or stone elements. This creates a layered system where plants mature over time, providing seasonal variation and aesthetic interest, while the structural element ensures privacy from the outset.