


16 Beautiful Lake House Bathroom Ideas to Create a Cozy Retreat
There’s a particular kind of quiet that settles into a lake house bathroom just after sunrise, long before the espresso machine starts its morning chatter downstairs. Steam gathers on the window in soft, uneven patches, half-fogging the view of water that hasn’t quite decided what color it wants to be yet, silver, maybe, or the palest blue-grey.
Somewhere outside, a loon calls once and goes silent again. This is not the bathroom you rush through on your way to a commute. It’s the room where the whole point of being at the lake finally sinks in.
I’ve spent enough years designing homes along shorelines to know that a lake house bathroom plays by its own rulebook, one that has almost nothing in common with its city cousin. In an urban primary suite, the priorities are efficiency and polish, get in, get out, get on with the day. But a lake retreat asks different questions entirely.
How does the light bounce off water and change the mood of a room three times before lunch? How do you keep bare, sandy feet from turning a marble floor into an ice rink? How does a space invite you to slow down, to soak a little longer, when everything about modern life has trained you to hurry?
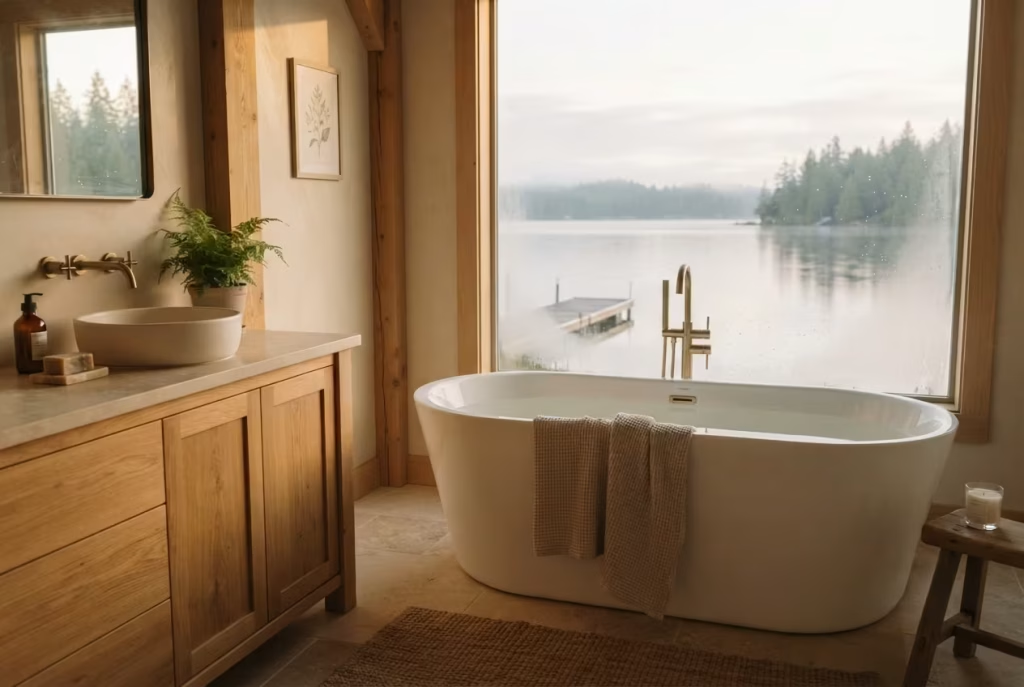
That tension, between coziness and function, between rustic charm and refined comfort, between a room that faces nature and one that still guards its privacy, is exactly what separates a forgettable lake bathroom from one that feels like a permanent vacation. Solving it well is part science, part instinct, and it’s the thread running through every idea ahead, starting with something as simple, and as often overlooked, as where you actually put the tub.
The Design Philosophy Behind a Lake House Bathroom
Most bathroom design advice you’ll find online treats every room the same, four walls, a vanity, a tub, done. But a lake house bathroom answers to a different master entirely, and if you skip this part, you’re building on sand, literally, in some cases.
Start with humidity, the quiet troublemaker of every lakefront property. A primary bath in a suburban colonial deals with the occasional steamy shower. A lake house bathroom, sitting near open water for months at a stretch, faces near-constant moisture in the air, which means every material choice carries consequences.
Wood expands and contracts with the seasons, sometimes by as much as an eighth of an inch across a wide plank floor. Natural stone, gorgeous as it is, has porosity ratings that matter far more here than in a dry, climate-controlled city apartment; a honed limestone that looks stunning in a magazine spread can stain within a season if it’s not sealed properly for a humid lake environment.
And then there’s the matter of sightlines, how a window positioned two feet too high can block a water view entirely, while one angled correctly turns a plain shower into the best seat in the house.
Then there’s the psychology of coziness itself, and this is where so many lake house renovations lose the plot. Cluttered rustic, think antler hooks, mismatched driftwood frames, and one too many “Life is Better at the Lake” signs, reads as kitsch, not comfort. True coziness comes from restraint paired with warmth: a limited material palette, honest textures, and enough breathing room for the eye to land somewhere peaceful.
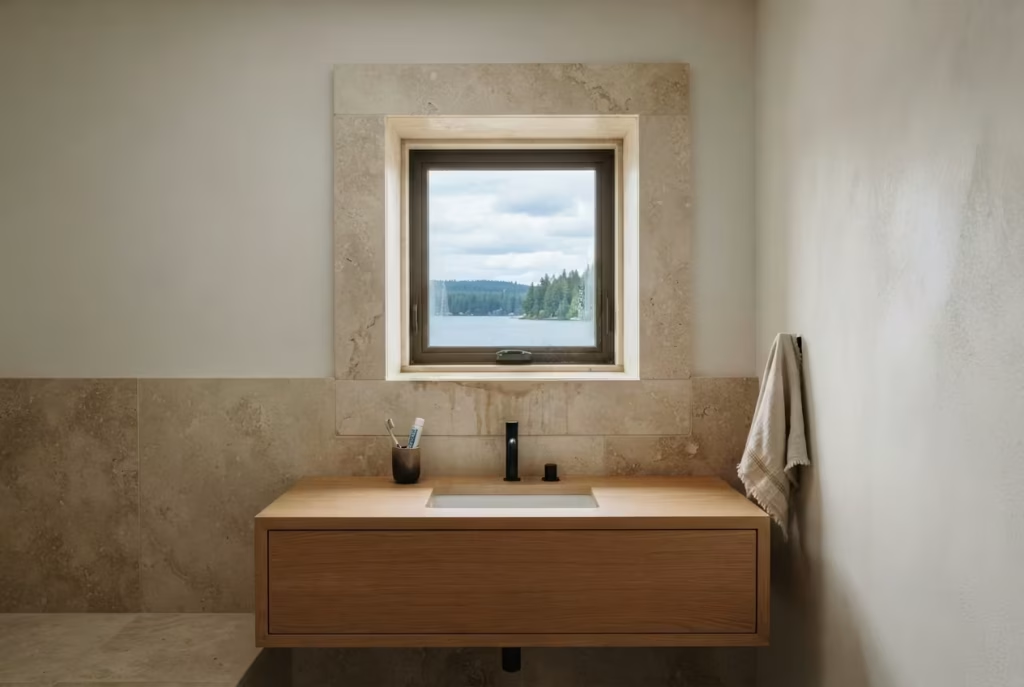
I still think about a 1970s lake cottage I renovated years ago where the original bathroom had one small, oddly placed window, barely eighteen inches square. Instead of fighting it, we built the entire layout around that window, orienting the vanity to frame the water glimpse it offered. That single decision became the design’s backbone, proof that limitations, handled with a bit of ingenuity, often make better teachers than a blank slate ever could.
A Freestanding Tub Positioned for the View, Not the Wall
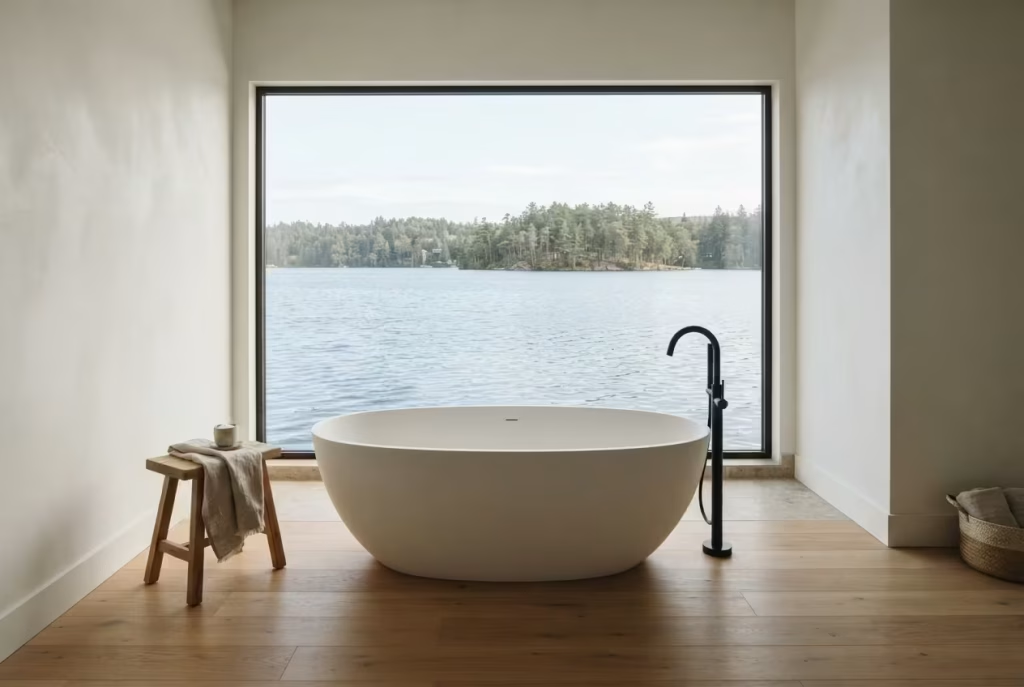
Ask any seasoned designer where the tub should go in a lake house bathroom, and the honest answer is rarely “wherever the plumbing already sits.” That’s the safe route, the one that saves money but quietly sacrifices the entire point of building near water in the first place.
A freestanding soaking tub, centered to face the window rather than tucked against a wall, turns bath time into something closer to a private observation deck. For this to feel intentional rather than cramped, you’ll want a minimum of 36 inches of clearance on all sides, enough room to walk around freely, set down a towel, or simply let the tub feel like it’s floating rather than shoved into a corner as an afterthought.
Here’s the catch, and it’s worth knowing before you fall in love with the idea. Centering a tub away from existing plumbing lines often means rerouting supply and drain pipes, which can add anywhere from a few hundred to a couple thousand dollars depending on your home’s layout and slab versus crawlspace foundation.
I’ve had clients balk at that number initially, then thank me every single morning once they’re soaking with a full water view instead of staring at drywall. Sometimes the juice really is worth the squeeze.
Reclaimed Wood Vanities That Carry the Dock Inside
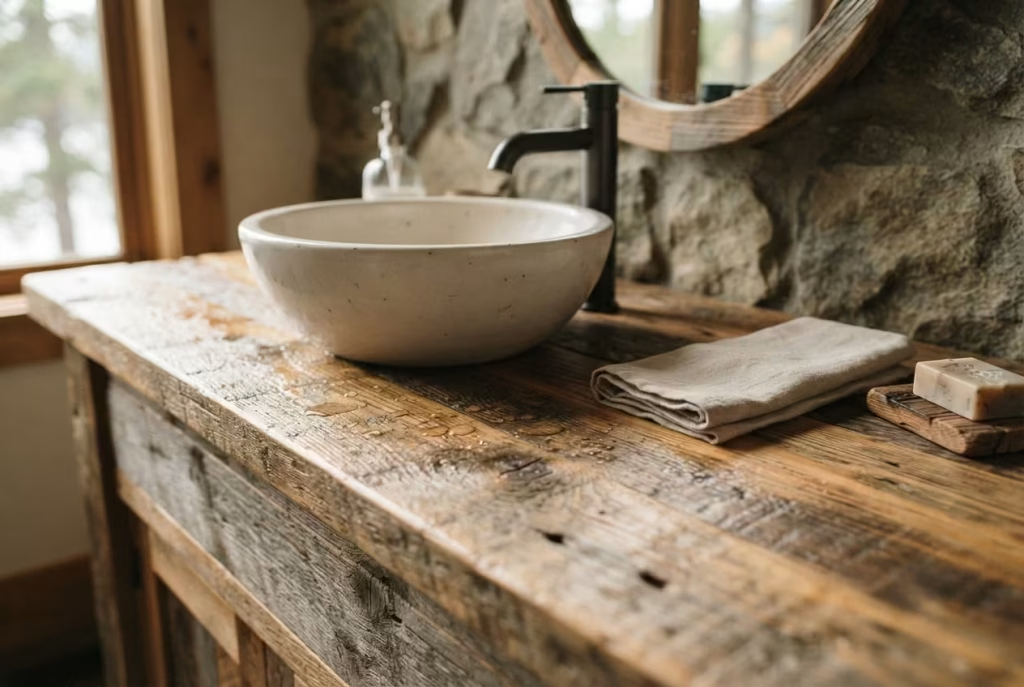
Walk down to most lake docks and you’ll notice the wood has a story written into every plank, sun-silvered in places, weathered smooth in others, worn by decades of bare feet and boat rope. There’s something almost poetic about bringing that same weathered character indoors, and a reclaimed wood vanity does exactly that, acting as a quiet bridge between the water outside and the room where you get ready to face the day.
But let’s not romanticize this without giving you the full picture, because reclaimed wood in a bathroom setting is a different animal than reclaimed wood used for, say, a dining table. The wet-zone environment demands serious sealing, and cutting corners here is a mistake I’ve watched more than one homeowner make.
For genuine durability, you’re looking at a marine-grade urethane finish applied in three separate coats, sanded lightly between each layer, the same standard used on boat decking for a reason. Skip a coat or rush the cure time, and you’ll see water spotting within the first year.
Now, the trade-off, and it’s worth being upfront about it. The character you’re paying for, those knots, nail holes, and uneven grain patterns, comes bundled with a maintenance commitment that a factory-finished vanity simply doesn’t ask of you.
You’ll need to reseal every few years depending on humidity levels, and the wood will keep shifting slightly with the seasons, part of its charm, honestly, but not something every homeowner has the patience for. If you want a vanity that looks the same in ten years as it did on day one, this isn’t your ideal choice. If you want a piece that ages the way a good friendship does, developing more depth over time, it’s hard to beat.
You May also Like: 15 Bathroom Remodel Ideas That Will Inspire Your Dream Renovation
Rainfall Showers With a Water-Facing Window (Privacy Solved)
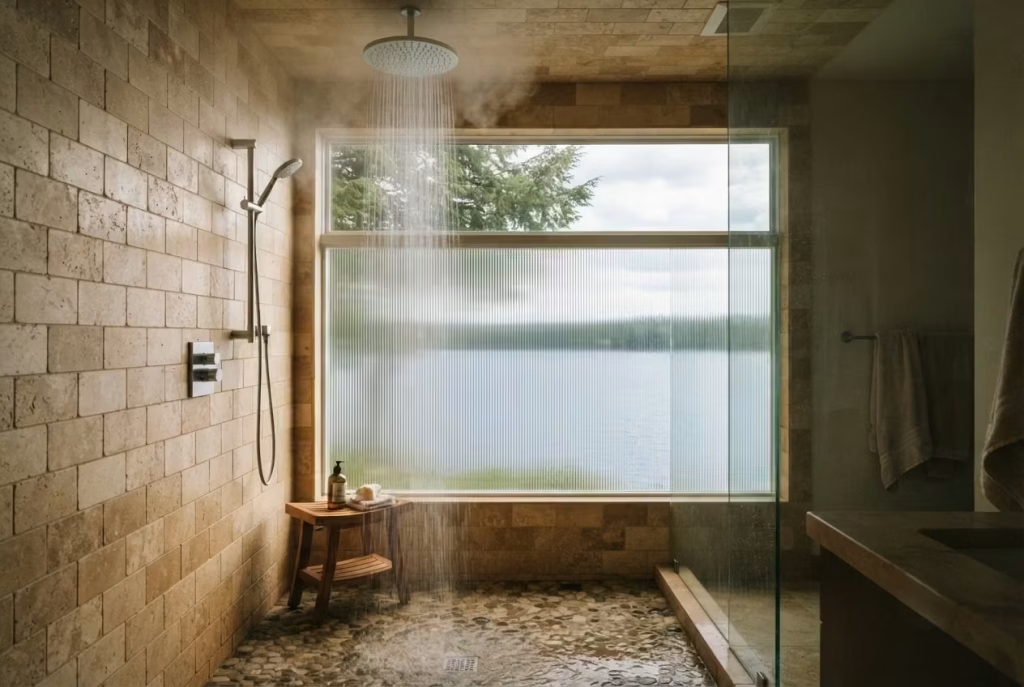
The question I get asked more than almost any other on a lakefront project is some version of “can we really put a window right in the shower without every passing boat getting an eyeful?” The answer, happily, is yes, and getting there is more about smart glass choice than it is about sacrificing the view altogether.
Rainfall showerheads already set a tone of quiet luxury, that gentle, even cascade feels less like rinsing off and more like standing beneath a warm summer drizzle. Pair that with a window facing the water, and you’ve built a shower that does double duty as a front-row seat to the lake. The trick lies in the glass.
Frosted glass diffuses light beautifully and blocks direct sightlines almost completely, though it does mute the crispness of the view somewhat, everything outside becomes a soft impression rather than a clear picture. Reeded glass, with its vertical linear texture, strikes a different balance, it allows more light and a hint of movement and color through while still breaking up any recognizable shape from a distance.
The real deciding factor, though, is sightline math, and this is where a lot of DIY renovations go wrong. If your bathroom sits above the average eye level of someone in a boat or standing on a neighboring dock, typically anything above 42 to 48 inches from ground level on the exterior side, you likely have far more natural privacy than you’d assume, even with clear glass in the upper portion of the window.
On one shoreline project a few summers back, we used reeded glass for the lower two-thirds of a large shower window and left the top third clear, positioned high enough that it framed treetops and open sky rather than the water’s edge where boat traffic passed. The homeowners still talk about that shower being their favorite part of the entire renovation, proof that a little technical thinking upfront saves you from ever feeling like you’re bathing in a fishbowl.
Stone Vessel Sinks as Sculptural Anchors
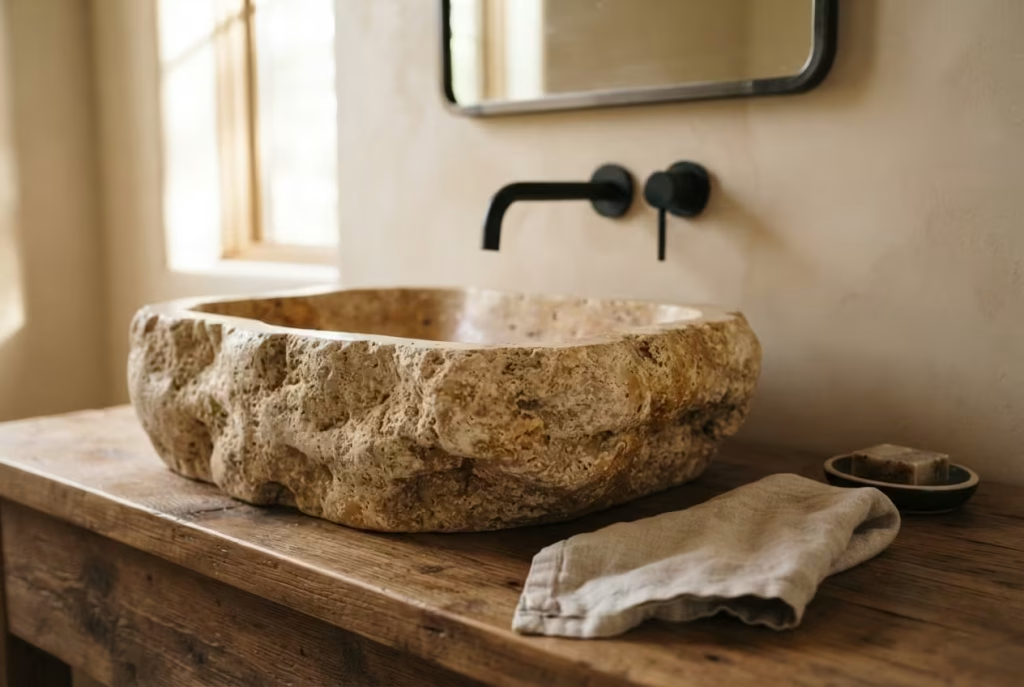
A stone vessel sink doesn’t just sit on a vanity, it commands the room, the way a single striking piece of furniture can anchor an entire living space and make everything around it feel deliberate. Carved from materials like travertine, honed granite, or river rock composite, these sinks bring a raw, elemental quality to a lake house bathroom that no drop-in ceramic basin can quite replicate. There’s something fitting about washing your hands in a vessel that looks like it was shaped by the same natural forces that carved the shoreline outside your window.
Here’s where a lot of homeowners get caught off guard, though, and it has nothing to do with style. Weight matters, more than most people think to ask about before falling for a particular sink online. Solid stone vessel sinks typically run anywhere from 25 to 40 pounds, sometimes heavier depending on the stone density and basin thickness, and that’s before you factor in the vanity structure supporting it.
For a ground-floor bathroom sitting on a concrete slab, this rarely raises an eyebrow. But for a second-floor primary bath, which is common in many lake house layouts designed to maximize water views from the main living level, that concentrated weight needs a vanity and subfloor built to handle it without any long-term sagging or stress cracks in the surrounding tile.
I always tell clients to loop in a contractor or structural engineer before finalizing a heavy stone vessel sink for an upper-floor installation, not because it’s usually a problem, but because catching a potential issue at the framing stage costs far less than discovering it after the tile’s already laid. A little due diligence here goes a long way toward making sure your sculptural centerpiece stays exactly that, a showstopper, not a headache waiting to happen.
Wide-Plank Flooring That Mimics Boat Decking
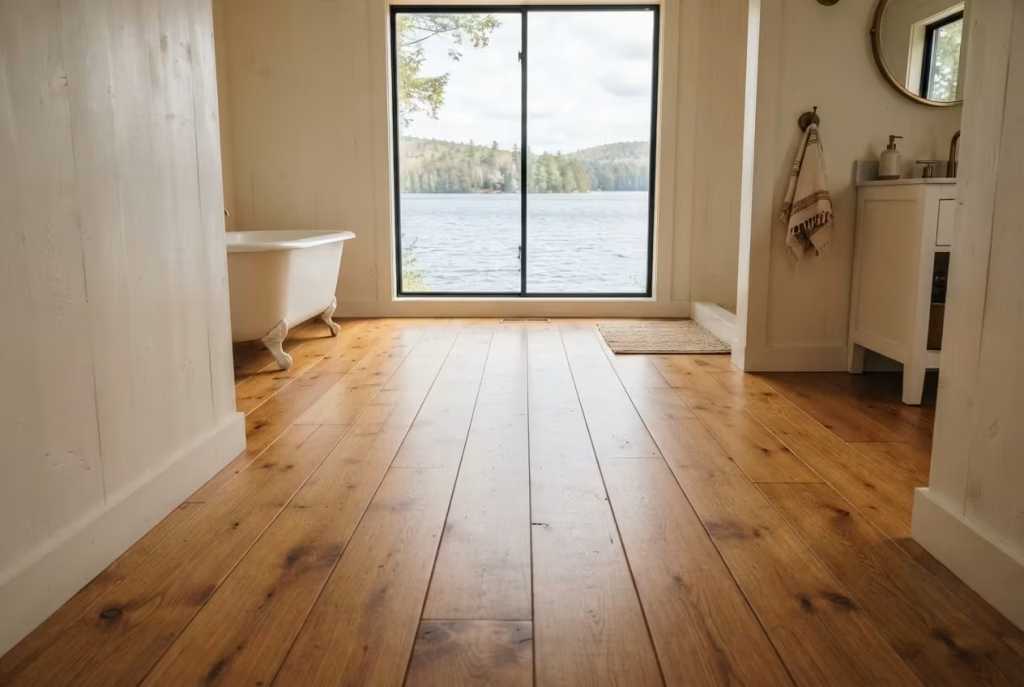
There’s a reason boat decking has stayed visually timeless for generations, those long, wide planks running in a single confident direction, echoing the horizon line of the water itself. Bring that same look into a lake house bathroom, and suddenly the floor stops being an afterthought and starts pulling its weight as a design feature, guiding the eye straight toward the window and the view beyond it.
Now comes the decision that trips up nearly every homeowner at some point in the process: real wood or a waterproof-core alternative built to look the part. Genuine wide-plank hardwood brings unmatched warmth underfoot and a richness in grain pattern that manufactured materials still struggle to fully replicate, but bathrooms are, by nature, wet zones, and real wood simply wasn’t built to shrug off standing water or constant humidity swings without some give and take over time.
Waterproof-core options, whether luxury vinyl plank or engineered composite with a rigid core, have come a remarkably long way in recent years, offering that same boat-deck aesthetic, wide boards, subtle texture, warm tones, while standing up to splashes, steam, and the occasional forgotten wet towel without warping.
If you do go the real wood route, and plenty of homeowners still do for the authenticity it brings, plan for proper expansion gaps around the room’s perimeter, typically a quarter inch, to allow the planks room to breathe as humidity levels shift with the seasons.
Skip this step, and you’ll eventually hear it before you see it, floors that creak, buckle slightly at the seams, or develop small gaps that weren’t there on installation day. I’ve walked into more than one lake house where beautiful wood flooring was installed flush to the wall with zero allowance for movement, and within two humid summers, the results spoke for themselves. A little breathing room, quite literally, saves you a world of trouble down the road.
A Soft, Sun-Bleached Color Palette (and Why Stark White Fails Here)
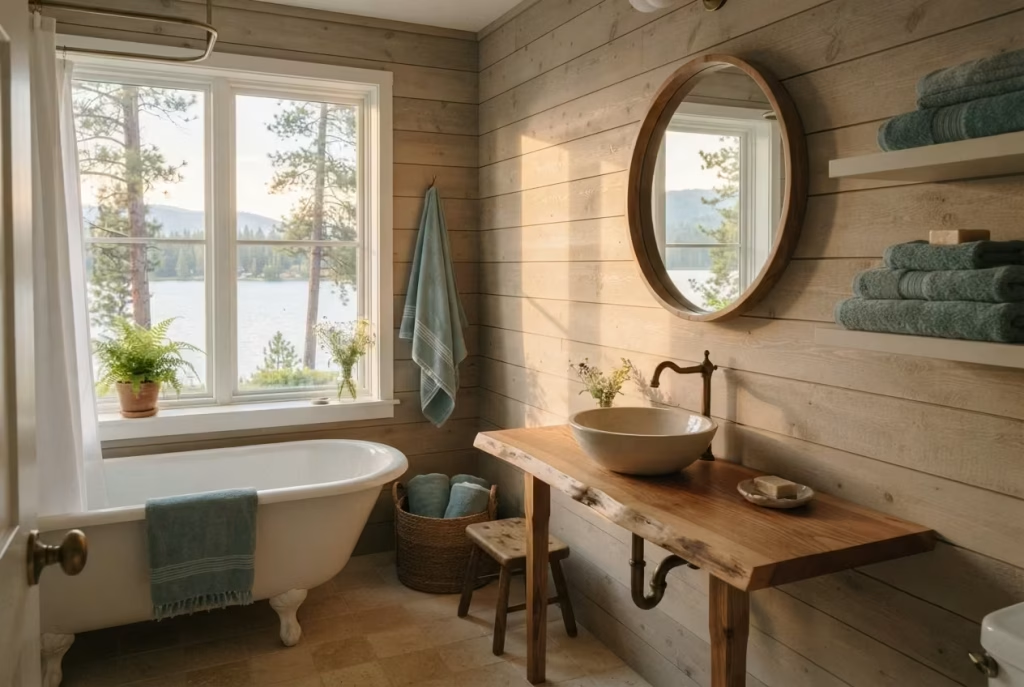
Plenty of homeowners assume that a bright, all-white bathroom is the safest bet for a lake house, clean, timeless, hard to get wrong. In practice, though, stark white often falls flat in this particular setting, and the reason comes down to something most people never think to consider: light behaves differently near water.
Lakes reflect and bounce sunlight in ways a landlocked room never has to account for, throwing shifting, sometimes cool-toned light across walls and tile at different hours of the day. A pure, cool white paint or tile, the kind that reads crisp and fresh in a city bathroom, can turn almost clinical under that reflected lake glow, sterile rather than serene, more clinic than retreat. It’s a subtle effect, but once you notice it, you can’t unsee it.
A sun-bleached palette solves this beautifully, and it works with the natural light rather than fighting against it. Think warm, weathered off-whites, soft sandy beiges, faded driftwood grays, and the occasional muted blue-green pulled straight from the water outside the window.
These tones absorb and soften the reflected light instead of amplifying its coolness, creating a wash of color that feels sun-warmed even on an overcast morning. It’s the same reason old beach cottages and coastal homes have leaned on weathered, muted palettes for decades, they’ve simply figured out, through trial and error, what actually flatters natural waterfront light.
On a recent project, we swapped a bright white shiplap wall for a warm, driftwood-toned version, same material, different undertone entirely, and the difference in how the room felt by late afternoon was night and day. The homeowners hadn’t even mentioned lighting as a concern going in, but they noticed the shift immediately once it was done. Sometimes the smallest color adjustment makes the biggest difference in how a room actually lives day to day.
Built-In Benches in the Shower for a Spa-Like Pause
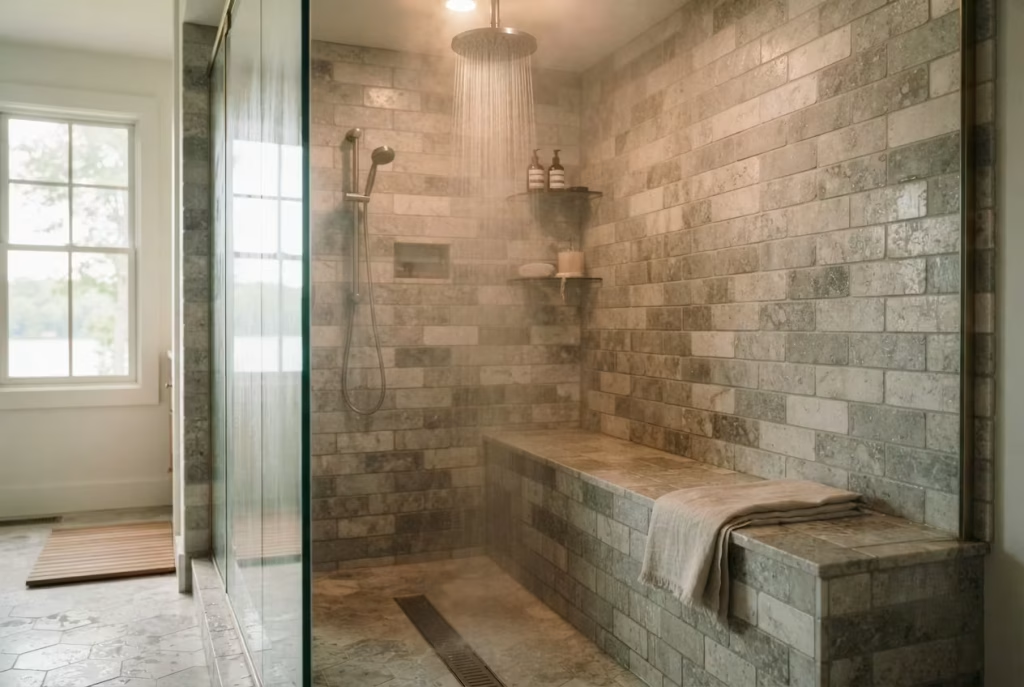
There’s a moment in almost every lake day, sunburned shoulders, tired legs from a long paddle, sand still clinging to your ankles, when the last thing you want is a shower that rushes you through it. This is exactly where a built-in bench earns its keep, transforming a quick rinse into an actual pause, a chance to sit, breathe, and let hot water work out the day’s stiffness before you even reach for a towel.
Getting the dimensions right, though, is where a good bench separates itself from an afterthought that just takes up space. A seat depth between 15 and 18 inches hits the sweet spot for comfort, deep enough to sit properly rather than perch awkwardly on the edge, but not so deep that it eats into your shower’s usable footprint. Equally important, and often overlooked entirely, is the slope of the seat itself.
A built-in bench needs a gentle drainage slope, typically around a quarter inch per foot, angled away from the wall, so water doesn’t pool and sit, which over time invites mildew and grout breakdown you really don’t want to deal with.
I’ve seen benches built dead flat, no slope whatsoever, and within a year the grout lines had darkened and the seat itself felt perpetually damp, never quite drying between uses. It’s a small detail on a blueprint, easy to skip if you’re not paying close attention, but it makes the difference between a bench that feels like a genuine retreat feature and one that quietly becomes a maintenance headache. Get the proportions and drainage right from the start, and this becomes the spot in the house everyone fights over after a long day on the water.
Brass and Blackened Metal Fixtures Aged by Lake Air

Fixtures are the jewelry of a bathroom, small in scale but disproportionately powerful in setting the room’s overall character. In a lake house setting, this is doubly true, because the lake environment itself becomes an active participant in how those fixtures look and feel over time, whether you plan for it or not.
Unlacquered brass and blackened metal finishes have become a favorite among designers working on waterfront properties, and it’s not purely an aesthetic trend, there’s real substance behind the choice. Living finishes, meaning metal left unsealed and untreated, are designed to react naturally with air, moisture, and touch, developing a patina that deepens and shifts in tone over roughly six to eighteen months of regular use.
Fingerprints darken slightly where hands make contact most often, brass takes on warmer, richer undertones near water sources, and blackened metal can develop subtle variations that make each fixture genuinely one of a kind. Lake air, with its higher ambient humidity compared to a typical inland home, tends to accelerate this process somewhat, meaning a lake house often shows a more pronounced patina timeline than the same fixture would in a drier climate.
Lacquered finishes, by contrast, are sealed to resist this exact kind of change, staying essentially frozen in their showroom appearance for years. Neither choice is wrong, but they serve different homeowners entirely. If you want a fixture that looks the same on day one thousand as it did on day one, lacquered is your answer.
If you’re drawn to the idea of a faucet or towel bar that quietly tells the story of every season it’s lived through, developing character the way a well-loved leather jacket does, living finishes are worth the small learning curve of embracing imperfection. I always walk clients through both options honestly, because buyer’s remorse over an “aging” fixture is real, and it’s far better to choose this with eyes wide open than to be caught off guard six months in.
You May also Like: Best Warm Neutral Paint Colours That Never Feel Flat
A Reading Nook or Bench by the Window
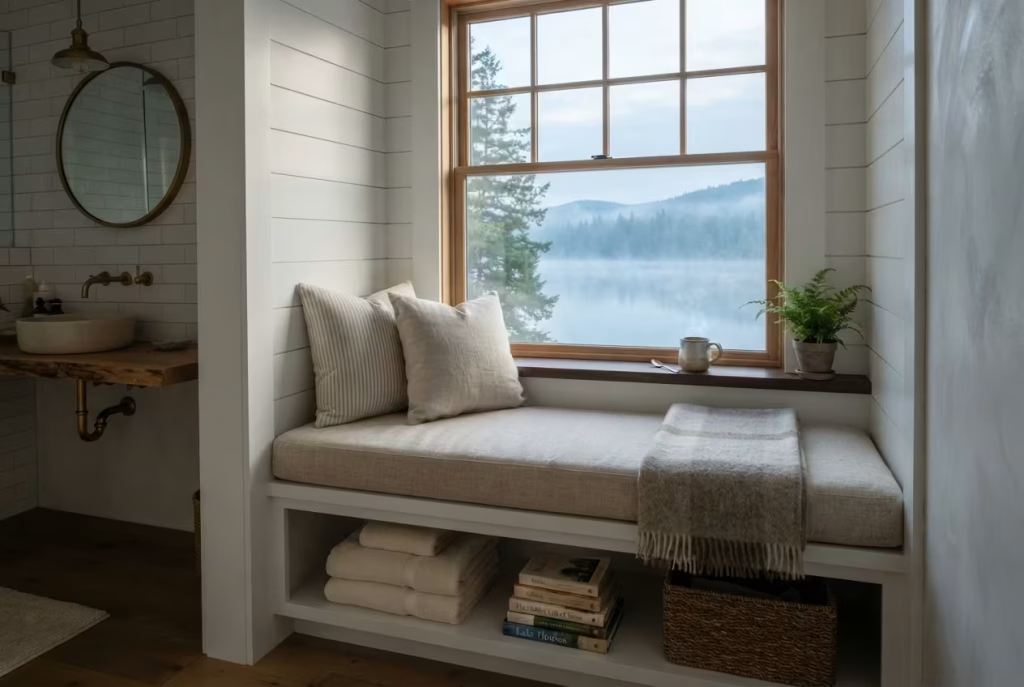
Every bathroom has one, that awkward little corner near a window where nothing quite fits, too small for a linen cabinet, too odd-shaped for storage, so it usually ends up as dead space, ignored and unused.
Yet this is often precisely where a lake house bathroom can earn its most cherished square footage, if you’re willing to look at it sideways instead of walking past it every morning without a second thought.
A built-in bench or window seat needs surprisingly little room to work its magic, often as little as 24 inches of depth is enough to reclaim what would otherwise be wasted corner space. Add a cushion, a small shelf underneath for towels or a stack of paperbacks, and suddenly you’ve carved out a spot to sit, dry off slowly, or simply watch the water change color as the morning unfolds. It’s a detail that costs relatively little in construction terms yet delivers an outsized return in how the room actually gets used day to day.
I think of one project where the original layout had exactly this kind of forgotten corner, three feet of unused space beside a window that the previous owners had filled with a wire shelving unit nobody liked.
We swapped it for a simple upholstered bench with hidden storage beneath, and the homeowners later told me it became their favorite five minutes of the entire day, coffee in hand, watching mist lift off the water before anyone else in the house woke up. Not every square inch of a bathroom needs to serve a purely functional purpose. Sometimes the best return on investment is a quiet place to simply sit still.
Woven and Natural Textiles (Jute, Linen) That Resist Humidity Better Than Cotton
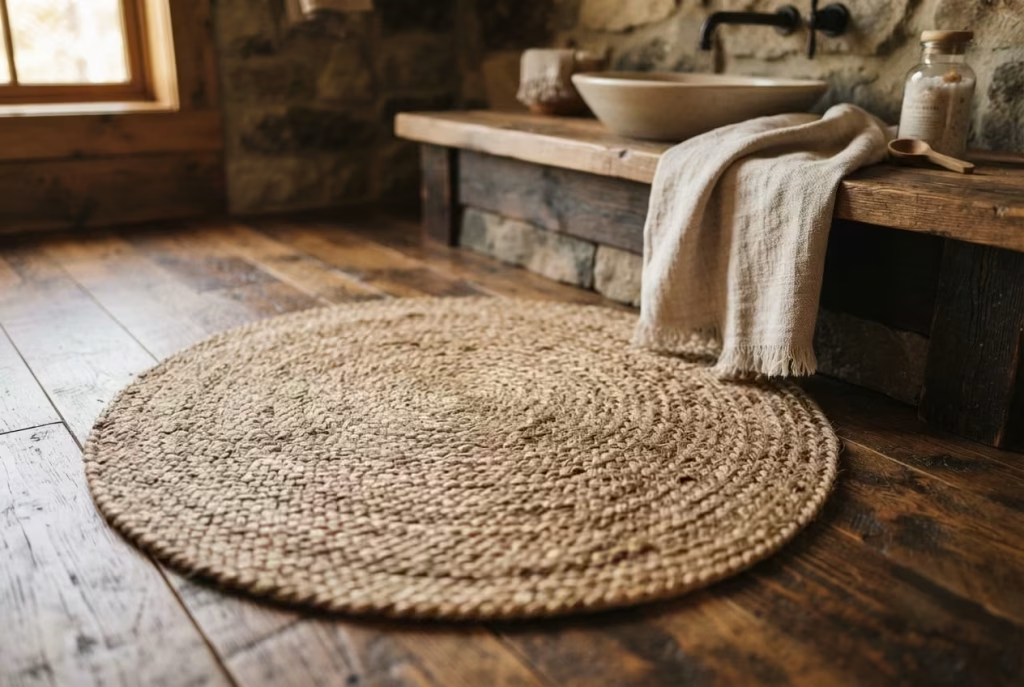
Textiles rarely get the credit they deserve in bathroom design, treated as an afterthought once the tile and fixtures are already chosen, yet fabric choice can quietly make or break how a lake house bathroom actually performs day to day.
Cotton, the default go-to for bath mats, curtains, and towels in most homes, has a well-known weakness in high-humidity environments: it holds onto moisture rather than releasing it, which means a cotton bath mat in a lake house bathroom often stays damp for hours after a morning shower, inviting a musty smell and, eventually, mildew that no amount of washing fully resolves.
Jute and linen tell a different story entirely, and it comes down to fiber structure. Jute, woven into rugs and mats, has a naturally coarse, breathable texture that allows moisture to evaporate quickly rather than settling into the fibers, making it far better suited to the persistent dampness that comes with lakeside living.
Linen, meanwhile, is famously moisture-wicking, pulling humidity away from the surface faster than cotton ever could, which is exactly why it’s been a favorite in warm, humid climates for centuries before anyone had a word like “performance fabric” to describe it. A linen shower curtain or hand towel dries noticeably faster than a cotton equivalent, and that speed matters more than people realize until they’ve lived with the alternative.
There’s also something about the visual texture of these natural fibers that suits the setting perfectly, a slightly rougher, more organic weave that feels at home beside reclaimed wood and stone rather than competing with it.
I always steer clients toward at least incorporating a jute bath mat and linen textiles somewhere in a lake house bathroom, even if the rest of the palette leans more polished, because it’s a small swap that pays real, tangible dividends every single humid morning, long after the design choices that get all the attention have faded into the background.
You May also Like: Terracotta Interior Design: 51 Warm & Stylish Ideas for Every Room
Skylights or Clerestory Windows for Privacy Plus Light Without Blinds
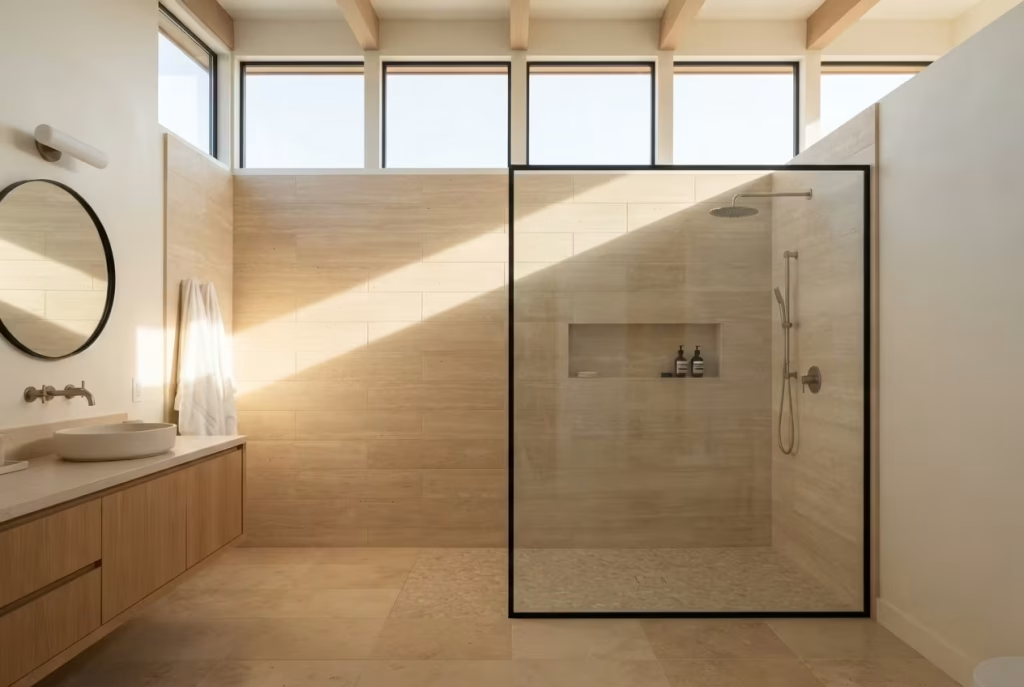
Blinds and curtains solve privacy, sure, but they solve it at a cost most homeowners don’t fully register until they’re standing in a bathroom that’s shrouded in shadow at two in the afternoon on a bright, sunny day. There’s a better way to have your cake and eat it too here, and it comes down to where you place the glass rather than how you cover it.
Clerestory windows, set high along the wall well above standing eye level, and skylights overhead both let daylight pour into a room without offering anyone outside a clear line of sight in. The industry standard for clerestory placement puts the bottom edge of the window above 6 feet 8 inches from the finished floor, comfortably higher than the average adult’s eyeline even when standing on tiptoe, which means you get the full benefit of natural light flooding a space without ever needing to fumble with a blind cord first thing in the morning.
For a lake house bathroom especially, where the temptation to install a large picture window is strong but privacy concerns hold people back, this approach becomes the best of both worlds, illuminated without being exposed.
There’s a practical bonus too, one that often gets overlooked in the excitement of choosing the window itself. Without blinds or curtains cluttering the sightline, humidity has one less fabric surface to cling to, and the room’s architectural lines stay clean and uninterrupted, letting the tile work or wood ceiling above genuinely take center stage.
On a renovation a few seasons back, we replaced a heavily curtained window with a run of clerestory glass along the top of the shower wall, and the homeowner mentioned, almost in passing, that she’d forgotten how bright bathrooms could actually be without feeling like she was on display. Sometimes the simplest architectural shift solves two problems that felt, at first glance, impossible to reconcile.
A Statement Ceiling: Tongue-and-Groove or Beadboard Overhead
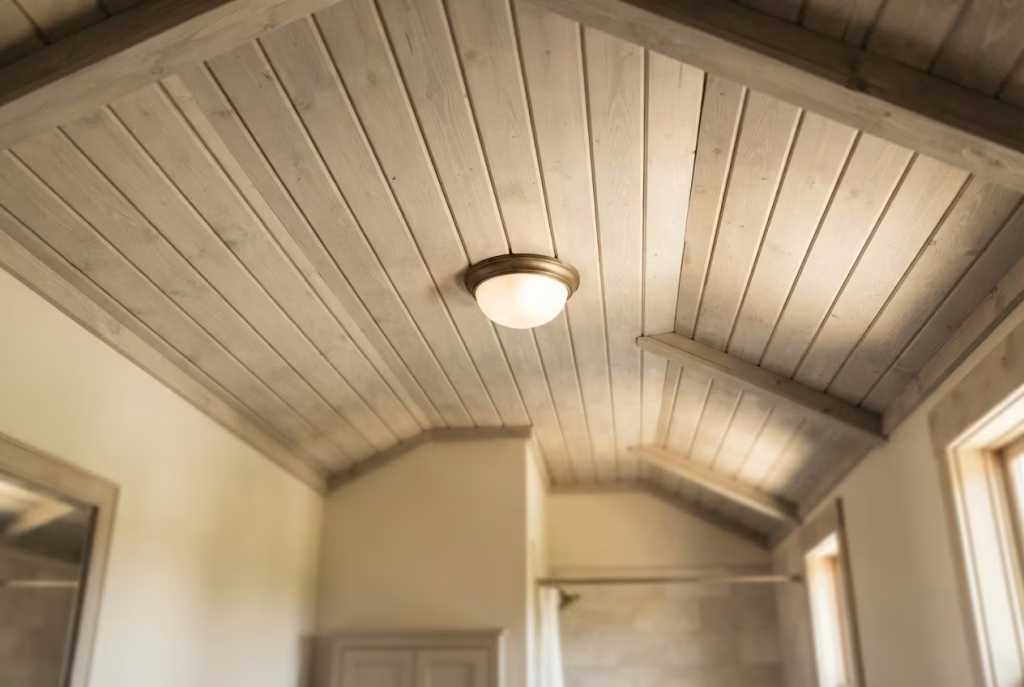
Most homeowners plan a bathroom from the floor up and never once glance toward the ceiling until the very end, treating it as a blank afterthought that simply gets a coat of flat white paint before the crew packs up. That’s a missed opportunity, and nowhere is it more obvious than in a lake house, where a ceiling has every reason to pull double duty as a design feature rather than fade quietly into the background.
Tongue-and-groove paneling and classic beadboard both bring a nautical, cottage-inspired texture overhead that instantly nods to the boat sheds and cabin porches scattered along most shorelines.
Running the planks the long way across a narrow bathroom can visually stretch the room, while a herringbone or diagonal layout adds a touch of unexpected flair for homeowners who want something a little less predictable than the standard straight-run look. Either way, painted in a soft, weathered tone rather than stark white, the ceiling stops being an empty expanse and starts framing the whole room the way a good picture frame sets off the art inside it.
Installation costs vary depending on material quality and whether you’re working with real wood or an MDF-based paneling product, but homeowners should generally budget somewhere between four and nine dollars per square foot installed, with real cedar or pine tongue-and-groove sitting toward the higher end and primed MDF beadboard toward the lower.
It’s not the cheapest upgrade on this list, admittedly, but few single changes shift a bathroom’s entire personality as dramatically as looking up and seeing texture and warmth instead of a flat, forgettable plane. I’ve had clients walk into a finished bathroom and comment on the ceiling before they even notice the vanity, which tells you everything about how much visual weight this one decision actually carries.
Double Vanities Designed for Morning Traffic, Not Just Symmetry
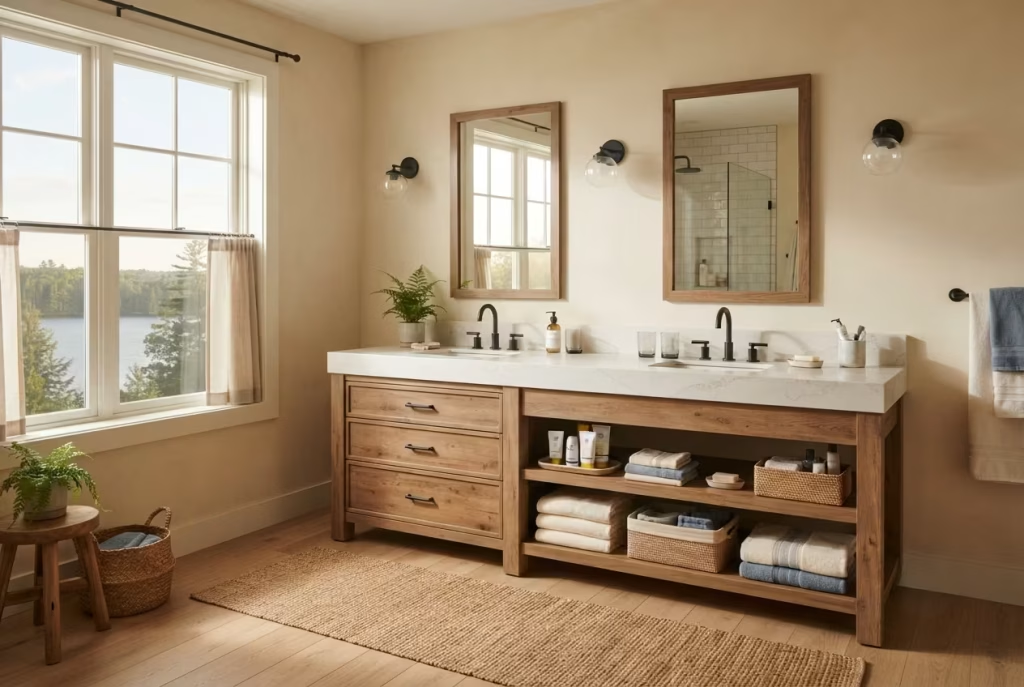
A double vanity gets specified in most bathroom plans purely for the sake of balance, two matching sinks, two matching mirrors, a symmetrical layout that photographs beautifully but doesn’t always hold up once real life starts moving through the room. At a lake house, where mornings often mean multiple people racing to catch the best hours on the water, symmetry alone won’t cut it. The layout needs to actually solve for traffic, not just look tidy in a listing photo.
I worked with a family of four a couple summers back whose old single-sink bathroom had become a genuine sore spot every single morning. Two teenagers, two parents, one dock schedule that everyone wanted to beat, and a single vanity meant someone was always waiting, toothbrush in hand, while somebody else hogged the mirror. The fix wasn’t complicated in concept, a proper double vanity, but the execution mattered enormously.
We spaced the sinks a full 30 inches apart center to center rather than the cramped 24 inches some contractors default to, giving two people genuine elbow room to brush teeth or apply sunscreen side by side without bumping arms. We also split the storage asymmetrically rather than mirroring it exactly, giving one side deeper drawers for hair tools and the other more open shelving for towels and swim gear, because real families don’t actually use both sides identically no matter how the floor plan looks on paper.
The result wasn’t just a prettier bathroom, it was a household that stopped bickering over the sink every single morning before 8am. That’s the real measure of whether a double vanity earns its square footage in a lake house, not how well it photographs, but whether it actually gets everyone out the door and down to the dock on time, without anyone missing the best light of the morning waiting their turn.
Hidden and Integrated Storage for Towels, Paddleboard Gear, and Sunscreen
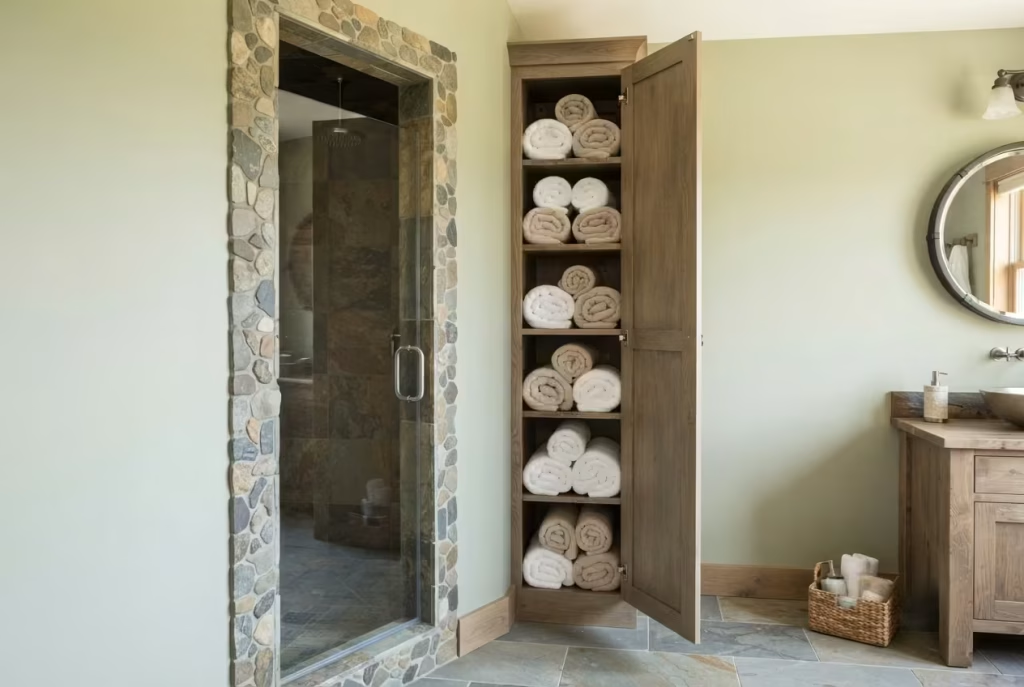
Lake life comes with a particular kind of clutter that most bathroom designs simply weren’t built to handle. It’s not just towels, it’s wet swimsuits draped over every available surface, sunscreen bottles multiplying on the counter like they’re breeding overnight, a paddleboard leash tangled somewhere near the door, and a growing pile of goggles nobody can ever find when it’s time to head back out. A beautiful bathroom stops looking beautiful fast when it’s buried under the everyday debris of dock-to-door living.
This is where integrated storage earns its keep in a way few other design choices can match, dollar for dollar. Rather than relying on a single linen closet to catch the overflow, the smarter approach carves storage into places that would otherwise sit empty and useless. A tall, narrow cabinet built into unused wall space beside the shower can hold rolled towels vertically, taking up a fraction of the footprint a traditional shelf would need.
Bench seating, like the built-in option covered earlier in this guide, does even more work when the seat lifts to reveal storage underneath, perfect for stashing sunscreen, extra goggles, or a spare set of swim gear out of sight until it’s needed again. Even a simple recessed niche near the entry, deep enough for a hook and a small shelf, gives paddleboard leashes and wet gear somewhere specific to land instead of ending up in a heap on the floor.
On one lakefront renovation, we built a slim, floor-to-ceiling cabinet flanking the shower entrance, barely 14 inches wide, that the family swore they’d never find a use for when I first proposed it.
Within a month of moving back in, it had become the single most-used piece of storage in the entire house, holding everything from spare towels to a small basket of reef-safe sunscreen bottles that used to clutter every counter in sight. Sometimes the smallest, most overlooked storage decision ends up doing the heaviest lifting in keeping a lake house bathroom feeling like a retreat rather than a gear closet in disguise.
You May also Like: Mid-Century Modern Bathroom Ideas: 26 Ways to Create a Timeless, Stylish Space
A Freestanding Soaking Tub Under a Window Instead of a Shower-Tub Combo
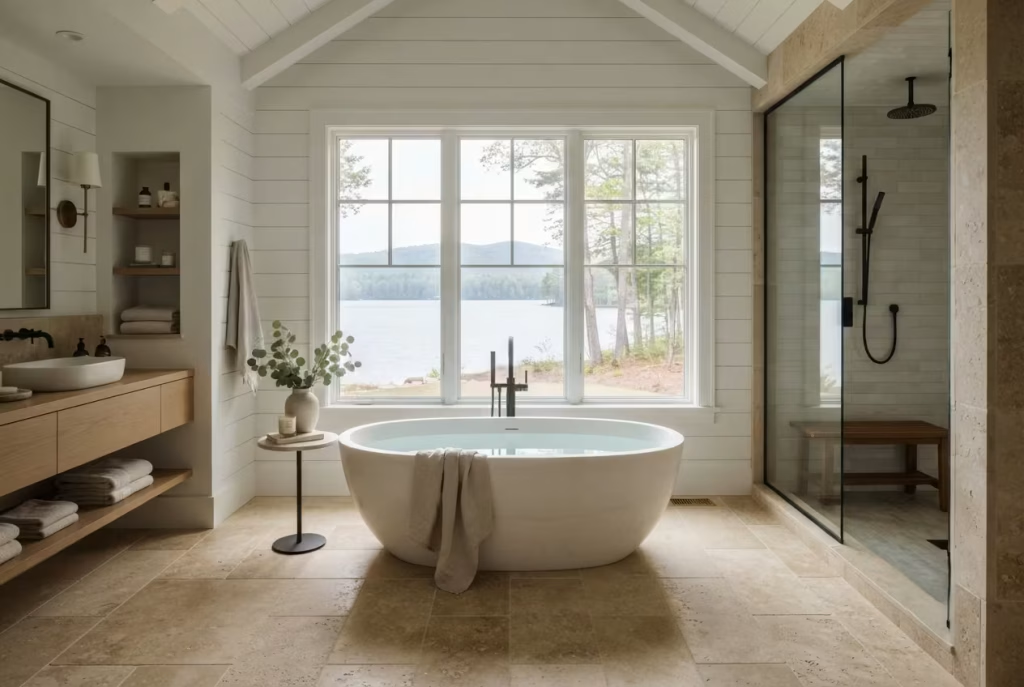
There’s a fork in the road that comes up in nearly every lake house bathroom renovation, and it’s one homeowners often don’t realize they’re facing until a contractor lays it out plainly: keep the standard shower-tub combo everyone’s used to, or commit the square footage to a standalone soaking tub positioned beneath the window instead. It sounds like a small decision on paper. In practice, it reshapes the entire feel of the room.
A shower-tub combo is the practical, space-efficient choice, no argument there. It does two jobs in one footprint, works well for resale appeal since it reads as functional to a broad range of buyers, and rarely requires any structural rethinking. But it also tends to push the tub itself into a purely utilitarian role, something you use occasionally rather than something the room is designed around. A freestanding soaking tub under a window flips that priority entirely.
It asks for more space, typically an additional 15 to 25 square feet beyond what a combo unit would need once you account for proper clearance on all sides, and it usually means adding a separate walk-in shower elsewhere in the layout to cover daily use. That’s real square footage, and in a lake house where every foot often comes at a premium given lot size and setback restrictions near the water, it’s not a decision to make lightly.
Here’s the payoff, though, and it’s the reason I still recommend it whenever the layout allows for it. A soaking tub positioned to catch the window’s view turns bathing from a chore into an occasion, the kind of feature that guests remember and homeowners genuinely use, rather than a tub that sits mostly empty while everyone defaults to the shower out of habit.
On a recent build where the client debated this exact trade-off for weeks, we ultimately carved out the extra footage from an oversized walk-in closet next door that nobody was using to capacity anyway. Two years later, she still tells me it was the best square footage she ever gave up, and that’s a testament worth remembering when the spreadsheet math starts to feel discouraging.
You May also Like: Baja Earth House: How to Keep a Desert Home Cool Naturally
Outdoor-Adjacent Design A Bathroom That Opens to a Deck or Screened Porch
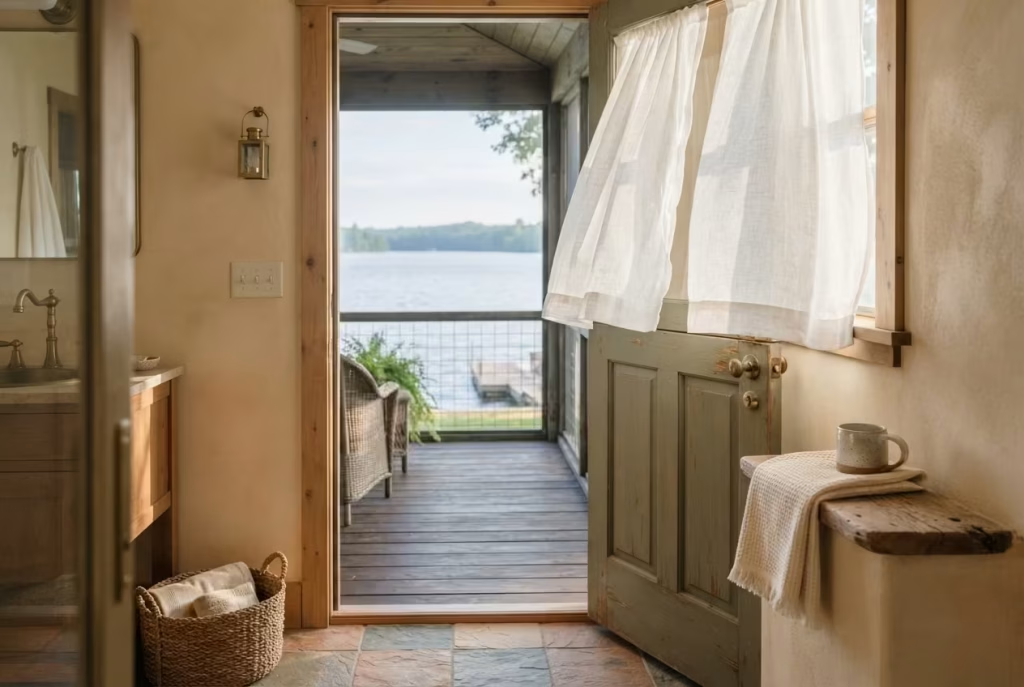
The final idea on this list might be the most ambitious, and it’s also the one that tends to leave the deepest impression on anyone who experiences it firsthand. Instead of treating the bathroom as a sealed-off room entirely separate from the outdoors, this approach blurs that boundary on purpose, letting the space open, either literally or visually, onto a deck, screened porch, or private outdoor shower area just beyond the wall.
A pocket door is often the cleanest way to pull this off, sliding fully into the wall cavity rather than swinging outward and eating up floor space, which makes it ideal for a tight bathroom footprint that still wants a genuine connection to the outdoors.
A Dutch door offers a different kind of flexibility, letting you crack open just the top half for airflow and a partial view while keeping the bottom half closed for privacy and to keep curious pets or kids from wandering straight through. Either option, done well, turns a simple bath into something closer to an outdoor spa experience, one where you can hear the water lapping against the shore or feel a genuine breeze while you’re getting ready for the day.
The catch, and it’s a real one worth planning around carefully, involves humidity and weatherproofing. Any opening to the outdoors introduces moisture and temperature swings that a fully enclosed bathroom never has to manage, which means door seals, weatherstripping, and proper screening become non-negotiable rather than optional extras.
On one waterfront project, we installed a Dutch door leading to a screened porch just off the primary bathroom, and it took a bit of trial and error with weatherstripping before we found a seal that held up through a full humid summer without letting moisture creep into the surrounding drywall.
Once dialed in, though, the homeowners described stepping out onto that porch straight from the shower, coffee in hand, as the single feature that made the entire renovation feel worth every late night spent poring over blueprints. It’s proof that the boldest ideas often demand the most patience, but they tend to pay you back in full.
How to Choose Which Ideas Fit Your Actual Space
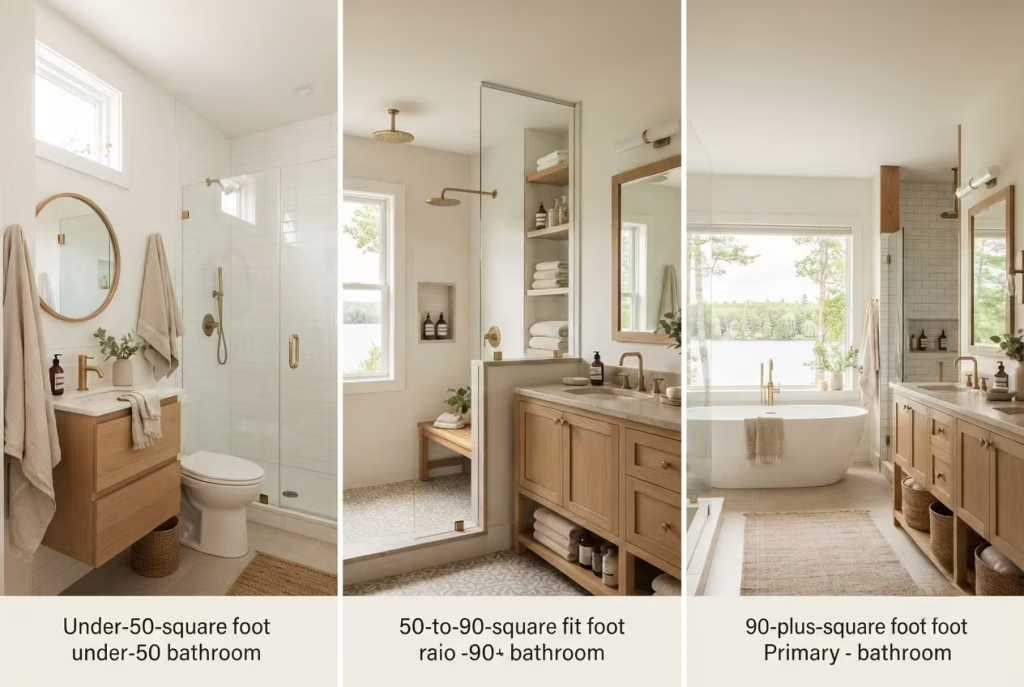
Sixteen ideas make for a lot of inspiration, but no single lake house bathroom needs to check every box on this list, and trying to cram all of them into one room is a recipe for a space that feels overstuffed rather than curated. The real skill lies in matching ambition to actual square footage and budget, so let’s break that down properly.
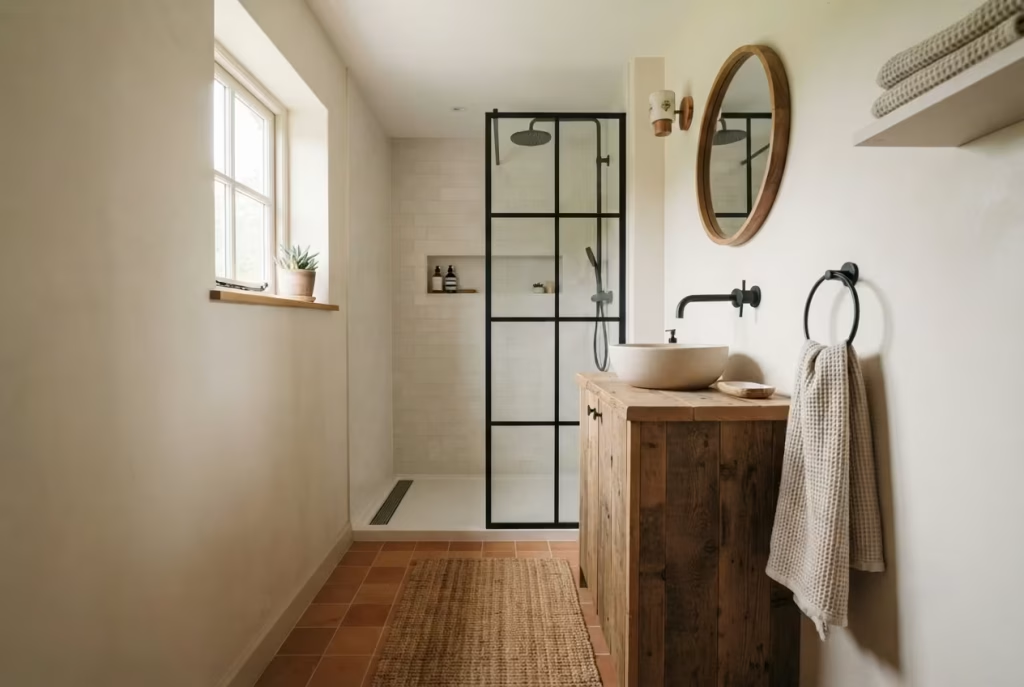
Under 50 square feet. This is the classic compact lake house bathroom, often the original footprint from a mid-century cottage that never got expanded. Here, the smartest moves are the ones that add character without eating floor space: a reclaimed wood vanity sized to the room rather than oversized for effect, natural jute and linen textiles, a sun-bleached color palette to keep things feeling open rather than boxed in, and a reading nook only if you can genuinely spare 24 inches without cramping traffic flow. Skip the freestanding tub and double vanity here entirely; the math simply doesn’t work in a room this size, and forcing it usually means sacrificing walking room you’ll regret every single morning.
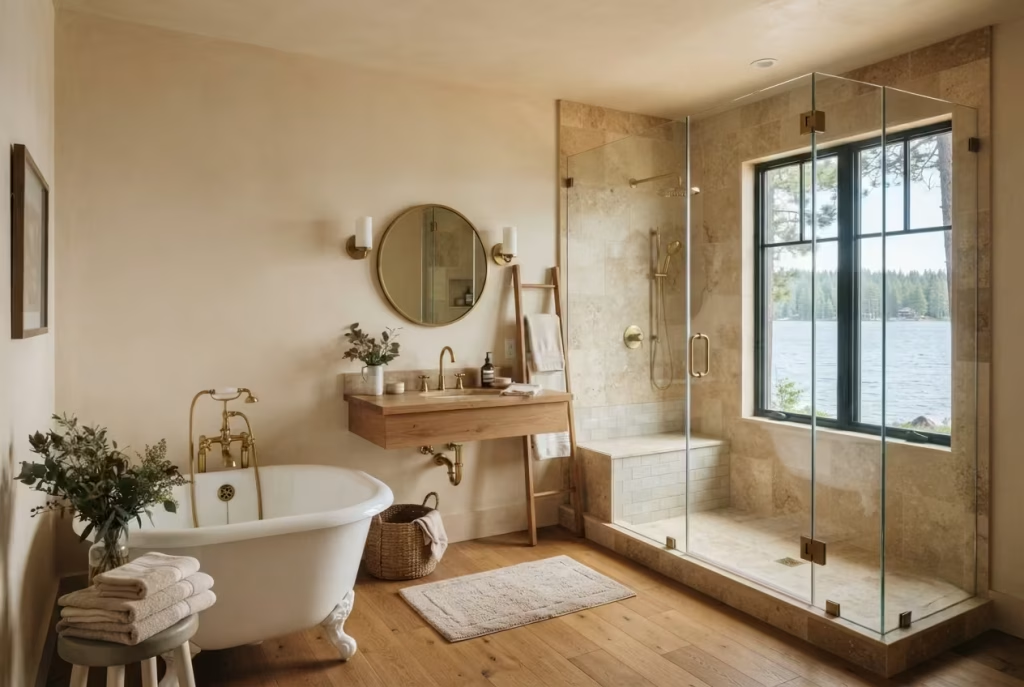
50 to 90 square feet. This mid-range footprint is where most of the sixteen ideas start to genuinely shine. You’ve got enough room for a rainfall shower with a water-facing window, a built-in bench, brass or blackened fixtures as a focal point, and quite possibly a compact freestanding tub if the layout cooperates. This tier rewards thoughtful prioritization over trying to do it all at once.
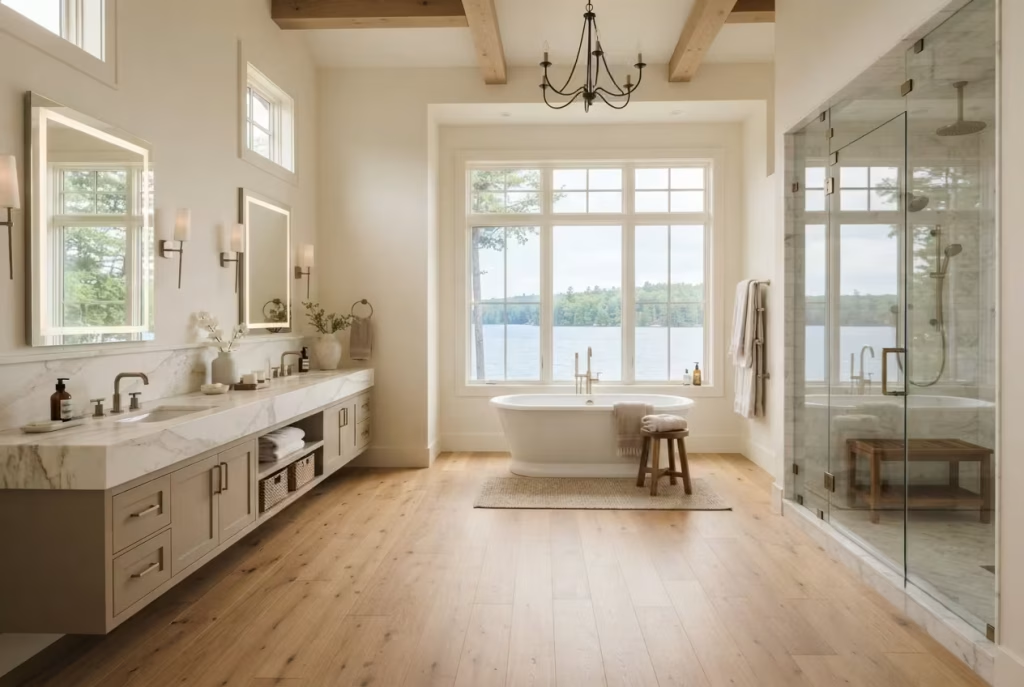
90 square feet and up. Now you’re working with a primary suite scale bathroom, and this is where the more ambitious ideas, the double vanity built for real morning traffic, the view-facing soaking tub instead of a shower combo, the outdoor-adjacent pocket door leading to a private deck, become genuinely realistic rather than a stretch.
On budget, it helps to think in two clear buckets. A weekend-scale upgrade, new textiles, a fixture swap to living brass, a fresh coat of sun-bleached paint, can transform the feel of a room for a few hundred dollars and zero demolition. A full renovation, moving plumbing to center a tub, reframing for a heavier stone vessel sink, cutting in a pocket door to the outdoors, is a different animal entirely, often running into the tens of thousands once labor and structural work enter the picture.
My honest rule of thumb after years of walking clients through this exact decision: pick two or three ideas that genuinely excite you and commit to doing them well, rather than half-executing all sixteen. A bathroom built around a handful of thoughtful choices will always outshine one that spreads itself thin trying to be everything at once.
You May also Like: 25 Spanish Bathroom Design Ideas Full of Color, Texture, and Mediterranean Charm
A Word on Maintenance: What “Cozy” Costs Over Time
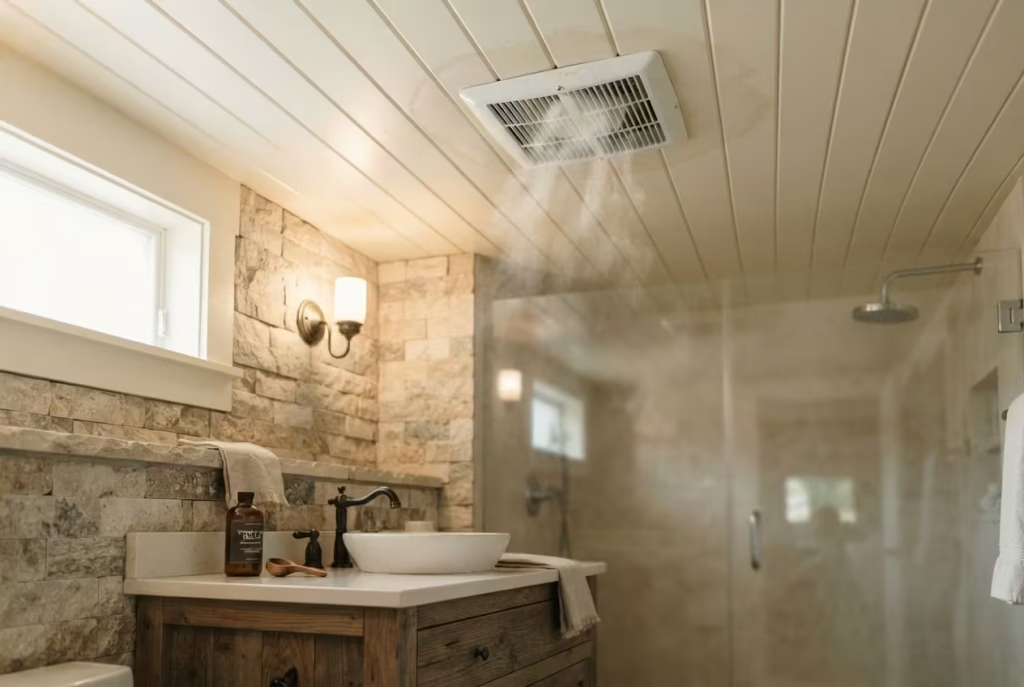
Every idea in this guide comes with a price tag beyond the initial invoice, and I’d be doing you a disservice if I wrapped things up without being upfront about it. Coziness, the genuine, lived-in kind rather than the staged-for-a-photo kind, asks for a bit of ongoing care, and knowing that going in saves you from feeling blindsided a year or two down the road.
Humidity control sits at the top of that list. A lake house bathroom benefits enormously from a properly sized exhaust fan, one rated for at least 50 CFM per 50 square feet of room, run consistently during and after every shower to pull moisture out before it settles into wood, grout, or fabric. Skimp on ventilation, and even the best materials on this list will struggle against the odds.
Sealants need a place on your calendar too, not just your shopping list. Natural stone surfaces generally want resealing every 12 to 18 months depending on porosity and usage, while reclaimed wood vanities and boat-deck-style flooring benefit from a fresh coat of marine-grade sealant roughly every two to three years to keep water from working its way into the grain.
Living metal finishes, as covered earlier, need no maintenance at all in the traditional sense, their evolving patina is simply part of the deal, though occasional gentle cleaning keeps them from accumulating grime alongside their character.
None of this should scare you off. It should simply arm you with realistic expectations, because a bathroom that’s cared for properly rewards you tenfold, while one that’s neglected loses its charm faster than anyone expects.
Final Thoughts: Beautiful Lake House Bathroom
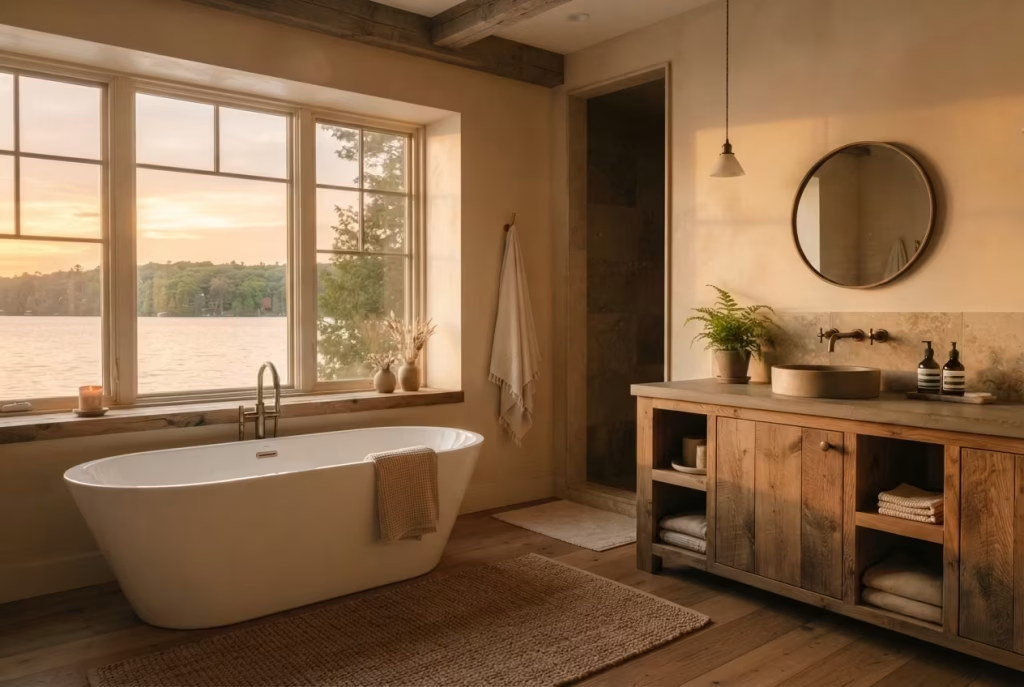
Sixteen ideas, one underlying truth: a lake house bathroom works best when it stops trying to imitate a city bathroom wearing a nautical costume and instead builds itself around the water, light, and rhythm of lake life itself.
Whether that means a freestanding tub angled toward the sunrise, a reclaimed wood vanity that carries the dock indoors, or nothing more ambitious than swapping a cotton bath mat for jute, the through-line is the same. Good design here isn’t about following a checklist to the letter. It’s about understanding why each choice earns its place, then deciding, with clear eyes, which two or three fit the room you actually have.
I keep coming back to that eighteen-inch window from the 1970s cottage renovation, because it taught me something no glossy inspiration board ever could: constraints, handled with a bit of patience and imagination, often lead to better design than a blank slate ever does.
Your bathroom doesn’t need every idea on this list to feel like a retreat. It needs the right ones, chosen deliberately and executed with care, so that stepping in each morning feels less like starting your day and more like slipping back into the quiet you came to the lake for in the first place.
If you’re standing at the start of your own renovation, take it one honest decision at a time, material by material, measurement by measurement, and let the water outside your window be the quiet guide it’s always meant to be.
You May also Like: 30 Stunning Desert Bathroom Design Ideas for a Warm, Natural Look
Frequently Asked Questions
What makes a lake house bathroom different from a regular bathroom design?
A lake house bathroom deals with constant humidity, shifting natural light bouncing off water, and barefoot traffic straight from the dock, none of which a standard primary bath has to account for. Materials need to handle moisture without warping or staining, and layouts often prioritize a water view over strict symmetry, making the design logic fundamentally different from a typical suburban bathroom renovation.
What’s the best flooring for a humid lake house bathroom?
Waterproof-core options like luxury vinyl plank in a wide-board, boat-deck style offer the warm aesthetic of real wood without the expansion and warping risks that come with genuine hardwood in a wet zone. If real wood is non-negotiable, proper quarter-inch expansion gaps and diligent sealing are essential to prevent buckling as humidity shifts with the seasons.
How do you get privacy in a bathroom with a lake view?
Frosted or reeded glass, clerestory windows set above 6 feet 8 inches, and careful sightline math based on shoreline distance all allow natural light and partial views in without exposing the room to passing boats or neighboring docks. The right glass choice, paired with smart window placement, solves privacy far better than heavy curtains ever could.
What’s a realistic budget range for a cozy lake house bathroom update?
Weekend-scale updates, new textiles, a fixture swap, fresh paint, can run a few hundred dollars with no demolition involved. Full renovations involving plumbing relocation, structural work for heavier stone fixtures, or an outdoor-adjacent addition typically start in the low thousands and climb well into the tens of thousands depending on scope and material choices.
Can small lake house bathrooms still feel like a retreat?
Absolutely, and often more successfully than larger ones when done with restraint. Under 50 square feet, prioritizing a sun-bleached palette, natural textiles, and a well-sized reclaimed wood vanity creates genuine coziness without needing a freestanding tub or double vanity, which simply don’t fit the math in a compact footprint.
What materials should be avoided in a high-humidity lake bathroom?
Unsealed natural stone, untreated solid wood without proper marine-grade sealant, and cotton textiles all struggle against sustained humidity, staining, warping, or holding onto moisture far longer than jute, linen, or properly sealed alternatives. Ventilation matters just as much as material choice in keeping any of these problems at bay long term.